
The Better Bilstein Ebay Coilover Thread
 11-16-2014, 01:28 PM
#301
Junior Member
iTrader: (1)

Join Date: Dec 2012
Location: Akron/Cleveland Ohio
Posts: 160
Total Cats: 0
Secret Hint:
For removing the tabs off the side of the Bilstein shock bodies (the one that aligns the factory perch), you can grind away at them for an hour as described above, it works...
***
OR, you can grab a small flat blade cold chisel and stick it between the shock body and the tab (chisel perpendicular to shock body), and give it a smack with a hammer. If it doesn't snap off, give it another hit or give it a try from the other side, working back and forth.
Note, I did this just holding chisel & shock with one hand, hammer with the other, shock resting across some 4x4 blocks. Personally, I would not stick the body of the shock in a vice.
I didn't figure this out til my last shock, mine came off with 2 little hits, cake. Mine were MSM shocks, so the yellow bodies might differ. It works because that tab is held on with 2 little nipples that stick out, which look to just be resistance welded to the bodies. Wish I had known this for all 4!
Also, on advice from CordyCord, I'll be using a silicone or similar rubbery type goop for between the perch and shock body. Electrical tape and the like might work, but why mess around. Also, the factory used what looks like liquid urethane when they put the stock perches on, so I say why not do the same.
Cheers.

Reply
 0
0

0
11-16-2014, 10:49 PM
#302
Elite Member
Thread Starter

Join Date: Jul 2007
Location: Houston, TX
Posts: 3,201
Total Cats: 145
Regarding the MSM Bilsteins, was there a consensus as to what spring rates were fastest on track (comfort not a concern), with R comp street tires like Rivals or RA1s?
I've seen numbers listed here as high as 550/350 (believe that was Jacob300zx) on stock valving. Highest I saw from Hustler was 450/300, I think it was JeffGoji who was actually running 550/375.
Curious for any first hand knowledge on handling improvements (read: lap time improvements) with such higher rates...
For the typical track use Miata running r comps anything in the 800-600 range and 300-450 range rear. Highest I've used on stock MSM bilstein's was 670/350, rode fine for track use. Get it close then use an adjustable bar front or rear to tune.
Reply
0
0
11-17-2014, 10:52 AM
#303
Junior Member
iTrader: (1)
Join Date: Dec 2012
Location: Akron/Cleveland Ohio
Posts: 160
Total Cats: 0
**Still looking for NB top hats and 600# x 7" 2.50" ID pair of springs, as a matter of fact if anyone has these.**
Last edited by sbcrx007; 11-17-2014 at 11:59 AM.
Reply
0
0
11-17-2014, 04:06 PM
#304

Secret Hint:
For removing the tabs off the side of the Bilstein shock bodies (the one that aligns the factory perch), you can grind away at them for an hour as described above, it works...
***
OR, you can grab a small flat blade cold chisel and stick it between the shock body and the tab (chisel perpendicular to shock body), and give it a smack with a hammer. If it doesn't snap off, give it another hit or give it a try from the other side, working back and forth.
Note, I did this just holding chisel & shock with one hand, hammer with the other, shock resting across some 4x4 blocks. Personally, I would not stick the body of the shock in a vice.
I didn't figure this out til my last shock, mine came off with 2 little hits, cake. Mine were MSM shocks, so the yellow bodies might differ. It works because that tab is held on with 2 little nipples that stick out, which look to just be resistance welded to the bodies. Wish I had known this for all 4!
Also, on advice from CordyCord, I'll be using a silicone or similar rubbery type goop for between the perch and shock body. Electrical tape and the like might work, but why mess around. Also, the factory used what looks like liquid urethane when they put the stock perches on, so I say why not do the same.
Cheers.
For removing the tabs off the side of the Bilstein shock bodies (the one that aligns the factory perch), you can grind away at them for an hour as described above, it works...
***
OR, you can grab a small flat blade cold chisel and stick it between the shock body and the tab (chisel perpendicular to shock body), and give it a smack with a hammer. If it doesn't snap off, give it another hit or give it a try from the other side, working back and forth.
Note, I did this just holding chisel & shock with one hand, hammer with the other, shock resting across some 4x4 blocks. Personally, I would not stick the body of the shock in a vice.
I didn't figure this out til my last shock, mine came off with 2 little hits, cake. Mine were MSM shocks, so the yellow bodies might differ. It works because that tab is held on with 2 little nipples that stick out, which look to just be resistance welded to the bodies. Wish I had known this for all 4!
Also, on advice from CordyCord, I'll be using a silicone or similar rubbery type goop for between the perch and shock body. Electrical tape and the like might work, but why mess around. Also, the factory used what looks like liquid urethane when they put the stock perches on, so I say why not do the same.
Cheers.
might not be a bad option though. dunno which took longer, I think on the last one I used my dremel with a thin cut-off wheel and ground the rest of the nipple off. been a while though.
Reply
0
0
11-17-2014, 09:10 PM
#305
Junior Member
iTrader: (1)
Join Date: Dec 2012
Location: Akron/Cleveland Ohio
Posts: 160
Total Cats: 0
the nipples are usually still too tall to fit the sleeve over them (depending on where you break it off). I did this on one or two of my shocks when I had bilsteins. I ended up having to go back and grind the nipples down.
might not be a bad option though. dunno which took longer, I think on the last one I used my dremel with a thin cut-off wheel and ground the rest of the nipple off. been a while though.
might not be a bad option though. dunno which took longer, I think on the last one I used my dremel with a thin cut-off wheel and ground the rest of the nipple off. been a while though.
Anyone have a good (read: inexpensive) source for helper spring to main spring couplers? No thanks on the zip ties.
I think it was mentioned earlier in this thread, but for those just joining in here are some inexpensive helper springs:
http://www.filthymotorsports.com/PAC...pac-tender.htm
Last edited by sbcrx007; 11-17-2014 at 10:05 PM.
Reply
0
0


 11-21-2014, 02:24 AM
#307
Newb

Join Date: Oct 2014
Location: YVR
Posts: 6
Total Cats: 0
Still trying to wrap my head around which shocks to use. NB HD Sport, or NA HD? Haven't really found anything definitive as of yet, or maybe I'm not searching in the right places... wtf is the difference? I know that shock length differs between the NB HD and the subsequent HD Sport's, but what of NA HD's?
Plan is to use NB top hats in front, ISC 1.5" in the rear, DIY ghettocat bumpstops, Allstar sleeves, and something like 500f/375r
Plan is to use NB top hats in front, ISC 1.5" in the rear, DIY ghettocat bumpstops, Allstar sleeves, and something like 500f/375r
Reply
0
0
11-21-2014, 06:20 AM
#308
Moderator


iTrader: (12)
Join Date: Nov 2008
Location: Tampa, Florida
Posts: 20,650
Total Cats: 3,011
If you are using NB hats then you will need the NB shocks anyway so quit worrying over that part of it. They have a different rod diameter between the NA and NB.
And no one has recommended the NA HD shocks to my recollection. NB "Hard S" or Mazdaspeed are the recommended ones. The NB aftermarket HD has less compression damping according to the chart posted previously, but is still a substantial improvement over stock.
And no one has recommended the NA HD shocks to my recollection. NB "Hard S" or Mazdaspeed are the recommended ones. The NB aftermarket HD has less compression damping according to the chart posted previously, but is still a substantial improvement over stock.
Reply
0
0
11-21-2014, 09:42 PM
#309
Junior Member
iTrader: (1)
Join Date: Dec 2012
Location: Akron/Cleveland Ohio
Posts: 160
Total Cats: 0
More helper springs and couplers:
PitStopUSA.com
Hhammerly, where did you source yours?
$100 for a set of those little devils is insulting... I may just have a set machined instead, bastards.
Or hell, some of those ebay raceland style kits even come with the helpers and spring connectors... Buy the set, take helpers/connectors, resell?
Last edited by sbcrx007; 11-21-2014 at 09:57 PM.
Reply
0
0
11-22-2014, 08:45 AM
#310
So i went to 3" 175# tenders and 6" 600# mains up front and ERS P 4" 225# tenders and 7" 350# mains on the back.
The rear tenders have 1/2" of wheel travel before they bottom out and i'm on the main spring, the fronts are on the mains but start to open up when i lift the car 1/2".
So the car feels very compliant over bumps and stifens up when I lean on it and that it is exactley what i wanted on the street and and tosing it around, will see how it is on a bumpy autocross next year.
Last edited by HHammerly; 11-22-2014 at 08:58 AM.
Reply
0
0
11-22-2014, 09:11 PM
#311
Newb

Join Date: Jul 2009
Posts: 17
Total Cats: 1
This is probably a dumb question, but for those of you with the Allstar sleeves, how do you adjust height without a spanner wrench? I imagine it would be much easier on a new setup, but in due time, the threads on the sleeve etc will be covered in dirt and grime, no? From pictures (since I haven't ordered anything yet), looks like the only way to adjust is to spin the collar by hand.
However, I suspect that if I had packed the sleeve threads with grease, no dirt would have gotten in there in the first place.
Anyway, given a choice between clamp collar, set screw, or jam-nut, I like the jam-nut style.
Reply
0
0
11-30-2014, 10:15 PM
#312
Junior Member

Join Date: Aug 2014
Location: North Carolina
Posts: 403
Total Cats: 103
Spoon-feeding time.
I've been following this thread with great interest, and based mostly on what's in here, I got '99 Sport Billies and hats, 450/300 High Travel QA1 springs, AllStar sleeves, and cheap Energy Suspension bushings that had similar dimensions to the FCM stops. I'll be putting these on an otherwise stock 1990 base. I have a few questions though.
1. The top hats came with 2 stock NB bump stops, and they seem soft compared to the Energy stops. I'm a bit worried about their size now at 45mm, and I was thinking I might run the stock bumpstops in the rear as that seems to be the end of the car with more limited travel. Or, should I just keep it the same all around? Cut the Energy ones? They're loose on the shock shaft, but I don't think that's an issue.
2. I'm looking to run around stock ride height or a tiny bit lower. Can someone recommend a rough starting point for the free droop (or preload) I should install them at? And is there anything simple I can do to center the spring to help with rubbing issues? Would those cheap eBay isolators hold my springs in place?
3. Speaking of rubbing, is it worth getting new grooves cut? Or should I just cut the rear sleeves shorter and be done with it?
The goodies:
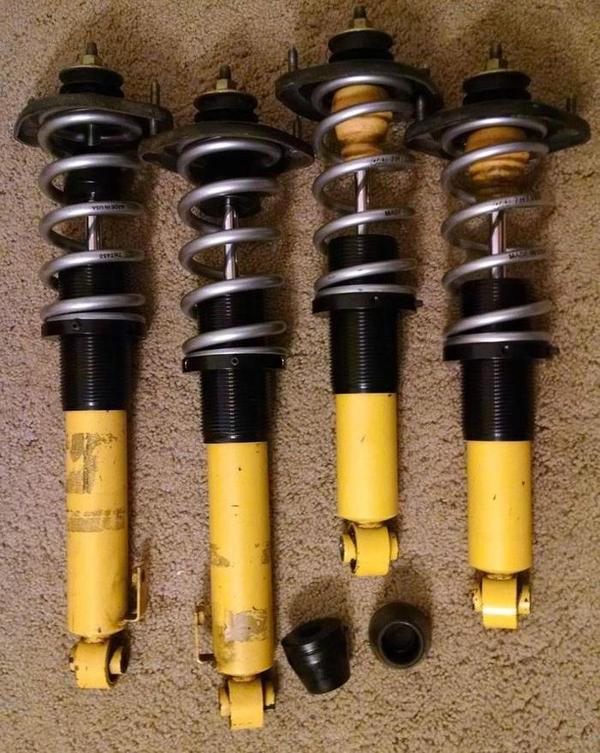
Other than that, I'll be following the advice in here. Grease the perch threads, anti-seize on the set screws, paint the shock bodies, and I've cleaned out the groove rust. Also, I bought the same part number sleeves as Bahurd and they were a loose fit on my shocks, although it is still pretty clear the circlip will not come out.
I've been following this thread with great interest, and based mostly on what's in here, I got '99 Sport Billies and hats, 450/300 High Travel QA1 springs, AllStar sleeves, and cheap Energy Suspension bushings that had similar dimensions to the FCM stops. I'll be putting these on an otherwise stock 1990 base. I have a few questions though.
1. The top hats came with 2 stock NB bump stops, and they seem soft compared to the Energy stops. I'm a bit worried about their size now at 45mm, and I was thinking I might run the stock bumpstops in the rear as that seems to be the end of the car with more limited travel. Or, should I just keep it the same all around? Cut the Energy ones? They're loose on the shock shaft, but I don't think that's an issue.
2. I'm looking to run around stock ride height or a tiny bit lower. Can someone recommend a rough starting point for the free droop (or preload) I should install them at? And is there anything simple I can do to center the spring to help with rubbing issues? Would those cheap eBay isolators hold my springs in place?
3. Speaking of rubbing, is it worth getting new grooves cut? Or should I just cut the rear sleeves shorter and be done with it?
The goodies:
Other than that, I'll be following the advice in here. Grease the perch threads, anti-seize on the set screws, paint the shock bodies, and I've cleaned out the groove rust. Also, I bought the same part number sleeves as Bahurd and they were a loose fit on my shocks, although it is still pretty clear the circlip will not come out.
Reply
0
0
12-01-2014, 06:54 AM
#313
Moderator
iTrader: (12)
Join Date: Nov 2008
Location: Tampa, Florida
Posts: 20,650
Total Cats: 3,011
1. you may wish to cut down a bumpstop or two but wait until you put the car on the ground and see how much free play you have.
2. you could use a factory NB upper rubber spring isolator to keep the spring centered and it may help although it is made for a larger diameter. I don't have anything and my springs touch the threads on the adjuster occasionally.
3. you don't need to cut grooves. It is imperative, however, that the adjusting sleeve does not stick up past the height of the shock body when installed. Leave the perches on them when you cut so that you don't have a problem getting them back over the threads once they are cut. Looks good.
Did you put tape or something around the shock to keep the adjusters centered?
Reply
0
0
12-10-2014, 10:38 AM
#314
Junior Member
Join Date: Aug 2014
Location: North Carolina
Posts: 403
Total Cats: 103
I got them installed over the weekend, although I need to figure out a way to get the ride heights right while having the preload/freeload reasonably close for rough corner weighting. I tried running the rear AllStar sleeves at full length, and that resulted in a good bit of rubbing. I cut the sleeves off just above the upper centering ring, which seems to have done the trick. No tape to center the adjusters, although that might have been a good idea as they now rotate freely and have to be held in place to adjust the corner height. I cut the Energy Suspension bumpstops to 30 mm, they're super stiff and I wouldn't recommend buying these specific ones for a Miata. By my rough measurements, there's about 10mm between the shock bodies and the washers ("bump stop cup") at full compression, so in effect I have a 20mm for the bumpstops to compress. Rear bumpstops are stock NB.
The ride isn't worse or any better IMO, just different. Smaller, high frequency bumps seem to be better dealt with, and larger square edge bumps feel about the same with a bit less of a "crashing" noise. Naturally, the car follows the undulations of the road more, so on uneven roads I get tossed around a good bit. That's not to say the ride is rough. I drive on some poorly maintained mountain roads, so take that with a grain of salt. On smoother asphalt passengers can't tell the suspension isn't stock.
Before my car had a ton of understeer, and the car is a lot more neutral now. The car is more responsive and feels tighter as you would expect. My issue with the suspension now is the loss of droop travel. My inside rear tire came off the ground as I went left over a hill, and that had never happened before. The next step I take will probably be better bumpstops all around and some helper springs to keep the tires on the ground.
Last edited by OptionXIII; 12-10-2014 at 12:26 PM.
Reply
0
0
12-11-2014, 01:56 PM
#315
If you are using NB hats then you will need the NB shocks anyway so quit worrying over that part of it. They have a different rod diameter between the NA and NB.
And no one has recommended the NA HD shocks to my recollection. NB "Hard S" or Mazdaspeed are the recommended ones. The NB aftermarket HD has less compression damping according to the chart posted previously, but is still a substantial improvement over stock.
And no one has recommended the NA HD shocks to my recollection. NB "Hard S" or Mazdaspeed are the recommended ones. The NB aftermarket HD has less compression damping according to the chart posted previously, but is still a substantial improvement over stock.
Just my experience, YMMV.
I didn't think the valving between NA and NB aftermarket Bilsteins is different, but then again I couldn't find a comparison dyno. Can you link the one you mentioned?
Last edited by Seefo; 12-12-2014 at 09:23 AM.
Reply
0
0
 12-16-2014, 01:18 PM
#318
Newb

Join Date: Apr 2012
Posts: 27
Total Cats: 1
Secret Hint:
For removing the tabs off the side of the Bilstein shock bodies (the one that aligns the factory perch), you can grind away at them for an hour as described above, it works...
***
OR, you can grab a small flat blade cold chisel and stick it between the shock body and the tab (chisel perpendicular to shock body), and give it a smack with a hammer. If it doesn't snap off, give it another hit or give it a try from the other side, working back and forth.
Note, I did this just holding chisel & shock with one hand, hammer with the other, shock resting across some 4x4 blocks. Personally, I would not stick the body of the shock in a vice.
I didn't figure this out til my last shock, mine came off with 2 little hits, cake. Mine were MSM shocks, so the yellow bodies might differ. It works because that tab is held on with 2 little nipples that stick out, which look to just be resistance welded to the bodies. Wish I had known this for all 4!
Also, on advice from CordyCord, I'll be using a silicone or similar rubbery type goop for between the perch and shock body. Electrical tape and the like might work, but why mess around. Also, the factory used what looks like liquid urethane when they put the stock perches on, so I say why not do the same.
Cheers.
For removing the tabs off the side of the Bilstein shock bodies (the one that aligns the factory perch), you can grind away at them for an hour as described above, it works...
***
OR, you can grab a small flat blade cold chisel and stick it between the shock body and the tab (chisel perpendicular to shock body), and give it a smack with a hammer. If it doesn't snap off, give it another hit or give it a try from the other side, working back and forth.
Note, I did this just holding chisel & shock with one hand, hammer with the other, shock resting across some 4x4 blocks. Personally, I would not stick the body of the shock in a vice.
I didn't figure this out til my last shock, mine came off with 2 little hits, cake. Mine were MSM shocks, so the yellow bodies might differ. It works because that tab is held on with 2 little nipples that stick out, which look to just be resistance welded to the bodies. Wish I had known this for all 4!
Also, on advice from CordyCord, I'll be using a silicone or similar rubbery type goop for between the perch and shock body. Electrical tape and the like might work, but why mess around. Also, the factory used what looks like liquid urethane when they put the stock perches on, so I say why not do the same.
Cheers.
Reply
0
0
12-18-2014, 10:10 PM
#319
Junior Member

Join Date: Mar 2011
Location: VA
Posts: 65
Total Cats: -2
I'm having an issue and hoping to get some advice on it. I'm using NB sports with allstar sleeves and 7" QA1 400lb springs up front with no helper spring. The first picture is what I happened to see when I popped the hood today, which explains the creaking i've been hearing lately. I used leftover integra speedthane bump stop for the upper bushing just like to OP did, but I used slightly less for more bump travel. The third picture is the passenger side, which is fine but gives you an idea of how much bump stop I used on each side. I'm unsure of how this managed to happen. Maybe the fact that I used very little bump stop crushed the lower rubber bushing with the nipple on it and completely flattened out the upper bushing? I followed the instructions in the OP maybe the black rubber bushing underneath the shock mount is mangled up? It looks in tact when looking at it from the under side. When I lift the upper plate and upper bushing, I can see that the nipple is mangled up but it doesn't explain why so much of the unthreaded portion of the shaft is sticking out. I am thinking about replacing the stock rubber bushing on both sides and maybe using a thicker piece of bump stop for the upper bushing I feel like I may need more than the recommended 36mm to bridge that gap. I'm trying not to get aftermarket top hats if I don't have to and I don't want to end up bending the shaft so I have to figure out a solution soon.
http://i60.tinypic.com/24gj09z.jpg
http://oi62.tinypic.com/2akufq.jpg
http://oi59.tinypic.com/n2n6zl.jpg
http://i60.tinypic.com/24gj09z.jpg
http://oi62.tinypic.com/2akufq.jpg
http://oi59.tinypic.com/n2n6zl.jpg
Reply
0
0


