
How to remove and replace differential bushings
 03-15-2012, 08:24 PM
#21

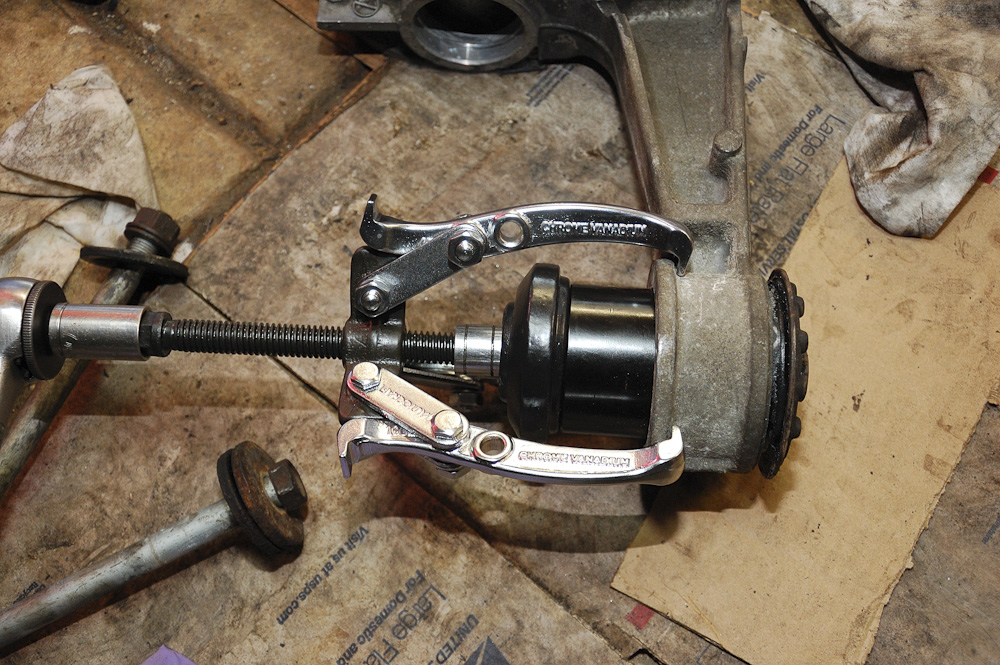
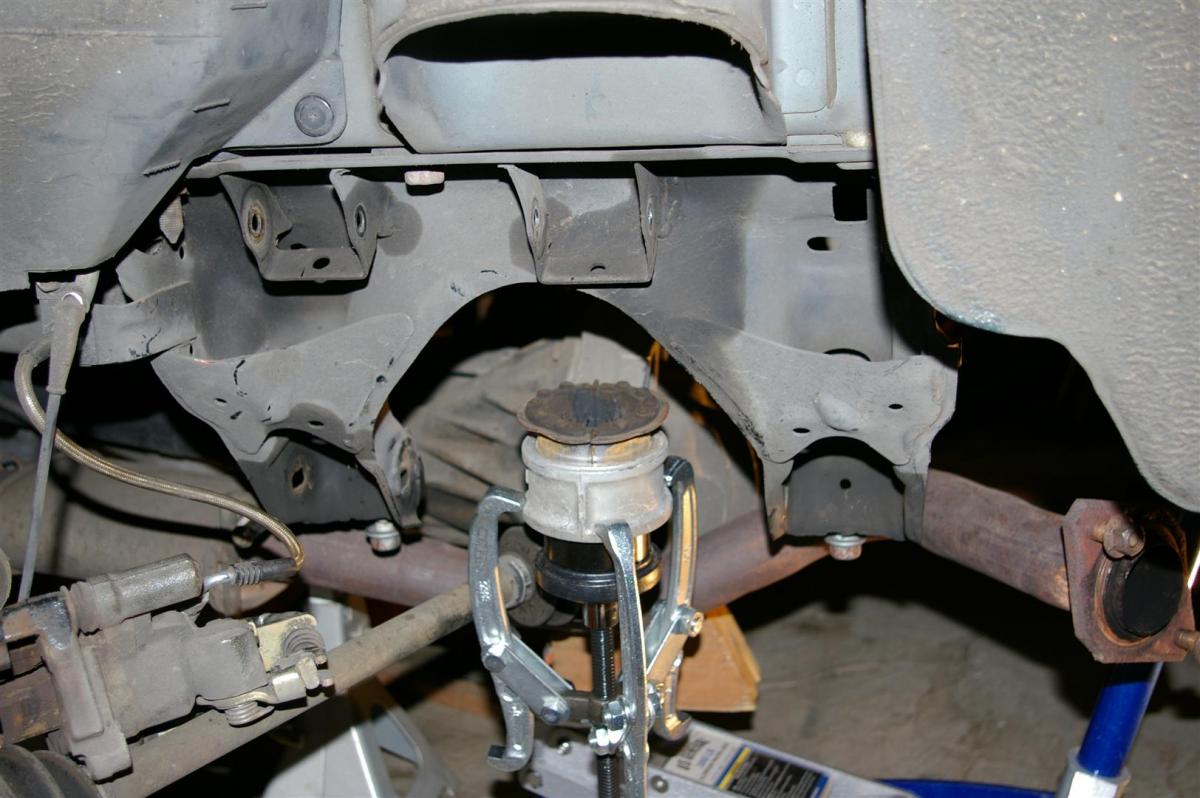
Just did this now and it works great. You need a jaw puller (I used a 4" 3-jaw puller from Advance Auto) and harbor freight ball joint press (you need this for suspension bushings anyways).
Anyways, pictures of how it all works.
You take the puller. Put a 1/2 to 3/4 adapter on it. From the ball joint tool, use the disk and 2.5" OD receiver tube.
Anyways, pictures of how it all works.
You take the puller. Put a 1/2 to 3/4 adapter on it. From the ball joint tool, use the disk and 2.5" OD receiver tube.
I supported the diff on the edge of a wood pallet. The bushing was hanging off the edge. I used a couple pieces of wood to support the diff level.
I took the 2.5 OD collar and disk in your picture, placed it over the bushing. Imagine it like you have it in the picture without the puller.
I took another scrap piece of wood to protect the wing of the 3rd member from the next step, in case I missed.
I took a 3-4# sledge and hit the top of the disk. 2-3 real solid swings on each bushing popped it out. Less than 10 minutes total for the entire job.

Reply
 0
0

0
 08-08-2012, 03:50 PM
#23
Junior Member

Join Date: Apr 2011
Location: Oregon
Posts: 301
Total Cats: 4
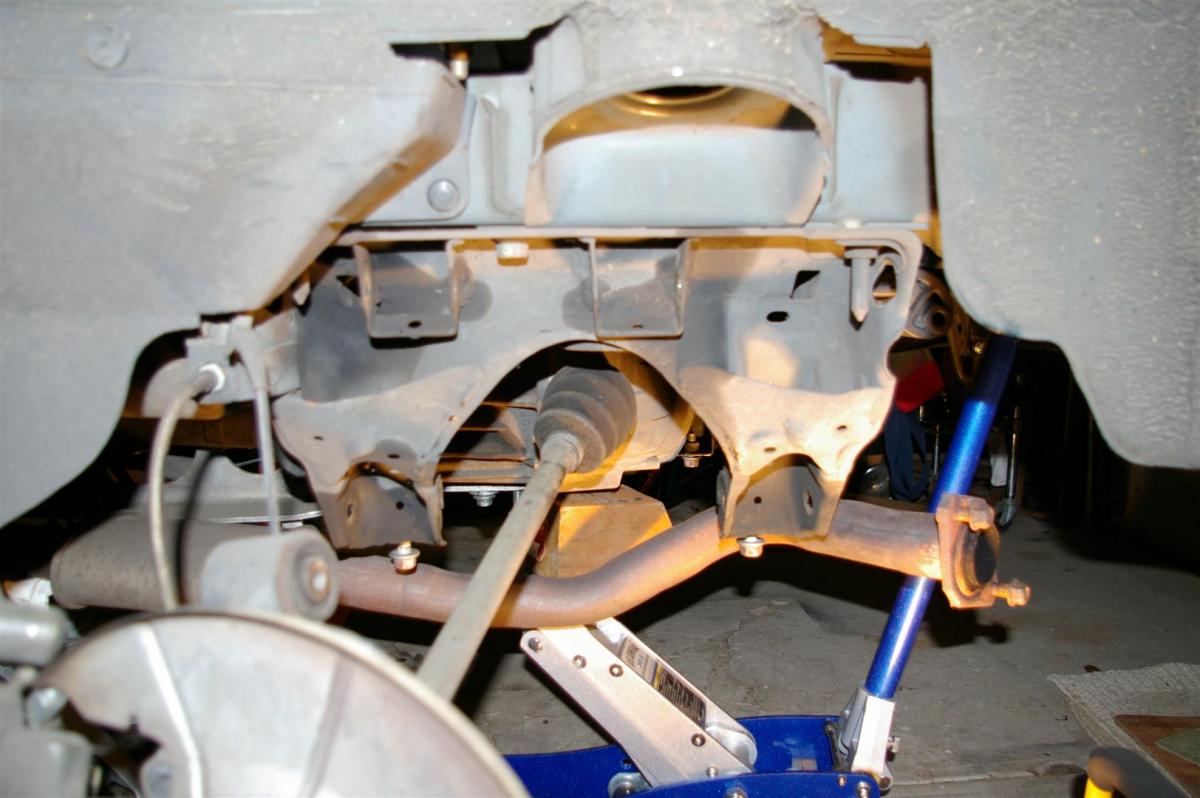
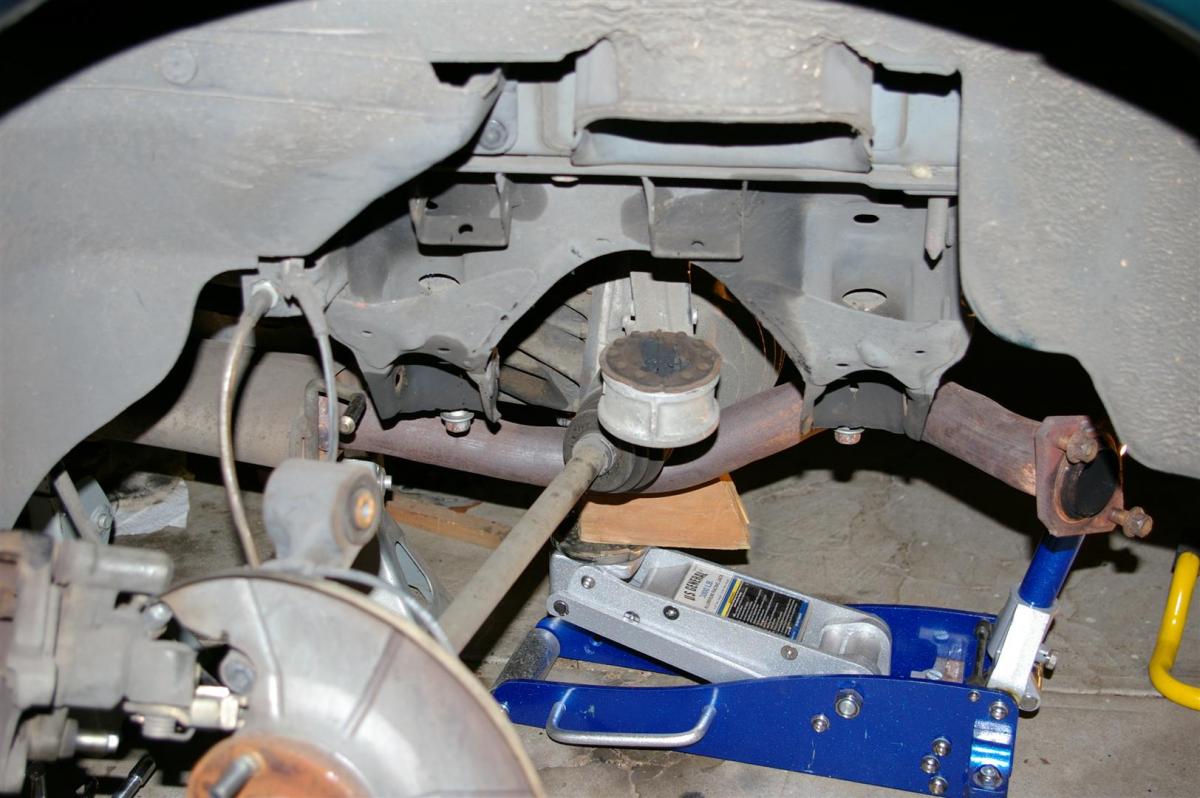
I first lowered the diff which did allow adequate clearance for the bushing to be pushed out, but there was not adequate access to the bushing for when things went wrong. What could go wrong, right? One popped out easily, the other one was way harder. It took 45 mins of air chiseling while lying on my back to get it to budge. My aching shoulder!
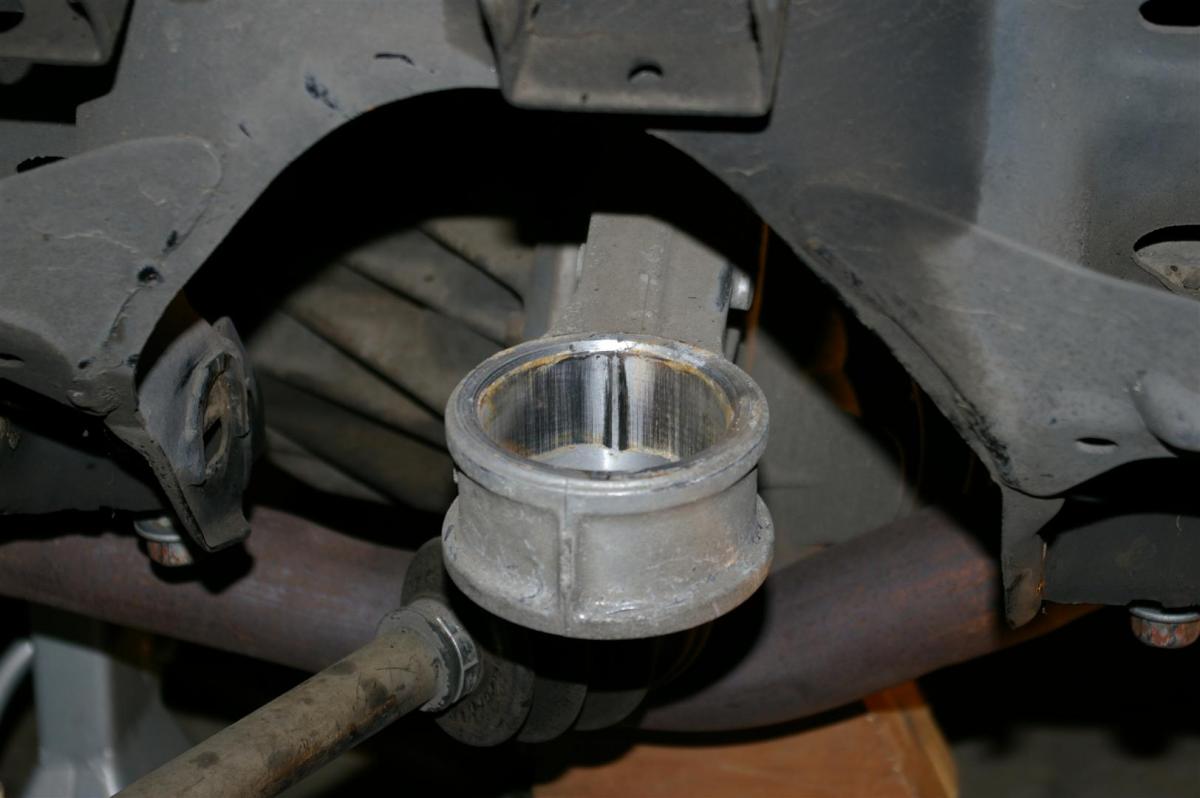
If you do use the air hammer method, a helpful hint that I discovered is that the OEM bushing casing is actually in 2 pieces. If you knock out the center rubber, you can more easily divide the casing at it's parting line.
I think that the 3-arm press method might work more easily, even with the diffi in the car. The clamp can't be positioned at the top due to the shape of the bushing casing; and I would be worried that it might slip off the lower flange as it is a bit irregular. I only had a 2-arm press and it kept slipping off.
My arm is really sore!
Last edited by gtred; 05-01-2017 at 10:48 AM.
Reply
0
0
 08-31-2012, 04:34 PM
#25

I did mine using this method last year. Did it with the diff hanging down underneath the car. I should note that I have ears of experience using different types of pullers to remove bearings etc on ship. When I posted elsewhere about this being an easy way, I got talked down about how no one would buy a ball joint kit to get the pieces needed.
Edit: turns out it was this very forum.
Edit: turns out it was this very forum.
Last edited by chiefmg; 09-01-2012 at 03:24 PM.
Reply
0
0
 02-25-2013, 12:29 PM
#27
Elite Member

Thread Starter
iTrader: (10)
Join Date: Jan 2010
Location: VA
Posts: 3,493
Total Cats: 268
on a side note, the ball joint tool has now been used for bushings on 4 different cars, for extended wheel studs, and a ton of other things that i forget.
still going strong.
Reply
0
0
02-25-2013, 12:37 PM
#28

When I did mine I burned through the first bushing only to fight the metal ring with a sledge and punch for a half hour or so because everyone at m.net
 screamed about how you should absolutely not use an impact hammer, you will crack the housing, yadda yadda.
Used an impact hammer on the second bushing, no burning. Took about thirty seconds. Didn't crack the housing.

Reply
0
0
02-25-2013, 05:29 PM
#29
Elite Member
iTrader: (2)
Join Date: May 2008
Location: Portland, Oregon
Posts: 3,468
Total Cats: 365
Torch is silly and unnecessary. Impact hammer is silly and unnecessary. Removing diff is silly and unnecessary. This takes about 5 minutes; the longest part of which is getting the 3-jaw puller attached and stable.
Inserting new rubber diff bushings, either stock or Mazdacomp, may require significant force and the use of the Harbor Freight ball joint press kit c-clamp tool. My homemade easy-access diff bushing installer, which was a big long bolt with washers on either end and a nut, proved insufficient to the task. Once the rubber bushing starts to tilt sideways, and it will, you don't have enough oomph to get the bushing in. The HF tool is the way.
Always lube the threads on all of these tools.

Reply
0
0
02-25-2013, 05:41 PM
#30
With my transmission, PPF, and driveshaft on the ground it was much easier to pull the diff and stub shafts than wheels, brakes, uprights and control arms. The hardest part was the stubs until I hit the prybar with a hammer and *pop*.
Will probably use your method if I ever help anyone, though. Didn't think about doing it on-car.
Will probably use your method if I ever help anyone, though. Didn't think about doing it on-car.
Reply
0
0
 10-23-2019, 02:06 PM
#32
Junior Member

Join Date: Jun 2010
Location: Salem, Ore.
Posts: 63
Total Cats: 6
Thread revival/necrobump.
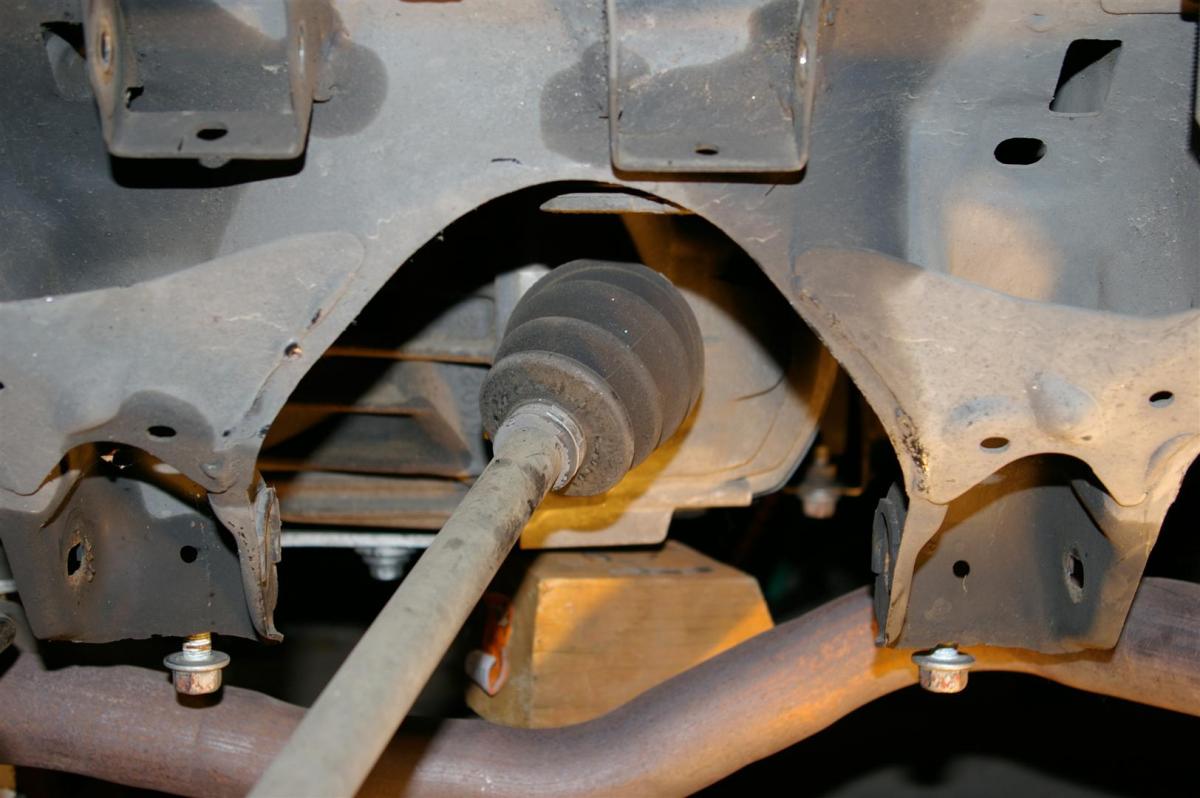
I did Mazdacomp differential bushings and I've got a small gap to the bottom bracket. Is this a problem? I'm chasing a small clunk under heavy braking that I can't find, and just trying to figure out if this might be it?
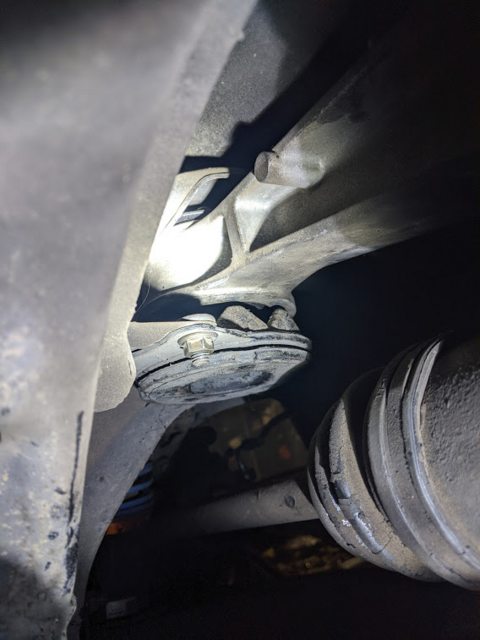
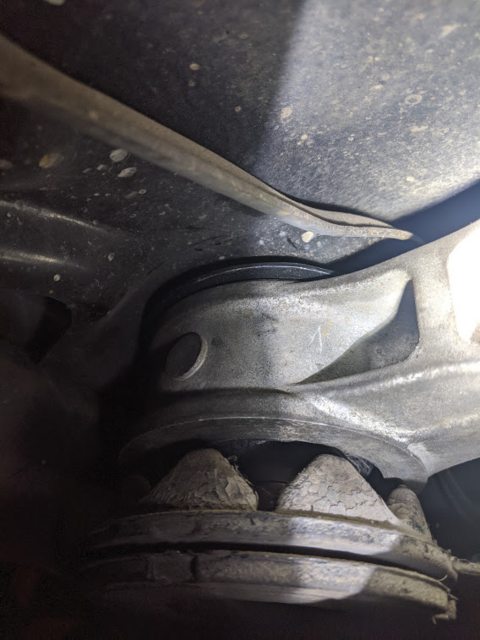
I did Mazdacomp differential bushings and I've got a small gap to the bottom bracket. Is this a problem? I'm chasing a small clunk under heavy braking that I can't find, and just trying to figure out if this might be it?
Reply
0
0

Thread
Thread Starter
Forum
Replies
Last Post
stoves
Suspension, Brakes, Drivetrain
5
04-21-2016 03:00 PM


