
Review: SADFab Delrin Bushing Kit
 03-31-2016, 08:19 PM
#1
Elite Member
Thread Starter
iTrader: (2)

Join Date: Jan 2013
Location: Chandler, AZ
Posts: 1,628
Total Cats: 427
Before I start this review, I just want to make it clear that this is not an advertisement, and that sales of this kit don't benefit me in any way. I'm not part of SADFab and I purchased the kit on my own.
Intro:
To start things off, I've had Energy Suspension bushings in the car for years. I always thought they were great compared to the failing rubber bushings. When I first installed them, I could move the control arms with relative ease and the compliance was much less than the factory rubber bushings. But, after reading through The Bushing Megathread, I thought that some of the points brought up were valid and decided to go for one of the SADFab delrin kits.
I ordered the NASA legal kit which is a zero points modification in TT and PT, and I also added on the Front Lower Control Arm Offset Bushings in order to get stancenation levels of camber. The NASA kit does not include the rear upper outer spherical bearing portion of their normal full kit.
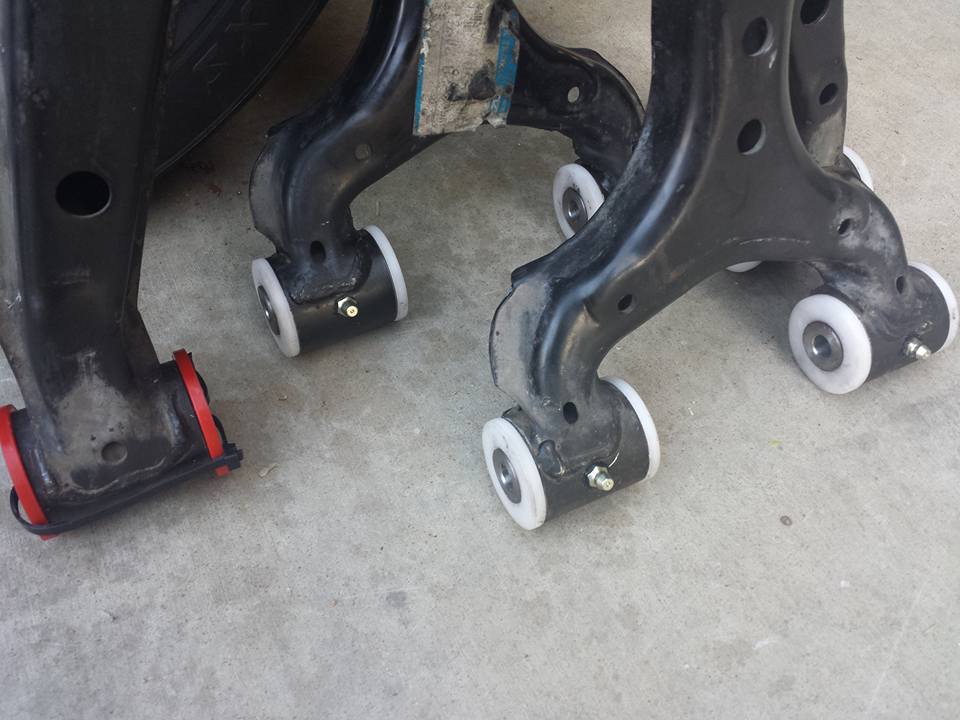
Here's what the kit came with:
- Delrin Bushings for the following locations:
- - FLCA Forward Bushing (Offset + Set Screws)
- - FUCA-I bushings
- - RLCA-I Forward Bushing
- - RLCA-O bushings
- - RUCA-I bushings
- Poly bushings and bronze bearings for the following locations (see Bushing Megathread to find out why):
- - FLCA Aft bushing
- - RLCA Aft bushing
- - RUCA-O bushing
- Grease fittings for all locations
Installation:
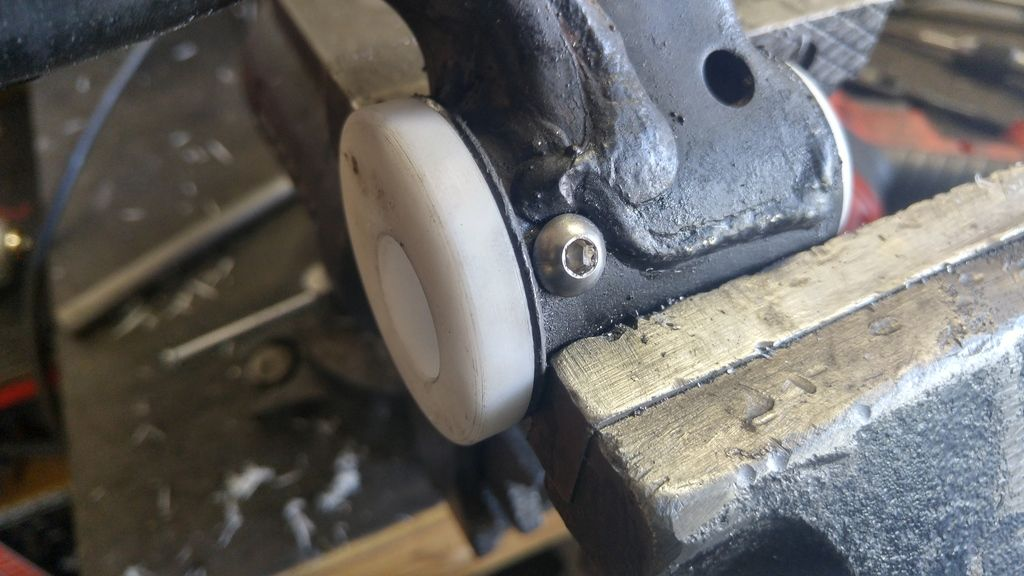
The first thing I noticed when taking the control arms off my car, was that I could not move them by hand anymore unless I put some serious force into it. To get the hub to move was probably 100+lbs of force to move them with the coilovers and sway bars disconnected. I did not have grease fittings installed, nor have I ever taken them apart to grease them, this is likely a huge contributing factor to that but whatever.
I took all the arms off, and headed over to Sean's place (hi_im_sean), who makes these kits. He has a press and was kind enough to help me get everything installed.
Next thing Sean and I noticed is that the bushing thrust faces were starting to chew themselves up, the sleeves had scoring on them, the plating had been worn off and the Energy Suspension grease had turned into almost an adhesive now that dirt and dust had been mixed in. A shop press was required to get most of them out.
After that, it's lots of cleaning, new grease, press bushings in, drill holes for grease zerks and for the offset set screws, etc etc. It's your typical bushing install aside from having to ream out the delrin bushings before putting in the sleeves. Everything was pretty straight forward.
After that was done, I just had to put all the arms back on the car, get an alignment and corner balance redone and hit the track. Luckily I had two track events on the same course, in about the same weather conditions only two weeks apart so I got to do some really good back to back comparison.
When the arms went back on, they move by hand with ease. The resistance is maybe 5% of what it was before with the poly bushings. Massive improvement.

Observations:
TL;DR: I firmly believe this kit is worth purchasing and installing. I'm happy with my purchase and the results I've gotten with it.
First, I'm sure some of you are interested in how much front camber I was able to gain with the offset bushings. The answer is a lot. The middle of the adjustment range was about -3.5 degrees with 4.0" front and 4.25" rear pinch weld heights with brand new, zero heat cycle 205/50R15 Hoosier R7's on 15x9" Advanti S1's.
The adjustment range looks to be about -3.0 to -4.2 in the front at that ride height. Perfect for track oriented cars.
Qualitative Stuff:
-- The car is now ******* telepathic. It just feels much more connected to the road, and communicates through the steering wheel better.
-- The car now feels tighter and more solid.
-- It feels like the suspension is doing a better job now that it is not fighting the resistance of the poly bushings. Handled bumps and irregularities much better.
-- NVH did not really change for me, but my car is a purpose built race car and NVH is already abysmal, so take that with a grain of salt. Me personally, I would still not hesitate to put these on a street car.
Track Test Results:
Below, are pictures of two time sheets, before and after. The track is Wild Horse Pass East in Arizona. Those are the best laps out of each two day track event that I attended. The events were only two weeks apart. I'm usually a very consistent driver, the weather was nearly the same, and the car didn't have any massive changes.
Both events were done on Xida Gen 2 with Billet Coaxial Mounts.
Both events had no changes to power. The car makes 133WHP and 113WTQ on a dynojet.
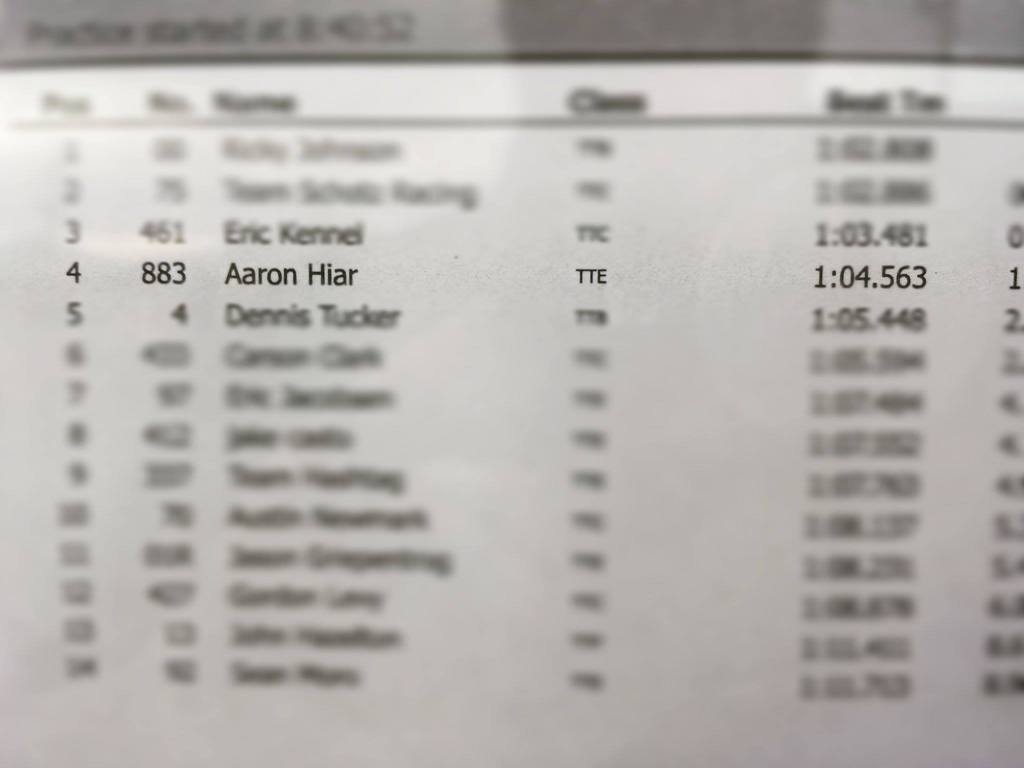
Poly Bushings:
2405lbs coming off track
6 Heat Cycle 205/50R15 Hoosier R7
-- Alignment
-2.4 Front Camber
-3.0 Rear Camber
0 Toe All Around
Delrin Bushings:
2460lbs coming off track (+55lbs!)
0 Heat Cycle 205/50R15 Hoosier R7
-- Alignment
-4.0 Front Camber
-3.9 Rear Camber
0 Toe All Around
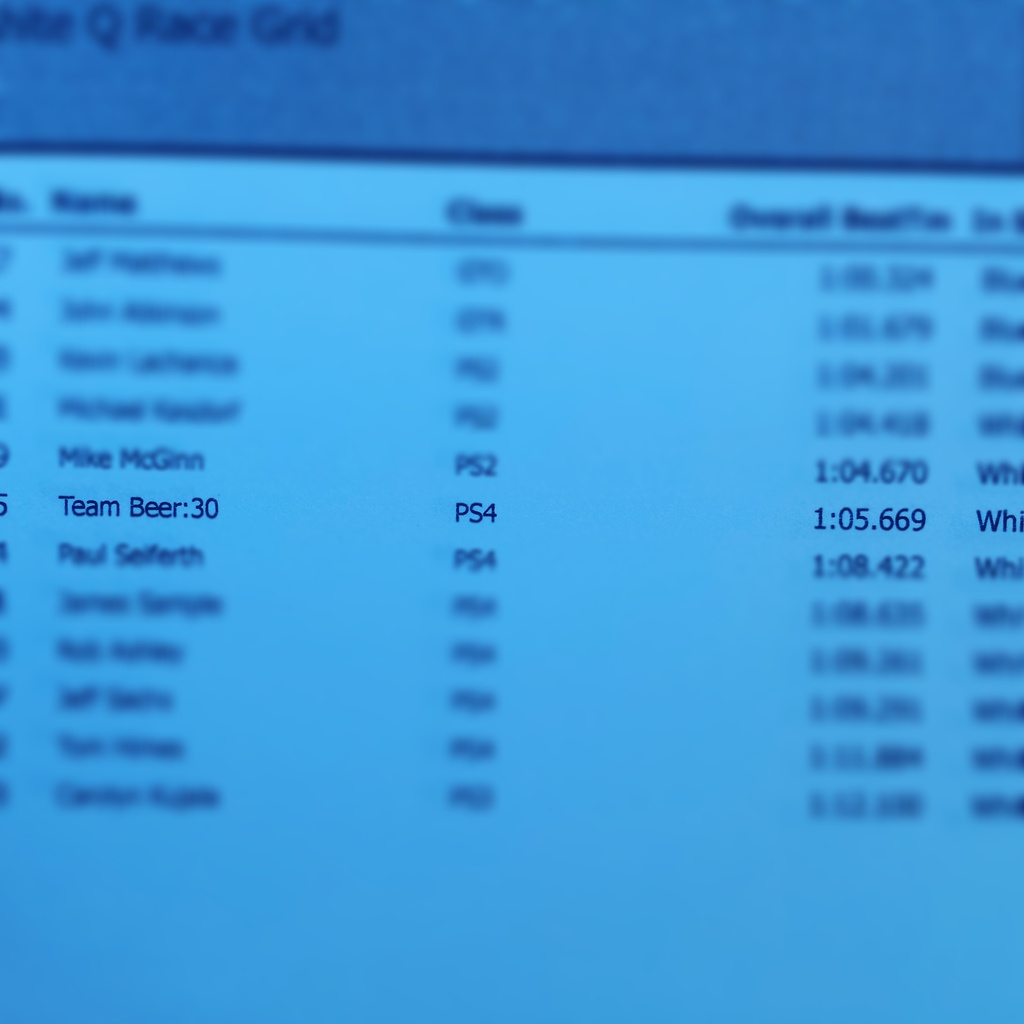
As you can see, I went about 1.1 seconds faster with the SADFab delrin bushing kit. I also was able to break the long standing TTE record, set three years ago, by 1.3 seconds. The newer tires probably helped a bit, but take into consideration that during the faster run I was 55 pounds heavier as well. I had to ballast up a little bit for my new classing. Also, the way more aggressive alignment that I was able to achieve, as a direct result of the delrin bushing kit, helped a lot as well. Also being on a fresh corner balance and alignment was helpful too but I believe the delrin bushing kit played a large factor in being able to set that track record and my new personal best at that track.
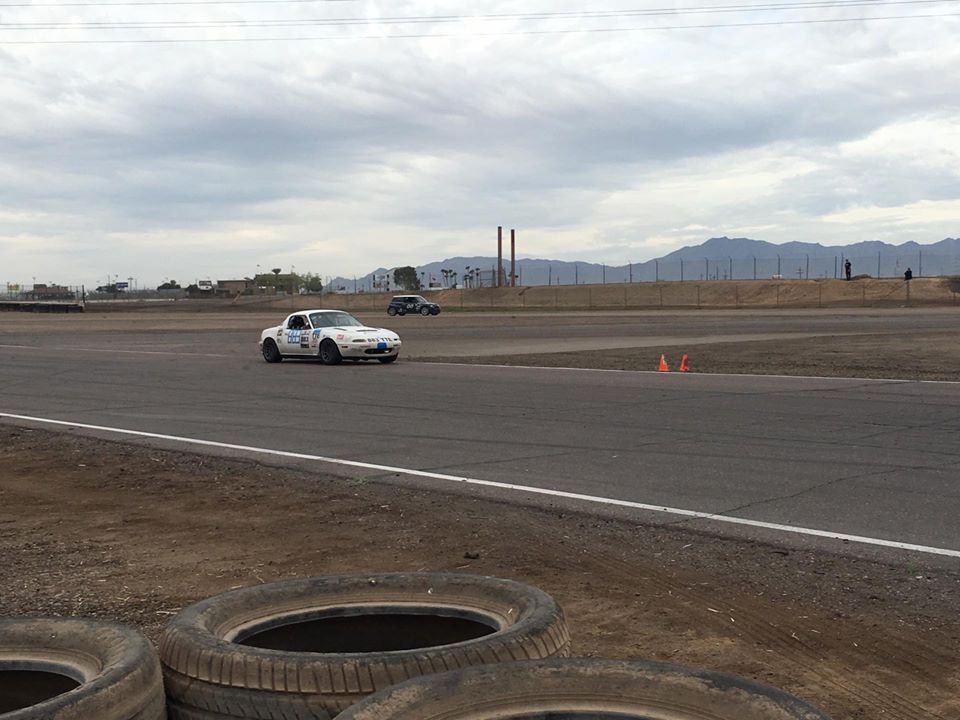
Also, I've even got video from the two events. The first two videos are races from that weekend, I set the fast time in open qualifying that morning but no video of that. But the third video has the delrin fast lap in it.
Poly Bushings:
SADFab Delrin Bushings:
If you read this far, thank you. Hopefully this helps anyone looking for more information on this product. If anyone has any questions, feel free to ask and I'll try to answer as best I can.
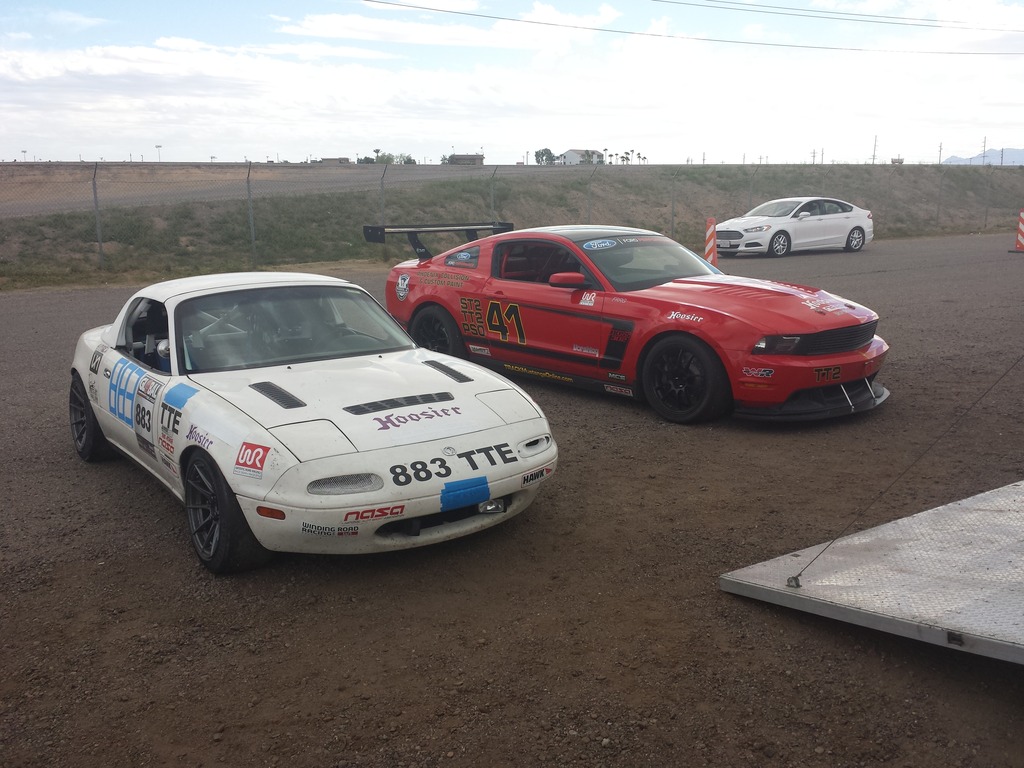
And a couple pictures from the Delrin weekend because why not.
Intro:
To start things off, I've had Energy Suspension bushings in the car for years. I always thought they were great compared to the failing rubber bushings. When I first installed them, I could move the control arms with relative ease and the compliance was much less than the factory rubber bushings. But, after reading through The Bushing Megathread, I thought that some of the points brought up were valid and decided to go for one of the SADFab delrin kits.
I ordered the NASA legal kit which is a zero points modification in TT and PT, and I also added on the Front Lower Control Arm Offset Bushings in order to get stancenation levels of camber. The NASA kit does not include the rear upper outer spherical bearing portion of their normal full kit.
Here's what the kit came with:
- Delrin Bushings for the following locations:
- - FLCA Forward Bushing (Offset + Set Screws)
- - FUCA-I bushings
- - RLCA-I Forward Bushing
- - RLCA-O bushings
- - RUCA-I bushings
- Poly bushings and bronze bearings for the following locations (see Bushing Megathread to find out why):
- - FLCA Aft bushing
- - RLCA Aft bushing
- - RUCA-O bushing
- Grease fittings for all locations
Installation:
The first thing I noticed when taking the control arms off my car, was that I could not move them by hand anymore unless I put some serious force into it. To get the hub to move was probably 100+lbs of force to move them with the coilovers and sway bars disconnected. I did not have grease fittings installed, nor have I ever taken them apart to grease them, this is likely a huge contributing factor to that but whatever.
I took all the arms off, and headed over to Sean's place (hi_im_sean), who makes these kits. He has a press and was kind enough to help me get everything installed.
Next thing Sean and I noticed is that the bushing thrust faces were starting to chew themselves up, the sleeves had scoring on them, the plating had been worn off and the Energy Suspension grease had turned into almost an adhesive now that dirt and dust had been mixed in. A shop press was required to get most of them out.
After that, it's lots of cleaning, new grease, press bushings in, drill holes for grease zerks and for the offset set screws, etc etc. It's your typical bushing install aside from having to ream out the delrin bushings before putting in the sleeves. Everything was pretty straight forward.
After that was done, I just had to put all the arms back on the car, get an alignment and corner balance redone and hit the track. Luckily I had two track events on the same course, in about the same weather conditions only two weeks apart so I got to do some really good back to back comparison.
When the arms went back on, they move by hand with ease. The resistance is maybe 5% of what it was before with the poly bushings. Massive improvement.
Observations:
TL;DR: I firmly believe this kit is worth purchasing and installing. I'm happy with my purchase and the results I've gotten with it.
First, I'm sure some of you are interested in how much front camber I was able to gain with the offset bushings. The answer is a lot. The middle of the adjustment range was about -3.5 degrees with 4.0" front and 4.25" rear pinch weld heights with brand new, zero heat cycle 205/50R15 Hoosier R7's on 15x9" Advanti S1's.
The adjustment range looks to be about -3.0 to -4.2 in the front at that ride height. Perfect for track oriented cars.
Qualitative Stuff:
-- The car is now ******* telepathic. It just feels much more connected to the road, and communicates through the steering wheel better.
-- The car now feels tighter and more solid.
-- It feels like the suspension is doing a better job now that it is not fighting the resistance of the poly bushings. Handled bumps and irregularities much better.
-- NVH did not really change for me, but my car is a purpose built race car and NVH is already abysmal, so take that with a grain of salt. Me personally, I would still not hesitate to put these on a street car.
Track Test Results:
Below, are pictures of two time sheets, before and after. The track is Wild Horse Pass East in Arizona. Those are the best laps out of each two day track event that I attended. The events were only two weeks apart. I'm usually a very consistent driver, the weather was nearly the same, and the car didn't have any massive changes.
Both events were done on Xida Gen 2 with Billet Coaxial Mounts.
Both events had no changes to power. The car makes 133WHP and 113WTQ on a dynojet.
Poly Bushings:
2405lbs coming off track
6 Heat Cycle 205/50R15 Hoosier R7
-- Alignment
-2.4 Front Camber
-3.0 Rear Camber
0 Toe All Around
Delrin Bushings:
2460lbs coming off track (+55lbs!)
0 Heat Cycle 205/50R15 Hoosier R7
-- Alignment
-4.0 Front Camber
-3.9 Rear Camber
0 Toe All Around
As you can see, I went about 1.1 seconds faster with the SADFab delrin bushing kit. I also was able to break the long standing TTE record, set three years ago, by 1.3 seconds. The newer tires probably helped a bit, but take into consideration that during the faster run I was 55 pounds heavier as well. I had to ballast up a little bit for my new classing. Also, the way more aggressive alignment that I was able to achieve, as a direct result of the delrin bushing kit, helped a lot as well. Also being on a fresh corner balance and alignment was helpful too but I believe the delrin bushing kit played a large factor in being able to set that track record and my new personal best at that track.
Also, I've even got video from the two events. The first two videos are races from that weekend, I set the fast time in open qualifying that morning but no video of that. But the third video has the delrin fast lap in it.
Poly Bushings:
SADFab Delrin Bushings:
If you read this far, thank you. Hopefully this helps anyone looking for more information on this product. If anyone has any questions, feel free to ask and I'll try to answer as best I can.
And a couple pictures from the Delrin weekend because why not.

Reply
 7
7

7


 04-01-2016, 08:50 AM
#6
Senior Member

Join Date: Jul 2014
Location: Canberra, sort of
Posts: 1,088
Total Cats: 184
Good read, good to know I appear to have something to look forward to - heaven knows I need to find a second or two! Waiting on my delrins now, I upgraded from a poly bushing kit as they don't fit my Superpros.
Reply
0
0
04-01-2016, 09:21 AM
#7
SadFab CEO

iTrader: (3)
Join Date: Sep 2012
Location: your mom's house phoenix, AZ
Posts: 4,560
Total Cats: 1,142
That **** is nasty, im pretty sure its silicone based, so it already sucks to clean off. Degreasers just bead up on it, so you have to use a solvent, like brake clean. Aarons dad used gasoline with good results lol. Its also a dirt magnet worse than any "lube" I've ever encountered, due to its viscosity and sticky-ness. That **** will hold 1/4 minus landscaping rock to your bushings lmao.
Reply
0
0
 04-02-2016, 11:05 AM
#9

I need to do this too. Superior product and supports a couple of good guys.
Arca, your videos need data!
Just FYI, when I put my polys in, I did grease fittings. Initial lube was done with commonly available marine grease and I've kept up with regreasing every 6 months. Hyperlube has never been near the car. After 2+ years of constant tracking, I haven't experienced the significant increase in resistance being reported here. I think the takeaway is -- when faced with the alternative of a "permanent" lubrication option vs. a continuous maintenance lubrication option, opt for the latter and make sure the lubricant you use isn't unobtanium.
Reply
0
0
04-02-2016, 03:04 PM
#11
If only my company owned a fighter jet! Our customers own those (and all the cool helos too).
Best I can do is a Beech Baron . . . it does pretty nice acro though:
I'll just buy a kit though. After all, you're the starving college student/entrepeneur with cool ideas and drive.
Best I can do is a Beech Baron . . . it does pretty nice acro though:
I'll just buy a kit though. After all, you're the starving college student/entrepeneur with cool ideas and drive.
Reply
0
0
04-03-2016, 01:27 AM
#12

Great thread. I have been spending too much time lately thinking about poly vs. delrin vs. rubber. I am half way done with a hybrid Poly/Delrin setup and I am kinda wishing I had just left the stock rubber bushings in place or gone full delrin!!!
Also - just a friendly fabrication tip - when tapping things like mild steel or aluminum, I always just put the tap into the cordless drill and run it on low speed. Its 10X faster than hand tapping and you don't wallow out the threads as much because you can hold the drill steady and the tap spins true. This method always works great for me, unless the tap is dull, in which case you should buy a new tap! Just be cautious if you are using a small tap (m4 or smaller) or if you are tapping stainless.
Also - just a friendly fabrication tip - when tapping things like mild steel or aluminum, I always just put the tap into the cordless drill and run it on low speed. Its 10X faster than hand tapping and you don't wallow out the threads as much because you can hold the drill steady and the tap spins true. This method always works great for me, unless the tap is dull, in which case you should buy a new tap! Just be cautious if you are using a small tap (m4 or smaller) or if you are tapping stainless.
Reply
0
0
04-03-2016, 01:50 AM
#13
Elite Member
Thread Starter
iTrader: (2)
Join Date: Jan 2013
Location: Chandler, AZ
Posts: 1,628
Total Cats: 427
I need to do this too. Superior product and supports a couple of good guys.
Arca, your videos need data!
Just FYI, when I put my polys in, I did grease fittings. Initial lube was done with commonly available marine grease and I've kept up with regreasing every 6 months. Hyperlube has never been near the car. After 2+ years of constant tracking, I haven't experienced the significant increase in resistance being reported here. I think the takeaway is -- when faced with the alternative of a "permanent" lubrication option vs. a continuous maintenance lubrication option, opt for the latter and make sure the lubricant you use isn't unobtanium.
Arca, your videos need data!
Just FYI, when I put my polys in, I did grease fittings. Initial lube was done with commonly available marine grease and I've kept up with regreasing every 6 months. Hyperlube has never been near the car. After 2+ years of constant tracking, I haven't experienced the significant increase in resistance being reported here. I think the takeaway is -- when faced with the alternative of a "permanent" lubrication option vs. a continuous maintenance lubrication option, opt for the latter and make sure the lubricant you use isn't unobtanium.
Also, data might be coming soon (Race Technology Dash 2 Pro) but if you've been following the build thread you can see where all of the racecar money is going...
Great thread. I have been spending too much time lately thinking about poly vs. delrin vs. rubber. I am half way done with a hybrid Poly/Delrin setup and I am kinda wishing I had just left the stock rubber bushings in place or gone full delrin!!!
Also - just a friendly fabrication tip - when tapping things like mild steel or aluminum, I always just put the tap into the cordless drill and run it on low speed. Its 10X faster than hand tapping and you don't wallow out the threads as much because you can hold the drill steady and the tap spins true. This method always works great for me, unless the tap is dull, in which case you should buy a new tap! Just be cautious if you are using a small tap (m4 or smaller) or if you are tapping stainless.
Also - just a friendly fabrication tip - when tapping things like mild steel or aluminum, I always just put the tap into the cordless drill and run it on low speed. Its 10X faster than hand tapping and you don't wallow out the threads as much because you can hold the drill steady and the tap spins true. This method always works great for me, unless the tap is dull, in which case you should buy a new tap! Just be cautious if you are using a small tap (m4 or smaller) or if you are tapping stainless.
Reply
-1
-1
04-03-2016, 08:21 PM
#14
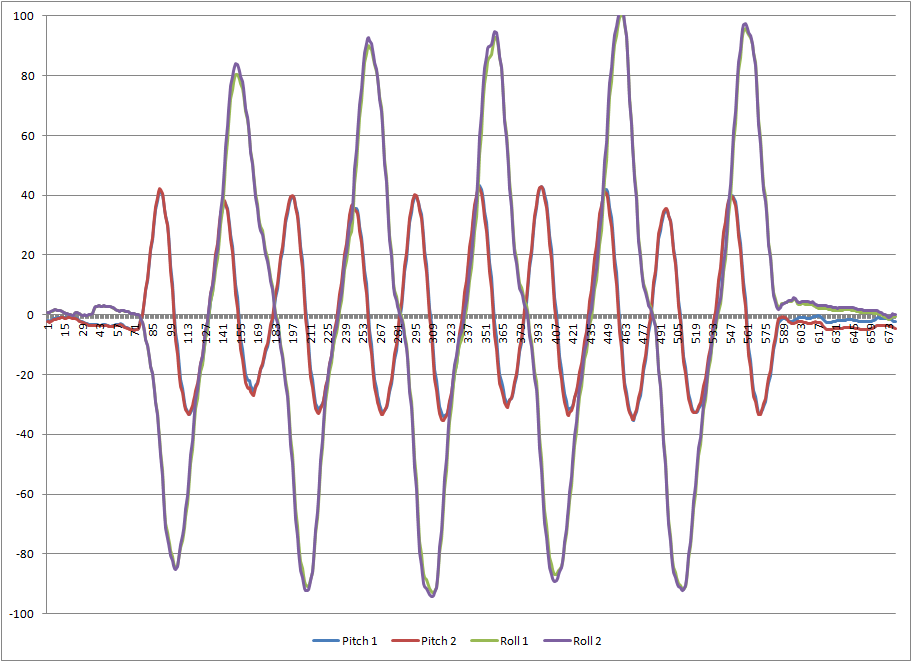
I made a quick video of the smooth action of the SADfab bushing kits on the car. Portrait mode for your viewing pleasure 
RLCA-I: poly with bronze sleeve bearings
RLCA-O: delrin
RUCA-I: delrin
RUCA-O: spherical bearing
The bolts are all fully torqued, and there is absolutely zero play. The tapping noise is the RLCA bumping into the bottom of my damper. I "reamed" the delrin with a 7/8" drill bit until it had about the same resistance to rotation as a spherical in good condition. This is all before greasing the delrin bushings, but as you can see there is minimal friction. In the awkward camera position, the weight of the upright is quite a lot for me to lift (I am not a big guy), but I can still move it very easily with absolutely zero stick-slip.
For all of those who own ES bushings and use Hyperlube semi-regularly: if you are on the fence, go put your car on stands, disconnect the damper and sway bar, and try to replicate this video. Prepare to be frustrated.
Reply
1
1
 04-07-2016, 02:53 AM
#16
Elite Member
Thread Starter
iTrader: (2)
Join Date: Jan 2013
Location: Chandler, AZ
Posts: 1,628
Total Cats: 427
The improved alignment (due to the offset bushings) and fresh corner balance also contributed to the faster time as well, but I feel that the bushings played a large role in going faster.
Reply
1
1

 04-09-2016, 10:47 PM
#18
Elite Member
Thread Starter
iTrader: (2)
Join Date: Jan 2013
Location: Chandler, AZ
Posts: 1,628
Total Cats: 427
Xidas were installed for both events, I think that's outlined in the track test section. Saw a significant improvement from them alone as well. 
Last edited by Arca_ex; 04-10-2016 at 10:32 PM.
Reply
0
0
05-02-2016, 09:38 AM
#19
Senior Member
Join Date: Jul 2014
Location: Canberra, sort of
Posts: 1,088
Total Cats: 184
Just finishing up my install, with rear knuckle spherical. Replaces a Superpro kit, been in the car since c2008/9.
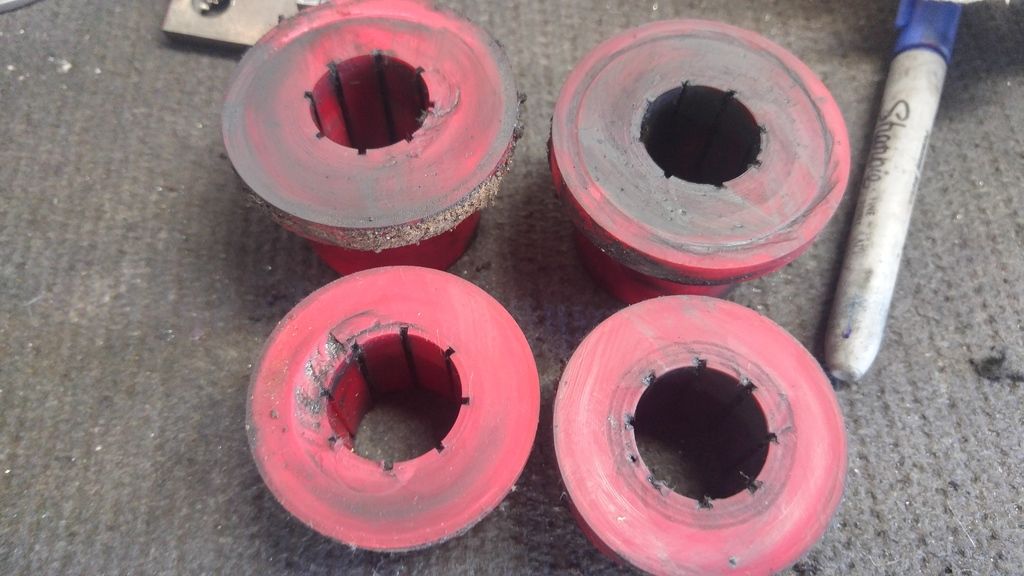
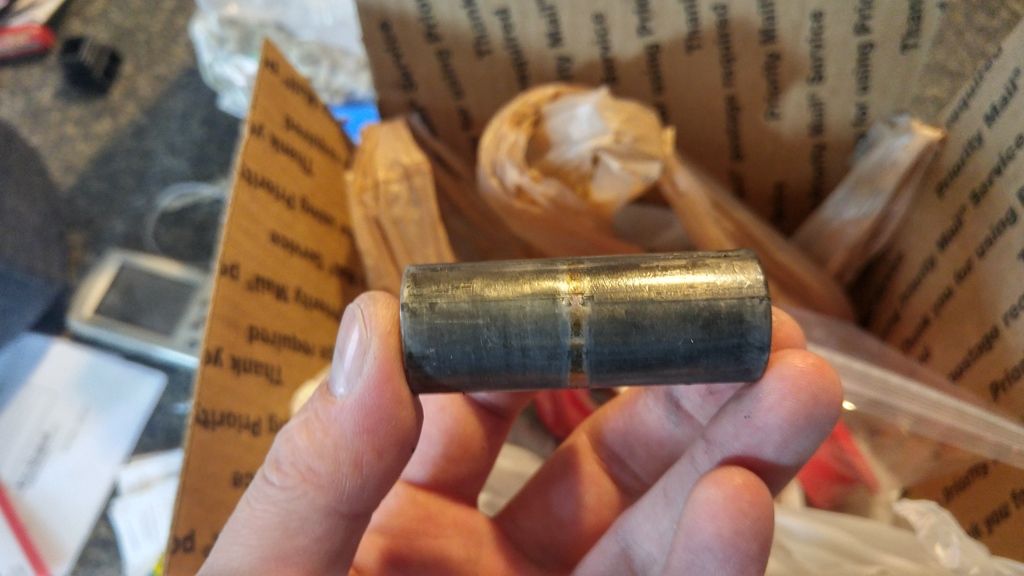
The Superpros were a mixed bag, some pins seemed ok, others required hammering out. Some had seized and the whole bush was rotating, one rear knuckle was badly worn by this. As I couldn't in conscience sell them on, I ended up cutting the ends of a lot and punching them out. Any suggestions for what creative use these can be put to?
Just a couple of comments on the delrin, reaming was not as straightforward as I had hoped, just drilling didn't cut it (pardon the pun ) - that might have been my drill bit but the pins were a really tight fit, like hammer them in. Rocking the drill helped, but seemed to leave a bore that was wider at the ends than the middle. Getting the bores to a push fit I ended with a couple that are a bit on the loose side, I'll see how they go but they may need replacing.
Had a problem with the sphericals, a couple of details had eluded me and as a result one bearing was damaged and the sleeve scored. The sleeves were welded in, and this was done before the bearings arrived - Sean recommends the bearings be inserted before the sleeve is fixed. The welding left some residue obstructing the sleeve and that and the damage to the sleeve was cleaned up as best I could, including a bit of enlarging of that sleeve's bore to clean up the scoring. That worked so well the bearing sat inside the sleeve for a short distance, and then was pressed in. That initial positioning of the bearing made things quite simple, and I did the same to the undamaged sleeve. Note to those trying this at home, keep well away from the snap ring groove - if you are going to try this all you want to do is put a slight chamfer on the outer 5mm or so, just enough to get the bearing sitting inside the sleeve a fraction. It will require a few goes because you need to have the bearing properly aligned for insertion, not angled in any way. I was prepared to take a couple of risks because I have a spare spherical kit, and could start over immediately if necessary.
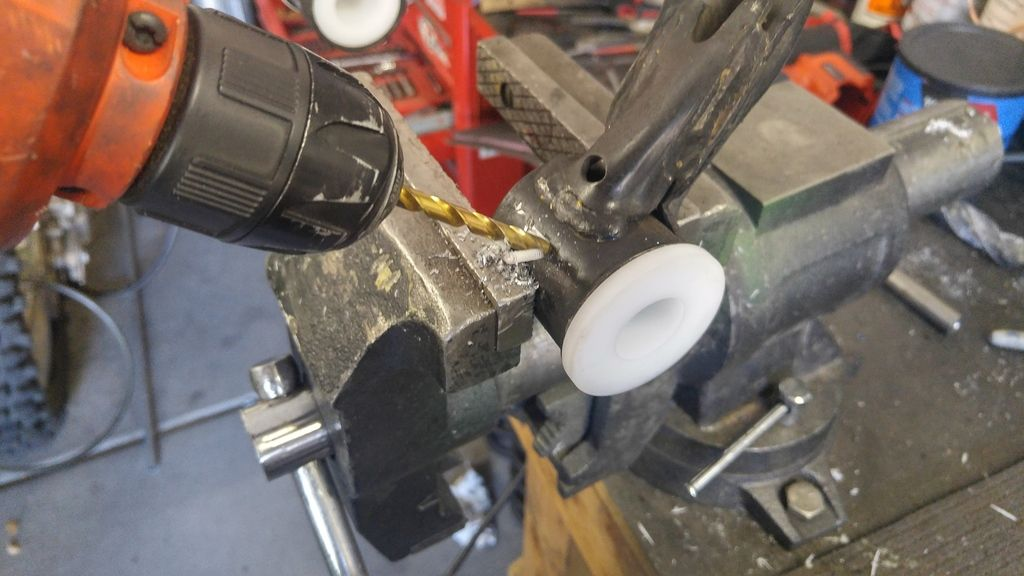
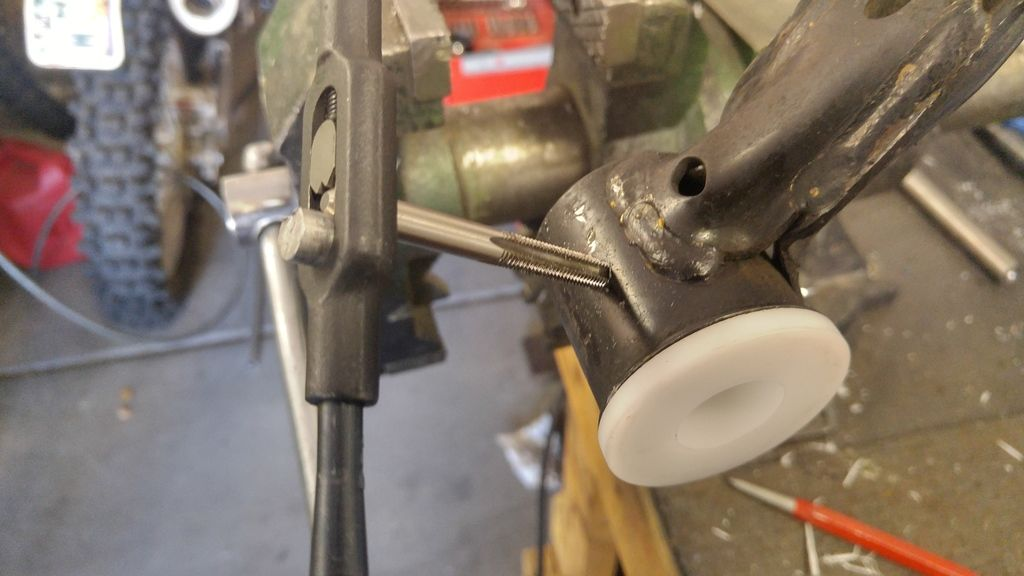
I did this at MX5 Solutions, and Dave made up a tool to seat the bearing, see photo. I might get him to make another to get the bearing out, unless tapping it out with a drift is possible without damaging the sleeve - opinions?
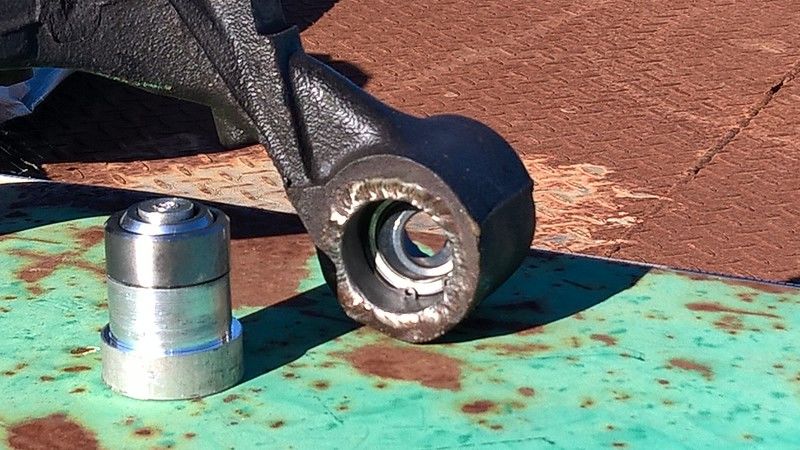 Install tool, with bearing sitting on it
Using this tool one bearing went in smoothly and easily. The other, the damaged/repaired pair, required more persuasion and the spherical action is quite stiff in comparison to the other. Again, I will see how it goes when fully assembled, but if it looks like being too stiff I will make up another upright using one of the sleeves from my spare kit, and a new bearing.
Next step is to get the head back on the engine (swallowed a screw/small bolt, dislodged SUB), get it aligned, and do a track test. I am particularly interested in any changes to the handling, and the possibility of changes to spring rate/shock valving that might be called for.
The Superpros were a mixed bag, some pins seemed ok, others required hammering out. Some had seized and the whole bush was rotating, one rear knuckle was badly worn by this. As I couldn't in conscience sell them on, I ended up cutting the ends of a lot and punching them out. Any suggestions for what creative use these can be put to?
Just a couple of comments on the delrin, reaming was not as straightforward as I had hoped, just drilling didn't cut it (pardon the pun
) - that might have been my drill bit but the pins were a really tight fit, like hammer them in. Rocking the drill helped, but seemed to leave a bore that was wider at the ends than the middle. Getting the bores to a push fit I ended with a couple that are a bit on the loose side, I'll see how they go but they may need replacing.Had a problem with the sphericals, a couple of details had eluded me and as a result one bearing was damaged and the sleeve scored. The sleeves were welded in, and this was done before the bearings arrived - Sean recommends the bearings be inserted before the sleeve is fixed. The welding left some residue obstructing the sleeve and that and the damage to the sleeve was cleaned up as best I could, including a bit of enlarging of that sleeve's bore to clean up the scoring. That worked so well the bearing sat inside the sleeve for a short distance, and then was pressed in. That initial positioning of the bearing made things quite simple, and I did the same to the undamaged sleeve. Note to those trying this at home, keep well away from the snap ring groove - if you are going to try this all you want to do is put a slight chamfer on the outer 5mm or so, just enough to get the bearing sitting inside the sleeve a fraction. It will require a few goes because you need to have the bearing properly aligned for insertion, not angled in any way. I was prepared to take a couple of risks because I have a spare spherical kit, and could start over immediately if necessary.
I did this at MX5 Solutions, and Dave made up a tool to seat the bearing, see photo. I might get him to make another to get the bearing out, unless tapping it out with a drift is possible without damaging the sleeve - opinions?
Install tool, with bearing sitting on itUsing this tool one bearing went in smoothly and easily. The other, the damaged/repaired pair, required more persuasion and the spherical action is quite stiff in comparison to the other. Again, I will see how it goes when fully assembled, but if it looks like being too stiff I will make up another upright using one of the sleeves from my spare kit, and a new bearing.
Next step is to get the head back on the engine (swallowed a screw/small bolt, dislodged SUB), get it aligned, and do a track test. I am particularly interested in any changes to the handling, and the possibility of changes to spring rate/shock valving that might be called for.
Reply
0
0
05-02-2016, 10:45 AM
#20
SADFab Destructive Testing Engineer

iTrader: (5)
Join Date: Apr 2014
Location: Beaverton, USA
Posts: 18,642
Total Cats: 1,866
I had a similar issue to yours with the spherical. Spent about an hour with a pick and file cleaning out the snap ring groove where it had collapsed in.
Sean also made some tools to press in and out that helped me a lot. Though you are on the wrong side of the equator so shipping is probably really expensive.
Sean also made some tools to press in and out that helped me a lot. Though you are on the wrong side of the equator so shipping is probably really expensive.
Reply
0
0


