
Xida install questions...One corner lower
 05-09-2015, 04:31 PM
#1
Newb
Thread Starter

Join Date: Jan 2015
Location: Denver, CO
Posts: 37
Total Cats: 1
I have a dilemma that I believe is out of my knowledge base. I installed my Xida coilovers last night. The install went pretty easily with no major hiccups. All bolts came out without to much of a fight, the coilovers went in easy, they look might purrttty.
My issue is that the passenger rear corner sits visibly and measurably lower. I never noticed it in stock form but was not paying attention. I set the spring perch heights at the same height for the two rears before the install and verified once on the car as well but when on the ground and after driving it for around 60 miles, the passenger rear sits .75" lower then the driver rear. I have measured hub to fender as well as pinch weld and they show the same result.
If I was to make it to where both rear pinch welds matched at 5.0" the passenger rear spring perch will have to be tightened much more than the driver side. Will that effect handling in the long run? Also what could be causing such a difference? I could understand a quarter of an inch but not three quarters. I verified both sets of springs between both rear assemblies are the same part numbers. I did not assemble them, they came pre-assembled from 949.
Any help would be welcomed.

Reply
 0
0

0
 05-09-2015, 05:02 PM
#3
Newb
Thread Starter
Join Date: Jan 2015
Location: Denver, CO
Posts: 37
Total Cats: 1
I will go ahead and swap the two rears. I did check the front and they are pretty close to the same in height as well as being the same in part numbers for the springs. I do not have access to corner weight scales. I plan on having it done after the suspension settles. But with this issue I will hold off.
Reply
0
0
 05-09-2015, 05:58 PM
#6
Junior Member

Join Date: Apr 2010
Location: Laguna Niguel
Posts: 228
Total Cats: 99
They come pre-assembled, but not pre-setup. Once they are installed you have to adjust them. The adjustment will be different from side to side. This is part of setting the ride height and corner weight. If you just put them in as assembled then they will be way off.
Reply
0
0
05-09-2015, 06:03 PM
#7
Newb
Thread Starter
Join Date: Jan 2015
Location: Denver, CO
Posts: 37
Total Cats: 1
I understand that, sure they won't be perfect. But if I have to compensate for 3/4 of an inch which is roughly 9 full turns on spring collar. It makes the spring pre loads significantly different between both sides as well as travel which seems excessive to me.
Reply
0
0
05-09-2015, 07:19 PM
#8

Which side sits higher? Given the same perch position, the passenger side rear should be measuring higher.
.75" difference in ride height seems like a lot. I haven't ever seen a stock shock with a fixed perch showing that much difference side to side. My guess is that the shock collars are actually not adjusted equally. The other possibility is that your driveway or garage isn't level side to side.
.75" difference in ride height seems like a lot. I haven't ever seen a stock shock with a fixed perch showing that much difference side to side. My guess is that the shock collars are actually not adjusted equally. The other possibility is that your driveway or garage isn't level side to side.
Reply
0
0
05-10-2015, 11:15 AM
#9
Former Vendor

iTrader: (31)

Join Date: Nov 2006
Location: Sunnyvale, CA
Posts: 15,442
Total Cats: 2,099
Ground must be perfectly, flawlessly level. Lower shock bolt will have nothing to do with it since that's a spherical. If you have OE bushings, make sure those aren't bound up.
I hate to ask, but are there any signs of a major crash in the tub? Wrinkled framerails, etc?
I hate to ask, but are there any signs of a major crash in the tub? Wrinkled framerails, etc?
Reply
0
0
05-10-2015, 11:28 AM
#10
Newb
Thread Starter
Join Date: Jan 2015
Location: Denver, CO
Posts: 37
Total Cats: 1
Ground must be perfectly, flawlessly level. Lower shock bolt will have nothing to do with it since that's a spherical. If you have OE bushings, make sure those aren't bound up.
I hate to ask, but are there any signs of a major crash in the tub? Wrinkled framerails, etc?
I hate to ask, but are there any signs of a major crash in the tub? Wrinkled framerails, etc?
I have not taken a thorough look to see if I see any major damage. The car is completely under coated so it will hide it's flaws to some degree if there is any damage. It had crossed my mind but never noticed it with the own suspension.
Reply
0
0
05-10-2015, 11:28 AM
#11
Newb
Thread Starter
Join Date: Jan 2015
Location: Denver, CO
Posts: 37
Total Cats: 1
Ground must be perfectly, flawlessly level. Lower shock bolt will have nothing to do with it since that's a spherical. If you have OE bushings, make sure those aren't bound up.
I hate to ask, but are there any signs of a major crash in the tub? Wrinkled framerails, etc?
I hate to ask, but are there any signs of a major crash in the tub? Wrinkled framerails, etc?
I have not taken a thorough look to see if I see any major damage. The car is completely under coated so it will hide it's flaws to some degree if there is any damage. It had crossed my mind but never noticed it with the oem suspension.
Reply
0
0
05-10-2015, 01:49 PM
#12
You can level out contact patch areas with a bucket and 1/2" clear tubing like this:
1) Fill bucket halfway with water and place it in a central location so its easy to reach each corner (you want to mark where the tires go and then move the car).
2) Tape a long length of clear plastic hose to a yard stick with the open end facing up. You want to tape it in at least two spots so there is a linear section that won't move on the yard stick.
3) Siphon water into the tube to create a water level somewhere along the yard stick.
4) Place the yard stick at each corner and note where the water line is on the tubing.
5) Write down the measurements and use some kind of shims at each corner until all four patches are level.
Reply
0
0
05-11-2015, 01:18 PM
#13

Take the car out for a roll for a few blocks and back (check for loose things first!) - I've had things settle dramatically after a short cruise.
Edit;
Also, rubber control arm bushings can bind and hold the car up, make sure every moving bolt is loose until you torque it down with weight on the joint(s).
Edit;
Also, rubber control arm bushings can bind and hold the car up, make sure every moving bolt is loose until you torque it down with weight on the joint(s).
Reply
0
0
05-11-2015, 08:20 PM
#14
Newb
Thread Starter
Join Date: Jan 2015
Location: Denver, CO
Posts: 37
Total Cats: 1
Take the car out for a roll for a few blocks and back (check for loose things first!) - I've had things settle dramatically after a short cruise.
Edit;
Also, rubber control arm bushings can bind and hold the car up, make sure every moving bolt is loose until you torque it down with weight on the joint(s).
Edit;
Also, rubber control arm bushings can bind and hold the car up, make sure every moving bolt is loose until you torque it down with weight on the joint(s).
Didn't think I needed to loosen every control arm bolt but the binding makes sense. I saw some cracked bushings my 3rd look over everything.
Reply
0
0
05-11-2015, 09:50 PM
#15
Cpt. Slow
iTrader: (25)
Join Date: Oct 2005
Location: Oregon City, OR
Posts: 14,175
Total Cats: 1,129
Uh, I wouldn't throw more parts at it until you fix the problem. That's only if your stock bushings are the one and only failure on that one corner. And they're known to not be a failure point.
Reply
0
0
05-11-2015, 10:18 PM
#16
Newb
Thread Starter
Join Date: Jan 2015
Location: Denver, CO
Posts: 37
Total Cats: 1
I will loosen every moving parts bolts and re tighten them on then ground and see if it helps. If not it will just come apart sooner, so I can figure out what the real issue is.
Reply
0
0
 05-12-2015, 05:02 PM
#18
Newb
Thread Starter
Join Date: Jan 2015
Location: Denver, CO
Posts: 37
Total Cats: 1
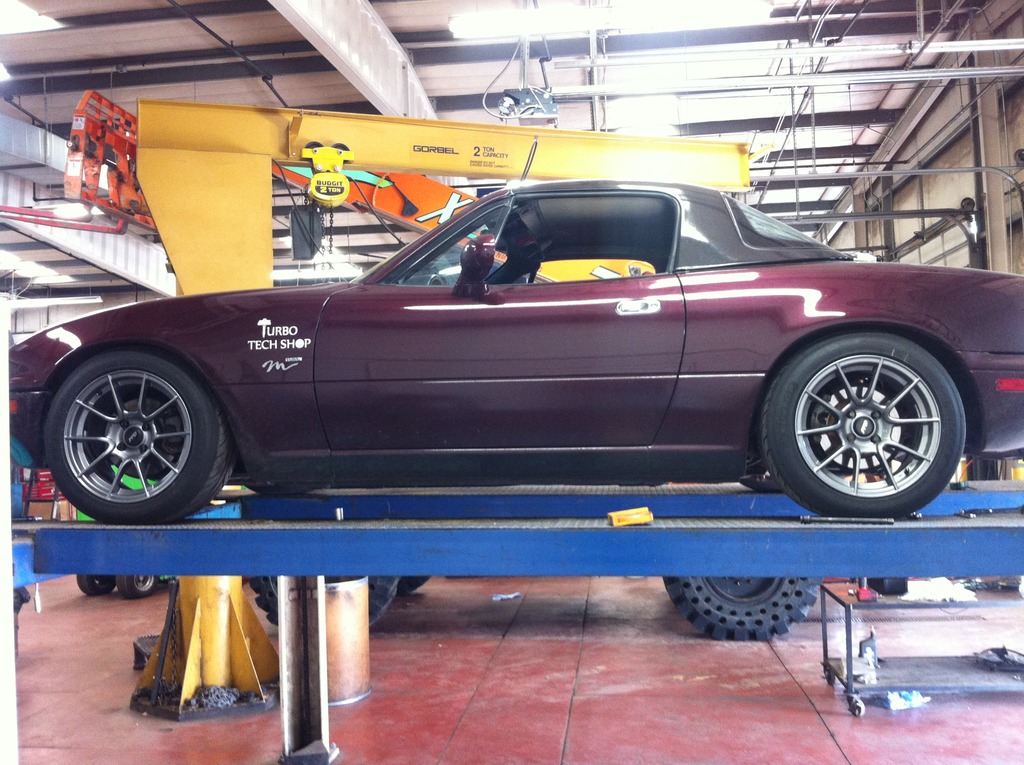
Noticed she is leaning front and rear heavily to the passenger side. This morning I had it up on the lift, loosened every moving bolt on the suspension. Drove it around and put around 4 miles on it. Brought it back, tightened everything and went and had an alignment. I have 2 more weeks to get a free alignment and after the body work I had done, the repair shop had the passenger rear out of whack.
I had the alignment shop align it to the 949 Dual Duty alignment settings. The guy doing the work said he had a hard time with the rear and getting them to 949s settings. He said he felt like some alignment bolts were getting stuck or something was binding up in the suspension. You can see the leaning the pictures.
Again don't see any frame damage, atleast from the parts of the frame I can see. So unless it is damaged where it goes into the actually body, I am just at a lost. I have read where most cars have a slight lean almost built in to them from the factory but I wouldn't think it is this severe.
Sounds like I will be pulling it all back out and measure it and then pulling pieces off to see if there is any damage to bolts, or bushings.


Reply
0
0
05-12-2015, 05:42 PM
#20
Newb
Thread Starter
Join Date: Jan 2015
Location: Denver, CO
Posts: 37
Total Cats: 1
My tech noticed that when i sit in the car it levels out. Did Mazda have a factory built in lean to compensate for the driver at all?

Reply
0
0


