2001 MX5 with MSM bits
 05-21-2015, 03:25 PM
#1
Senior Member
Thread Starter

Join Date: Aug 2009
Location: melbourne aus
Posts: 515
Total Cats: 92
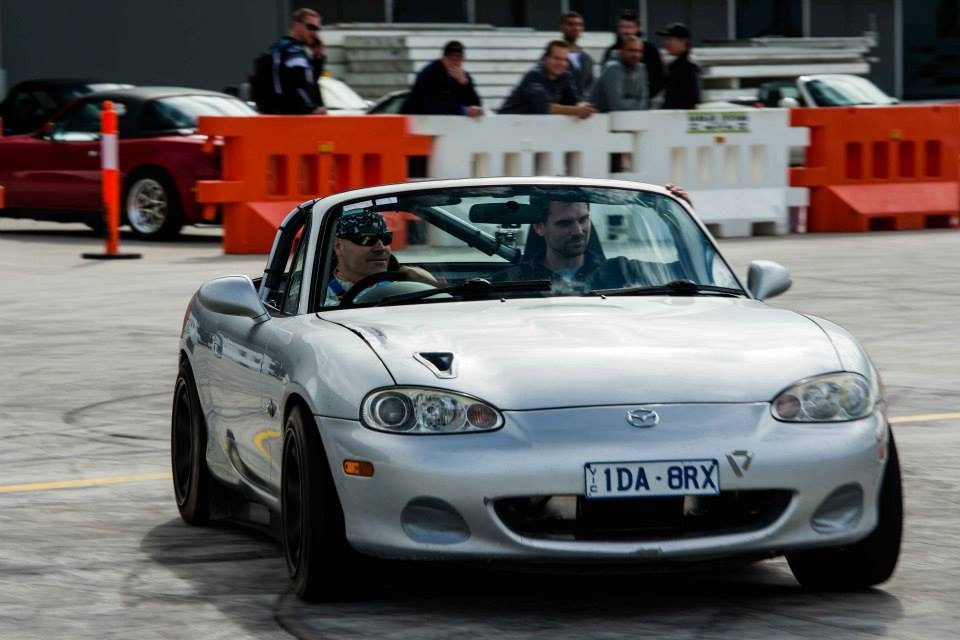
I bought this MX5 to use primarily as a track car, but it has rego, so I can drive it on the road.
The idea was just something basic to use till my Carbon Fibre one is built.
I bought it at the end of last year after selling a WRX race car. Not going to start on about WRX ownership....
It came with a few goodies at a reasonable price.$9,500. (All parts were practically new)
MS3, Sparco Sprint seat, Blitz coilovers, 225 RS3 tyres and 15 x 8 Buddyclub rims, harness, BD Rollbar, etc.
Pic from a skid pad day.
how to screenshot on windows 7

Reply
 0
0

0
05-21-2015, 03:40 PM
#2
Senior Member
Thread Starter
Join Date: Aug 2009
Location: melbourne aus
Posts: 515
Total Cats: 92
First thing I did was return it to stock to get a roadworthy certificate so I could transfer ownership into my name.
Then I sold off most of the bits, and replaced them with parts that I prefer. Helped pay for the upgrades. Car was worth about $9,000 stock.
So now it has no softop, just a Lightyear (prototype) Fastback. Custom welded in Rollbar, airbag delete, deep dish OMP steering wheel and quick release on lowered steering column. Velo seat on custom side rails, no passenger seat for now.
Underneath it has Blitz coilovers and a big hollow front swaybar, 2.25" straight thru exhaust. 15 x 9 konig's on 225 NT01's. Front and rear spoiler, and some side skirts.
I put in an elcheapo lightweight 1.6 flywheel and clutch. The clutch lasted 3 laps before all the friction material turned to dust.
Put in an Xtreme HD clutch, did 2 track days, a skid pad day, and 5 laps before failing. This time the inner half ripped away from the outer half.

image hosting site over 5mb
I have had the flywheel machined again, and have an Ezedy HD clutch this time.
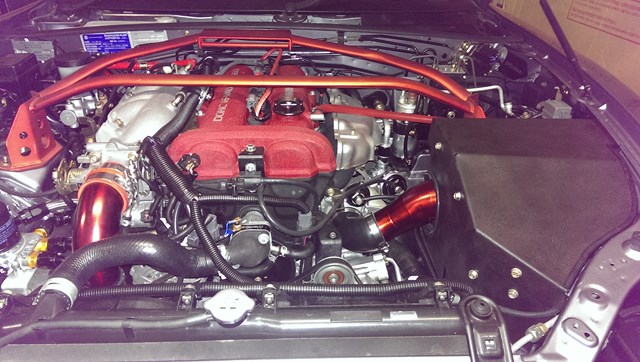
Somewhere along the way I got hold of an SE turbo manifold, turbo, and some bits for next to nothing. So it was too tempting not to put it on.
I bought a turbo exhaust outlet elbow, and made a downpipe to join up to the 2.25" exhaust.
Bought a V mount intercooler, will run the IC pipes over the radiator and into the IC as the IC outlets face up.
Something like this.

free image host
I also have a set of RX8 injectors to go in, as well as a Walbro fuel pump. So hopefully I can get a nice strong and safe tune, and enjoy...
Should be able to keo up with the quick guys now in the WRX club.
Then I sold off most of the bits, and replaced them with parts that I prefer. Helped pay for the upgrades. Car was worth about $9,000 stock.
So now it has no softop, just a Lightyear (prototype) Fastback. Custom welded in Rollbar, airbag delete, deep dish OMP steering wheel and quick release on lowered steering column. Velo seat on custom side rails, no passenger seat for now.
Underneath it has Blitz coilovers and a big hollow front swaybar, 2.25" straight thru exhaust. 15 x 9 konig's on 225 NT01's. Front and rear spoiler, and some side skirts.
I put in an elcheapo lightweight 1.6 flywheel and clutch. The clutch lasted 3 laps before all the friction material turned to dust.
Put in an Xtreme HD clutch, did 2 track days, a skid pad day, and 5 laps before failing. This time the inner half ripped away from the outer half.
image hosting site over 5mb
I have had the flywheel machined again, and have an Ezedy HD clutch this time.
Somewhere along the way I got hold of an SE turbo manifold, turbo, and some bits for next to nothing. So it was too tempting not to put it on.
I bought a turbo exhaust outlet elbow, and made a downpipe to join up to the 2.25" exhaust.
Bought a V mount intercooler, will run the IC pipes over the radiator and into the IC as the IC outlets face up.
Something like this.
free image host
I also have a set of RX8 injectors to go in, as well as a Walbro fuel pump. So hopefully I can get a nice strong and safe tune, and enjoy...
Should be able to keo up with the quick guys now in the WRX club.
Last edited by lightyear; 05-21-2015 at 04:11 PM.
Reply
0
0
05-21-2015, 03:52 PM
#3
Senior Member
Thread Starter
Join Date: Aug 2009
Location: melbourne aus
Posts: 515
Total Cats: 92
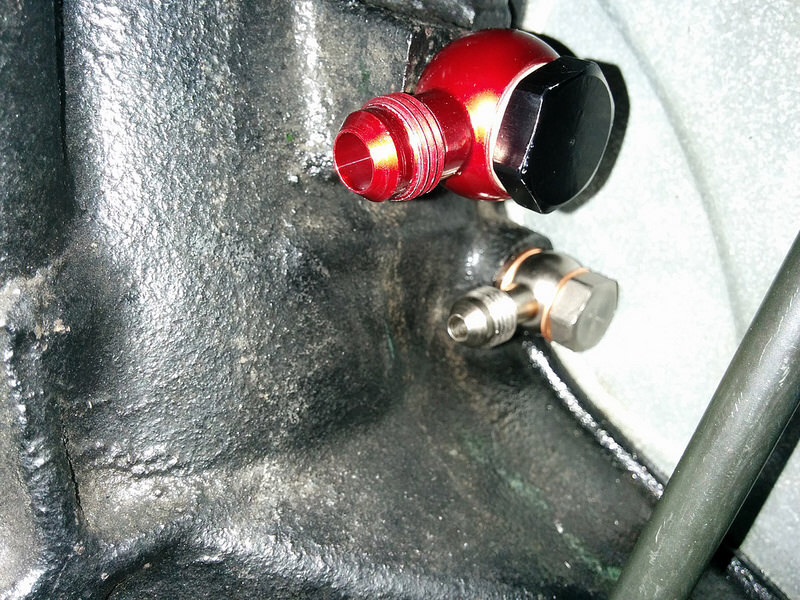
Will take it down to my mechanic next week to do the welding, drilling and tapping.
Will need to drill and tap these two, so left the gearbox off to make it easy.
adult photo hosting
The turbo outlets are so small, it makes it hard to find reducers to make the pipes go up to 2.5". Outlet on compressor is 1.5", and intake side is 1.75".
Will figure out as much as I can, and buy all the bits to make it work so when I get to his shop, we should get it all done in a day. I am hoping I can reliably double the hp of this car. Will see how it goes.
And a pic on the awesome Phillip Island curcuit. Very fast and flowing. Turn one is over 180mk/h. And you do over 160km/h coming onto the long straight.

image upload free
Will need to drill and tap these two, so left the gearbox off to make it easy.
adult photo hosting
The turbo outlets are so small, it makes it hard to find reducers to make the pipes go up to 2.5". Outlet on compressor is 1.5", and intake side is 1.75".
Will figure out as much as I can, and buy all the bits to make it work so when I get to his shop, we should get it all done in a day. I am hoping I can reliably double the hp of this car. Will see how it goes.
And a pic on the awesome Phillip Island curcuit. Very fast and flowing. Turn one is over 180mk/h. And you do over 160km/h coming onto the long straight.
image upload free
Last edited by lightyear; 05-21-2015 at 04:06 PM.
Reply
0
0


 05-21-2015, 10:20 PM
#10
Senior Member
Thread Starter
Join Date: Aug 2009
Location: melbourne aus
Posts: 515
Total Cats: 92
Ok, does anyone know for sure if it will work? It seems odd that they would leave the boss like that on the outside and change the inside.
MSM or Aus SE block would be an NB8B block wouldn't it?
I could always drill it and see. What's the worse thing that can happen? lol..
MSM or Aus SE block would be an NB8B block wouldn't it?
I could always drill it and see. What's the worse thing that can happen? lol..
Last edited by lightyear; 05-21-2015 at 10:42 PM.
Reply
0
0
05-21-2015, 10:37 PM
#11
Senior Member
Thread Starter
Join Date: Aug 2009
Location: melbourne aus
Posts: 515
Total Cats: 92
I found this bit of info.
If you mean the castings are all the same, I would agree with that, but a standard NB block cannot be used on an MSM without modifying the turbo water and oil supplies. In that regard, all 1.8l blocks are definitely not the same.
All of the NB engine blocks that I've seen (other than the MSM) lack the oil and water ports used to feed the MSM turbo. The bosses for the ports are cast into the block, but the ports are not machined. NA 1.8l blocks have these ports.
Though it is technically feasible to drill and tap a normally aspirated NB block, the copper crush washer used in unions can only adapt to minor discrepancies. The threaded port needs to be quite square to the sealing surface. In addition, the oil port has to be drilled all the way to the oil galley in the center of the block, and that galley isn't very large.
Reply
0
0
05-21-2015, 10:40 PM
#12
Senior Member
Thread Starter
Join Date: Aug 2009
Location: melbourne aus
Posts: 515
Total Cats: 92
So that means the boss is there, but not drilled from Mazda. Seems the water supply might be easy. But the oil may be harder due to having to drill so deep. Might be better taping into the other side of the block.
Reply
0
0
05-25-2015, 11:50 PM
#13
Senior Member
Thread Starter
Join Date: Aug 2009
Location: melbourne aus
Posts: 515
Total Cats: 92
Not a lot of progress. But the intercooler is in. And the pipe work is all there. I need to weld the 90* elbow on the 2.5" pipe, and put all the hose clamps on. I am not going to drill the block for water and oil. Just doing it the normal way the aftermarket turbo installs are done.
For the inlet, I had to buy a 45* 1.75" elbow and a straight 2" to 3" reducer, a small piece of 1.75" alloy pipe to join the silicon hoses together, and a 200mm length of 3" to go to the pod filter.
For the turbo outlet I reused the factory 1.5" 45* pipe cut and turned. Then 1.5"-2" reducer with a small piece of 2" alloy, 2"-2.5" 45* elbow. Then 2.5" alloy to intercooler and to TB.
Total cost was about $90.00 for the pipe work and reducers. Lucky I found 2 that worked in the $5 bargain box.
And $200 for the intercooler.

image hosting over 5mb
For the inlet, I had to buy a 45* 1.75" elbow and a straight 2" to 3" reducer, a small piece of 1.75" alloy pipe to join the silicon hoses together, and a 200mm length of 3" to go to the pod filter.
For the turbo outlet I reused the factory 1.5" 45* pipe cut and turned. Then 1.5"-2" reducer with a small piece of 2" alloy, 2"-2.5" 45* elbow. Then 2.5" alloy to intercooler and to TB.
Total cost was about $90.00 for the pipe work and reducers. Lucky I found 2 that worked in the $5 bargain box.
And $200 for the intercooler.
image hosting over 5mb
Reply
0
0
05-29-2015, 06:04 AM
#14
Senior Member
Thread Starter
Join Date: Aug 2009
Location: melbourne aus
Posts: 515
Total Cats: 92
Took the car down to Nick at Lux Racing. And it's pretty close now. It runs and drives with the turbo on. Water and oil lines are done, intercooler piping is done. It's all bolted up, exhaust is hooked up.
A few things need to be done, like the catch can. The biggest job will be the ducting of the radiator and intercooler. I think that will be a 2-3 night job.

upload an image
A few things need to be done, like the catch can. The biggest job will be the ducting of the radiator and intercooler. I think that will be a 2-3 night job.
upload an image
Reply
0
0
05-30-2015, 03:24 AM
#16
Senior Member
Thread Starter
Join Date: Aug 2009
Location: melbourne aus
Posts: 515
Total Cats: 92
Don't worry, I have thought about going down that path. I can box it all in foam, then lay up c.f over it. Then remove the foam. Will work out the quickest and easiest way depending on what I have lying around.
Reply
0
0
05-30-2015, 08:53 AM
#17
Senior Member
Thread Starter
Join Date: Aug 2009
Location: melbourne aus
Posts: 515
Total Cats: 92
I started with the main part of the duct I made previously. Changed the shape from a curved inlet, to an S shape to clear the intercooler. Trimmed the bumper opening reducer pieces so they sit inside a bit. Rather than stuck on the outside. The opening is 80mm wider than before.
It's all working well. Need to finish the top panel. And use some of that super sticky silver tape with the gummy backing to finish up any holes/gaps.


image hosting over 5mb
It's all working well. Need to finish the top panel. And use some of that super sticky silver tape with the gummy backing to finish up any holes/gaps.
image hosting over 5mb
Reply
1
1
05-31-2015, 04:51 PM
#18
Senior Member
Thread Starter
Join Date: Aug 2009
Location: melbourne aus
Posts: 515
Total Cats: 92
Ducting for the radiator and intercooler is finished. Made a template for the airbox. So tonight I can make that from alloy.

free picture upload
free picture upload
Reply
0
0
05-31-2015, 10:56 PM
#19
All-round "Good Guy"

Join Date: Dec 2009
Location: Brisbane, AUSTRALIA
Posts: 993
Total Cats: 245
To make my cold-air box's lid more solid, I bent the front of the wall about 40* so that it's not just supported by two walls at right angles to each other:
FYI: I removed the foglights and now duct that air into the cold airbox too.
FYI: I removed the foglights and now duct that air into the cold airbox too.
Reply
0
0
05-31-2015, 11:46 PM
#20
Senior Member
Thread Starter
Join Date: Aug 2009
Location: melbourne aus
Posts: 515
Total Cats: 92
Nice box. I was going to have no lid. Just use the bonnet as the lid. And the front is staying open.
The fog light is a good idea. But, I planned on using them for brake ducts.
The fog light is a good idea. But, I planned on using them for brake ducts.
Reply
0
0


