90 FE-dohc (FE3) Turbo
 09-23-2013, 02:19 PM
#122
Elite Member
Thread Starter
iTrader: (5)
Join Date: Jan 2005
Location: Atlanta
Posts: 7,482
Total Cats: 372
Plasma cutters on eBay
The base models that do only plasma cutting can be had at auction for low $200s. I stepped up to the model that does stick/tig with pedal control. And it does in fact do both. I have nothing to compare it to, but I did in fact tig and stick weld with it. I would imagine that a quality welder would do a far superior job. I eventually land this model for $280 delivered.
The base models that do only plasma cutting can be had at auction for low $200s. I stepped up to the model that does stick/tig with pedal control. And it does in fact do both. I have nothing to compare it to, but I did in fact tig and stick weld with it. I would imagine that a quality welder would do a far superior job. I eventually land this model for $280 delivered.

Reply
 0
0

0
09-30-2013, 01:13 PM
#123
Elite Member
Thread Starter
iTrader: (5)
Join Date: Jan 2005
Location: Atlanta
Posts: 7,482
Total Cats: 372
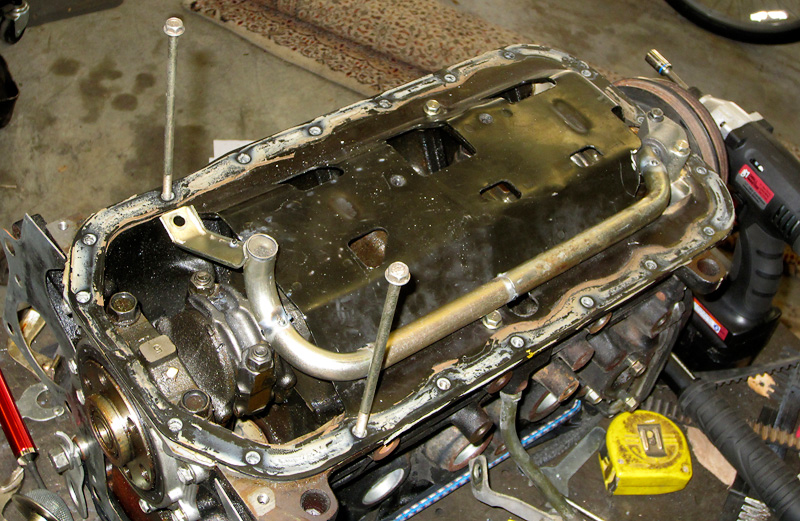
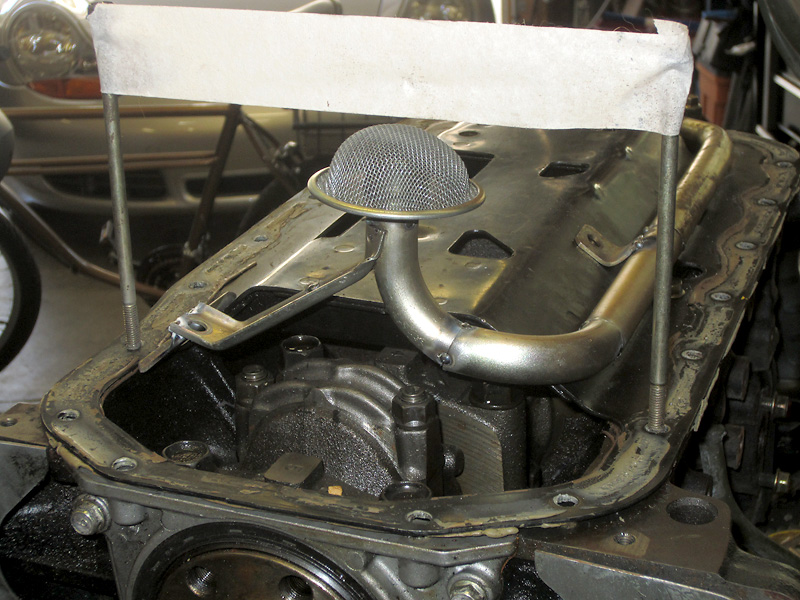
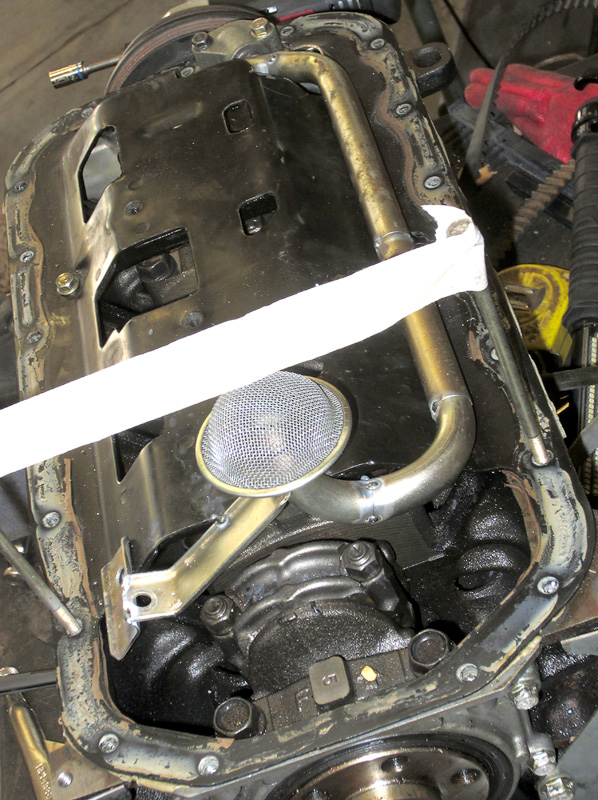
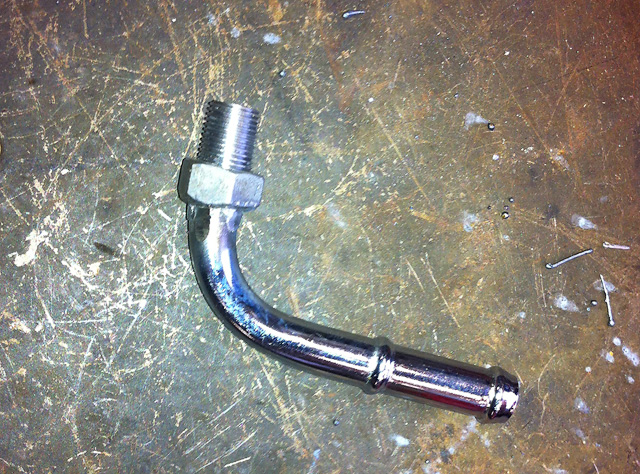
Oil pan is completed. Capacity measured out just over 4qts- so I'll call that a victory. Has AN-10 turbo oil drain fitting, transplanted OE stock drain and 1/8" npt port for temp sender. Oil pickup sorting is completed with tested fit- just need to weld it up. I used the stock 1.6 fitting to make the tight 90 off the pump and then stock pickup tubing and screen for the rest. 1.6 rear pan bolts and tape were used to set the pickup depth limit. It will be anchored to the windage tray in two spots.
Reply
0
0
09-30-2013, 07:20 PM
#125
Elite Member
Thread Starter
iTrader: (5)
Join Date: Jan 2005
Location: Atlanta
Posts: 7,482
Total Cats: 372
That's an F8 I've used to build everything on, so I'm sure metal shavings aren't the worst thing in there.  It was a great help to have one engine in the car mounted up to check the oil pan against while it was under construction on the other engine.
It was a great help to have one engine in the car mounted up to check the oil pan against while it was under construction on the other engine.
Reply
0
0
12-13-2013, 11:21 AM
#126
Elite Member
Thread Starter
iTrader: (5)
Join Date: Jan 2005
Location: Atlanta
Posts: 7,482
Total Cats: 372
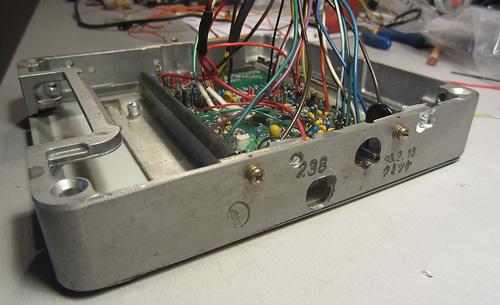
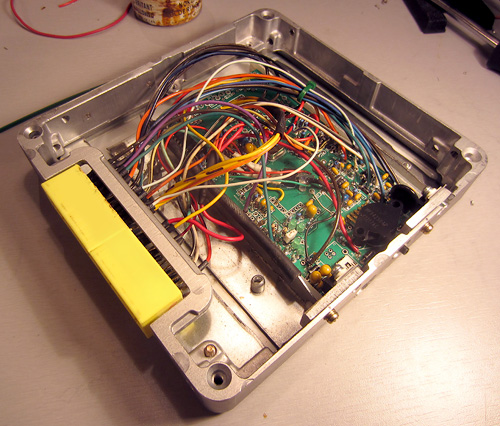
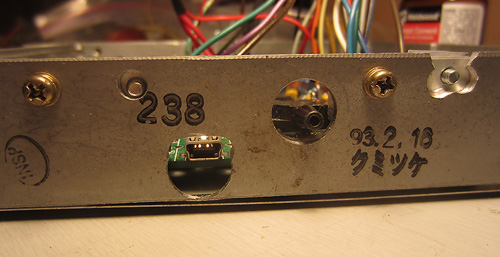
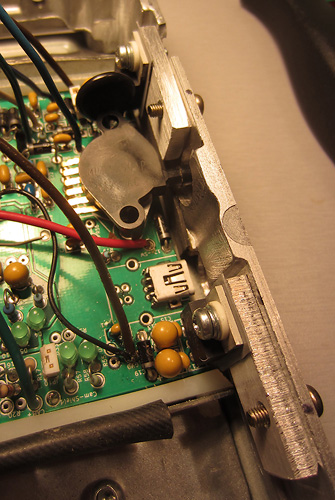
Engine management is complete. I'm using a purpose-built Jaguar A3 ECU (hardware) running FreeEMS open source engine management code in a stock Miata ECU case to the stock Mazda connector. It's wired up so it will be mostly plug-n-play. I'll need to add some leads outside the case for sequential injection and IAT. Also have additional connections available for future use. It tested successfully on a JimStim and bench test code using Megatunix.

Reply
2
2
12-13-2013, 02:07 PM
#127
Junior Member

Join Date: Feb 2009
Location: Madison, WI
Posts: 78
Total Cats: 0
WICKED!!! now thats what im talking about. always glad to see yet another FREE EMS'er out there.
i will be anxious to come back & visit- have a look over this beast when its all settled in.
i will be anxious to come back & visit- have a look over this beast when its all settled in.
Reply
0
0
12-19-2013, 09:35 AM
#128
Elite Member
Thread Starter
iTrader: (5)
Join Date: Jan 2005
Location: Atlanta
Posts: 7,482
Total Cats: 372
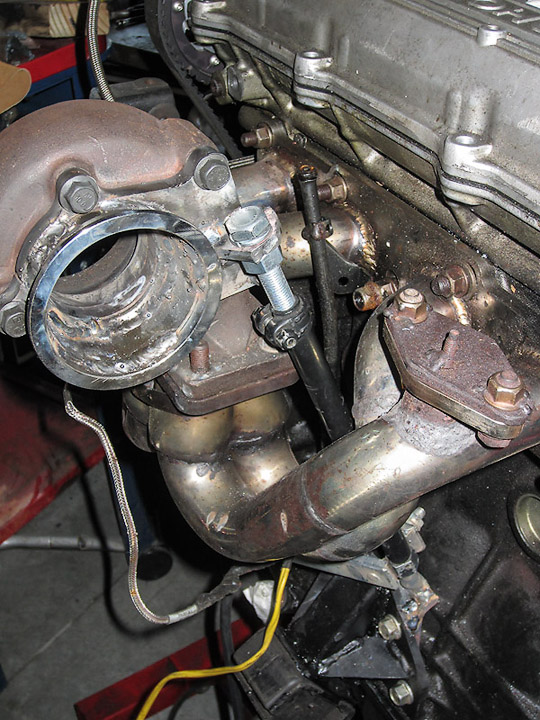
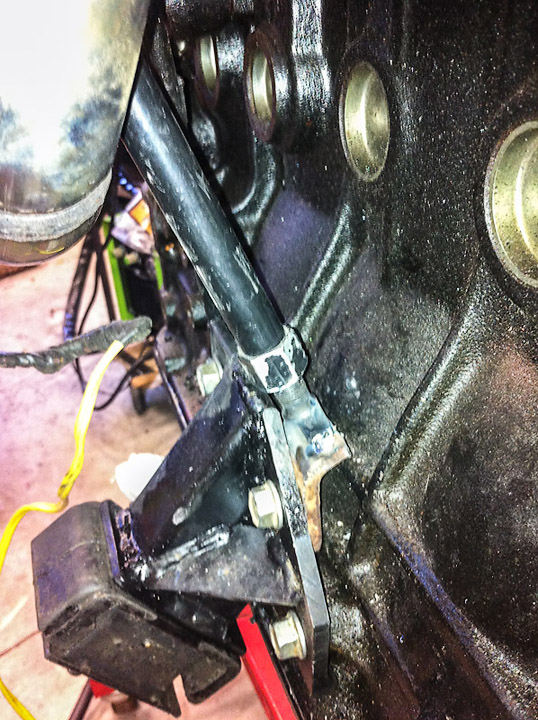
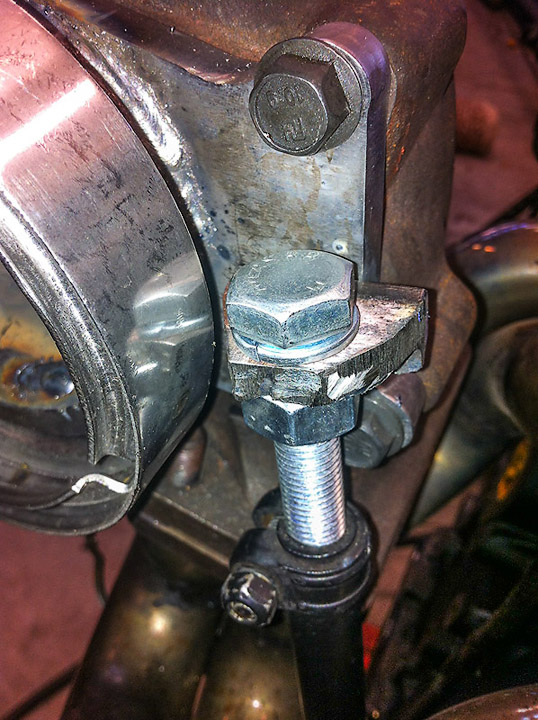
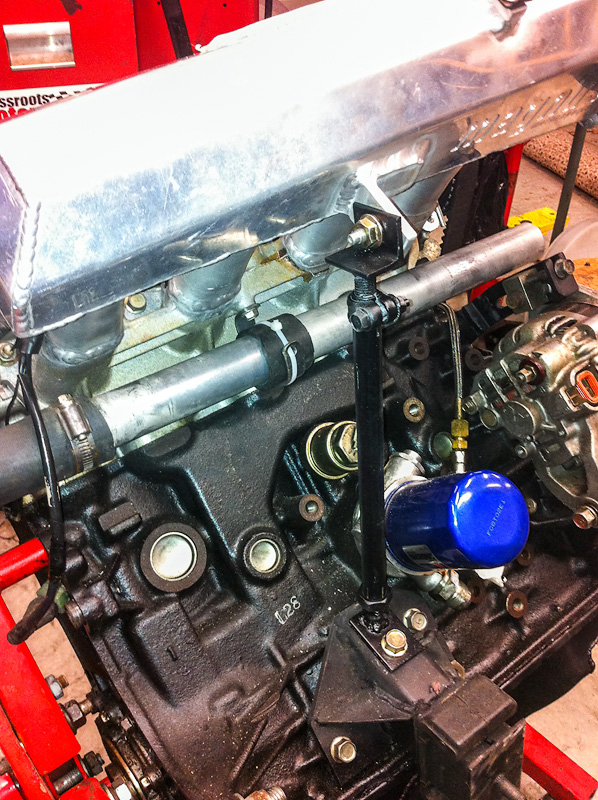
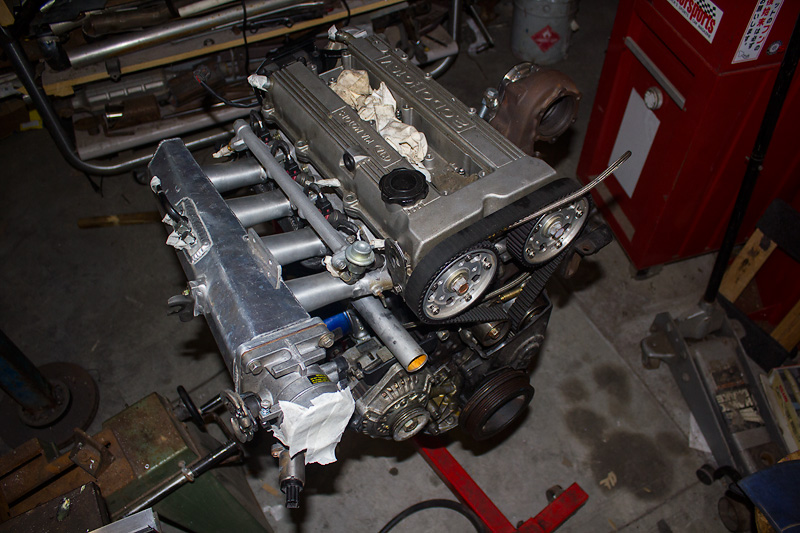
Turbo/manifold support brace is complete. I used a similar approach to the prior version since it worked. That was using a tube with solid rod ends, so the center section would allow movement/flex while the ends held strong. I used an old tie rod from my Benz as the core. Then I added a thick bracket to the turbine flange, secured the rod with with a bolt, and stuck a bracket to the bottom end of the brace that bolts to the motor mount. Also got the turbine flange complete with a 2.25-3" exhaust cone and V-band. Will smooth out the inside with a carbide bit and die grinder. In the end I have clean assembly/disassembly here since most of these parts interfered with each other.
Reply
1
1
12-20-2013, 08:57 AM
#130
Elite Member
Thread Starter
iTrader: (5)
Join Date: Jan 2005
Location: Atlanta
Posts: 7,482
Total Cats: 372
Last brace design mounted to a massive sched 40 down pipe that bolted directly to the internal waste gate housing. That mount point was about 5-6" from the turbine housing, so I'm thinking this is an improvement.
The v-band should be a big improvement over the prior stock Mercedes internal waste gate housing. I am going to use that number 4 runner waste gate port for the EWG since it doesn't seem to cause issues with others using that location, though it is not theoretically ideal.
The v-band should be a big improvement over the prior stock Mercedes internal waste gate housing. I am going to use that number 4 runner waste gate port for the EWG since it doesn't seem to cause issues with others using that location, though it is not theoretically ideal.
Reply
0
0
01-23-2014, 12:56 PM
#131
Elite Member
Thread Starter
iTrader: (5)
Join Date: Jan 2005
Location: Atlanta
Posts: 7,482
Total Cats: 372
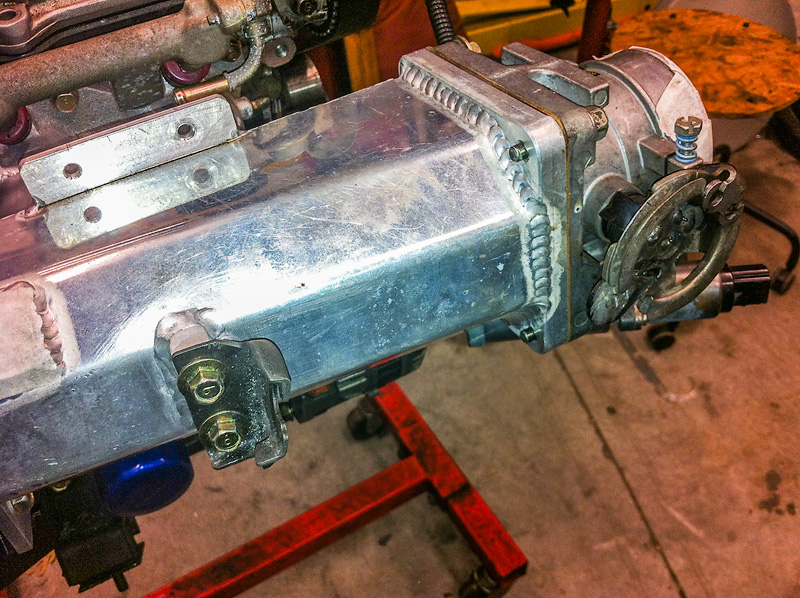
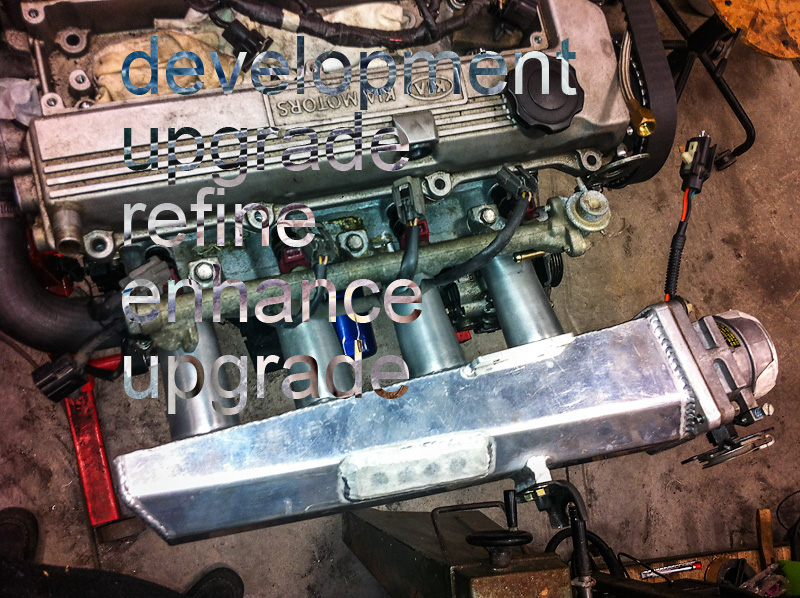
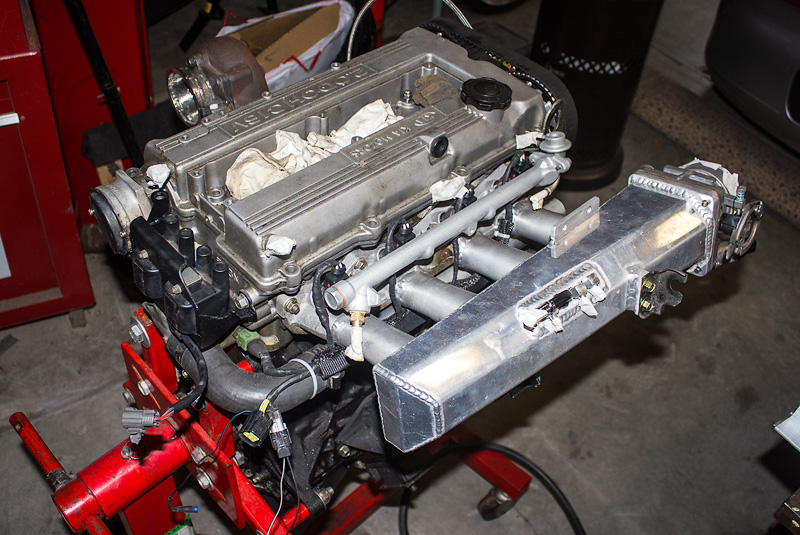
Coolant return pipe from rear of cylinder head to radiator installed under intake mani runners. Ferdi-made mitsu-mazda hybrid manifold bolted up. Intake manifold brace fab'd/installed using another Benz tie rod. OE FE injector rail modified and RX7 550cc injectors fitted. Ford 65mm TB installed. Throttle cable solution using stock Miata tb cam/wheel and cable bracket completed.


Reply
0
0


 01-23-2014, 01:36 PM
#135
Elite Member
Thread Starter
iTrader: (5)
Join Date: Jan 2005
Location: Atlanta
Posts: 7,482
Total Cats: 372
It better be an improvement over the 1.6 plenum welded to the FE runners. And since you didn't ask- I thought I'd make some improvements this time around. Like going with a properly size manifold plenum- the larger stock Ford v8 65mm throttle body just happened to be what this DSM manifold was designed to take. My subframe was shimmed last time to get the engine under the hood, so this time around I wanted to get it in there without shims. Figured might as well get it as low and far back as I could. And so on.
Reply
0
0
01-24-2014, 09:28 AM
#136
Elite Member
Thread Starter
iTrader: (5)
Join Date: Jan 2005
Location: Atlanta
Posts: 7,482
Total Cats: 372
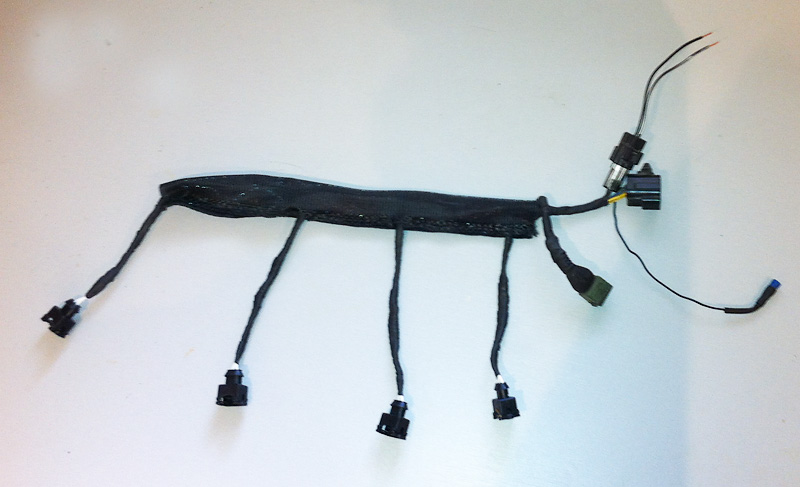
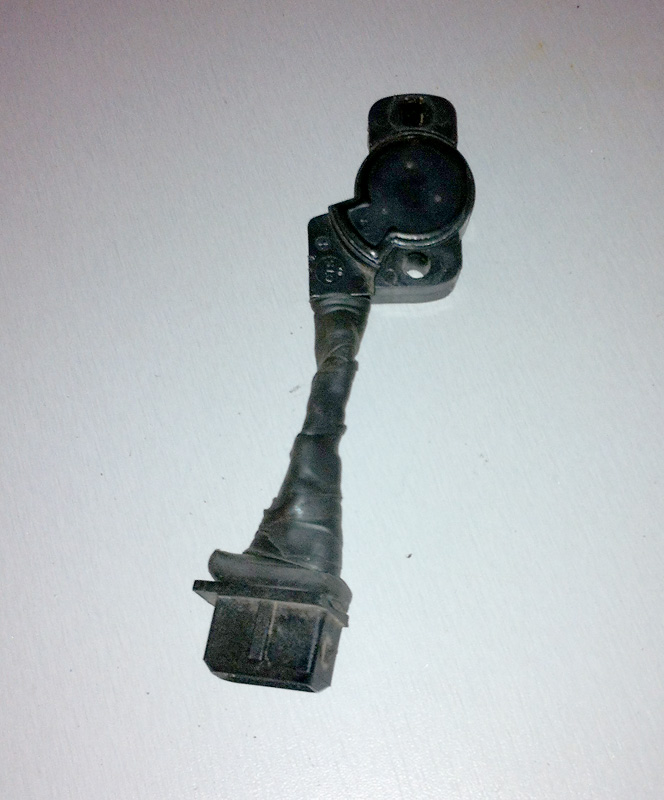
Sequential fuel injection harness is complete. All OE connectors for PnP. Nice having another complete set of harnesses to salvage connectors from. Also have the Ford TPS set up for a direct plug into the Miata harness.
Last edited by m2cupcar; 01-24-2014 at 09:46 AM.
Reply
0
0
 01-27-2014, 08:46 AM
#138
Elite Member
Thread Starter
iTrader: (5)
Join Date: Jan 2005
Location: Atlanta
Posts: 7,482
Total Cats: 372
Oil pan sat for a full week full of kerosene w/o leaking. Of course that was after plugging 6 pin holes.  I welded the entire pan up on the spare block I have- removed when cold. I'm convinced that anything cantilevered off the block needs a brace (remember I have an SSAutochrome long tube turbo header)- your runner cracks just confirmed that.
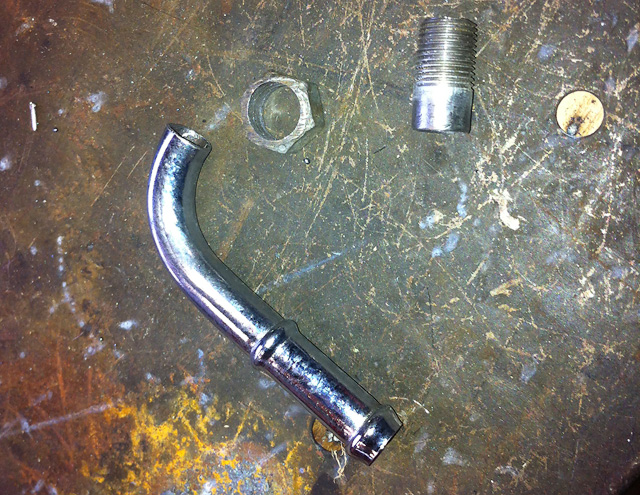
Speaking of intake manifold- I was installing all my vacuum barbs in the magnus-build vacuum block on the manifolds plenum, only to find that the ⅛" NPT ports are not only unaligned but are also not evenly spaced. So these fancy 90 barbs I picked up for cheap won't spin in on ports 2 & 3. For that I have to put the brake booster barb in port 3 and the small vacuum barbs in the rest. I ended up using a stock 1.6 breather tube, drilled out nut and half a ⅛" pipe nipple for the booster vacuum line.
I welded the entire pan up on the spare block I have- removed when cold. I'm convinced that anything cantilevered off the block needs a brace (remember I have an SSAutochrome long tube turbo header)- your runner cracks just confirmed that.Speaking of intake manifold- I was installing all my vacuum barbs in the magnus-build vacuum block on the manifolds plenum, only to find that the ⅛" NPT ports are not only unaligned but are also not evenly spaced. So these fancy 90 barbs I picked up for cheap won't spin in on ports 2 & 3. For that I have to put the brake booster barb in port 3 and the small vacuum barbs in the rest. I ended up using a stock 1.6 breather tube, drilled out nut and half a ⅛" pipe nipple for the booster vacuum line.
Reply
0
0
02-07-2014, 08:49 AM
#139
Elite Member
Thread Starter
iTrader: (5)
Join Date: Jan 2005
Location: Atlanta
Posts: 7,482
Total Cats: 372
Engine is ready to drop in except for the rear heater hose (between head and coil pack) that needs to be installed before installation. Going to crank the engine and run it before wrapping up all the big stuff on the car like heat exchangers, exhaust, etc. Short list for the first key turn looks like this (I hope):
- fuel pump wiring
- sequential inj leads to ecu
- IAT sensor wiring
- idle air valve connector/wiring
- block ground points
- oil sandwich plate loop
- down pipe firewall cut/mod
- CAS lock down bracket
- fuel pump wiring
- sequential inj leads to ecu
- IAT sensor wiring
- idle air valve connector/wiring
- block ground points
- oil sandwich plate loop
- down pipe firewall cut/mod
- CAS lock down bracket
Reply
0
0


