94 Brilliant Black on Road to Glory
 05-28-2014, 05:06 PM
#1
Junior Member
Thread Starter

Join Date: May 2014
Location: Columbia, MD
Posts: 145
Total Cats: 14
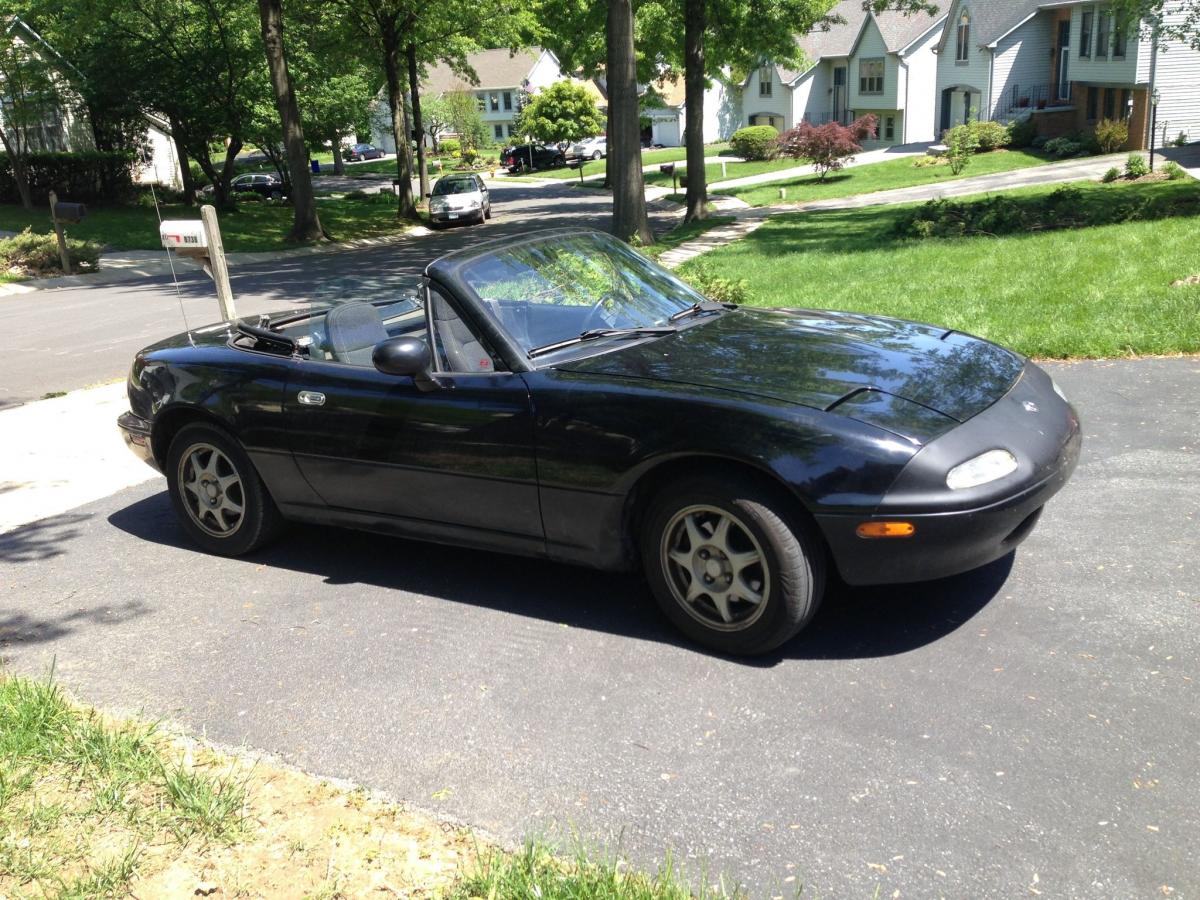
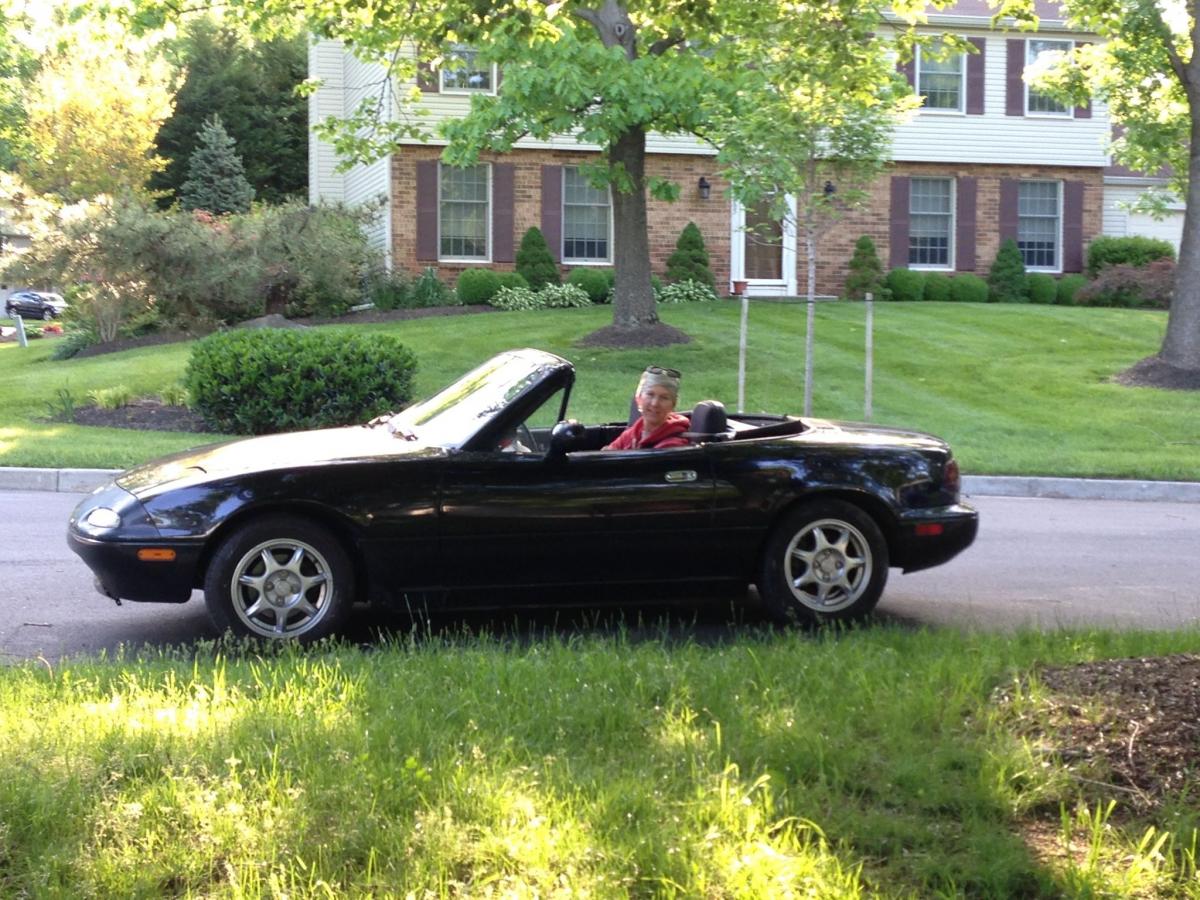
I purchased a 94 Brilliant Black with 140K miles on it for 2K at the beginning of May. Ultimate goal is to get a turbo in it, and have some fun doing it.
Starting Status:
Immediate Fixes
I drove it for a couple weeks and then moved to the next phase.
The MS3 from Reverant was plug and play, and the playing was a lot of fun. The MS3 worked great, engine feels and sounds better, and I am enjoying the learning experience. Only issue was the magic box for the wideband to CAN. My AFR's were varying from what the AEM gauge displayed, they were spot on around 14.7, but the further away, the larger the drift. Reverant is looking into, hopefully this will get resolved soon.
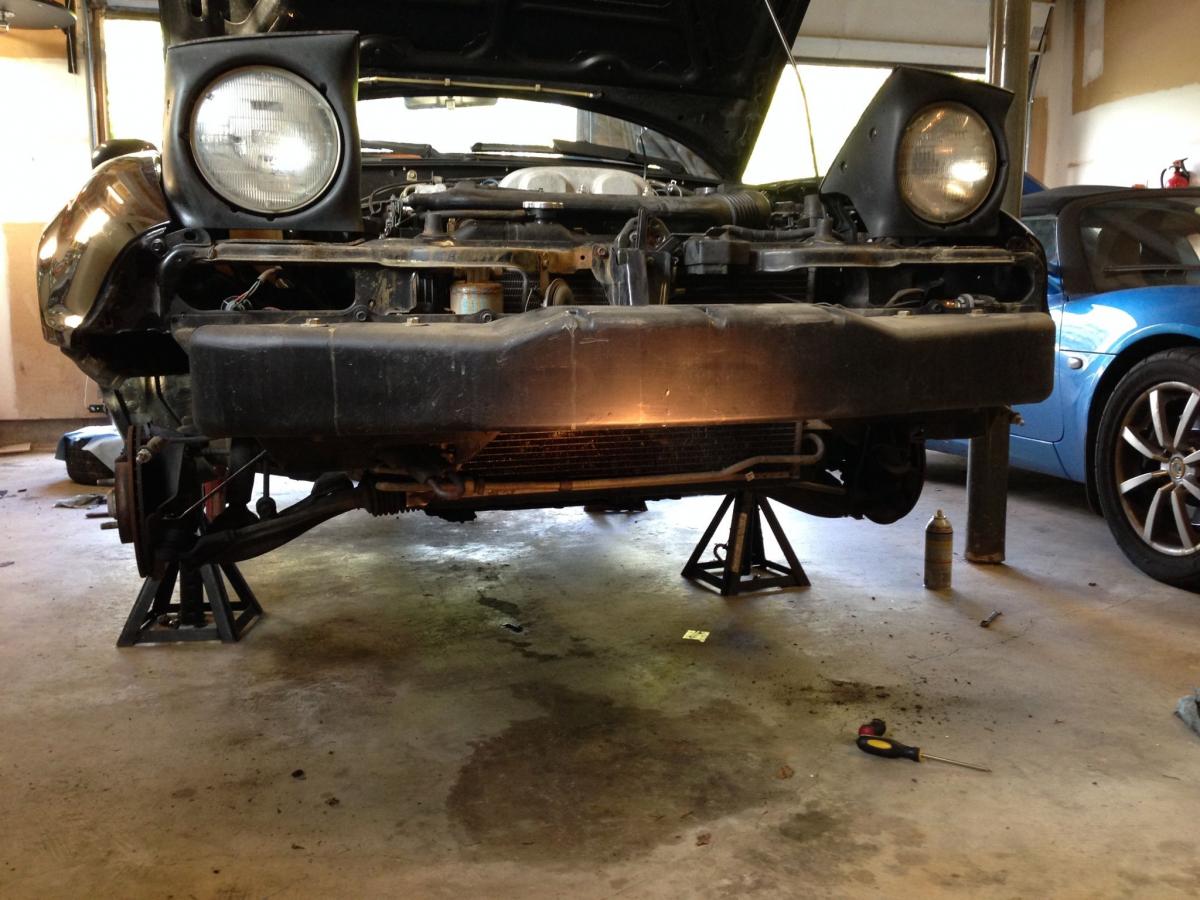
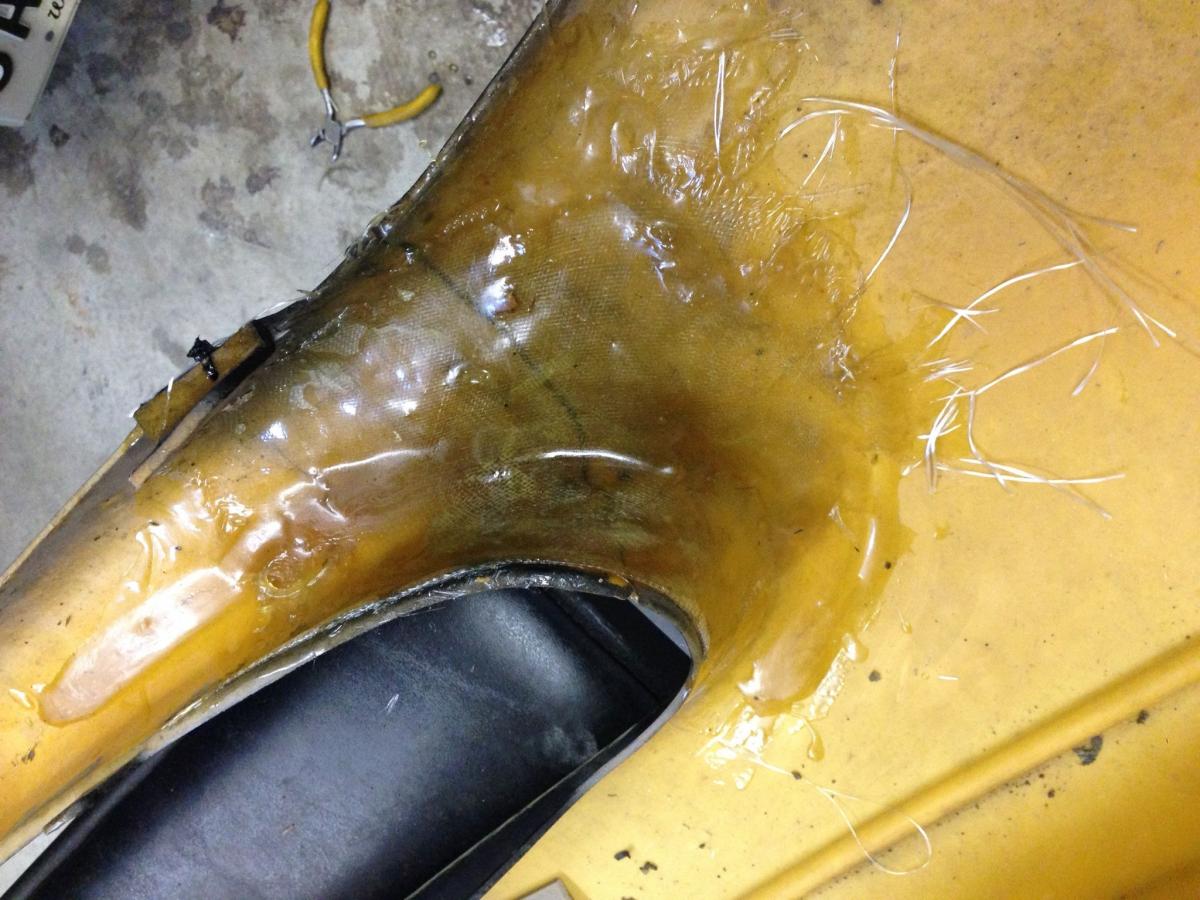
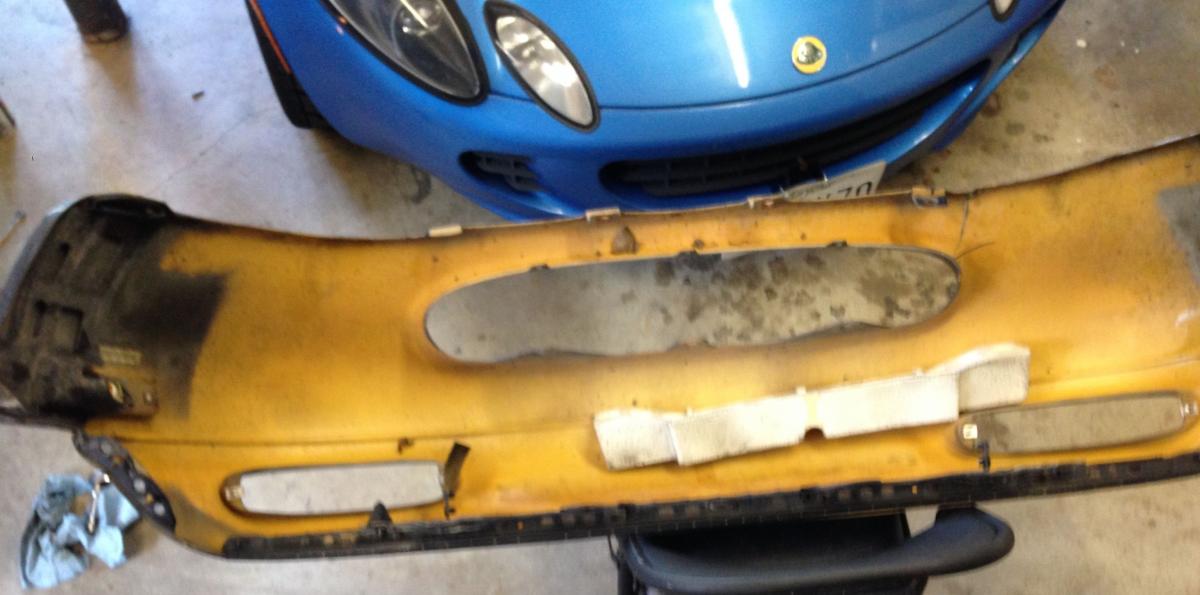
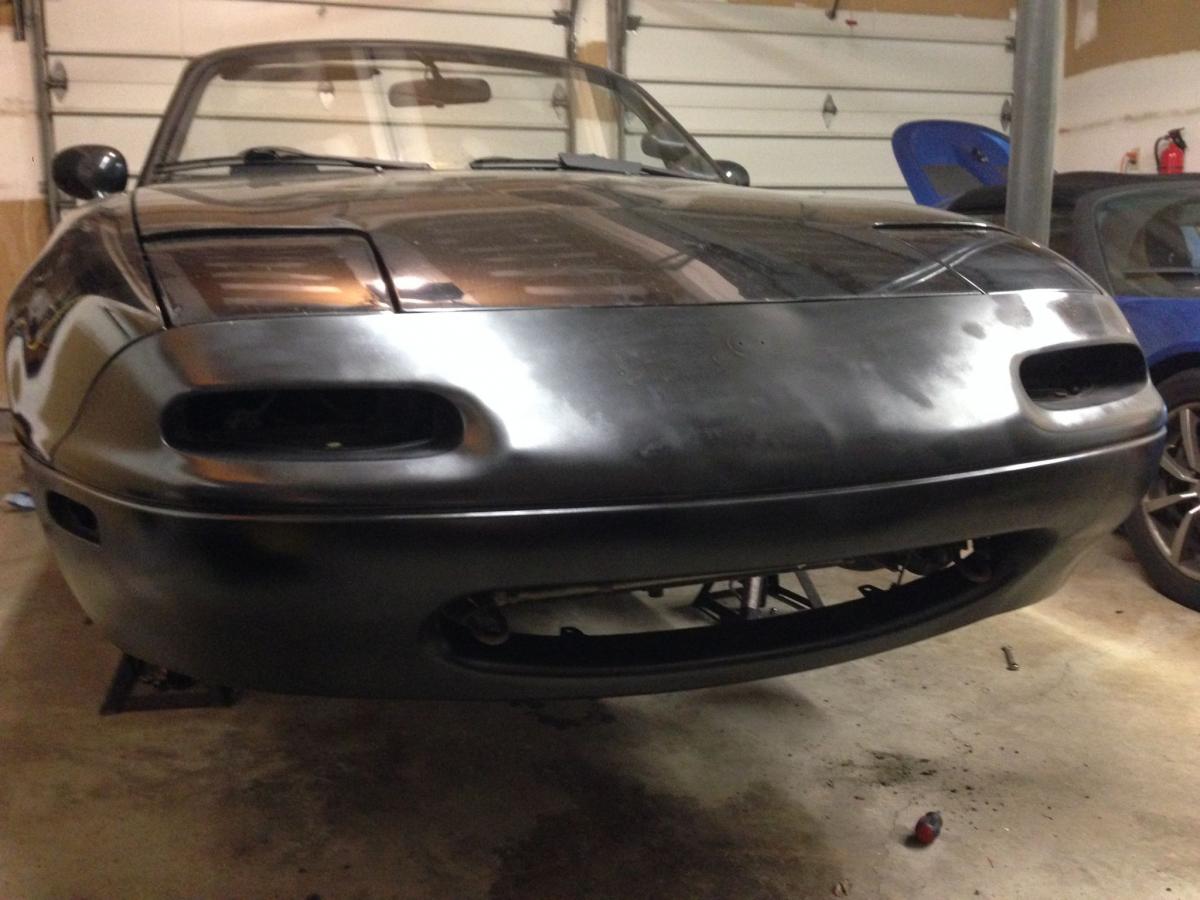
Last weekend I pulled off the front bumper cover in order to repair a crack, several dents, and paint it (was in a dull black primer, it had obviously been replaced before). By goal for this car is for it to look nice from twenty feet away, not a show car... Having said that, I fiberglassed the crack, repaired the dents, and got a couple coats of paint on it. Paint was sourced from AutomotiveTouchup.com. The paint matched well (not real obvious in photo), however I need a couple more cans, it currently does not have enough coats on it. And, will need some additional wet sanding as well...
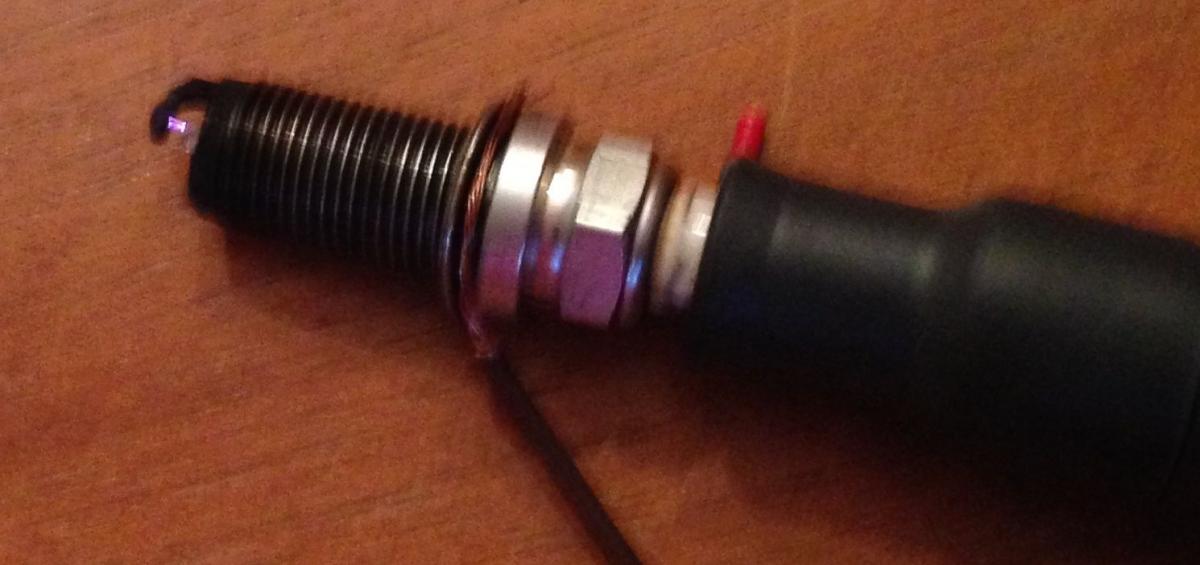
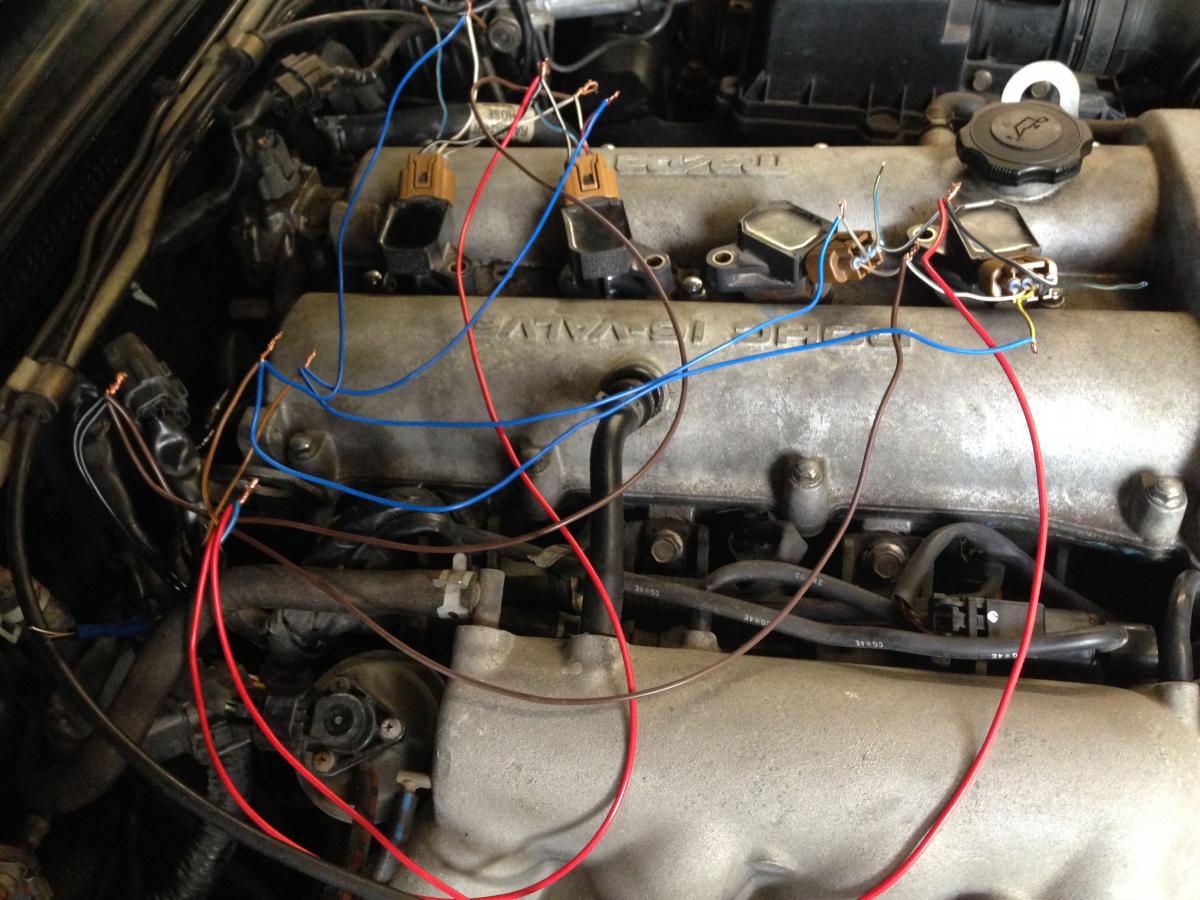
Next step in the process is COPS. I have sourced the COPs and tested them, working on getting together some wiring goodies before I plug it all together.
Wiring the IGN C and IGN D pins from MS3.

Spark Test
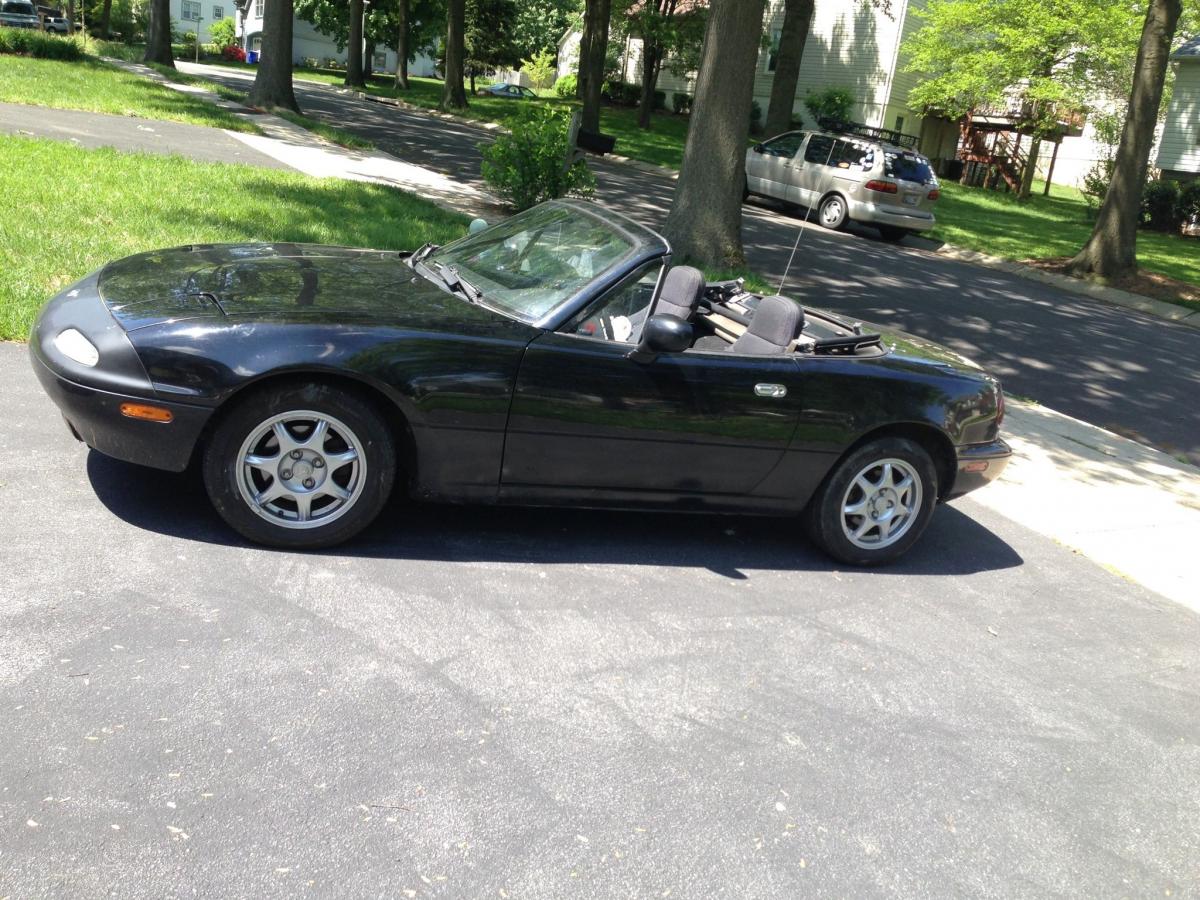
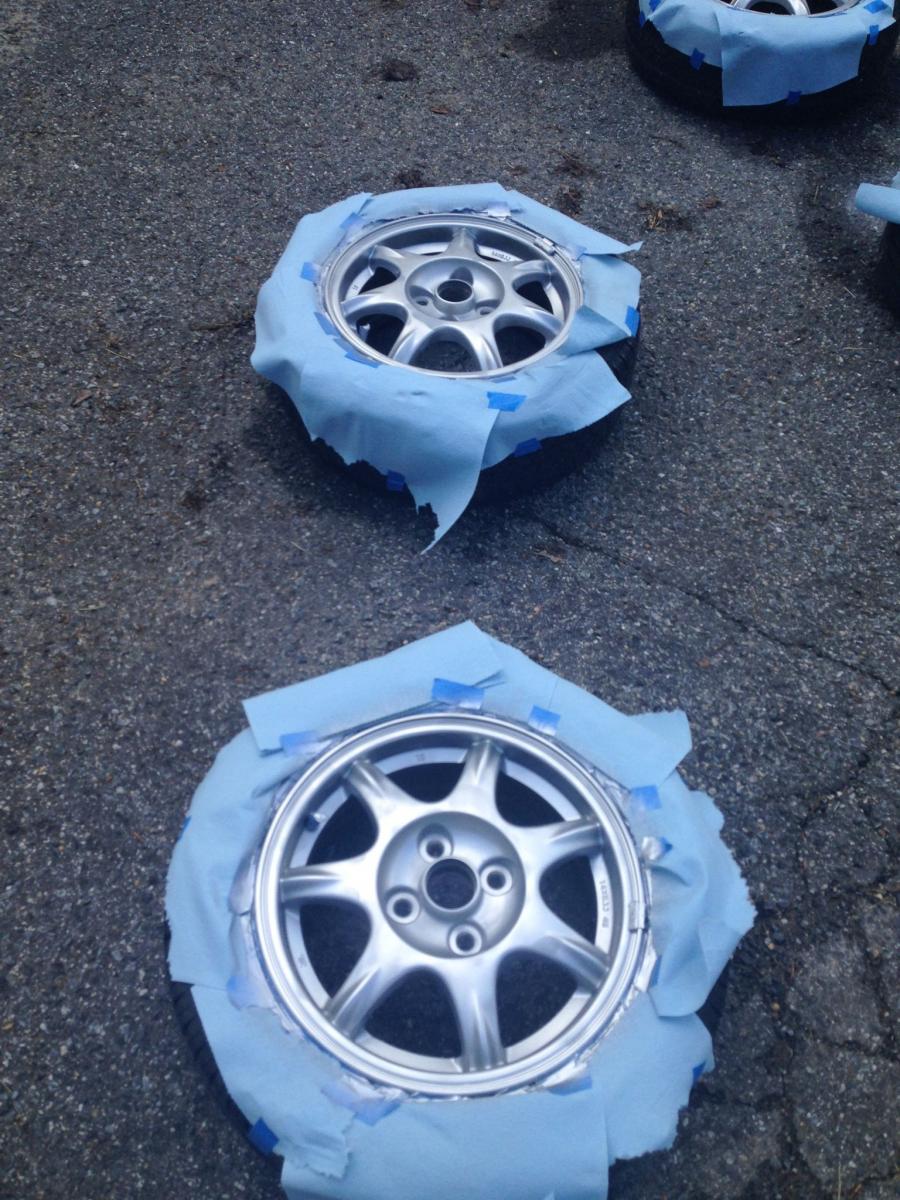
Two pictures after wheels were painted, but before bumper repair.
Starting Status:
- Body and Chassis in Fair Shape
- Engine in Good Shape
- Interior in OK Shape
- Top in Crap Shape
Immediate Fixes
- Repair Glove Box latch - could not open at all - $10 part from Rosenthal
- New Cluster Hood - original cracked - from Rosenthal
- Driver Side Window Regulator - from Rosenthal
- Changed Oil
- Replaced Spark Plugs
- Fresh Gorilla Tape on Soft Top
- Driveway Rustoleum Wheel Refresh - Amazing how much better the car looks after this...
I drove it for a couple weeks and then moved to the next phase.
- Added AEM Wideband
- Installed MS3 from Reverant
- Installed Wideband to CAN magic box from Reverant
- Tuned Base Map
The MS3 from Reverant was plug and play, and the playing was a lot of fun. The MS3 worked great, engine feels and sounds better, and I am enjoying the learning experience. Only issue was the magic box for the wideband to CAN. My AFR's were varying from what the AEM gauge displayed, they were spot on around 14.7, but the further away, the larger the drift. Reverant is looking into, hopefully this will get resolved soon.
Last weekend I pulled off the front bumper cover in order to repair a crack, several dents, and paint it (was in a dull black primer, it had obviously been replaced before). By goal for this car is for it to look nice from twenty feet away, not a show car... Having said that, I fiberglassed the crack, repaired the dents, and got a couple coats of paint on it. Paint was sourced from AutomotiveTouchup.com. The paint matched well (not real obvious in photo), however I need a couple more cans, it currently does not have enough coats on it. And, will need some additional wet sanding as well...
Next step in the process is COPS. I have sourced the COPs and tested them, working on getting together some wiring goodies before I plug it all together.
Wiring the IGN C and IGN D pins from MS3.
Spark Test
Two pictures after wheels were painted, but before bumper repair.
Last edited by gjsmith66; 05-29-2014 at 09:30 AM. Reason: Fixed pix

Reply
 3
3

3
05-28-2014, 05:19 PM
#2
Junior Member
Thread Starter
Join Date: May 2014
Location: Columbia, MD
Posts: 145
Total Cats: 14
As I mentioned in my first post, I have sourced a set of Toyota COPs, and they have been bench tested. I am running wires from MS3 behind the seats to the engine bay. At that point, I plan on joining the other ignition wires at the existing coil pack, and using the standard wiring outlined in the COP thread.
However, I have found a secondary connector that connects all 5 ignition wires to the two connectors at the coil pack. After a bunch of searching, this looks like a 6-pin connector from Sumitomo DL Sealed Series, and is only available from Eastern Beaver, or a junk yard loom. So, I can either pull mine apart and splice in, or try and find a connector.
Realistically, this car is never going back to stock, so at this point I think I should just bite the bullet, man up, and pull the coil pack and start hacking into the harness. Or, I can keep trying to track down a connector, or try and pull pins and re-stuff them. Heading out of town for a couple days, so no need to make an immediate decision. And, I still have work to do on getting the bumper painted, wet sanded, and polished.
Reply
0
0


 06-02-2014, 10:06 PM
#11
Junior Member
Thread Starter
Join Date: May 2014
Location: Columbia, MD
Posts: 145
Total Cats: 14
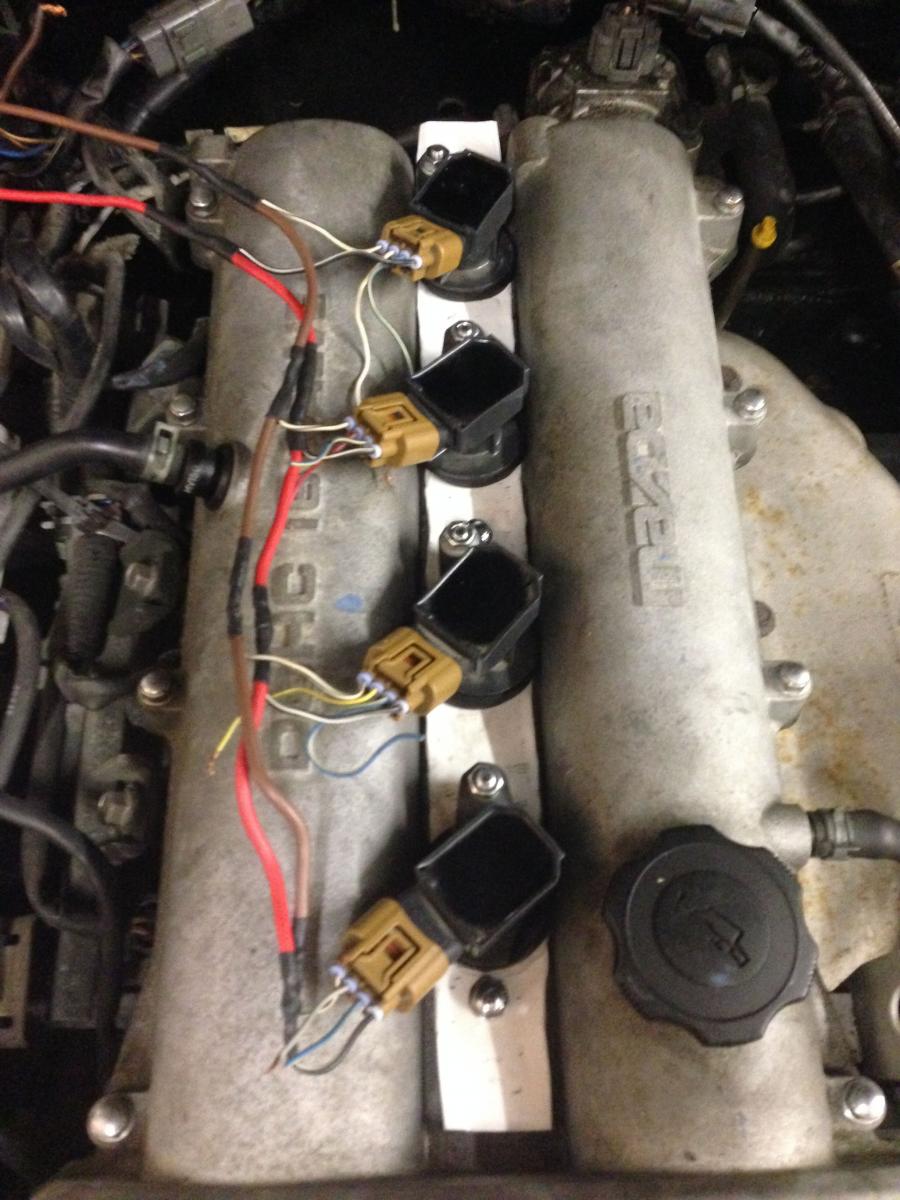
Wired up my Toyota COPS tonight. Did it quick and dirty, spliced and twisted some wires just so I could test my config. Was rewarded with an immediate start-up. I currently have configured as wasted spark, will add IGN C+D tomorrow night to the mix, and if working correctly, I will wire them up properly.
My understanding is that :
Spark A goes to Cylinder 1
Spark B goes to Cylinder 3
Spark C goes to Cylinder 4
Spark D goes to Cylinder 2
In Tuner Studio, it looks like I just need to switch Number of Coils from wasted spark to coil on plug. My nominal dwell is current set to 2.3ms (MS3).
I ended up pulling the stock coil pack and wiring directly into the ignition wires. Worked like a champ.
Reply
0
0
06-06-2014, 09:50 PM
#12
Junior Member
Thread Starter
Join Date: May 2014
Location: Columbia, MD
Posts: 145
Total Cats: 14
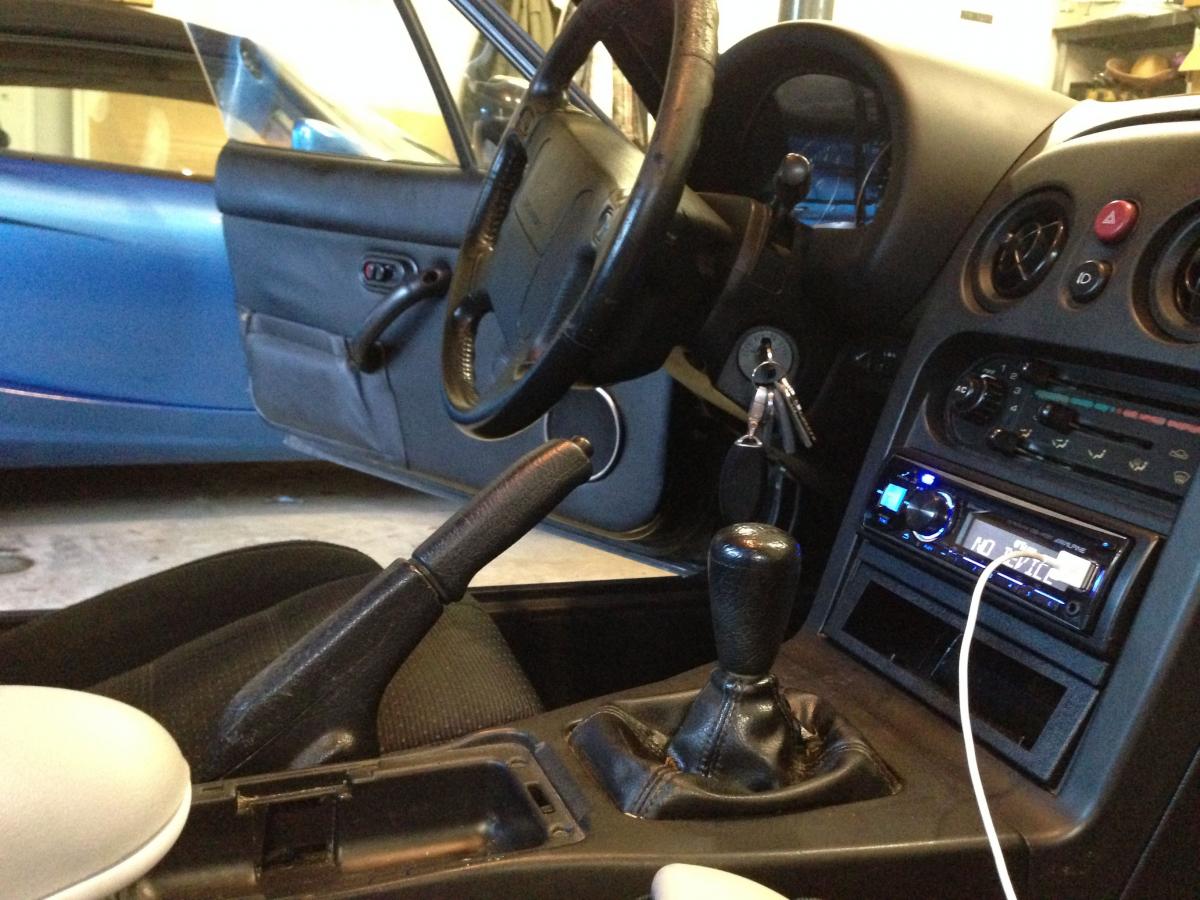
Progress this week consisted of wiring up the COPS and programing them to run Sequential in Tuner Studio. I also fabricated a hold-down bracket that I am pretty happy with. Used a sheet of aluminum, drilled the proper holes, and it all actually worked out nicely.
I have my wiring complete, just need to finish up the triggers, and wrap in a wire loom. I bought some ballerz red wire loom at advanced auto, and I plan to use allofit.
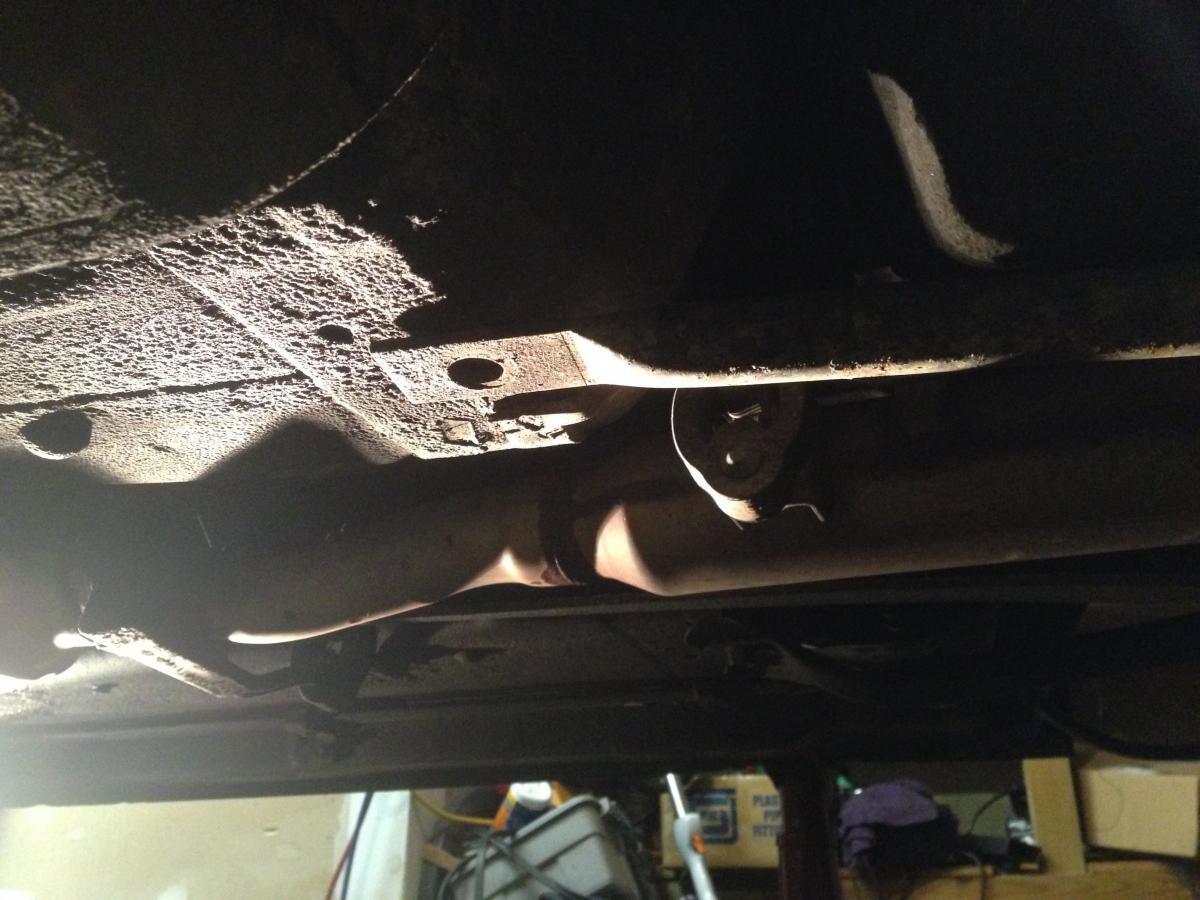
While under the car the other day, I noticed this. Pretty damn sure I need a bolt in there. Makes me wonder at what point in the last twenty years it went missing. Looks like a M12 something, but nothing I have fits...
Hoping to finish up bumper this weekend and start on my air intake, I plan on going into the cowl, have a feeling it may not be pretty...
I have my wiring complete, just need to finish up the triggers, and wrap in a wire loom. I bought some ballerz red wire loom at advanced auto, and I plan to use allofit.
While under the car the other day, I noticed this. Pretty damn sure I need a bolt in there. Makes me wonder at what point in the last twenty years it went missing. Looks like a M12 something, but nothing I have fits...
Hoping to finish up bumper this weekend and start on my air intake, I plan on going into the cowl, have a feeling it may not be pretty...
Reply
0
0
06-10-2014, 10:48 AM
#13
Junior Member
Thread Starter
Join Date: May 2014
Location: Columbia, MD
Posts: 145
Total Cats: 14
Activities completed this weekend:
Finished up repainting bumper, looks good from 20 feet away, not so much up close. Lesson learned is to just pay a body shop, but oh well.
I also changed the transmission fluid, used the Ford Unicorn Jizz. May just be in my head, but shifts seem much smoother, 2nd and 3rd were not great before the change.
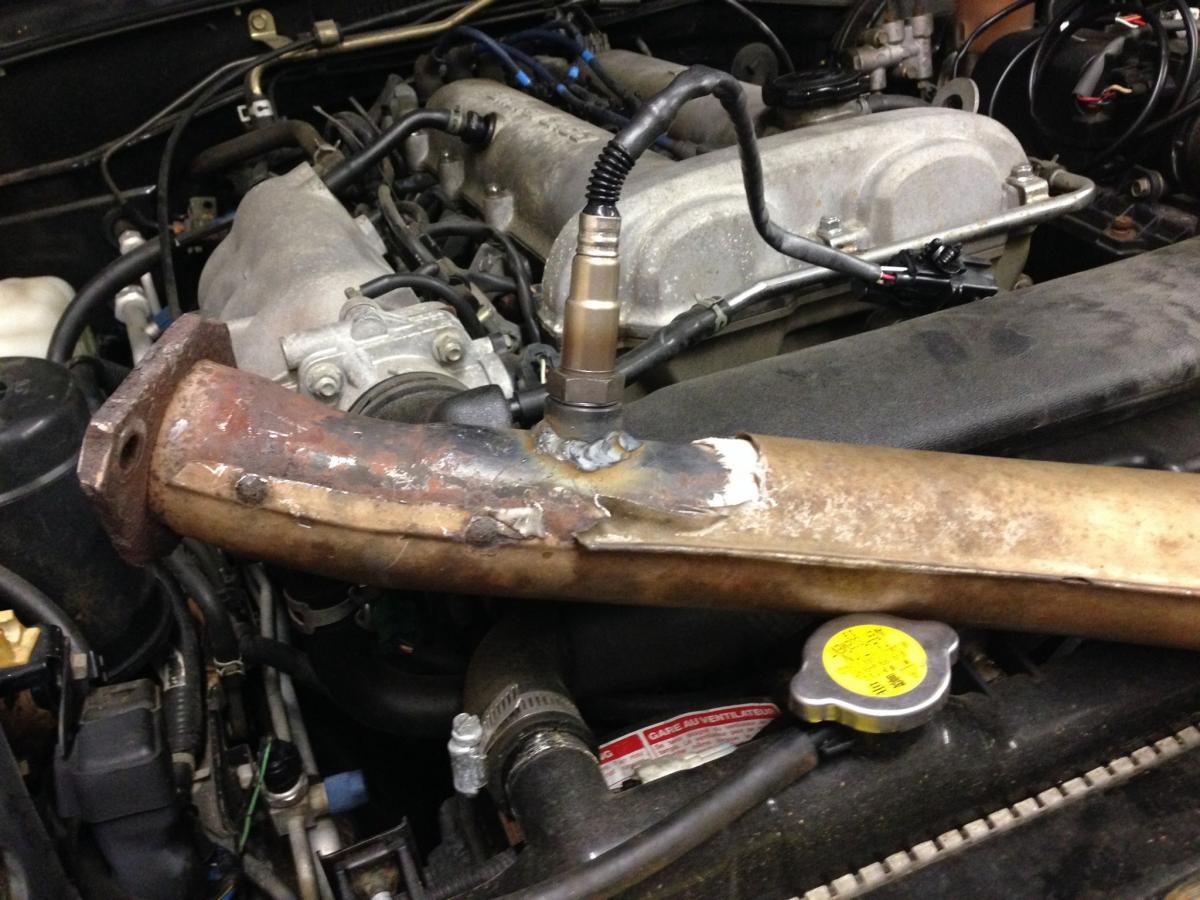
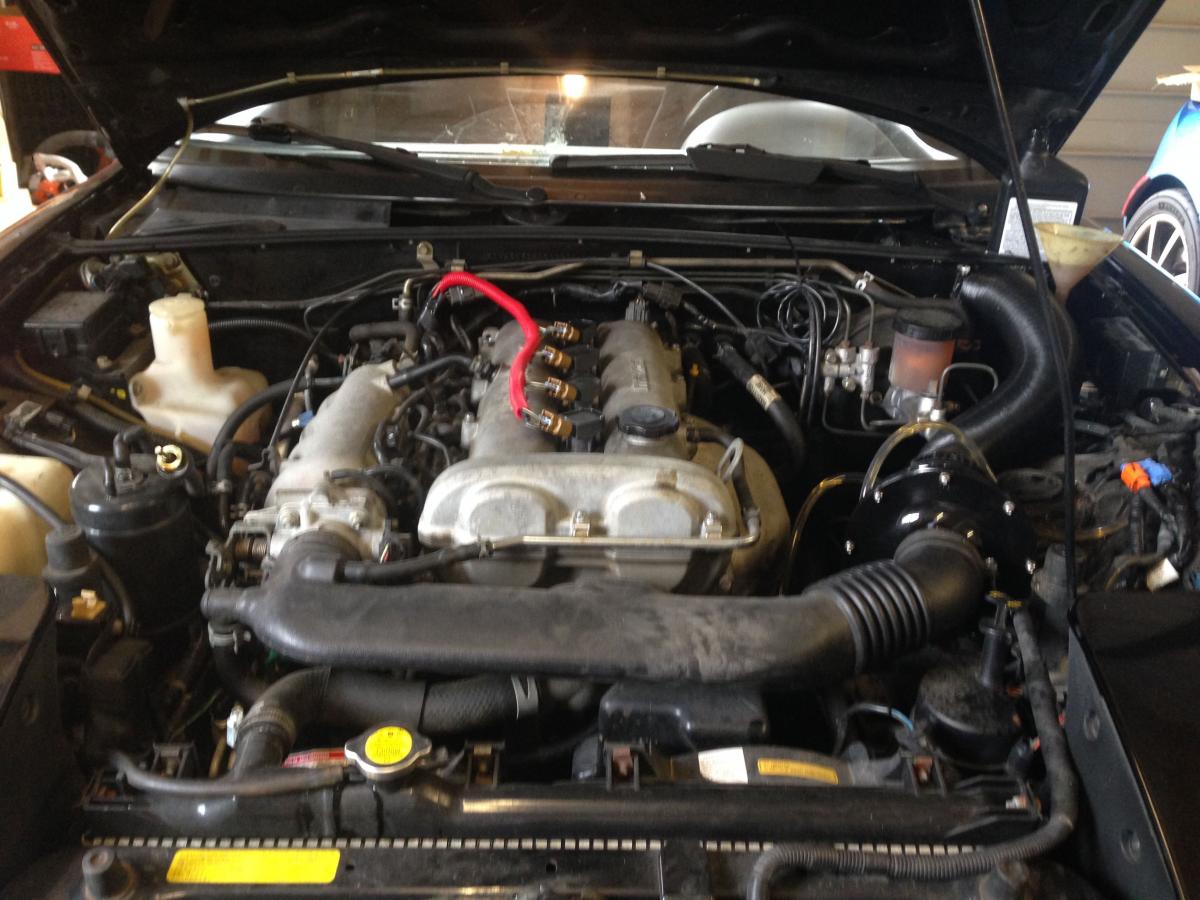
I completed my wiring for the COPs, the red loom looks fancy. I also punched a hole in my firewall and have the cold intake installed. First drive resulted in some odd fuel cut-out issues, but I disabled launch control and that seemed to resolve the issue. After that problem, the car ran very well. The intake temps were noticeably lower than I was seeing before, usually only a couple degrees higher than ambient temp, this is 20-30 degrees lower than I was seeing before. And, the intake growl is awesome...
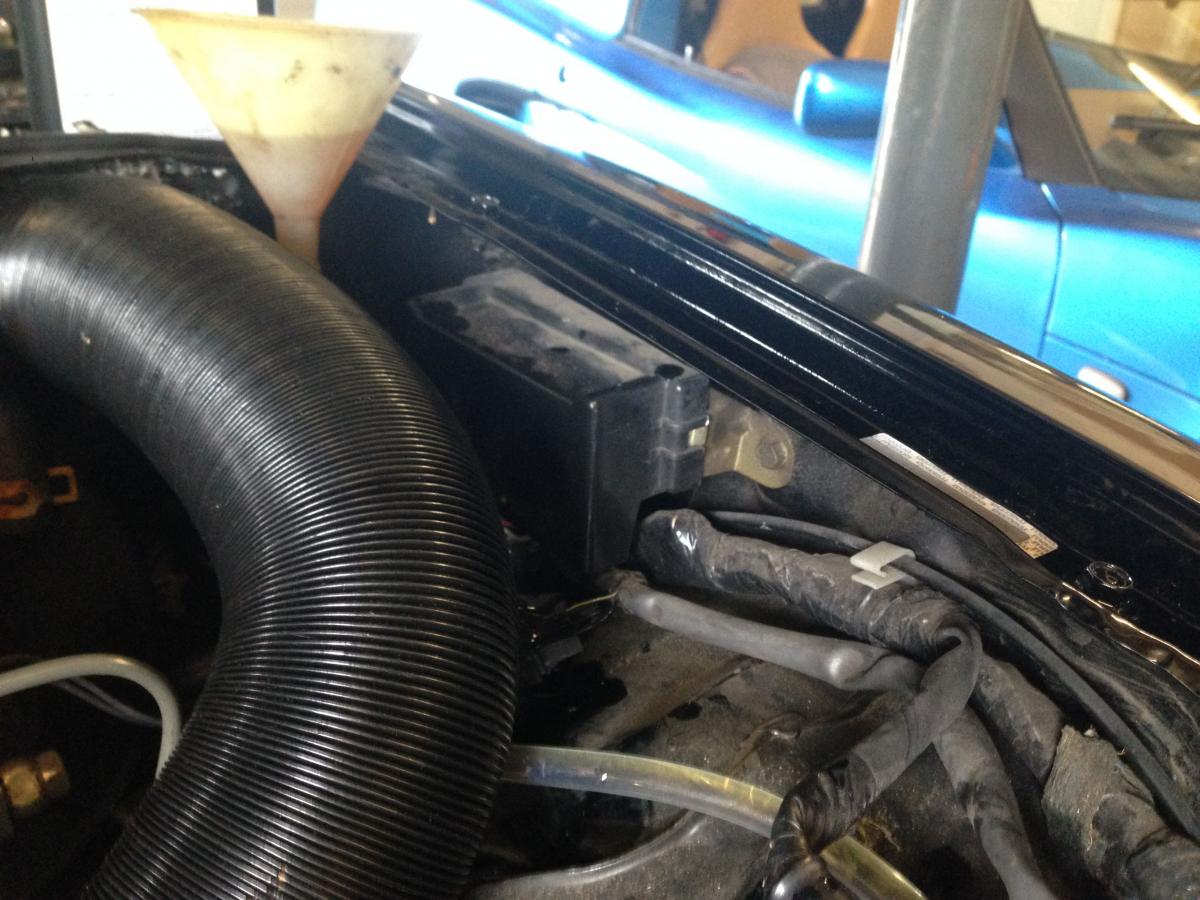
Here are some of pictures of the engine compartment.
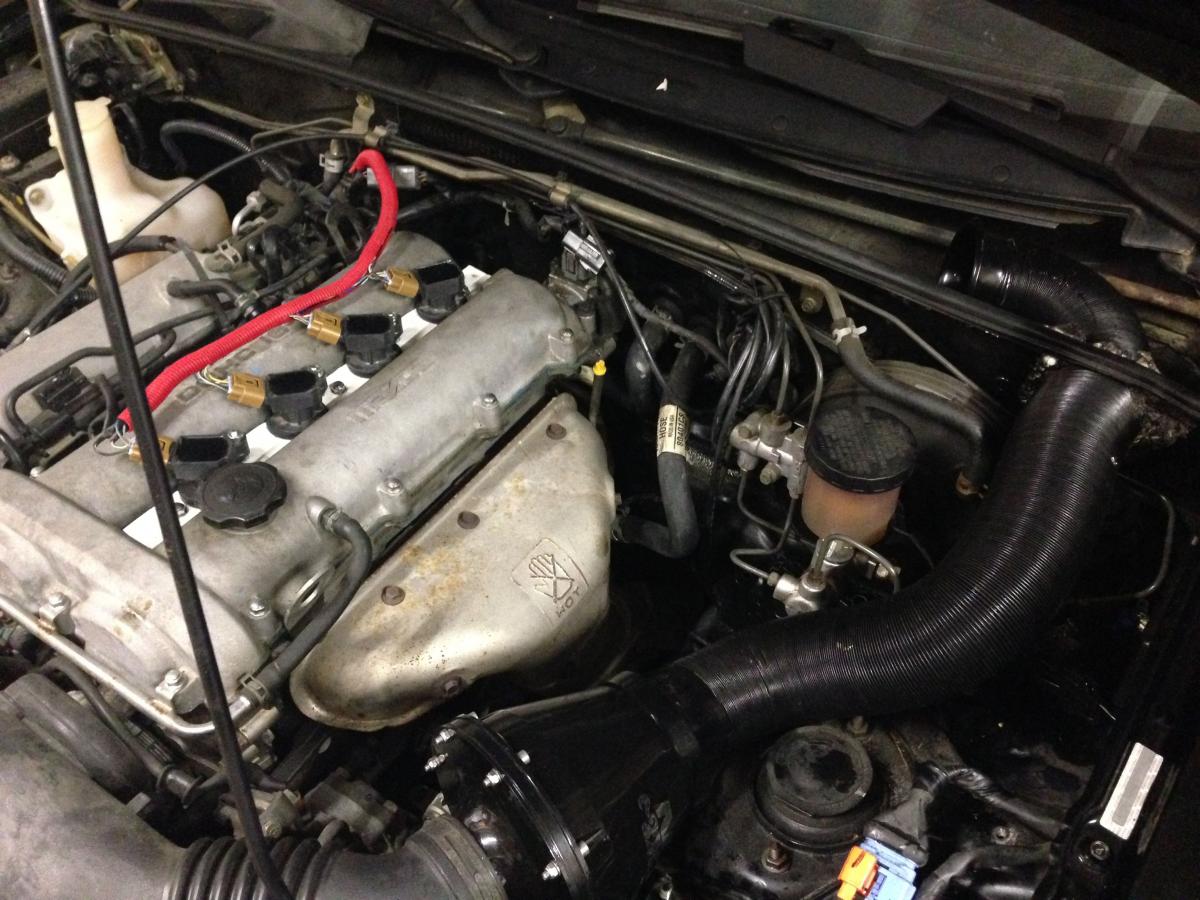
I am curious what is behind this black box? It looks like a couple relays, have not had a chance to trace back the wires. Anyone know?
In my last post, I had a picture of a bolt that was missing on one of the rear suspension braces. I sourced the correct bolt, and while starting to torque it, the captive nut broke free (was probably rusted from being exposed to elements). So now I have a loose bolt stuck in the captive nut that does not appear to be accessible. Will need to figure out a solution to that... Open to any ideas....
Finished up repainting bumper, looks good from 20 feet away, not so much up close. Lesson learned is to just pay a body shop, but oh well.
I also changed the transmission fluid, used the Ford Unicorn Jizz. May just be in my head, but shifts seem much smoother, 2nd and 3rd were not great before the change.
I completed my wiring for the COPs, the red loom looks fancy. I also punched a hole in my firewall and have the cold intake installed. First drive resulted in some odd fuel cut-out issues, but I disabled launch control and that seemed to resolve the issue. After that problem, the car ran very well. The intake temps were noticeably lower than I was seeing before, usually only a couple degrees higher than ambient temp, this is 20-30 degrees lower than I was seeing before. And, the intake growl is awesome...
Here are some of pictures of the engine compartment.
I am curious what is behind this black box? It looks like a couple relays, have not had a chance to trace back the wires. Anyone know?
In my last post, I had a picture of a bolt that was missing on one of the rear suspension braces. I sourced the correct bolt, and while starting to torque it, the captive nut broke free (was probably rusted from being exposed to elements). So now I have a loose bolt stuck in the captive nut that does not appear to be accessible. Will need to figure out a solution to that... Open to any ideas....
Reply
0
0
06-21-2014, 09:14 AM
#17
Junior Member
Thread Starter
Join Date: May 2014
Location: Columbia, MD
Posts: 145
Total Cats: 14
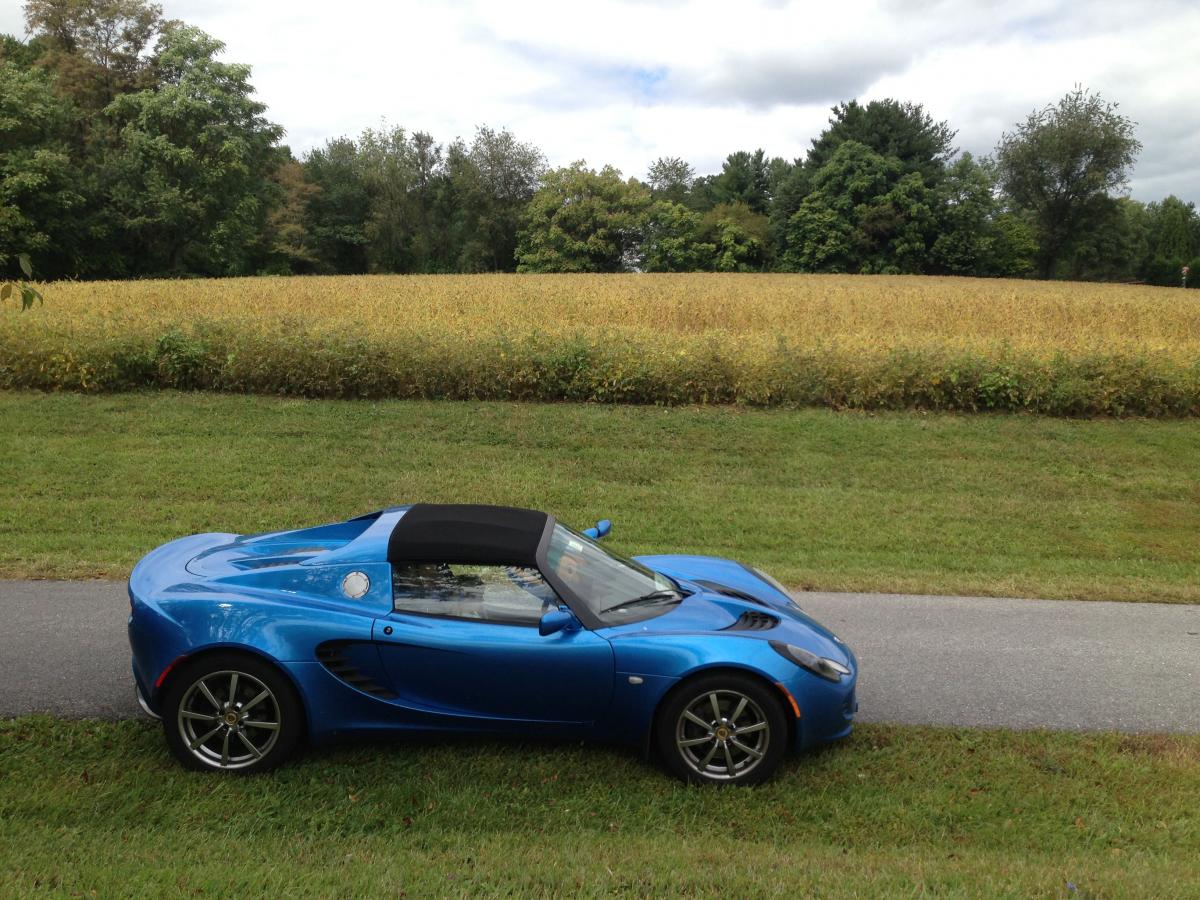
Last two weeks have involved driving and tuning, adding lightness, and general clean up. I have been using the car as my DD as much as possible, and have been impressed with the drivability and overall fun factor. Switching back to the Lotus reminds me the handling still sucks, and driving the Infiniti reminds me the car is still slow, but somehow it still has been a blast to drive around in.
In search of lightness, I have started removing everything in the engine bay that is not controlled by the MS3. Not sure I have saved a ton of weight, but it has cleaned up the look.
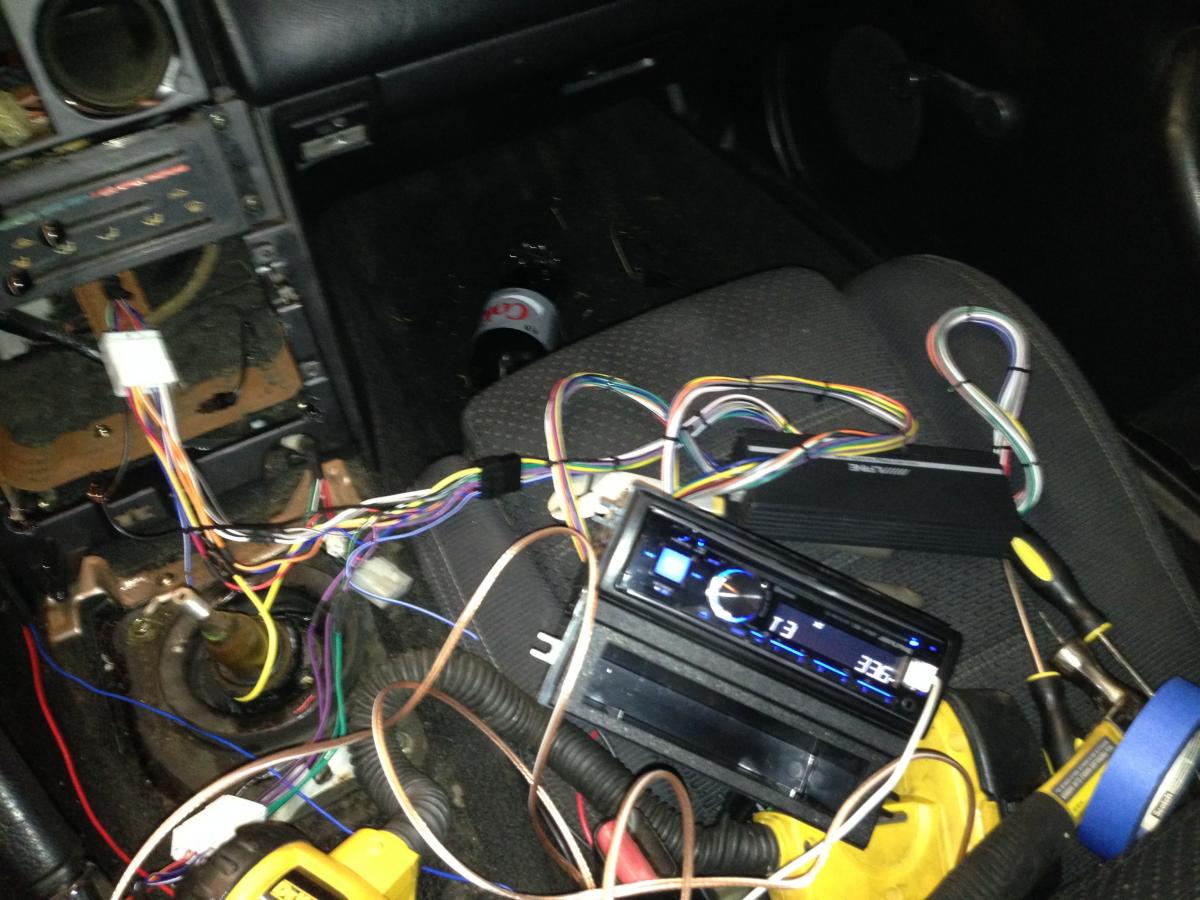
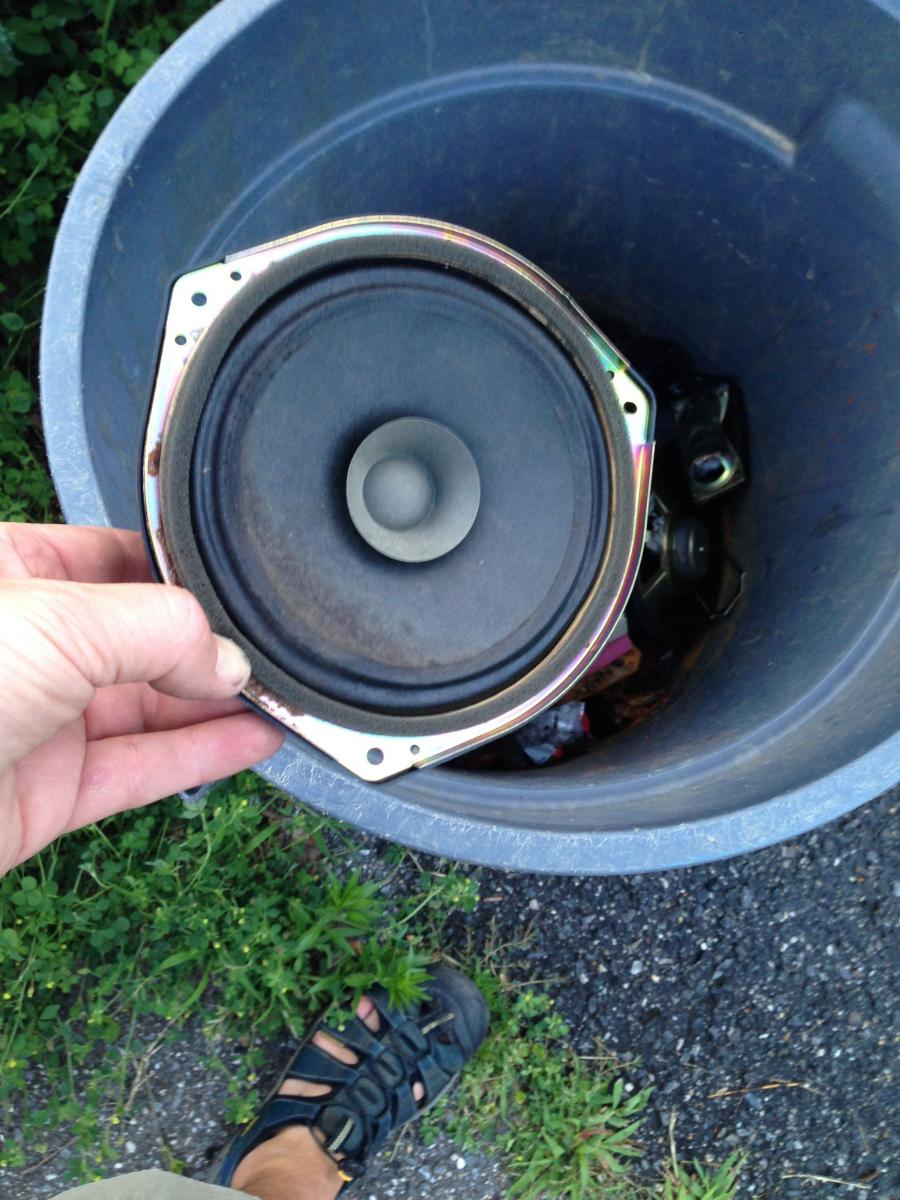
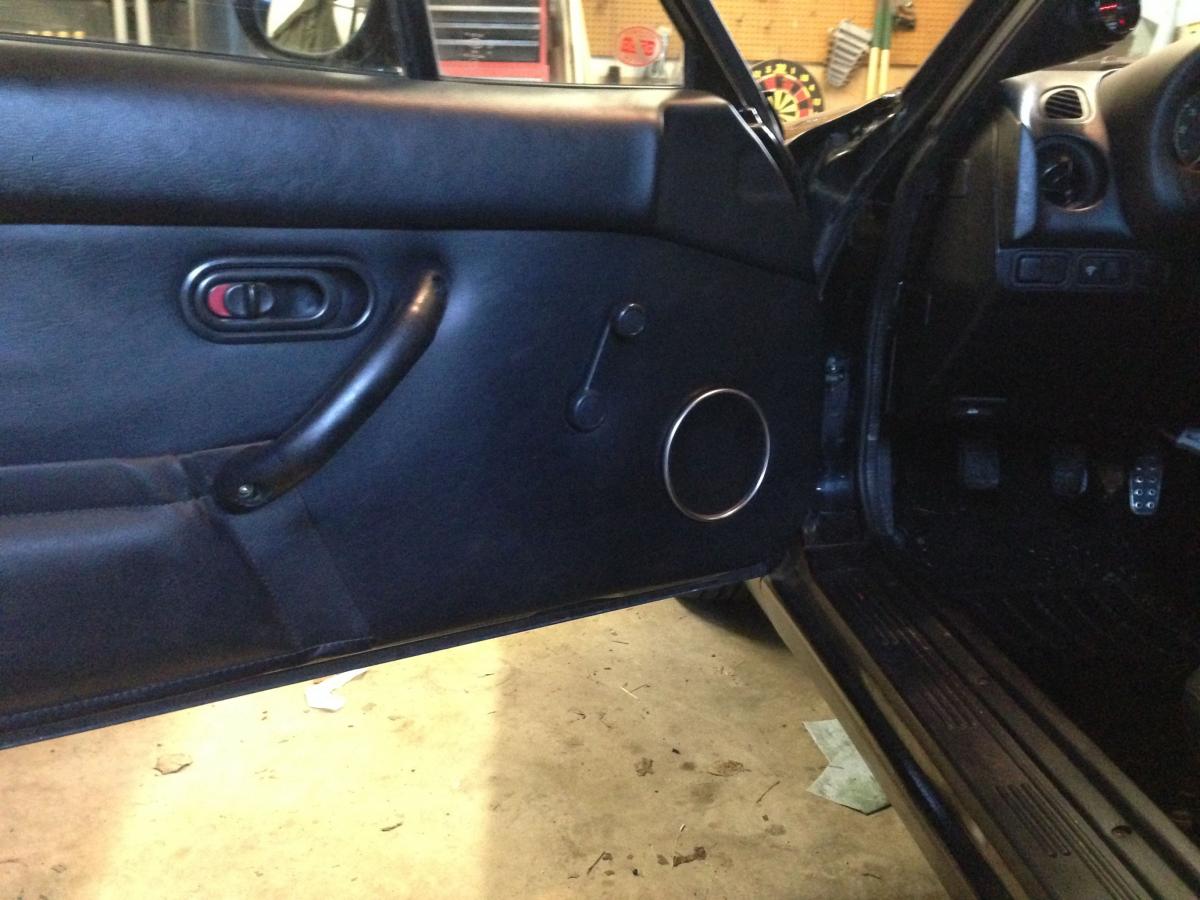
The power quest got side tracked with a sound quest. The stock stereo was not going to cut it for commuter duty. The stock speakers were blown, headrest speakers not working at all, and in addition my speaker grills were a mess of rusted ugliness.
I upgraded to a Alpine CDE-143BT with a Alpine KTP-445A amplifier. I have the same setup in the Lotus, so I knew what I was getting into, and figured it would help to have similar control placement in both cars. For speakers, I went with Alpine SPS-610 in the doors, and Kicker DS35 in the headrests. I bought some grills off of E-Bay that claim to be from a Jaguar XJ and fit the Miata. They actually worked very well, and look good.
Most everything was plug and play, and it sounds great. I did have to rewire the headrest speakers as the wiring had been ripped up.
In Progress
Trashing the Old
New Speaker Grills
Full install
When I pulled the console, I was greeted to double ripped gear shift boots. Not surprising I guess on a 20 year old car with 140K on it. After reading a bunch, I decided to do a full turret refresh, and picked up the parts at Rosenthal. When reading, there seemed to be a lot of confusion on parts required. This is what I went with, I replaced all plastic bushings, both wavy washers, and both boots. The lower boot is listed as for a NC, but works fine on my 94.
BOOT,DUST (R501-17-47Z)
BUSH (M501-17-515)
BUSHING, SHIFTER (0398-17-462A)
INSULATOR (NA01-64-481B)
INSULATOR,LEVER (M501-17-501) 2
WASHER,WAVE (M505-17-482) 2
I would not have called the shifting sloppy before, but I noticed an immediate improvement, the shifting is perfect now. Wish the Lotus felt like this...
And, last comfort replacement were two new pedal pads, the old ones were gone, so $10 well spent.
I guess that is all, next power projects will be ExIntake which has already been sourced, and fuel injectors. I have been looking to find a deal on some used fuel injectors, but have not seen any bargains. At this point I am thinking of just playing it safe and getting some plug and play Fuel Injector Clinic 650ccs. That is assuming I don't break down and blow my budget first on a new top. Last week I lost a gorilla tape patch while hitting 80mph down I-70...
In search of lightness, I have started removing everything in the engine bay that is not controlled by the MS3. Not sure I have saved a ton of weight, but it has cleaned up the look.
The power quest got side tracked with a sound quest. The stock stereo was not going to cut it for commuter duty. The stock speakers were blown, headrest speakers not working at all, and in addition my speaker grills were a mess of rusted ugliness.
I upgraded to a Alpine CDE-143BT with a Alpine KTP-445A amplifier. I have the same setup in the Lotus, so I knew what I was getting into, and figured it would help to have similar control placement in both cars. For speakers, I went with Alpine SPS-610 in the doors, and Kicker DS35 in the headrests. I bought some grills off of E-Bay that claim to be from a Jaguar XJ and fit the Miata. They actually worked very well, and look good.
Most everything was plug and play, and it sounds great. I did have to rewire the headrest speakers as the wiring had been ripped up.
In Progress
Trashing the Old
New Speaker Grills
Full install
When I pulled the console, I was greeted to double ripped gear shift boots. Not surprising I guess on a 20 year old car with 140K on it. After reading a bunch, I decided to do a full turret refresh, and picked up the parts at Rosenthal. When reading, there seemed to be a lot of confusion on parts required. This is what I went with, I replaced all plastic bushings, both wavy washers, and both boots. The lower boot is listed as for a NC, but works fine on my 94.
BOOT,DUST (R501-17-47Z)
BUSH (M501-17-515)
BUSHING, SHIFTER (0398-17-462A)
INSULATOR (NA01-64-481B)
INSULATOR,LEVER (M501-17-501) 2
WASHER,WAVE (M505-17-482) 2
I would not have called the shifting sloppy before, but I noticed an immediate improvement, the shifting is perfect now. Wish the Lotus felt like this...
And, last comfort replacement were two new pedal pads, the old ones were gone, so $10 well spent.
I guess that is all, next power projects will be ExIntake which has already been sourced, and fuel injectors. I have been looking to find a deal on some used fuel injectors, but have not seen any bargains. At this point I am thinking of just playing it safe and getting some plug and play Fuel Injector Clinic 650ccs. That is assuming I don't break down and blow my budget first on a new top. Last week I lost a gorilla tape patch while hitting 80mph down I-70...
Reply
0
0
06-21-2014, 10:11 AM
#18
I didn't know you were allowed to drive that fast in Maryland. Here in N TX, 80 is like a minimum speed on our 2-lanes. LOL. Seriously, whenever my BIL visits from MD, he's shocked at both the speed limits and the competence/politeness of drivers here. I went to USNA and U of MD for an advanced degree. I remember well what it was like to drive in that part of the world (yuck) -- no wonder you want a stereo.
Reply
0
0
06-21-2014, 12:55 PM
#19
Junior Member
Thread Starter
Join Date: May 2014
Location: Columbia, MD
Posts: 145
Total Cats: 14
What year did you finish at USNA? I have some friends who went there, I also went to U of MD.
I live in a rural section, so on I-70 you can definitely get moving. However, I work down in VA and have to battle the beltway, so, a stereo is definitely needed.
Thanks for your service. Given your handle, did you fly F-18s?
I live in a rural section, so on I-70 you can definitely get moving. However, I work down in VA and have to battle the beltway, so, a stereo is definitely needed.
Thanks for your service. Given your handle, did you fly F-18s?
Reply
0
0


