Amateur VVT NA woadster build.
 01-06-2016, 12:49 AM
#1
Junior Member
Thread Starter

Join Date: Apr 2011
Location: vancouver, bc
Posts: 116
Total Cats: 5
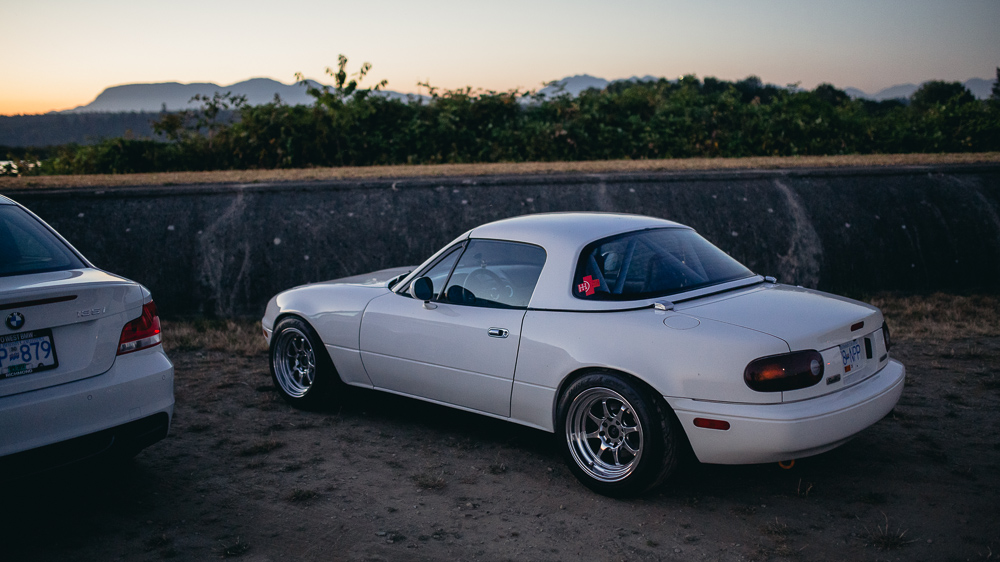
Hi guys I'm back from being MIA for almost 2 years now. I had a build thread a while back which the car was pretty much a stock 95 1.8l aside from coilover and brakes. It went on a few track days then the stock motor started to rod knock on me. I didn't have a garage previously and in the area I live I wasn't allowed to work on my car outside the garage so it was sent to a friend to have a vvt motor swapped in. New vvt motor has metal bits under the pan so it was then sent out to have motor rebuild. At some point he gave up so it was towed to another friend's place.
Long story short, we got the car up running after a long and difficult process because the car just wouldn't start. However after around 600miles of breaking in the motor started knocking again in July 15. I was sick of the car so it was sat until now. I have some workspace in my garage now so hopefully that will help.
This build's philosophy was to follow Emilio's 95R before he had the CNC head upgrades.I wanted a simple build so it's easy to fix and reliable. (The race track we occasionally visit is around 200 miles 1 way)
NB2 engine 95R SuperMiata street project - ClubRoadster.net
I started this thread so I can get some advice and motivation. I have very limited skills but hopefully I can learn as much as I can. I'm targeting to have the car started before March-April.
Some specs on the car right now:
-vvt BP6D swap running MS basic from Reverant (I've received so much help from this guy. Props to him)
-tein flex 9k/6k, racing beat front sway
-z1 star specs on street, ra1 on track
-stock brakes with ss brake lines, xp10/xp8
-4.3 torsen
-roll bar, frame rails
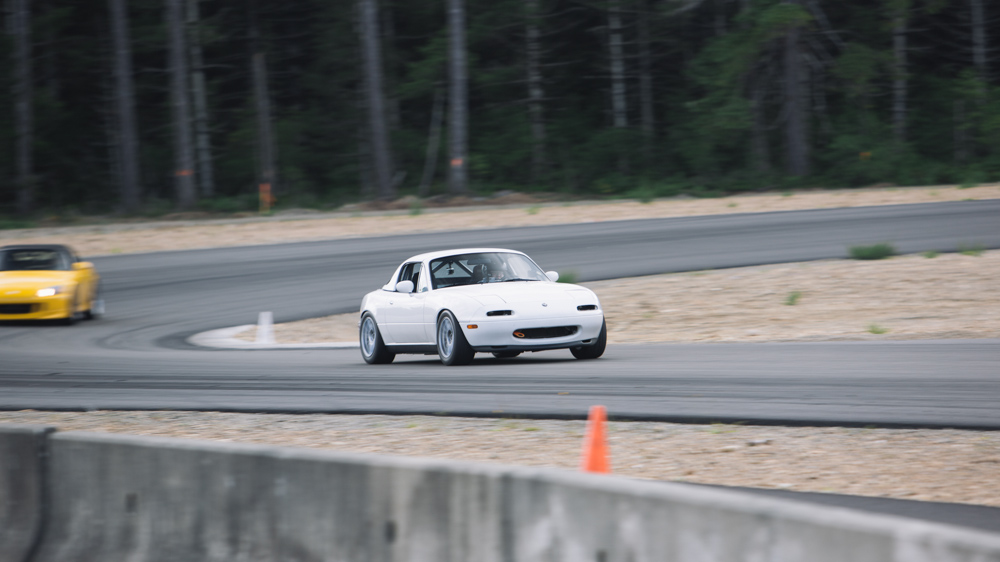
Track event at the Ridge Motorsports Park

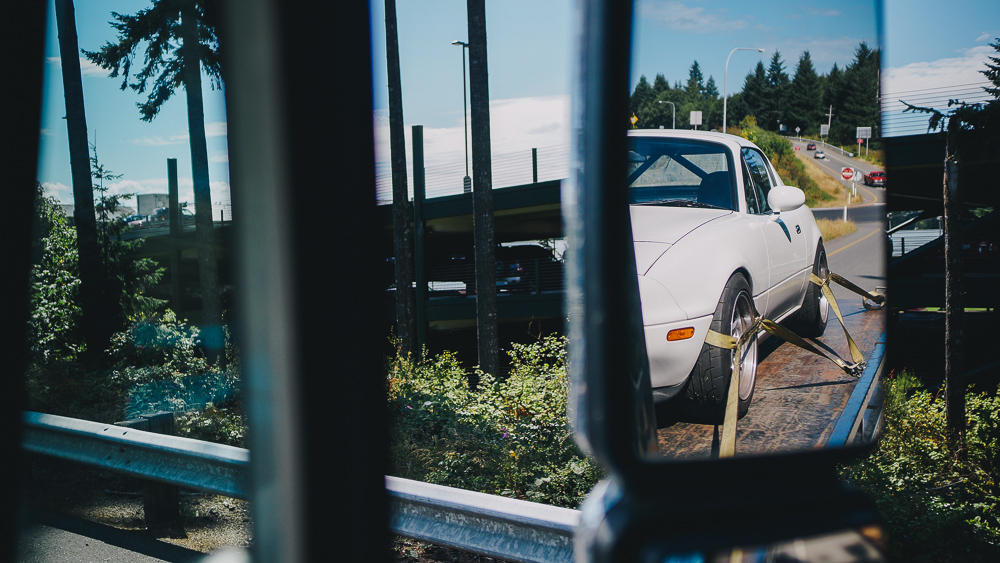
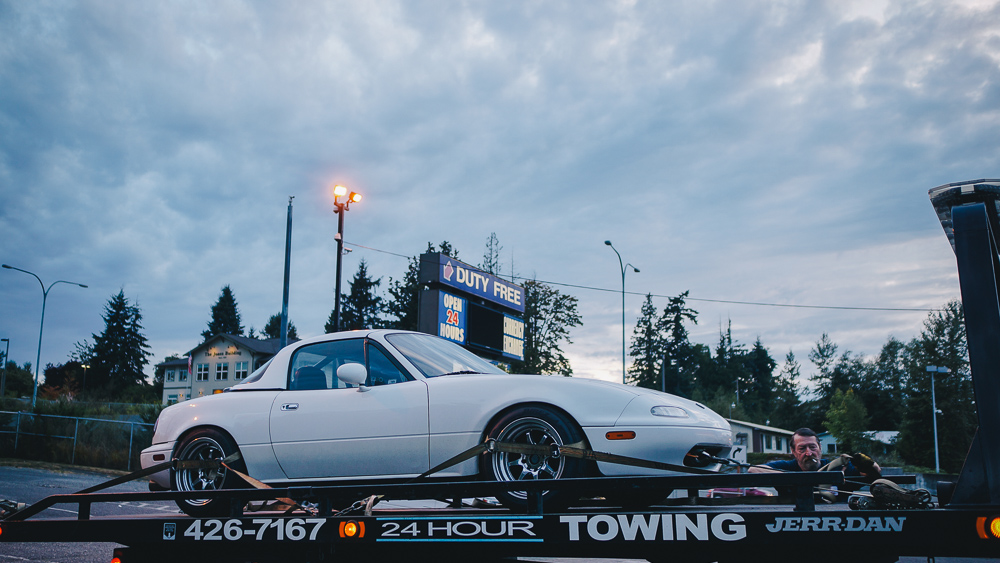
The day that it took 9 hours to tow home :\
[youtube]Mrn5cAysw5M[/youtube]
Long story short, we got the car up running after a long and difficult process because the car just wouldn't start. However after around 600miles of breaking in the motor started knocking again in July 15. I was sick of the car so it was sat until now. I have some workspace in my garage now so hopefully that will help.
This build's philosophy was to follow Emilio's 95R before he had the CNC head upgrades.I wanted a simple build so it's easy to fix and reliable. (The race track we occasionally visit is around 200 miles 1 way)
NB2 engine 95R SuperMiata street project - ClubRoadster.net
I started this thread so I can get some advice and motivation. I have very limited skills but hopefully I can learn as much as I can. I'm targeting to have the car started before March-April.
Some specs on the car right now:
-vvt BP6D swap running MS basic from Reverant (I've received so much help from this guy. Props to him)
-tein flex 9k/6k, racing beat front sway
-z1 star specs on street, ra1 on track
-stock brakes with ss brake lines, xp10/xp8
-4.3 torsen
-roll bar, frame rails
Track event at the Ridge Motorsports Park
The day that it took 9 hours to tow home :\
[youtube]Mrn5cAysw5M[/youtube]

Reply
 2
2

2
 01-06-2016, 12:49 AM
#3
Junior Member
Thread Starter
Join Date: Apr 2011
Location: vancouver, bc
Posts: 116
Total Cats: 5
Update:
So head is removed and it seems like there's no knocking/piston slap. Could be some other issues but we'll find out next Monday when we bring it to the engine builder. He told me to keep the oil pan on so he could inspect it.
Anyone have any idea what caused the knocking from these photos? Motor has around 1000 kms (600 miles) since rebuild. It was knocking and metal shavings was found from pan and magnetic drain bolt.
Piston 1 (Starting from front of motor)

Piston 2

Piston 3

Piston 4

As for the cylinder, there seems to be some vertical marks from the wall.
Cylinder 1

cylinder 2

cylinder 3

cylinder 4

The head (front to back)


So head is removed and it seems like there's no knocking/piston slap. Could be some other issues but we'll find out next Monday when we bring it to the engine builder. He told me to keep the oil pan on so he could inspect it.
Anyone have any idea what caused the knocking from these photos? Motor has around 1000 kms (600 miles) since rebuild. It was knocking and metal shavings was found from pan and magnetic drain bolt.
Piston 1 (Starting from front of motor)
Piston 2
Piston 3
Piston 4
As for the cylinder, there seems to be some vertical marks from the wall.
Cylinder 1
cylinder 2
cylinder 3
cylinder 4
The head (front to back)
Reply
0
0
01-06-2016, 10:55 AM
#4
Junior Member

Join Date: Sep 2014
Location: Canton, GA
Posts: 153
Total Cats: -84
I'm confused. Want to find sourcing of knocking, but no pictures of any bearing surfaces?
Post pictures of all rod and main bearings and their corresponding surfaces. Seems very low mileage to develop a knock, definitely a pre-mature bearing failure. 99% certain oil starvation is about the only cause. Oil pump failure would be high on the suspect list for me. Was it replaced with the rebuild 600 miles ago?
Regarding the vertical marks: those are very minimal and there is still a lot of cross-hatching visible. Give them the finger-nail test. Likely caused by loose bearing/journal material after one or more bearings spun/failed.
Reply
0
0
01-06-2016, 02:52 PM
#5
Junior Member
Thread Starter
Join Date: Apr 2011
Location: vancouver, bc
Posts: 116
Total Cats: 5
I'm confused. Want to find sourcing of knocking, but no pictures of any bearing surfaces?
Post pictures of all rod and main bearings and their corresponding surfaces. Seems very low mileage to develop a knock, definitely a pre-mature bearing failure. 99% certain oil starvation is about the only cause. Oil pump failure would be high on the suspect list for me. Was it replaced with the rebuild 600 miles ago?
Regarding the vertical marks: those are very minimal and there is still a lot of cross-hatching visible. Give them the finger-nail test. Likely caused by loose bearing/journal material after one or more bearings spun/failed.
Post pictures of all rod and main bearings and their corresponding surfaces. Seems very low mileage to develop a knock, definitely a pre-mature bearing failure. 99% certain oil starvation is about the only cause. Oil pump failure would be high on the suspect list for me. Was it replaced with the rebuild 600 miles ago?
Regarding the vertical marks: those are very minimal and there is still a lot of cross-hatching visible. Give them the finger-nail test. Likely caused by loose bearing/journal material after one or more bearings spun/failed.
The engine builder asked me to send the whole block in without removing the oil pan. We'll get an update soon

Reply
1
1
01-06-2016, 02:53 PM
#6
Junior Member
Thread Starter
Join Date: Apr 2011
Location: vancouver, bc
Posts: 116
Total Cats: 5
Update:
Still no news from engine builder but received something in the mail
Yonaka aluminum radiator for 90-97 miata with 2 fans.

It was around $190 usd shipped (bought in Canada and they shipped from Canadian warehouse)

Welds don't look too bad. I mean after all if it doesn't leak and performs well then it's money well spent

I am a little disappointed even at $200 that some of the fins are damaged. Am I asking too much?


Fans are included but I might run just one. If I do, do you think I should block off the other side so air gets properly sucked out?


The cap

I guess I'll do more review when it's bolted on and when the car runs. I weighted it by hand and it's a heavier unit than the oem replacement I have. Removing 1 fan might lighten it. We'll see..
Still no news from engine builder but received something in the mail
Yonaka aluminum radiator for 90-97 miata with 2 fans.
It was around $190 usd shipped (bought in Canada and they shipped from Canadian warehouse)
Welds don't look too bad. I mean after all if it doesn't leak and performs well then it's money well spent
I am a little disappointed even at $200 that some of the fins are damaged. Am I asking too much?
Fans are included but I might run just one. If I do, do you think I should block off the other side so air gets properly sucked out?
The cap
I guess I'll do more review when it's bolted on and when the car runs. I weighted it by hand and it's a heavier unit than the oem replacement I have. Removing 1 fan might lighten it. We'll see..
Reply
0
0
01-06-2016, 03:07 PM
#7
mkturbo.com


iTrader: (24)
Join Date: May 2006
Location: Charleston SC
Posts: 15,176
Total Cats: 1,680
Update:
Still no news from engine builder but received something in the mail
Yonaka aluminum radiator for 90-97 miata with 2 fans.
It was around $190 usd shipped (bought in Canada and they shipped from Canadian warehouse)
Welds don't look too bad. I mean after all if it doesn't leak and performs well then it's money well spent
I am a little disappointed even at $200 that some of the fins are damaged. Am I asking too much?
Fans are included but I might run just one. If I do, do you think I should block off the other side so air gets properly sucked out?
The cap
I guess I'll do more review when it's bolted on and when the car runs. I weighted it by hand and it's a heavier unit than the oem replacement I have. Removing 1 fan might lighten it. We'll see..
Reply
0
0
 01-07-2016, 07:11 AM
#10

I just ordered that exact same radiator from a seller on Ebay. It came with a trans cooler as well. Some of the fins were slightly damaged when it arrived as well, but honestly, for the money it doesn't matter. A bit cheaper but probably because freedom bucks.
I also used a stock fan in mine with a coolant reroute. It takes forever for the thing to warm up and you can physically feel the heat gradient in the radiator when the fan is running. Try running the slim fans and if you find they are not working trim up the stock ones to fit (you can run the A/C fan if you have a Megasquirt or you can wire them together). I had to mount some outdoor trim material along the stock fans to seal up and gaps. I am really impressed with how inexpensive the radiator is and how well it conducts heat. Fitment was pretty good as well.
I also used a stock fan in mine with a coolant reroute. It takes forever for the thing to warm up and you can physically feel the heat gradient in the radiator when the fan is running. Try running the slim fans and if you find they are not working trim up the stock ones to fit (you can run the A/C fan if you have a Megasquirt or you can wire them together). I had to mount some outdoor trim material along the stock fans to seal up and gaps. I am really impressed with how inexpensive the radiator is and how well it conducts heat. Fitment was pretty good as well.
Reply
0
0
01-07-2016, 03:15 PM
#11
mkturbo.com
iTrader: (24)
Join Date: May 2006
Location: Charleston SC
Posts: 15,176
Total Cats: 1,680
I just ordered that exact same radiator from a seller on Ebay. It came with a trans cooler as well. Some of the fins were slightly damaged when it arrived as well, but honestly, for the money it doesn't matter. A bit cheaper but probably because freedom bucks.
I also used a stock fan in mine with a coolant reroute. It takes forever for the thing to warm up and you can physically feel the heat gradient in the radiator when the fan is running. Try running the slim fans and if you find they are not working trim up the stock ones to fit (you can run the A/C fan if you have a Megasquirt or you can wire them together). I had to mount some outdoor trim material along the stock fans to seal up and gaps. I am really impressed with how inexpensive the radiator is and how well it conducts heat. Fitment was pretty good as well.
I also used a stock fan in mine with a coolant reroute. It takes forever for the thing to warm up and you can physically feel the heat gradient in the radiator when the fan is running. Try running the slim fans and if you find they are not working trim up the stock ones to fit (you can run the A/C fan if you have a Megasquirt or you can wire them together). I had to mount some outdoor trim material along the stock fans to seal up and gaps. I am really impressed with how inexpensive the radiator is and how well it conducts heat. Fitment was pretty good as well.
Reply
0
0
01-07-2016, 07:21 PM
#12
Junior Member
Thread Starter
Join Date: Apr 2011
Location: vancouver, bc
Posts: 116
Total Cats: 5
UPDATE:
So I called the engine builder today. He told me upon disassembly, he found out that the rod bearings on cylinder 1 and 4 were squashed. He measured everything and it seems still within specs. He told me the failure could come from low oil pressure. He questioned about my oem oil cooler and said it would be a good idea to replace the oil cooler as well as the oil pump as there were some marks possibily from a lack of oil.
He also said my crankshaft is done. Anyone know where's a good place to buy one or have one for sale? :P
Motor is a bp6d which I believe is identical to the Bp4w block wise.
Reply
0
0
03-05-2016, 02:54 PM
#13
Junior Member
Thread Starter
Join Date: Apr 2011
Location: vancouver, bc
Posts: 116
Total Cats: 5
Update:
It's been a while guys. Got an update from the engine builder that he sourced most of the parts for the build.
Going to run King XP racing bearings. Crank is going to get balanced.
Now I'm looking for some options.
I'm looking to get an supermiata harmonic balancer, BE oil pump, trigger wheel with more tooth, and most likely a external oil cooler.
I read about both the supermiata and ATI damper and it seems like everyone prefers the SPM damper because it's lighter and cheaper. I most likely would go for that although 949racing is OOS right now.
Any trigger wheel recommendation? Running MS3 basic from reverent.
I have something in mind for oil cooler. Will keep updated once I get it
Reply
0
0
06-22-2016, 11:59 PM
#14
Junior Member
Thread Starter
Join Date: Apr 2011
Location: vancouver, bc
Posts: 116
Total Cats: 5
wow it's been quite a few months since last update.
I've been busy with work so I had no time to work on the car. Now I have a week of free time so I'm going to do as much as I can.
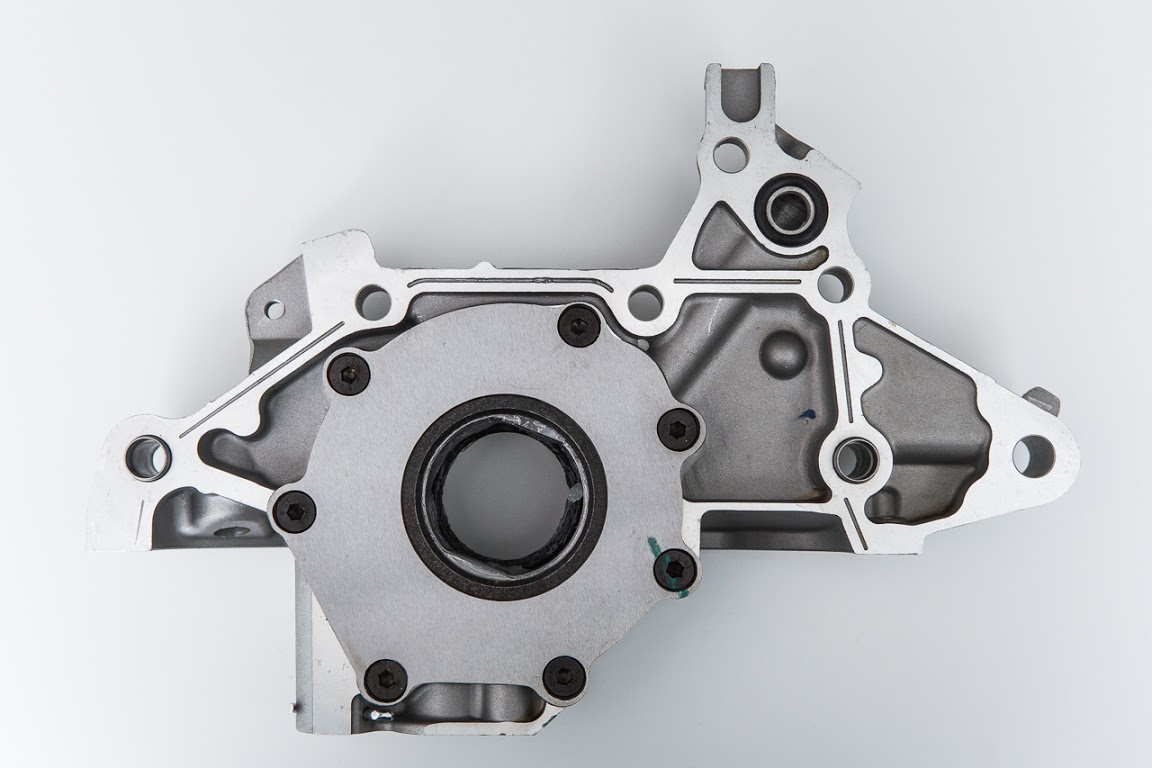
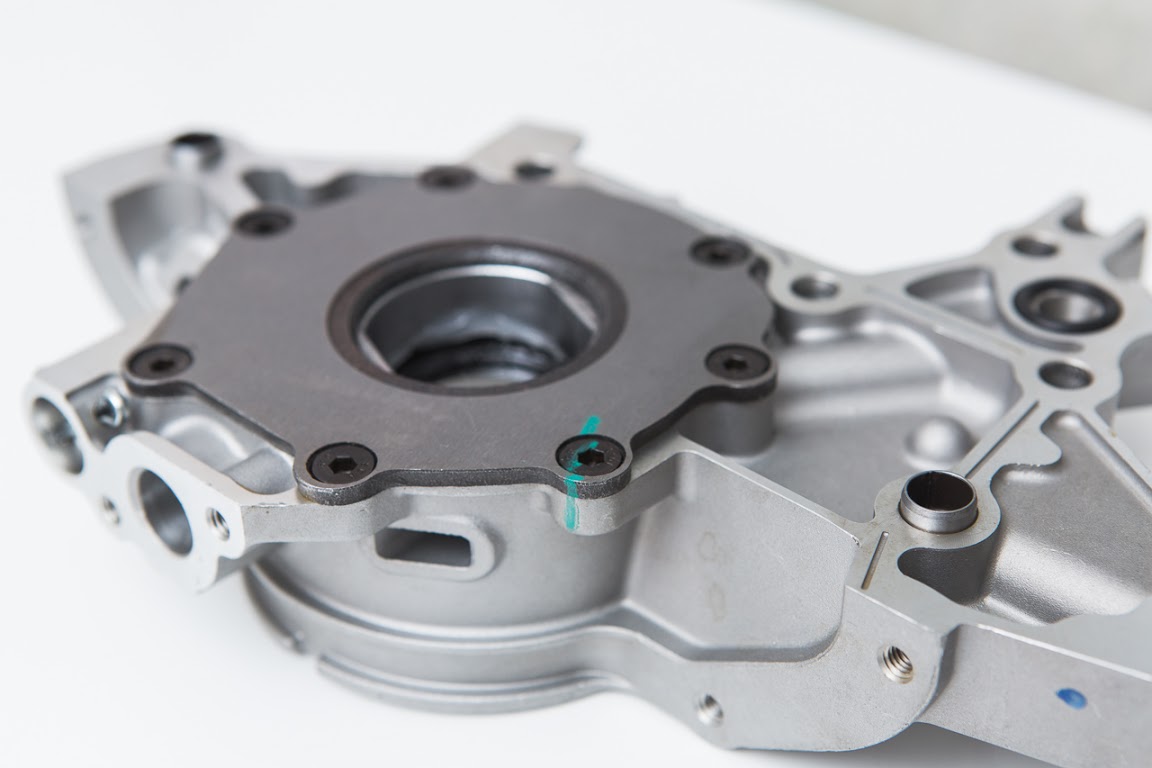
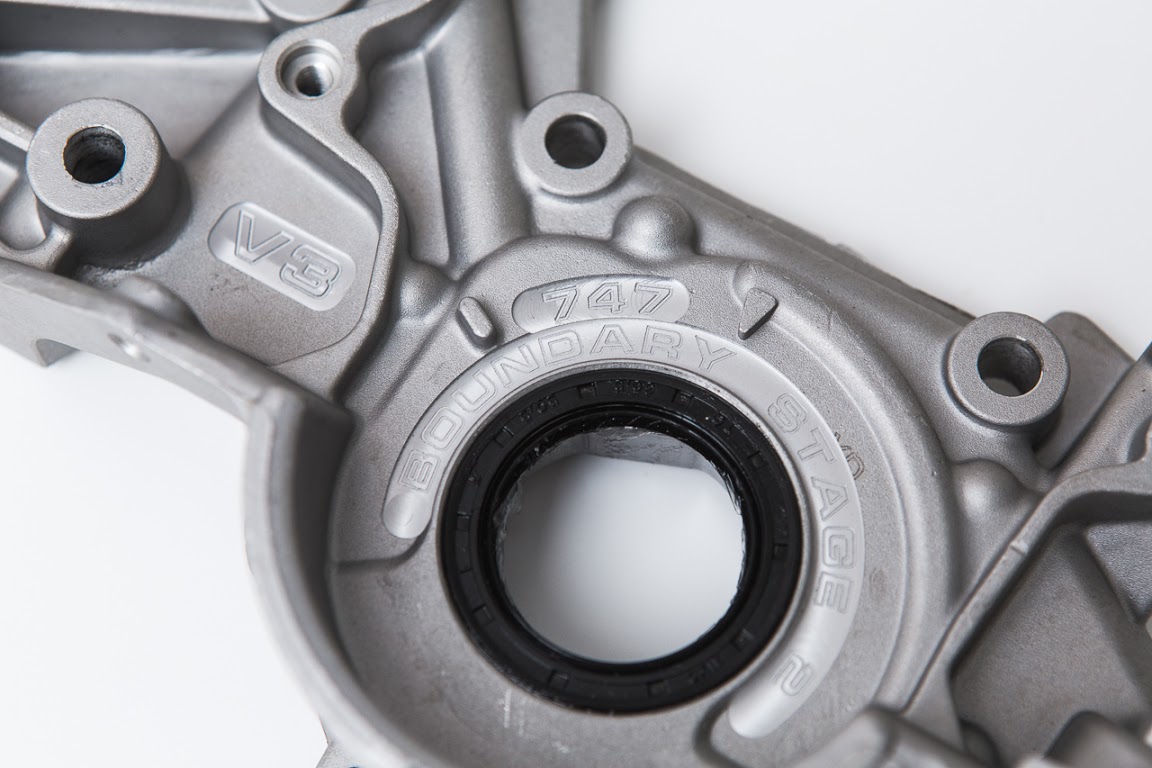
So far I've sent the motor in along with the 949racing damper, and Boundary Engineering V3 oil pump. It'll be balanced on oem BP6D crank and rods/pistons on 10.5:1 compression. I know you guys would be like "wtf why no forged internals!?" and my answer is that I wanted to keep the car relatively stock. I guess it's sort of OEM+
I wanted to do a quick review on the Boundary Engineering oil pump. I'm actually quite stoked to get this piece. It's one of the nicer pieces in the build and I do want to show you guys what you are getting if you do decide to buy.
I really don't think there's a nicer pump with billet gear when it comes to this for our cars. It's also reasonably priced and I bought it for a piece of mind. I know eventually I can go for a crazier build with this pump if needed. It might be a bit overkill for my build but I'm not complaining
The one I bought is the Stage II pump:
Stage II: Miata\Protege\Escort BP Oil Pump ? Boundary
It was necessary to buy the Stage II oil pump for the VVT motor.
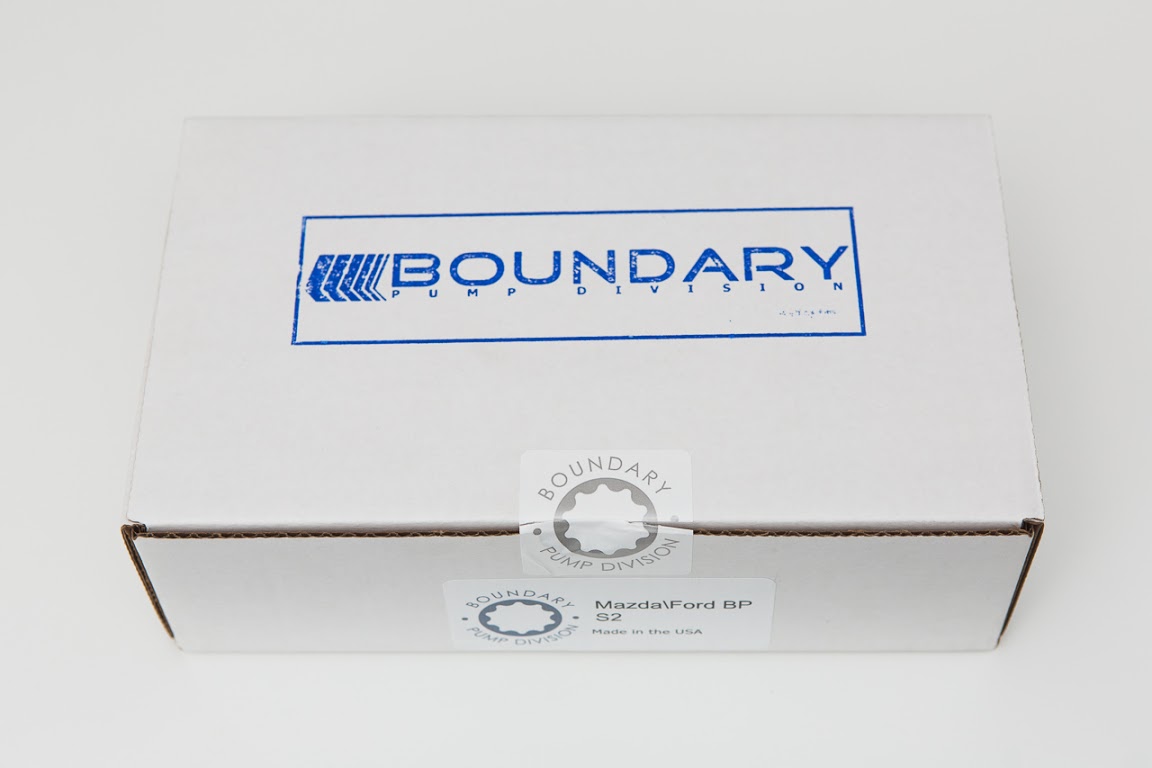
The box. Well packaged and shipped quickly
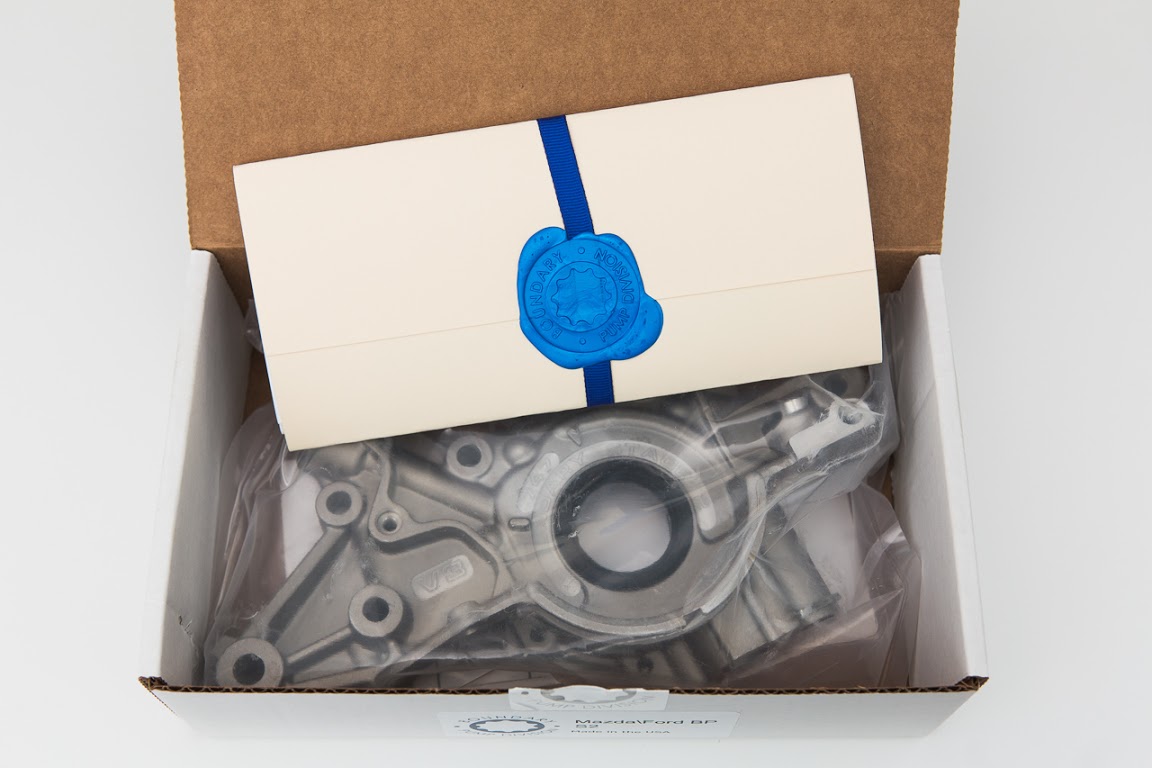
Unboxed. The pump sealed in a plastic bag.
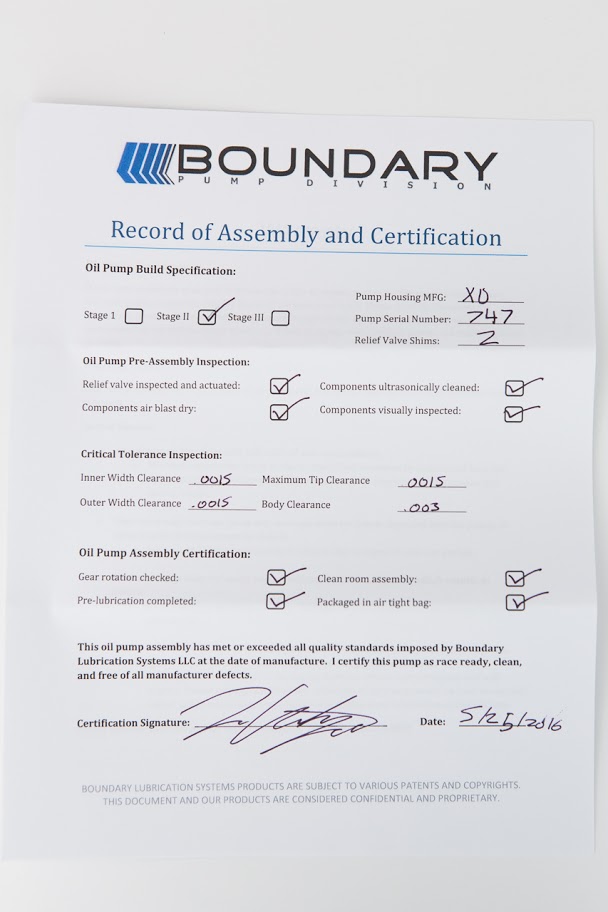
Specs of the pump.
The part is clean when opened.
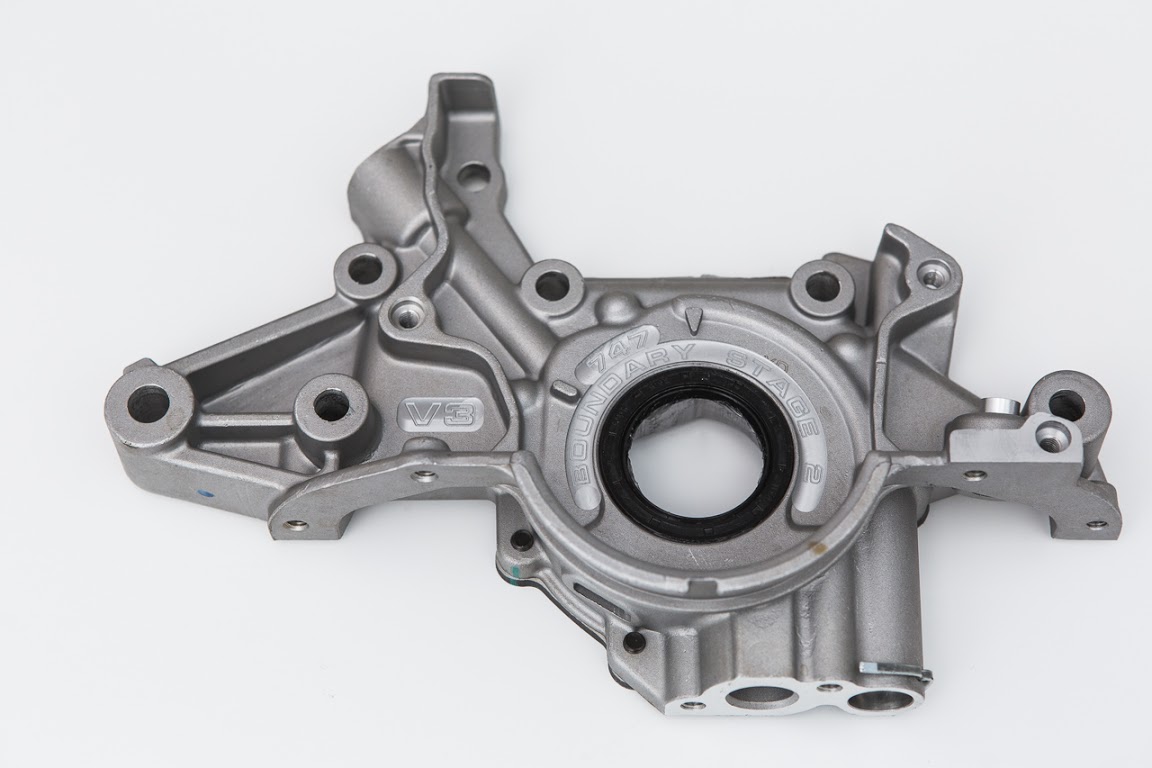
Some more pics
Overall I can't be more impressed. 10/10. It's being put together by my engine builder so hoepfully no more problems from here on. I was told that the motor was previously failed was largely possible the fact that the last guy who assembled my block applied too much RTV which resulted in low oil pressure. Lesson learned :(
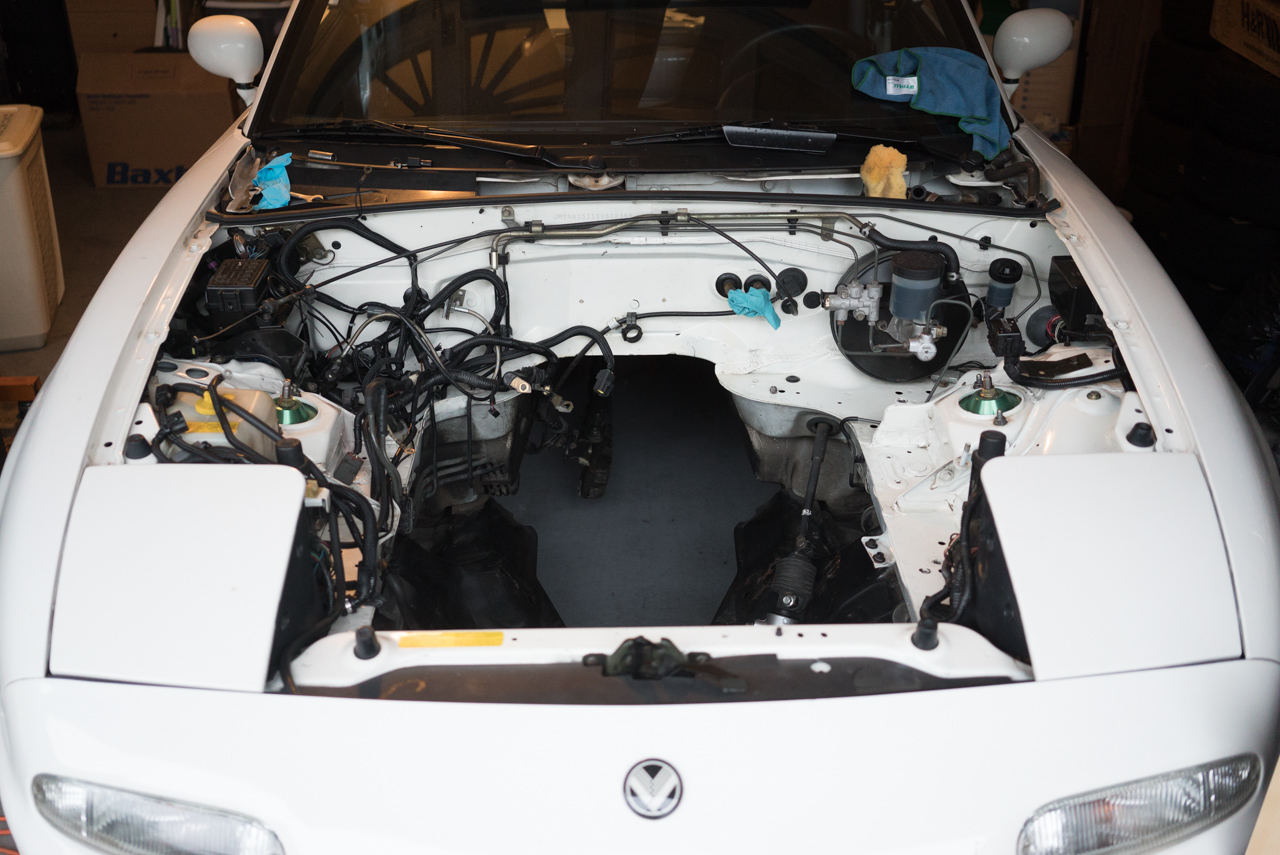
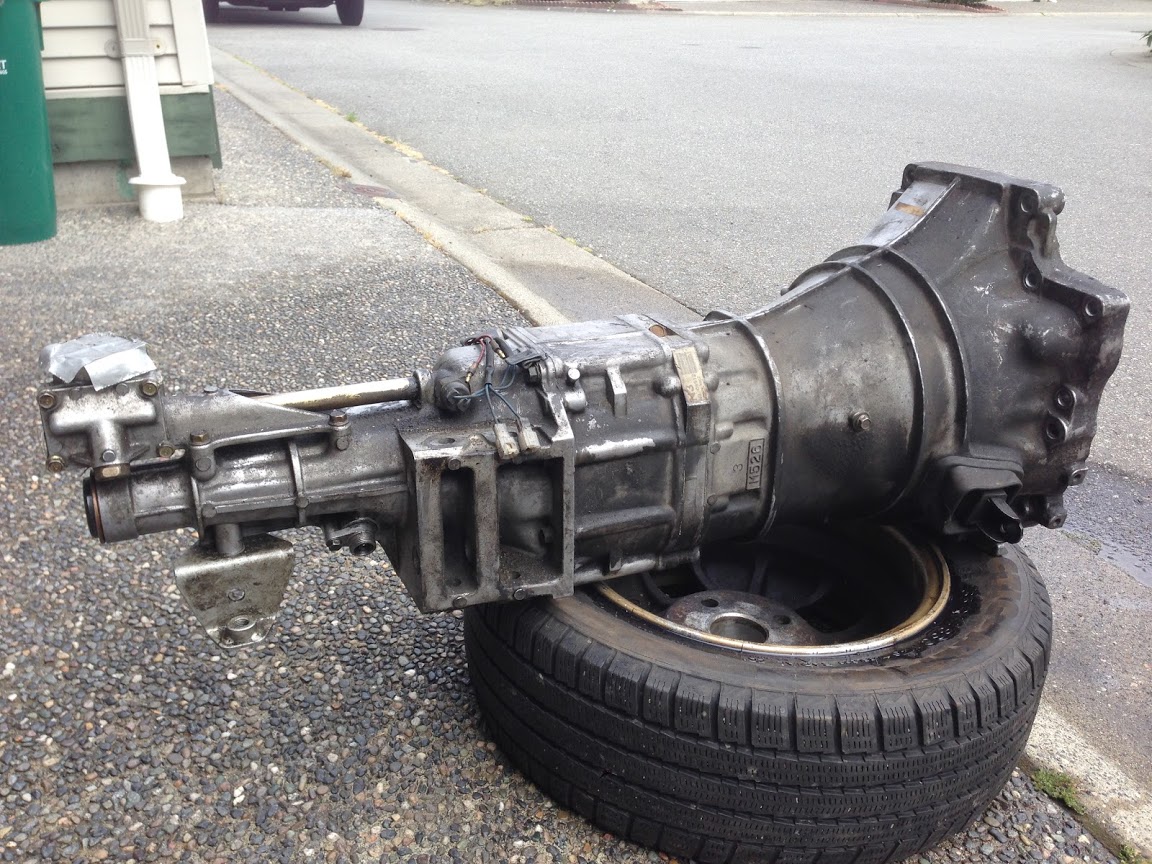
I also did some cleaning today. I don't know how you guys do it. It seemed so easy until I started cleaning mine. I used Simple Green with pressure washer. I should've used the Easy Off oven stuff. The PPF was the easier one to clean than the tranny.
PPF Before:

PPF After:

Tranny Before:
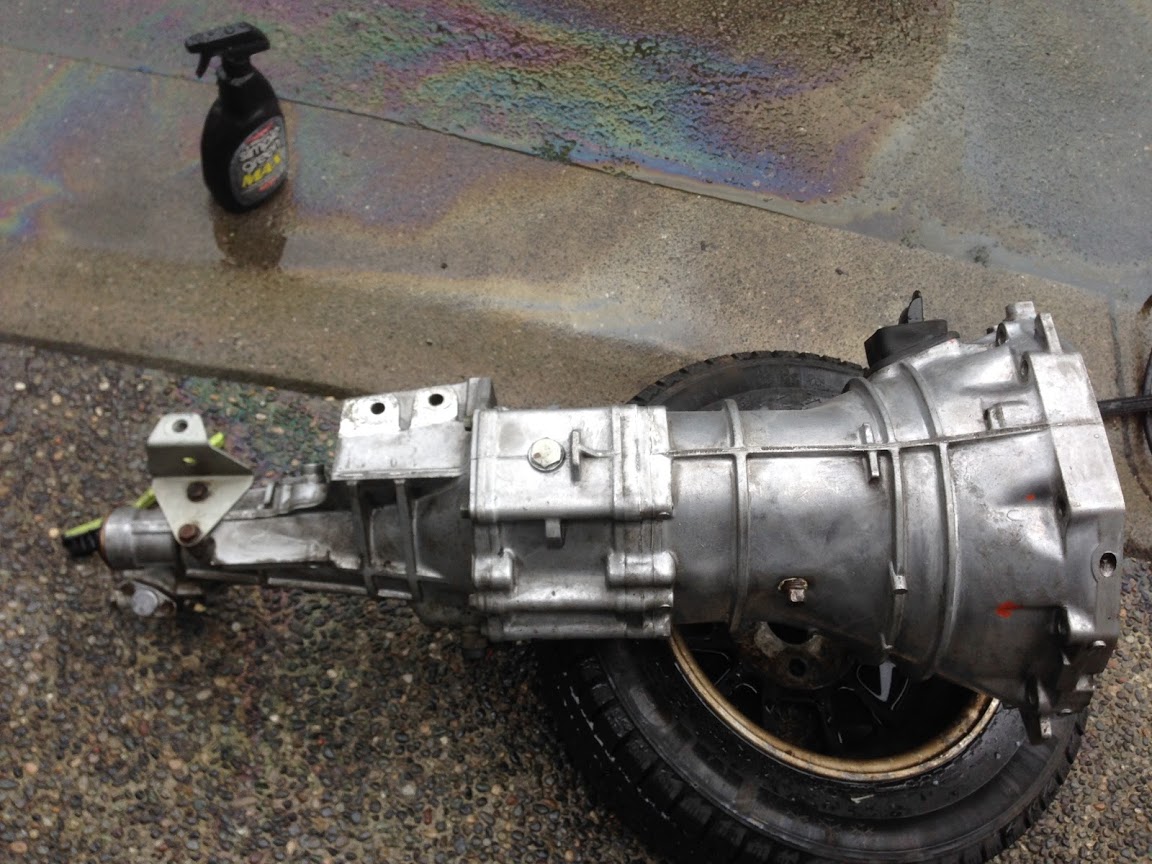
Tranny After:
UGGGLYYY
MUCH BETTER
Now I have a question: Do you guys clean off ALL the dirt and grease before spraying the tranny or just do your best?
I've been busy with work so I had no time to work on the car. Now I have a week of free time so I'm going to do as much as I can.
So far I've sent the motor in along with the 949racing damper, and Boundary Engineering V3 oil pump. It'll be balanced on oem BP6D crank and rods/pistons on 10.5:1 compression. I know you guys would be like "wtf why no forged internals!?" and my answer is that I wanted to keep the car relatively stock. I guess it's sort of OEM+
I wanted to do a quick review on the Boundary Engineering oil pump. I'm actually quite stoked to get this piece. It's one of the nicer pieces in the build and I do want to show you guys what you are getting if you do decide to buy.
I really don't think there's a nicer pump with billet gear when it comes to this for our cars. It's also reasonably priced and I bought it for a piece of mind. I know eventually I can go for a crazier build with this pump if needed. It might be a bit overkill for my build but I'm not complaining
The one I bought is the Stage II pump:
Stage II: Miata\Protege\Escort BP Oil Pump ? Boundary
It was necessary to buy the Stage II oil pump for the VVT motor.
The box. Well packaged and shipped quickly
Unboxed. The pump sealed in a plastic bag.
Specs of the pump.
The part is clean when opened.
Some more pics
Overall I can't be more impressed. 10/10. It's being put together by my engine builder so hoepfully no more problems from here on. I was told that the motor was previously failed was largely possible the fact that the last guy who assembled my block applied too much RTV which resulted in low oil pressure. Lesson learned :(
I also did some cleaning today. I don't know how you guys do it. It seemed so easy until I started cleaning mine. I used Simple Green with pressure washer. I should've used the Easy Off oven stuff. The PPF was the easier one to clean than the tranny.
PPF Before:
PPF After:
Tranny Before:
Tranny After:
UGGGLYYY
MUCH BETTER
Now I have a question: Do you guys clean off ALL the dirt and grease before spraying the tranny or just do your best?
Reply
0
0
 06-24-2016, 01:08 AM
#16
Junior Member
Thread Starter
Join Date: Apr 2011
Location: vancouver, bc
Posts: 116
Total Cats: 5
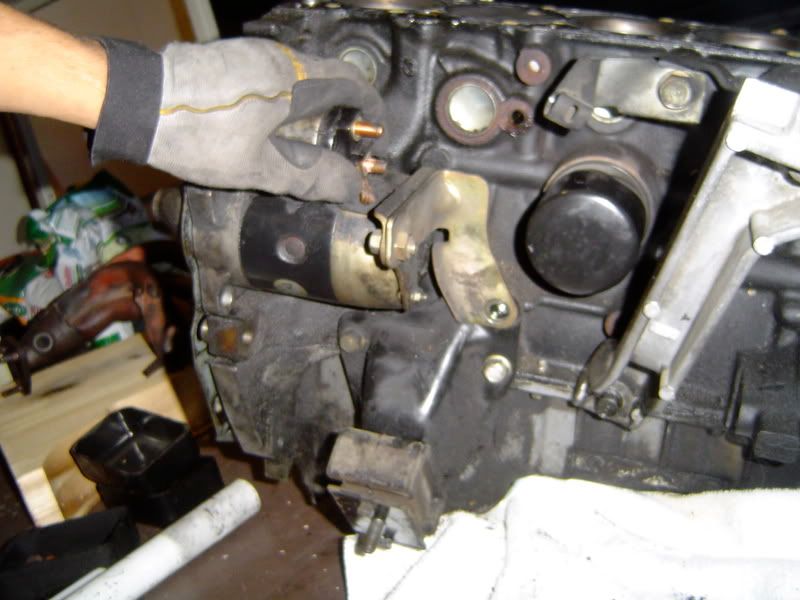
Paint time!

I started doing some cleaning and painting today but I noticed my starter motor is missing a bracket. It's the one connecting to the bracket in the front here. Necessary to buy a replacement?
A little heartbreaking to see how the last guy worked on the car. Missing pieces here and there.
Mine

bracket.
Reply
0
0


 07-10-2016, 02:19 AM
#20
Junior Member
Thread Starter
Join Date: Apr 2011
Location: vancouver, bc
Posts: 116
Total Cats: 5
Update:
Woo hooo i ordered something that I wanted for a very long time. Will post update once I get it!
Still waiting for engine to come back so I guess there's not much to do other than to finish up installing gauges. I am working on something a little different tomorrow. Will update!
Here's a newly edited video from 2013 track day. I miss it dearly so hopefully I can make it in September for the shake down.
VIDEO
Reply
0
0


