240_'s Project Paint
 04-24-2011, 08:30 PM
#1
Elite Member
Thread Starter
iTrader: (2)

Join Date: May 2007
Location: Cromwell, Connecticut
Posts: 2,604
Total Cats: 16
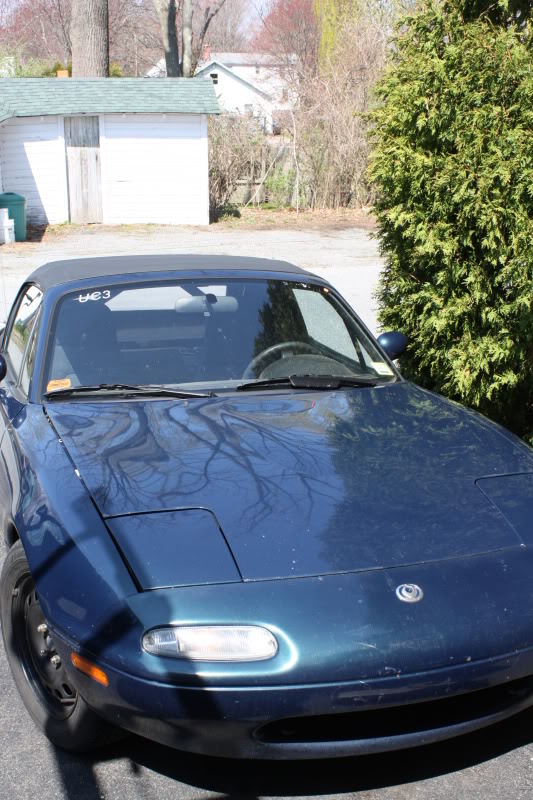
Finally. . . Its time for me to start my build thread.
Things are going to be SLOW going with this project. The project is happening at my parents house (~50 miles away from my apt, ~35 from work) , and my work schedule is a bit crazy right now.
My goal: Finish by the end of June
A very ROUGH outline of the project:
- rustoleum the interior and trunk black. Por15 where needed
- Complete the rocker patch panels and cover all welds with POR15.
- Use frame rust converter behind the patch panels
- seam seal around all the patches and make sure its done RIGHT this time.
- strip the body down as far as 60 grit will get me
- epoxy primer the entire body before starting bodywork
- body work... high build... wetsand... etc.
- Base / Clear
- Wetsand/ Buff
- install CF headlight cover and TougeRun Front Lip
- Install new race seat and harness
The color:
Lotus Magnetic Blue. Its a very heavy metalic blue found on the elise and exige

The facilities:
Just like when I painted my 240sx in highschool I will be setting up a portable garage (20' x 12'). I have a large (~3' dia.) vent fan hooked to a small briggs. I will be putting a filter on the fan to keep my parents possessions from turning blue.
The Fan. . .

The tent from when I set it up in '06 (setup will be the same this time):
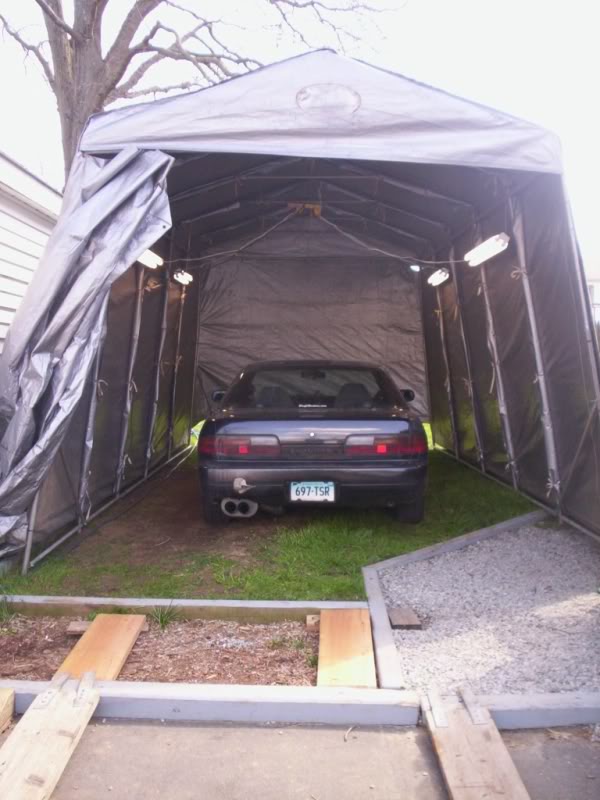
More to come. I will try to actually document this build although I never seem to keep up with them.
Things are going to be SLOW going with this project. The project is happening at my parents house (~50 miles away from my apt, ~35 from work) , and my work schedule is a bit crazy right now.
My goal: Finish by the end of June
A very ROUGH outline of the project:
- rustoleum the interior and trunk black. Por15 where needed
- Complete the rocker patch panels and cover all welds with POR15.
- Use frame rust converter behind the patch panels
- seam seal around all the patches and make sure its done RIGHT this time.
- strip the body down as far as 60 grit will get me
- epoxy primer the entire body before starting bodywork
- body work... high build... wetsand... etc.
- Base / Clear
- Wetsand/ Buff
- install CF headlight cover and TougeRun Front Lip
- Install new race seat and harness
The color:
Lotus Magnetic Blue. Its a very heavy metalic blue found on the elise and exige
The facilities:
Just like when I painted my 240sx in highschool I will be setting up a portable garage (20' x 12'). I have a large (~3' dia.) vent fan hooked to a small briggs. I will be putting a filter on the fan to keep my parents possessions from turning blue.
The Fan. . .
The tent from when I set it up in '06 (setup will be the same this time):
More to come. I will try to actually document this build although I never seem to keep up with them.

Reply
 0
0

0
 04-24-2011, 08:35 PM
#3
Elite Member
Thread Starter
iTrader: (2)
Join Date: May 2007
Location: Cromwell, Connecticut
Posts: 2,604
Total Cats: 16
4/24/2011
Didnt want to clog up the Intro... so here is todays short amount of work i got done between socializing and easter dinner :
-Put winter tires on the thing. Figure I care less about getting these covered in bondo dust.
- Started gutting the interior but then it rained. Ill try to get down there to finish that during the week if I'm not stuck at work.
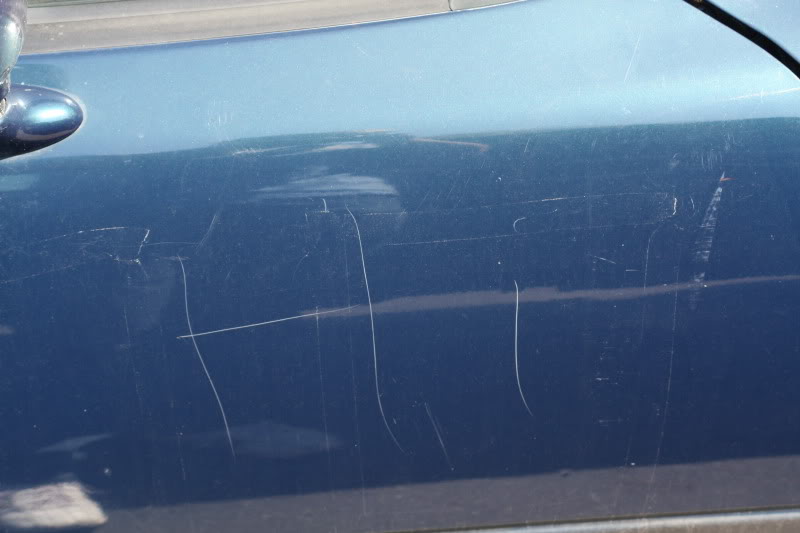
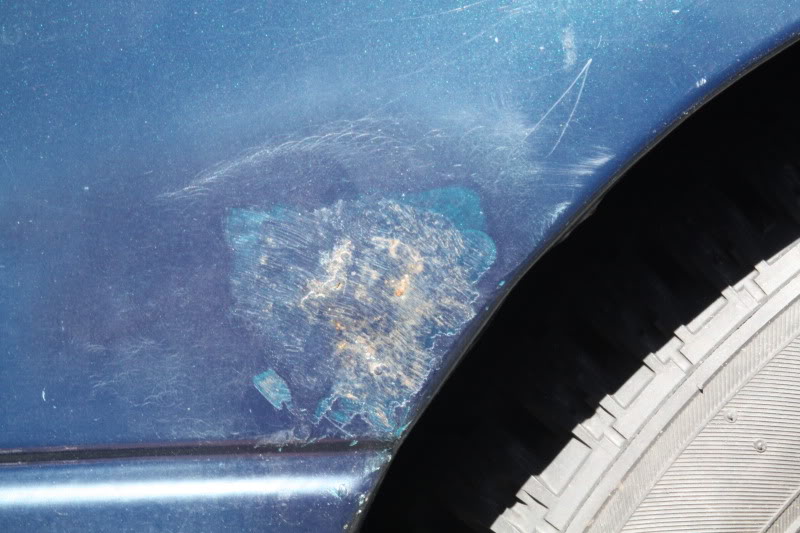
And to show how ready I am to paint this thing. . . I keyed my own car a few weeks ago. (this door has a rust hole and is getting replaced anyway)
I'll post up more pics of my goodies next time I am at my parents. Spent $150ish on supplies at home depot this weekend including lights for the tent, masking paper, tape, etc. Also have a set of brand new spray guns!
Didnt want to clog up the Intro... so here is todays short amount of work i got done between socializing and easter dinner :
-Put winter tires on the thing. Figure I care less about getting these covered in bondo dust.
- Started gutting the interior but then it rained. Ill try to get down there to finish that during the week if I'm not stuck at work.
And to show how ready I am to paint this thing. . . I keyed my own car a few weeks ago. (this door has a rust hole and is getting replaced anyway)
I'll post up more pics of my goodies next time I am at my parents. Spent $150ish on supplies at home depot this weekend including lights for the tent, masking paper, tape, etc. Also have a set of brand new spray guns!
Reply
0
0
05-03-2011, 09:26 PM
#4
Elite Member
Thread Starter
iTrader: (2)
Join Date: May 2007
Location: Cromwell, Connecticut
Posts: 2,604
Total Cats: 16
5/1 Interior and Misc.
PROGRESS!
finished gutting the interior last weekend. I am installing a new carpet after paint, along with racing seats. . . So I took this opportunity to tear everything out and paint the interior.
I used Rustoleum on the rear deck and transmission tunnel cause I didnt have enough POR15 to do everything, and I am cheap as hell.
The floor boards and trunk got POR15. Before anyone asks why I brushed it instead of spray, my main intention was to prevent rust, not make it look nice. I wasnt ---- about moving wires out of my way or removing every little thing, but I think it came out pretty nice. So here are some pics:
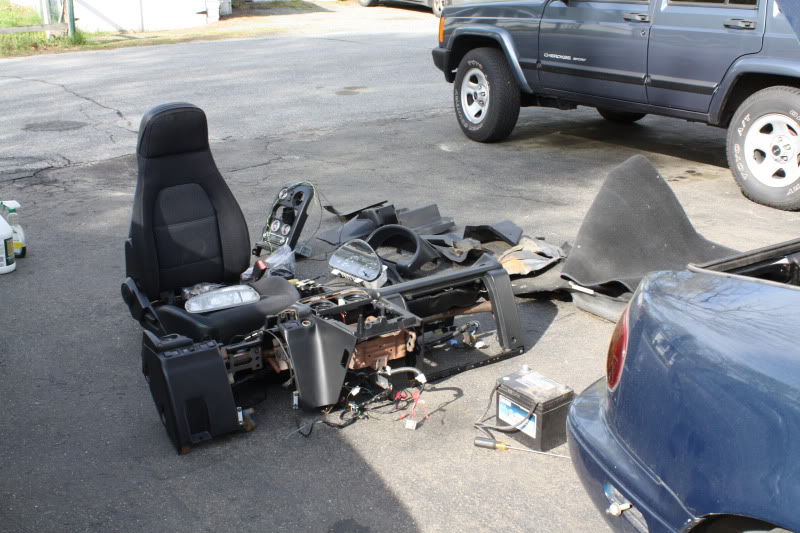
After:
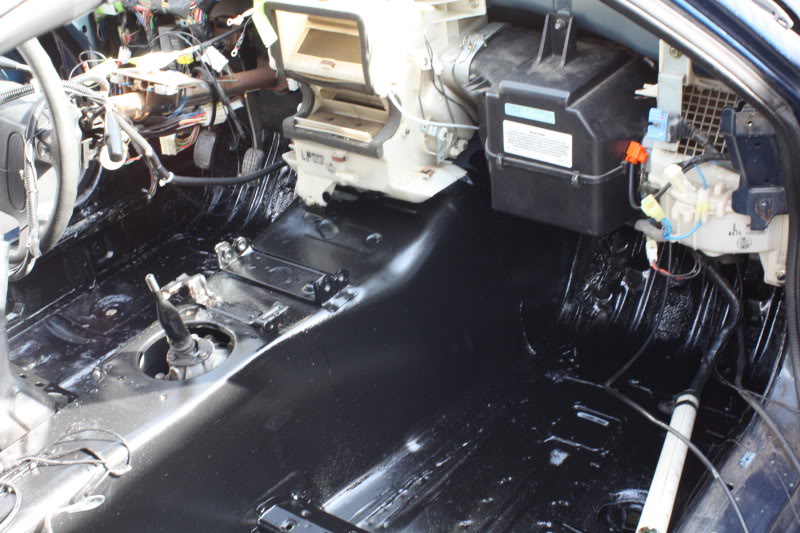
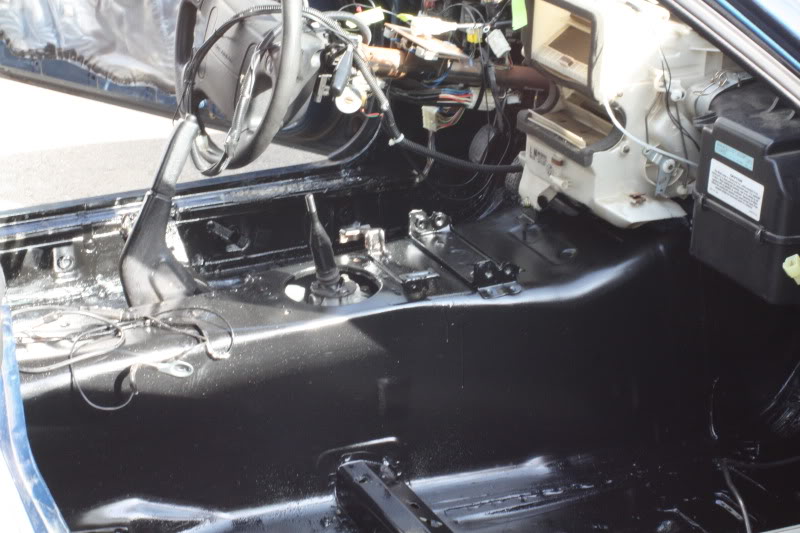
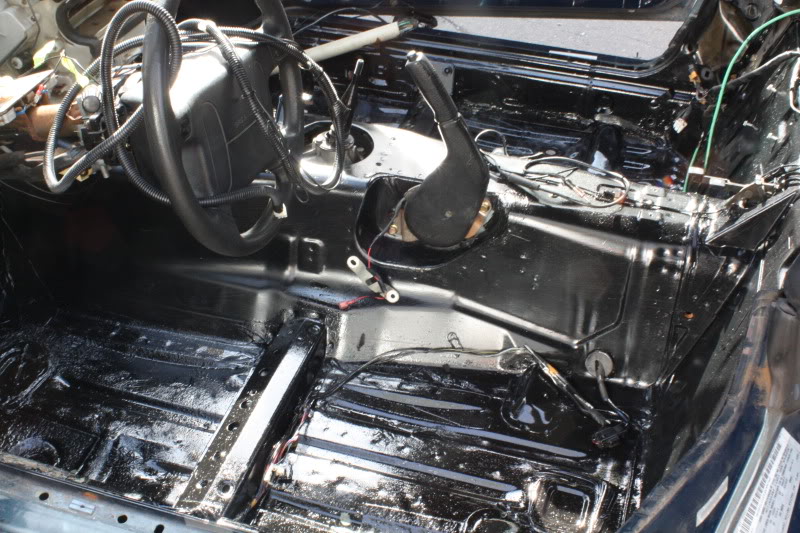
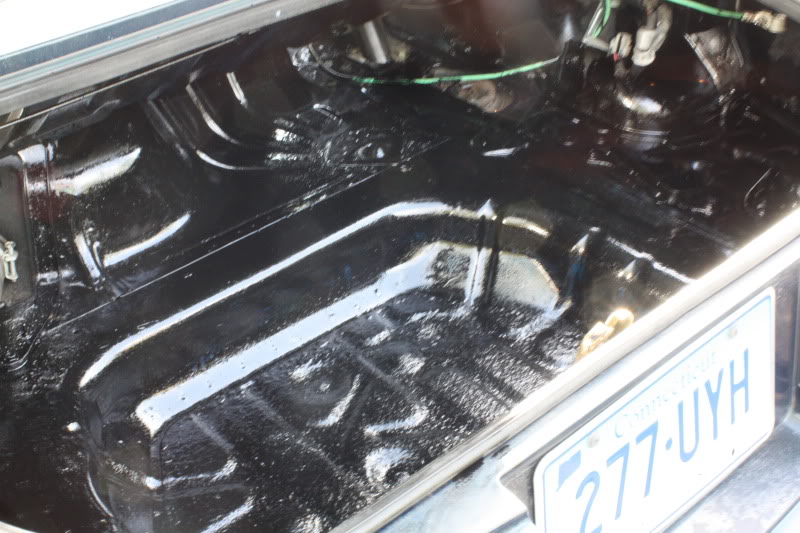
(yes I know I missed stuff in the trunk)
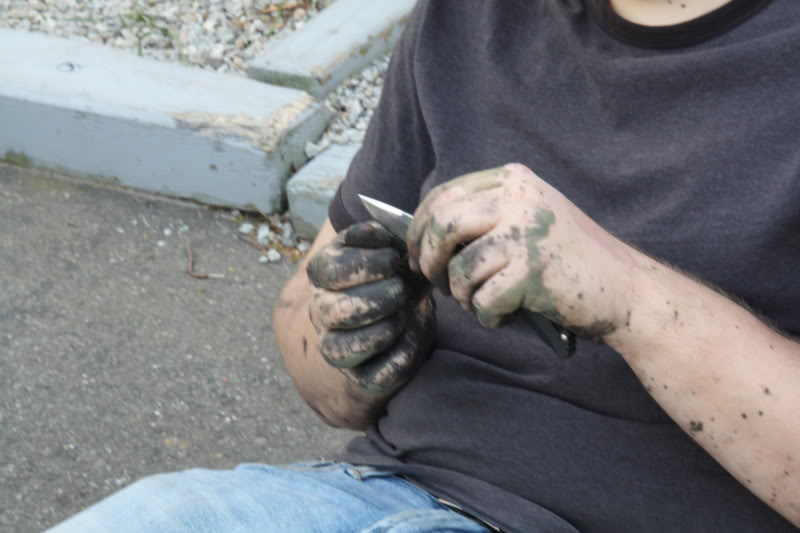
And because I am an idiot and didnt wear gloves:
I also used eastwood Frame Coating to get behind my patch panels and in my rockers. The stuff seemed to work great. It comes in a big can with a long tube and a nozzle designed to spray in a fan pattern. I covered the insides of the rockers and behind as much **** as I could get to from the access holes inside the car.
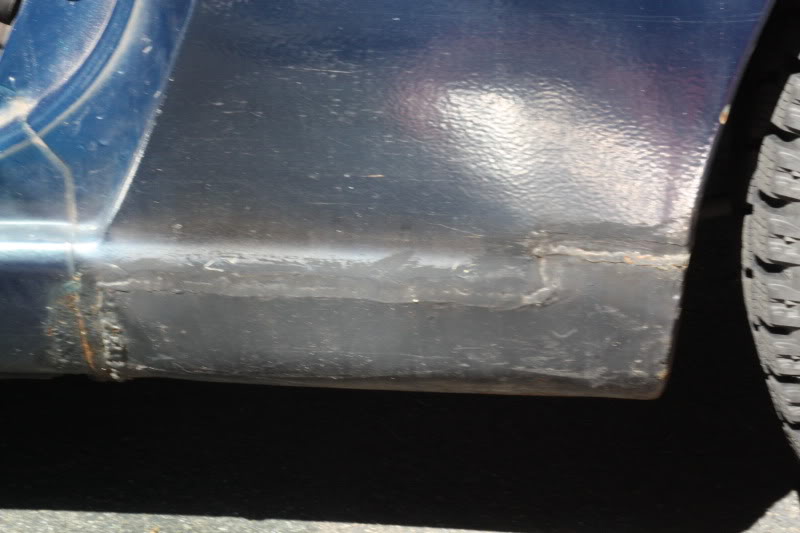
Here are some pics of the patch panels. I still need to grind the welds, seal them up with seam sealer on the bottom, and por15 them / epoxy primmer.
And last fall I rolled my fenders quickly. I ran into rust doing those too, so this is gunna take some massaging with a hammer to avoid mass amounts of filler:
PROGRESS!
finished gutting the interior last weekend. I am installing a new carpet after paint, along with racing seats. . . So I took this opportunity to tear everything out and paint the interior.
I used Rustoleum on the rear deck and transmission tunnel cause I didnt have enough POR15 to do everything, and I am cheap as hell.
The floor boards and trunk got POR15. Before anyone asks why I brushed it instead of spray, my main intention was to prevent rust, not make it look nice. I wasnt ---- about moving wires out of my way or removing every little thing, but I think it came out pretty nice. So here are some pics:
After:
(yes I know I missed stuff in the trunk)
And because I am an idiot and didnt wear gloves:
I also used eastwood Frame Coating to get behind my patch panels and in my rockers. The stuff seemed to work great. It comes in a big can with a long tube and a nozzle designed to spray in a fan pattern. I covered the insides of the rockers and behind as much **** as I could get to from the access holes inside the car.
Here are some pics of the patch panels. I still need to grind the welds, seal them up with seam sealer on the bottom, and por15 them / epoxy primmer.
And last fall I rolled my fenders quickly. I ran into rust doing those too, so this is gunna take some massaging with a hammer to avoid mass amounts of filler:
Reply
0
0
05-03-2011, 09:35 PM
#5
Elite Member
Thread Starter
iTrader: (2)
Join Date: May 2007
Location: Cromwell, Connecticut
Posts: 2,604
Total Cats: 16
5/3 Rear Bumper
Actually was able to sneak out of work after only 9 hours (amazing!) so I went down to my parents house and got a bit of work done.
Due to my homemade POS test pipe, my exhaust managed to burn thru my bumper and enlarge the hole. . . So I decided I wanted to cut the bumper as a lot of guys seem to be doing lately. I think I got it pretty symmetric all things considered. I decided not to cut off the rear posts because without a welder on hand to box the frames back up I didnt want to take all that strength out in case **knock on wood** I do ever get rear ended. I also may make some tow hooks at some point instead of keeping the stock ones. For now the stockers will get sandblasted and POR15'ed...the posts will also go black.
Here are the pics (just iphone 4):
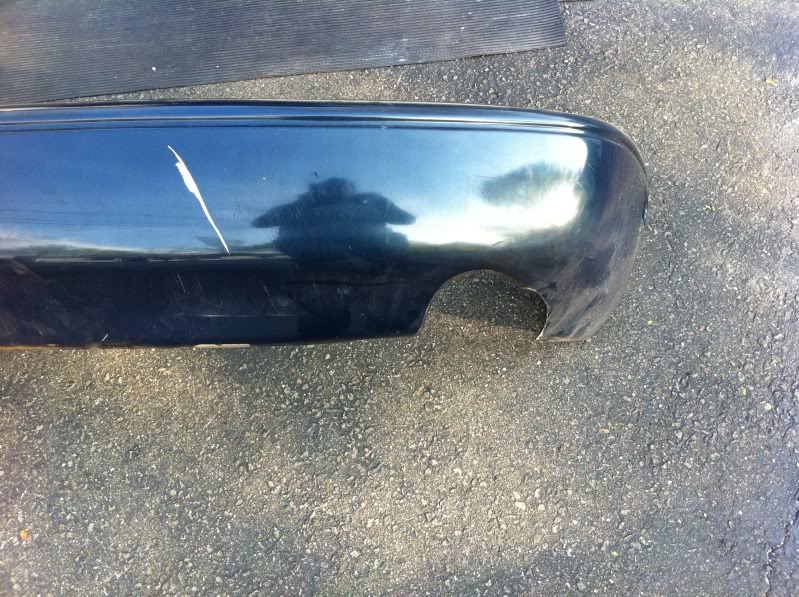
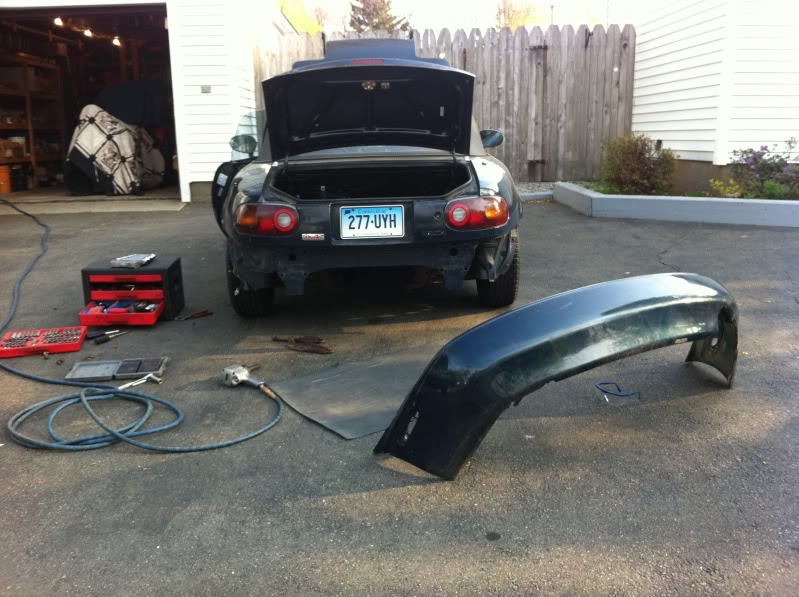
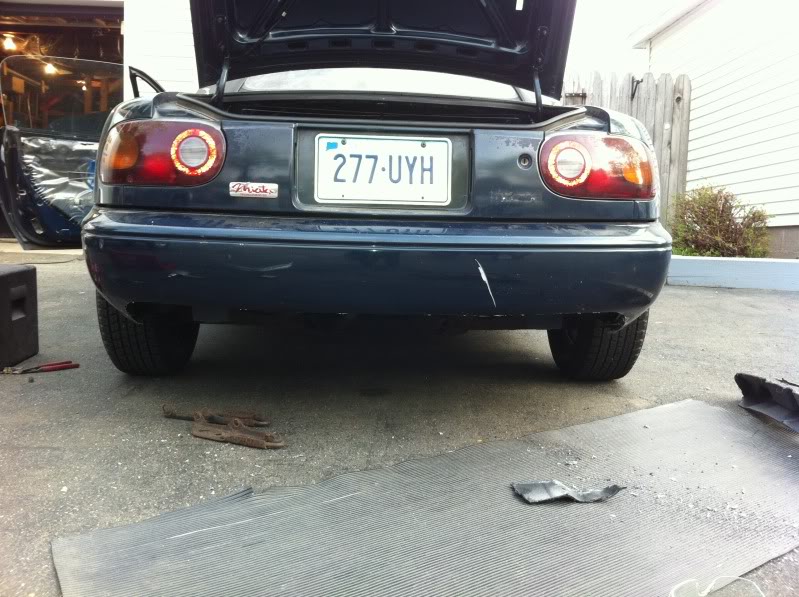
The edge will be cleaned up and finalized more when I start body work. The bumper isnt bolted in for this pic... and the exhaust is off (obviously)
Actually was able to sneak out of work after only 9 hours (amazing!) so I went down to my parents house and got a bit of work done.
Due to my homemade POS test pipe, my exhaust managed to burn thru my bumper and enlarge the hole. . . So I decided I wanted to cut the bumper as a lot of guys seem to be doing lately. I think I got it pretty symmetric all things considered. I decided not to cut off the rear posts because without a welder on hand to box the frames back up I didnt want to take all that strength out in case **knock on wood** I do ever get rear ended. I also may make some tow hooks at some point instead of keeping the stock ones. For now the stockers will get sandblasted and POR15'ed...the posts will also go black.
Here are the pics (just iphone 4):
The edge will be cleaned up and finalized more when I start body work. The bumper isnt bolted in for this pic... and the exhaust is off (obviously)
Reply
0
0
05-03-2011, 10:33 PM
#6

Damn dude, how are you going to flaunt that you have a working car with it in pieces?
Good to see your finally painting this thing, if you want to finish off the fender rolling I have access to the tool for doing it rite. Also the cut bumper's lookin good. Making me want to start work on mine
Good to see your finally painting this thing, if you want to finish off the fender rolling I have access to the tool for doing it rite. Also the cut bumper's lookin good. Making me want to start work on mine
Reply
0
0
05-03-2011, 10:48 PM
#7
Elite Member
Thread Starter
iTrader: (2)
Join Date: May 2007
Location: Cromwell, Connecticut
Posts: 2,604
Total Cats: 16
I used a roller. But rust doesnt bend it breaks, lol.
Reply
0
0
 05-09-2011, 07:43 PM
#10
Elite Member
Thread Starter
iTrader: (2)
Join Date: May 2007
Location: Cromwell, Connecticut
Posts: 2,604
Total Cats: 16
Not much progress this weekend. Saturday I worked and then went Jet Skiing in between rain storms, sunday I worked on the car till it started raining and then moved on to other stuff.
-Got the rear bumper mostly stripped down
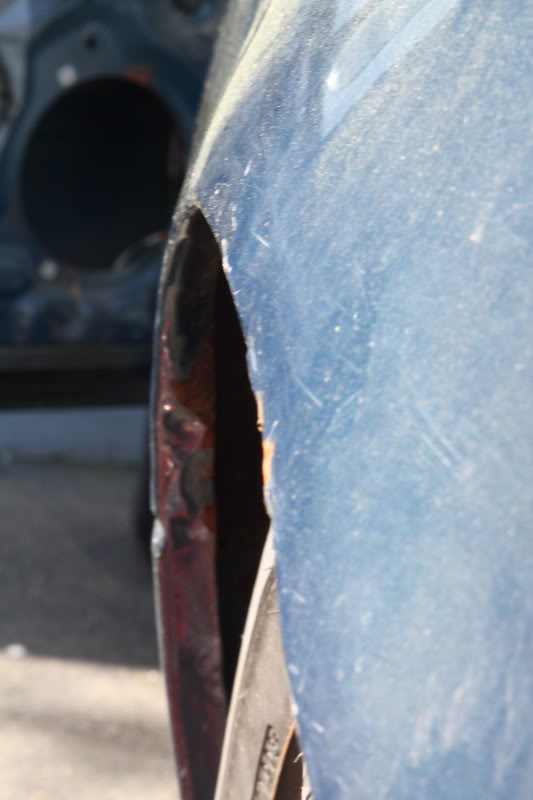
-Stripped the patch panels back down, finished grinding the welds down and applied seam sealer to the bottom seam
-Por-15ed the patch in the drivers wheel well. I couldnt get in there great with a welder or grinder so that patch is by no means sealed. I will be sealing it all up with seam sealer.
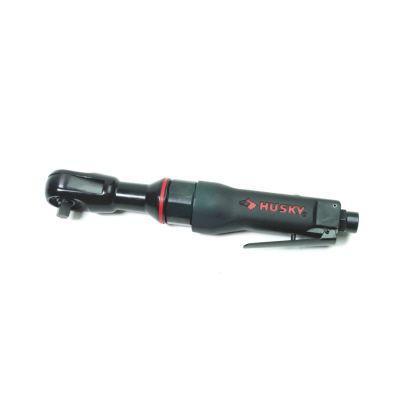
I also measured the tent frame so I could buy tarps cause the original one is shot. Went to home depot today and grabbed tarps. I hate that they dont actually sell tarps in true dimensions. I need a 20x30 not a F'in 19 x 29.5 you jackasses
Anyway. . . While I was at home depot I picked this sucker up:
3/8" air ratchet. Ive wanted one for so long.
BTW Martin I almost swung by your house saturday afternoon. I drove right by your house on my way home from Crystal Pond where I was jetskiing. I was still frozen tho and my GF and I figured you were hanging out with the Mrs. and the baby. Maybe next time.
-Got the rear bumper mostly stripped down
-Stripped the patch panels back down, finished grinding the welds down and applied seam sealer to the bottom seam
-Por-15ed the patch in the drivers wheel well. I couldnt get in there great with a welder or grinder so that patch is by no means sealed. I will be sealing it all up with seam sealer.
I also measured the tent frame so I could buy tarps cause the original one is shot. Went to home depot today and grabbed tarps. I hate that they dont actually sell tarps in true dimensions. I need a 20x30 not a F'in 19 x 29.5 you jackasses
Anyway. . . While I was at home depot I picked this sucker up:
3/8" air ratchet. Ive wanted one for so long.
BTW Martin I almost swung by your house saturday afternoon. I drove right by your house on my way home from Crystal Pond where I was jetskiing. I was still frozen tho and my GF and I figured you were hanging out with the Mrs. and the baby. Maybe next time.
Reply
0
0

 06-06-2011, 09:09 PM
#14
Elite Member
Thread Starter
iTrader: (2)
Join Date: May 2007
Location: Cromwell, Connecticut
Posts: 2,604
Total Cats: 16
OK its been a few weeks. . . Work has been NUTS, but i have gotten to work on the car a little bit.
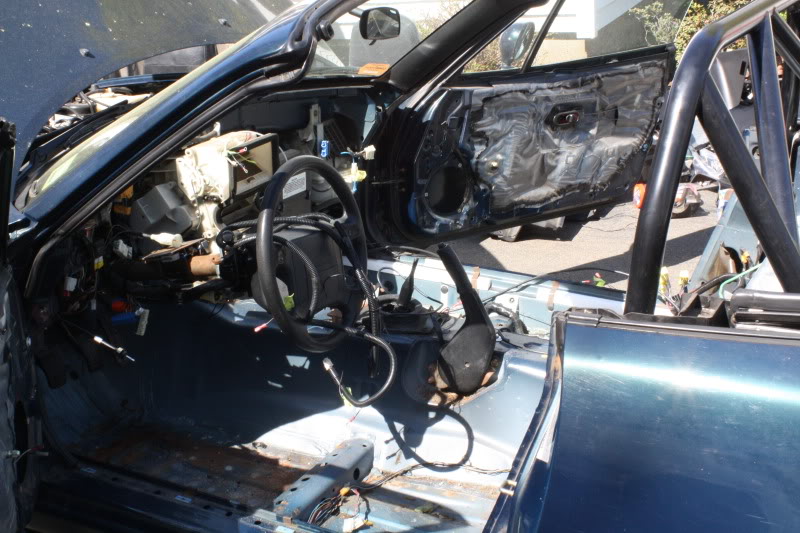
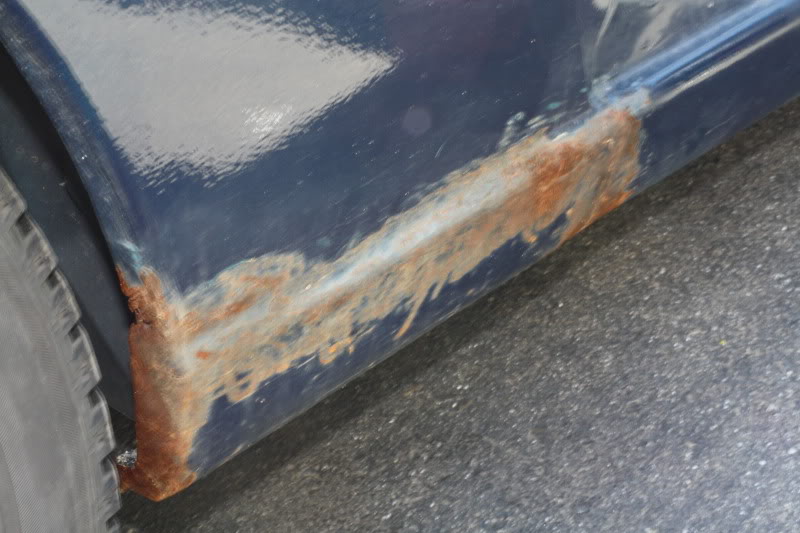
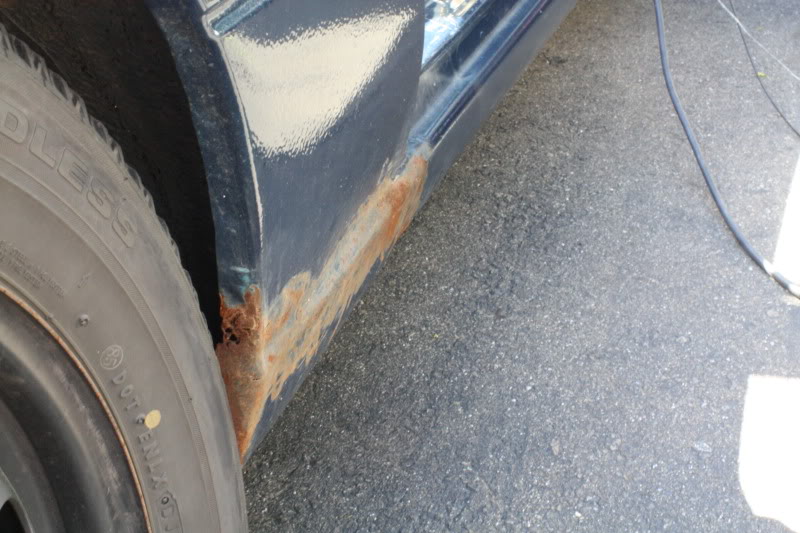
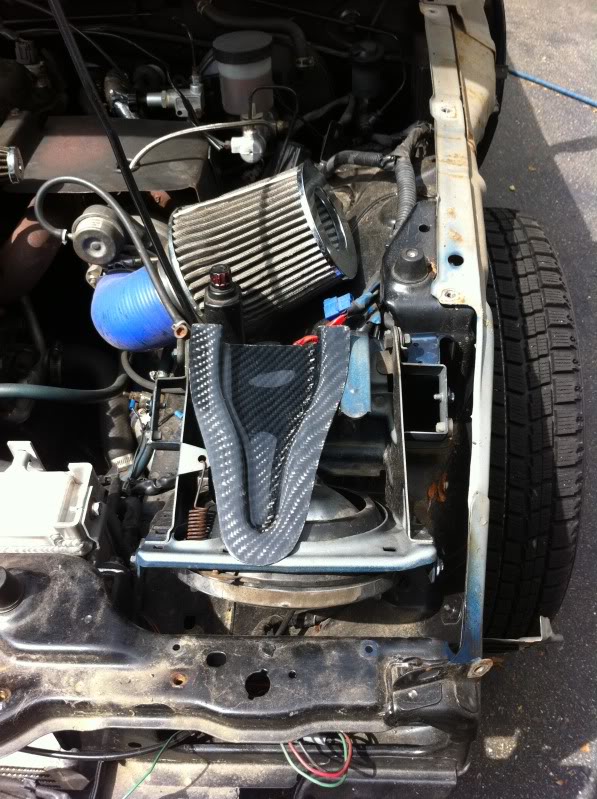
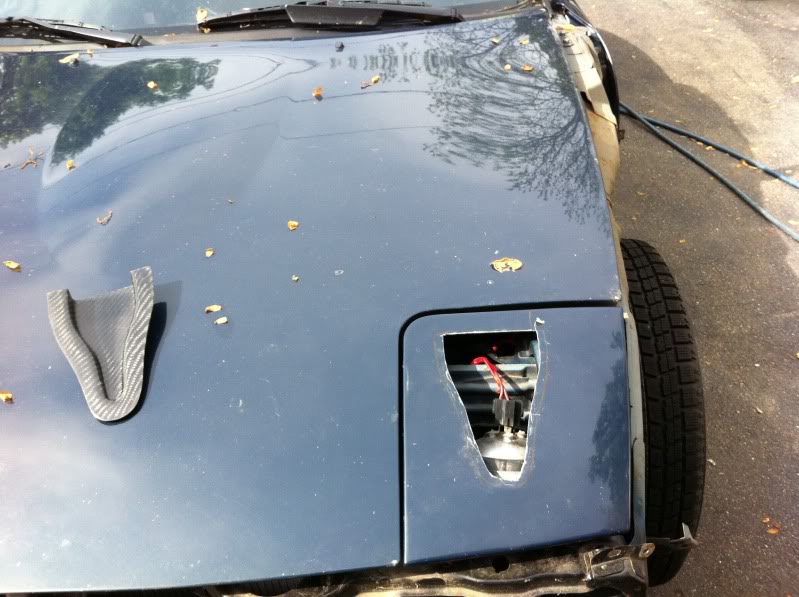
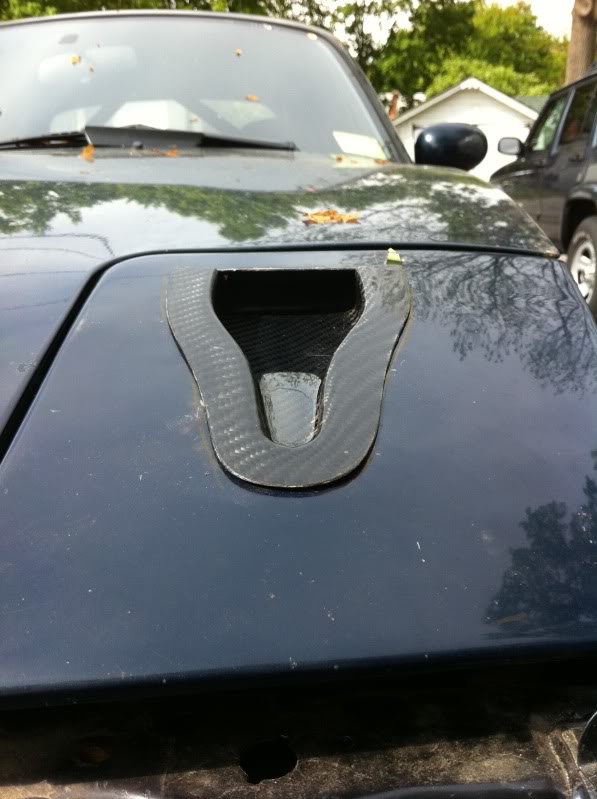
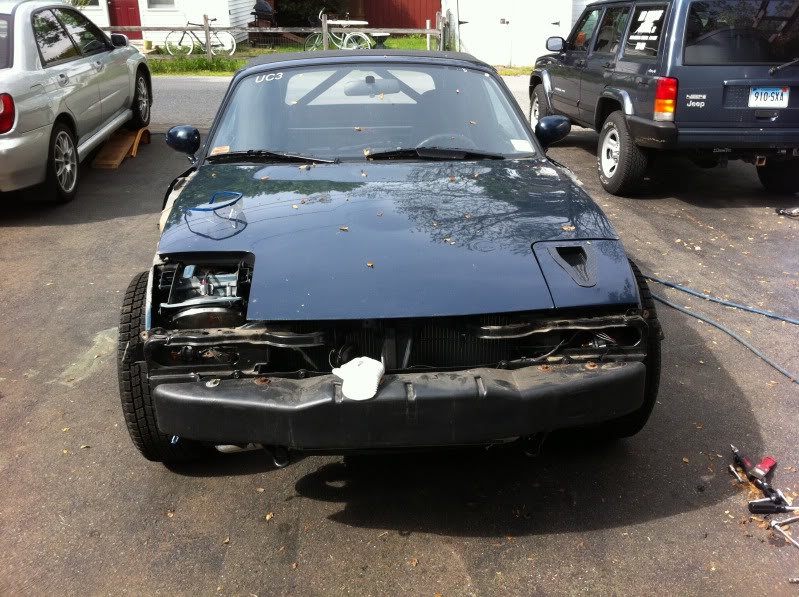
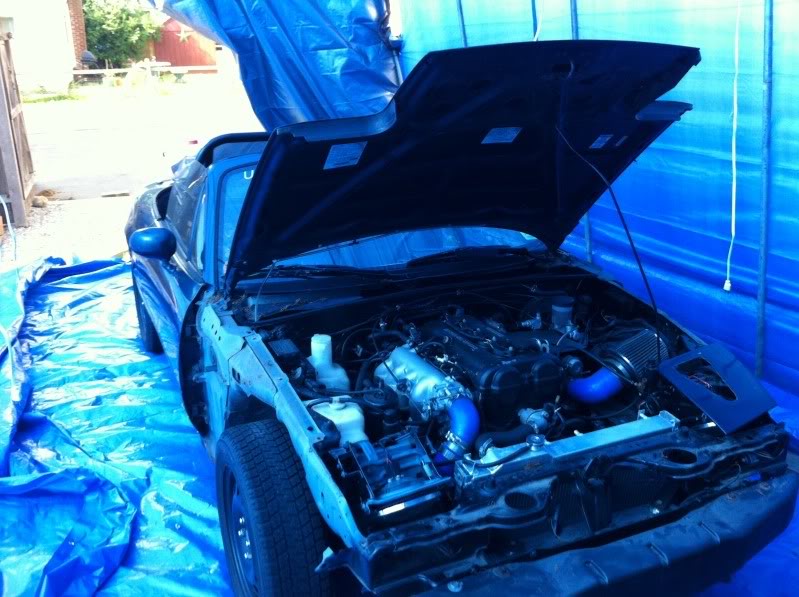
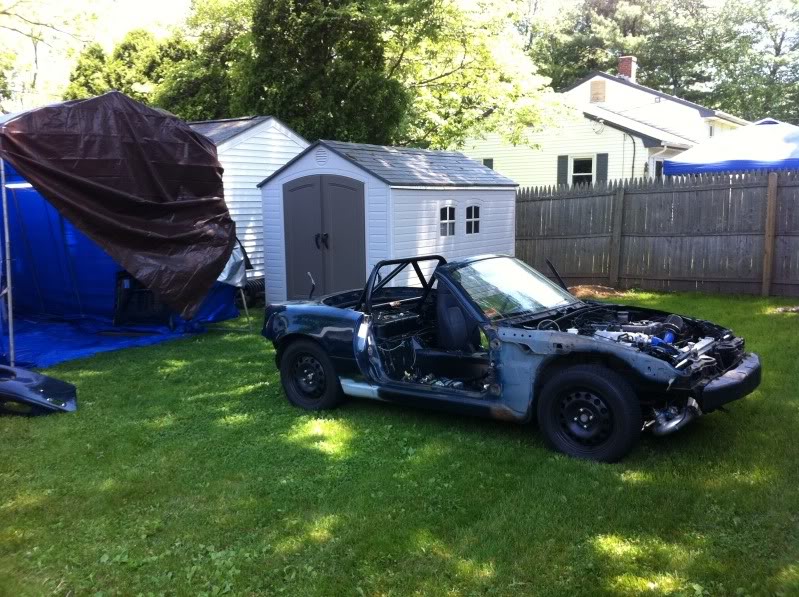
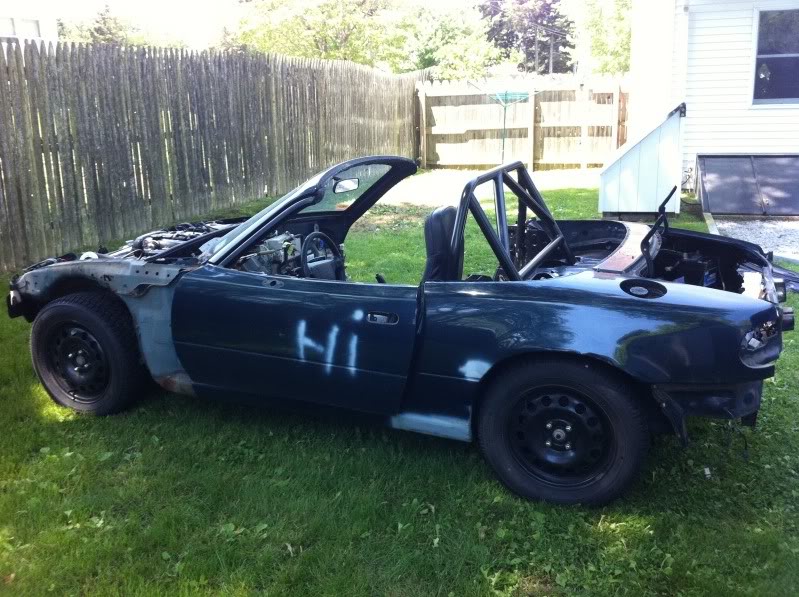
2 weeks ago I continued to strip down the car. Removed the fenders, bumper, and all the inner liners. I also rough cut the NACA duct for the headlight. Right now my plan is to place it over the top and use adhesive to mount it. I have some massaging to work, but as of right now it fits pretty flat on the headlight cover.
As expected there was some surface rust behind the fenders. . .
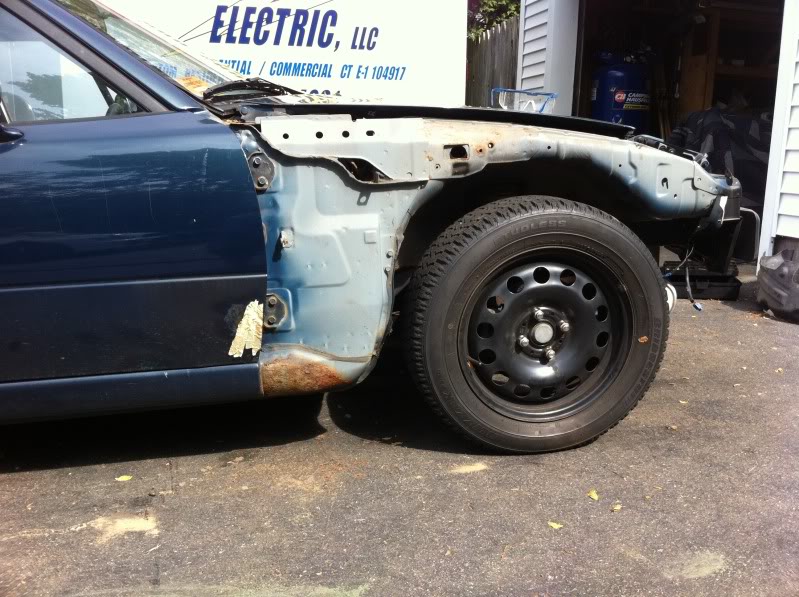
Reply
0
0
06-06-2011, 09:16 PM
#15
Elite Member
Thread Starter
iTrader: (2)
Join Date: May 2007
Location: Cromwell, Connecticut
Posts: 2,604
Total Cats: 16
6/4/11
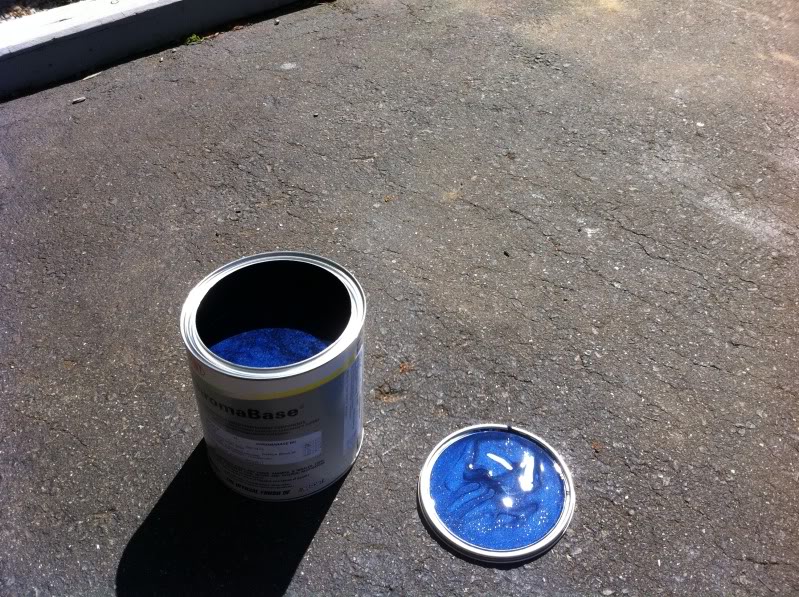
Friday I bought the paint. I bought a lot more than I think I will need, but I figure i want extra of the original batch to color match stuff later on
1 Gallon of Epoxy Primmer & reducer (3:1 I think?) - I will use this as an epoxy primer and as a sealer before color
1 Gallon of High build primmer (4:1)
3 Qt. Lotus Magnetic Blue (1:1)
1 Gallon Clear (4:1)
Total cost with some other random supplies = about $1100
Pricey, but I didnt cheap out on the stuff.
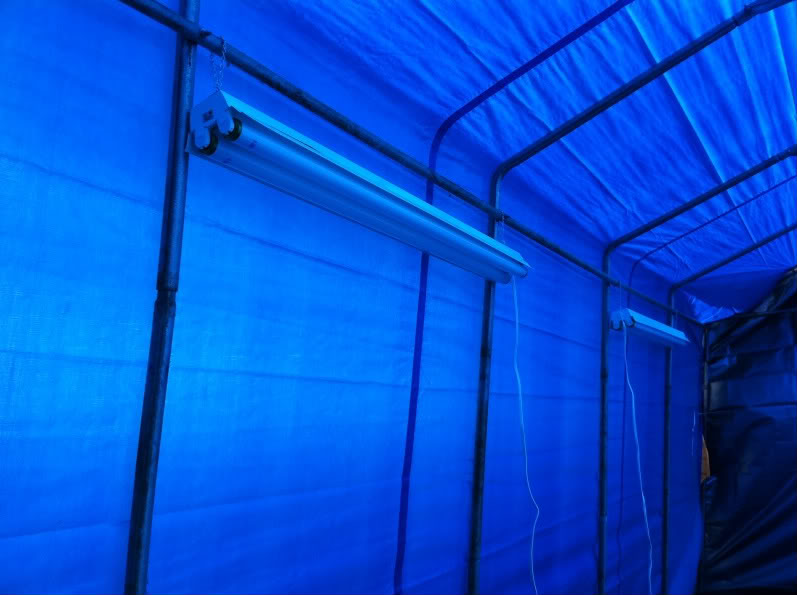
I also set up the tent. It is 20 x 12. I dont have the original tarp so i had to buy my own and improvise.
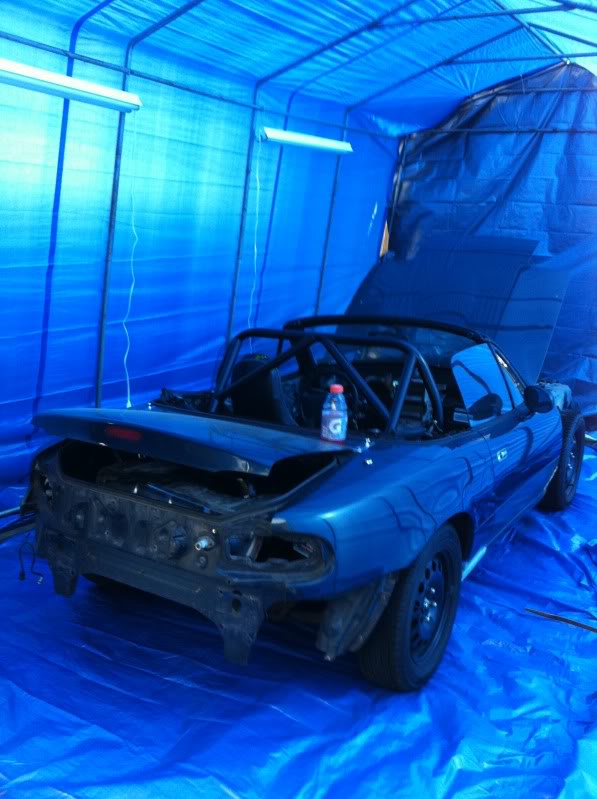
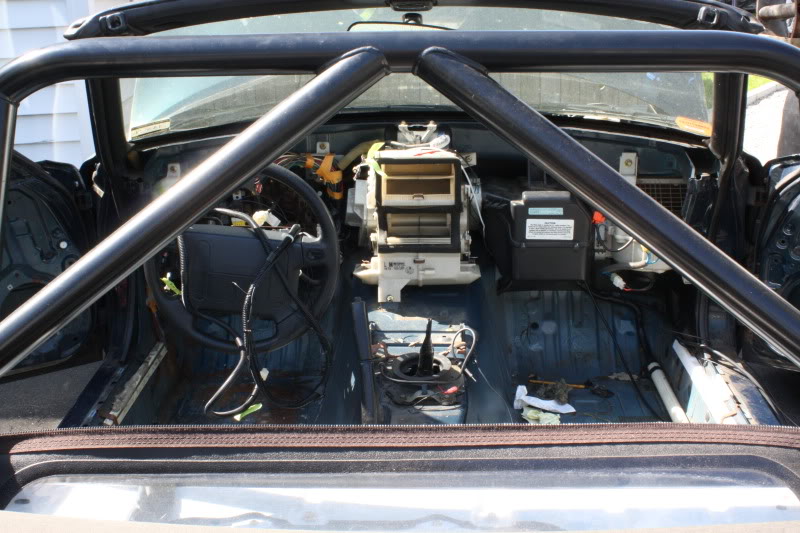
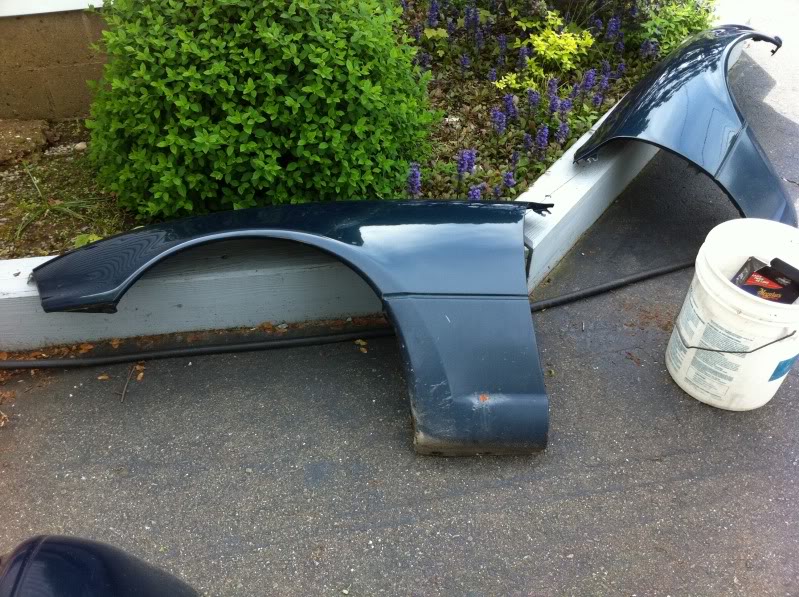
Also started stripping panels. My plan is to do all the panels off the car, epoxy primer them, then mask the body and start sanding & epoxy primering that stuff. THEN i can lay down bondo.
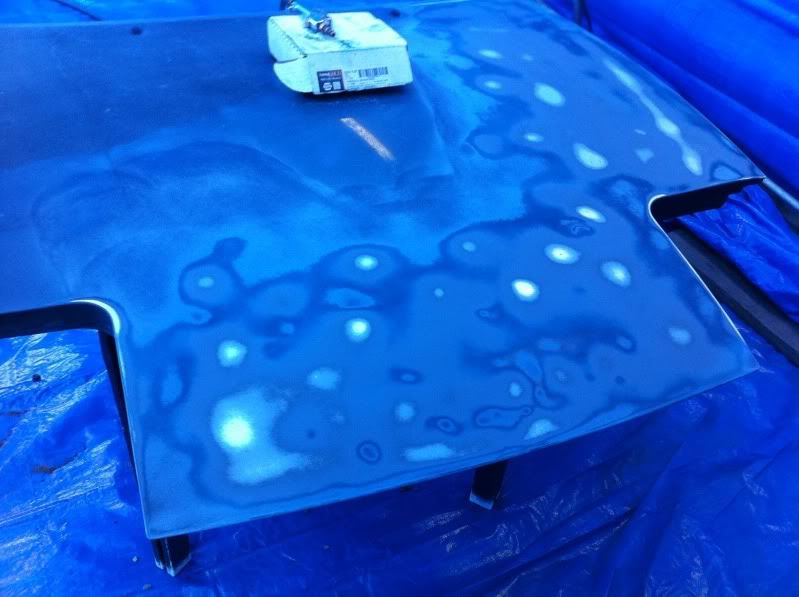
. . . Dented hood
And thats all till next weekend.
Friday I bought the paint. I bought a lot more than I think I will need, but I figure i want extra of the original batch to color match stuff later on
1 Gallon of Epoxy Primmer & reducer (3:1 I think?) - I will use this as an epoxy primer and as a sealer before color
1 Gallon of High build primmer (4:1)
3 Qt. Lotus Magnetic Blue (1:1)
1 Gallon Clear (4:1)
Total cost with some other random supplies = about $1100
Pricey, but I didnt cheap out on the stuff.
I also set up the tent. It is 20 x 12. I dont have the original tarp so i had to buy my own and improvise.
Also started stripping panels. My plan is to do all the panels off the car, epoxy primer them, then mask the body and start sanding & epoxy primering that stuff. THEN i can lay down bondo.
. . . Dented hood
And thats all till next weekend.
Reply
0
0
 06-11-2011, 10:53 AM
#18
Elite Member
Thread Starter
iTrader: (2)
Join Date: May 2007
Location: Cromwell, Connecticut
Posts: 2,604
Total Cats: 16
No mini Cooper scoop. Gunna sell it. I have enough to fix a panel or two but not a lot.
Oh and a lot of the pics are quick iPhone ones. Sorry for the quality
Oh and a lot of the pics are quick iPhone ones. Sorry for the quality
Reply
0
0
06-11-2011, 02:27 PM
#19

I really envy you for taking on a project like this. I wish I could paint, my car needs it really really bad. Every time I try it turns out like ****. I just dont have the patience for it.
Cant wait to see how this turns out. Maybe it'll motivate me to give it a try again.
Cant wait to see how this turns out. Maybe it'll motivate me to give it a try again.
Reply
0
0


