Build Thread (FE3, RX7 TII, EFR 6258, MS3)
 06-27-2011, 10:35 PM
#41

Ive put the Intake manifold on hold till i can get the motor mounts re-made. I wasn't too happy with my first set so i opted for a redesign with some heavier gauge steel and poly bushings.
This means ive go to sort out my coolant re route so i know how close i can get the motor to the firewall. So far i've discovered that the Tsat cap from the 1.6 is the same bolt pattern as the back of the FE head but im not sure if its going to hurt if the outlet is pointing straight up. I should be able to get creative and make my way back to the radiator with it as long as you guys dont think im going to have an issue with it being vertical.
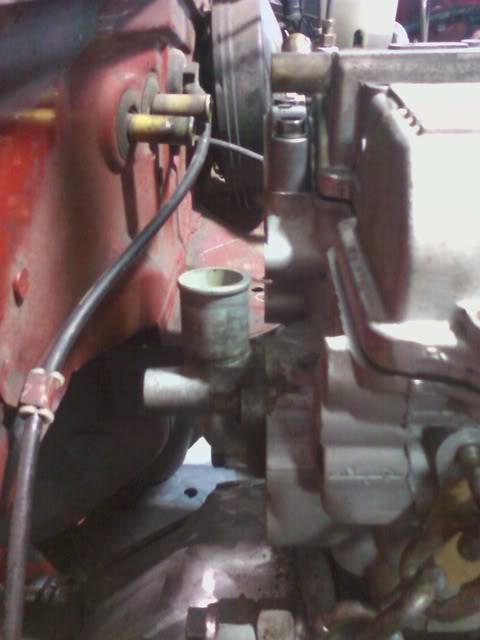
The head doesnt have the recess for the thermostat but i havent read of other guys having issues when they relocate the Tsat to the rear of the 1.6 head which also doesnt have the recess. Recess in stock miata/kia Tsat seen here
I was able to use the rear cap from the kia to cap the front of the Kia head but i had to drill to a larger size and use the dremmel a bit to make it fit. should work perfect with a different set of studs and a stock kia gasket.
Threads i've been referencing for coolant re-route
https://www.miataturbo.net/general-miata-chat-9/beginning-my-spacerless-coolant-reroute-12027/
https://www.miataturbo.net/engine-performance-56/%2416-coolant-reroute-32579/
This means ive go to sort out my coolant re route so i know how close i can get the motor to the firewall. So far i've discovered that the Tsat cap from the 1.6 is the same bolt pattern as the back of the FE head but im not sure if its going to hurt if the outlet is pointing straight up. I should be able to get creative and make my way back to the radiator with it as long as you guys dont think im going to have an issue with it being vertical.
The head doesnt have the recess for the thermostat but i havent read of other guys having issues when they relocate the Tsat to the rear of the 1.6 head which also doesnt have the recess. Recess in stock miata/kia Tsat seen here
I was able to use the rear cap from the kia to cap the front of the Kia head but i had to drill to a larger size and use the dremmel a bit to make it fit. should work perfect with a different set of studs and a stock kia gasket.
Threads i've been referencing for coolant re-route
https://www.miataturbo.net/general-miata-chat-9/beginning-my-spacerless-coolant-reroute-12027/
https://www.miataturbo.net/engine-performance-56/%2416-coolant-reroute-32579/
Last edited by yank; 06-28-2011 at 09:35 AM.

Reply
 0
0

0

 07-03-2011, 04:17 AM
#43
Senior Member
iTrader: (2)
Join Date: May 2005
Location: Edmonton Ab, Canada
Posts: 1,202
Total Cats: 21
What you doing for the oilpan? Shimming subframe? Only shitty part about having the engine so far back is having less room for the dp, I had to trim alittle off the 6 speed housing to fit my header, worth it for weight distribution though.


Reply
0
0
07-03-2011, 02:52 PM
#44
I notched the front subframe down about 1.25" to give me some more depth to the pan in the middle. (pics when i close the hole up prob late next week.) I have a little different idea on the deepest part of the sump than most people have done but its still going to be one of the shallowest pans i've seen. the real problem is the steering rack up front. Im sure you already know but theres the crank tray/ oil tray that gets sandwiched in between the block and the oil pan and it comes down about an inch below the block which is pretty much the bottom of the oil pan up front.. If i have to shim the subframe i will but im hoping not to have to.
Did you coat the inside of your pan with anything or did you figure that since its covered in oil its not going to rust or corrode? Ive got some 16ga stainless steel sheet scraps that i was planing to use to closing it up.
Did you coat the inside of your pan with anything or did you figure that since its covered in oil its not going to rust or corrode? Ive got some 16ga stainless steel sheet scraps that i was planing to use to closing it up.
Reply
0
0
 07-04-2011, 12:15 AM
#47
Senior Member
iTrader: (2)
Join Date: May 2005
Location: Edmonton Ab, Canada
Posts: 1,202
Total Cats: 21
The FE3 pan? Stainless? hahaha thats a joke right??? (what oem pans are SS)
Its cast aluminum, and a bitch to weld to as its got 20 years of oil exposure.
My pan is as shallow as possible, I rerouted my pick-up tube around the side of the mbsp so I could have the bottom of the pan almost touching it. The rear sump hangs below the subframe about .25-.5" and it is not shimmed and my hood closes no problem.
I didnt coat my oilpan, its all alum so I'm not worried about the corrosion.
Its cast aluminum, and a bitch to weld to as its got 20 years of oil exposure.
I have a little different idea on the deepest part of the sump than most people have done but its still going to be one of the shallowest pans i've seen. the real problem is the steering rack up front. Im sure you already know but theres the crank tray/ oil tray that gets sandwiched in between the block and the oil pan and it comes down about an inch below the block which is pretty much the bottom of the oil pan up front.. If i have to shim the subframe i will but im hoping not to have to.
Did you coat the inside of your pan with anything or did you figure that since its covered in oil its not going to rust or corrode? Ive got some 16ga stainless steel sheet scraps that i was planing to use to closing it up.
Did you coat the inside of your pan with anything or did you figure that since its covered in oil its not going to rust or corrode? Ive got some 16ga stainless steel sheet scraps that i was planing to use to closing it up.
I didnt coat my oilpan, its all alum so I'm not worried about the corrosion.
Reply
0
0
 07-07-2011, 11:27 PM
#53
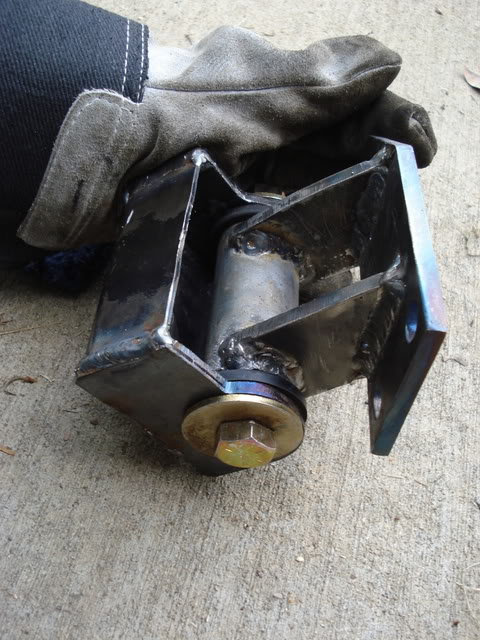
Edited above post with better pic. cant really see it in the pic but they are about 5 inches wide.
Reply
0
0
07-07-2011, 11:40 PM
#54
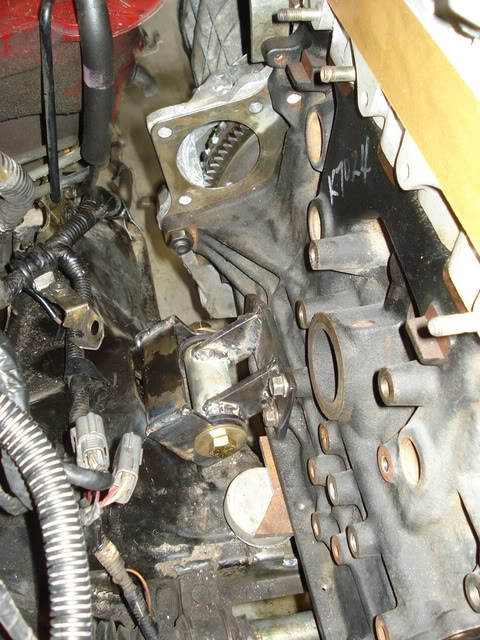
Rebuilt the shifter with new springs and retainers. Feels just like a stock miata shifter. All transmission replacement parts sourced from mazdatrix.com
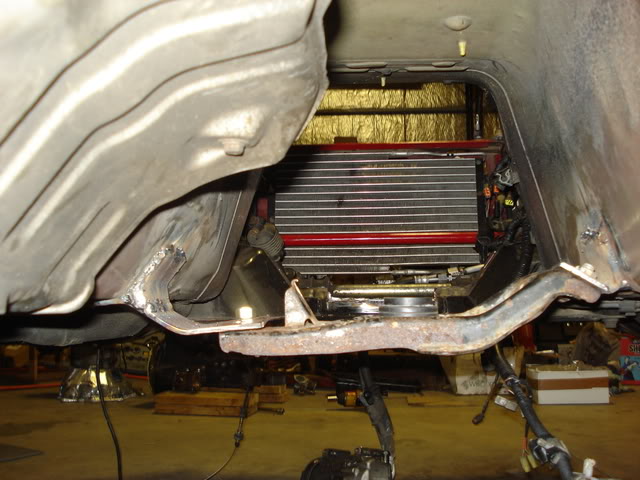
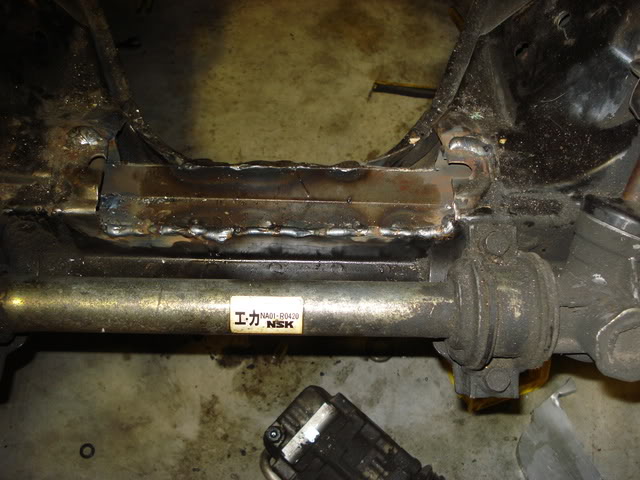
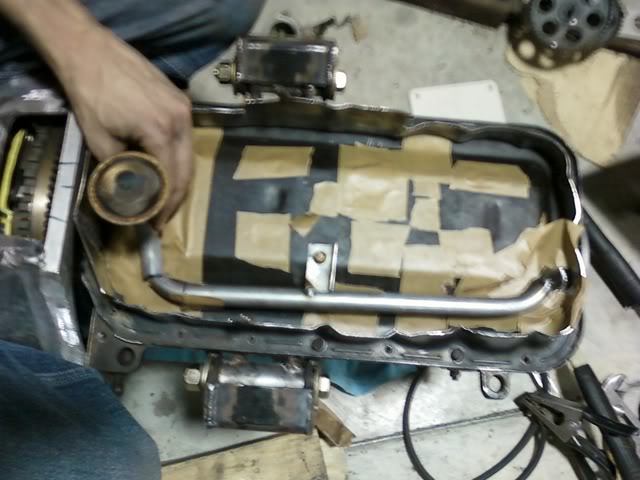
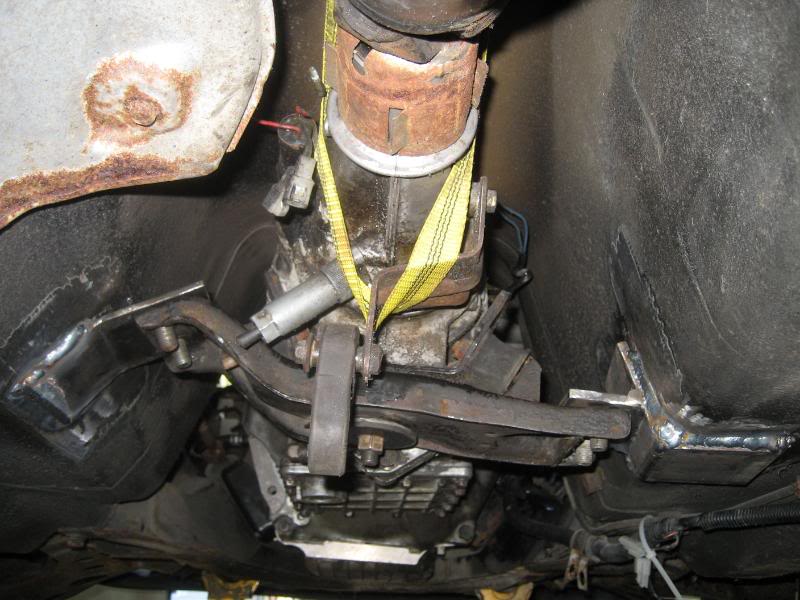
This is the front sub frame mod i mentioned earlier. Im hoping to have a little deeper pan and possibly gain some extra oil capacity. Reinforced with 12 gauge steel front and back. Ill box this in after i finish the oil pan and mount the engine in case i have to do any more grinding.
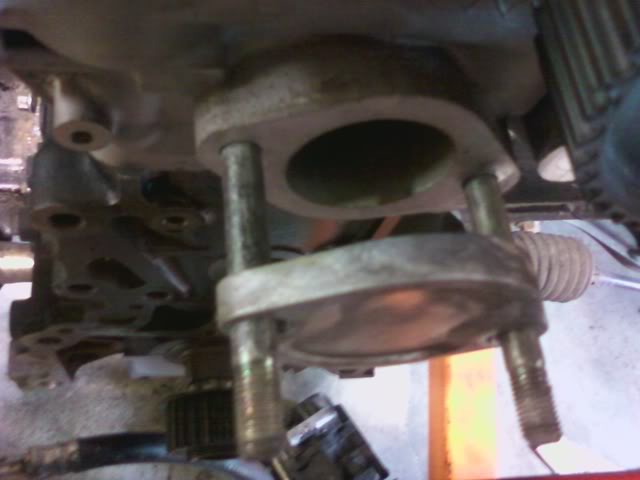
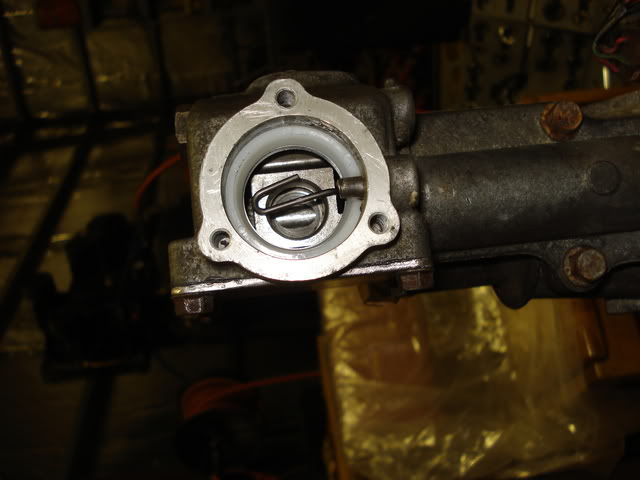
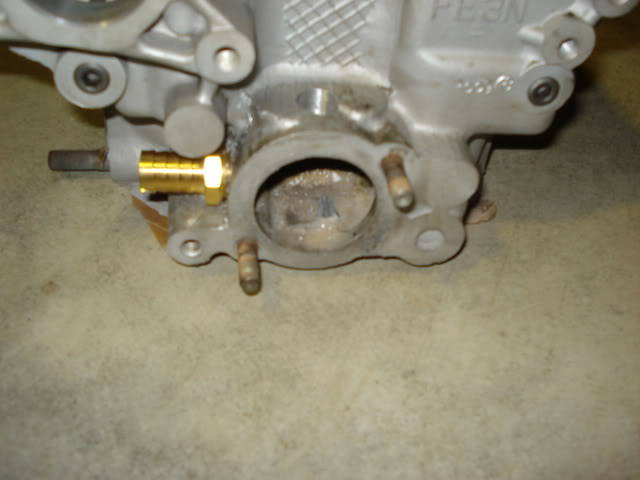
Coolant reroute in progress. I still need to drill and tap for the gauge sensor. Ill have to pick up the right size tap at the store tomorrow.
New parts! Mocal sandwich plate and VR sensor from a 2000 ford focus. the M1-206 oil filter is the largest one i could find with the right threads.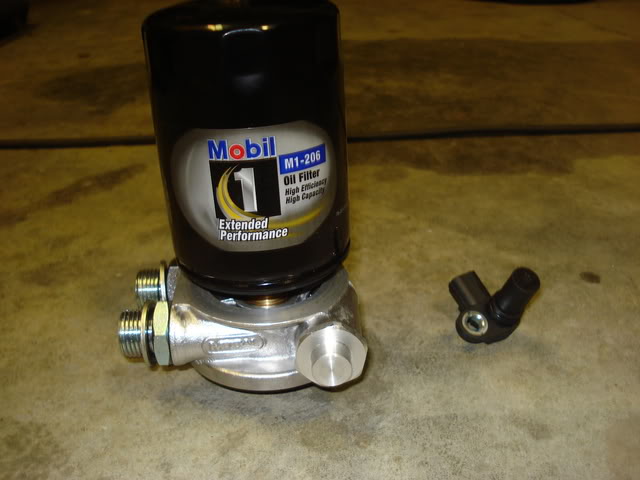
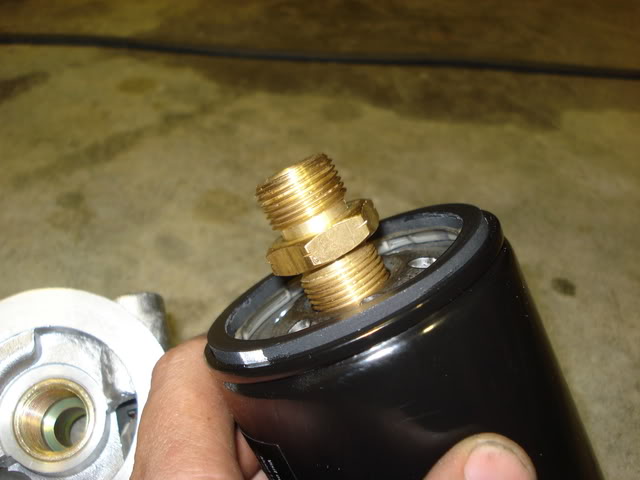
Had to pick up an extra male to male connector to thread into the fitting provided in the kit. I really need one with another .5" of thread on one side at least so im going to keep looking.
This is the front sub frame mod i mentioned earlier. Im hoping to have a little deeper pan and possibly gain some extra oil capacity. Reinforced with 12 gauge steel front and back. Ill box this in after i finish the oil pan and mount the engine in case i have to do any more grinding.
Coolant reroute in progress. I still need to drill and tap for the gauge sensor. Ill have to pick up the right size tap at the store tomorrow.
New parts! Mocal sandwich plate and VR sensor from a 2000 ford focus. the M1-206 oil filter is the largest one i could find with the right threads.
Had to pick up an extra male to male connector to thread into the fitting provided in the kit. I really need one with another .5" of thread on one side at least so im going to keep looking.
Reply
0
0
07-13-2011, 11:05 PM
#55
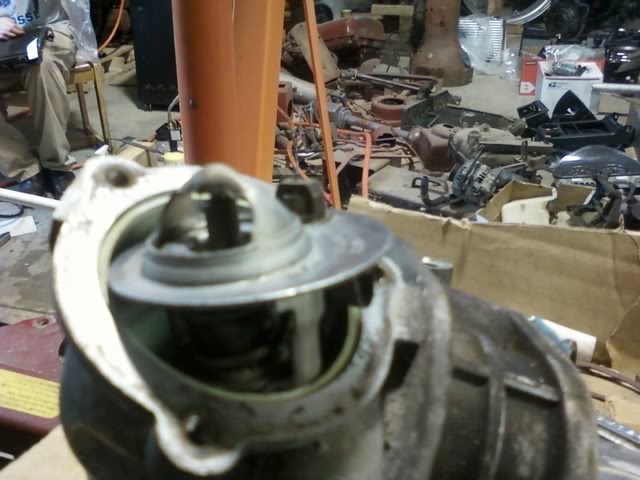
Oil pickup tube and oil pan in progress. My engine sits a bit lower than M2cupcars and DC2696s which has made the oil pickup tube a challenge. I've been battling contaminated welds and tight clearances which is making this step frustrating and time consuming. The stainless steel sheet metal seems to be welding nicely with the carbon steel of the stock oil pan. I'm learning that welding stainless steel is much different than carbon steel so hopefully I figure out the technique before i get started on the exhaust manifold.
Here's some blurry cell phone pictures of the tolerances and layout I'm having to go with.
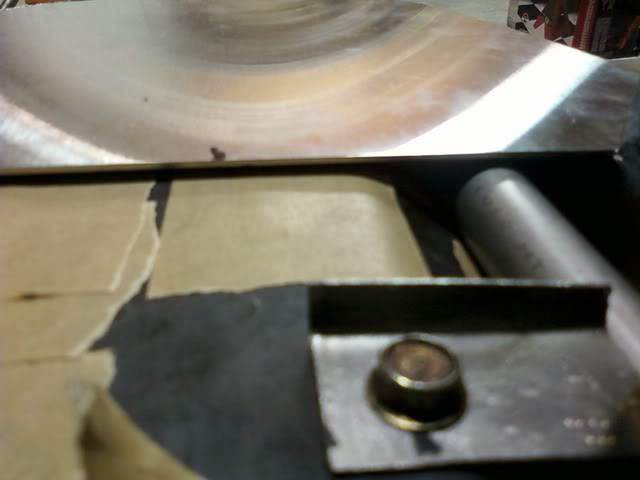
Here's some blurry cell phone pictures of the tolerances and layout I'm having to go with.
Reply
0
0
07-13-2011, 11:13 PM
#56
Senior Member
iTrader: (2)
Join Date: May 2005
Location: Edmonton Ab, Canada
Posts: 1,202
Total Cats: 21
My oil pan is the depth of the pickup tube, doesn't get any more shallow than that. One bolt on the pick up flange is a bitch as my tube runs right over it to get around the mbsp. I'll take some pics as the subframe and oilpan needed work after an incident with a curb 8S
Reply
0
0
07-14-2011, 01:26 PM
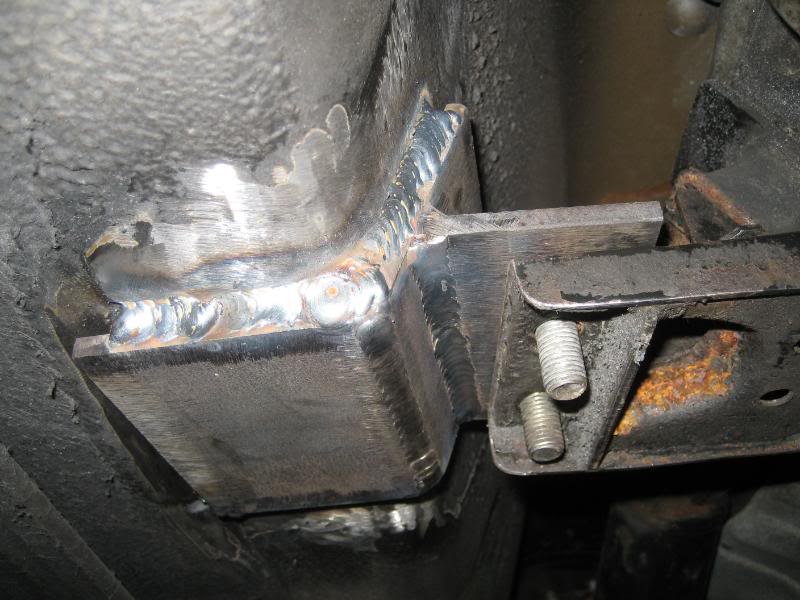
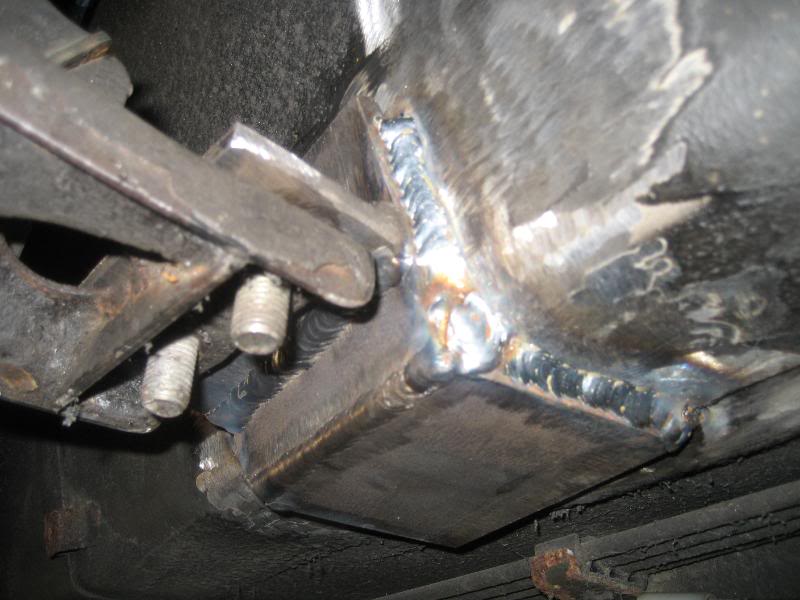
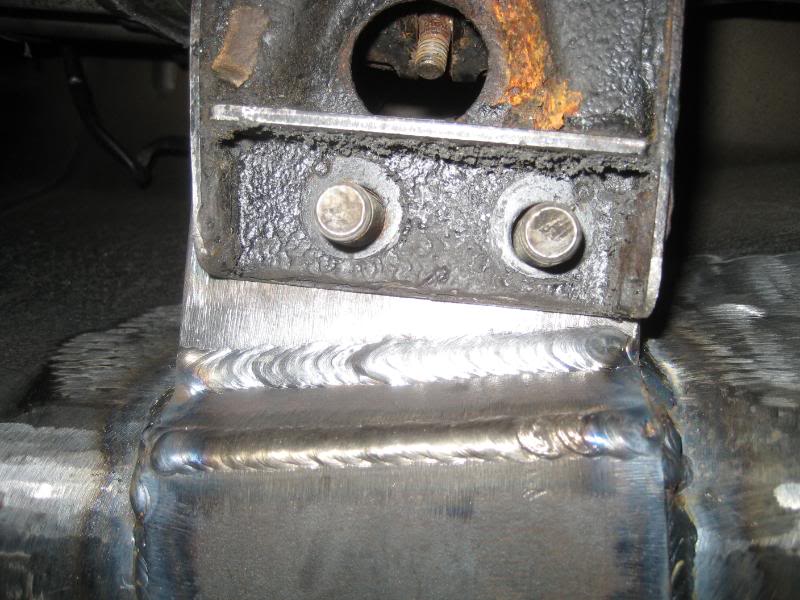
#58

How thick is that plate you used for your trans mount- it looks like 1/8". I would absolutely box it in or add a gusset. It's easy to do while everything is apart.
my trans brackets are 1/4" and I put gussets on the driver's side. The pass side I didn't feel needed a gusset, because it already had more weld area
my trans brackets are 1/4" and I put gussets on the driver's side. The pass side I didn't feel needed a gusset, because it already had more weld area
Reply
0
0
07-14-2011, 02:06 PM
#59
How thick is that plate you used for your trans mount- it looks like 1/8". I would absolutely box it in or add a gusset. It's easy to do while everything is apart.
my trans brackets are 1/4" and I put gussets on the driver's side. The pass side I didn't feel needed a gusset, because it already had more weld area
my trans brackets are 1/4" and I put gussets on the driver's side. The pass side I didn't feel needed a gusset, because it already had more weld area
Reply
0
0
07-14-2011, 05:07 PM
#60
Reply
0
0


