Build Thread (FE3, RX7 TII, EFR 6258, MS3)

 07-19-2011, 04:48 PM
#82

https://www.miataturbo.net/build-threads-57/build-thread-tii-drivetrain-swap-built-motor-cage-widebody-blah-blah-19010/
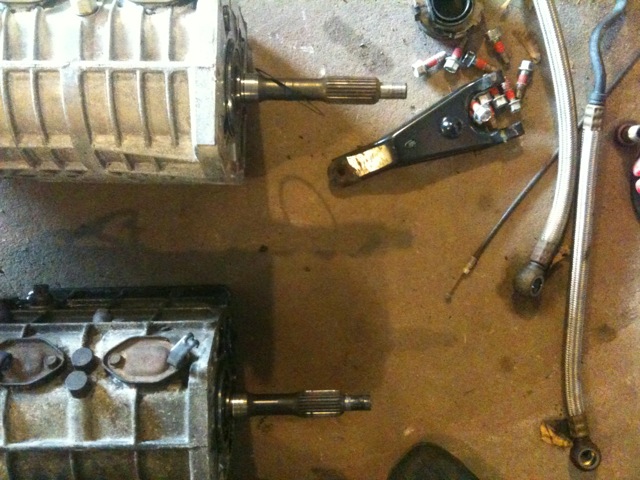
So far mounting the trans and diff has been the easiest party of my build...

Reply
 0
0

0
07-19-2011, 06:19 PM
#83

... there is. Mightymouse
https://www.miataturbo.net/showthread.php?t=19010
So far mounting the trans and diff has been the easiest party of my build...
https://www.miataturbo.net/showthread.php?t=19010
So far mounting the trans and diff has been the easiest party of my build...
 I don't posses the fabrication skills....yet
  I keep hoping that by the time I buy the trans and start there will be a bolt on solution already made. Time to stop being lazy I guess.
 Love the thread, by the way. I can't wait to see how the EFR performs.
Reply
0
0
07-19-2011, 10:40 PM
#84
Newb

Join Date: Jul 2011
Posts: 44
Total Cats: 0
re: the bongo/ute R bell - IIRC that bell is ~20mm deeper than the RX7 bell because the R trans it was paired with has an input shaft much longer than the RX7 R trans. I assembled that bongo bell with the rx7 trans and was seeing less than half the clutch splines penetrated by the input shaft and maybe 2mm of the input shaft making it to the pilot bearing, of which 1mm of that is radiused. Like I said, IIRC, this was five years ago.
UTE up top, TurboII bottom
and i started a build thread.
http://www.rx7club.com/showthread.ph...9#post10712119
Reply
0
0
07-19-2011, 10:50 PM
#85
I've been through that thread and others a billion times, lol, the difference between easy for you and easy for me is alot I don't posses the fabrication skills....yet I keep hoping that by the time I buy the trans and start there will be a bolt on solution already made. Time to stop being lazy I guess.
Love the thread, by the way. I can't wait to see how the EFR performs.
I don't posses the fabrication skills....yet I keep hoping that by the time I buy the trans and start there will be a bolt on solution already made. Time to stop being lazy I guess. Love the thread, by the way. I can't wait to see how the EFR performs.
Same here on the EFR. I cant wait!
Reply
0
0
07-19-2011, 11:16 PM
#86
and tonight's evening news..
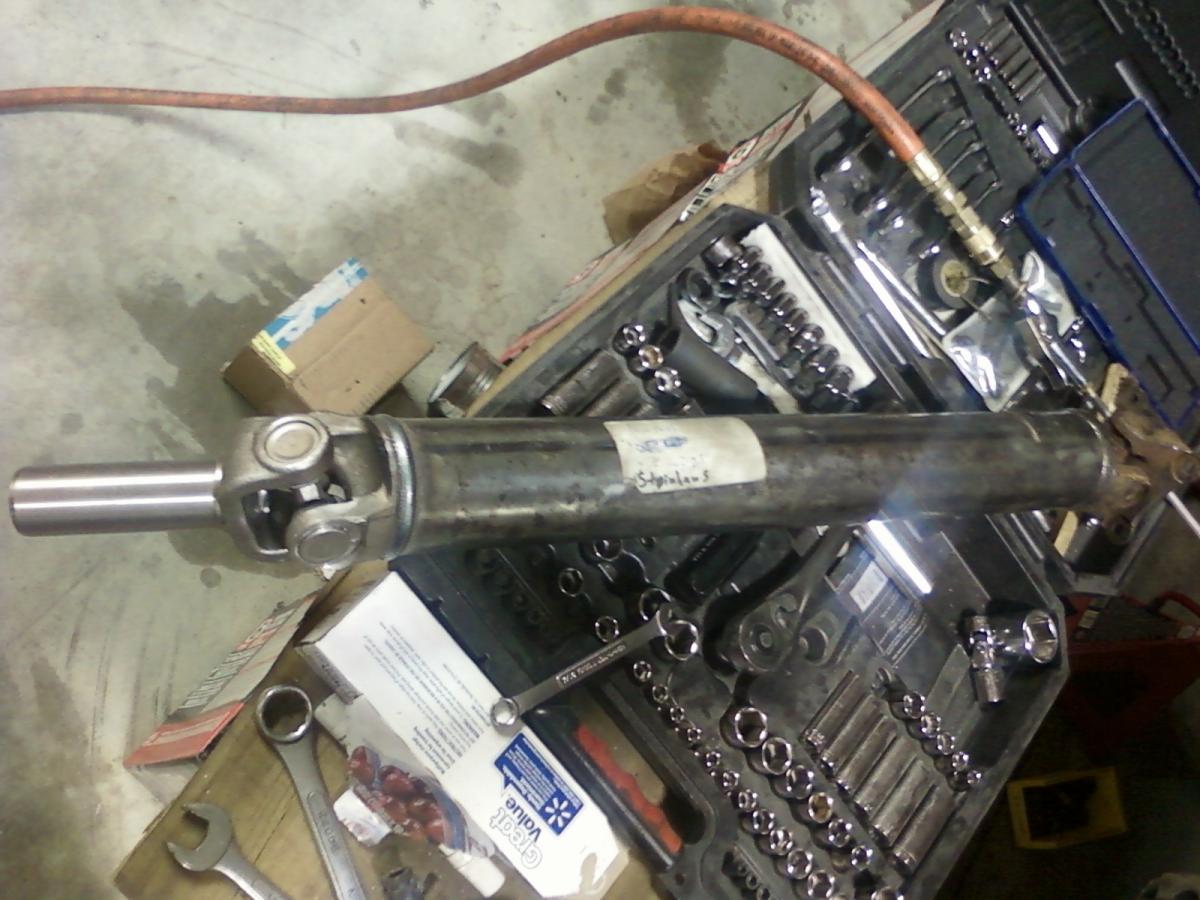
Driveshaft came in today! new input shaft and shortened 5.25" Luckily had a guy here in town that does this stuff for a living. Precision Driveline Glasgow KY. Awesome guy. 50$ shorten and balance and 96$ input (ouch) Input was rusty and pitted so i opted to get a new one.
Coolant reroute provisions finished. Sandwich plate made from 3/16" aluminum. a .039" recess was cut for the thermostat to sit in. This means im running 2 gaskets.
Baffle installed and leak tested. I had 3 small leaks to patch after i remembered to put in the drain plug haha kinda scared me. Its been suggested that i use diesel fuel to check for leaks too. apparently it can penetrate small cracks much better than water.
Driveshaft came in today! new input shaft and shortened 5.25" Luckily had a guy here in town that does this stuff for a living. Precision Driveline Glasgow KY. Awesome guy. 50$ shorten and balance and 96$ input (ouch) Input was rusty and pitted so i opted to get a new one.
Coolant reroute provisions finished. Sandwich plate made from 3/16" aluminum. a .039" recess was cut for the thermostat to sit in. This means im running 2 gaskets.
Baffle installed and leak tested. I had 3 small leaks to patch after i remembered to put in the drain plug
haha kinda scared me. Its been suggested that i use diesel fuel to check for leaks too. apparently it can penetrate small cracks much better than water.
Reply
0
0
 07-20-2011, 09:04 AM
#89
re- trans input shaft- I spent an hour going through mazmart's transmissions in an effort find another R trans with the longer shaft and apparently "it" never came to NA. I had several iterations including v6 variants for the 929 and B2600 truck but they were all shorter. I also found one for an MPV that I thought was only available for one year and only with a four banger (don't know which) and it was also shorter than the RX7 R-trans.
4qts is certainly adequate when you add the capacity of an oil cooler and lines. I've got you beat primarily because my sump is deeper - and my engine is sitting an inch higher or so for that reason.
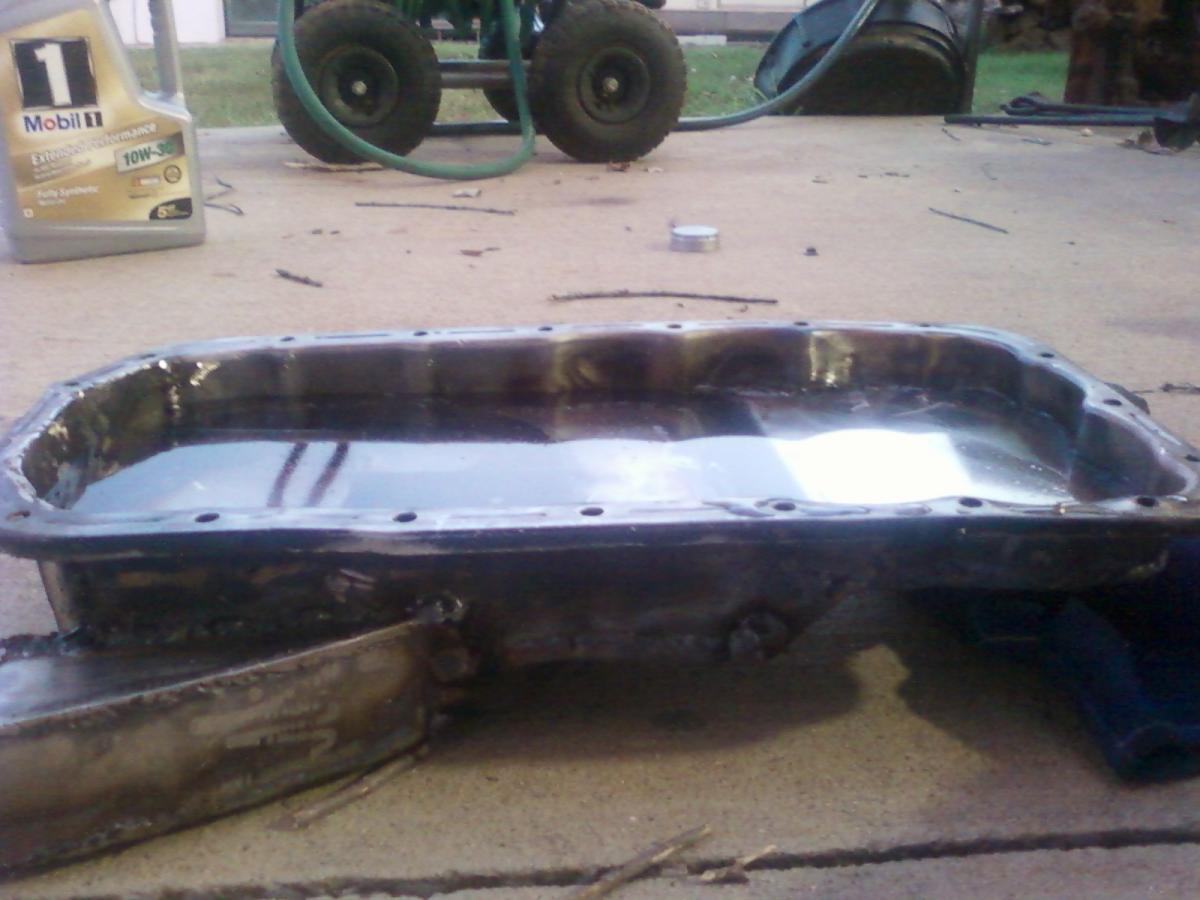
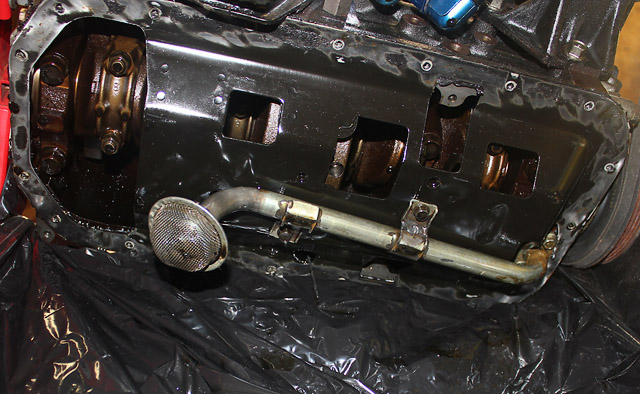
Here's a pic of the plate I was speaking of. It came on my steel pan JDM FE3. So maybe it's to supplement the weaker steel pan to bring it up to par of the aluminum pan? Couldn't be an oil baffle since it's 10 or 12ga. steel and the fwd pan that came on the engine was very deep and biased to one end, only used about a 1/3 of the total area of the pan (perimeter).
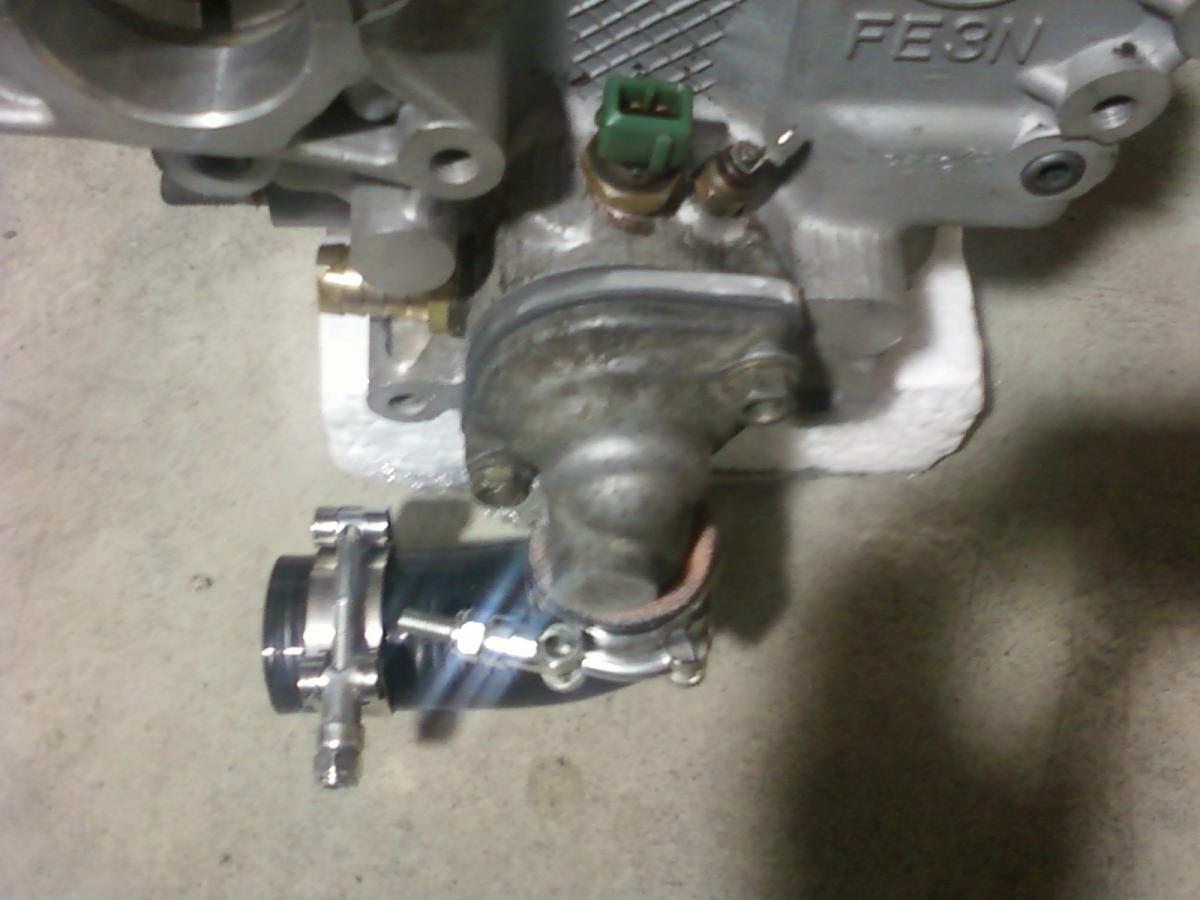
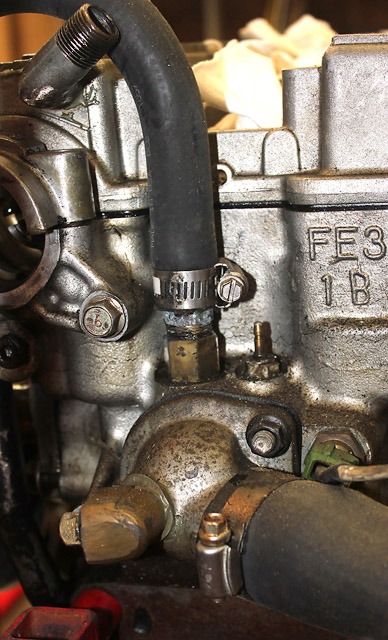
Here's my tstate mixer/housing at the rear. I don't know what it's (F2?)from but it apparently has a recess for the tstat- and had a sensor bung that was a temp heater source until I overbored the sensor bung in the head pre-tstat.
4qts is certainly adequate when you add the capacity of an oil cooler and lines. I've got you beat primarily because my sump is deeper - and my engine is sitting an inch higher or so for that reason.
Here's a pic of the plate I was speaking of. It came on my steel pan JDM FE3. So maybe it's to supplement the weaker steel pan to bring it up to par of the aluminum pan? Couldn't be an oil baffle since it's 10 or 12ga. steel and the fwd pan that came on the engine was very deep and biased to one end, only used about a 1/3 of the total area of the pan (perimeter).
Here's my tstate mixer/housing at the rear. I don't know what it's (F2?)from but it apparently has a recess for the tstat- and had a sensor bung that was a temp heater source until I overbored the sensor bung in the head pre-tstat.
Reply
0
0
07-20-2011, 11:26 PM
#93
attached the oil pan tonight and dropped it back in the car. good news is that the aluminum oil pump casting was strong enough to pull the front of the pan up enough to close the gap i was seeing earlier due to warpage.
Bad news was that the pan still was hitting the steering rack and one side of the subframe. a few hours later, some trimming and shimming and im back in good shape. turns out i have about a half inch of clearance above the cam pulleys. sittin low.
started playing around with some different solutions for the AC compressor and alternator. How did you guys solve this issue? modified bracket or complete custom? noticed how tight its gonna be to get a 3" down pipe in as well. one more tricky challenge. nothing a sawzall cant fix. haha. Looks like my coolant reroute solution should work. the 90 deg elbow sits on top of the bellhousing but it gets the job done. shouldnt hurt. I will be able to go cold or hot side by turning the elbow. Looks like M2cupcar went cold side. He also had a better solution for the Tsat housing IMO. I guess the next few things on the list will be:
Pick up oil drain bung
intake manifold
AC and alternator brackets
Modify crank pulley (cut one pulley off.. can i do this?)
design better exhaust mani that fits. (picking up a bottle of tri-mix gas monday for the ss)
Reply
0
0
07-21-2011, 08:32 AM
#94
Was the pan mounted to something when you welded it up? I'd think that would prevent the warping.
Was the pan hitting that cast aluminum piece on the rack? That was my issue.
My coolant return runs under the hybrid sportage/miata manifold runners and should do the same with my new manifold since both have runners that come off the head angle slightly upward.
My AC solution is a modified Miata mount plate with some steel stock to the block bosses, combined with a tensioning pulley that I have no idea where it came from. Unfortunately some of the pieces are missing because I had it removed when I was working on the oil return, then the tree fell on the garage... so I'll be reinventing the wheel. My guess is DC doesn't have much use for AC.
Alternator is custom using modified OE parts. The primary component is a rod end. I'll get a pic up in the thread today with details.
A lathe will cut precisely cut your pulley.
If you're running an oil temp gauge that's sensed in the pan, you would want to add that bung when you do the drain bung.
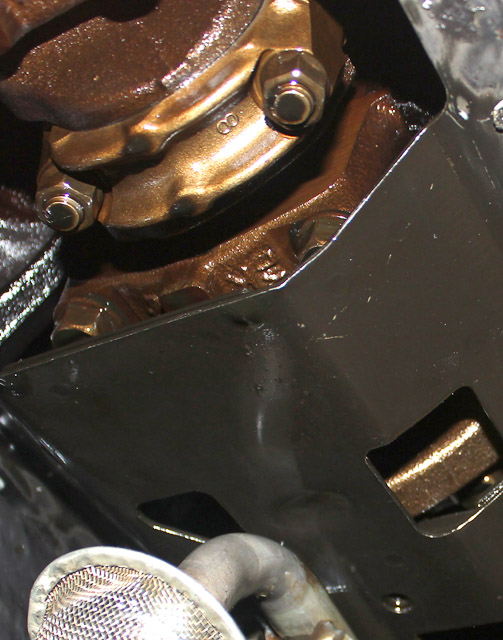
Does your engine have that steel plate spanning the bottom opening of the block?
Was the pan hitting that cast aluminum piece on the rack? That was my issue.
My coolant return runs under the hybrid sportage/miata manifold runners and should do the same with my new manifold since both have runners that come off the head angle slightly upward.
My AC solution is a modified Miata mount plate with some steel stock to the block bosses, combined with a tensioning pulley that I have no idea where it came from. Unfortunately some of the pieces are missing because I had it removed when I was working on the oil return, then the tree fell on the garage... so I'll be reinventing the wheel. My guess is DC doesn't have much use for AC.
Alternator is custom using modified OE parts. The primary component is a rod end. I'll get a pic up in the thread today with details.
A lathe will cut precisely cut your pulley.
If you're running an oil temp gauge that's sensed in the pan, you would want to add that bung when you do the drain bung.
Does your engine have that steel plate spanning the bottom opening of the block?
Reply
0
0
07-21-2011, 09:44 AM
#95
Was the pan mounted to something when you welded it up? I'd think that would prevent the warping.
Yeah. i clamped it to a piece of 12 gauge but it didnt seem to help after it cooled off.
Was the pan hitting that cast aluminum piece on the rack? That was my issue.
I saw this issue early on and dented the side of the pan in so it would clear when i installed it. My issue was that the pan itself was resting on the rack. think i have about 3/16" clearance now at best with the motor mount spacers.
My coolant return runs under the hybrid sportage/miata manifold runners and should do the same with my new manifold since both have runners that come off the head angle slightly upward.
Ill do the same.
My AC solution is a modified Miata mount plate with some steel stock to the block bosses, combined with a tensioning pulley that I have no idea where it came from. Unfortunately some of the pieces are missing because I had it removed when I was working on the oil return, then the tree fell on the garage... so I'll be reinventing the wheel. My guess is DC doesn't have much use for AC.
Yeah any pics you have will help for sure. Ill start modifying the stock mounts tonight if i reach a stopping point on the intake mani.
Alternator is custom using modified OE parts. The primary component is a rod end. I'll get a pic up in the thread today with details.
A lathe will cut precisely cut your pulley.
Ill take it to the machine shop then. I was worried that it would throw off the balance but since its symmetrical it shouldn't be an issue.
If you're running an oil temp gauge that's sensed in the pan, you would want to add that bung when you do the drain bung.
Good call. Anyone know what thread type the oil temp sensor usually is? Ill google it on my lunch break otherwise..
Does your engine have that steel plate spanning the bottom opening of the block?
Yeah. there should be plenty of pics of this around. some up on facebook for sure. the oil in the pan will come up to the bottom of that plate.
Reply
0
0
 It is what it is.
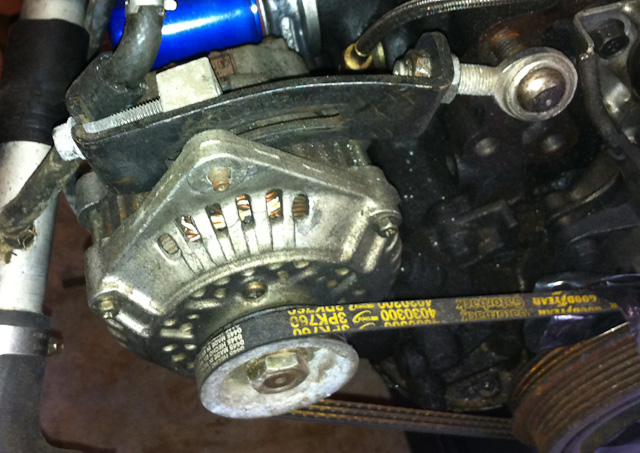
 07-21-2011, 11:13 PM
#99
did some work on the intake manifold tonight and threw around some ideas for the AC and alternator brackets with my Dad.
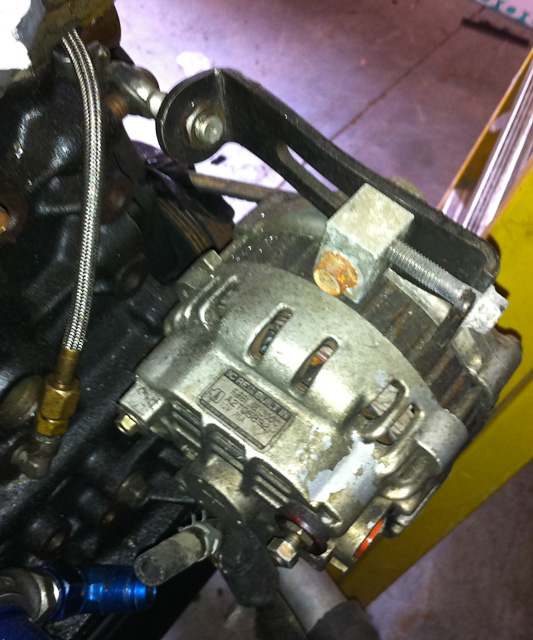
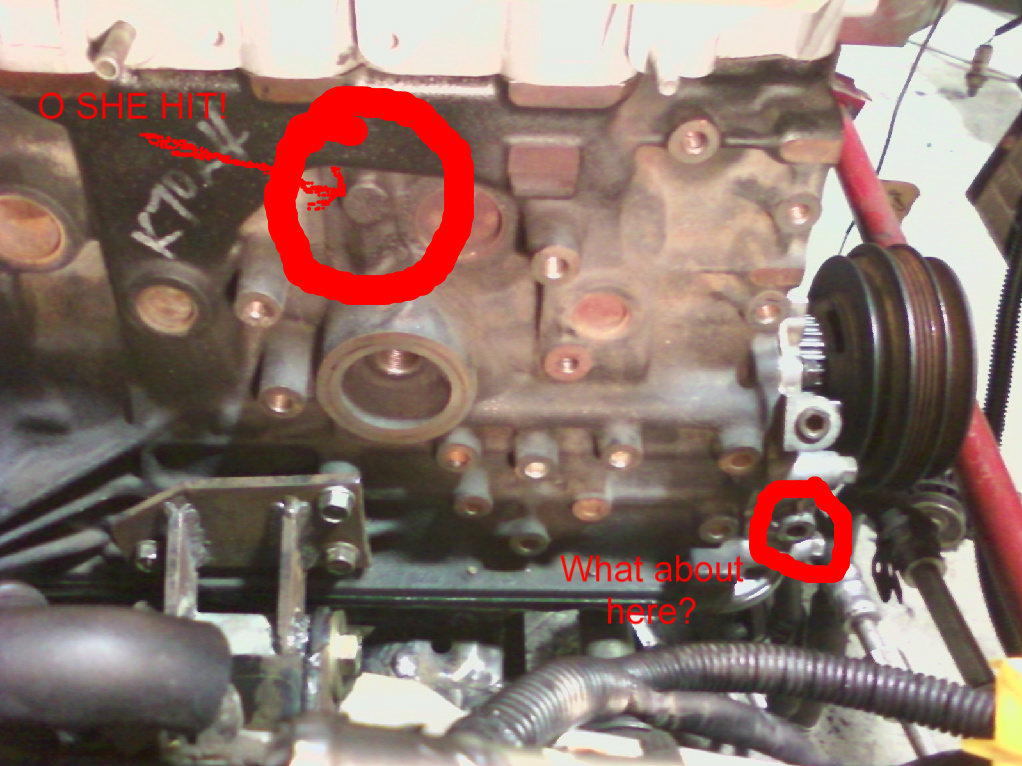
M2cupcar. by the way your oil sending unit is from the miata. i picked one up for the kia today and it looked nothing like the one you have. I cant seem to find any oil ports on the side of the block for the turbo feed.
DC is yours the same as M2s?
Reply
0
0
07-21-2011, 11:23 PM
#100
You can drill and tap that blank boss to fit the Miata sending unit from your old B motor. I don't know the thread on that on the oil pump boss you have circled, but I suppose you could always run a line/adapter etc. I know you don't want the bigass sender hanging off your oil pump. First option would be my choice. Although I can't recall what the thread is on the sender- I think it's 1/8" bpt.
Reply
0
0


