build thread (TII drivetrain swap, built motor, cage, widebody, blah blah)
 03-30-2008, 06:36 PM
#1
Senior Member
Thread Starter
iTrader: (9)

Join Date: Jun 2007
Location: NH
Posts: 1,013
Total Cats: 21
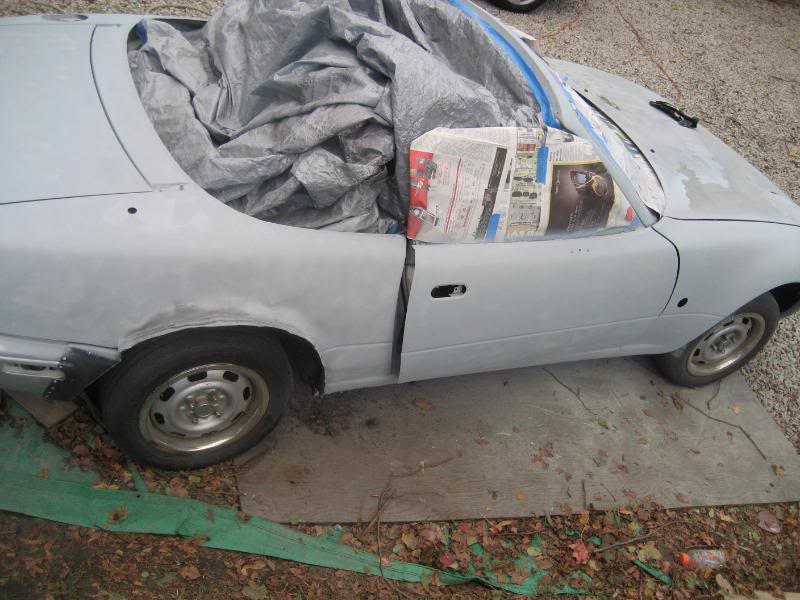
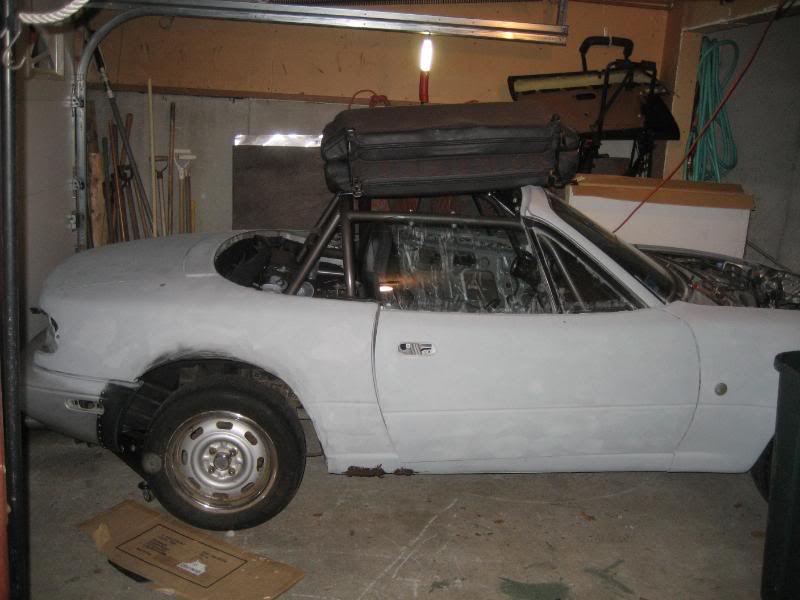
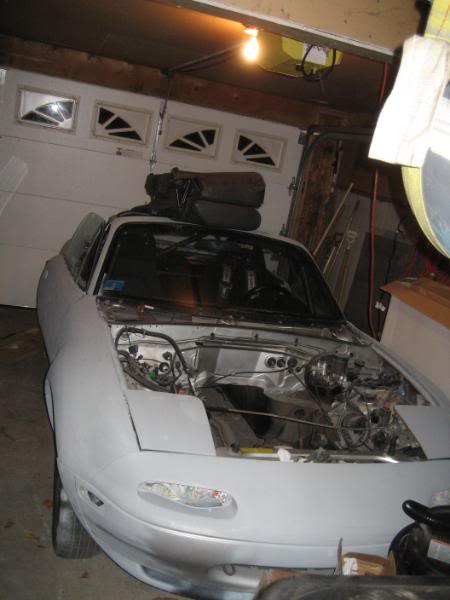
I think it's time to let you all in on my little build that's been going down. I'll start way back at the beginning. It is, well...was, a stock 1990 miata in need of a serious makeover- and so it began! I forgot to take pictures of it until after I started ripping into it, but I'm sure you all can picture a stock miata complete with steelies, dents, rust, and in need of paint.
These are the first pics I took; I was pretty deep into the disassembly before I realized I hadn't taken any yet!
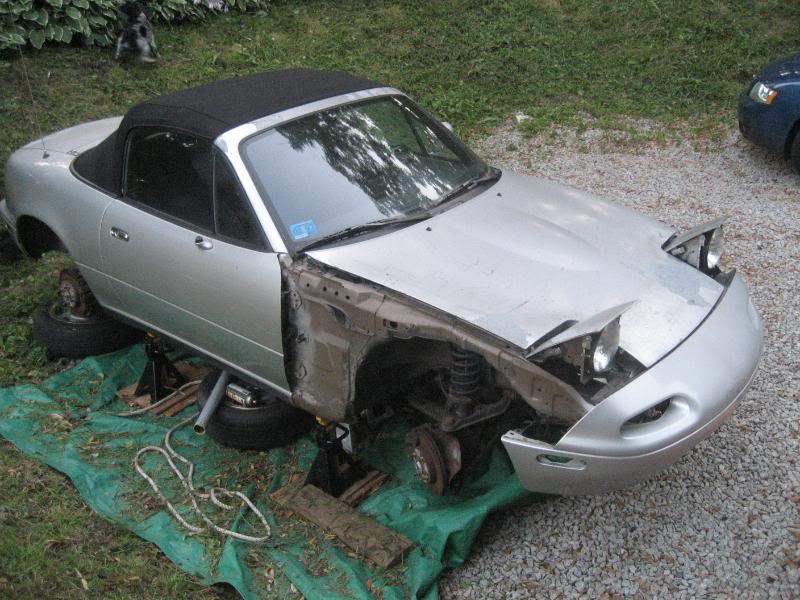
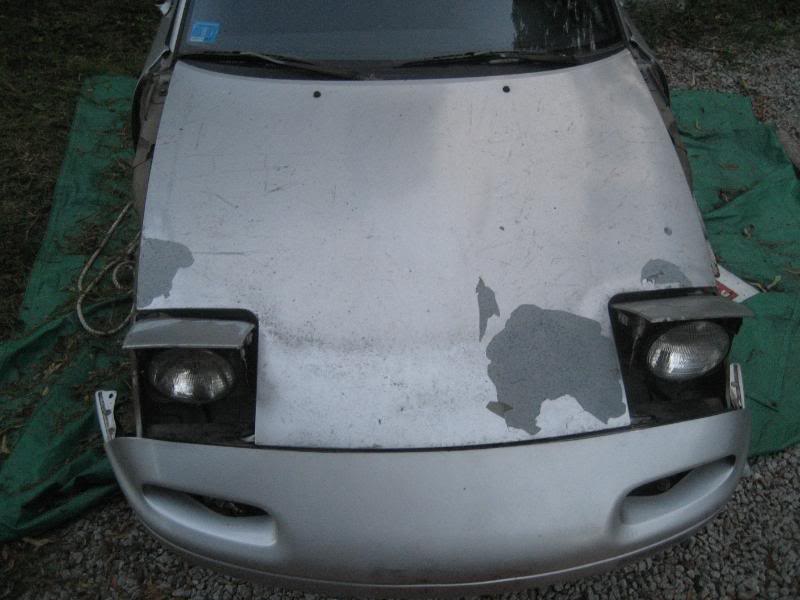
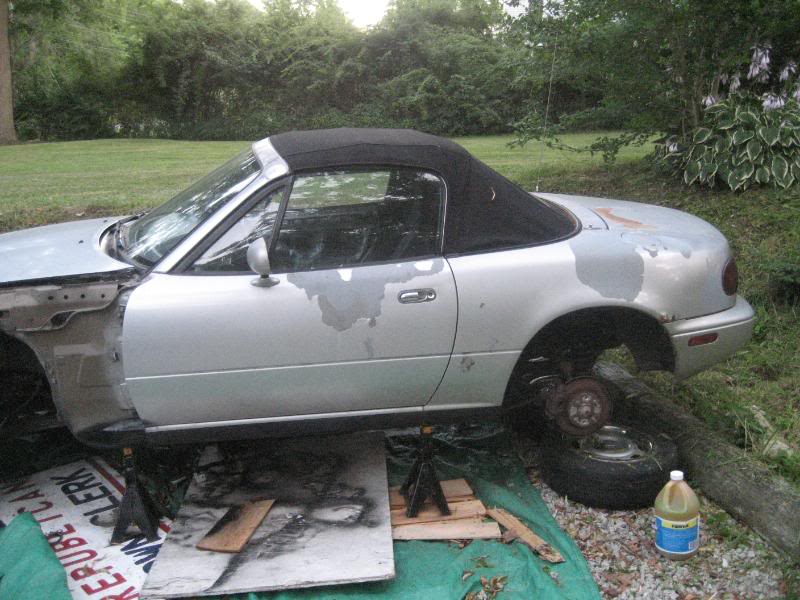
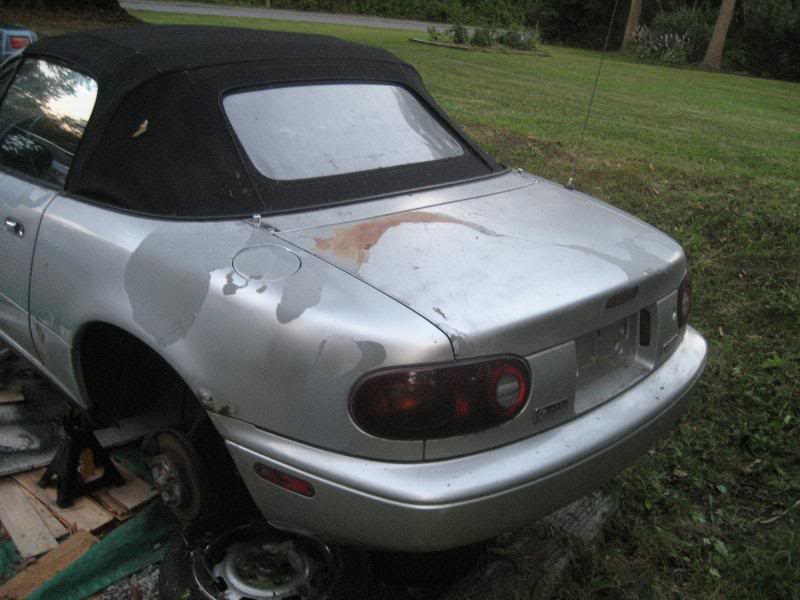
Lovely paint isn't it!
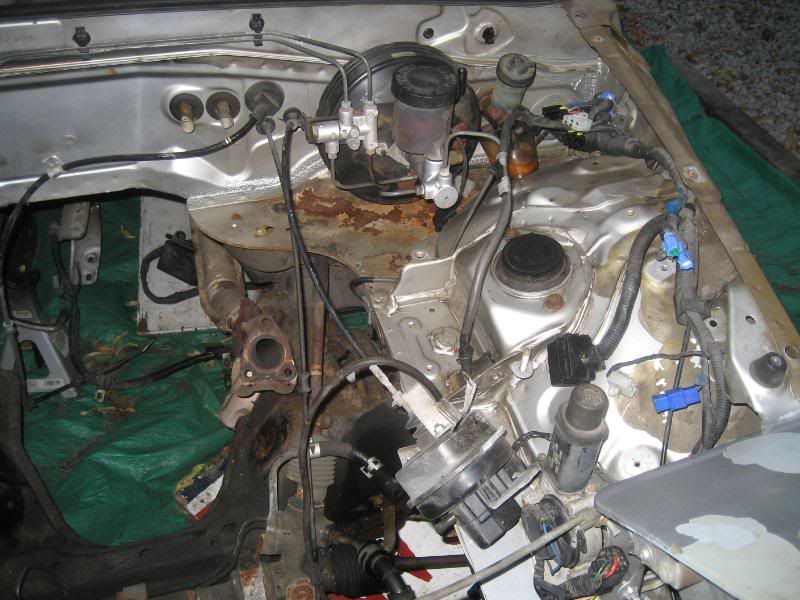
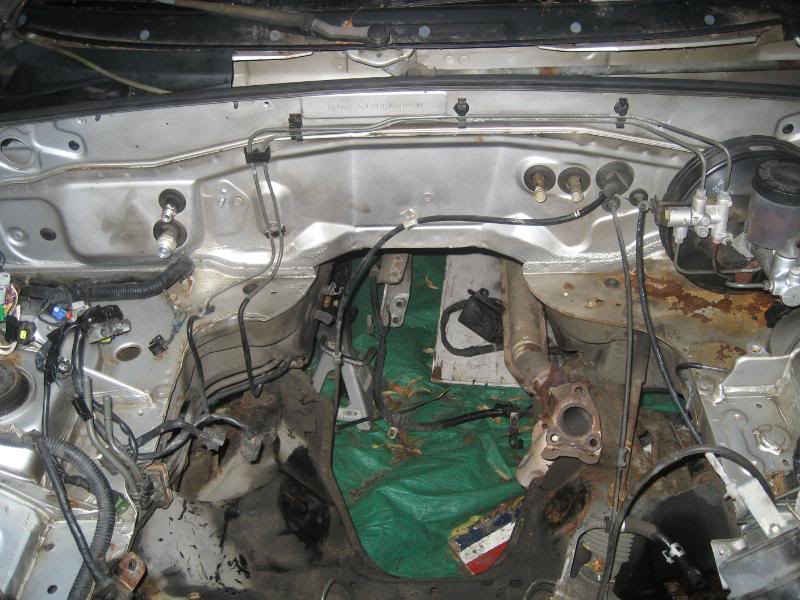
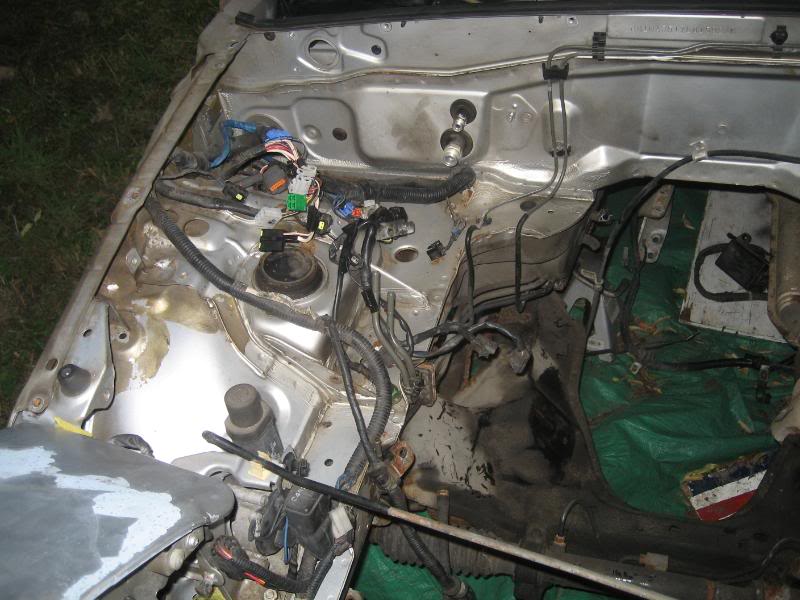
Next the motor came out....
These are the first pics I took; I was pretty deep into the disassembly before I realized I hadn't taken any yet!
Lovely paint isn't it!
Next the motor came out....

Reply
 1
1

1
03-30-2008, 06:36 PM
#2
Senior Member
Thread Starter
iTrader: (9)
Join Date: Jun 2007
Location: NH
Posts: 1,013
Total Cats: 21
Next up, gut the interior:
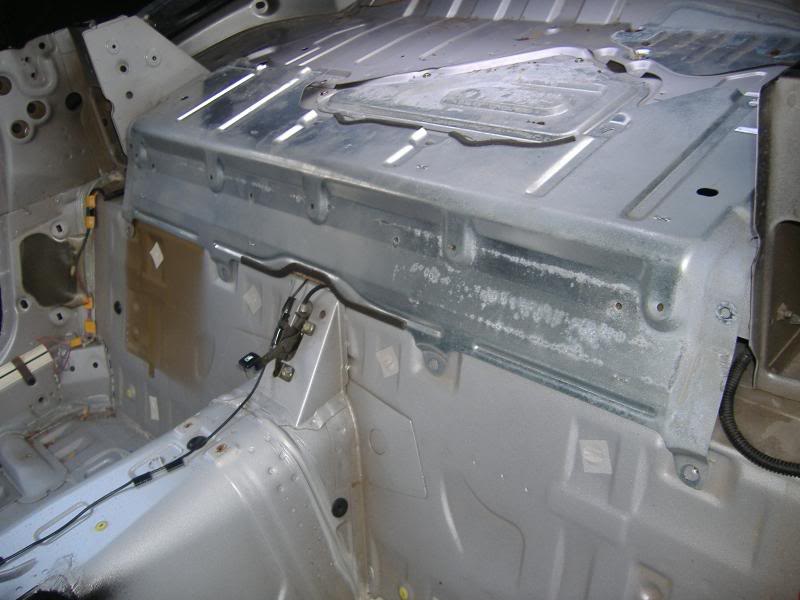
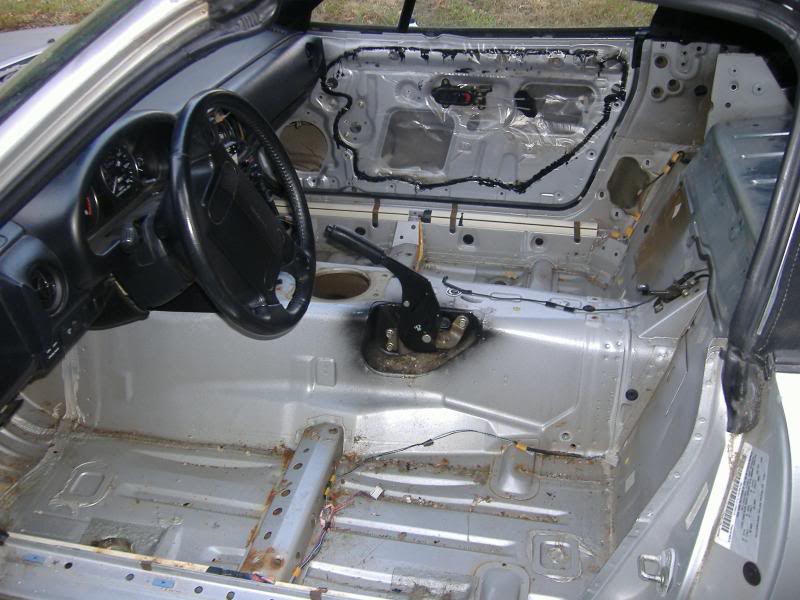
Yep, nothing out of the ordinary just yet...
Oh wait, what do we have here?
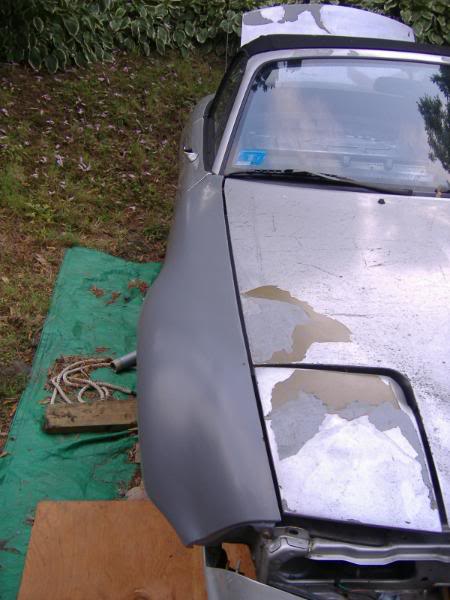
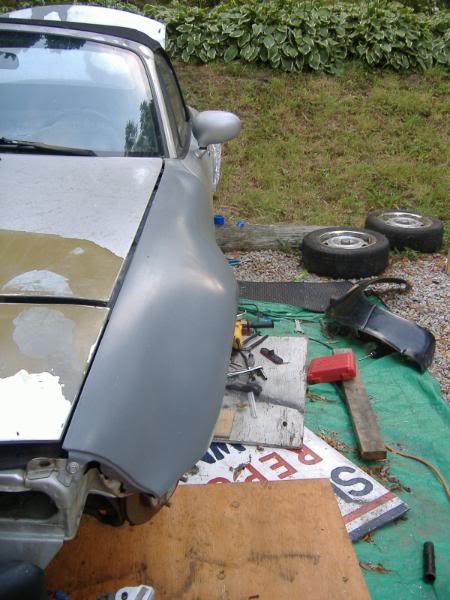
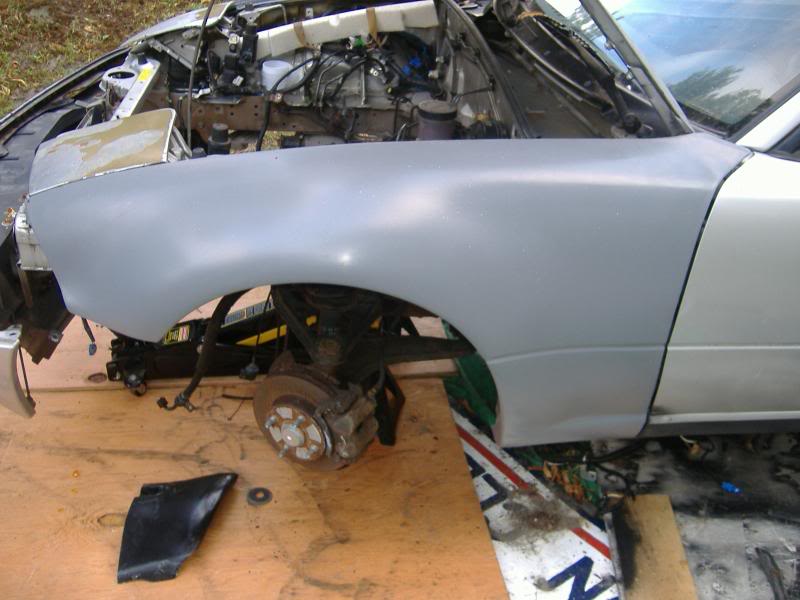
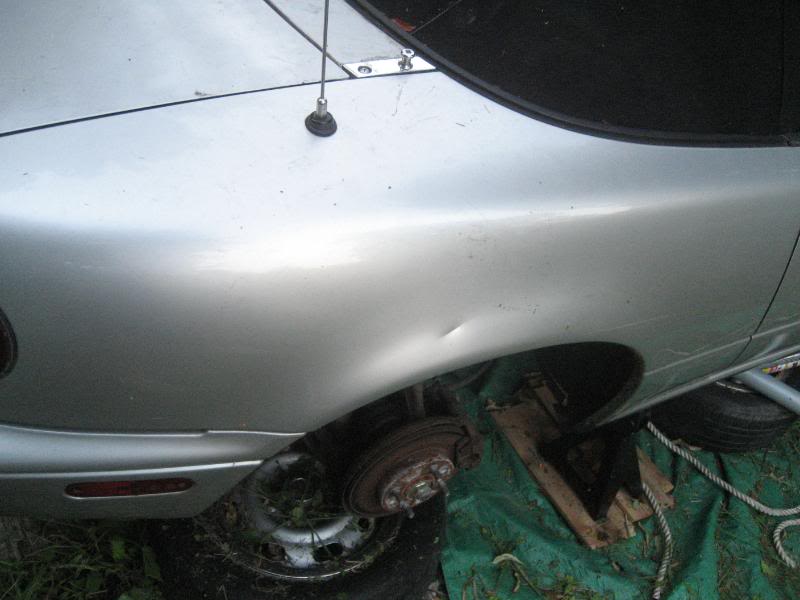
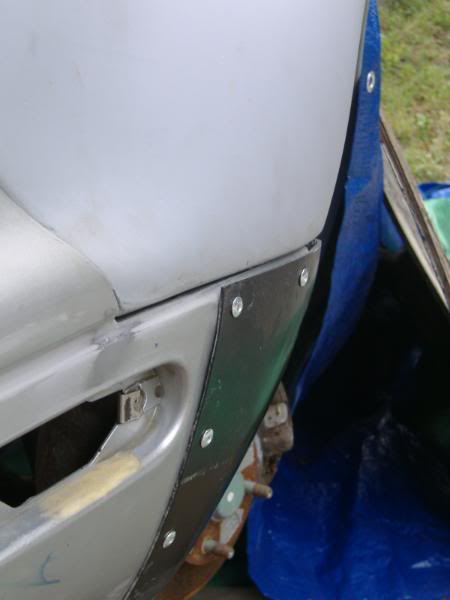
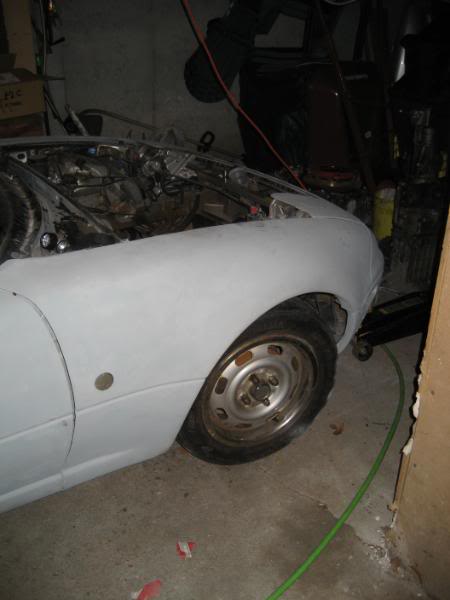
A little AWR action. The full fenders fit pretty well, the pass side went on without a hitch, but the driver's side needed a fair bit of coaxing. For the rears, I pulled the fenders way out and beat on them until they were up and out of the way to form the inner fender for the rear flares:

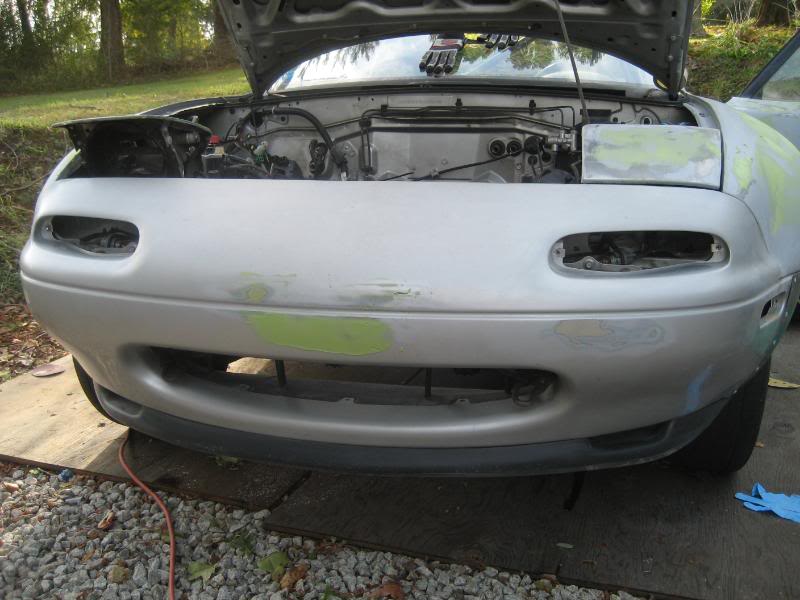
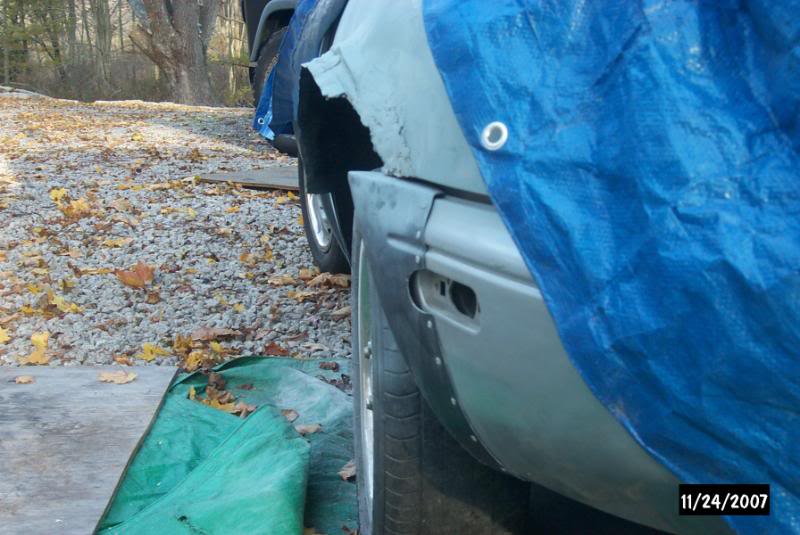
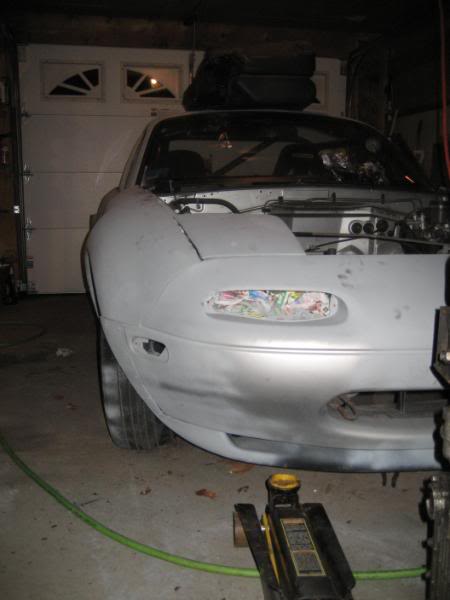
I haven�t installed the rear flares yet, as I have some rust in the rocker panels right behind the doors (go figure) which still needs to be fixed, so let's go back to the front of the car and work on the front bumper extensions. Here is the original bumper extension:
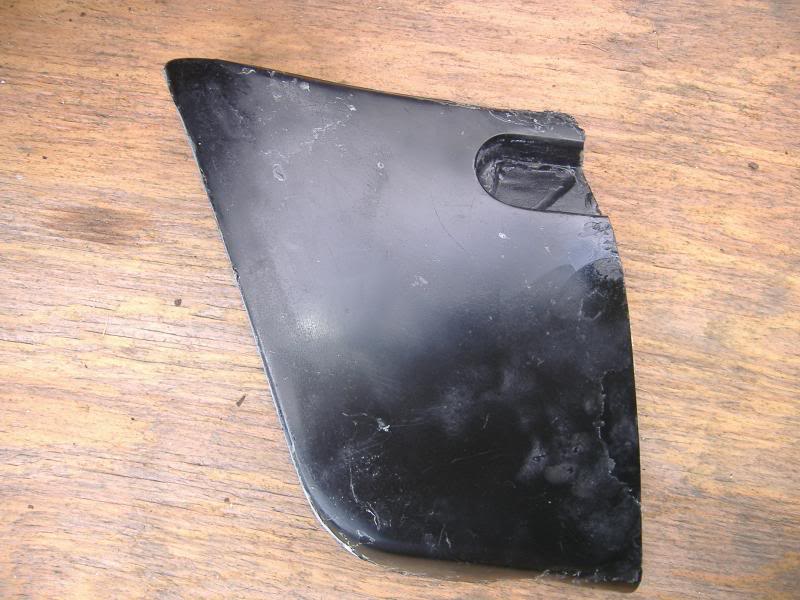
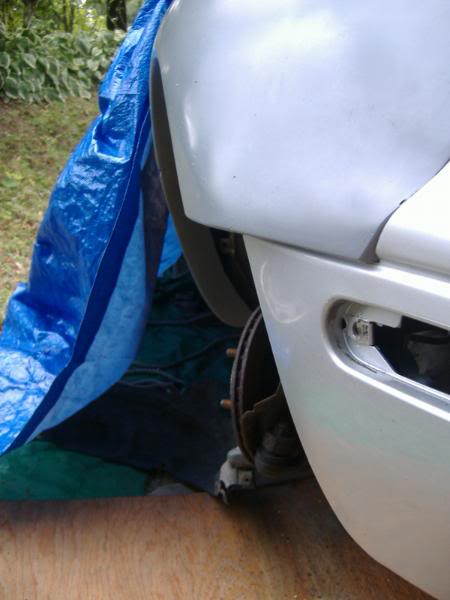
Now the original parts not only cover up the turn signals, but they also force you to make them shorter somehow, which I wasn't a fan of at all. I started to massage them with the dremel tool, and after about 10 trial fits, I realized 1. It was taking way too long, 2. I still had to cut down the actual light or find a replacement, and 3. I was starting to get annoyed. Now my current vehicle is a jeep, and when things don't fit there are only 2 tools you need, being a hammer and a saw. Now a hammer won't do much good here, but the saw sure will. So, after some careful thought and head scratching, I decided to just not deal with it at all and trim off enough material so the lights wouldn't be covered by the flare. The front bumper, being made of urethane, is very flexible, so I came up with a new game plan. Here's a pic of how much the bumper as it normally sits with the AWR flares:
Yep, nothing out of the ordinary just yet...
Oh wait, what do we have here?
A little AWR action. The full fenders fit pretty well, the pass side went on without a hitch, but the driver's side needed a fair bit of coaxing. For the rears, I pulled the fenders way out and beat on them until they were up and out of the way to form the inner fender for the rear flares:
I haven�t installed the rear flares yet, as I have some rust in the rocker panels right behind the doors (go figure) which still needs to be fixed, so let's go back to the front of the car and work on the front bumper extensions. Here is the original bumper extension:
Now the original parts not only cover up the turn signals, but they also force you to make them shorter somehow, which I wasn't a fan of at all. I started to massage them with the dremel tool, and after about 10 trial fits, I realized 1. It was taking way too long, 2. I still had to cut down the actual light or find a replacement, and 3. I was starting to get annoyed. Now my current vehicle is a jeep, and when things don't fit there are only 2 tools you need, being a hammer and a saw. Now a hammer won't do much good here, but the saw sure will. So, after some careful thought and head scratching, I decided to just not deal with it at all and trim off enough material so the lights wouldn't be covered by the flare. The front bumper, being made of urethane, is very flexible, so I came up with a new game plan. Here's a pic of how much the bumper as it normally sits with the AWR flares:
Reply
1
1
03-30-2008, 06:36 PM
#3
Senior Member
Thread Starter
iTrader: (9)
Join Date: Jun 2007
Location: NH
Posts: 1,013
Total Cats: 21
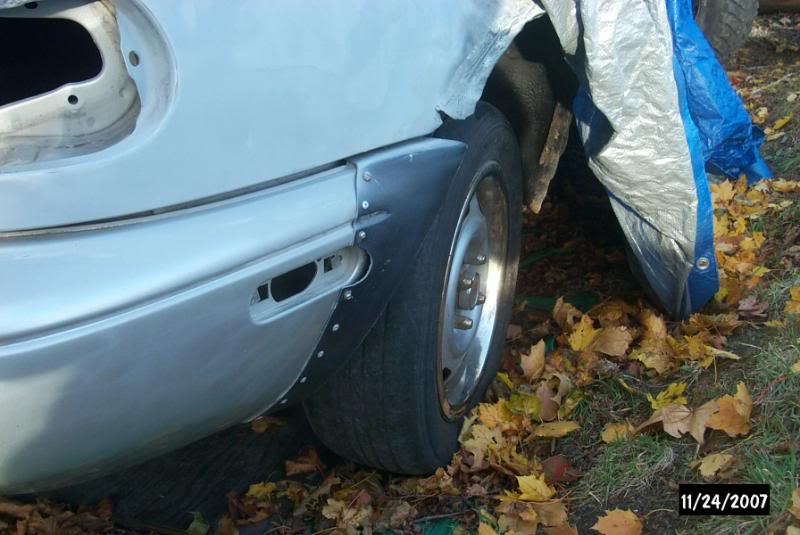
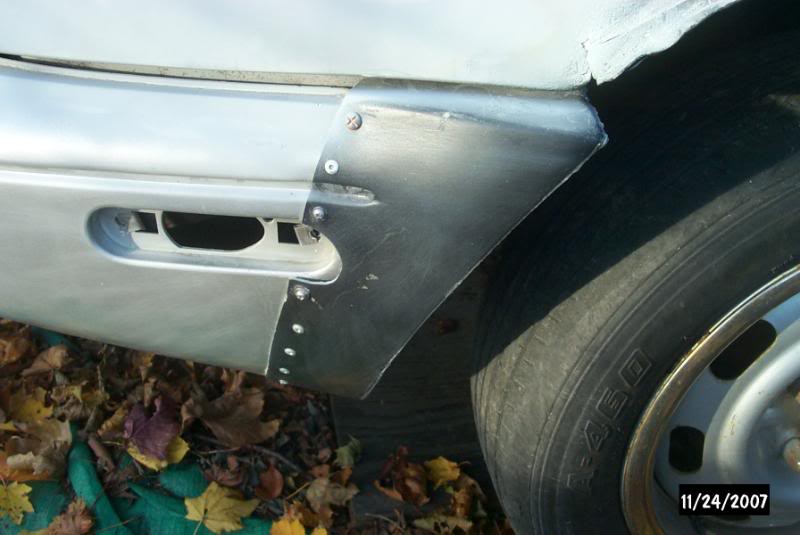
I pulled the bumper out to follow the line of the fender, and then attached it to the fender using a few bolts. Lastly, the flare was riveted to the bumper:
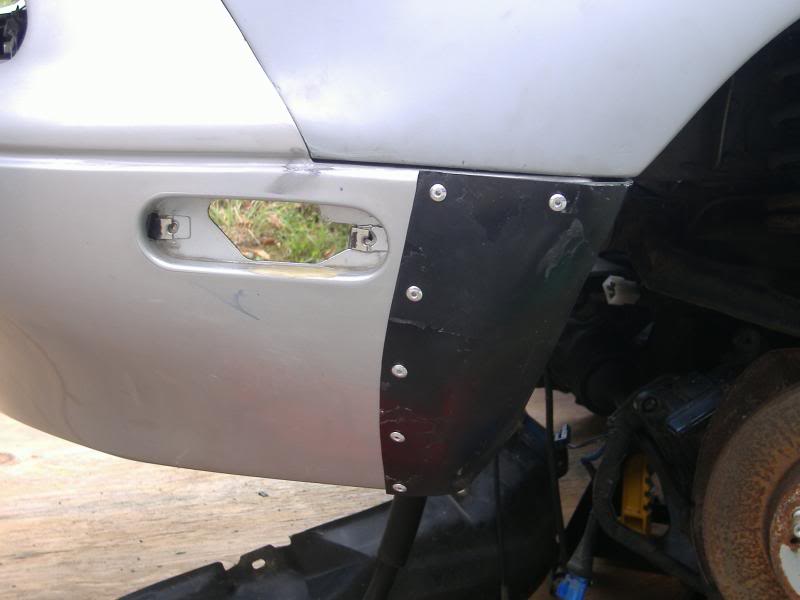
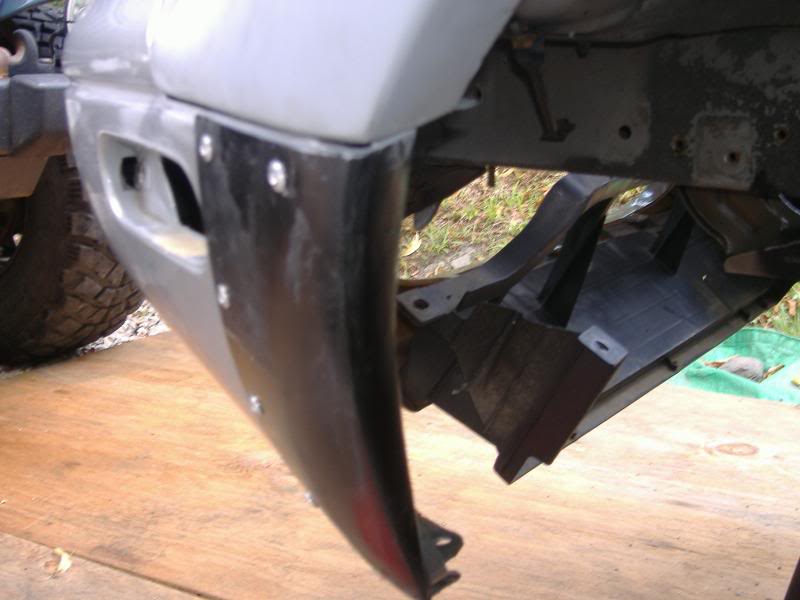
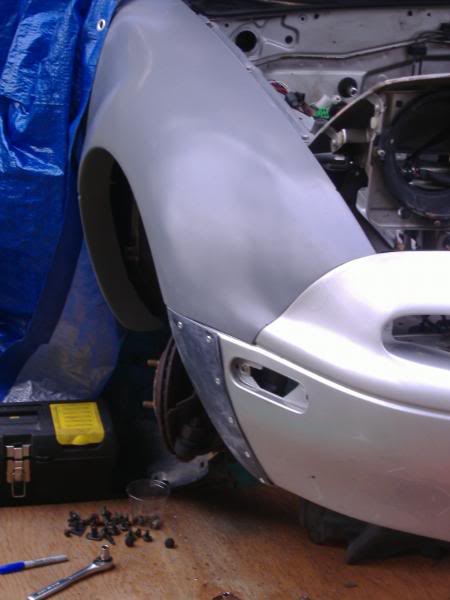
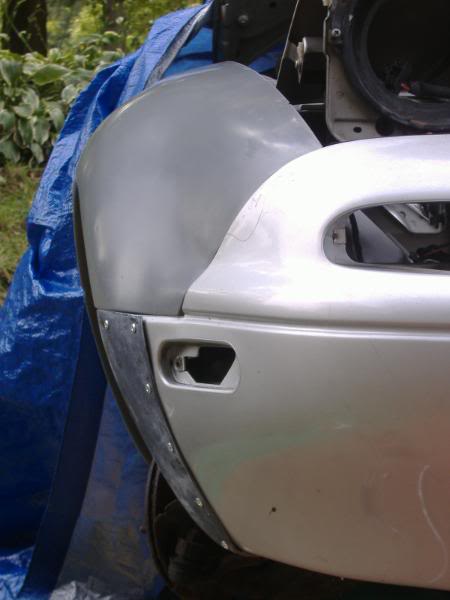
I'm more than pleased with the final result.
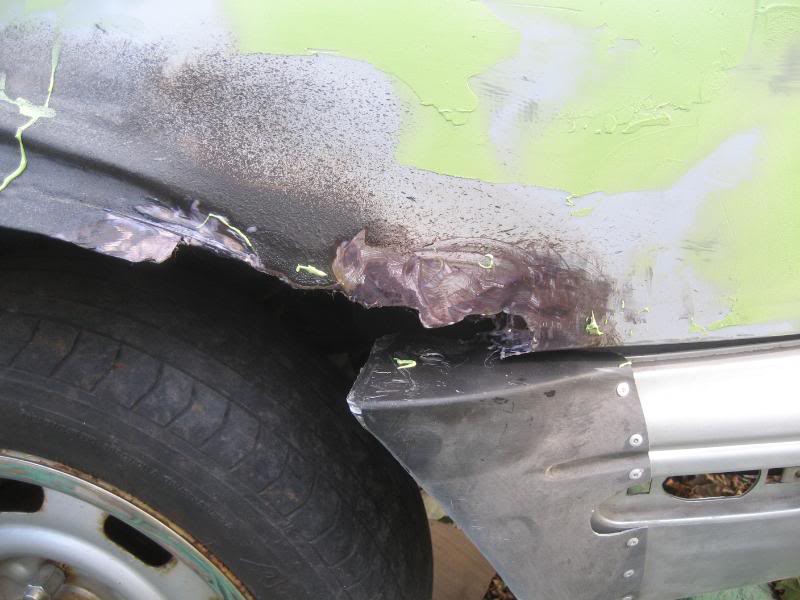
Now it was time for to bring the body back to life. I had been picking and poking at it throughout the months, but I spent some quality time with those camadecos and we went over the whole car. I'll let the pics to the explaining, as even I don't want to have to read this...
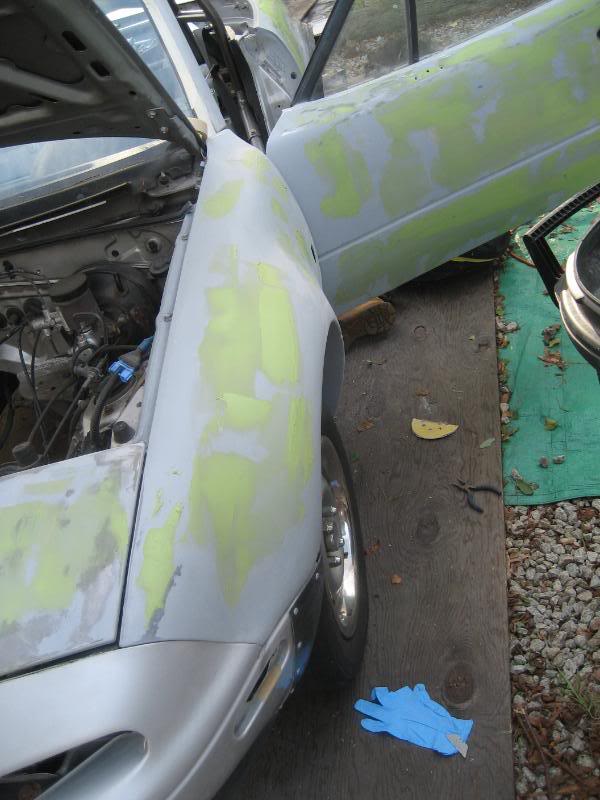
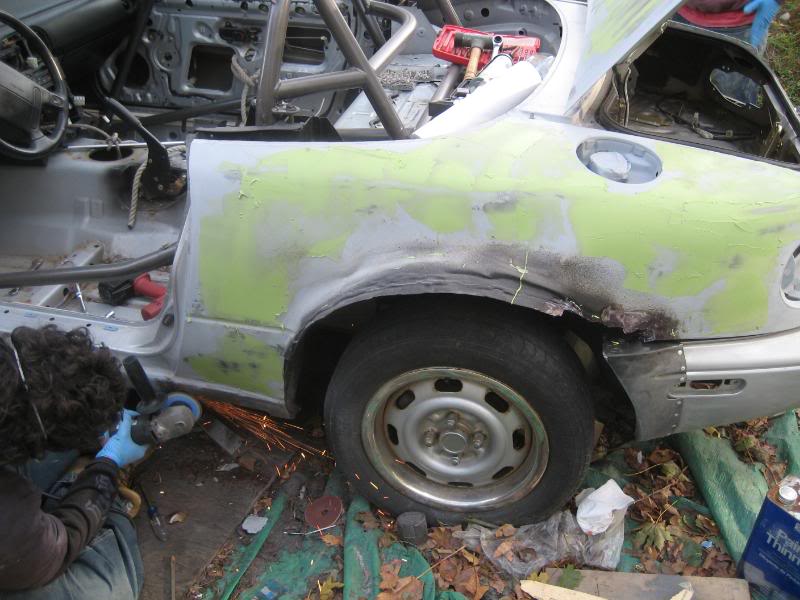
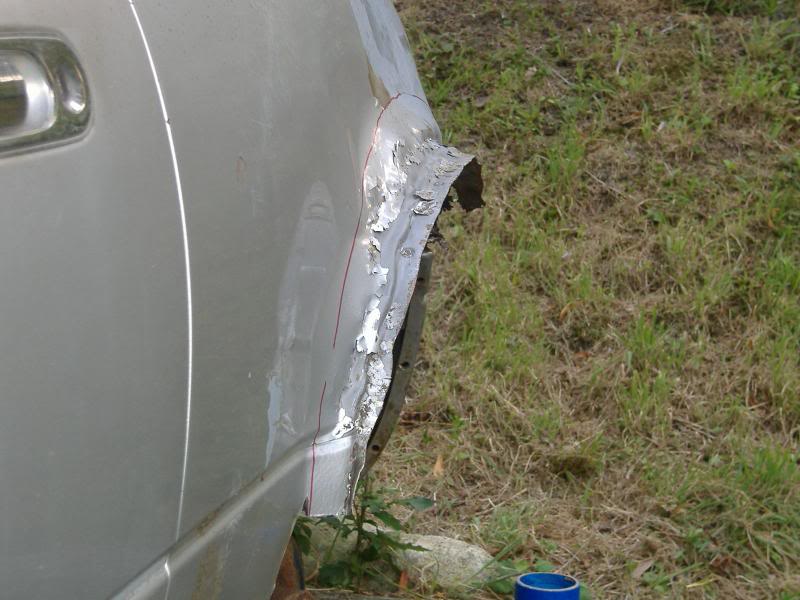
We patched the rear quarter rust spot with some fiberglass filler to seal it. I didn't see the need to take it to get it welded as the flares are going to cover it completely. Here's a pic:
I'm more than pleased with the final result.
Now it was time for to bring the body back to life. I had been picking and poking at it throughout the months, but I spent some quality time with those camadecos and we went over the whole car. I'll let the pics to the explaining, as even I don't want to have to read this...
We patched the rear quarter rust spot with some fiberglass filler to seal it. I didn't see the need to take it to get it welded as the flares are going to cover it completely. Here's a pic:
Reply
0
0
03-30-2008, 06:37 PM
#4
Senior Member
Thread Starter
iTrader: (9)
Join Date: Jun 2007
Location: NH
Posts: 1,013
Total Cats: 21
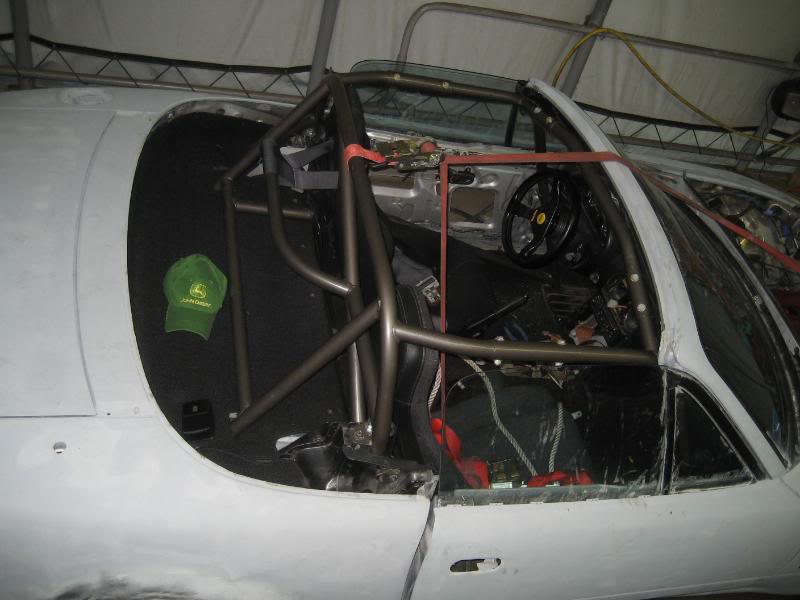
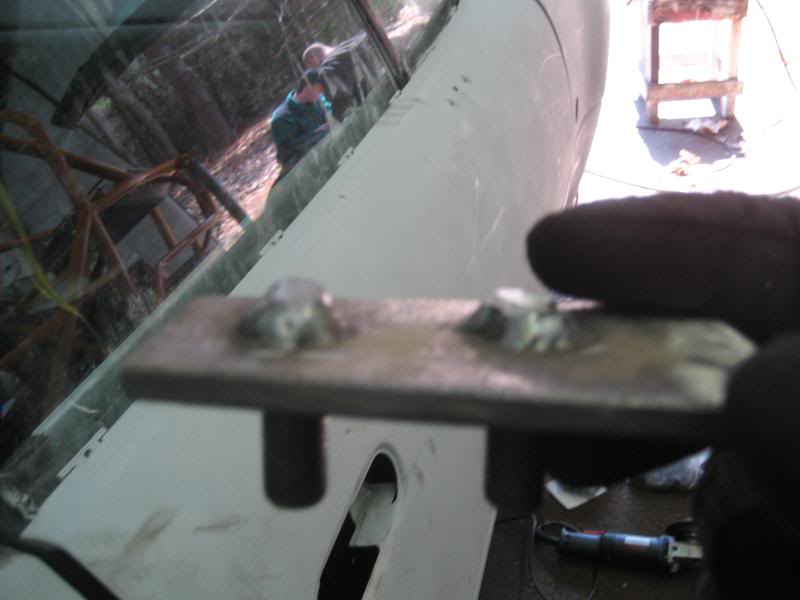
Now for those of you with good eyes, you're probably noticing the roll bar in the previous pics. The only thing is, it's not a roll bar....it's a whole cage!
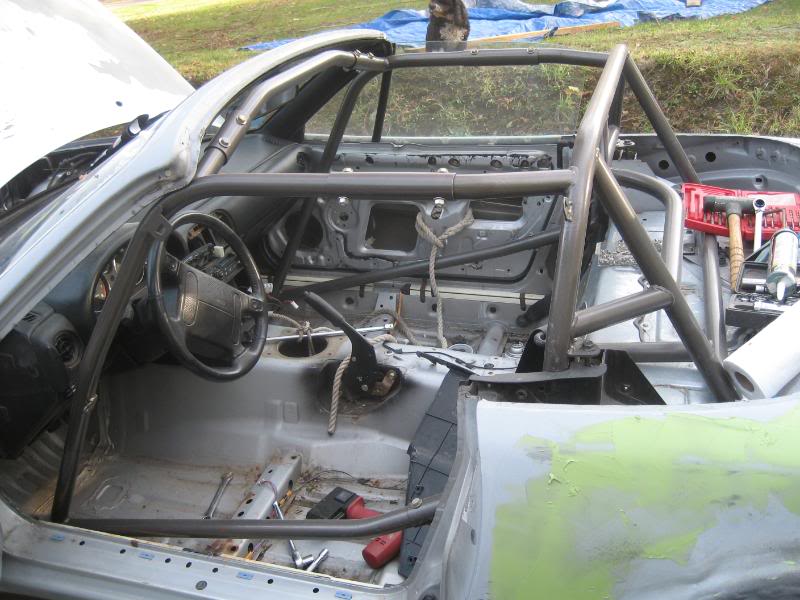
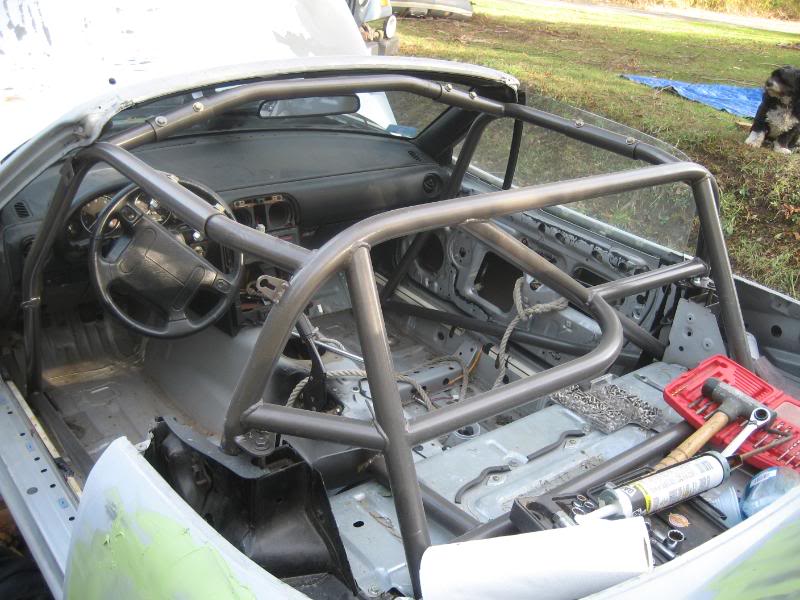
What a bear to install by yourself! I got it in though. It is a hard dog full cage with an extra support bar welded across the rear deck, and has provisions for a window net on the driver's side. (Thanks so much Owen for all your trouble getting this to me). The cage had a plate welded to it over the seat belt towers with 2 holes. I bored both holes out and bolted the plate down with the original seat belt bolt, and got some grade 8 bolts and bolted the upper seat belt mounts to the plate. Again, it came out fantastic.
Back to body work! After a lot of sanding and massaging, it was time for primer. I primed the whole car using some duplicolor primer. First stage of body work completed! Hooray!
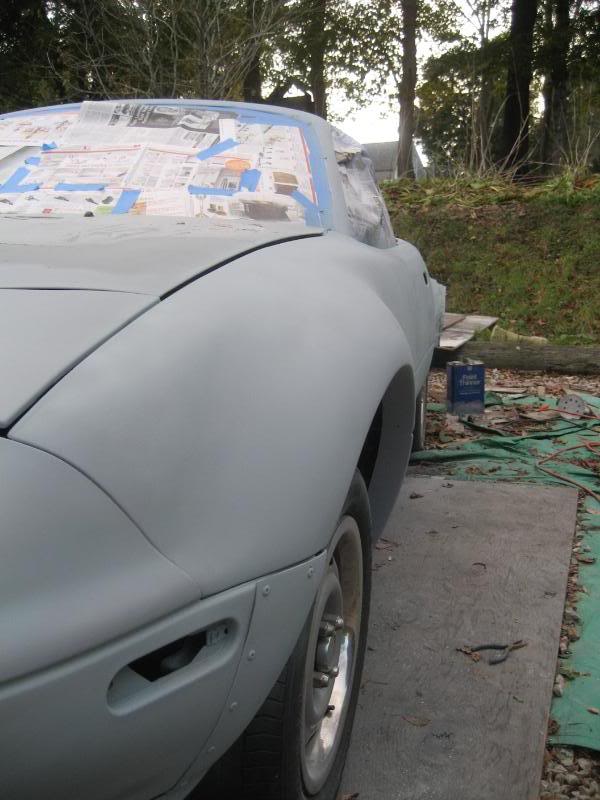
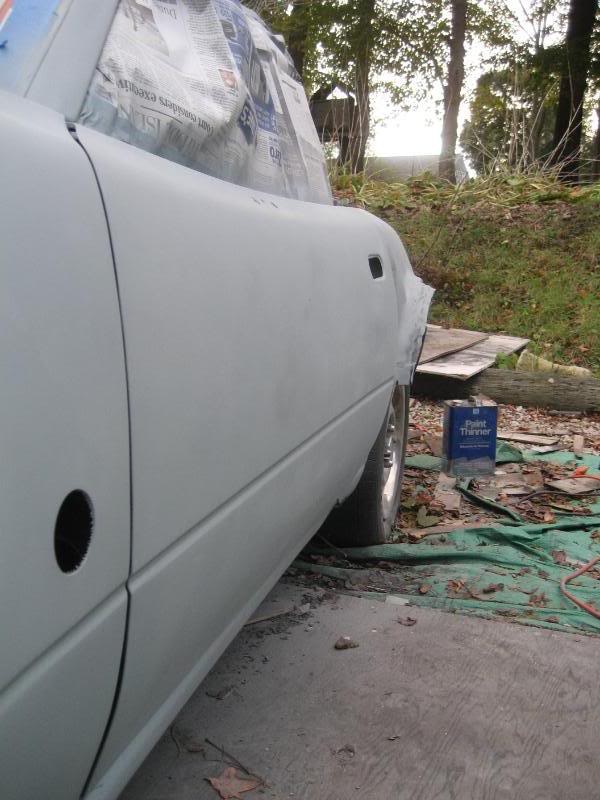
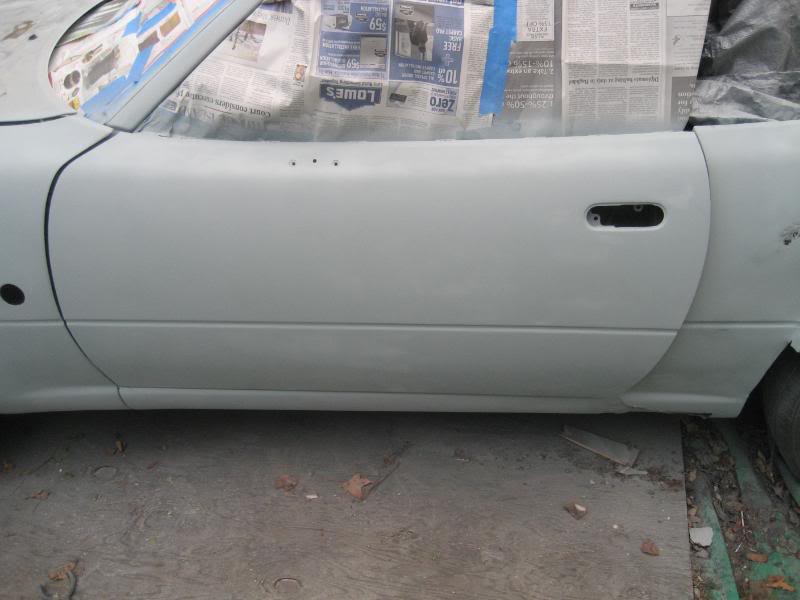
I also cut out a spot in the fenders for a set of jdm side winkers.
Well that's where the car sits right now, and that is all the pics I have of it at the moment. I have been collecting parts since June and have an entire garage/basement/bedroom full just waiting to be installed. Rather than list it all, I will post up pics as I install things, as I'm just like everyone else, and would rather see it than read it. Anyways, I love the site and hope you all like my build so far. There is PLENTY more to keep everyone entertained. Enjoy!
What a bear to install by yourself! I got it in though. It is a hard dog full cage with an extra support bar welded across the rear deck, and has provisions for a window net on the driver's side. (Thanks so much Owen for all your trouble getting this to me). The cage had a plate welded to it over the seat belt towers with 2 holes. I bored both holes out and bolted the plate down with the original seat belt bolt, and got some grade 8 bolts and bolted the upper seat belt mounts to the plate. Again, it came out fantastic.
Back to body work! After a lot of sanding and massaging, it was time for primer. I primed the whole car using some duplicolor primer. First stage of body work completed! Hooray!
I also cut out a spot in the fenders for a set of jdm side winkers.
Well that's where the car sits right now, and that is all the pics I have of it at the moment. I have been collecting parts since June and have an entire garage/basement/bedroom full just waiting to be installed. Rather than list it all, I will post up pics as I install things, as I'm just like everyone else, and would rather see it than read it. Anyways, I love the site and hope you all like my build so far. There is PLENTY more to keep everyone entertained. Enjoy!
Reply
1
1
03-30-2008, 06:37 PM
#5
Senior Member
Thread Starter
iTrader: (9)
Join Date: Jun 2007
Location: NH
Posts: 1,013
Total Cats: 21
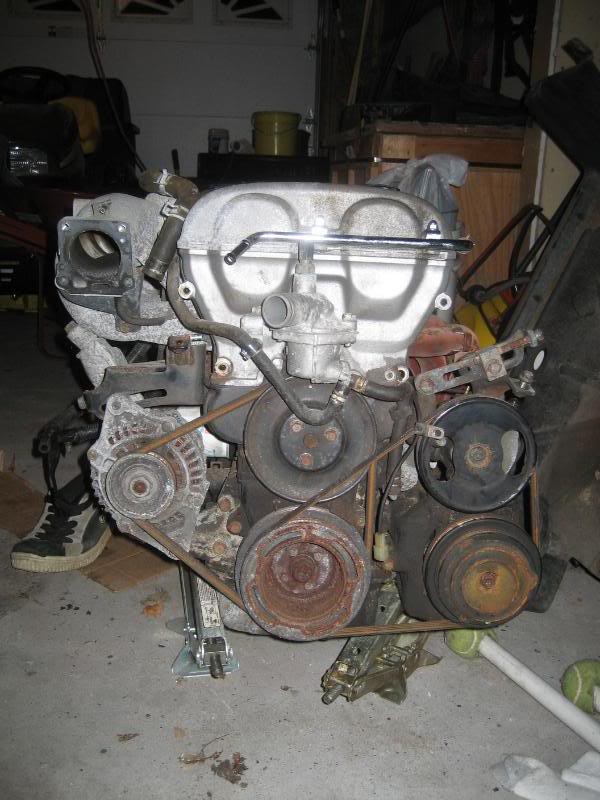
Got a little work done tonight, not as much as I had hoped for, but what are you going to do. Here's the old motor sitting on the floor of my garage, just waiting to donate anything it can to the new motor.
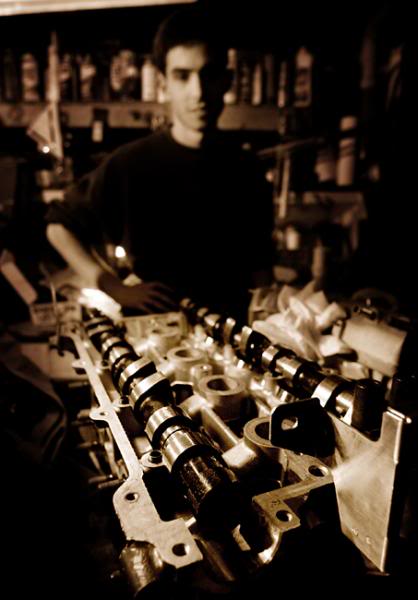
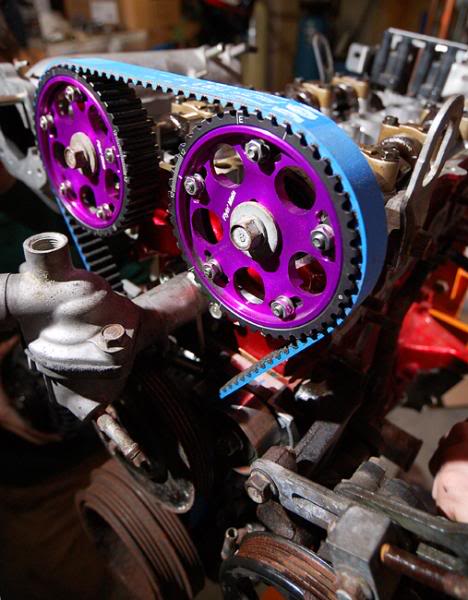
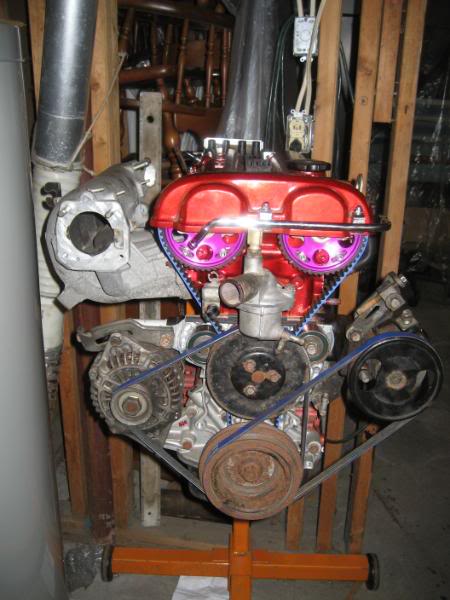
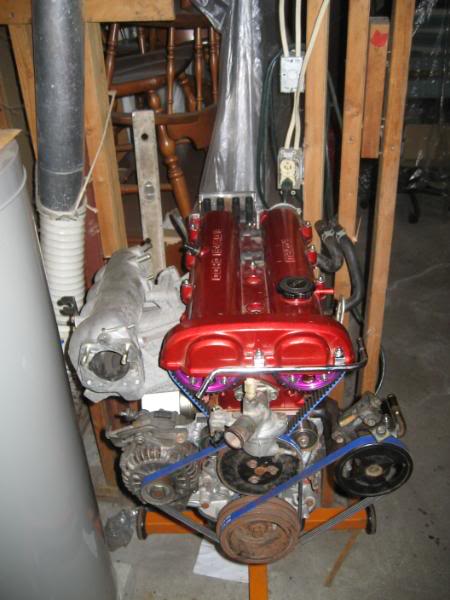
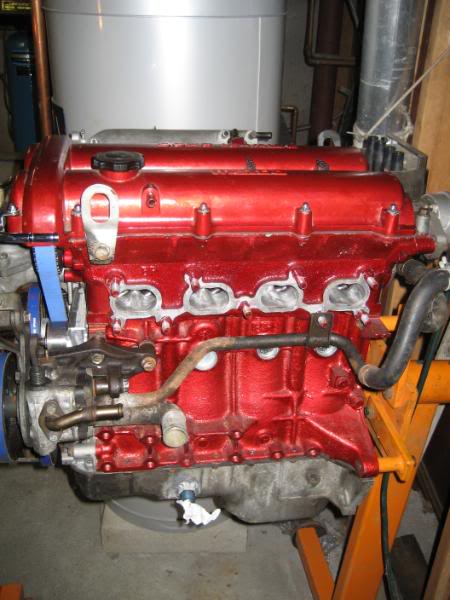
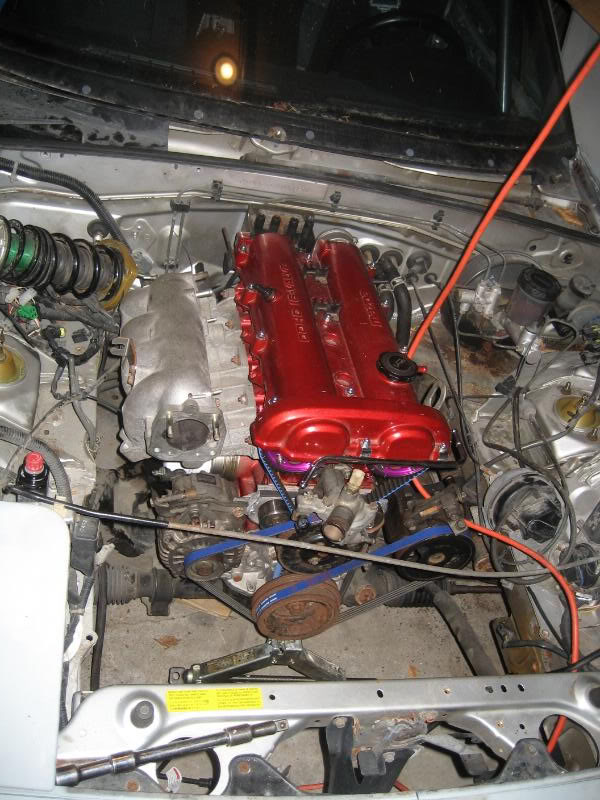
And what we've all been waiting for. The new motor!
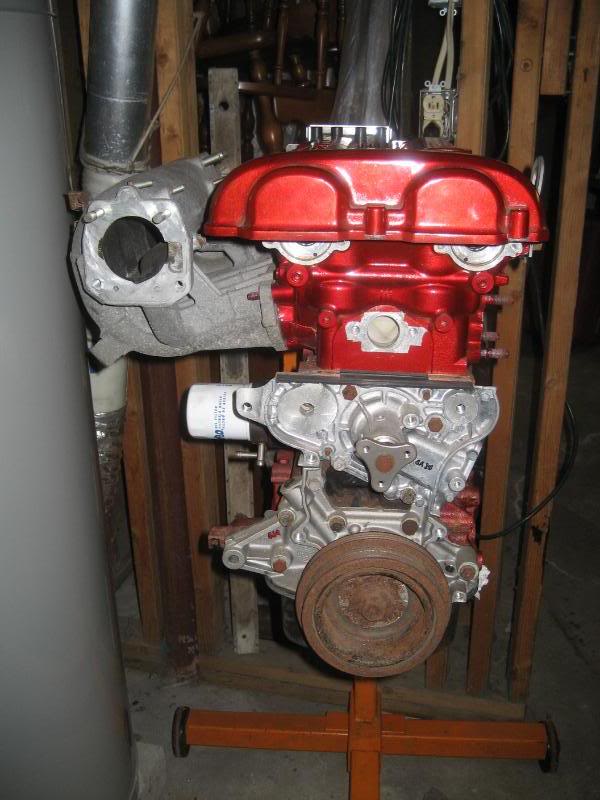
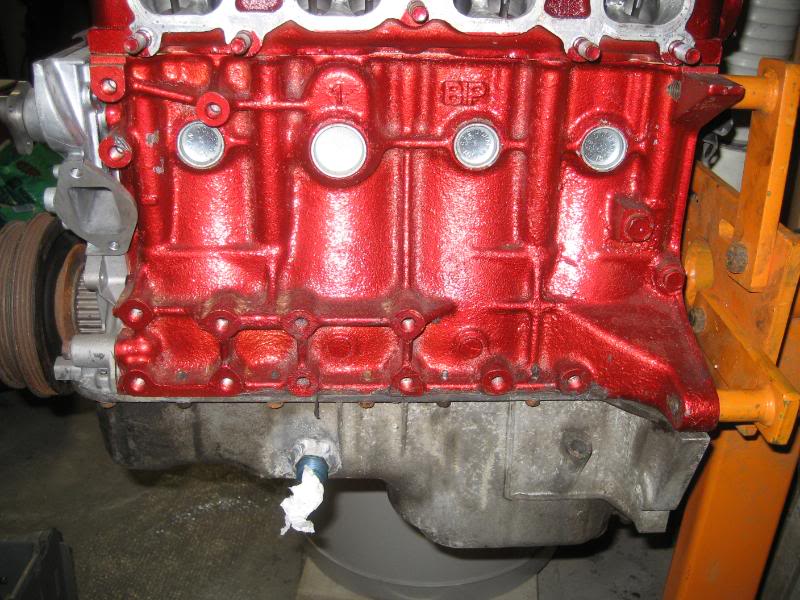
Now isn't that pretty....
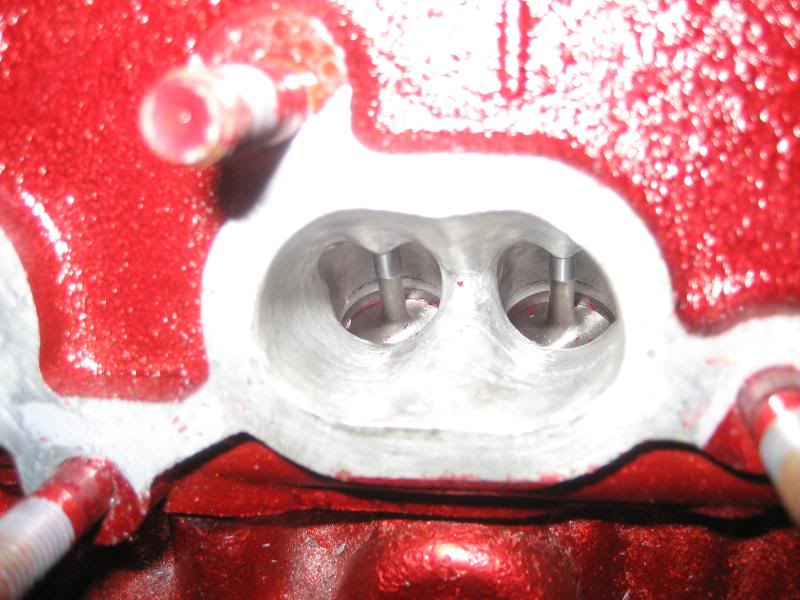
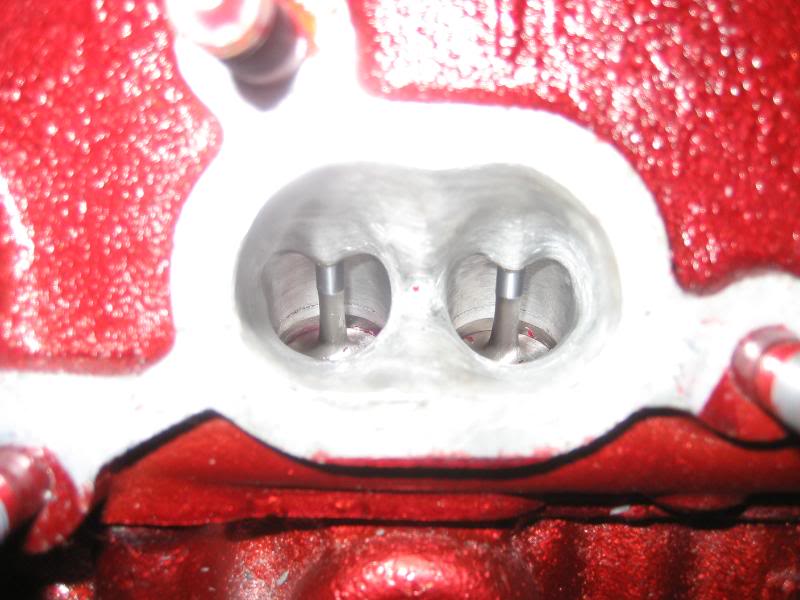
The port work is unreal
Just a few quick shots I snapped tonight. Here are the specs on it:
short block:
bored 40 over with weisco oversized turbo pistons (8.6:1) (it's now 1.92l, up from 1.8l)
pouter rods
ARP main and head studs
All new bearings and gaskets
pistons matched to 0.001 to the cylinder walls
balanced and blueprinted
lightened and balanced crank
lightweight flywheel
mazdaspeed high flow oil pump
ford racing water pump
copper 3 layer head gasket
head
fully ported and polished
checked for flatness
0.5mm oversize intake and exhaust rev valves
stiffer volvo valve springs
new retainers
new HLAs
Mazda 258 regrind cams
Flyin Miata adjustable Cam gears
Vishnu dual feed billet fuel rail w/ stainless lines
port-matched intake manifold
I still have to install the HLAs and the cams, but I won't be doing that until the motor is ready to go in the car, as it's not good to let it sit without being run with the stiffer valve springs. The block, head, and valve cover were painted with a few coats of high temp engine paint, primed, and then painted red. I cannot wait to start getting this car together. These next few months it's really going to start coming together.
And what we've all been waiting for. The new motor!
Now isn't that pretty....
The port work is unreal
Just a few quick shots I snapped tonight. Here are the specs on it:
short block:
bored 40 over with weisco oversized turbo pistons (8.6:1) (it's now 1.92l, up from 1.8l)
pouter rods
ARP main and head studs
All new bearings and gaskets
pistons matched to 0.001 to the cylinder walls
balanced and blueprinted
lightened and balanced crank
lightweight flywheel
mazdaspeed high flow oil pump
ford racing water pump
copper 3 layer head gasket
head
fully ported and polished
checked for flatness
0.5mm oversize intake and exhaust rev valves
stiffer volvo valve springs
new retainers
new HLAs
Mazda 258 regrind cams
Flyin Miata adjustable Cam gears
Vishnu dual feed billet fuel rail w/ stainless lines
port-matched intake manifold
I still have to install the HLAs and the cams, but I won't be doing that until the motor is ready to go in the car, as it's not good to let it sit without being run with the stiffer valve springs. The block, head, and valve cover were painted with a few coats of high temp engine paint, primed, and then painted red. I cannot wait to start getting this car together. These next few months it's really going to start coming together.
Reply
0
0
03-30-2008, 06:38 PM
#6
Senior Member
Thread Starter
iTrader: (9)
Join Date: Jun 2007
Location: NH
Posts: 1,013
Total Cats: 21
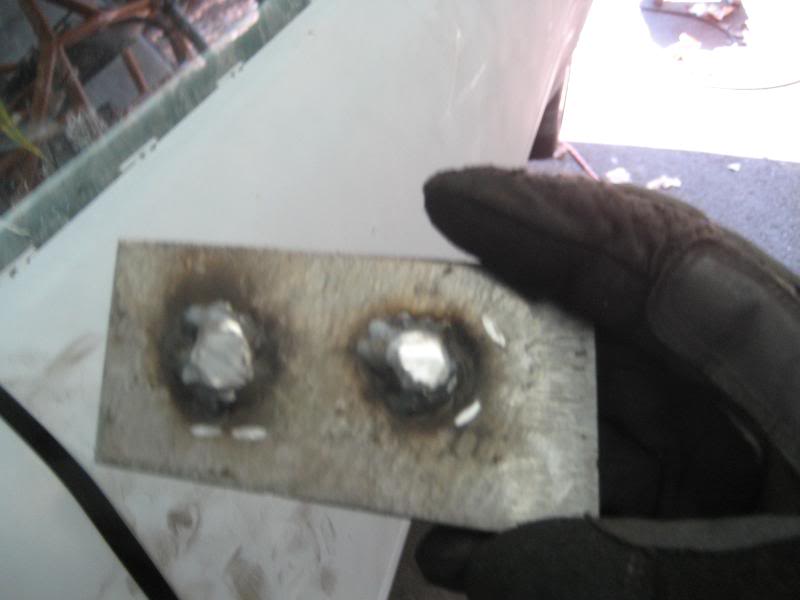
Here's another shot of the seatbelt attachment to the cage:
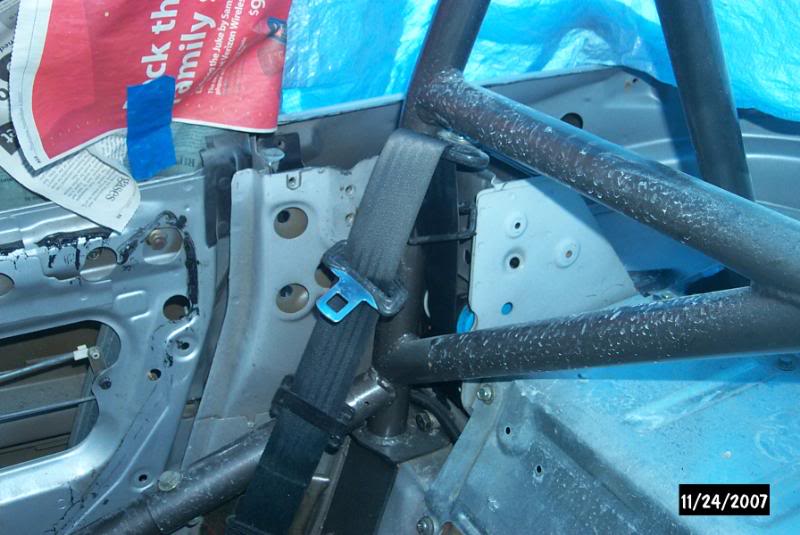
Yes I know it's filthy.
I had to enlarge the holes and get some different bolts. The old seatbelt bolt is bolted through the cage to the existing hole, and I got a new grade 8 bolt and mounted the seatbelt to the plate.
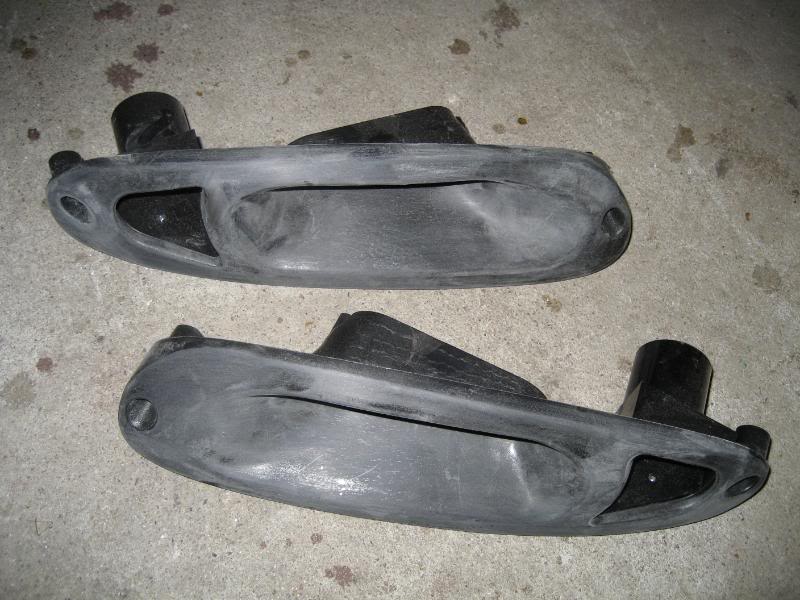
Moving on, took some pics of the finished rear bumper extensions. Again, I cut them down in size so I wouldn't have to deal with the smaller turn signal problem. I couldn't cut them down all the way, as the flare started about 1/2 way through the light, so I had to follow the contour of the signals and cut them to match:
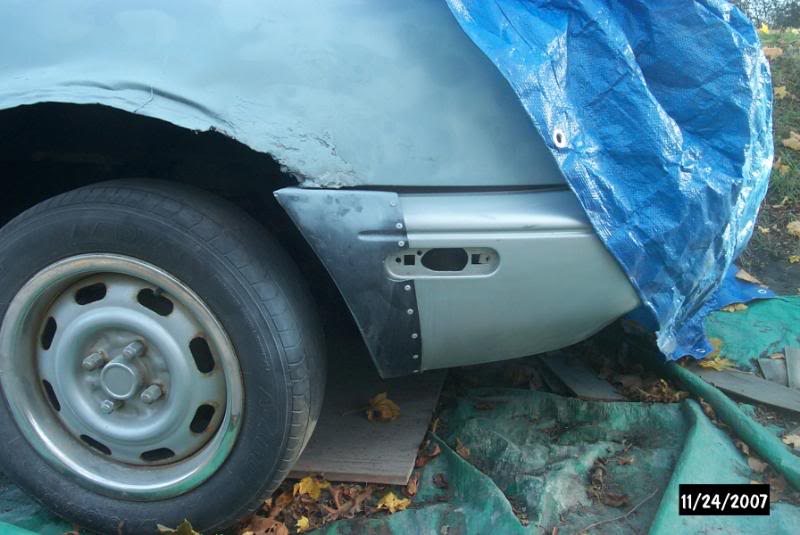
Work has been slowing down because it's getting cold and dark fast. Once all the leaves fall down and the lawnmower is tucked away for the winter, I'll bring the car into the garage.
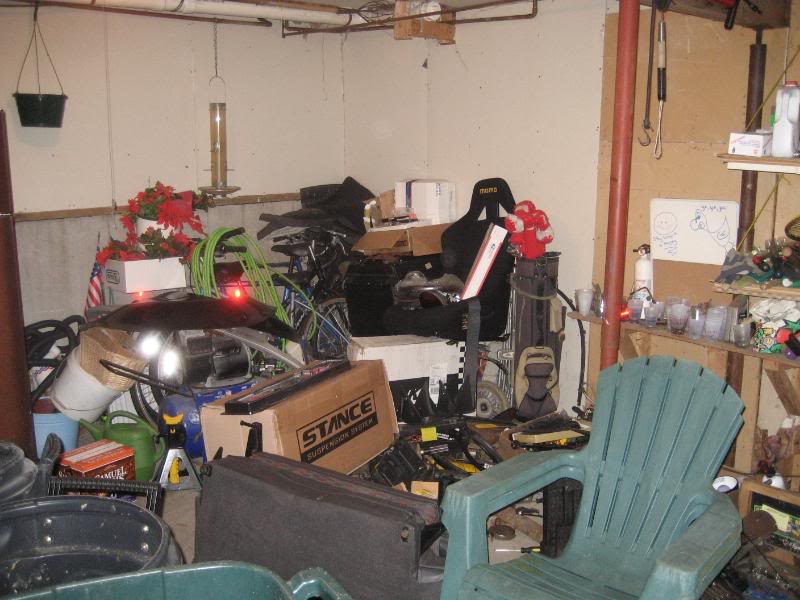
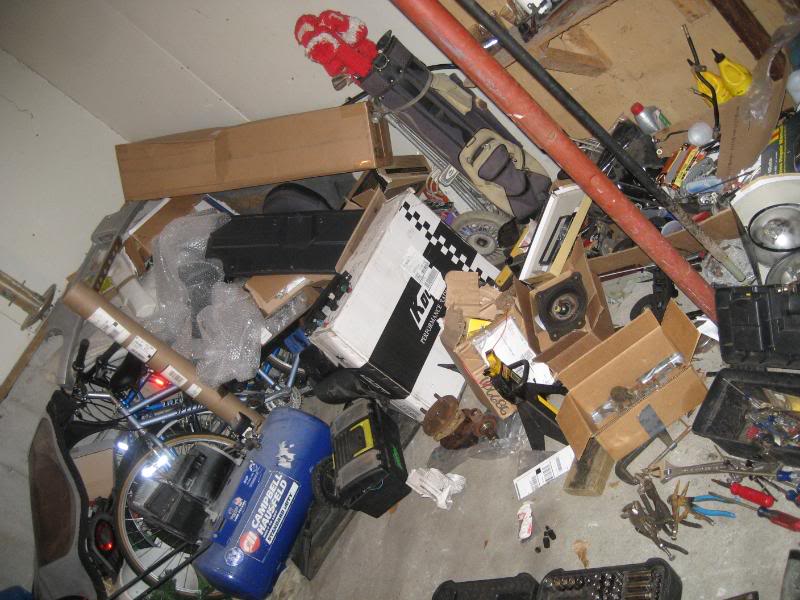
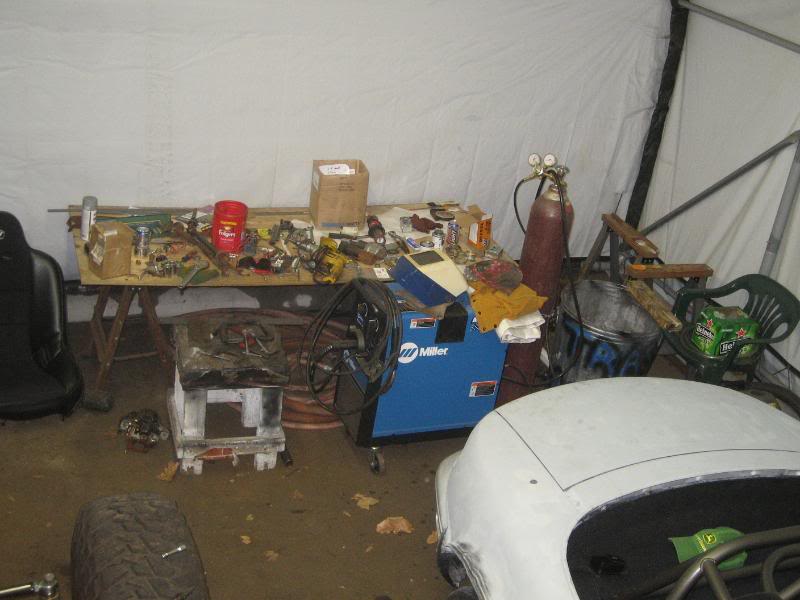
I thought this was a funny picture. Here's where most of the miata lies:
Yes I know it's filthy.
I had to enlarge the holes and get some different bolts. The old seatbelt bolt is bolted through the cage to the existing hole, and I got a new grade 8 bolt and mounted the seatbelt to the plate.
Moving on, took some pics of the finished rear bumper extensions. Again, I cut them down in size so I wouldn't have to deal with the smaller turn signal problem. I couldn't cut them down all the way, as the flare started about 1/2 way through the light, so I had to follow the contour of the signals and cut them to match:
Work has been slowing down because it's getting cold and dark fast. Once all the leaves fall down and the lawnmower is tucked away for the winter, I'll bring the car into the garage.
I thought this was a funny picture. Here's where most of the miata lies:
Reply
1
1
03-30-2008, 06:38 PM
#7
Senior Member
Thread Starter
iTrader: (9)
Join Date: Jun 2007
Location: NH
Posts: 1,013
Total Cats: 21
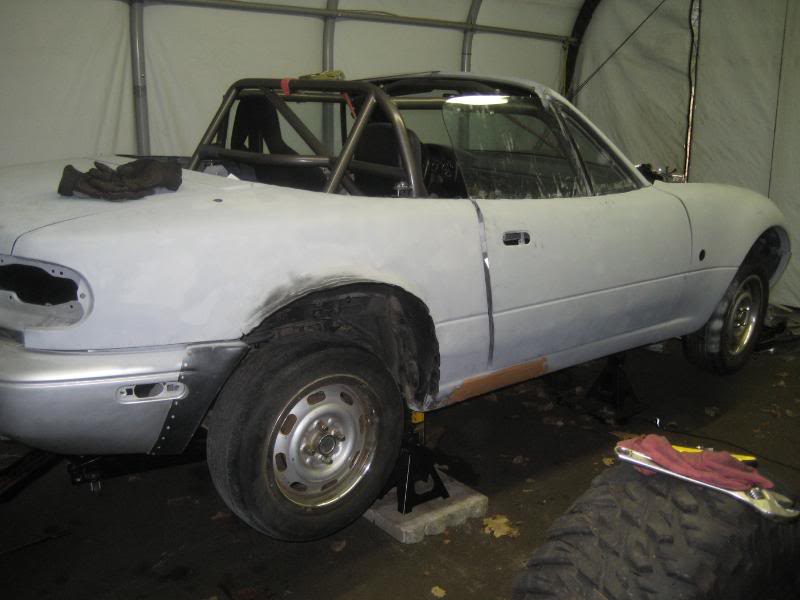
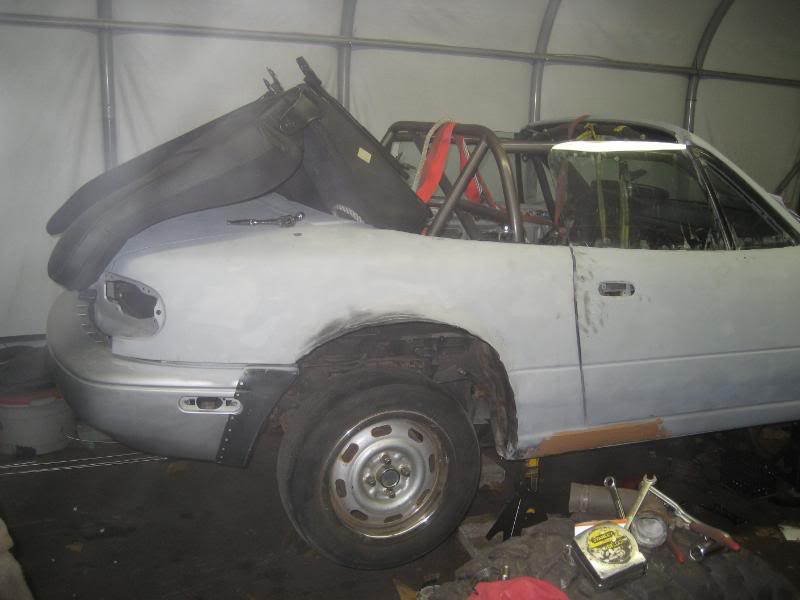
It's finally inside the garage- here's how it sits:
There's just too much stuff in this little garage. That's the rear seat from my jeep sitting on top of the roll cage. :roll:
BUT! The pile has gotten a little smaller (although much messier, sigh...)
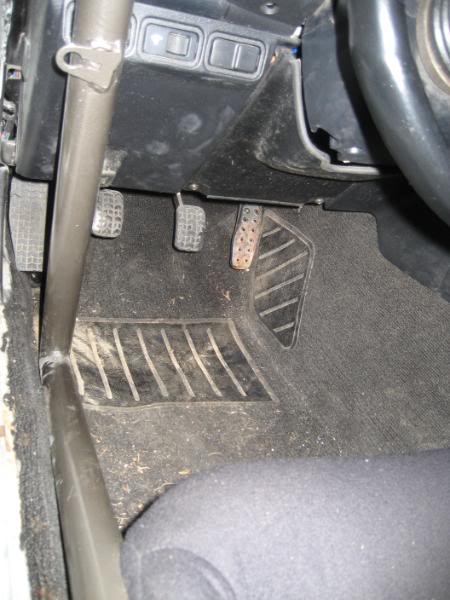
Decided to get some work done on the interior next. Got the carpets all installed again and cut to fit around the roll cage.
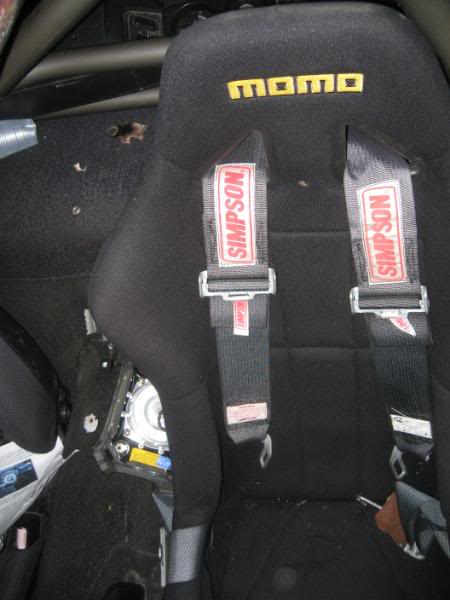
Installed my "new-to-me" Momo start seat and Simpson 3" 5 pt. harness. I haven't put in the submarine belt as I have to cut some brackets to use as backing plates. I'll do that later.
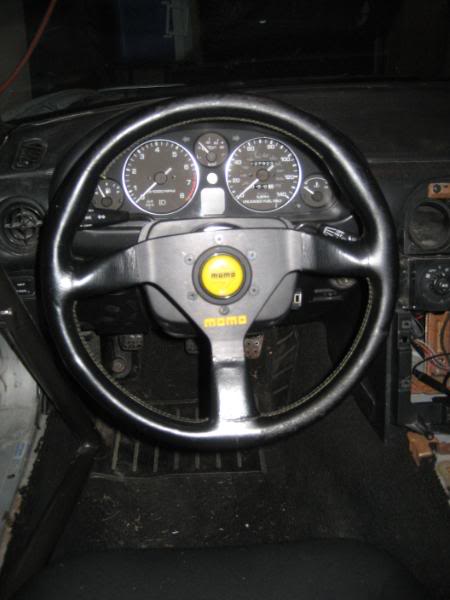
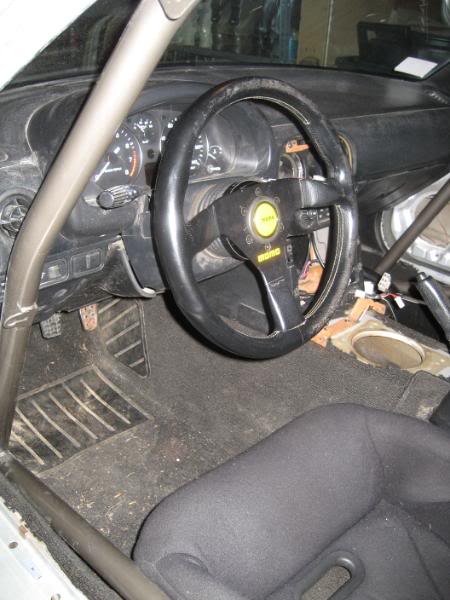
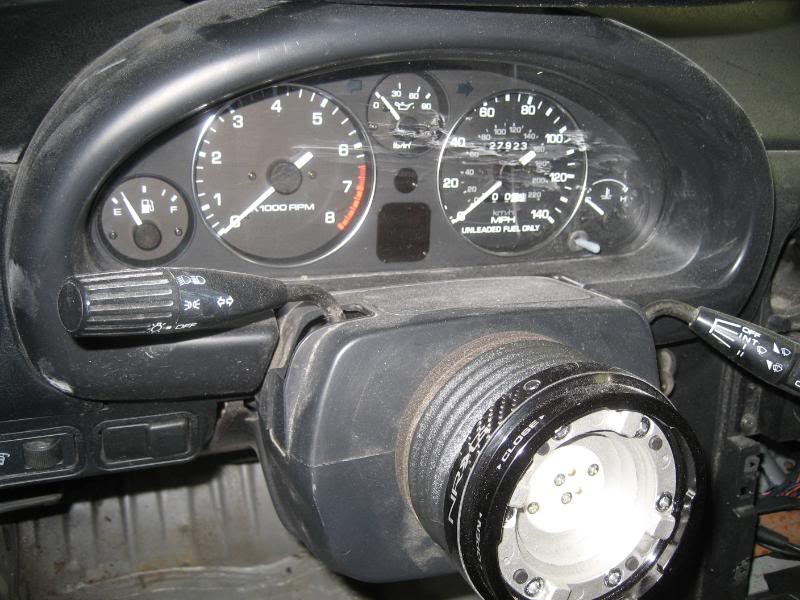
Next up, I ripped off that ugly stock steering wheel and the now useless airbag and bolted on a MOMO hub. Anyone who has installed a hub must know that they don't exactly just bolt right on. I ended up shaving down the connector for the airbag and horn button coming from the steering column, and then drilling out a 1/2" hole in the adaptor where the connector "hit" the hub. This hole allowed it to slide right in, allowing me to bolt the hub up flush- and I didn't have to mess with the turn signal stops this way either. Next up was a carbon fiber NRG Thin quick release hub. After this came my MOMO Competition wheel and a yellow MOMO horn button. MOMO was kind enough to not put the correct connections on the horn, so I got a little creative. A friend of mine came up with a great idea on how to get around this problem. I took the horn button apart, and bent the ground wire up through the "ground" hole, soldered a connector on it, and bent it flat. This allowed me to then hook up the connections for the horn on the quick release, and install the wheel.
After this, I didn't feel like doing anything else in the interior, so I went and grabbed my TSI's. They were a little too smooth for paint to stick too, and had some burrs on them, so I sanded them down smooth.
Few pics of some new parts that came on the mail:
First up, some 258 Mazda regrind cams.
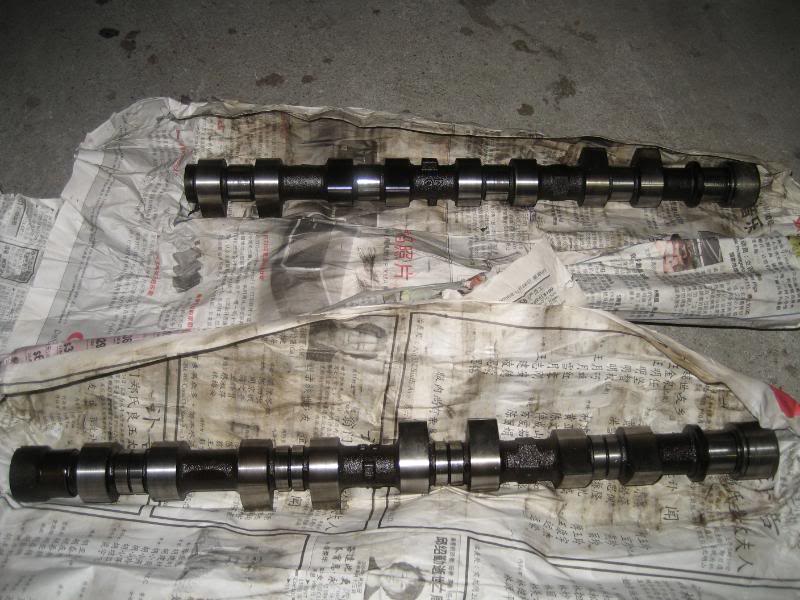
Nice.
There's just too much stuff in this little garage. That's the rear seat from my jeep sitting on top of the roll cage. :roll:
BUT! The pile has gotten a little smaller (although much messier, sigh...)
Decided to get some work done on the interior next. Got the carpets all installed again and cut to fit around the roll cage.
Installed my "new-to-me" Momo start seat and Simpson 3" 5 pt. harness. I haven't put in the submarine belt as I have to cut some brackets to use as backing plates. I'll do that later.
Next up, I ripped off that ugly stock steering wheel and the now useless airbag and bolted on a MOMO hub. Anyone who has installed a hub must know that they don't exactly just bolt right on. I ended up shaving down the connector for the airbag and horn button coming from the steering column, and then drilling out a 1/2" hole in the adaptor where the connector "hit" the hub. This hole allowed it to slide right in, allowing me to bolt the hub up flush- and I didn't have to mess with the turn signal stops this way either. Next up was a carbon fiber NRG Thin quick release hub. After this came my MOMO Competition wheel and a yellow MOMO horn button. MOMO was kind enough to not put the correct connections on the horn, so I got a little creative. A friend of mine came up with a great idea on how to get around this problem. I took the horn button apart, and bent the ground wire up through the "ground" hole, soldered a connector on it, and bent it flat. This allowed me to then hook up the connections for the horn on the quick release, and install the wheel.
After this, I didn't feel like doing anything else in the interior, so I went and grabbed my TSI's. They were a little too smooth for paint to stick too, and had some burrs on them, so I sanded them down smooth.
Few pics of some new parts that came on the mail:
First up, some 258 Mazda regrind cams.
Nice.
Reply
0
0
03-30-2008, 06:39 PM
#8
Senior Member
Thread Starter
iTrader: (9)
Join Date: Jun 2007
Location: NH
Posts: 1,013
Total Cats: 21
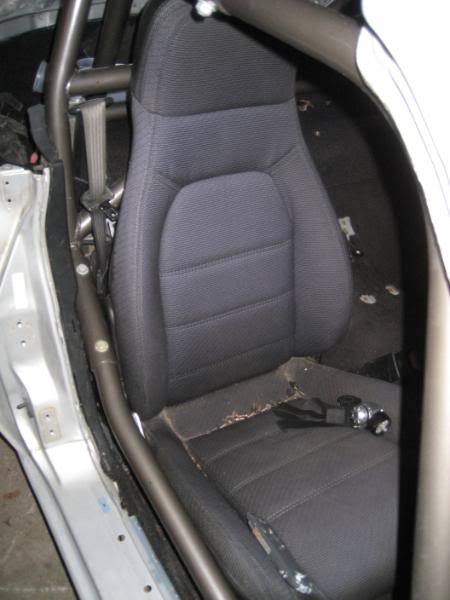
Here's a pic of the passenger seat, just a stock one for now. I plan on upgrading it, but since I don't sit over there, it's low on the list.
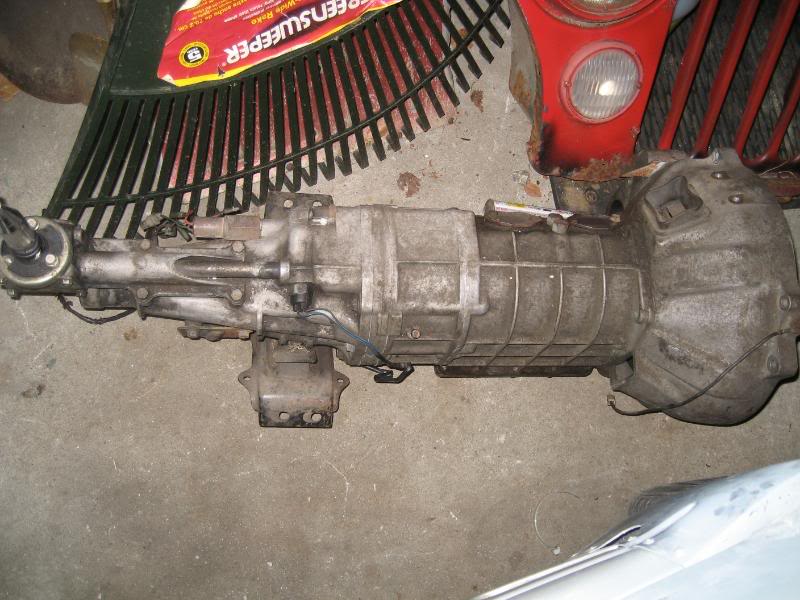
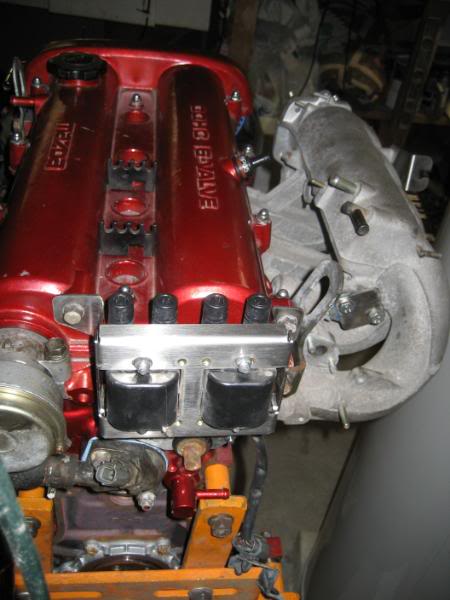
Well a deal fell into my lap that I just couldn't pass up. Can you say bulletproof miata? I'm certainly on the way!
RX-7 TII tranny:
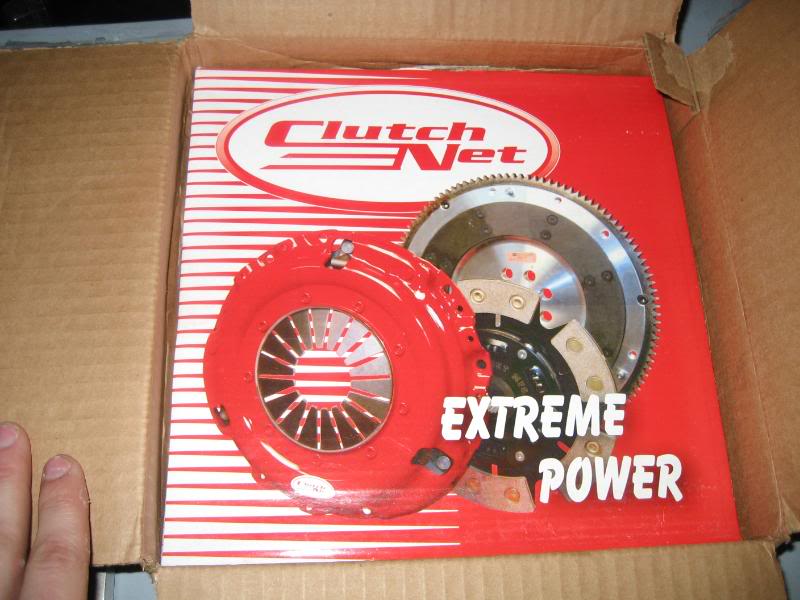
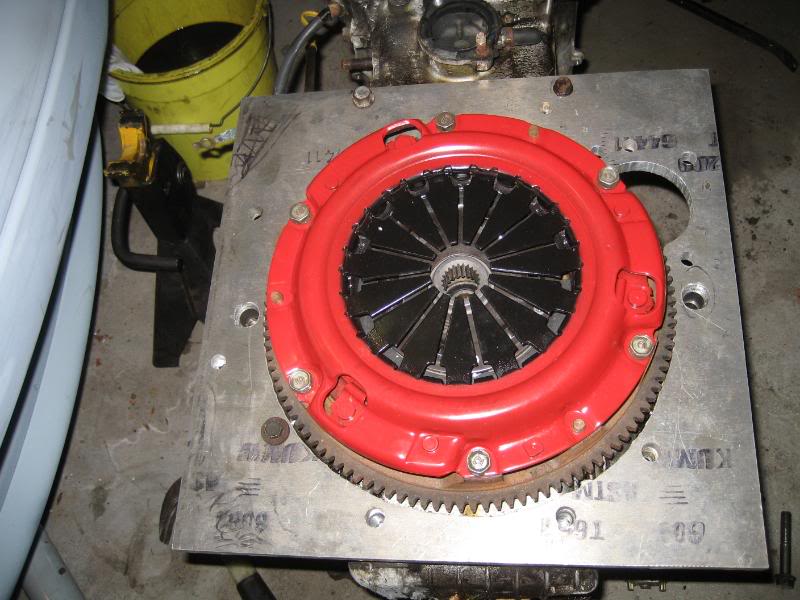
Miata 6 puck clutch with an RX-7 spline:
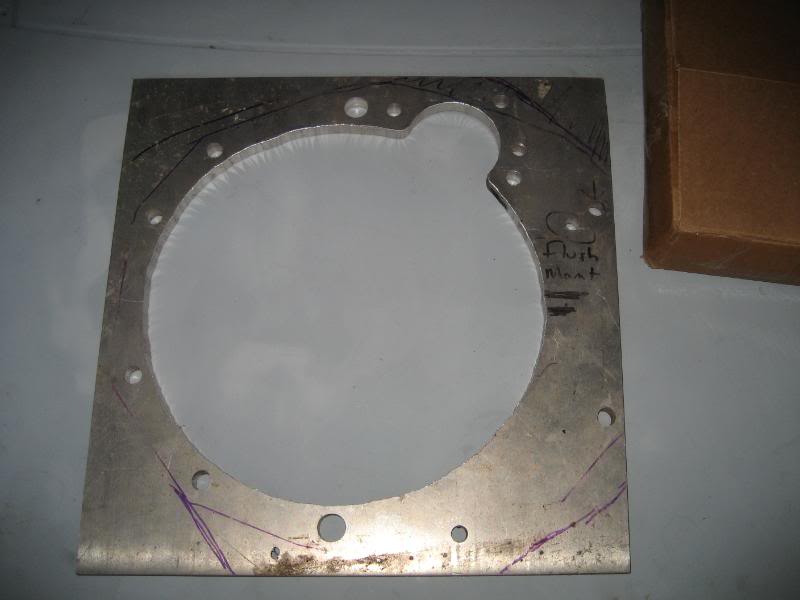
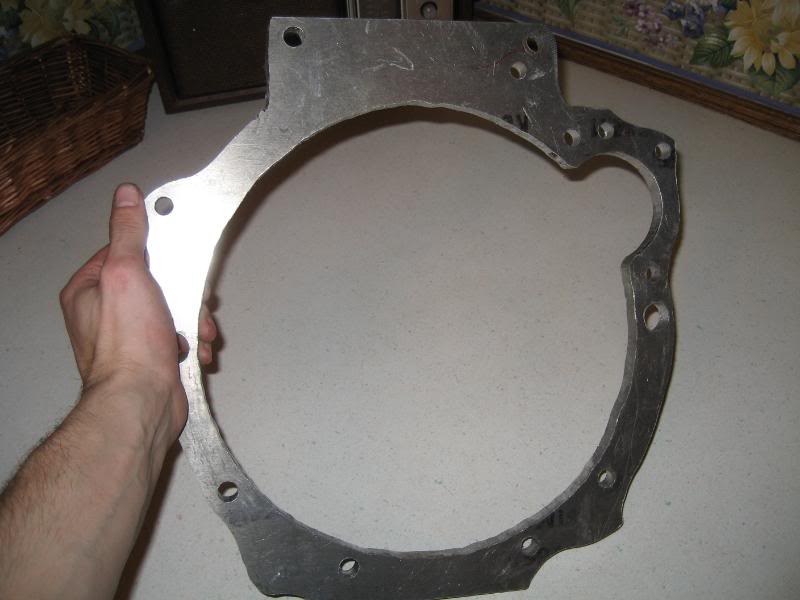
AND, an adaptor plate which I just need to trim to fit. All the holes have been drilled and the inside was cut out.
SOOOOOo excited!!! Anyone who has a lead on a TII rear end w/LSD and a driveshaft please get in touch with me!!!!
Well a deal fell into my lap that I just couldn't pass up. Can you say bulletproof miata? I'm certainly on the way!
RX-7 TII tranny:
Miata 6 puck clutch with an RX-7 spline:
AND, an adaptor plate which I just need to trim to fit. All the holes have been drilled and the inside was cut out.
SOOOOOo excited!!! Anyone who has a lead on a TII rear end w/LSD and a driveshaft please get in touch with me!!!!
Reply
0
0

 03-30-2008, 06:41 PM
#10
Senior Member
Thread Starter
iTrader: (9)
Join Date: Jun 2007
Location: NH
Posts: 1,013
Total Cats: 21
and one more:
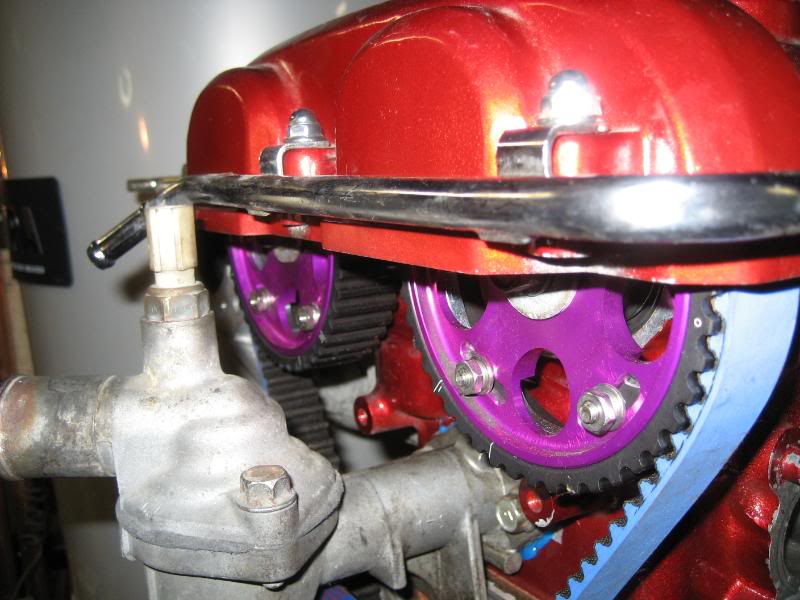
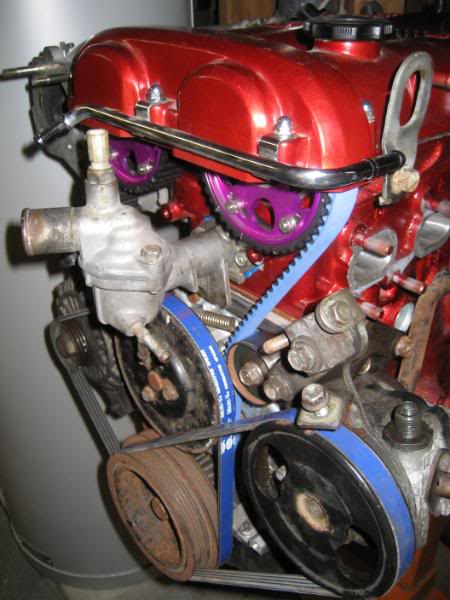
I will be trimming the valve cover so the cam gears are fully exposed. I have a gates racing timing belt, and both gates racing accessory belts (hence the blue color). The motor went together very smoothly.
I will be trimming the valve cover so the cam gears are fully exposed. I have a gates racing timing belt, and both gates racing accessory belts (hence the blue color). The motor went together very smoothly.
Reply
0
0
03-30-2008, 06:42 PM
#11
Senior Member
Thread Starter
iTrader: (9)
Join Date: Jun 2007
Location: NH
Posts: 1,013
Total Cats: 21
Ok I have a bunch of new pictures, I got a little bit more done on a few things.
Removed the oil pressure sender from my 1.6 and swapped it over to the new motor ta-da!
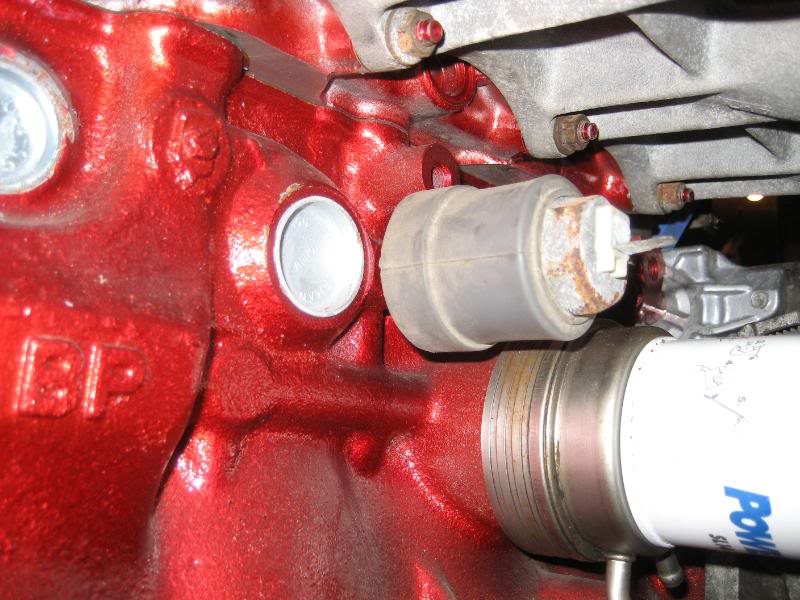
phew that was tough! :lol:
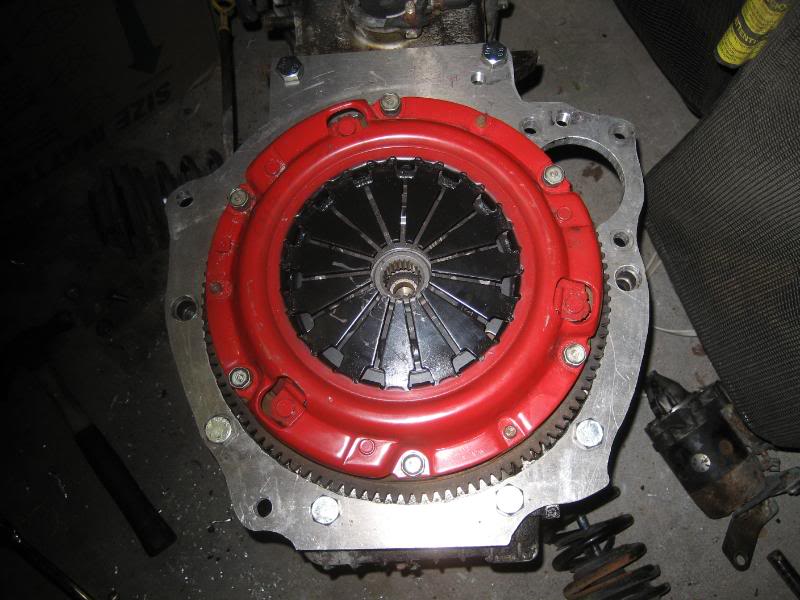
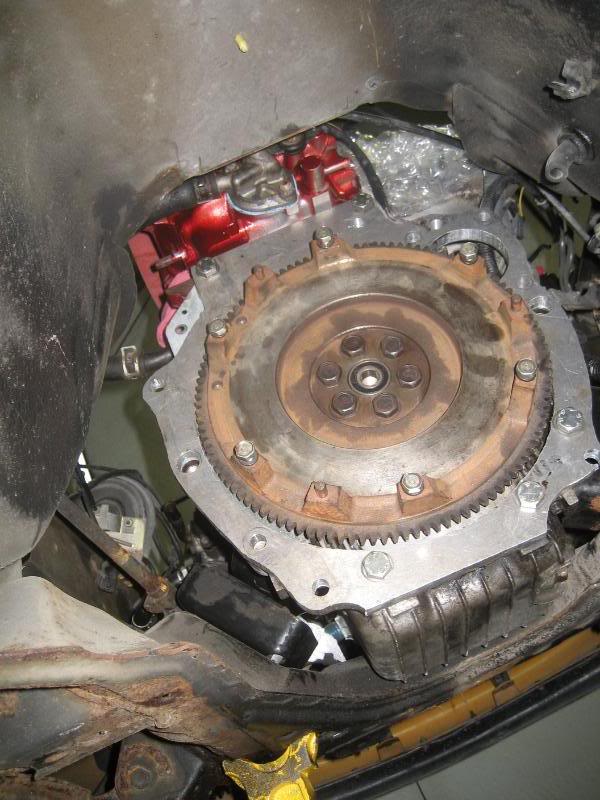
Now on to the adapter plate. It is a 12"x14"x1/2" 6061 T6 aluminum plate. I bolted my flywheel and clutch to my 1.6 block which I turned over onto it's front face and slid the plate over them. I picked up a semi-complete/half hearted attempt at an adapter plate. It has most of the holes drilled, however 3 were off a bit and I had to enlarge them slightly. The middle was all cut out which was excellent, but the cut was a little rough and a little too close to the flywheel for my liking, so after some quality time with the drill, dremel tool, and grinder, it seemed to fit to OK.
I still have to enlarge the holes, tap 2 of them and drill out 2 more holes, but the tap I needed wasn't on sale at the dangerzone, and they were the only ones open, so that's on hold right now. Here's a shot of the starter mounting spots.
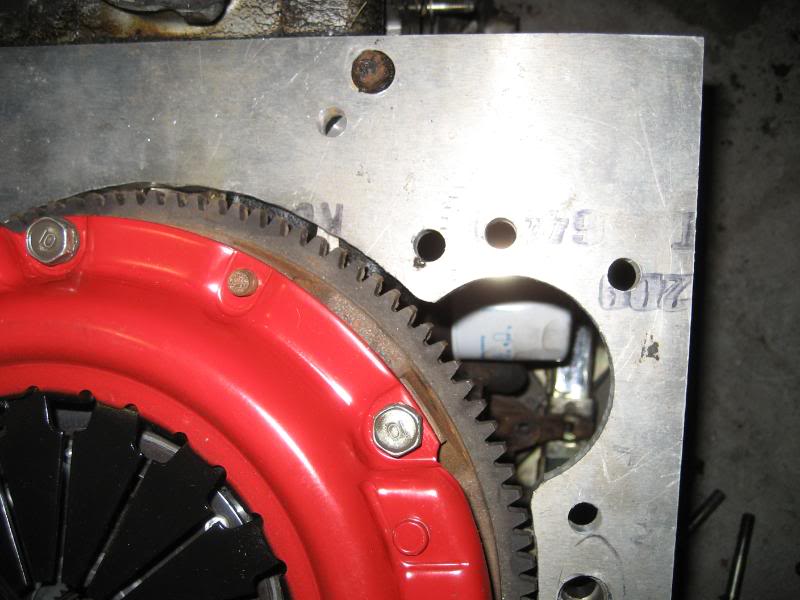
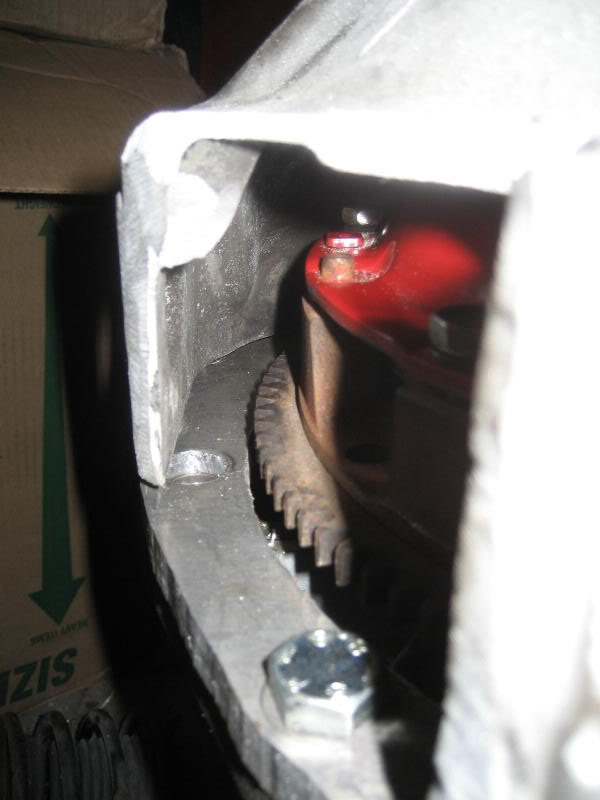
The top left most bolt hole won't be used, as it interferes with the TII bellhousing. I cut out the notch for the starter, and also had to shave down the bellhousing just below the cut so that the lower-most bolt for the starter had enough clearance to fit inside the bellhousing.
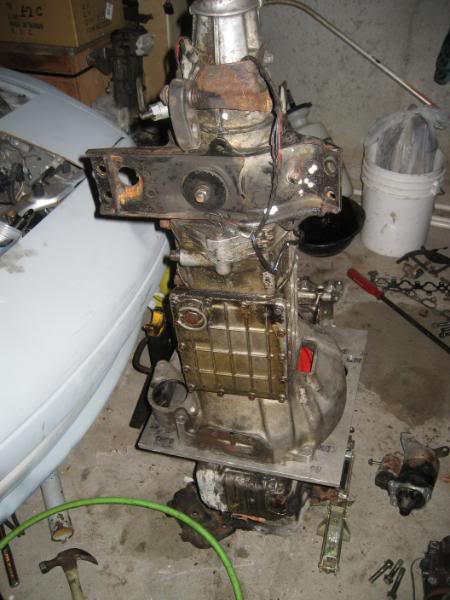
Next, up the infamous shot of the tranny sitting on the square adapter plate!
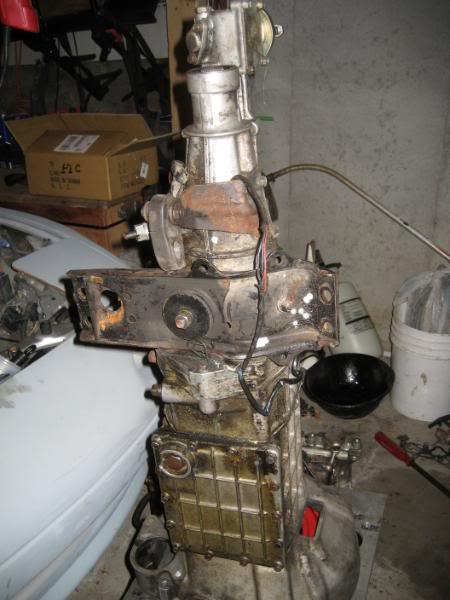
and another, better shot:
OOOOOOOOO, AAHHHHHHHH....
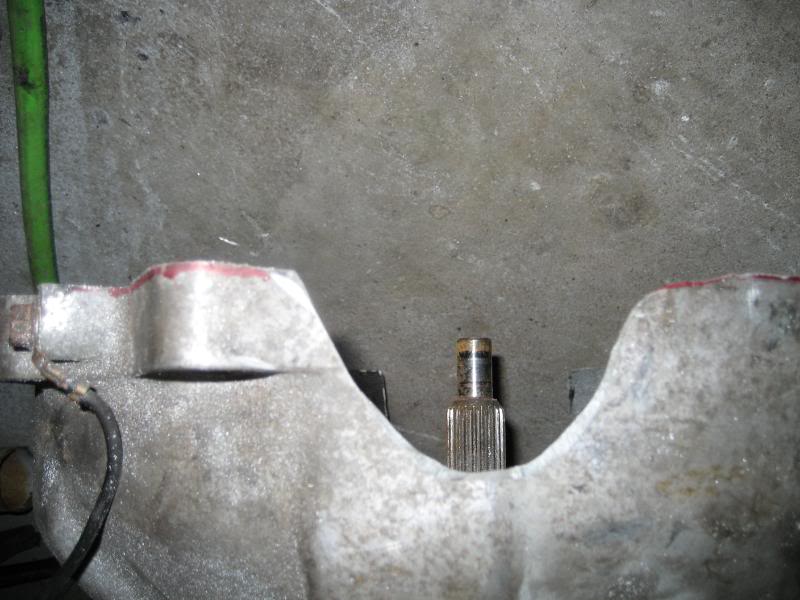
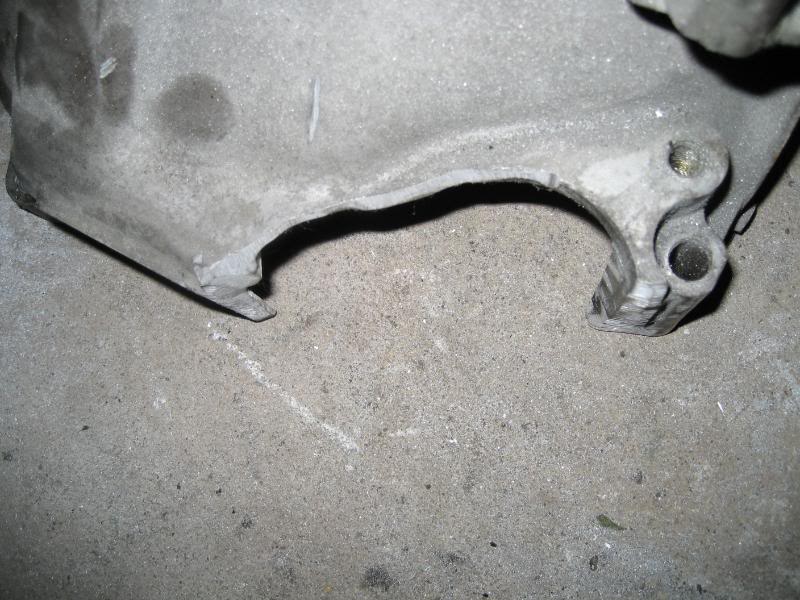
The next thing I did was to grind off the old starter location on the TII transmission so my downpipe will be able to pass by without interference (ancient Chinese secret). My grinder with a cutoff disc made quick work of the soft aluminum.
and another shot from a different angle
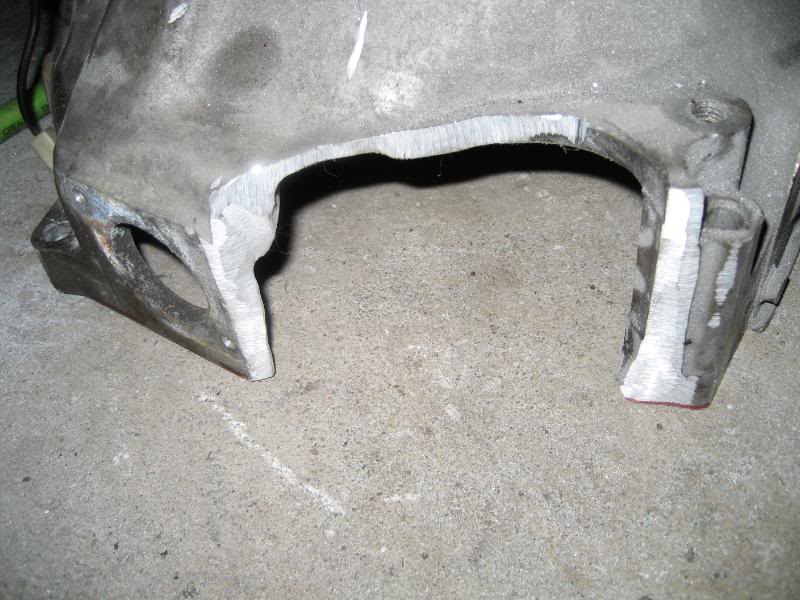
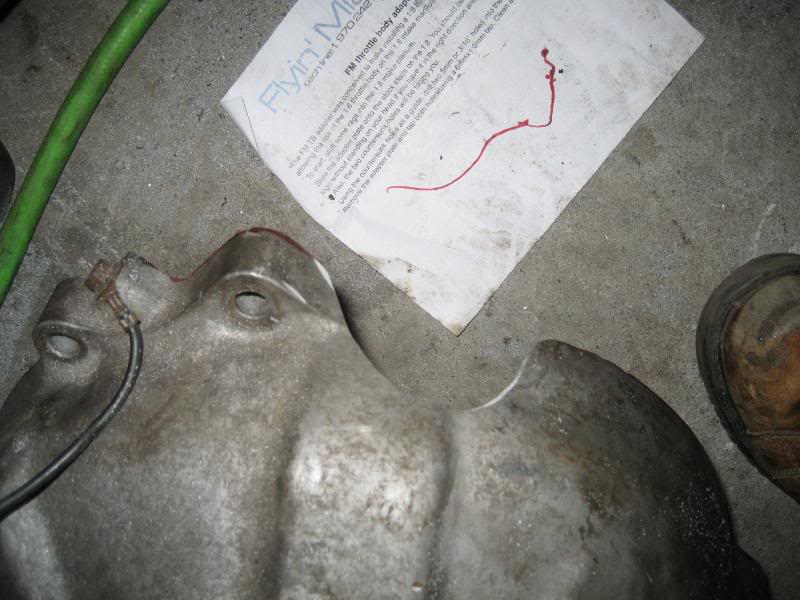
Ground it all down smooth and rounded the sharp corners over.
Well it seems to be fitting OK minus the holes I have to enlarge and tap, and the new holes I have to drill out, so it's time to trim the plate. I traced the TII bellhousing onto the adapter plate, and then laid the miata bellhousing gasket over the plate, and traced the cutout for that. Where the lines interested was my final template. Sorry no pics of this, I forgot! I opted to just man up and cut it out myself with a jigsaw. It was slow going and loud, but not at all impossible. I just kept the blade well lubed with WD40 as I went. Here's a shot 1/4 of the way cut out:

After this, I just got in the zone and banged out the rest of it, so sorry about no more progress pics again, but you get the idea. Here's the finished product! (minus the missing holes still)

Straight up gangsta!
OK, put that back in the corner. Next up front suspension. I figured since we're gonna be manhandling the motor in, getting the car a tad lower would be a good idea, as that translates into less height it has to actually be lifted. Here's a shot of the old crappy factory stuff:
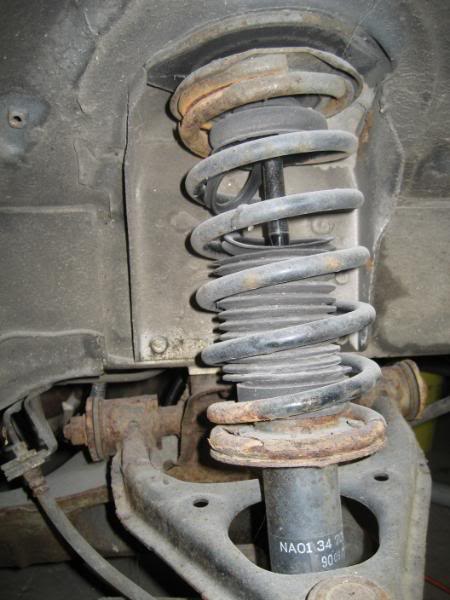
and the lower half
Not too rusty at all for an 18 year old car!
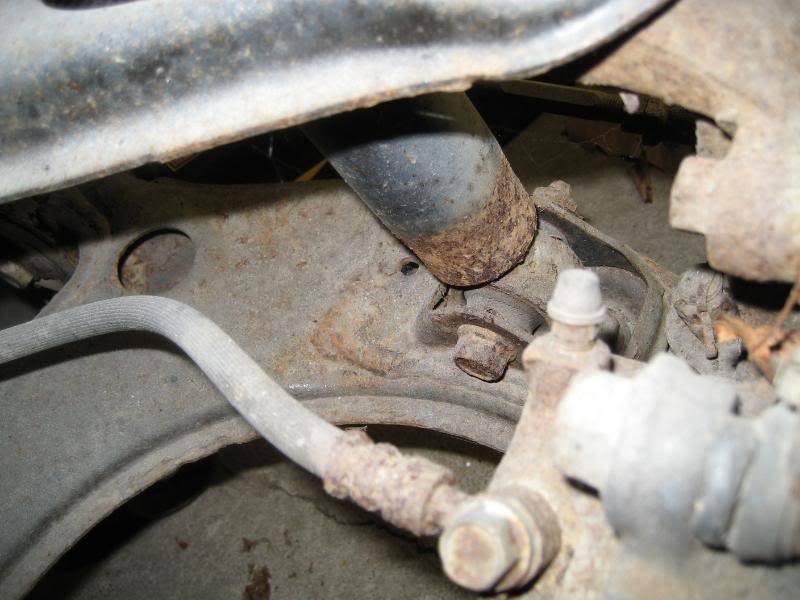
I took this shot, thought it was a neat angle:

That sad empty space will be filled soon!
Out with the old, in with the new!
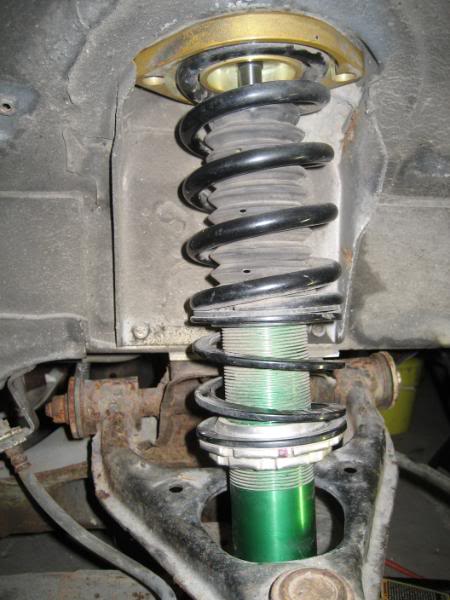
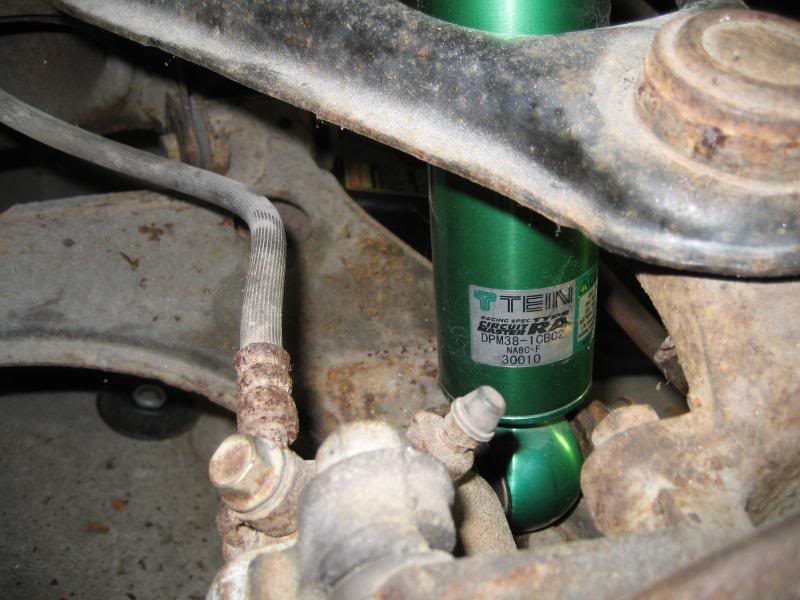
Tein RA full coilovers....yah, they are baller.
Shot of the top mount
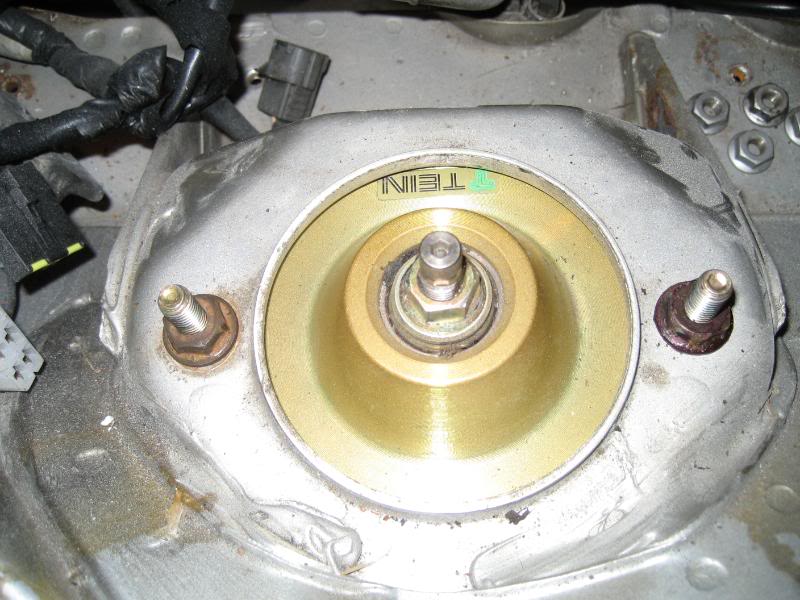
And how it sits:
Right now with no motor, it is 2" lower that stock. Tomorrow, if all goes well, the crew will be coming back and we can get the motor in. I'm also going to be picking up a TII rear end and driveshaft in the morning.
Removed the oil pressure sender from my 1.6 and swapped it over to the new motor ta-da!
phew that was tough! :lol:
Now on to the adapter plate. It is a 12"x14"x1/2" 6061 T6 aluminum plate. I bolted my flywheel and clutch to my 1.6 block which I turned over onto it's front face and slid the plate over them. I picked up a semi-complete/half hearted attempt at an adapter plate. It has most of the holes drilled, however 3 were off a bit and I had to enlarge them slightly. The middle was all cut out which was excellent, but the cut was a little rough and a little too close to the flywheel for my liking, so after some quality time with the drill, dremel tool, and grinder, it seemed to fit to OK.
I still have to enlarge the holes, tap 2 of them and drill out 2 more holes, but the tap I needed wasn't on sale at the dangerzone, and they were the only ones open, so that's on hold right now. Here's a shot of the starter mounting spots.
The top left most bolt hole won't be used, as it interferes with the TII bellhousing. I cut out the notch for the starter, and also had to shave down the bellhousing just below the cut so that the lower-most bolt for the starter had enough clearance to fit inside the bellhousing.
Next, up the infamous shot of the tranny sitting on the square adapter plate!
and another, better shot:
OOOOOOOOO, AAHHHHHHHH....
The next thing I did was to grind off the old starter location on the TII transmission so my downpipe will be able to pass by without interference (ancient Chinese secret). My grinder with a cutoff disc made quick work of the soft aluminum.
and another shot from a different angle
Ground it all down smooth and rounded the sharp corners over.
Well it seems to be fitting OK minus the holes I have to enlarge and tap, and the new holes I have to drill out, so it's time to trim the plate. I traced the TII bellhousing onto the adapter plate, and then laid the miata bellhousing gasket over the plate, and traced the cutout for that. Where the lines interested was my final template. Sorry no pics of this, I forgot! I opted to just man up and cut it out myself with a jigsaw. It was slow going and loud, but not at all impossible. I just kept the blade well lubed with WD40 as I went. Here's a shot 1/4 of the way cut out:
After this, I just got in the zone and banged out the rest of it, so sorry about no more progress pics again, but you get the idea. Here's the finished product! (minus the missing holes still)
Straight up gangsta!
OK, put that back in the corner. Next up front suspension. I figured since we're gonna be manhandling the motor in, getting the car a tad lower would be a good idea, as that translates into less height it has to actually be lifted. Here's a shot of the old crappy factory stuff:
and the lower half
Not too rusty at all for an 18 year old car!
I took this shot, thought it was a neat angle:
That sad empty space will be filled soon!
Out with the old, in with the new!
Tein RA full coilovers....yah, they are baller.
Shot of the top mount
And how it sits:
Right now with no motor, it is 2" lower that stock. Tomorrow, if all goes well, the crew will be coming back and we can get the motor in. I'm also going to be picking up a TII rear end and driveshaft in the morning.
Reply
0
0
03-30-2008, 06:44 PM
#12
Senior Member
Thread Starter
iTrader: (9)
Join Date: Jun 2007
Location: NH
Posts: 1,013
Total Cats: 21
OK, ALOT of progress. Here goes.
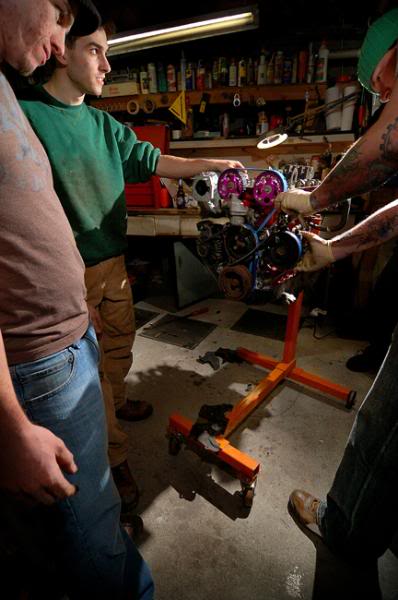
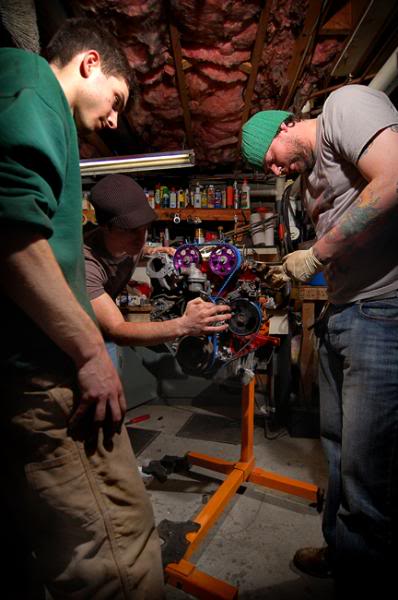
Had 2 friends (Ferris and Dan) come over and help me lift the engine off the stand and carry it on a 2x4 and drop it in- took all of 10 minutes to do, I could not believe how painless it was.
It looks much better in the car than on the stand. Don't mind the rear coilover.

I have a jack under the crank pulley so the engine isn't resting on the oil pain.
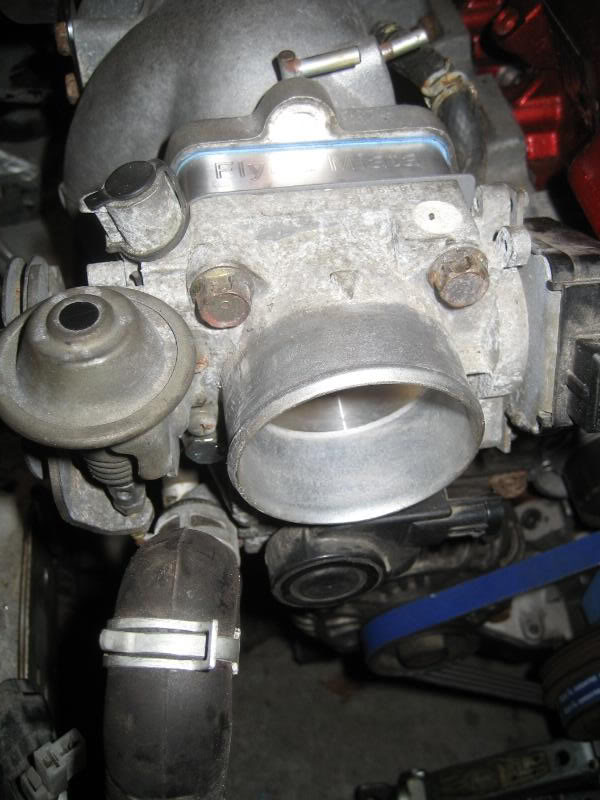
Tapped the 2 holes for the throttle body adapter, made another TB gasket, and bolted on the FM adapter and the 1.6 throttle body.
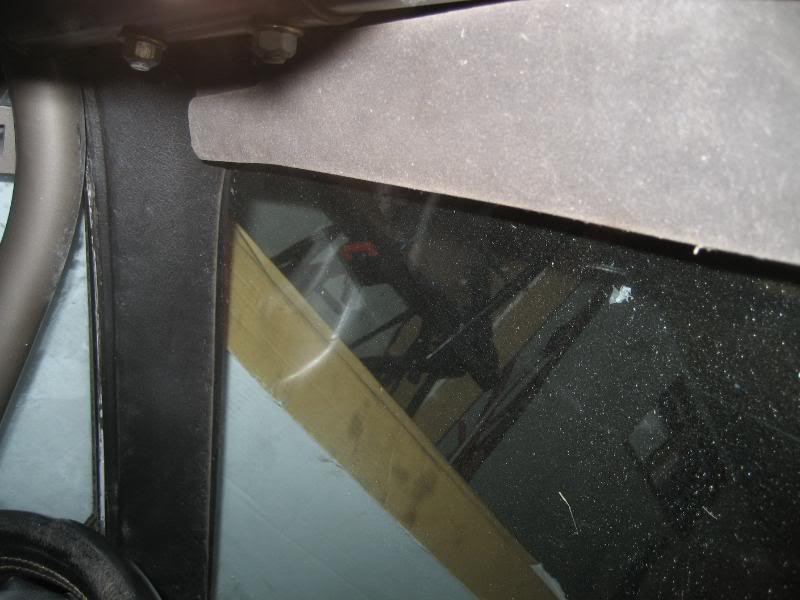
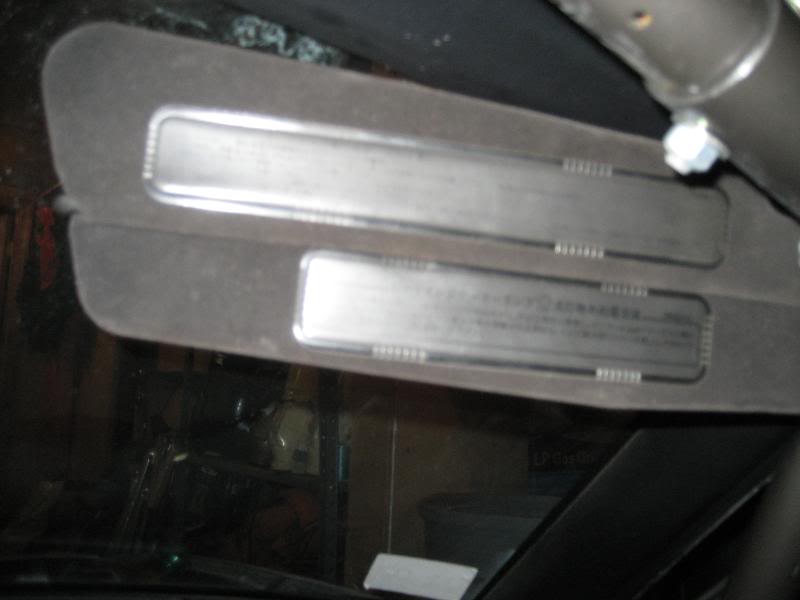
Next, a quick one, very difficult also. JDM visors.
They fold up and tuck nicely behind the cage.
I went back and finished up the work on the adapter plate. It took me forever to find shorter 12x1.5 bolts, I couldn't believe it.
Here's a pick of the plate bolted to the block:
And a close up of the starter added on to the plate
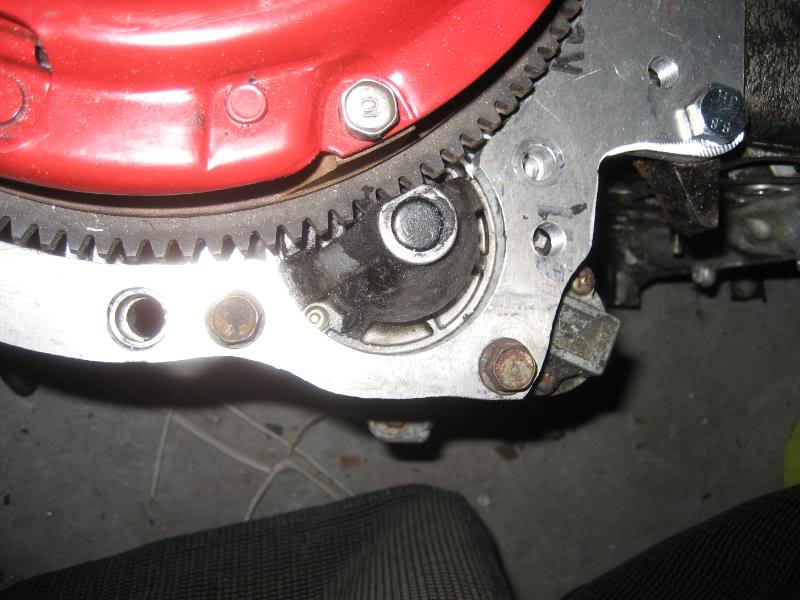
I believe I am only going to use 2 holes for the starter, but I might run a tap through the plate and come up from the opposite side of the starter with the 3rd bolt.
Next up, put the tranny back up on the plate (I've only done this about 300 times :roll .
.
Had 2 friends (Ferris and Dan) come over and help me lift the engine off the stand and carry it on a 2x4 and drop it in- took all of 10 minutes to do, I could not believe how painless it was.
It looks much better in the car than on the stand. Don't mind the rear coilover.
I have a jack under the crank pulley so the engine isn't resting on the oil pain.
Tapped the 2 holes for the throttle body adapter, made another TB gasket, and bolted on the FM adapter and the 1.6 throttle body.
Next, a quick one, very difficult also. JDM visors.
They fold up and tuck nicely behind the cage.
I went back and finished up the work on the adapter plate. It took me forever to find shorter 12x1.5 bolts, I couldn't believe it.
Here's a pick of the plate bolted to the block:
And a close up of the starter added on to the plate
I believe I am only going to use 2 holes for the starter, but I might run a tap through the plate and come up from the opposite side of the starter with the 3rd bolt.
Next up, put the tranny back up on the plate (I've only done this about 300 times :roll
.
Reply
0
0
03-30-2008, 06:45 PM
#13
Senior Member
Thread Starter
iTrader: (9)
Join Date: Jun 2007
Location: NH
Posts: 1,013
Total Cats: 21
made ALOT of progress over the weekend. I brought the car to my buddy's shop so we could start on the fabrication/welding of the new mounts for the tranny and rear end.
I took a lot of pictures, so enjoy!
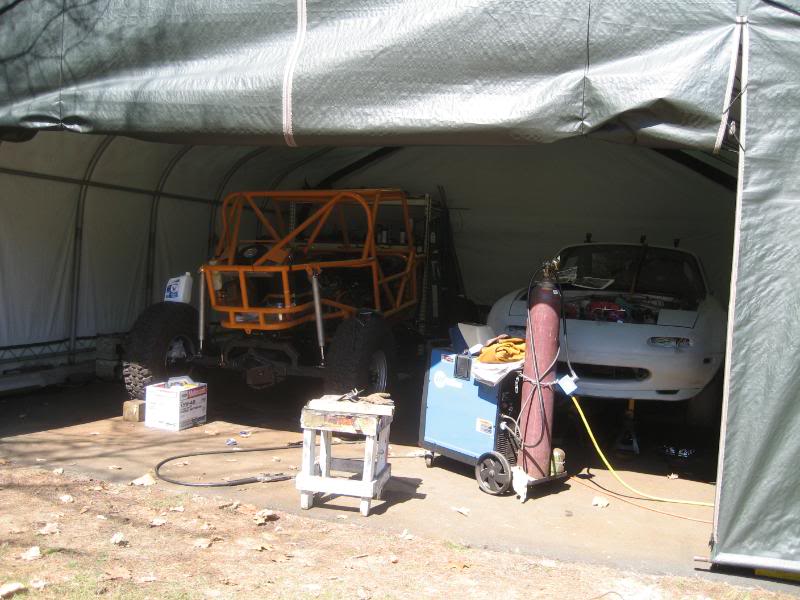
My buddy has been working on a tube-frame rock crawling buggy which he is building from scratch. I took a few pics of both cars in the garage- it's the opposite end of the motorsports spectrum
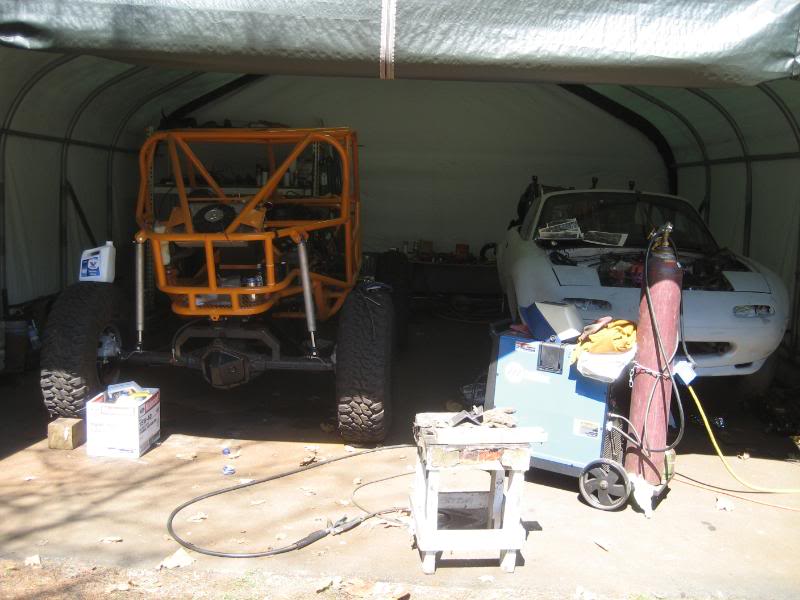
I stood on the buggy's tires (37"), and snapped some overhead shots of the miata

tools of the trade:
Got the miata up on jackstands so that we could begin work on it
Pulled out the inferior rear end and muffler
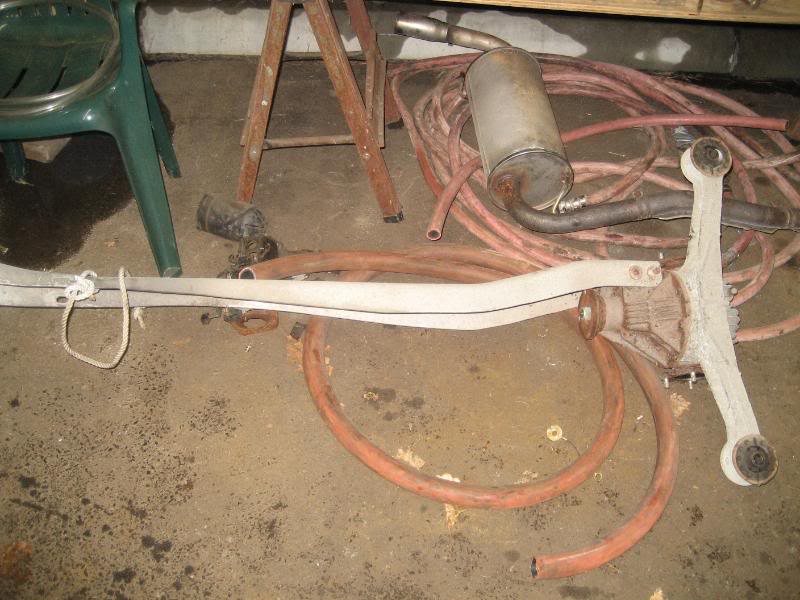
I broke one of the bolts holding the ppf to the diff, so I had to remove it all in one unit...what a pain
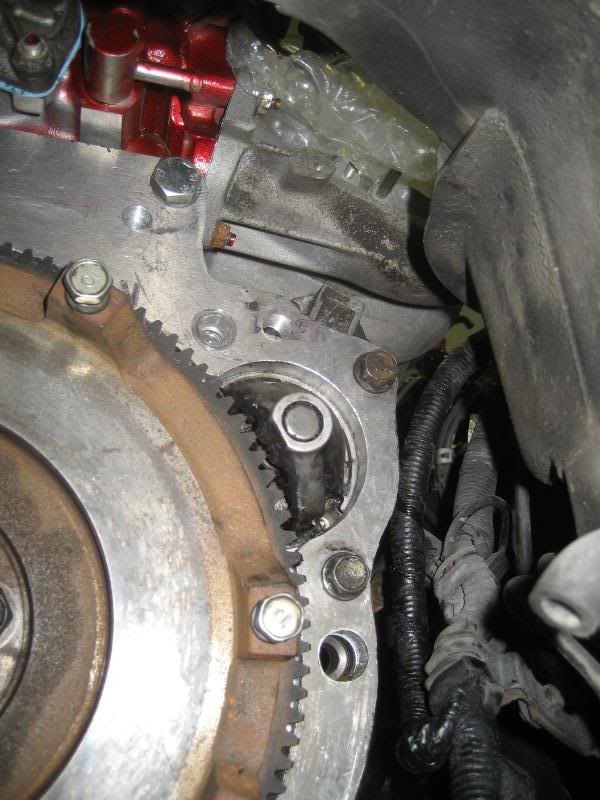
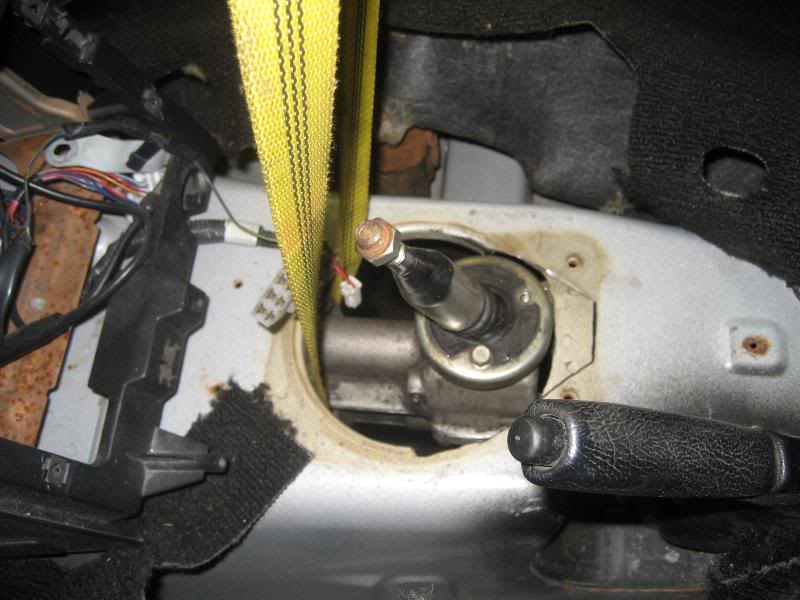
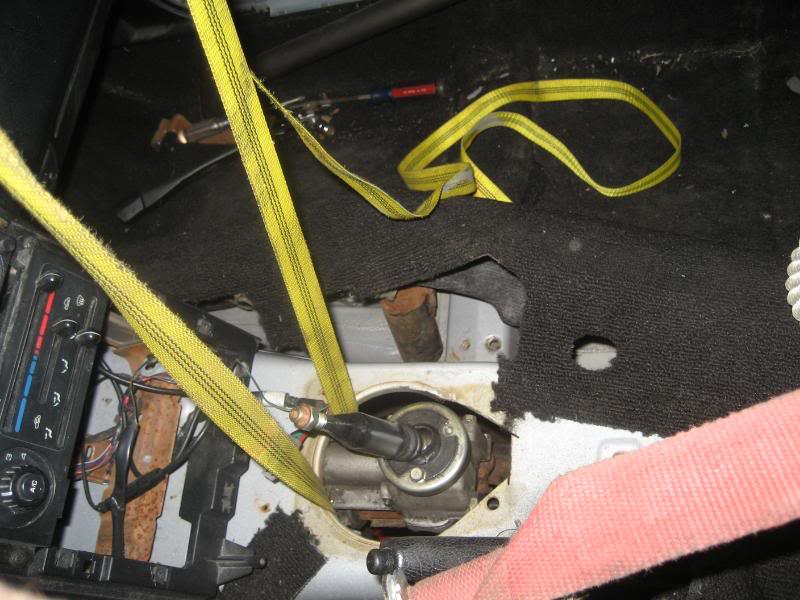
here's a shot looking from the rear down the transmission tunnel
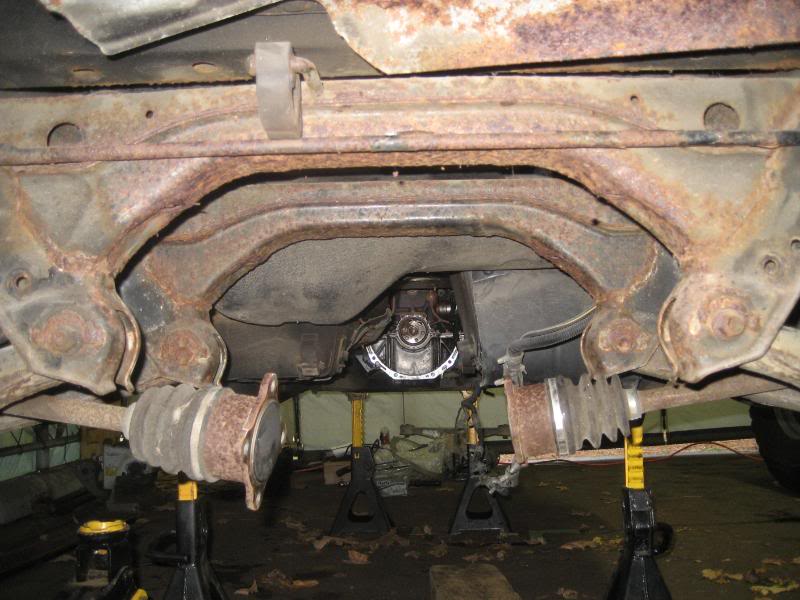
closeup:

Next, I bolted on the transmission bellhousing gasket, the flywheel and my adapter plate:
I took a lot of pictures, so enjoy!
My buddy has been working on a tube-frame rock crawling buggy which he is building from scratch. I took a few pics of both cars in the garage- it's the opposite end of the motorsports spectrum
I stood on the buggy's tires (37"), and snapped some overhead shots of the miata
tools of the trade:
Got the miata up on jackstands so that we could begin work on it
Pulled out the inferior rear end and muffler
I broke one of the bolts holding the ppf to the diff, so I had to remove it all in one unit...what a pain
here's a shot looking from the rear down the transmission tunnel
closeup:
Next, I bolted on the transmission bellhousing gasket, the flywheel and my adapter plate:
Reply
0
0
03-30-2008, 06:45 PM
#14
Senior Member
Thread Starter
iTrader: (9)
Join Date: Jun 2007
Location: NH
Posts: 1,013
Total Cats: 21
attached the starter to the adapter plate...
Brought the TII trans and got it positioned under the miata so it can get accustomed to it's new home

I ordered a throwout bearing, but it hasn't arrived yet :evil: , so unfortunately the tranny will have to come back out again, that's why the clutch isn't installed either.
Here the tranny is bolted to the adapter plate:
We supported the rear of the tranny with a ratchet strap off the front roll cage bar so we wouldn't have any obstructions in our way under the car. I also trimmed the shifter opening a bit to accommodate for the TII sitting 1/2" farther back than normal.
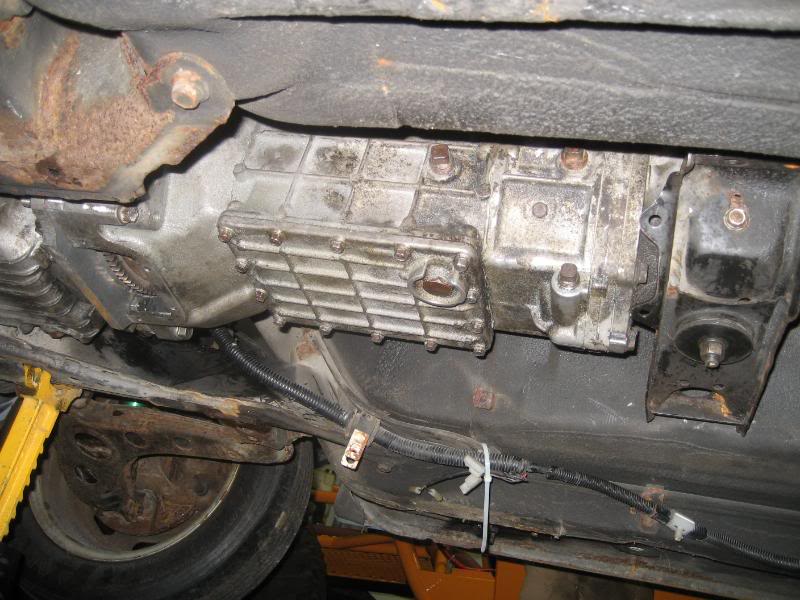
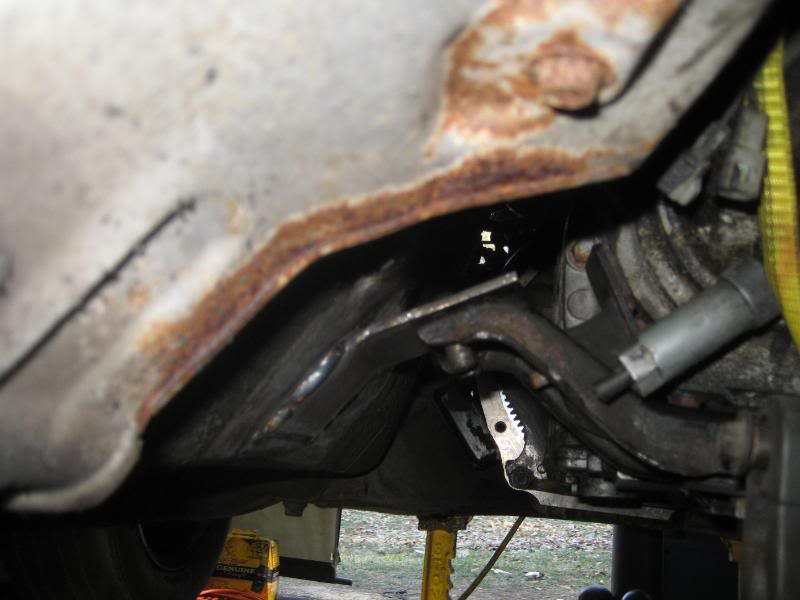
here is the stock TII transmission mount:
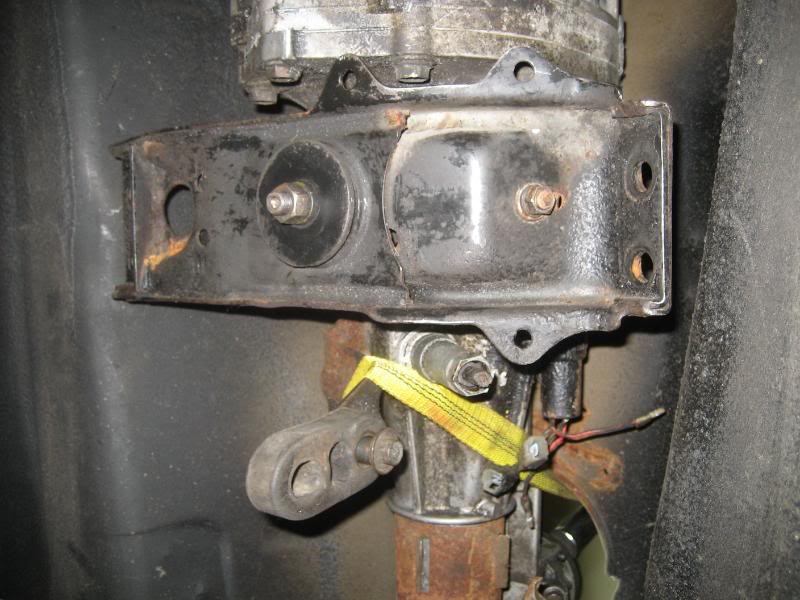
What I ended up doing was taking it off and rotating it 180 degrees so the "bump" to clear the exhaust is now on the driver's side.
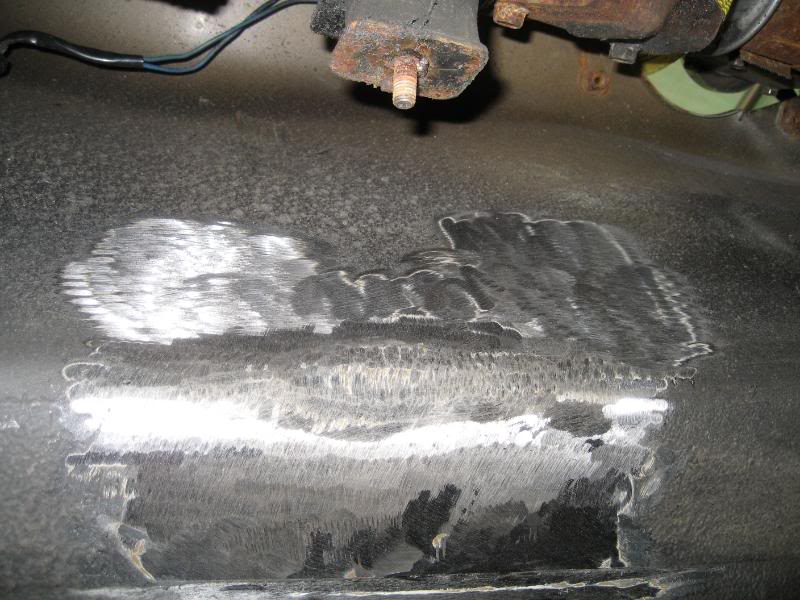
Next up, I took the seats and carpet back out:
and then ground the undercoat off of the trans. tunnel where we would be welding
driver's side
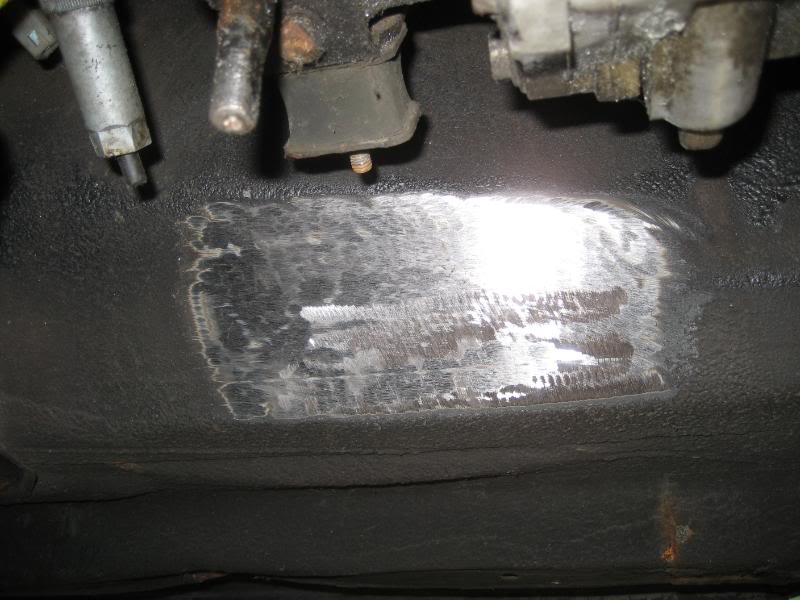
pass. side
Brought the TII trans and got it positioned under the miata so it can get accustomed to it's new home
I ordered a throwout bearing, but it hasn't arrived yet :evil: , so unfortunately the tranny will have to come back out again, that's why the clutch isn't installed either.
Here the tranny is bolted to the adapter plate:
We supported the rear of the tranny with a ratchet strap off the front roll cage bar so we wouldn't have any obstructions in our way under the car. I also trimmed the shifter opening a bit to accommodate for the TII sitting 1/2" farther back than normal.
here is the stock TII transmission mount:
What I ended up doing was taking it off and rotating it 180 degrees so the "bump" to clear the exhaust is now on the driver's side.
Next up, I took the seats and carpet back out:
and then ground the undercoat off of the trans. tunnel where we would be welding
driver's side
pass. side
Reply
0
0
03-30-2008, 06:46 PM
#15
Senior Member
Thread Starter
iTrader: (9)
Join Date: Jun 2007
Location: NH
Posts: 1,013
Total Cats: 21
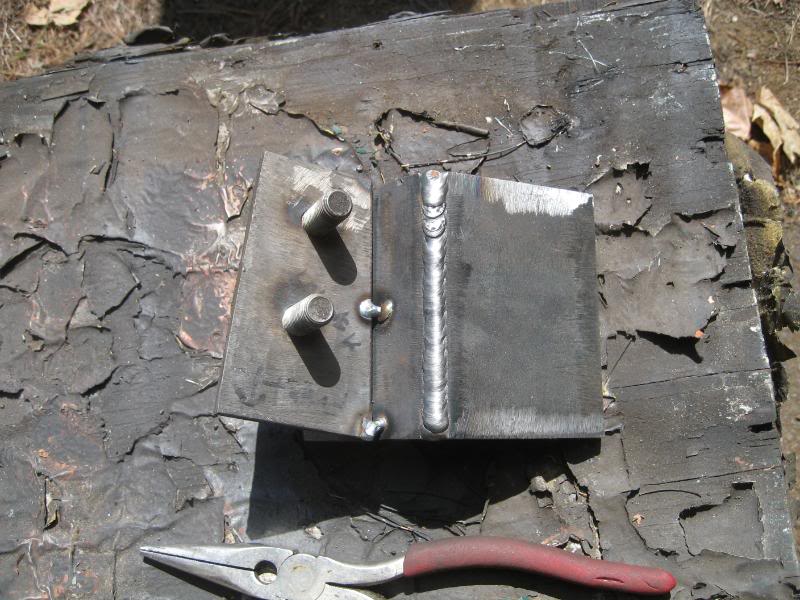
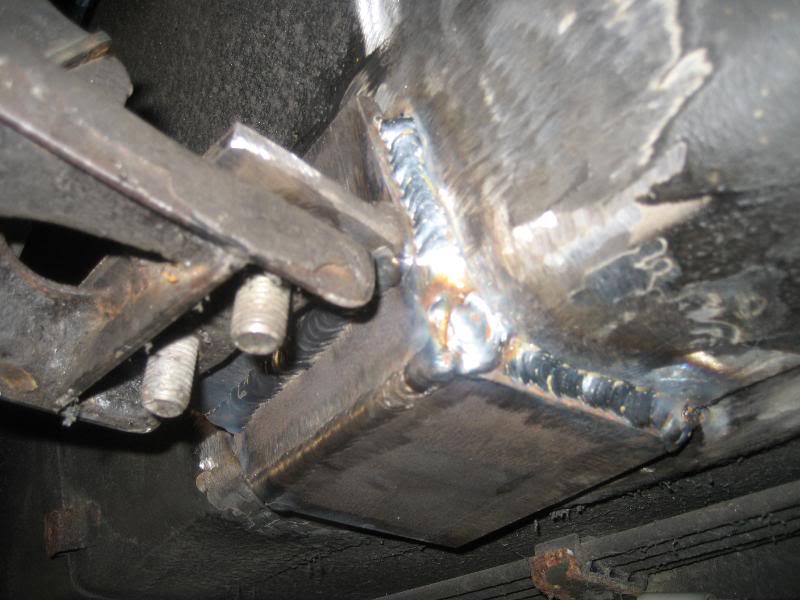
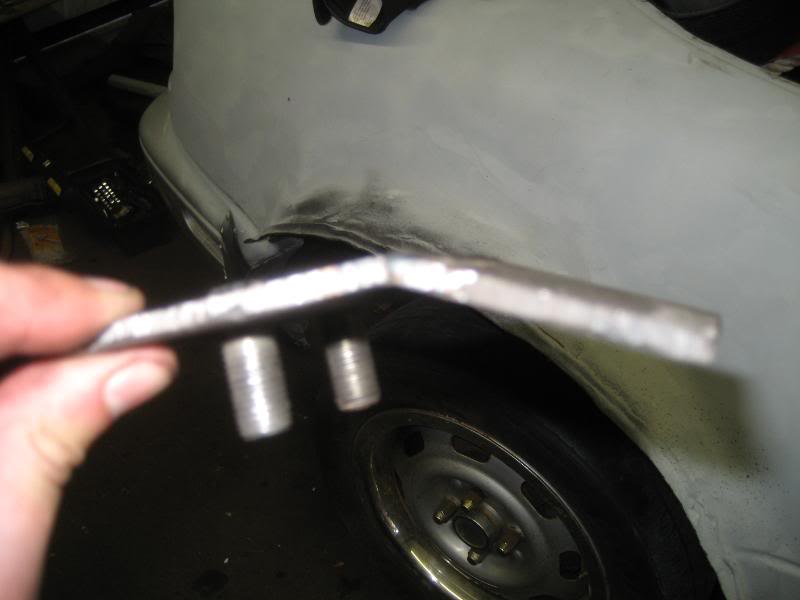
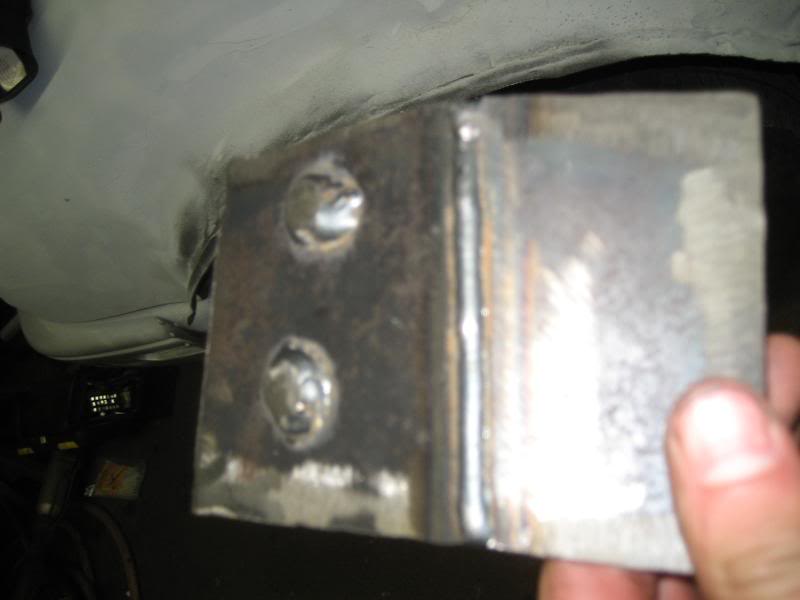
We measured for the brackets and ended up using 1/4" steel that was 4" wide. I wanted the brackets to be above the stock TII mount so that i could easily remove the transmission without having to take the TII mount off, and also so that I don't lose any more clearance for my exhaust, because ground clearance is going to be a precious quantity.
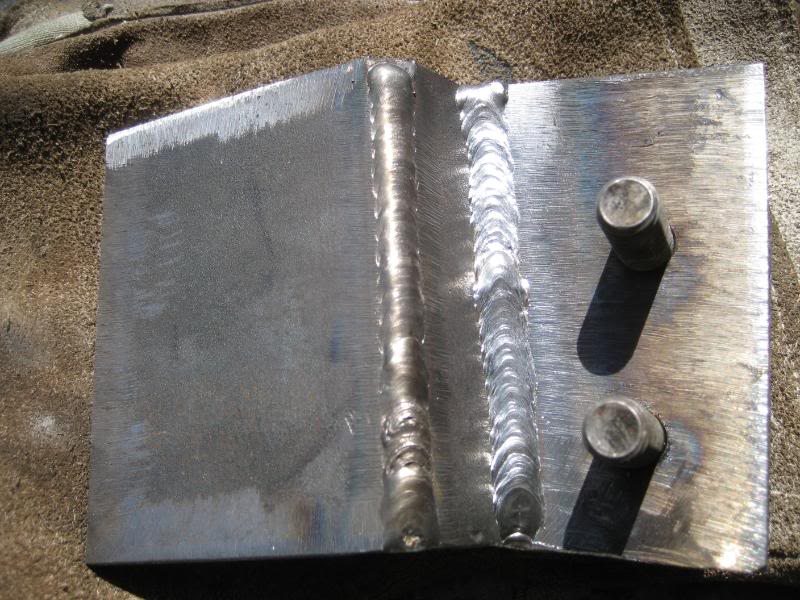
I marked the holes on the TII tranny bracket on the new bracket, and drilled them out with a drill press. next, we welded in 2 12mm bellhousing bolts I had leftover and lopped off the tops so they would clear the tranny tunnel:
I left enough room to be able to fit a lockwasher with the nut and still have a few threads sticking out past the nut.

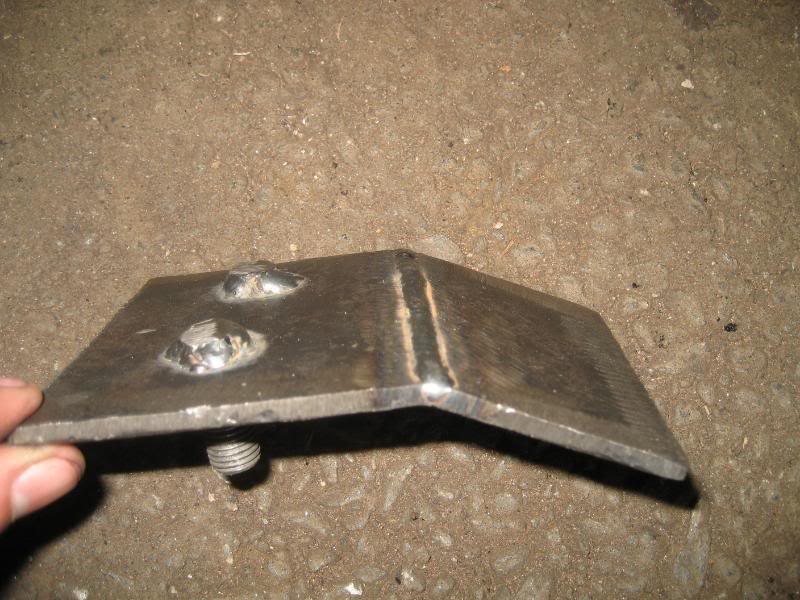
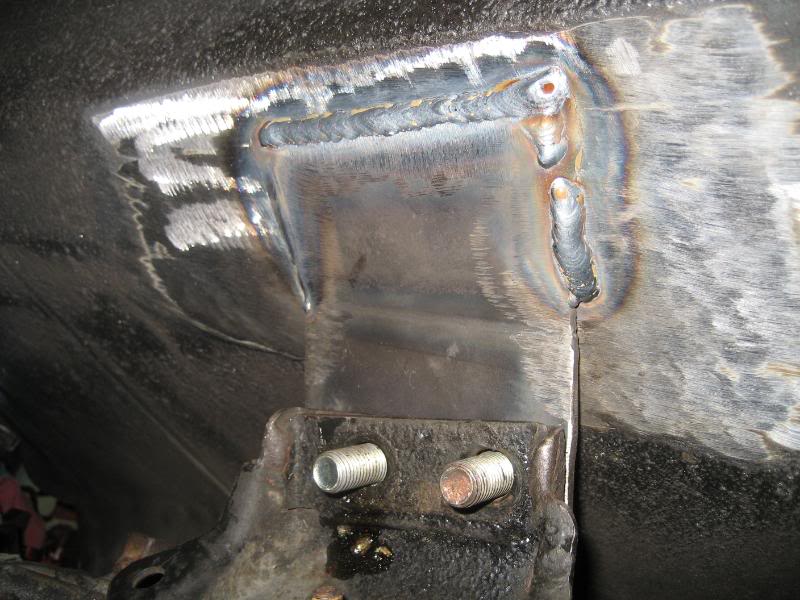
Then we bent another piece of 1/4" metal to the shape of the trans tunnel and tacked the above bracket on
and welded it up:
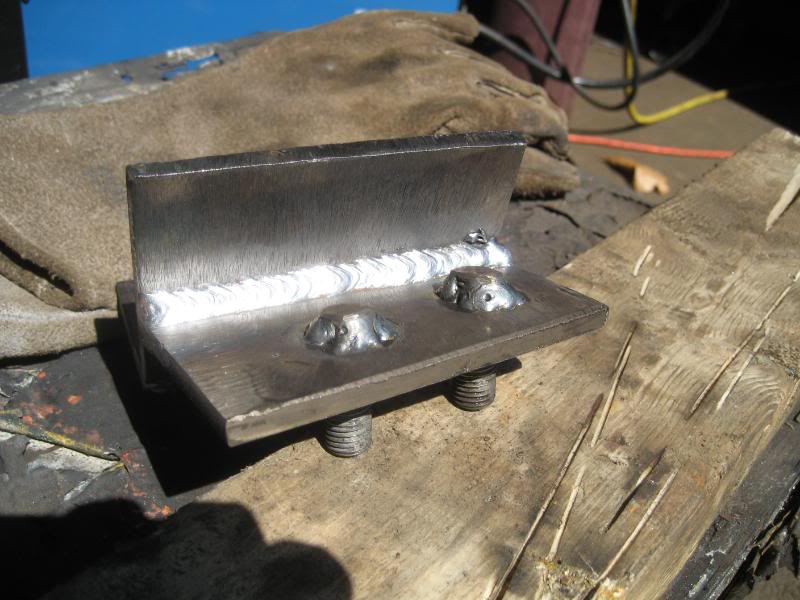
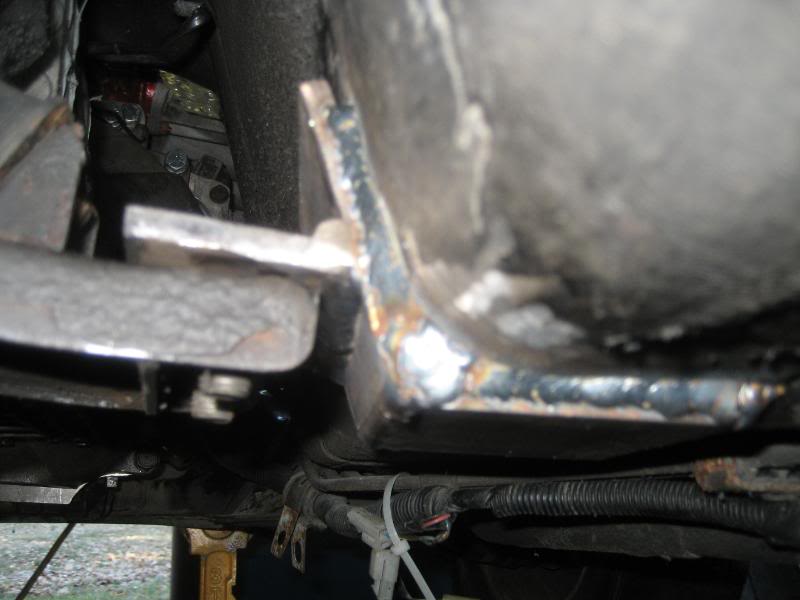
Here's the bracket how it will sit on the car:
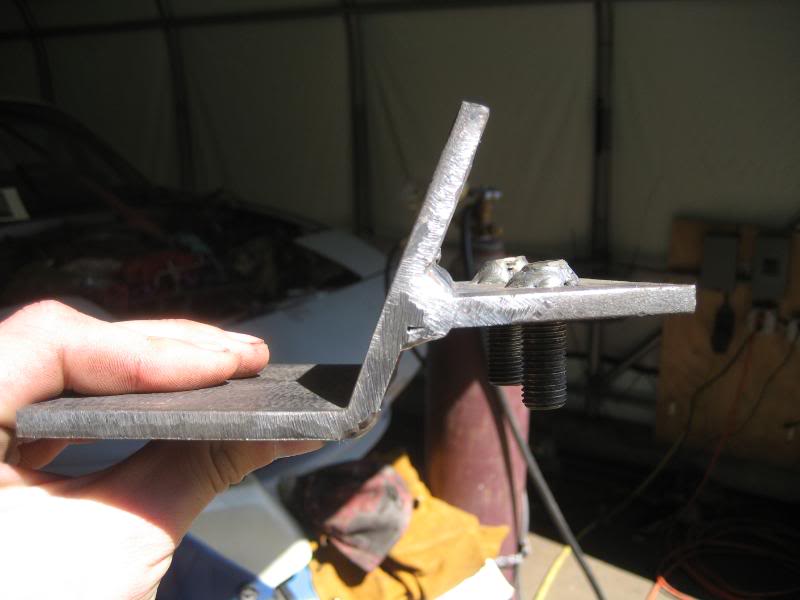
pretty slick it you ask me
Here it is burned in on the car:

I marked the holes on the TII tranny bracket on the new bracket, and drilled them out with a drill press. next, we welded in 2 12mm bellhousing bolts I had leftover and lopped off the tops so they would clear the tranny tunnel:
I left enough room to be able to fit a lockwasher with the nut and still have a few threads sticking out past the nut.
Then we bent another piece of 1/4" metal to the shape of the trans tunnel and tacked the above bracket on
and welded it up:
Here's the bracket how it will sit on the car:
pretty slick it you ask me
Here it is burned in on the car:
Reply
0
0
03-30-2008, 06:46 PM
#16
Senior Member
Thread Starter
iTrader: (9)
Join Date: Jun 2007
Location: NH
Posts: 1,013
Total Cats: 21
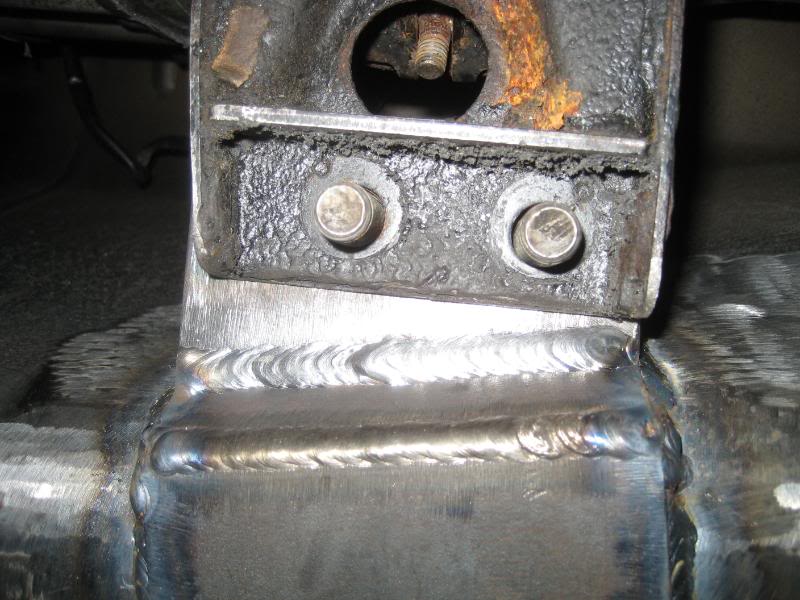
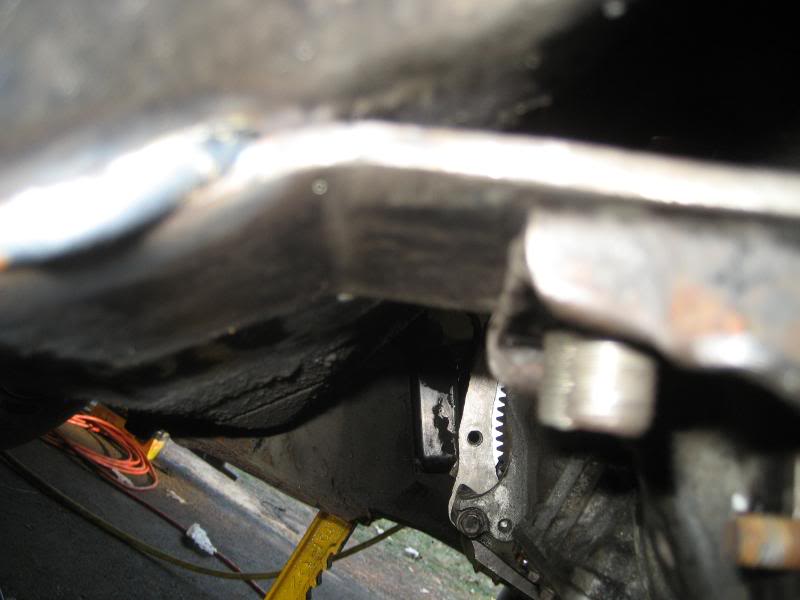
Here's the finished product of the driver's side bracket. I did the same thing as the other side as far as keeping the mount above the TII stock mount, and welding the bolts to it:
and a shot of it burned in....
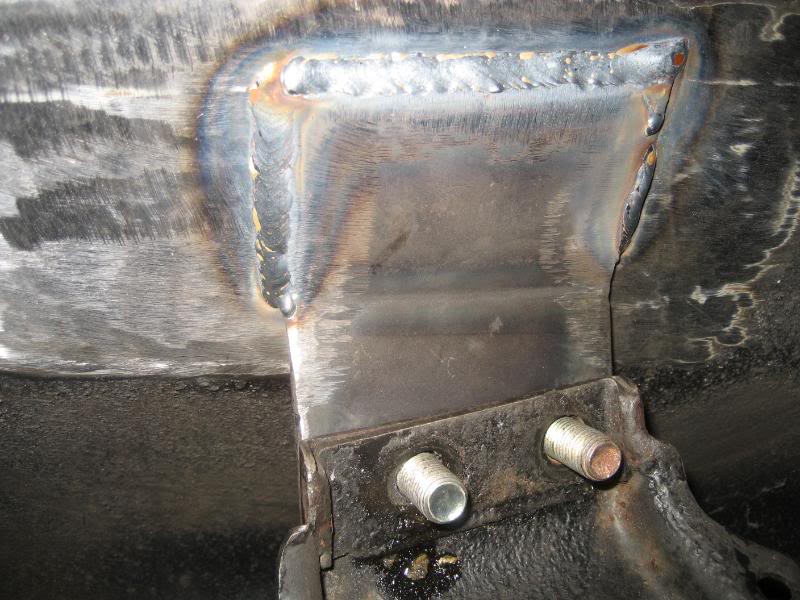
Tranny mounts- DONE


and a shot of it burned in....
Tranny mounts- DONE
Reply
1
1
03-30-2008, 06:47 PM
#17
Senior Member
Thread Starter
iTrader: (9)
Join Date: Jun 2007
Location: NH
Posts: 1,013
Total Cats: 21
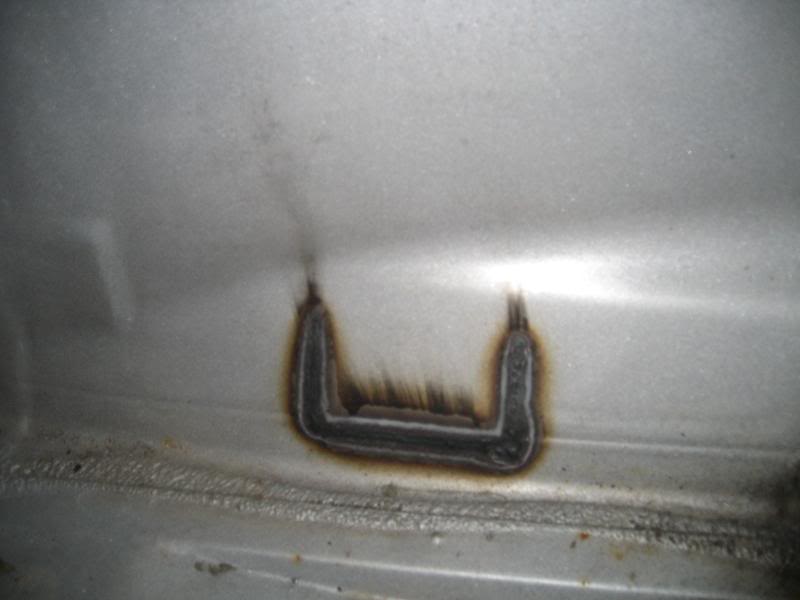
Here's a shot of the welds from the inside...the paint got a little burnt up, oh well
pass side.
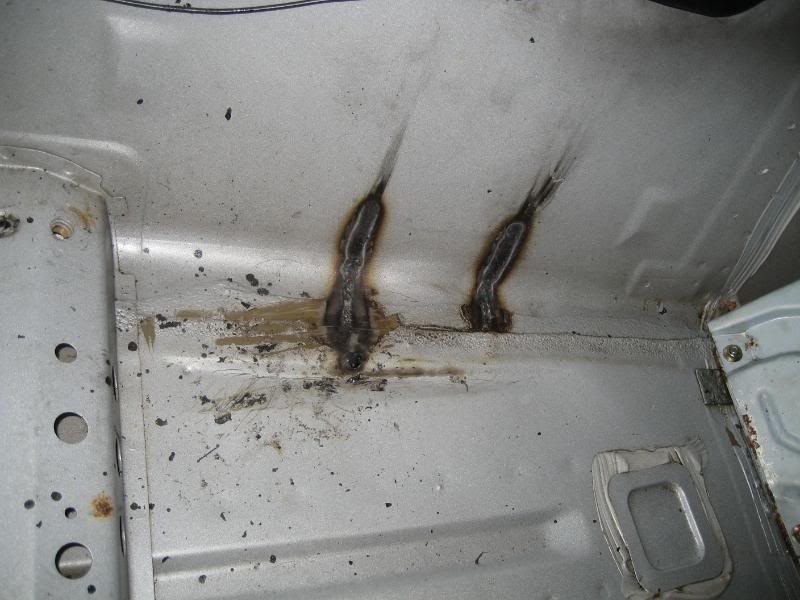
driver's side:
and since i was in there, here's a better shot of my NRG Thin carbon quick release
If my mazdaspeed diff mounts come in this week next weekend we'll start on the rear diff, if not, there is plenty of other things to keep my occupied.
pass side.
driver's side:
and since i was in there, here's a better shot of my NRG Thin carbon quick release
If my mazdaspeed diff mounts come in this week next weekend we'll start on the rear diff, if not, there is plenty of other things to keep my occupied.
Reply
0
0
 03-30-2008, 07:06 PM
#20
So far so good.
Quick questions:
1.) Are you worried about the clearance between the front hoop of the cage and the steering wheel? Looks kinda close.
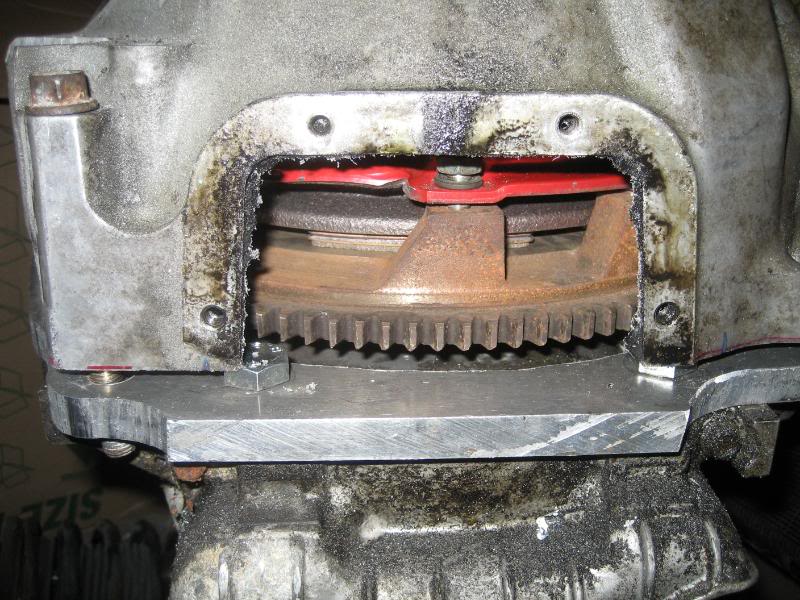
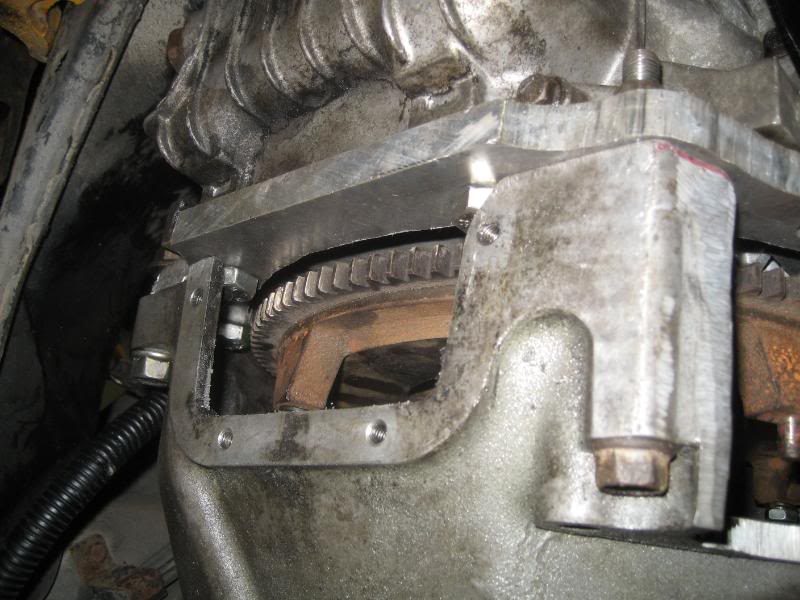
2.) Are you going to fabricate a cover for the driver's side cutout on the transmission bell-housing? I would think you wouldn't want to leave that open to the elements (dirt, grease, gravel, etc.)
3.) Take out that rear subframe and PAINT IT. lol. Good lord I'm glad I don't live where there's snow. lol.
Quick questions:
1.) Are you worried about the clearance between the front hoop of the cage and the steering wheel? Looks kinda close.
2.) Are you going to fabricate a cover for the driver's side cutout on the transmission bell-housing? I would think you wouldn't want to leave that open to the elements (dirt, grease, gravel, etc.)
3.) Take out that rear subframe and PAINT IT. lol. Good lord I'm glad I don't live where there's snow. lol.
Reply
0
0


