Project Kimiko
 03-21-2014, 01:10 AM
#1
Junior Member
Thread Starter
iTrader: (3)

Join Date: Mar 2014
Location: North Houston
Posts: 77
Total Cats: 0
I'm new to the forums. I have a couple of build threads over on CR but with the heavy apperance and stance focus over on that forum I might fit in better here. In any case, why not start out by moving my build thread. Meet Kimiko, my '96 Montego blue miata.
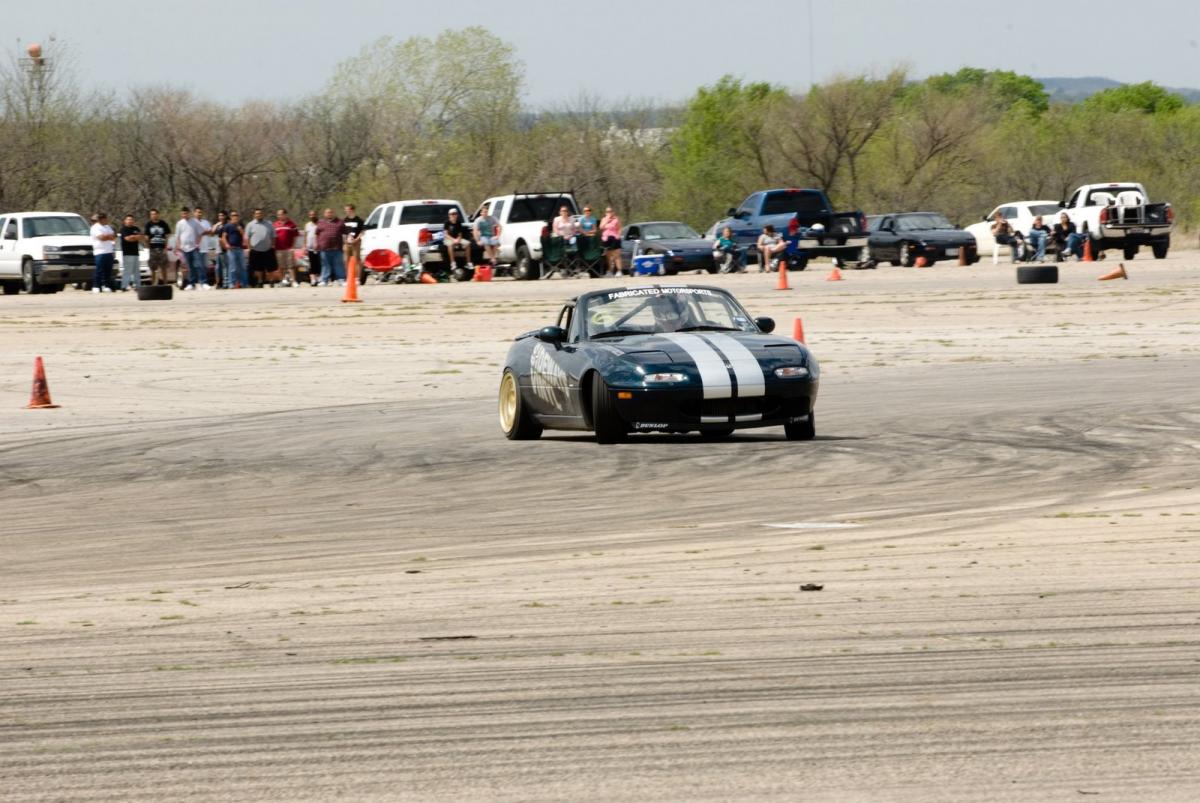
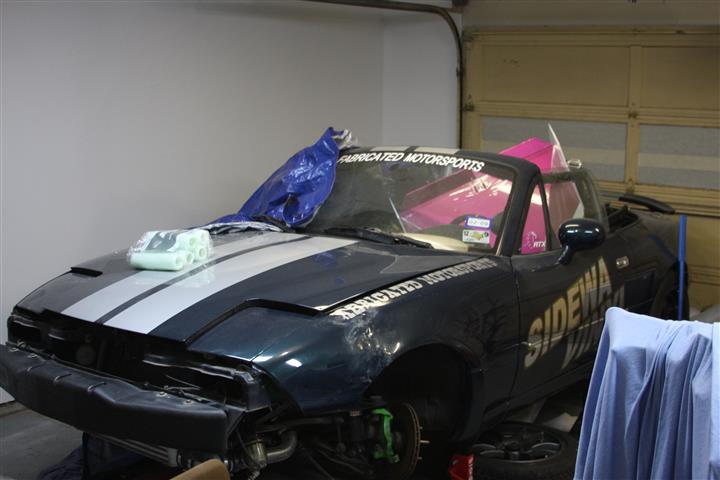
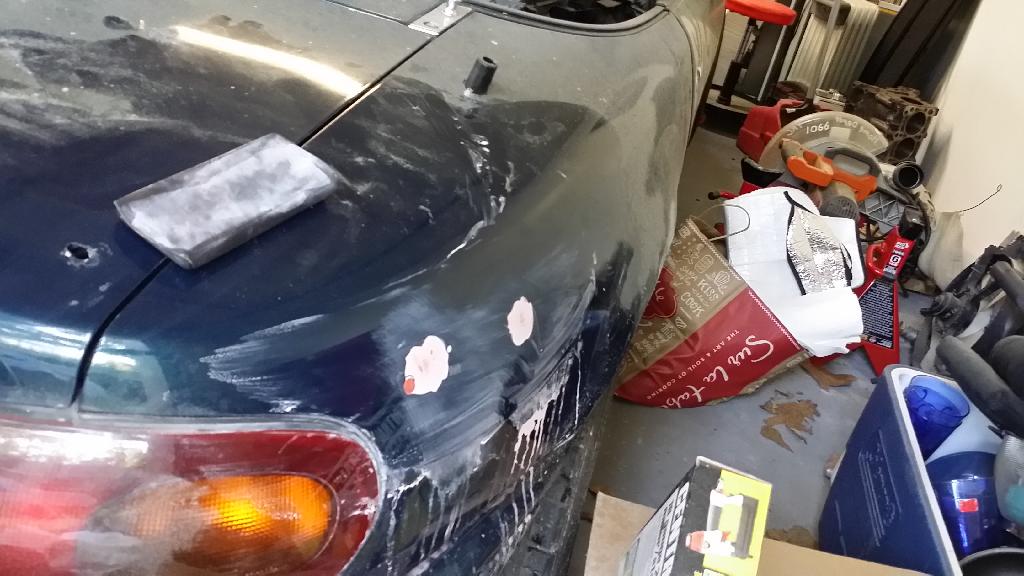
I wish that most of its life was like that pic but the last five years have looked more like this:
Previous build thread can be seen here:
'96 NA turbo set up for drift - ClubRoadster.net
This car has seen a lot of guises. I bought it from a friend who had it turbocharged with a full flyin' miata kit fourteen years ago. From there it was a street car for my ex-girlfriend, a street car for me, a drift car, and finally an oversized paperweight. Unfortunately, more of my ownership of the car has been in paperweight mode than driving...
In the last five years since it last saw service, I started building towards a new turbo setup with a top mount manifold. The build has evolved from a full on drift car, to a combined street/track car, and most recently back to an almost entirely street focused build. This has caused a lot of backtracking and unnecessary work.
Where things are now:
The engine is out of the car and mid-rebuild. I've pulled it from one machine shop due to horrible communication and will be giving it to another to finish shortly.
Engine bay has been stripped down and spot primered to fix some surface rust from scuffs over the years.
The interior is pretty much as it has been for the last five years. Soon the roll cage will come out and move to my other new track car Yui. That will kick off a lot of interior work to bring Kimiko's interior up to a level I won't be embarrassed to show.
New montego blue metallic paint has been purchased and very shortly I'll be spraying some individual panels as test pieces. That may be a bad idea as my technique with a spray gun is far from "expert" and doing things in little batches may end up with three or four shades of blue on the car... no help for it though, I need to practice some before I spray everything in sight.
Current plans are as follows:
Engine
Stock 1.8 block
Wiseco 8.5:1 pistons
K1 Rods
Supermiata sold lifter conversion
Supermiata dual valve springs
Flyin miata manifold
Garret 2560R turbo
Flyin miata 3" down pipe
Interior
Hard dog roll bar
Custom gauge faces for new redline
Custom shorty console and trans tunnel cover
Exterior
Respray in original montego blue
Delete current spoiler
? Wheels
Fastback (long term)
And to finish up, my latest pic of the engine bay work:
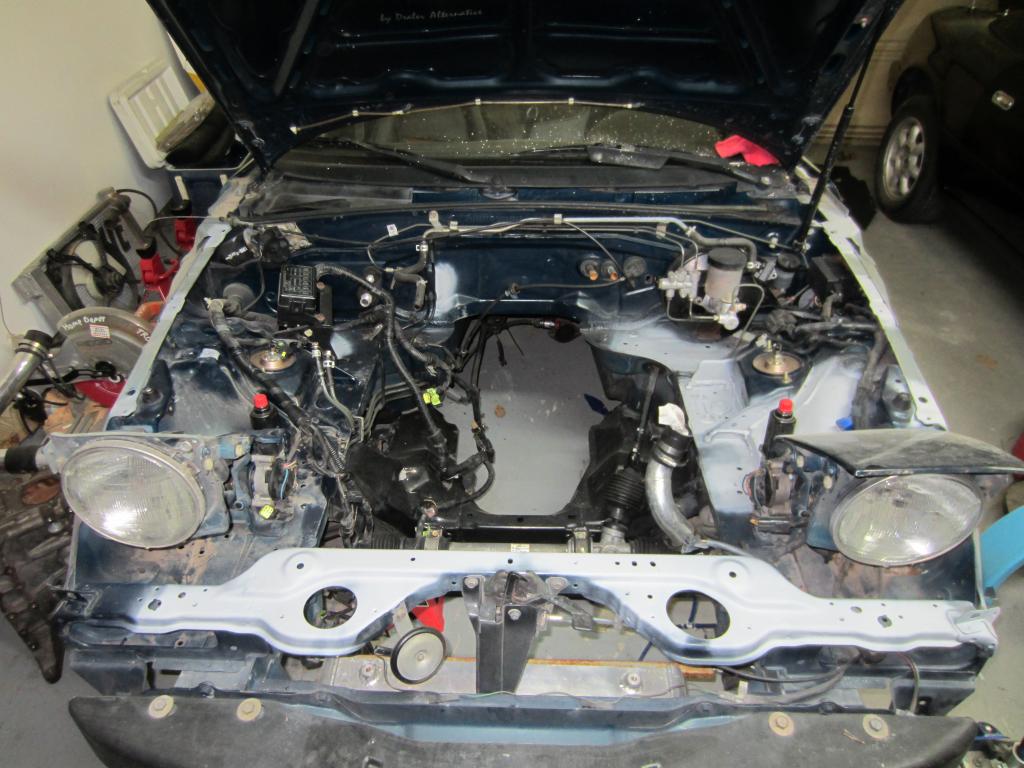
As you can see, lots of primer, and a lot more stuff to move out of the way and/or mask before I spray the engine bay.
Right now I have my engine parts back from one machine shop that I wasn't happy with and waiting on another paycheck before I take them to another one. Here's some fun before and after pictures of the work so far.
Block head and crank before:

Head after cleaning and valve job:
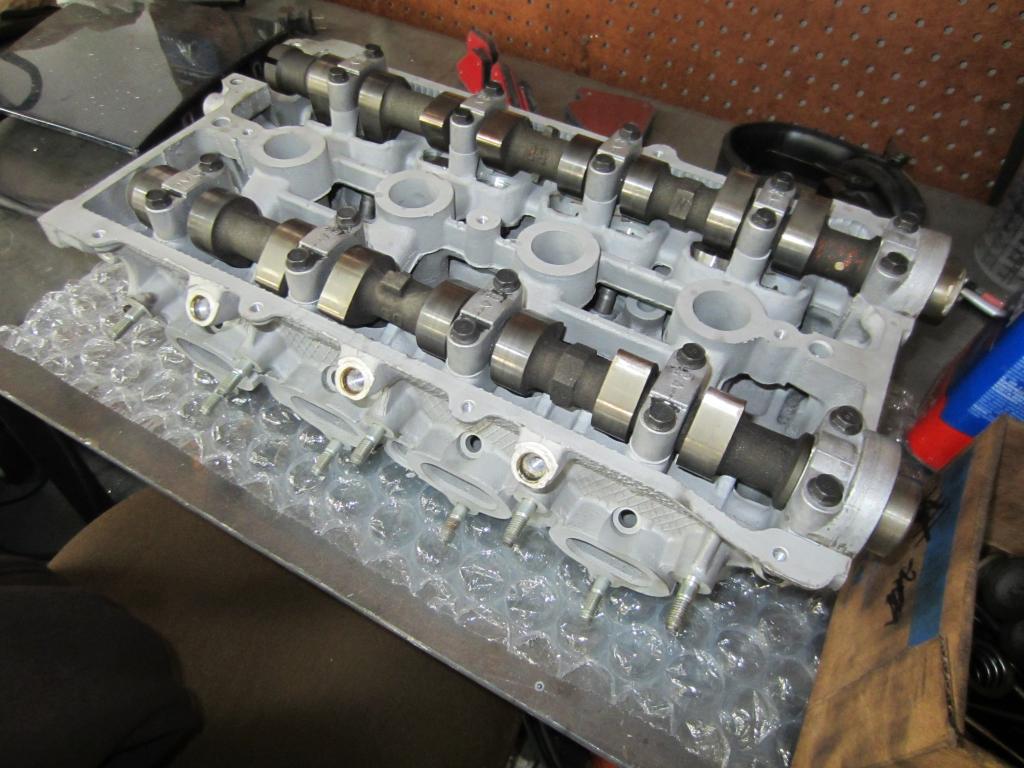
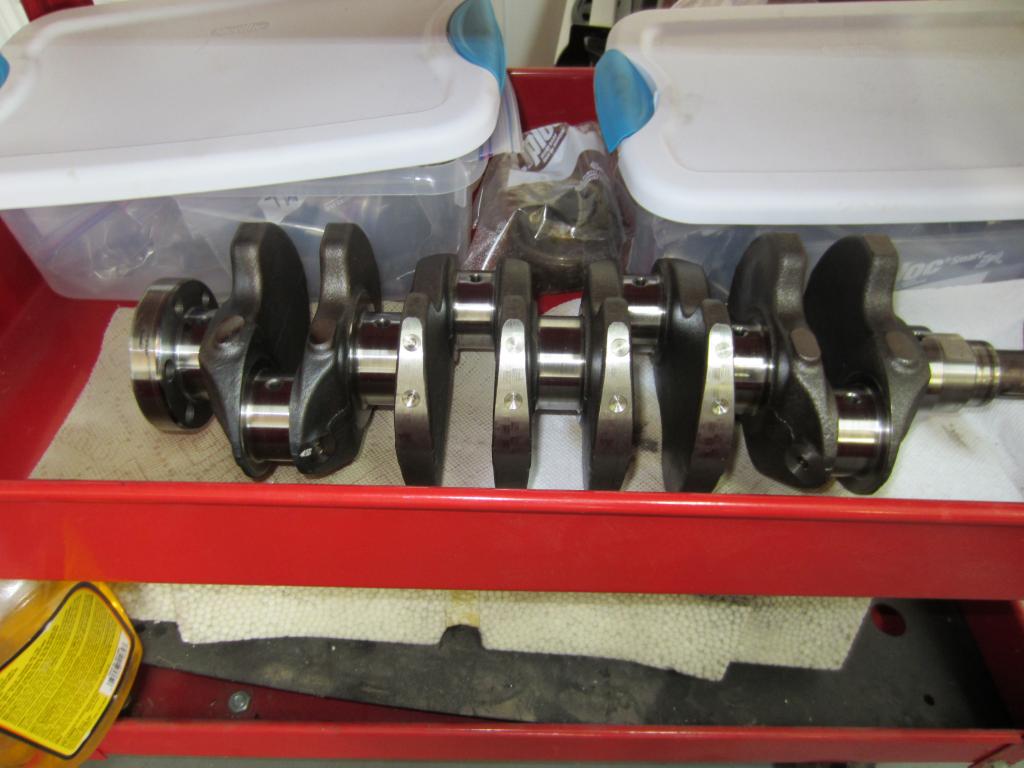
Crank after polish:
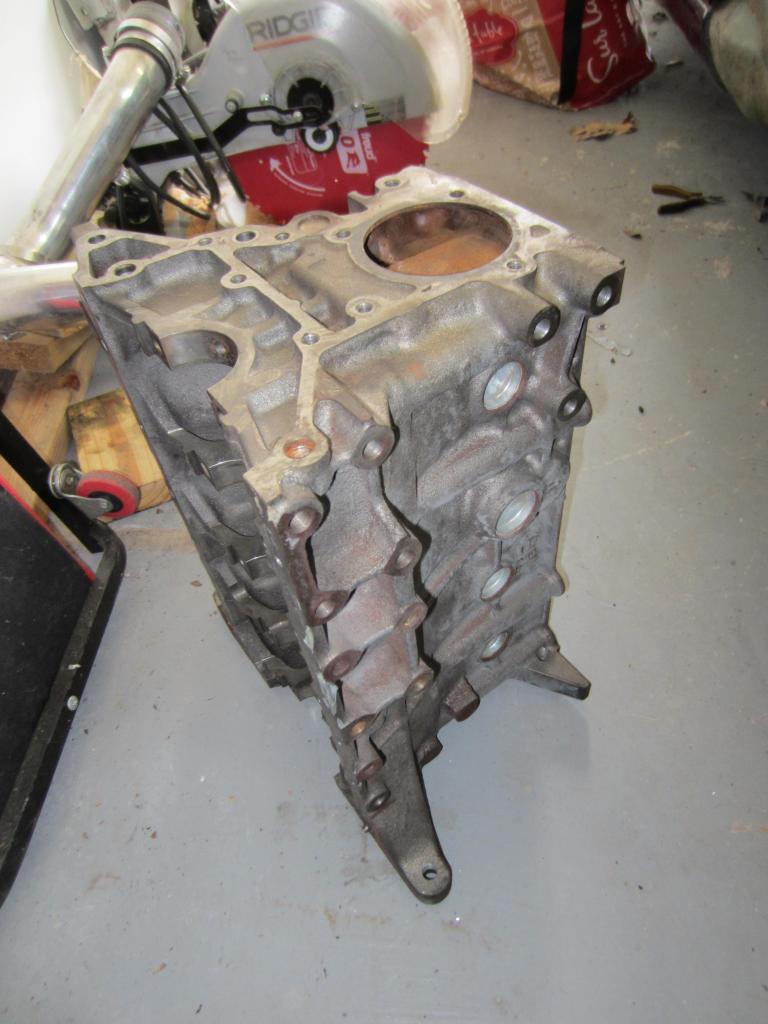
Block after cleaning:
More (as) soon (as I get another paycheck in).
I wish that most of its life was like that pic but the last five years have looked more like this:

Previous build thread can be seen here:
'96 NA turbo set up for drift - ClubRoadster.net
This car has seen a lot of guises. I bought it from a friend who had it turbocharged with a full flyin' miata kit fourteen years ago. From there it was a street car for my ex-girlfriend, a street car for me, a drift car, and finally an oversized paperweight. Unfortunately, more of my ownership of the car has been in paperweight mode than driving...
In the last five years since it last saw service, I started building towards a new turbo setup with a top mount manifold. The build has evolved from a full on drift car, to a combined street/track car, and most recently back to an almost entirely street focused build. This has caused a lot of backtracking and unnecessary work.
Where things are now:
The engine is out of the car and mid-rebuild. I've pulled it from one machine shop due to horrible communication and will be giving it to another to finish shortly.
Engine bay has been stripped down and spot primered to fix some surface rust from scuffs over the years.
The interior is pretty much as it has been for the last five years. Soon the roll cage will come out and move to my other new track car Yui. That will kick off a lot of interior work to bring Kimiko's interior up to a level I won't be embarrassed to show.
New montego blue metallic paint has been purchased and very shortly I'll be spraying some individual panels as test pieces. That may be a bad idea as my technique with a spray gun is far from "expert" and doing things in little batches may end up with three or four shades of blue on the car... no help for it though, I need to practice some before I spray everything in sight.
Current plans are as follows:
Engine
Stock 1.8 block
Wiseco 8.5:1 pistons
K1 Rods
Supermiata sold lifter conversion
Supermiata dual valve springs
Flyin miata manifold
Garret 2560R turbo
Flyin miata 3" down pipe
Interior
Hard dog roll bar
Custom gauge faces for new redline
Custom shorty console and trans tunnel cover
Exterior
Respray in original montego blue
Delete current spoiler
? Wheels
Fastback (long term)
And to finish up, my latest pic of the engine bay work:

As you can see, lots of primer, and a lot more stuff to move out of the way and/or mask before I spray the engine bay.
Right now I have my engine parts back from one machine shop that I wasn't happy with and waiting on another paycheck before I take them to another one. Here's some fun before and after pictures of the work so far.
Block head and crank before:
Head after cleaning and valve job:

Crank after polish:

Block after cleaning:

More (as) soon (as I get another paycheck in).

Reply
 0
0

0
 03-21-2014, 06:23 AM
#3
Elite Member

Join Date: Oct 2013
Location: Cedar City, UT
Posts: 2,764
Total Cats: 951
I was about to make a derogatory comment as well, but it looks like a solid build start albeit the doriftoness.
Plus he left CR and came here so he is headed in the right direction...
In for quality work, don't let us down!
Plus he left CR and came here so he is headed in the right direction...
In for quality work, don't let us down!
Reply
0
0
03-21-2014, 11:10 AM
#4
Junior Member
Thread Starter
iTrader: (3)
Join Date: Mar 2014
Location: North Houston
Posts: 77
Total Cats: 0
I take it you guys don't like the slidey stuff over here! Drifting has always been my motorsport. Most of my previous cars have been built for it (this one included) and I still love going sideways. Kimiko has probably turned her last drift lap though. I have a lot of sentimental value attached to her and the idea of abusing her that way again really turns me off. That's why I am building up my '91 as a replacement track car while the '96 remains my fun street car. Even then I don't know how much more drifting I'm going to do. It really does tear up cars something horrible. I want to try my hand at some general track days and maybe see what kind of series I can run in for grip around here.
Reply
0
0

 03-21-2014, 02:23 PM
#7
Junior Member
Thread Starter
iTrader: (3)
Join Date: Mar 2014
Location: North Houston
Posts: 77
Total Cats: 0
Had to hit up autozone for a headlight bulb for my daily. Went ahead and picked up some evaporust and VHT engine block paint while I was at it. I want to test out some rust cleaning on the bolts and hardware that are going back on to the car. Reading Jeff's build thread has me itching to clean up the larger hardware that will be reused on my car and have it yellow zinc plated. I'll probably go ahead and do the larger hardware from my other car at the same time.
Jeff, I'm going to have to send you a PM some time to ask about the various cleaning solutions you use.
No work on the car this weekend. I'm out helping to put on a local figure skating, er... drifting event here in Houston. Next week I should get the block painted though.
Jeff, I'm going to have to send you a PM some time to ask about the various cleaning solutions you use.
No work on the car this weekend. I'm out helping to put on a local figure skating, er... drifting event here in Houston. Next week I should get the block painted though.
Reply
0
0
03-21-2014, 03:30 PM
#8
Elite Member
Join Date: Oct 2013
Location: Cedar City, UT
Posts: 2,764
Total Cats: 951
Purple Power, acetone, goof off, Adams Super VRT, 1Z Plastic Cleaner, Graffiti Remover, 1Z Gummi Pflege Stift, soap, brake fluid, gasoline, sandpaper, magic erasers, power washer, steam cleaner, **** load of microfiber towels, and a metric **** ton of elbow grease.
And a load of other crap. I can't remember what.
And a load of other crap. I can't remember what.
Reply
1
1
03-21-2014, 04:06 PM
#9
Junior Member
Thread Starter
iTrader: (3)
Join Date: Mar 2014
Location: North Houston
Posts: 77
Total Cats: 0
Now that's a laundry list. I'm not building either of my cars to the level you have yours (but then again who does) but I do take inspiration from your attention to detail. While I have my engines out and bays open I see no reason not to organize, clean and refinish everything I touch.
Reply
0
0
03-21-2014, 06:34 PM
#10
Elite Member
Join Date: Oct 2013
Location: Cedar City, UT
Posts: 2,764
Total Cats: 951
Now that's a laundry list. I'm not building either of my cars to the level you have yours (but then again who does) but I do take inspiration from your attention to detail. While I have my engines out and bays open I see no reason not to organize, clean and refinish everything I touch.
But play it smart and use justifiable reasoning and you won't go too far down the rabbit hole as I did unintentionally.
Just don't skirt the quality of the go-go bits.
Reply
0
0
04-14-2014, 07:17 PM
#11
Junior Member
Thread Starter
iTrader: (3)
Join Date: Mar 2014
Location: North Houston
Posts: 77
Total Cats: 0
No updates because I've been all sorts of busy with other things. Sold my truck and picked this thing up to haul crap around in and do some van camping this summer:
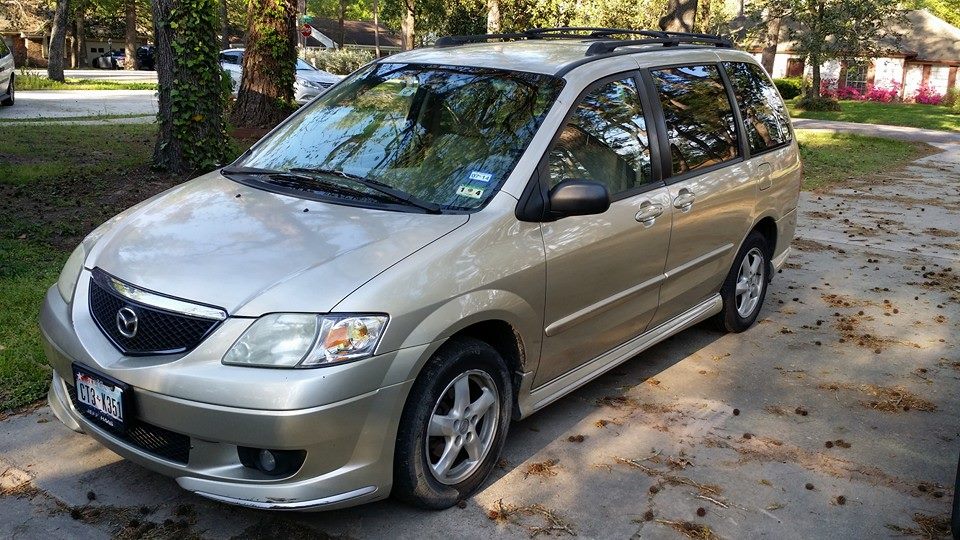
Trailer hitch, new transmission fluid, head unit, and cleaning have kept me busy for a bit. I also sold one of my two other miatas and am working on selling the second spare. Fortunately all the selling has freed up some cash for Kimiko... and I discovered the buy/sell forum here is awesome.
I have a Garret 2871 on the way from shuiend to replace my 2560. Moar boost, moar fun! (more broken parts)
I also got these in from bmxfuel007:
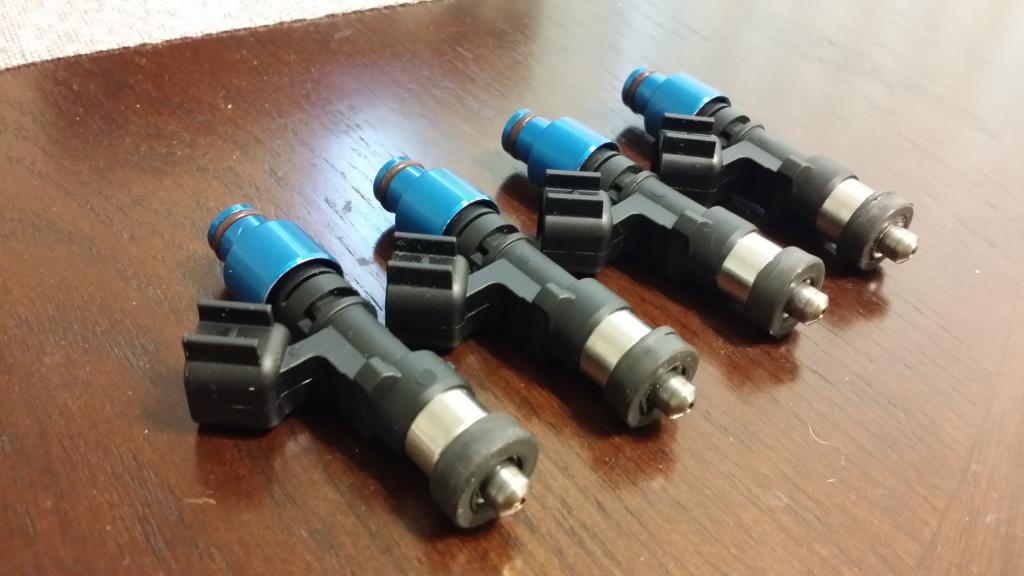
ID1000 injectors. Just a bit of an upgrade from the old RC racing 550's that have been in the car since 2000. They worked fine but I've been told that technology has come a long way and who am I to argue with what people tell me on the internet?
The next piece of work to be tackled will be bodywork and paint. I've spent a while trying to decide if the racing stripes will stay or go and I think I've settled on stay. I also decided to go for a full respray rather than try to tackle this in sections. Might as well do this once and do it right rather than be pissed off down the line when part of the car looks good and the rest looks like crap.
Reply
0
0
04-17-2014, 04:26 PM
#12
Junior Member
Thread Starter
iTrader: (3)
Join Date: Mar 2014
Location: North Houston
Posts: 77
Total Cats: 0
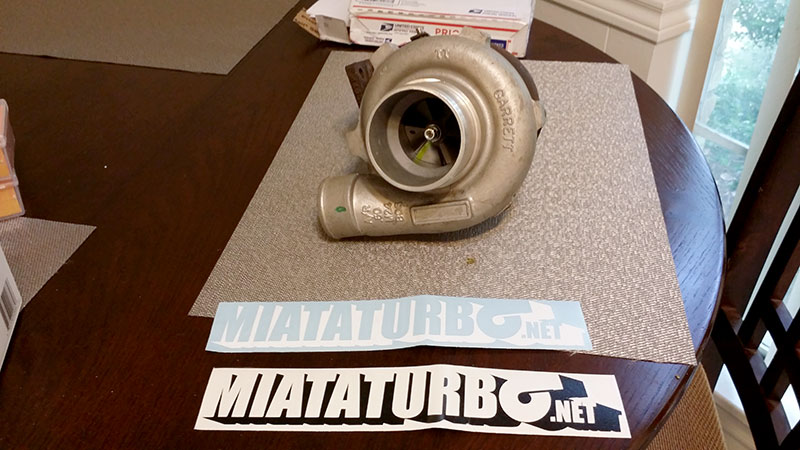
Got my 2871 from shuiend, and stickers! Not quite sure what I'm going to do with them just yet since I'm no doing any graphics on the car. Toolbox maybe...
I haven't decided what is next for the project. I need to deal with bodywork but I'm starting to lean towards doing a racing beat type 2 front bumper. I also need to buy my wheels and tires so I can work the fenders before I finish bodywork and get into paint.
So many things to buy...

I haven't decided what is next for the project. I need to deal with bodywork but I'm starting to lean towards doing a racing beat type 2 front bumper. I also need to buy my wheels and tires so I can work the fenders before I finish bodywork and get into paint.
So many things to buy...
Reply
0
0
04-21-2014, 07:11 PM
#13
Junior Member
Thread Starter
iTrader: (3)
Join Date: Mar 2014
Location: North Houston
Posts: 77
Total Cats: 0
I got bored last weekend and decided to dig into body work a little bit.
Replaced the ~10lb runabout style fuel lid with this stock piece.
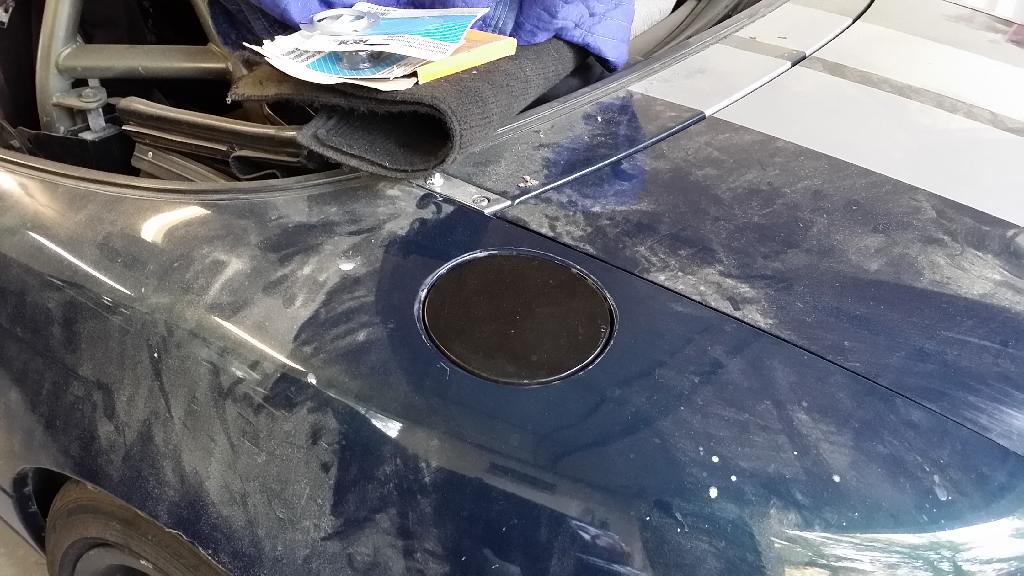
Actually was almost a disaster. Some wasps had built a mud nest over one of the bolts that holds the lid on and the water from the nest had turned the head of one bolt into a rust pile. Fortunately pounding an undersized american socket on was successful and I got the new lid swapped on. I still need to tweak its placement to get it to sit perfect and probably will skim it with filler to take out some ugly ripples.
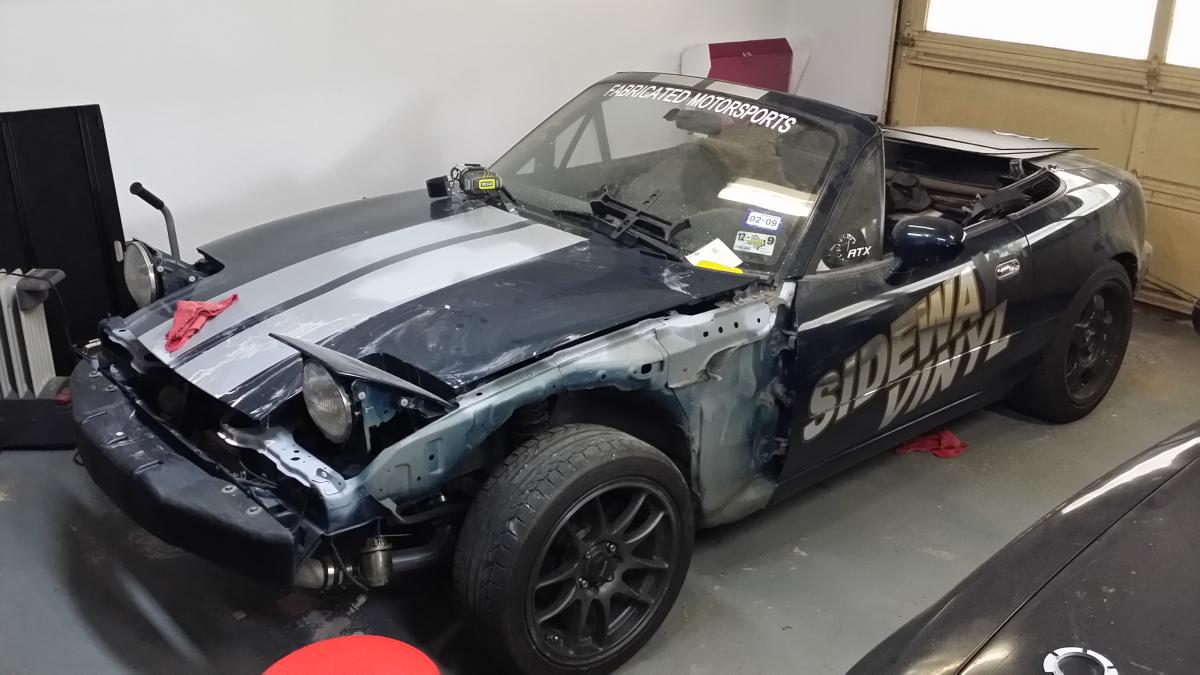
I finally pulled off the fiberglass "welcome to the early 2000's" spoiler.
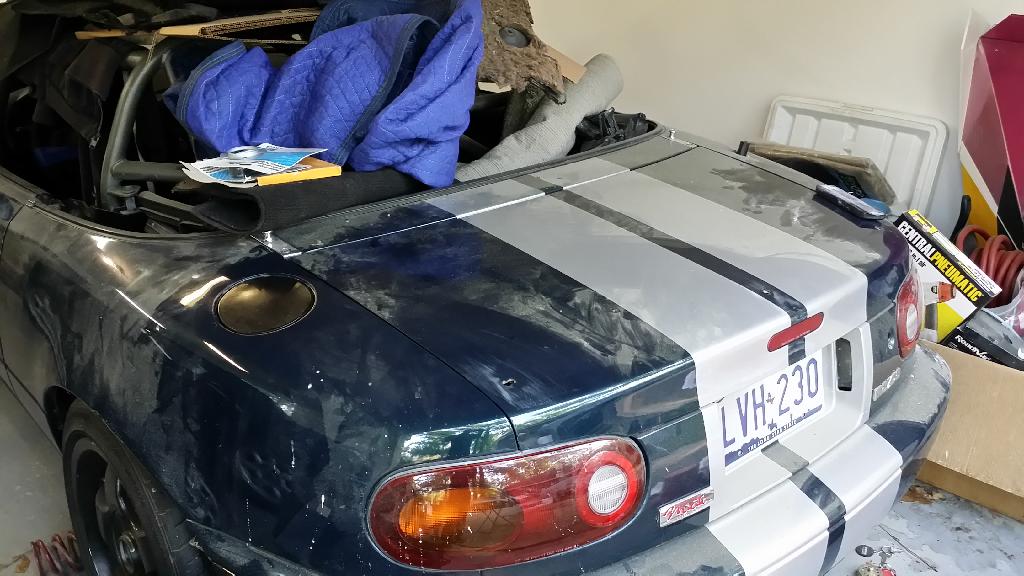
Looks like it should be fairly straightforward to fill in the holes. They're big enough that I need to cut some plugs but a few minutes with a grinder and welder and I should have the trunk lid ready for filler.
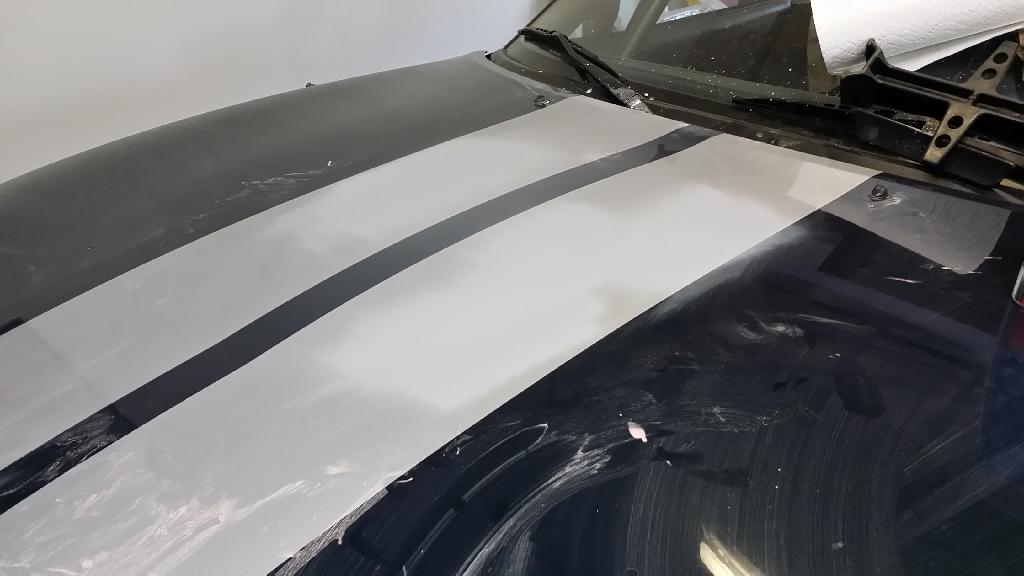
I put a tiny bit of filler on the hood where there were several dings. Doesn't look like much with primer over the stripes.
Finally I took a picking hammer and knocked some dents from things rolling around in the trunk back down. A little filler and some sanding and they're ready for some primer. Glad I got to these, there was rust from water seeping through cracks in the paint. Nothing serious yet but good to take care of now.
Replaced the ~10lb runabout style fuel lid with this stock piece.

Actually was almost a disaster. Some wasps had built a mud nest over one of the bolts that holds the lid on and the water from the nest had turned the head of one bolt into a rust pile. Fortunately pounding an undersized american socket on was successful and I got the new lid swapped on. I still need to tweak its placement to get it to sit perfect and probably will skim it with filler to take out some ugly ripples.
I finally pulled off the fiberglass "welcome to the early 2000's" spoiler.

Looks like it should be fairly straightforward to fill in the holes. They're big enough that I need to cut some plugs but a few minutes with a grinder and welder and I should have the trunk lid ready for filler.
I put a tiny bit of filler on the hood where there were several dings. Doesn't look like much with primer over the stripes.

Finally I took a picking hammer and knocked some dents from things rolling around in the trunk back down. A little filler and some sanding and they're ready for some primer. Glad I got to these, there was rust from water seeping through cracks in the paint. Nothing serious yet but good to take care of now.

Reply
0
0
04-21-2014, 07:38 PM
#14
Elite Member
iTrader: (13)

Join Date: Dec 2006
Location: Taos, New mexico
Posts: 6,598
Total Cats: 561
Looks like you are heading in the right direction with this one! My car has a dent in the same place from when the battery came loose. Pisses me off, but easy enough to fix.
Reply
0
0
04-22-2014, 01:53 PM
#16
Junior Member
Thread Starter
iTrader: (3)
Join Date: Mar 2014
Location: North Houston
Posts: 77
Total Cats: 0
Ugh, these dents in the rear quarter are kicking my ***. One of the problems of owning a car shaped roughly like a jelly bean: basically no flat surfaces for easy body work. In my case the body filler is the "high point" of an arc and since it is softer than the surrounding paint I'm ending up with two little flat patches in the continual curve of the body.
I think that even my soft sanding blocks are too hard to flex to the body. I may try hand sanding with some adhesive backed disks and no block. The rigidity of the thick sandpaper might be enough to act as a "block" and let me very carefully shape the filler back to exactly match the body.
I think that even my soft sanding blocks are too hard to flex to the body. I may try hand sanding with some adhesive backed disks and no block. The rigidity of the thick sandpaper might be enough to act as a "block" and let me very carefully shape the filler back to exactly match the body.
Reply
0
0
04-22-2014, 03:16 PM
#18
Junior Member
Thread Starter
iTrader: (3)
Join Date: Mar 2014
Location: North Houston
Posts: 77
Total Cats: 0
Will do. For starters I think I'm going to grab some two part finishing glaze. Standard body filler is a little thick to easily spread this thin and I'm afraid of the one part air dry spot putty I use for filling pinholes cracking down the line.
Reply
0
0
05-12-2014, 02:01 PM
#19
Junior Member
Thread Starter
iTrader: (3)
Join Date: Mar 2014
Location: North Houston
Posts: 77
Total Cats: 0
Not a lot of progress this last month. One of my other hobbies is model aircraft and I help set up and run the local event for the group I fly with. Between getting that set up and doing a lot of this: https://www.youtube.com/watch?v=___M...ature=youtu.be, what little time I did have other than that I spent arranging to purchase this:
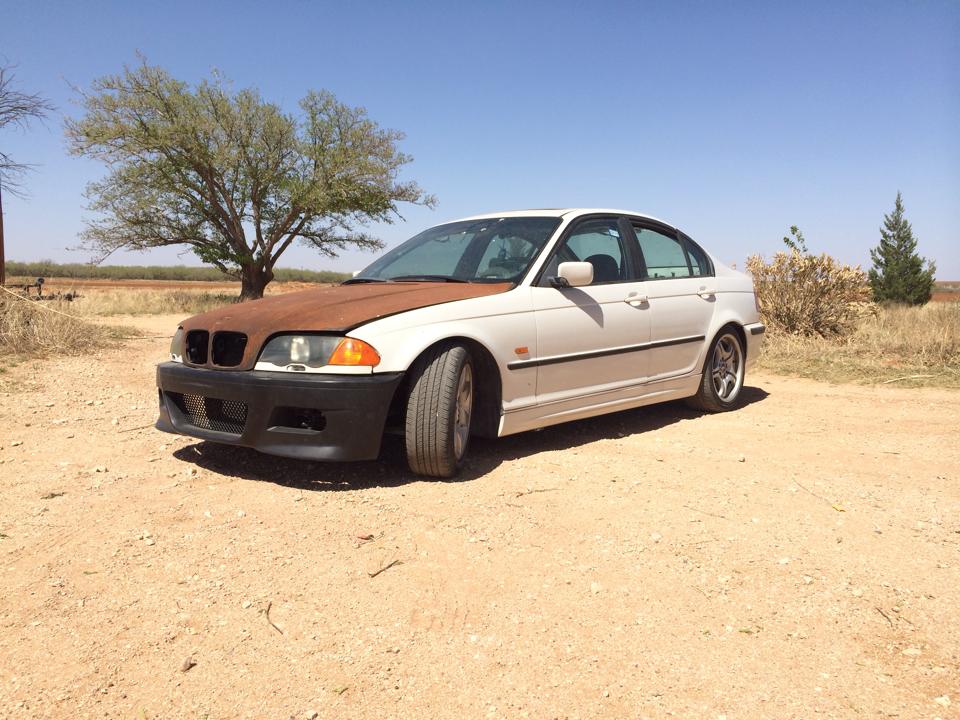
'01 BMW 325i. BC racing coils, longtube header, welded diff, gutted interior. Kimiko is going to be built to a level of finish that I would feel bad about doing heavy track duties with her. I really have wanted a car to play with and a friend listed this up so I put some money on it. The car is about seven hours away so I don't have it in my hands yet but I'll take care of that next month. Current plans are to do a basic fix up on the cosmetics, throw my racing seat and harness in and otherwise leave it alone.
Back on Kimiko, I did move forward a bit... by removing parts? My current build is for the street so having a cage that requires me to wear a helmet at all times wasn't going to cut it. I mentioned to another miata guy who mentioned to someone else, etc. and ended up selling my cage. That gives me a few bucks I can put back into a new roll bar. I'm still undecided on if I am going to have one custom fabbed for absolute max clearance against the fastback or just buy another hard dog bar.
I also have a friend who has committed to buying my SV650. That will fund the purchase of the autoconexion fastback I have been lusting after for years. That plus a few other select pieces will complete the puzzle of the exterior of the car and allow me to finally get on to painting.
Last edited by TheProfessor; 05-12-2014 at 02:21 PM.
Reply
0
0
05-20-2014, 08:59 PM
#20
Junior Member
Thread Starter
iTrader: (3)
Join Date: Mar 2014
Location: North Houston
Posts: 77
Total Cats: 0
Found this on my doorstep this morning:
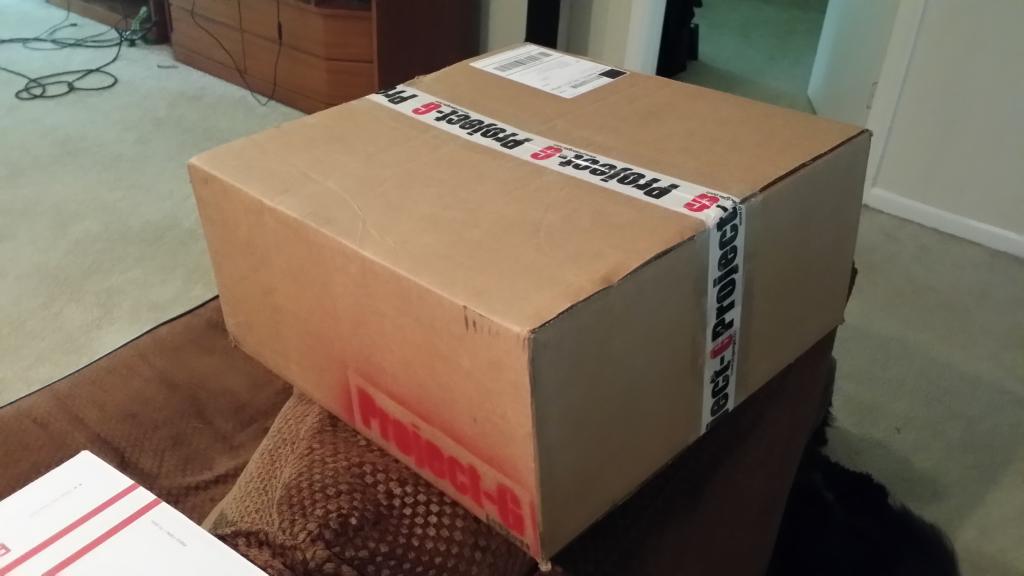
Yum, new parts
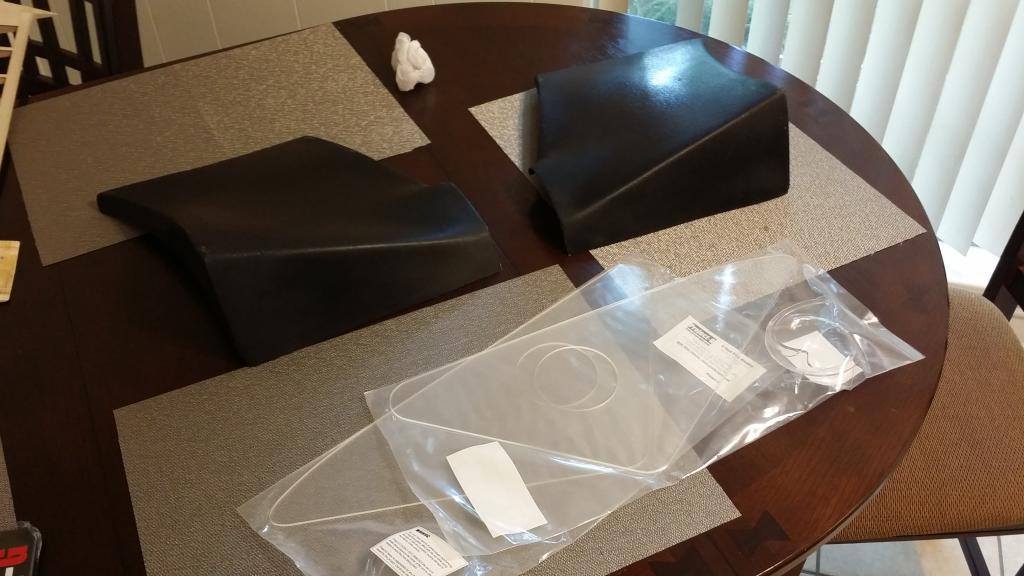
I'm trying to remove just enough of the "jellybean" look that NA's suffer from so badly by carefully selecting parts. My inspiration is largely the FD RX7 which in my mind took all of the styling elements from the miata and made them work so much better. When I saw the project-G rear flares I knew I had to give them a shot.
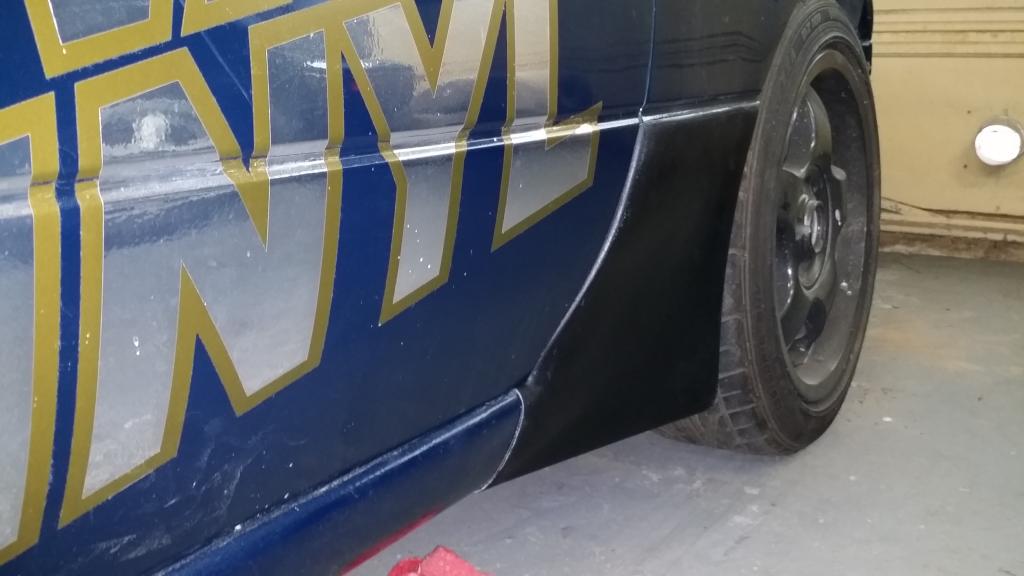
Sigh. Can't wait until I'm through paint and those old graphics are gone.
I'm thrilled with the fit and finish of the parts. Project-G has definitely got their A-game on with these. The pictures were taken without even needing any tape to hold the parts in place. I did not opt for the side skirts of gfusers or whatever the hell they named the complete kit. I don't want to run any skirts on this car.
I may still modify them slightly to adjust the look a little more but we'll see. I need to get more of the body together so I can see the car as a whole.
More parts coming soon! With a little luck I'll be in paint within a couple of months.
Reply
0
0


