When you click on links to various merchants on this site and make a purchase, this can result in this site earning a commission. Affiliate programs and affiliations include, but are not limited to, the eBay Partner Network.
Seem a little backwards to start a build thread after the car is pretty much done, but here goes anyway...
I've had this car for over 10 years at this point and have done a good bit to make it more fun along the way, but it finally came time to give up keeping this as a fun street car and build it for what I really want. After seeing the builds from Emilio and Savington I knew that was the route I wanted to go. Couldn't be happier that I made that choice, the speed and drivability of this car is amazing considering the relative ease and cost with which the package is built. Massive kudos to the guys for putting this formula together. Now we just need more cars
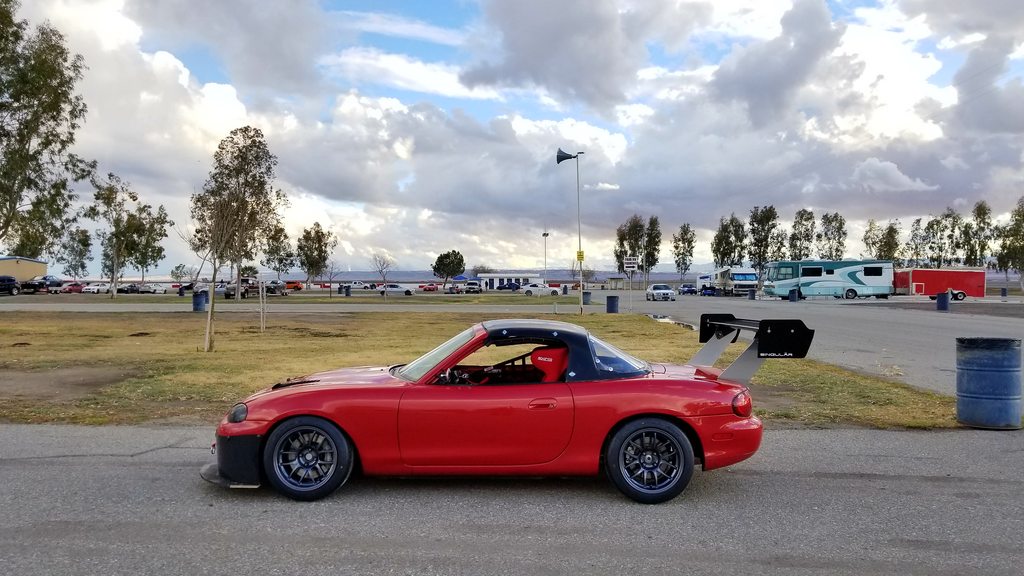
So here is how the car sits now. I've got three weekends on the car so far with zero issues to speak of from any of the products that make an S1 what it is. I'm particularly proud of how this car turned out, as every part of the build except the cage and exhaust was done myself in my rented 1 car apartment garage. After deciding to build the car in mid October last year, I was glad to have it on track the first weekend in March.
My first Supermiata race came at Willow Springs not long ago when we had 4 S1 cars in attendance. It was a learning event for me trying to get up to speed with a new car on a new-to-me track, but I felt comfortable and on-pace. Fair to say I think we'll have some very good battles in the future.
My only issue I've had with the car so far is an ignition cut-out in hard left corners at the WSIR event, which is audible in the video above in T1 every lap. Data showed rpm signal spiking to zero during the cuts, and it didn't take long to find that the culprit was a loose crank trigger sensor. Under hard lefts, it would rotate just enough to make contact with the trigger wheel and interrupt the signal. Rather annoying problem that was costing me time each lap, but somewhat easy fix after adding some extra rigidity to the mount.
Mostly recently was a race at ACS. Just myself and one other car at this one (who unfortunately dropped out of the first race from a splitter issue), but it was another good chance to learn the car and put it through its paces. Not a single issue to report here. Fastest lap in practice is below, doing my best to catch a F430 Challenge car.
I plan to update this thread kinda from the beginning of this current build then continue it through current and future events. Things like the engine build that we're done in prior years won't get much attention, but I'm sure I can dig up that info and pictures if desired.
Middle of last October is when I decided I'd give my shot at building my car in time for the 2018 Supermiata season. I didn't have high hopes of it being done by Race 1, but that was the idea.
Having never taken on a project like this myself, I wanted to do as much as I could myself both to learn from it and to save on cost. I also wanted to prevent cutting corners where I could while keeping a simple, clean build as much as possible. It won't be near the scale of some other S1 cars I'm sure, but I figured getting the thing done and saving my time and money for more track time will make me faster than anything. I haven't spent a ton of time on this forum, but it was still a huge resource in building up my knowledge to make all this happen and get things done right the first time (hopefully).
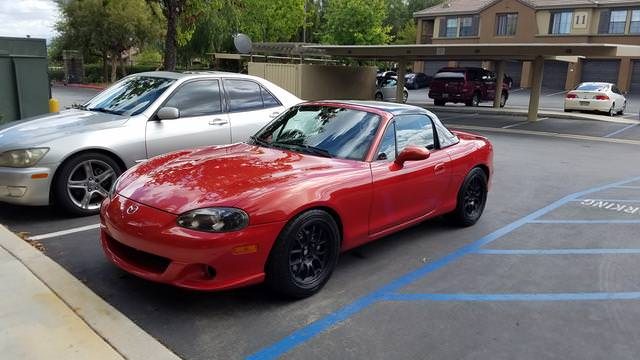
This is as the car sat when I decided to take the plunge
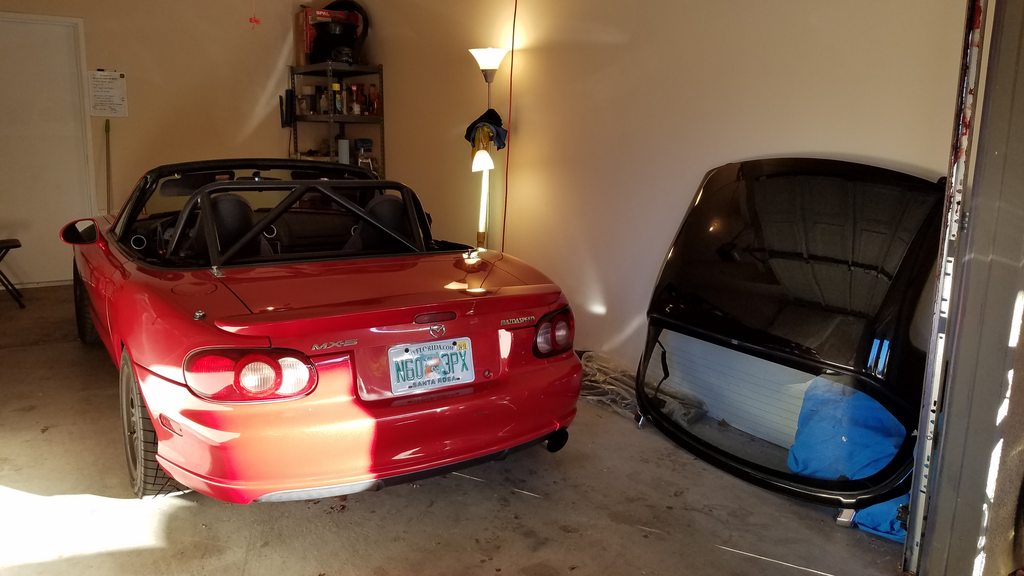
Now in its home for the next few months in my apartment garage. Nothing special but it'll have to do.
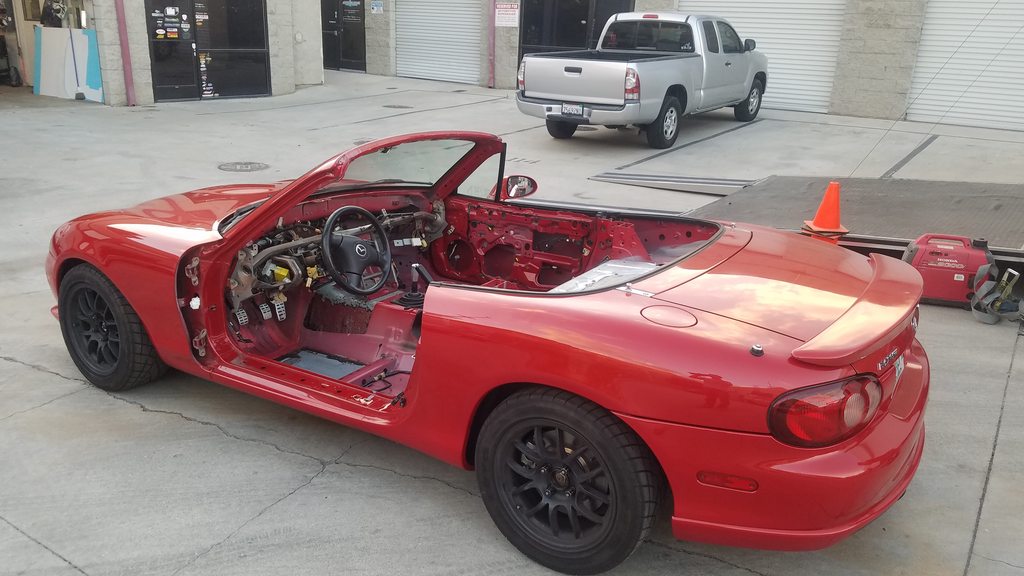
It hurt a little to tear into what had been such a great street car for me or the last 10 years, but it was always a goal of mine to make at least dedicated track car out of it. I'd much rather hang onto the car and do something I really enjoy with it than sell it off to just anybody.
First out was the OEM hardtop and roll bar that quickly went off to new owners
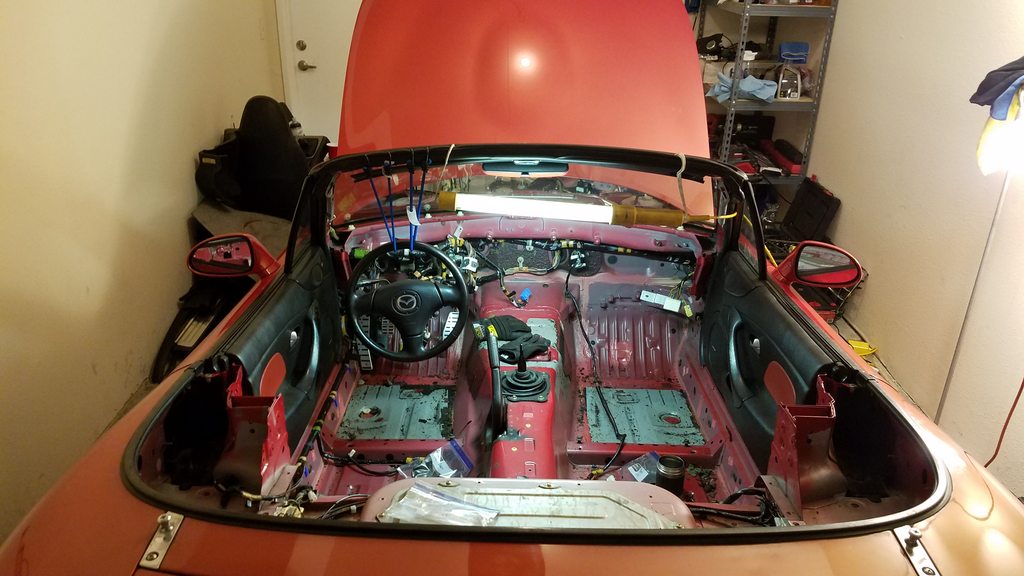
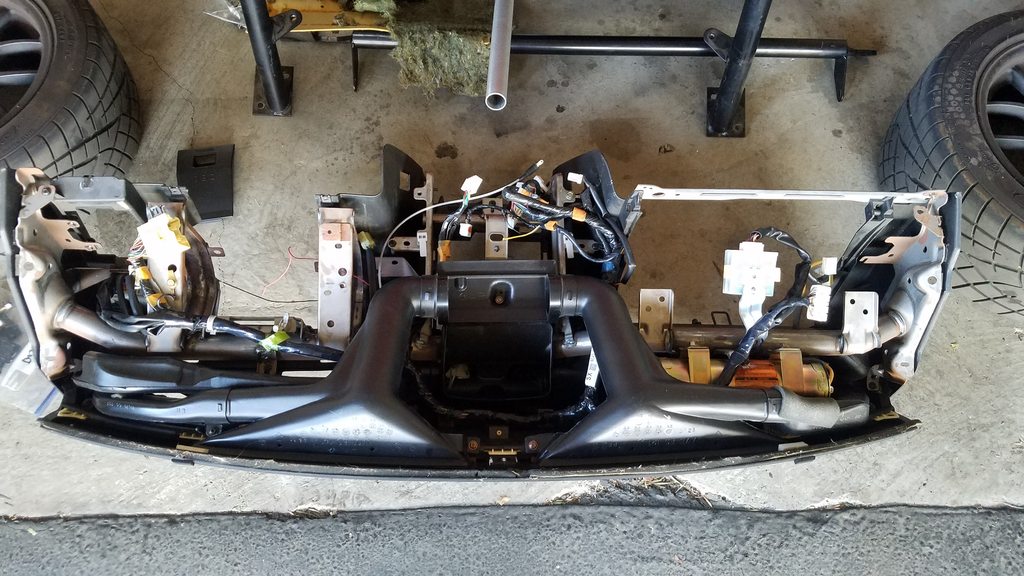
With a string of work trips coming up, I wanted to get the interior stripped and off to the cage builder as quick as possible. It was easy work getting all the parts and pieces out, but the time consuming part came when trying to remove all the sound deadening. I used mostly dry ice for the large flat areas and a heat gun/scraper for some of the curved and vertical parts that I couldn't get dry ice to stay on.
All the wiring will end up coming out as well to get replaced. I had an entire spare harness on hand that I had previously gone through and cut out everything but the essentials for a track car, cutting somewhere in the range of 15 pounds of wiring alone.
There was a surprising amount of bulk attached to the factory dash. I wanted to keep the dash in place to just give a cleaner appearance and limit the amount of fabrication needed to mount other items, so it was torn into to get every piece off that wasn't absolutely needed. Didn't weigh it or get a picture after, but I'm pretty happy with whats left. I'm sure I could drop a few pounds getting rid of it entirely, but I'll take that penalty for the cleaner look for now.
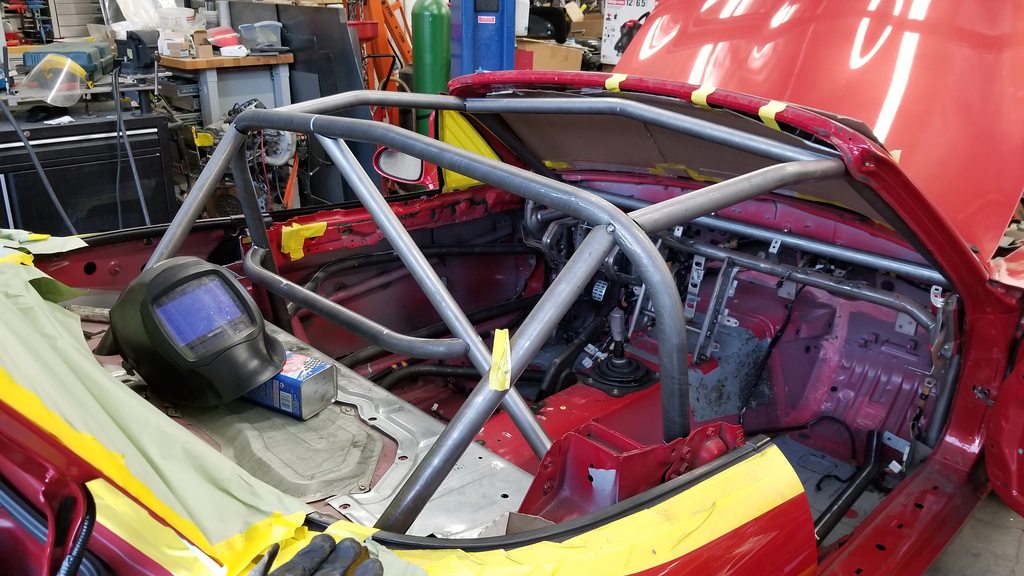
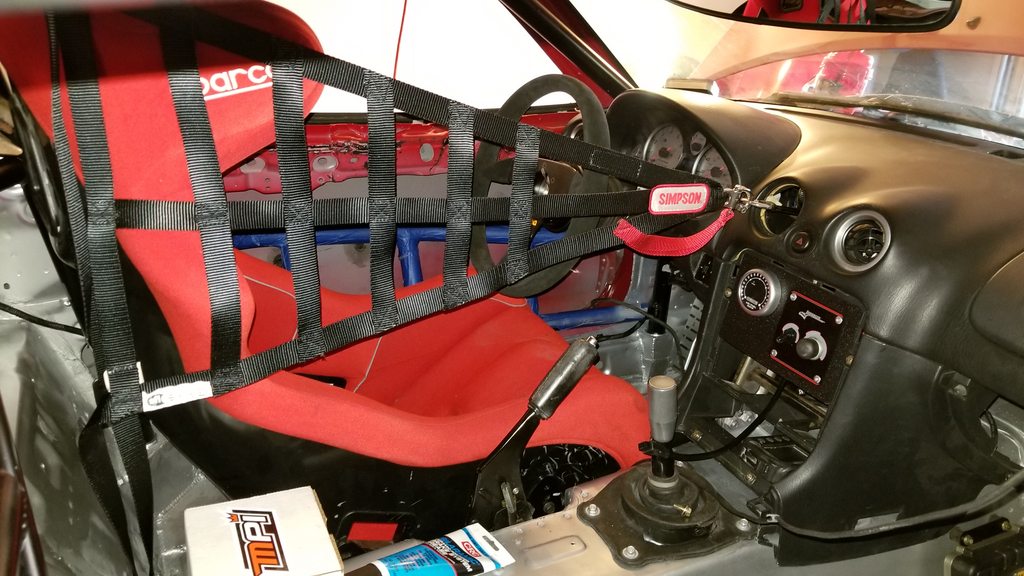
Now 4 days in, the car was ready to go get a cage. Local to me, Iron Canyon Motorsports was the shop of choice. Mark of ICM has spent a lot of time around miatas and built enough cages that I felt comfortable handing it off to them. Got the car dropped off, and stole the drivers door in the meantime to go cut it up and make room for the door bars.
Lucky for me, the actual build proceeded much quicker than my documentation of it so far...
With the car at ICM, I had them handle the main fab work that I wasn't capable of doing myself. This meant the full cage, seat fitting, and mounting a lightweight fiberglass top. To be honest I thought the quality of the cage could have been better, and in hindsight going with a more reputable shop may have been a better choice. I did have to take the car back on one occasion to finish up some welds that weren't 100% completed.
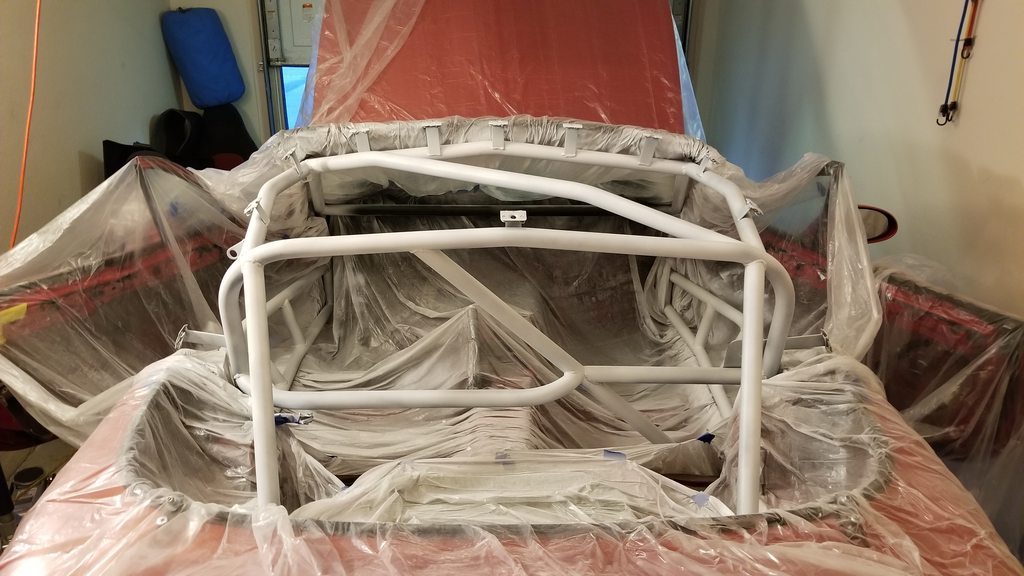
Some cage progress
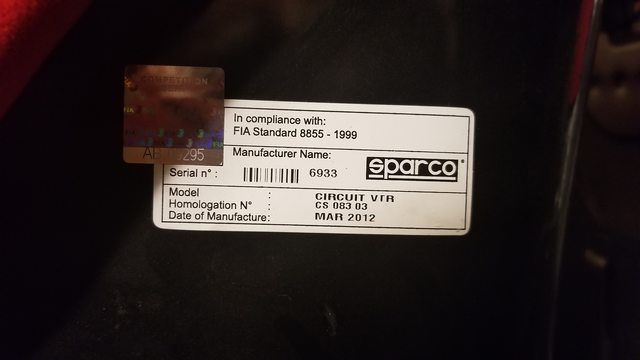
The seat turned out to be a minor issue as well. I ordered a Sparco Circuit through SafeRacer, and unfortunately the seat I ended up receiving (in October 2017) had a manufactured date of 2012... A call to SafeRacer was of no help as they had changed ownership at that time and could supposedly do nothing to help by the time I got the car back and discovered the 5+ year old seat. Luckily the simple addition of a seat back brace was all I needed to keep it legal and run the still brand new seat.
I got the car back at the end of November and then stripped down the rest of the interior to prep it for paint. White primer down first before a coat of black on the cage and silver through the rest of the interior. Nothing better than a blanket of tarps and spray cans to get the job done!
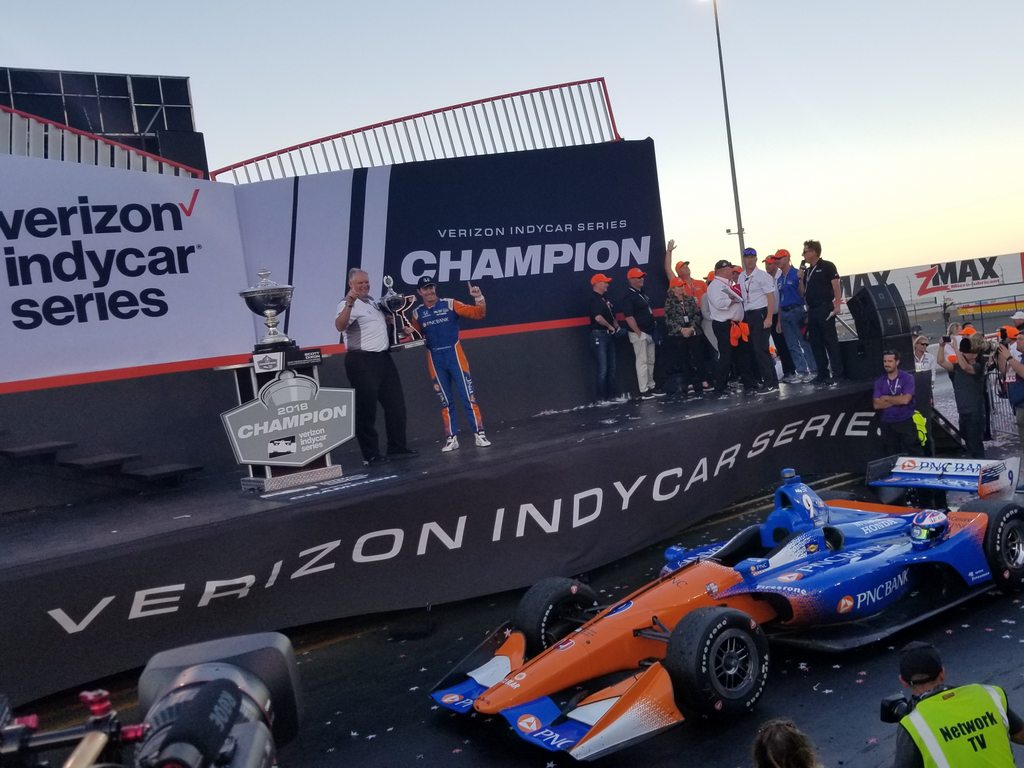
Conveniently for myself, my work schedule and the SPM race schedule worked great together this year. With no SPM race since early May but tons keeping me busy at work, I'm now getting prepped for Sonoma in a week then two more events in November. I just finished up the busy part of my year as an IndyCar engineer with Honda where we took the championship with Scott Dixon. That guy knows how to get it done!
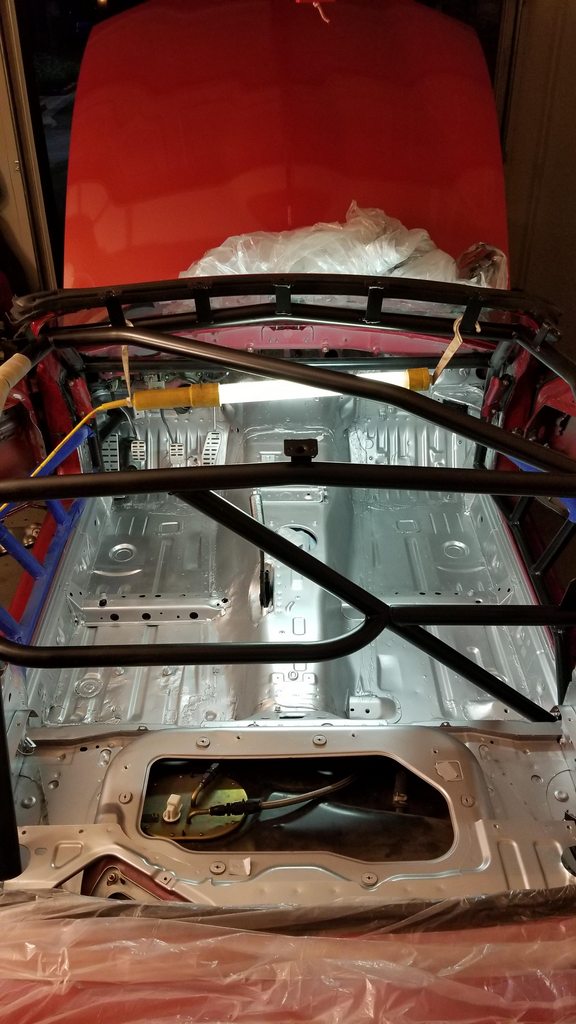
So back to showing some old progress... With the cage done and painted, I could get on to actually putting bits back on the car.
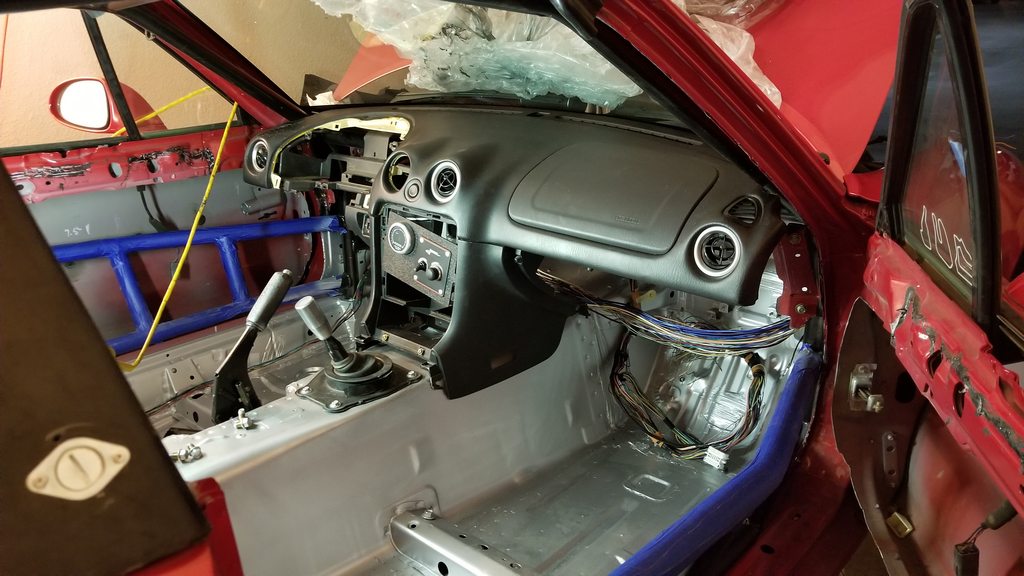
I started with the interior, trimming and test fitting the dash. I definitely prefer the look with the factory dash still in over just an aluminum dash panel hung on the dash bar. I'm not planning on a fancy dash logger or really much complexity at all in this area so the stock instrument cluster will go back in for now, accompanied by an AIM Solo DL for vital engine info and lap timing. You can also see the mess of wires as I finish sorting a spare harness that I stripped anything no longer necessary out of. The ECU (Haltech Elite 1500) gets mounted on the passenger side trans tunnel on anti-vibration mounts.
Seat and steering column back in for the final time. I took a bit of a guess on what spacing to get for the wheel since I didn't have anything to measure when I bought it all, but I feel like it turned out about perfect for me after lowering the column a bit. I'm a short guy so getting the seat placement low/rear wasn't a huge concern for me. I didn't realize how convenient that air vent in the dash was until I went to mount the center net
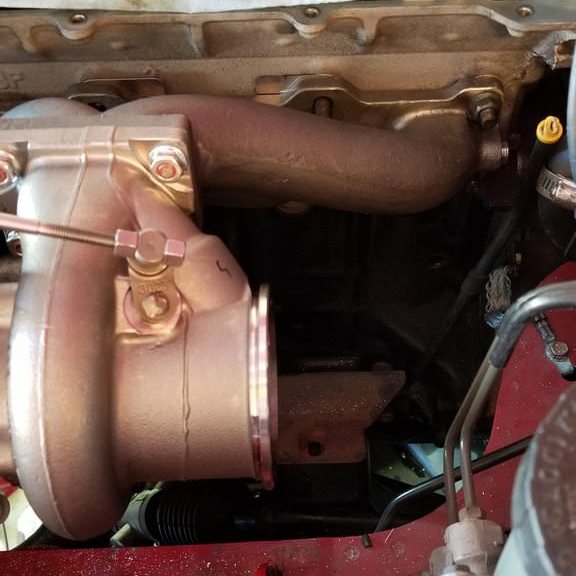
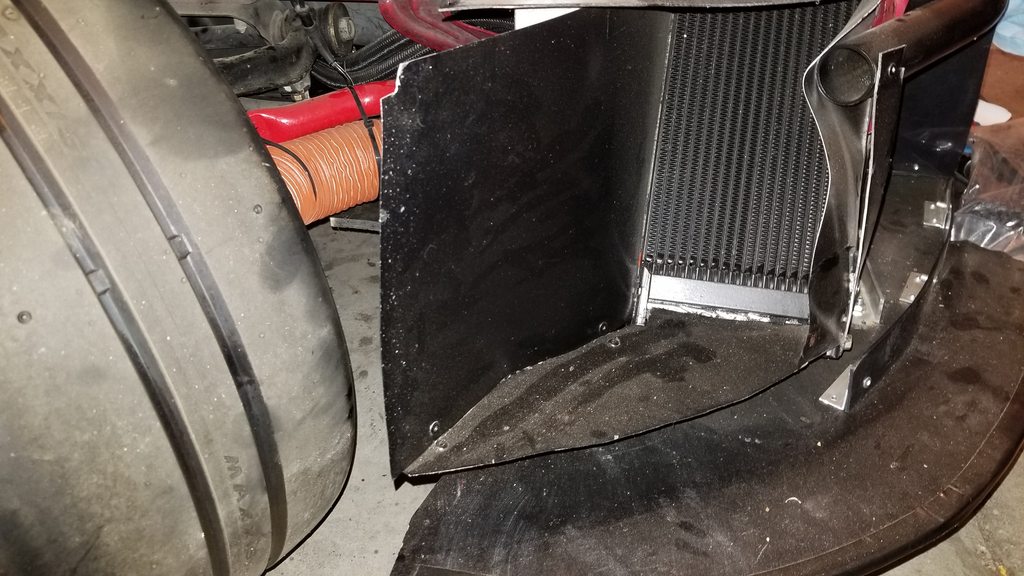
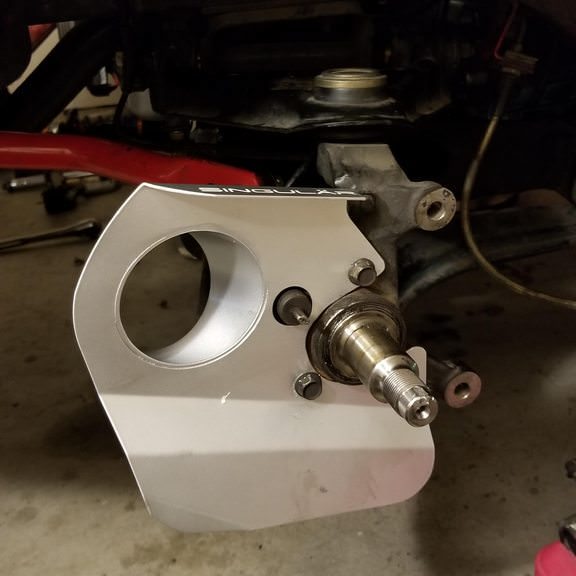
The first order of business at the front of the car for me (and probably trickiest) was trying to find a place to mount the oil cooler. The Trackspeed 19 row kit was the perfect base, allowing me to mock up several different options before I found one I'm decently happy with. I think I got the idea from somewhere on this forum, but the cooler is mounted almost perpendicular to the direction of travel, hanging off the passenger frame rail. It's currently fed from the air box up front that feeds the intercooler and rad(probably not ideal), then exits out the side just ahead of the right front wheel. So far so good with this setup in 100 degree heat, but if I need to feed it more air that can be done without much trouble.
I'd only know the cooler is working (or isn't) if I can measure oil temp, so that was the next step. I'm not sure I've seen anyone put a sensor here before, but I didn't see any reason not too and seems to to the trick. Fits perfect right in the top port of the oil pump, right before it goes to the filter. The sensor tip extends just far enough into the pump without obstructing the flow. (Ignore all the residual oil, this engine had a few thousand miles of street use with a leaking cam seal before this, whoops...)
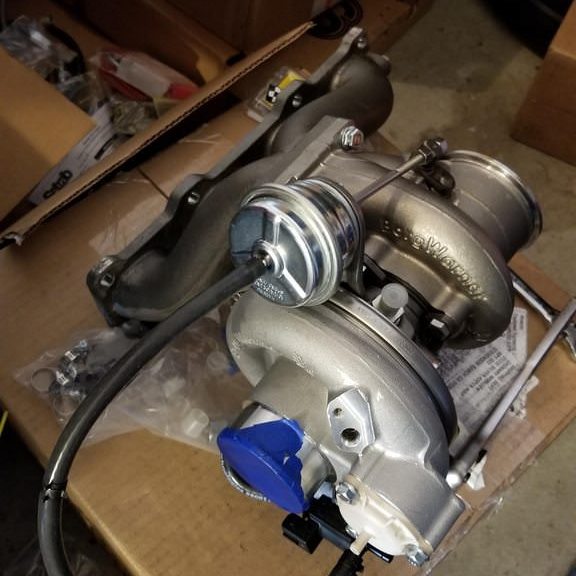
I was really impressed overall with this kit from TSE. Very quality components everywhere and it all went together without a fight. First test fit showed the brake lines way too close to where the downpipe had to go, so those got shifted over and wrapped in heat reflective material, in addition to the heat shield that would cover that general area.
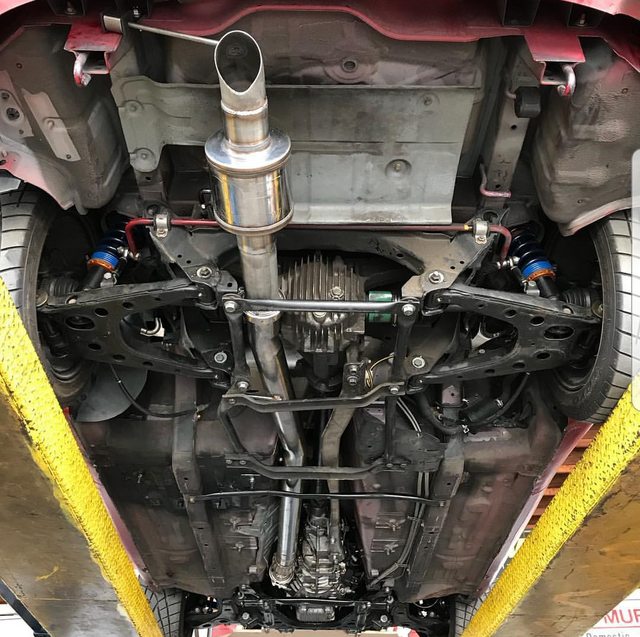
With the turbo mounted up, I had a great muffler shop down the road from me finish up the exhaust back from the TSE downpipe in addition to fabbing up the mounts for the Precision intercooler. Exhaust is just simple 3" stainless with a 6" Magnaflow muffler off the back.
Next up was the rest of the intake piping now that the turbo and intercooler were mounted. I didn't get any photos in the process, but it's 2" aluminum from the turbo to intercooler and 2.5" up to the throttle body with flexible elbows on either end to allow for some engine movement. I kept the routing as tight to the sway bars as I could to leave room for the 3" brake duct hoses between the intake piping and the undertray. Throttle body is a Junk2, nothing more to be said about that...
Brakes!
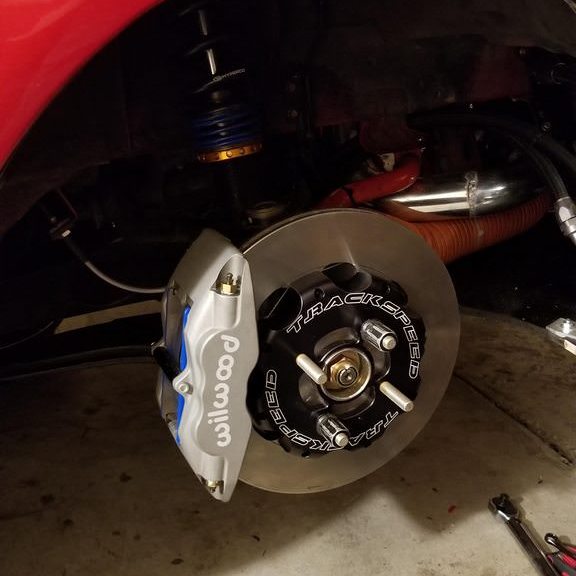
Bigger is better right? Went with the Trackspeed Superlite kit with the singular brake ducts to help keep them cool. Again, amazing product from TSE. Having the bolts predrilled for safety wire was a big plus for me, and again the install was straight forward. For pads I'm currently running G-loc R12 on the from Superlites and R8 on the rear stock sport calipers. Overall a great setup, but I've yet to have working ABS or proper bias so there's a little to be gained here still. Went ahead and replaced hubs and wheel bearings all the way around at the same time as well.
Finishing up the front end consisted mainly of the S1 spec splitter and air dam, and the ducting to the rad. Following everything I've found on this forum, the splitter is just a 0.5" sheet of birch ply, cut to give 4" in front of the air dam. Air dam is a 0.1" (I think) plastic sheet, bolted to the top half of the original bumper skin. Conveniently I had a bunch of air dam material left over, so that was used to make the air box that sealed up to the radiator from the opening in the air dam. The box also feeds air to the oil cooler and brakes, the 3" duct is just tied into the sides. I tried to squeeze some NACA ducts to the inside there but there really just wasn't enough room for me to make it work the way I wanted.
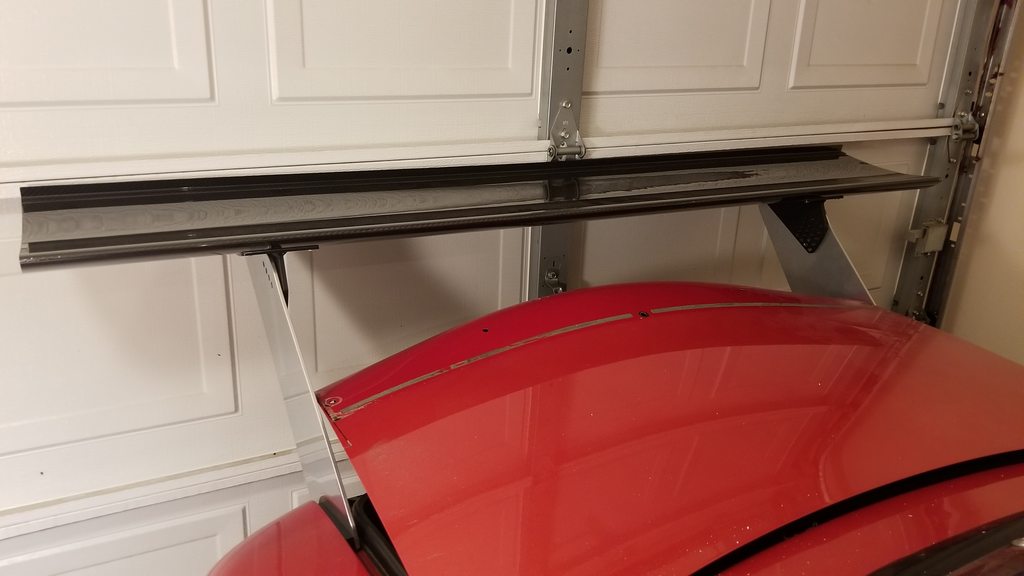
Balancing out the front is the GT250 wing out back, using the Singular mounts and endplates.
Besides all the little stuff here and there that I never mentioned, the car was just about ready for a shakedown test at this point. Found a track day at Buttonwillow when I had a free weekend and off I went
The setup on the car was pretty much non-existent at this point, but the car still felt really good and gave me a chance to feel everything out and see where I need to focus the next round of work. It was a surprisingly successful and trouble-free day, finishing off at 7's Only on the dyno tweaking for class power of 220whp max.
This is basically the setup I'm going for over the next year. Wish we had supermiata races in the midwest. It would motivate me to replace my FM kit with the TSE.
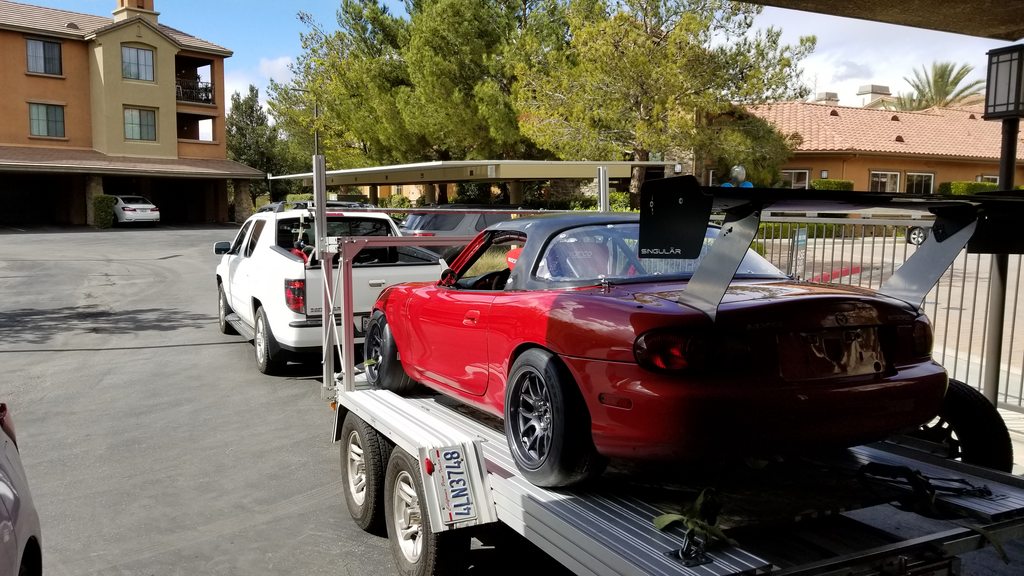
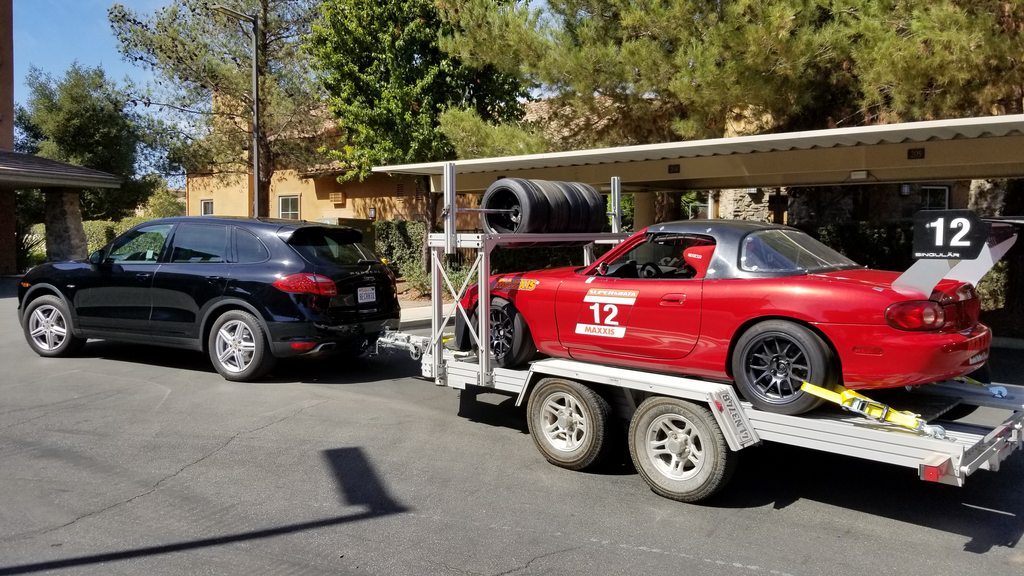
Had a great time at Sonoma this past weekend, it is such a fun track when you get it down. It gave me a chance to try out the new-to-me tow rig, a 2013 Cayenne Diesel that is also my daily. It handled the trip beautifully and got 20mpg towing the whole way there and back.
First session on Saturday I got all of 1 lap in before the fuel pump shorted out and left me stranded on track. Whatever heat shrink I originally used to wire the pump in didn't like being submerged in fuel, and eventually slid off the butt connectors which then touched and shorted the pump... Luckily Emilio had a replacement DW300 on hand so we got it swapped in for second practice. That practice was then shortened due to a crash which meant I was going into qualifying with 3 total laps ever around the track. Predictably then I qualified last. First race went well, still getting to grips with the track, though I developed a water leak towards the end which knocked me out of race 2 so I could return to the paddock to diagnose. I could see water dripping from the back of the head, but not 100% sure if that was from the reroute housing, hose connection, or anything else back there. Took the shotgun approach and just took it all off and resealed it for Sunday. That at least got me through Sunday, when I finally felt I was getting up to speed at Sonoma.
Since SPM inverts the grid every race from the finishing order of the previous race, I got to start Race 3 on pole. I managed to get away early while the others got hung up a bit and held on to take my first real win! First video isn't all that exciting to watch though it was probably my most consistent set of laps through the weekend running some 1:48s.
Race 4 started from the back (just 4 cars), and I spent the whole race trying to get around William in the orange S1. Made it by once when he made a mistake, which I promptly did as well and gave it right back . So much fun to race with these guys though. Can't wait to do it again and improve myself. Car could surely use some setup attention too, but I've been putting that off until I'm confident I've got a good handle on the car and can actually make productive changes.
I was really impressed overall with this kit from TSE. Very quality components everywhere and it all went together without a fight. First test fit showed the brake lines way too close to where the downpipe had to go, so those got shifted over and wrapped in heat reflective material, in addition to the heat shield that would cover that general area.
Have same issue with brake lines. Thought of several different fixes but would prefer not to cut and flare ABS lines.
Do you have a pic of what you did? Thinking just a smooth bend back on both lines?
Have same issue with brake lines. Thought of several different fixes but would prefer not to cut and flare ABS lines.
Do you have a pic of what you did? Thinking just a smooth bend back on both lines?
I don't have a good picture of it, but basically I unbolted the factory proportioning valve from its mount under the master cylinder and just pulled everything towards the outside of the car, away from the downpipe. I was able to bend the lines enough to get plenty of clearance from the downpipe, along with a heat shield in between. No indications that anything has gotten too hot so far.
 05-10-2018, 12:18 AM


 2
2


 . So much fun to race with these guys though. Can't wait to do it again and improve myself. Car could surely use some setup attention too, but I've been putting that off until I'm confident I've got a good handle on the car and can actually make productive changes.