Dual-duty N/A VVT track car "budget" build
 01-01-2018, 03:24 PM
#1
Junior Member
Thread Starter

Join Date: Aug 2013
Location: Towson, MD
Posts: 87
Total Cats: 18
Happy new year everyone. I don’t post much here, but I’ve learned so much from this site that I figured I’d start one of these and introduce myself to the community a little better. I’m pretty far into the build already, so I’ll give a bit of a backstory. The goal of this project has always been a low-budget, dual duty car – dead-reliable and capable on track while being a good street toy and road trip capable, built with maximum DIY and lots of learning. Also, I have no F/I planned for this car, so you can stop reading now.
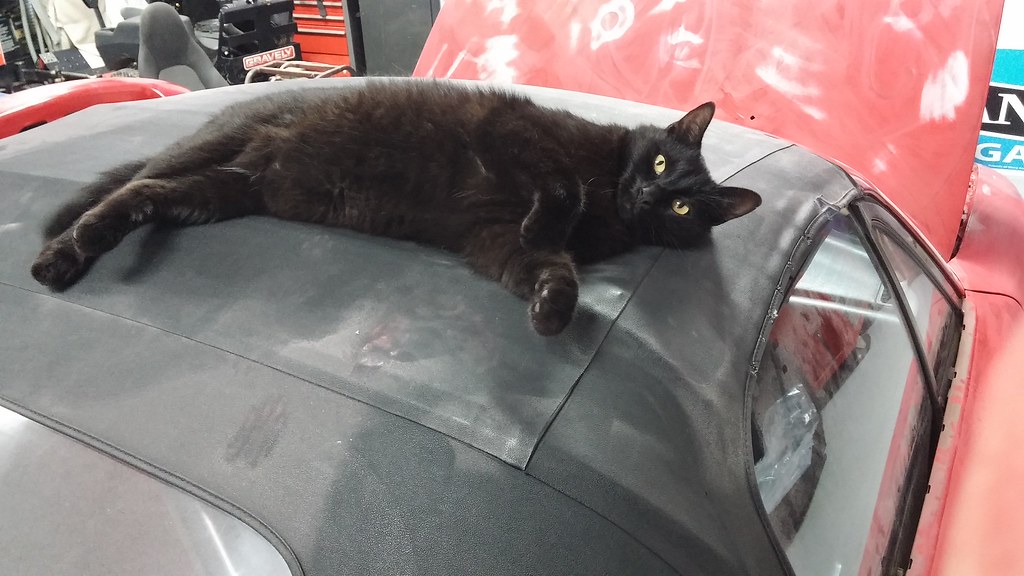
And I have four cats.
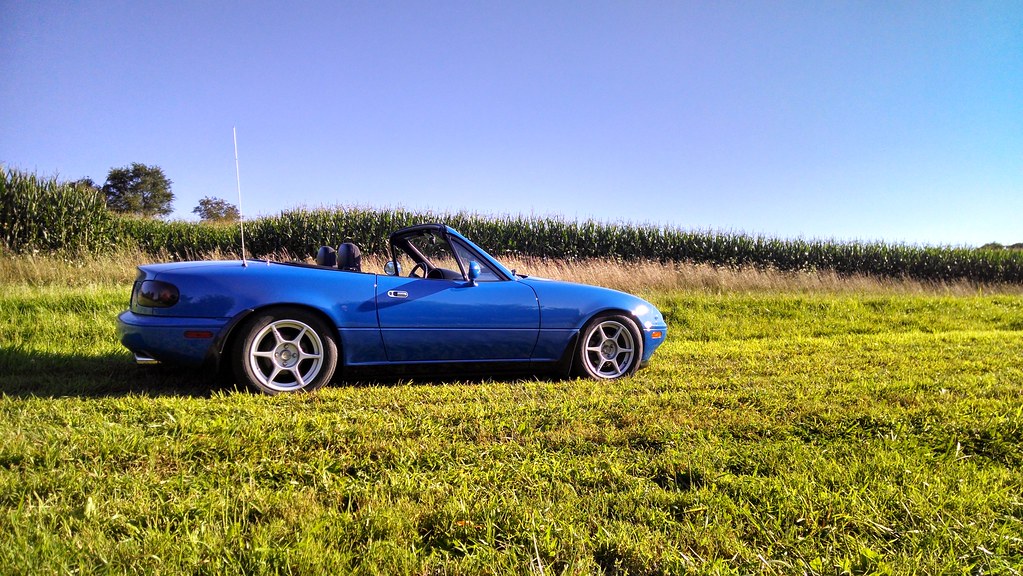
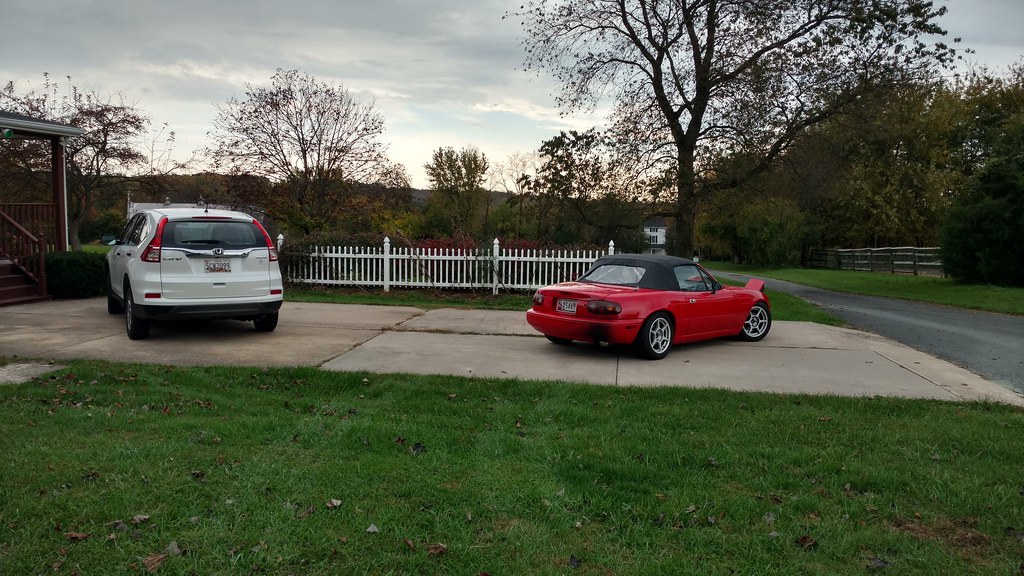
Not the subject of this thread, but I’ll introduce my first Miata since you’ll see it in a lot of the pictures. Bought it in 2012 for my senior year of high school. 50k and nearly mint condition – exactly the Miata I wanted and I managed not to make it too much worse.

Drove it for a year, installed the wheels, FM Vmaxxxx, a RS3 catback, and a few little things here and there. Started autocrossing in it, had a lot of fun just the way it is. Then I went to college and bought a daily, this car has been on the back burner since, but not forgotten.
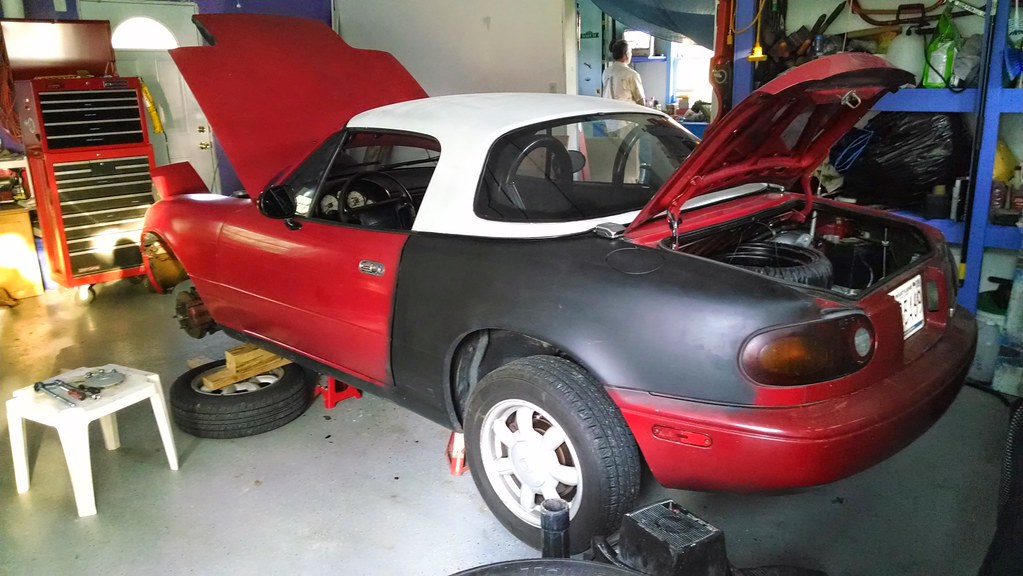
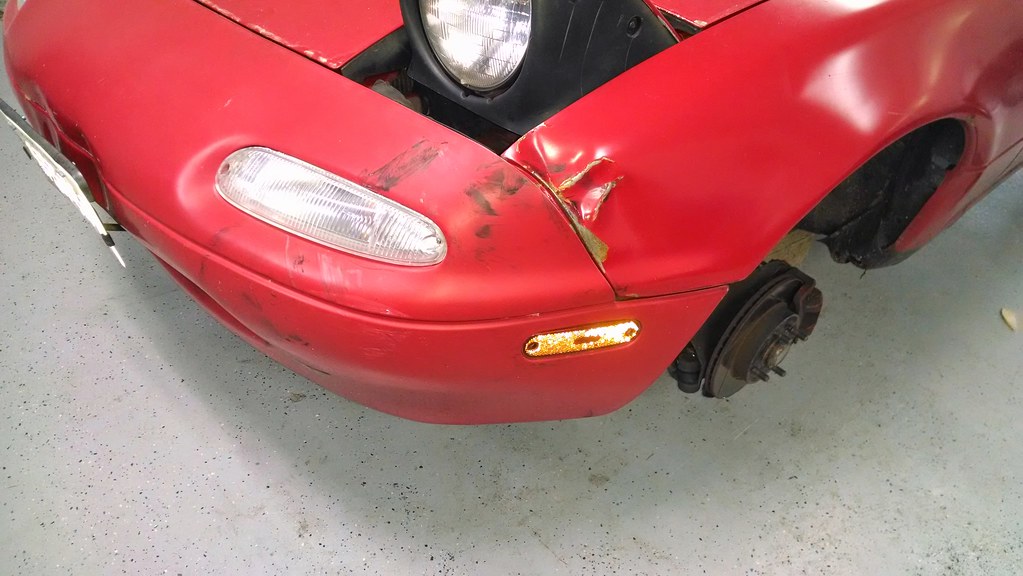
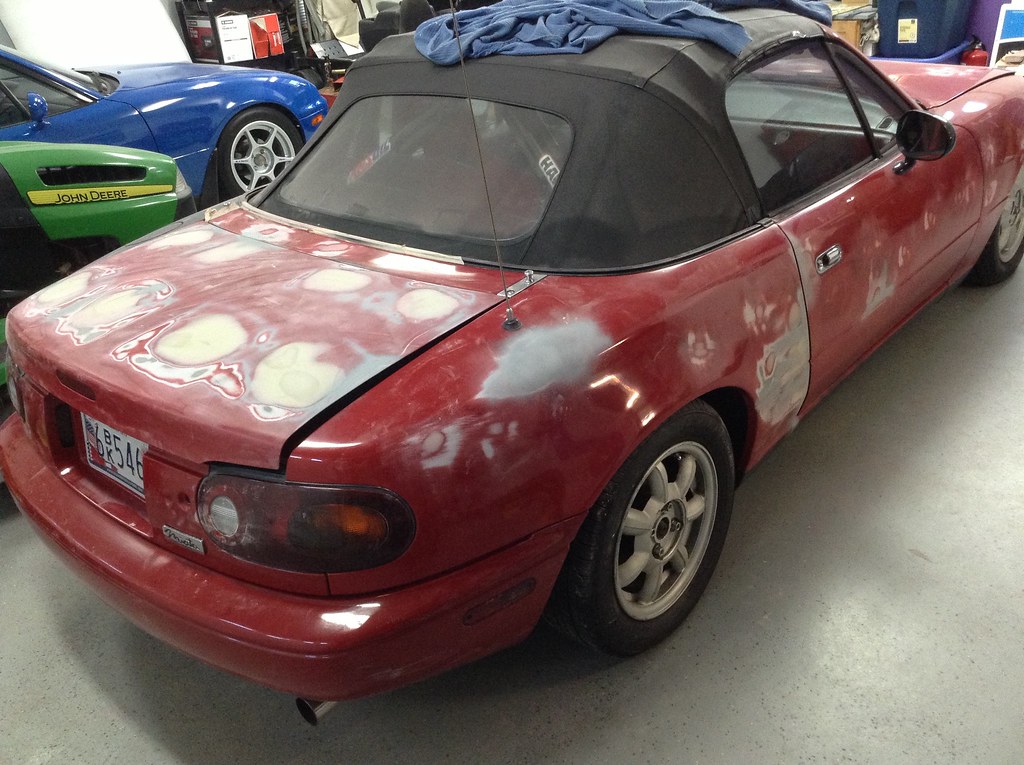
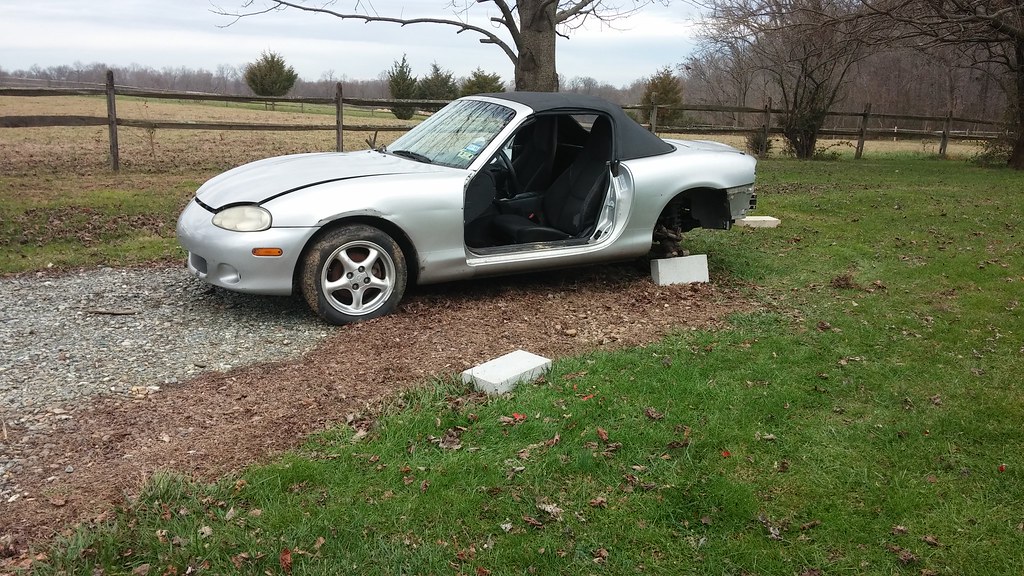
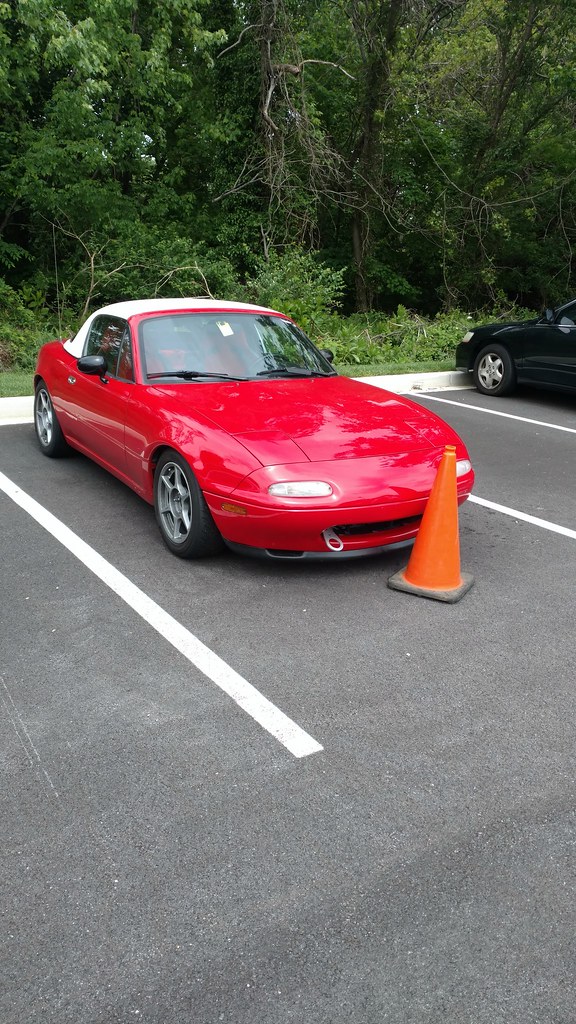
Now May 2014, I wanted a summer project so I sort of impulse bought our subject. Unfortunately she has yet to offer inspiration for a name. Another ’91, this time with 135k, for $1200. Exterior was beat, interior was nasty, but it somehow had no rust, a strong drivetrain, and a few mediocre aftermarket goodies that made it a good deal. I didn’t take many picture because it was so unpleasant to look at – 5 shades of red, black quarter, and a bondo’d trunk (didn’t come with the hard top).
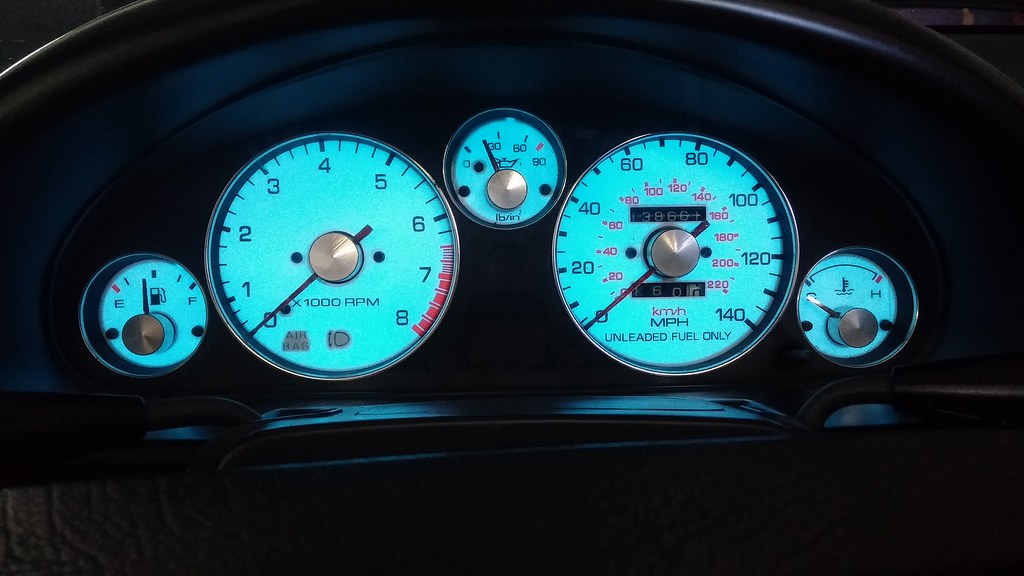
These almost killed the deal. Fortunately, the stock gauge faces were still underneath!
Mint SNC!? Seals, no so much.
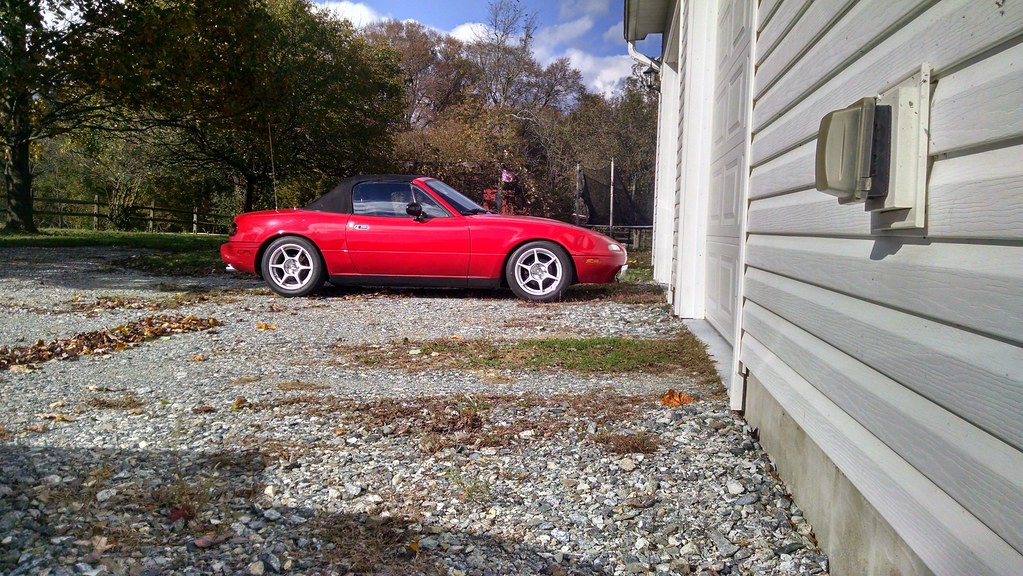
Polished the paint, and the passenger side actually looked decent! Mostly drove it to work that summer, autocrossed it some, caught up on maintenance. I had no significant plans for this car going in.
Then decided autocross was boring, and I wanted to go fast.
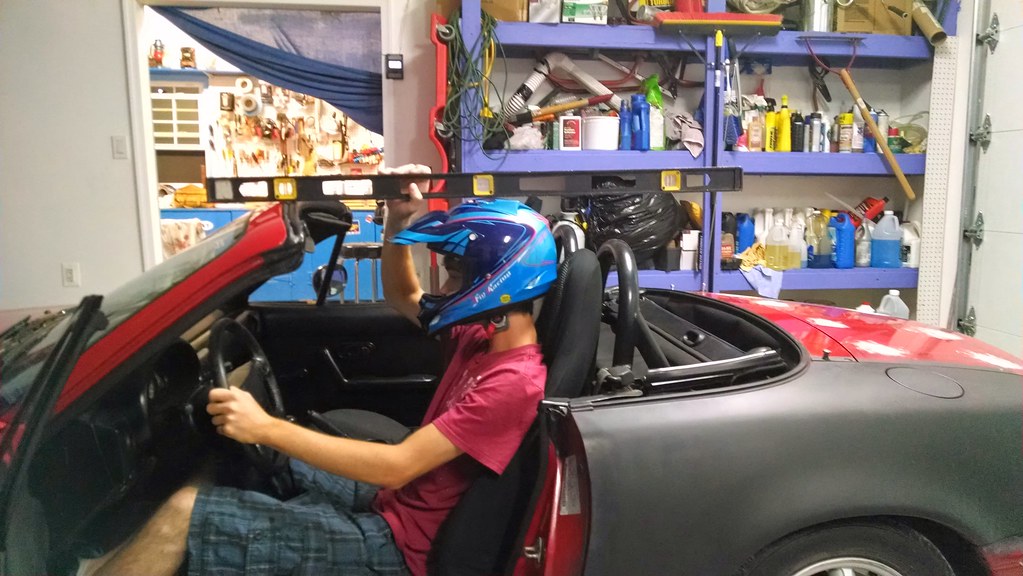
Broomstick test unsuccessful.
Winter 14-15
Found all this stuff on craigslist for cheap. Looks like this track car thing is gonna happen.
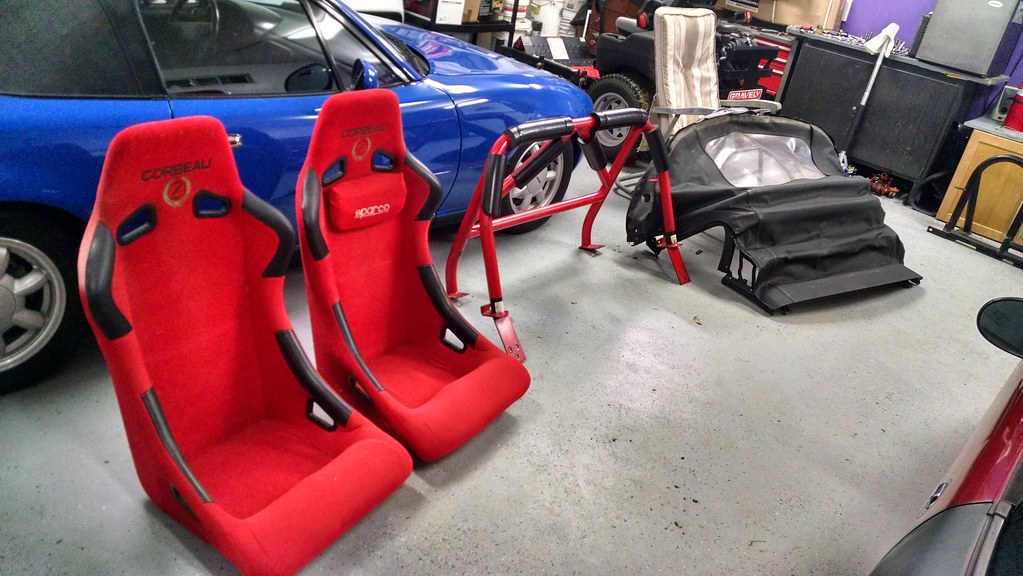
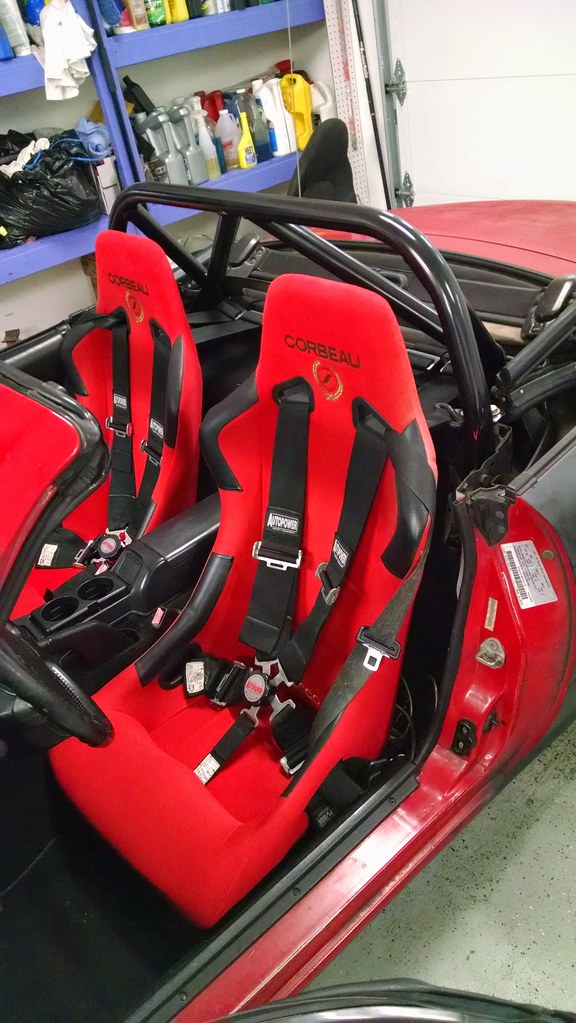
Talk about a transformation.

Success! (Motocross helmet is bulky, I’m a little further below the bar than that)
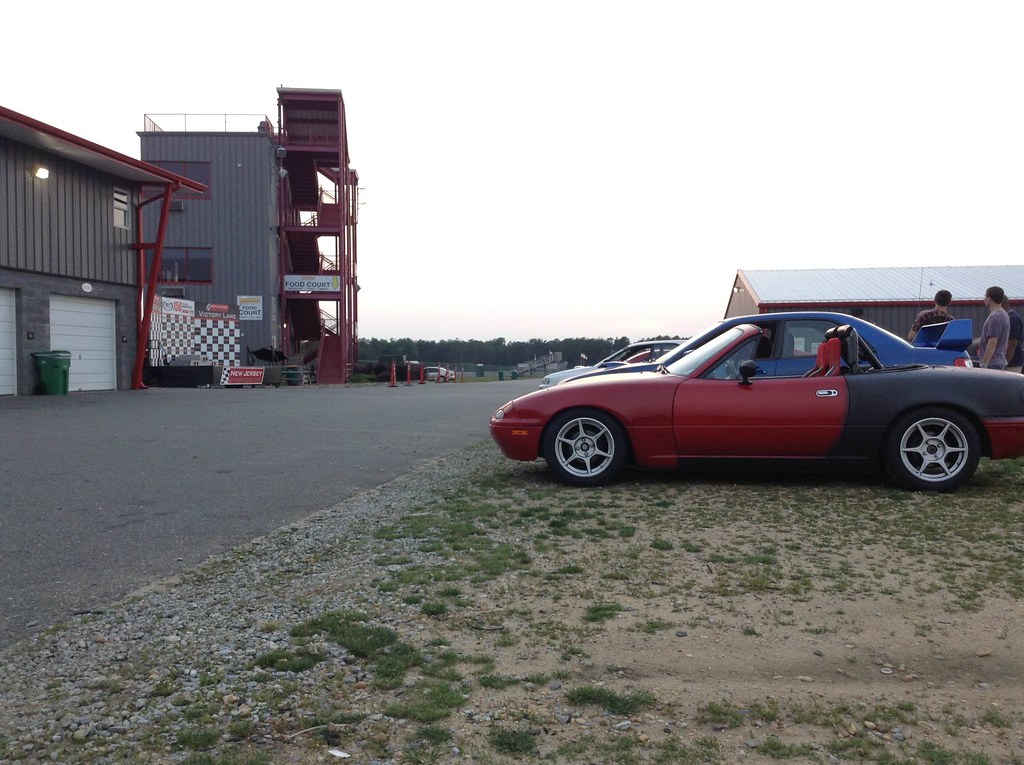
Fast forward to June ‘15 – threw some HP+ on her and went to a Track Night in America event at NJMP Thunderbolt. Hooked. TNiA events have been controversial, with their lack of instruction and cheap entry fee, a lot of people reported sketchy stuff happening in the lower run groups. This one was pretty good, but I saw some accidents the next year. Regardless, the cost of these events couldn’t be beat, so I mostly did them for the next two years. At this point I think I was into this car for $2500, fully baselined and safe to track. Plus, look how ugly it is. I don't really care about its well-being. Mission accomplished?
July ’15, my dad and I trekked out to Summit Point on the hottest day of the year to run with WDCR SCCA on Shenandoah, free of charge courtesy of a friend from school who had flagger credits but no track car. Thanks, Paul!
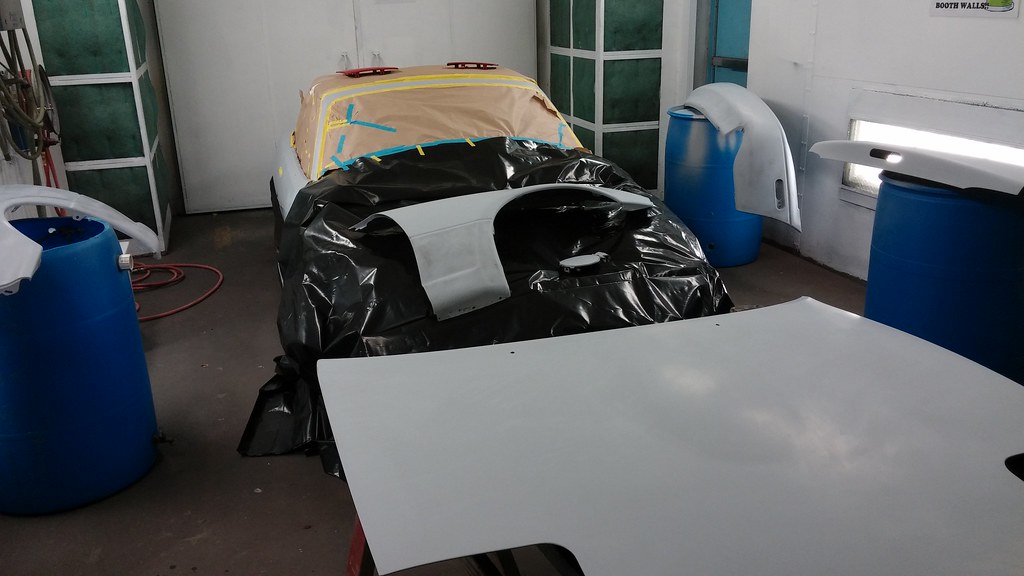
Then my cheap track rat and I fell into the rabbit hole. Got tired of how bad the car looked:
Jellybean helped.
Primed it in the garage.
Went back to the track. I almost dug this look…
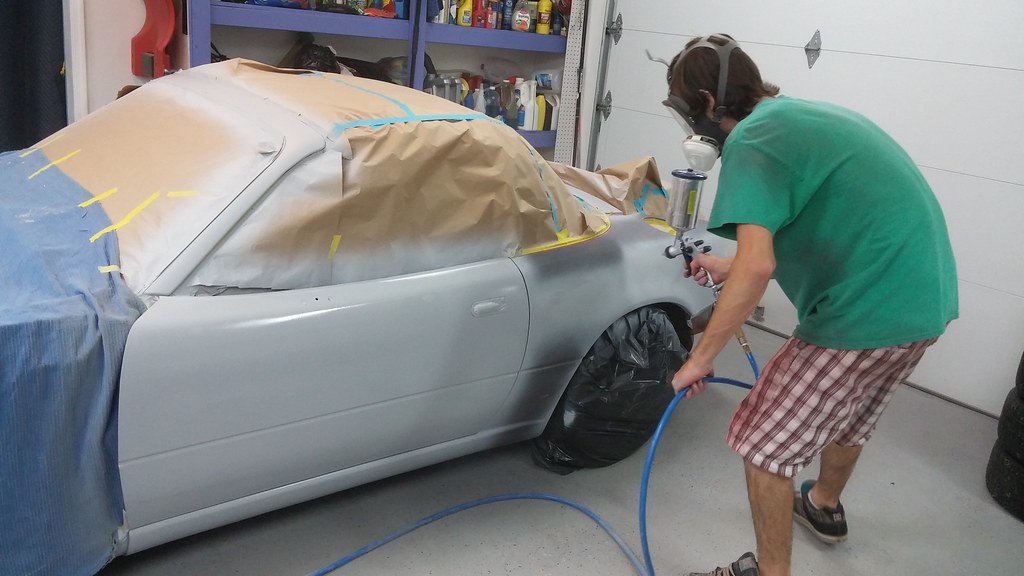
Nah. Rented a paint booth to spray the color.
Magic happened.
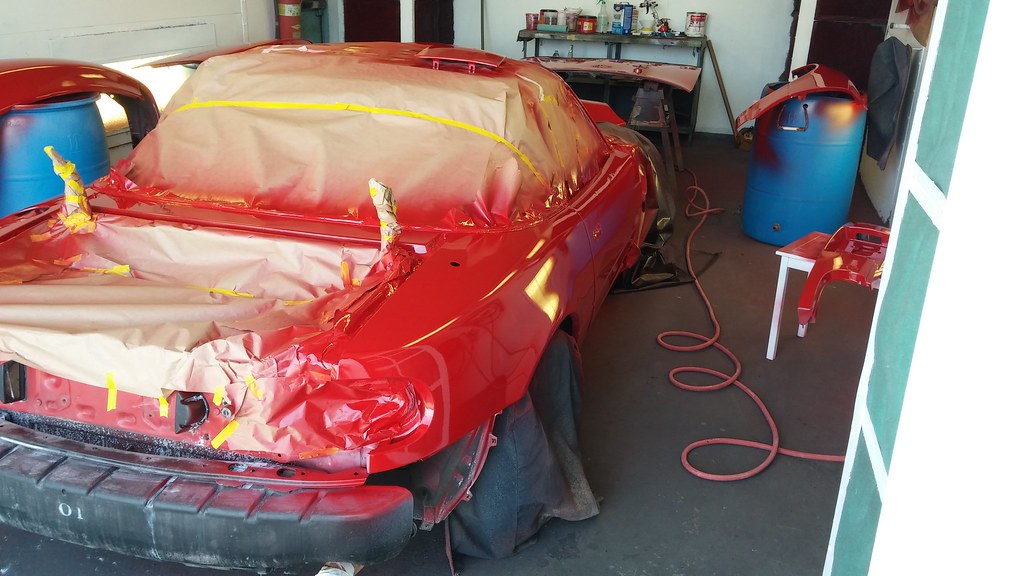

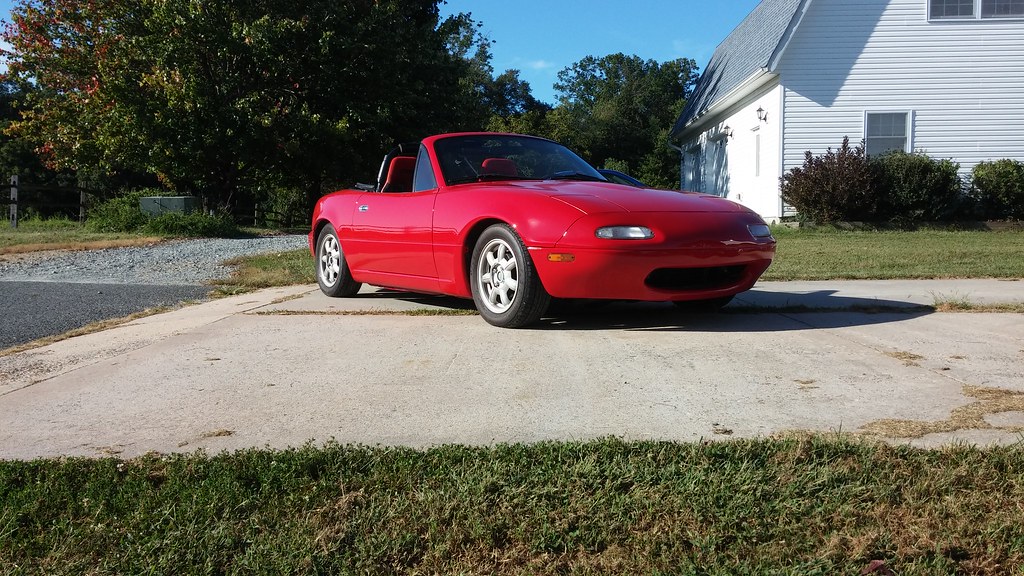
Not bad for a newb. Just single stage classic red. It came out a little bright, but two years later it’s darkened up a bit and looks quite nice.
Hngggg.
I let the paint cure and didn’t track any more that fall. Four events, I had a blast, car did great, albeit slow and very soft.
Winter 15-16 upgrade plans were to address the latter…
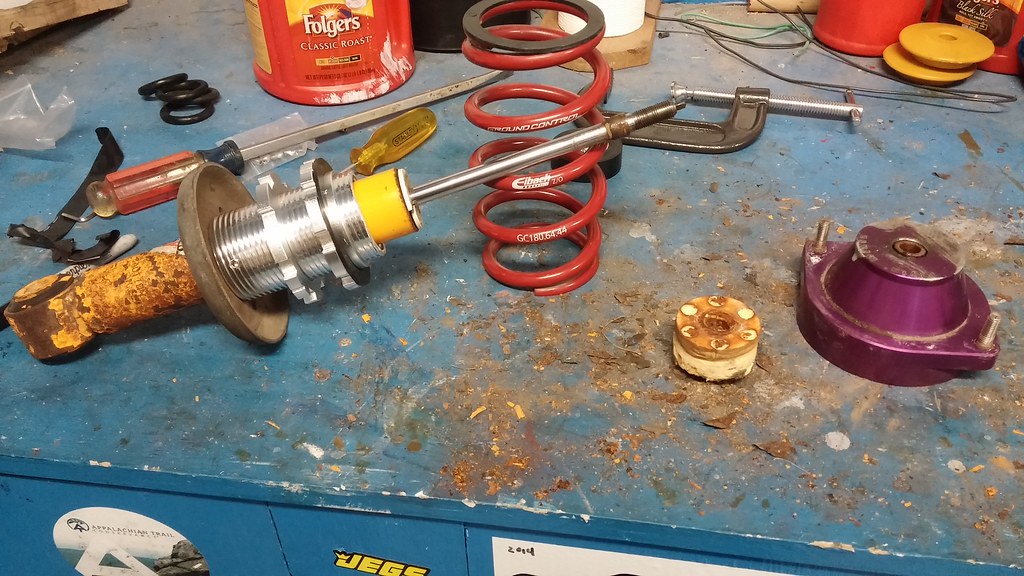
Put sleeves and 375/250 springs on the PO’s Konis. Still a compromise, but infinitely better than the previous Koni blue lowering springs that were as soft as stock.
Then the next day I found this on craigslist for $500.
It was 10 minutes away and the guy delivered it to my house, to my mom’s delight. 93k on her. Seems like a good candidate for restoration?
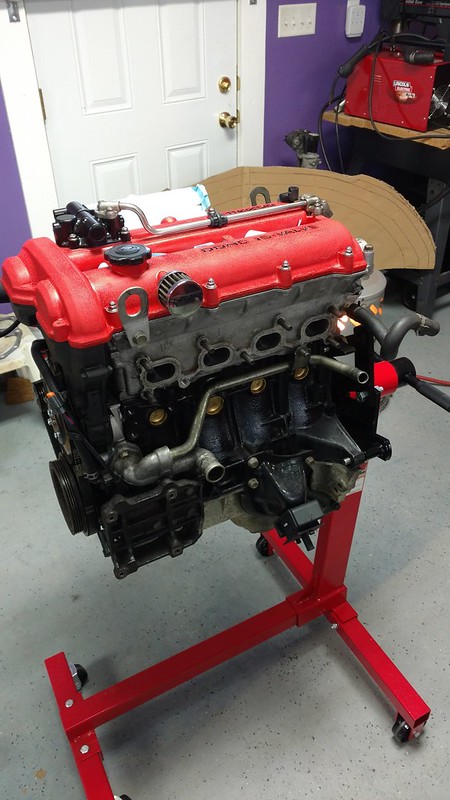
Nope. The internet told me all the cool kids have this engine.

I guess those were 93k commuter miles on extended changes with conventional. This donor sat for about three years before I got it, but once I used a sketchy Russian website to get a key programmed for it and run it, it had great compression. Plus, it was a free drivetrain so I had to install it regardless.
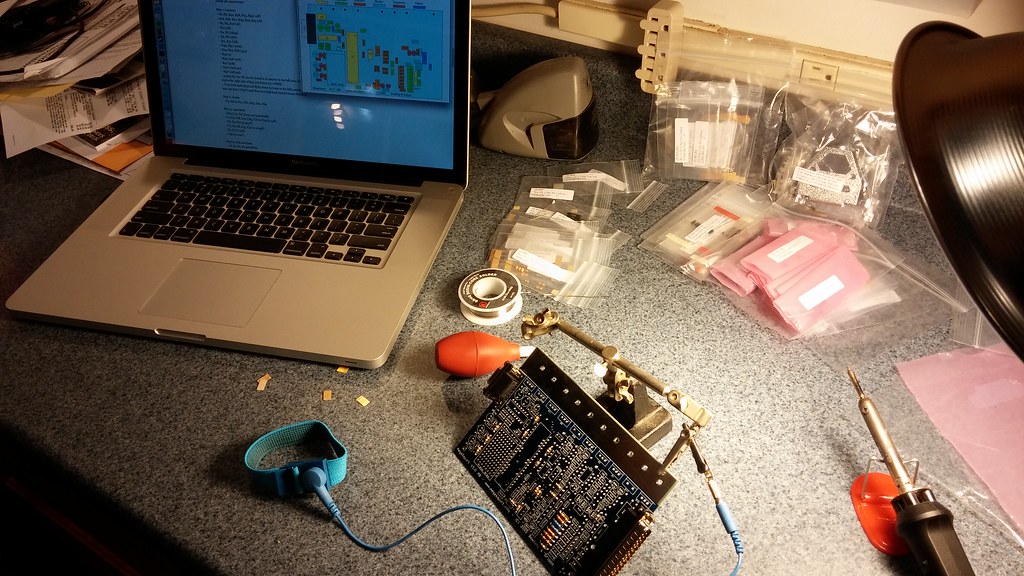
Built myself an MS3x. Many hours were spent on this site. Thank you.
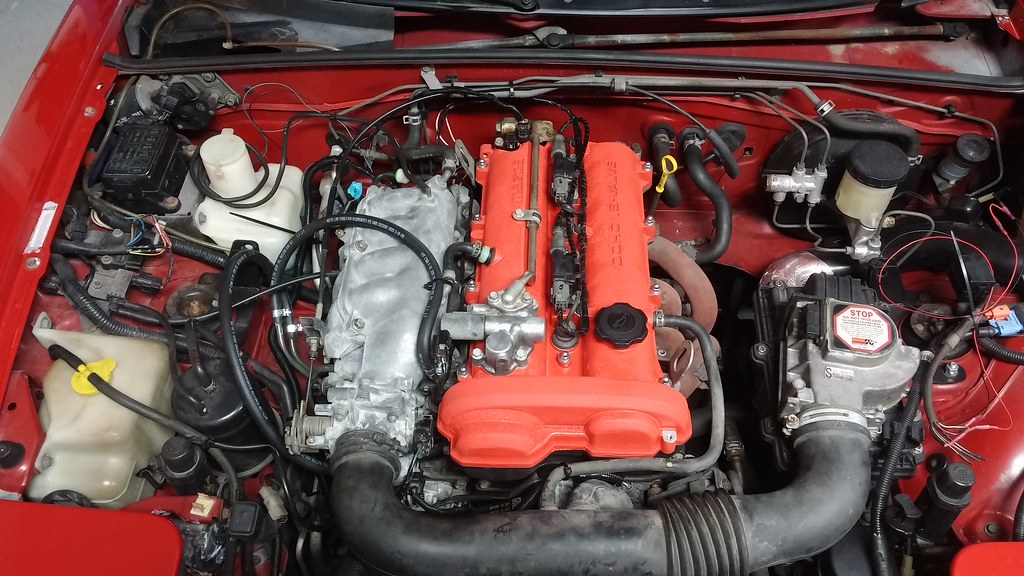
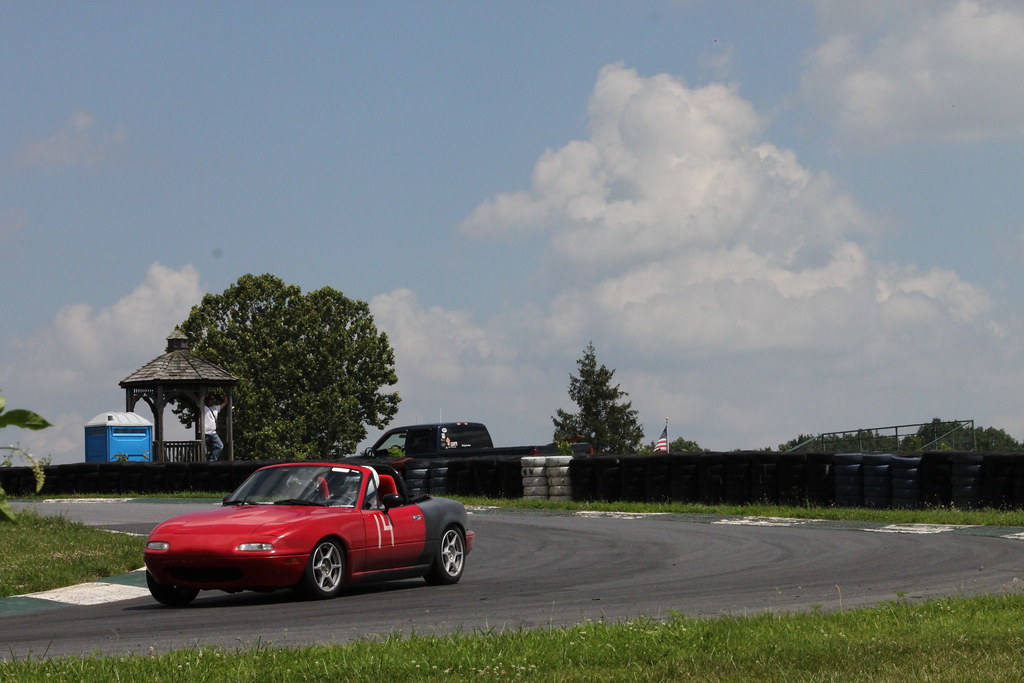
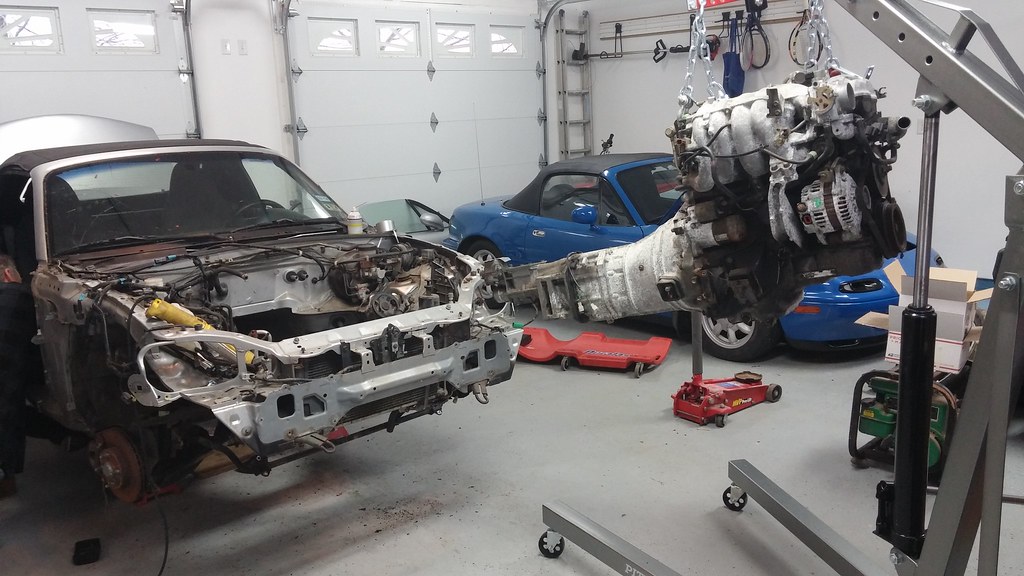
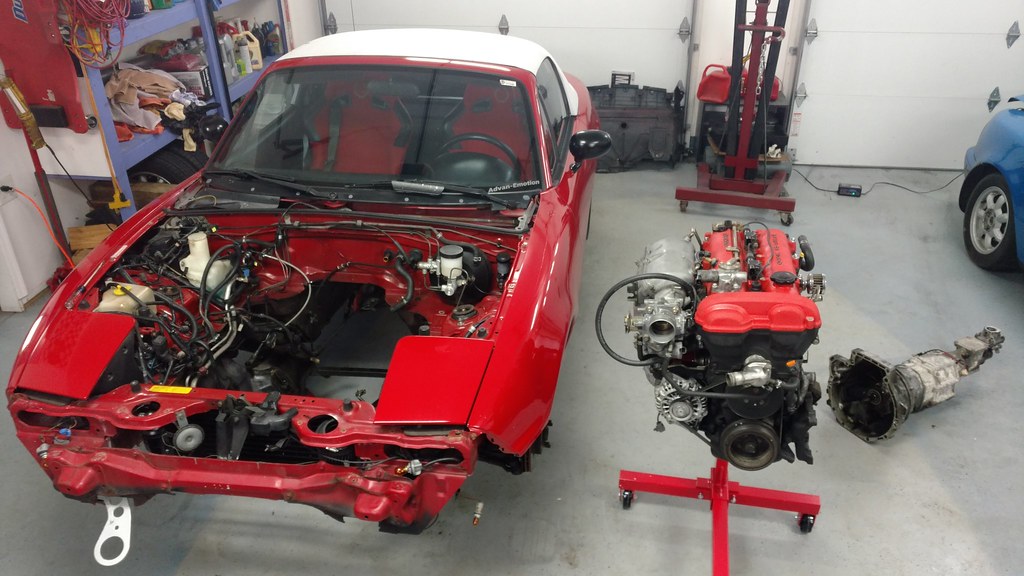
Cobbled together and functional! Never swapped an engine before, this was fun. Luckily we didn’t get much snow/salt that year so I was able to start tuning immediately. Took about two months of tweaking the DIYAT basemap before I was comfortable taking it all the way to the track. Car now has the much fresher NB 5-speed, and the NB 4.3 open diff in place of the made-of-glass vLSD. Ran NJMP Lightning for the first time. I can now outrun civics and keep pace with BRZs!?
Fun track, still learning how to drive.
Got the rest of my VVT starter pack installed.
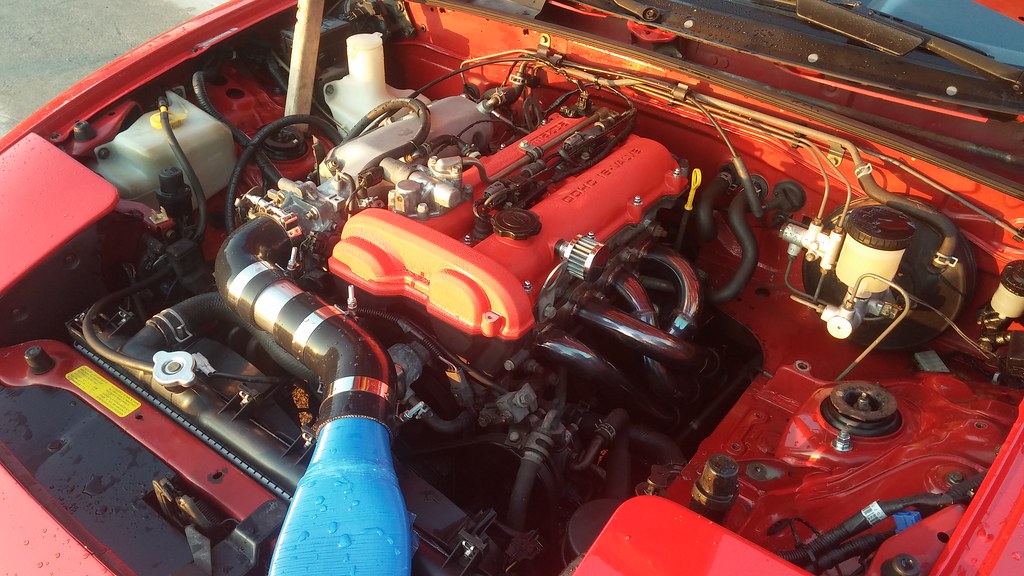
Had the car tuned.
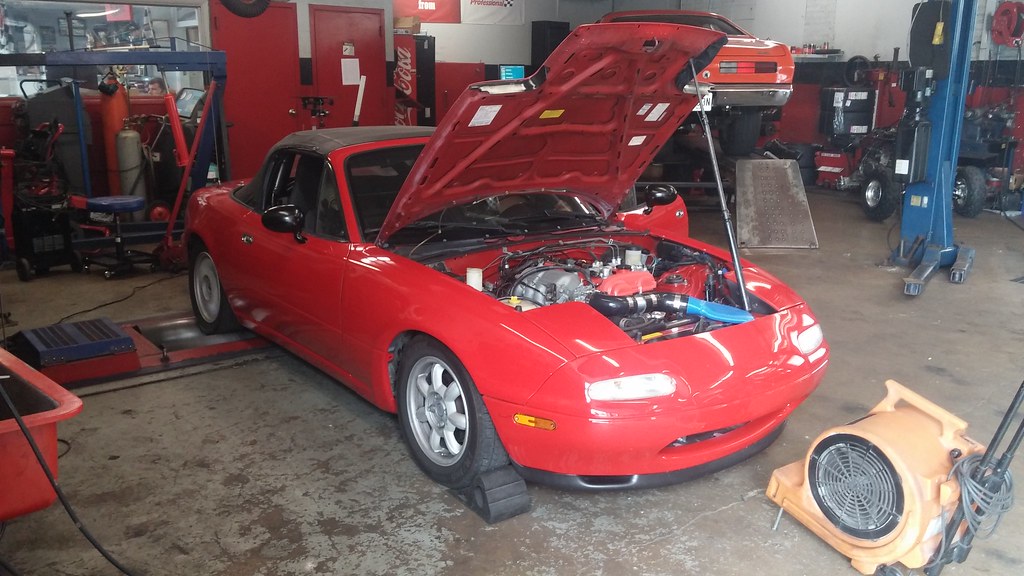
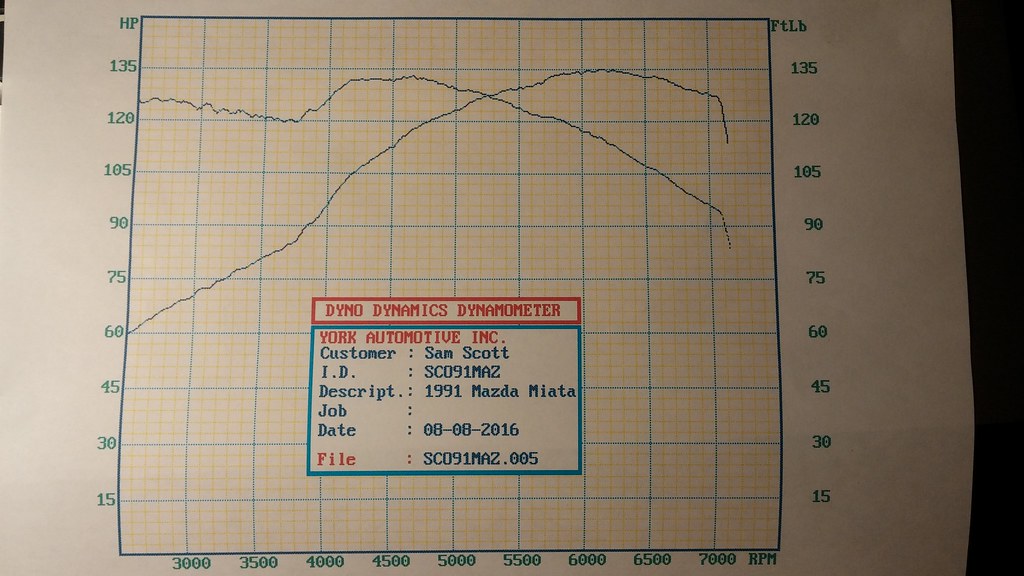
134whp on the Dyno Dynamics dyno at York Automotive. Not the 140whp everyone told me I would get, the tuner said their reading is 10% low but don’t they all say that? I’m very happy with it nonetheless - I don’t think the 1.6 in this car was making more than 90whp. This is the power level this chassis deserved.
Mod list at this point:
93k unopened VVT motor
3d printed intake
stock throttle body
squaretop
raceland header
test pipe
RB resonated catback
MS3x
Stock 1.6 flywheel, 1.6 ACT HD
Tracked it the next day. Highlight of my season – chasing a Focus RS around Thunderbolt:
<iframe width="560" height="315" src="https://www.youtube.com/embed/gommtIN94us?start=317" frameborder="0" gesture="media" allow="encrypted-media" allowfullscreen></iframe>
Winter 16-17
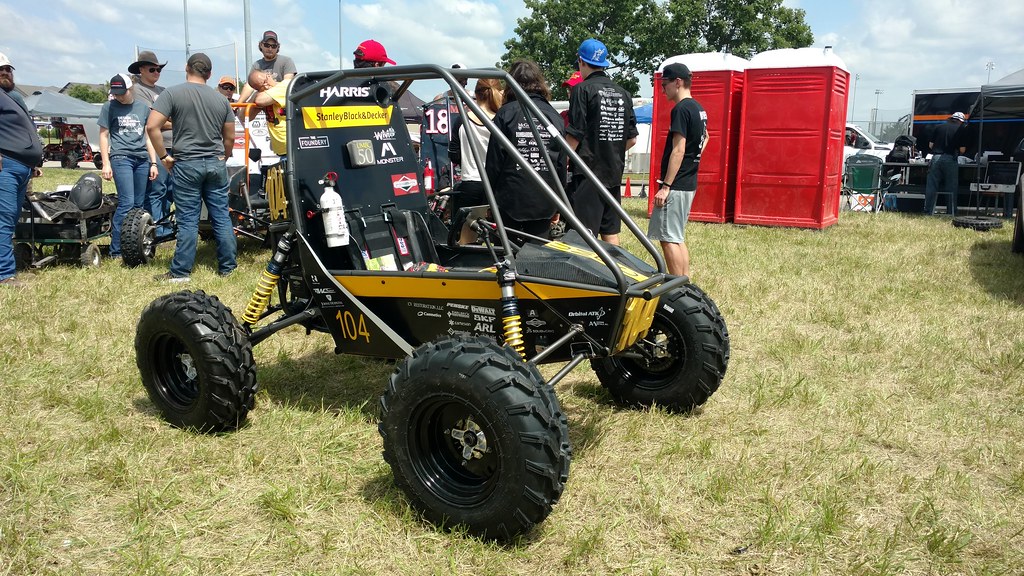
Didn’t do much to the car. Got really busy with senior year, plus being heavily involved with our Baja SAE team. Spent my time designing, building, and driving this racecar instead:
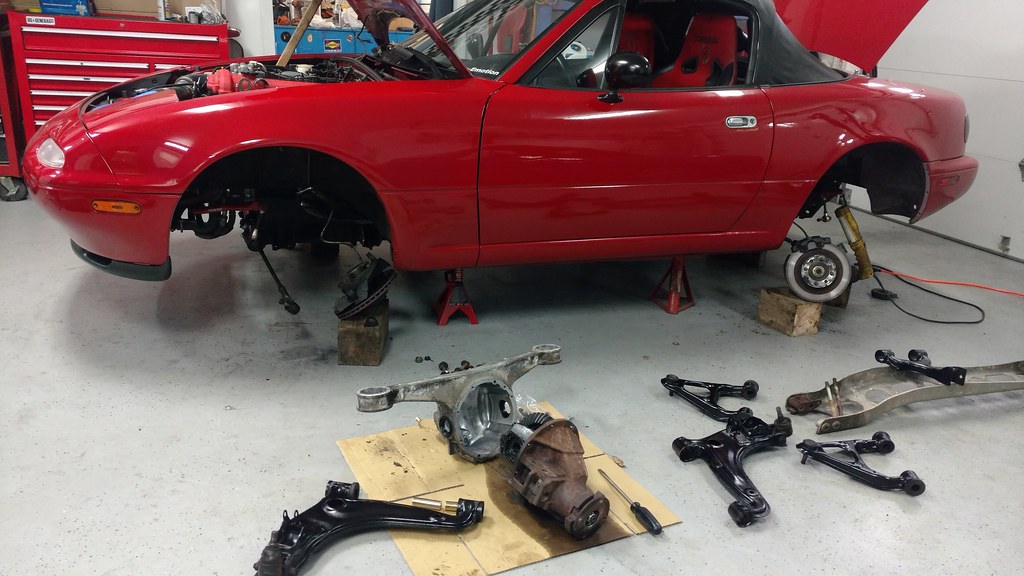
Finally got the 1.8 brakes installed from the donor in April, a year later. Skipped history 101 on a Wednesday to try them out. Lightning again. Hawk Street/Race pads. They’re better than HP+ in every way on street and track, except wear. Killed two sets of fronts this season. The 1.6 HP+ lasted two seasons/8 days.
Track Night lived up to its reputation this time. An E36 spun out of the last corner and went tail-first into the inside wall lap one of my first session. My last session was black flagged for two cars getting together. T1 is over a blind crest, looked to me like the STI spun in 1 and the BRZ wasn’t able to avoid T-boning him. Both looked totaled, but everyone was alright. Worst damage I’ve seen yet in an HPDE. Coincidentally, I haven’t been to another TNiA. You can see the aftermath in the last few seconds of this video.
Took the car to school. Someone didn’t like it.
June ’17. Graduated. I’m now a mechanical engineer. Got a job. Have surprisingly little additional free time. I guess I can technically now afford a more proper build, but the theme of this project won’t change much.
Mid-season (if you can call it that after one event) refresh. I bought poly bushings on ebay, and zerks from harbor freight. Budget build vibes still going strong.
While I was on eBay I got a bare torsen for cheap. Put my 4.3 ring gear on it. Watch this autocross run from before, you’ll know why I needed one:
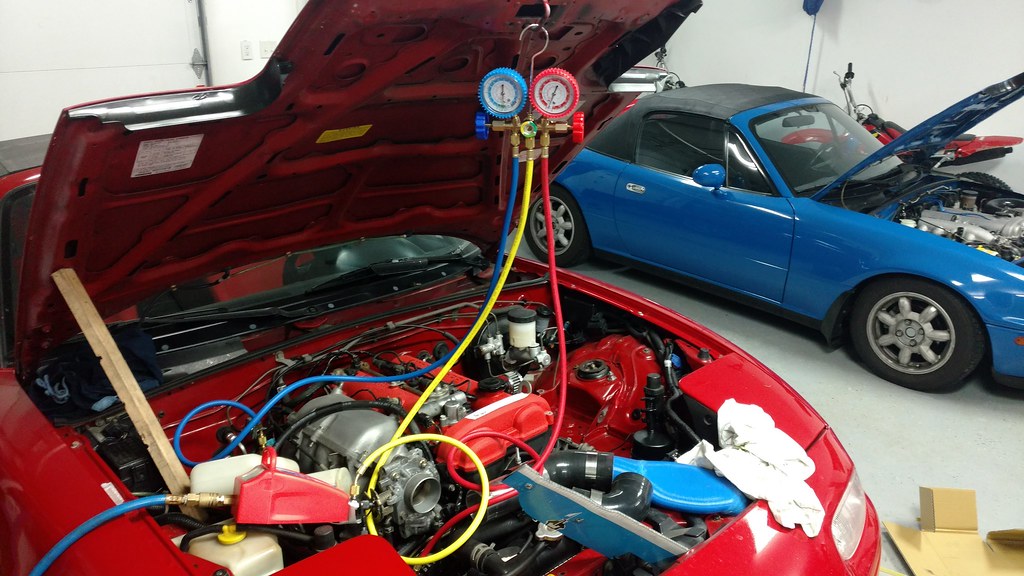
Rebuilt my AC and converted to R134a. I’ve used it once so far.
Also depowered the rack. I didn’t like it at first. Went and got a new alignment, from 6.5 to 3.5 deg caster, and camber up to 3/2.8. Once I hit the track, I loved it. I never understood just how much feedback you lose with PS until now.
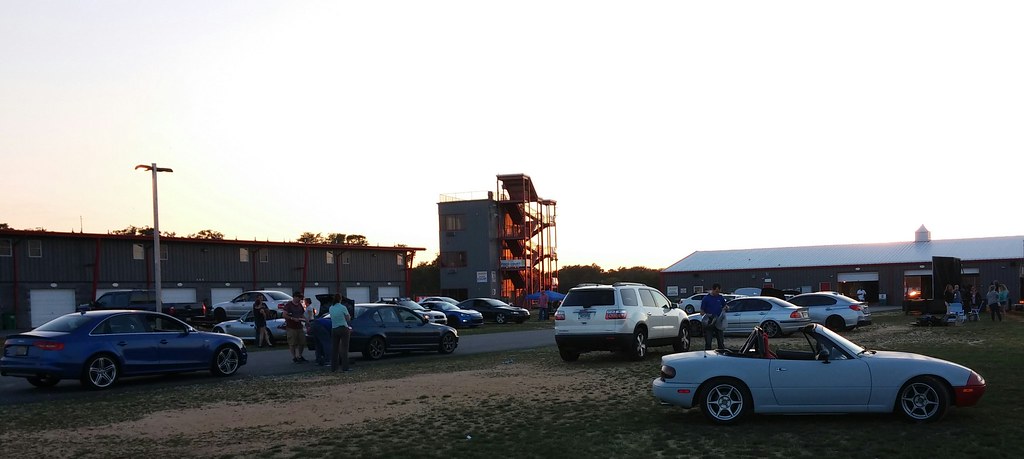
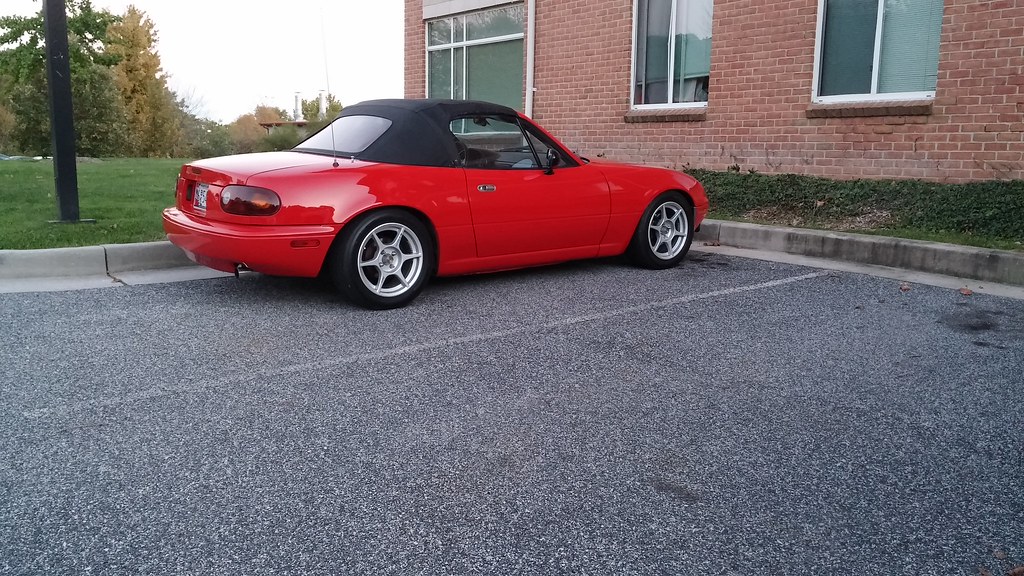
At this point, the car feels really solid with the dead bushings gone and no BS assistance in the middle of the steering system. On the street it’s planted and nimble. Confidence inspiring on the track. Despite the “coilovers” that most of you probably rolled your eyes at, it does shockingly well in both settings. Granted, I’ve never driven anything better than Vmax. The goal for the rest of 2017 was to keep the car alive and drive as much as possible. Made it to six events for eight days of driving this year: Lightning, Shenandoah x2, Summit Point main (new!), Thunderbolt, Summit. Didn’t do much else to this car. It was nice.
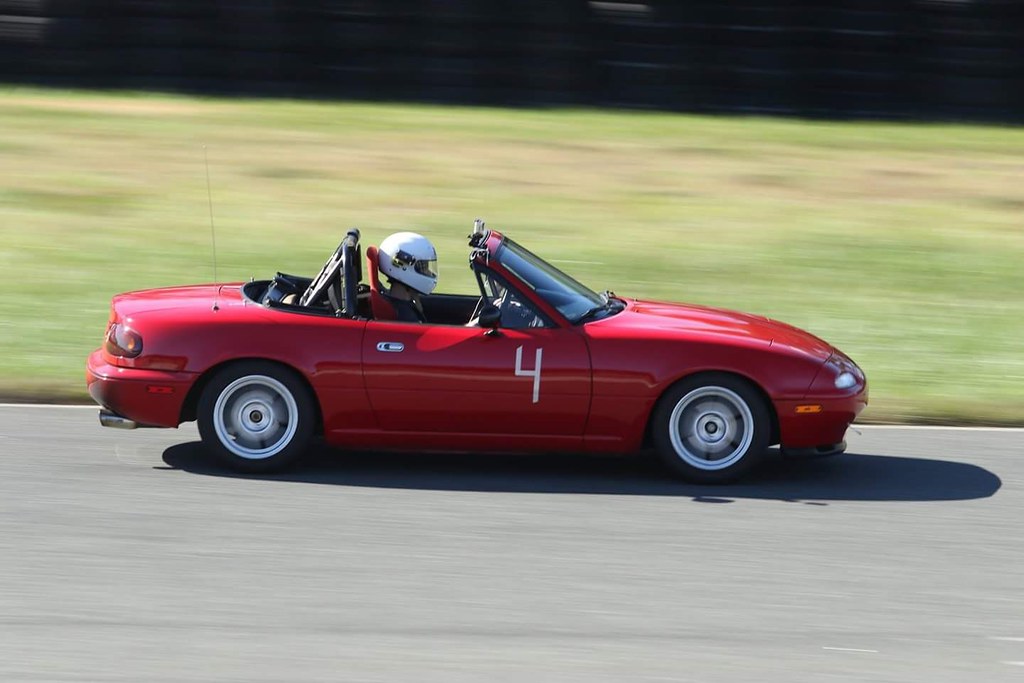
^ Best run of the season. My first time at Summit main, and my first event with NASA. Great group, I will be doing more events with them next year. Itching for some wheel-to-wheel.
A friend from high school who is an “amateur” photographer also starting coming to events with me. He’s pretty good. I’ll have to find some more of his shots later.
https://scottybennett.photoshelter.com/index
And I have four cats.
Not the subject of this thread, but I’ll introduce my first Miata since you’ll see it in a lot of the pictures. Bought it in 2012 for my senior year of high school. 50k and nearly mint condition – exactly the Miata I wanted and I managed not to make it too much worse.
Drove it for a year, installed the wheels, FM Vmaxxxx, a RS3 catback, and a few little things here and there. Started autocrossing in it, had a lot of fun just the way it is. Then I went to college and bought a daily, this car has been on the back burner since, but not forgotten.
Now May 2014, I wanted a summer project so I sort of impulse bought our subject. Unfortunately she has yet to offer inspiration for a name. Another ’91, this time with 135k, for $1200. Exterior was beat, interior was nasty, but it somehow had no rust, a strong drivetrain, and a few mediocre aftermarket goodies that made it a good deal. I didn’t take many picture because it was so unpleasant to look at – 5 shades of red, black quarter, and a bondo’d trunk (didn’t come with the hard top).
These almost killed the deal. Fortunately, the stock gauge faces were still underneath!
Mint SNC!? Seals, no so much.
Polished the paint, and the passenger side actually looked decent! Mostly drove it to work that summer, autocrossed it some, caught up on maintenance. I had no significant plans for this car going in.
Then decided autocross was boring, and I wanted to go fast.
Broomstick test unsuccessful.
Winter 14-15
Found all this stuff on craigslist for cheap. Looks like this track car thing is gonna happen.
Talk about a transformation.
Success! (Motocross helmet is bulky, I’m a little further below the bar than that)
Fast forward to June ‘15 – threw some HP+ on her and went to a Track Night in America event at NJMP Thunderbolt. Hooked. TNiA events have been controversial, with their lack of instruction and cheap entry fee, a lot of people reported sketchy stuff happening in the lower run groups. This one was pretty good, but I saw some accidents the next year. Regardless, the cost of these events couldn’t be beat, so I mostly did them for the next two years. At this point I think I was into this car for $2500, fully baselined and safe to track. Plus, look how ugly it is. I don't really care about its well-being. Mission accomplished?
July ’15, my dad and I trekked out to Summit Point on the hottest day of the year to run with WDCR SCCA on Shenandoah, free of charge courtesy of a friend from school who had flagger credits but no track car. Thanks, Paul!
Then my cheap track rat and I fell into the rabbit hole. Got tired of how bad the car looked:
Jellybean helped.
Primed it in the garage.
Went back to the track. I almost dug this look…
Nah. Rented a paint booth to spray the color.
Magic happened.
Not bad for a newb. Just single stage classic red. It came out a little bright, but two years later it’s darkened up a bit and looks quite nice.
Hngggg.
I let the paint cure and didn’t track any more that fall. Four events, I had a blast, car did great, albeit slow and very soft.
Winter 15-16 upgrade plans were to address the latter…
Put sleeves and 375/250 springs on the PO’s Konis. Still a compromise, but infinitely better than the previous Koni blue lowering springs that were as soft as stock.
Then the next day I found this on craigslist for $500.
It was 10 minutes away and the guy delivered it to my house, to my mom’s delight. 93k on her. Seems like a good candidate for restoration?
Nope. The internet told me all the cool kids have this engine.
I guess those were 93k commuter miles on extended changes with conventional. This donor sat for about three years before I got it, but once I used a sketchy Russian website to get a key programmed for it and run it, it had great compression. Plus, it was a free drivetrain so I had to install it regardless.
Built myself an MS3x. Many hours were spent on this site. Thank you.
Cobbled together and functional! Never swapped an engine before, this was fun. Luckily we didn’t get much snow/salt that year so I was able to start tuning immediately. Took about two months of tweaking the DIYAT basemap before I was comfortable taking it all the way to the track. Car now has the much fresher NB 5-speed, and the NB 4.3 open diff in place of the made-of-glass vLSD. Ran NJMP Lightning for the first time. I can now outrun civics and keep pace with BRZs!?
Fun track, still learning how to drive.
Got the rest of my VVT starter pack installed.
Had the car tuned.
134whp on the Dyno Dynamics dyno at York Automotive. Not the 140whp everyone told me I would get, the tuner said their reading is 10% low but don’t they all say that? I’m very happy with it nonetheless - I don’t think the 1.6 in this car was making more than 90whp. This is the power level this chassis deserved.
Mod list at this point:
93k unopened VVT motor
3d printed intake
stock throttle body
squaretop
raceland header
test pipe
RB resonated catback
MS3x
Stock 1.6 flywheel, 1.6 ACT HD
Tracked it the next day. Highlight of my season – chasing a Focus RS around Thunderbolt:
<iframe width="560" height="315" src="https://www.youtube.com/embed/gommtIN94us?start=317" frameborder="0" gesture="media" allow="encrypted-media" allowfullscreen></iframe>
Winter 16-17
Didn’t do much to the car. Got really busy with senior year, plus being heavily involved with our Baja SAE team. Spent my time designing, building, and driving this racecar instead:
Finally got the 1.8 brakes installed from the donor in April, a year later. Skipped history 101 on a Wednesday to try them out. Lightning again. Hawk Street/Race pads. They’re better than HP+ in every way on street and track, except wear. Killed two sets of fronts this season. The 1.6 HP+ lasted two seasons/8 days.
Track Night lived up to its reputation this time. An E36 spun out of the last corner and went tail-first into the inside wall lap one of my first session. My last session was black flagged for two cars getting together. T1 is over a blind crest, looked to me like the STI spun in 1 and the BRZ wasn’t able to avoid T-boning him. Both looked totaled, but everyone was alright. Worst damage I’ve seen yet in an HPDE. Coincidentally, I haven’t been to another TNiA. You can see the aftermath in the last few seconds of this video.
Took the car to school. Someone didn’t like it.
June ’17. Graduated. I’m now a mechanical engineer. Got a job. Have surprisingly little additional free time. I guess I can technically now afford a more proper build, but the theme of this project won’t change much.
Mid-season (if you can call it that after one event) refresh. I bought poly bushings on ebay, and zerks from harbor freight. Budget build vibes still going strong.
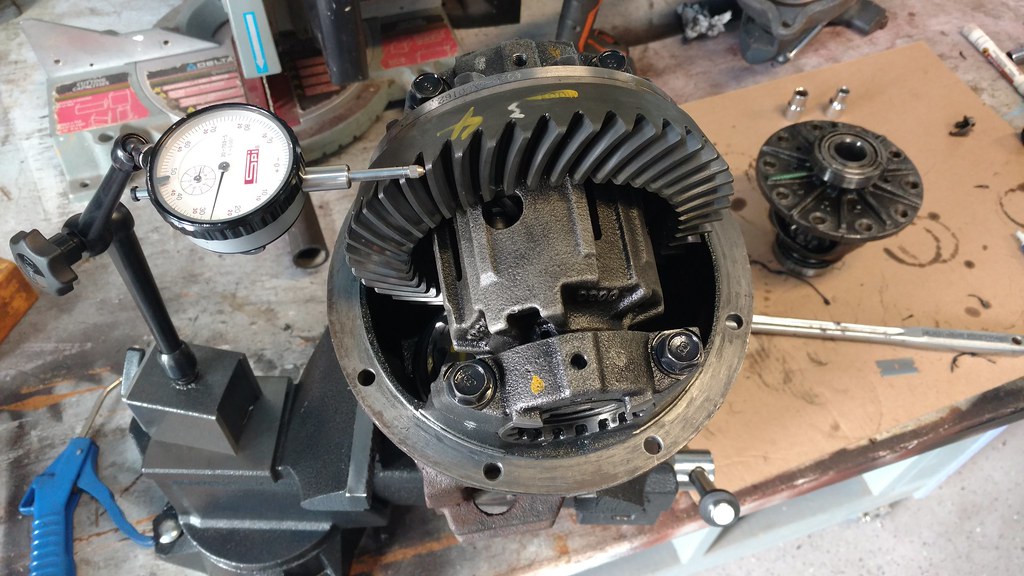
While I was on eBay I got a bare torsen for cheap. Put my 4.3 ring gear on it. Watch this autocross run from before, you’ll know why I needed one:
Rebuilt my AC and converted to R134a. I’ve used it once so far.
Also depowered the rack. I didn’t like it at first. Went and got a new alignment, from 6.5 to 3.5 deg caster, and camber up to 3/2.8. Once I hit the track, I loved it. I never understood just how much feedback you lose with PS until now.
At this point, the car feels really solid with the dead bushings gone and no BS assistance in the middle of the steering system. On the street it’s planted and nimble. Confidence inspiring on the track. Despite the “coilovers” that most of you probably rolled your eyes at, it does shockingly well in both settings. Granted, I’ve never driven anything better than Vmax. The goal for the rest of 2017 was to keep the car alive and drive as much as possible. Made it to six events for eight days of driving this year: Lightning, Shenandoah x2, Summit Point main (new!), Thunderbolt, Summit. Didn’t do much else to this car. It was nice.
^ Best run of the season. My first time at Summit main, and my first event with NASA. Great group, I will be doing more events with them next year. Itching for some wheel-to-wheel.
A friend from high school who is an “amateur” photographer also starting coming to events with me. He’s pretty good. I’ll have to find some more of his shots later.
https://scottybennett.photoshelter.com/index
Last edited by add lightness; 01-17-2018 at 09:21 PM.

Reply
 4
4

4
01-01-2018, 03:32 PM
#2
Junior Member
Thread Starter
Join Date: Aug 2013
Location: Towson, MD
Posts: 87
Total Cats: 18
Winter 17-18, here we are:
� Tires
I’ve been running the same set of ZIIs on this car since 2014. They really stopped gripping this season, but they also stopped wearing, so I didn’t stop driving them. For next season, I scored a deal on these secondhand, but unused.
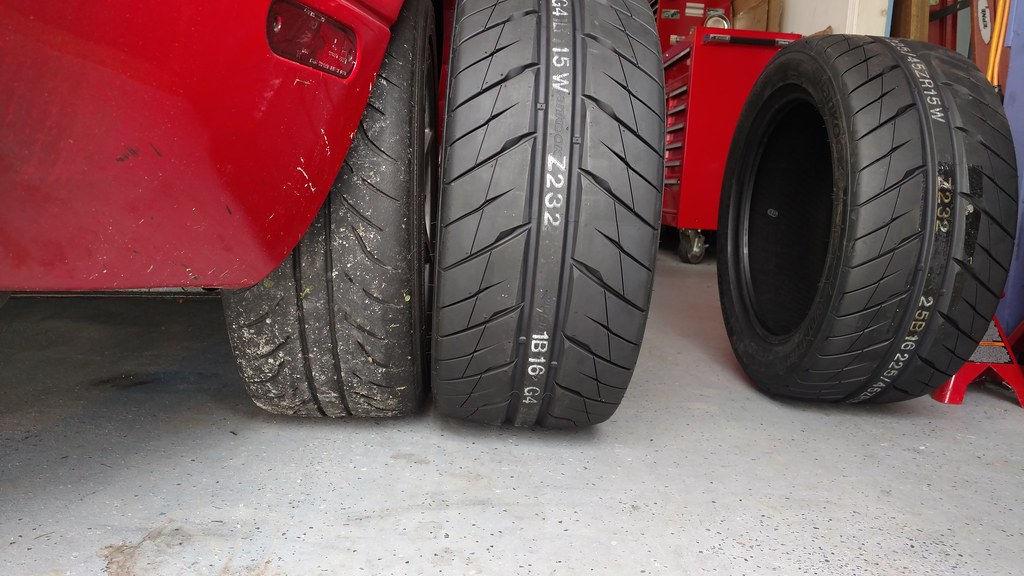
They won’t fit on my 15x7s though…
� Brakes
Killed two sets of Hawk street/race this year. I like them a lot but still don’t quite have 100% confidence in my brake system. Time to upgrade to one of the big boy pads. TBD.
� Engine
Take a look at my rear bumper.
(Photobombed) Yep, that low-miles motor is burning oil. It’s been getting worse, and its past a quart per tank, or half a quart in a 20 minute session. To the point of being dangerous. Here we go again…
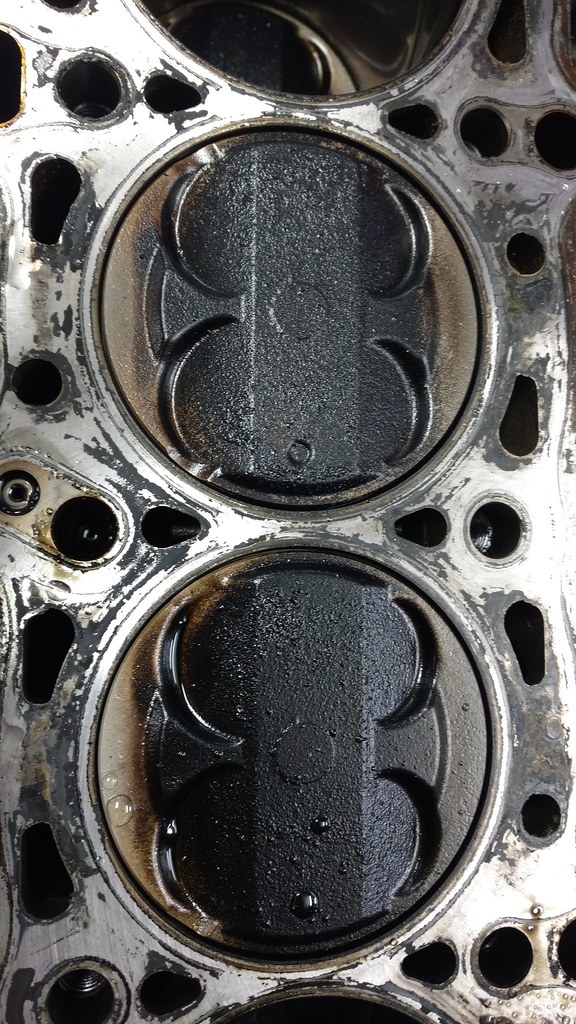
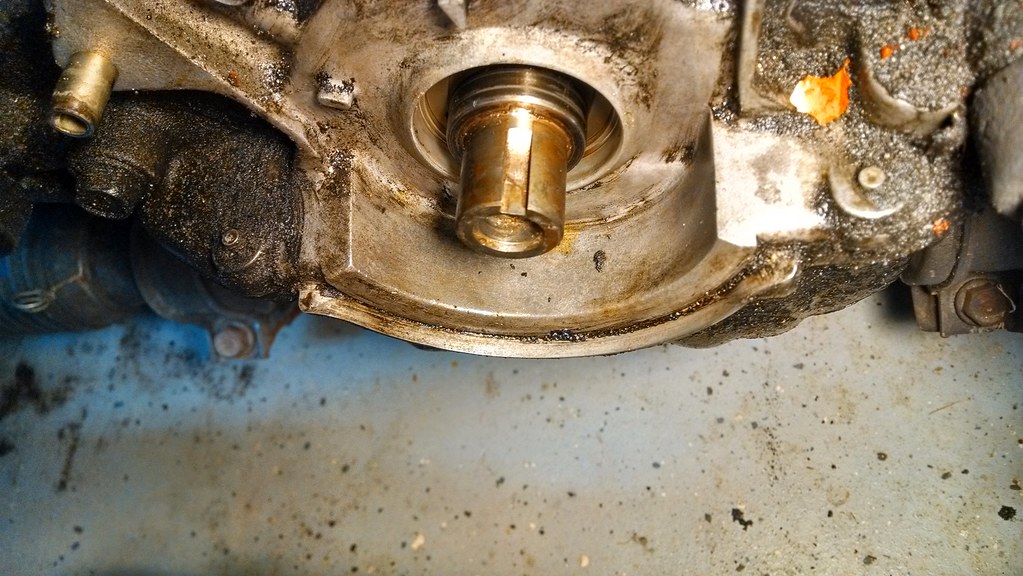
Yep, rings. Suspicions confirmed. All four pistons have those clean edges, that’s a sure sign of poor oil control, right?
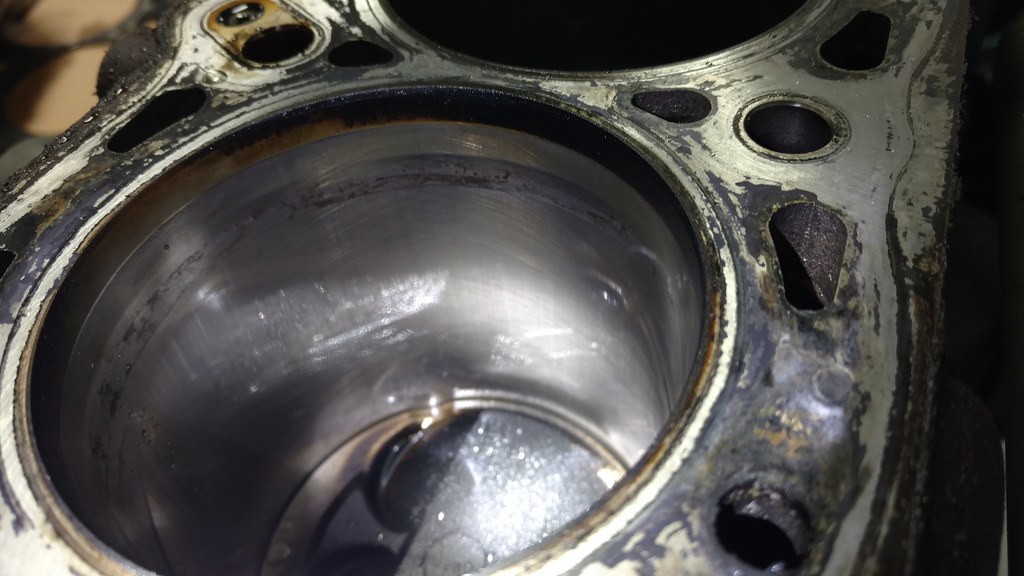
Weird oxidation in some of the bores. Some near the top and some at the bottom of the stroke. That downtime didn’t do this engine any favors. Minimal wear though.
Bearings still minty. I shouldn’t have to do this.

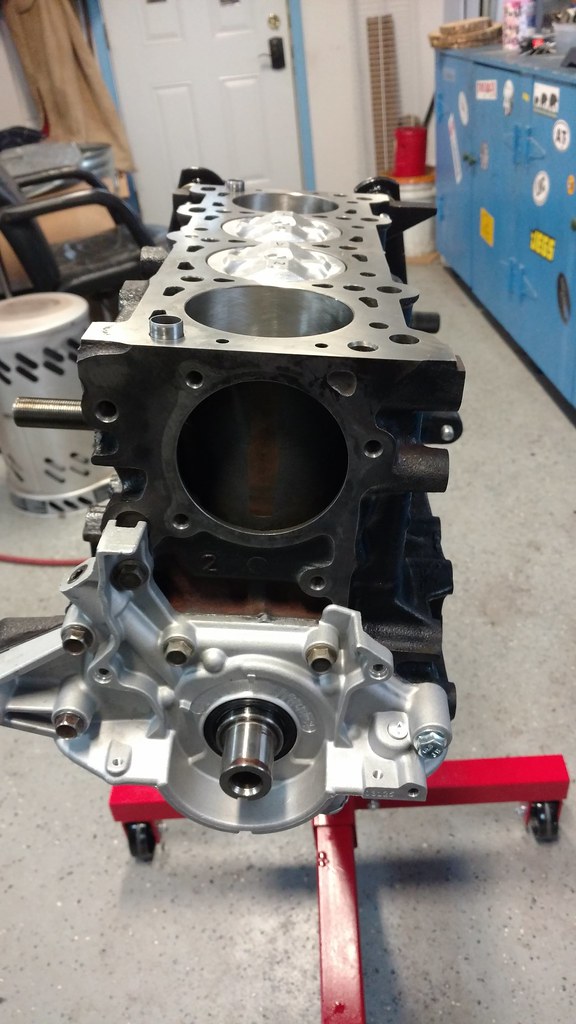
Already got the block back. Kept it at 83mm.
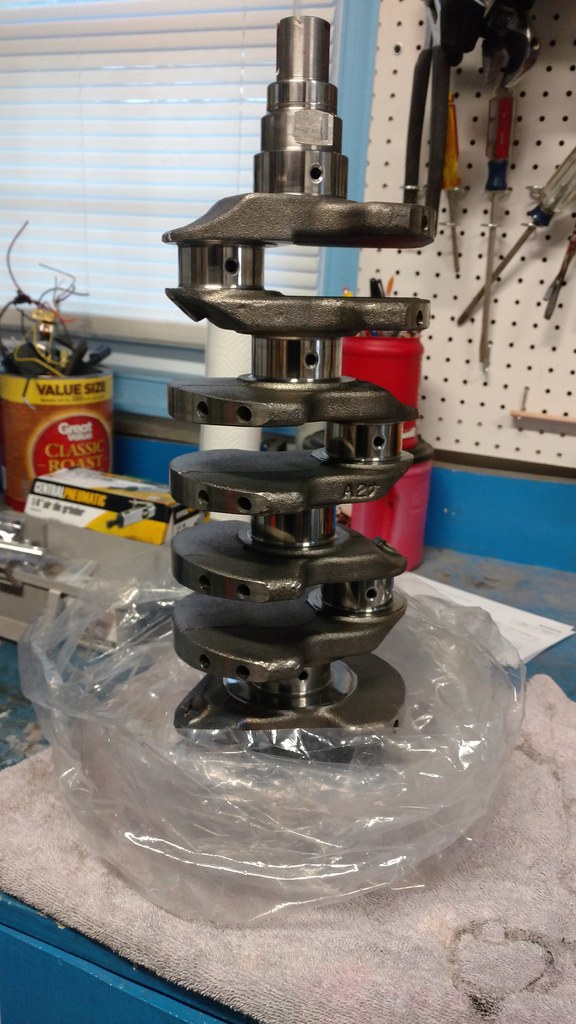
Had the crank balanced while it was out.
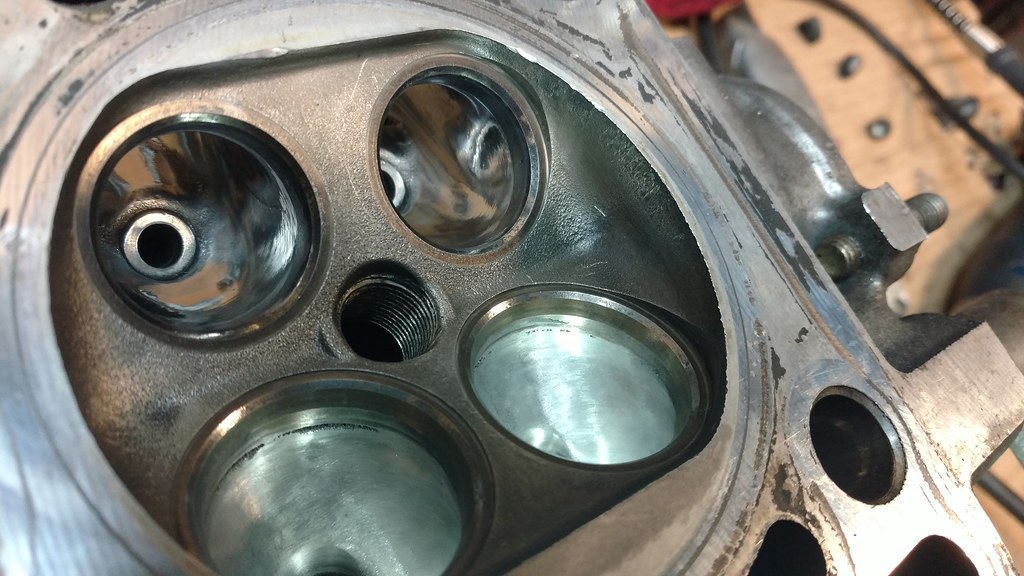

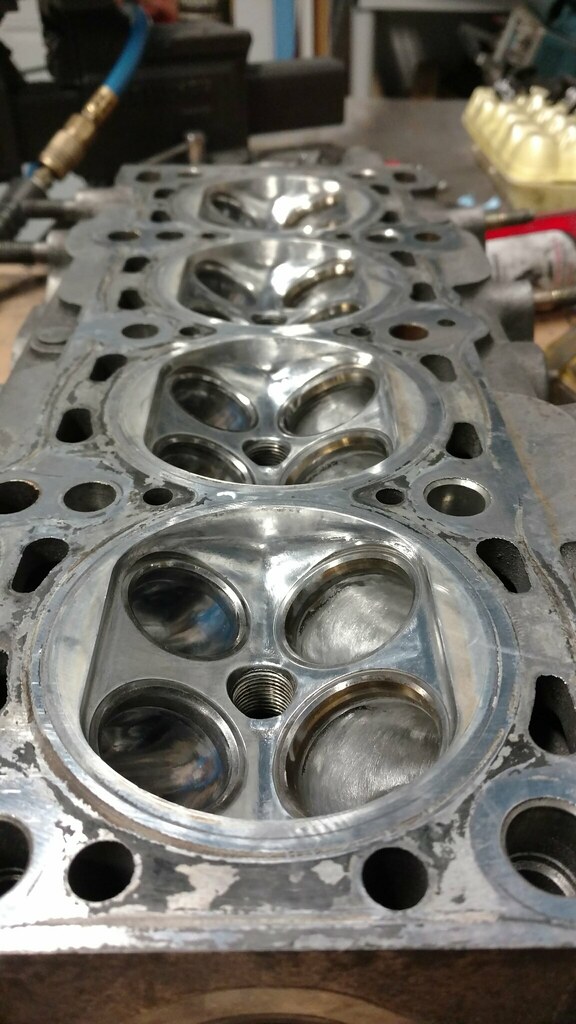
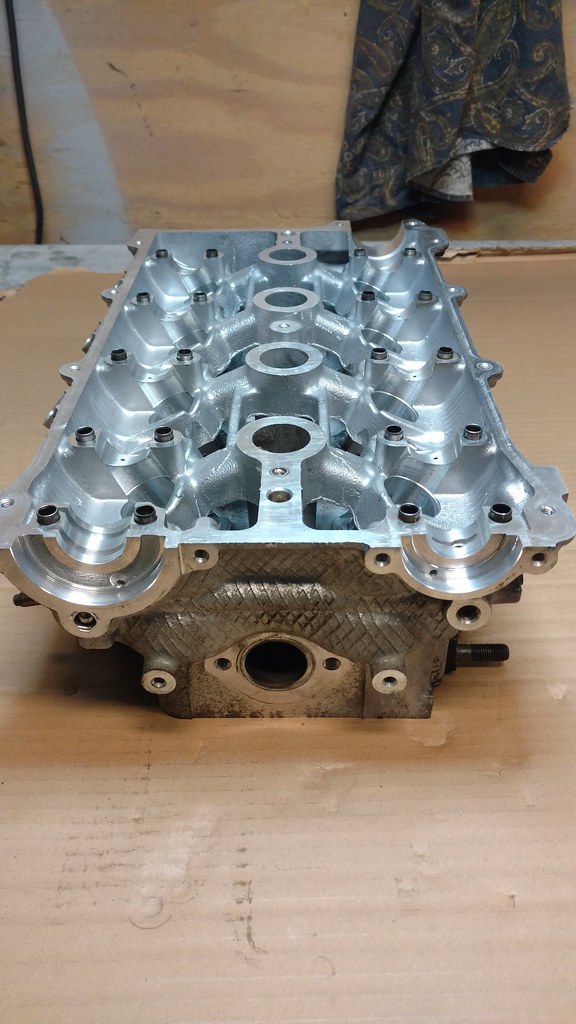
Where I’m at currently. Decided to port the head myself. Not doing anything extreme with it, cleaned up the casting and blended the bowls in pretty nicely. Exhaust ports are polished. Currently waiting on a new alignment dowel for the head so I can mark up the chambers to deshroud the valves a bit. Then I’ll polish the cambers and send it off for a valve job. Decided to stop myself short of lapping the valves myself. Now that we’ve caught up, here’s my plan for the build. This is mostly keeping with my theme from the beginning, but with the bar for “budget” raised slightly. I don’t want to give up any on-track reliability, or too much street drivability with this engine, so it’s staying N/A on 93 octane.
� JDM NB2 pistons, 10.5:1
� ~.02” off the head for 11:1 compression
� eBay rods
� billet oil pump
� ACL race bearings
� Volvo VS855 valve springs
� Mild head porting
� Coolant reroute
I think I can cap this at 7600 rpm and not have to worry about it again for more than a few years. Could probably go a lot higher with SUBs, but the stock lifters and cheap valve springs are easy to upgrade later. I’ll at least have a solid bottom end.
� Tires
I’ve been running the same set of ZIIs on this car since 2014. They really stopped gripping this season, but they also stopped wearing, so I didn’t stop driving them. For next season, I scored a deal on these secondhand, but unused.
They won’t fit on my 15x7s though…
� Brakes
Killed two sets of Hawk street/race this year. I like them a lot but still don’t quite have 100% confidence in my brake system. Time to upgrade to one of the big boy pads. TBD.
� Engine
Take a look at my rear bumper.
(Photobombed) Yep, that low-miles motor is burning oil. It’s been getting worse, and its past a quart per tank, or half a quart in a 20 minute session. To the point of being dangerous. Here we go again…
Yep, rings. Suspicions confirmed. All four pistons have those clean edges, that’s a sure sign of poor oil control, right?
Weird oxidation in some of the bores. Some near the top and some at the bottom of the stroke. That downtime didn’t do this engine any favors. Minimal wear though.
Bearings still minty. I shouldn’t have to do this.
Already got the block back. Kept it at 83mm.
Had the crank balanced while it was out.
Where I’m at currently. Decided to port the head myself. Not doing anything extreme with it, cleaned up the casting and blended the bowls in pretty nicely. Exhaust ports are polished. Currently waiting on a new alignment dowel for the head so I can mark up the chambers to deshroud the valves a bit. Then I’ll polish the cambers and send it off for a valve job. Decided to stop myself short of lapping the valves myself. Now that we’ve caught up, here’s my plan for the build. This is mostly keeping with my theme from the beginning, but with the bar for “budget” raised slightly. I don’t want to give up any on-track reliability, or too much street drivability with this engine, so it’s staying N/A on 93 octane.
� JDM NB2 pistons, 10.5:1
� ~.02” off the head for 11:1 compression
� eBay rods
� billet oil pump
� ACL race bearings
� Volvo VS855 valve springs
� Mild head porting
� Coolant reroute
I think I can cap this at 7600 rpm and not have to worry about it again for more than a few years. Could probably go a lot higher with SUBs, but the stock lifters and cheap valve springs are easy to upgrade later. I’ll at least have a solid bottom end.
Last edited by add lightness; 01-17-2018 at 09:22 PM.
Reply
5
5
01-01-2018, 03:37 PM
#3
Junior Member
Thread Starter
Join Date: Aug 2013
Location: Towson, MD
Posts: 87
Total Cats: 18
Also, I didn't realize how gross Flickr embedding is on this site. I'll clean it up and switch to imgur or something in the future.
Thanks to anyone who read this far. I'm open to suggestions on my engine plans, and anything else really. Already ordered parts but there's still time for changes if I've done something dumb.
Thanks to anyone who read this far. I'm open to suggestions on my engine plans, and anything else really. Already ordered parts but there's still time for changes if I've done something dumb.
Reply
0
0
01-01-2018, 05:04 PM
#4
Senior Member
iTrader: (1)

Join Date: Dec 2010
Location: Farmington Hills, MI
Posts: 1,218
Total Cats: 175
For Flickr, I use the "share" button, then after pasting into the post, delete everything except for what's in between (and including) the [IMG ] [/IMG ] tags.
Looks nice and well thought out. Props for Baja! I was on both my schools Baja and FSAE team.
Looks nice and well thought out. Props for Baja! I was on both my schools Baja and FSAE team.
Reply
0
0
01-02-2018, 10:49 AM
#5
Junior Member

Join Date: Mar 2015
Location: Columbus Indiana
Posts: 178
Total Cats: 74
Good work so far. Like the Baja car, what school did you go to? I helped some with Baja, but was mostly FSAE.
When bores get corroded like that, the rings wear out real quick. That's probably where your oil consumption comes from. You might also consider ARP studs, to future proof the engine for anything.
When bores get corroded like that, the rings wear out real quick. That's probably where your oil consumption comes from. You might also consider ARP studs, to future proof the engine for anything.
Reply
0
0
 01-02-2018, 12:42 PM
#7

I'm still torn on whether I want to swap the VVT engine I have into my NB1. My NB1 engine is starting to get tired and the NB2 engine I have will most likely need a rebuild itself anyway, so I'm not sure which direction to go. The VVT engine certainly looks right at home in your car though, that's for sure!
Awesome build so far! 2018 will by my first year back with NASA after a hiatus, so maybe I'll see you at Summit.
Awesome build so far! 2018 will by my first year back with NASA after a hiatus, so maybe I'll see you at Summit.
Reply
0
0
 01-03-2018, 10:48 PM
#9
Junior Member
Thread Starter
Join Date: Aug 2013
Location: Towson, MD
Posts: 87
Total Cats: 18
Thanks all.
I went to UMBC in Baltimore.
I've never seen corrosion like that before but it makes sense. I took a closer look at the block and a lot of it is still visible after honing, although I can't feel it at all. Should I get it re-done or is it not a problem as long as the surface is consistent? The shop didn't say anything to me about it.
Sweet, I will definitely be at Summit for a couple events. Also really hoping to make it to one of the VIR and/or Pittrace dates, both new tracks for me.
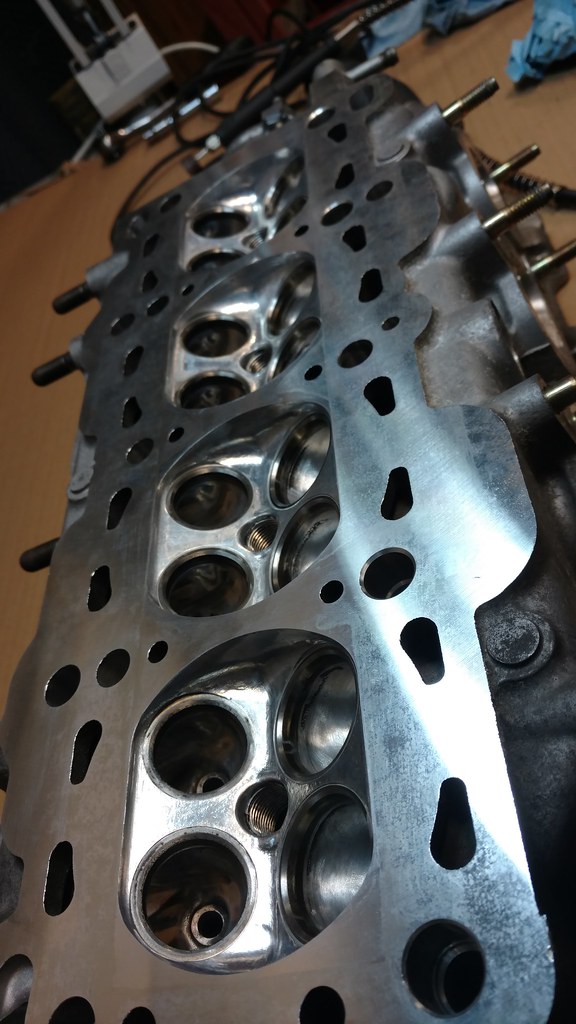
Finished the combustion chamber work tonight. Took a small amount of material off around the valves, not a lot to work with at stock bore size though. Also polished up the chambers for good measure. I'll drop it off at the machine shop on Friday.
Good work so far. Like the Baja car, what school did you go to? I helped some with Baja, but was mostly FSAE.
When bores get corroded like that, the rings wear out real quick. That's probably where your oil consumption comes from. You might also consider ARP studs, to future proof the engine for anything.
When bores get corroded like that, the rings wear out real quick. That's probably where your oil consumption comes from. You might also consider ARP studs, to future proof the engine for anything.
I've never seen corrosion like that before but it makes sense. I took a closer look at the block and a lot of it is still visible after honing, although I can't feel it at all. Should I get it re-done or is it not a problem as long as the surface is consistent? The shop didn't say anything to me about it.
I'm still torn on whether I want to swap the VVT engine I have into my NB1. My NB1 engine is starting to get tired and the NB2 engine I have will most likely need a rebuild itself anyway, so I'm not sure which direction to go. The VVT engine certainly looks right at home in your car though, that's for sure!
Awesome build so far! 2018 will by my first year back with NASA after a hiatus, so maybe I'll see you at Summit.
Awesome build so far! 2018 will by my first year back with NASA after a hiatus, so maybe I'll see you at Summit.
Finished the combustion chamber work tonight. Took a small amount of material off around the valves, not a lot to work with at stock bore size though. Also polished up the chambers for good measure. I'll drop it off at the machine shop on Friday.
Last edited by add lightness; 01-17-2018 at 09:23 PM.
Reply
0
0
01-05-2018, 11:38 AM
#10
Junior Member
Join Date: Mar 2015
Location: Columbus Indiana
Posts: 178
Total Cats: 74
I've never seen corrosion like that before but it makes sense. I took a closer look at the block and a lot of it is still visible after honing, although I can't feel it at all. Should I get it re-done or is it not a problem as long as the surface is consistent? The shop didn't say anything to me about it.
Anecdotally, at work, I have seen engines where 4 cylinders were corroded, and 2 were not (6 cylinder, with open valves due to where the engine stopped). There was a very distinct amount of measured ring wear difference between the two.
Reply
0
0
01-26-2018, 09:09 PM
#11
Junior Member
Thread Starter
Join Date: Aug 2013
Location: Towson, MD
Posts: 87
Total Cats: 18
Small update. Got the head back, ended up taking .022 off of it. I neglected to cc the piston crowns before disassembly, but assuming stock 10:1 CR is accurate, that puts me at 10.56:1 with just the shave. Add .5 with new pistons plus a little wiggle room for them supposedly being lower than advertised, and it should be close to 11:1 all said and done. Will measure everything once I get the pistons. Those are another month out, everything else is completely ready for final assembly. Putting the head together tomorrow. Getting impatient, ugh.
Wow. Freakin clean.
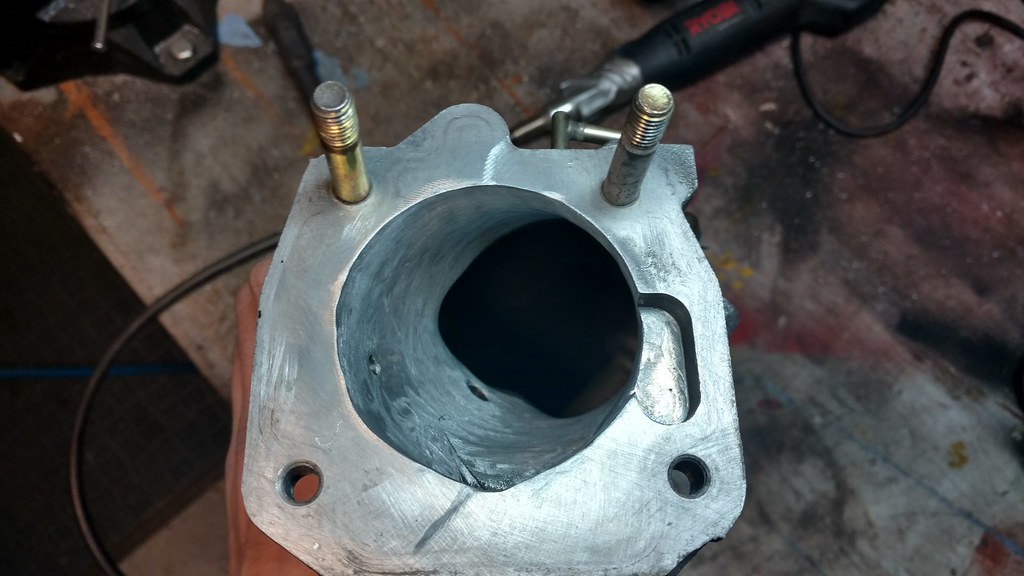
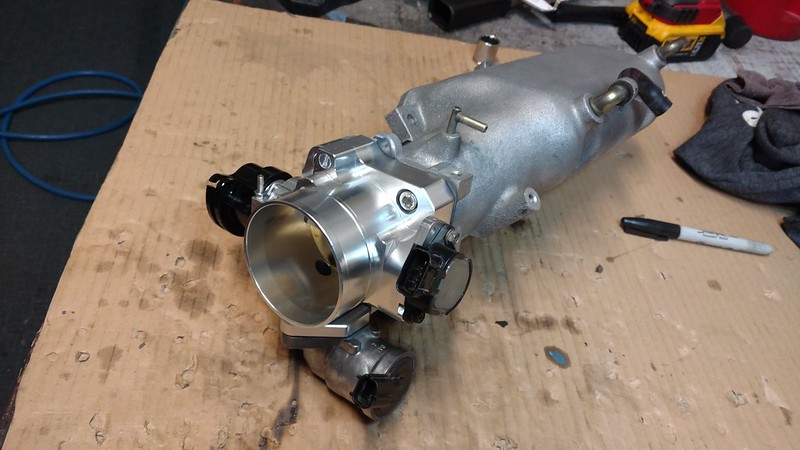
Decided to try one of the eBay knockoff throttle bodies. Ported my squaretop to match. Still need to disassemble the TB and inspect it. After all this porting I was really tempted to clean up the casting in the IM runners... Couldn't quite reach all the way in with the dremel so I didn't. I suppose there's such a thing as going too far.
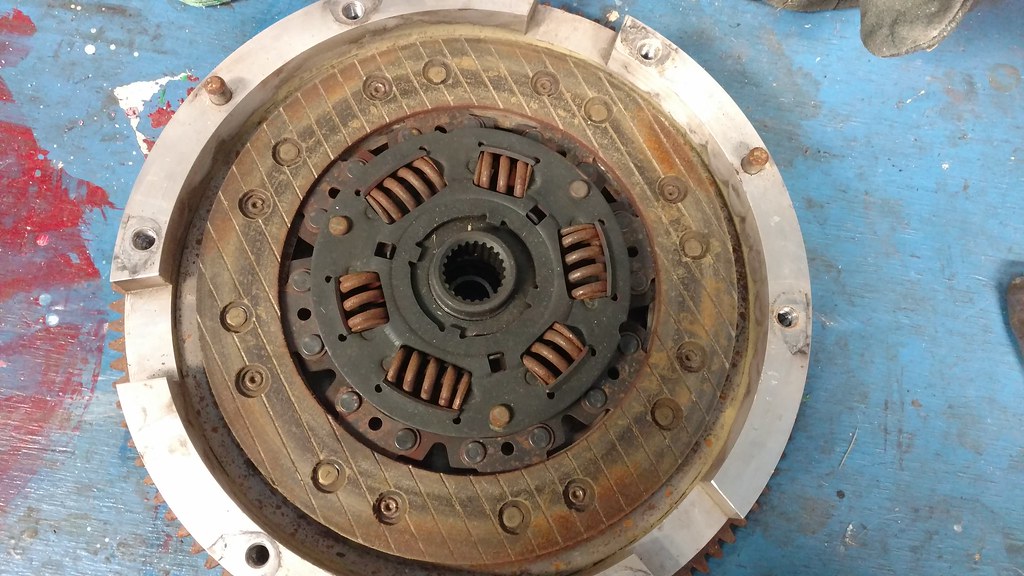
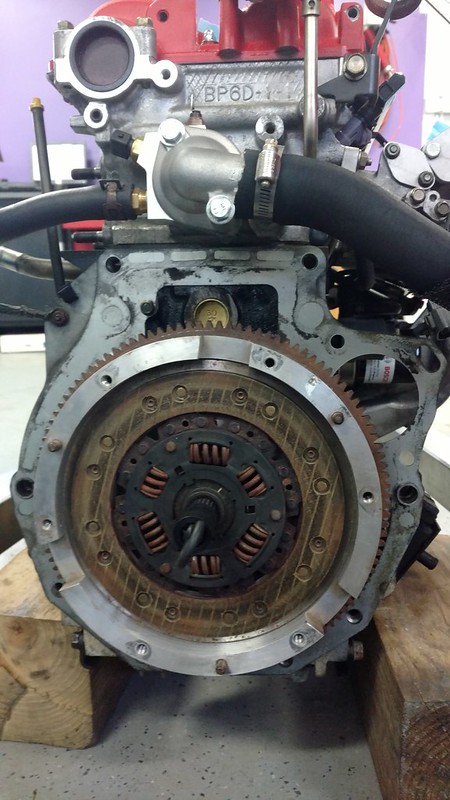
Question time! I have two clutch setups to choose from:
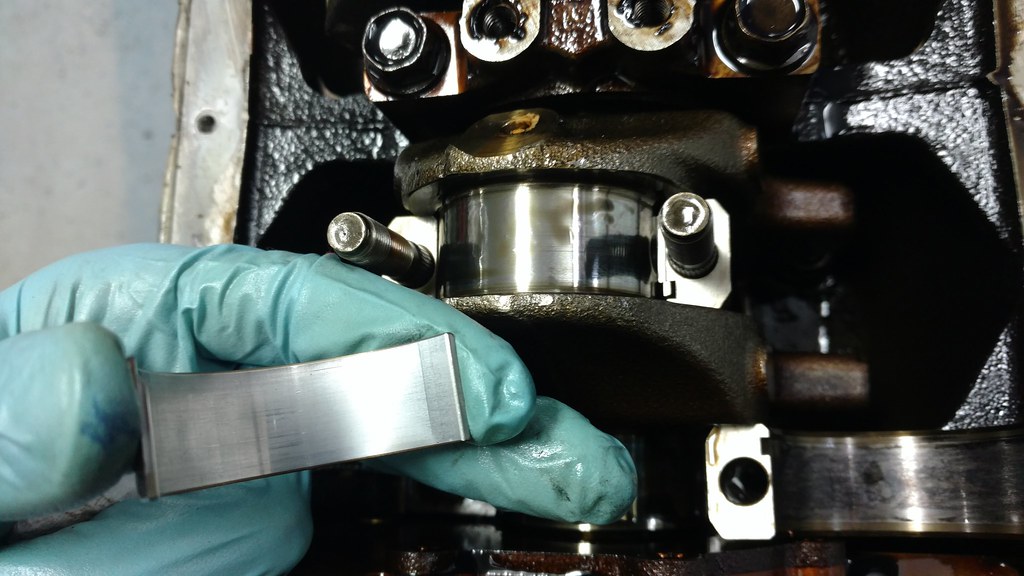
Warning, I'm probably way overthinking this. So, I really want to use the aluminum flywheel to speed the revs up a little bit. Downside is the 1.8 disc is both heavier and larger OD, so likely much higher inertia than the 1.6 ACT. This will increase synchro wear on fast shifts and slow the 'natural shift speed' of the trans, if you will. I thought the ACT setup was fairly well balanced as far as rpm change vs shift speed, so I'm not sure I want to add inertia to one side and remove it from the other, but I really have no idea how much of a difference it would make. I do have an 8lb Fidanza with OEM 1.6 clutch in the blue car, and while the flywheel is great, the revs do drop just a little too quickly compared to how quickly the gearbox wants to shift. Anyone ever put any thought into this?
I collected some data. The 1.8 disc is 1360g, the ACT 1.6 disc is 960g, and a new OEM 1.6 disc is 1030g, for reference. I don't have a scale to measure the PPs or FWs. I did make some quick models of the flywheels to get an idea, though:

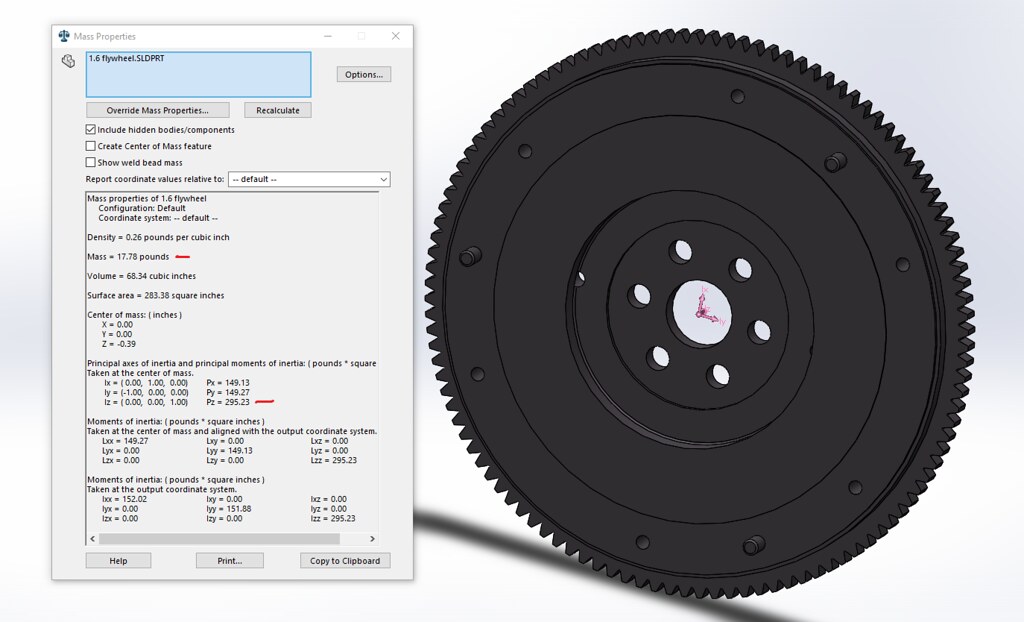
Weights seem about right, so we'll call it accurate enough. So 36% less inertia in the Al flywheel. Unfortunately I don't have the patience to model the other parts. Even with the bigger PP negating some of that savings, it should be a significant difference on the engine side.
I tried to measure the inertia of the entire assemblies by hanging a mass off them and measuring its acceleration, but there was too much difference in friction between the two bearings, and a tape measure and stop watch is a terrible timing system. Trying to come up with a better way to get some numbers.
Wow. Freakin clean.
Decided to try one of the eBay knockoff throttle bodies. Ported my squaretop to match. Still need to disassemble the TB and inspect it. After all this porting I was really tempted to clean up the casting in the IM runners... Couldn't quite reach all the way in with the dremel so I didn't. I suppose there's such a thing as going too far.
Question time! I have two clutch setups to choose from:
- The stock 1.6 flywheel and ACT HD that came with the car. It showed no measurable wear since last inspection two years ago, ~60% left. It drove well enough, pretty stock-like, with more bite and a heavier pedal.
- A friend generously gave me a very old but lightly used FM happy meal. He even had the invoice for it dated 1998. Aluminum flywheel, kevlar disc, some white Exedy pressure plate, 1.8 size. At least 75% material left. Not a lot of info on this setup online, reviews I found were generally good but of course there wasn't much else on the market when this was relevant.
- And before someone says it... sell both and buy a 1.6 Supermiata sport & 8lb flywheel? Tempting, but I kinda want to use something I have. Because, y'know, free and re-purposed?
Warning, I'm probably way overthinking this. So, I really want to use the aluminum flywheel to speed the revs up a little bit. Downside is the 1.8 disc is both heavier and larger OD, so likely much higher inertia than the 1.6 ACT. This will increase synchro wear on fast shifts and slow the 'natural shift speed' of the trans, if you will. I thought the ACT setup was fairly well balanced as far as rpm change vs shift speed, so I'm not sure I want to add inertia to one side and remove it from the other, but I really have no idea how much of a difference it would make. I do have an 8lb Fidanza with OEM 1.6 clutch in the blue car, and while the flywheel is great, the revs do drop just a little too quickly compared to how quickly the gearbox wants to shift. Anyone ever put any thought into this?
I collected some data. The 1.8 disc is 1360g, the ACT 1.6 disc is 960g, and a new OEM 1.6 disc is 1030g, for reference. I don't have a scale to measure the PPs or FWs. I did make some quick models of the flywheels to get an idea, though:
Weights seem about right, so we'll call it accurate enough. So 36% less inertia in the Al flywheel. Unfortunately I don't have the patience to model the other parts. Even with the bigger PP negating some of that savings, it should be a significant difference on the engine side.
I tried to measure the inertia of the entire assemblies by hanging a mass off them and measuring its acceleration, but there was too much difference in friction between the two bearings, and a tape measure and stop watch is a terrible timing system. Trying to come up with a better way to get some numbers.
Reply
1
1

 02-04-2018, 08:56 PM
#14
Junior Member
Thread Starter
Join Date: Aug 2013
Location: Towson, MD
Posts: 87
Total Cats: 18
Thanks guys.
They're still available through Mazda Motorsports... if you're willing to wait.
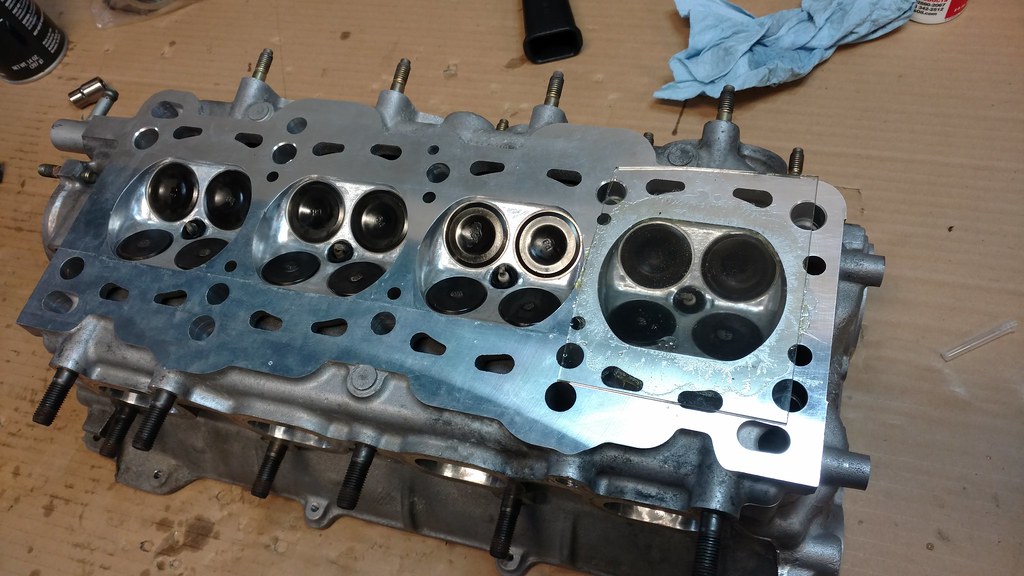
Started putting the head together last weekend. Had to order some shims, and finished it all up yesterday. Fortunately the clearances came out perfectly the first try. Installed the Trackspeed water neck delete, and the head is done and ready to go on! I did go with the "volvo" valve springs. They measure out nearly identically to the online specs for Supertech heavy doubles. I'll post up some details when I get back to my other computer.
I cc'd the combustion chambers again, and they came out to 50.5-51cc. Pre-teardown was 51-51.5cc... I guess the machine shop didn't shave my head the .022" I asked for - should've put it around 48.5-49cc. I don't think I removed nearly that much material from the cambers. Oh well. I'm considering other options, but I'm not taking the head back apart to have it machined again.
Put together some other subassemblies - hoping for a marathon weekend of assembly, install, and break-in once the pistons arrive. I'm running out of prep to do! Hawley performance reroute spacer:
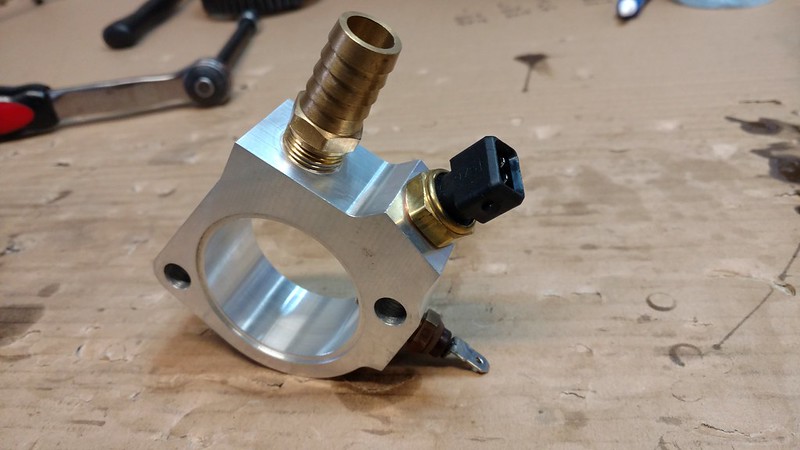
Ebay knockoff throttle body. Decided to try one of these. After cleaning it thoroughly, upgrading most of the hardware, and putting loctite on everything, I'm comfortable giving it a shot. It will be monitored closely. Gotta love that billet bling.
They're still available through Mazda Motorsports... if you're willing to wait.
Started putting the head together last weekend. Had to order some shims, and finished it all up yesterday. Fortunately the clearances came out perfectly the first try. Installed the Trackspeed water neck delete, and the head is done and ready to go on! I did go with the "volvo" valve springs. They measure out nearly identically to the online specs for Supertech heavy doubles. I'll post up some details when I get back to my other computer.
I cc'd the combustion chambers again, and they came out to 50.5-51cc. Pre-teardown was 51-51.5cc... I guess the machine shop didn't shave my head the .022" I asked for - should've put it around 48.5-49cc. I don't think I removed nearly that much material from the cambers. Oh well. I'm considering other options, but I'm not taking the head back apart to have it machined again.
Put together some other subassemblies - hoping for a marathon weekend of assembly, install, and break-in once the pistons arrive. I'm running out of prep to do! Hawley performance reroute spacer:
Ebay knockoff throttle body. Decided to try one of these. After cleaning it thoroughly, upgrading most of the hardware, and putting loctite on everything, I'm comfortable giving it a shot. It will be monitored closely. Gotta love that billet bling.
Reply
1
1
 02-26-2018, 09:48 PM
#16
Junior Member
Thread Starter
Join Date: Aug 2013
Location: Towson, MD
Posts: 87
Total Cats: 18
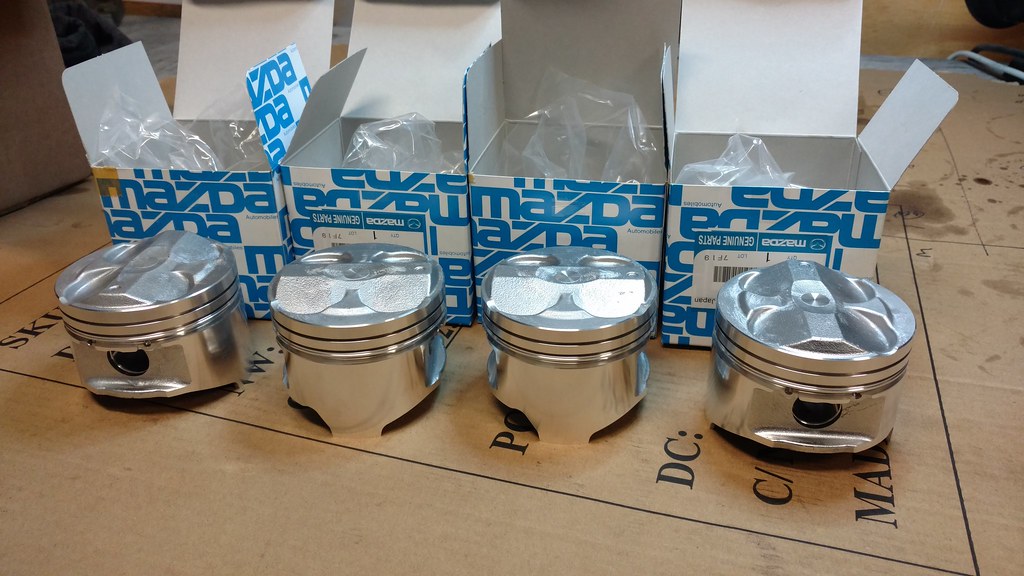
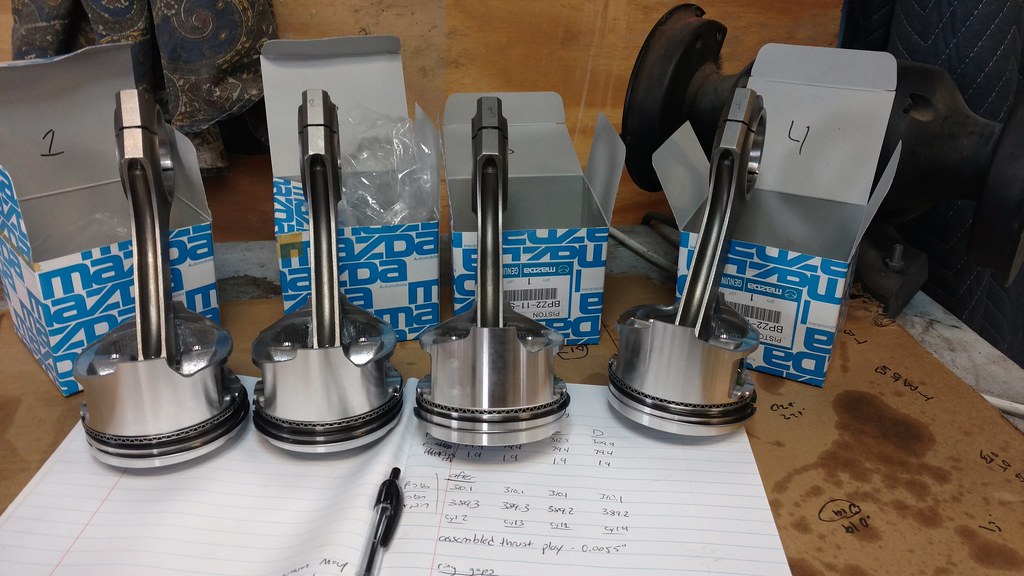
Finally, time for a legitimate update. Pistons arrived last week! Such JDM, yo. 3 of the 4 were within 0.3g of 310g, one was 2.5g over. Weight matched them all to 0.1g.
Finally time for assembly! All the parts are here, everything is clean, measured and ready to bolt together.
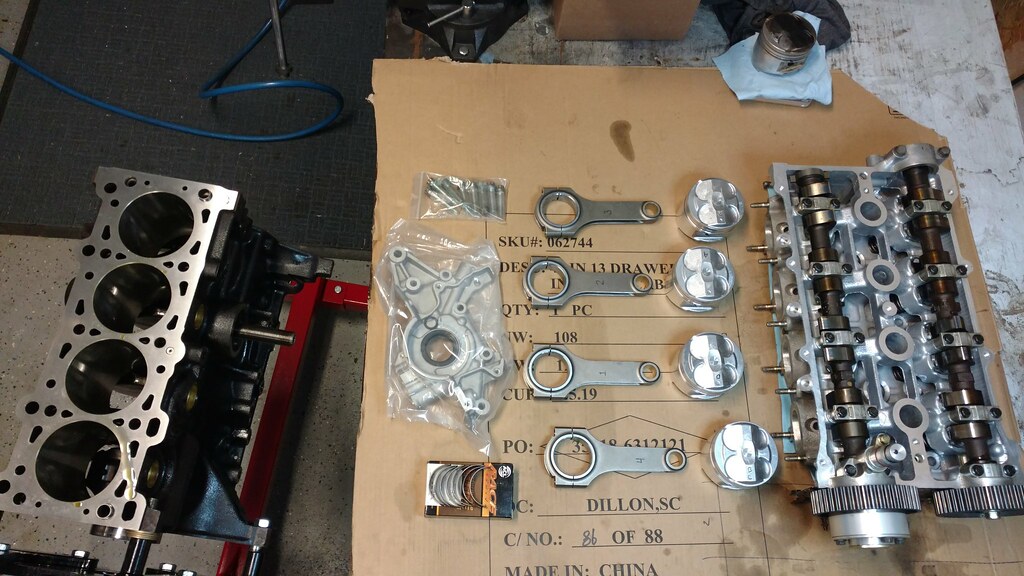
Japan + China ... Why not?
Masterful RTV-ing.
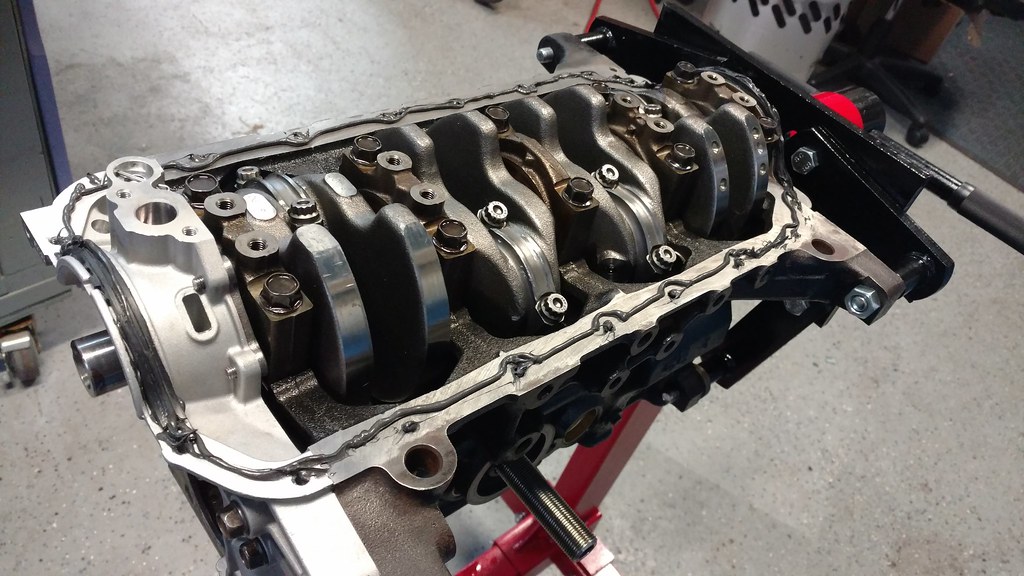
And the bottom end is done!
Dat dome.
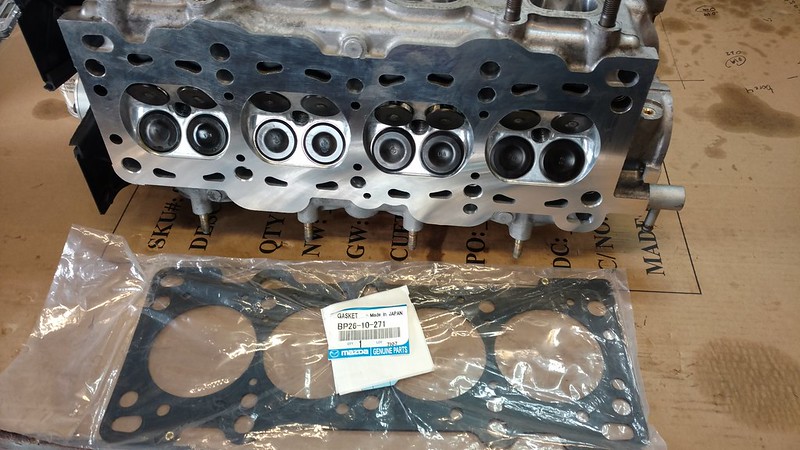
Then, I went to put the head on and turns out my NB1 head gasket is actually an NB2... No bueno with the reroute. Ordered an OEM which should be in by the middle of the week. I've only been staring at these piles of parts for a month now, something had to go wrong, right? My backordered Mazda Comp motor mounts also just shipped on Friday, so at least I won't have to do that job twice in a week.
I think I can put the two halves of this thing together and dress it this week, and then we'll drop it in and cross our fingers this weekend. Really looking forward to driving this car again!
Oh, while I had nothing to do I also finally checked rear wheel bearings and hubs off the list. They seemed fine but were original and the Weekend of Failure thread convinced me... probably for good reason.
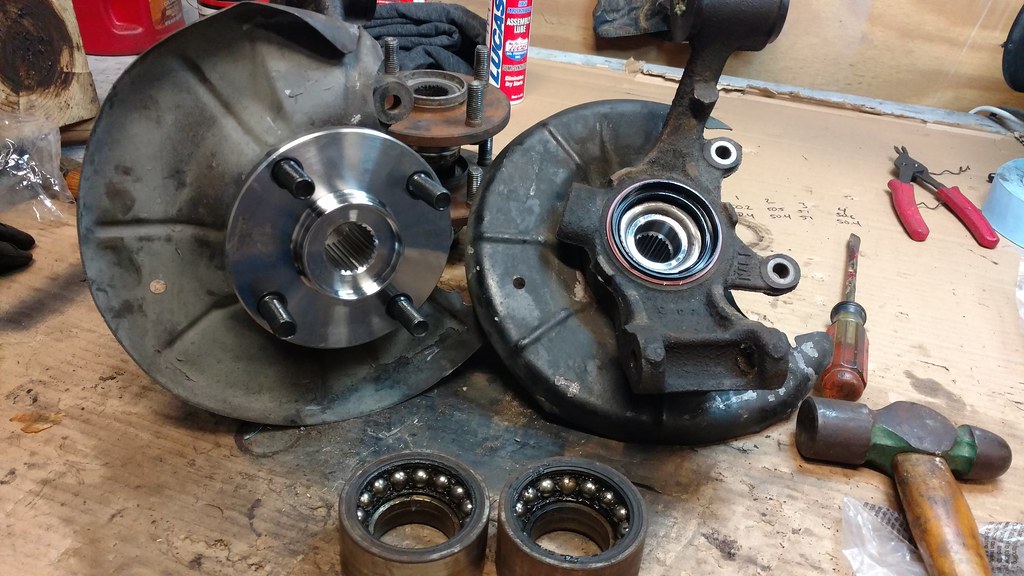
The grease in those bearings was straight sludge... wow. There's very few parts left on this car without an indefinite service life I haven't replaced at this point... pretty satisfying.
Thanks, I'll definitely be back for at least one Shenandoah event with you guys.
Finally time for assembly! All the parts are here, everything is clean, measured and ready to bolt together.
Japan + China ... Why not?
Masterful RTV-ing.
And the bottom end is done!
Dat dome.
Then, I went to put the head on and turns out my NB1 head gasket is actually an NB2... No bueno with the reroute. Ordered an OEM which should be in by the middle of the week. I've only been staring at these piles of parts for a month now, something had to go wrong, right? My backordered Mazda Comp motor mounts also just shipped on Friday, so at least I won't have to do that job twice in a week.
I think I can put the two halves of this thing together and dress it this week, and then we'll drop it in and cross our fingers this weekend. Really looking forward to driving this car again!
Oh, while I had nothing to do I also finally checked rear wheel bearings and hubs off the list. They seemed fine but were original and the Weekend of Failure thread convinced me... probably for good reason.
The grease in those bearings was straight sludge... wow. There's very few parts left on this car without an indefinite service life I haven't replaced at this point... pretty satisfying.
Thanks, I'll definitely be back for at least one Shenandoah event with you guys.
Reply
0
0
03-11-2018, 10:34 PM
#17
Junior Member
Thread Starter
Join Date: Aug 2013
Location: Towson, MD
Posts: 87
Total Cats: 18
Another big update! Lost a bunch of time thanks to Priority Mail 1-day turning into low-priority 1-week delivery, but I have a proper head gasket now:
+ internet points, right?
And just like that, a BP6D was (re)born. MazdaComp motor mounts came in just in time for this.
Decided to give the kevlar clutch a try. We'll see if there's any noticeable difference on the shifter end of things now that I'm paying attention for it. Also see the Hawley performance reroute spacer graced with an Esclade hose. This thing made dropping the motor in way more of a pain! Had to knock off the speedo cable mounting tab to get just enough wiggle room against the firewall to get the motor mounts to slip in.
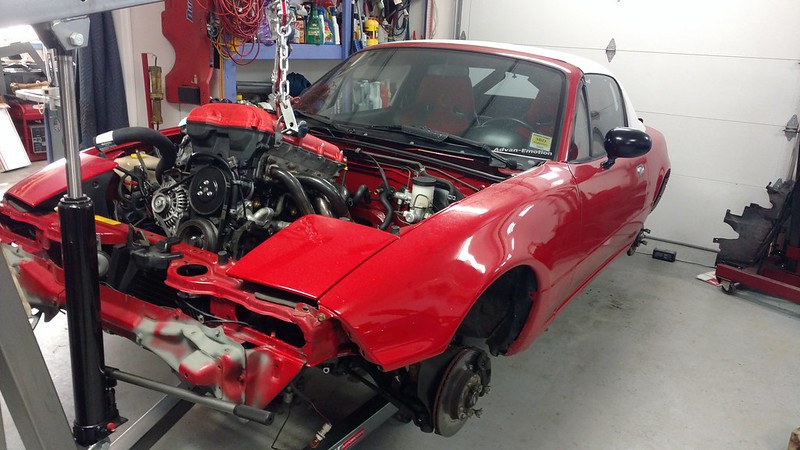
Slip in, they did.
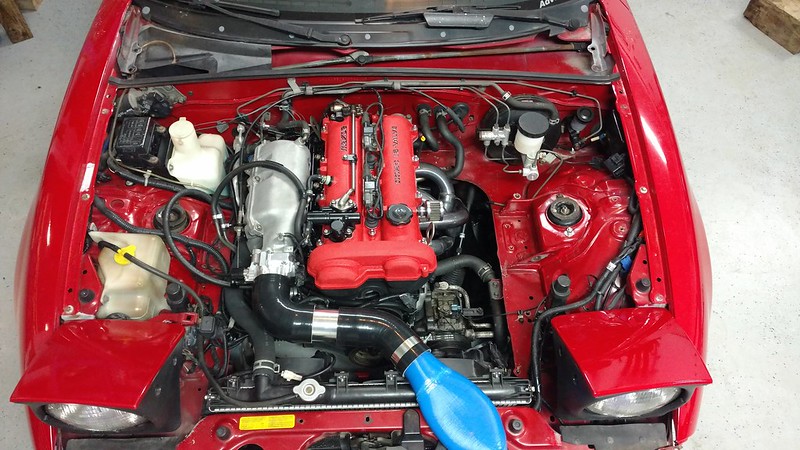
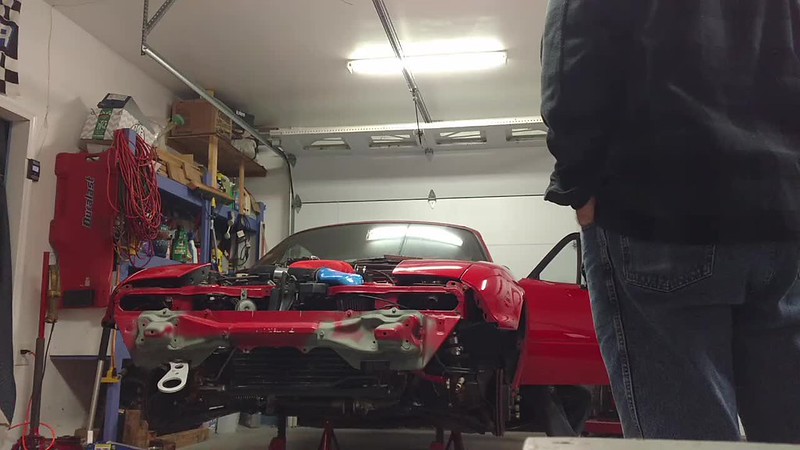
AND IT'S DONE! I plan on cleaning up the spaghetti on the cold side at some point, but for now it isn't going anywhere.
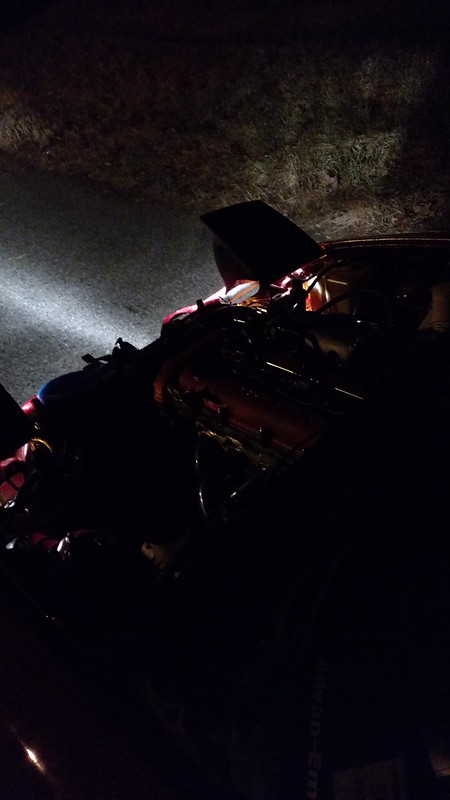
Of course I took it for a drive immediately...
(success video ^)
Cranked it for about 30 seconds until it made an impressive 50psi of oil pressure at starter speed. Then the plugs went back in, and it started up on the first try! This was so awesome, I can't believe it just worked. And it was so smooth and quiet too!
So I took it out and did about 40 miles, loading it up then pulling lots of vacuum. Ran pretty well with no changes to the tune - idle and AE will need some adjustment, and it was going lean above 4k at 70-80 kPa so I didn't really take it above 4500 RPM. Sounds and feels really good though, and no cloud of blue smoke behind me! The old-school FM clutch feels good, somewhat lighter pedal and softer engagement than the ACT, not sure which I prefer yet. Crappy AE masks the lighter flywheel for now.
Issues - when I pulled back into the garage there was some ticking noise from the passenger rear of the head. Already rechecked valve lash and it hasn't moved, so I'm not sure what the cause is. I don't want to run it again until I change the oil, then I'll diagnose.
Had a total of three leaks... heater core pipe, expected, I kinda crushed it, already fixed. And the only two gaskets I forgot to replace... are both leaking . Fortunately easy ones, trans output seal and the o-ring on the back of the factory oil warmer. Waiting to change the oil and assemble the front bodywork until those come in. USPS again decided that wouldn't be this weekend, unfortunately. I was hoping to have the car done for a shakedown at Lightning on the 23rd, but I'm going to Sebring this week to see some real race cars, so that definitely isn't happening now. Roads are still salty here and we're due for some more snow tomorrow, though, so that's really a lost cause anyway!
+ internet points, right?
And just like that, a BP6D was (re)born. MazdaComp motor mounts came in just in time for this.
Decided to give the kevlar clutch a try. We'll see if there's any noticeable difference on the shifter end of things now that I'm paying attention for it. Also see the Hawley performance reroute spacer graced with an Esclade hose. This thing made dropping the motor in way more of a pain! Had to knock off the speedo cable mounting tab to get just enough wiggle room against the firewall to get the motor mounts to slip in.
Slip in, they did.
AND IT'S DONE! I plan on cleaning up the spaghetti on the cold side at some point, but for now it isn't going anywhere.
Of course I took it for a drive immediately...
(success video ^)
Cranked it for about 30 seconds until it made an impressive 50psi of oil pressure at starter speed. Then the plugs went back in, and it started up on the first try! This was so awesome, I can't believe it just worked. And it was so smooth and quiet too!
So I took it out and did about 40 miles, loading it up then pulling lots of vacuum. Ran pretty well with no changes to the tune - idle and AE will need some adjustment, and it was going lean above 4k at 70-80 kPa so I didn't really take it above 4500 RPM. Sounds and feels really good though, and no cloud of blue smoke behind me! The old-school FM clutch feels good, somewhat lighter pedal and softer engagement than the ACT, not sure which I prefer yet. Crappy AE masks the lighter flywheel for now.
Issues - when I pulled back into the garage there was some ticking noise from the passenger rear of the head. Already rechecked valve lash and it hasn't moved, so I'm not sure what the cause is. I don't want to run it again until I change the oil, then I'll diagnose.
Had a total of three leaks... heater core pipe, expected, I kinda crushed it, already fixed. And the only two gaskets I forgot to replace... are both leaking
. Fortunately easy ones, trans output seal and the o-ring on the back of the factory oil warmer. Waiting to change the oil and assemble the front bodywork until those come in. USPS again decided that wouldn't be this weekend, unfortunately. I was hoping to have the car done for a shakedown at Lightning on the 23rd, but I'm going to Sebring this week to see some real race cars, so that definitely isn't happening now. Roads are still salty here and we're due for some more snow tomorrow, though, so that's really a lost cause anyway!
Reply
2
2
03-13-2018, 10:52 PM
#19
Junior Member
Thread Starter
Join Date: Aug 2013
Location: Towson, MD
Posts: 87
Total Cats: 18
Guys... did I **** up?
Got a ticking sound... sounds a lot like a collapsed HLA. Tried to isolate with the screwdriver trick but wasn't very helpful. I want to say it's coming from the bottom end around cylinder 1 though.
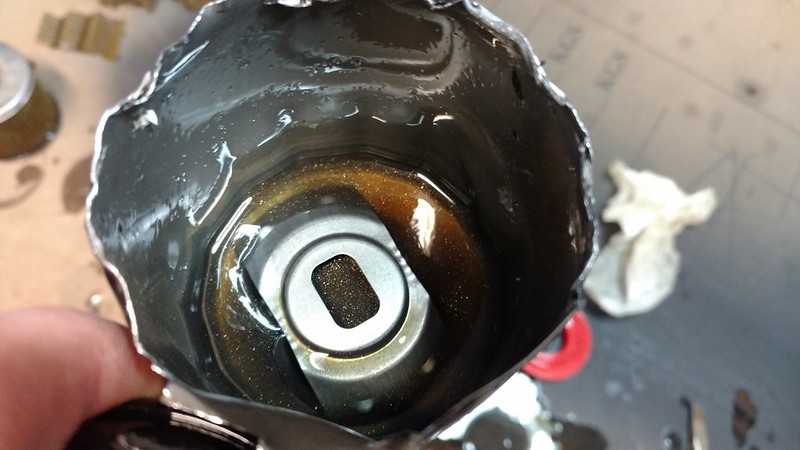
Dirty side of oil filter, first fill, 40 miles. Some very tiny particles were attracted to a magnet, what you can see wasn't.
Thoughts, please?
Got a ticking sound... sounds a lot like a collapsed HLA. Tried to isolate with the screwdriver trick but wasn't very helpful. I want to say it's coming from the bottom end around cylinder 1 though.
Dirty side of oil filter, first fill, 40 miles. Some very tiny particles were attracted to a magnet, what you can see wasn't.
Thoughts, please?
Reply
0
0
03-14-2018, 08:20 AM
#20
That stuff is way too big for break-in and big enough to chew up your cam journals. Typically break-in oil requires smearing on some white paper to get a view of the metal. I would stop running it and start investigating. Check for damage- Use a scope to look at the cylinder walls. Pull cam caps. Manually rotate the crank with plugs out to see if you can feel anything. If that stuff looks good, then check compression with plugs out and listen for your click.
Reply
0
0


