ManicGTI's third attempt...
 04-23-2013, 09:26 AM
#1
Junior Member
Thread Starter

Join Date: Nov 2010
Location: London, UK
Posts: 102
Total Cats: 0
So, first a quick history:
My Noob post: https://www.miataturbo.net/meet-gree...ding-uk-53729/
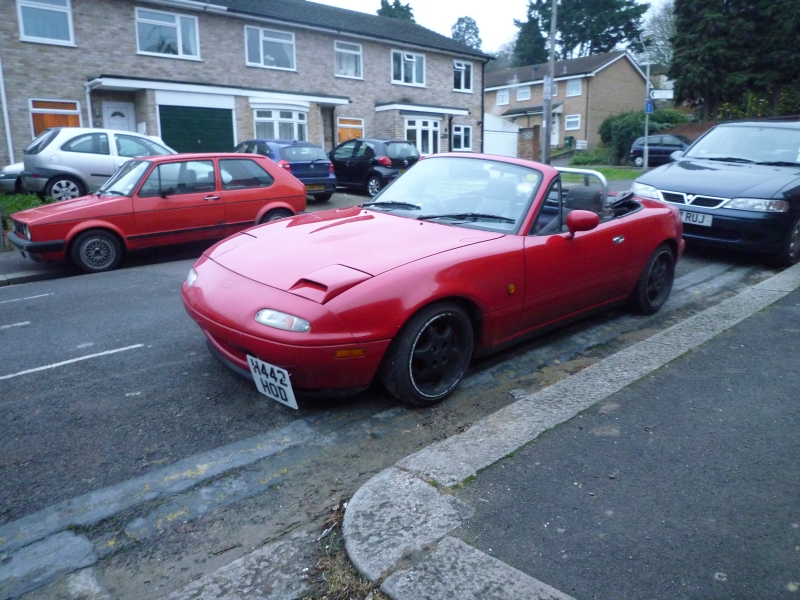
- 1989 GReddied 1.6 Eunos Roadster. Written off by rear impact, Followed by: https://www.miataturbo.net/general-m...dead-mx-55411/
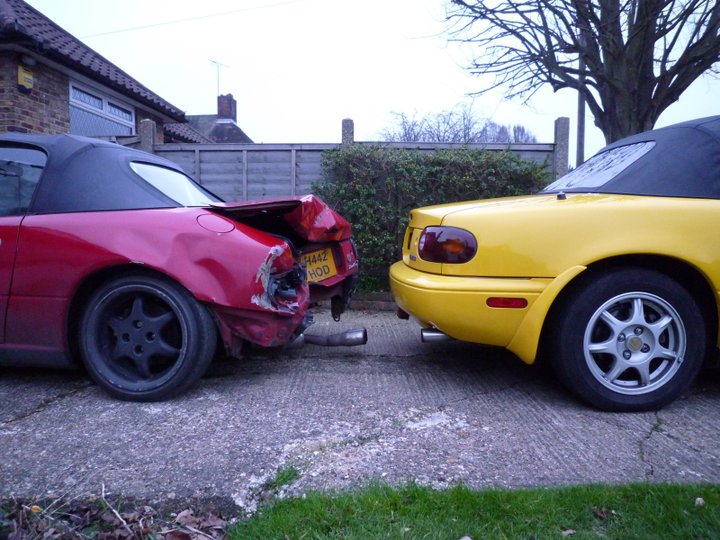
- 1994 1.8 J-Limited 2 Eunos Roadster (standard). Also written off from behind, by a girl that took her foot off the brake as a spider ran across her dash. Ho hum.
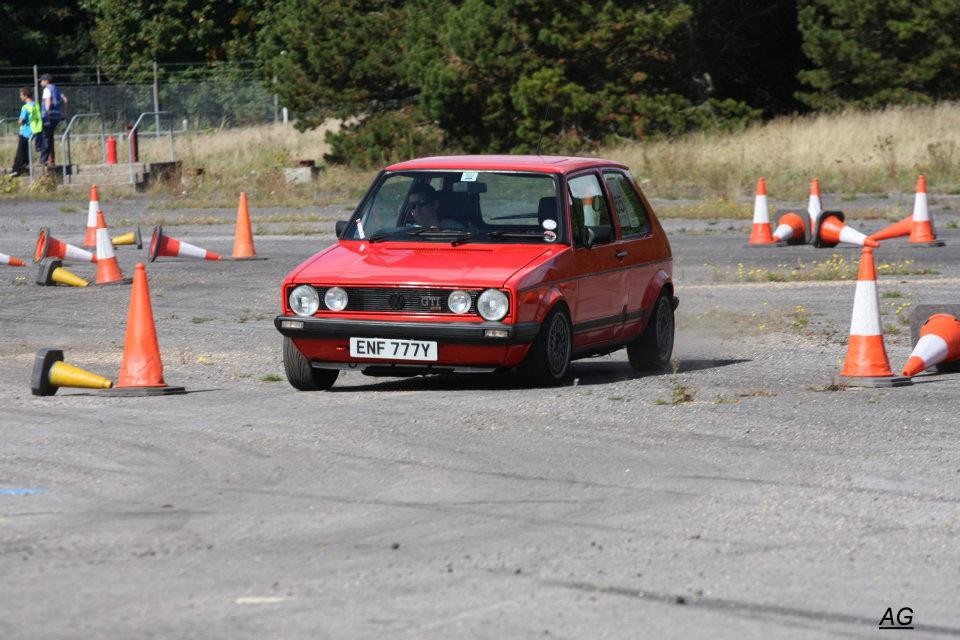
- Plus I've had this Mk1 Golf (2.0l 16V converted) for the past 7 years, sadly just sold it before christmas, loved that car.
So.. a few years down the line and a few aborted attempts...I've now ended up with:
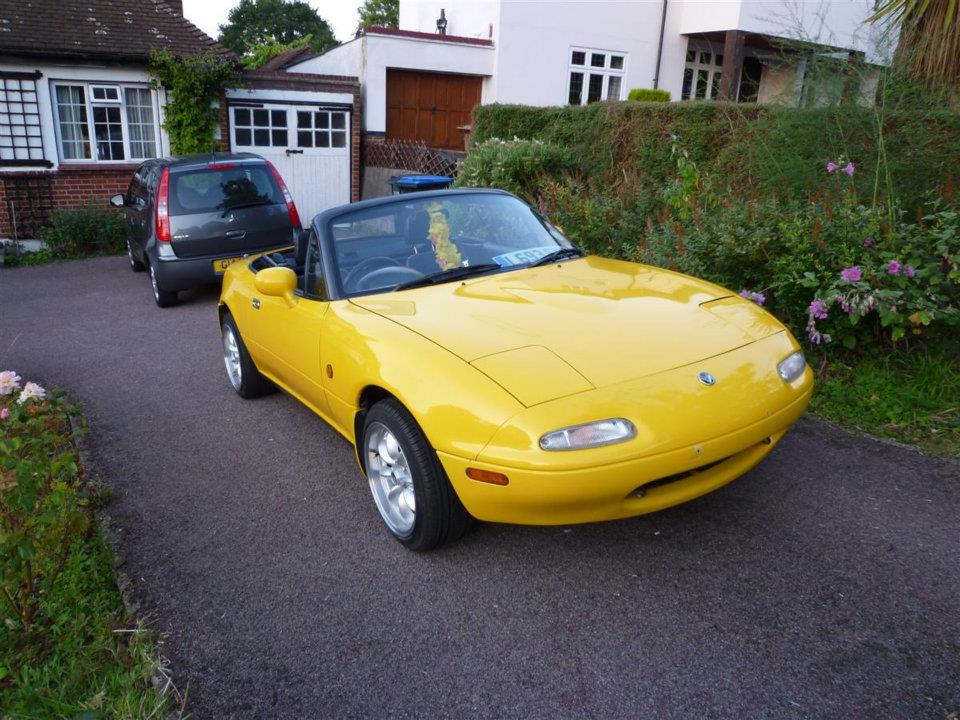
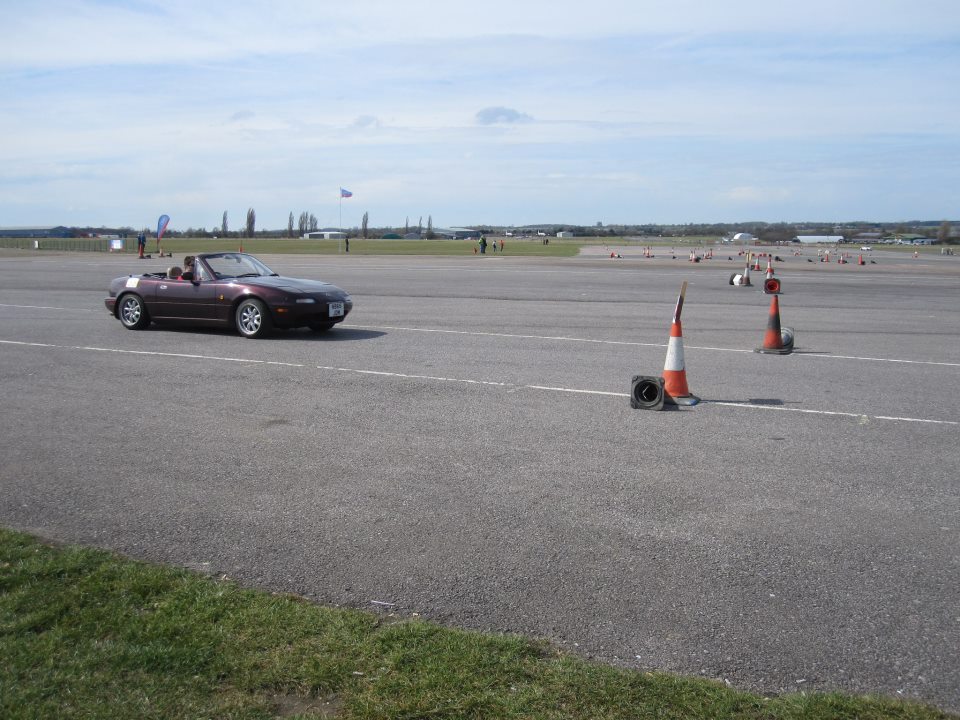
- Art-Vin 1995 1.8 VR-Limited Eunos Roadster. Only other modifications so far are Gaz Pro Gold coilovers and 15x8 et25 Rota RBs I already had in the garage.
It's nowhere close to the standard of the J-Ltd2 but as I've moved to London and hardly use it anyway I've decided to crack on with the planned turbo conversion anyway and just have fun with it. Had a first poke at an AutoSolo in it a few weeks ago:
So, here's the plan so far!
Bits already sorted out and purchased for the previous car:
- MS2 DIYPNP (I built for the 2-Plug 94, reconfigured for the 3-Plug 95 last night).
- Used S13 T28 Turbo, TB2815.
- New FM Manifold, outlet and downpipe.
- MTX-L WBO2
And parts recently picked up:
- Oil and Water feed and drain fittings for the TB2815.
- Inlet and Outlet adaptors for the TB2815.
- 650cc FIC Injectors.
- Boost Gauge (VDO, 15psi range)
- DIYPNP EBC Solenoid.
- FM Downpipe brace
- FM Stage 1 Clutch (Friction and pressure plate, I'll use the VR-Ltd Flywheel)
- FM Lower Coolant Hose.
Parts still to consider / source:
- FMIC and pipework, currently planning for 2.25" thoughout, possibly 2" hotside.
- BOV. Ideally a recirc.
- Heat shielding.
- Air filter setup.
- Wastegate Actuator relocation, likely use with U-Clamp method.
A lot of text I know! More pictures to follow...
My Noob post: https://www.miataturbo.net/meet-gree...ding-uk-53729/
- 1989 GReddied 1.6 Eunos Roadster. Written off by rear impact, Followed by: https://www.miataturbo.net/general-m...dead-mx-55411/
- 1994 1.8 J-Limited 2 Eunos Roadster (standard). Also written off from behind, by a girl that took her foot off the brake as a spider ran across her dash. Ho hum.
- Plus I've had this Mk1 Golf (2.0l 16V converted) for the past 7 years, sadly just sold it before christmas, loved that car.
So.. a few years down the line and a few aborted attempts...I've now ended up with:
- Art-Vin 1995 1.8 VR-Limited Eunos Roadster. Only other modifications so far are Gaz Pro Gold coilovers and 15x8 et25 Rota RBs I already had in the garage.
It's nowhere close to the standard of the J-Ltd2 but as I've moved to London and hardly use it anyway I've decided to crack on with the planned turbo conversion anyway and just have fun with it. Had a first poke at an AutoSolo in it a few weeks ago:
So, here's the plan so far!
Bits already sorted out and purchased for the previous car:
- MS2 DIYPNP (I built for the 2-Plug 94, reconfigured for the 3-Plug 95 last night).
- Used S13 T28 Turbo, TB2815.
- New FM Manifold, outlet and downpipe.
- MTX-L WBO2
And parts recently picked up:
- Oil and Water feed and drain fittings for the TB2815.
- Inlet and Outlet adaptors for the TB2815.
- 650cc FIC Injectors.
- Boost Gauge (VDO, 15psi range)
- DIYPNP EBC Solenoid.
- FM Downpipe brace
- FM Stage 1 Clutch (Friction and pressure plate, I'll use the VR-Ltd Flywheel)
- FM Lower Coolant Hose.
Parts still to consider / source:
- FMIC and pipework, currently planning for 2.25" thoughout, possibly 2" hotside.
- BOV. Ideally a recirc.
- Heat shielding.
- Air filter setup.
- Wastegate Actuator relocation, likely use with U-Clamp method.
A lot of text I know! More pictures to follow...

Reply
 0
0

0
06-03-2013, 06:16 AM
#2
Junior Member
Thread Starter
Join Date: Nov 2010
Location: London, UK
Posts: 102
Total Cats: 0
Ok, so it begins at last.
- AIT Installed in plastic crosspipe.
- Vac hose run from rear of Intake Manifold to ECU location.
- MTX-L Installed:
- 96-97 Basemap did not include Sequential injection, so added settings from DIYPNP site.
- Some confusion over calibration settings required for the AIT, have left it as the settings given in DIYPNP guide pages for the 96-97.
- WB02 set to Innovate LC-1, assuming this is fine for the MTX-L.
- Timing locked to 10Deg for initial installation.
Hopefully that all means i'm not ready to slot in the DIYPNP, calibrate and get tuning etc!
- AIT Installed in plastic crosspipe.
- Vac hose run from rear of Intake Manifold to ECU location.
- MTX-L Installed:
- Lambda into a bung at the front end of a 2.5" Decat pipe, directly below shifter.
- Red (Switched 12V) and White (Dash Illumination) to Stereo Loom (Red/Black and Blue/Black).
- Black (Ground) to Ground point at T/B end of head.
- Yellow (WB Output) routed to ECU location for impending DIYPNP...
DIYPNP Updated to 3.2.4 Firmware and 96-97 DIYPNP Basemap loaded up- Red (Switched 12V) and White (Dash Illumination) to Stereo Loom (Red/Black and Blue/Black).
- Black (Ground) to Ground point at T/B end of head.
- Yellow (WB Output) routed to ECU location for impending DIYPNP...
- 96-97 Basemap did not include Sequential injection, so added settings from DIYPNP site.
- Some confusion over calibration settings required for the AIT, have left it as the settings given in DIYPNP guide pages for the 96-97.
- WB02 set to Innovate LC-1, assuming this is fine for the MTX-L.
- Timing locked to 10Deg for initial installation.
Hopefully that all means i'm not ready to slot in the DIYPNP, calibrate and get tuning etc!
Reply
0
0
06-09-2013, 09:23 AM
#3
Junior Member
Thread Starter
Join Date: Nov 2010
Location: London, UK
Posts: 102
Total Cats: 0
- DIYPNP Installed last week, started and idled on the button (whoop!).
- Checked static timing then unlocked to run off timing map, then a little bit of VEAL to get AFRs on target at Idle.
- 650cc FIC Injectors Installed yesterday. Scaled Req_Fuel down to 4.6 from 13.0 and started fine! (Whoop whoop!).
Now to get tuning!
- Checked static timing then unlocked to run off timing map, then a little bit of VEAL to get AFRs on target at Idle.
- 650cc FIC Injectors Installed yesterday. Scaled Req_Fuel down to 4.6 from 13.0 and started fine! (Whoop whoop!).
Now to get tuning!
Reply
0
0
 06-10-2013, 12:25 PM
#5
Junior Member
Thread Starter
Join Date: Nov 2010
Location: London, UK
Posts: 102
Total Cats: 0
Yeah, I gathered 'most' of the parts when I had the J-Ltd. The bits I have left to source now hasn't changed from my first post. No rush though, I won't be putting Turbo in until after Glastonbury at the end of June as I need it reliable for that.
Went out for a first drive with the MS last night, drove fine under cruise but stuttered/bogged down if I accelerated too hard. From a quick glance at the MTX-L it's going rich, so I 'think' I need to lower my AE curve. Haven't looked into it yet...only learning TunerStudio this week!
Tuning to be done but at least I can drive it.
I suspect the weak link at the moment will be the Turbo itself. It didn't cost me much so I'm not too worried too much but it's got a snapped exhaust stud in it and appears to have a bit of place in the bearing. I don't want to waste too much money on it so may try a cheap rebuild kit, throw it in and see how it goes. Ideally I'd like a GT2560R to come up for a reasonable price.
Reply
0
0
 06-12-2013, 05:32 AM
#7
Junior Member
Thread Starter
Join Date: Nov 2010
Location: London, UK
Posts: 102
Total Cats: 0
Fill your boots:The Cars Photo Gallery by Dave Gawen at pbase.com
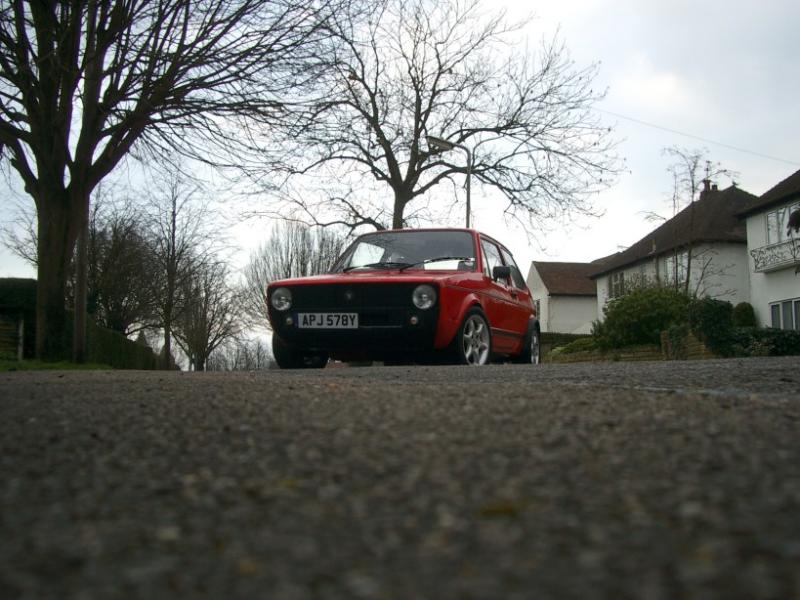
I've had three Mk1s, two GTIs and a Clipper Cabrio.. I'll admit I'm a Mk1 Geek, wrote the FAQ on 1.8/2.0 16V Conversions for the Mk1 Owners Club
The tatty first GTI:
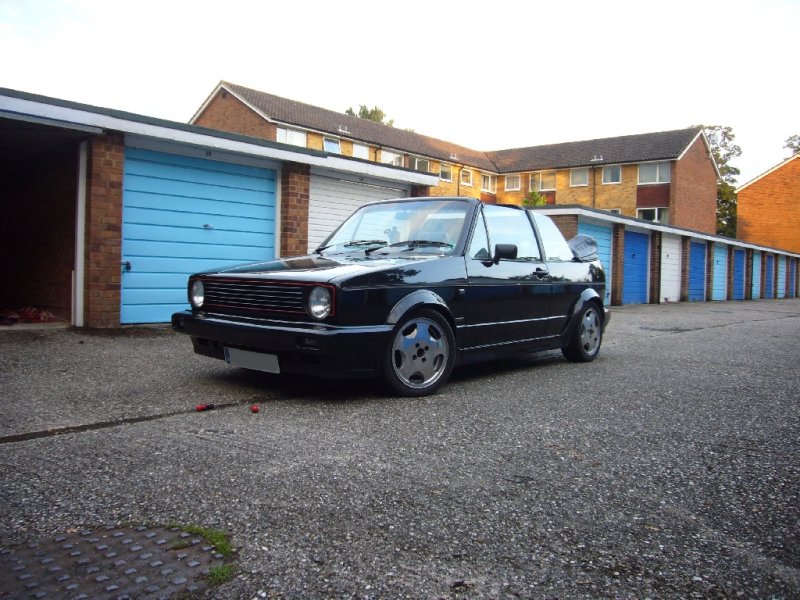
The Clipper Cab:
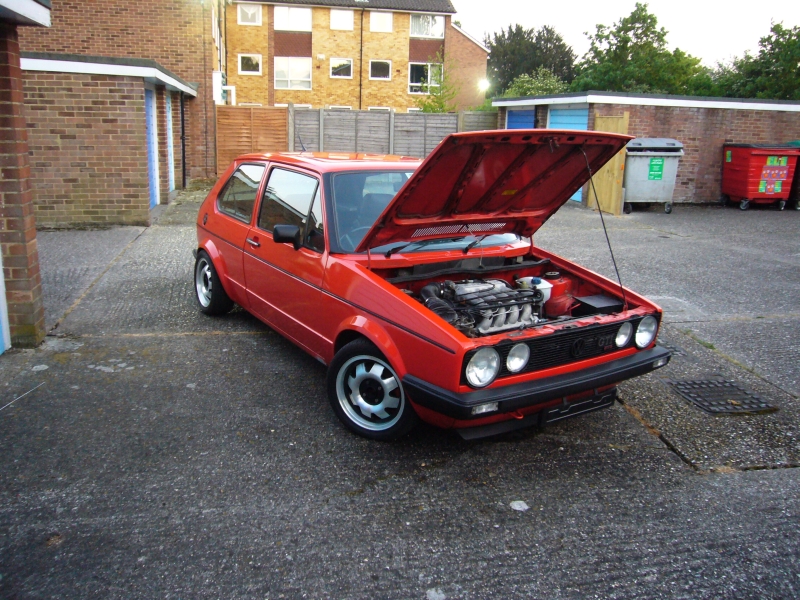
The second GTI, with 16V conversion:
I've had three Mk1s, two GTIs and a Clipper Cabrio.. I'll admit I'm a Mk1 Geek, wrote the FAQ on 1.8/2.0 16V Conversions for the Mk1 Owners Club
The tatty first GTI:
The Clipper Cab:
The second GTI, with 16V conversion:
Reply
0
0
06-20-2013, 06:15 AM
#8
Senior Member

Join Date: Dec 2004
Location: Brisbane, Australia
Posts: 1,278
Total Cats: 37
Hi David,
With the MTX-L install, did you punch a hole in the shifter boot and push the sensor through? If so, does it still seal up?
I keep dreading doing this thinking the boot will start to tear from the point I install the sensor.
With the LC-1 I was able to install the controller in the engine bay but obviously that won't work on the MTX-L.
Cheers
Reply
0
0
06-20-2013, 07:19 AM
#9
Junior Member
Thread Starter
Join Date: Nov 2010
Location: London, UK
Posts: 102
Total Cats: 0
timk: I unbolted the shift boot and dropped the WBO2 under the boot and literally straight down to a boss at the front end of the Cat replacement pipe. My shift boot is already a bit knackered and probably needs changing at some point, so I guess I could have threaded it through. Personally I have an aversion to making new holes in anything I don't have to.
I just bolted the boot back down on top of the cable. Cable comes out halfway between the bolts to minimise force on it, and controller just fits in the void under the plastic gear change surround, right next to changer. No pictures I'm afraid.
I guess it does crush it a bit, but I'm happy that it wont break. I've cable tied the cable to the PPF to 'minimise' vibration in the cable.
If/when I put a new boot in, I may hammer it down over a steel rod first to create a path for the cable under the boot. Or make a rubber gasket to sit under the edge of the new one so exerts less force on the cable. It's low on my list at the moment.
Update:
I've now done about 300-400 miles on the DIYPNP, using VEAL for most of that. Fairly happy with the cells I've covered, although VEAL seems to want to change the idle area all the time. I've scaled the rest of the map up inline with the changes that VE was making to the cells i've hit. Sticking with the DIYAutoTune provided AFR and Spark tables.
Running on WarmUp PWM Idle at the moment which works fine in general but it can't deal with A/C or coming down to idle from speed...so I guess next thing to tune will be CL Idle.
Reply
0
0
06-20-2013, 09:11 AM
#10
Boost Czar


iTrader: (62)
Join Date: May 2005
Location: Chantilly, VA
Posts: 79,490
Total Cats: 4,079
don't let VEAL do idle. It should be filtered out during CL idle anyways by default.
I tend to filter out <1000 and <35kPa
oh you use warmup only. Lame. Grow up and tune your PID CL idle
I tend to filter out <1000 and <35kPa
oh you use warmup only. Lame. Grow up and tune your PID CL idle
Reply
0
0
06-20-2013, 11:32 AM
#11
Junior Member
Thread Starter
Join Date: Nov 2010
Location: London, UK
Posts: 102
Total Cats: 0
Haha, ok thanks. It was idling so well I decided to ignore it for the time being but after a couple of embarrassing stalls on roundabouts it's moved up the to-do list!
Presumably it's ok to use the DIY and MX5Nutz guides:
Tuning idle with MegaSquirt
How Do I Tune My Idle With A Standalone? - Guides: Forced induction - MX5Nutz Forum
Tuning Idle Valve - Ms2 - Guides: Forced induction - MX5Nutz Forum
So:
- Warm up!
- Disconnect Idle valve and adjust Bleed screw, VE and Spark maps to get idle as consistent as possible and hopefully self 'catching'.
- Reconnect and tune CL Idle.
- Lock out Idle area on VE Map before any further tuning.
A couple of questions going forward:
- The DIYAutoTune basemap for my '96 1.8 NA uses an AFR target of 13.0 around idle, matching their guidance in the the thread above for batch injection. As I'm on Sequential, should I be adjusting this up to 14.7 in the idle region?
- I've fitted the 650cc injectors and scaled the Req_Fuel appropriately (down from 13.0 to 4.6). I haven't scaled down the 'PW Adder ms' values in AE yet, is there anything else I should adjust for the new injectors?
Reply
0
0
06-20-2013, 11:43 AM
#12
Boost Czar
iTrader: (62)
Join Date: May 2005
Location: Chantilly, VA
Posts: 79,490
Total Cats: 4,079
I'd do it this way:
1. Upgrade to GSlender firmware
2. input the A/C switch in the MS and back out to trigger the compressor
2. Load MSQ.
3. Turn on CL Idle, adaptive timing, voltage pwm idle compenstation, and A/C Idle up.
4. Take about ten minutes to tune.
5. ????
6. win at life.
1. Upgrade to GSlender firmware
2. input the A/C switch in the MS and back out to trigger the compressor
2. Load MSQ.
3. Turn on CL Idle, adaptive timing, voltage pwm idle compenstation, and A/C Idle up.
4. Take about ten minutes to tune.
5. ????
6. win at life.
Reply
0
0
11-25-2013, 06:01 AM
#14
Junior Member
Thread Starter
Join Date: Nov 2010
Location: London, UK
Posts: 102
Total Cats: 0
Argh, no progress made since June. Just checking in again as my enthusiasm for the car has returned after an Alcohol soaked Autumn here in London
Following the above posts I did get GSlender v2.8 running (thanks!). I never got round to tuning as I reverted to Factory ECU/Inj as I had some long journeys coming up and Annual MOT test.
I now have some unrelated engine issues now; it's not running smoothly, a loud mechanical engine noise and high emissions (failed test on this). Ideally I want to resolve these issues before pushing ahead with MS and FI.
Following conversations with my Tester we reckoned the stutter and emissions seems related and likely to be a problem with the Ignition. I've done the obvious change of Plugs, Leads and Air Filter. Next up to look at is Coilpack and ECU.
Rather than replace factory ECU I think it makes sense to get the DIYPNP back in there, so I've updated it to the MS2/Extra v3.3 Firmware and reverted the fuel map to the DIYPNP Basemap for factory 230cc Injectors.
Reply
0
0
04-01-2014, 08:27 AM
#15
Junior Member
Thread Starter
Join Date: Nov 2010
Location: London, UK
Posts: 102
Total Cats: 0
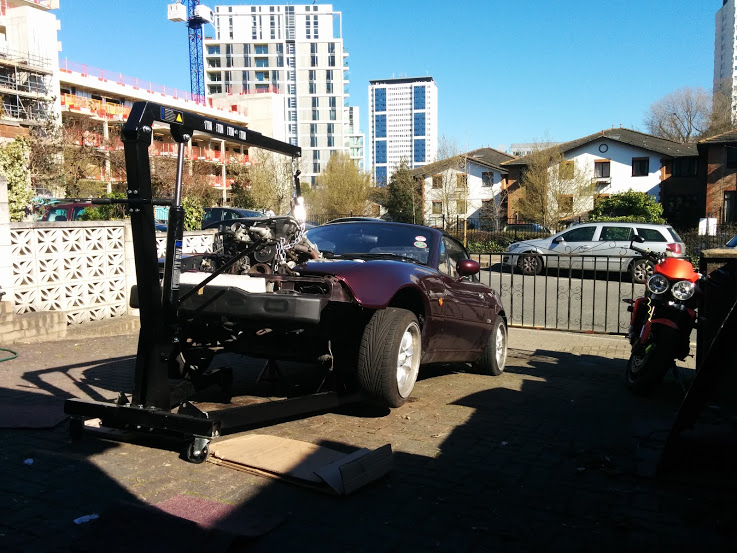
Exciting times...after my unknown mechanical noise, I decided to fit a replacement low(er) mileage engine. I had to do the sump drain and fit the FM Stage 1 clutch anyway so hasn't actually cost me much more that splitting the engine.
It's now fully in and I've started refitting plumbing/wiring, hopefully start mounting the turbo bits this weekend coming! Whoop whoop!
Dave
It's now fully in and I've started refitting plumbing/wiring, hopefully start mounting the turbo bits this weekend coming! Whoop whoop!
Dave
Reply
0
0
04-07-2014, 07:20 AM
#16
Junior Member
Thread Starter
Join Date: Nov 2010
Location: London, UK
Posts: 102
Total Cats: 0
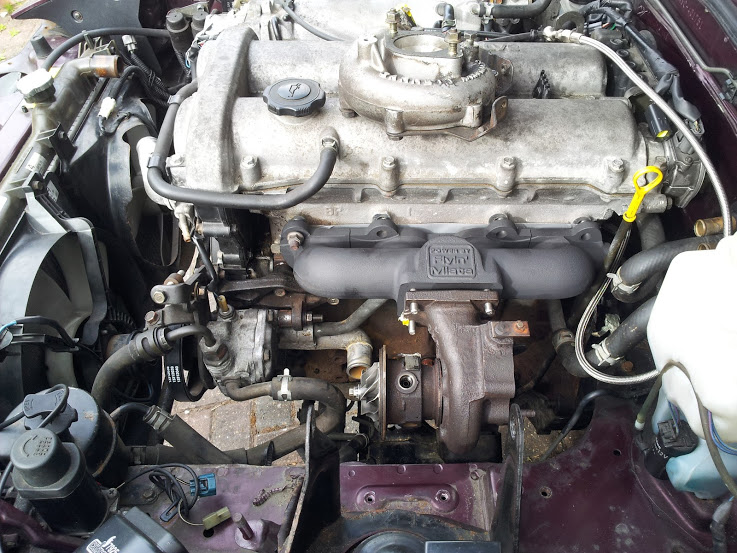
So some pictures to go with the words...
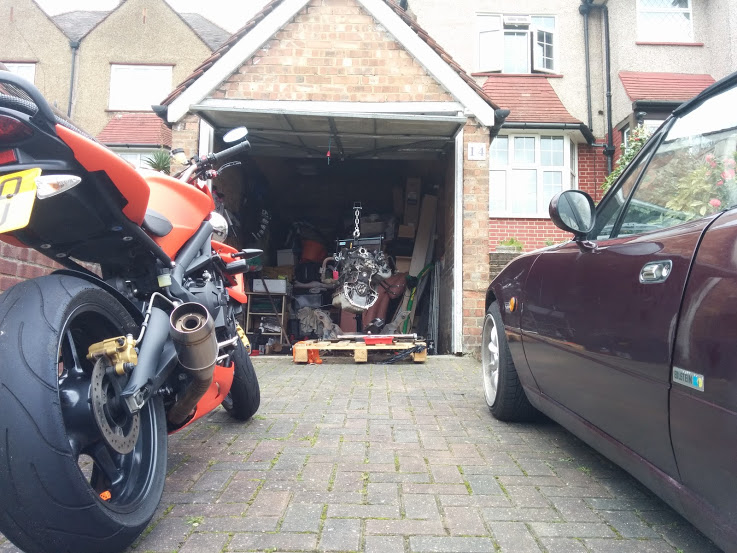
Bike out the garage for a bit to play with the replacement engine:
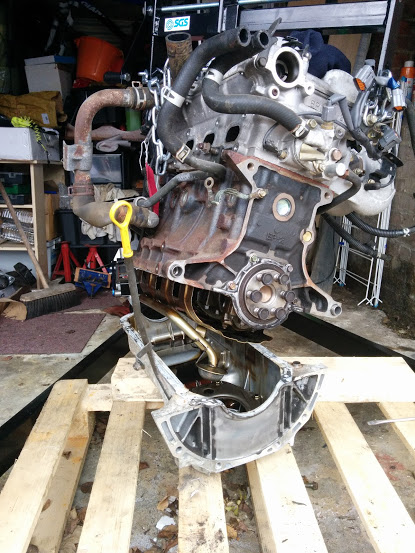
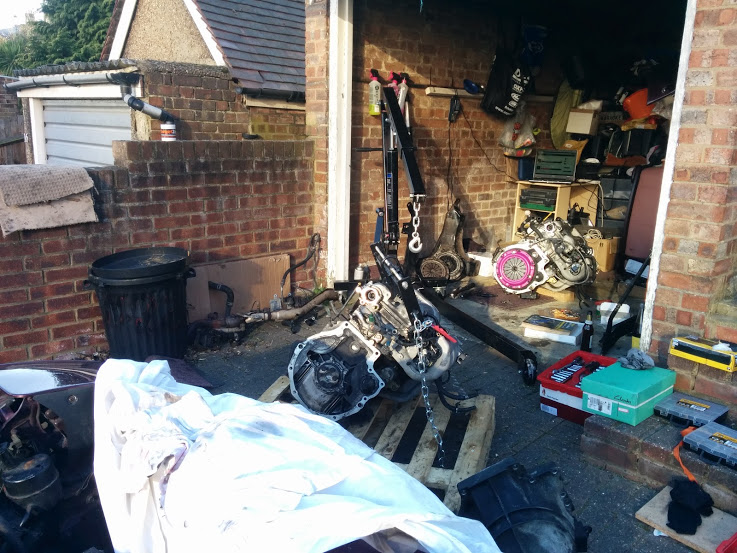
As the engine was already loose, decided to crack the sump off to do the Oil Drain:
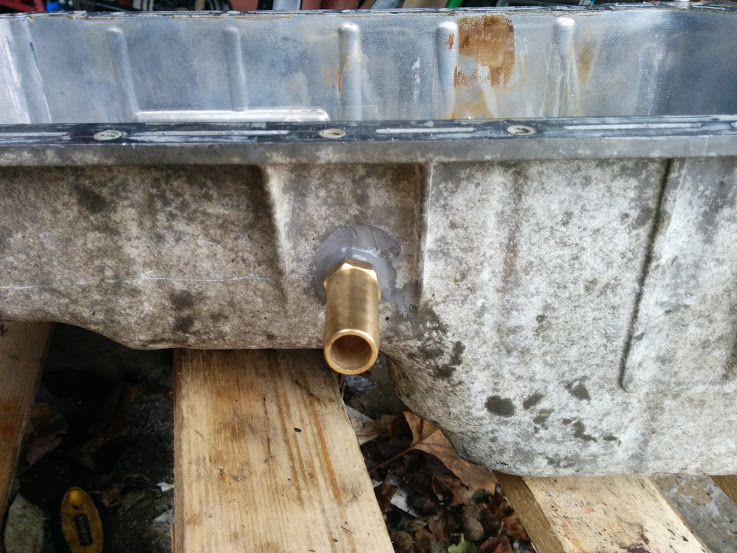
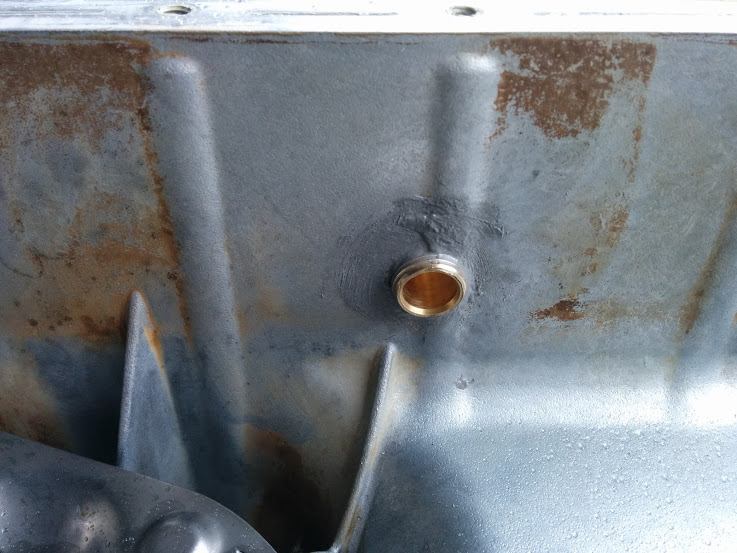
3/8NPT Thread, 16mm OD Barb to match Turbo Drain outlet. Tapped, JB-Welded. Spent ages working out where I wanted it, this is basically straight down from where the Turbo Drain will sit:
Ready to pull the original engine:
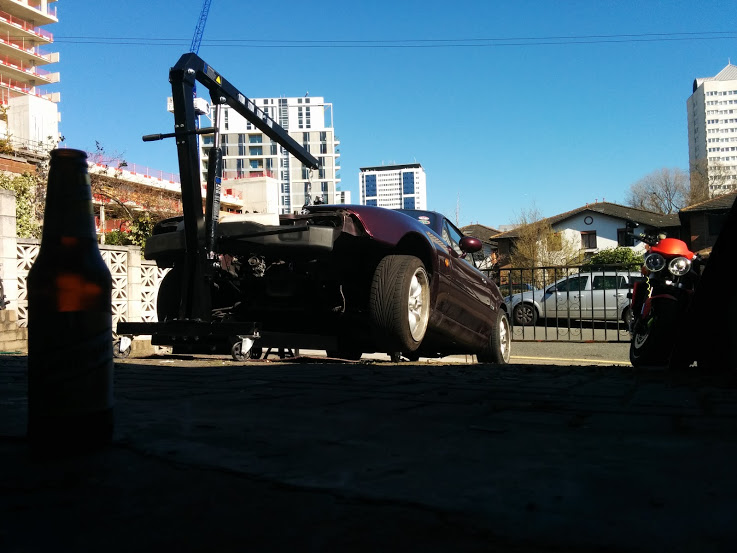
And out she came:
'Lightweight' Flywheel (Supposedly, I couldn't see any difference) from the VR-Ltd and FM Stage 1 Clutch fitted to replacement engine:
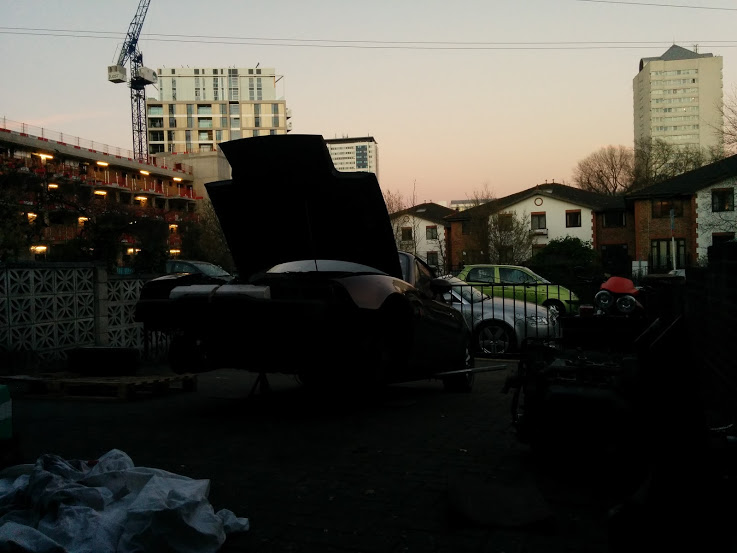
So that was the catch up from the post above weekend one, Engine and box back in and on the mounts, no plumbing. By no means solid work, beer and lie ins were involved, Then I wandered off to Austria to ski for the week
Bike out the garage for a bit to play with the replacement engine:
As the engine was already loose, decided to crack the sump off to do the Oil Drain:
3/8NPT Thread, 16mm OD Barb to match Turbo Drain outlet. Tapped, JB-Welded. Spent ages working out where I wanted it, this is basically straight down from where the Turbo Drain will sit:
Ready to pull the original engine:
And out she came:
'Lightweight' Flywheel (Supposedly, I couldn't see any difference) from the VR-Ltd and FM Stage 1 Clutch fitted to replacement engine:
So that was the catch up from the post above weekend one, Engine and box back in and on the mounts, no plumbing. By no means solid work, beer and lie ins were involved, Then I wandered off to Austria to ski for the week
Reply
0
0
04-07-2014, 08:06 AM
#17
Junior Member
Thread Starter
Join Date: Nov 2010
Location: London, UK
Posts: 102
Total Cats: 0
Ok, so back on it this weekend...midday start with a hangover...
First hit the boring admin bits, refilled gearbox and turret, connected up driveshaft, PPF, and all the OEM Wiring loom. Essentially got it back to where I would have been without the engine swap.
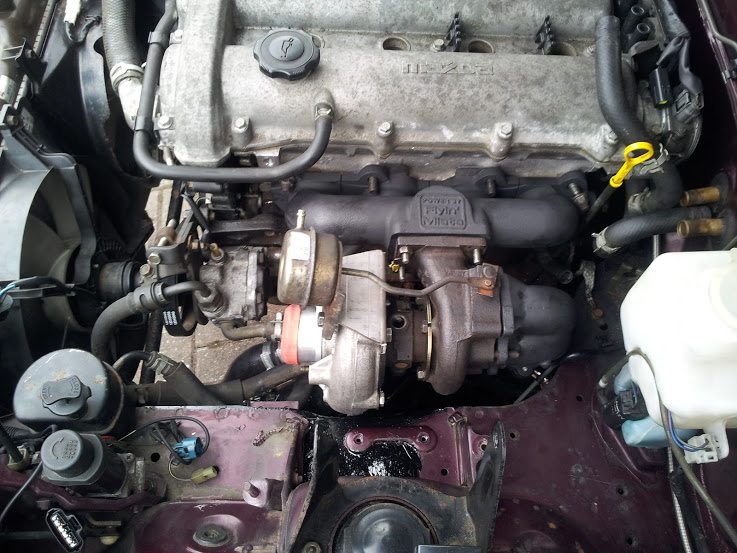
Turbo initial fit, to check frame rail clearance etc [200SX S14 T28 Turbo (Plain bearing), FM Wastegate bracket, FM Manifold and DP setup]:
Frame rail hammered down for ~10mm clearance (No cuts needed) and a splash of paint:
FMIC:
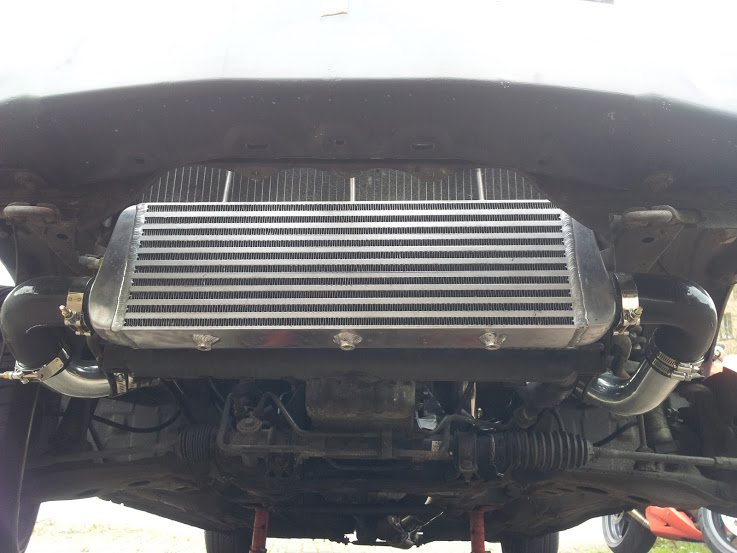
I've adjusted the height so the bottom sits bang over the joint between the lower cowls/shrouds. Drilled out the factory fixings and Button head Stainless screws bolt through both cowls to the FMIC bosses (I have test fitted, but not shown).
Secured via Three M8 Aluminium threaded studs straight up to the slam panel from the bosses on the Intercooler. Not happy with this entirely, I'd like to install some rubber bushes to take some load off the studding. Just black plastic caps on view here:
 .
.
Twin Piston Forge BOV fitted to Silicone T just below Throttle, I suspect I will get annoyed with it and go recirculating but this is decent quality so it will be fine for the moment:
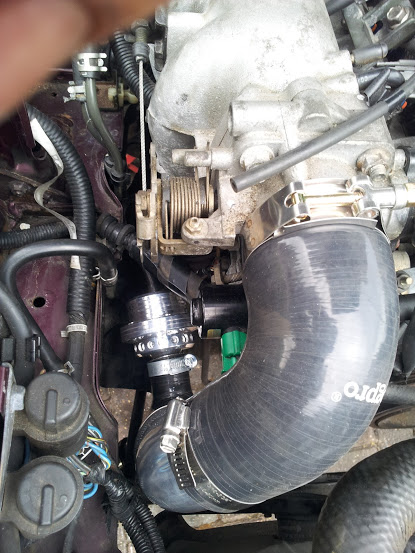
Once I'm done I'll list out exactly what I used for the pipework, but essentially it was a generic ebay kit with a few extra silicone elbows and a Silicone T for BOV. Not a fan of shiney bits in the engine bay, so I may paint up the Alum pipes at some point.
Other bits:
I've planned all this based on trawling threads etc, so I am fully aware that none of this is revolutionary/exciting to you guys!
I've been planning this for so long so I'm properly excited/nervous about it running!
Main to-do list:
First hit the boring admin bits, refilled gearbox and turret, connected up driveshaft, PPF, and all the OEM Wiring loom. Essentially got it back to where I would have been without the engine swap.
Turbo initial fit, to check frame rail clearance etc [200SX S14 T28 Turbo (Plain bearing), FM Wastegate bracket, FM Manifold and DP setup]:
Frame rail hammered down for ~10mm clearance (No cuts needed) and a splash of paint:
FMIC:
- Removed A/C when taking the engine out, so loads more space to mess with.
- The FMIC is an EBay (TX Motorsport) 'Medium' Bar and Fin, 2.25"/57mm In/Outlets, 70x18x6.5cm (Approx 27.5x7x2.5").
- Fitted the GM IAT to the coldside tank (top left) (3/8NPT, same as my oil drain).
- All FMIC pipework is 2.25"/57mm. Only exception is 90Deg adaptor elbows at the Throttle Body (57-63mm) and Turbo Outlet (51-57mm)
- Test fitted with supplied hose clamps, more T-Bolt clamps are in the post!
I've adjusted the height so the bottom sits bang over the joint between the lower cowls/shrouds. Drilled out the factory fixings and Button head Stainless screws bolt through both cowls to the FMIC bosses (I have test fitted, but not shown).
Secured via Three M8 Aluminium threaded studs straight up to the slam panel from the bosses on the Intercooler. Not happy with this entirely, I'd like to install some rubber bushes to take some load off the studding. Just black plastic caps on view here:
.Twin Piston Forge BOV fitted to Silicone T just below Throttle, I suspect I will get annoyed with it and go recirculating but this is decent quality so it will be fine for the moment:
Once I'm done I'll list out exactly what I used for the pipework, but essentially it was a generic ebay kit with a few extra silicone elbows and a Silicone T for BOV. Not a fan of shiney bits in the engine bay, so I may paint up the Alum pipes at some point.
Other bits:
- 650cc FIC injectors refitted
- FM Lower Rad hose fitted. I know the guidance says to trim this, but it did NOT fit. I was surprised and annoyed by this given it's price. Solution was to cut it half way along and fit a joiner (cut from the old metal lower rad pipe), this allowed rotation of the top 90 deg part so it now fits perfectly with no kinking.
- Remove Carbon Canister setup, routing it's vac line (At Throttle Body) to the newly fitted BOV.
- Swapped factory clutch line for a braided one straight to Slave cylinder.
I've planned all this based on trawling threads etc, so I am fully aware that none of this is revolutionary/exciting to you guys!
I've been planning this for so long so I'm properly excited/nervous about it running!
Main to-do list:
- Check brake line proximity to turbo outlet...looks very close and will likely need protection.
- Remove and refit with all proper gaskets and fixing hardware.
- Work out Idle Valve pipework.
- Turbo inlet/filter pipework.
- Plumb in Turbo water and oil lines, heat shield where required.
- Refill with fluids, gap and fit new plugs and leads.
- Refit the DIYPNP (Including re-Calibration of WB and senders, set static timing, check basetune etc).
Reply
0
0
04-20-2014, 02:49 PM
#18
Junior Member
Thread Starter
Join Date: Nov 2010
Location: London, UK
Posts: 102
Total Cats: 0
Ok, got it all in!

Finished fitting it all up yesterday...but couldn't get it started. No fuel it appeared. After some web trawling and with a fresh head I wandered outside in the rain today and realised that the fuel lines to the rail were the wrong way round. What an idiot.
So, swapped them round and it started on the button! It's VERY noisey at the moment, which I'll admit is concerning, so I won't go anywhere until I've checked it all over. For the time being I played with the VE table so it's idling at a sensible AFR. It idling high it should be ok for the moment while I work through the noises, fitting issues, any leaks that come up etc.
That is all..for the time being :whistle:.
Dave
Reply
0
0
04-29-2014, 07:30 AM
#19
Junior Member
Thread Starter
Join Date: Nov 2010
Location: London, UK
Posts: 102
Total Cats: 0
Ok...noise/dodgy running source discovered...I completely forgot to plug the EGR Port on the FM Manifold! Now running properly and obviously need to play with tune again now the AFRs are actually representative. Whoop!
Last edited by ManicGTI; 04-29-2014 at 10:35 AM.
Reply
0
0


