Harold's 1999 sport build
 01-29-2014, 08:03 PM
#1
Senior Member
Thread Starter
iTrader: (3)

Join Date: Dec 2007
Location: Brownsburg,IN
Posts: 837
Total Cats: 63
Well after over a year of working on this car it is finally time to start a time lapse build thread on my 99 sport DYI EFR build, I certainly appreciate all the other build threads that helped me with ideas as well as failures that I attempted to avoid.
I knew from day one that it would take me a year or more to build this car since I only work on it when everything else on my to do list is done enjoy making parts and was planning to build everything that I could build myself rather than to purchase it.
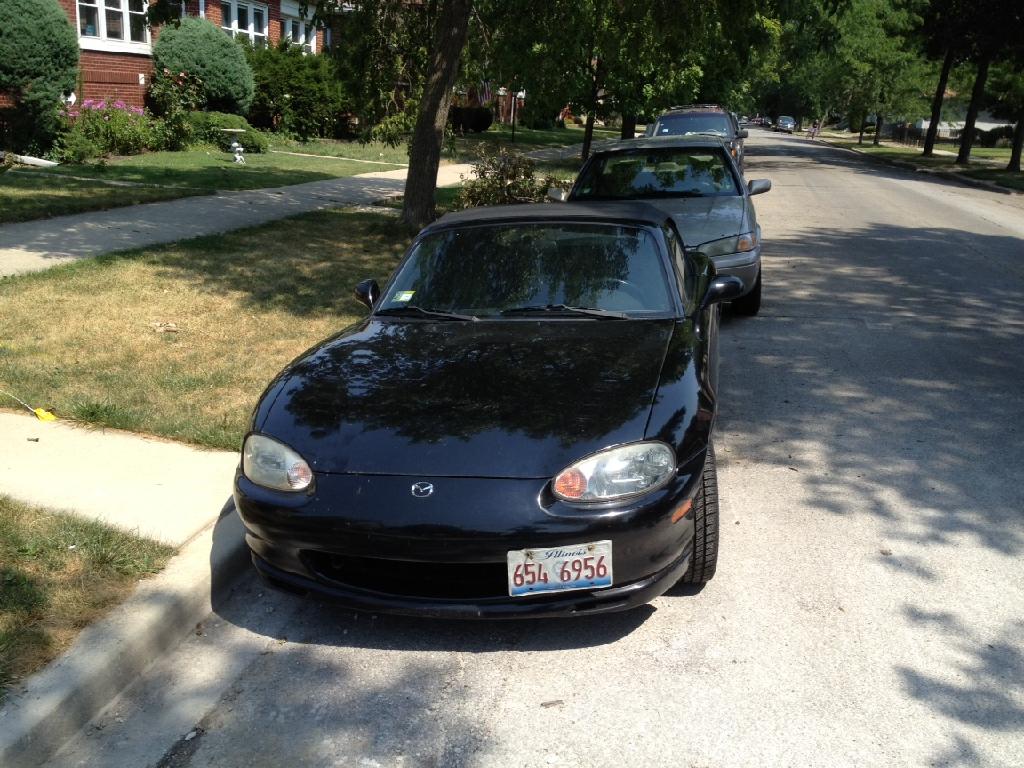
Started out with this clean stock 80k miles 99 sport from Chicago, the car has no body rust and some surface corrosion on the rear subframe and A arms that will get sandblasted and repainted when the suspension work gets dine next winter, the engine had a hole on the block and oil pan from a rod that decided to let go of the crank (suspect a broken main bolt)
The car will be mostly a street car with 6-10 autocross and 1-4 open track days so the AC and PS have to stay.
Basic build parts are:
Supertech 8.5 pistons
Scot roods
ARP head, main and rood bolts
Billet oil pump
Stock head gaskets and seals
DYI coolant re-route
Koyo 55mm rad
DYI manifold and 3" exhaust
DYI water to air intercooler system (I know)
Enhanced MS2
ID 1000 injectors
Deatech DW200 fuel pump
LS truck coils
EFR 6258 turbo
Fidenza flywheel with flying miata stage 2 clutch
6 speed transmision
3.3 rear end (3.9 on the car now) with polyurethane bushings and RX7 carrier
Oil press, water and oil temp AEM wideband, boost and oil pressure gauges

I knew from day one that it would take me a year or more to build this car since I only work on it when everything else on my to do list is done enjoy making parts and was planning to build everything that I could build myself rather than to purchase it.
Started out with this clean stock 80k miles 99 sport from Chicago, the car has no body rust and some surface corrosion on the rear subframe and A arms that will get sandblasted and repainted when the suspension work gets dine next winter, the engine had a hole on the block and oil pan from a rod that decided to let go of the crank (suspect a broken main bolt)
The car will be mostly a street car with 6-10 autocross and 1-4 open track days so the AC and PS have to stay.
Basic build parts are:
Supertech 8.5 pistons
Scot roods
ARP head, main and rood bolts
Billet oil pump
Stock head gaskets and seals
DYI coolant re-route
Koyo 55mm rad
DYI manifold and 3" exhaust
DYI water to air intercooler system (I know)
Enhanced MS2
ID 1000 injectors
Deatech DW200 fuel pump
LS truck coils
EFR 6258 turbo
Fidenza flywheel with flying miata stage 2 clutch
6 speed transmision
3.3 rear end (3.9 on the car now) with polyurethane bushings and RX7 carrier
Oil press, water and oil temp AEM wideband, boost and oil pressure gauges


Reply
 0
0

0
01-29-2014, 08:10 PM
#2
Senior Member
Thread Starter
iTrader: (3)
Join Date: Dec 2007
Location: Brownsburg,IN
Posts: 837
Total Cats: 63
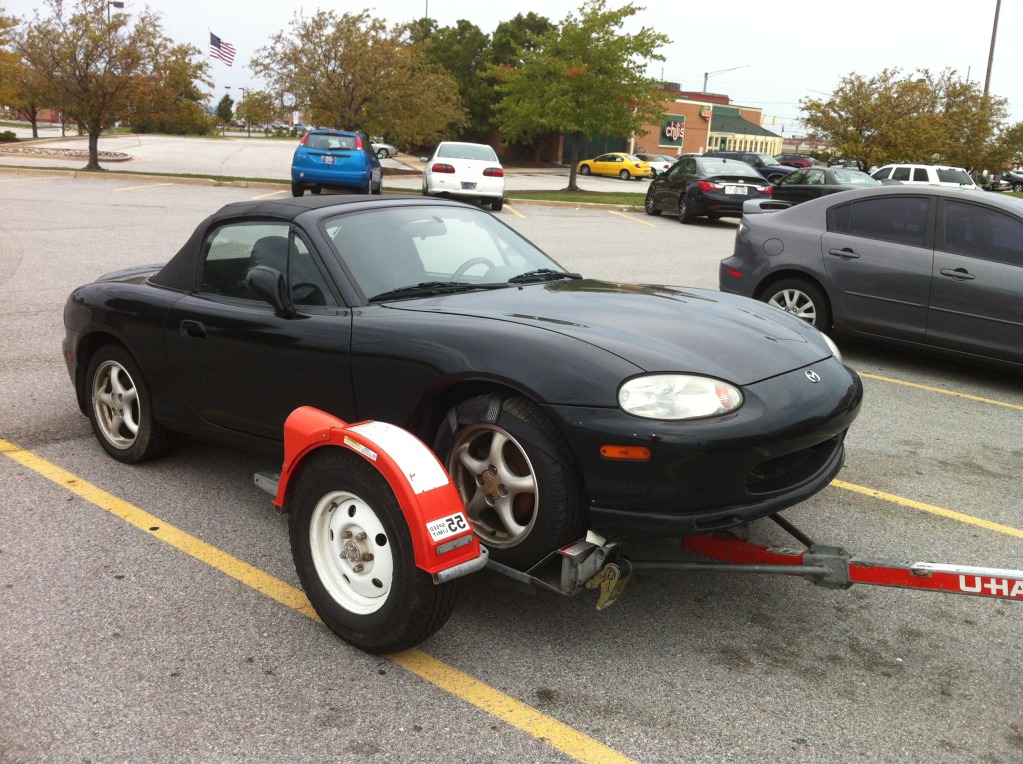
Brought the car home and pulled the engine transmission and rear end out and pressure washed everything to have a good clean car to work on and start the to do and to buy list.


Reply
0
0
01-29-2014, 08:14 PM
#3
Senior Member
Thread Starter
iTrader: (3)
Join Date: Dec 2007
Location: Brownsburg,IN
Posts: 837
Total Cats: 63
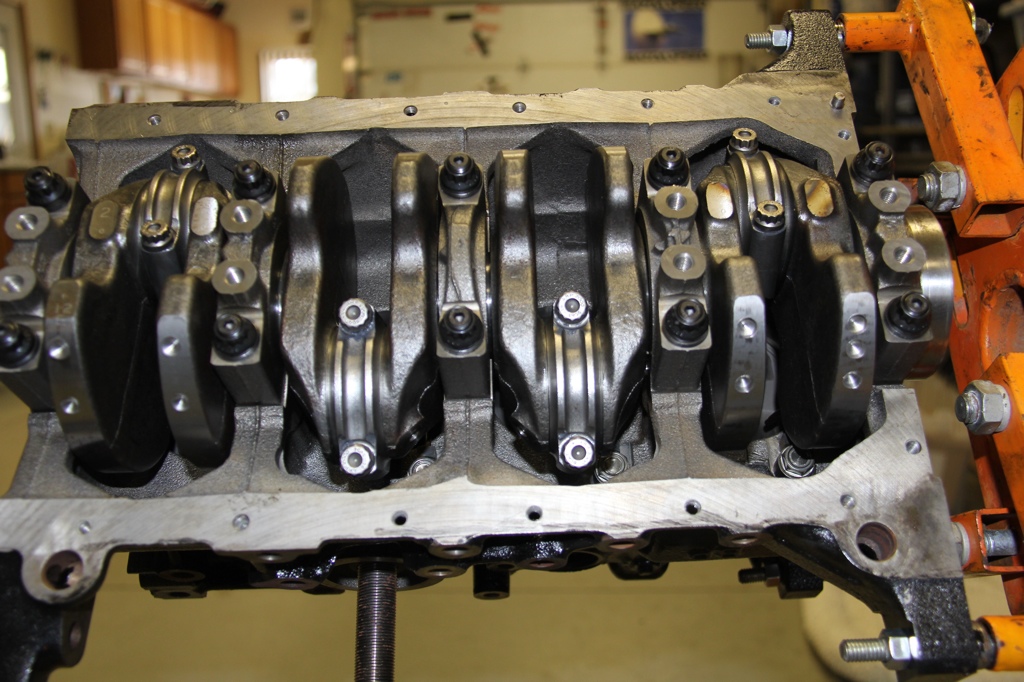
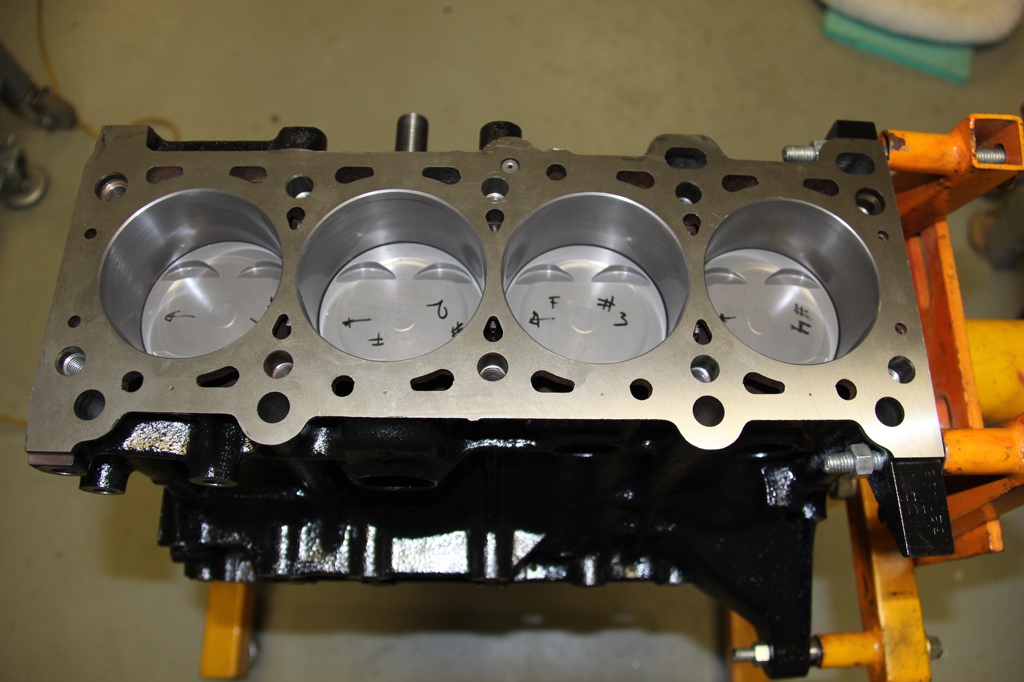
Found a bottom end core that needed rebuilding and sent it to the machine shop to get it cleaned up, crank cut and balanced,re bored the cylinders, and line bored the mains with ARP studs and a very light deck job, painted the block and put it together with Supertech 8.5 comp piston Scott roods, OEM bearings seals and gaskets.


Reply
0
0
01-29-2014, 08:21 PM
#4
Senior Member
Thread Starter
iTrader: (3)
Join Date: Dec 2007
Location: Brownsburg,IN
Posts: 837
Total Cats: 63
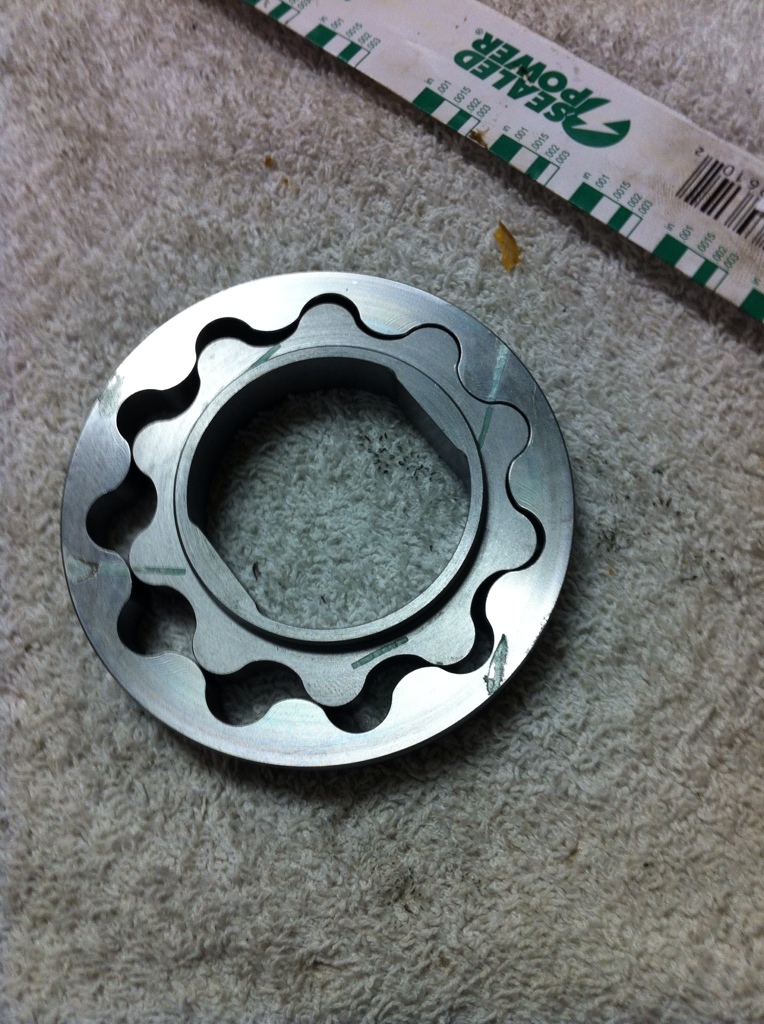
Got billet oil pump gears and had to sand the oil pump housing on a surface plate to get the OEM recommended gear to housing clearances looks like the housing on the center gear was bent outwards and had bigger clearances than the outer gear section
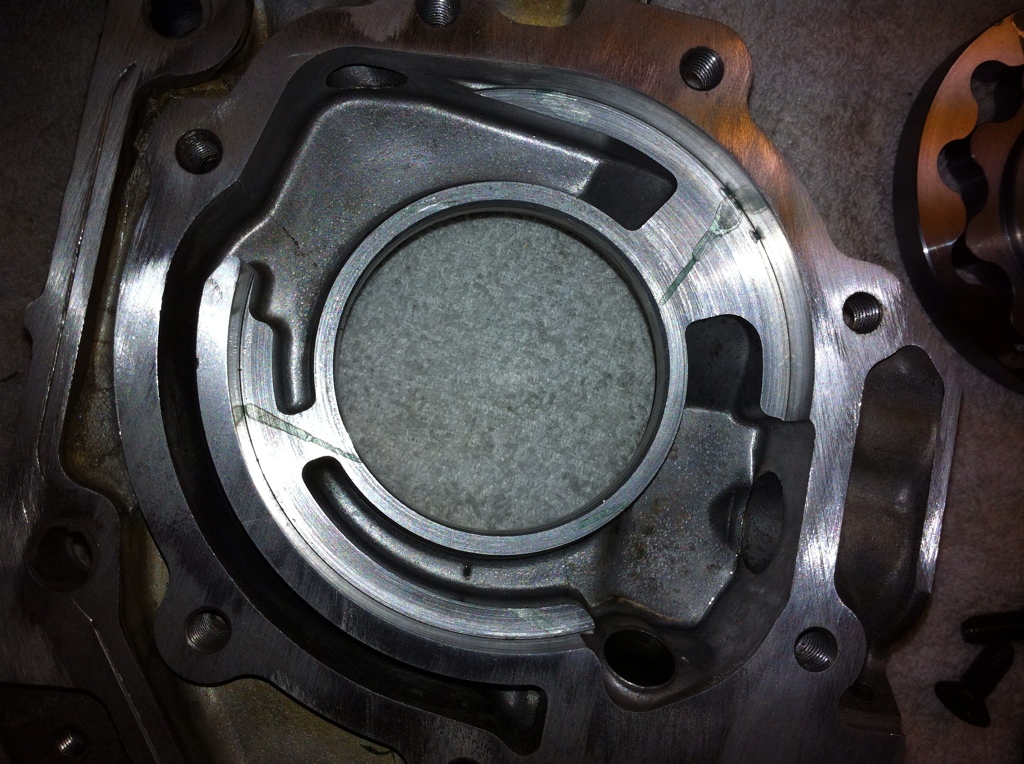
This was how it ended after some resurfacing the housing

This was how it ended after some resurfacing the housing

Reply
0
0


 01-29-2014, 08:38 PM
#6
Senior Member
Thread Starter
iTrader: (3)
Join Date: Dec 2007
Location: Brownsburg,IN
Posts: 837
Total Cats: 63
Made up a coolant re-route spacer and neck and taped the head for a second temp sensor for a water temp gauge that will live above the radio.
Cut the front thermostat neck and plugged it.
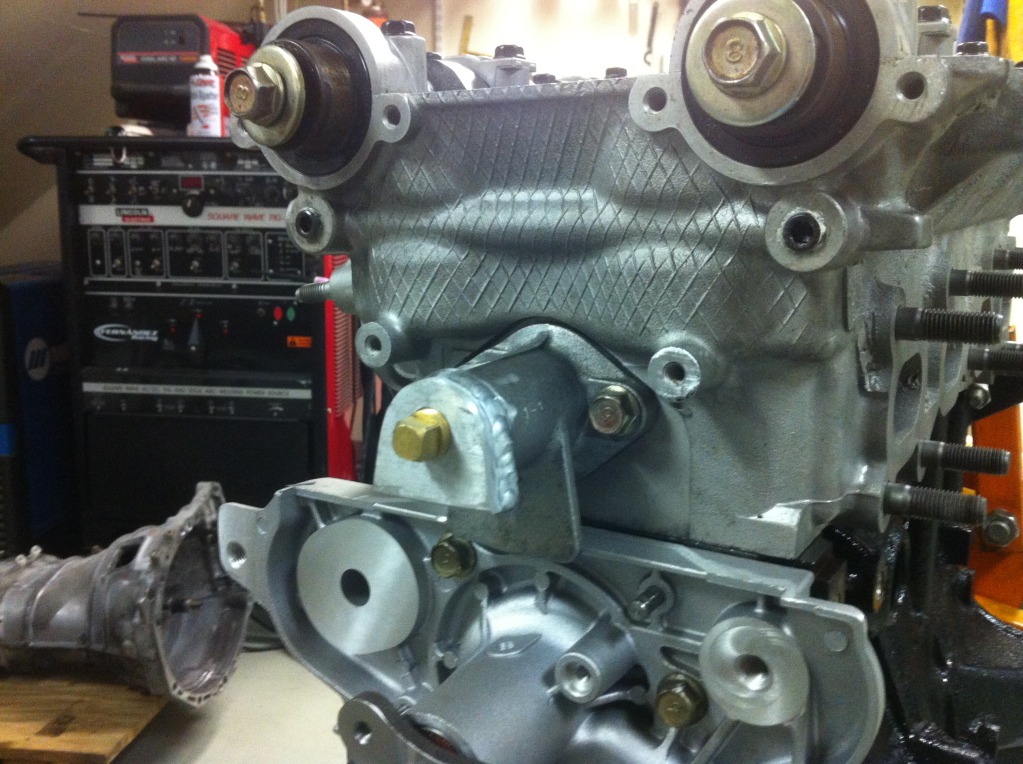
Cut the front thermostat neck and plugged it.


Reply
1
1
01-29-2014, 09:03 PM
#7
Senior Member
Thread Starter
iTrader: (3)
Join Date: Dec 2007
Location: Brownsburg,IN
Posts: 837
Total Cats: 63
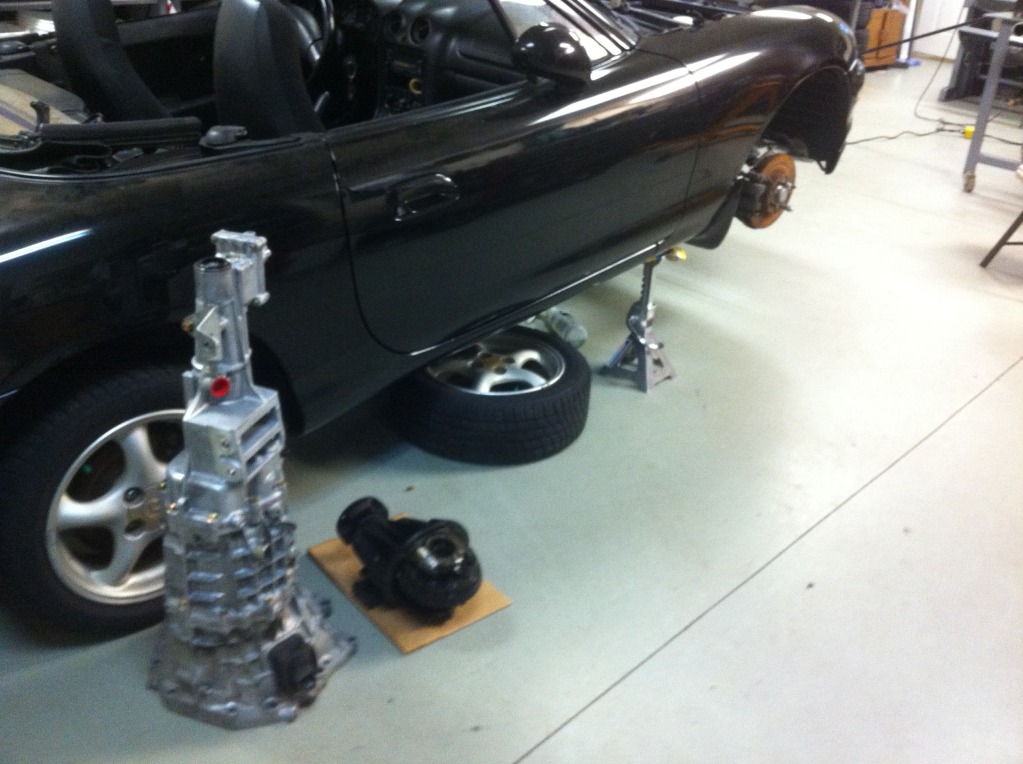
Got a 6 speed transmission and had a local guy that works on 6 speed miata transmission take a look at to make sure that the syncros, forks etc. are OK before it goes in the car, put new input and output shaft oil seals and shifter boots
Installed 2 Flying miata clutch and Fidenza flywheel
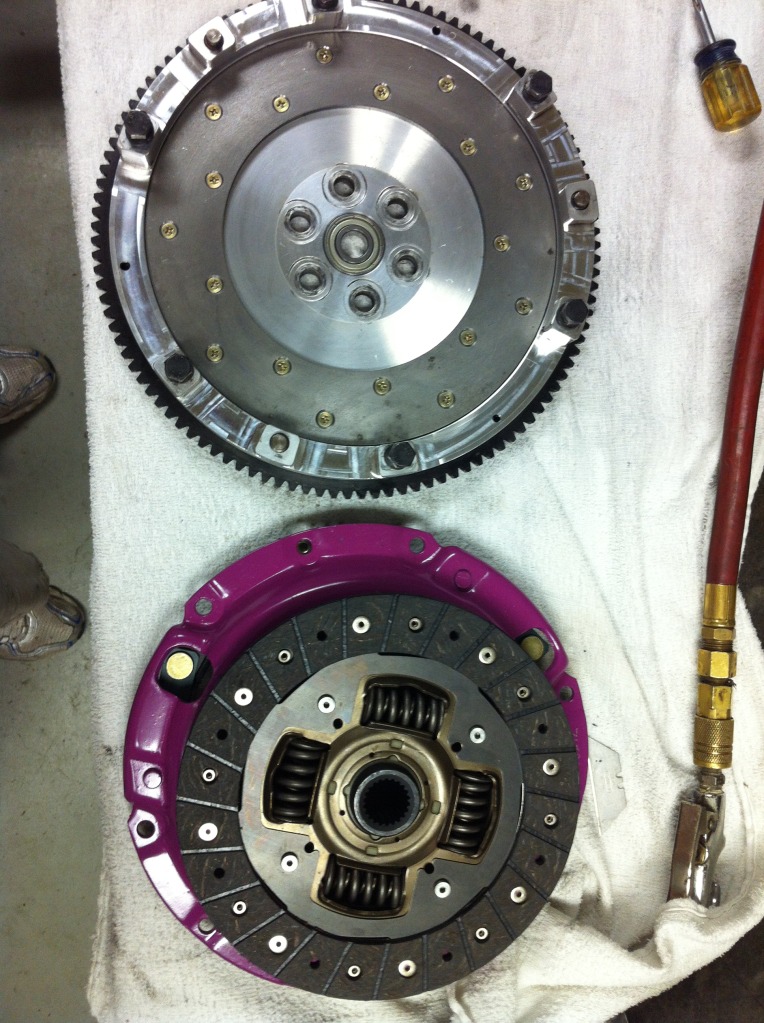
Installed 2 Flying miata clutch and Fidenza flywheel


Reply
1
1

 01-29-2014, 09:14 PM
#9
Senior Member
Thread Starter
iTrader: (3)
Join Date: Dec 2007
Location: Brownsburg,IN
Posts: 837
Total Cats: 63
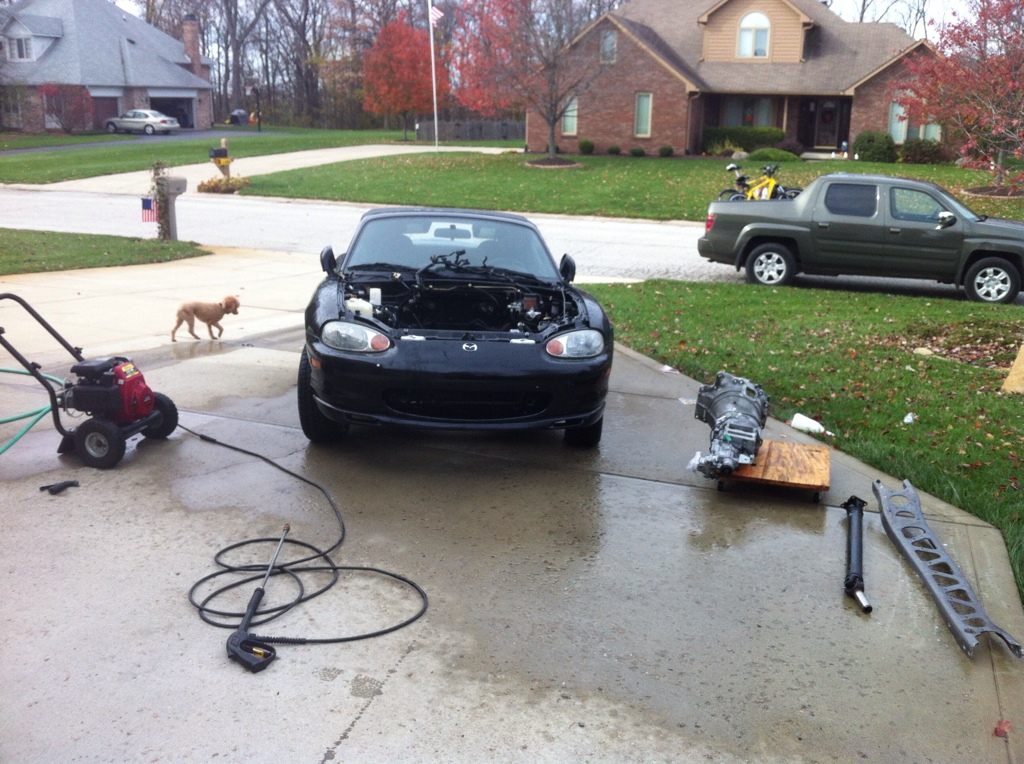
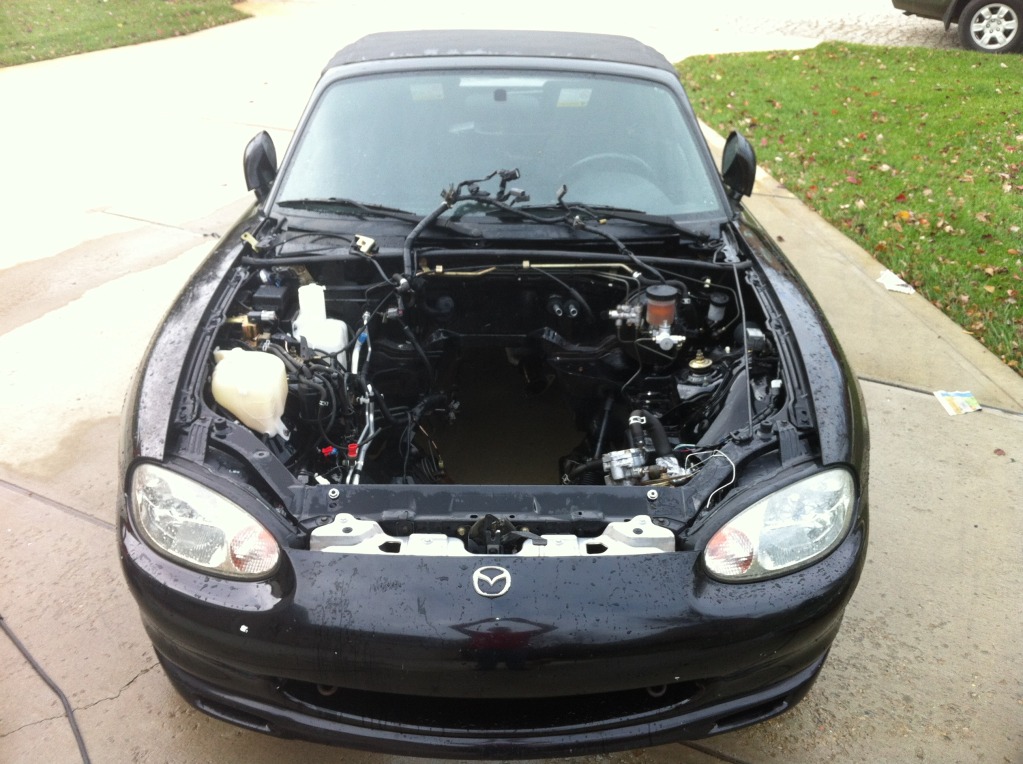
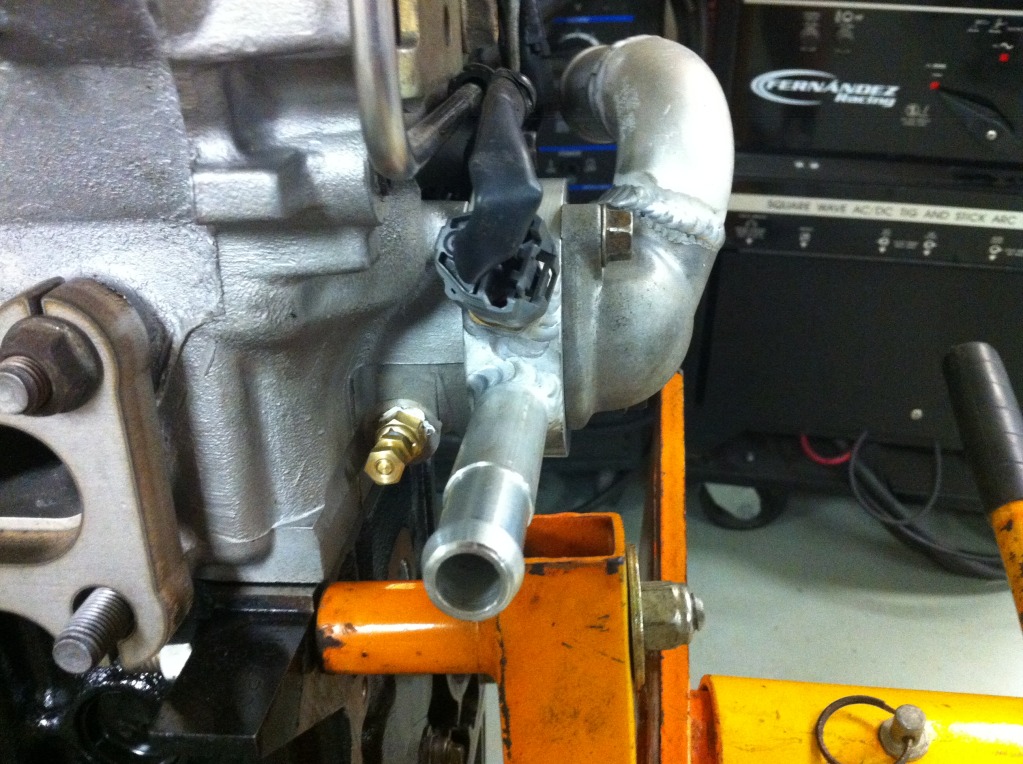
Engine and transmission back in the car, time to start on the exhaust manifold.
It was pretty tight to get the EFR to fit with AC and PS and had to go with a top mount turbo, also had to modify the water pump and PS inlets
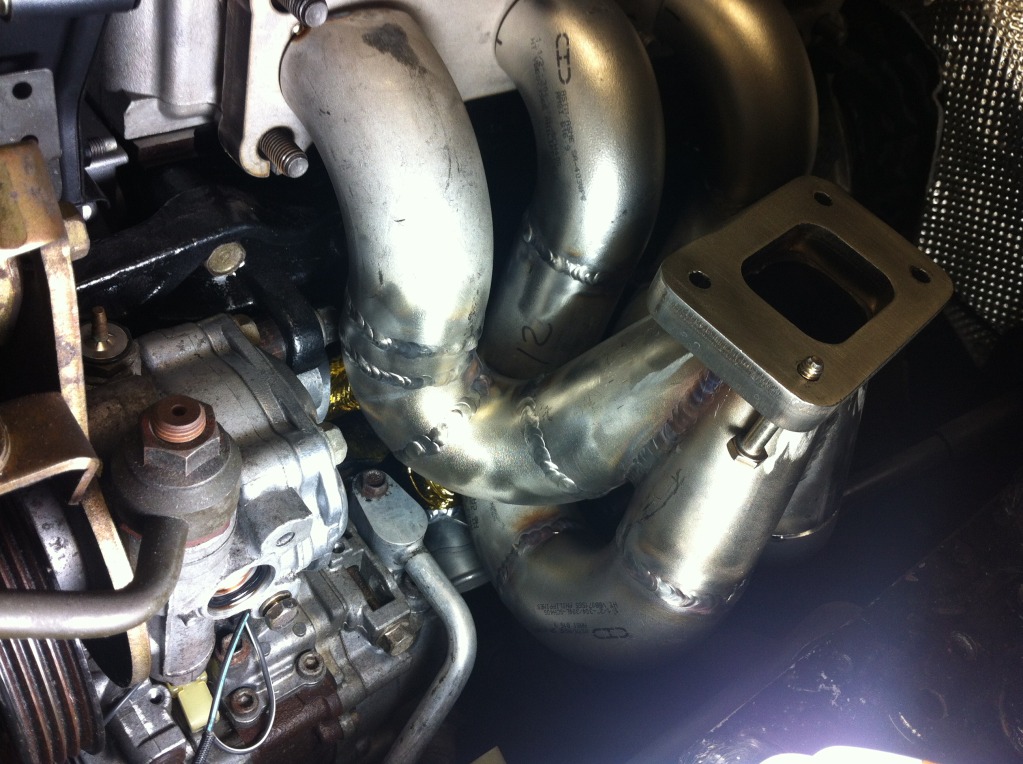

It was pretty tight to get the EFR to fit with AC and PS and had to go with a top mount turbo, also had to modify the water pump and PS inlets


Reply
1
1


 01-29-2014, 11:38 PM
#14

I will save your photos to my hard drive, so I can pleasure myself while looking at them.
Few questions-
-source of manifold and exhaust stuff, if you don't mind.
-Did you use some sort of jig to land your turbo flange where you needed it?
I bought a TIG yesterday night, and I'm ready to start turning stuff into scrap...
Is that a resonator where the cat would be?
Few questions-
-source of manifold and exhaust stuff, if you don't mind.
-Did you use some sort of jig to land your turbo flange where you needed it?
I bought a TIG yesterday night, and I'm ready to start turning stuff into scrap...
Is that a resonator where the cat would be?
Reply
0
0
01-30-2014, 06:53 AM
#17
Senior Member
Thread Starter
iTrader: (3)
Join Date: Dec 2007
Location: Brownsburg,IN
Posts: 837
Total Cats: 63
I held the turbo in place with some 2 x 2s and straps and bolted the flanges to the turbo(with the collector section) and head, then welded a pair of 1/4" x 1/2" to hold them in place relative to each other, from there it was a mater of running the primaries to clear the ac and ps, there was a lot of fitting a piece racking it in place and test fitting in the car to make sure that everything fit.
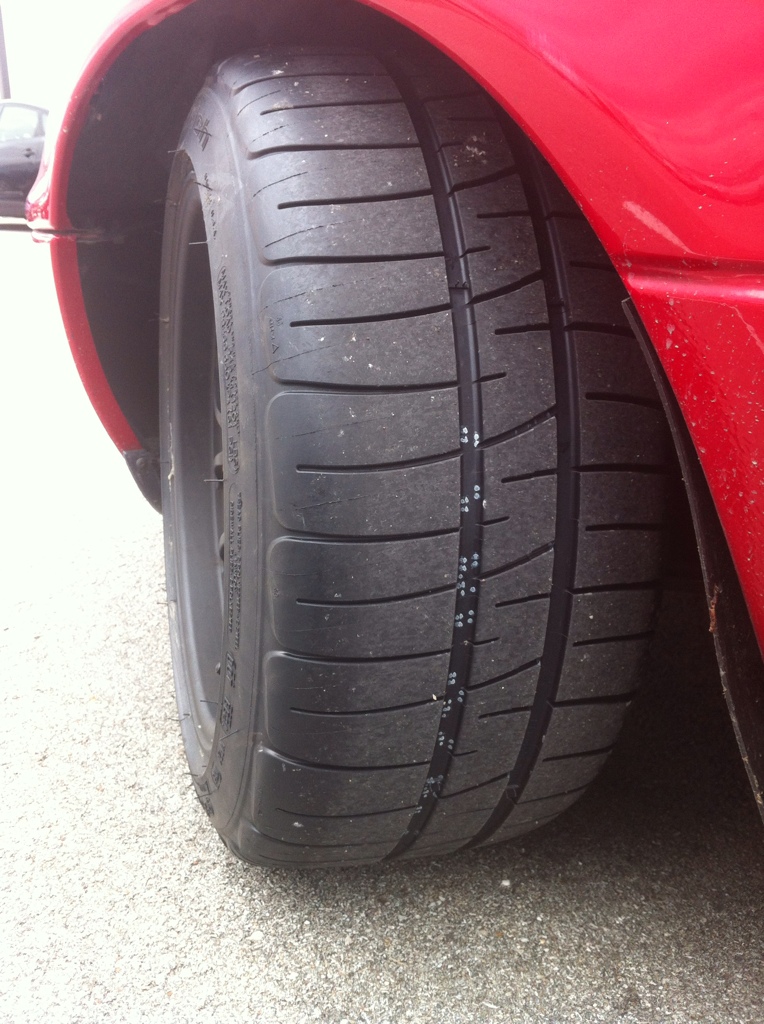
These 949 9" wheels are going on the car once the snow is gone, they are on my NA now.
The car has been runing on and of now, i am having some trouble with the ecu loosing firmware, so i have to get that sorted out and put some miles on it before taking it to the dyno, i will not be running ALLOFIT on this car and will run 93 octane pump gas initially, perhaps E85 in the future.
These 949 9" wheels are going on the car once the snow is gone, they are on my NA now.

The car has been runing on and of now, i am having some trouble with the ecu loosing firmware, so i have to get that sorted out and put some miles on it before taking it to the dyno, i will not be running ALLOFIT on this car and will run 93 octane pump gas initially, perhaps E85 in the future.
Reply
0
0
01-30-2014, 11:29 AM
#18
Senior Member
Thread Starter
iTrader: (3)
Join Date: Dec 2007
Location: Brownsburg,IN
Posts: 837
Total Cats: 63
I will save your photos to my hard drive, so I can pleasure myself while looking at them.
Few questions-
-source of manifold and exhaust stuff, if you don't mind.
-Did you use some sort of jig to land your turbo flange where you needed it?
I bought a TIG yesterday night, and I'm ready to start turning stuff into scrap...
Is that a resonator where the cat would be?
Few questions-
-source of manifold and exhaust stuff, if you don't mind.
-Did you use some sort of jig to land your turbo flange where you needed it?
I bought a TIG yesterday night, and I'm ready to start turning stuff into scrap...
Is that a resonator where the cat would be?
The resonator is where the cat should be so it will be a quick change if i ever need to put one in.
Good luck with the new tig, watch some youtube how to videos and practice and you will be there.
Reply
0
0
01-30-2014, 11:53 AM
#19
Cpt. Slow

iTrader: (25)
Join Date: Oct 2005
Location: Oregon City, OR
Posts: 14,175
Total Cats: 1,129
Why not hammer in a freeze plug and eliminate the front water neck? With the water temp sensor in the back of the head, I don't see a need for it. Also, that T fitting for the oil pressure sensor and oil feed is a big no no, they crack with the vibration. Run an -AN line to the firewall or over by the passenger coil over and T the two off that. Everything else looks great, looks like you've got some very nice fab skills.
Reply
0
0
01-30-2014, 12:01 PM
#20
Senior Member
Thread Starter
iTrader: (3)
Join Date: Dec 2007
Location: Brownsburg,IN
Posts: 837
Total Cats: 63
Why not hammer in a freeze plug and eliminate the front water neck? With the water temp sensor in the back of the head, I don't see a need for it. Also, that T fitting for the oil pressure sensor and oil feed is a big no no, they crack with the vibration. Run an -AN line to the firewall or over by the passenger coil over and T the two off that. Everything else looks great, looks like you've got some very nice fab skills.
Regarding the front neck i just like to have a small return line in the front of the engine so air trapped in the highest point of the head has a way to get out of the system, that is why the neck is still there.
Reply
0
0


