Hdizzle's Slow Winter Build
 10-25-2015, 09:25 PM
#1
Junior Member
Thread Starter

Join Date: Sep 2015
Posts: 45
Total Cats: 1
A few months ago I came up with the idea to build a turbo Miata to occupy myself during the long New England winter. This is my first Miata, but not my first forced induction build. Almost a decade ago when i was just a dumbass kid in high school, I pieced together a DIY setup for my Integra. I had absolutely no idea what I was doing, but in the end it actually ran pretty well.
Fast forward 11 years, I still have no absolutely no idea what I'm doing. However I've spent many, many hours obsessively researching these forums, reading through build threads, stickies, etc. At this point, I'm confident that I won't blow anything up.
I'm going to be running an MKTurbo, with MS3 basic, and EV14 injectors.
This thread will document my foray into this expensive, but extremely fun hobby.
First order of business is to do some basic maintenance. Then I'll begin the wideband installation, MS3, clutch, bigger radiator, etc. I want to do this right by installing each part by itself to make troubleshooting easier. My goal is to make 225whp reliably, cheaping out where I can, and shelling out the dough where it makes sense.

Reply
 0
0

0
 10-25-2015, 09:29 PM
#3
Junior Member
Thread Starter
Join Date: Sep 2015
Posts: 45
Total Cats: 1
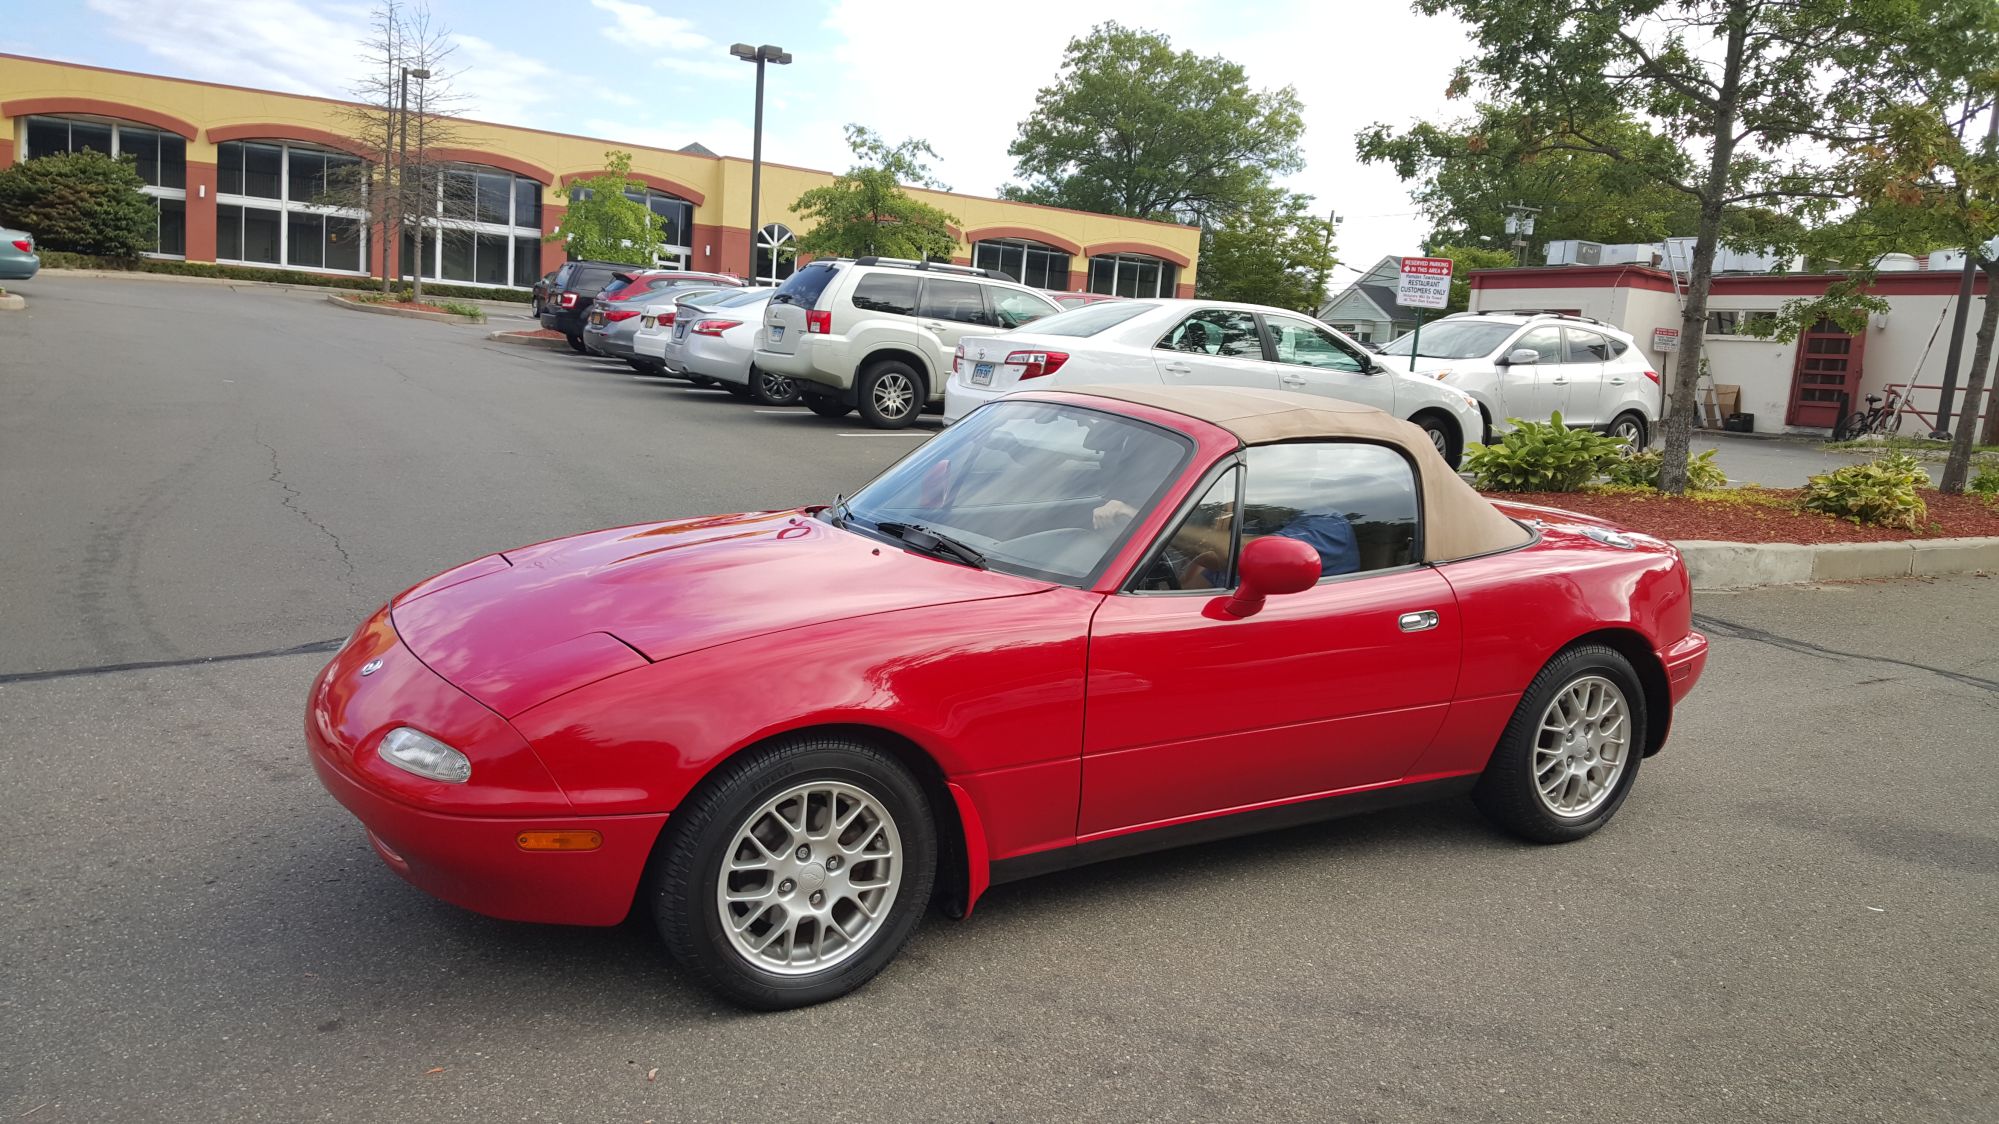
The foundation. 1994 C package, 94,000 miles. Purchased from an older gentleman who seemed to be an enthusiast.
PO had installed a Jackson Racing cold air intake, which will be coming off pre-turbo to make room for a larger radiator.
Reply
0
0
10-25-2015, 09:49 PM
#4
Junior Member
Thread Starter
Join Date: Sep 2015
Posts: 45
Total Cats: 1
Until my wife graduates from university in May, we're renting an apartment with no garage. After she graduates we can begin looking for houses to buy with a full fledged garage for me to screw around and break **** in.
A reasonable person would simply wait until next year, but I'm hasty and impulsive.
Working outdoors during the New England winter was obviously out of the question, so I looked for storage units to rent in my area that would be well-suited to me working on this car during the winter months. This turned out to be more difficult than I thought.
I'm sure there are others in this position, so I'll share some tips..
99% of the storage units around me did not have electric or heat, which I've discovered is pretty standard. Sure you could run a generator, but even still most of the managers/owners I spoke to were not fond of the idea of me working on my car in their units, let alone running a generator. Even if the owner was cool with me wrenching, an unheated, unpowered unit is far from ideal.
I spent a lot of time looking on craigslist for "parking/storage" listings, but even when I found private homeowners with spaces for rent, noone was thrilled about me working on my car in there.
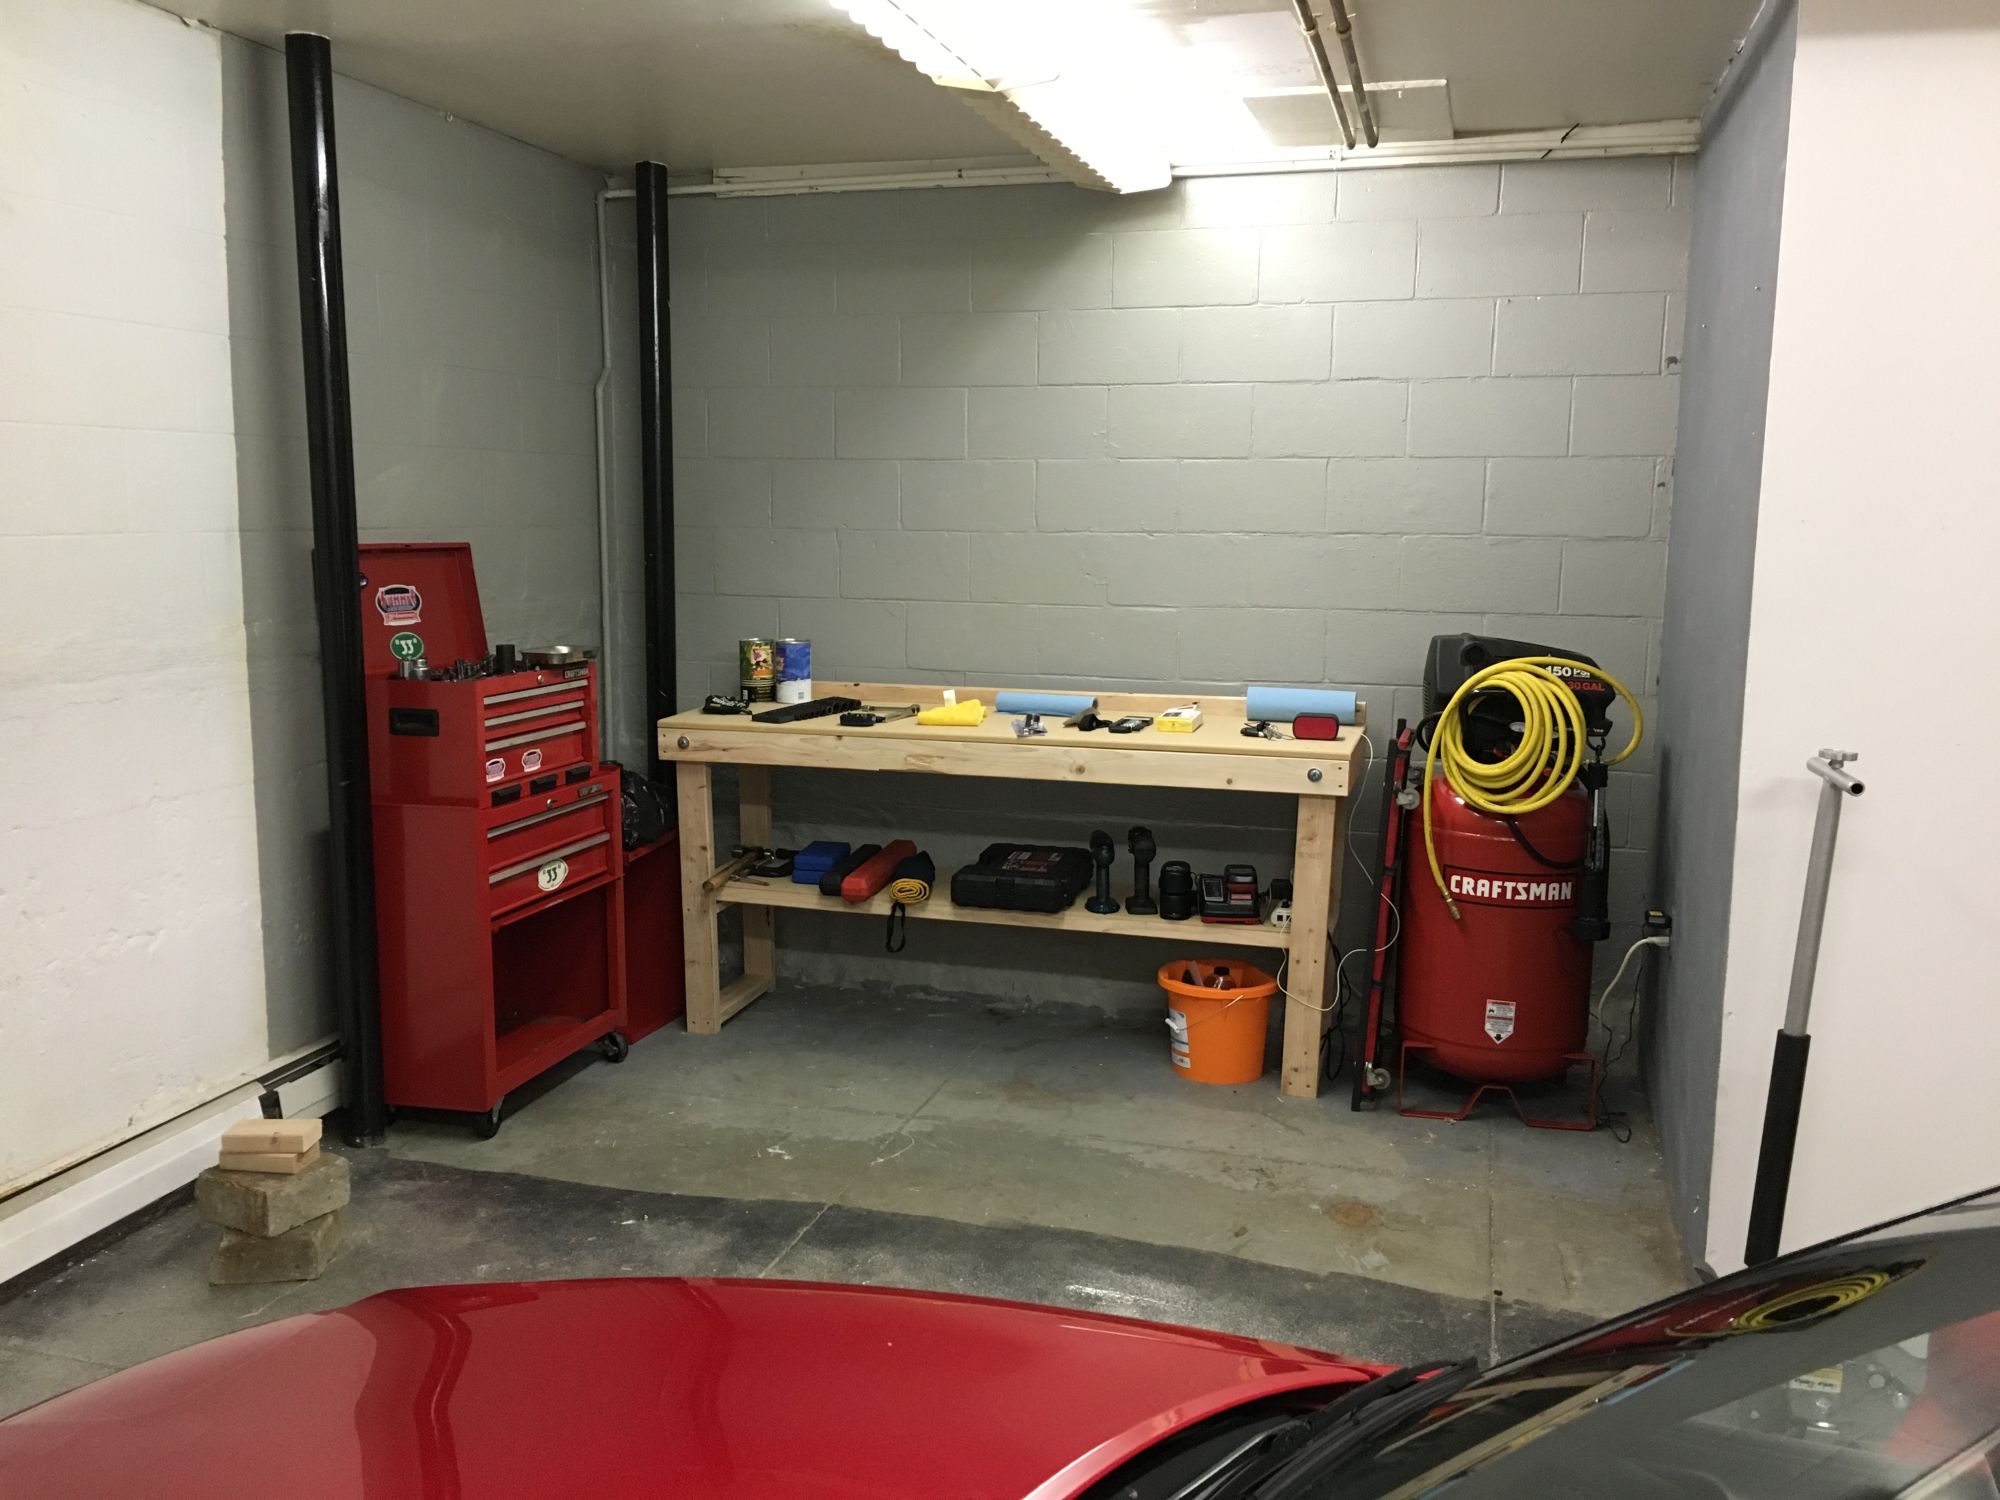
Finally, I realized that I should be searching in the commercial rental section of craigslist, rather than residential. I found a "contractor's space", which included heat, power, air, and 24/7 access. They don't care what I do in there, as long as I'm not an ******* and keep the unit clean. So for anyone in a similar life situation, search the commercial rental section of craigslist, look for "contractor bay", "contractor workshop", or something of the sort.
Now I'm ready to roll...
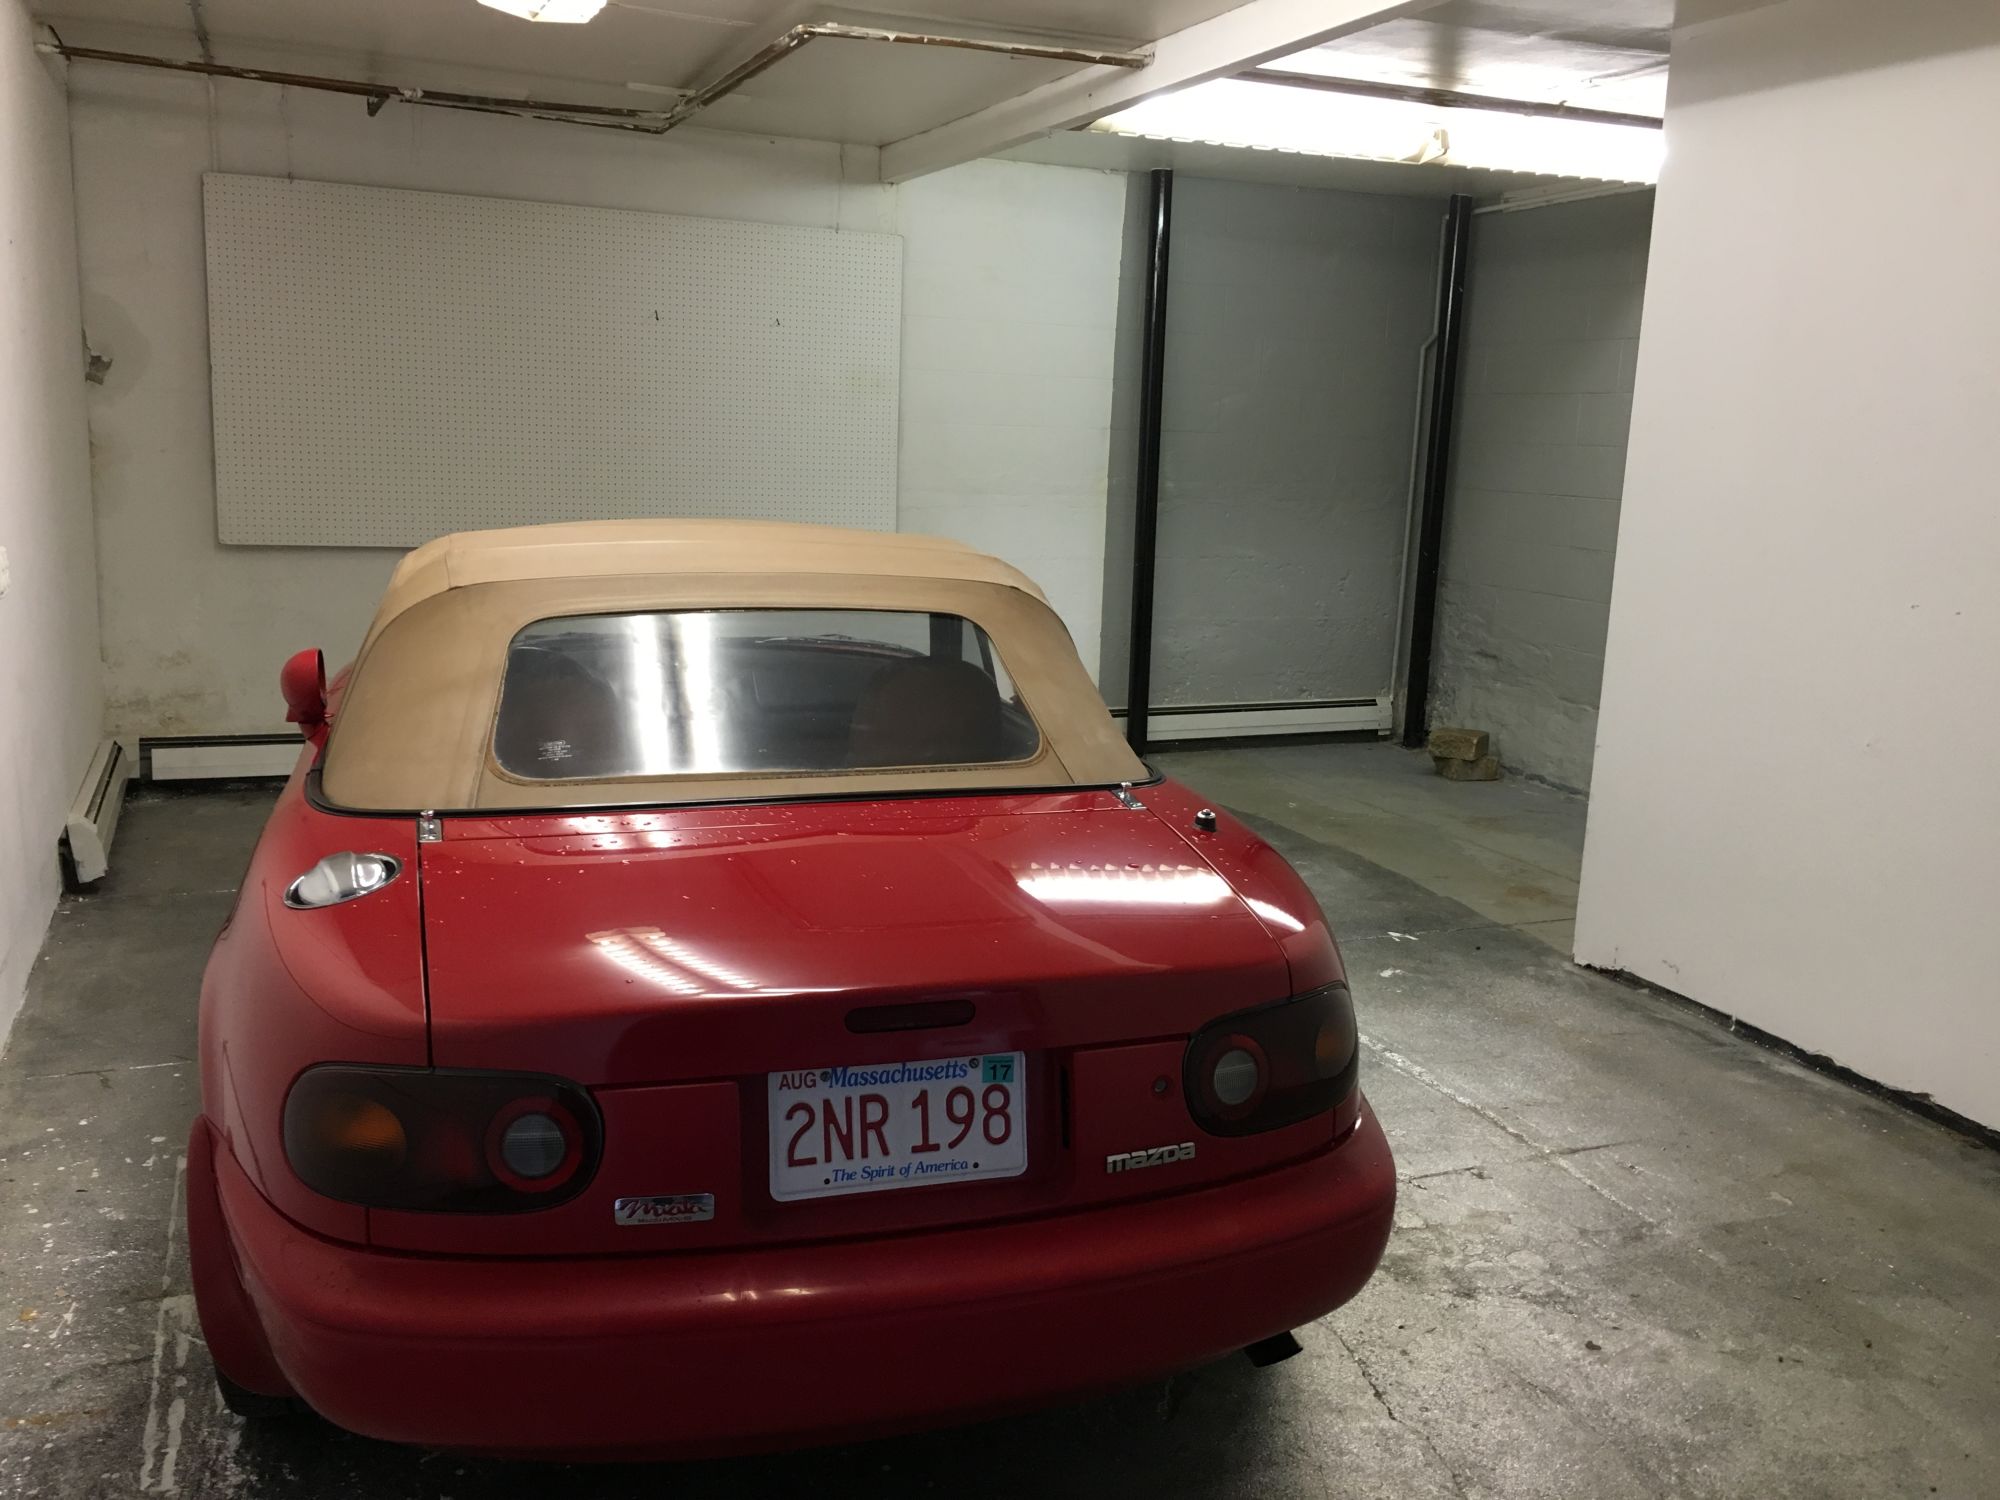
new digs
moving in....
A reasonable person would simply wait until next year, but I'm hasty and impulsive.
Working outdoors during the New England winter was obviously out of the question, so I looked for storage units to rent in my area that would be well-suited to me working on this car during the winter months. This turned out to be more difficult than I thought.
I'm sure there are others in this position, so I'll share some tips..
99% of the storage units around me did not have electric or heat, which I've discovered is pretty standard. Sure you could run a generator, but even still most of the managers/owners I spoke to were not fond of the idea of me working on my car in their units, let alone running a generator. Even if the owner was cool with me wrenching, an unheated, unpowered unit is far from ideal.
I spent a lot of time looking on craigslist for "parking/storage" listings, but even when I found private homeowners with spaces for rent, noone was thrilled about me working on my car in there.
Finally, I realized that I should be searching in the commercial rental section of craigslist, rather than residential. I found a "contractor's space", which included heat, power, air, and 24/7 access. They don't care what I do in there, as long as I'm not an ******* and keep the unit clean. So for anyone in a similar life situation, search the commercial rental section of craigslist, look for "contractor bay", "contractor workshop", or something of the sort.
Now I'm ready to roll...
new digs
moving in....
Reply
0
0
10-25-2015, 09:57 PM
#6
Junior Member
Thread Starter
Join Date: Sep 2015
Posts: 45
Total Cats: 1
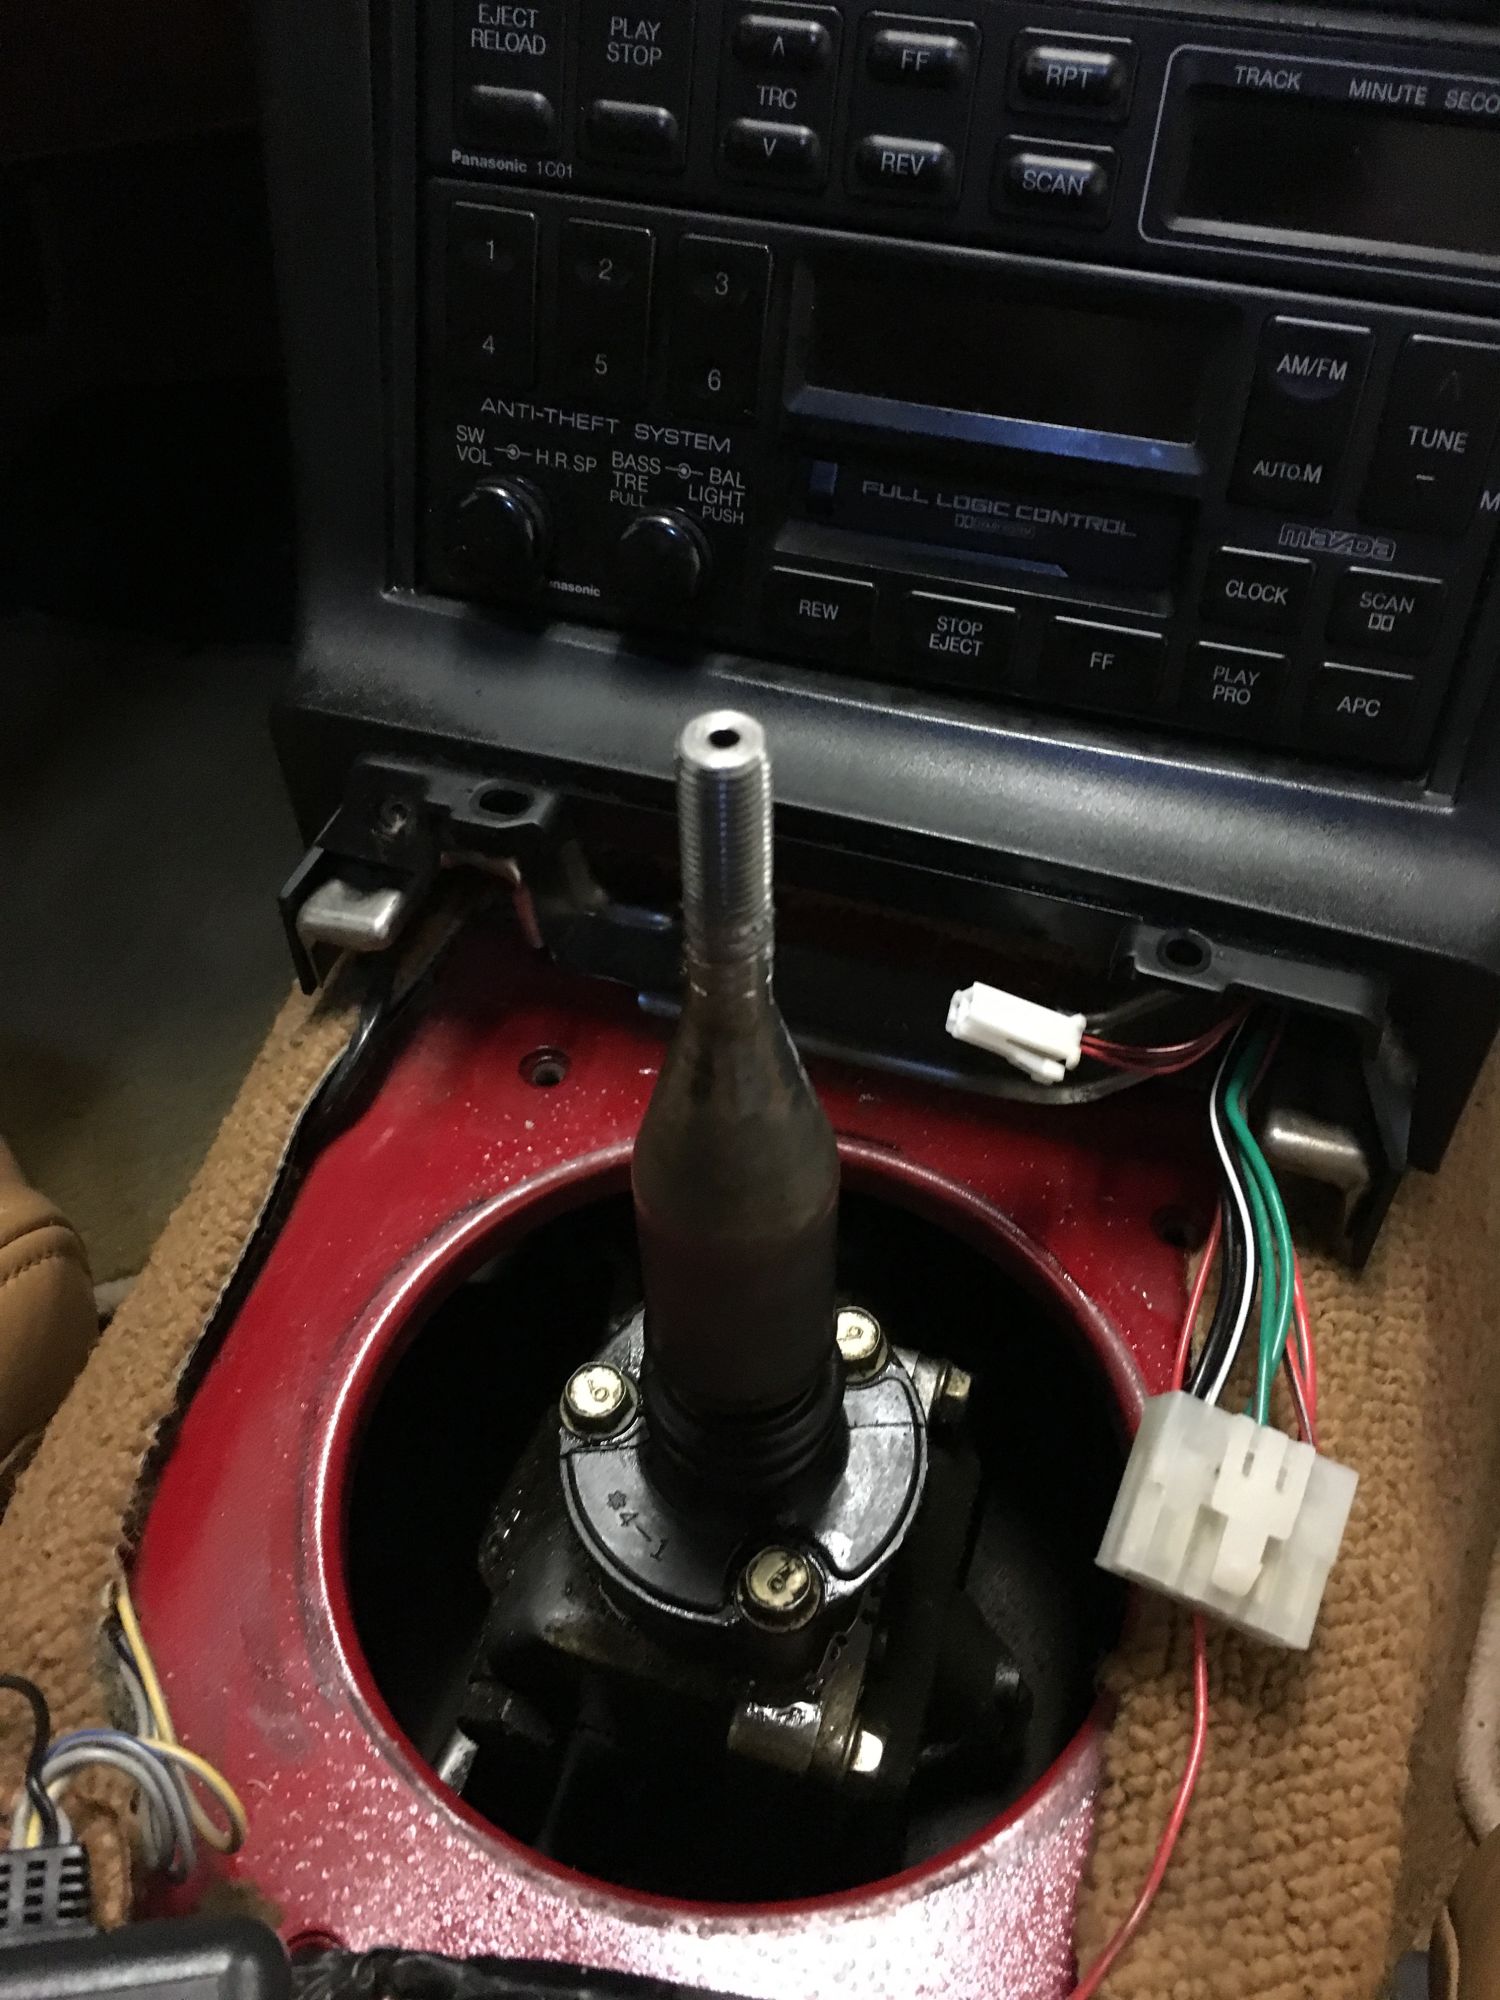
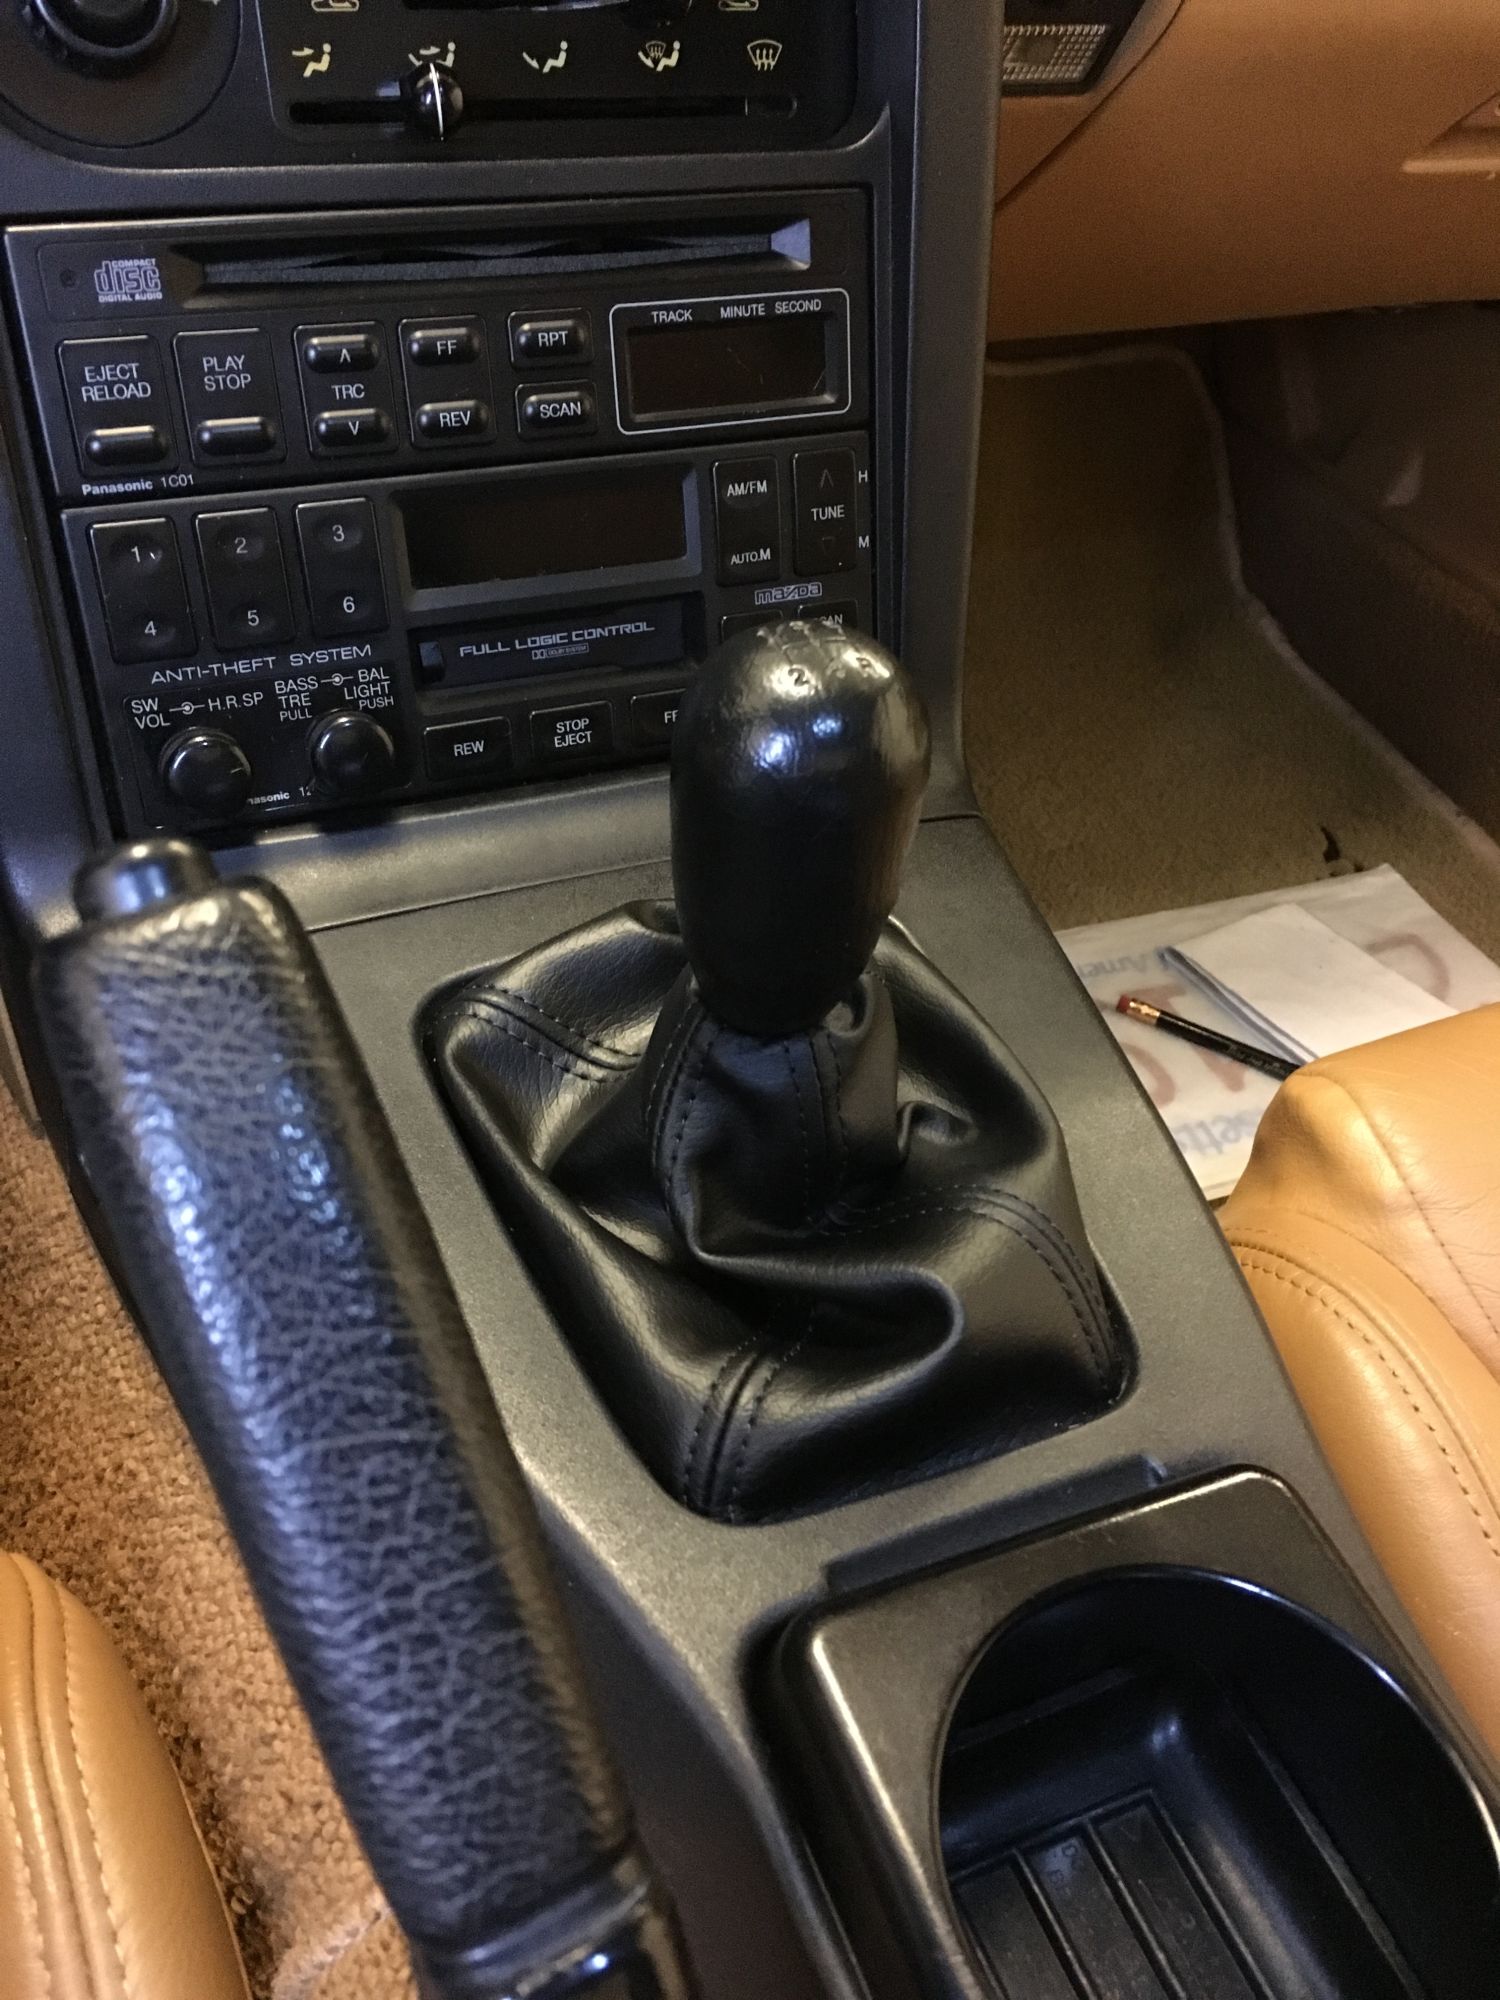
Obligatory shifter rebuild pics.....
You really have to lube the **** out of the shifter before installing the new upper boot, or else you won't fully seat it all the way past the taper.
A nice first mini-project to get my feet wet.
You really have to lube the **** out of the shifter before installing the new upper boot, or else you won't fully seat it all the way past the taper.
A nice first mini-project to get my feet wet.
Reply
0
0

 10-26-2015, 02:10 PM
#10
mkturbo.com


iTrader: (24)
Join Date: May 2006
Location: Charleston SC
Posts: 15,176
Total Cats: 1,680
Hdizzle is on the lower end of my list. It will probably be sometime next year when I get his setup done. So he has some time to get everything else done and ready for MKTurbo.
Reply
0
0
11-06-2015, 05:37 PM
#11
Junior Member
Thread Starter
Join Date: Sep 2015
Posts: 45
Total Cats: 1
I don't know what he paid, but when I looked several years ago, it was cheaper to buy my house then rent the same size space.
Hdizzle is on the lower end of my list. It will probably be sometime next year when I get his setup done. So he has some time to get everything else done and ready for MKTurbo.
Hdizzle is on the lower end of my list. It will probably be sometime next year when I get his setup done. So he has some time to get everything else done and ready for MKTurbo.
Also, thank you for answering all of my questions in great detail. You've been very helpful!!
Reply
0
0
11-06-2015, 05:55 PM
#12
Junior Member
Thread Starter
Join Date: Sep 2015
Posts: 45
Total Cats: 1
so the past few weeks I've been doing your standard run of the mill maintenance, getting familiarized with the car. After my experience wrenching on cramped, overengineered audis, this car is really a welcome relief in terms of how simple seems to be.

changing trans/diff/engine fluids... I used Ford XT-M5-QS in the gearbox. the shifting wasn't as miraculously improved as i had hoped. My third gear still grinds 50% of the time.
what IS noteworthy is that changing to Rotella T6 with the pureone filter completely silenced my noisy lifters. it could be that the prior owner hadn't changed the oil (he said he used mobile one) in some time, but regardless, that annoying *** valve chatter on warm restarts is totally gone. that makes me happy.
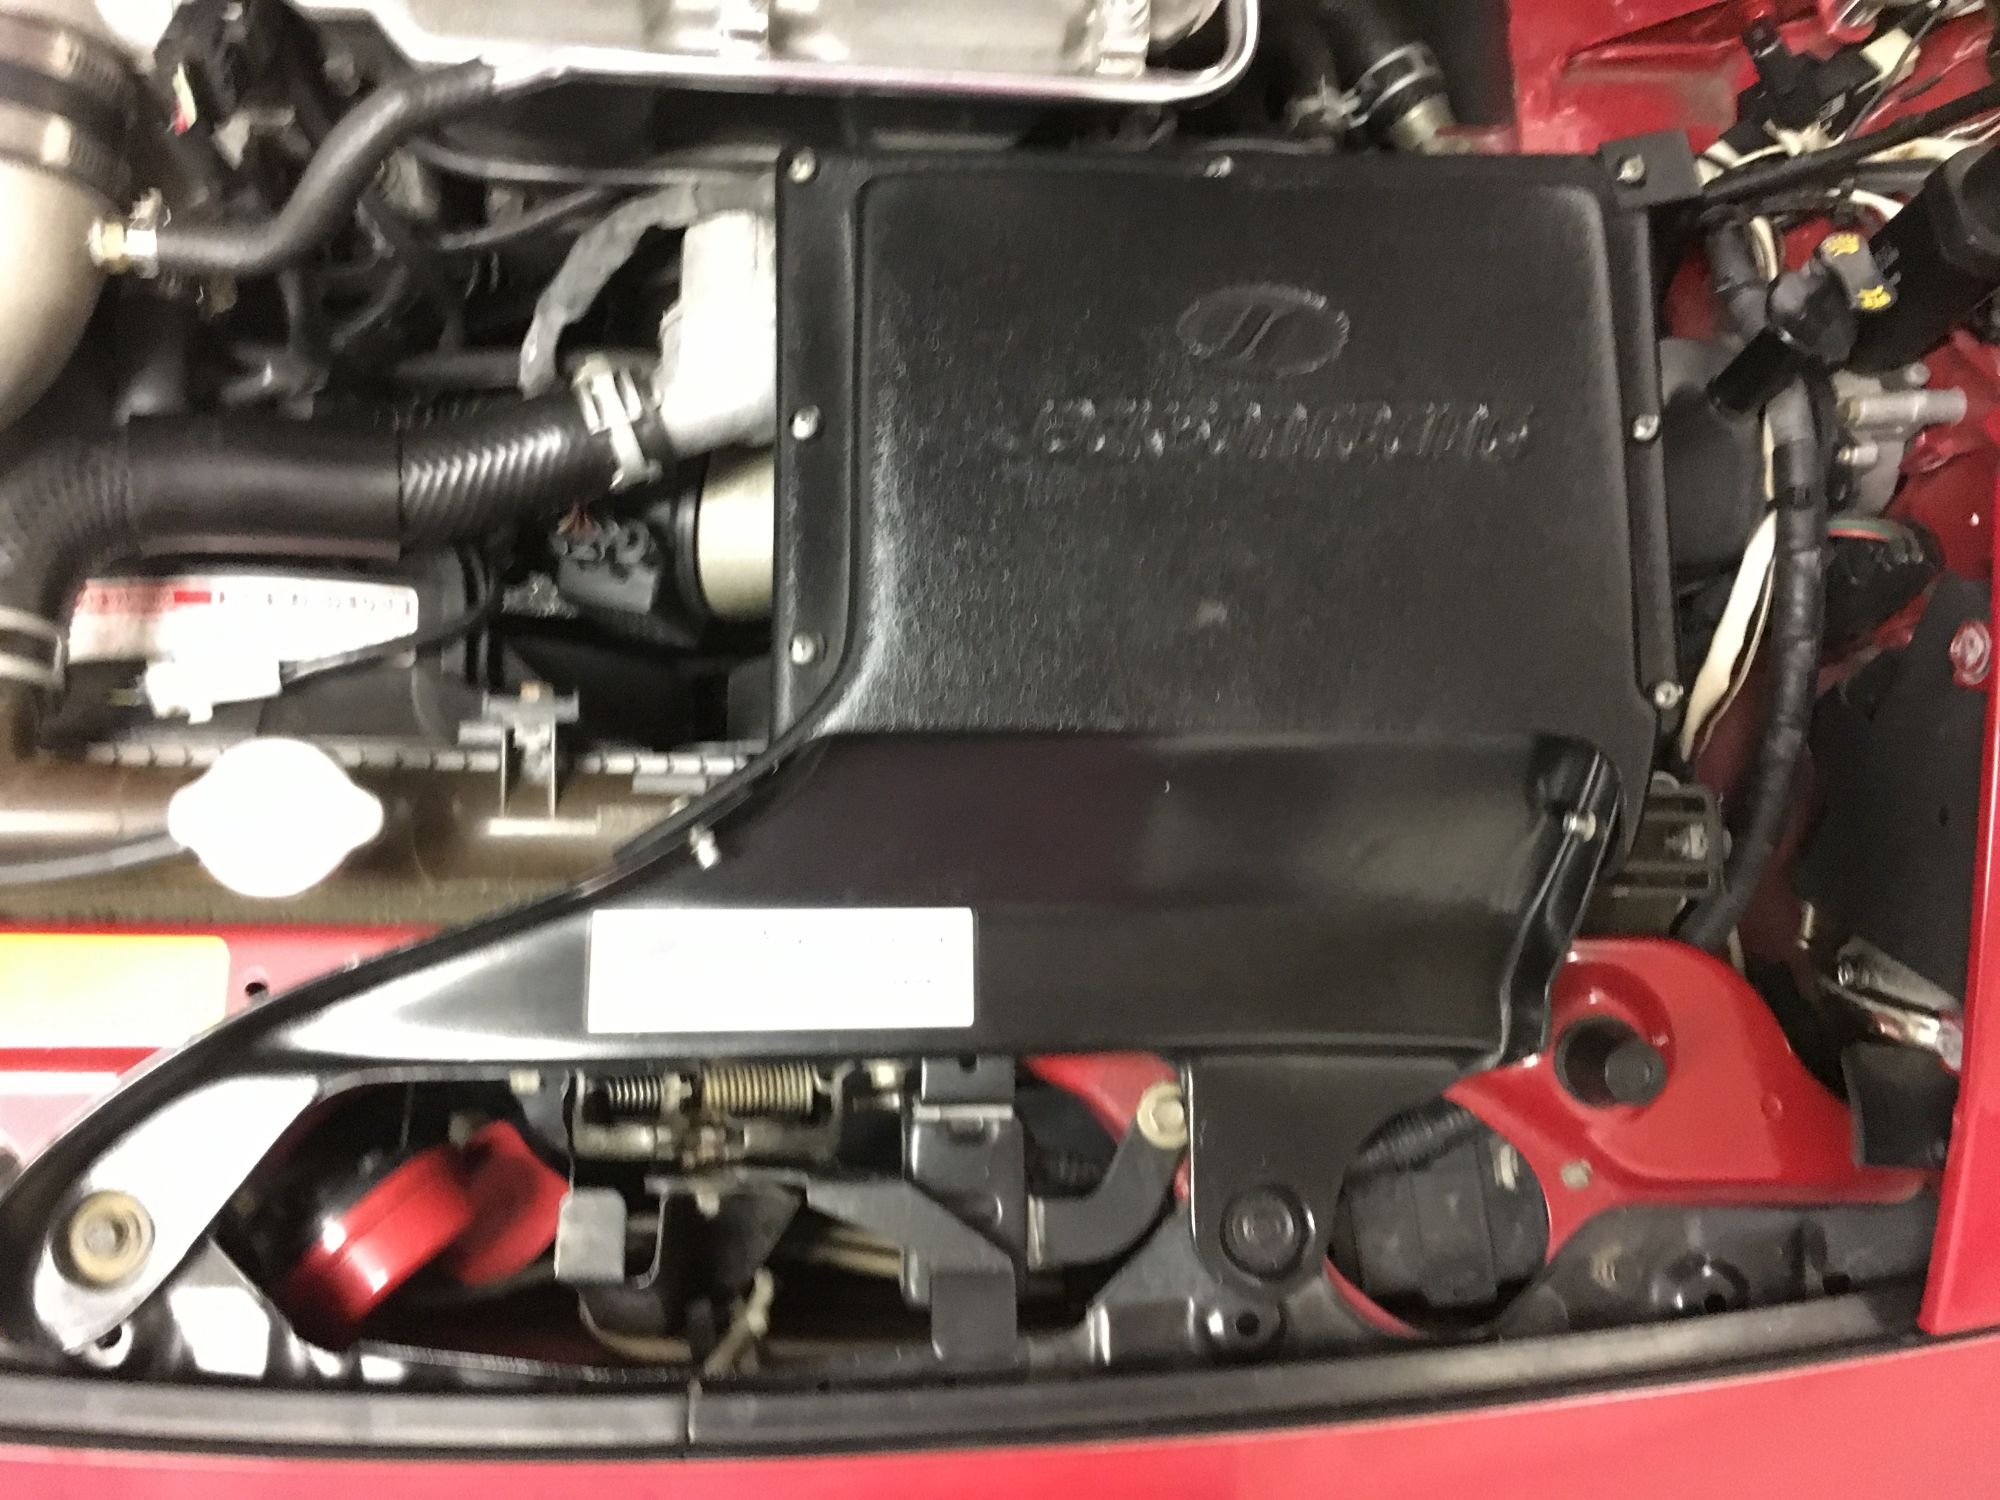
previous owner had installed a JR cold air intake. I've already ripped it out and replaced it with the stock air box for now. Im going to install an aluminum radiator pre-turbo, and the cold air intake ate up all of the space required for a larger radiator. btw i noticed no loss in performance going back to the stock intake. none whatsoever.
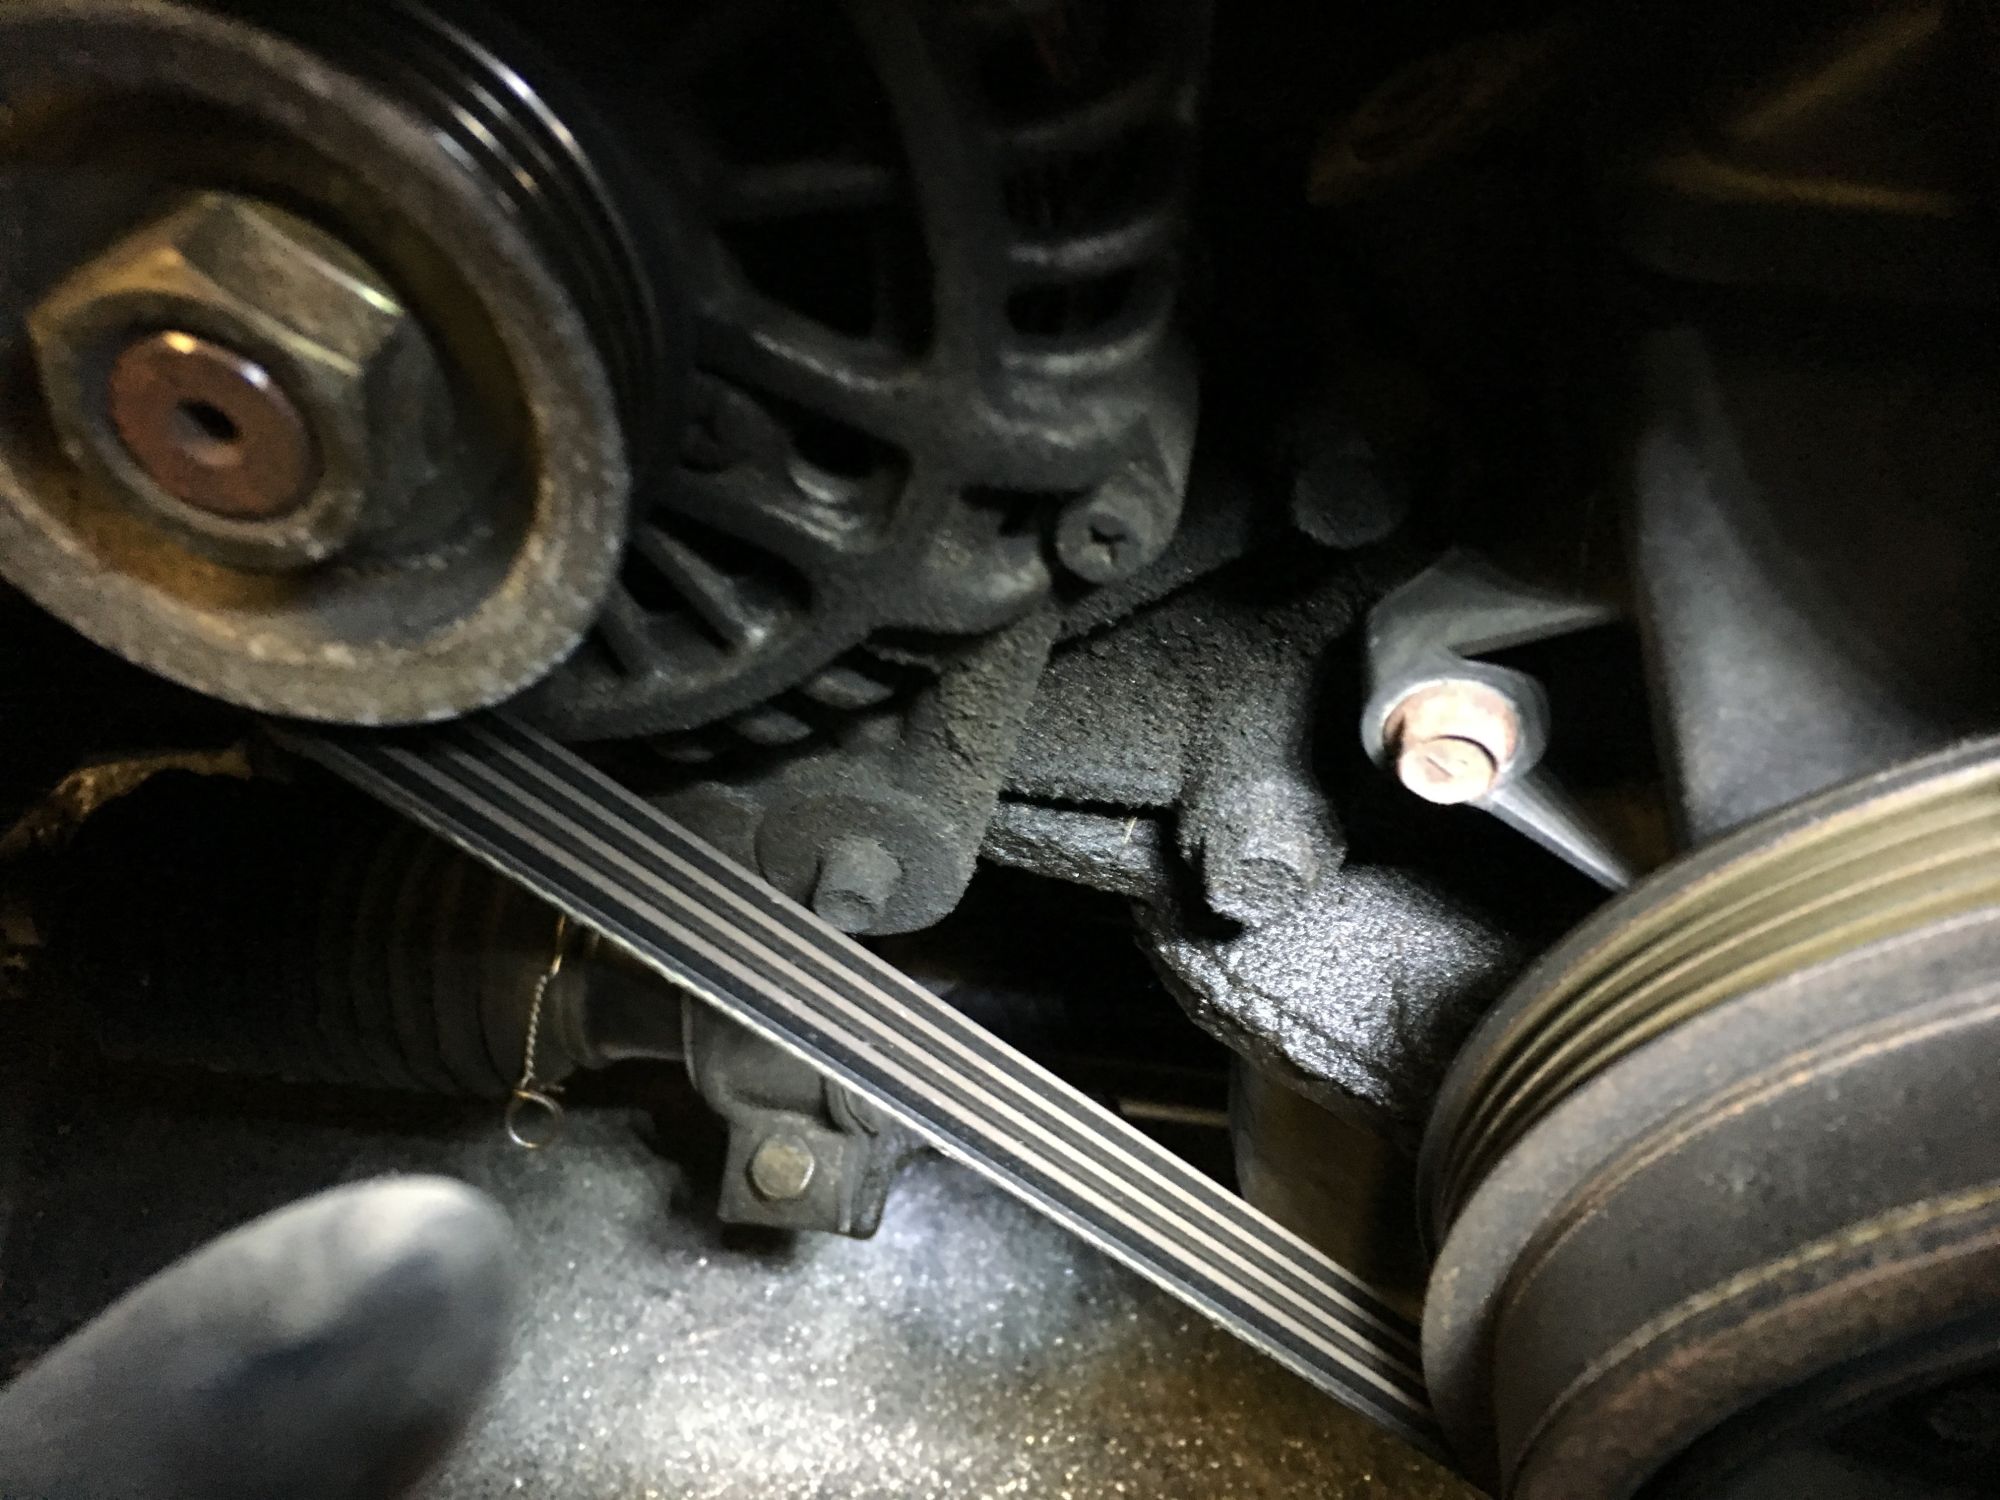
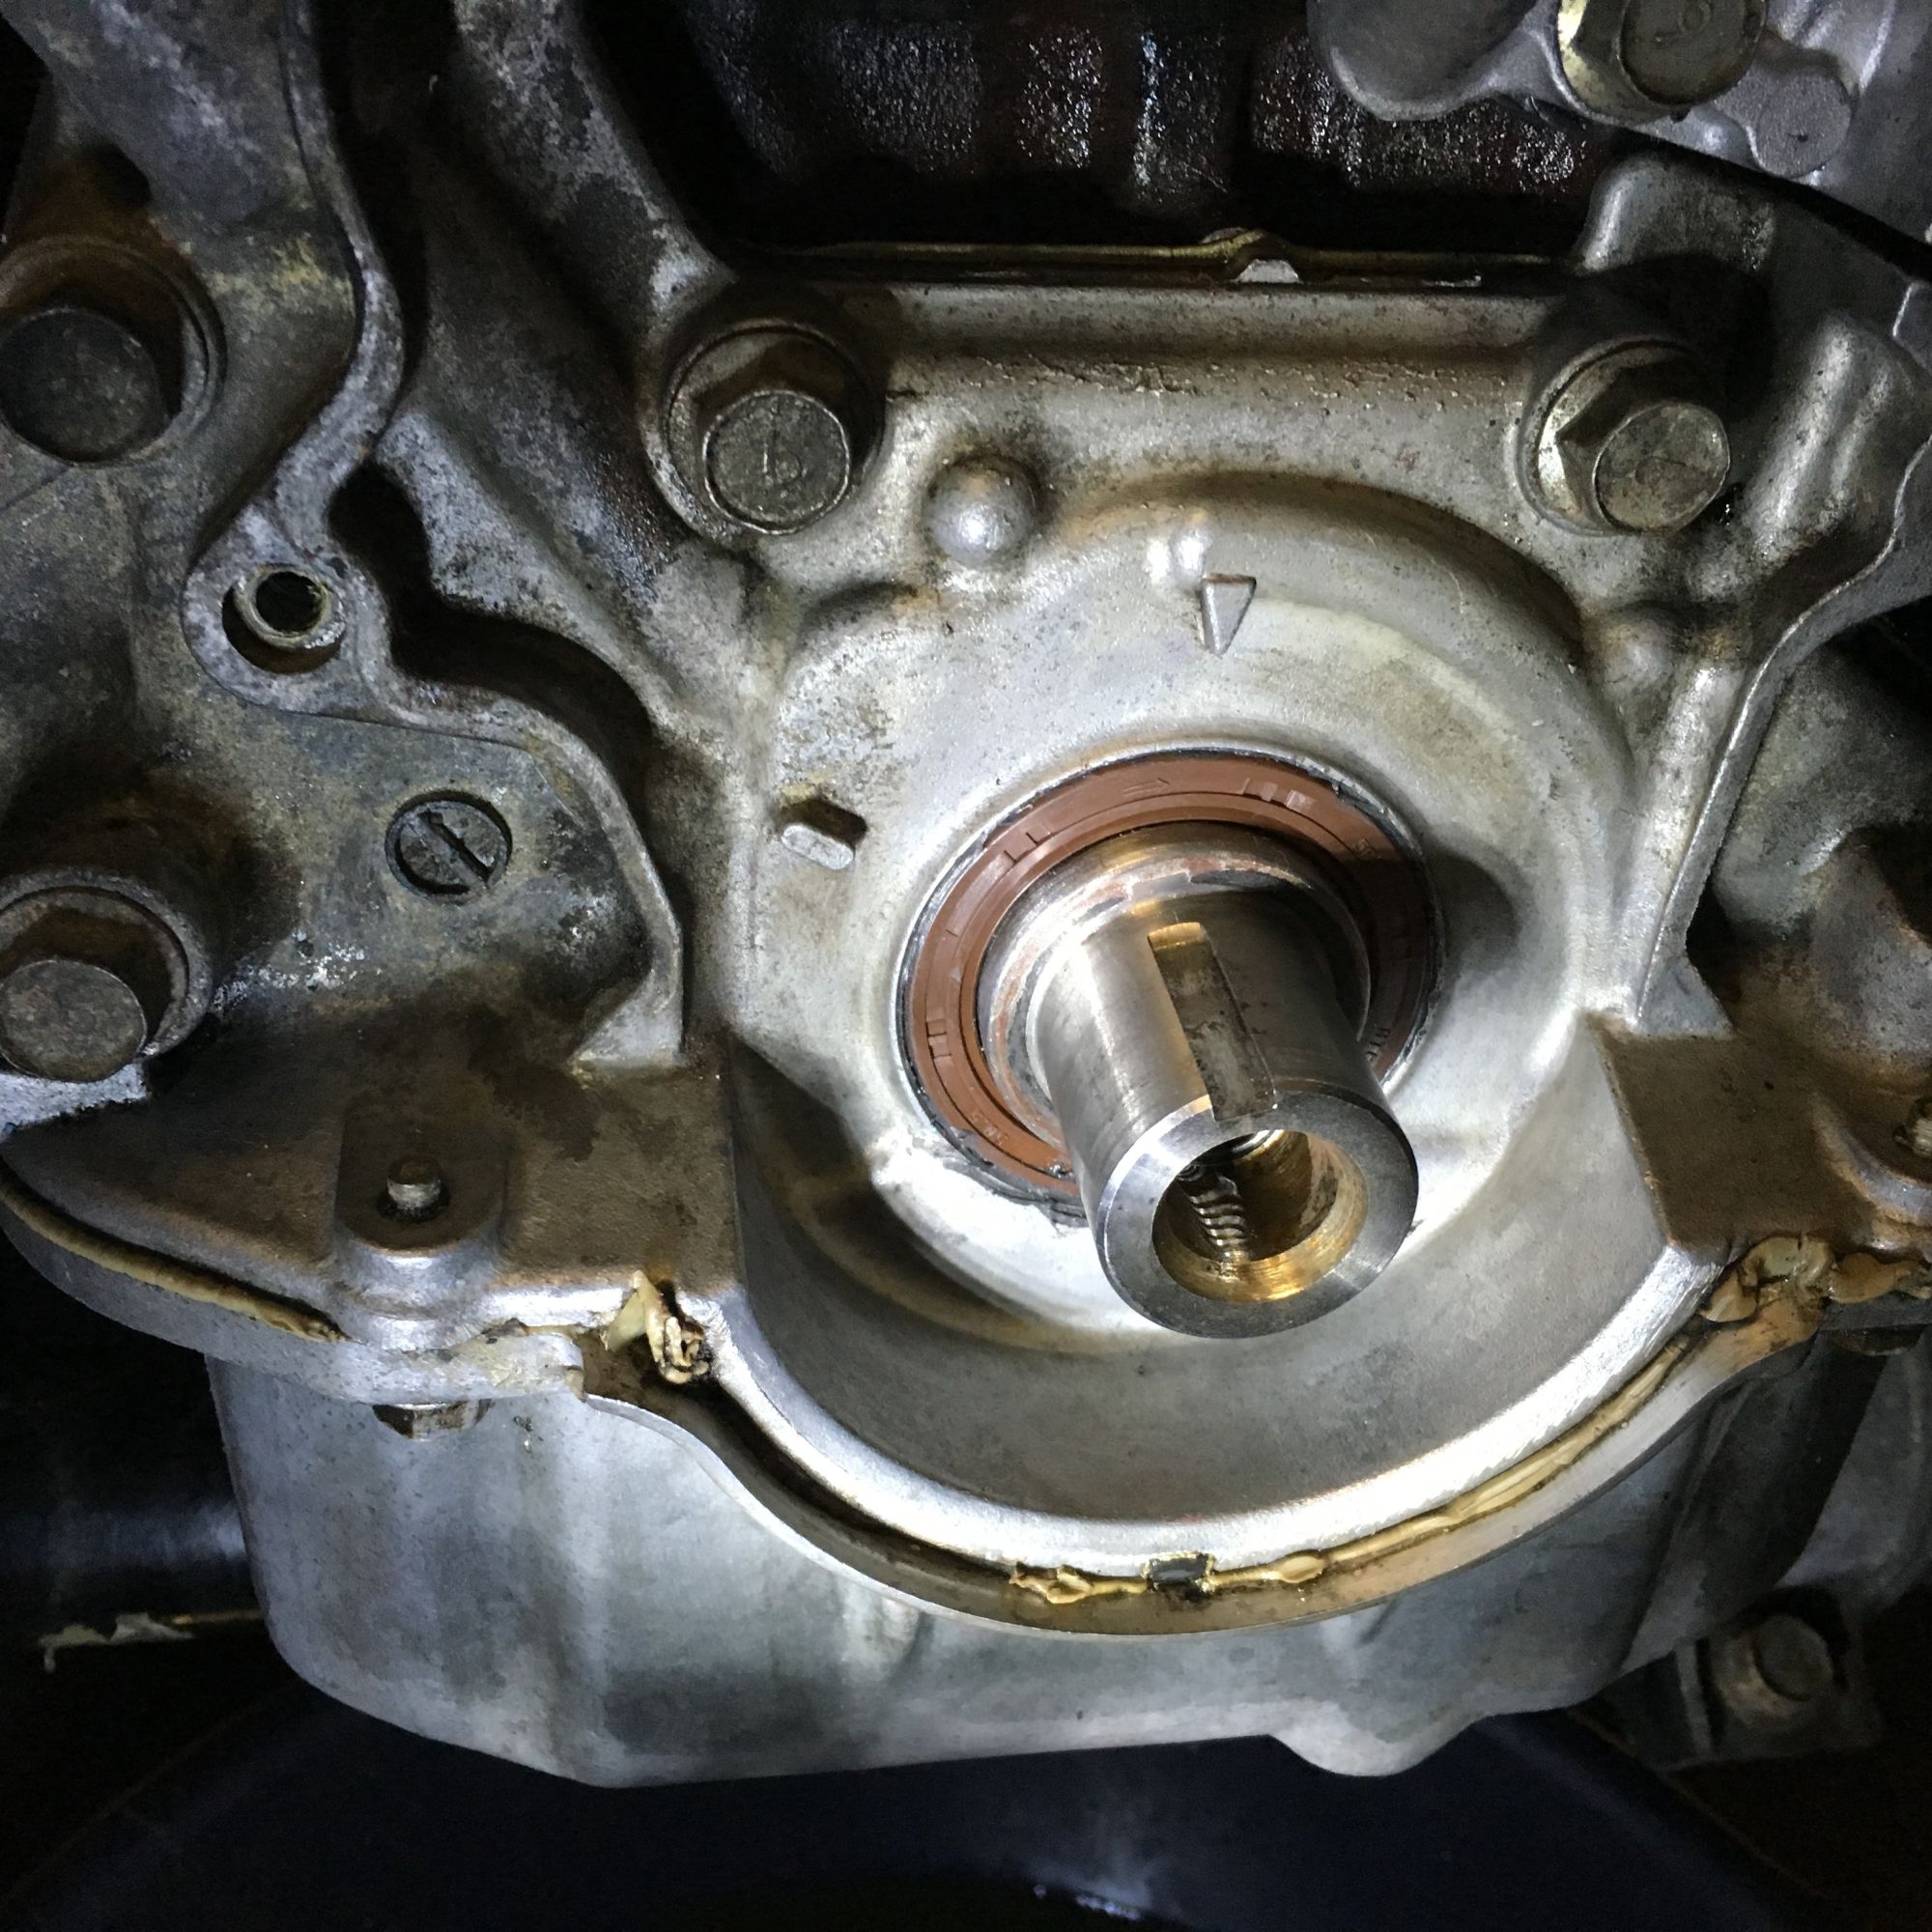
yikes, looks like the front crankshaft seal is weeping. I'm going to do tbelt / water pump / seals next to ensure this is taken care of.
changing trans/diff/engine fluids... I used Ford XT-M5-QS in the gearbox. the shifting wasn't as miraculously improved as i had hoped. My third gear still grinds 50% of the time.
what IS noteworthy is that changing to Rotella T6 with the pureone filter completely silenced my noisy lifters. it could be that the prior owner hadn't changed the oil (he said he used mobile one) in some time, but regardless, that annoying *** valve chatter on warm restarts is totally gone. that makes me happy.
previous owner had installed a JR cold air intake. I've already ripped it out and replaced it with the stock air box for now. Im going to install an aluminum radiator pre-turbo, and the cold air intake ate up all of the space required for a larger radiator. btw i noticed no loss in performance going back to the stock intake. none whatsoever.
yikes, looks like the front crankshaft seal is weeping. I'm going to do tbelt / water pump / seals next to ensure this is taken care of.
Reply
0
0
11-06-2015, 06:24 PM
#14
Junior Member
Thread Starter
Join Date: Sep 2015
Posts: 45
Total Cats: 1
I got around to installing my AEM uego and cheapass $20 Bosch boost gauge this past weekend. I want to try help others who may have some of the same questions I had before going into this..
for the wideband, pull the driver's side wheel off, and you should have access to the O2 sensor. I cut the wires on the factory O2 as close to the sensor as possible.
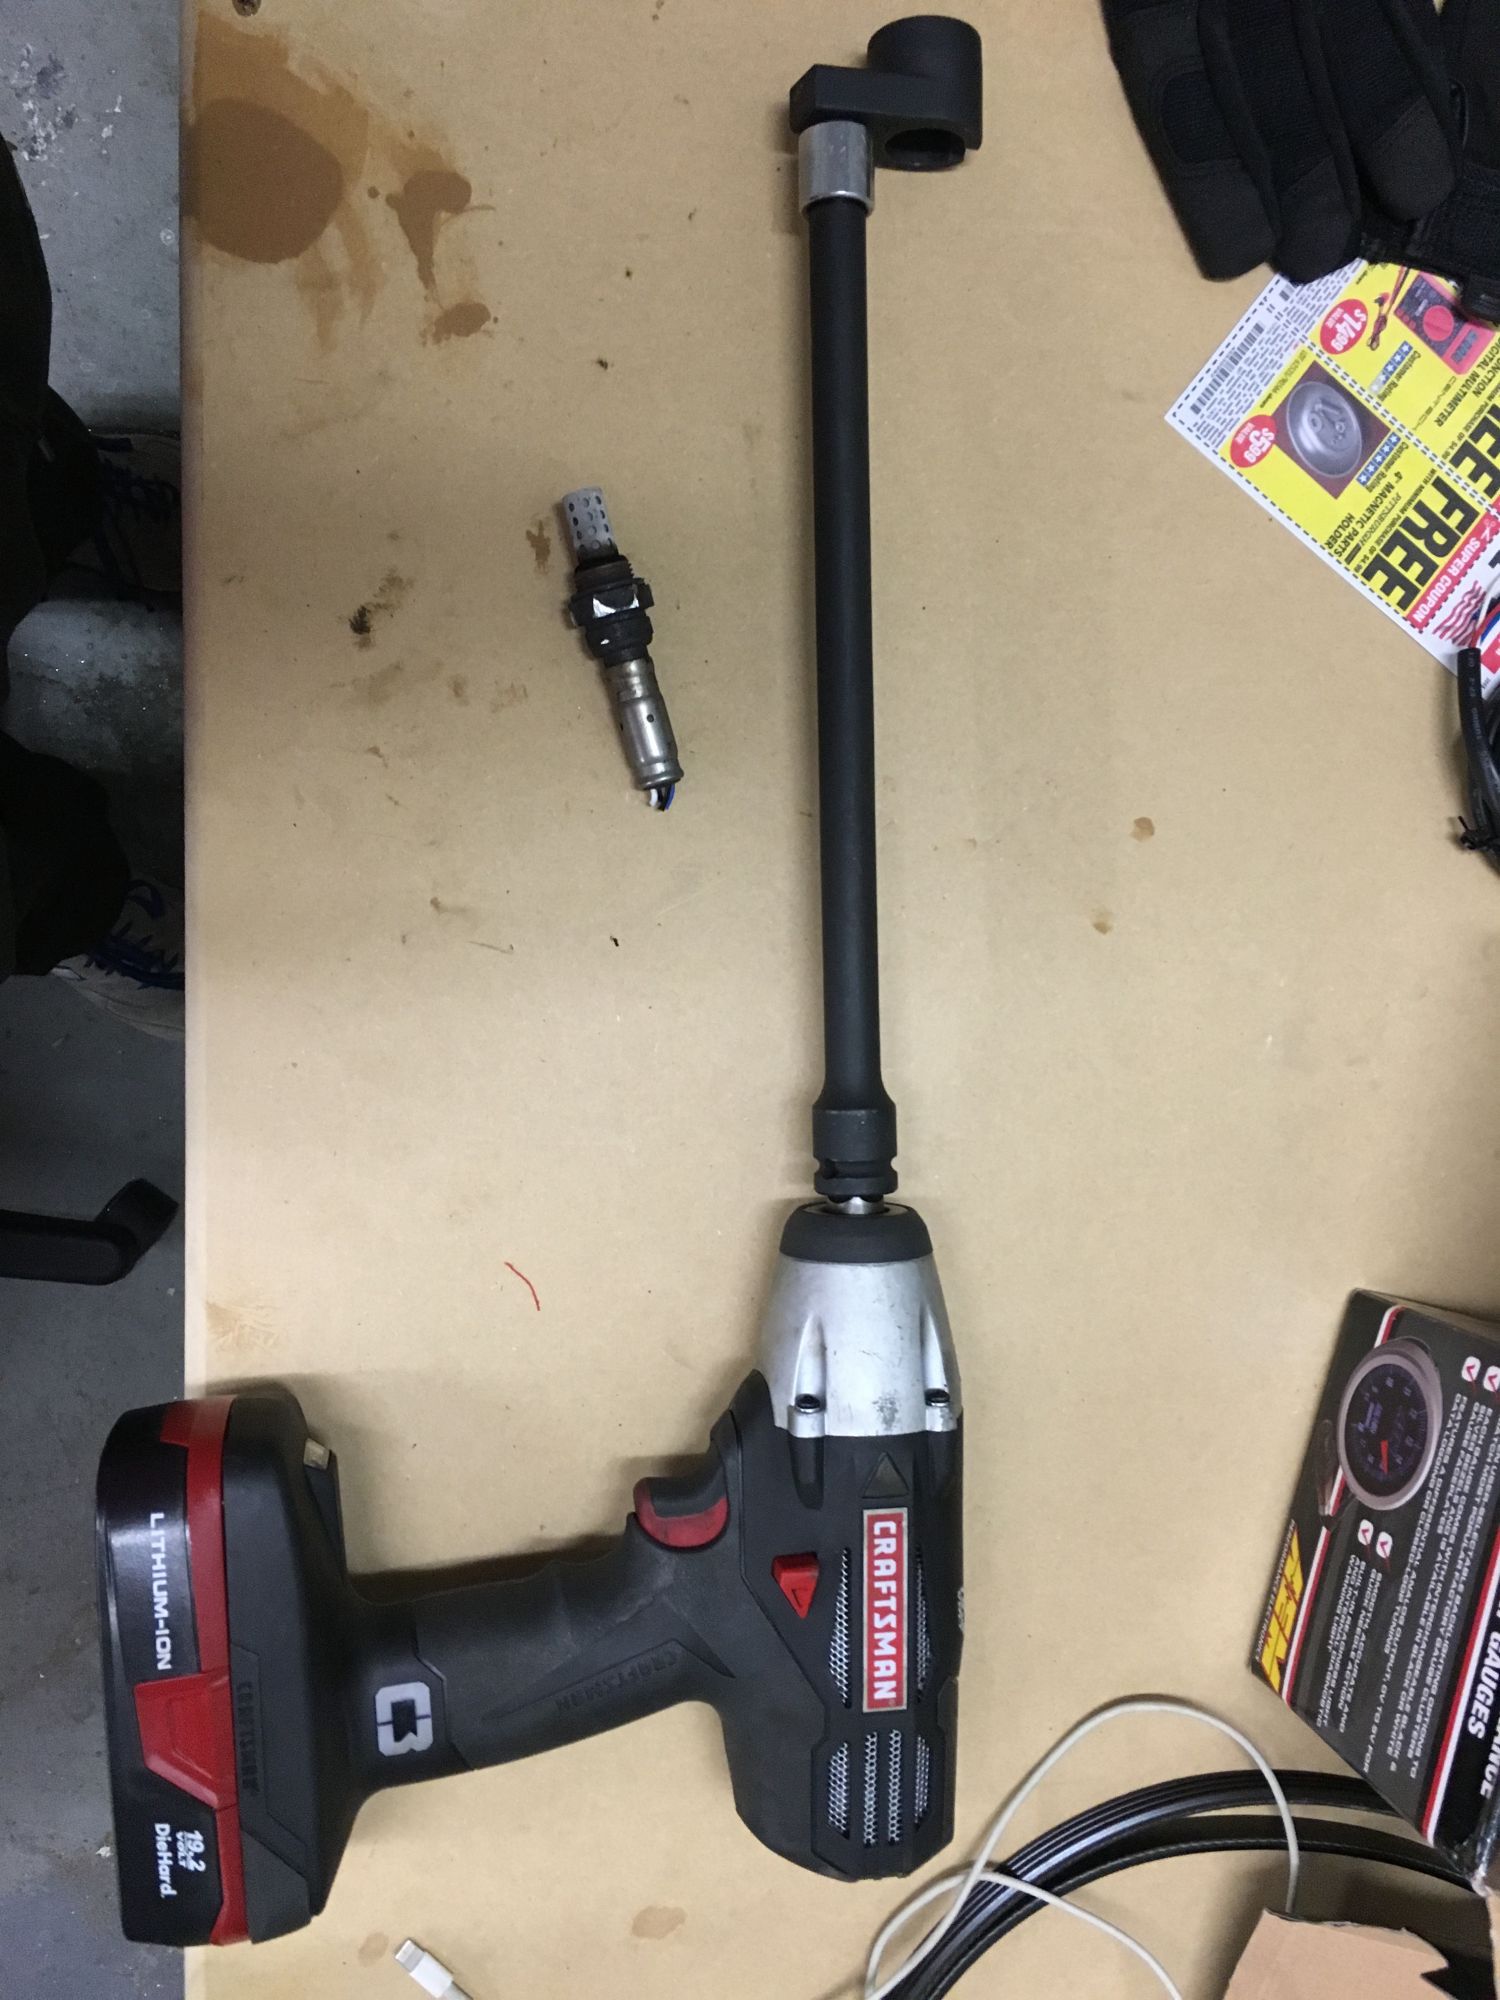
This is the setup I used to remove the stock O2 sensor.
Electric 1/2" impact > extension > 3/8" reducer > harbor freight O2 socket
the cheap metal reducer held up just fine with all of the torque, and the stock O2 came out without any issues. I used a this O2 sensor thread chaser before putting in the aem wideband - - I'm not sure how necessary it was, but amazon recommended that I buy it, and it did make me feel all warm and fuzzy after using it.
the AEM uego comes with anti-seize on the threads right out of the box, which is a nice touch.
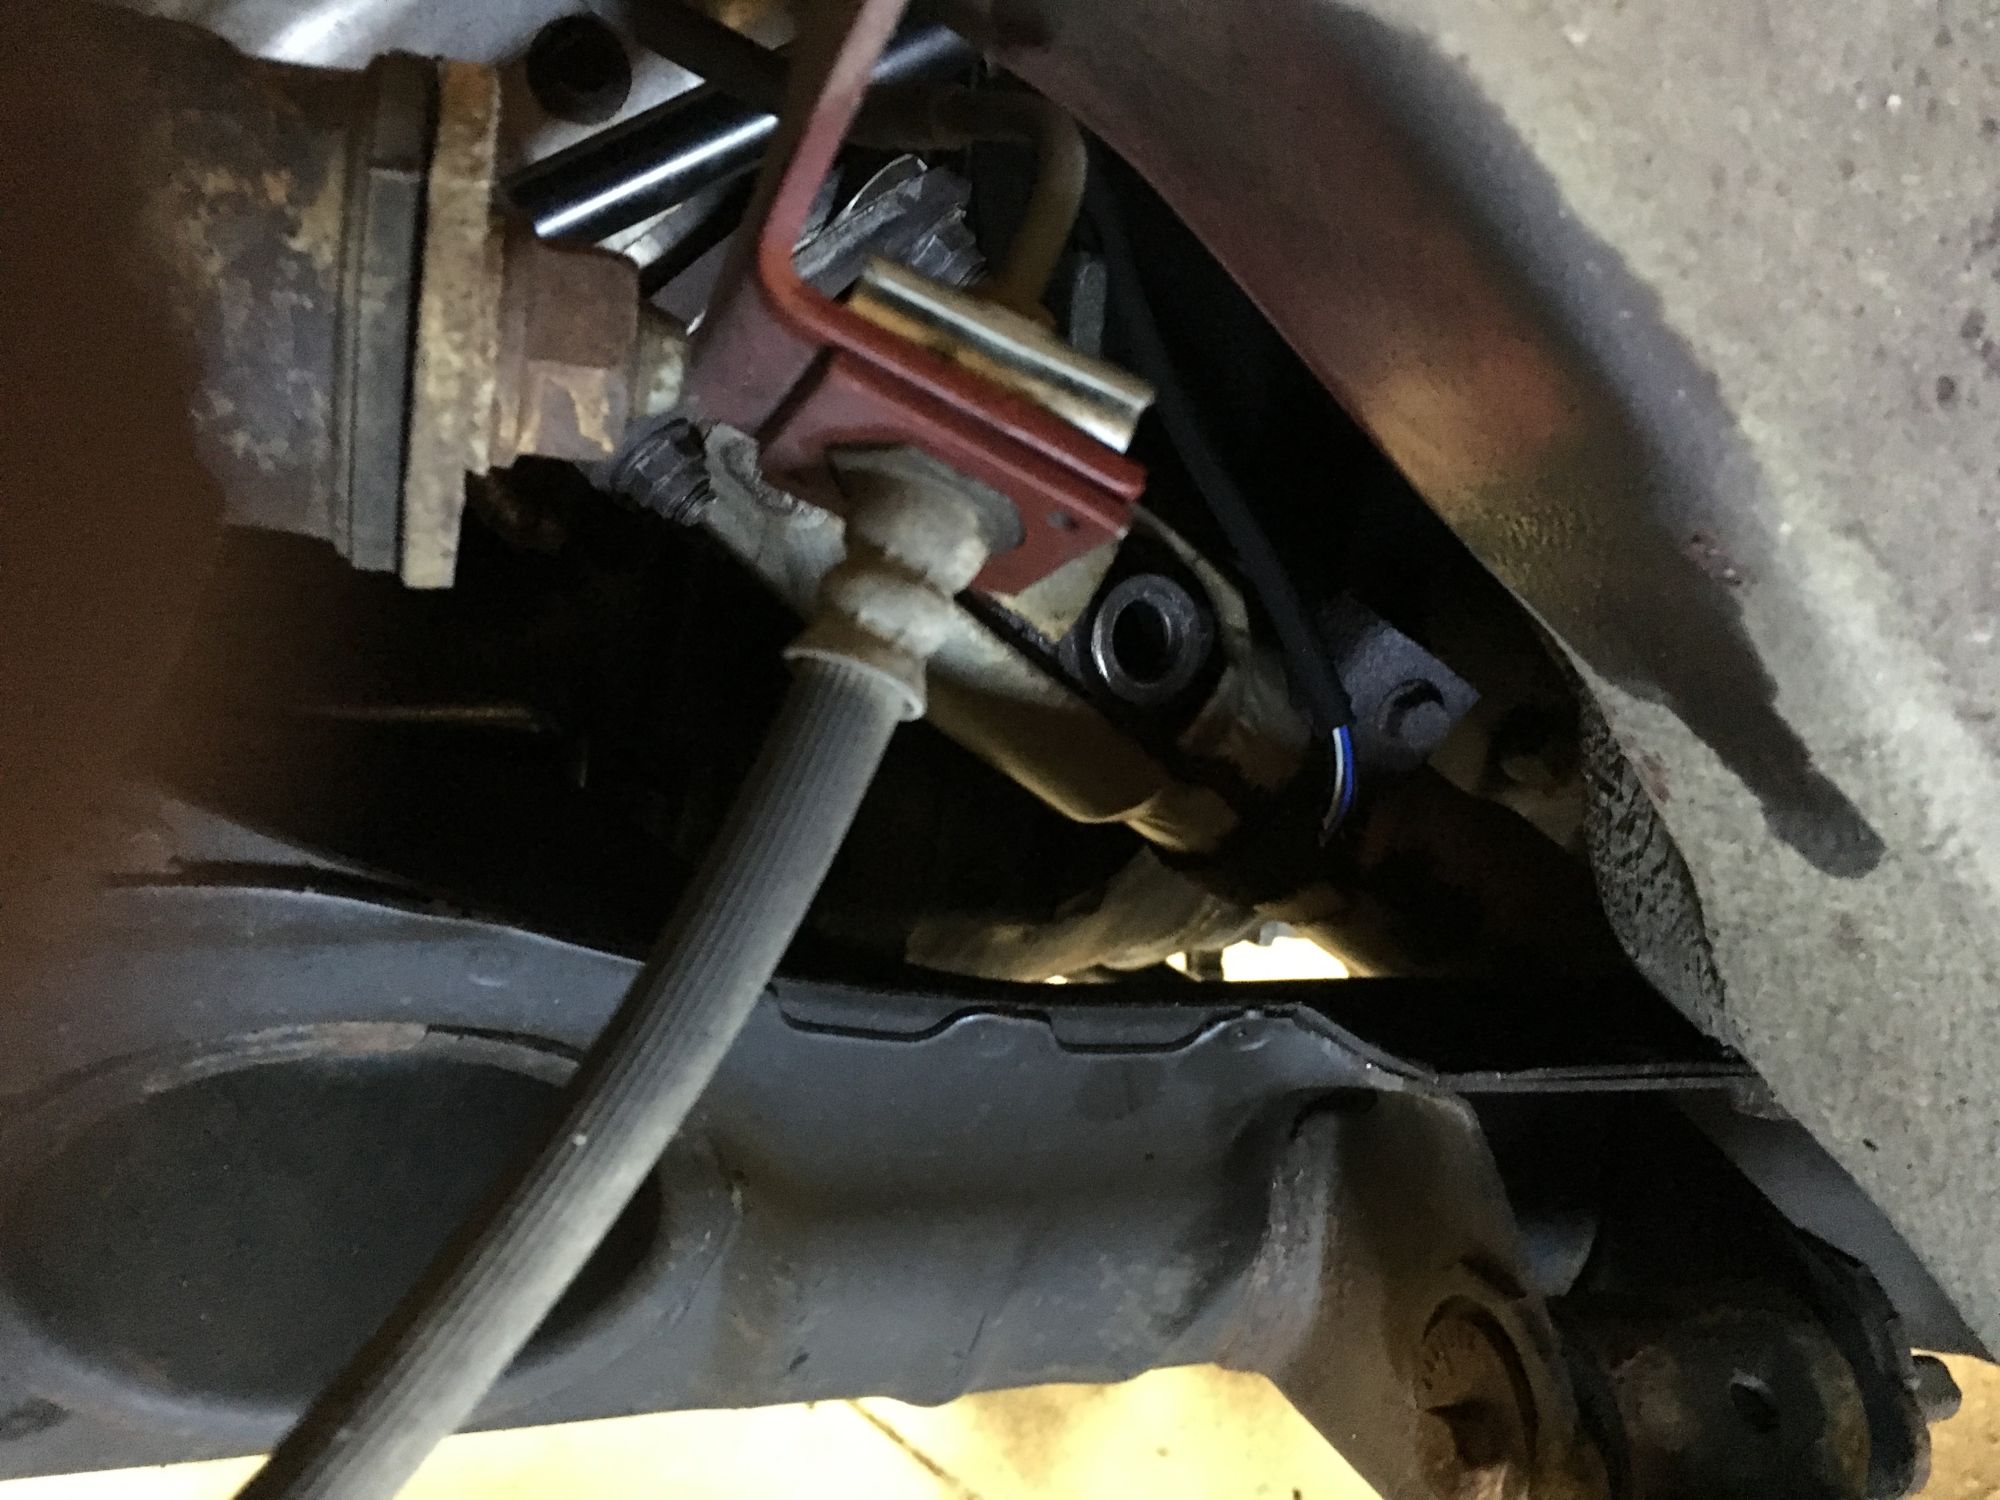
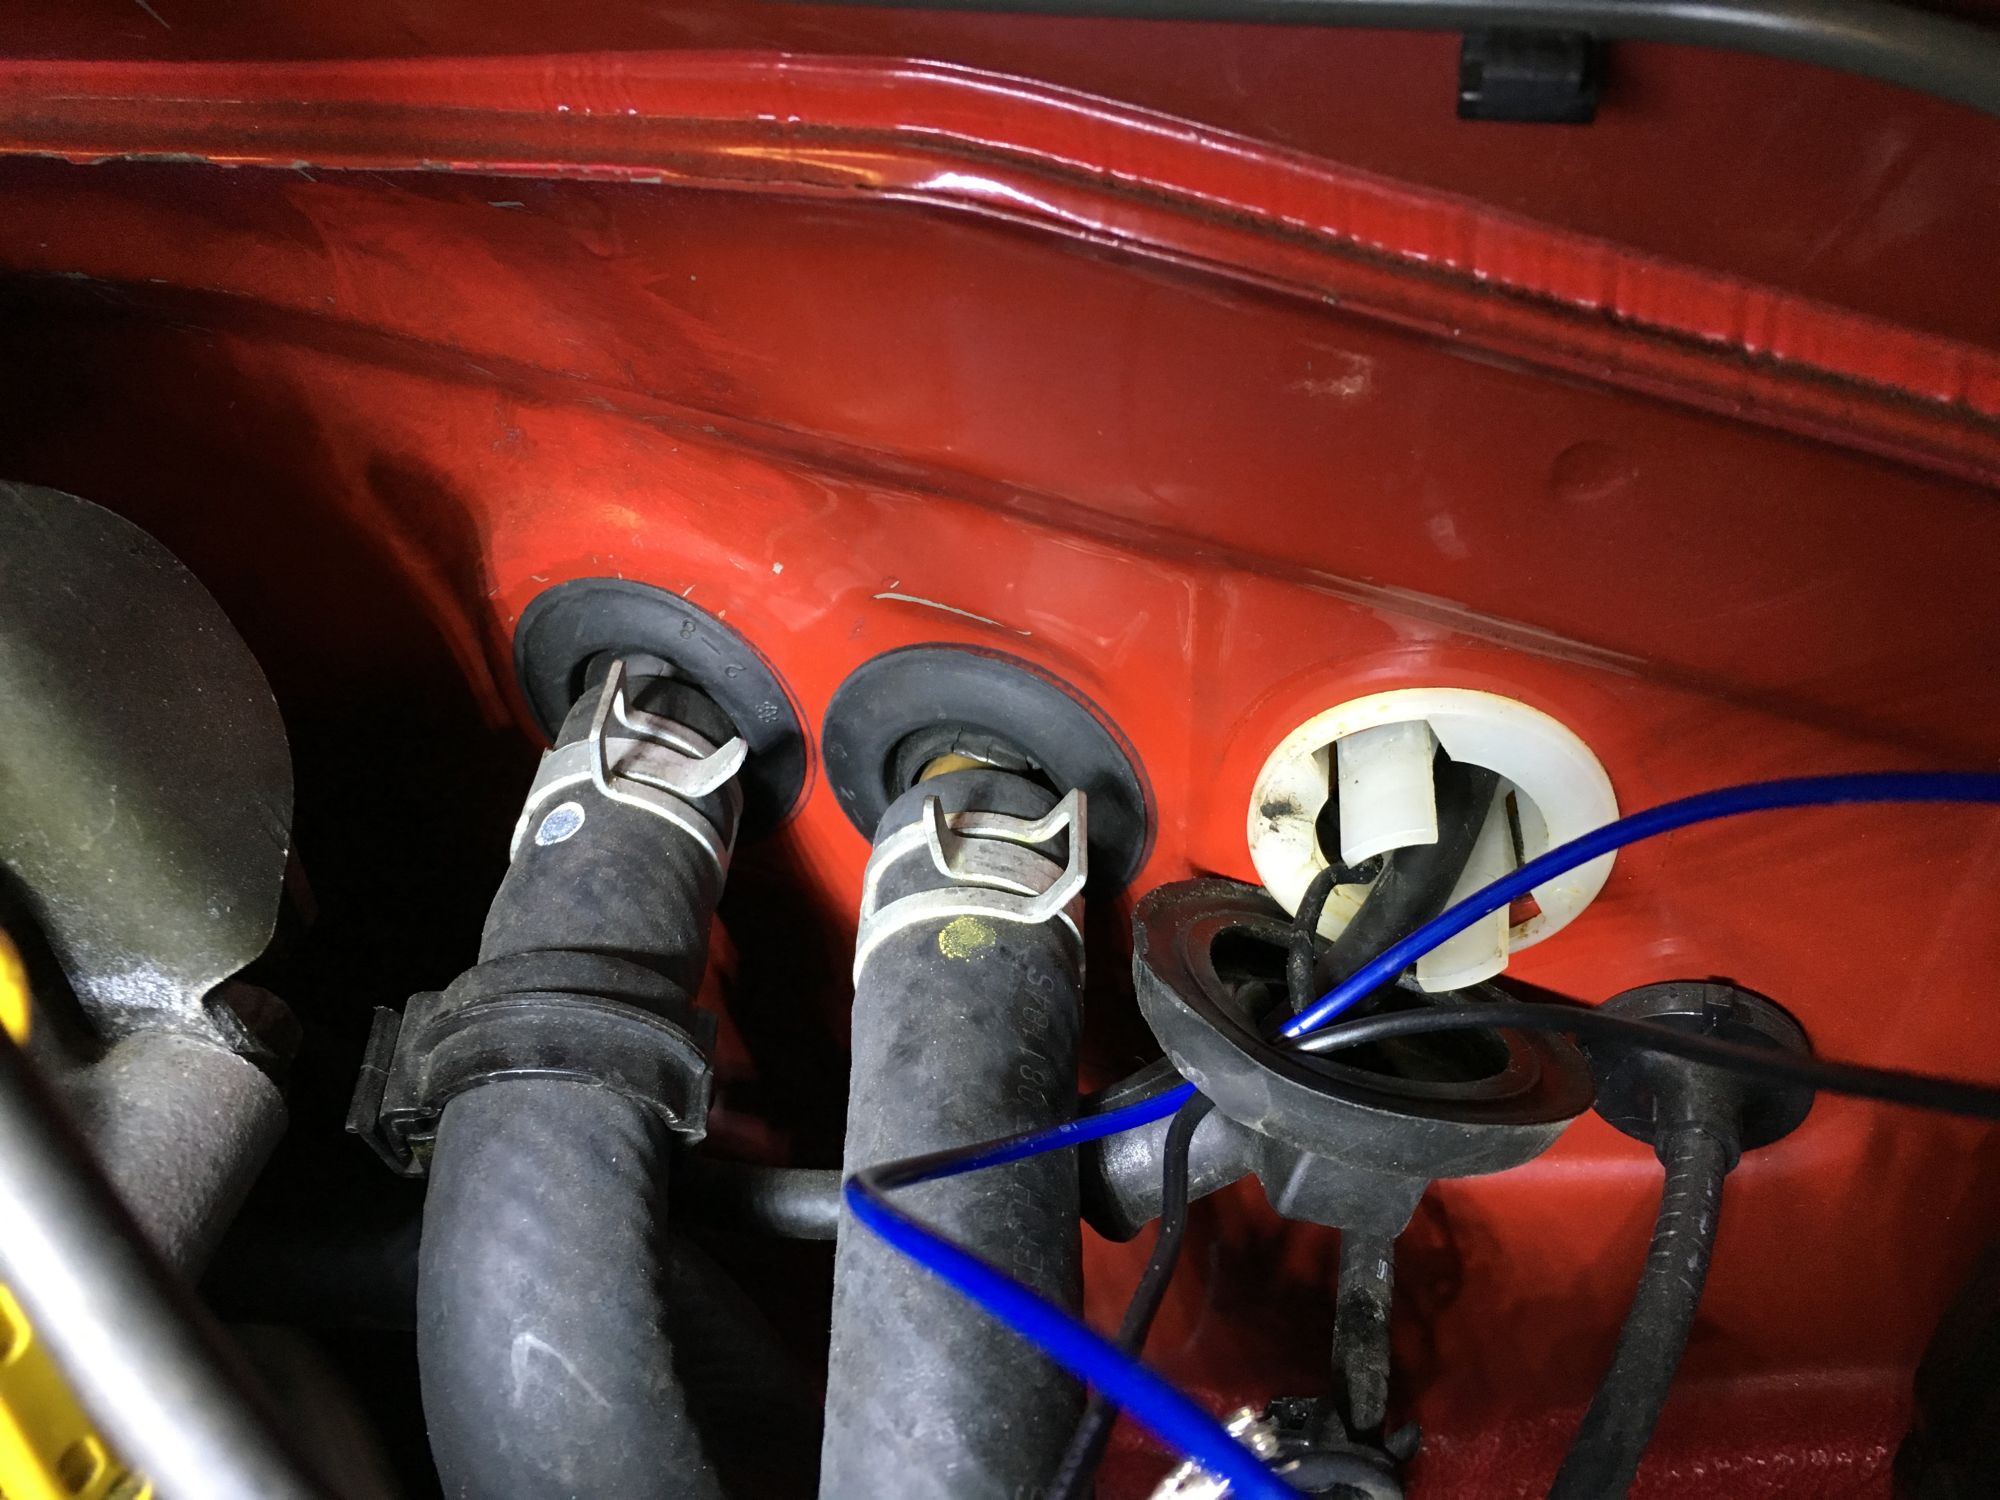
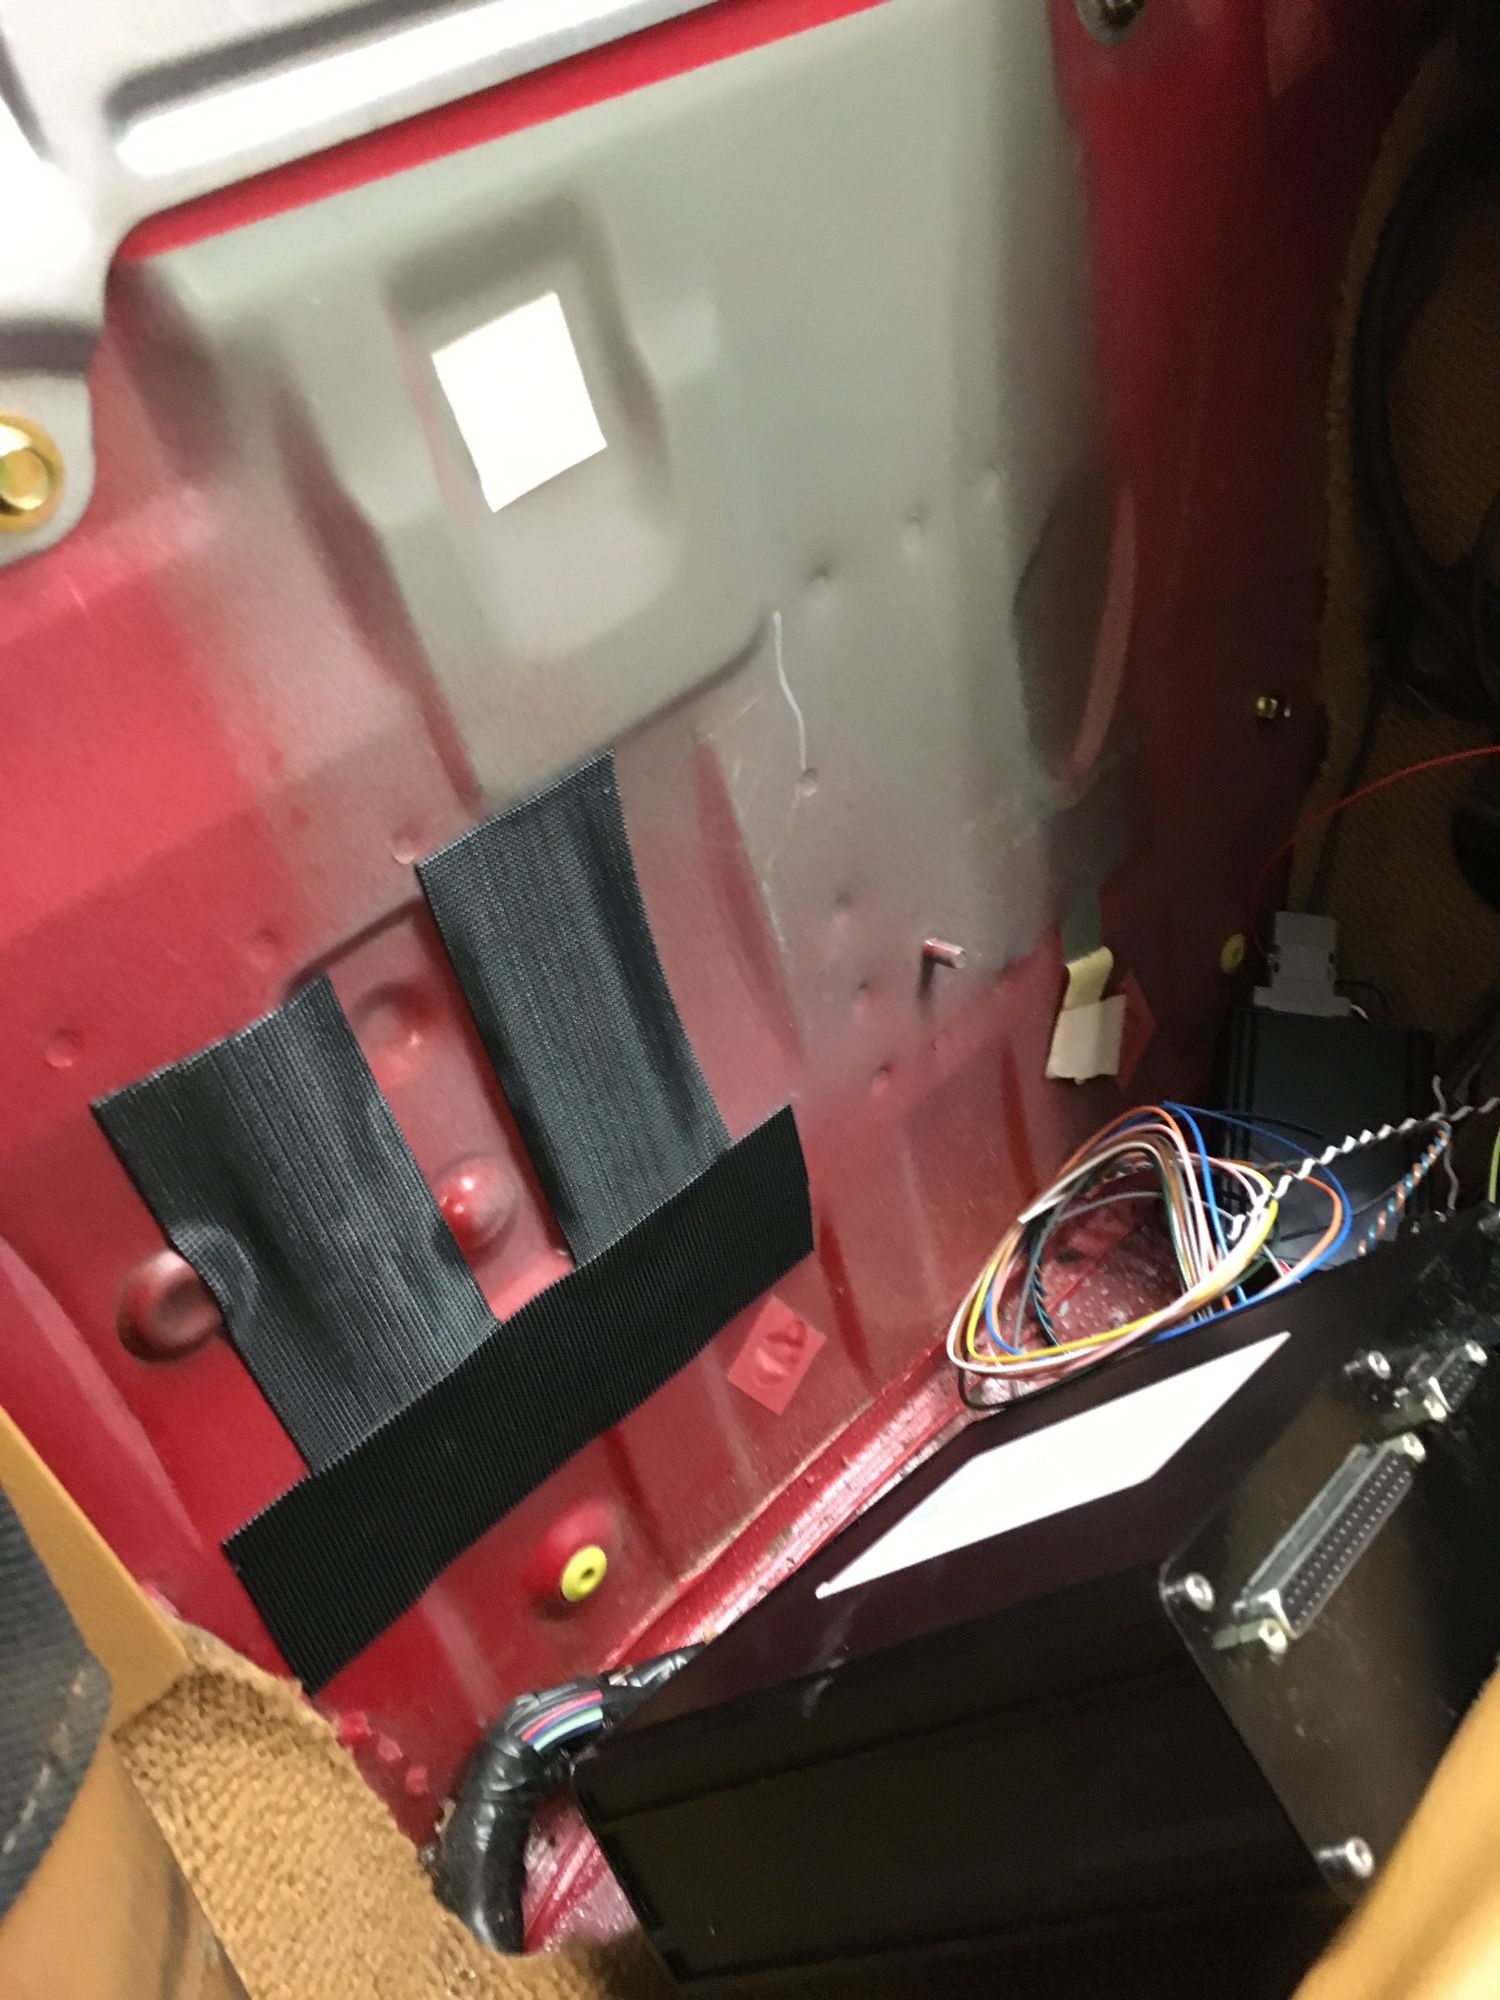
after screwing in the sensor, I ran the harness up along the transmission tunnel, and through the shifter into the cabin. Then I extended the signal wire (white wire on the AEM harness, but as you can see I used blue wire to extend it into the engine bay), and the ground (black wire) through this rubber grommet back into the engine bay..
I used this location as the ground..

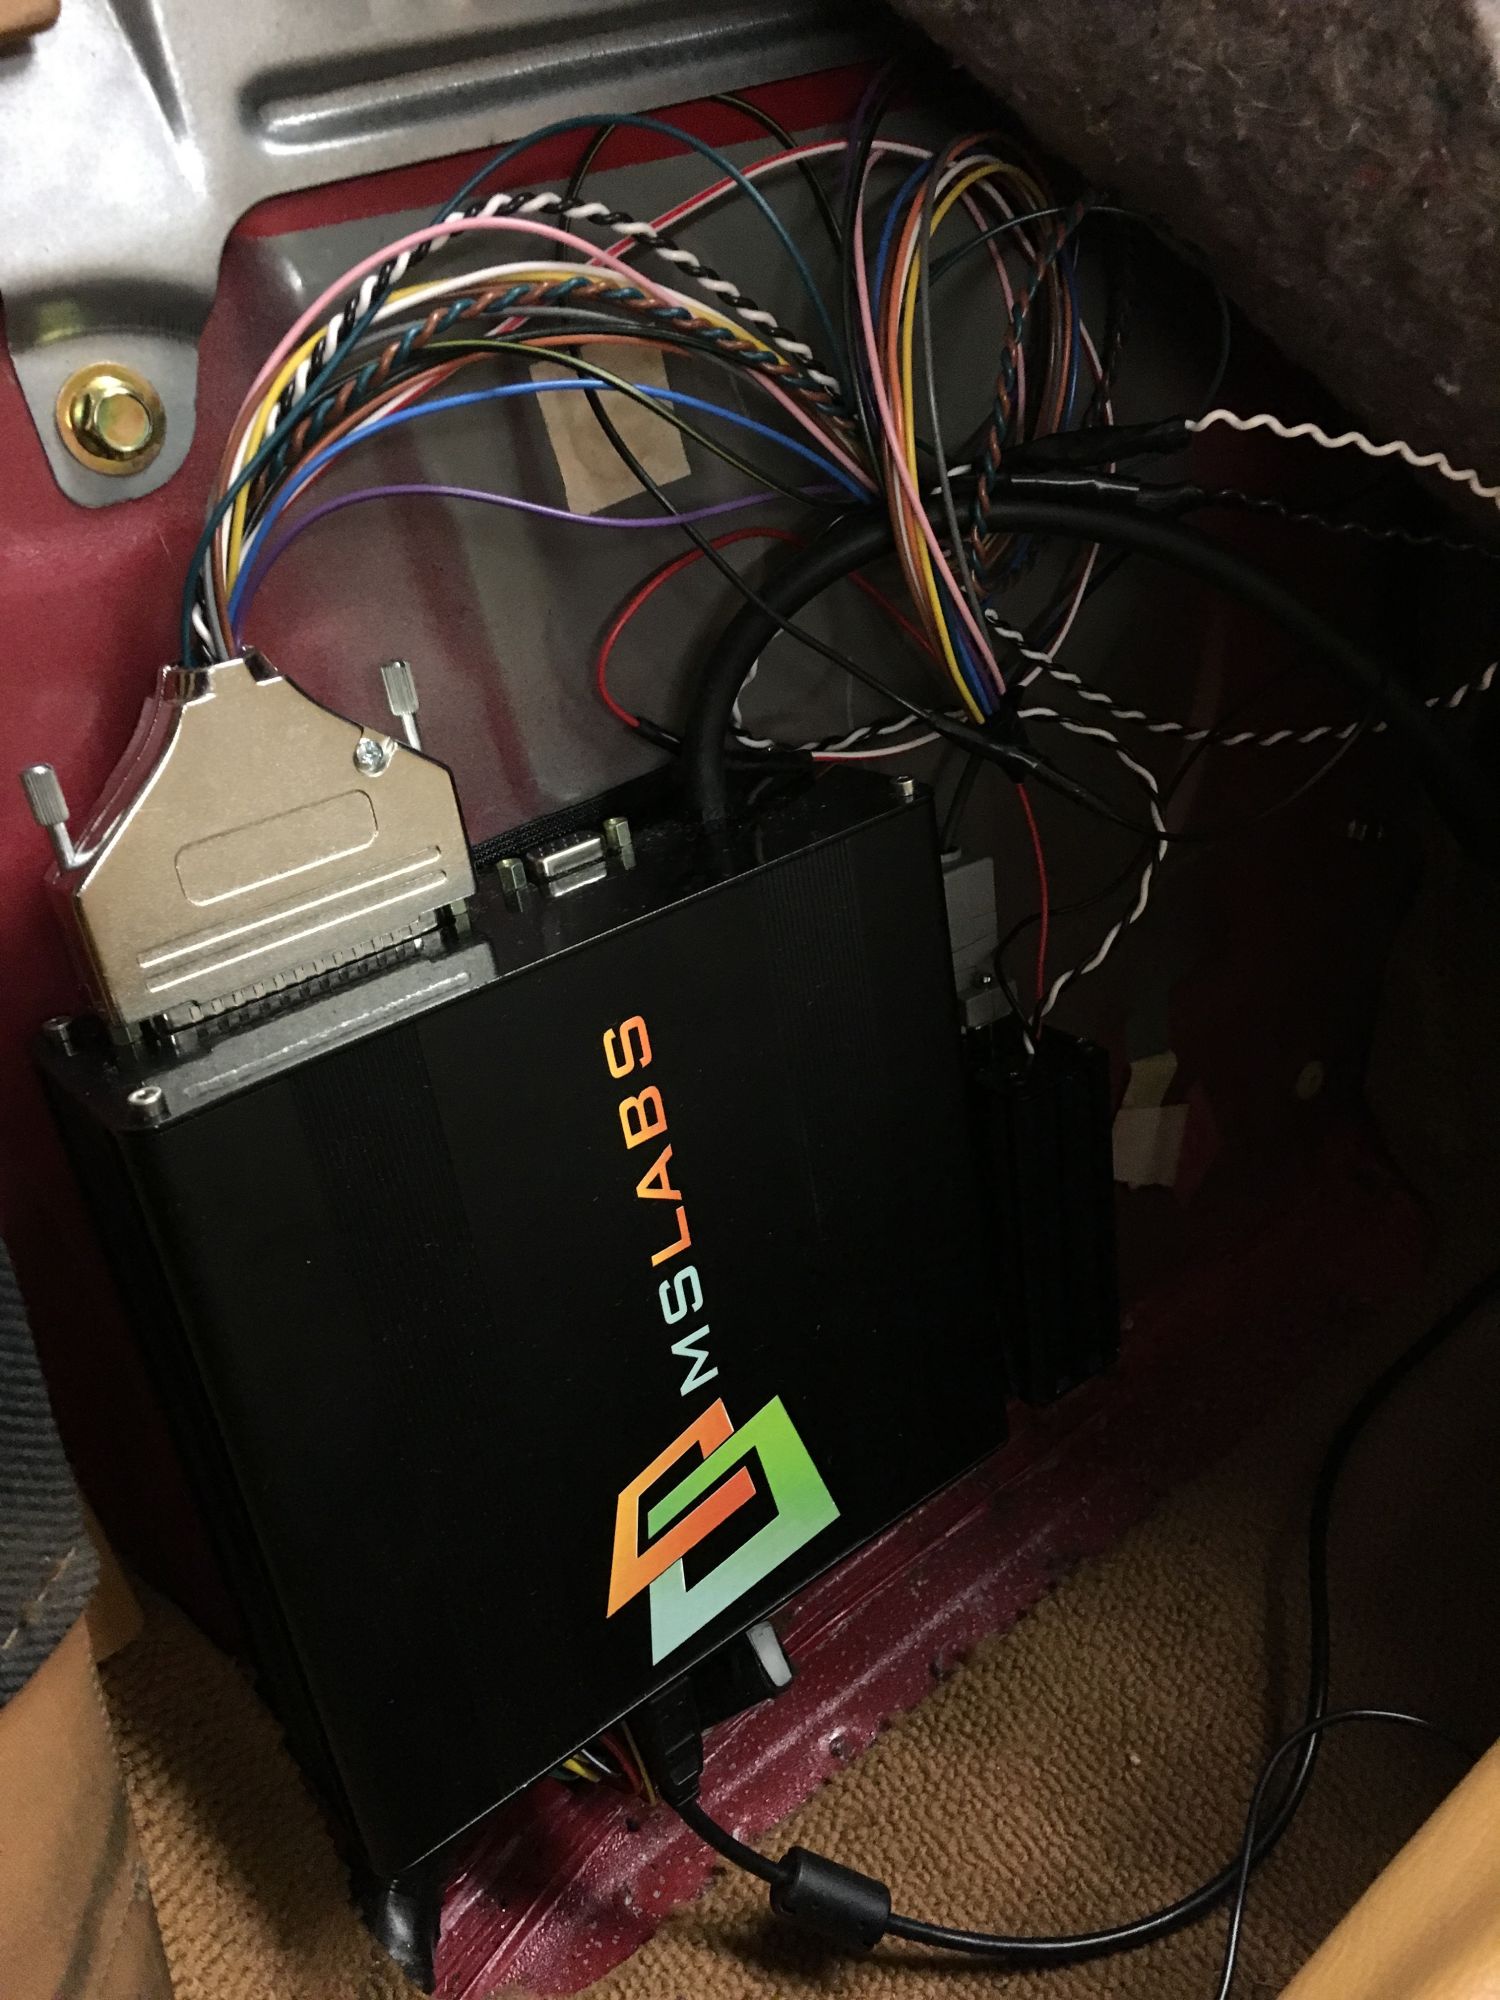
(experienced MTers feel free to chime in and tell me if this is a horrible ground to use. i'm going to be using the MSLabs Wideband CAN module with my MS3 when i install in a few weeks fyi)
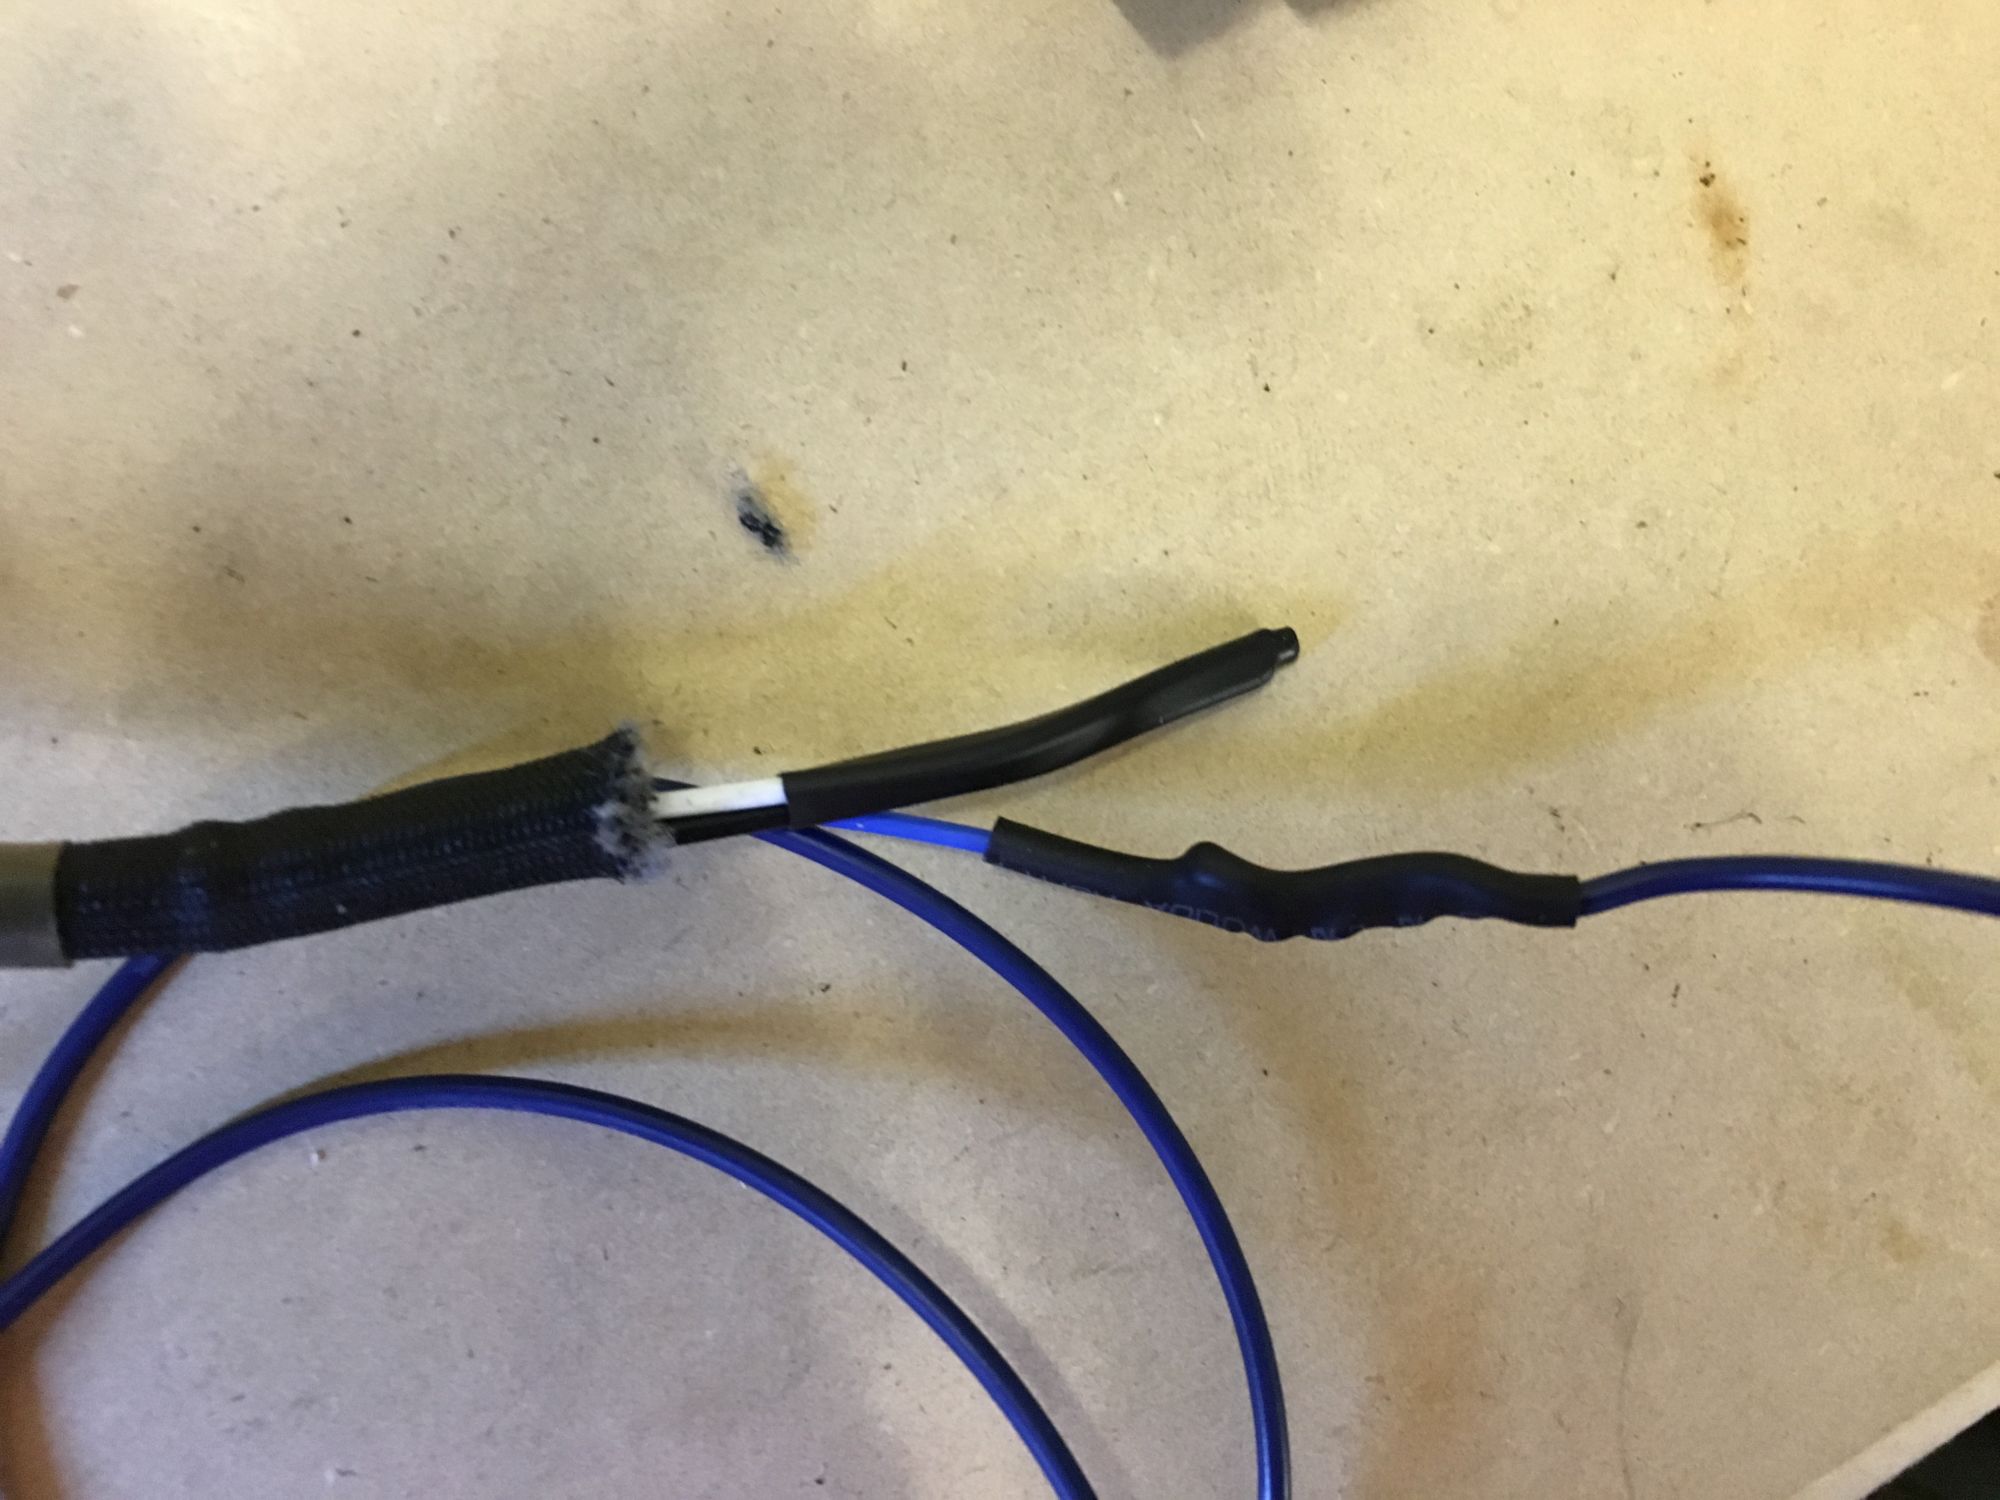
..and soldered the extended signal wire (remember white AEM harness wire) to the blue wire on the factory O2 harness that I had previously snipped. the other three wires in the factory harness do not get any love.
i had read that soldering this wire was tough because of the metal used, but I had no issues with my weller iron.
for power I used an add-a-circuit fuse tap on the Engine fuse. super easy.
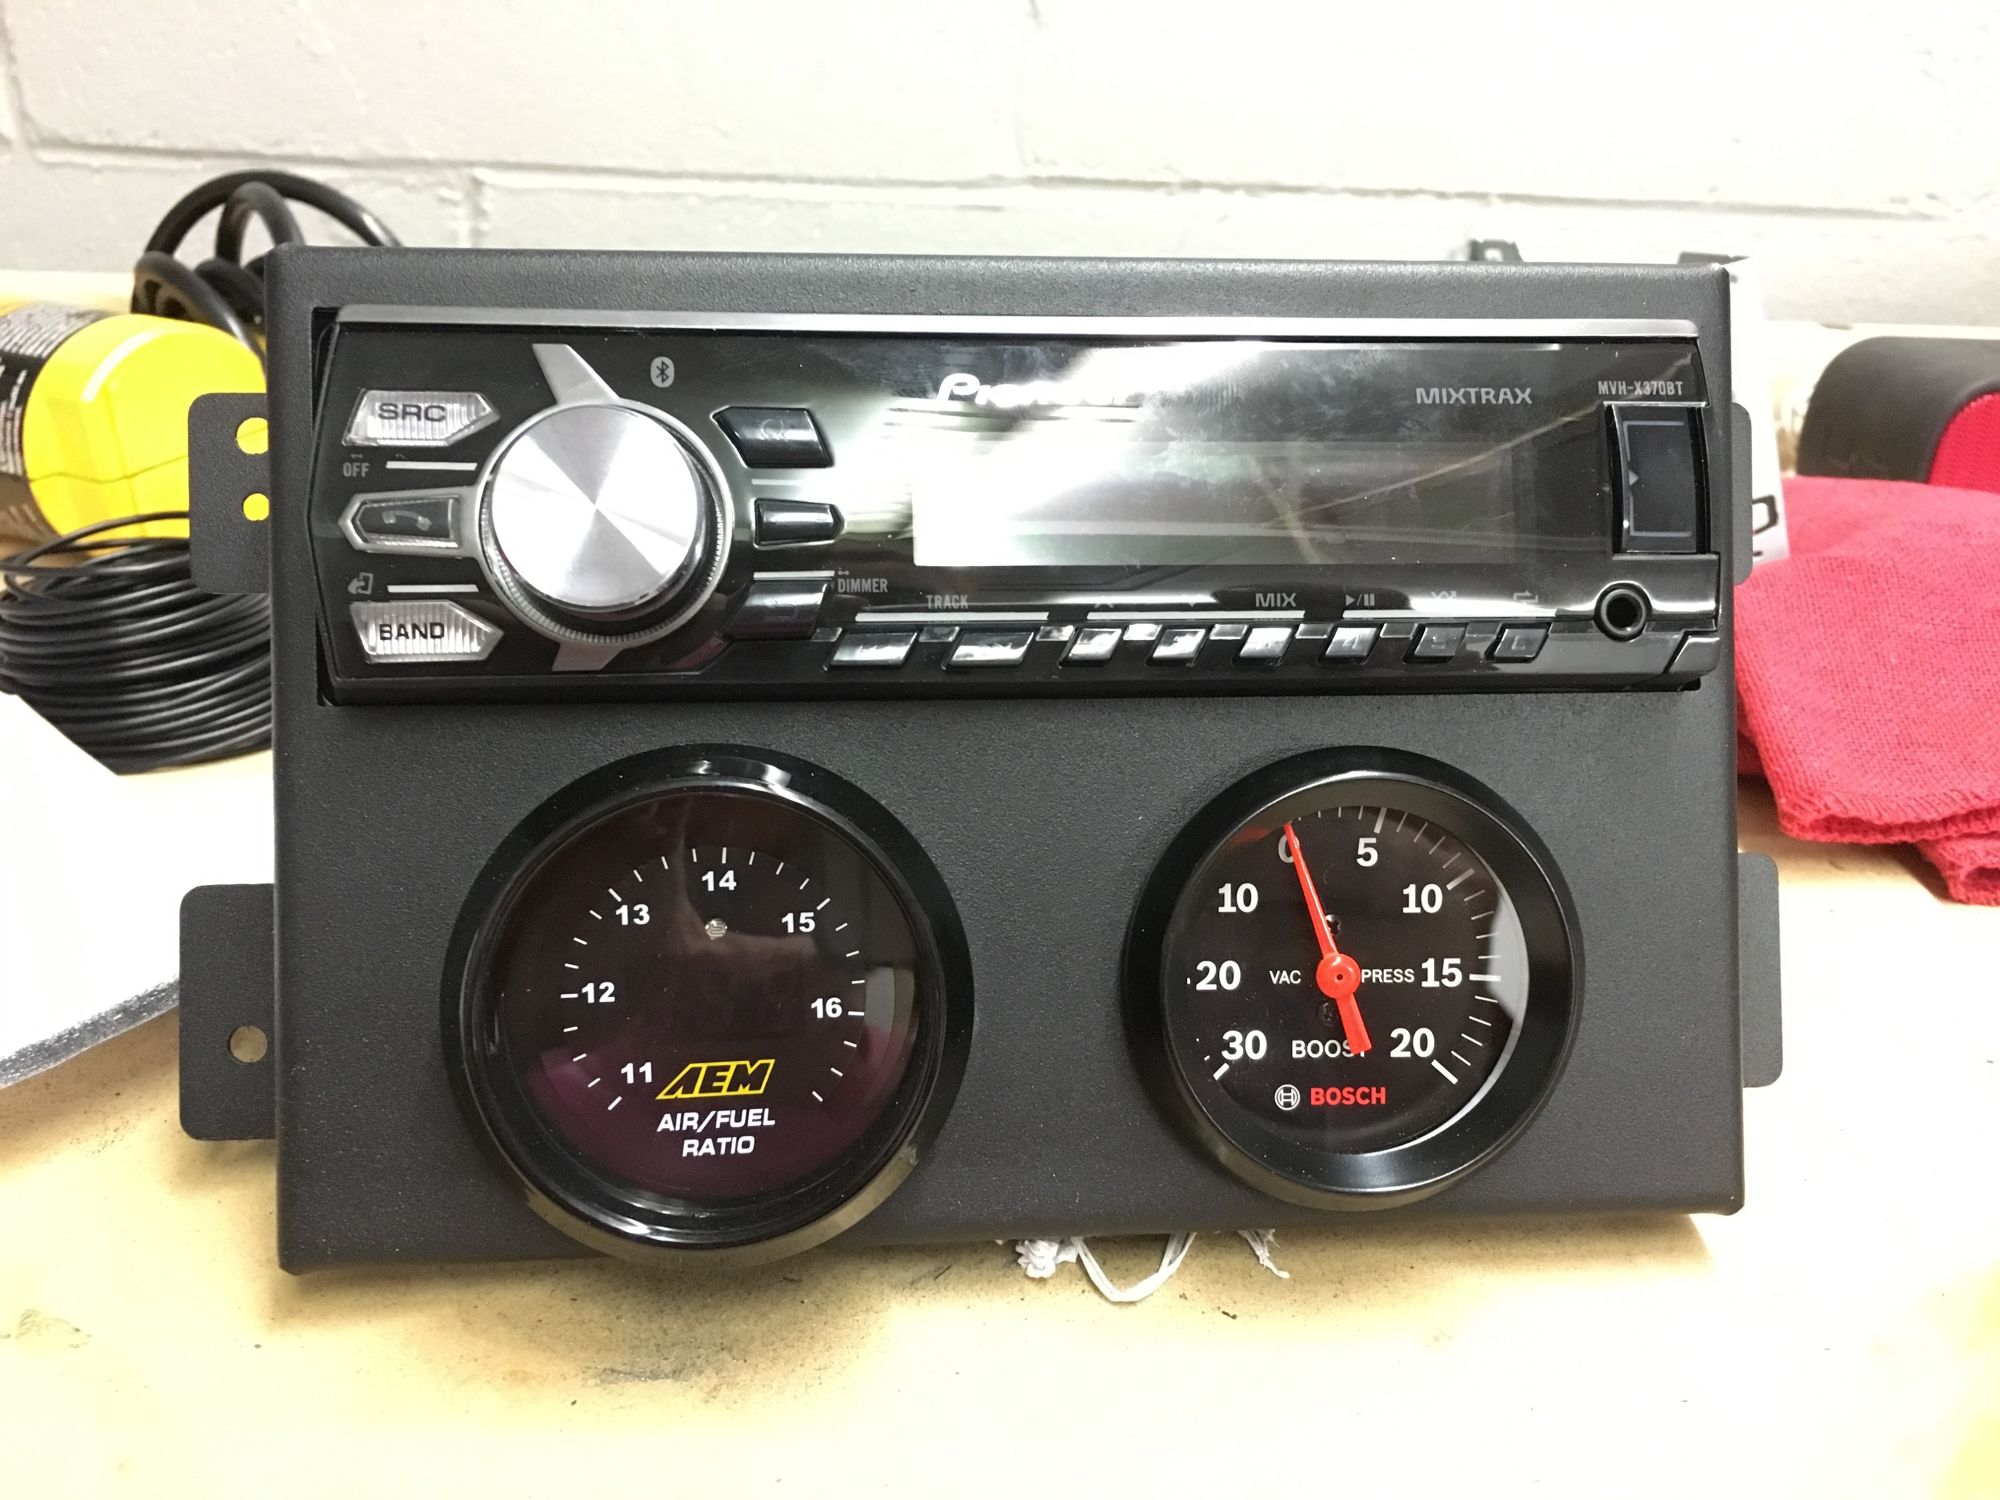
test fitting, with the DDM gauge pod.
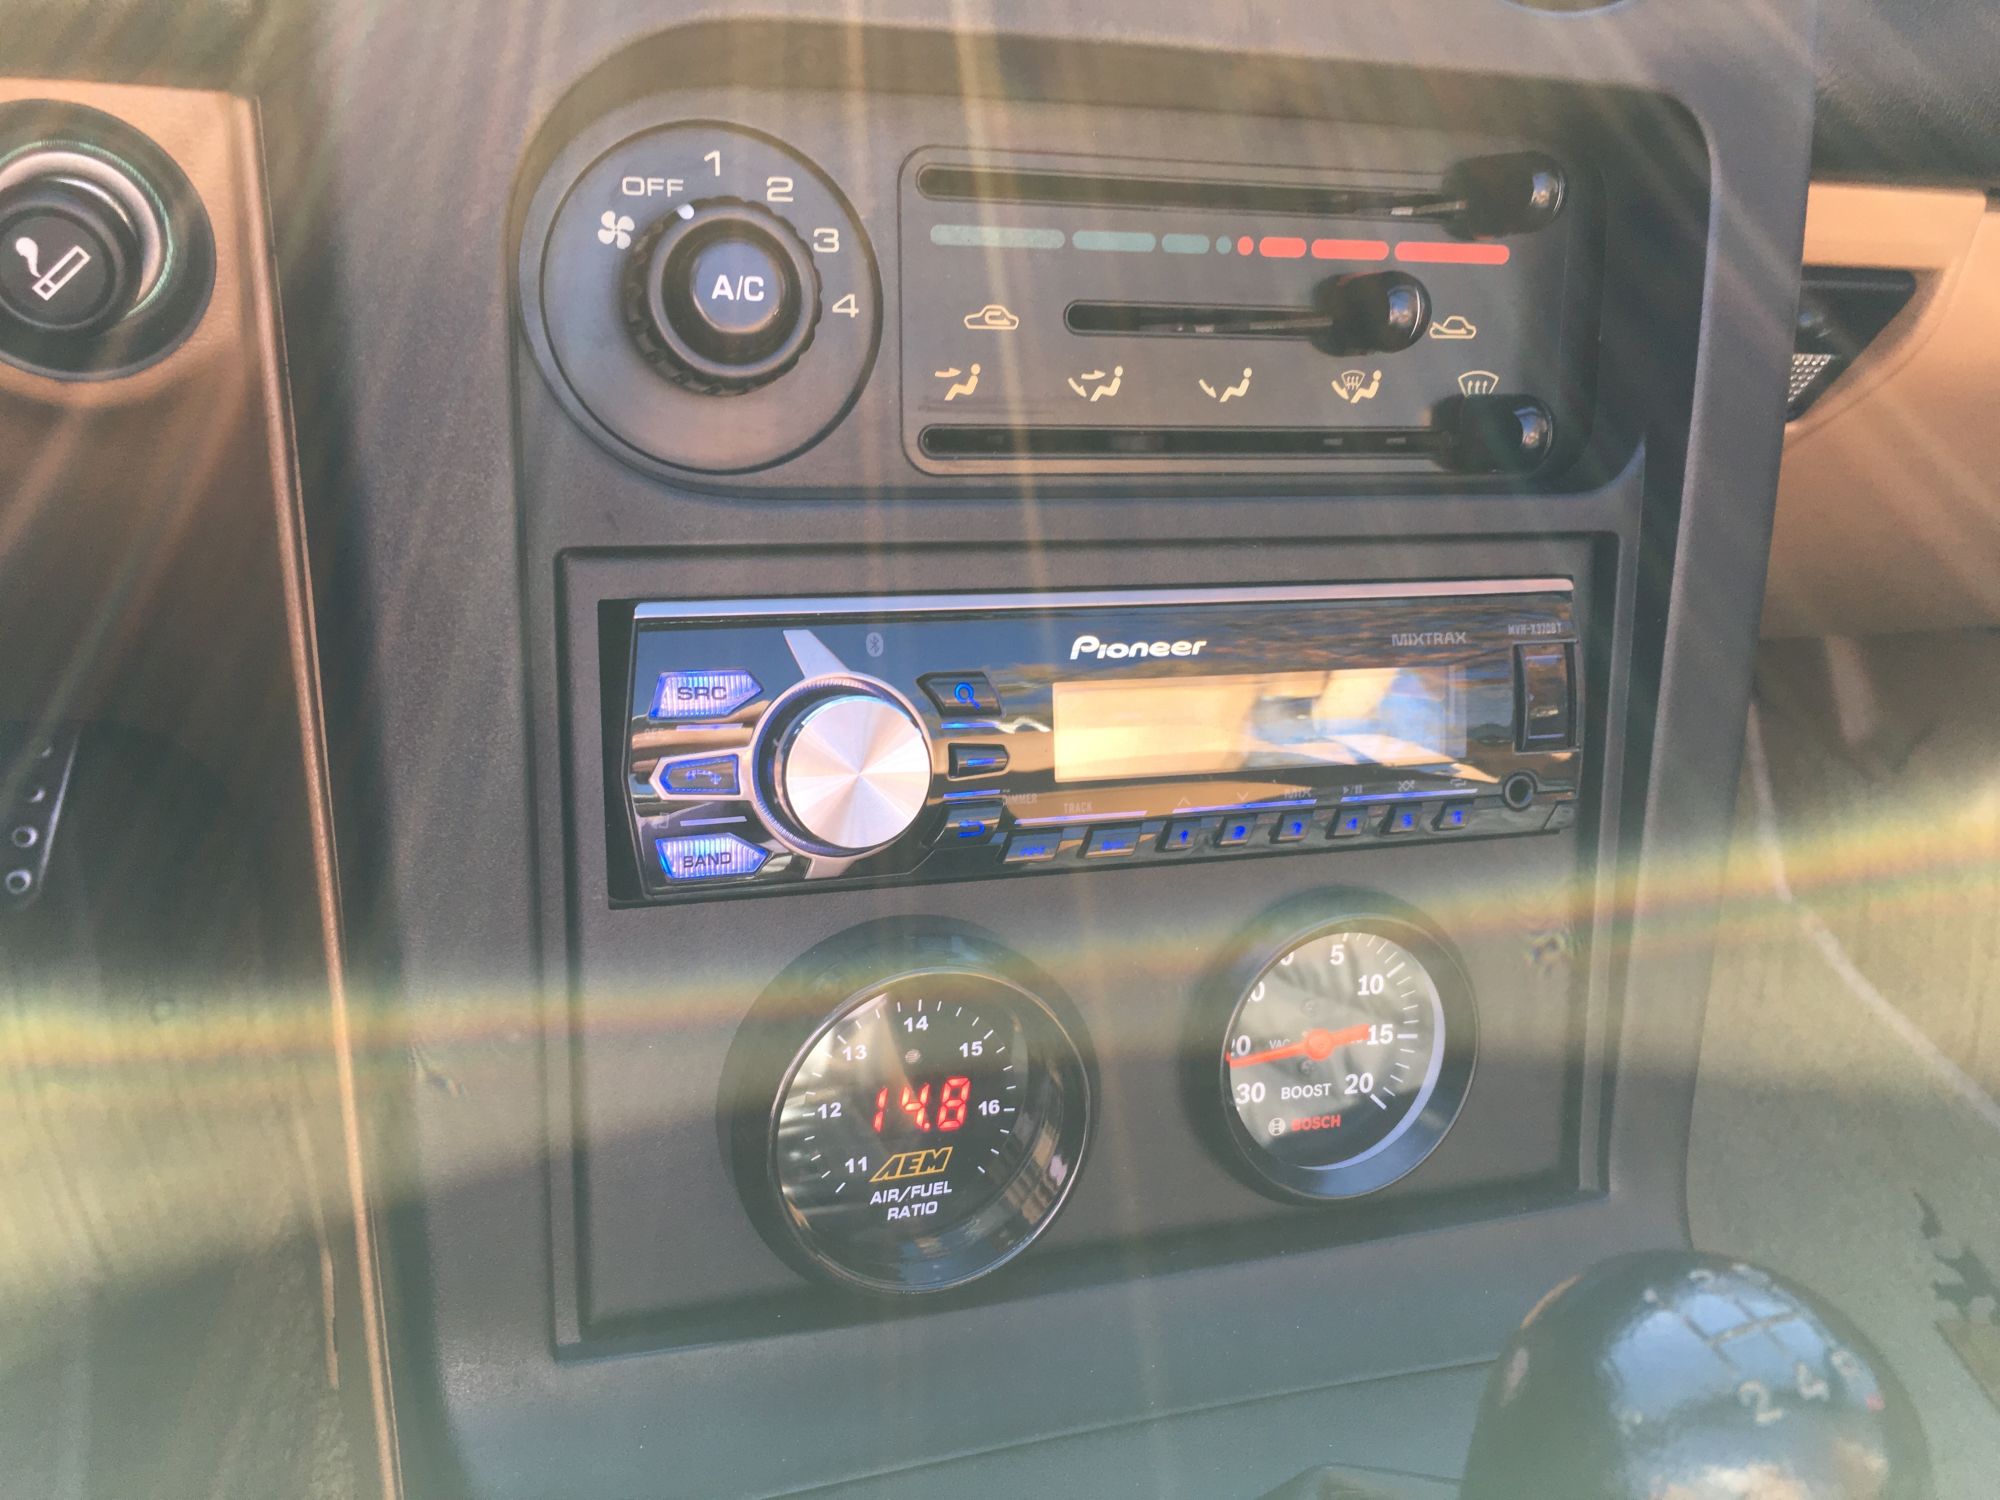
all set to go. If you are using the stock ECU as I am for now, you want to set the AEM gauge to the P04 setting, using a tiny flathead on the back of the gauge. this simulates a narrowband output for the stock ECU. I've probably put 50 miles on the car since the install, and haven't had any issues with CELs or otherwise.
for the wideband, pull the driver's side wheel off, and you should have access to the O2 sensor. I cut the wires on the factory O2 as close to the sensor as possible.
This is the setup I used to remove the stock O2 sensor.
Electric 1/2" impact > extension > 3/8" reducer > harbor freight O2 socket
the cheap metal reducer held up just fine with all of the torque, and the stock O2 came out without any issues. I used a this O2 sensor thread chaser before putting in the aem wideband - - I'm not sure how necessary it was, but amazon recommended that I buy it, and it did make me feel all warm and fuzzy after using it.
the AEM uego comes with anti-seize on the threads right out of the box, which is a nice touch.
after screwing in the sensor, I ran the harness up along the transmission tunnel, and through the shifter into the cabin. Then I extended the signal wire (white wire on the AEM harness, but as you can see I used blue wire to extend it into the engine bay), and the ground (black wire) through this rubber grommet back into the engine bay..
I used this location as the ground..
(experienced MTers feel free to chime in and tell me if this is a horrible ground to use. i'm going to be using the MSLabs Wideband CAN module with my MS3 when i install in a few weeks fyi)
..and soldered the extended signal wire (remember white AEM harness wire) to the blue wire on the factory O2 harness that I had previously snipped. the other three wires in the factory harness do not get any love.
i had read that soldering this wire was tough because of the metal used, but I had no issues with my weller iron.
for power I used an add-a-circuit fuse tap on the Engine fuse. super easy.
test fitting, with the DDM gauge pod.
all set to go. If you are using the stock ECU as I am for now, you want to set the AEM gauge to the P04 setting, using a tiny flathead on the back of the gauge. this simulates a narrowband output for the stock ECU. I've probably put 50 miles on the car since the install, and haven't had any issues with CELs or otherwise.
Reply
0
0
01-24-2016, 09:00 PM
#15
Junior Member
Thread Starter
Join Date: Sep 2015
Posts: 45
Total Cats: 1
more updates.... still performing pre-turbo tasks in anticipation of my MK Turbo setup.
-Timing belt / water pump (cheap ebay kit from domesticgaskets). No issues with fitment, came with a GMB water pump.
-MS3 Basic from Trackspeed
-Chinese radiator
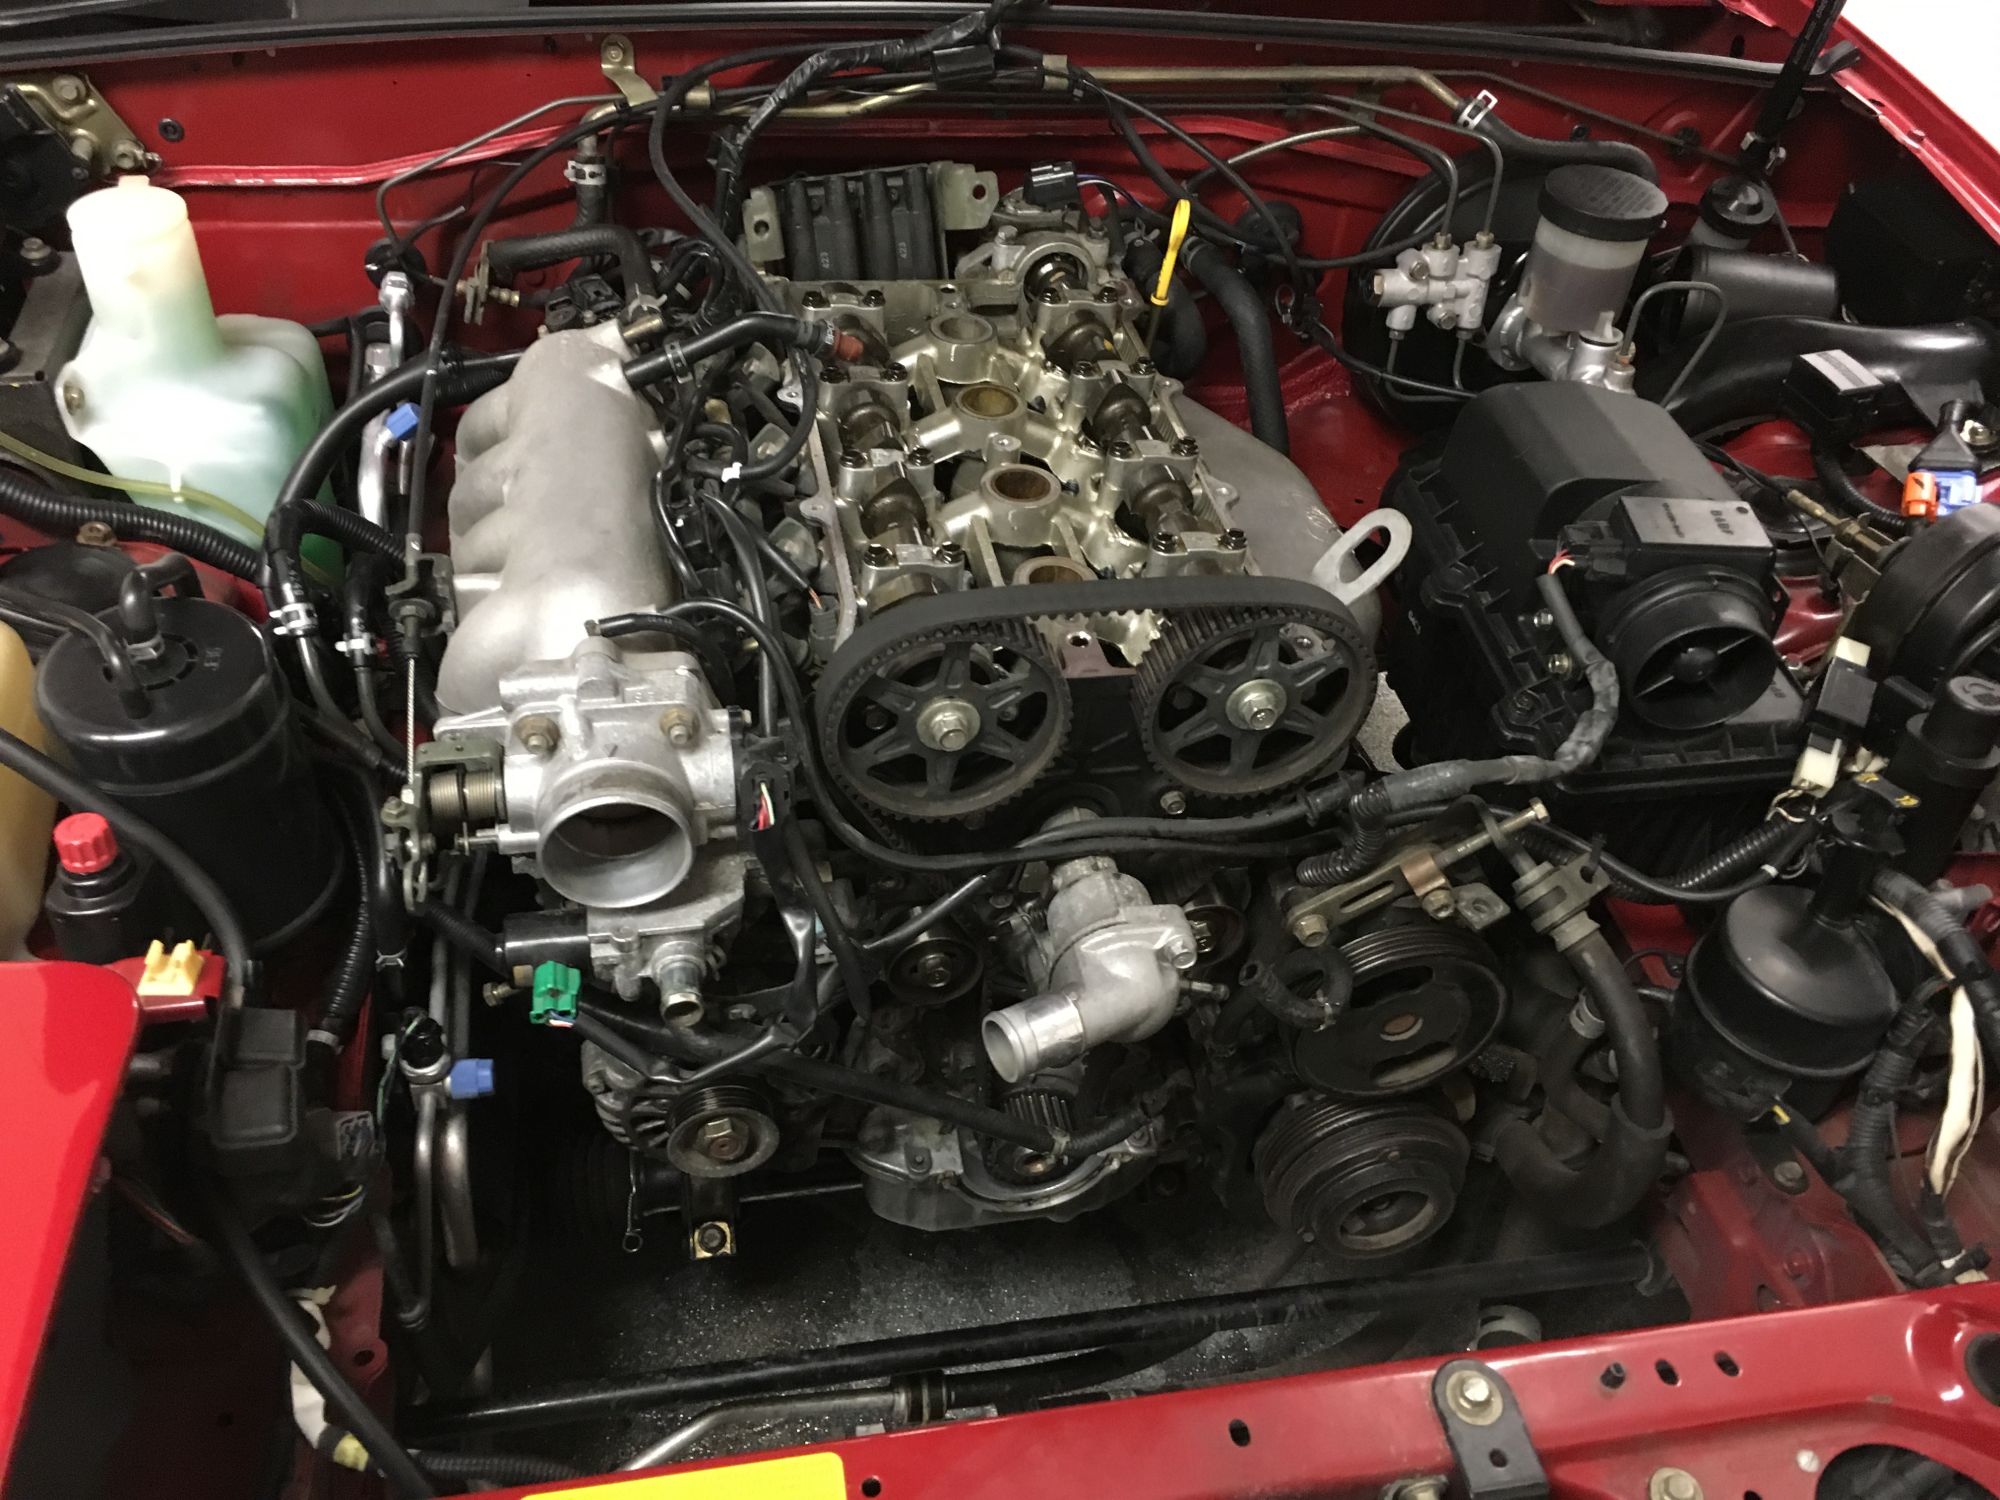
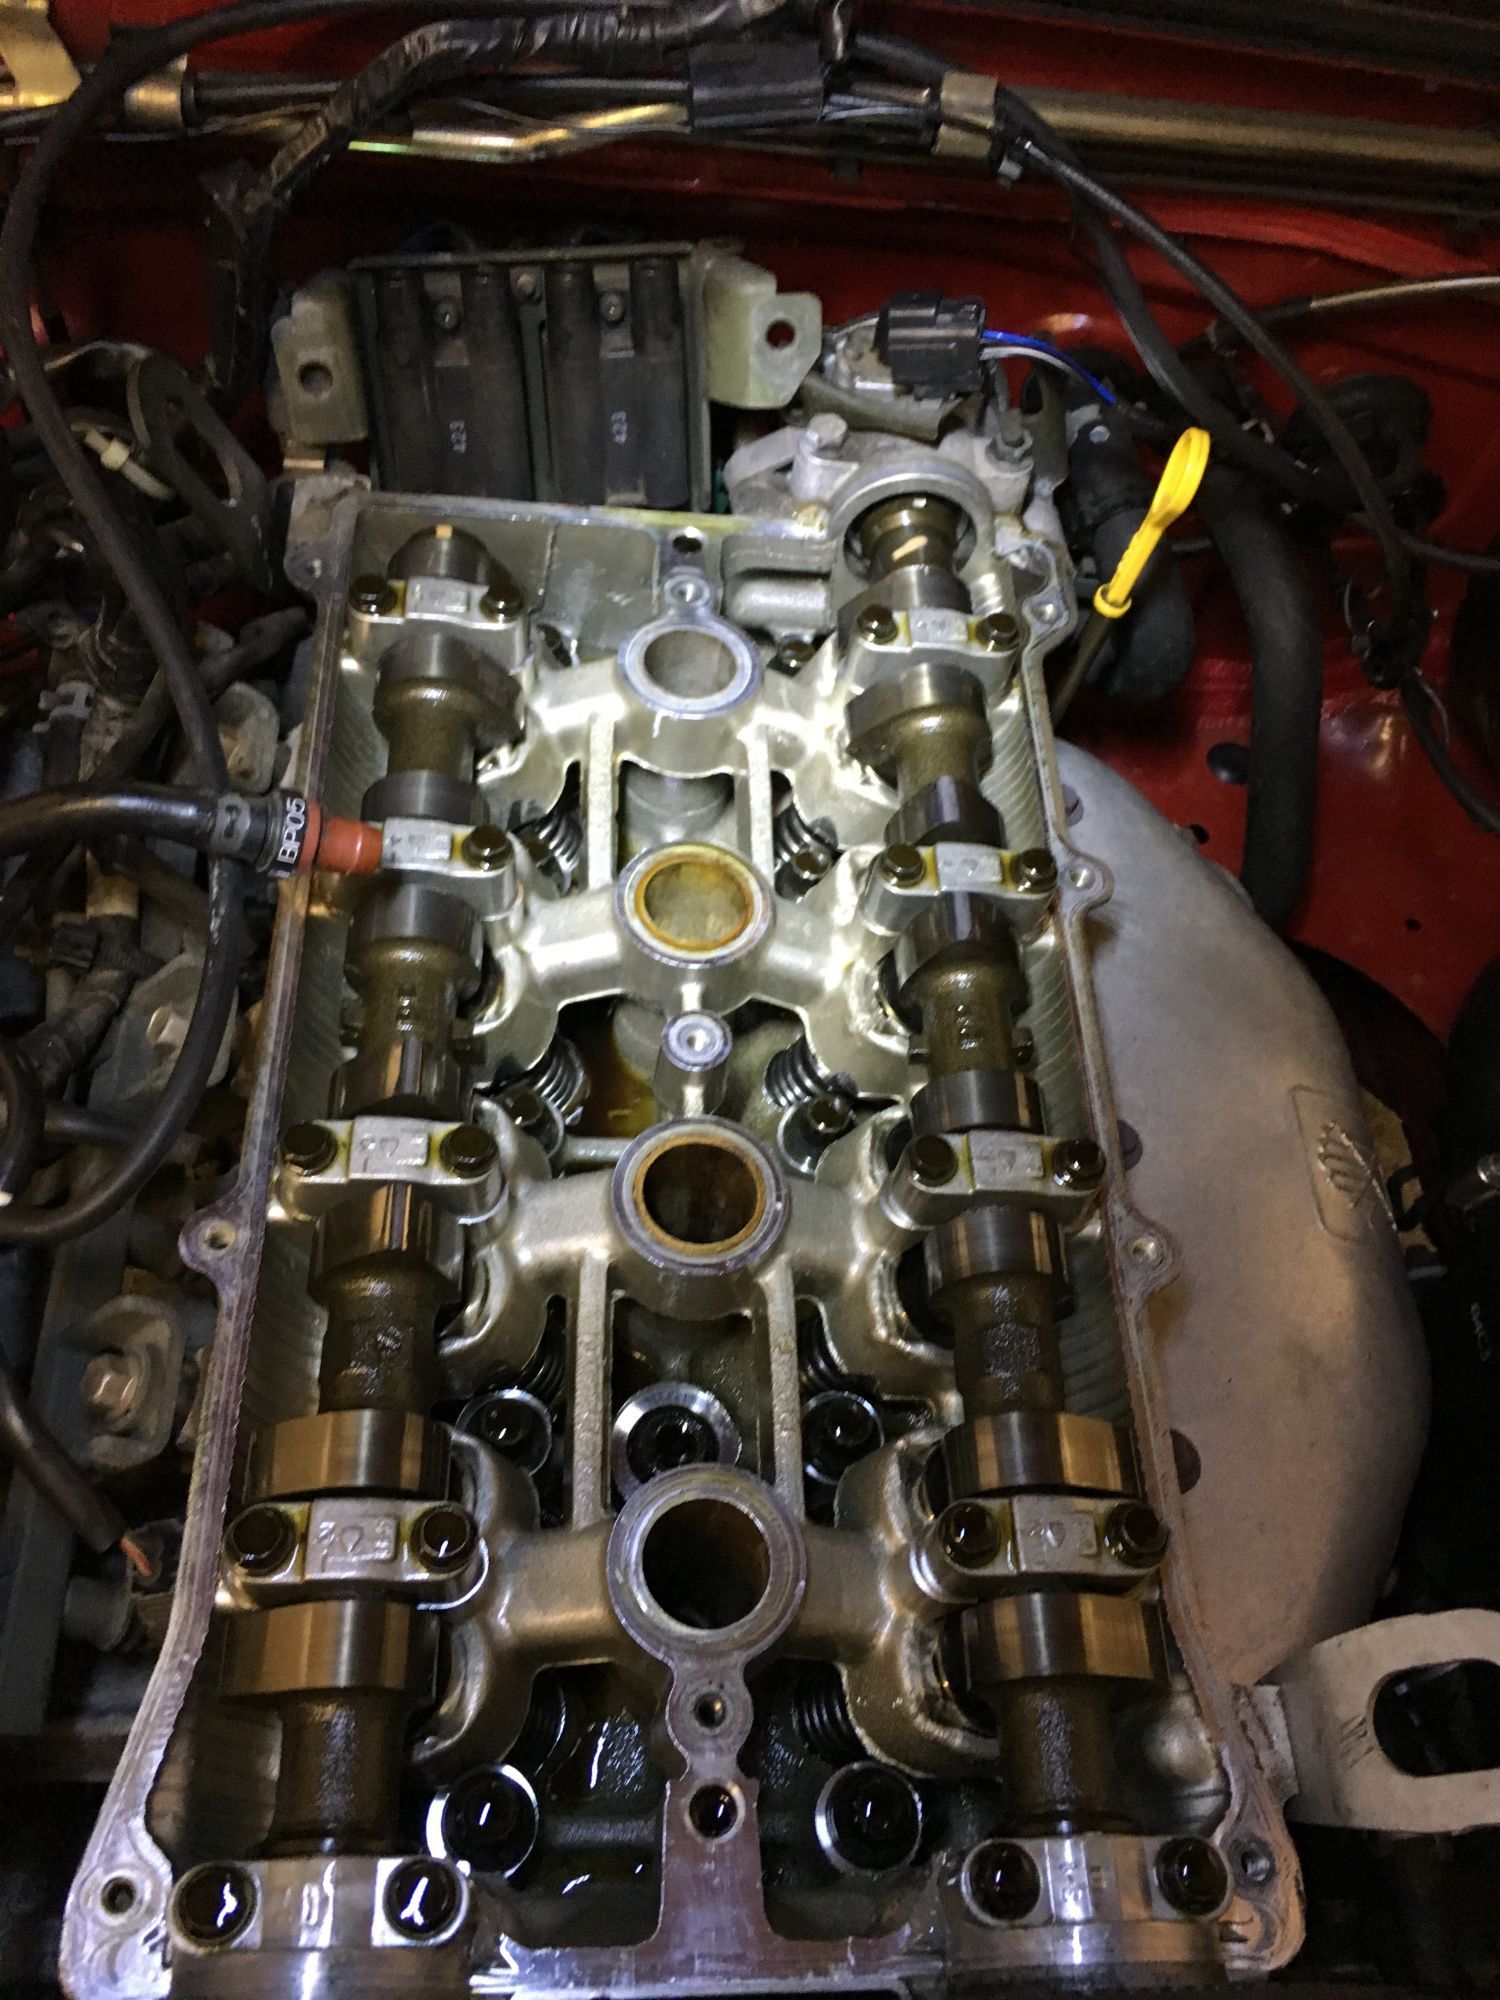
pleasantly surprised at how clean the engine looks under the valve cover..
the front main seal area was a complete mess before this work
MS3 installation. my high tech mounting solution
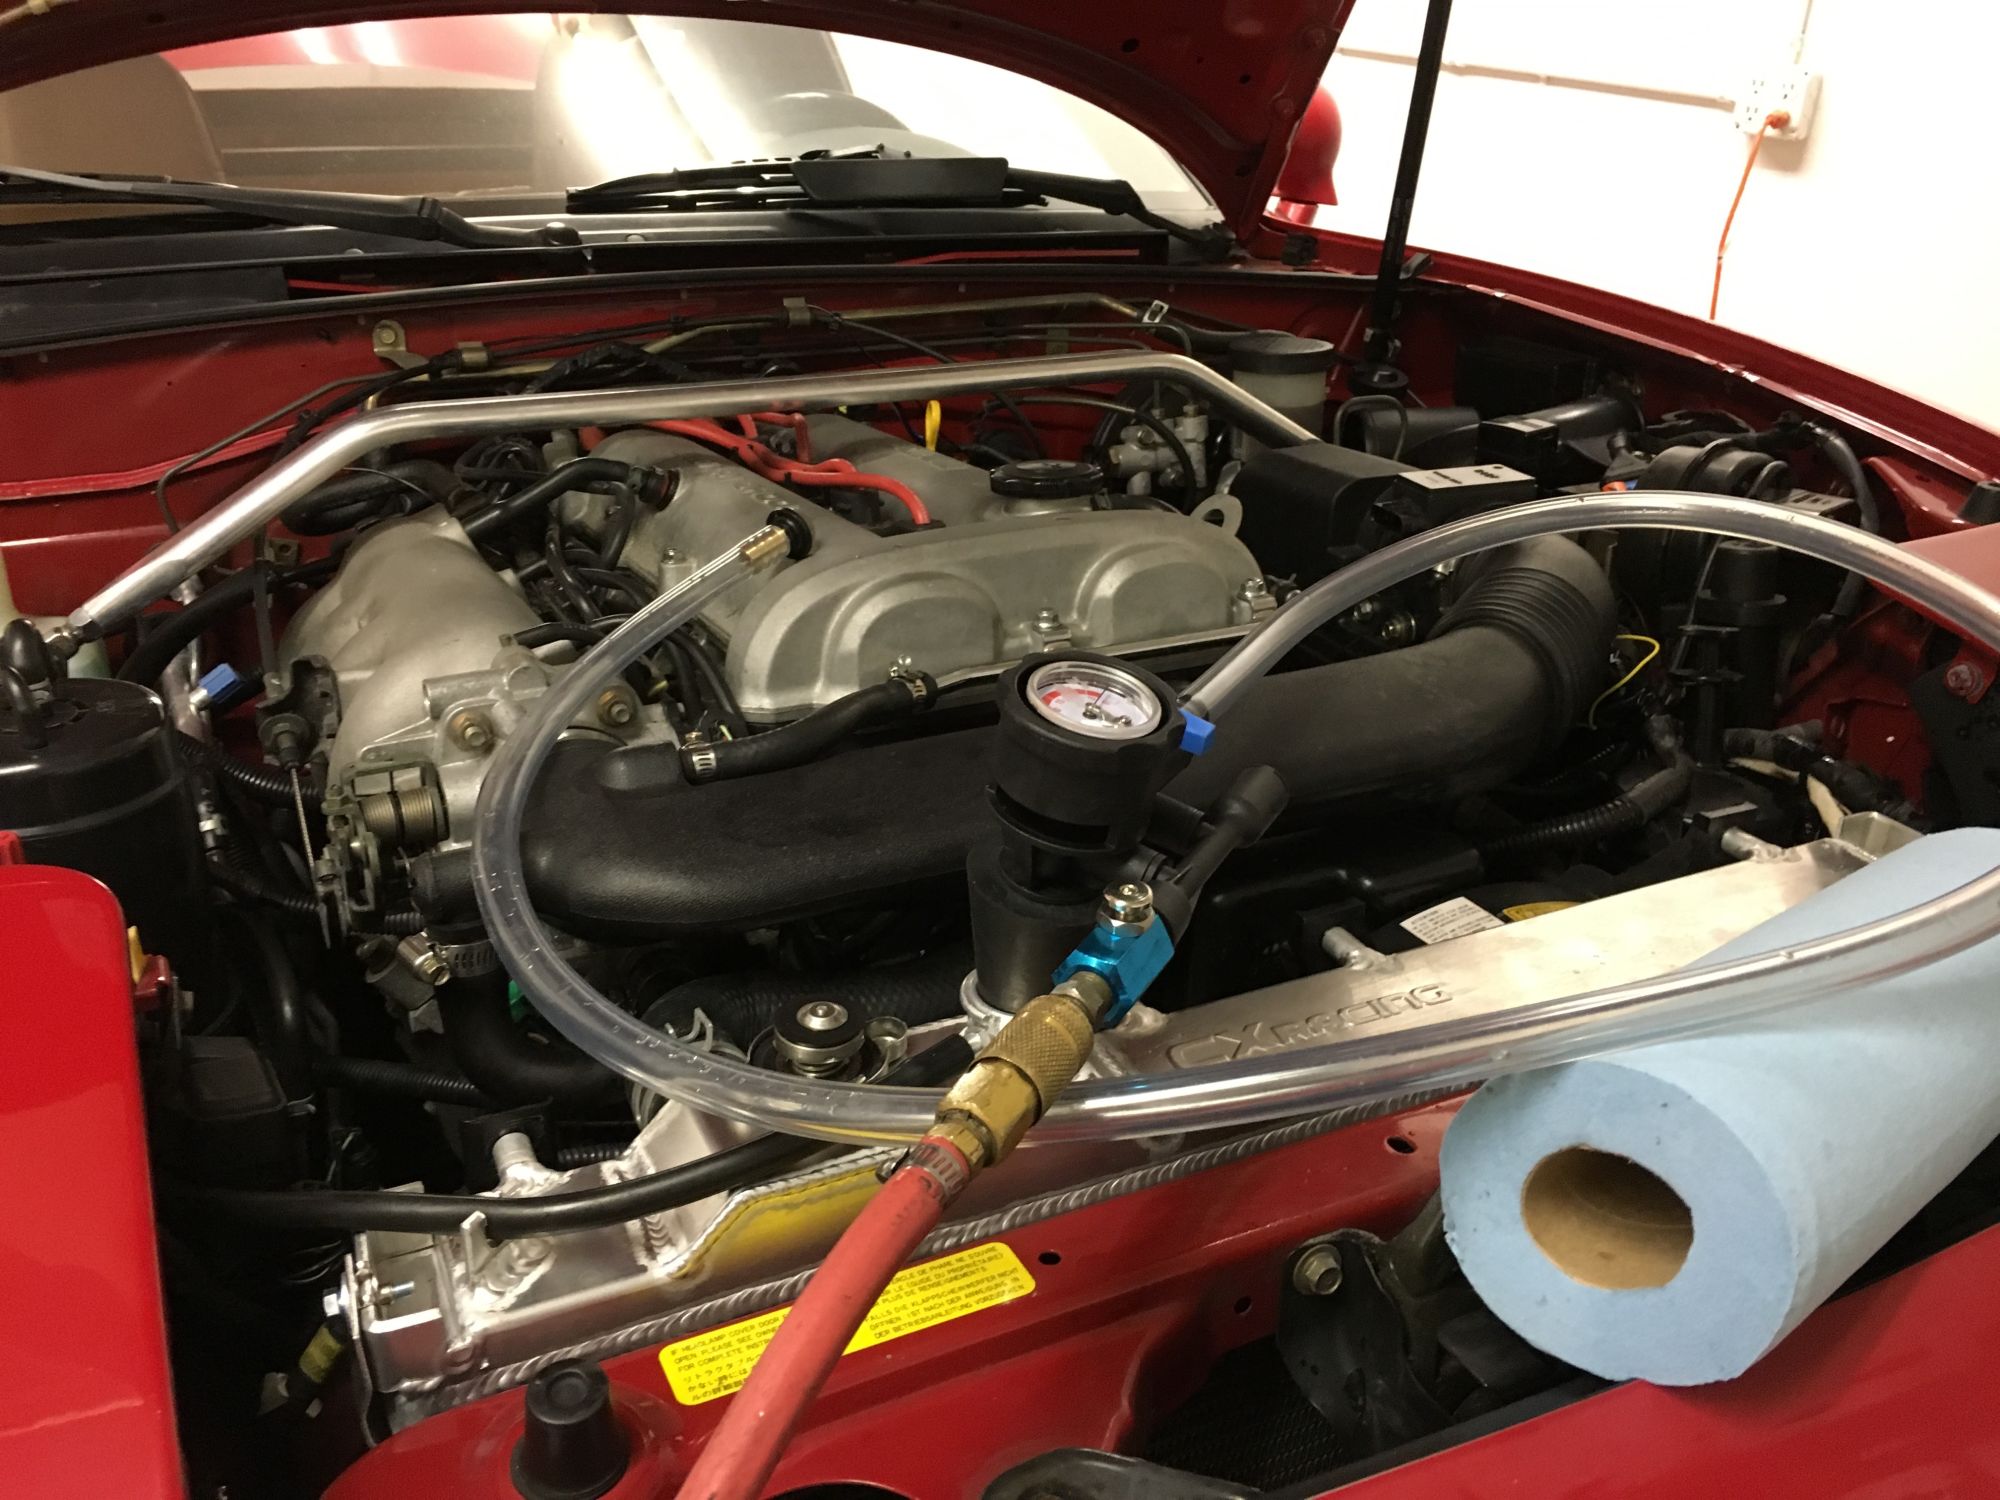
refilling coolant with my UView airlift.... one of the coolest tools I own.
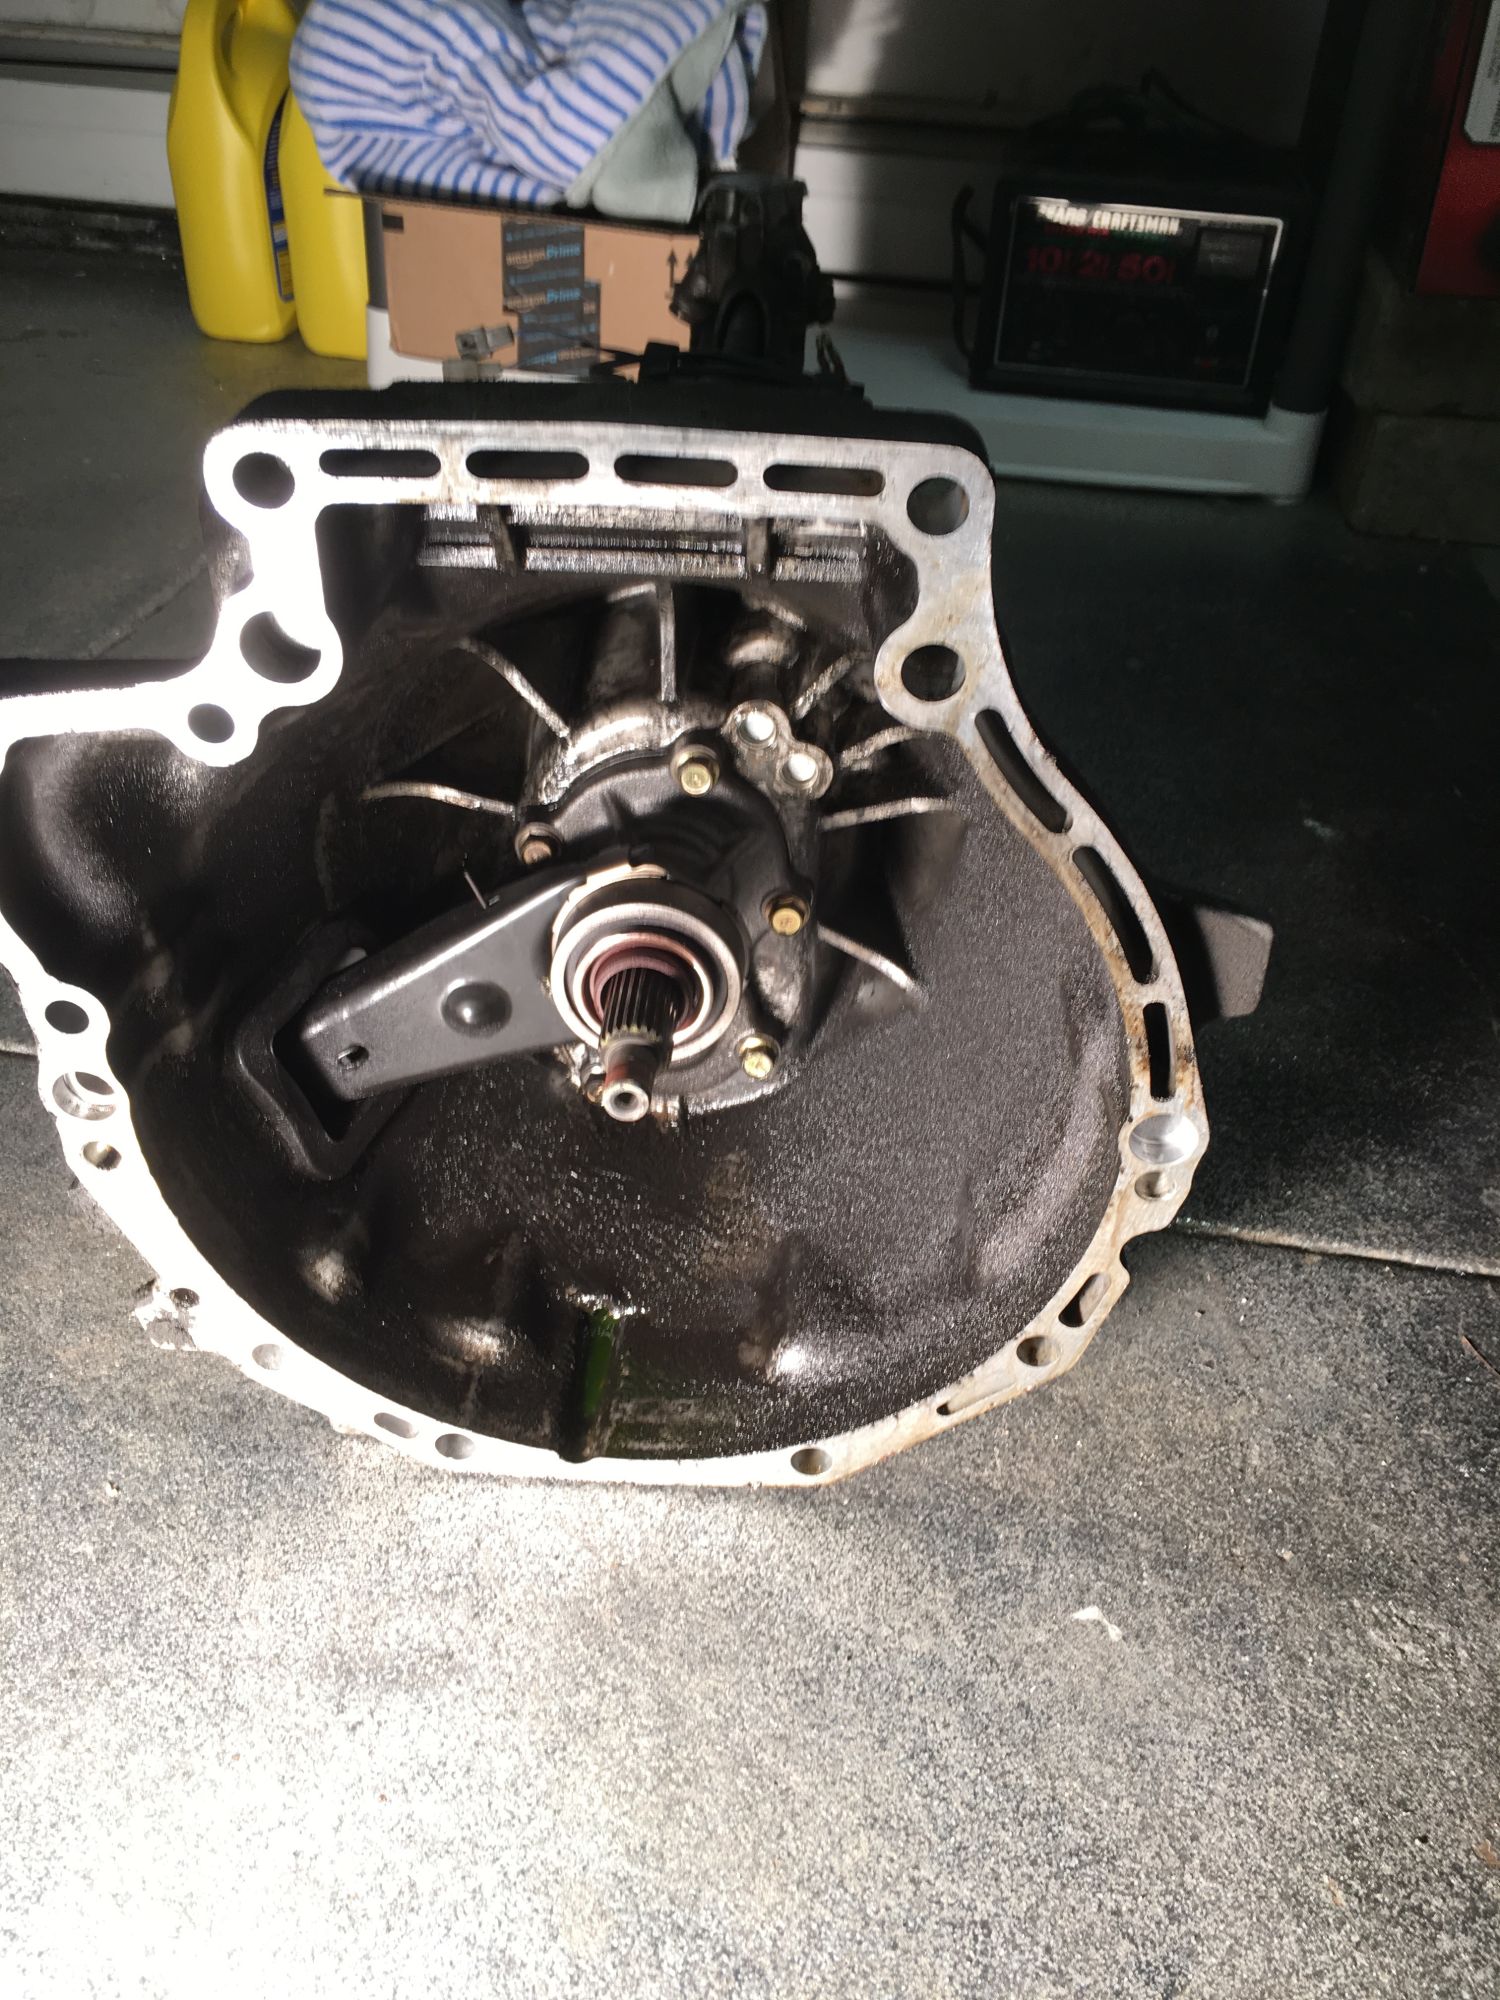
Currently I'm upgrading the stock clutch to an FM stage 1. I also wanted to find out where the oil that drools from the weep hole is coming from.
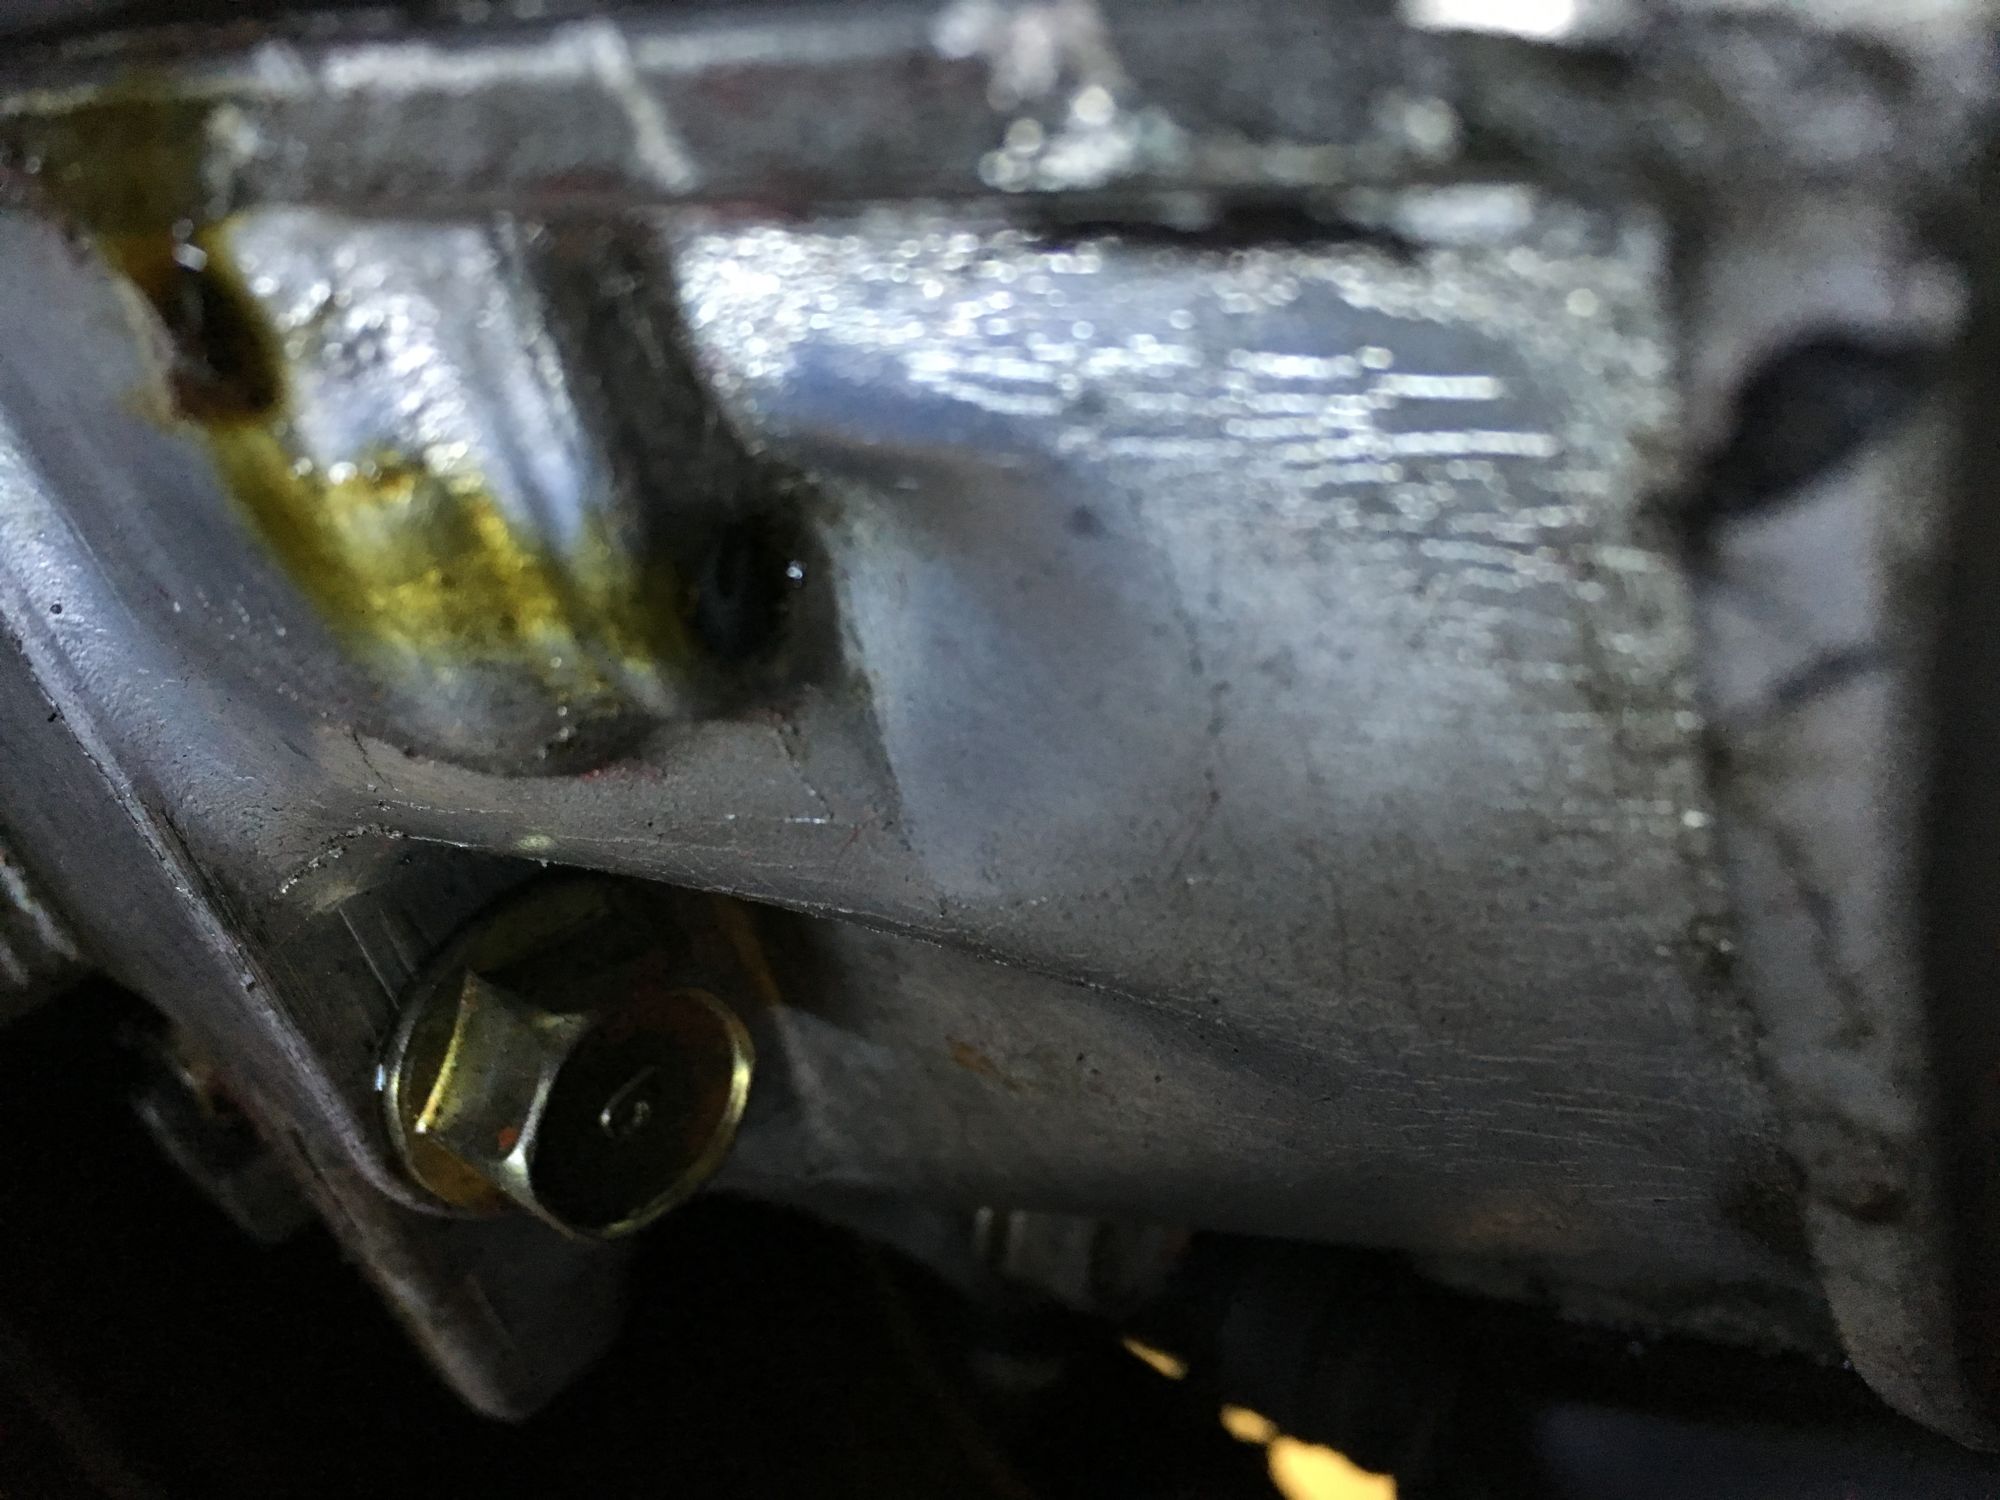
After removing the transmission I was greeted to a nice streak of coolant in the bellhousing.
I'm pretty certain it's the old coolant hoses that run to the back of the head (heater & oil cooler), so while I'm in there I'll be replacing all of those.
The other more concerning issue is that the oil found in the bellhousing looks like it's coming from the rear main "half moon" seal rather than the RMS itself.
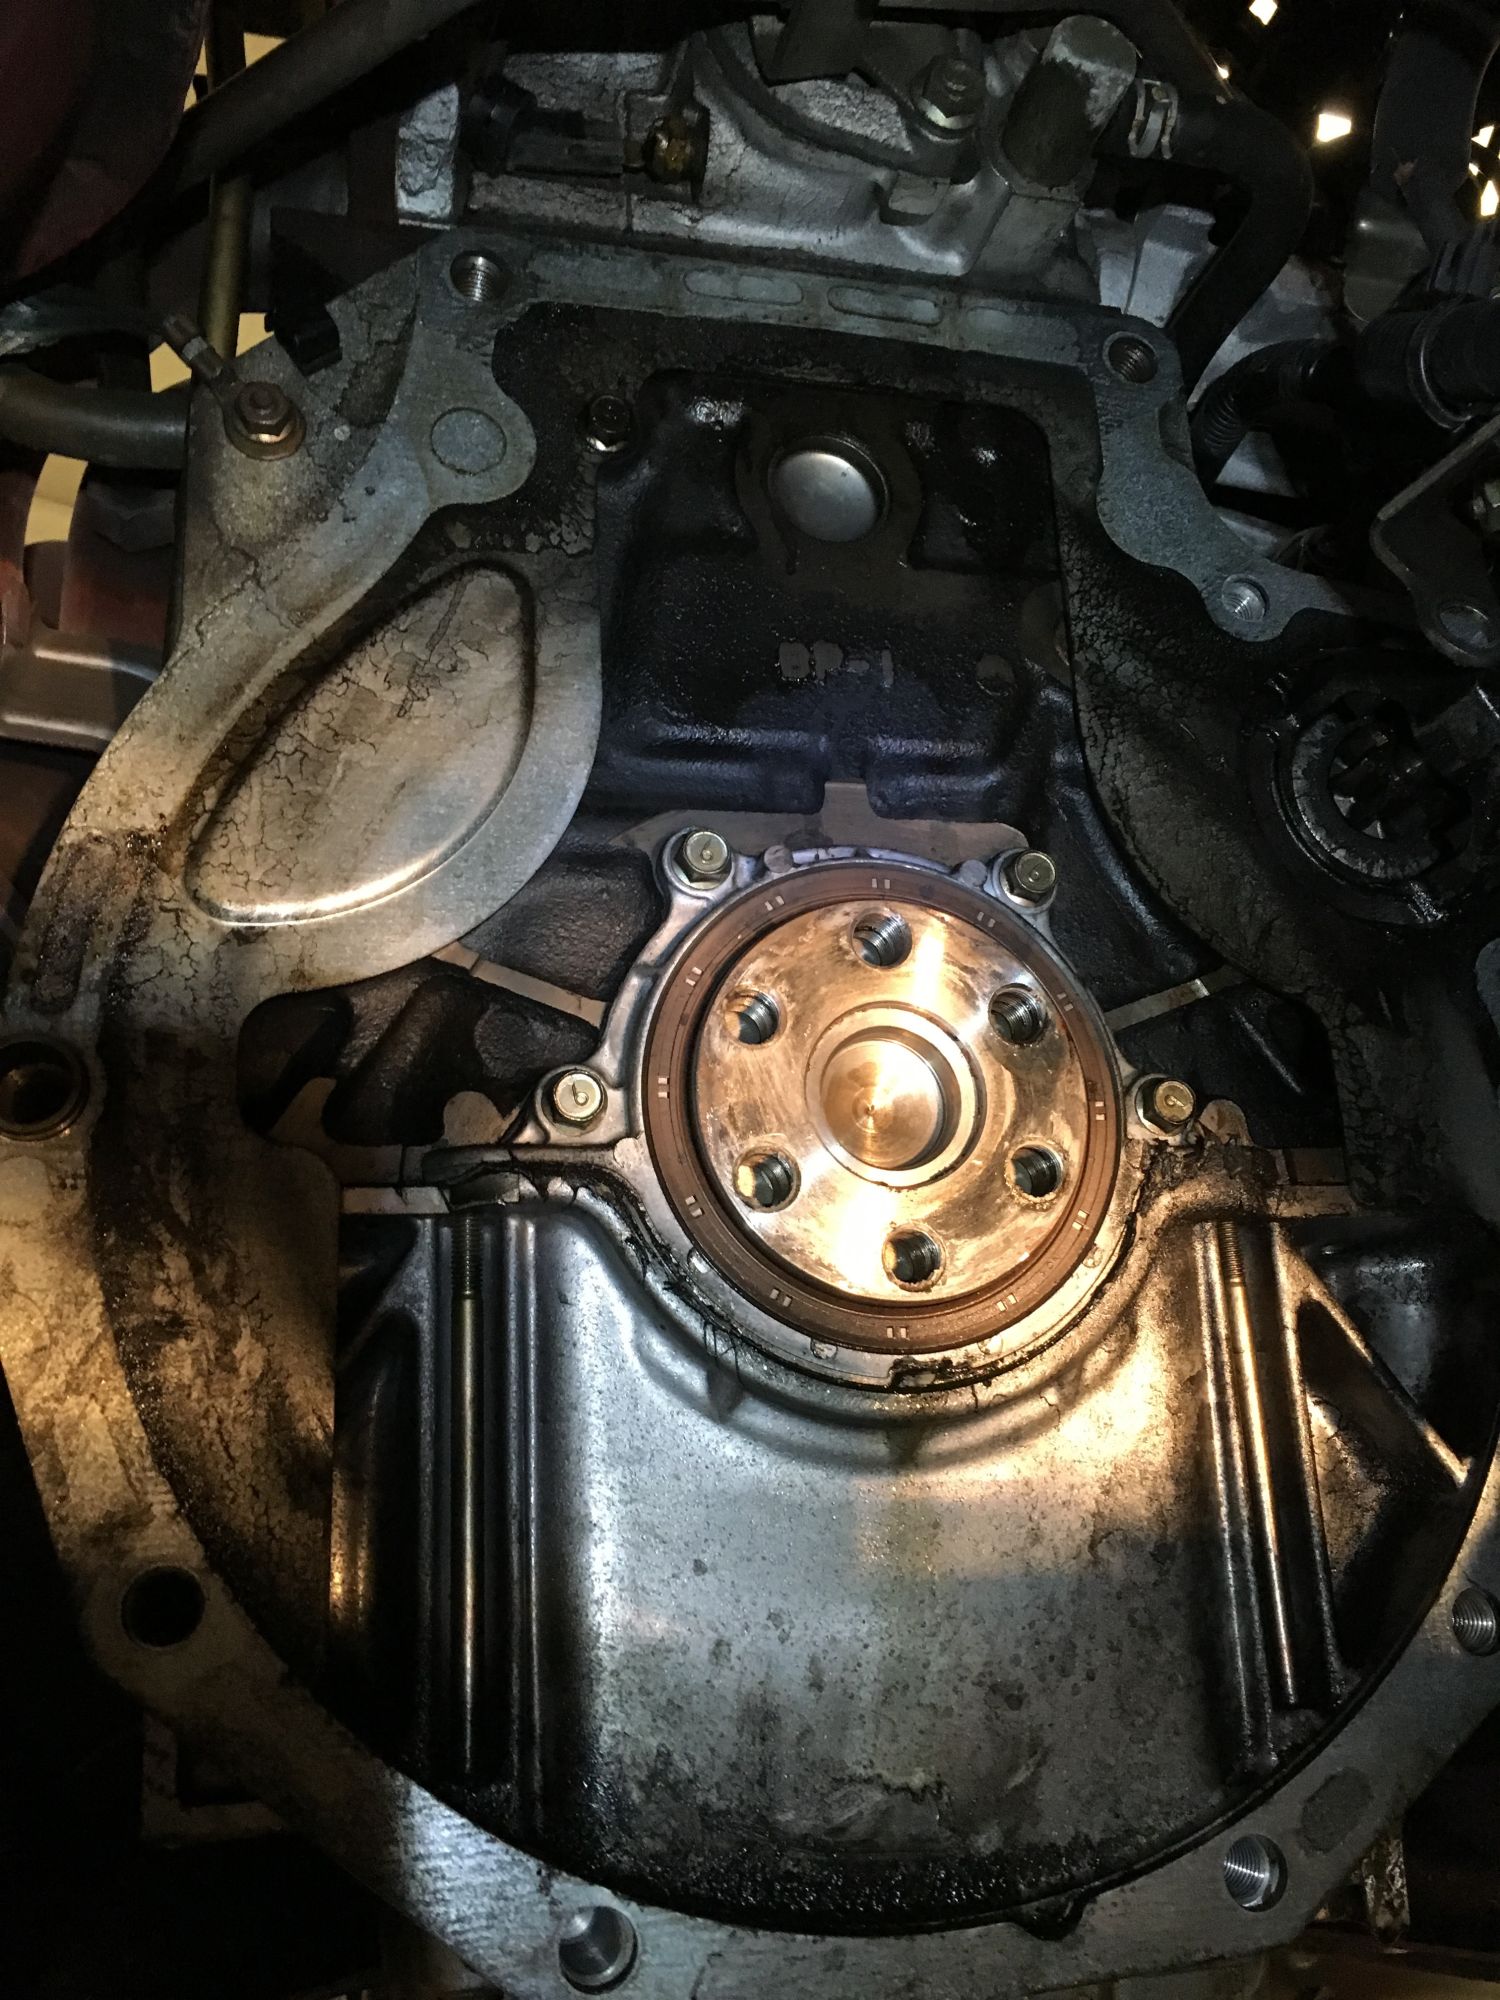
From what I've read online, this is a total pain in the *** to replace this seal while the engine is still in the car. I'm tempted to just clean everything up and apply a bead of RTV in the problem area. I'm wondering if others here have had success in replacing this half moon seal without dropping the pan.
Overall, the car runs great and pulls really hard with the MS3. Of course it's not a fast car in its stock form by any means, but the sensation of speed in this little go kart makes it so fun to drive. I truly cannot imagine what ~225whp will feel like.
In the next couple of months I'll be doing the suspension, installing forceflow injectors & retuning, tapping my oil pan, and working out the intercooler piping. I've been having a lot of fun wrenching and tuning megasquirt, and have learned a shitload from this site.
I would say I'm well past the half way point of this project to turbo goodness.
-Timing belt / water pump (cheap ebay kit from domesticgaskets). No issues with fitment, came with a GMB water pump.
-MS3 Basic from Trackspeed
-Chinese radiator
pleasantly surprised at how clean the engine looks under the valve cover..
the front main seal area was a complete mess before this work
MS3 installation. my high tech mounting solution
refilling coolant with my UView airlift.... one of the coolest tools I own.
Currently I'm upgrading the stock clutch to an FM stage 1. I also wanted to find out where the oil that drools from the weep hole is coming from.
After removing the transmission I was greeted to a nice streak of coolant in the bellhousing.
I'm pretty certain it's the old coolant hoses that run to the back of the head (heater & oil cooler), so while I'm in there I'll be replacing all of those.
The other more concerning issue is that the oil found in the bellhousing looks like it's coming from the rear main "half moon" seal rather than the RMS itself.
From what I've read online, this is a total pain in the *** to replace this seal while the engine is still in the car. I'm tempted to just clean everything up and apply a bead of RTV in the problem area. I'm wondering if others here have had success in replacing this half moon seal without dropping the pan.
Overall, the car runs great and pulls really hard with the MS3. Of course it's not a fast car in its stock form by any means, but the sensation of speed in this little go kart makes it so fun to drive. I truly cannot imagine what ~225whp will feel like.
In the next couple of months I'll be doing the suspension, installing forceflow injectors & retuning, tapping my oil pan, and working out the intercooler piping. I've been having a lot of fun wrenching and tuning megasquirt, and have learned a shitload from this site.
I would say I'm well past the half way point of this project to turbo goodness.
Reply
0
0
 01-26-2016, 03:29 AM
#17
Junior Member

Join Date: Sep 2012
Location: New Zealand Christchurch
Posts: 208
Total Cats: -3
I don't imagine that oil leak will fix itself. Seeing you have the gearbox out you could pull the engine and fix the pan properly although this isn't a fun job...But i guess you could get a fitting welded to the pan while thats off... this does seem to be the problem though one thing always leads to another thing haha. Hope you get it sorted though. The boost is best
Reply
0
0
01-27-2016, 10:43 PM
#18
Junior Member
Thread Starter
Join Date: Sep 2015
Posts: 45
Total Cats: 1
I don't imagine that oil leak will fix itself. Seeing you have the gearbox out you could pull the engine and fix the pan properly although this isn't a fun job...But i guess you could get a fitting welded to the pan while thats off... this does seem to be the problem though one thing always leads to another thing haha. Hope you get it sorted though. The boost is best
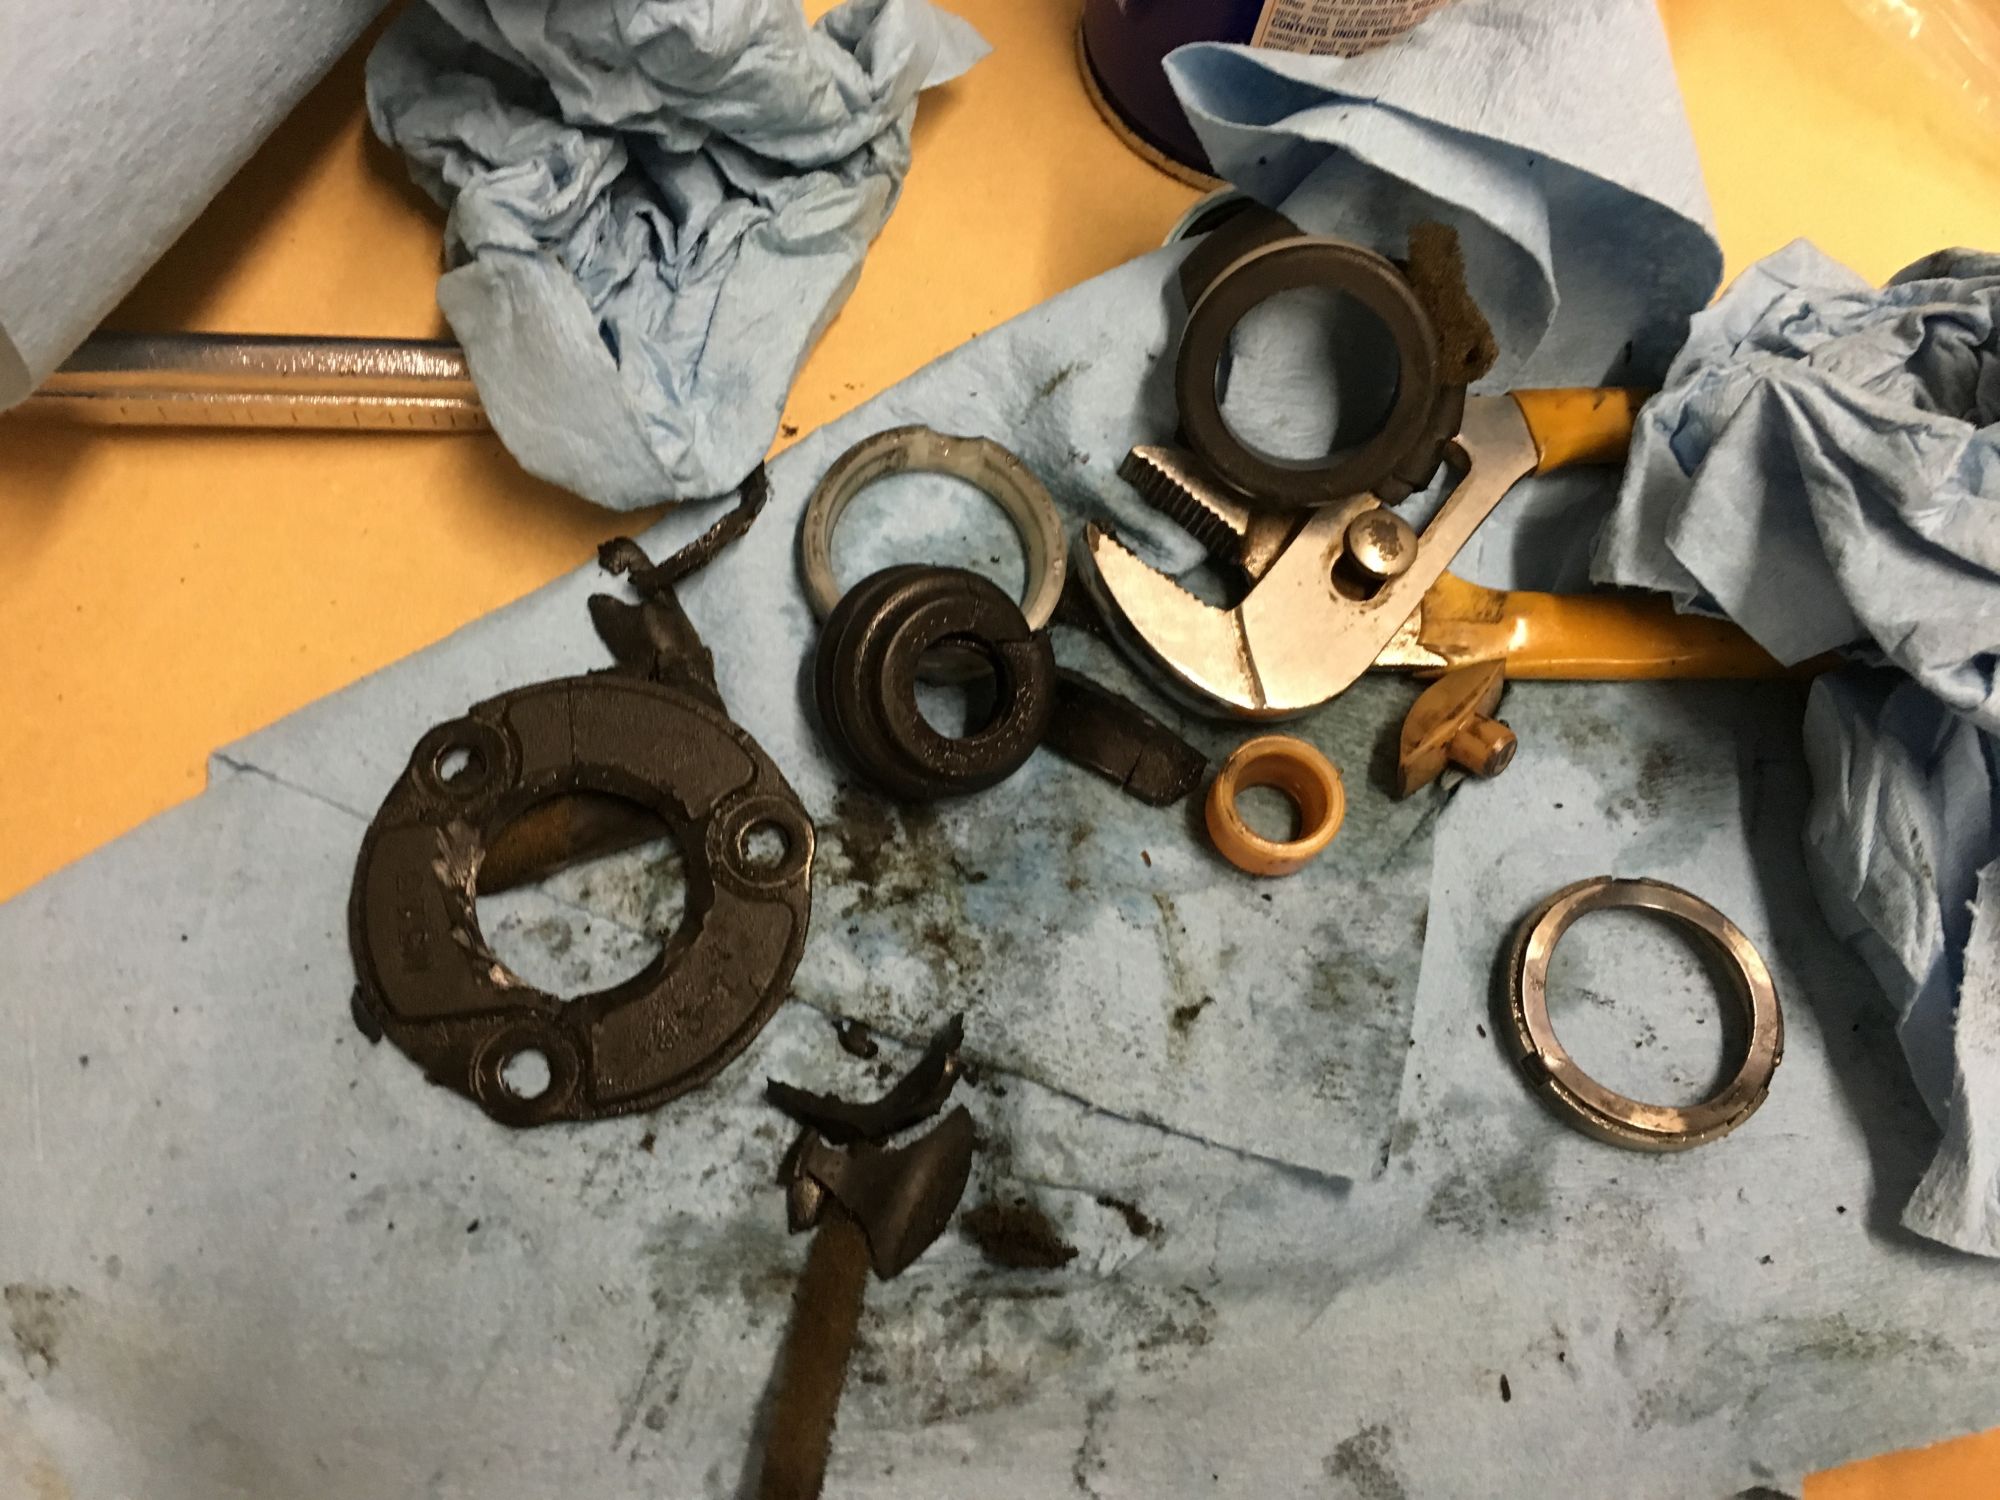
I decided to pull the rear main seal carrier from the block. It came off remarkably easy after removing the four bolts.
What a shitmess.
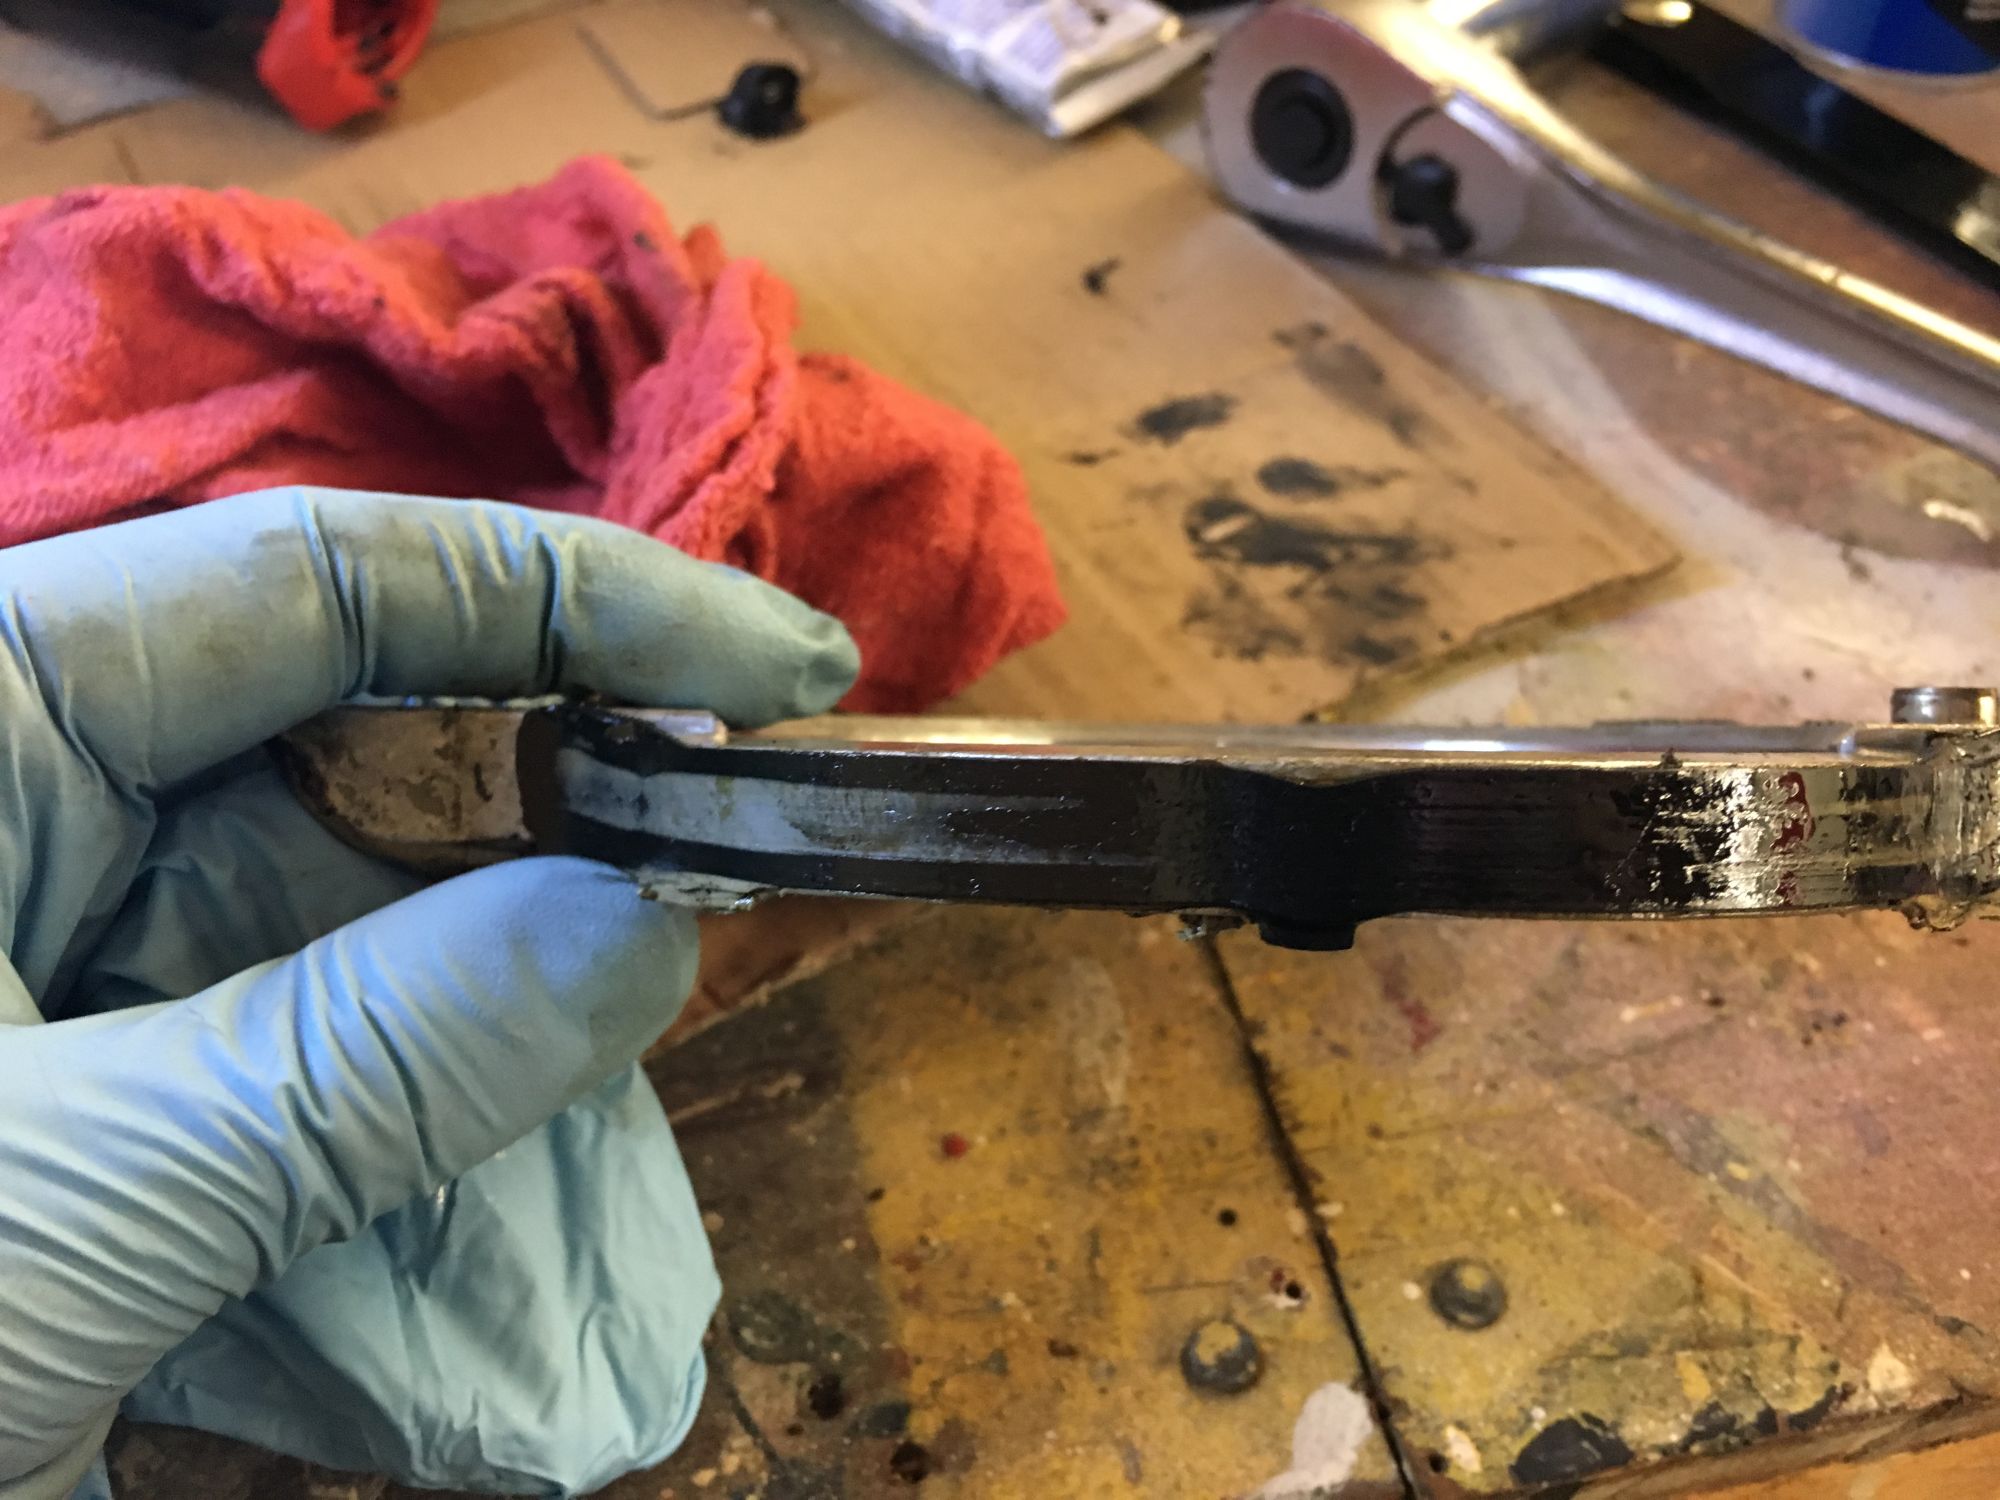
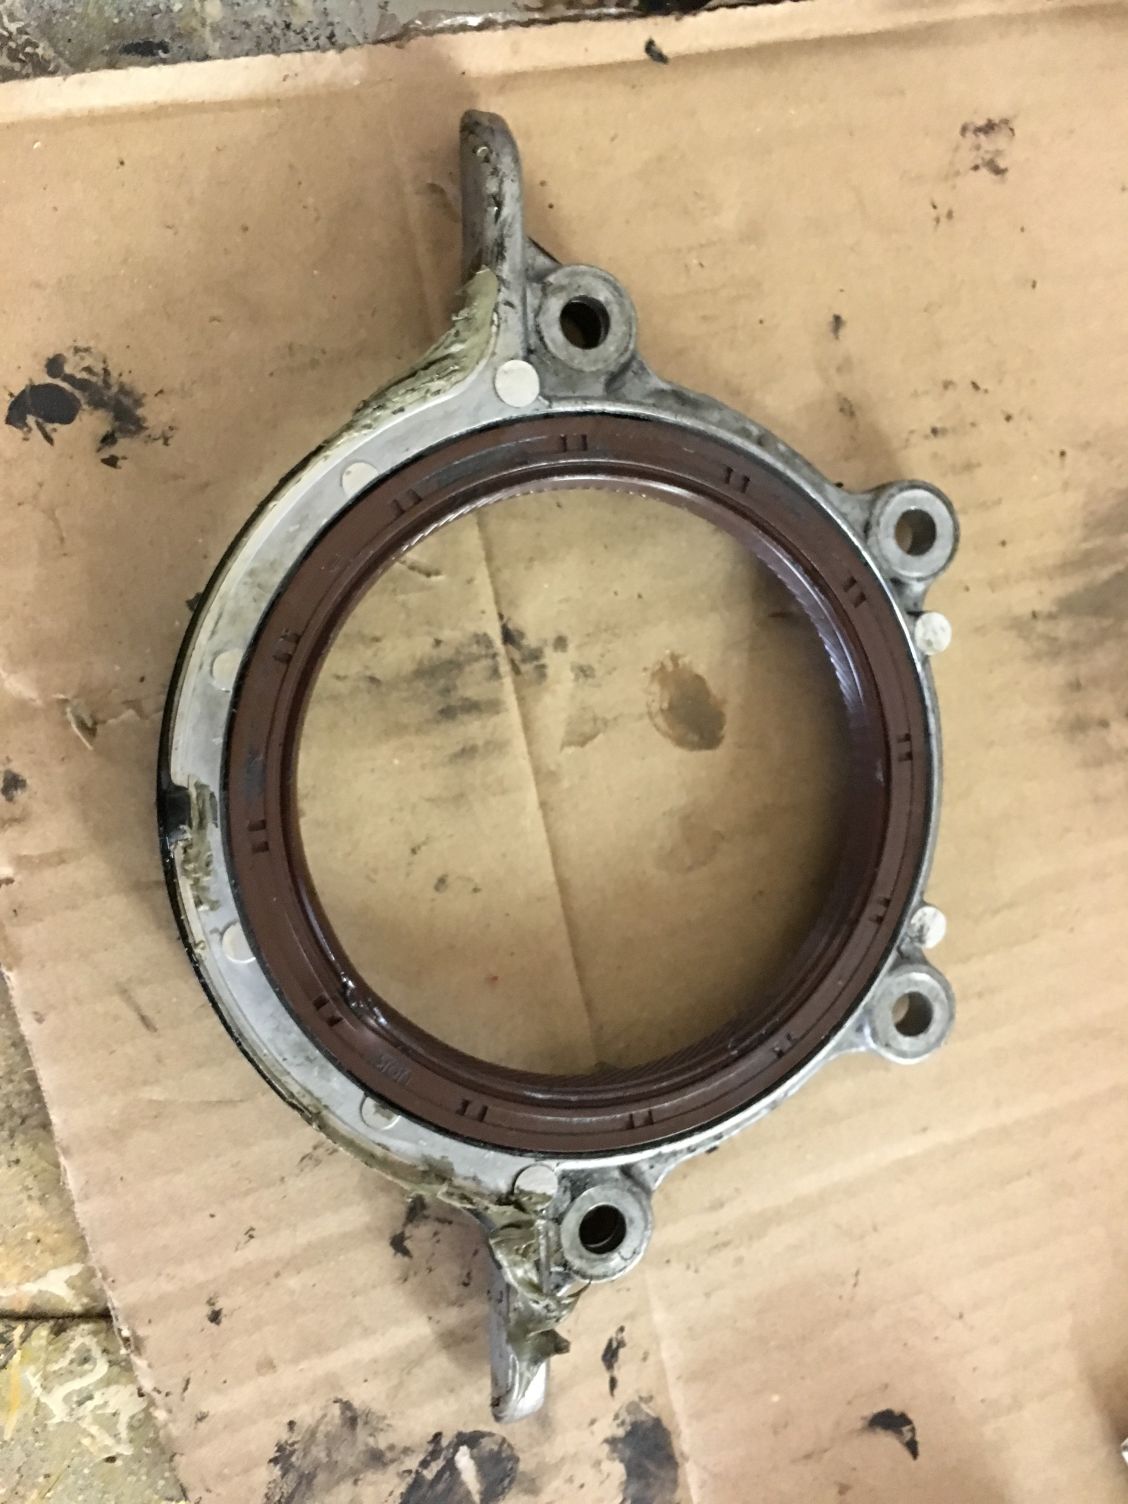
This black seal that runs along the bottom of the carrier is the problem. After ~23 years it's hard as a rock and allowing oil to seep past it. I ordered a new one from Rosenthal, and will reuse the carrier after cleaning it up.
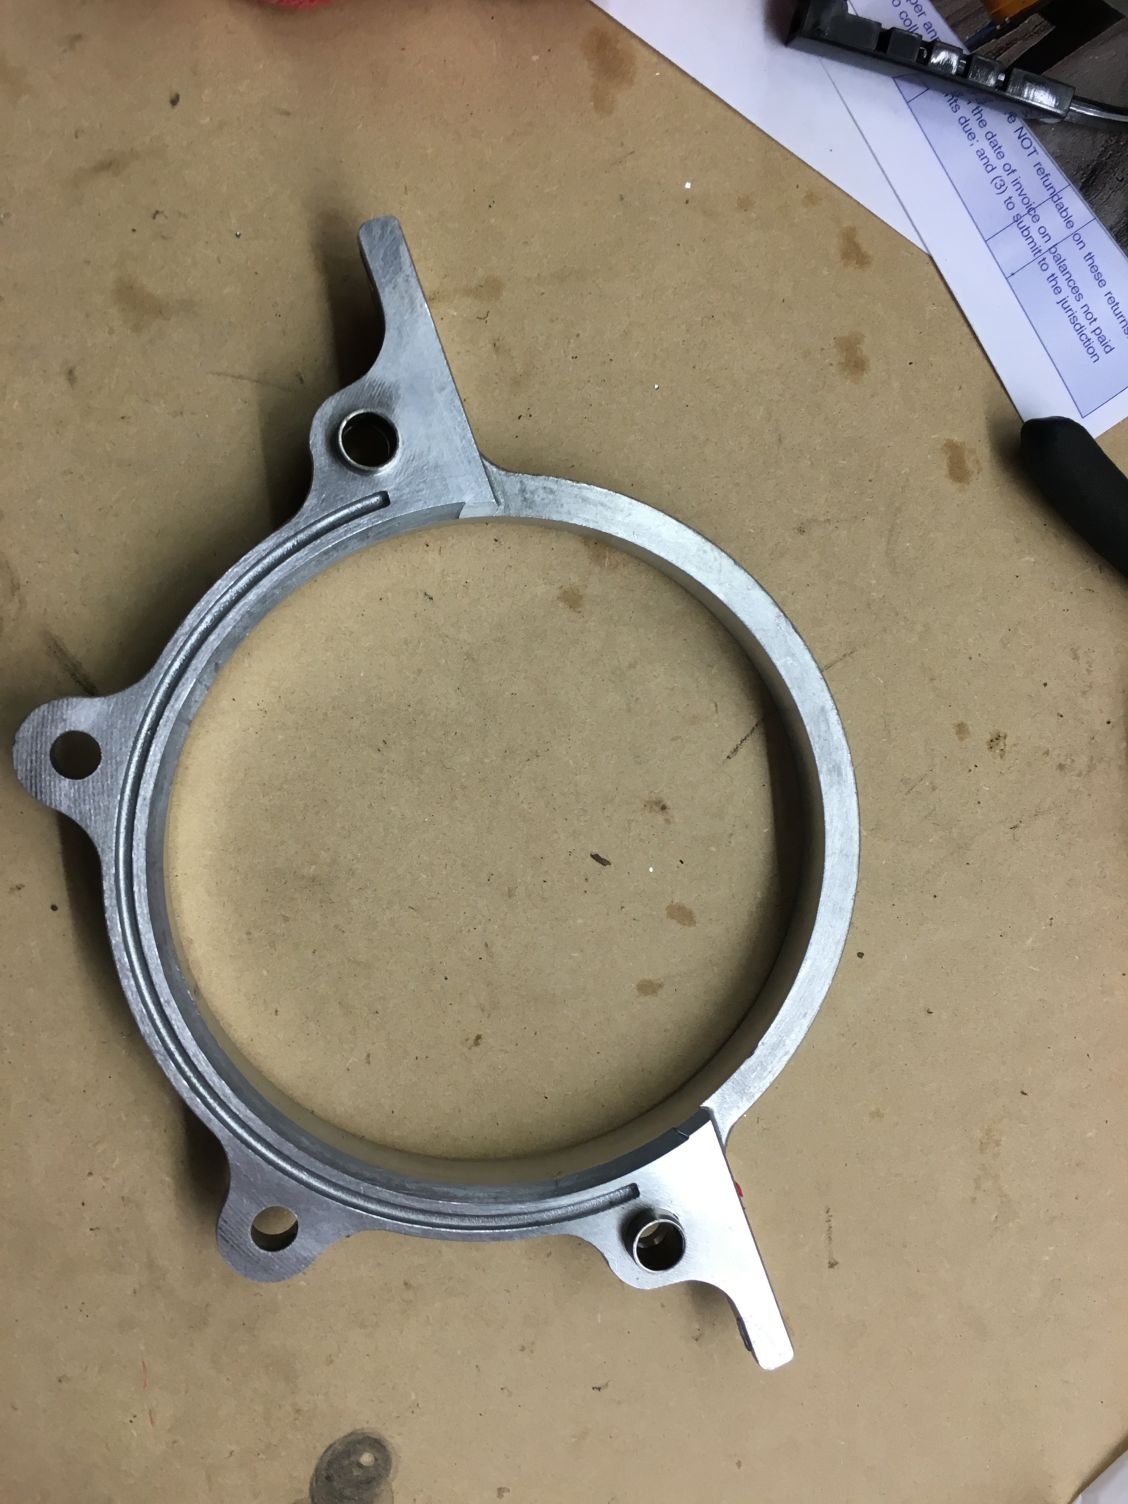
all clean and pretty. I'll be cleaning the block and pan tomorrow and plan on using copious amounts of RTV to get this all sealed up nicely. I really can't stand leaks.

Reply
1
1
01-28-2016, 10:03 AM
#19
Junior Member

Join Date: Sep 2014
Location: Canton, GA
Posts: 153
Total Cats: -84
Hmmm interesting. I am at the same point on my '99 block, although both front and rear half-moons are leaking. Trying to figure out best plan of attack. FMS, RMS, cam seals, valve cover, cam cap have all been replaced and are not leaking, 100% positive these two guys are the only thing causing my oily mess.
Reply
0
0


