When you click on links to various merchants on this site and make a purchase, this can result in this site earning a commission. Affiliate programs and affiliations include, but are not limited to, the eBay Partner Network.
So this was Austin's Purple Miata. I purchased it about 2 months ago and I've set about making it mine.
Long List of what's what... (great starting with such a well built car). It hadn't been on the track in a few years, but when he was running it was a dominant ST4 car.
Wilwood Dynapro Radial Mount 4 Piston - 11.75� Front
OEM Sport Rear brakes
OEM 1995 ABS
949 Racing 6UL 15x10 with 245 Hoosier R7
Engine/Drivetrain:
2.0L VVT Motor swap from 2003 Miata
Supertech 85.5mm pistons, Wiseco ringpack
Carrillo A-beam rods
ACL Race bearings
ARP head/main studs
Hand-ported cylinder head
Supertech SUB lifters
Supertech valve springs/retainers
Tomei Cams
Boundary Stage 2 Oil Pump
Flat Top Intake Manifold
Skunk2 Throttle Body
Underdrive Pulley
Supermiata Harmonic Balancer
Supermiata Engine Mounts
Supermiata Crossflow Radiator - Rad & IC Fully Ducted to Air Dam
Spa Cooling Fan
Coolant Re-Route
Setrab Big Oil Cooler with Custom Ducting and Electric Fan
Custom Engine Wire Harness
AEM Infinity ECU
Flyin Miata Big E85 Fuel Kit with custom Swirl Pot
Injector Dynamics ID1000 Fuel Injectors
JDL Auto Tubular Turbo Manifold for Evo X turbo
Turbosmart Wastegate Actuator
Turbosmart Race BOV
Custom 3� Exhaust W/ V-Bands and options for: No Muffler, 1 Muffler, 2 Mufflers (Laguna)
Supermiata Race Twin Disc Clutch - New Plates Recently
Miata Roadsters Short Shifter
OS Giken LSD with 3.66 Rear Gear
Interior/Misc:Sparco Pro ADV Seat
6 Point Racequip Harness
Race Technologies Dash Pro 2 - Canbus Connection, GPS, Data Logging, etc...
ARC 8000 Switch Panel
To this I've done this so far.
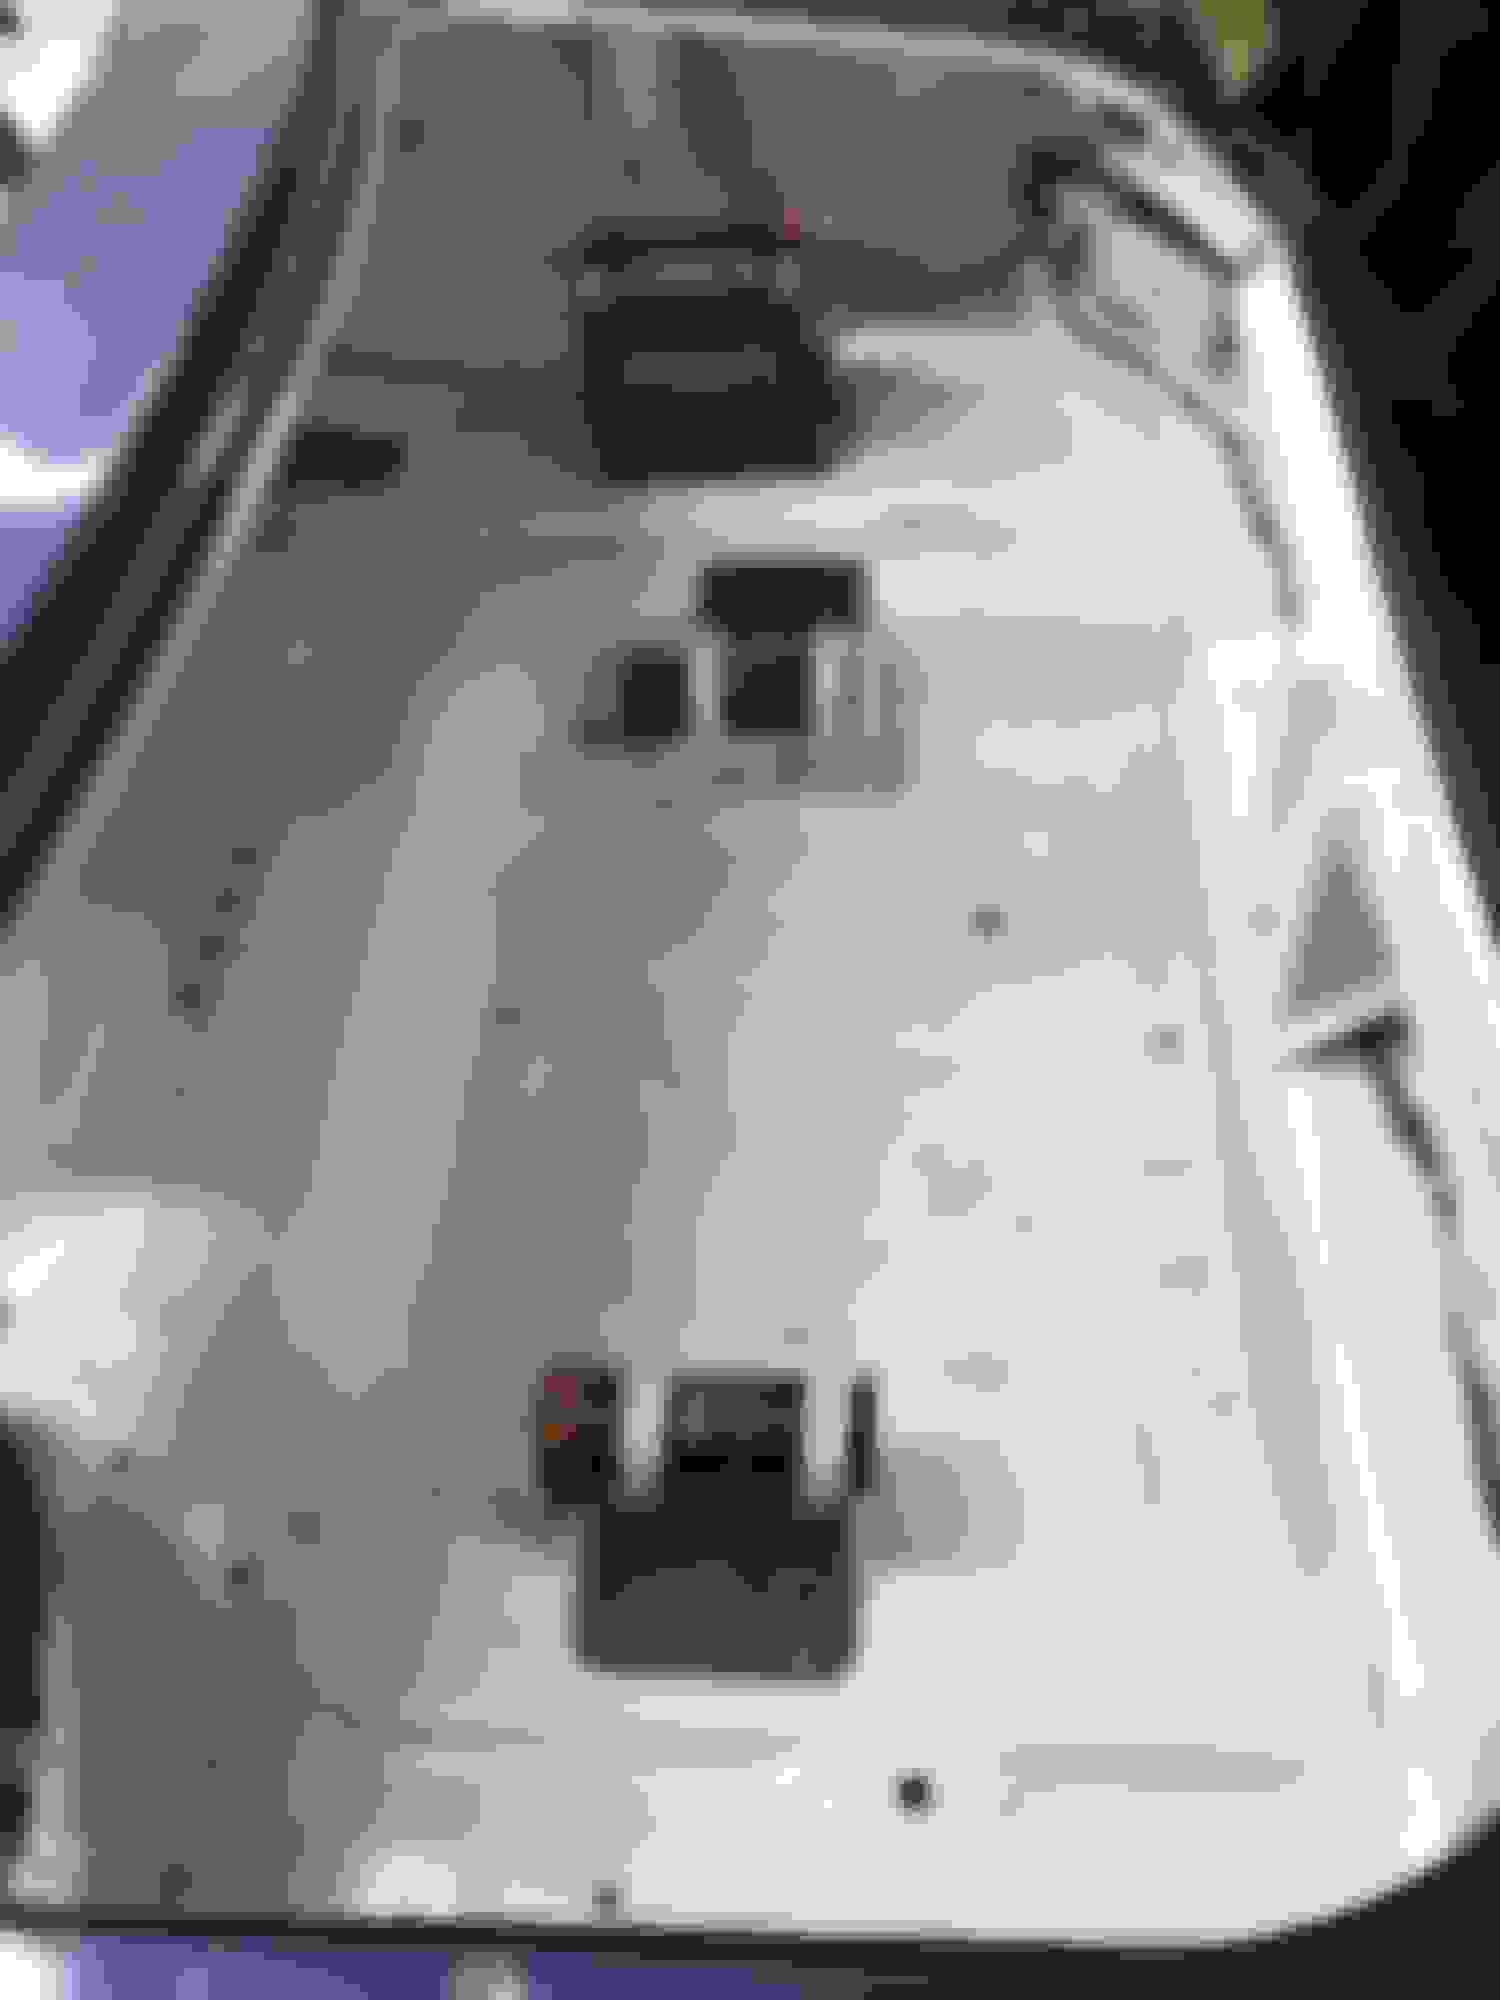
Wiring harness was a bit of a mess and there weren't any diagrams. I've spent a lot of my Covid time completely documenting the harness and then remade a completely new harness from scratch. All the wires are color coded (analog power is all the same color, etc, and everything is loomed and labeled)
Added a Tombstone from LRB Auto and added USB port for Dash2, charging port for battery, LED's for alternator and ABS
Updated ABS to NB2 from 1995 unit
Replaced fuel tank (sat for 2 years with E85)
Added fuel level float and custom circuit to the Dash2
Repainted interior and undercarriage
Replaced floors and frame rails as these had gotten a bit mangled somehow
Removed fuel swirlpot for now (not needed I think)
I loved seeing this car out on track. I had helped plan some of the flow of the build process in one way or another back in the day as well. Solid buy.
Hopefully you have some updates soon, looks like you've made some good changes so far.
I tore a shoulder so it's been a bit slow unfortunately. It sucks getting old! I'm working on a drop floor, a small cage change for taller drivers, and I added bulkhead connectors to the harness along with a few other things. I've also got a full Autokonexion gt kit and top for it that will eventually go on it. Mechanically it's solid, they did a great job on it. I also had UMS do an extra tune for ~300hp for fun days.
Do you have any bigger/ closer pics of where you mounted your remote cannisters for the shocks? Looks like the rear may be on the LCA? Super clean car!
I tore a shoulder so it's been a bit slow unfortunately. It sucks getting old! I'm working on a drop floor, a small cage change for taller drivers, and I added bulkhead connectors to the harness along with a few other things. I've also got a full Autokonexion gt kit and top for it that will eventually go on it. Mechanically it's solid, they did a great job on it. I also had UMS do an extra tune for ~300hp for fun days.
That's a drag.
How tall are you and what series do you plan to race in? The reason I ask is because I'm 6'5" and found a way to fit without the drop floor that gets penalized in some series. Should be a riot at 300whp as well
It took me a couple of looks to realize - is your battery hanging out on top of the trans tunnel, under the dash?
As a NASA tech inspector, I'd be looking at that very carefully. I can't tell from the pictures, but I'd assume it's AGM, so a case is only "recommended", not required. I see one covered positive terminal, I think, but I'm not sure anything is attached to it - is your positive lead attached somewhere else? Gotta be covered.
If this is a lithium battery, that whole setup is Nope - gotta be outside the cockpit.
Just trying to save you some headaches when you go for your annual.
Uh... on further inspection... that flat copper-looking ribbon that goes to the relay board... that's not an un-insulated connection to the positive terminal? Please?
Most everything has moved since those pictures btw, but It's a LifePo4 battery, so I suspect it needs to be outside the cockpit. Back to the trunk it goes.
All the terminals are fully covered, it's all those little things that you end up short on and have to order, I was short a few for those pictures. The copper looking un-insulated thing is actually a ribbon cable for the dash control. I have actually since covered that in shrink tube, but it's only low current / voltage 28awg actually, so more for aesthetics than anything else really.
The rear shock canisters I mounted in the trunk btw. There is just enough room to cut a hole for the canister to go through. The car will be for play mostly, but also Super GT, Nasa ST3, and maybe an SCCA ITE day here and there. Safety is a concern though so if you see something wonky I I'm more than happy to hear about it btw. Goal #1 is always to be able to go home!
Since those pictures an OMP HTE 400 Halo seat has come in, the Sparco will be for ride alongs.
Still need to plumb in the fire system, center net, etc...
The floors, especially drivers looked like a complete war zone, so I needed / wanted to redo the floor anyway. In NASA it will cost me some points, but everywhere else it's free.
Most everything has moved since those pictures btw, but It's a LifePo4 battery, so I suspect it needs to be outside the cockpit. Back to the trunk it goes.
Yep, even though I think that's one of the more-stable chemistries, it's got lithium, so for NASA it's gonna have to be in the trunk (or engine compartment, if you're insane).
The copper looking un-insulated thing is actually a ribbon cable for the dash control. I have actually since covered that in shrink tube, but it's only low current / voltage 28awg actually, so more for aesthetics than anything else really.
Ah. That makes a lot more sense. Whew.
It always sucks to tell someone that they can't run their car that weekend unless they fix something that they're obviously not going to be able to fix in the paddock. Or even just something that makes them lose part of a day. Much better if it passes on the first try
Awesome build thread and I'm super impressed with your positivity through it all. Can't wait to see where you end up with this car. Good luck on the next outing!
So this moved along a lot slower than expected. Took it to three shops to get some welding done, and each kept if for months and didn't work on it, or if they did, didn't finish. Anyway, finally got some progress. In the process of rebuilding now. Still have a few weekends worth of work. Big changes to come with complete Autokonexion GT body kit currently at the paint shop.
Jeeze man, in what hellish environment did you leave that poor multimeter that the case deteriorated so badly? Do you play with chlorine gas for fun or something?
Some additional progress this weekend on the interior. Almost finished up, maybe one additional day on the wiring / interior left. Then the exterior project can be finished.
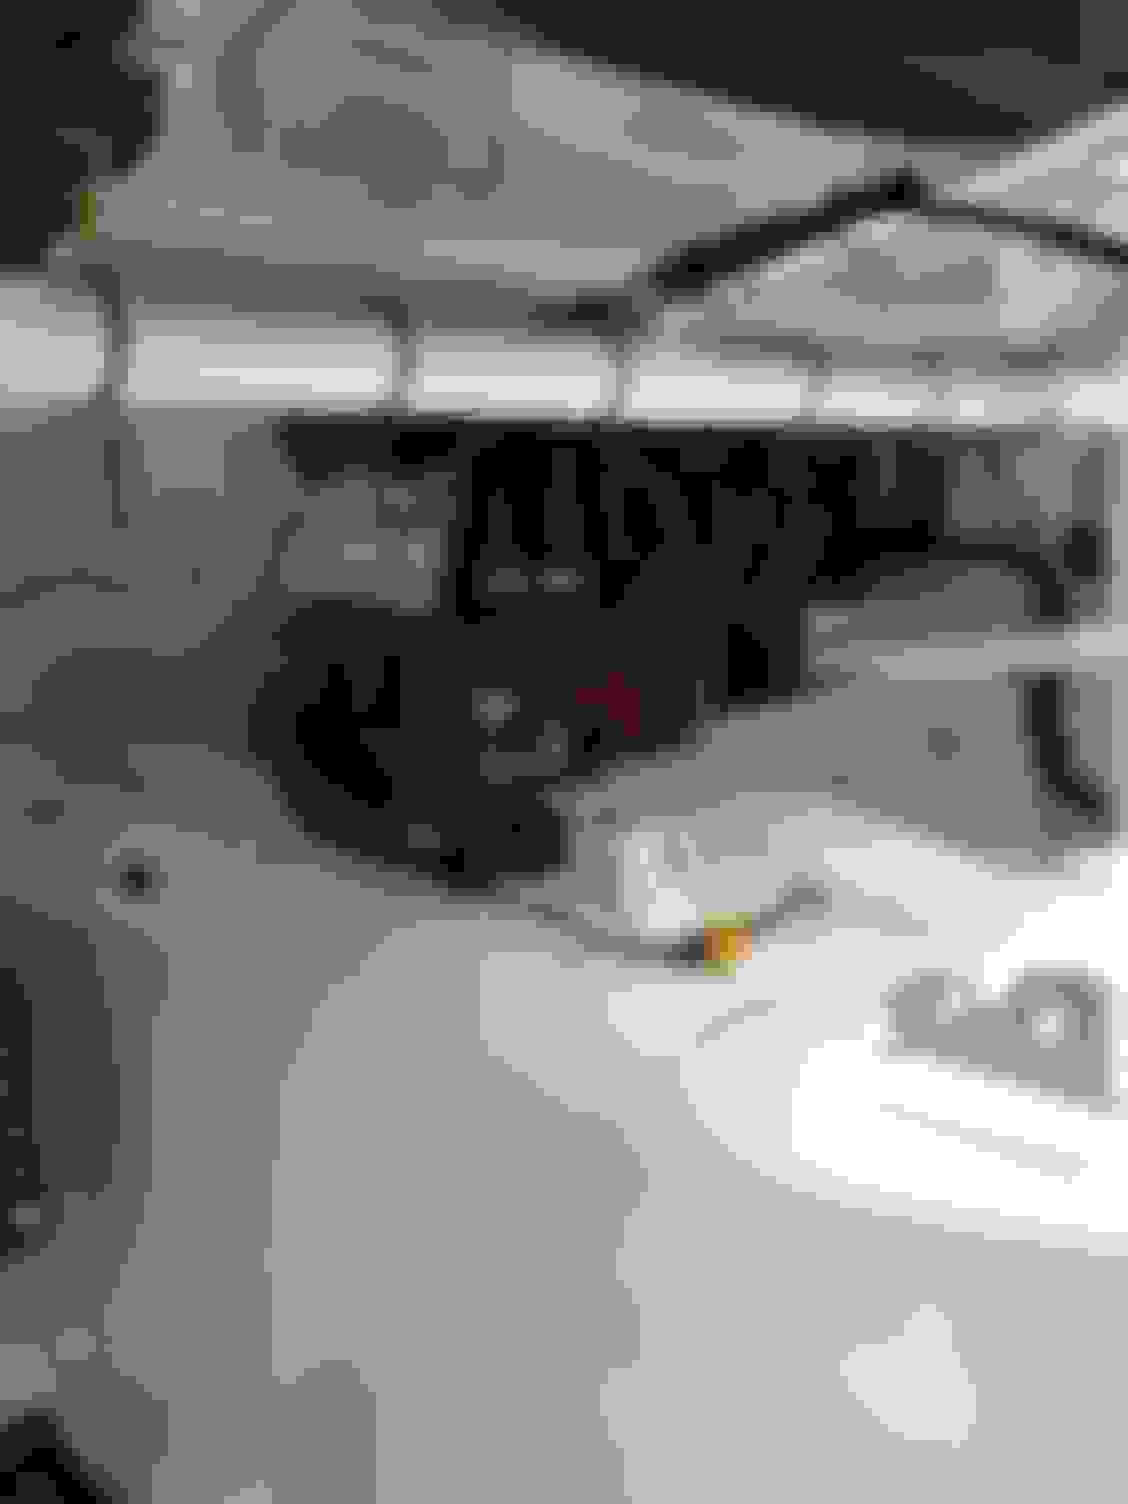
Dash Almost finished. A few connectors to still order. Seats mounted. Still need to do the harnesses. Dash mock install Trying out grip tape Racebred foot perch Under the dash. Almost finished up. Big Relay for kill switch. Still need some additional battery terminal covers, but getting close.
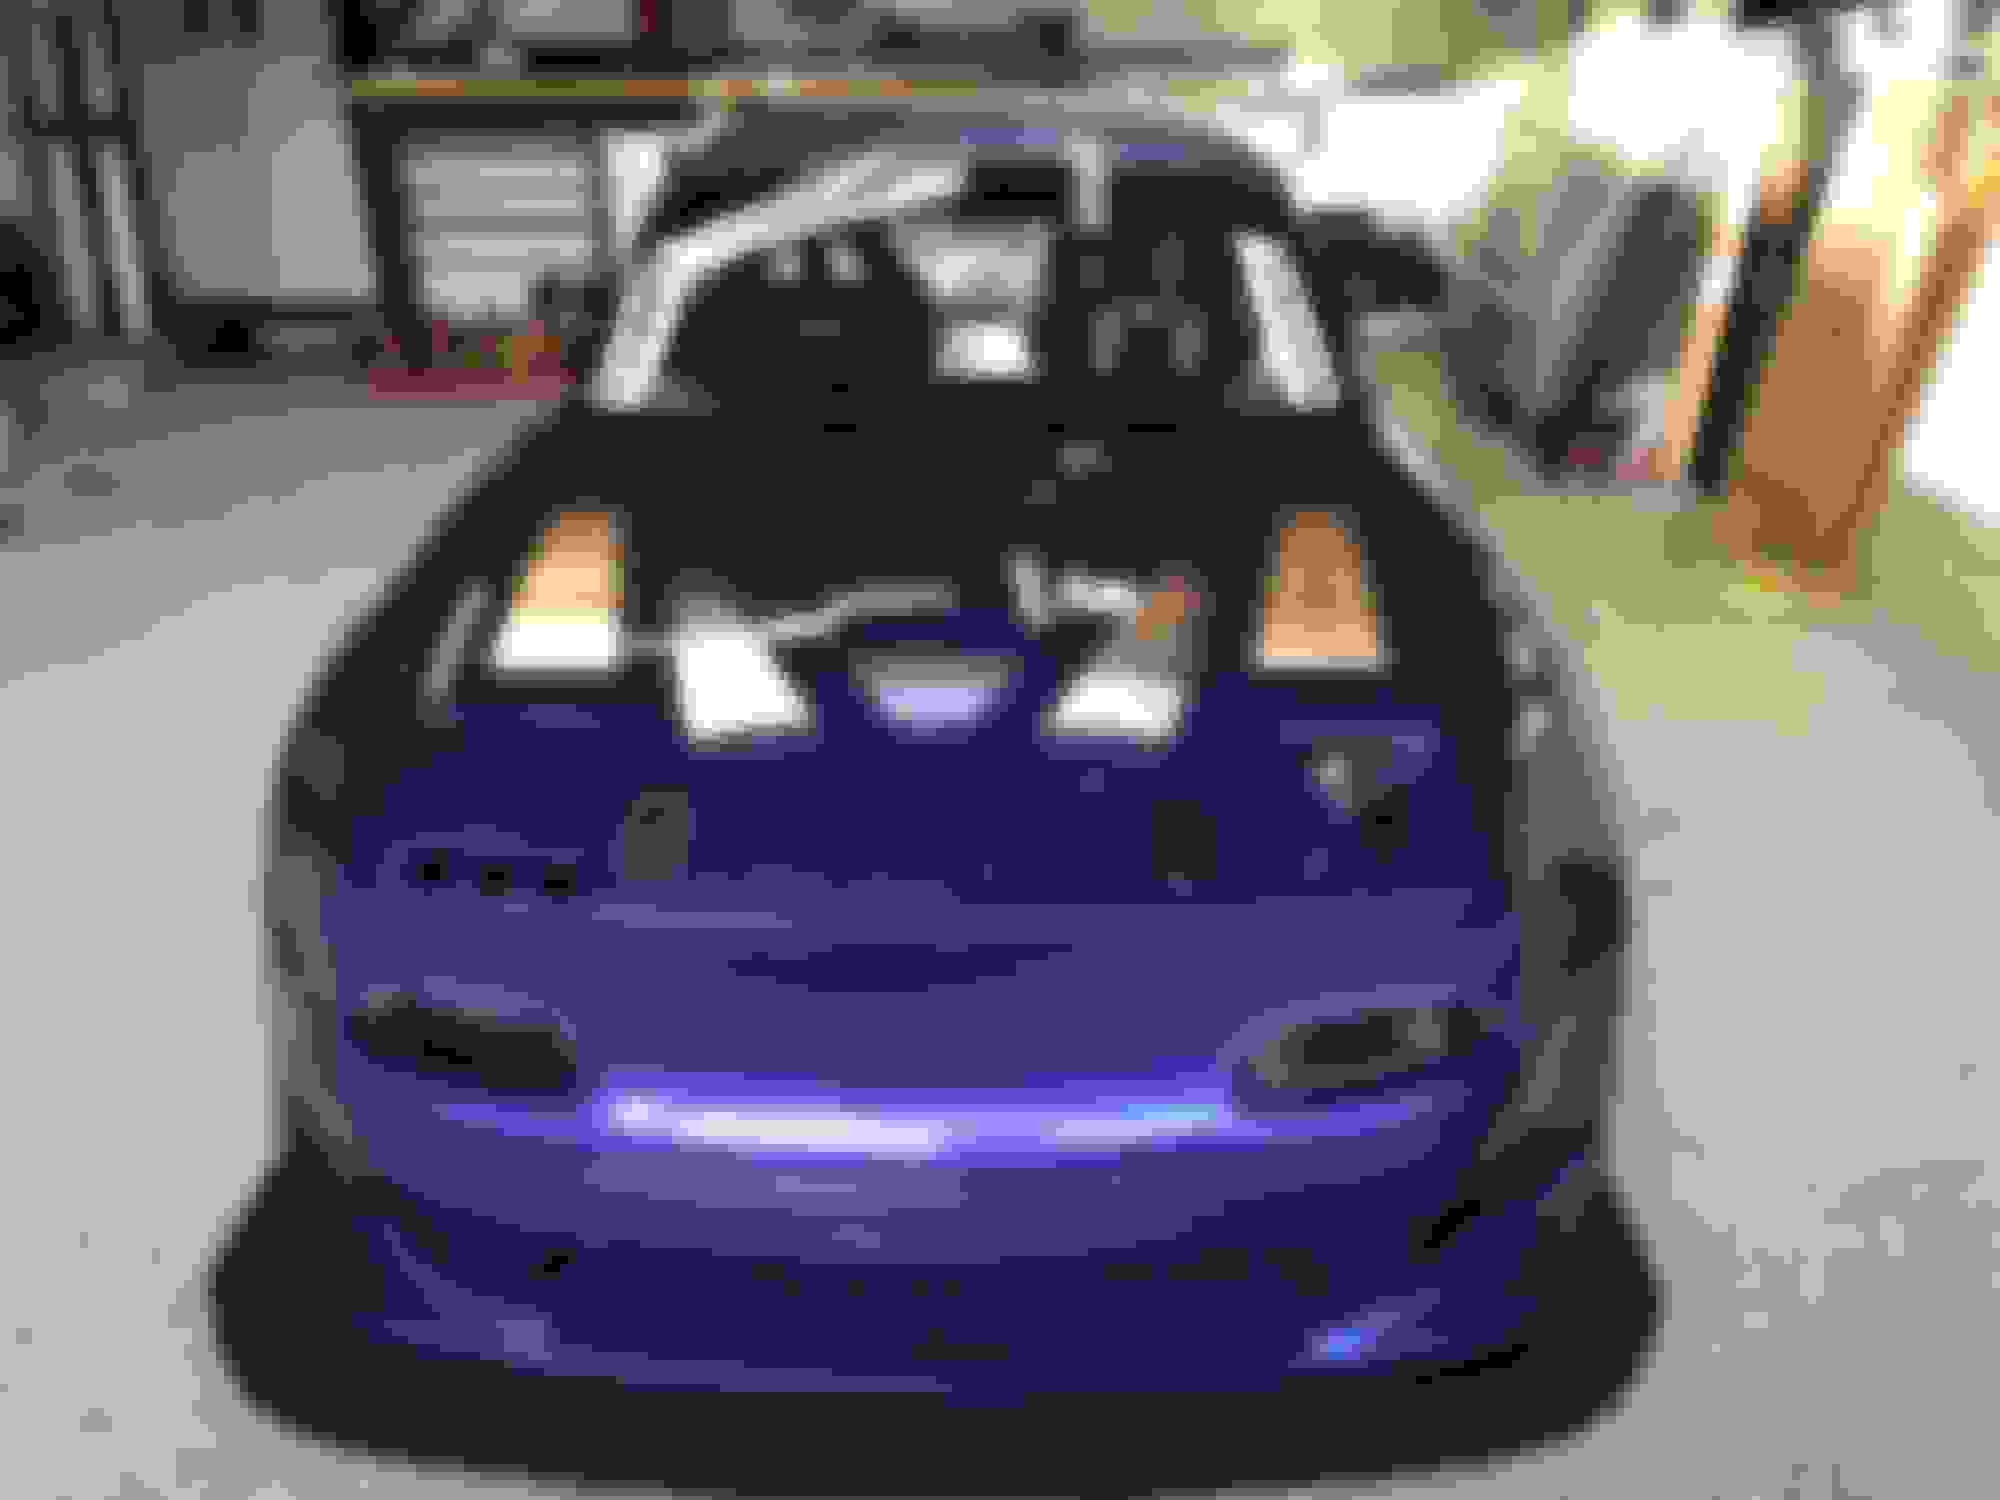
Body kit is finally on. This wasn't straight forward as Autokonexion never did fit well and after being stored for several years fiberglass can change shapes. It's getting there though, still have a few small things to do though. 15x10's under Autokonexion GT kit Still need to final radiator ducting, but ducted the oil cooler though the right turn signal. Hood vents galore
It's from Autorod Controls. At some point I'll install the AEM PDM32 instead, but it wasn't available when I did the wiring, and I'm not ready to redo it again.
 05-20-2020, 06:46 PM


 4
4