Ian's 99 build thread
 10-21-2014, 11:46 PM
#21
Elite Member

Thread Starter
Join Date: Mar 2007
Location: Santa Clara, CA
Posts: 5,165
Total Cats: 855
Bore plate arrived. With this, hopefully the machining can start!
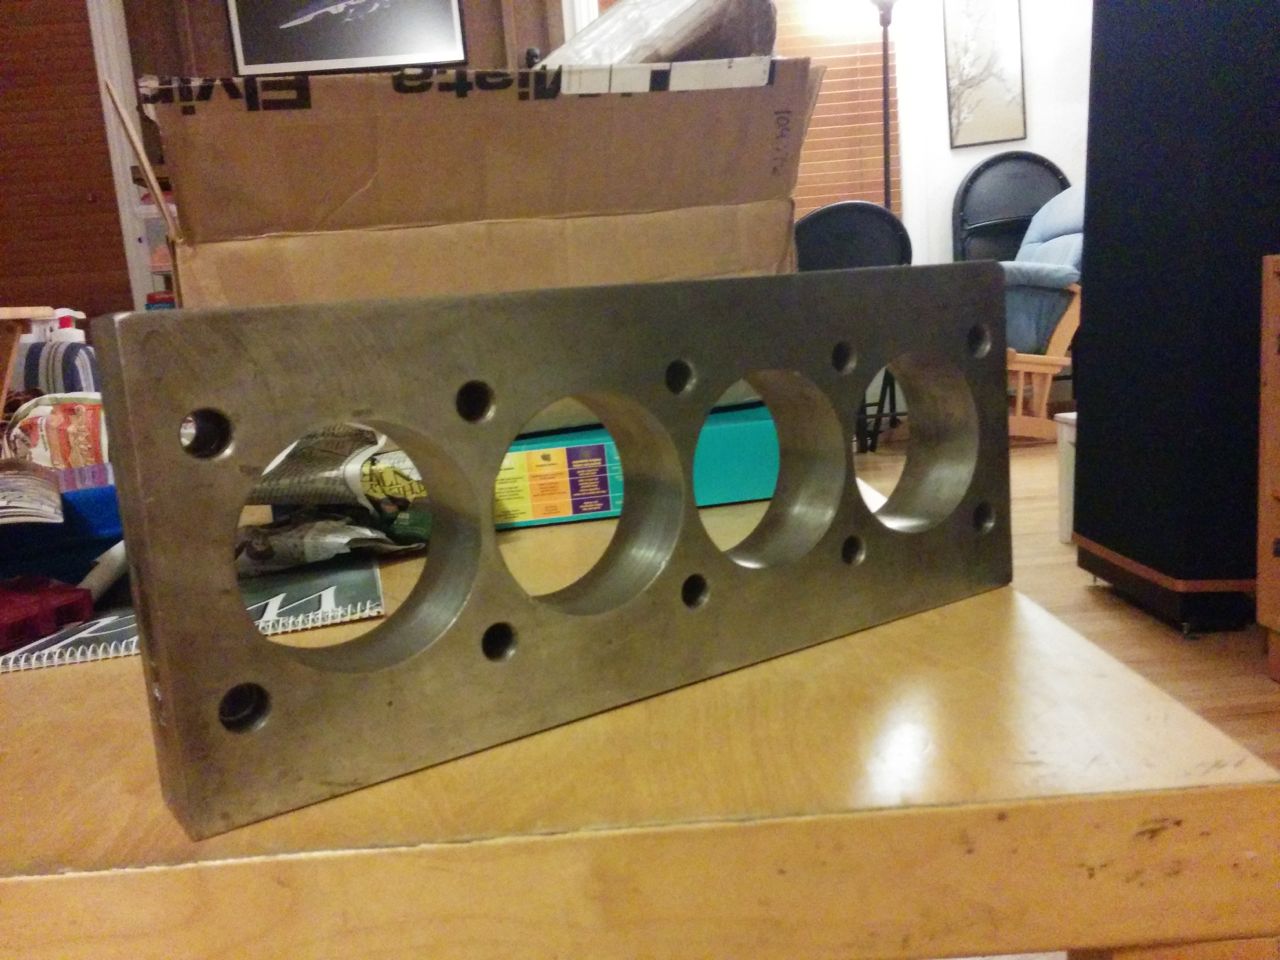
I was wrong. The FM block had the numbers *stamped* into the main caps, presumably the work of the machine shop that bored it for the original Supertechs.
--Ian
I was wrong. The FM block had the numbers *stamped* into the main caps, presumably the work of the machine shop that bored it for the original Supertechs.
--Ian

Reply
 0
0

0
10-22-2014, 02:33 AM
#23
Elite Member
Thread Starter
Join Date: Mar 2007
Location: Santa Clara, CA
Posts: 5,165
Total Cats: 855
 Ran $30 from Grand Junction to San Jose.
The machine work is at Rob's Auto Machine in Hayward, I'll be doing the assembly myself.
--Ian
Reply
0
0
 10-24-2014, 04:14 AM
#25
Elite Member
Thread Starter
Join Date: Mar 2007
Location: Santa Clara, CA
Posts: 5,165
Total Cats: 855
Dropped the bore plate and a spare set of head bolts off at the machine shop today -- hoping to have the parts back ready to assemble next week.
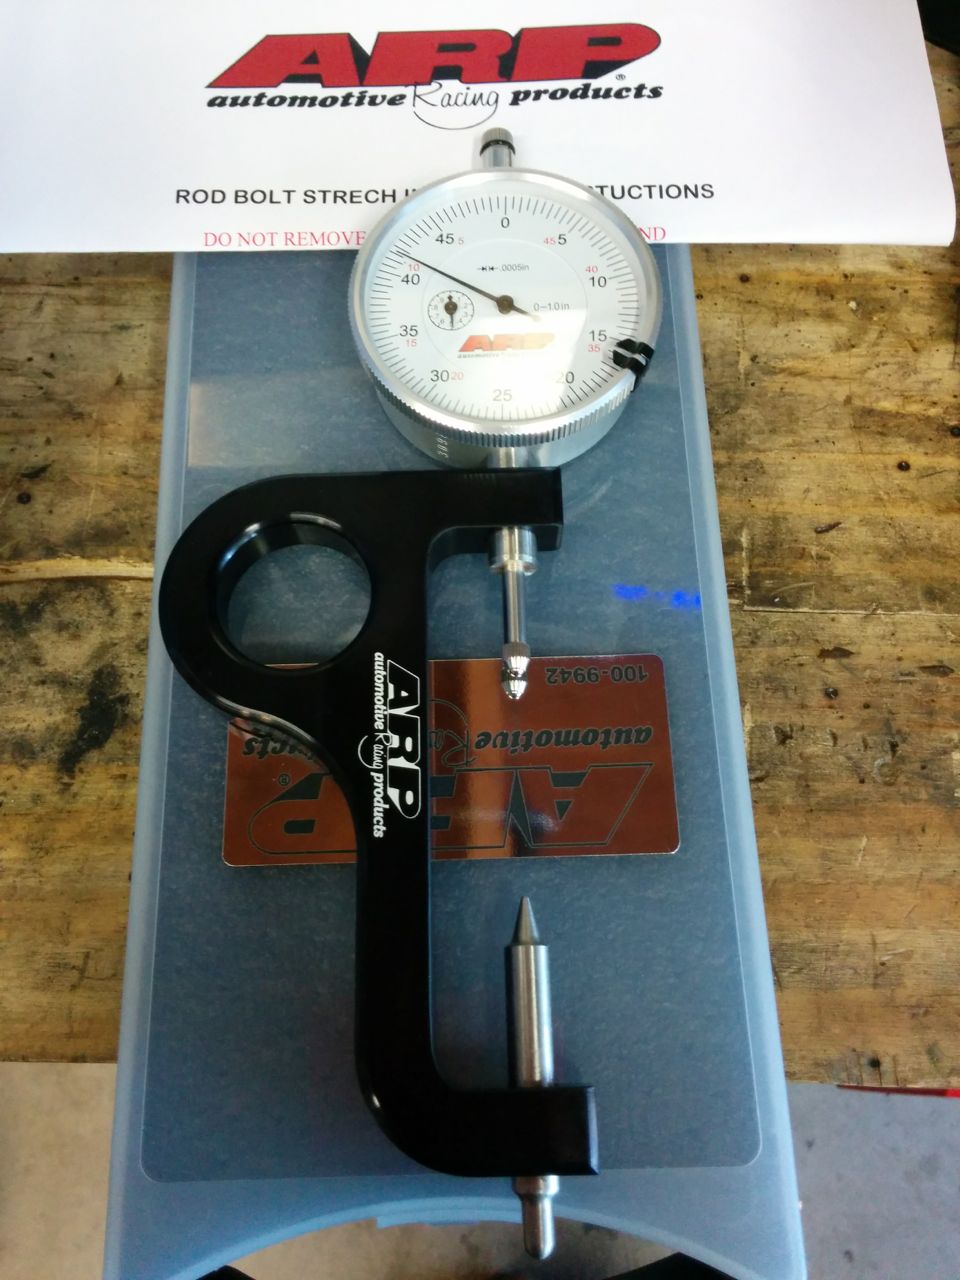
Anyone have a favorite rod bolt stretch gauge? When I built it the first time I used a standard micrometer, which was definitely not the most convenient way to measure stuff. There appear to be a bunch of no-name ones on the market at $60 or so (such as this one http://www.summitracing.com/parts/sum-900015/overview/), or there's an ARP one for three times as much (http://www.summitracing.com/parts/ar...9942/overview/).
Spent a bit more time playing with the Seven last weekend, and well:
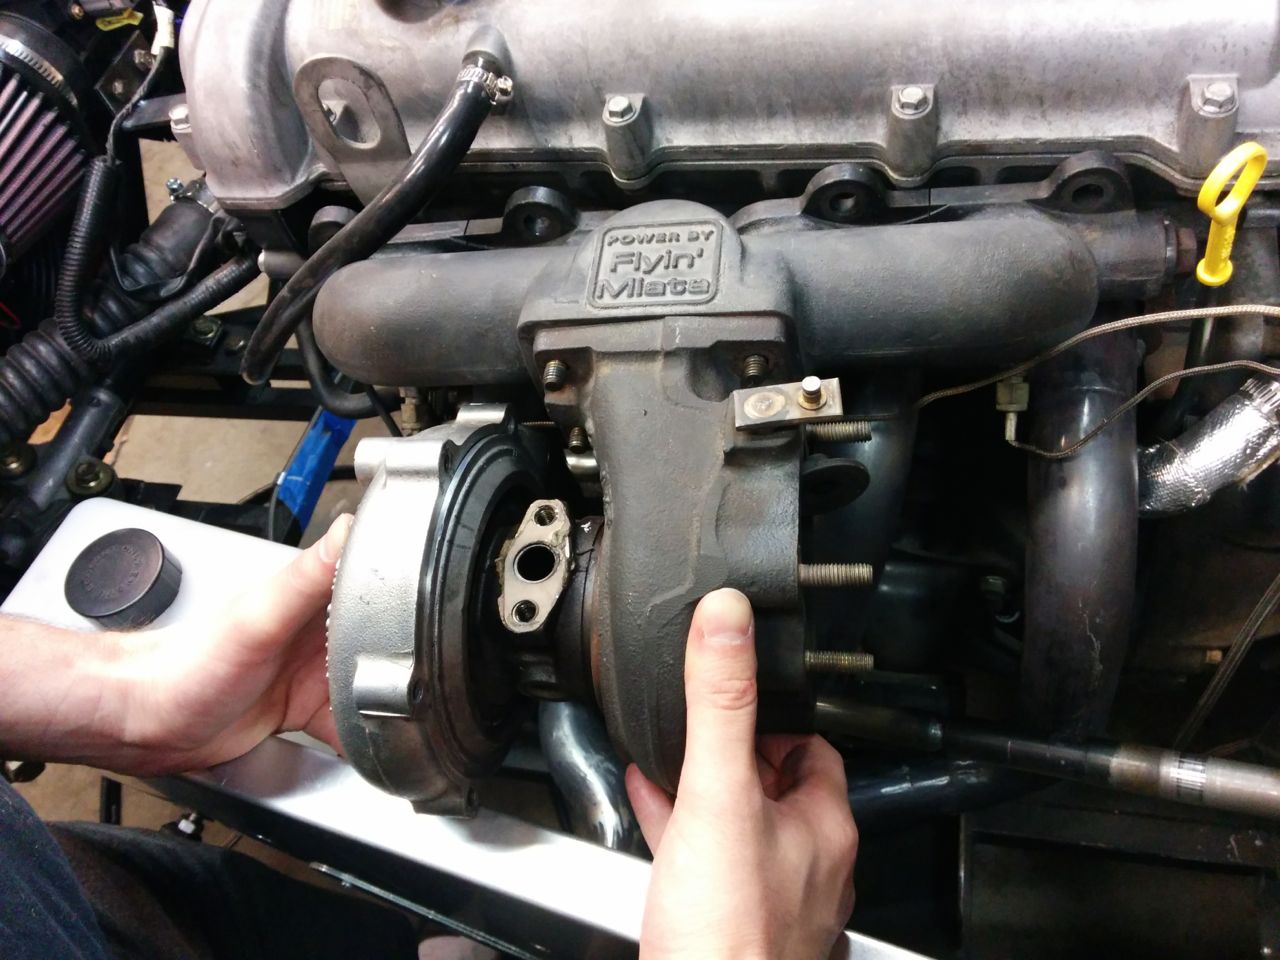
Hm. Looks like it would fit...
--Ian
Anyone have a favorite rod bolt stretch gauge? When I built it the first time I used a standard micrometer, which was definitely not the most convenient way to measure stuff. There appear to be a bunch of no-name ones on the market at $60 or so (such as this one http://www.summitracing.com/parts/sum-900015/overview/), or there's an ARP one for three times as much (http://www.summitracing.com/parts/ar...9942/overview/).
Spent a bit more time playing with the Seven last weekend, and well:
Hm. Looks like it would fit...
--Ian
Reply
0
0
10-28-2014, 06:13 PM
#26
Elite Member
Thread Starter
Join Date: Mar 2007
Location: Santa Clara, CA
Posts: 5,165
Total Cats: 855
No parts back from the machine shop yet, but some more goodies delivered. This goes in the oil cooler lines, a -10 inline fitting with a 1/8 NPT port:

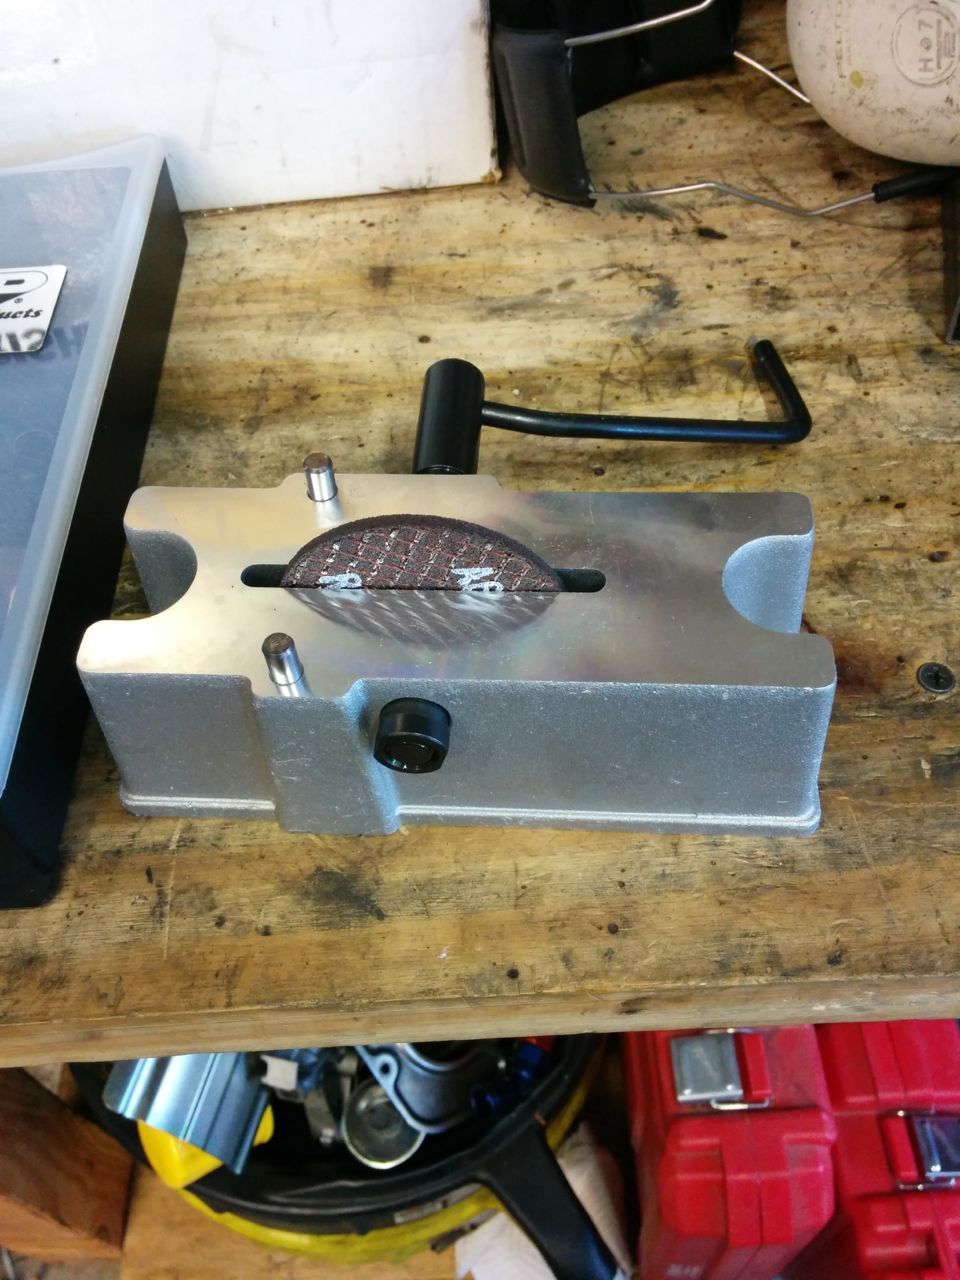
And then for the bottom end assembly that's coming up soon, the standard cheapie ring grinder:
and a not-so-cheapie rod bolt stretch gauge:
Still hoping to have parts back from the machine shop this weekend so I can start to put these to use.
--Ian
And then for the bottom end assembly that's coming up soon, the standard cheapie ring grinder:
and a not-so-cheapie rod bolt stretch gauge:
Still hoping to have parts back from the machine shop this weekend so I can start to put these to use.
--Ian
Reply
0
0
11-02-2014, 02:41 AM
#27
Elite Member
Thread Starter
Join Date: Mar 2007
Location: Santa Clara, CA
Posts: 5,165
Total Cats: 855
Well, the machinist called on Friday at 3 to say the parts were done -- that's far too late to try to drive from San Jose to Hayward, the traffic up 880 sucks. Fortunately, he was in shop on Saturday morning, so I stopped there on the way to taking my daughter to a birthday party in Foster City and picked up the parts...
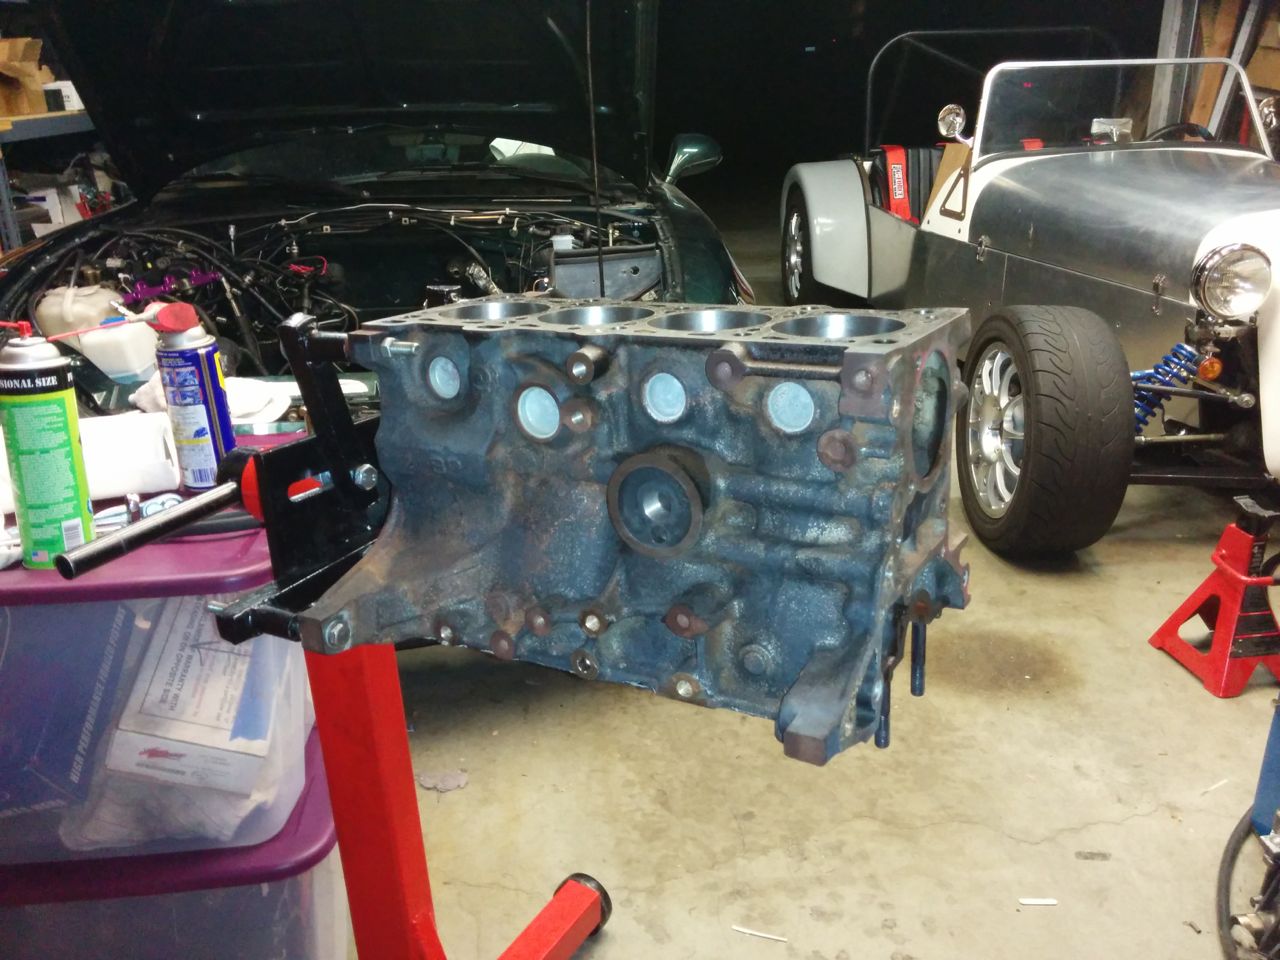
...except the rods. They weren't done yet. Oops. Ah well, there's a bunch I can do before I need the rods. Like put the block on the engine stand!
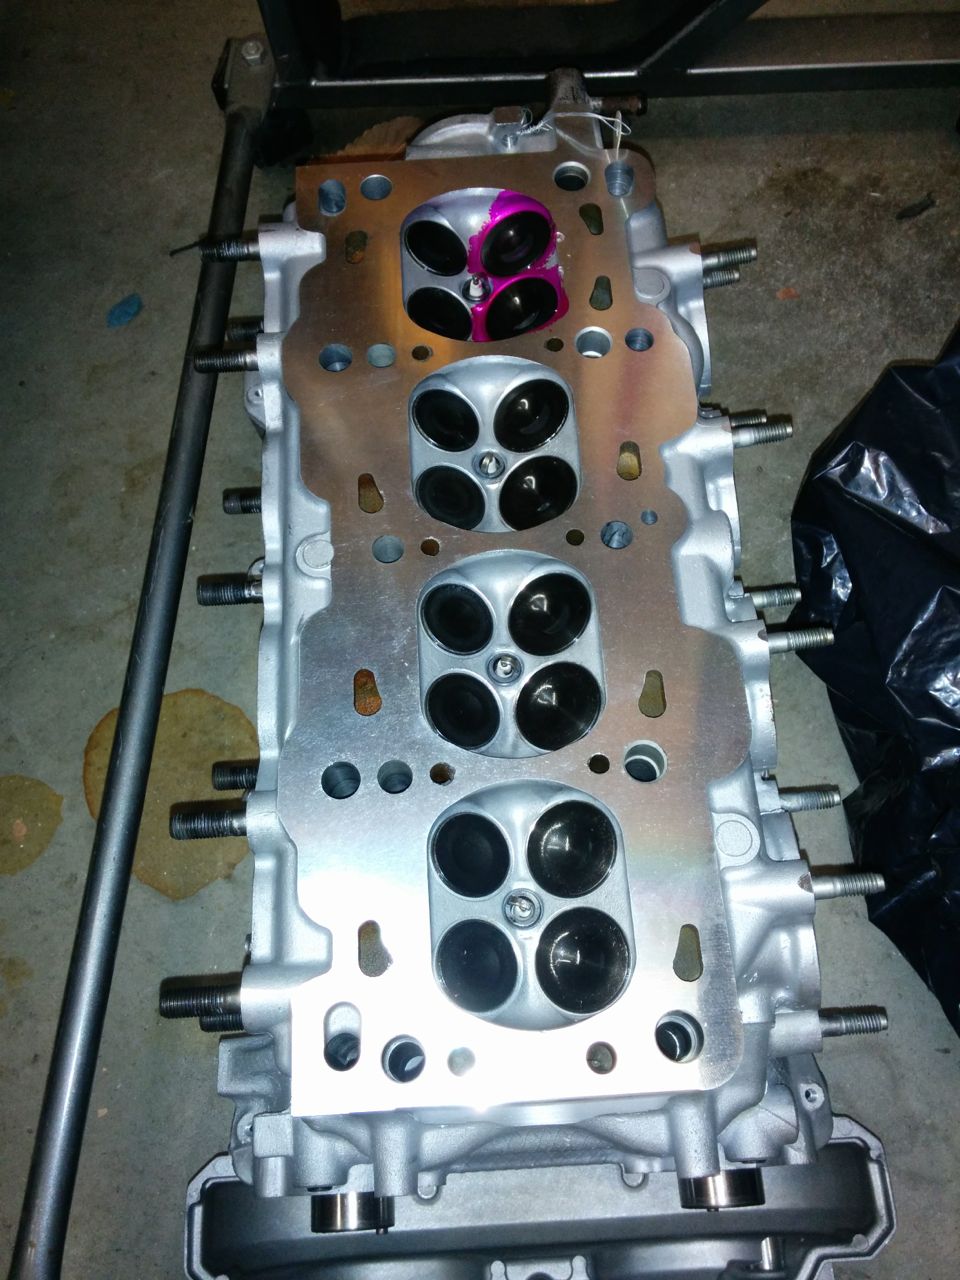
And admire the freshly machined head! (not sure why it's still got dye on a couple of the valves, but the shop says it's all done). Apparently the valve guides needed replacement, not sure exactly why. The valves themselves were all good.
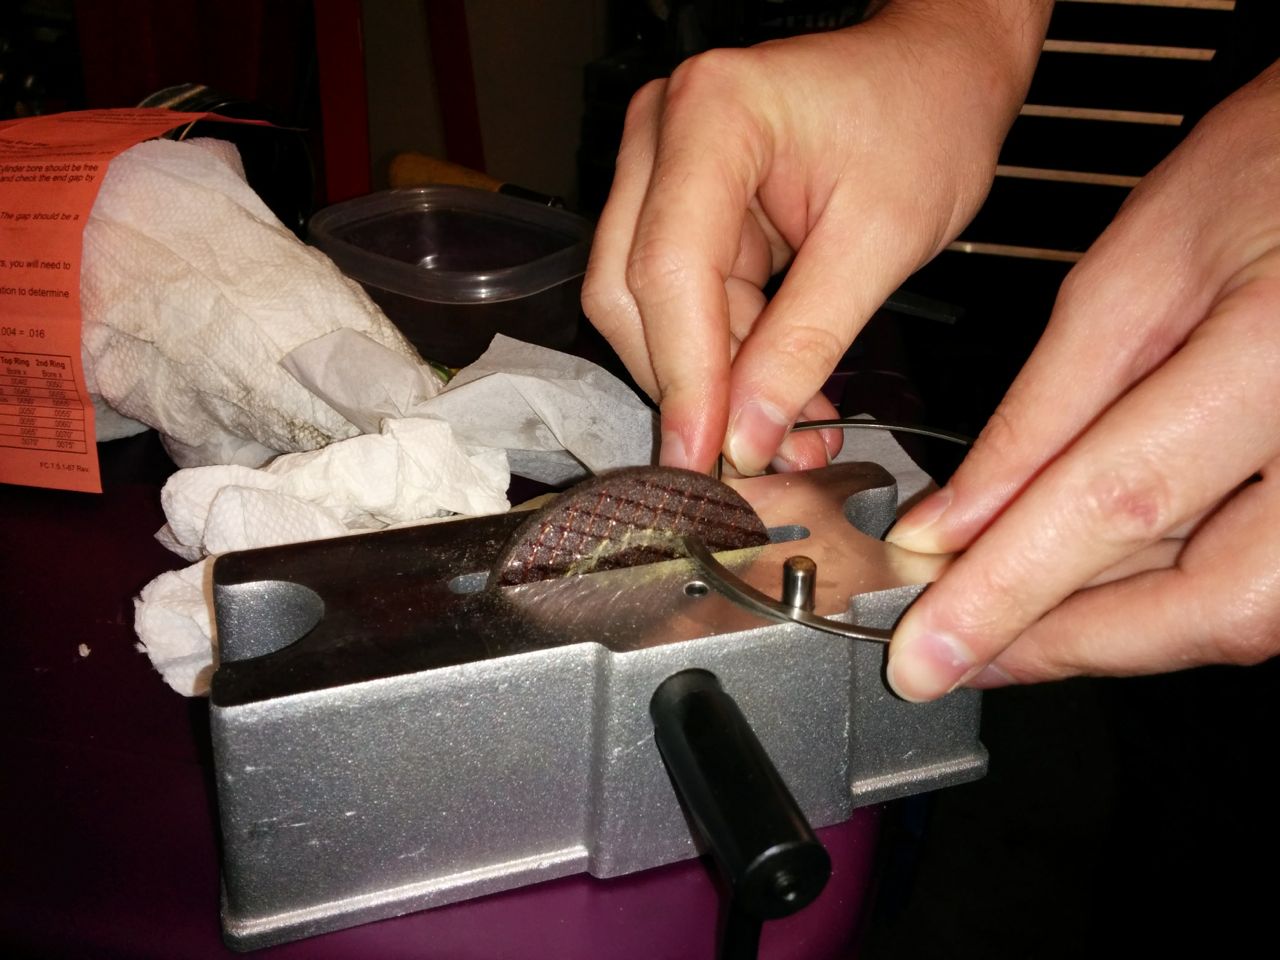
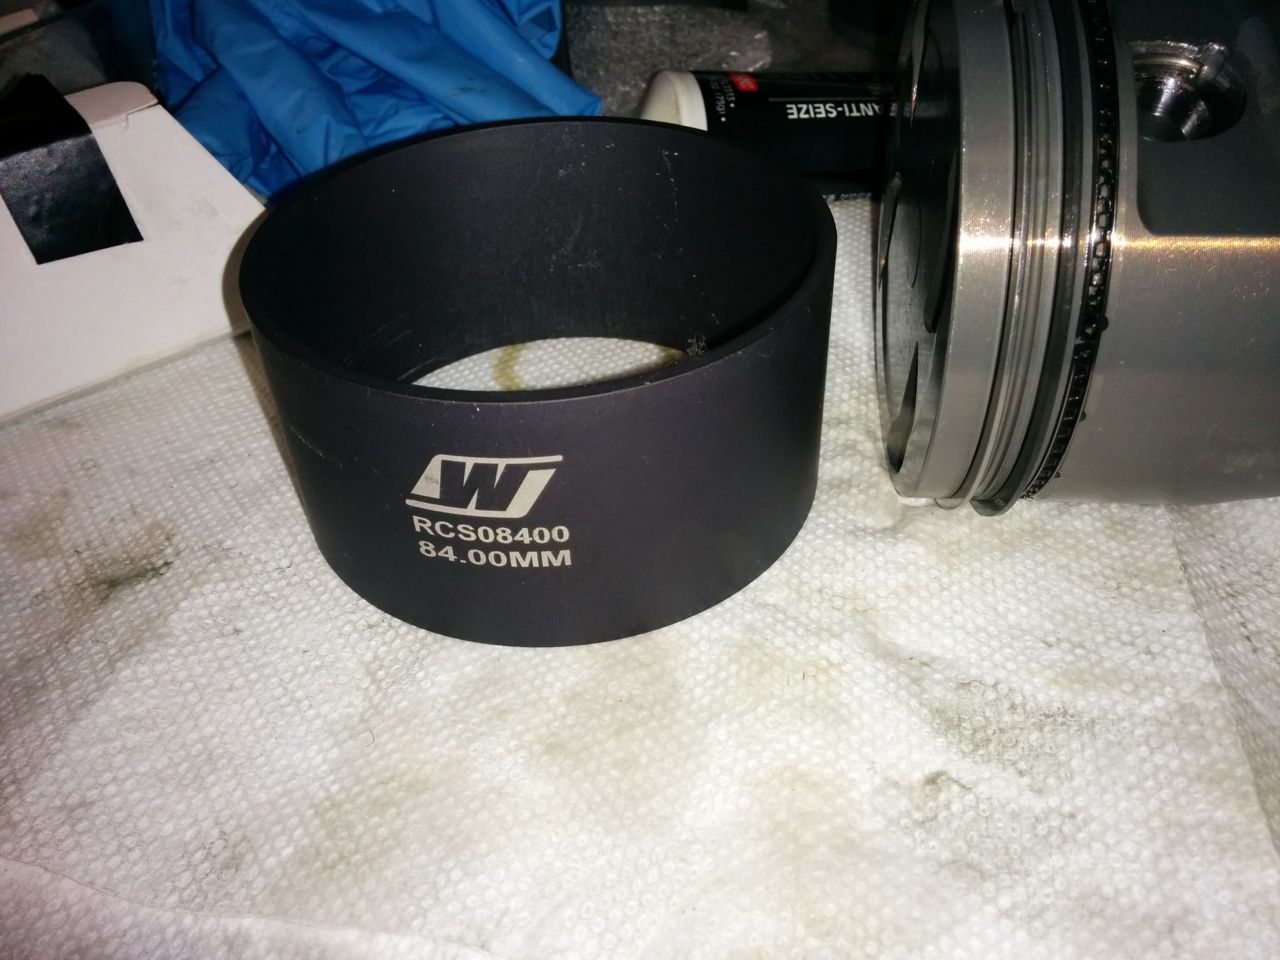
Oh, and grind the rings!

They are 84mm Supertech 9:1 pistons, and I'm using the Wiseco rings that TSE recommends. At .0055 per inch, that works out to about .018 for the top ring and .020 for the second ring. 2-4 are just right there, 1 is a teeny bit big (maybe .0005). That oughta do.
I can put the crank in as well, but haven't done that yet. I need to get some more plastigauge tomorrow -- I still have some left somewhere from the last build, but hell if I know where it is.
Oh, and I guess it's time to decide if I reuse the oil pump or go buy a Boundary one. The current pump is an OEM pump with only 10K miles on it (was brand new when I first built the engine) and made good oil pressure when I tore it down. I've got an ATI super damper on the engine, so I'm not terribly worried about destroying the oil pump gear, but...
--Ian
...except the rods. They weren't done yet. Oops. Ah well, there's a bunch I can do before I need the rods. Like put the block on the engine stand!
And admire the freshly machined head! (not sure why it's still got dye on a couple of the valves, but the shop says it's all done). Apparently the valve guides needed replacement, not sure exactly why. The valves themselves were all good.
Oh, and grind the rings!
They are 84mm Supertech 9:1 pistons, and I'm using the Wiseco rings that TSE recommends. At .0055 per inch, that works out to about .018 for the top ring and .020 for the second ring. 2-4 are just right there, 1 is a teeny bit big (maybe .0005). That oughta do.
I can put the crank in as well, but haven't done that yet. I need to get some more plastigauge tomorrow -- I still have some left somewhere from the last build, but hell if I know where it is.
Oh, and I guess it's time to decide if I reuse the oil pump or go buy a Boundary one. The current pump is an OEM pump with only 10K miles on it (was brand new when I first built the engine) and made good oil pressure when I tore it down. I've got an ATI super damper on the engine, so I'm not terribly worried about destroying the oil pump gear, but...
--Ian
Reply
1
1
11-02-2014, 10:58 AM
#28
Elite Member
iTrader: (37)

Join Date: Apr 2010
Location: Very NorCal
Posts: 10,441
Total Cats: 1,899
Good lord Ian, 1:41am? Just a little excited I take it?
Also, 9:1? I'm wondering why not 8.6:1 or are you going to play with the ethanol this time around?
Also, 9:1? I'm wondering why not 8.6:1 or are you going to play with the ethanol this time around?
Last edited by EO2K; 11-02-2014 at 11:14 AM.

Reply
0
0
11-02-2014, 12:47 PM
#29
Elite Member
Thread Starter
Join Date: Mar 2007
Location: Santa Clara, CA
Posts: 5,165
Total Cats: 855
I had 9:1 last time, I like it because it helps spool the turbo sooner.
I live in the Campbell area, about 4-5 miles from the 76 station at the base of 9, which sells 100 octane. I mix 100 and 91 to get around 95 octane, which was good enough to run MBT on my 2560 all the way at the top of the efficiency range. Yes it's more expensive, but the Miata only gets a few thousand miles a year on it, so it's not that big a deal. At the track I run straight 100 for safety. E85 is interesting, but too much of a PITA to get.
If I need to run the car on 91, I turn the boost down a bit.
--Ian
Reply
0
0
11-02-2014, 03:02 PM
#30
Elite Member
Thread Starter
Join Date: Mar 2007
Location: Santa Clara, CA
Posts: 5,165
Total Cats: 855
A couple thoughts on ring grinding: Getting the ring straight in the bore is critical, a small misalignment on the angle can throw off the reading by a lot. The Wiseco top rings started out around .012, and after 30 or so turns of the grinding wheel were up to .014. So we did another 20 turns, and all of a sudden it was measuring .022, overshooting the target .018 by a ton. WTF? After rechecking everything it turned out it was only .016, it had just been cocked in the bore slightly, which gave it a larger diameter and a larger gap.
I had been pushing them in using an old piston -- one of the junk stock 83mm pistons that had come out of the motor with the rings removed. Since it's 1mm smaller, there was a lot of slop between the piston and the bore, and it was easy to get it cocked. I didn't want to use my shiny new Supertechs for this, and I couldn't find the old Supertechs either (they're probably buried under an enormous pile of crap in the corner of my garage), so I took an old, junk compression ring and stuck it in the oil control land. Poof, instant level stop on the piston, now I could reliably get the new rings to sit level in the bore, at a constant depth.
--Ian
Reply
0
0
 11-02-2014, 11:24 PM
#32
Elite Member
Thread Starter
Join Date: Mar 2007
Location: Santa Clara, CA
Posts: 5,165
Total Cats: 855
Spent some more time assembling it today. Put in the main bearings and plastigauged them. The crank is cut 1/4mm, so I'm using one-step oversize ACL bearings. Factory new spec seems to be .0007 to .0014, and mine all appear to be around .0015. I guess it's a bit loose, hm.
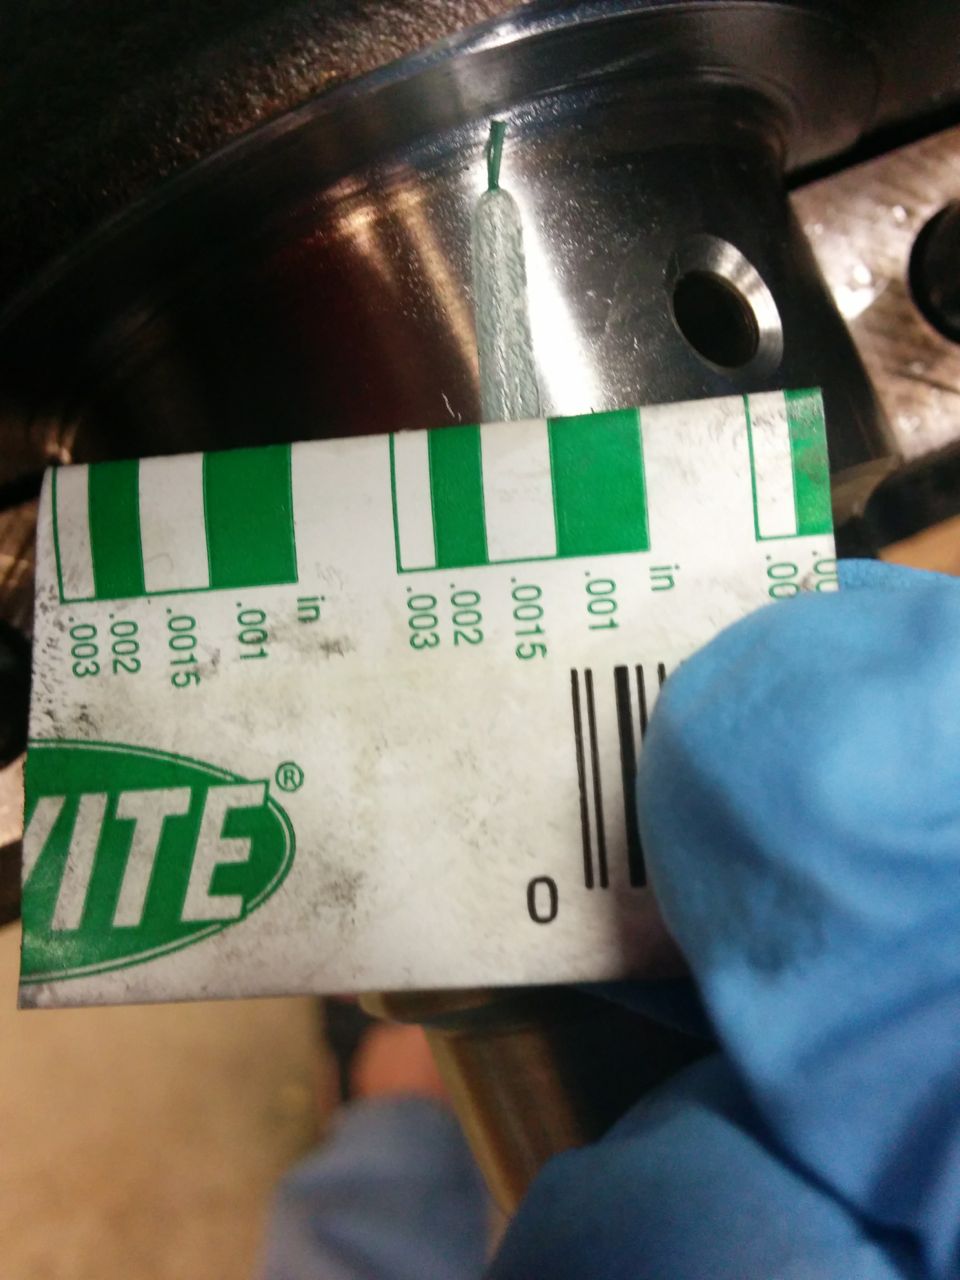
On with the assembly! Main bearings and thrust bearings:
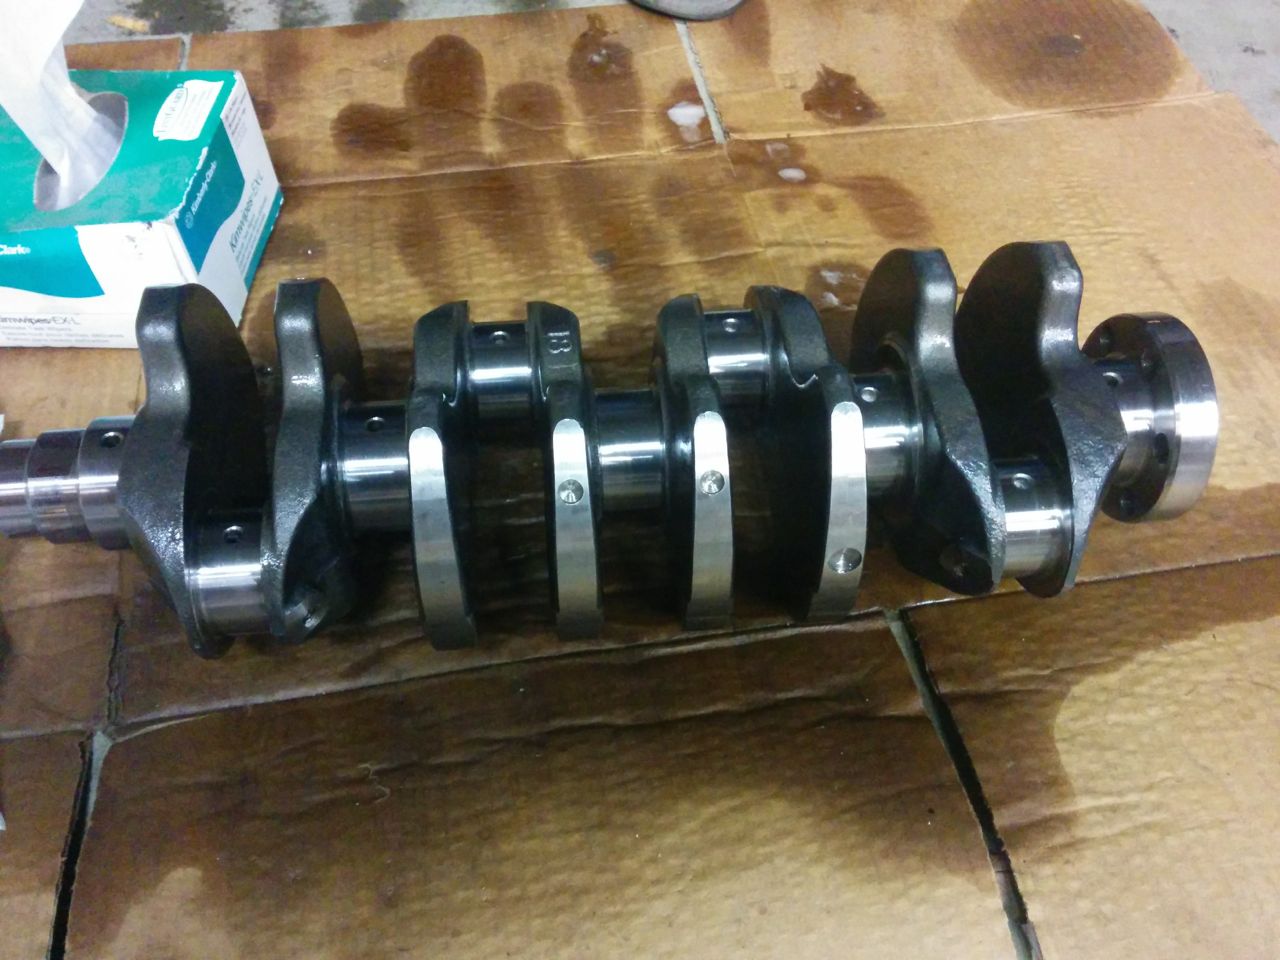
Crank is cleaned:
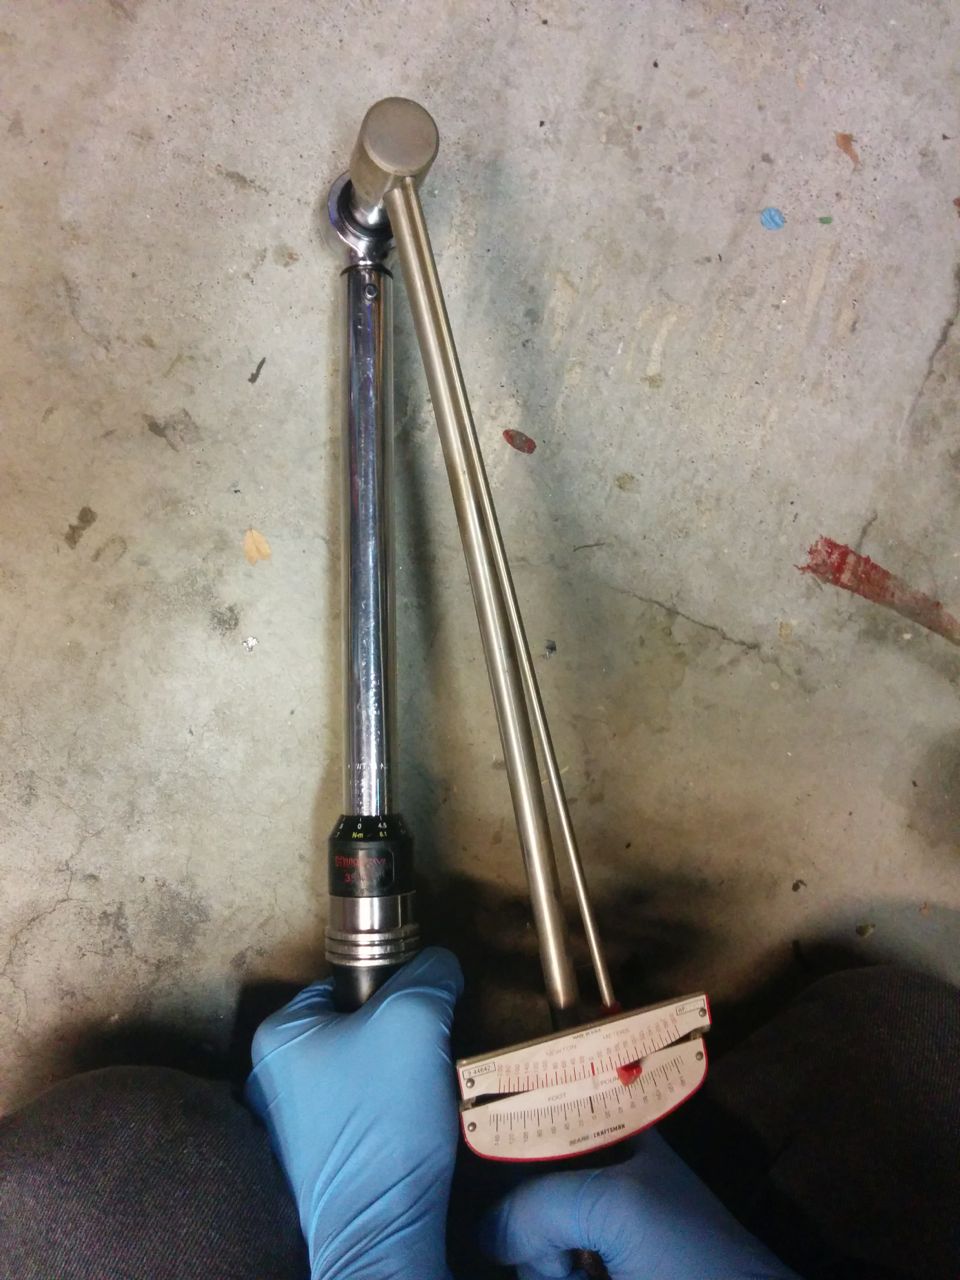
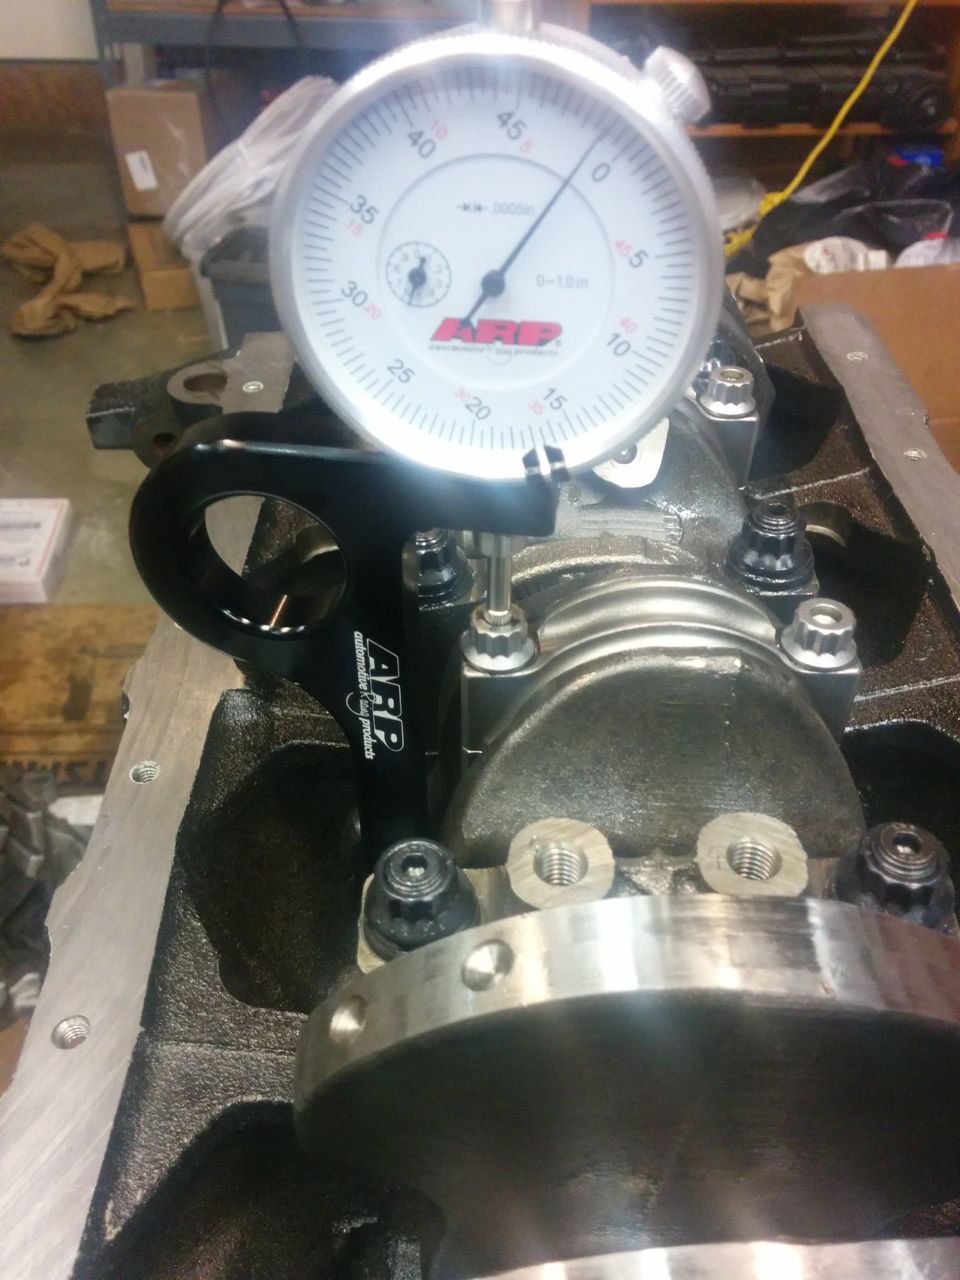
I torqued the ARP main studs in 4 steps -- 10, 20, 40, then 60 ft-lbs. Before doing the last step, we validated the clicker torque wrench against a beam-type:
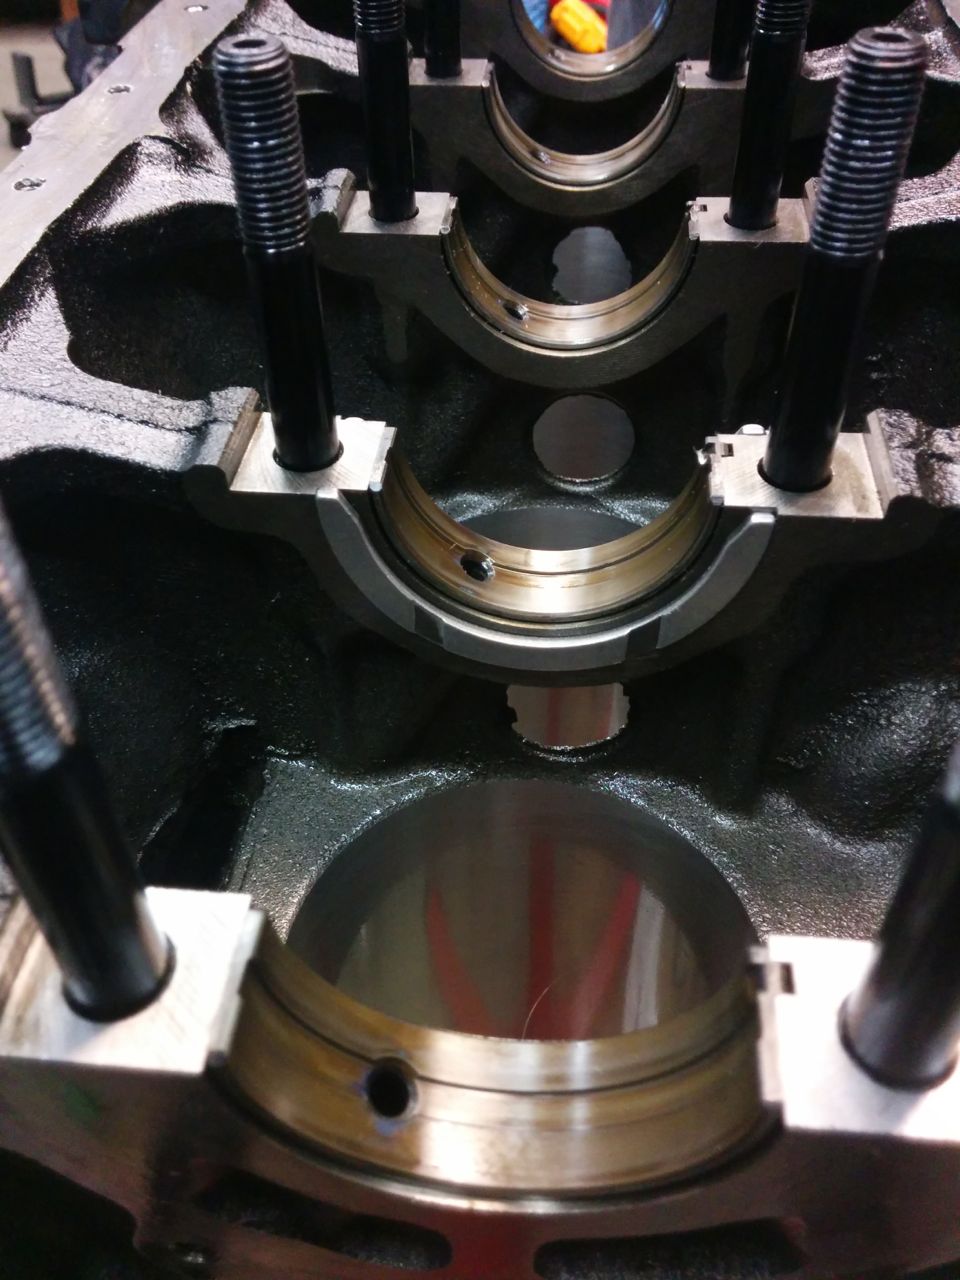
Crank is in!
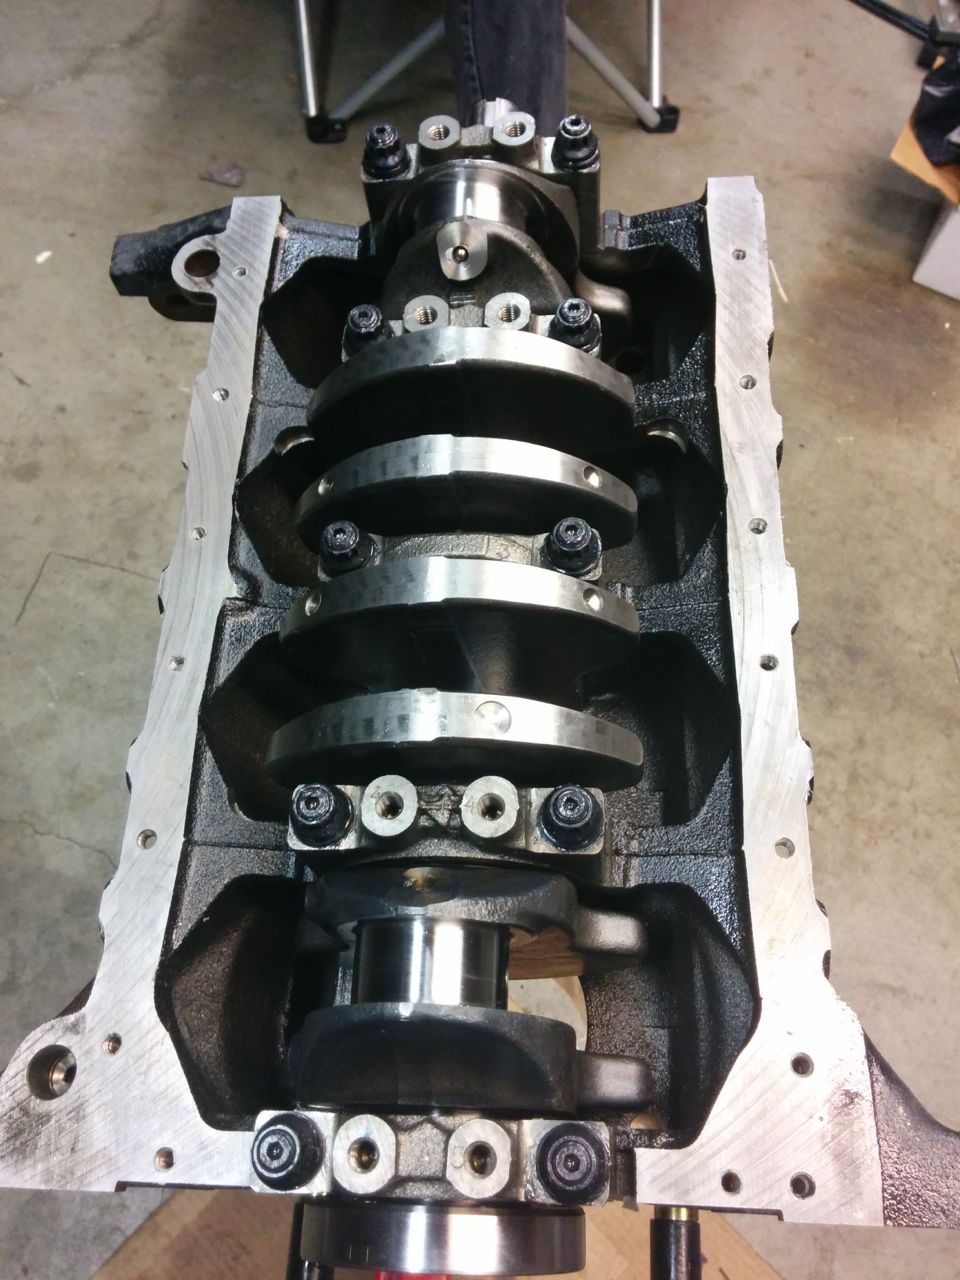
--Ian
On with the assembly! Main bearings and thrust bearings:
Crank is cleaned:
I torqued the ARP main studs in 4 steps -- 10, 20, 40, then 60 ft-lbs. Before doing the last step, we validated the clicker torque wrench against a beam-type:
Crank is in!
--Ian
Reply
0
0
11-05-2014, 12:49 AM
#35
Elite Member
Thread Starter
Join Date: Mar 2007
Location: Santa Clara, CA
Posts: 5,165
Total Cats: 855
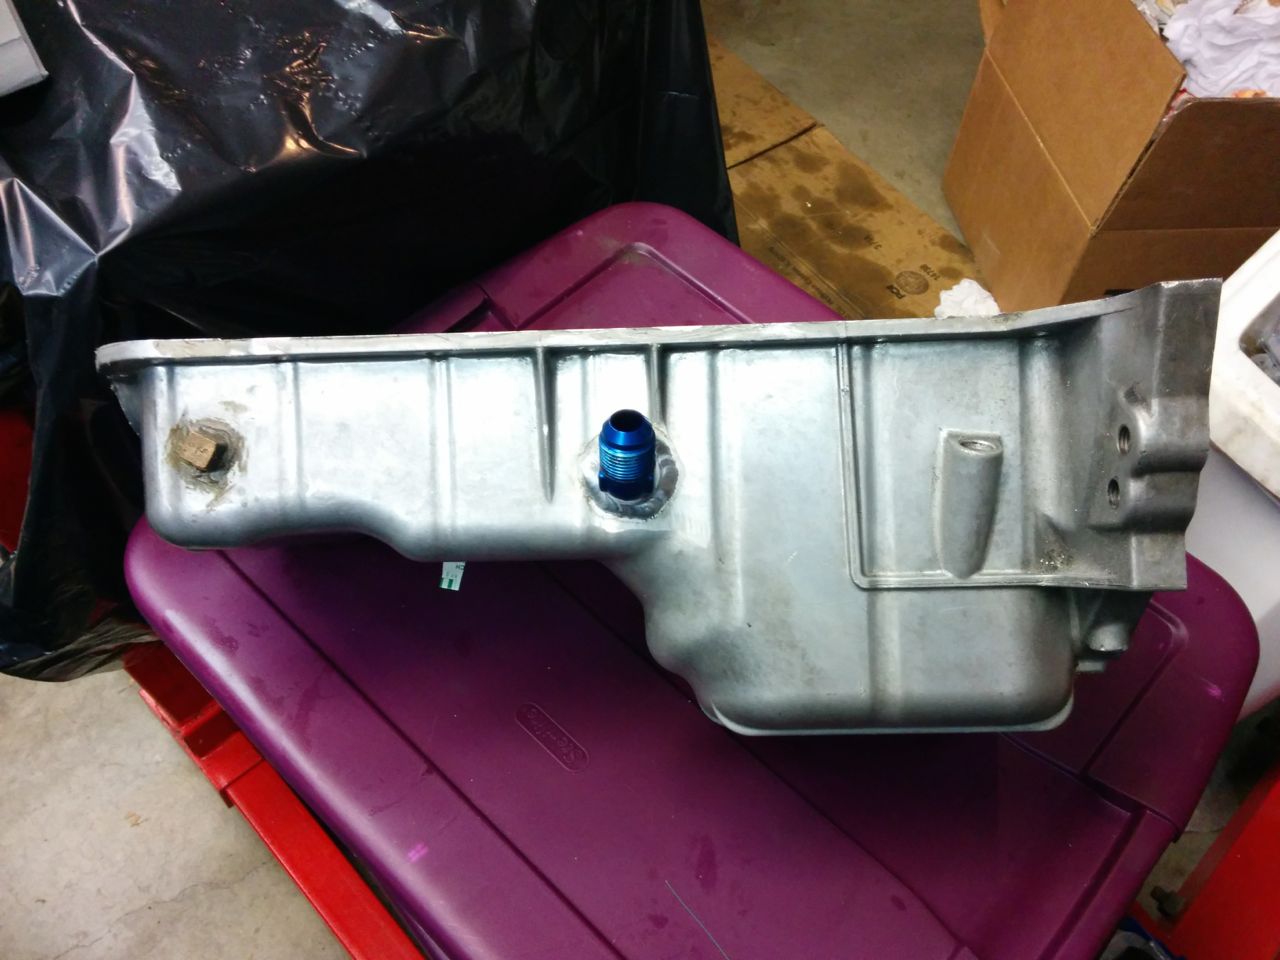
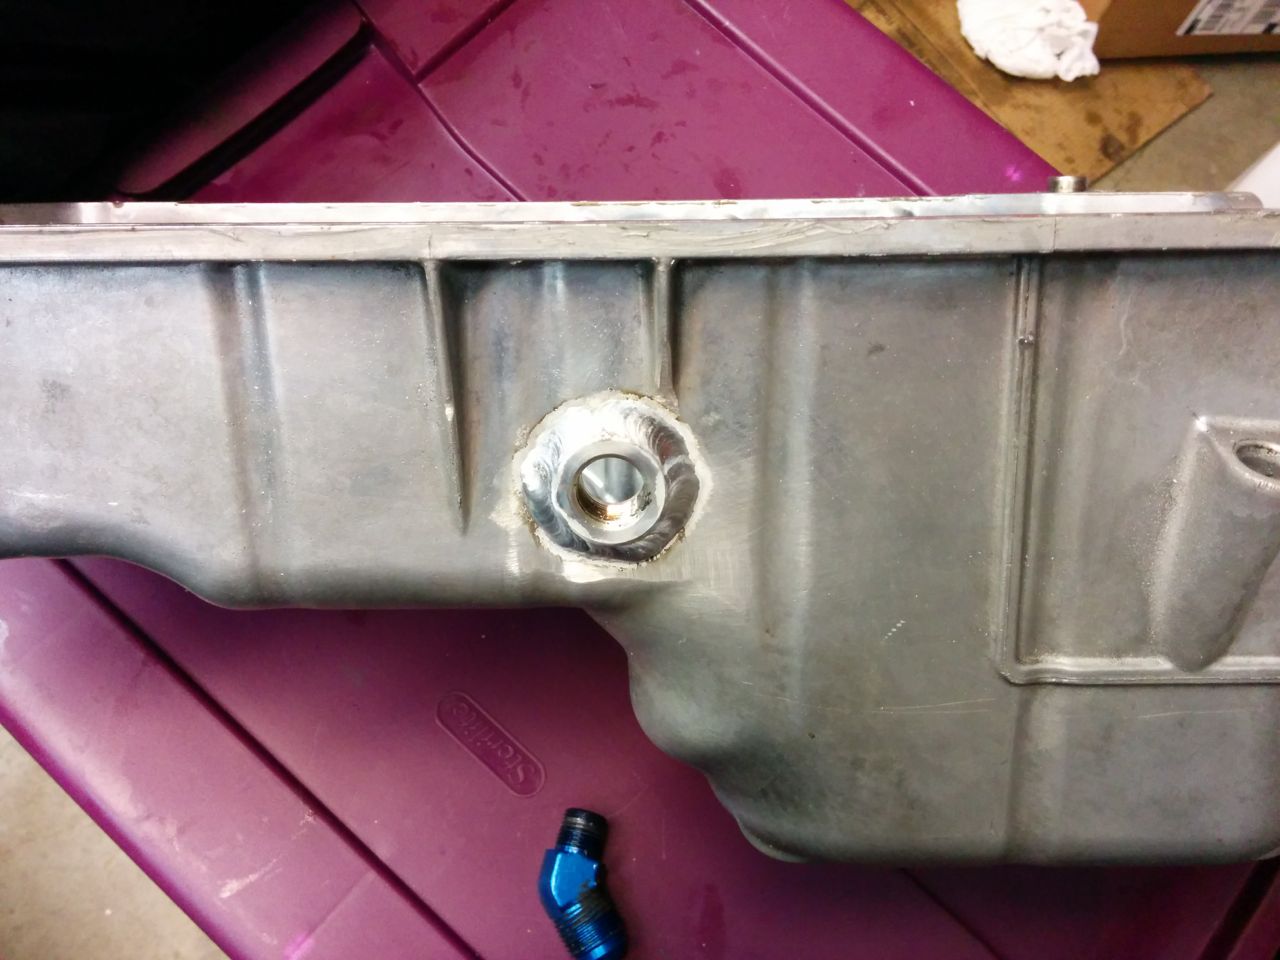
I first put a turbo in the car way back in 2002, with one of the CARB-approved, 2-cat FM2 kits. When I drilled the pan for that turbo I screwed it up and located the hole too high, it wasn't possible to screw in the hose barb because the AC bracket was in the way. I wound up dropping the subframe and pulling the oil pan off to fix it (don't do this -- pull the motor, it's easier). I plugged the original hole, and drilled/tapped a new one further back, between the motor mount and the subframe. This is actually a great place to locate the drain because it's almost a straight drop from the turbo, but there's no way to drill it on the car.
Over the years, the JB weld holding the fitting into the pan cracked and flaked off, and the NPT threads in the thin-walled pan got very loose. It was leaking, coating the entire bottom of the car in oil.
The *right* way to fix it is to weld a fitting into the pan, and since I have the motor out, now is the time. I have a Miller welder, complete with spoolgun for aluminum, but welding a cast oil pan is well beyond my very beginner-level welding skills, so I took it to a local fabricator. Purty!
--Ian
Last edited by codrus; 11-05-2014 at 01:08 AM.
Reply
1
1
 11-05-2014, 12:34 PM
#38
Elite Member
Thread Starter
Join Date: Mar 2007
Location: Santa Clara, CA
Posts: 5,165
Total Cats: 855
I prefer to get oil temp on the return line from the cooler -- that's what the black AN fitting in post #26 is for.
--Ian
--Ian
Last edited by codrus; 11-05-2014 at 12:59 PM.
Reply
0
0
11-10-2014, 03:03 AM
#39
Elite Member
Thread Starter
Join Date: Mar 2007
Location: Santa Clara, CA
Posts: 5,165
Total Cats: 855
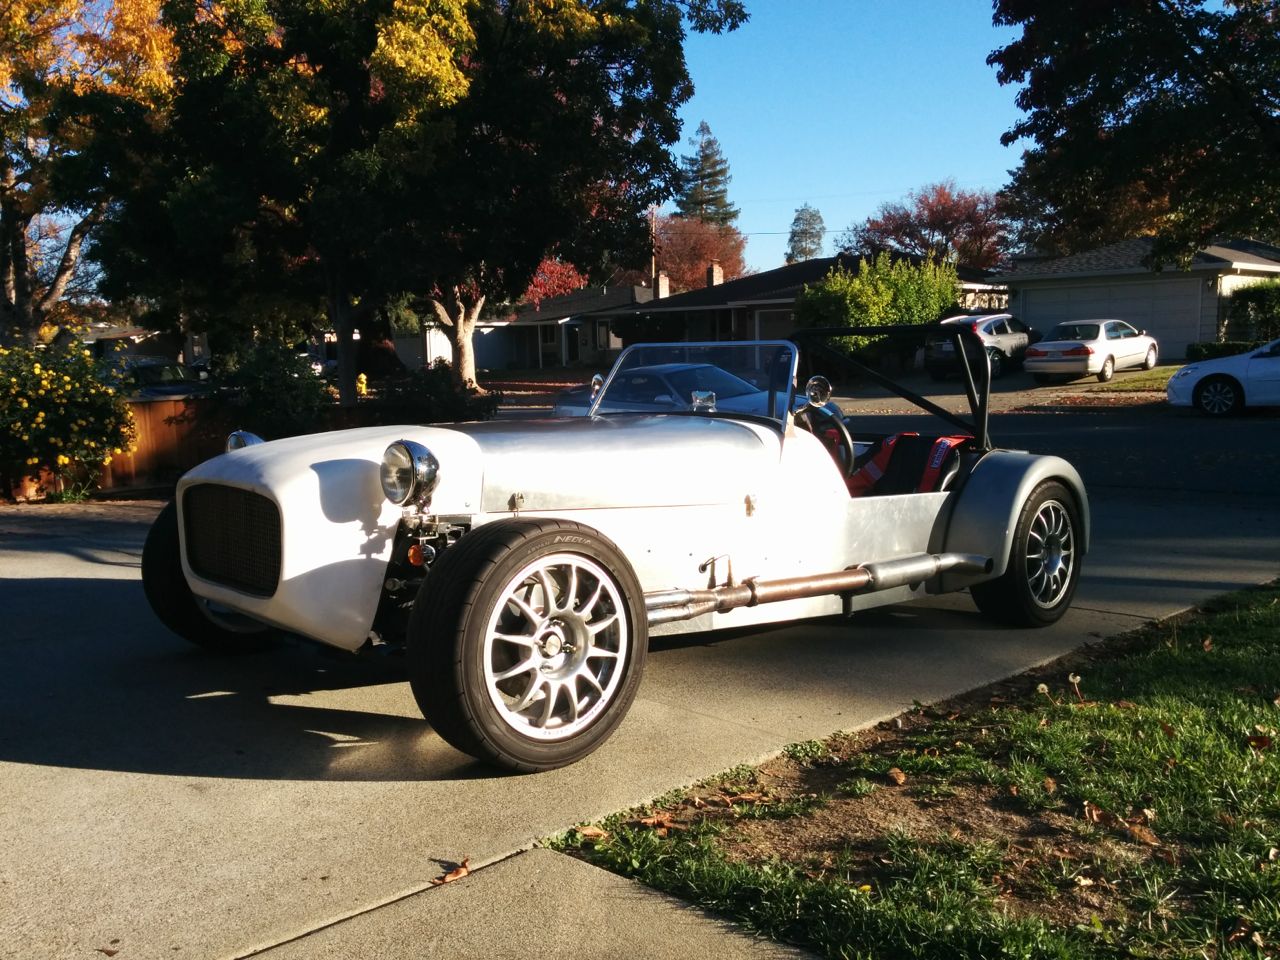
So today was reasonably productive. First I watched F1 from Brazil, then it was time for lunch. Since it's the middle of November, but still 80F, I had to take the Seven out.
OK, now back to the Miata engine. Pistons! Rods! Bottom end assembly! First I weighed some things:
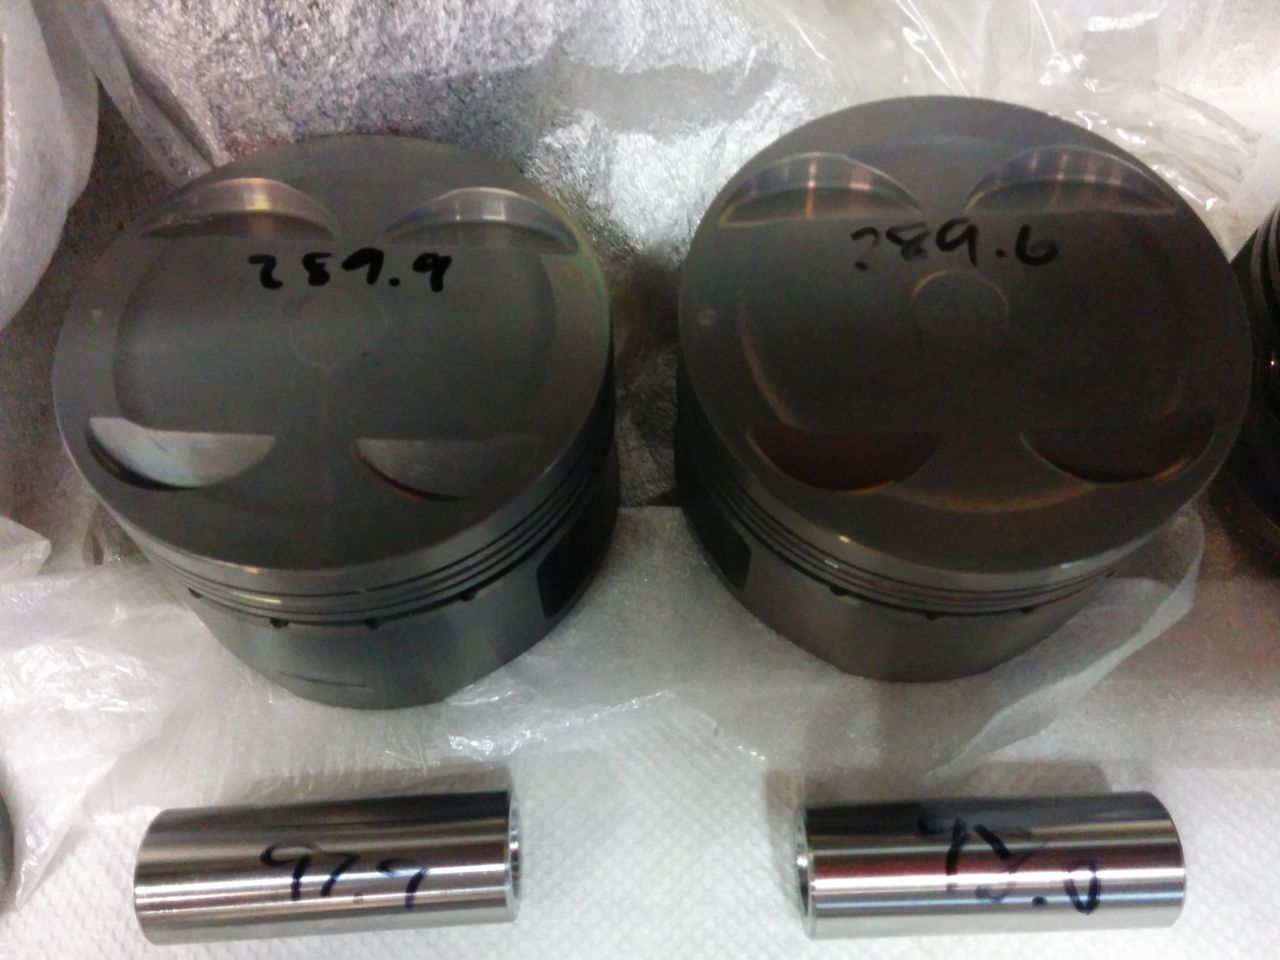
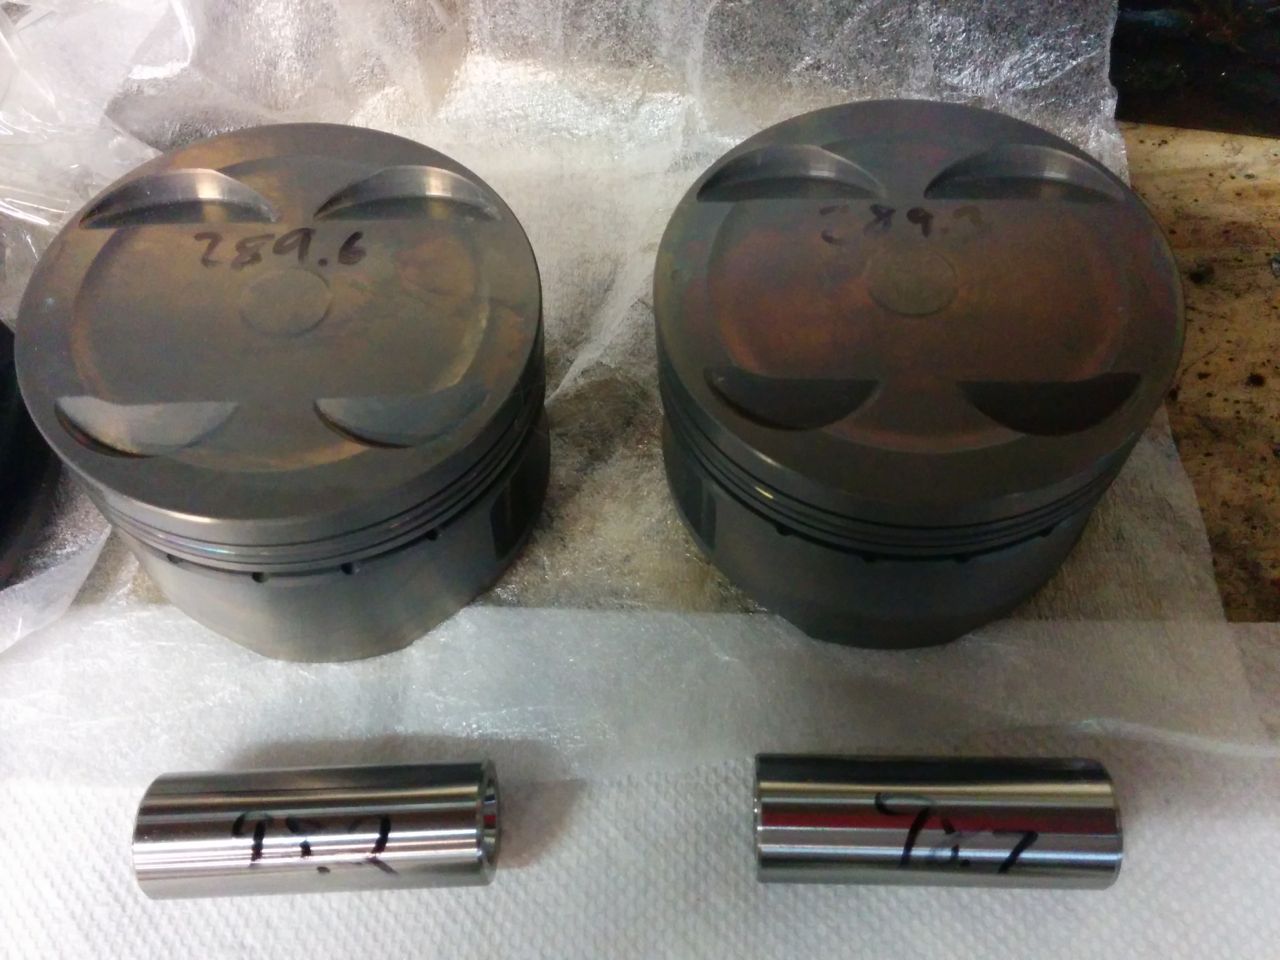
Pairing up the light pistons with the heavy wrist pins got three of them within 2 tenths of a gram, and the last one half a gram off. Close enough. The rods were all the same weight to within a tenth of a gram, so I didn't bother writing it down or taking pictures of them.
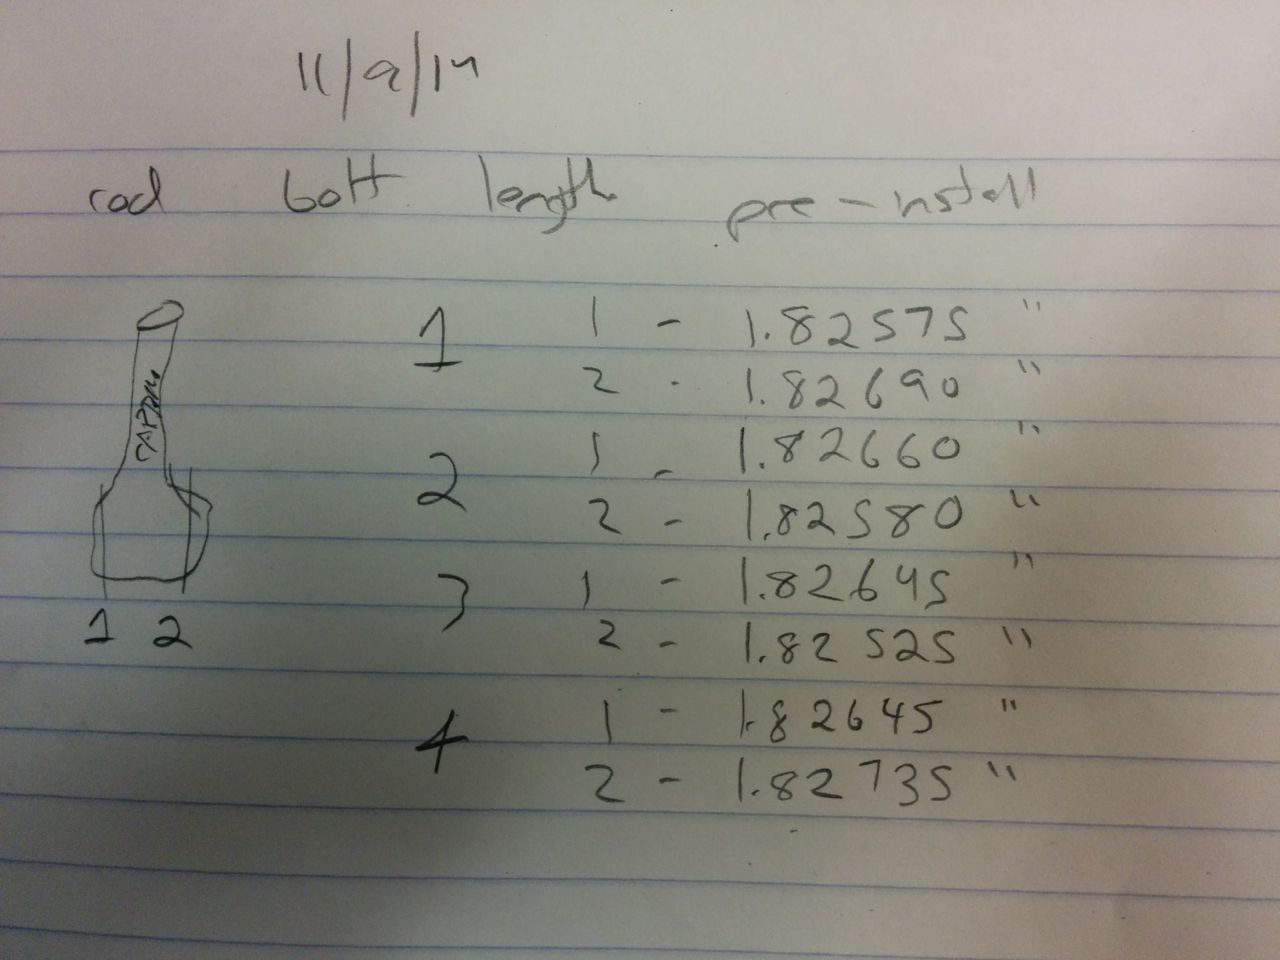
I did measure the lengths of all of the rod bolts before putting them in, though, so that if I ever do this again (and man I hope not) I can tell if I need to replace 'em.
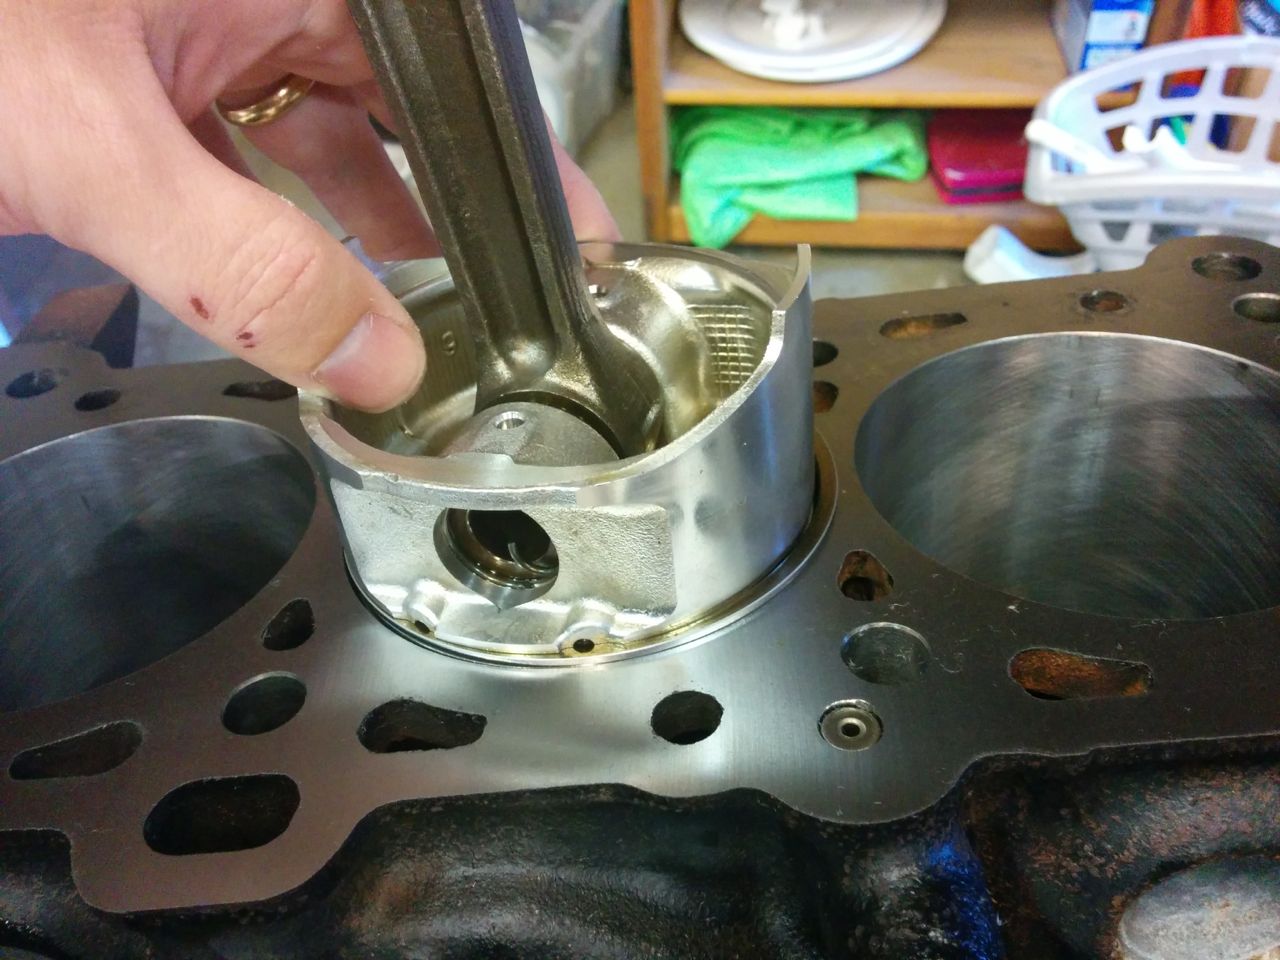
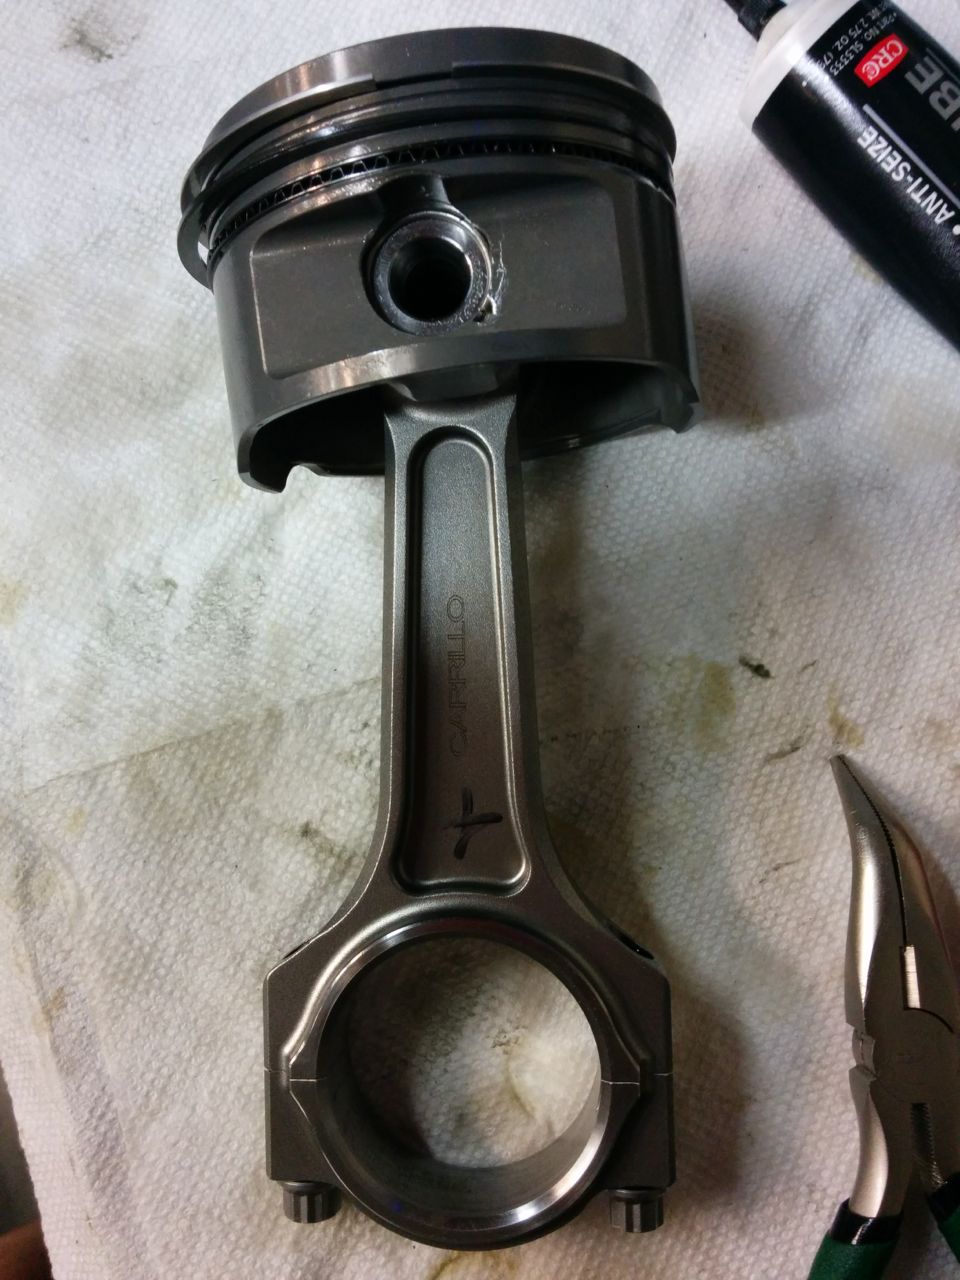
Then it was time to wrestle with the stupid Supertech circlips that don't have any convenient way to grab them. After spending 45 minutes putting in three clips, I finally figured out a good way to do it. Skip the needlenose pliers, wedge the two open ends into the circlip groove at the bottom of the piston, then use an old, junk wrist pin to push the top of the circlip in. Click, done, WAY easier than using pliers. So eventually I had four of these.
and it was time to use this:
and then this:
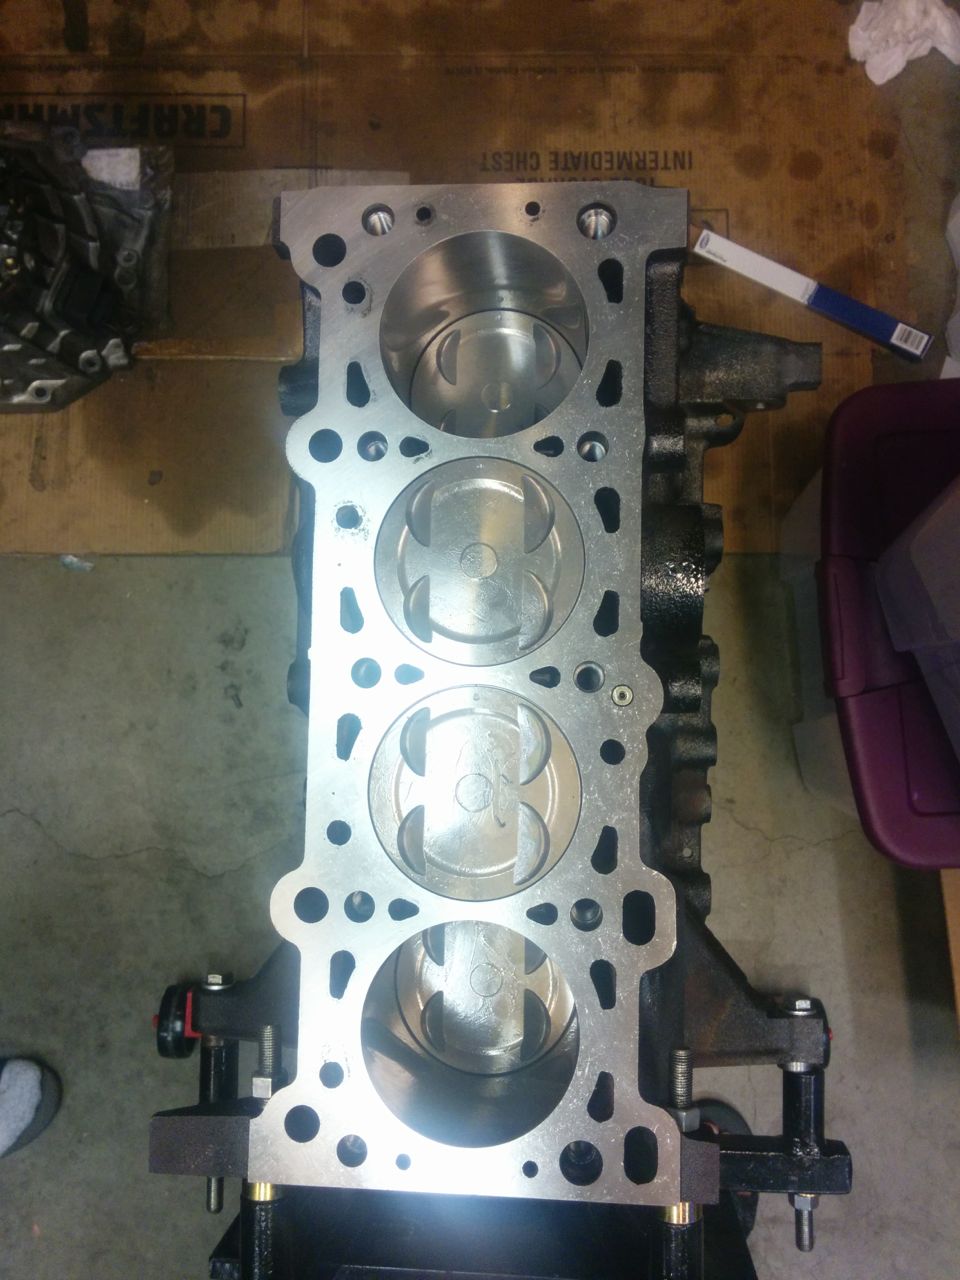
and poof:
Yay!
So then I took a look at the head. Opened up my shiny new BP5A intake cam, only to discover it wasn't actually shiny after all, and seems to have some rust on it. Ugh.
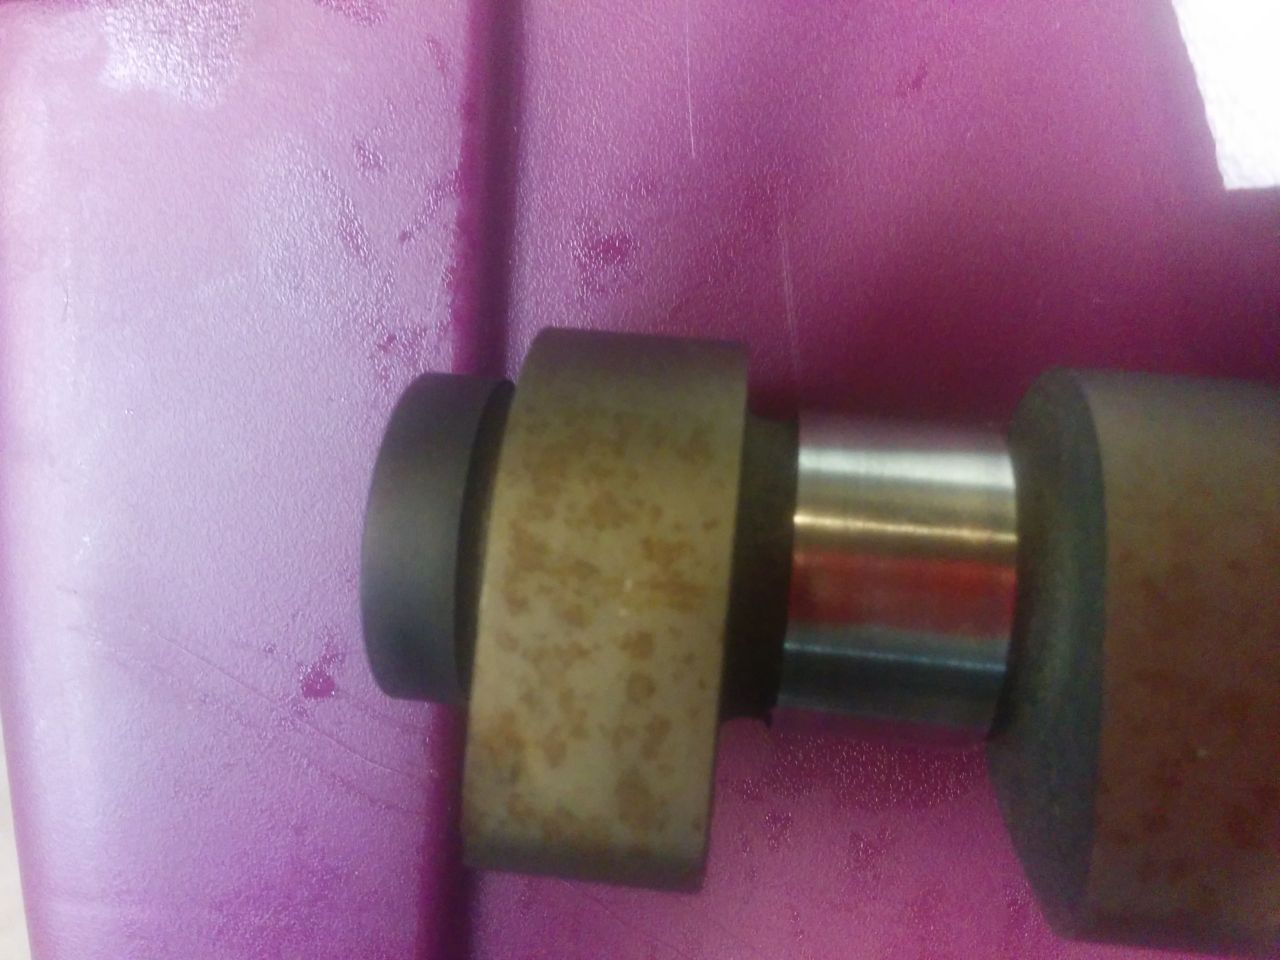
It looks like it's just surface rust -- haven't tried to get it off yet. That's about when I called it a night.
--Ian
OK, now back to the Miata engine. Pistons! Rods! Bottom end assembly! First I weighed some things:
Pairing up the light pistons with the heavy wrist pins got three of them within 2 tenths of a gram, and the last one half a gram off. Close enough. The rods were all the same weight to within a tenth of a gram, so I didn't bother writing it down or taking pictures of them.
I did measure the lengths of all of the rod bolts before putting them in, though, so that if I ever do this again (and man I hope not) I can tell if I need to replace 'em.
Then it was time to wrestle with the stupid Supertech circlips that don't have any convenient way to grab them. After spending 45 minutes putting in three clips, I finally figured out a good way to do it. Skip the needlenose pliers, wedge the two open ends into the circlip groove at the bottom of the piston, then use an old, junk wrist pin to push the top of the circlip in. Click, done, WAY easier than using pliers. So eventually I had four of these.
and it was time to use this:
and then this:
and poof:
Yay!
So then I took a look at the head. Opened up my shiny new BP5A intake cam, only to discover it wasn't actually shiny after all, and seems to have some rust on it. Ugh.
It looks like it's just surface rust -- haven't tried to get it off yet. That's about when I called it a night.
--Ian
Reply
0
0
11-10-2014, 05:44 AM
#40

Unpack any shipment with engine internals as soon as you get them and give it a workover with WD40 or similar, to prevent rust. And without immediate inspection it's tough to complain about the state.
Shipping always mean that stuff travels in a mixed temperatures and moisture will condensate.
There are stickier stuff than WD40 to use that will stay on for longer, but anything is better than leaving it dry (or moist).
There are no Cam-shaped (long and narrow, does not need lobes
) Ziploc bags I guess.Hmm, now I need to go over my own inventory of cams, just to make sure.

Reply
0
0


