Roxanne gets Rebuilt
 11-30-2015, 11:25 PM
#1
Junior Member
Thread Starter

Join Date: Aug 2014
Location: North Carolina
Posts: 403
Total Cats: 103
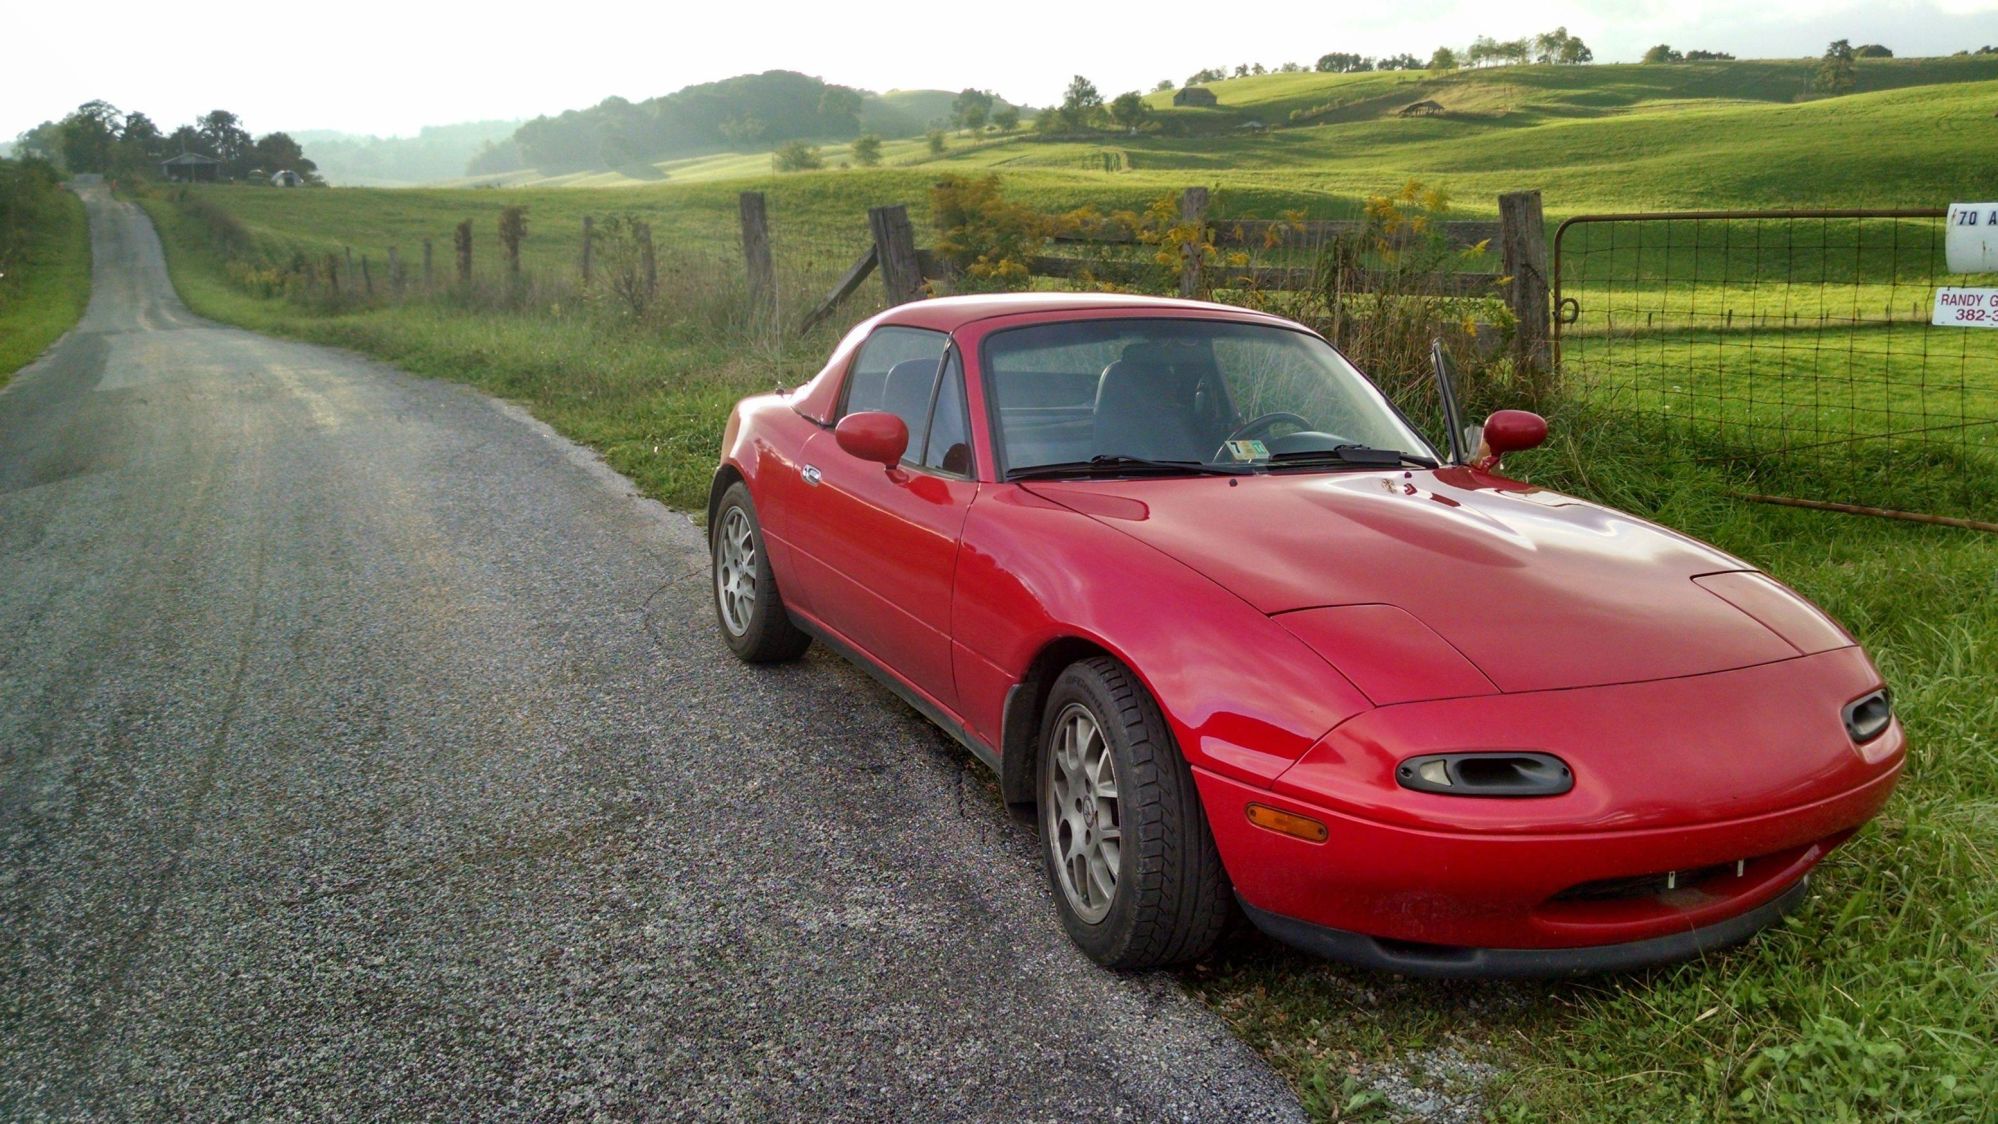
Hey all, I'm starting a complete re-shell of my Miata and figured I'd post here for the technical advice. July of last year I bought my neighbors car, a pretty clean 1990 Miata with just 69k on the clock. Ran through all the maintenance - fluids flushed, completely new cooling system and timing belt, new top, etc. Did some light modding too - a budget Billie setup, frame rails, steering wheel, Randall intake, and Cibie headlights. It was a blast to drive in the mountains around Blacksburg VA, which I did quite a bit of.
After graduation I decided to go on a road trip before getting a big boy job. Drove the car 14,000 miles in 51 days, from Virginia to California, north to British Columbia, and back across 1,951 miles in 36 hours to Quebec to visit family. We had our fun.
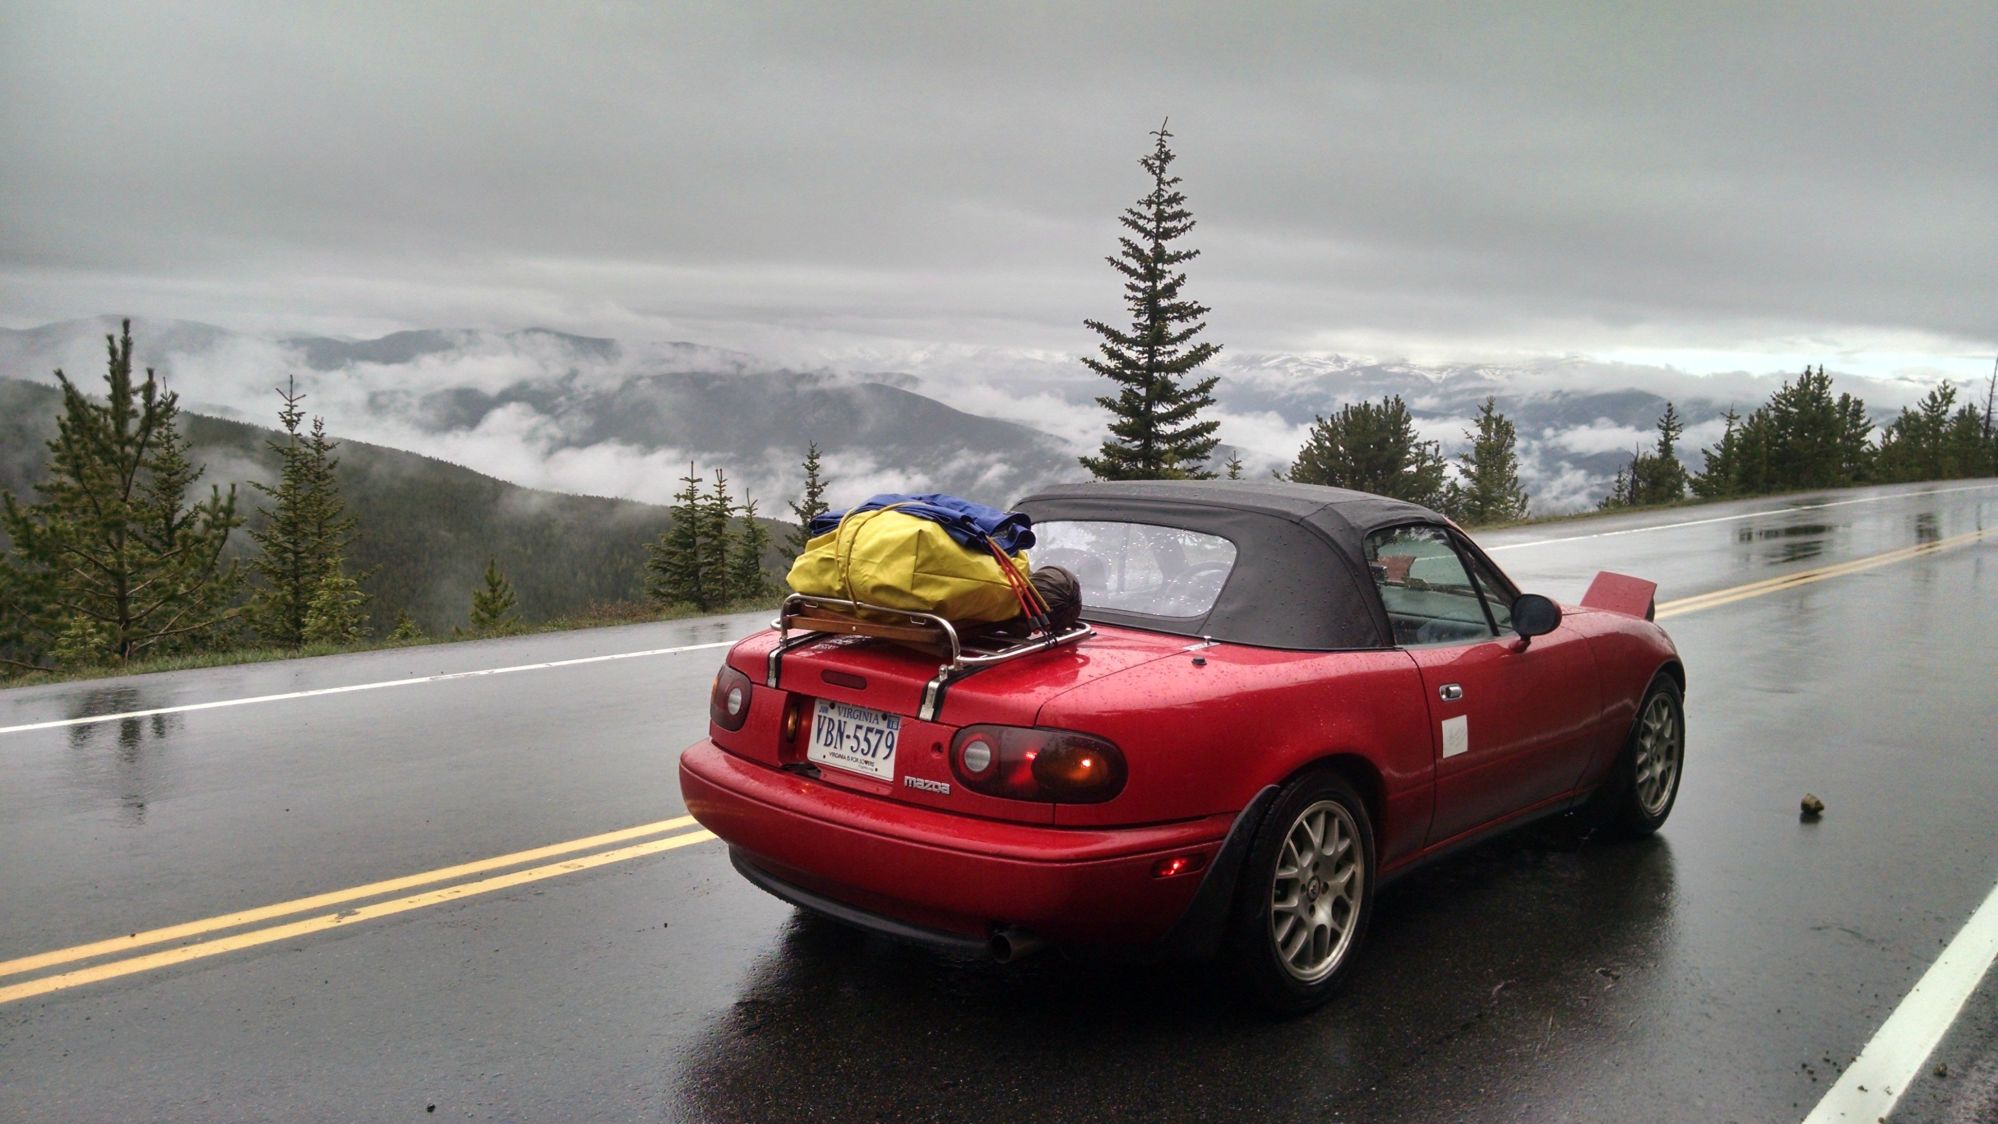
1.6L = Gutless at 12,000 feet.
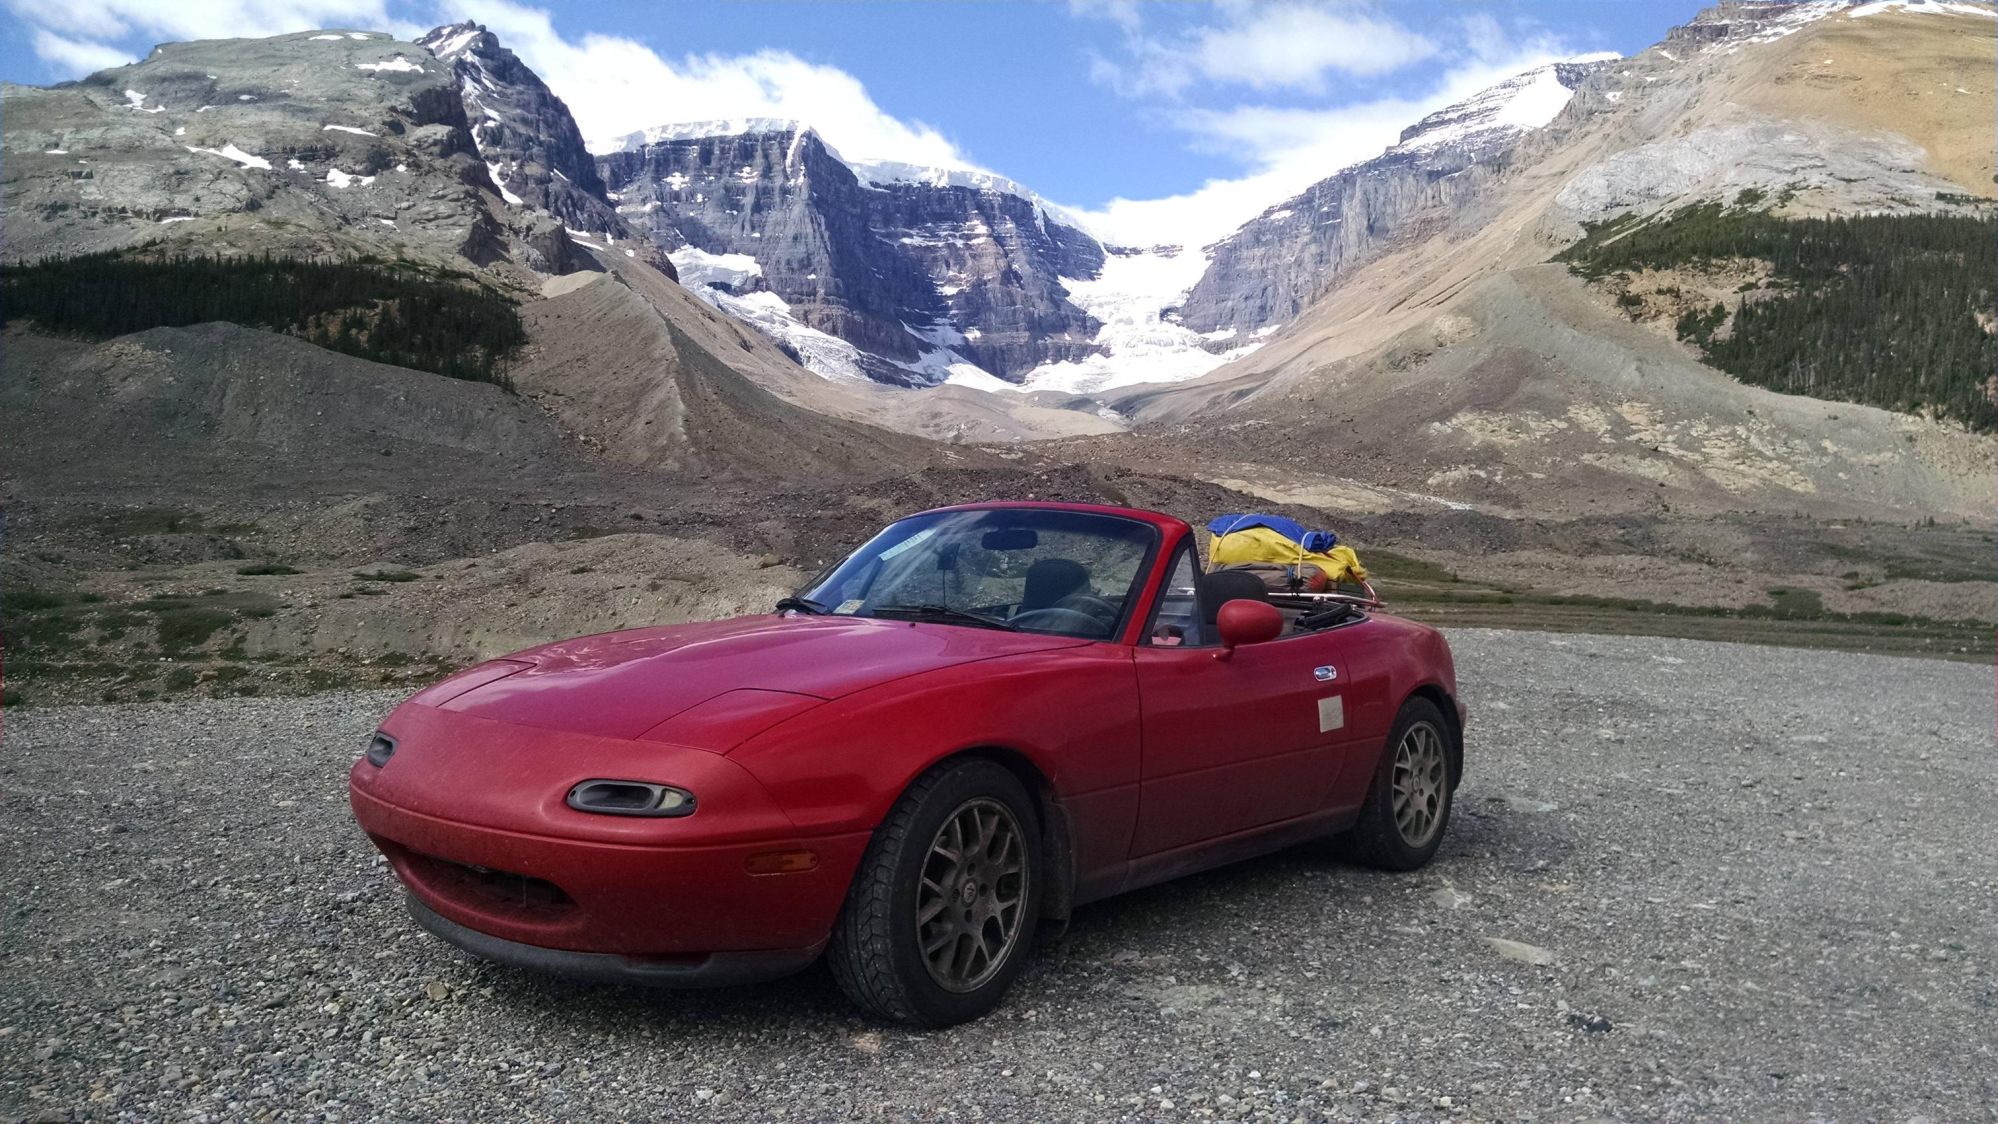
Jasper National Park, Canada
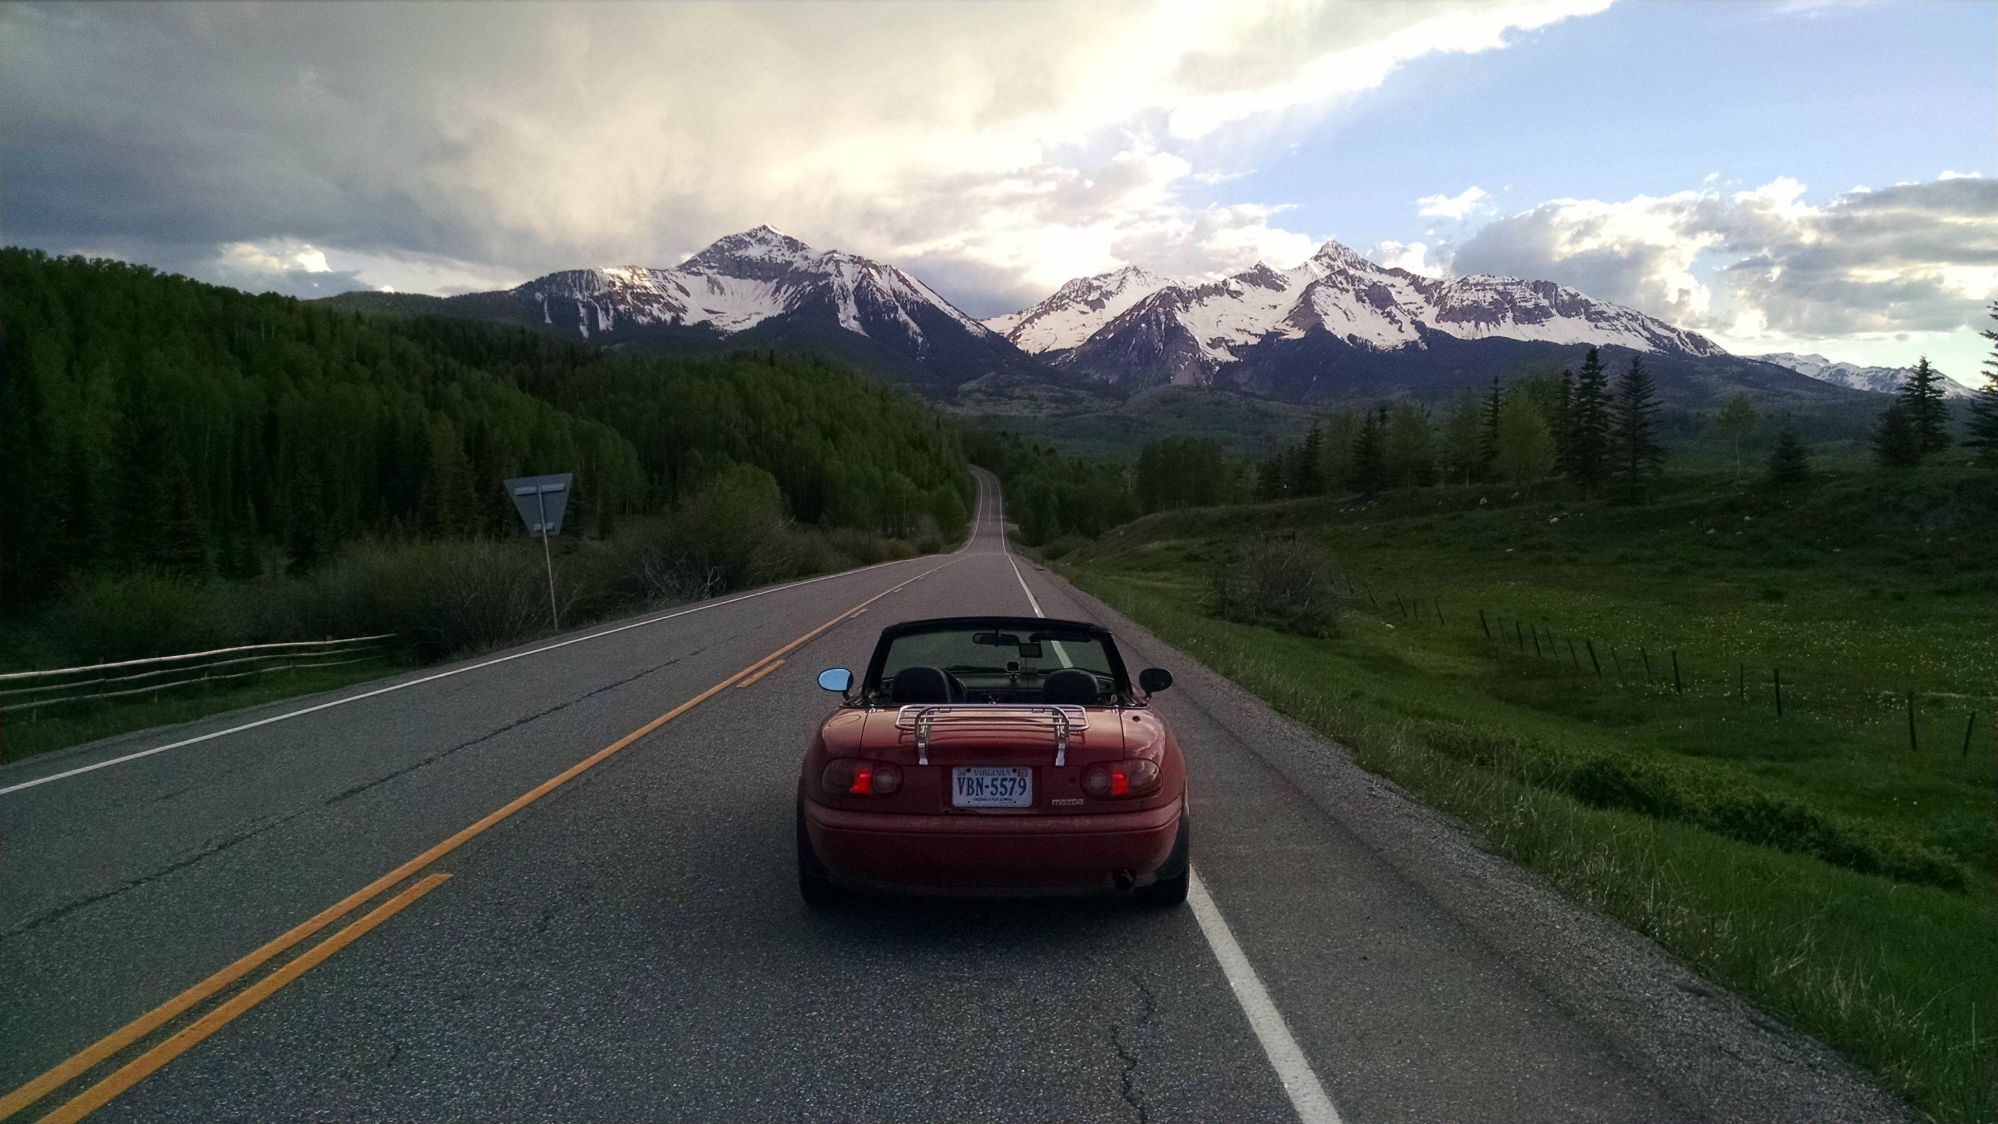
Somewhere along the San Juan Skyway.
Then we went to MiB. Absolutely a blast. Not my video, I'm the guy behind whose car you can't hear.
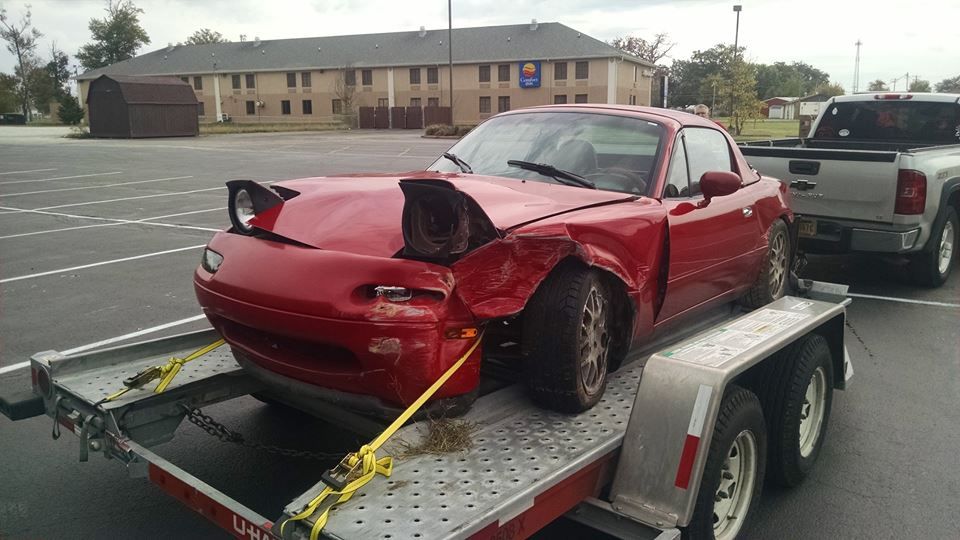
Dammit. In early October I hit a wall at night during a rainstorm - totally my fault. No ticket and no insurance claim, so I still think I was lucky. I got it up to 103k before the accident, not bad for 15 months of ownership.
Good fortune continues. I found a fairly clean shell for sale just as I was going on vacation and pounced. It's a basket case 1990, came with sound deadened doors, power windows, and a power steering rack. All good things I didn't have before. And that pretty much gets us up to speed.
Tonight I got the dash and wiring harness out, which was pretty easy considering both were half removed anyway. The new body has some small bits of rust I intend on attacking, including two pinky sized holes in the passenger floorpan. Pics below, I goofed on the links.
Anyway, the immediate plan is to continue disassembly, repair the rust and re-undercoat the underbody, possibly stitch weld the chassis and look into other reinforcements. The frame rails are pretty mangled, I saw someone once replace them with much thicker box sections. I want to weld up the power rack and convert it to manual properly. The budget for this is pretty small right now, so I'm looking for things to do while the car is this far apart that aren't hard on the wallet.
Thoughts? Ideas? Inspiration? I've read the "Totalled and Flipped" build thread, and it's giving me lots of ideas. Got any more threads like that I should read?
After graduation I decided to go on a road trip before getting a big boy job. Drove the car 14,000 miles in 51 days, from Virginia to California, north to British Columbia, and back across 1,951 miles in 36 hours to Quebec to visit family. We had our fun.
1.6L = Gutless at 12,000 feet.
Jasper National Park, Canada
Somewhere along the San Juan Skyway.
Then we went to MiB. Absolutely a blast. Not my video, I'm the guy behind whose car you can't hear.
Dammit. In early October I hit a wall at night during a rainstorm - totally my fault. No ticket and no insurance claim, so I still think I was lucky. I got it up to 103k before the accident, not bad for 15 months of ownership.
Good fortune continues. I found a fairly clean shell for sale just as I was going on vacation and pounced. It's a basket case 1990, came with sound deadened doors, power windows, and a power steering rack. All good things I didn't have before. And that pretty much gets us up to speed.
Tonight I got the dash and wiring harness out, which was pretty easy considering both were half removed anyway. The new body has some small bits of rust I intend on attacking, including two pinky sized holes in the passenger floorpan. Pics below, I goofed on the links.
Anyway, the immediate plan is to continue disassembly, repair the rust and re-undercoat the underbody, possibly stitch weld the chassis and look into other reinforcements. The frame rails are pretty mangled, I saw someone once replace them with much thicker box sections. I want to weld up the power rack and convert it to manual properly. The budget for this is pretty small right now, so I'm looking for things to do while the car is this far apart that aren't hard on the wallet.
Thoughts? Ideas? Inspiration? I've read the "Totalled and Flipped" build thread, and it's giving me lots of ideas. Got any more threads like that I should read?

Reply
 1
1

1
 12-02-2015, 04:56 AM
#3
Newb

Join Date: Oct 2015
Location: Hamilton, Ontario, Canada
Posts: 33
Total Cats: 4
Cars are meant to be driven! Epic roadtrip! I've gone from Victoria BC to Hamilton ON a few times in my Mustang. The best route is #1 from Vancouver to Banff and then 93S up to Jasper. I lucked out when I tried it because it was lit by a huge full moon. No headlights we're actually required. The sections that I could see from far away (to check for wildlife) were a lot of fun. I might have run one of them twice...
I just did Vancouver to Jasper 2 weeks ago in my Roadster and I'm glad I put 175/65/14 snows on. I didn't want to push my luck on 93S this time of year. #5 from Kamloops to Jasper is so boring.


Not trying to **** up your thread with a 3600lb turd. Just showing off the wonderful views of BC.
The reason for the redo sucks but I can't wait to watch it all play out!
I just did Vancouver to Jasper 2 weeks ago in my Roadster and I'm glad I put 175/65/14 snows on. I didn't want to push my luck on 93S this time of year. #5 from Kamloops to Jasper is so boring.
Not trying to **** up your thread with a 3600lb turd. Just showing off the wonderful views of BC.
The reason for the redo sucks but I can't wait to watch it all play out!
Reply
0
0
12-04-2015, 11:38 PM
#4
Junior Member
Thread Starter
Join Date: Aug 2014
Location: North Carolina
Posts: 403
Total Cats: 103
I have a soft spot for the '13+ Mustangs, great shots! I'm not sure the exact route I took, but I wrote it all down in a journal every day and could map it out if I hadn't loaned the journal out to my uncle.
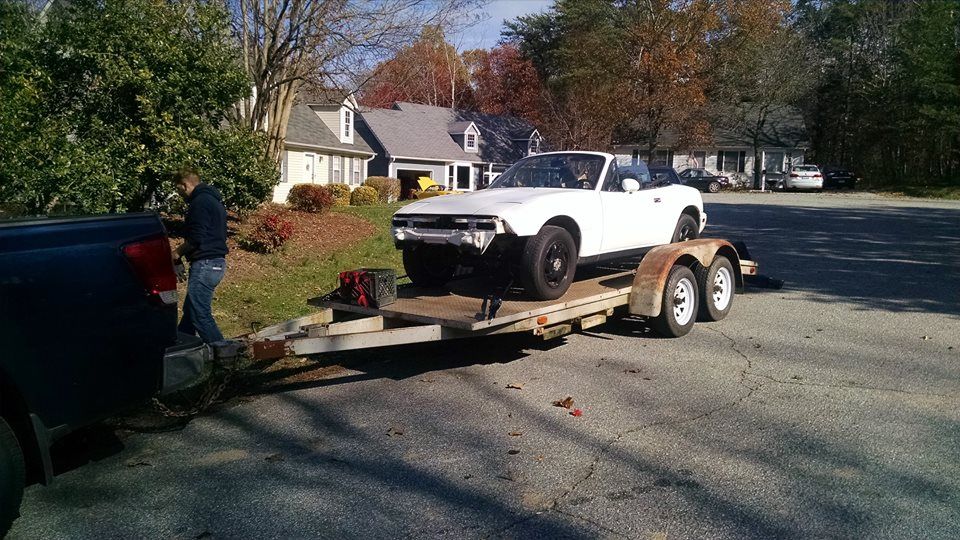
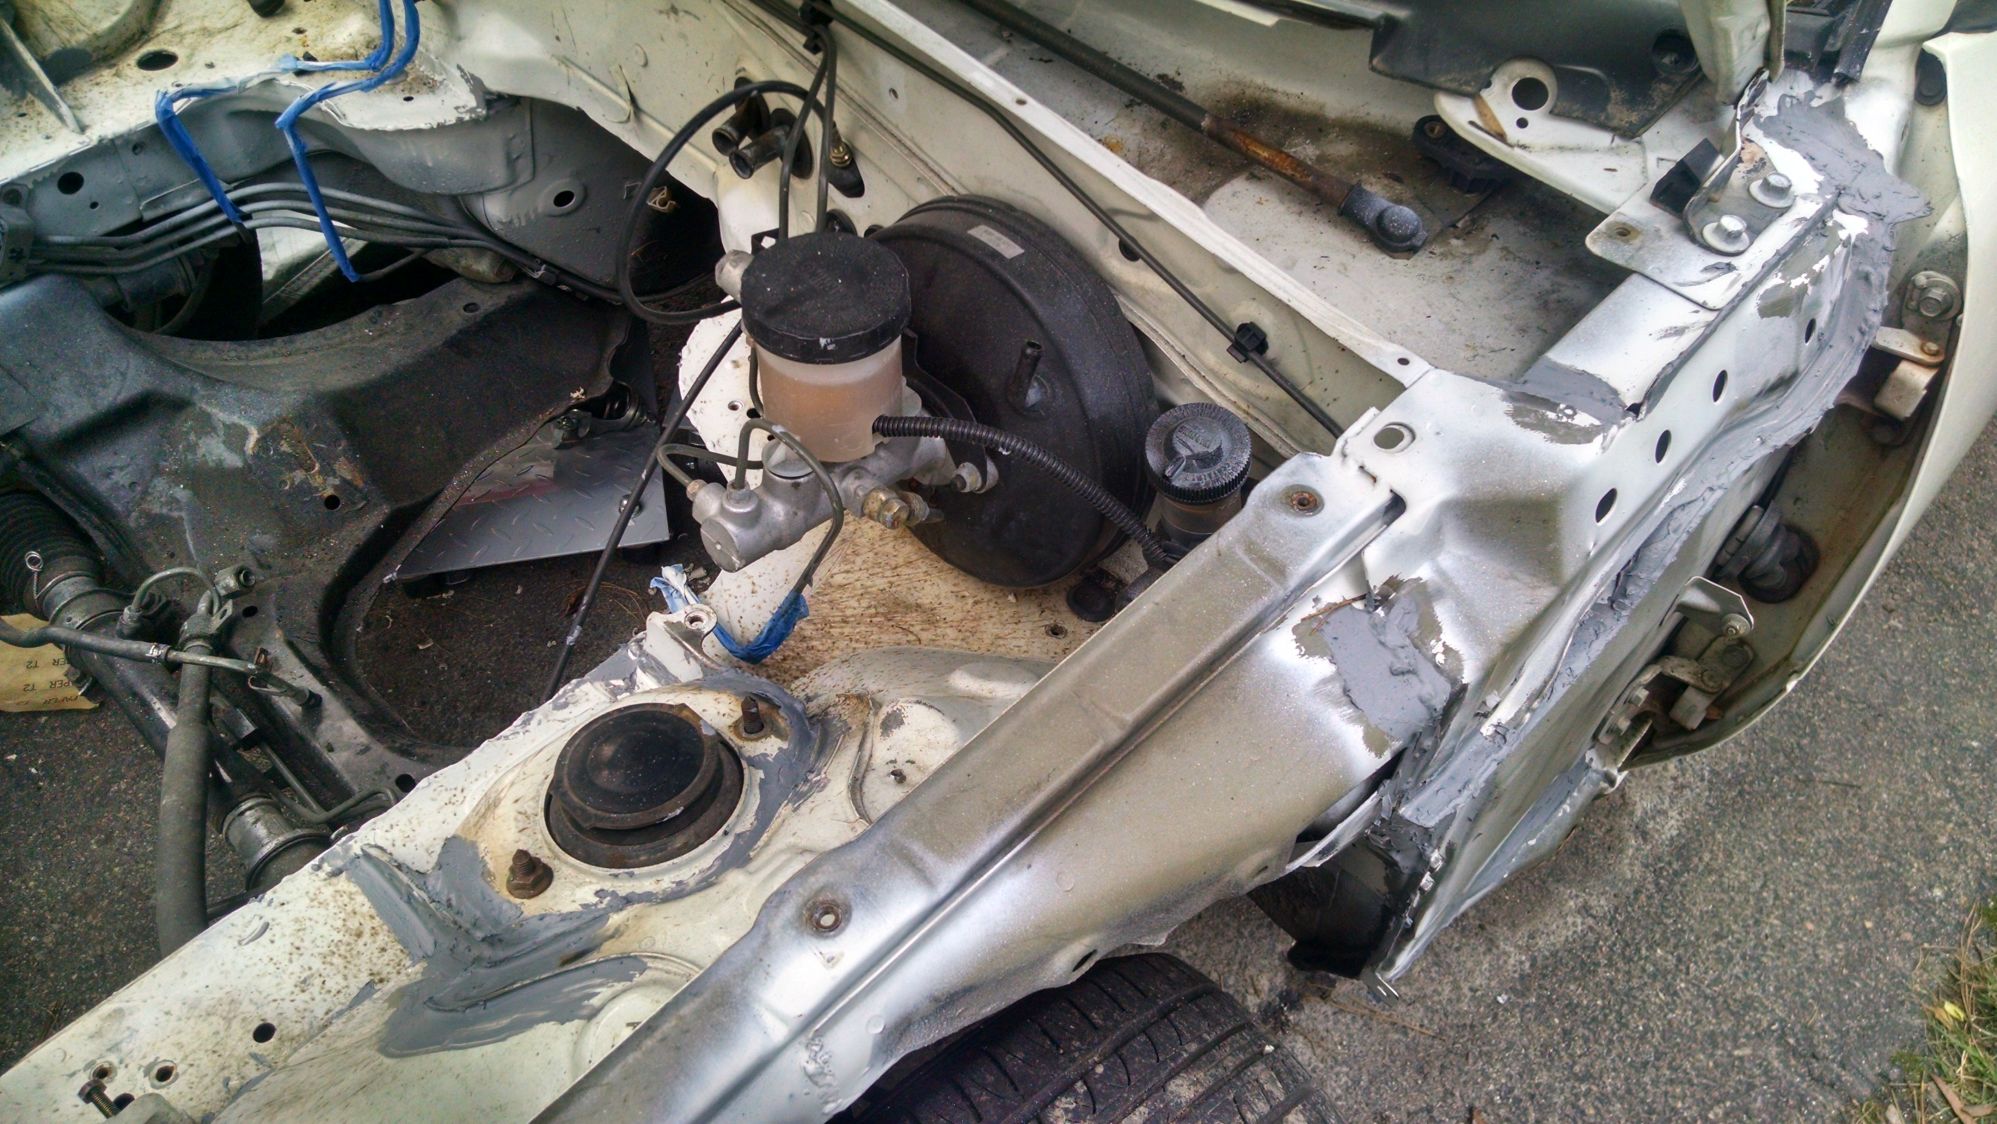
Got the car to it's new home and immediately started stripping it back to the bare shell. Someone else had clearly beat me to it and just wanted the car back together, so this was a super easy process with half the bolts missing and loose.

The interior to start with, incluing random parts.
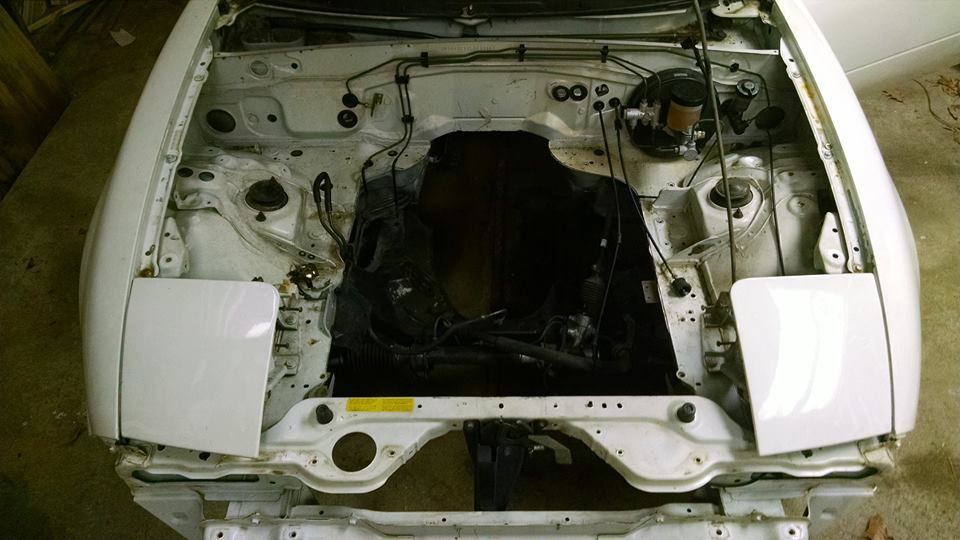
Stripped out the engine bay.
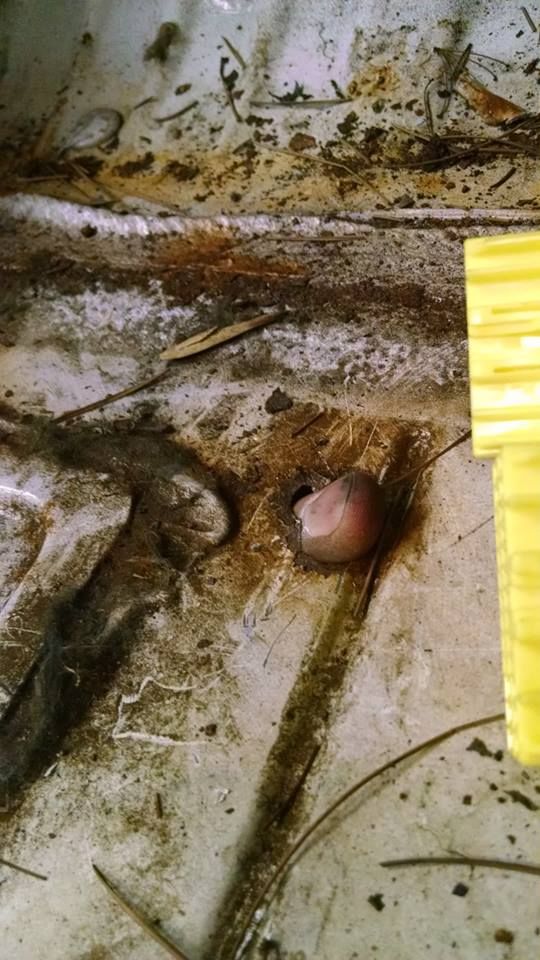
Crap. Two small holes in the passenger floorpan. The metal around the holes is good and still has primer on it, so I think it's pretty isolated.
At this stage I could just wire brush the rust away, glue in a quick patch, and reassemble. But with the car completely stripped, I plan to stitch weld a few spots, reinforce the frame rails, and rustproof and insulate the chassis. Streetcar and all...
As she sits, awaiting my acquisition of a welder.
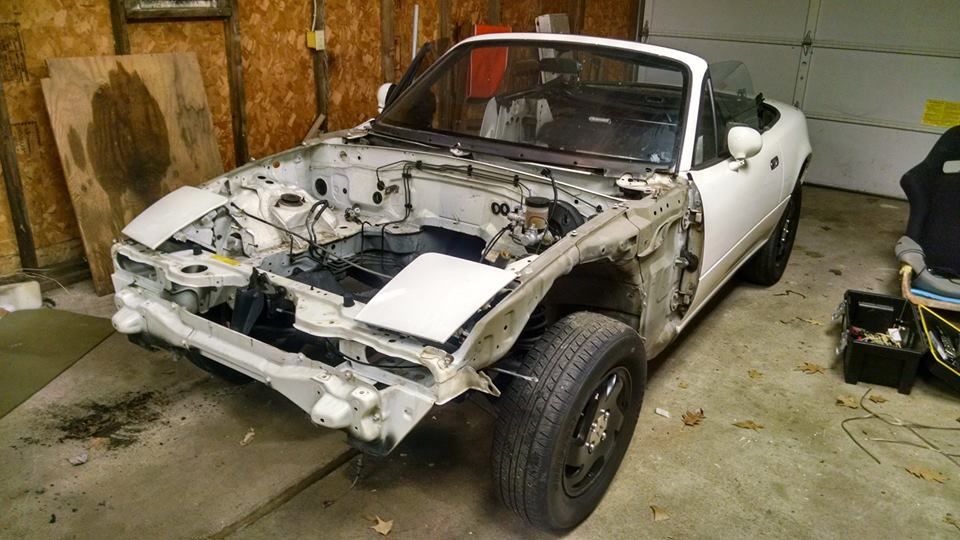
Any recommendations for things I should do with my car torn this far down?
Got the car to it's new home and immediately started stripping it back to the bare shell. Someone else had clearly beat me to it and just wanted the car back together, so this was a super easy process with half the bolts missing and loose.
The interior to start with, incluing random parts.
Stripped out the engine bay.
Crap. Two small holes in the passenger floorpan. The metal around the holes is good and still has primer on it, so I think it's pretty isolated.
At this stage I could just wire brush the rust away, glue in a quick patch, and reassemble. But with the car completely stripped, I plan to stitch weld a few spots, reinforce the frame rails, and rustproof and insulate the chassis. Streetcar and all...
As she sits, awaiting my acquisition of a welder.
Any recommendations for things I should do with my car torn this far down?
Reply
0
0
12-05-2015, 09:17 AM
#5
Junior Member

Join Date: Aug 2005
Location: Cayman Islands
Posts: 440
Total Cats: 17
if your going to be seam welding. Break out the angle grinder and knotted wire wheel/cup and get to work stripping the seams you plan to weld.
Not sure how far you are planning to go with that side of things but my cowl shake is almost nil after adding spot welds in the windshield opening area as well as around the entire outside edge down into the door opening where the large main top seal goes (horrible description?)
oh....if you're looking to part ways with a pair of the top half of the NA door cards let me know
Reply
0
0
12-06-2015, 06:58 PM
#6
Junior Member
Thread Starter
Join Date: Aug 2014
Location: North Carolina
Posts: 403
Total Cats: 103
Caved in to my desire to get the frame welded and bought a cheap 90 amp Horrible Freight welder. It did okay, but combine a not so great welder and a not so great operator and it's going to be a long day. Lots of grinding off bad welds and redoing them till I was happyish. I got the doorframes up to the beltline, some on the trans tunnel, above the front wheels and the longitudinal seam in front of either door.
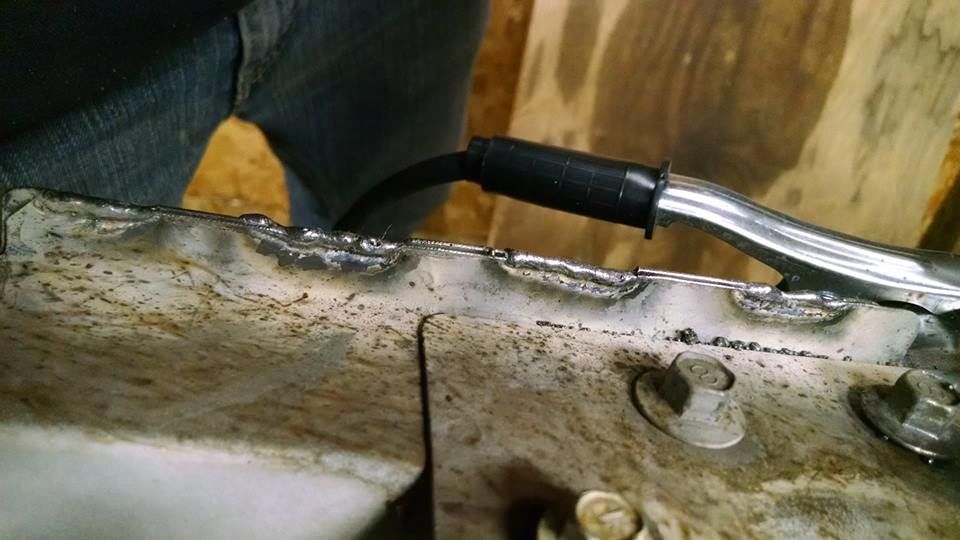
Okay welding in front of the doors.
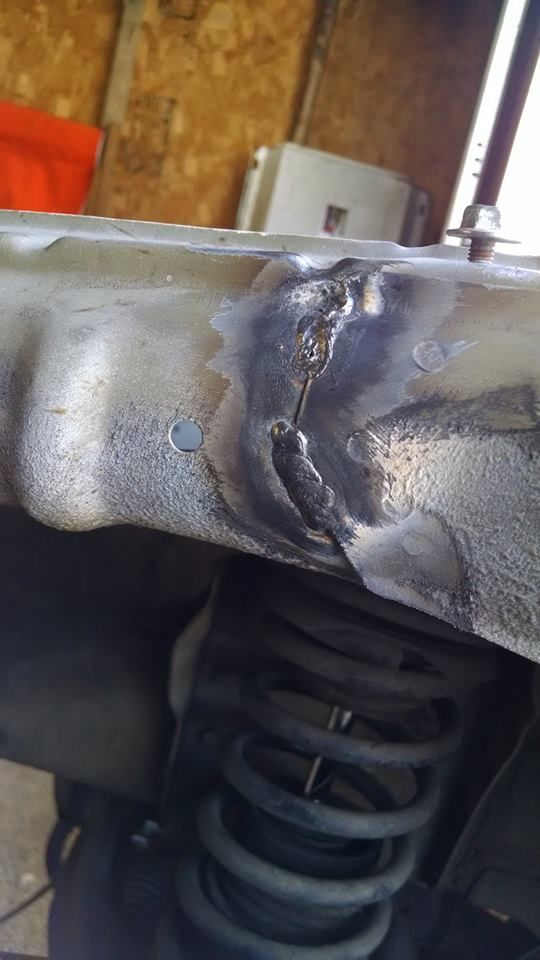
Eh, it will hold.
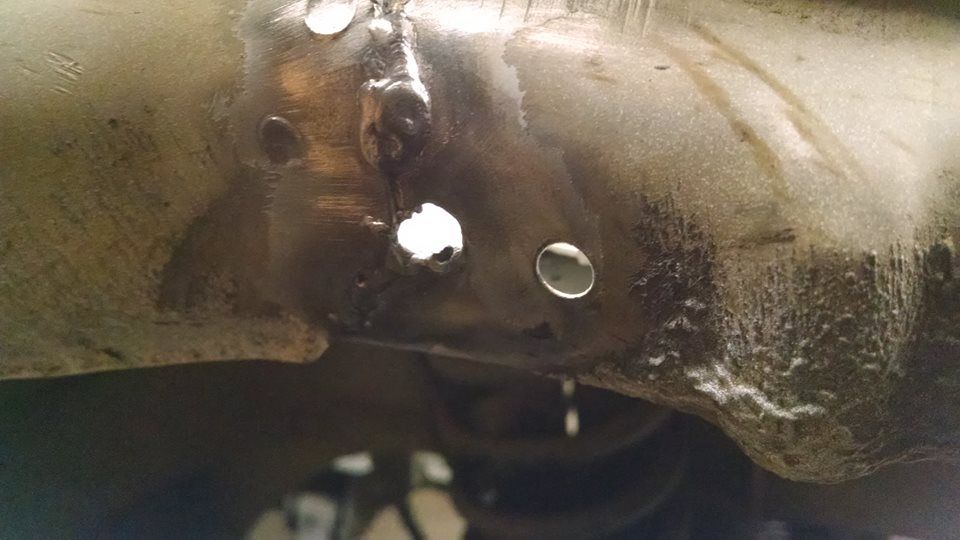
Probably made that worse by blowing another hole through it. Think it's worth trying to get someone to patch and fix? I don't want to make it doubly worse.
Not sure how far you are planning to go with that side of things but my cowl shake is almost nil after adding spot welds in the windshield opening area as well as around the entire outside edge down into the door opening where the large main top seal goes (horrible description?)
Reply
0
0
12-08-2015, 01:08 PM
#7
Newb
Join Date: Oct 2015
Location: Hamilton, Ontario, Canada
Posts: 33
Total Cats: 4
That looks like flux core. It burns through because flux core wire burns much hotter than hardwire with gas. You could put a small section of sheet metal behind the hole to absorb some of the heat. You really have your work cut out for you with that machine. Can it be upgraded to use gas?
Reply
0
0
12-08-2015, 02:19 PM
#8
Junior Member
Thread Starter
Join Date: Aug 2014
Location: North Carolina
Posts: 403
Total Cats: 103
Yup, cheap *** flux core. I'll get a real welder eventually, this thing only has two settings for current, low and high. And that adjustment setting seems to affect the wire feed rate as well. It's not worth upgrading, but luckily my neighbor wants to buy it after I'm done with it, then I can get something real with more monies.
It's difficult enough for me to use that I'm second guessing that frame rail replacement I wanted to do. A better operator probably wouldn't have so much trouble. I have FM frame rails on the other car that will go on this one either way. And I'm thinking maybe the floor holes should be professionally patched.
It's difficult enough for me to use that I'm second guessing that frame rail replacement I wanted to do. A better operator probably wouldn't have so much trouble. I have FM frame rails on the other car that will go on this one either way. And I'm thinking maybe the floor holes should be professionally patched.
Reply
0
0
01-04-2016, 04:02 PM
#10
Junior Member
Thread Starter
Join Date: Aug 2014
Location: North Carolina
Posts: 403
Total Cats: 103
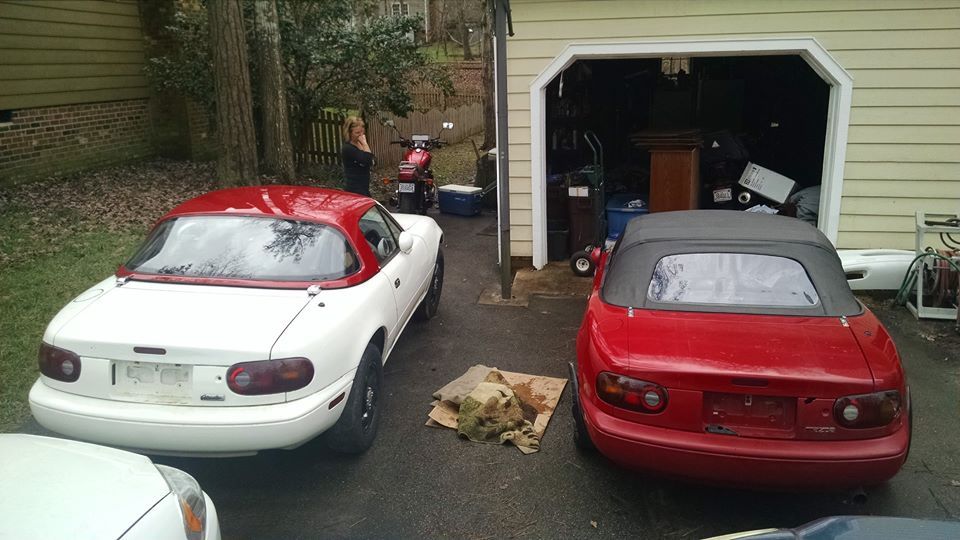
Well, life threw a wrench into my plans. The company I was working for cut a bunch of jobs, including my own after less than four months there. I wasn't even out of training yet and they had recruited me straight out of college. On the bright side, I've moved back to Virginia from Indiana. The biggest negative on this build though is that I lost my garage and all the storage space I had for parts. Progress has hit a serious wall due to moving back and cleaning everything to make space.
Want to see if your mother really loves you? Move back home and park two junk cars in the driveway.
At this point, the door frames (including A-pillar), under fender area, and parts of the engine bay have been stitch welded and had seam sealer reapplied to prevent rust.
I'm debating having the rust holes professionally repaired and welded in, or just covered with a patch and sealed over. Functionally, it seems that the only real difference would be the damage to my wallet.
I'm also definitely going to be painting the engine bay, interior, and trunk red in preparation for a full respray when funds are more available. There are some good looking white Miatas, but mine definitely needs to be red. This again is one of those things where I have to decide if it will be professionally done or DIY.
I can't really do anything but order small parts right now until I get a workspace clean and clear. I'm looking to replace the clutch while the engine is out. Anyone have experience with the eBay Exedy clutch and lightweight flywheel combo?
Reply
0
0
01-04-2016, 07:17 PM
#11
Elite Member
iTrader: (5)
Join Date: Oct 2011
Location: Detroit (the part with no rules or laws)
Posts: 5,677
Total Cats: 800
That's so weird, the NA6 i worked on had that exact same hole in the floor.
Despite minor setbacks, this seems to be off to a good start. I did some of my best work when broke as a joke and drunk as a skunk.
Despite minor setbacks, this seems to be off to a good start. I did some of my best work when broke as a joke and drunk as a skunk.

Reply
1
1

 01-04-2016, 11:55 PM
#13
Junior Member
Thread Starter
Join Date: Aug 2014
Location: North Carolina
Posts: 403
Total Cats: 103
Broke as a joke/Poverty spec budget is driving me to the eBay Exedy. My power goal is... stock, and FM is twice the price. Hard to justify that expense with no trubo and the other silly things I just ordered instead:
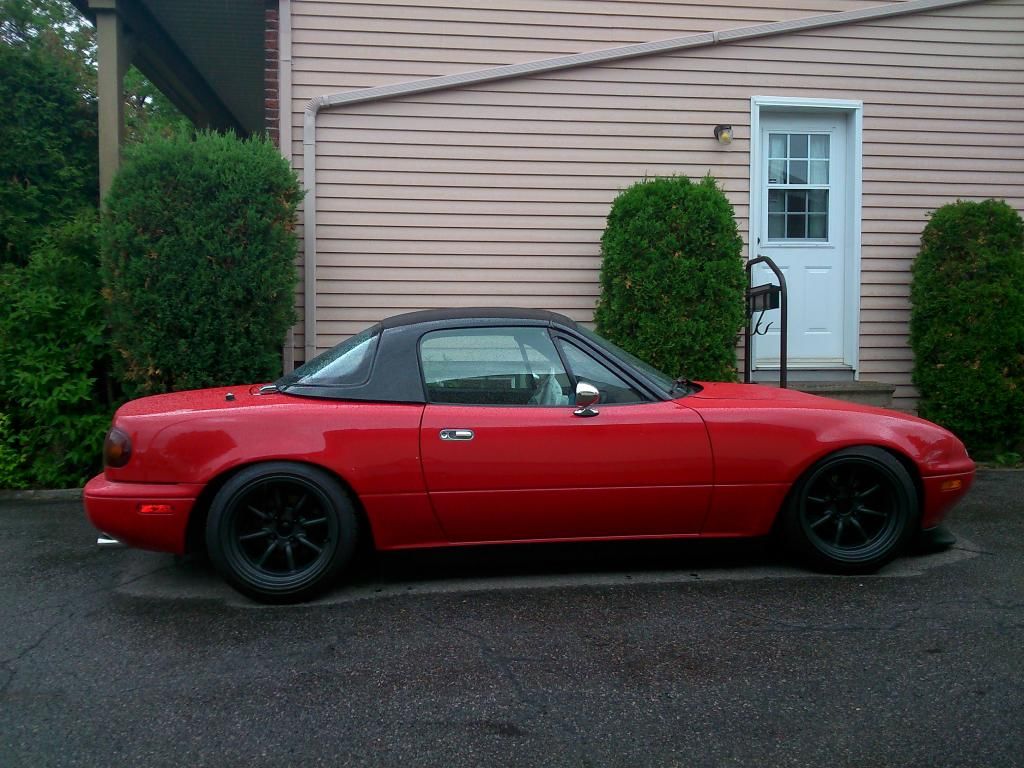
Basically, the goal is to get the car back on the road pretty cheap, while not ignoring the basic maintenance/upgrades that are best done with the car in kit form. Then I can continue down the upgrade path I was already on.
This is the goal, minus the questionable ride height and rimz.
- Skou coolant reroute spacer - thinking about a oil filter relocation to go with this.
- poly steering rack bushings - Plan on full depower and welding the splines
- Frame rail replacement material
- Tecna-Fit SS brake lines
- Mazda Comp engine mounts
- Replacement Cibie reflector, one was destroyed in the accident.
- DEI heat shield for trans tunnel
Basically, the goal is to get the car back on the road pretty cheap, while not ignoring the basic maintenance/upgrades that are best done with the car in kit form. Then I can continue down the upgrade path I was already on.
This is the goal, minus the questionable ride height and rimz.
Reply
1
1
02-03-2016, 11:57 PM
#14
Junior Member
Thread Starter
Join Date: Aug 2014
Location: North Carolina
Posts: 403
Total Cats: 103
Well, time to call this rebuild over. I'm moving across state lines for the second time after buying this shell two months ago. Renting the trailer and space to transport and rebuild the two only to end up with a 1.6L that needs a repaint doesn't make sense anymore. The white shell is for sale, the red one will be parted out in a few months once I get the new/good parts off of it.
A big factor was yesterday I bought this 2001 NB2. Old lady owned, 116k on the clock, tan leather+cruise = torsen(?), factory shock tower brace but no Billies, and waaaayyy below book value.
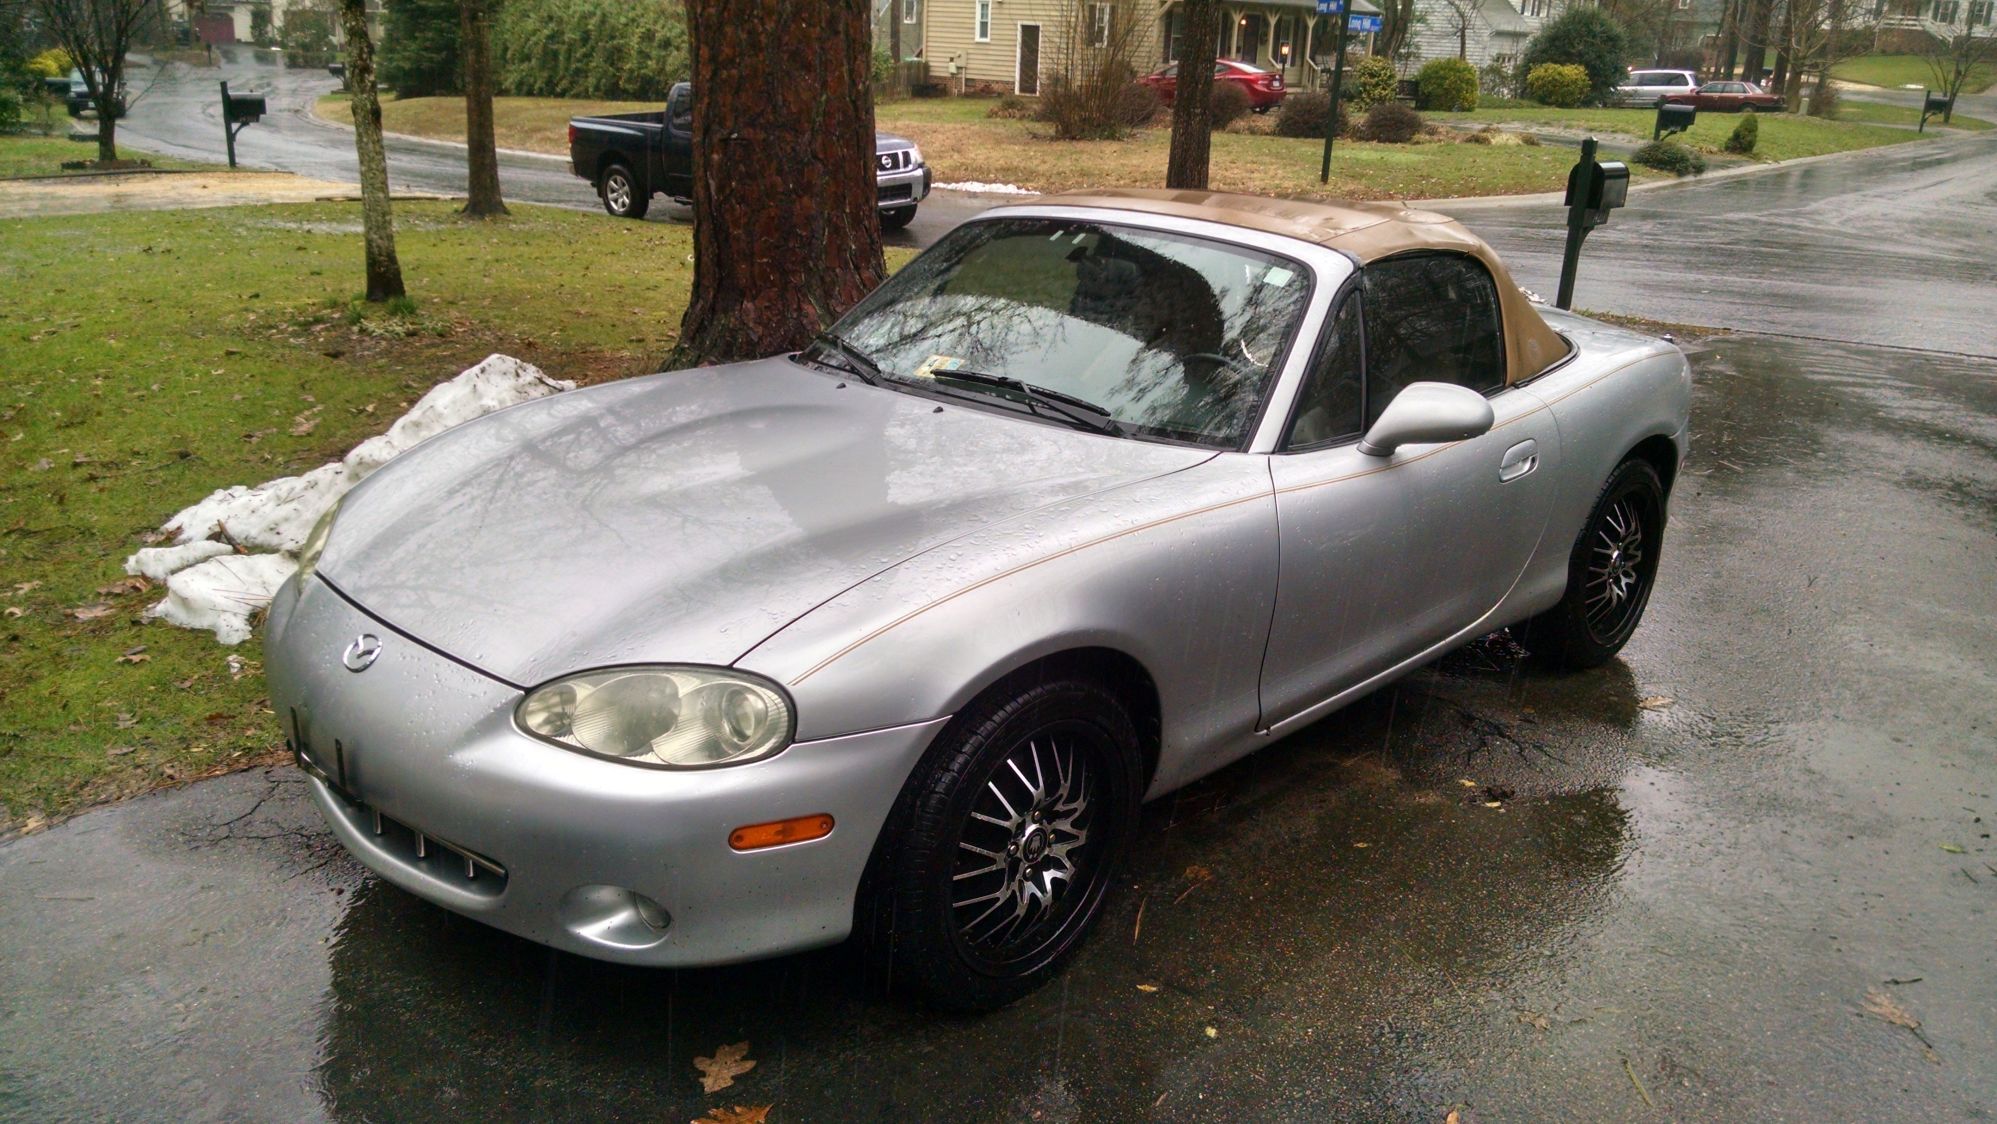
A big factor was yesterday I bought this 2001 NB2. Old lady owned, 116k on the clock, tan leather+cruise = torsen(?), factory shock tower brace but no Billies, and waaaayyy below book value.
Reply
0
0

Thread
Thread Starter
Forum
Replies
Last Post
psyber_0ptix
Engine Performance
34
12-10-2016 08:51 PM
Markus
Miata parts for sale/trade
3
11-12-2015 07:31 PM


