Just Another F20C build... <Preview>
 10-03-2011, 03:34 PM
#121
Junior Member
Thread Starter

Join Date: Dec 2010
Location: UK, in Cambridgeshire or wherever work takes me.
Posts: 375
Total Cats: 20
Thanks for the lolz Mr triple88a.
I just bought a front strut brace, which I will be sacrificing in the name of science. Ie, to see whether there really is any lateral loading in these cars which could be prevented with a strut brace. I could have used the stock yellow one, but don't trust it to give me accurate results for one reason or another. And it'll be going to a new home and making someone happy.
I just bought a front strut brace, which I will be sacrificing in the name of science. Ie, to see whether there really is any lateral loading in these cars which could be prevented with a strut brace. I could have used the stock yellow one, but don't trust it to give me accurate results for one reason or another. And it'll be going to a new home and making someone happy.

Reply
 0
0

0
 10-03-2011, 04:12 PM
#123
Junior Member
Thread Starter
Join Date: Dec 2010
Location: UK, in Cambridgeshire or wherever work takes me.
Posts: 375
Total Cats: 20
I know what you mean, but...
It was pressure-gauged at 52.5:47.5 front:rear initially. Don't know side to side, but it was measured. All without me in it, which obviously isn't great.
Still though, all we know, and all we have needed to know so far, is that things need to be moved backwards. We didn't really get a choice of by how much: for example, the drivetrain has to sit where it sits - it's boxed in by the heater at one end, and the steering rack at the other.
The cage will have to sit where the cage will sit. The seats will have to sit where they sit. Etc etc. Once we get on to stuff that we have a choice of location for - eg the battery, and frankly I don't know what else without the car in front of me (I don't have the budget to play with the fuel tank location etc) - then yes, it will make sense to corner weight it and optimise the location of everything that can be moved.
Edit: If you're talking about measuring the actual weights instead of the % distribution, then yes, that is something I wish I had done before the build started, if only out of interest because I am a weight nerd. Thing is, as cool as it would be to know that the car weighed, say, 1020kg pre-build, and 950kg post-build (here's hoping...) having that info wouldn't affect how the car drove at the end of the project. But yes, it would be very interesting to know.
Last edited by owenwilliams; 10-04-2011 at 05:19 PM.
Reply
0
0
10-06-2011, 04:18 PM
#124
Junior Member
Thread Starter
Join Date: Dec 2010
Location: UK, in Cambridgeshire or wherever work takes me.
Posts: 375
Total Cats: 20
Steering wheel and roll bar have arrived.
Seems I messed up slightly re. the rollbar. The company I ordered it from do two different designs - one where the front legs mount on the 'floor' by the seats, and one where the front legs only mount on the parcel shelf. I mistakenly ordered the type that only mounts on the parcel shelf. Oops. Also, I forgot to specifically ask for a harness bar, because I thought it came with one as standard. Oops again. Both of these things will be amended. Aside from that, it's a 'fair' design, and well finished.
The steering wheel, on the other hand, is all win. The fact that it has a fancy Italian (oooooooooo exotic) version of the phrase 'super light' on it means all of my weight-related problems will be single handedly solved by this product.
I weighed the new steering wheel and the old one. Can anybody guess how much lighter the new one is? Anybody? Well I'll tell you. It's so freaking light. All aluminium, dontcha know. The standard steering wheel weighs almost exactly 1kg/2.2lbs. Rumour has it, that Italian pixies hand whittled this new one over a period of >at least< ten years. All to save......
320 grams
The rollbar weighs 17kg
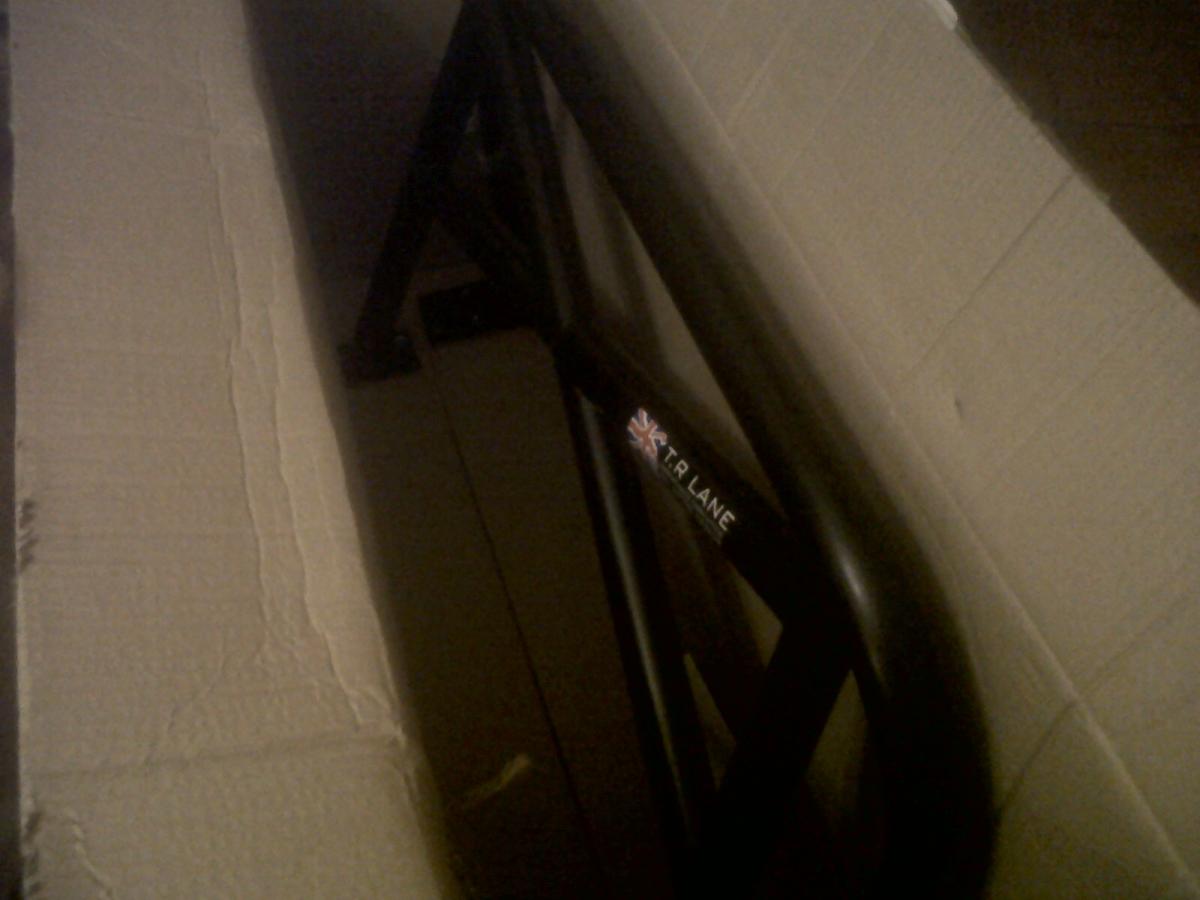
Last edited by owenwilliams; 10-07-2011 at 05:41 PM.
Reply
0
0
10-07-2011, 05:39 PM
#125
Junior Member
Thread Starter
Join Date: Dec 2010
Location: UK, in Cambridgeshire or wherever work takes me.
Posts: 375
Total Cats: 20
I'm going to seek out a new rollbar. I'm just not very impressed with this one, frankly. Tiny spreader plates, very upright rear section angle, narrow width and debatable fixing points. I don't usually buy things twice, because I tend to research the everliving **** out of everything before I buy it, but this bar was purchased on a uncharacteristically patriotic whim, and I have paid the price.
I'm now after the proven Hard Dog Hardcore X-braced bar, which will be considerably more suitable. It might also work out quite expensive to import one from the States, but when my life might well depend on the product one day, i want to get it right.
Also, I'm getting my brakes de-servoed. This is something I've always wanted to do to the car ever since I drove a de-servoed NA, and I think what's sealed the deal is the shop owner immediately suggesting removing the servo after I complained about certain aspects of my brakes. He reads my mind sometimes, I swear. Or my wallet, ha. I want to do it now because I'd like to make the 'I'll get that bit of the car sorted out....later' list either tiny or non-existent. Do it once and do it right FTW!
EDIT: Currently tempted by the rear half of this cage, in T45, with welded in X-type door bars. Not sure whether or not the soft top would be compatible though. I want to keep the soft top functional, as it's part of what makes an MX-5 an MX-5.
http://www.customcages.co.uk/Rollcag...ype=Multipoint
Last edited by owenwilliams; 10-08-2011 at 07:02 AM.
Reply
0
0
10-16-2011, 01:58 PM
#126
Junior Member
Thread Starter
Join Date: Dec 2010
Location: UK, in Cambridgeshire or wherever work takes me.
Posts: 375
Total Cats: 20
Just a quick and piktar-less update -
The end of the major fab work is in sight. I'm about to order the rear half of the Custom Cages cage linked above, with the door bars, and extra T45. If there's space to build better doorbars, that's what the shop has said they will do. Whatever happens, the front of the door bars are being tied into the steering column brace that runs through the dash.
Dampers and seats are due in two weeks. Sabelt Ultralight harnesses are here.
Radiator is in the works. It'll use completely sealed ducting that will run all the air from the radiator up and out through a large area of louvres in the bonnet, located where you racers put the hood vents, ie in the area of most vacuum. This has been discussed on this forum before, but I think this is the first time it's happening. With the engine having been moved back, there's plenty of space to do this.
Air filter will run beside the radiator and be sealed in it's own right.
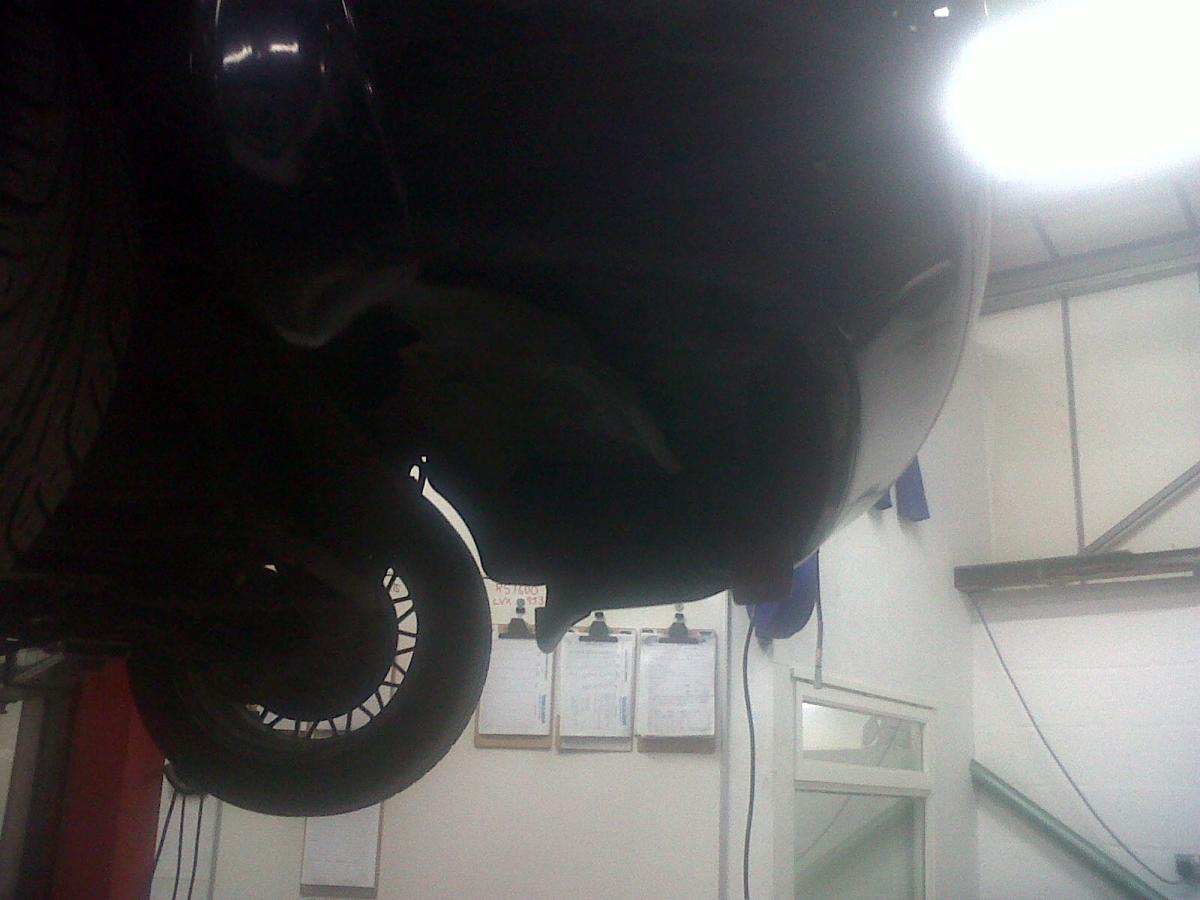
A transverse transmission brace has been added under the car, similar to hingston's.
The second exhaust silencer is coming in from Simpson Race Exhausts this week. Routing the exhaust will be interesting, but perfectly possible.
A Competition Clutch Stage 2 kit, and their 'Ultra Light' flywheel, will be ordered tomorrow.
The end of the major fab work is in sight. I'm about to order the rear half of the Custom Cages cage linked above, with the door bars, and extra T45. If there's space to build better doorbars, that's what the shop has said they will do. Whatever happens, the front of the door bars are being tied into the steering column brace that runs through the dash.
Dampers and seats are due in two weeks. Sabelt Ultralight harnesses are here.
Radiator is in the works. It'll use completely sealed ducting that will run all the air from the radiator up and out through a large area of louvres in the bonnet, located where you racers put the hood vents, ie in the area of most vacuum. This has been discussed on this forum before, but I think this is the first time it's happening. With the engine having been moved back, there's plenty of space to do this.
Air filter will run beside the radiator and be sealed in it's own right.
A transverse transmission brace has been added under the car, similar to hingston's.
The second exhaust silencer is coming in from Simpson Race Exhausts this week. Routing the exhaust will be interesting, but perfectly possible.
A Competition Clutch Stage 2 kit, and their 'Ultra Light' flywheel, will be ordered tomorrow.
Last edited by owenwilliams; 10-16-2011 at 02:12 PM. Reason: Added clutch stuff
Reply
0
0
10-16-2011, 09:52 PM
#127
That bar is junk, as far as structure goes. It is only good for holding the dash up. It will fail immediately if the door bars are contacted. Which means you will have door bars impacting/breaking your left leg/pelvis. Better to just run a main hoop, than run door bars that are not attached to proper structure. Also you don't want your door bars welded in shear.
Reply
0
0
10-17-2011, 02:24 AM
#128
Junior Member
Thread Starter
Join Date: Dec 2010
Location: UK, in Cambridgeshire or wherever work takes me.
Posts: 375
Total Cats: 20
Right leg  We sit on the correct side of out cars, dontcha know :P
As far as I understand, the plan is to use the dash bar as a brace for a bit of added rigidity, not use it as the sole support for the upper bar. So the door bars are being welded into an upright that's being welded to spreader plates that are being welded to the chassis, and the the dash bar is just being tied into the upright. So the use of the dash bar is not structural, it's being done simply to add a bit of extra bracing, because there's no reason not to use it.
We sit on the correct side of out cars, dontcha know :PAs far as I understand, the plan is to use the dash bar as a brace for a bit of added rigidity, not use it as the sole support for the upper bar. So the door bars are being welded into an upright that's being welded to spreader plates that are being welded to the chassis, and the the dash bar is just being tied into the upright. So the use of the dash bar is not structural, it's being done simply to add a bit of extra bracing, because there's no reason not to use it.
Reply
0
0
10-17-2011, 04:56 PM
#129
Junior Member
Thread Starter
Join Date: Dec 2010
Location: UK, in Cambridgeshire or wherever work takes me.
Posts: 375
Total Cats: 20
Step 1 - Sell bestest, oldest guitar
Step 2 - Buy car stuff
The money side of this is getting a bit silly, frankly. I don't regret any of it yet though.
Koyo radiator (same as hingston's) ordered, fan ordered, manifold heat shield ordered, Honda clutch ordered.
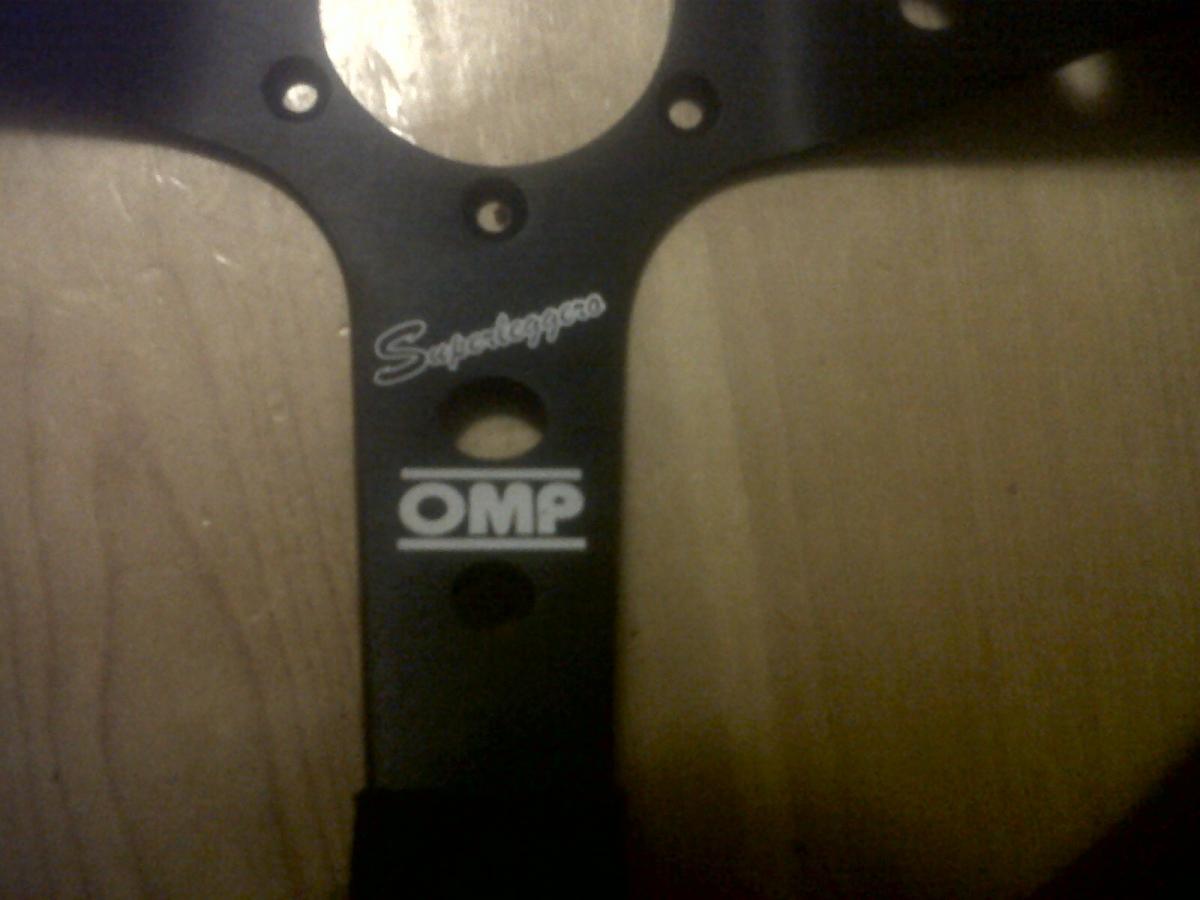
PS, the OEM front yellow strut brace weighs 3.8kg (8.4lbs), and the OEM seatbelt tower brace weighs 1kg (2.2lbs). Haven't weighed the Alu strut brace yet, but I'd estimate sub 1kg, even though the manufacturer claims 1.3kg (2.8lbs).
Step 2 - Buy car stuff
The money side of this is getting a bit silly, frankly. I don't regret any of it yet though.
Koyo radiator (same as hingston's) ordered, fan ordered, manifold heat shield ordered, Honda clutch ordered.
PS, the OEM front yellow strut brace weighs 3.8kg (8.4lbs), and the OEM seatbelt tower brace weighs 1kg (2.2lbs). Haven't weighed the Alu strut brace yet, but I'd estimate sub 1kg, even though the manufacturer claims 1.3kg (2.8lbs).
Reply
0
0
10-21-2011, 01:10 PM
#130
Junior Member
Thread Starter
Join Date: Dec 2010
Location: UK, in Cambridgeshire or wherever work takes me.
Posts: 375
Total Cats: 20
Semi-light new flywheel weighs 5.2kg (11.5lbs). Standard flywheel is apparently 6.4kg (14.1lbs), although the actual flywheel on the engine hasn't been weighed yet. So the flywheel I now have is half way between standard and super extra light. I'd have preferred it to be lighter, but this is fine.
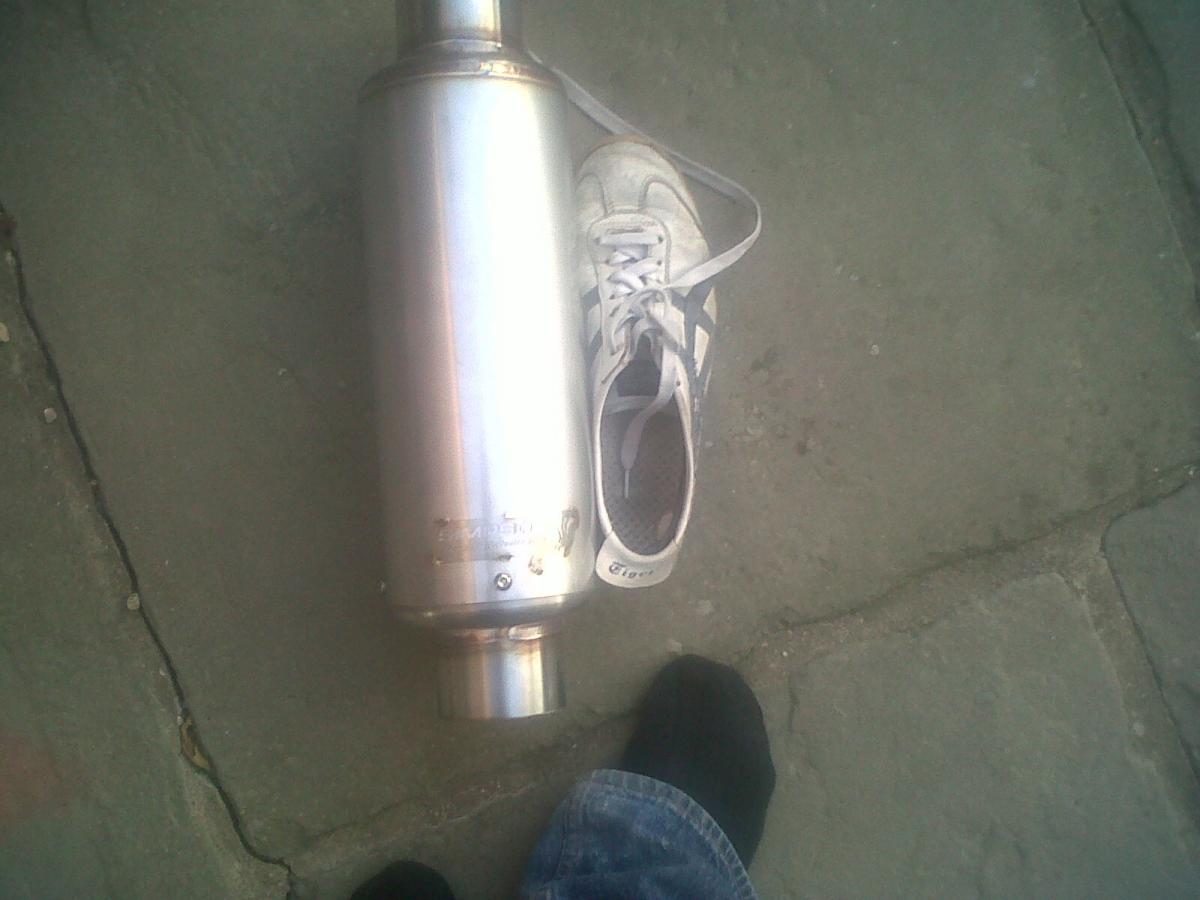
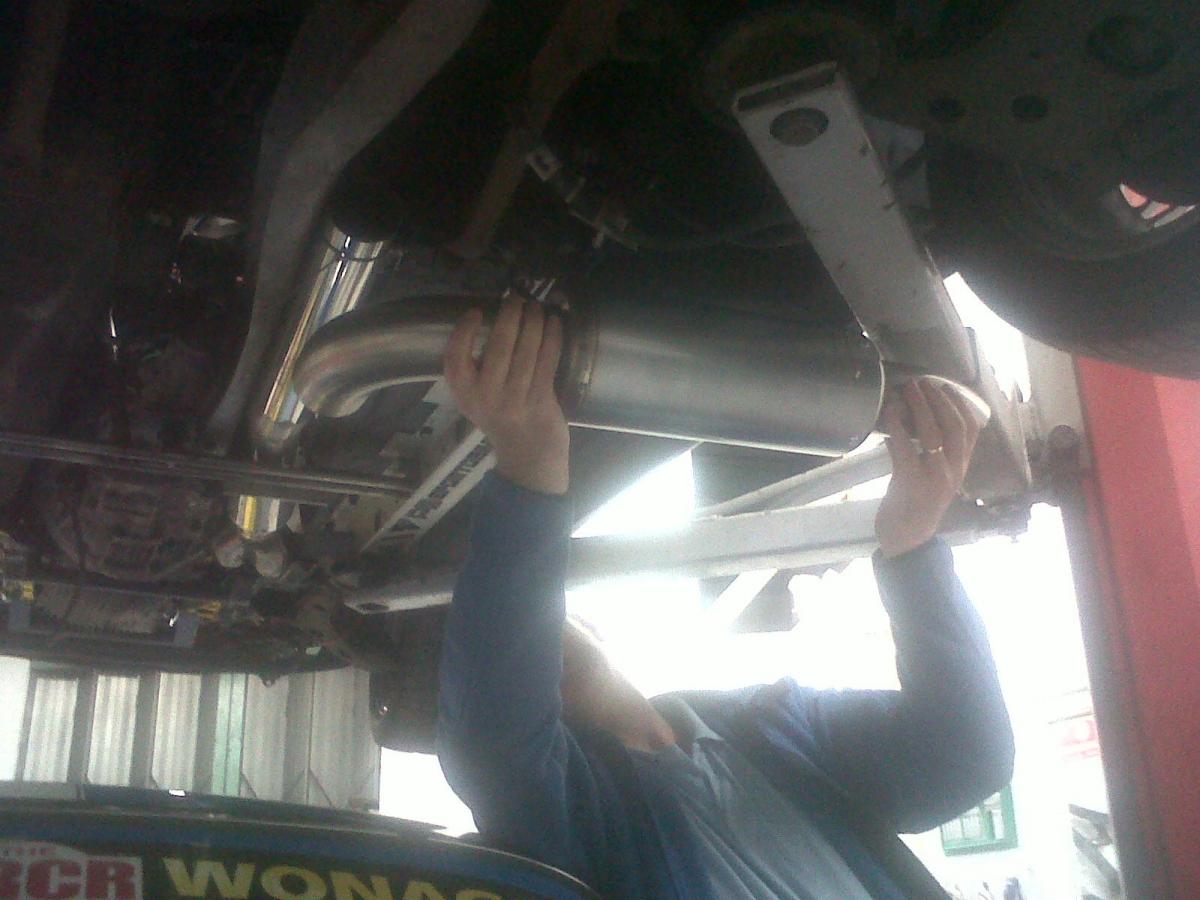
The first half of the exhaust has been tacked up. It's all starting to come together. Exhaust and trans mount will obviously all look much more awesome when complete. It's all in just in to get it seated right at the moment. Exhaust flares up from 2.25 inch at the manifold (which has had the secondaries shortened slightly and internally smoothed) to 3" back, into the small Coast silencer. As I said before, it'll then turn a smooth 90 degrees, pass through a Simpson Race Exhausts 5"x13" silencer, and exit just in front of the rear wheel through a trimmed back sill. The amount of moving/altering to make this work has been quite considerable.
And what's that towards the back of the car? A huge space that's perfect for a rear diffuser with flat underbody? Ooooooooooo yes
Reply
0
0
10-21-2011, 02:05 PM
#132
Junior Member
Thread Starter
Join Date: Dec 2010
Location: UK, in Cambridgeshire or wherever work takes me.
Posts: 375
Total Cats: 20
I will do next time I'm there. BUT if you dare say "the trans housing will snap", I will fly to America, come to your house, and kick you really hard in the *****. Then, buy you a drink and chat about Miatas. Then fly home. But the ball kicking part would really hurt.
Reply
1
1
10-24-2011, 05:04 PM
#134
Junior Member
Thread Starter
Join Date: Dec 2010
Location: UK, in Cambridgeshire or wherever work takes me.
Posts: 375
Total Cats: 20
NEW THINGS!
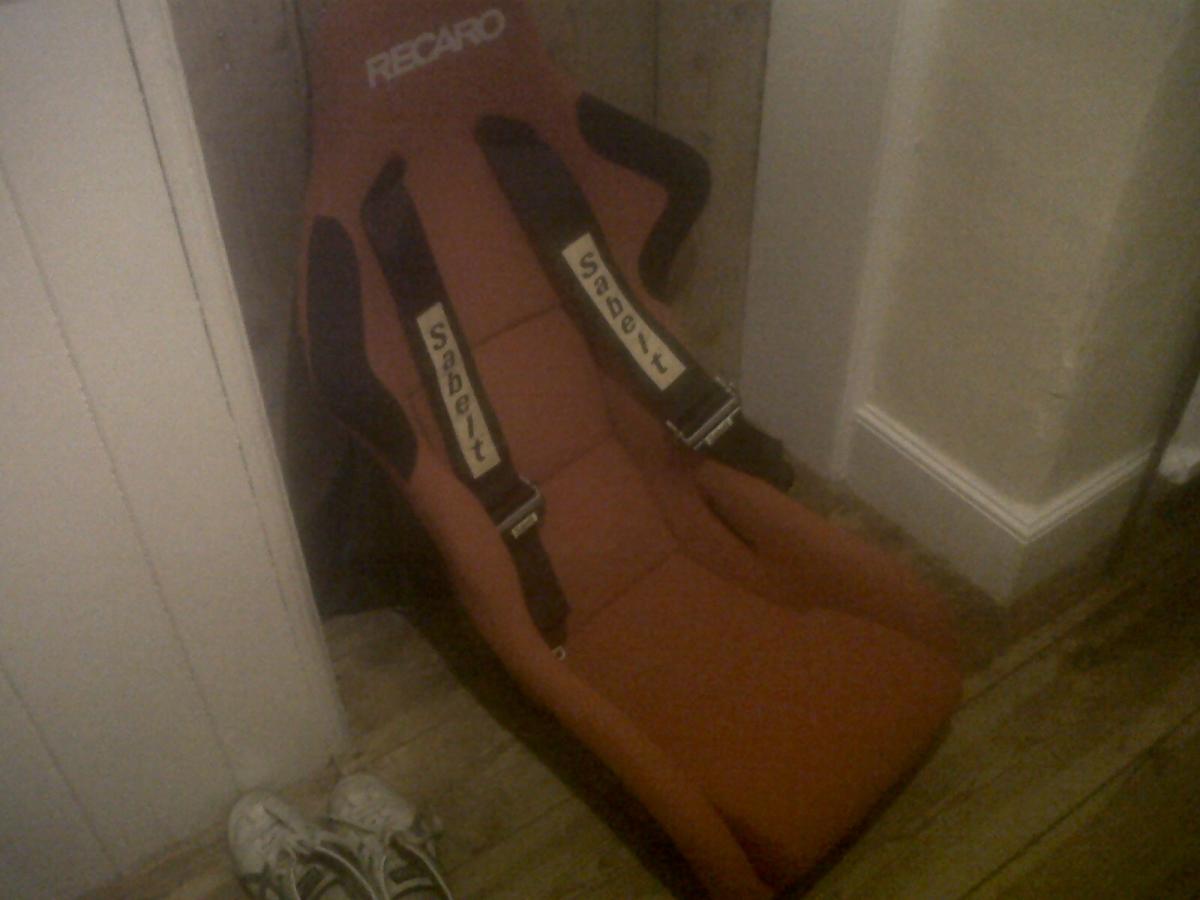
Recaro Profi SPGs and Sabelt Ultralight 6-point. With, er, only two points hanging through the seat.
The initial plans for the aero are starting to come together. Flat underfloor and diffuser are go, using aluminium... and that's all the pertinent detail on that for now. As for the radiator ducting, Quent and I have been discussing it quite a lot, as usual. I send emails back and forth to Quent almost every day discussing details of this car.
So what i thought might be of interest to somebody out there in the world reading this, is the following.
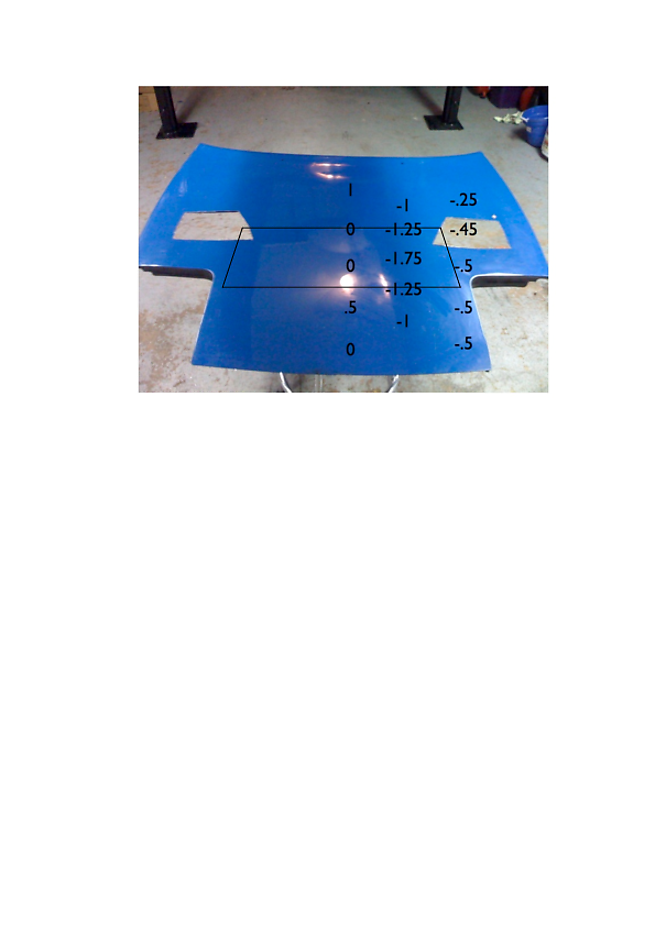
I sent Quent a photo yesterday that someone posted elsewhere on this site, of the relative air pressure over the Mk1 bonnet. I had no idea of it's accuracy, but it was all I could find, so I had to go with it. On the photo, I drew a square, outlining where I proposed to louver the **** out of the bonnet. I took into account air pressure, and the location of the radiator and the front of the engine. I wanted louvers because they fit the classic-ish vibe of the car.
I wanted Quent to measure, on my bonnet, the area of the square I drew on the photo, and see how it compared to the 350x350 area of the radiator. Basically I wanted a bigger vent area than radiator area (taking into account the restriction caused by the louvres) to maximise the use of all available vacuum. This was the photo:
This is a small part of what he sent me (edited for clarity only):
" 1. Front valance intake surface area =780sq/cm
2. Radiator surface area = 1225sq/cm (Actual between 850-920sq cm)
3. Proposed outlet max available area = 1190sq/cm (Assuming a clear opening)
The actual through flow restriction of the radiator taking into account the frontal surface area of the tubes and fins is probably about 25% to 30% leaving between 920sq/cm and 857 sq/cm.
Louvers!! I have measured the louvers on the Marlin!!! Not good! A 15cm wide louver gives a clear opening of only 7.5sq/cm meaning you would need somewhere in the region of 120 louvers! Not enough room. The max amount of louvers you can fit without affecting the structural integrity too much is 20."
The upshot of all this is that for people reading this wondering about using louvers for their 'vented hood'... well, it's certainly not the best way of doing it. They just offer too much of a restriction. Well, 'vintage style' ones do, anyway, which is the style I wanted.
Consequently, I'm leaning towards just having a bloody big open hole in my bonnet, sealed to the radiator. Might as well go all the way if I'm intent on using the sealed-ducting idea, huh...
Recaro Profi SPGs and Sabelt Ultralight 6-point. With, er, only two points hanging through the seat.
The initial plans for the aero are starting to come together. Flat underfloor and diffuser are go, using aluminium... and that's all the pertinent detail on that for now. As for the radiator ducting, Quent and I have been discussing it quite a lot, as usual. I send emails back and forth to Quent almost every day discussing details of this car.
So what i thought might be of interest to somebody out there in the world reading this, is the following.
I sent Quent a photo yesterday that someone posted elsewhere on this site, of the relative air pressure over the Mk1 bonnet. I had no idea of it's accuracy, but it was all I could find, so I had to go with it. On the photo, I drew a square, outlining where I proposed to louver the **** out of the bonnet. I took into account air pressure, and the location of the radiator and the front of the engine. I wanted louvers because they fit the classic-ish vibe of the car.
I wanted Quent to measure, on my bonnet, the area of the square I drew on the photo, and see how it compared to the 350x350 area of the radiator. Basically I wanted a bigger vent area than radiator area (taking into account the restriction caused by the louvres) to maximise the use of all available vacuum. This was the photo:
This is a small part of what he sent me (edited for clarity only):
" 1. Front valance intake surface area =780sq/cm
2. Radiator surface area = 1225sq/cm (Actual between 850-920sq cm)
3. Proposed outlet max available area = 1190sq/cm (Assuming a clear opening)
The actual through flow restriction of the radiator taking into account the frontal surface area of the tubes and fins is probably about 25% to 30% leaving between 920sq/cm and 857 sq/cm.
Louvers!! I have measured the louvers on the Marlin!!! Not good! A 15cm wide louver gives a clear opening of only 7.5sq/cm meaning you would need somewhere in the region of 120 louvers! Not enough room. The max amount of louvers you can fit without affecting the structural integrity too much is 20."
The upshot of all this is that for people reading this wondering about using louvers for their 'vented hood'... well, it's certainly not the best way of doing it. They just offer too much of a restriction. Well, 'vintage style' ones do, anyway, which is the style I wanted.
Consequently, I'm leaning towards just having a bloody big open hole in my bonnet, sealed to the radiator. Might as well go all the way if I'm intent on using the sealed-ducting idea, huh...
Reply
0
0
10-26-2011, 02:25 PM
#135
Junior Member
Thread Starter
Join Date: Dec 2010
Location: UK, in Cambridgeshire or wherever work takes me.
Posts: 375
Total Cats: 20
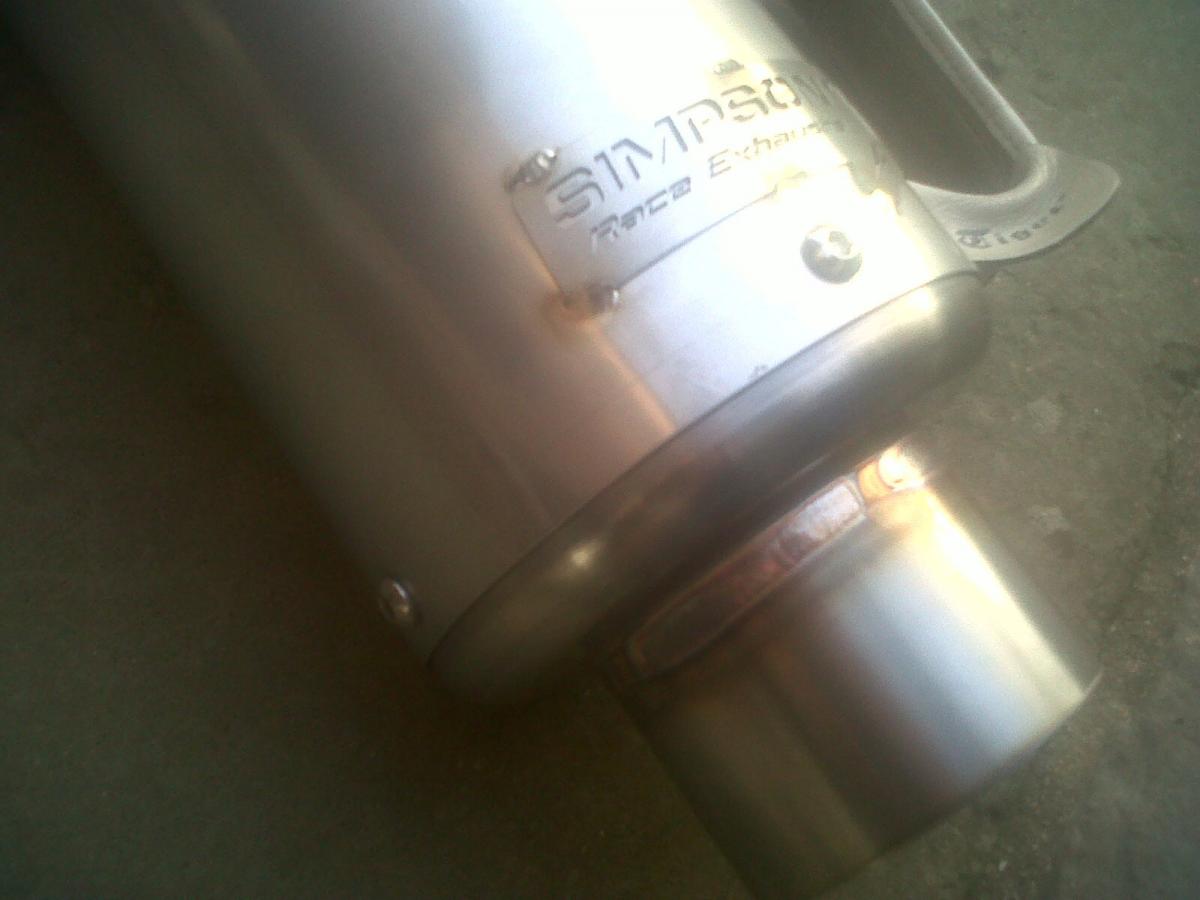
Second silencer arrived today. It's made by Simpson Race Exhausts.
[GrahamC, if you're reading this and are still after a silencer, I'd recommend SRE. They can do any silencer length and silencer OD, and any ID. As long as it's in inches. And to the nearest half inch. Ha.]
Most of the exhaust will be mounted to the PPF. It should be finished tomorrow. It was nice to hear today that Quent will be using a boroscope to fettle the insides of the mani and exhaust. I get abnormally excited about that kind of attention to detail
Reply
0
0
10-26-2011, 02:33 PM
#137
Elite Member
iTrader: (12)

Join Date: Nov 2009
Location: Harpers Ferry WV
Posts: 1,516
Total Cats: 20
How low does your car sit. Even a moderately low miata I would not see that exhaust working out well. unless you don't mind your really nice muffler being destroyed by the road.
Reply
0
0
10-26-2011, 02:35 PM
#139
Elite Member
iTrader: (12)
Join Date: Nov 2009
Location: Harpers Ferry WV
Posts: 1,516
Total Cats: 20
Also like stated above I have my exhaust only coming within an inch of my ppf with my old set up and with regular motor mounts and diff mounts it would still hit and rattle under the right circumstance.
Reply
0
0


