When you click on links to various merchants on this site and make a purchase, this can result in this site earning a commission. Affiliate programs and affiliations include, but are not limited to, the eBay Partner Network.
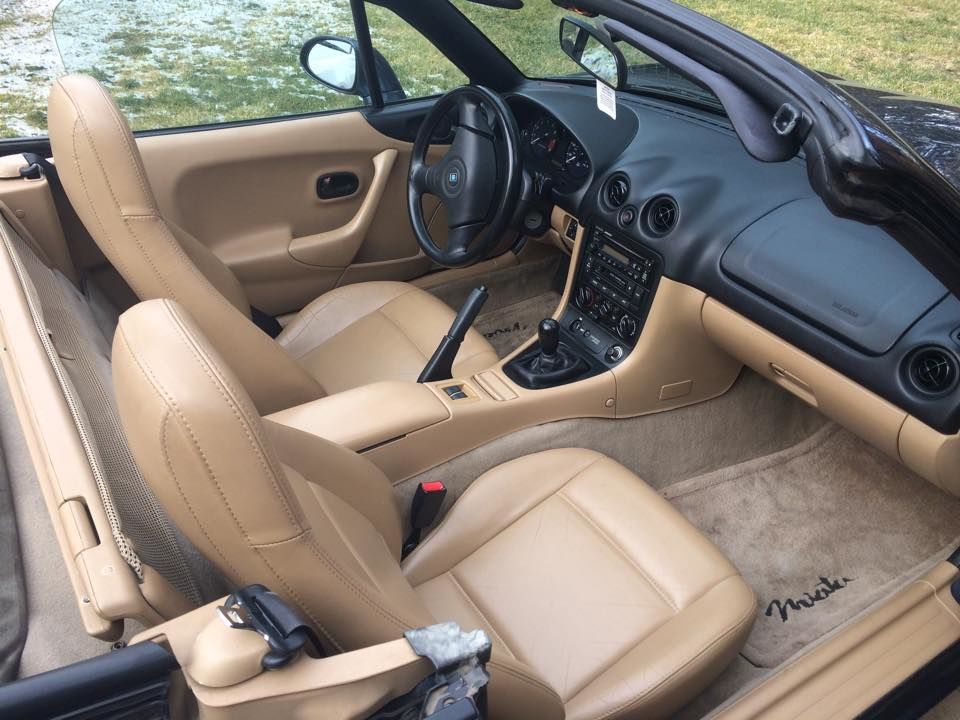
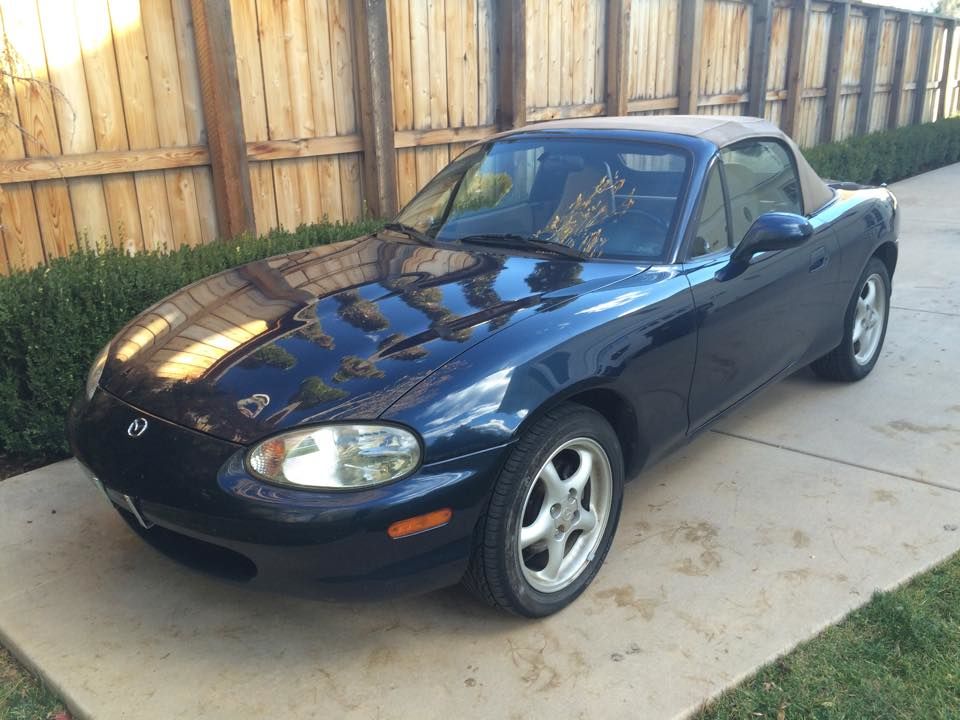
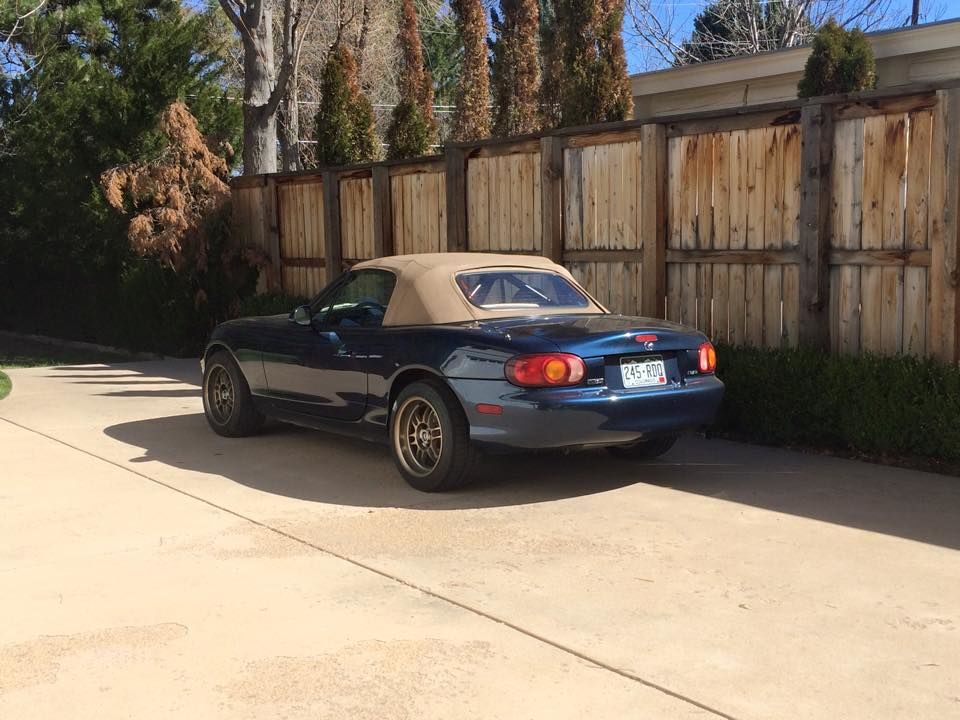
I bought my '99 in December of last year from a guy named Adolf. I would have expected him to primarily drive VW's, but I guess his friend had mysteriously died and willed him the car. Whatever. Bought it with 67k on the clock.
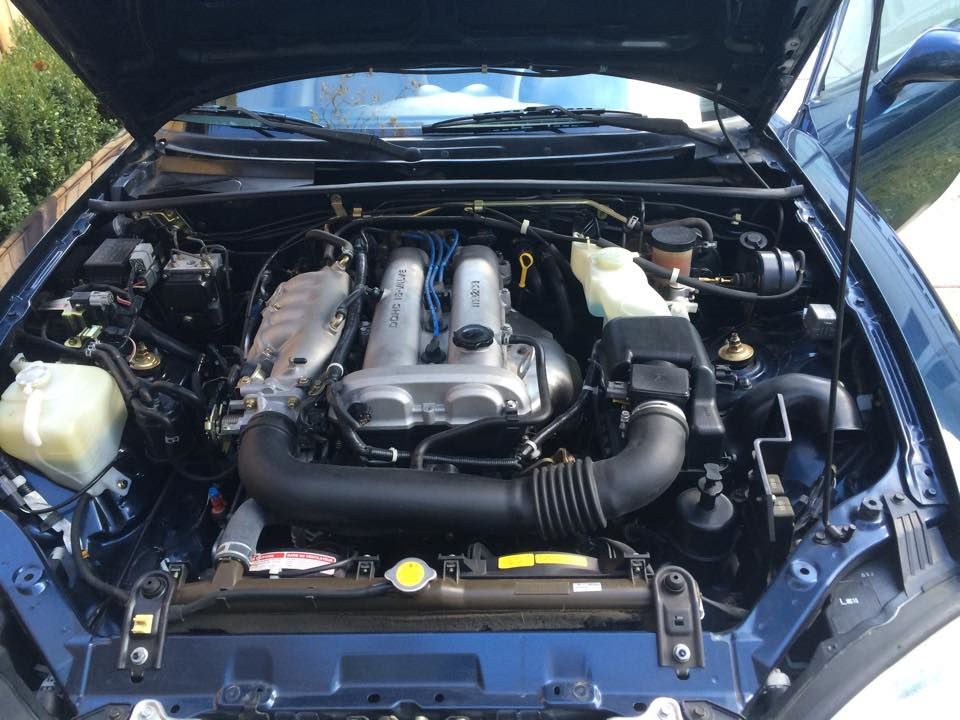
I spent the next several months taking care of maintenance and putting money into things like suspension, tires, bracing, and the like. The list goes something like:
-Hard Dog roll bar
-FM Sways
-Koni yellows w/ FM springs
-Timing belt, water pump, Koyo radiator
-Butterfly Brace
-15x8 Konigs w/ 205/50-15 Rivals
-Carbotech AX6/rotors/braided lines
-Riceland header, 2.25 FM midpipe, 2.25 Enthuza axleback
-Master cylinder brace
-Shifter rebuild/Ford "it better be made of unicorn tears at this price" tranny fluid.
It was pretty sweet. Nothing much to speak of for power, but the car drove well. I took it to a few autox races, did stupid things on mountain roads, and generally had a lot of fun with it. Bought myself a used Brain-built MS3, messed around with trying to get it to run, and had some good back and forth with the PO and the Brain himself to try to get it running. Ended up sending it back to Brain for some tweaks and hooked up the stock ECU in the meantime.
Then I got dumped in some drawn out ordeal, blah blah self pity and all that bullshit. But hey, what better time to do another autox? So I signed up for a November 1st autox, went, felt great behind the wheel and definitely more competent than the previous races I had done. Good, right? Well, the engine had started to make some noise over the course of the day, and in my moronic state I figured I could take a look at the end of the day. Cue my last run, I'm rolling across finish line, feeling great, and clutch in to coast into the grid. Go to apply the throttle. Nothing. ****.
My buddy helps me push the car out of the way and I pop the hood to figure out what happened. The hose from the crankcase to the intake had blown off and was smoking, and smoke was coming out of my dipstick. Pulled the dipstick to take a peek, and it was a fair bit drier than I would have liked. Oops. I had checked the oil a week or two before, it looked fine, and in my entirely distracted and ill-prepared state, had neglected to check it again before the race. I hadn't seen any leaks or blue smoke, so I figured everything was still dandy and I could get away with it. Didn't help that the night before was Halloween, and I had gone out, still trying to appease that stupid girl. Lessons learned? FBDM (**** Bitches Drive Miatas)
Yes, I'm a moron (at times)
The look of defeat:
We ran to a local gas station to pick up some oil, reattached the PCV hose, filled 'er up, and turned the key. Nothing. Alright, maybe we can bump it. Got a couple people to help push the car, got it rolling at a decent clip, and dumped the clutch. Again, nothing. ****. Ran home to grab my truck, rented a car dolly from Uhaul, drove back to the airport, and towed the stupid thing home.
I had just moved back into my parents house, gas was getting stupid cheap and I had my truck to drive, and I needed a project to keep me going. So with the help of my old man, we ripped the engine out and got to cracking it open to figure out what had happened. #4 rod bearing had fused itself to the rod, everything else still looked pretty good. Best case scenario, really.
Now I could have gotten away with some pretty minor stuff to get the engine fired up again, but I was in this deep already, not paying rent, and ready to push a project to excess.
Up next: More pics, my build list, and current progress.
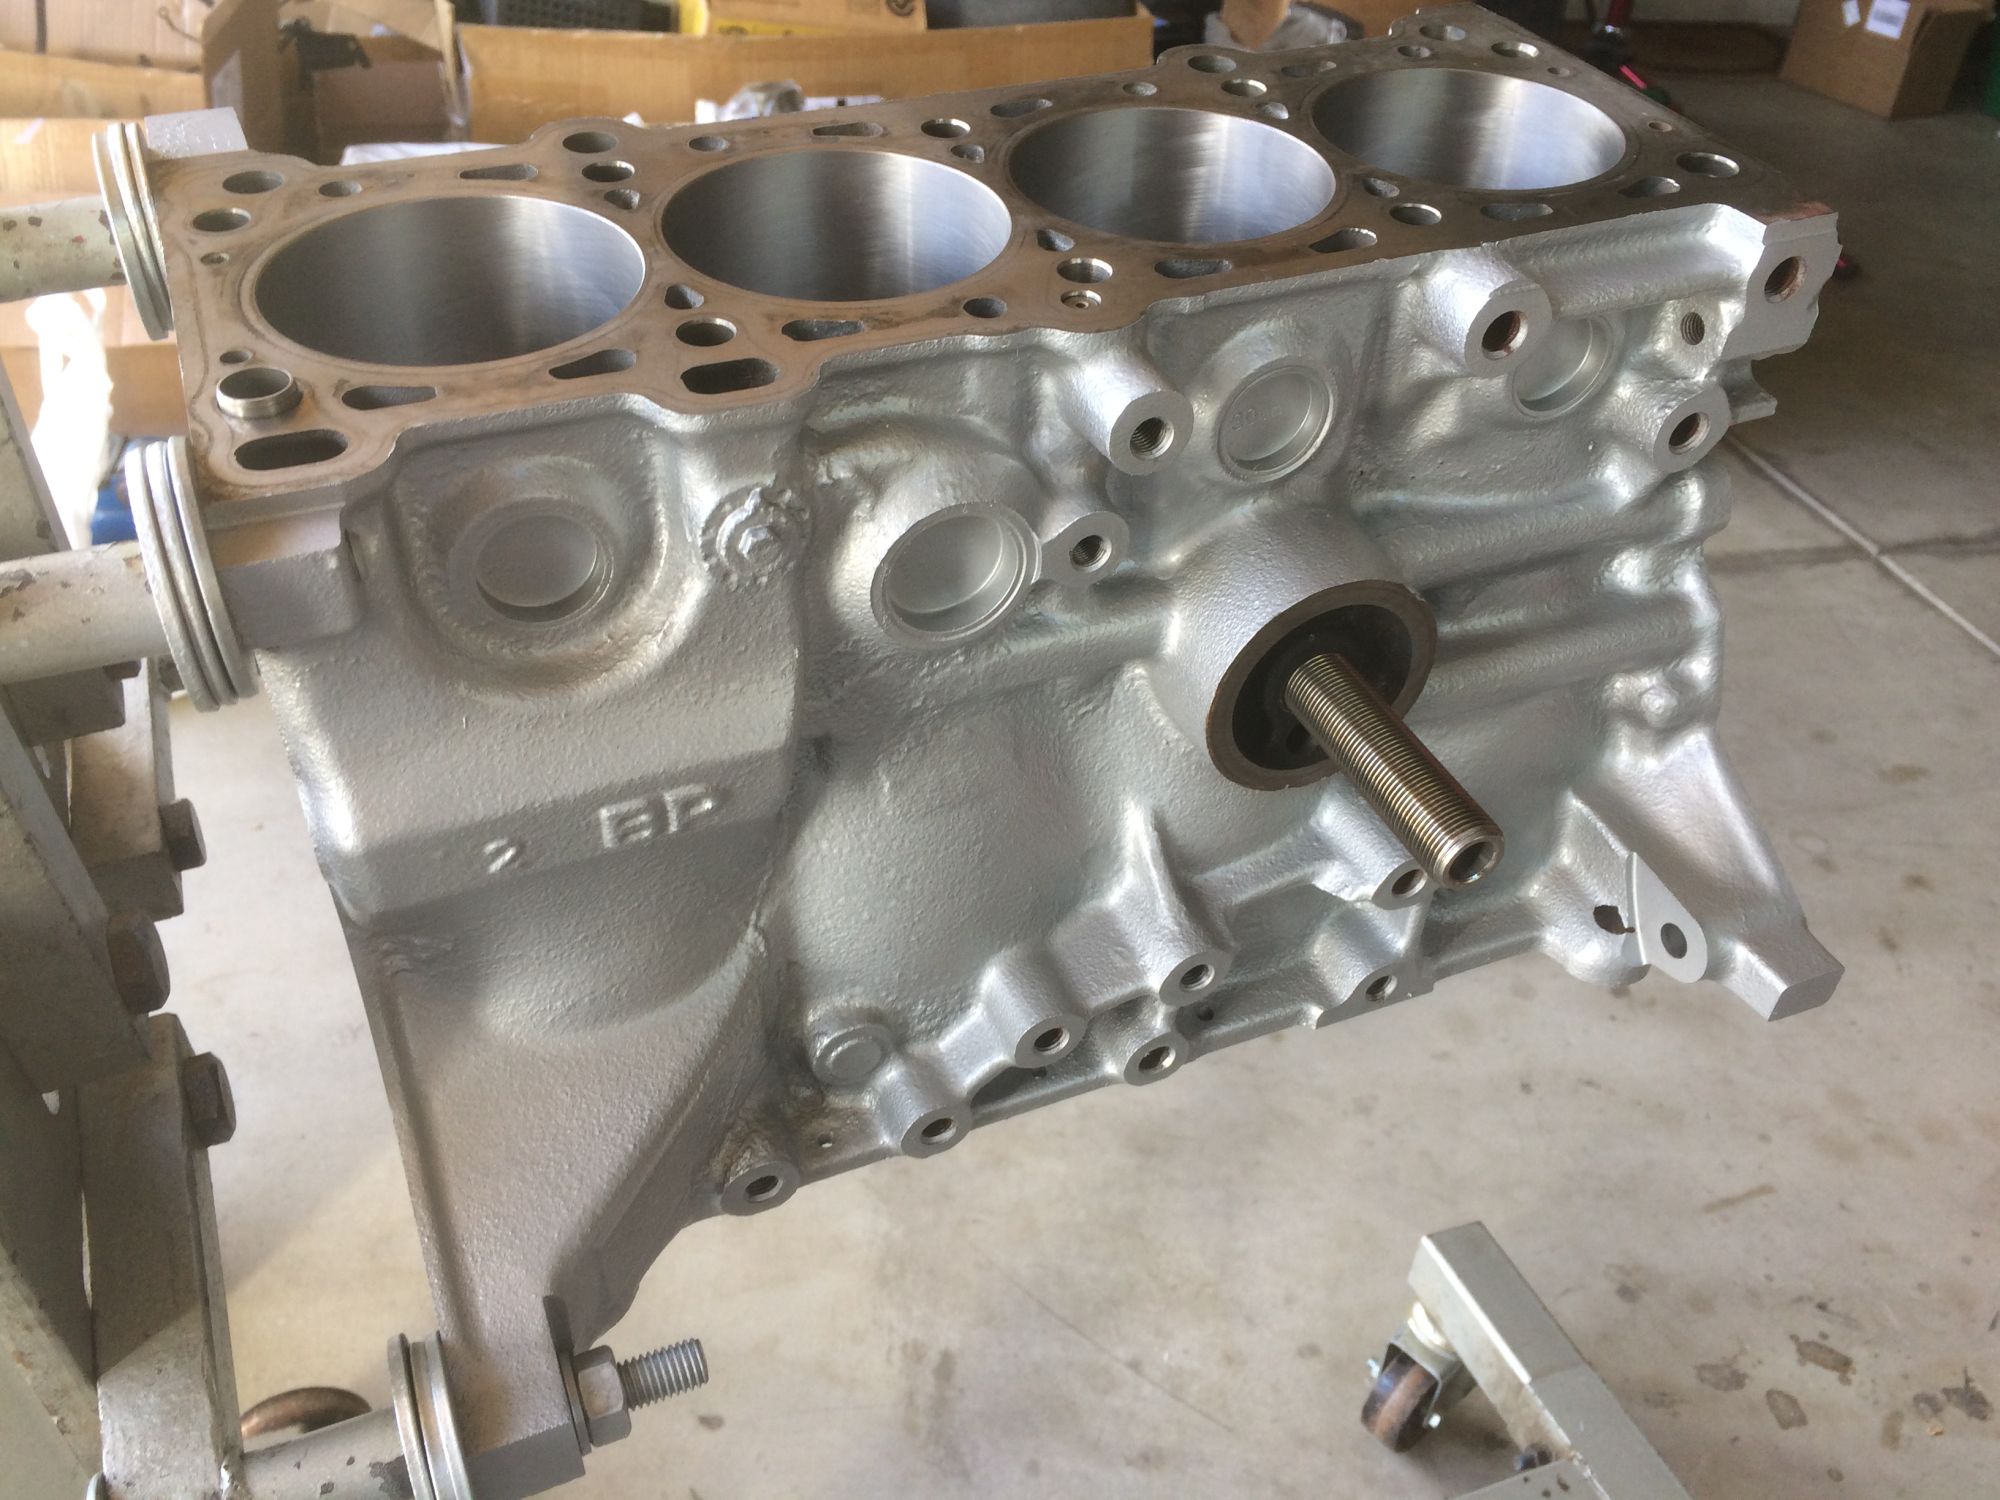
Lots of stuff happening this week. Got my motor back from the machinist the other day, if anyone is looking for a good shop in the Denver area, I used All Pro Automotive. Steve was a great guy to work with and I'm totally happy with the work he did. My invoice looks like this:
- Cylinder bore/hone
- Crank grind
- Rod assembly/align
- Valve job
- Cam R&R with valve adjustment
- Balance motor check
- Straighten crank (It was very slightly off)
- Head resurface
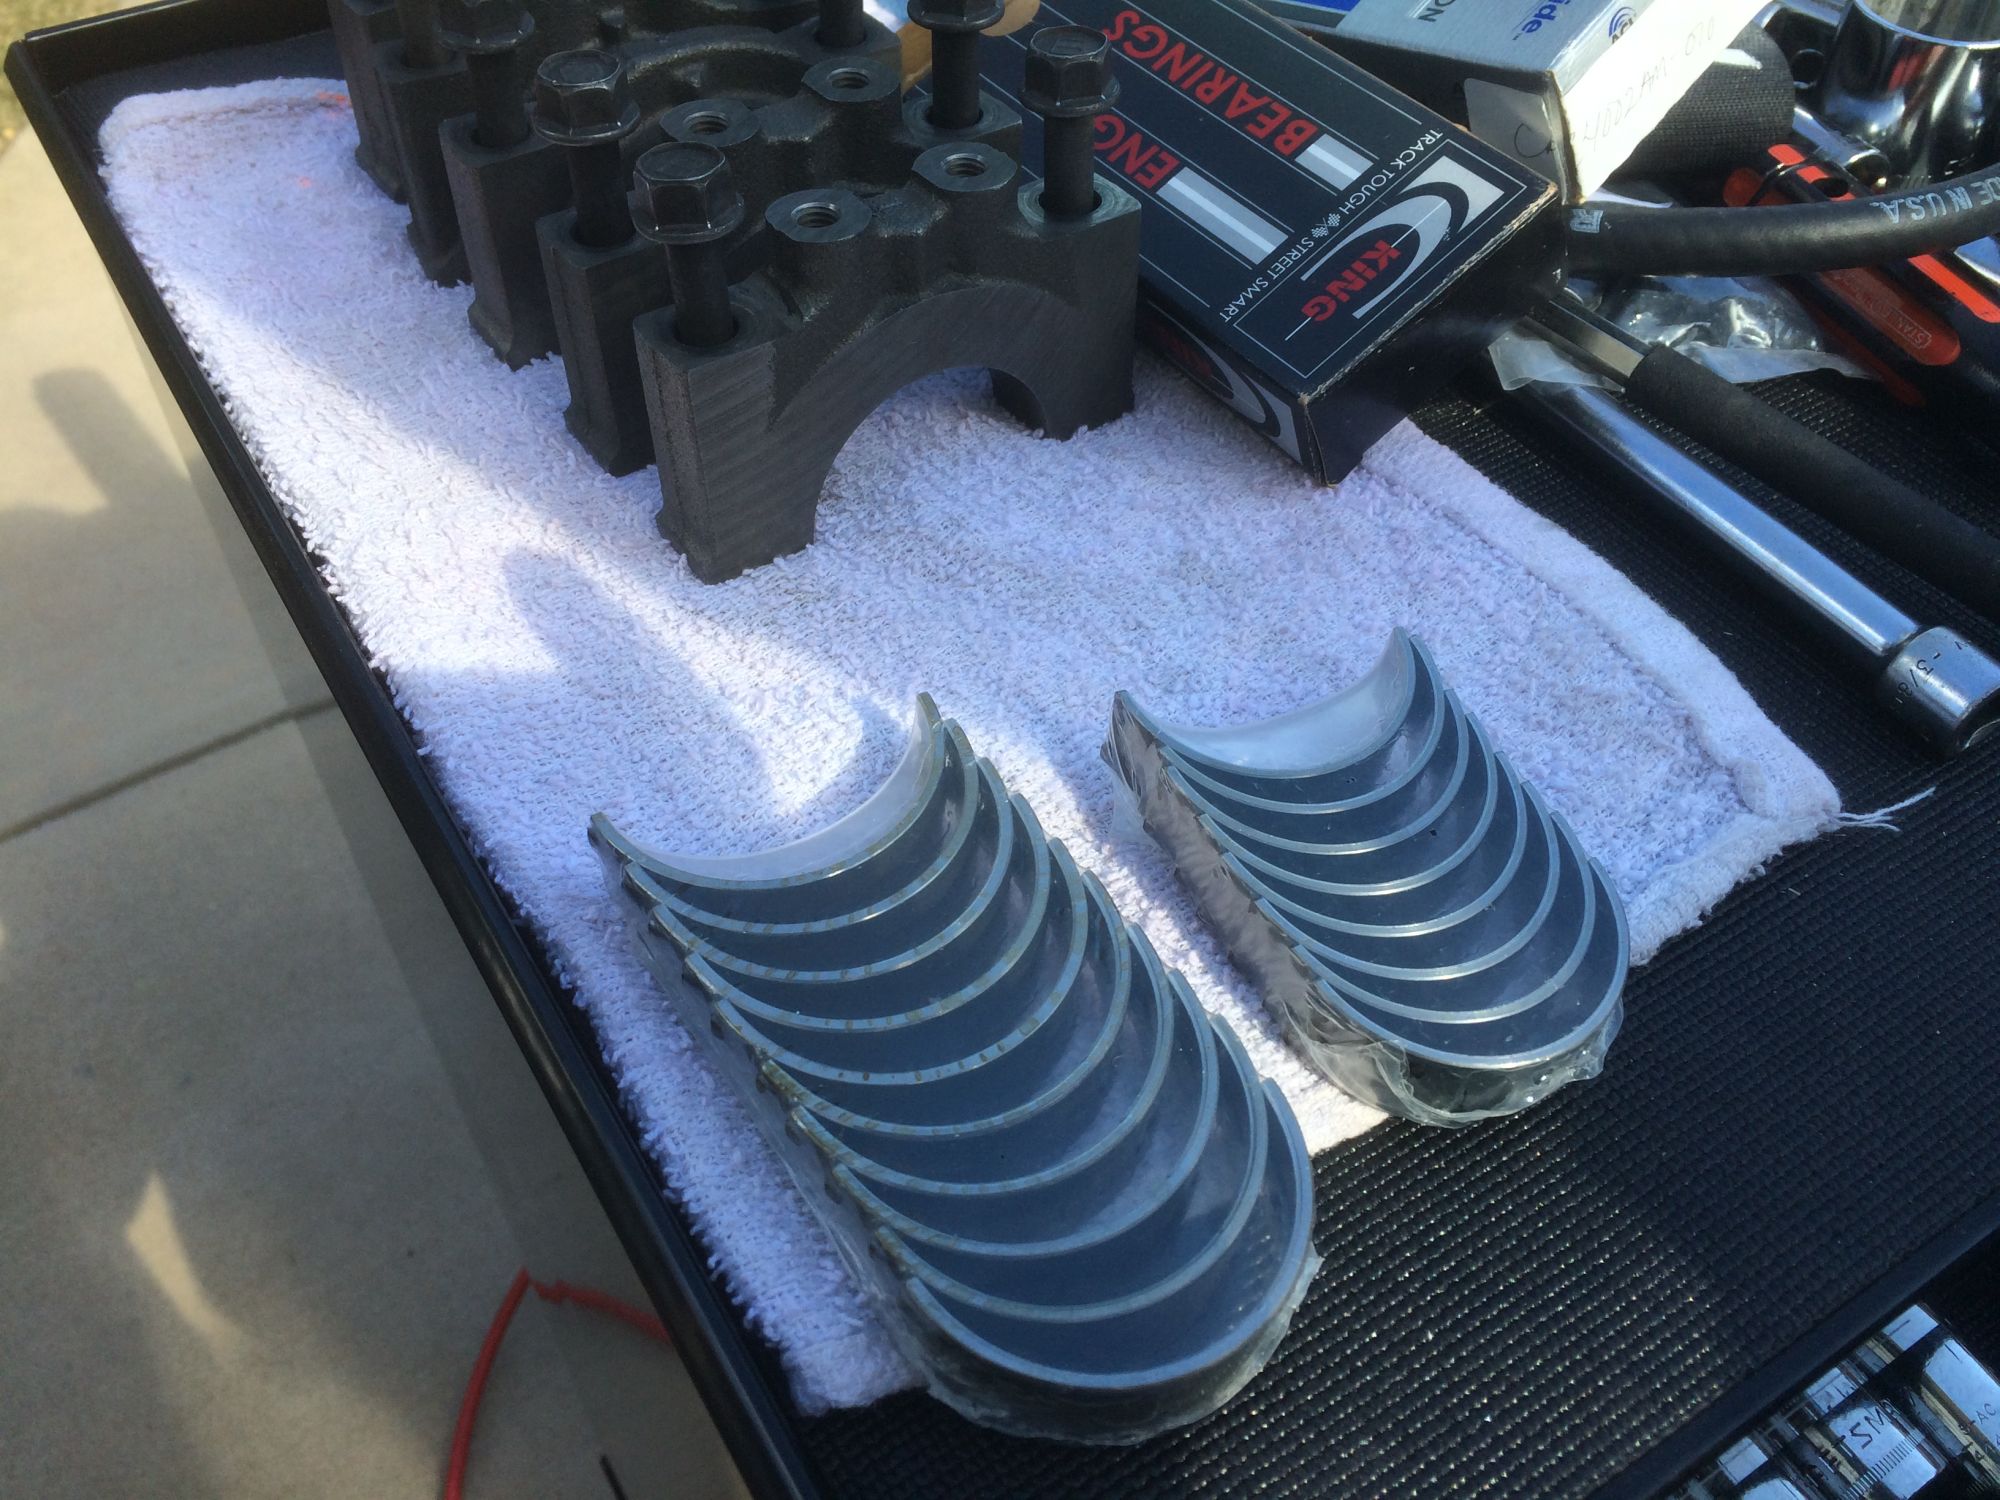
- Bearing kit (King/ACL)
- Freeze Plugs
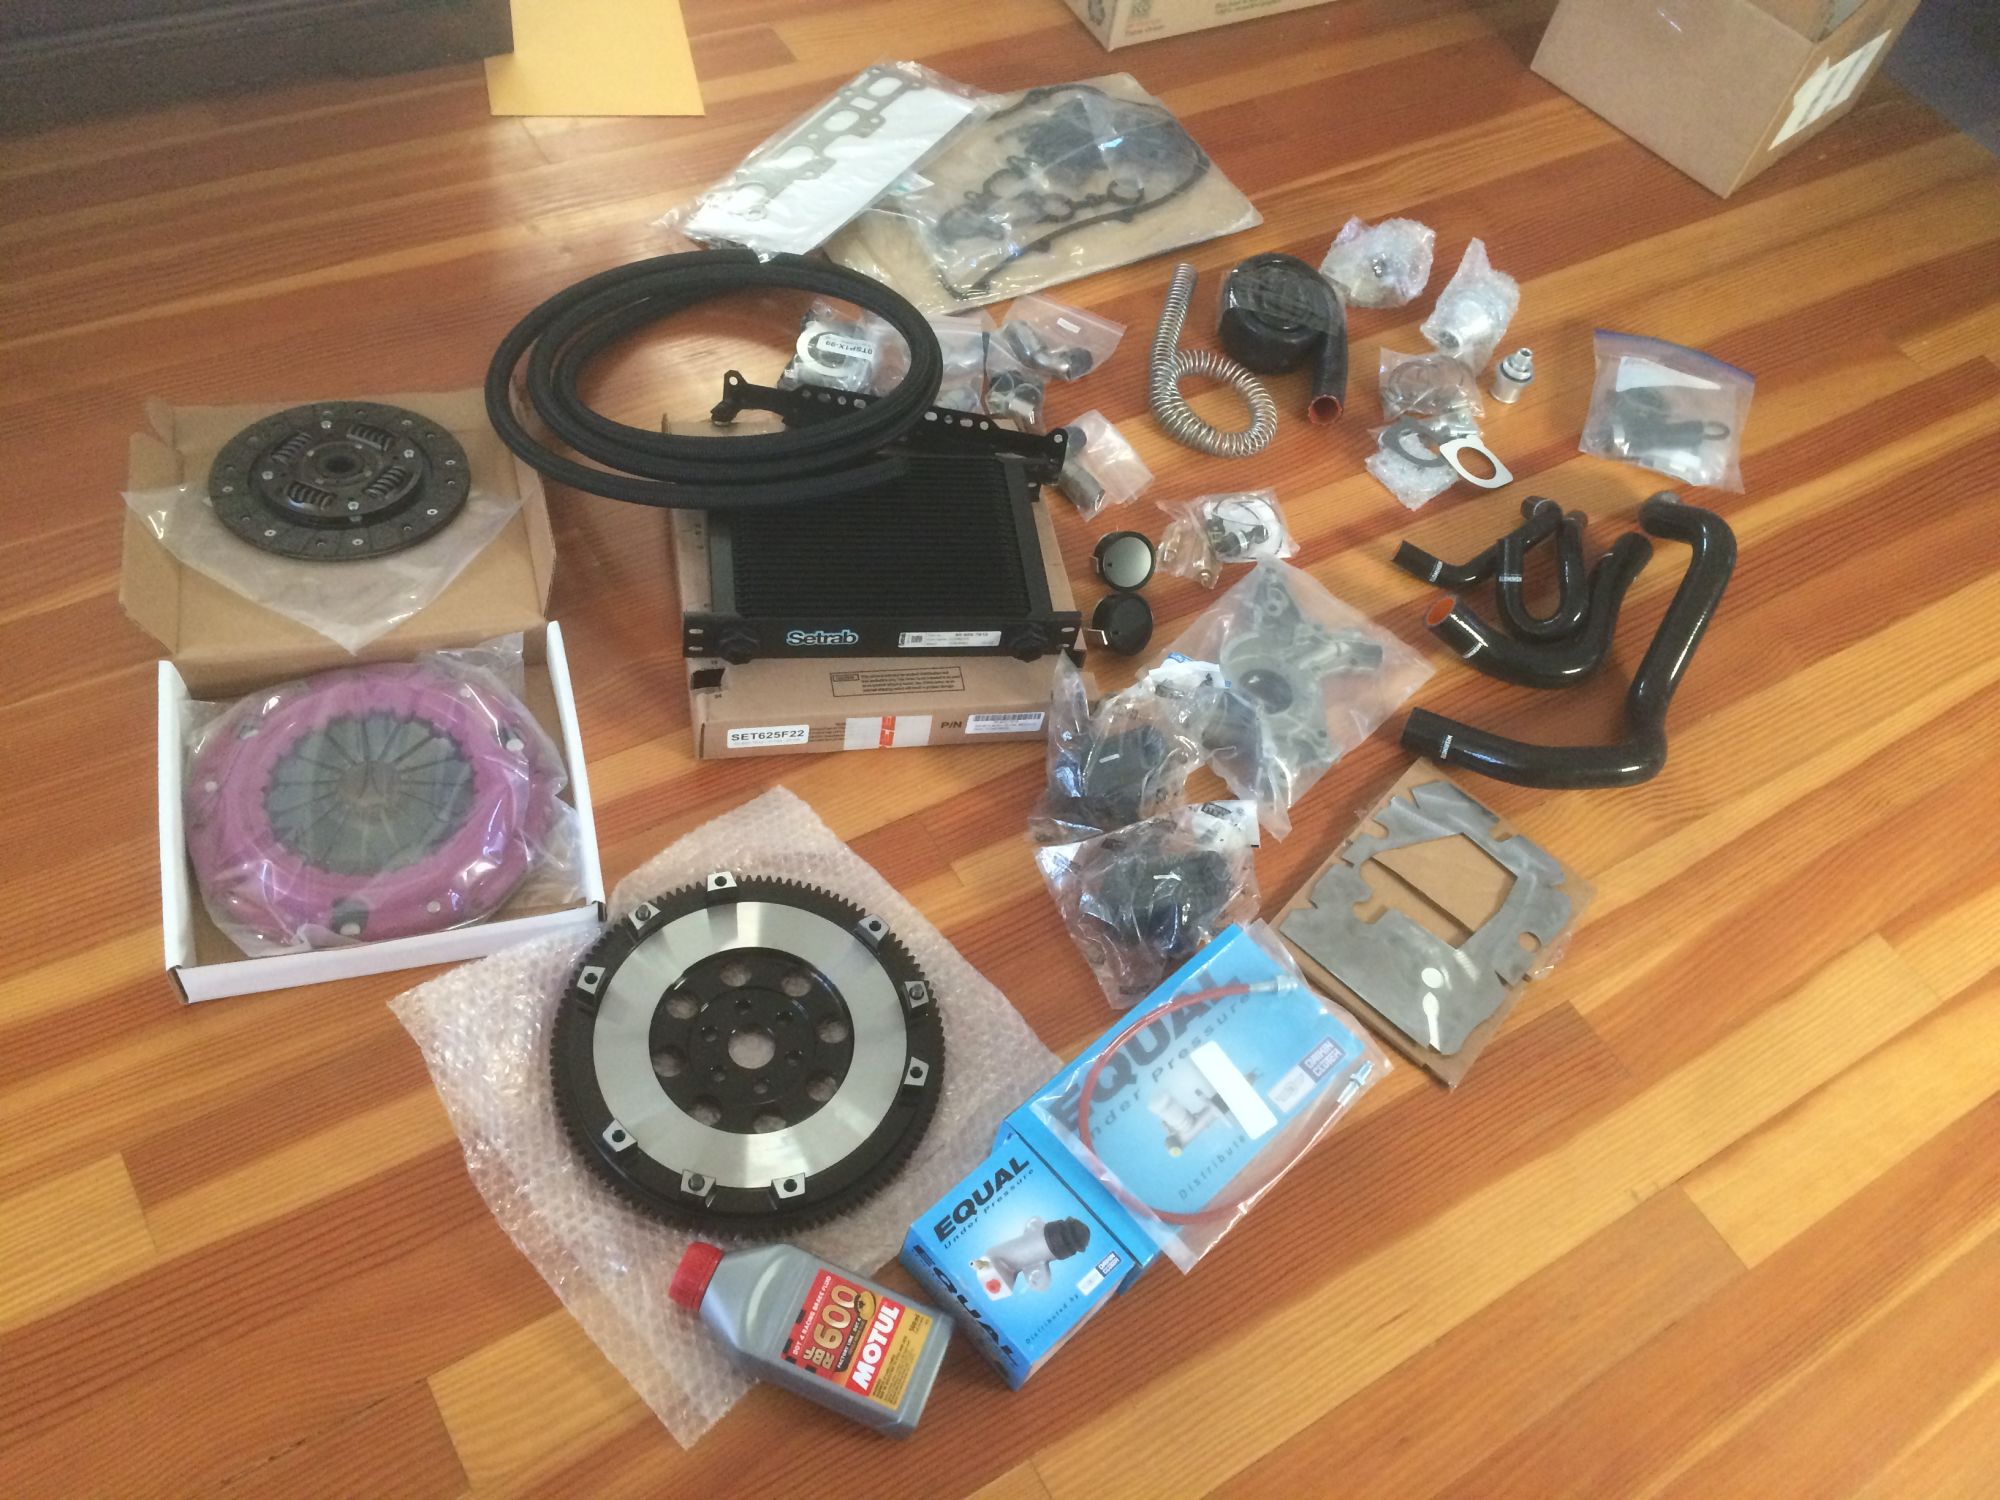
I picked up all the bits, stuck them in trash bags to keep it all nice and clean, and set it all in the garage. Saturday is going to be an engine work day. I also got a bunch of parts in this week. Already had pistons/rods/rings in for the machine work, and a lot of the rest just showed up or will be showing up today. Holding off for a paycheck or so before I get all the fun FI bits, including fueling and a COP kit, but this should be everything I need to get the motor back in the car and broken in while I get the pennies together for the rest of my fun parts.
I've been almost hesitant to say this, knowing how you all are, but my plan is to do a C30-94 Rotrex. I have a couple reasons for this, but it mostly comes down to how much easier it can be to make track reliable. I know I'm missing out on all that fun torque you get with a turbo, but after a LOT of deliberation it seems to be the most sensible option for how I'm going to be using this car. That said, I haven't ordered anything for the rotrex yet, so I still have the flexibility to change my mind. Feel free to try and talk me into a turbo or tell me how shitty the rotrex is.
The Build List
- OEM Gasket Set from Rosenthal Mazda (8DN3-10-271)
- ACL/King Race Bearings (ordered by Machinist)
- Fresh vac lines, radiator and heater hoses
- Manley H Beam Rods
- Supertech 83.5mm 8.6:1 pistons
- Wiseco Rings
- ARP head and main studs
- Boundary Engineering billet oil pump
- Trackspeed Engineering oil cooler (25 row)
- SuperMiata oil pan baffle
- M-Tuned coolant reroute
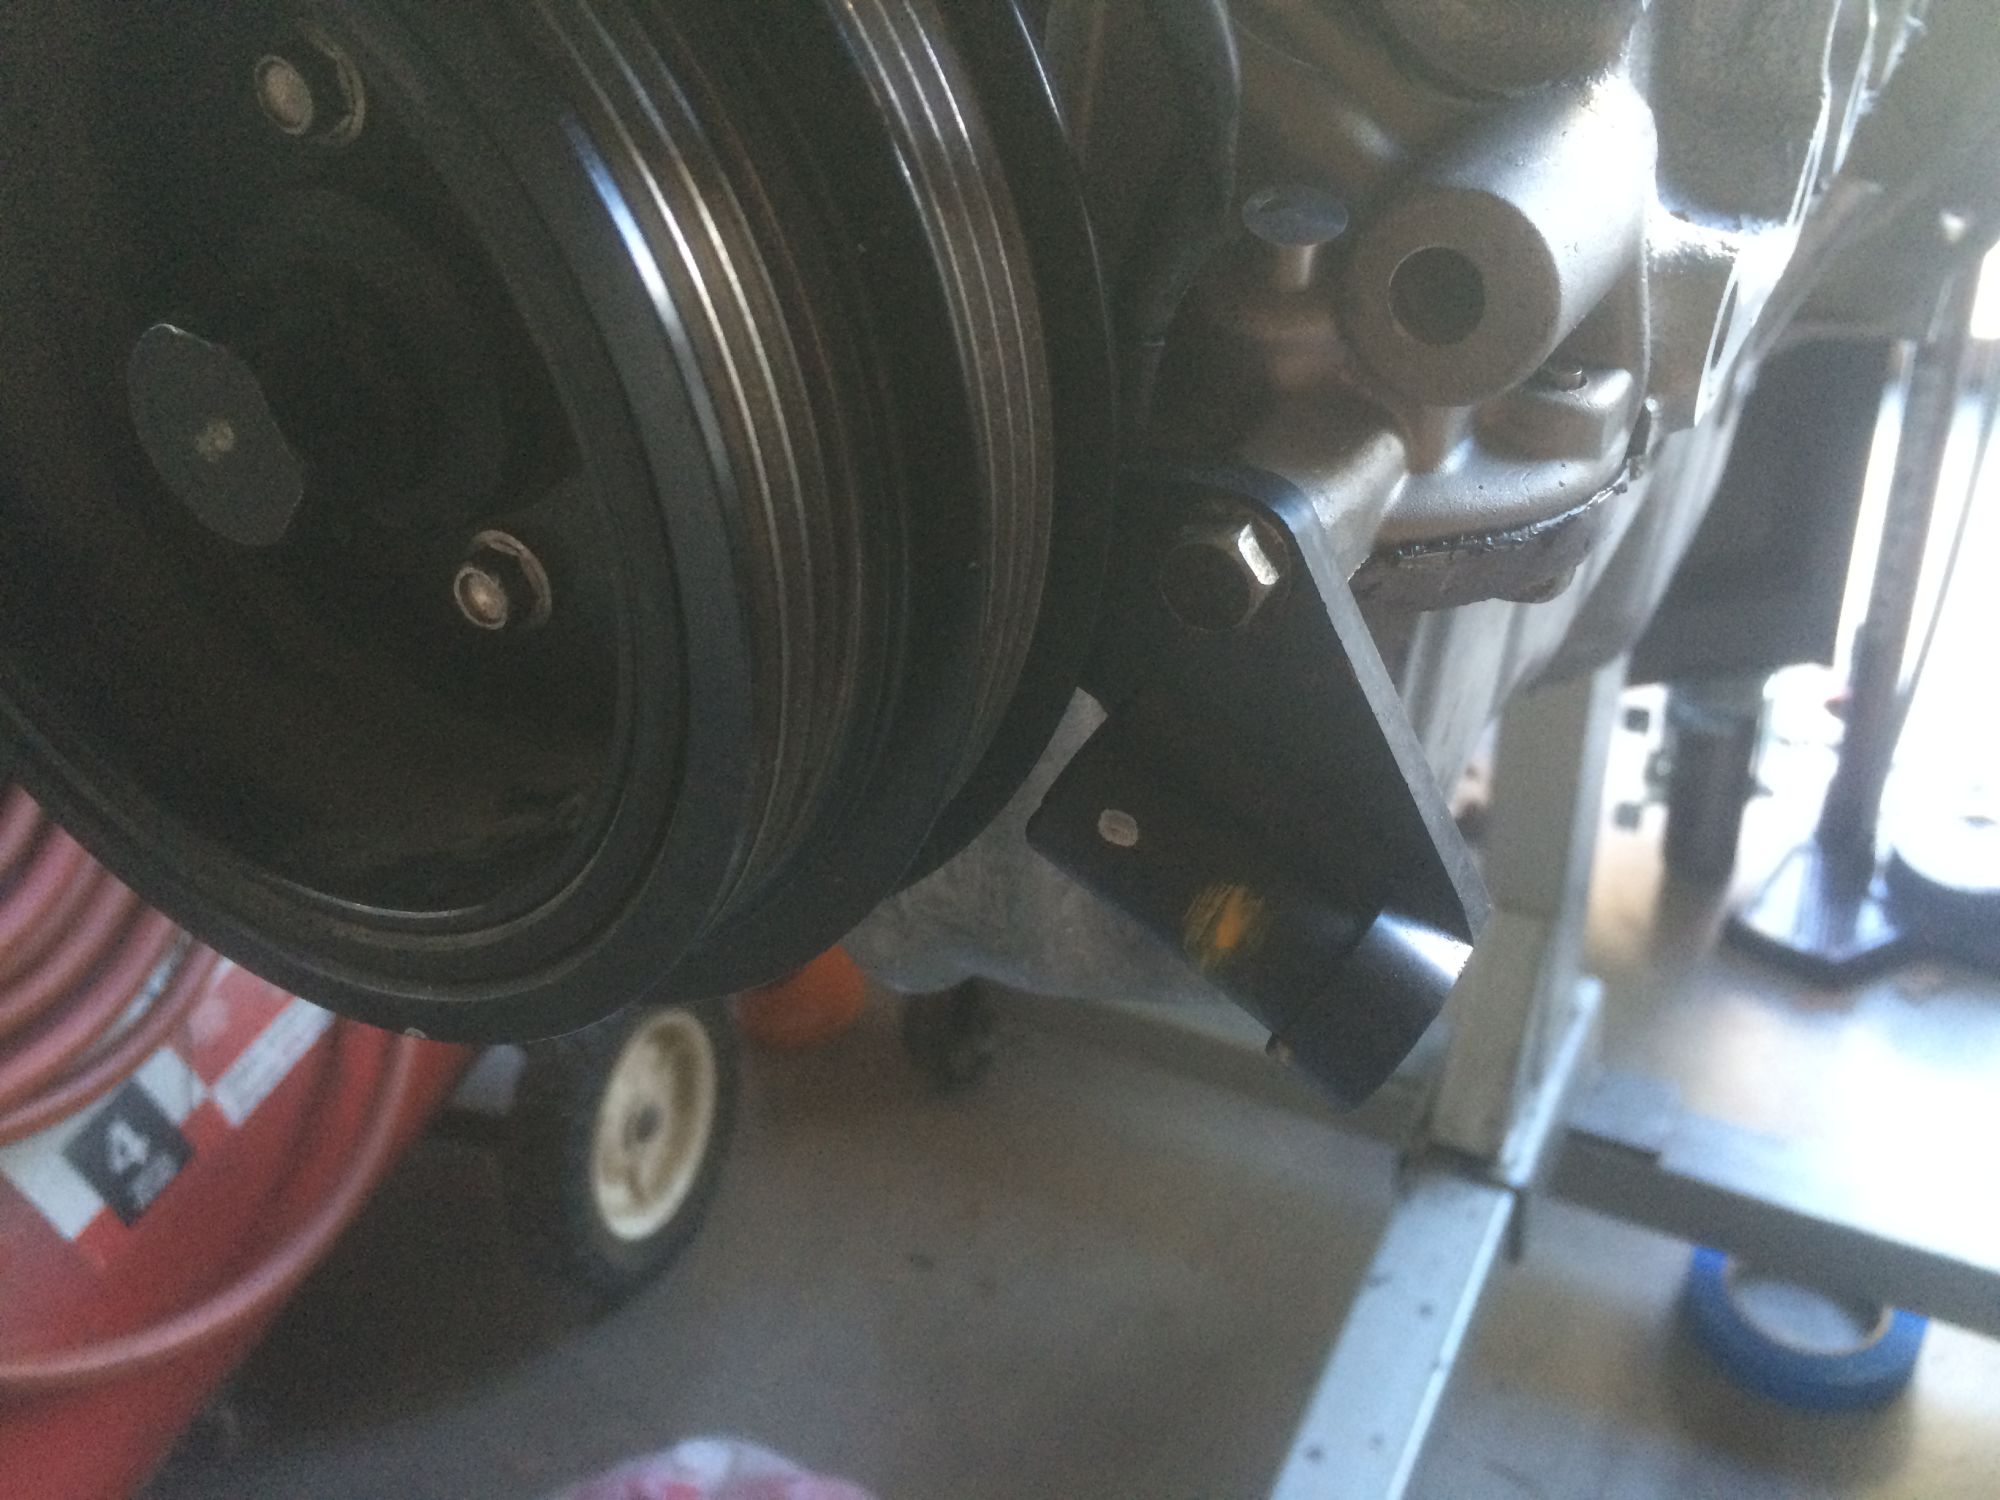
- Mazda Comp motor mounts
- FM Stage 2 "Happy Meal". Went with the 13.45lb flywheel.
- Already have an Innovate MTX-L wideband, and ordered two VEI gauges. One for Oil temp and pressure, and one for water temp and voltage. I'll be using a DIN mount in place of the cassette player. When I get my boost parts, I'll stick a boost/vac gauge behind the steering wheel. Anything else you guys would recommend, as far as gauges go?
I was planning on also getting a Harmonic Balancer, but Gary at TDR insisted that I won't need one (he also insisted I don't need the oil pump or baffle, but I went with those anyways). You guys have any thoughts on this, given the plans of going rotrex? If I get talked into a turbo, I'll definitely get one.
This should be all I need (minus assembly lube and gasket maker/sealant) to get the motor back in the car. The plan is to get the motor fired up on the stock ECU, triple check everything and go through the break in process. Then I'll stick the MS3 in place (thanks Brain), fire it all up and reacquaint myself with TunerStudio, and then get around to ordering my air cramming parts, fuel pump and injectors (ID 1000cc seems to be the way to go, no?), and the COP kit.
Get 84mm supertech pistons over the 83.5mm. Other then that it all looks pretty good so far.
I already had the machine work done for the 83.5, so I'm kind of committed to them unless I really fucked up with my decision. Why do you recommend 84mm? Just moar displacement?
I've been almost hesitant to say this, knowing how you all are, but my plan is to do a C30-94 Rotrex. I have a couple reasons for this, but it mostly comes down to how much easier it can be to make track reliable. I know I'm missing out on all that fun torque you get with a turbo, but after a LOT of deliberation it seems to be the most sensible option for how I'm going to be using this car. That said, I haven't ordered anything for the rotrex yet, so I still have the flexibility to change my mind. Feel free to try and talk me into a turbo or tell me how shitty the rotrex is.
I've done 5 days on our EFR setup and haven't spun a single wrench on the setup. Lapping 5s under the SM record. Biggest issue with the car is running warm, and that's because I have A/C, too large of an intercooler, no ducting, and no reroute (derp squared).
Got some more work done to the motor on Saturday. Nothing terribly exciting, but I got the bottom end mostly put together. I'm going to try and be fairly thorough with this - it's either going to show you guys that I'm screwing up terribly (and allow someone to chime in before I get too deep, please?) or help someone else who's also going through this for the first time.
First up was painting the block. Besides just looking cool, I figured it would gain me a touch of corrosion protection, fill in some of that dirt-trapping cast texture, and make oil easier to see.
Then it was time for the cylinder oil sprayers. Some quick googling gave me a torque range of 105-150 in-lb. I went to 13 N-m, or about 115 in-lb. Someone yell at me now if I should have pushed towards the upper end of that range.
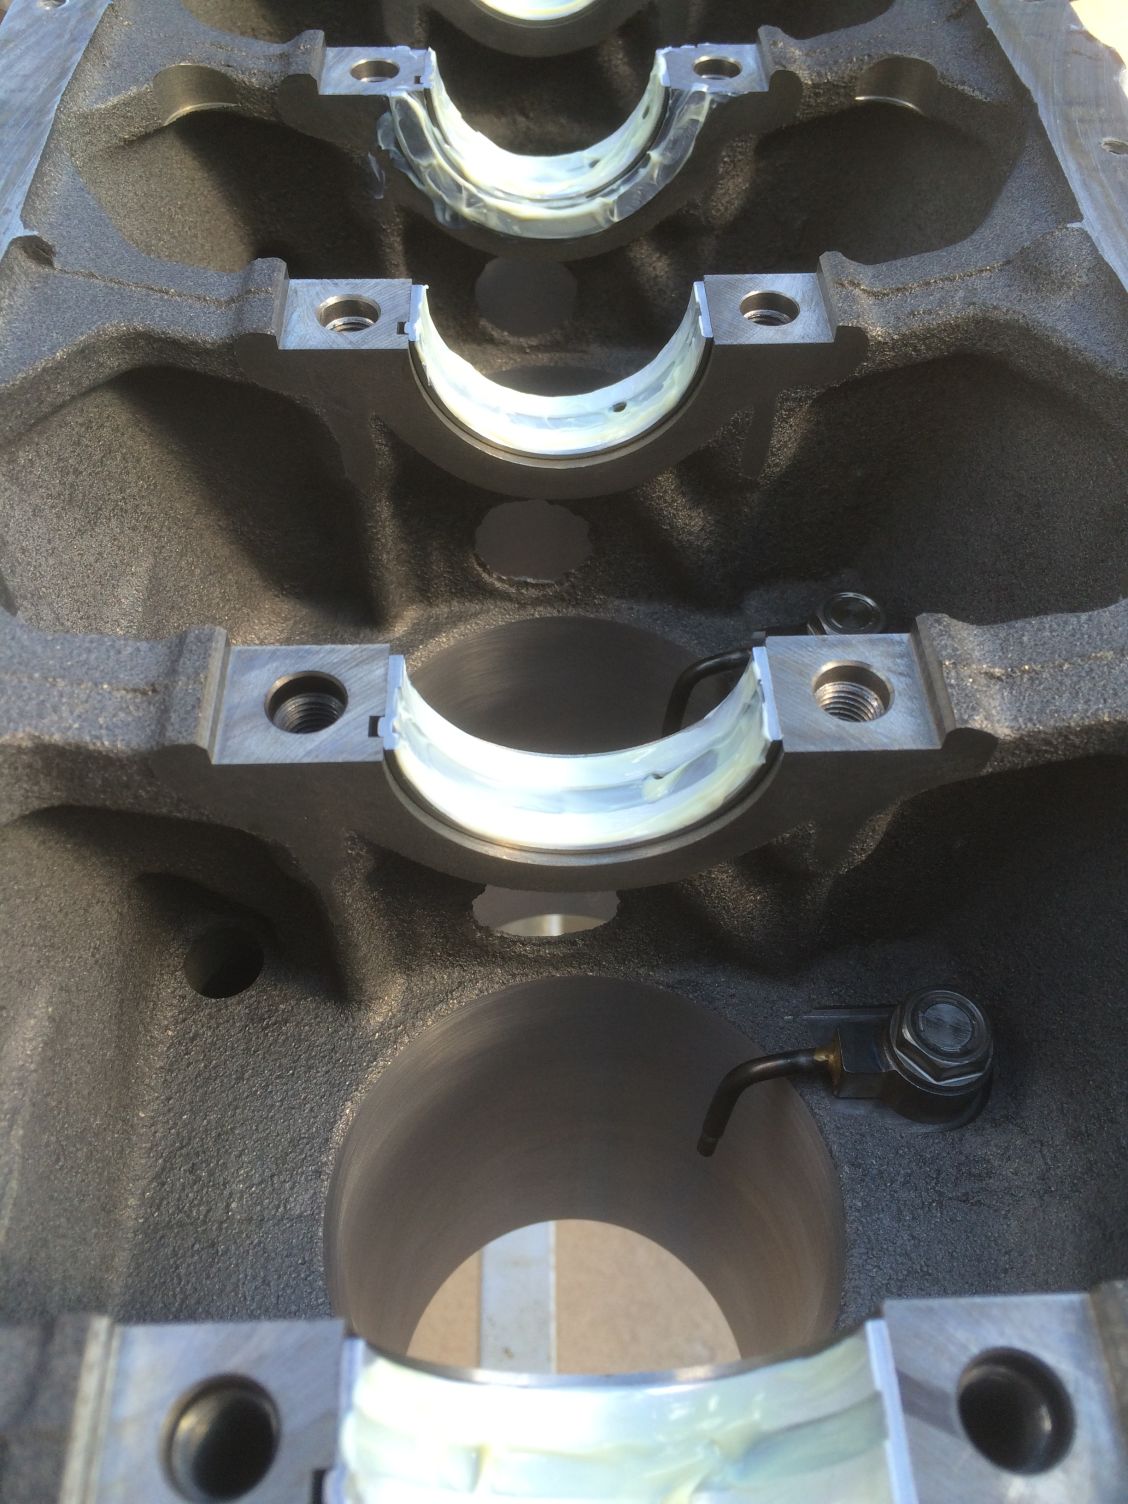
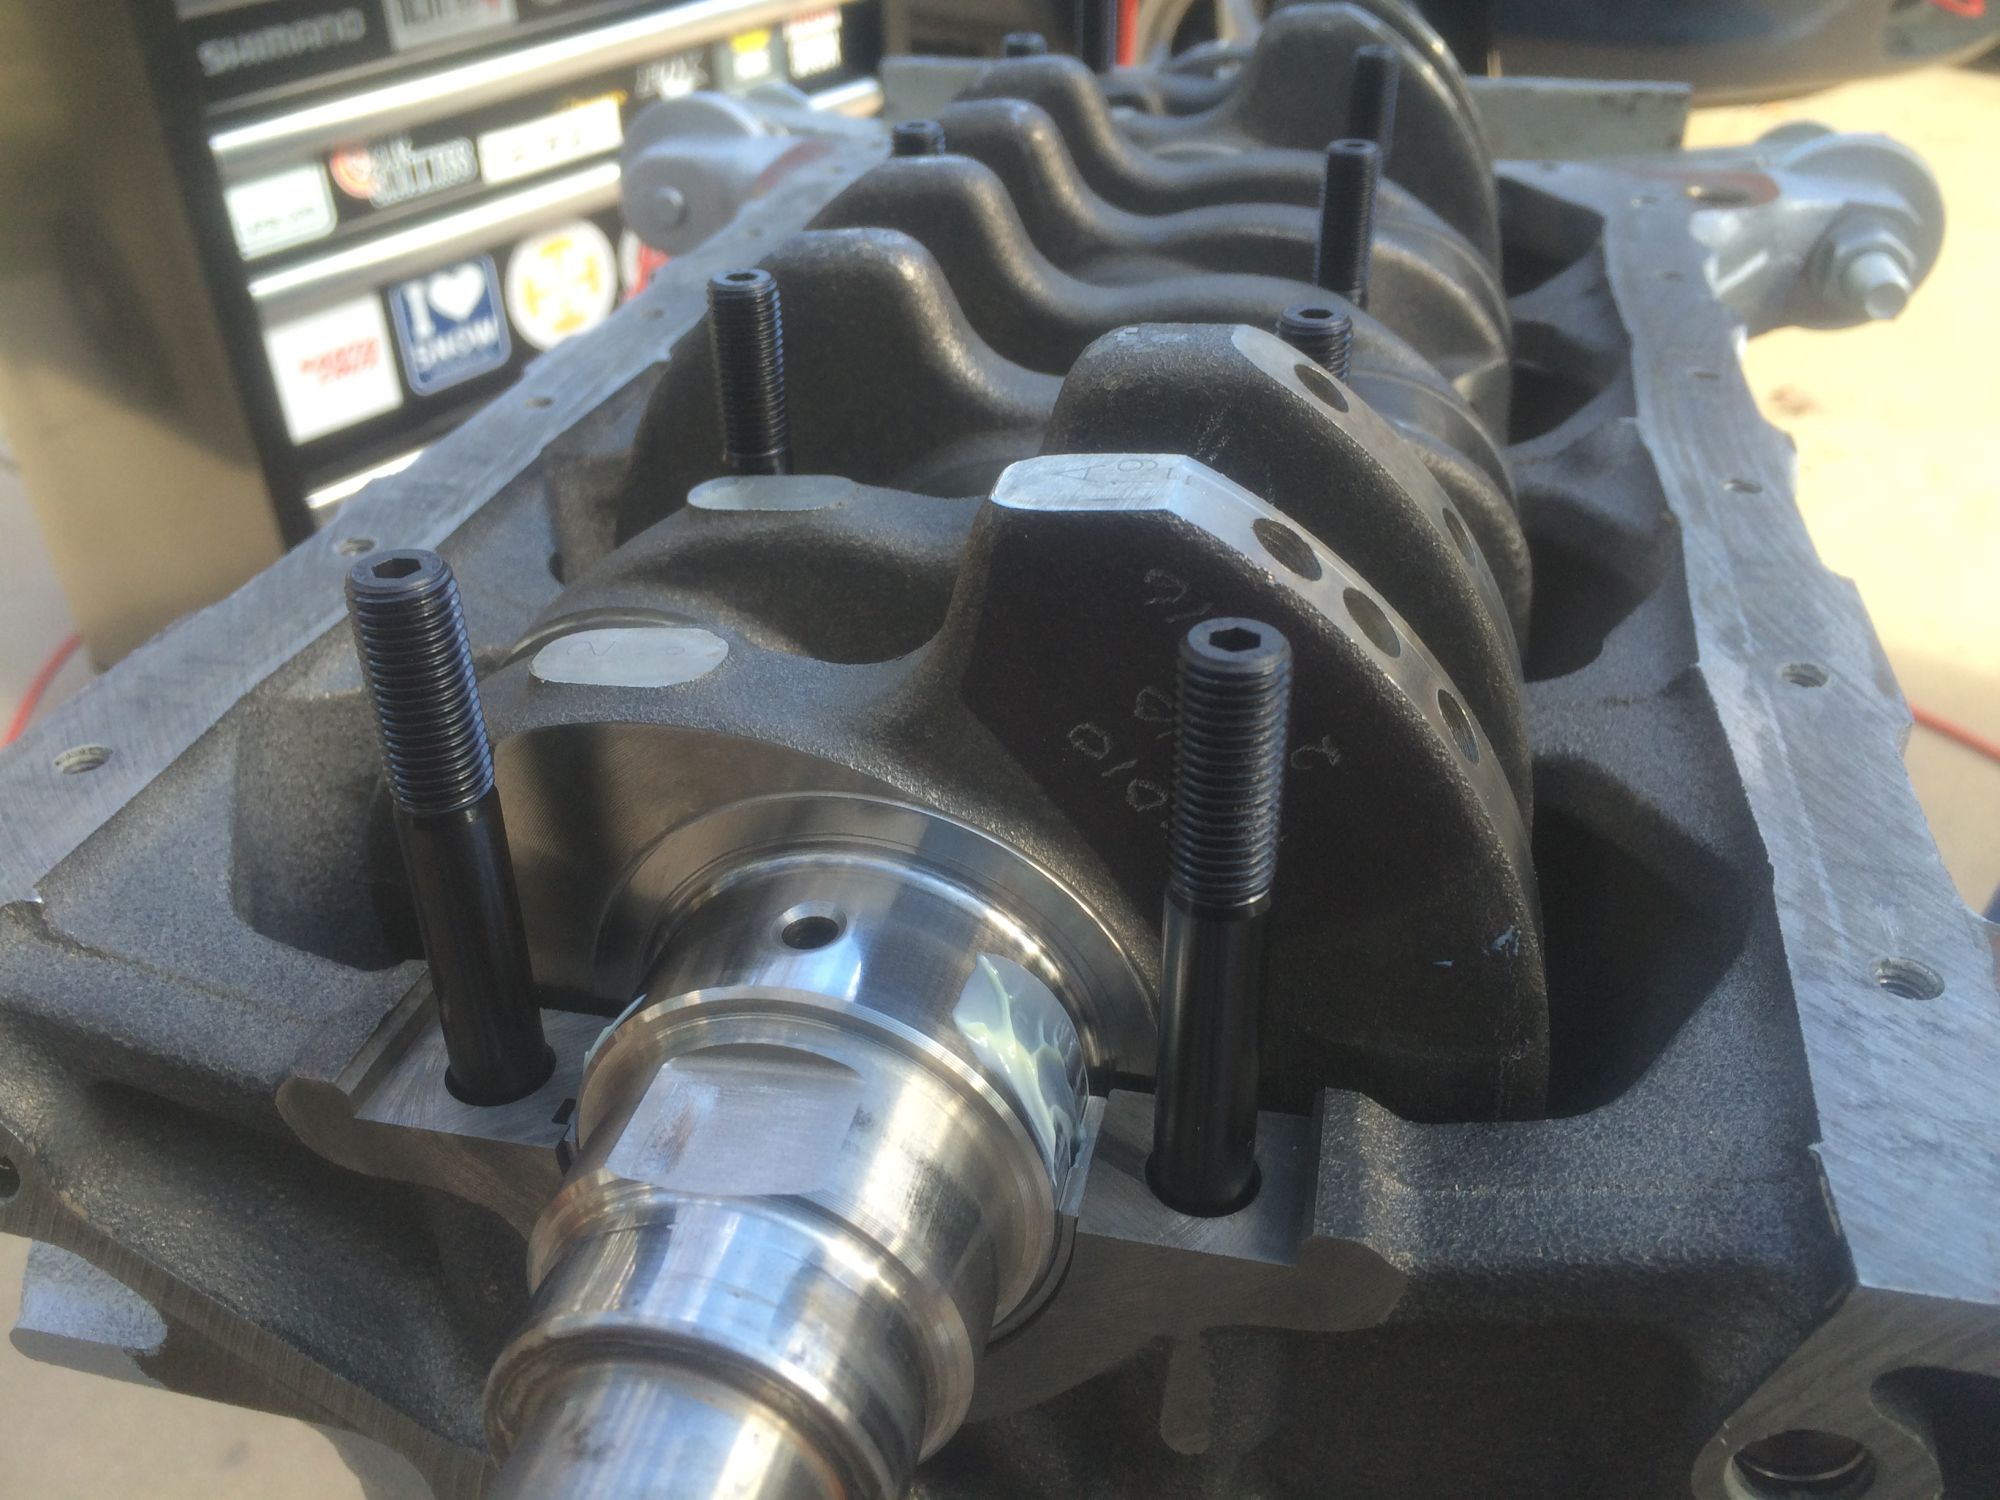
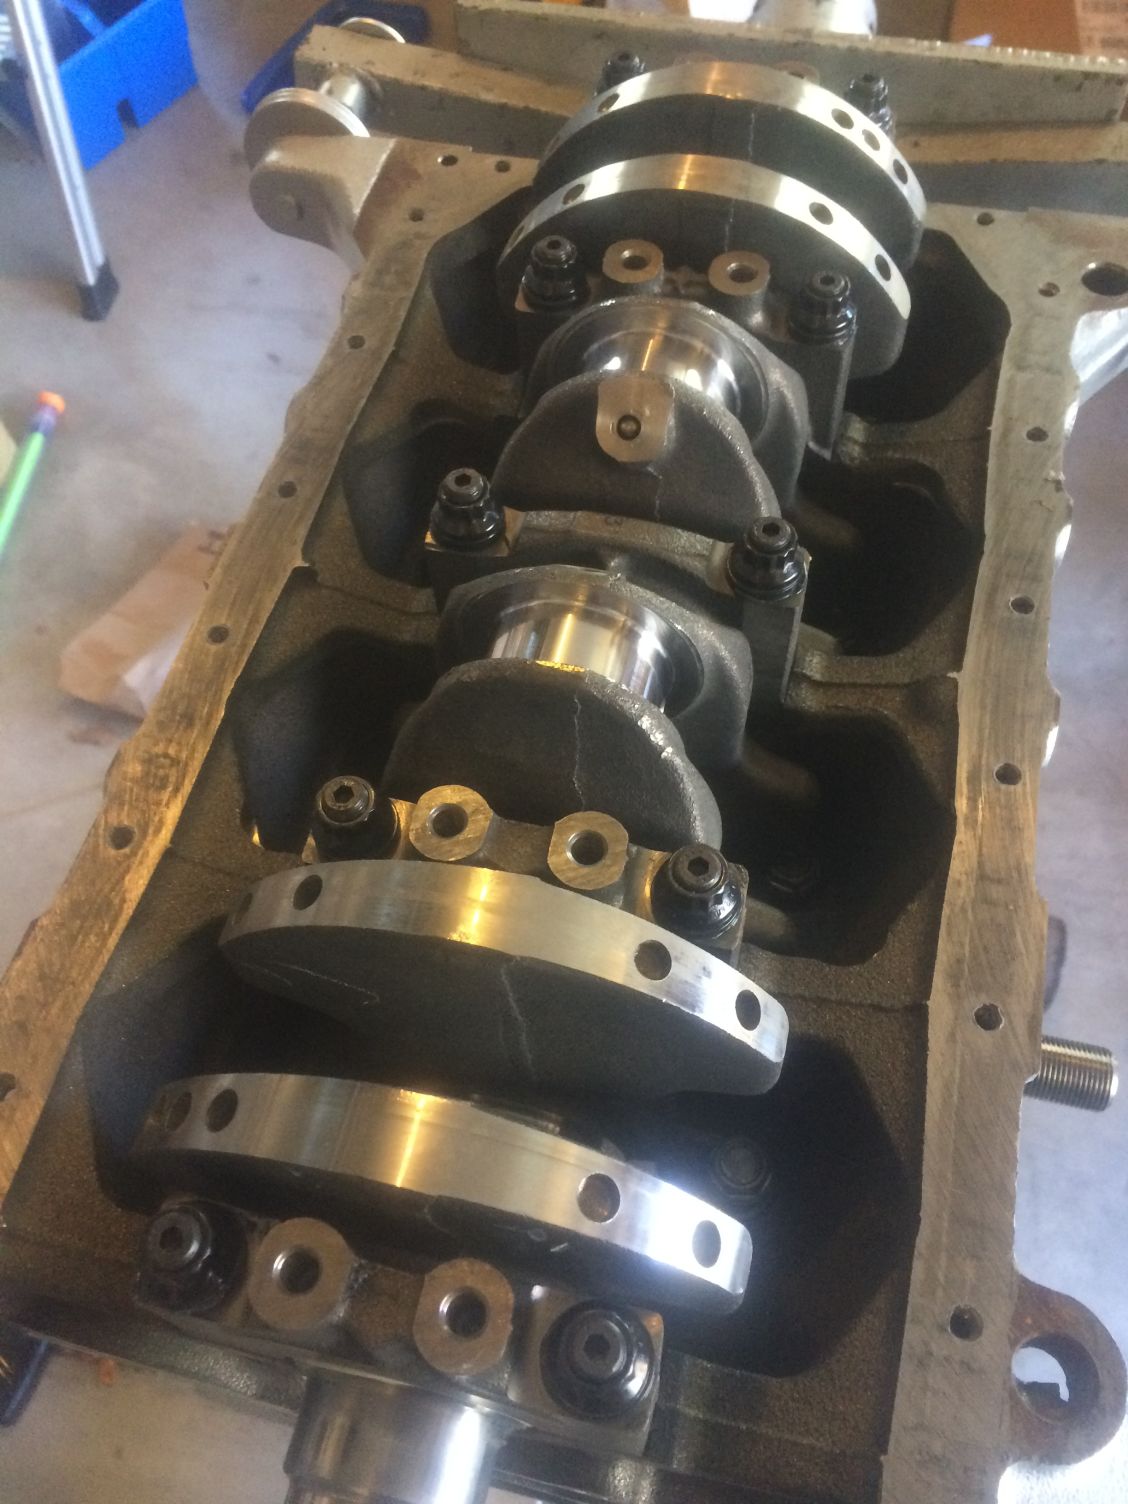
I then installed the shiny, freshly-machined crank using some ACL/King bearings and ARP hardware. I'm using Lubriplate No. 105 assembly grease for the bearing surfaces, it came recommended by the one old guy at Napa who seems like he might be the only one in the store to actually know what he's talking about.
I threaded the main studs into the block using an allen wrench and two fingers, as the instructions specified "finger tight" for this step. I used a little bit of the assembly/torque lube included with the hardware on the cap end of the studs, and torqued them to 60 ft-lbs as specified.
Now, time for the pistons. A quick pic for posterity's sake (and because they're so sexy). This is the last time I plan on seeing anything but the top of the pistons. If anyone is interested in some stock 99' pistons and rods, let me know.
I used a new piston to push my rings into the cylinder and check gaps. The literature included with my rings specified the following gaps:
Top Ring: .0045"-.0050" x bore (inches), for HP Street/Strip and Street Mod Turbo respectively. This gave me a range of .0148" to .0164" based on my bore diameter of 3.2874"
2nd Ring: .055" x bore (inches) = .0181"
I used a feeler gauge to measure the gaps. Both the top ring and 2nd ring had a little more gap than I had calculated, about .017" and .019", so I didn't touch the rings at all. I oriented the gaps according to the paperwork, and then set about using a ring compressor and the wooden handle of a hammer to gently tap them into place. I suppose it should be obvious, but make sure they're oriented correctly - the valve "grooves" in the pistons are different on the exhaust and intake sides. I went about torquing the rod end caps to 36 lb-ft. The first couple felt a little notchy as I approached the torque spec, so I backed them all out and put on a dab of the torque lube that came with my studs. This did the trick, and allowed me to be a little more precise in reaching my torque specs.
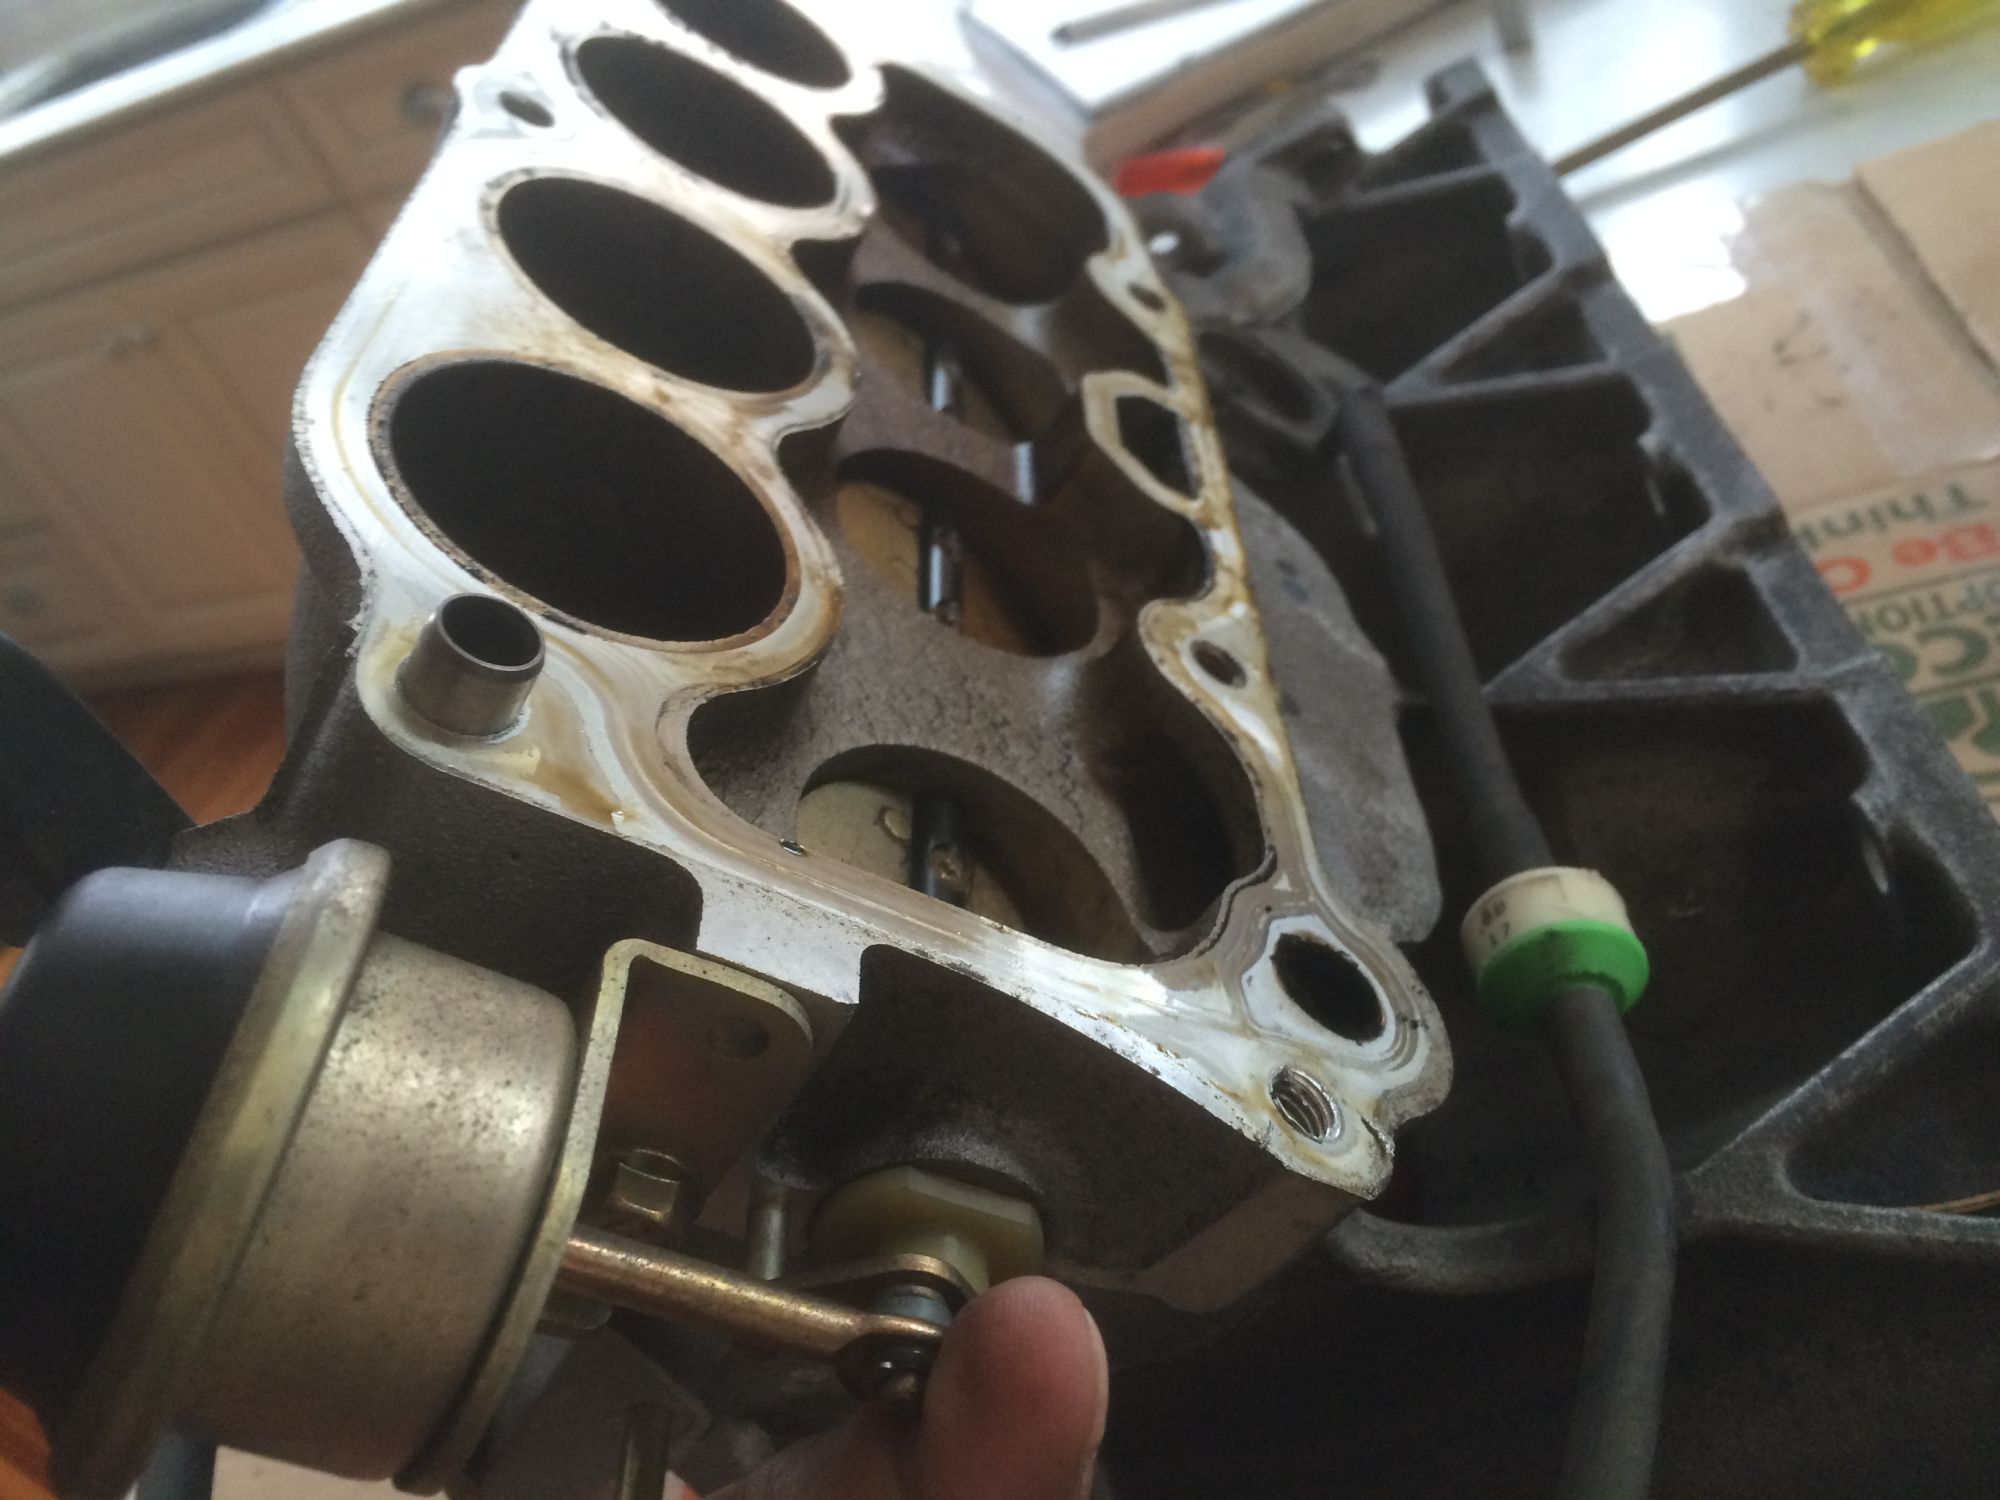
Once the pistons were in, I threaded the studs into the block and dropped the head gasket into place. I was a little confused by the "partial" holes on the gasket... there are a few where the outer layers of the gasket have holes but the inner layers do not. I did a little reading after seeing this (this thread in particular is of interest: Head gasket for 1999 and 2001+ different? - MX-5 Miata Forum) and didn't really come to any conclusions. As far as I can tell, that's how it's supposed to be.
I finally came to a stopping point after realizing that I only have one alignment sleeve in my block. It can be seen in the bottom right of the following picture. Without a second, the head gasket has room to pivot. I could probably clamp it all down and just hold the gasket in place, but I think I'm supposed to have another, so I'll be ordering that tomorrow.
I've done 5 days on our EFR setup and haven't spun a single wrench on the setup. Lapping 5s under the SM record. Biggest issue with the car is running warm, and that's because I have A/C, too large of an intercooler, no ducting, and no reroute (derp squared).
Just sayin'
Dammit, now you have me reading about the EFR line of turbos.... Any word on when the complete kit will be available?
Slow progress, but progress nonetheless. The weather in Colorado has been super nice the past couple weeks, and it's making me antsy to get this motor back in the car. I usually ski a ton during the winter, and March tends to be a pretty awesome time of the year for that, but it's just been way too warm. Hell, I've been ice racing at Georgetown lake in my truck (gotta get my fix in somehow) and today's race was canceled because the ice isn't holding up. Whatever, I have cars, mountain bikes, and fishing to get excited about.
Plus I have this pile of parts that I've been staring at:
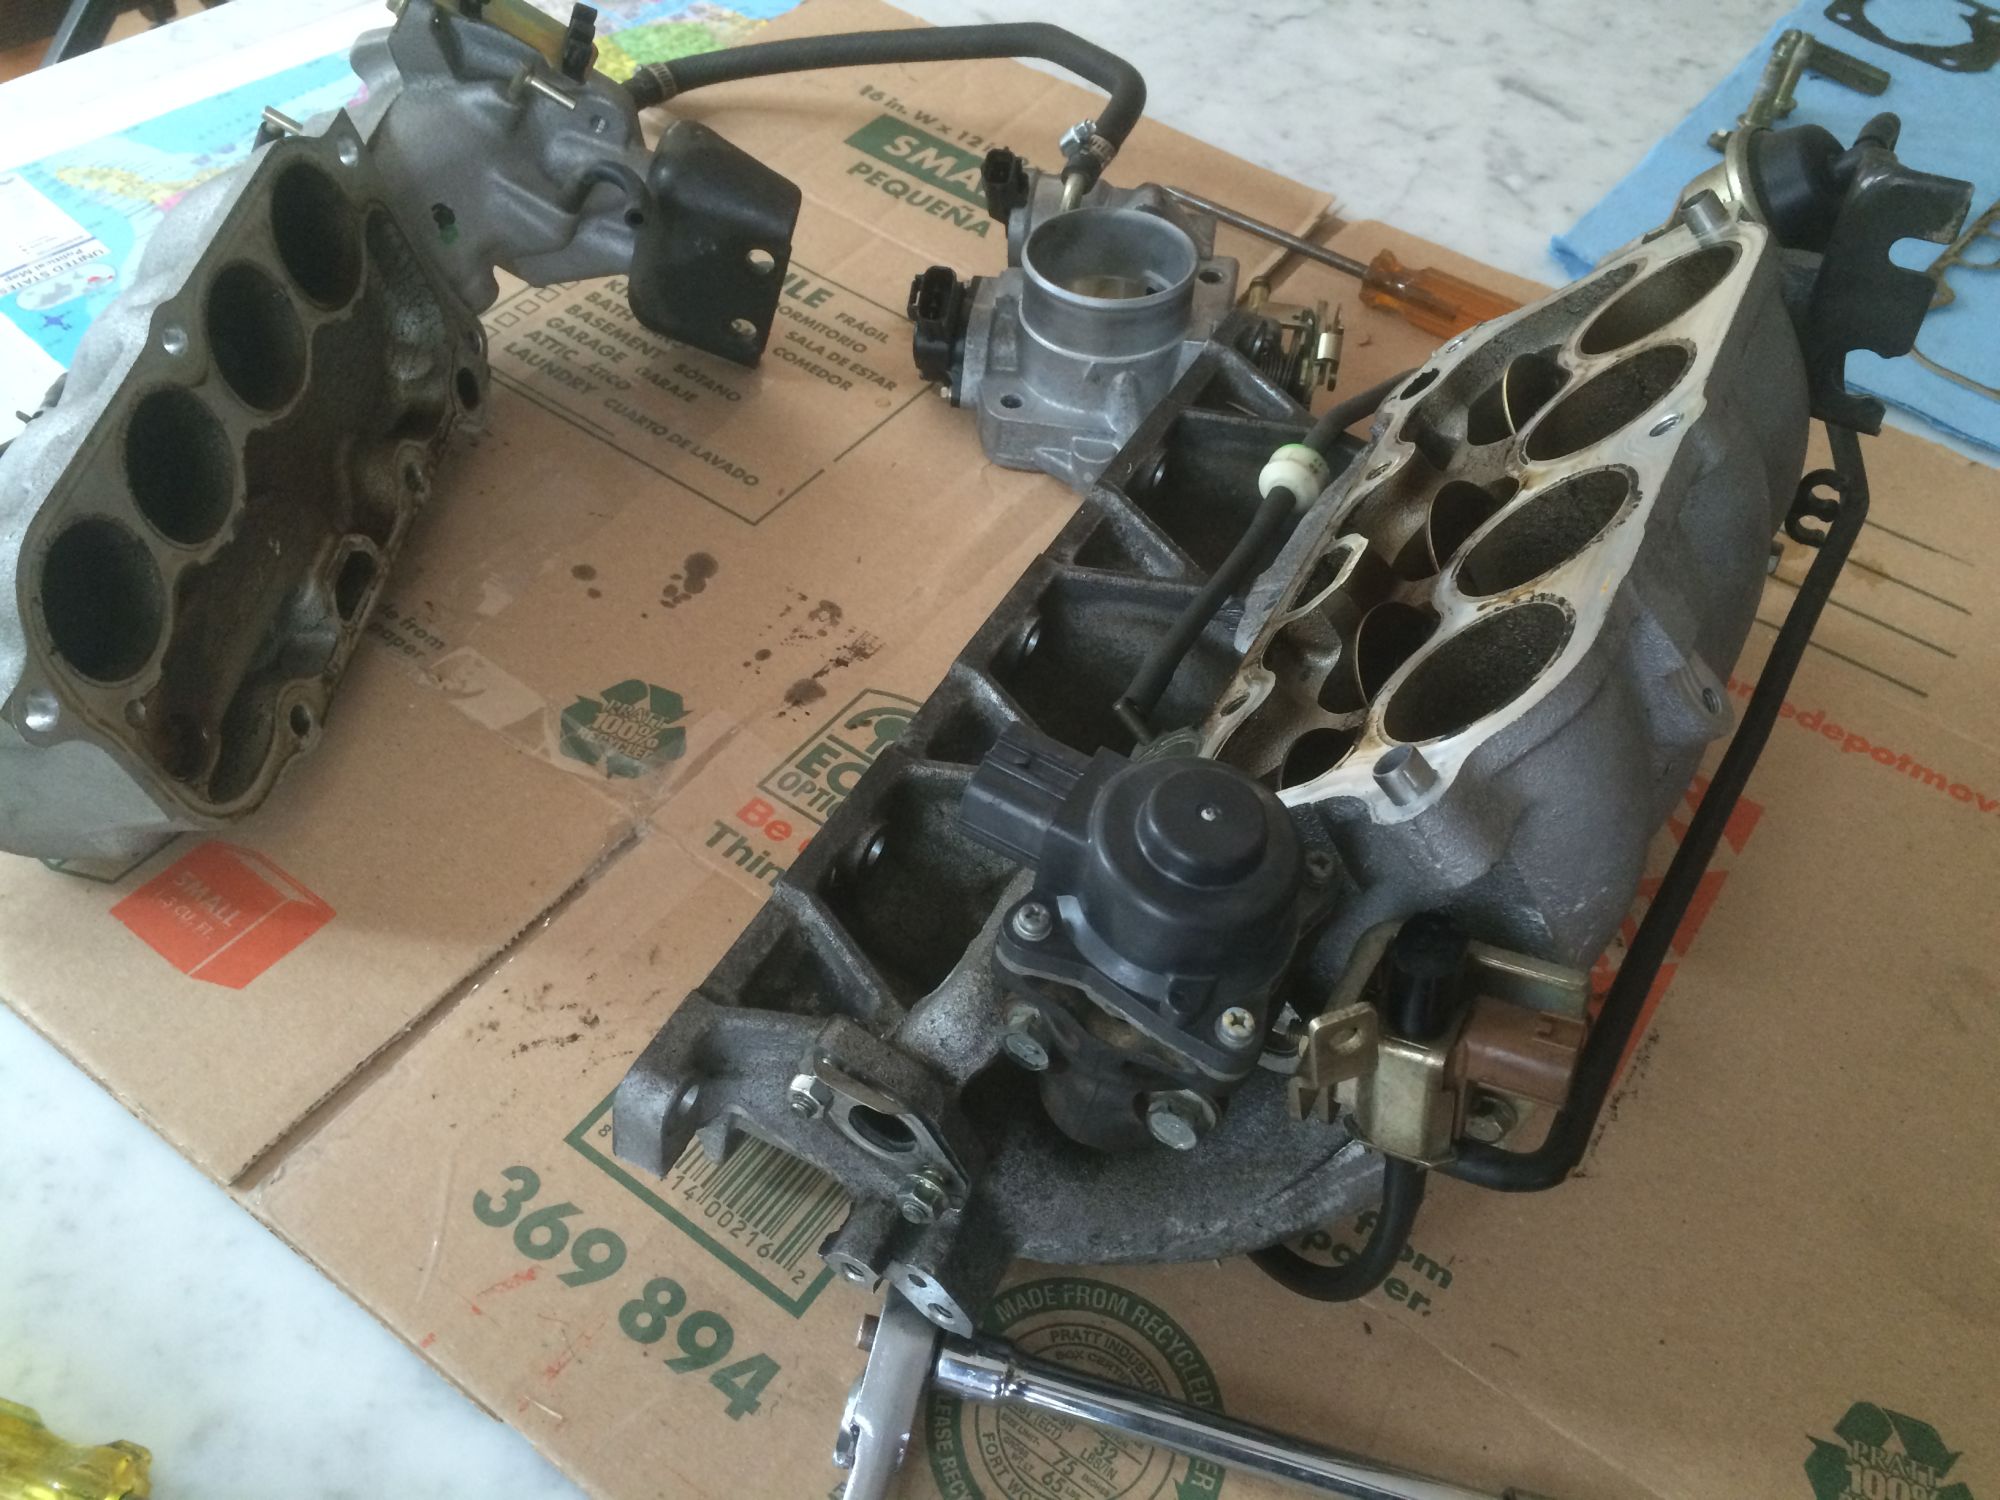
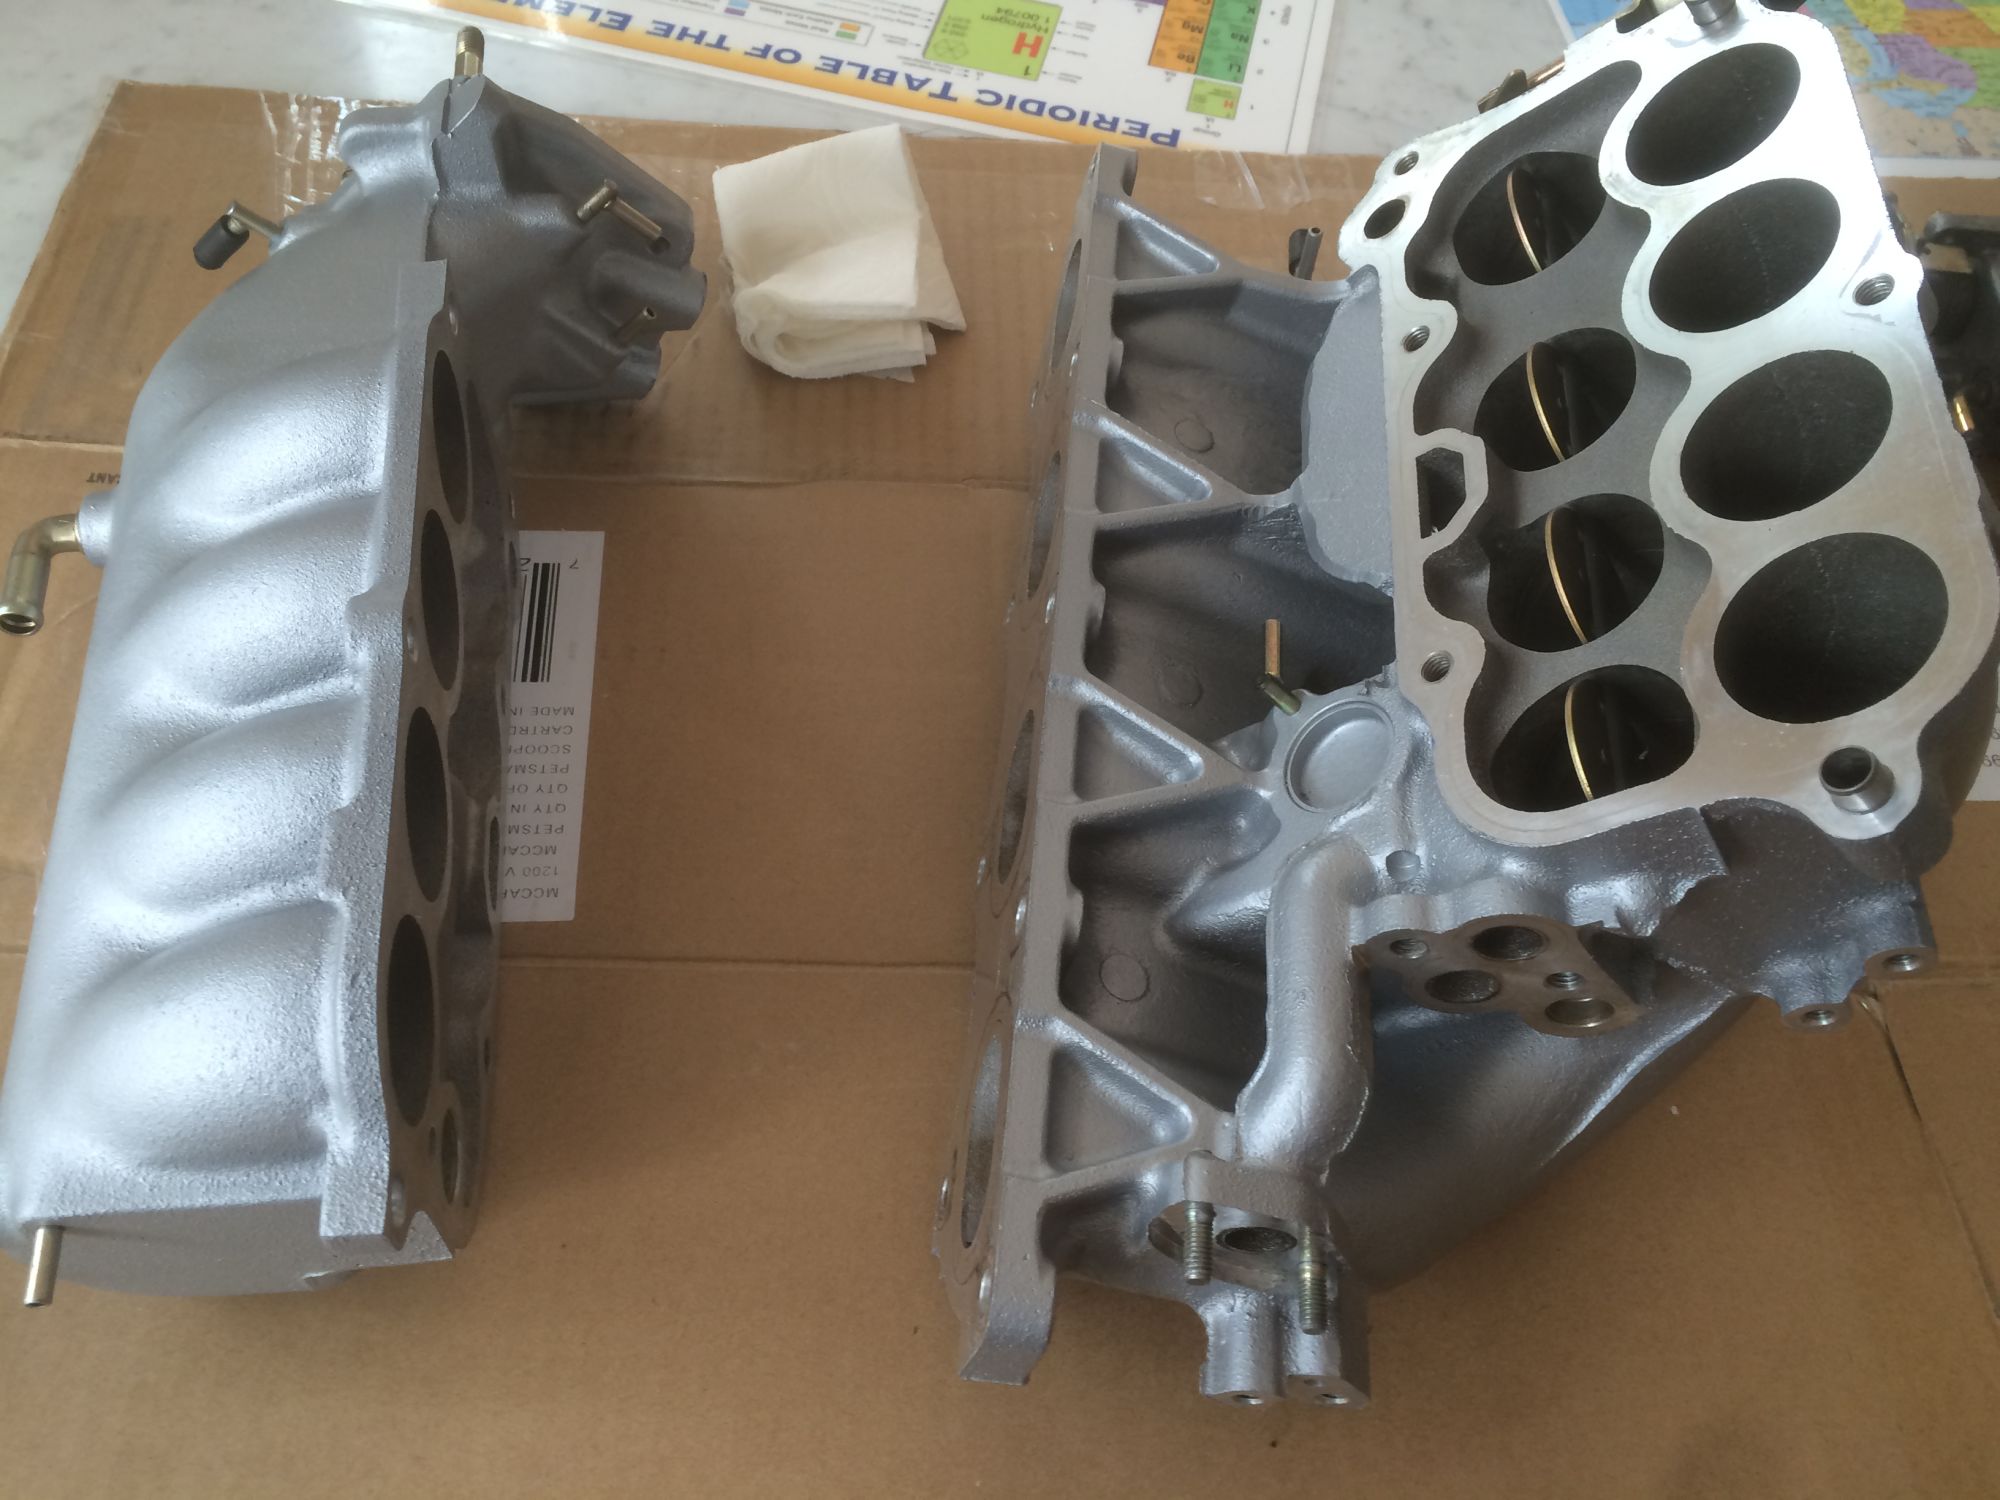
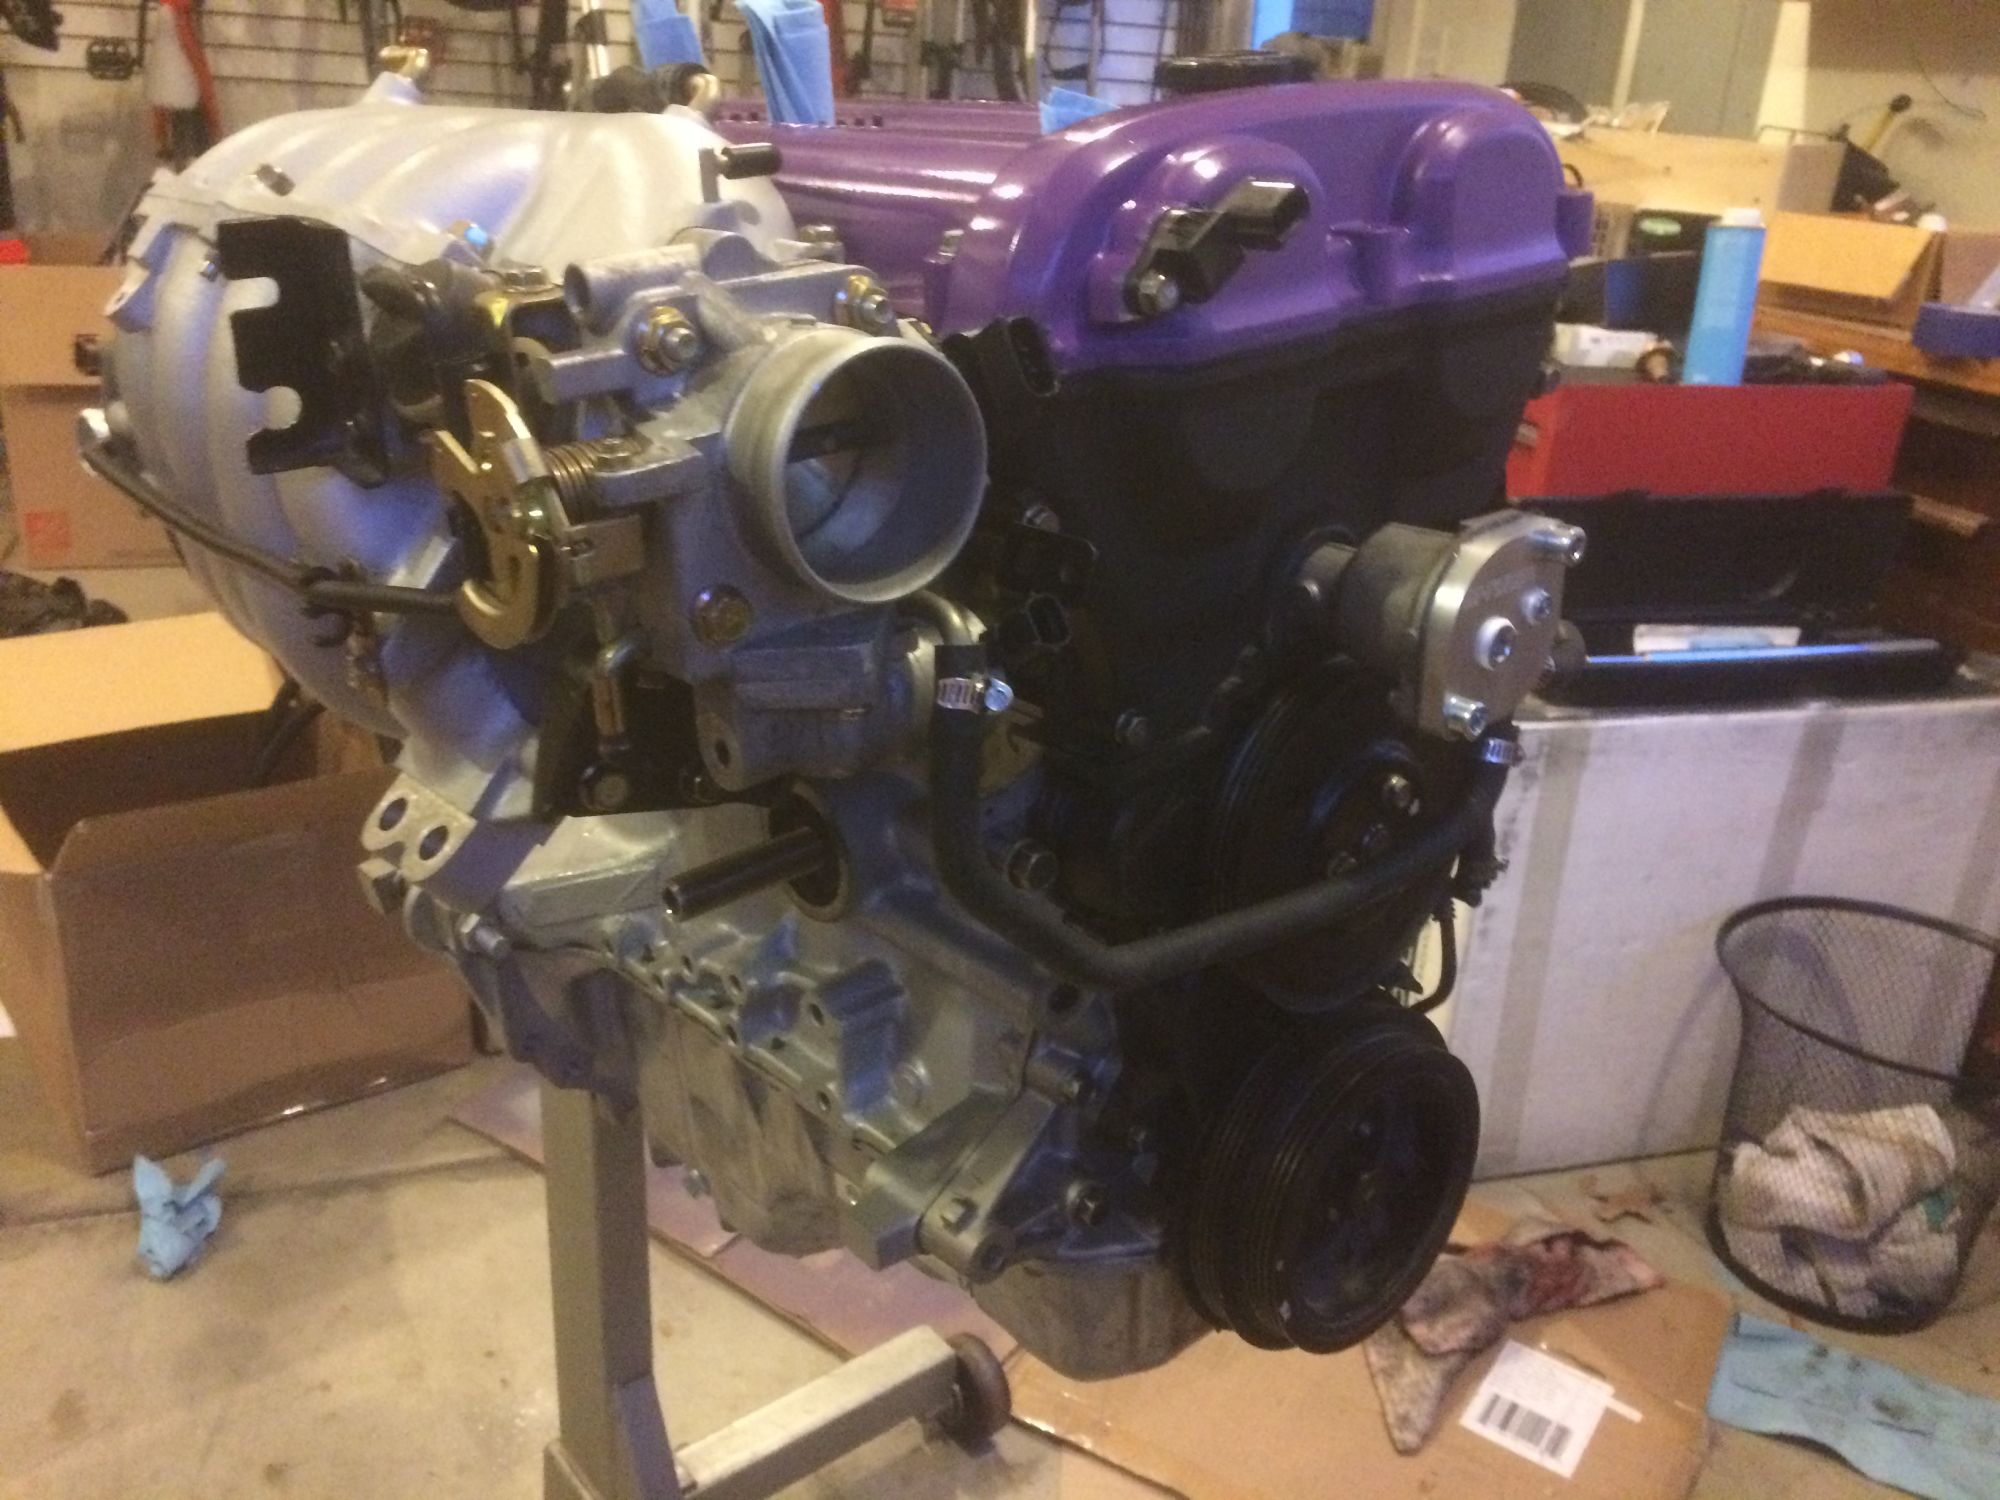
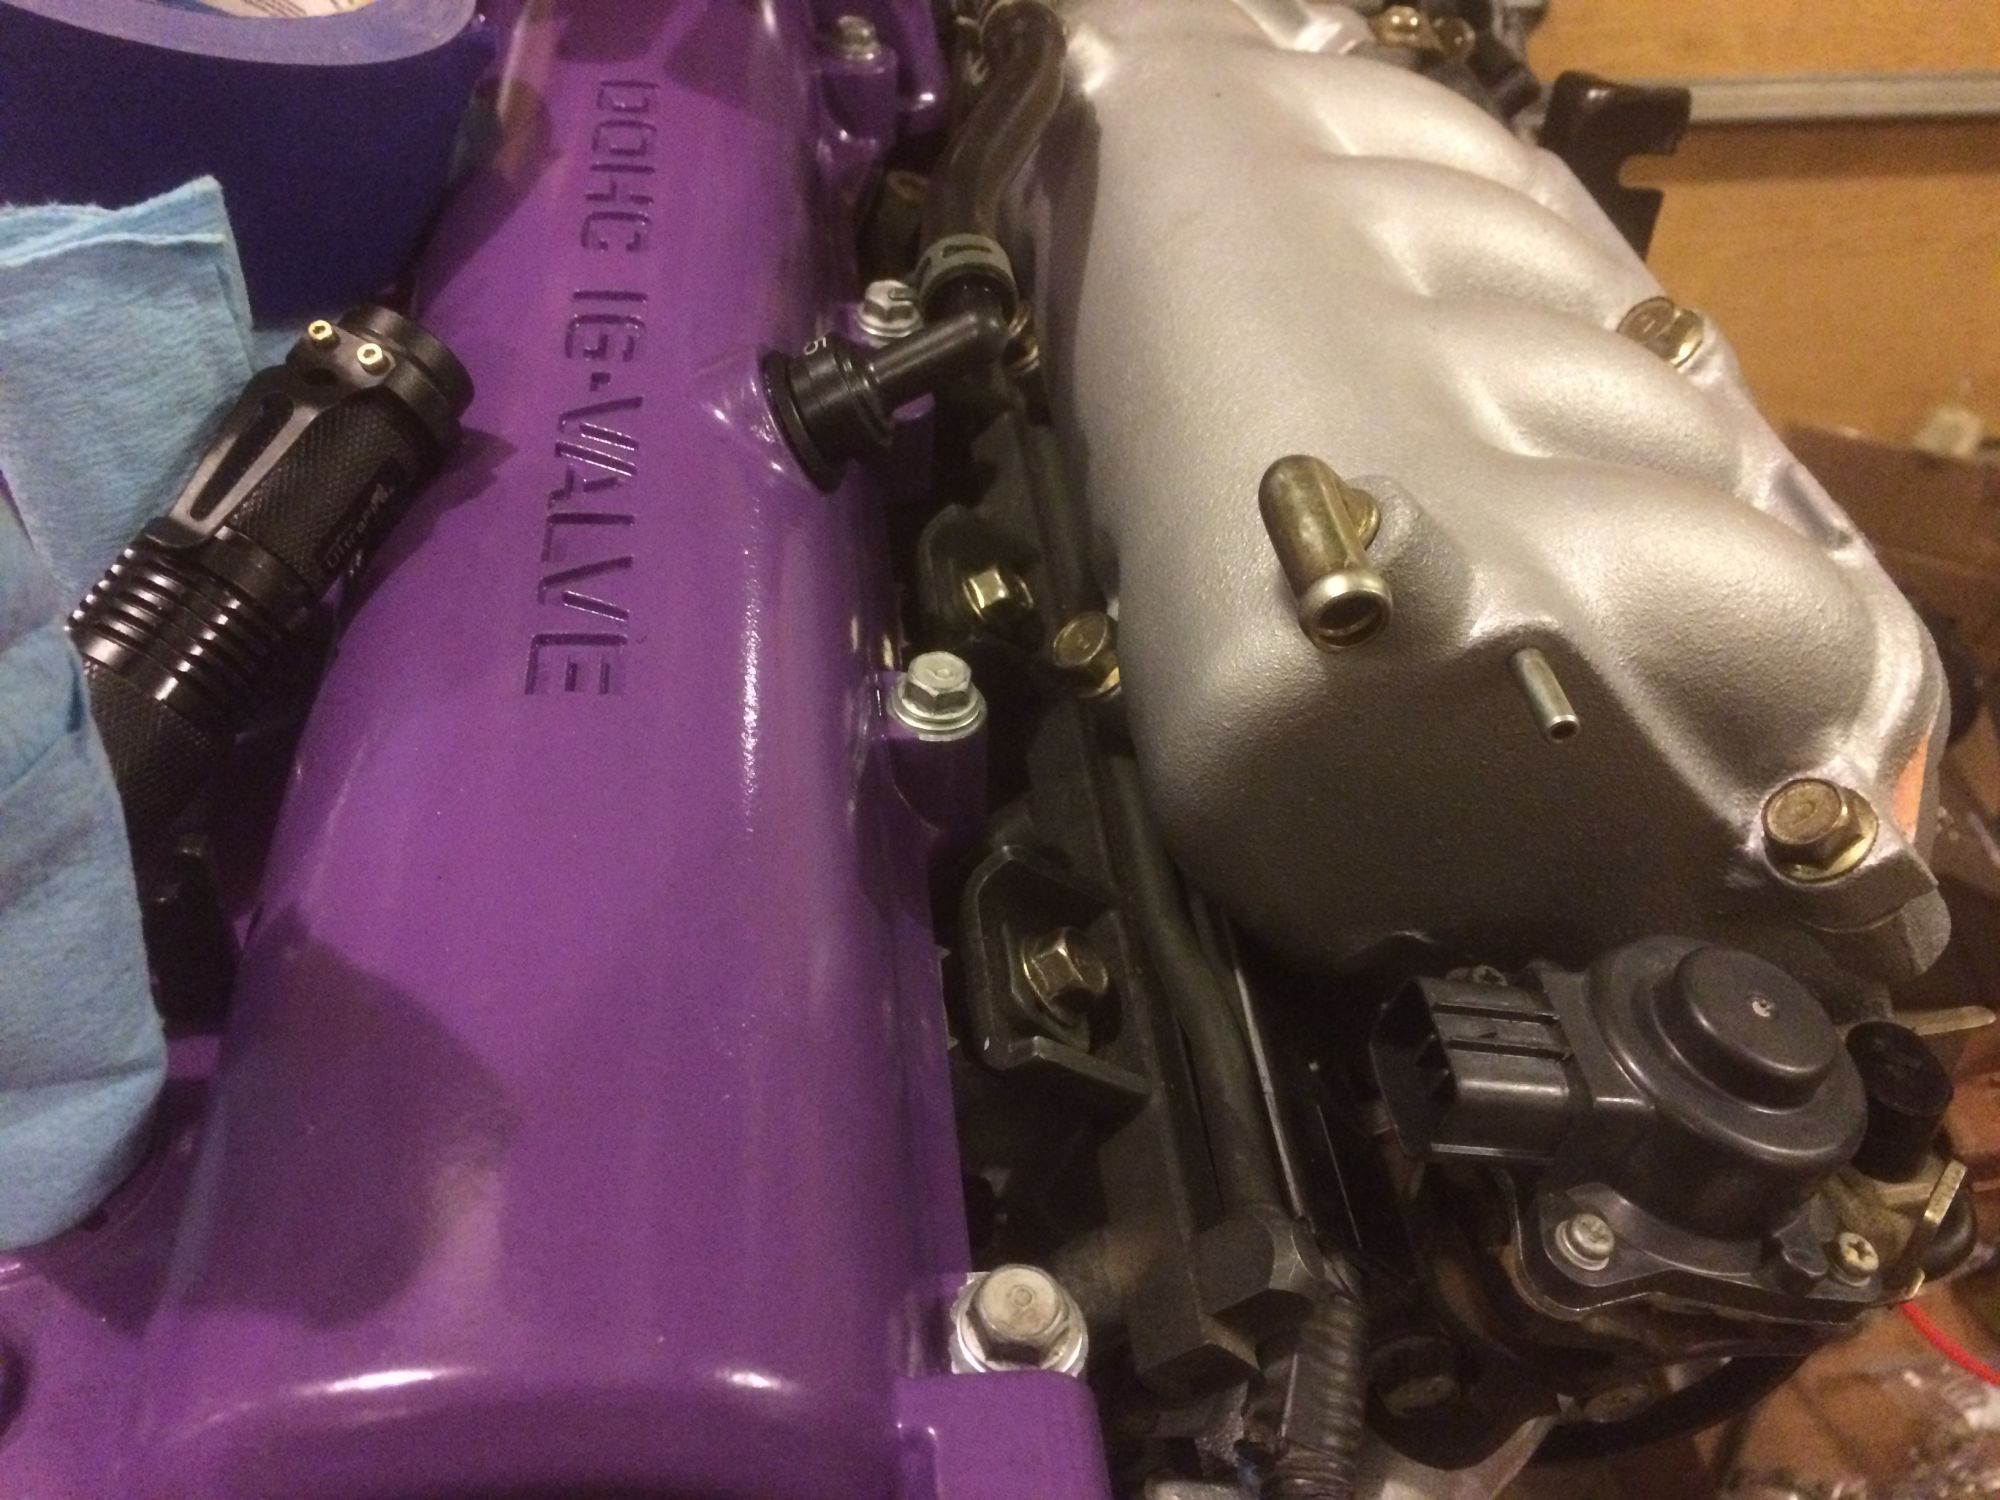
I managed to get a few things done over the past two weeks. First up was prepping the intake manifold. I completely disassembled it, and used about 4 cans of throttle body spray and a few different brushes to clean it... This thing was nasty. PCV and EGR are great and all that, but they leave the intake manifold absolutely full of grime. I got it as clean as I could, taped the upper and lower halves, and painted it with some engine primer and a coat of enamel.
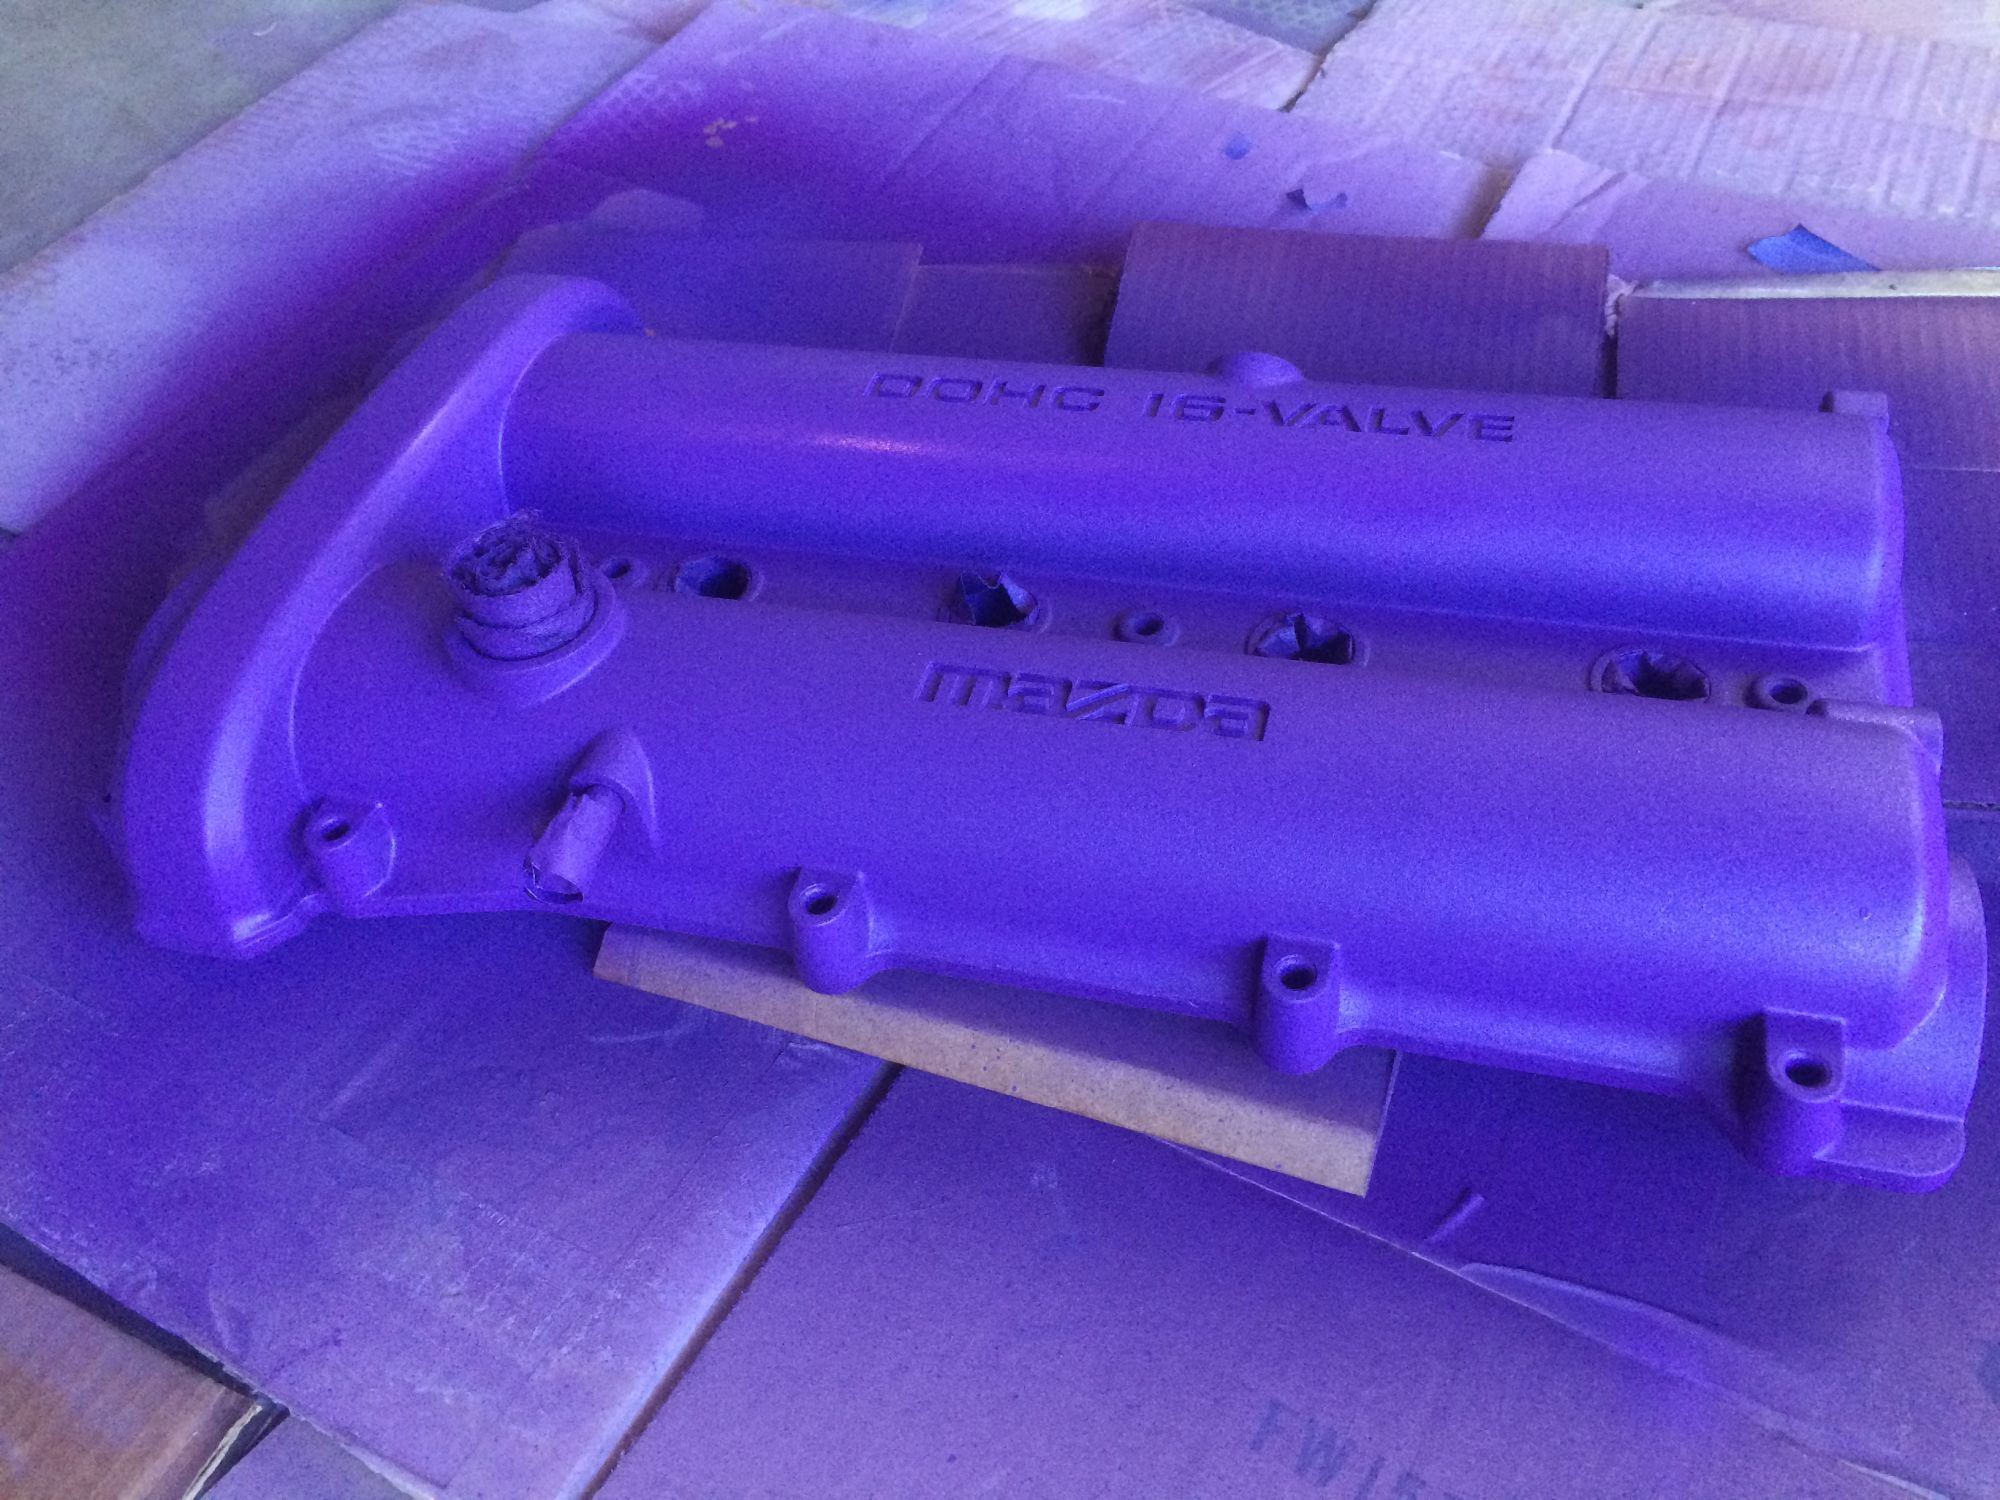
Next, I cleaned and painted my valve cover. It had a shitty coat of red on it, and that had to go. I pulled the three plates off of the bottom, washed the crap out of it, and used some aircraft paint stripper to get it back down to bare metal. Taped it all off, threw on a coat of primer, and then topped it off with some purple and a couple coats of clear.
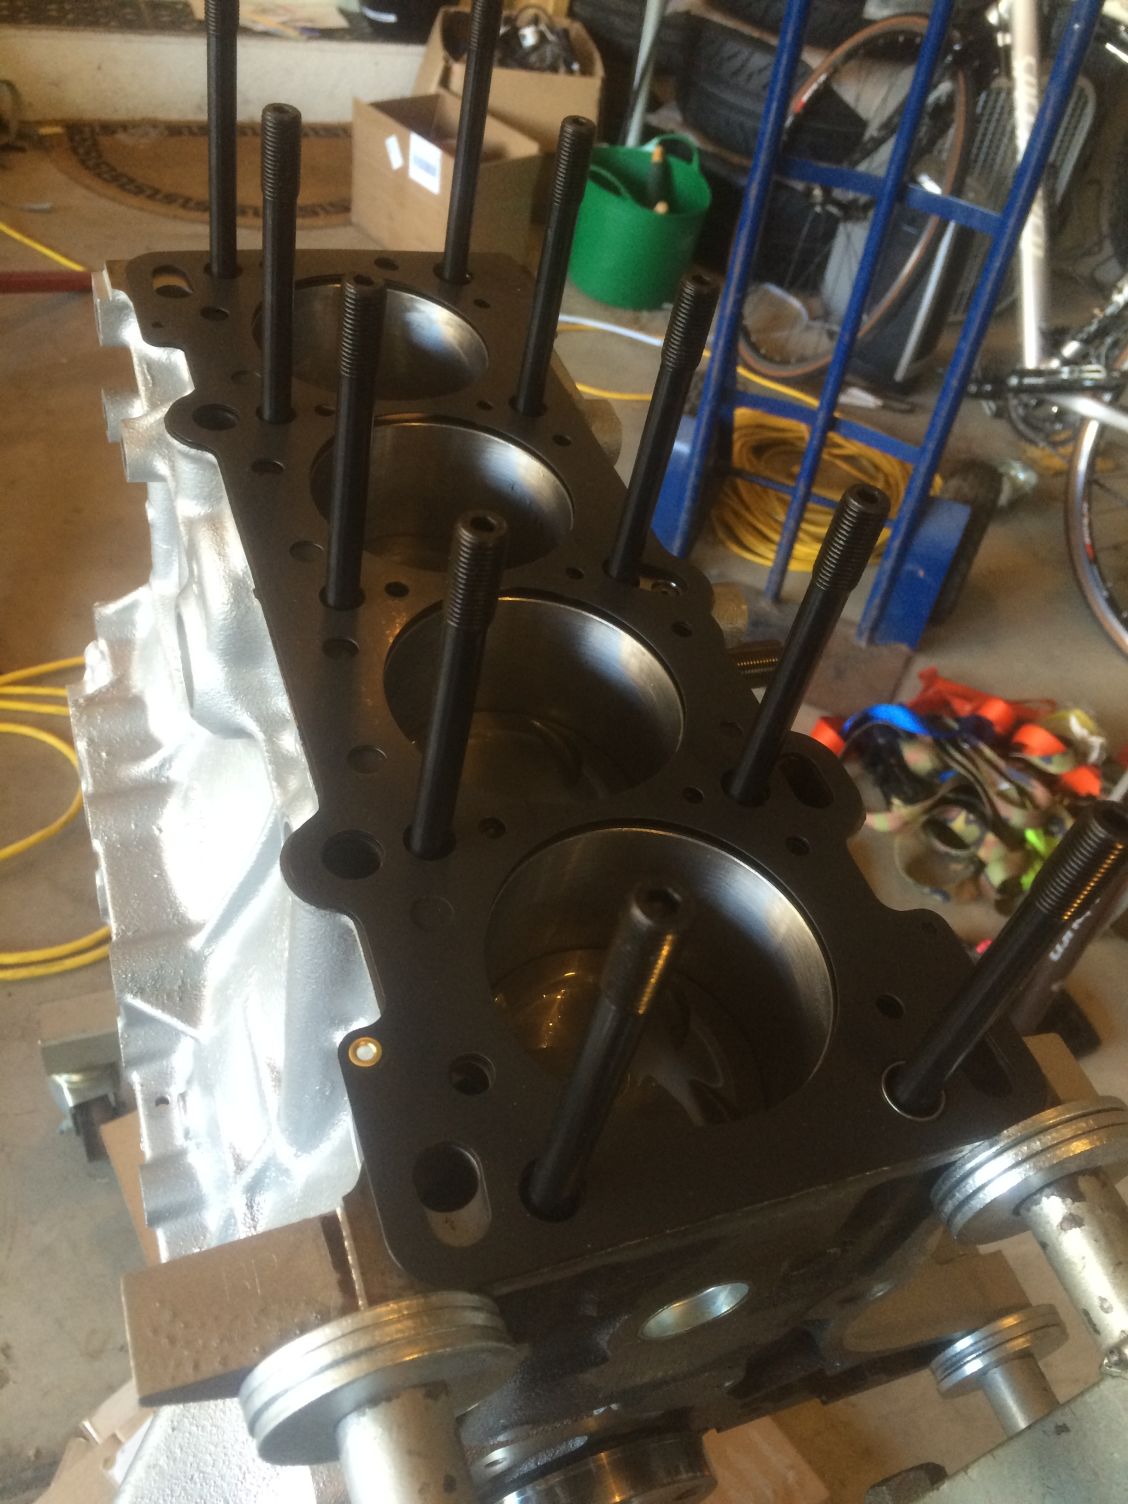
I'm using some washers between the engine stand and block because of the sleeves that stick out in a couple of the holes prevent it from nicely mounting otherwise. Two of the washers were interfering with mounting the head to the block, so I ground those down and got the head mounted. Applied a little ARP thread lube to each stud and followed the torquing pattern. I did it in 4 increments. 20 -> 40 -> 55 -> 65 ft-lbs. I read through this thread before deciding on 65 ft-lbs: https://www.miataturbo.net/engine-pe...e-miata-54746/ . Apparently the factory recommendation of 80 ft-lbs is too much and can damage your head. 65 ft-lbs is what came recommended in the instructions for the studs, as well as by a few posters in that thread, so it seemed like a reasonable number to use.
Then I torqued down the camshaft caps. 11.3-14.2 N-m is what was recommended, I took them to 13 N-m.
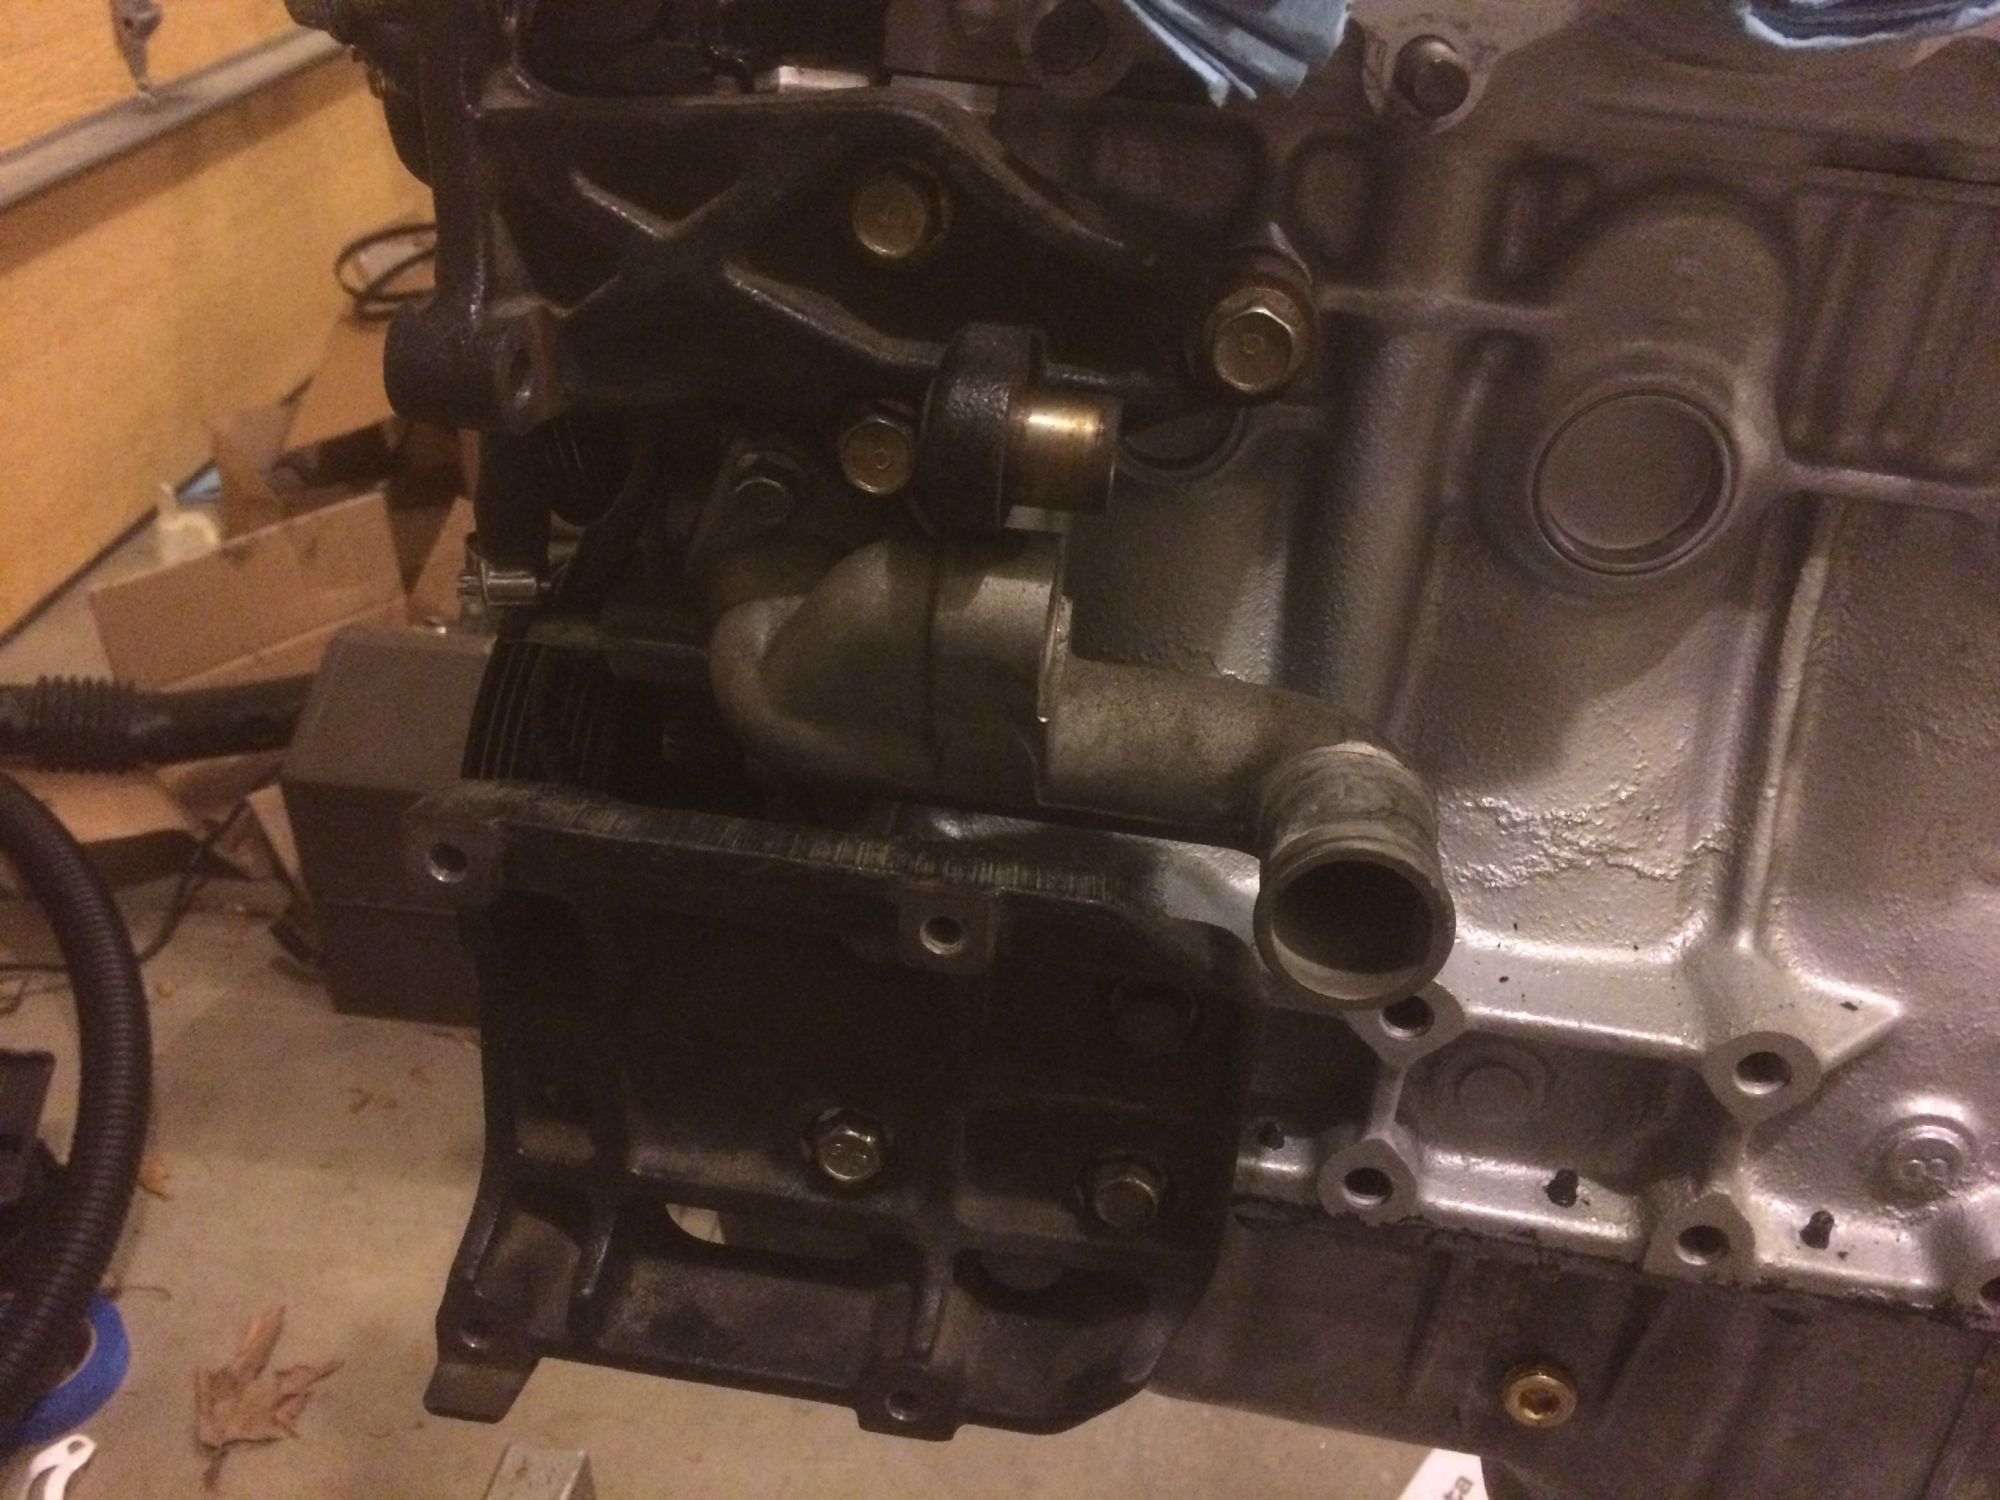
The Boundary oil pump looked like it had been dropped at some point... One of the corners was a little damaged, so I filed it down flat so it wouldn't interfere with the seal. I put a bead of black RTV around the edge (there's this handy groove that gives you an indication of where to put the RTV). Then I torqued it to 16 N-m based on the recommendation of 14-18 N-m.
Next up was the water pump, which I torqued to about 17 N-M (recommendation is 14-19 N-m)
Moving up the front of the block, my next step was to install the thermostat housing. It takes an O-ring, and for some reason I couldn't find the original O-ring, and the gasket set I got from Rosenthal Mazda didn't include it. This is my current hold up, I'm ordering the o ring and should have it this week. Then, I should be able to get all the timing parts installed.
This installment is titled: "Moar Progress and a Cat Picture".
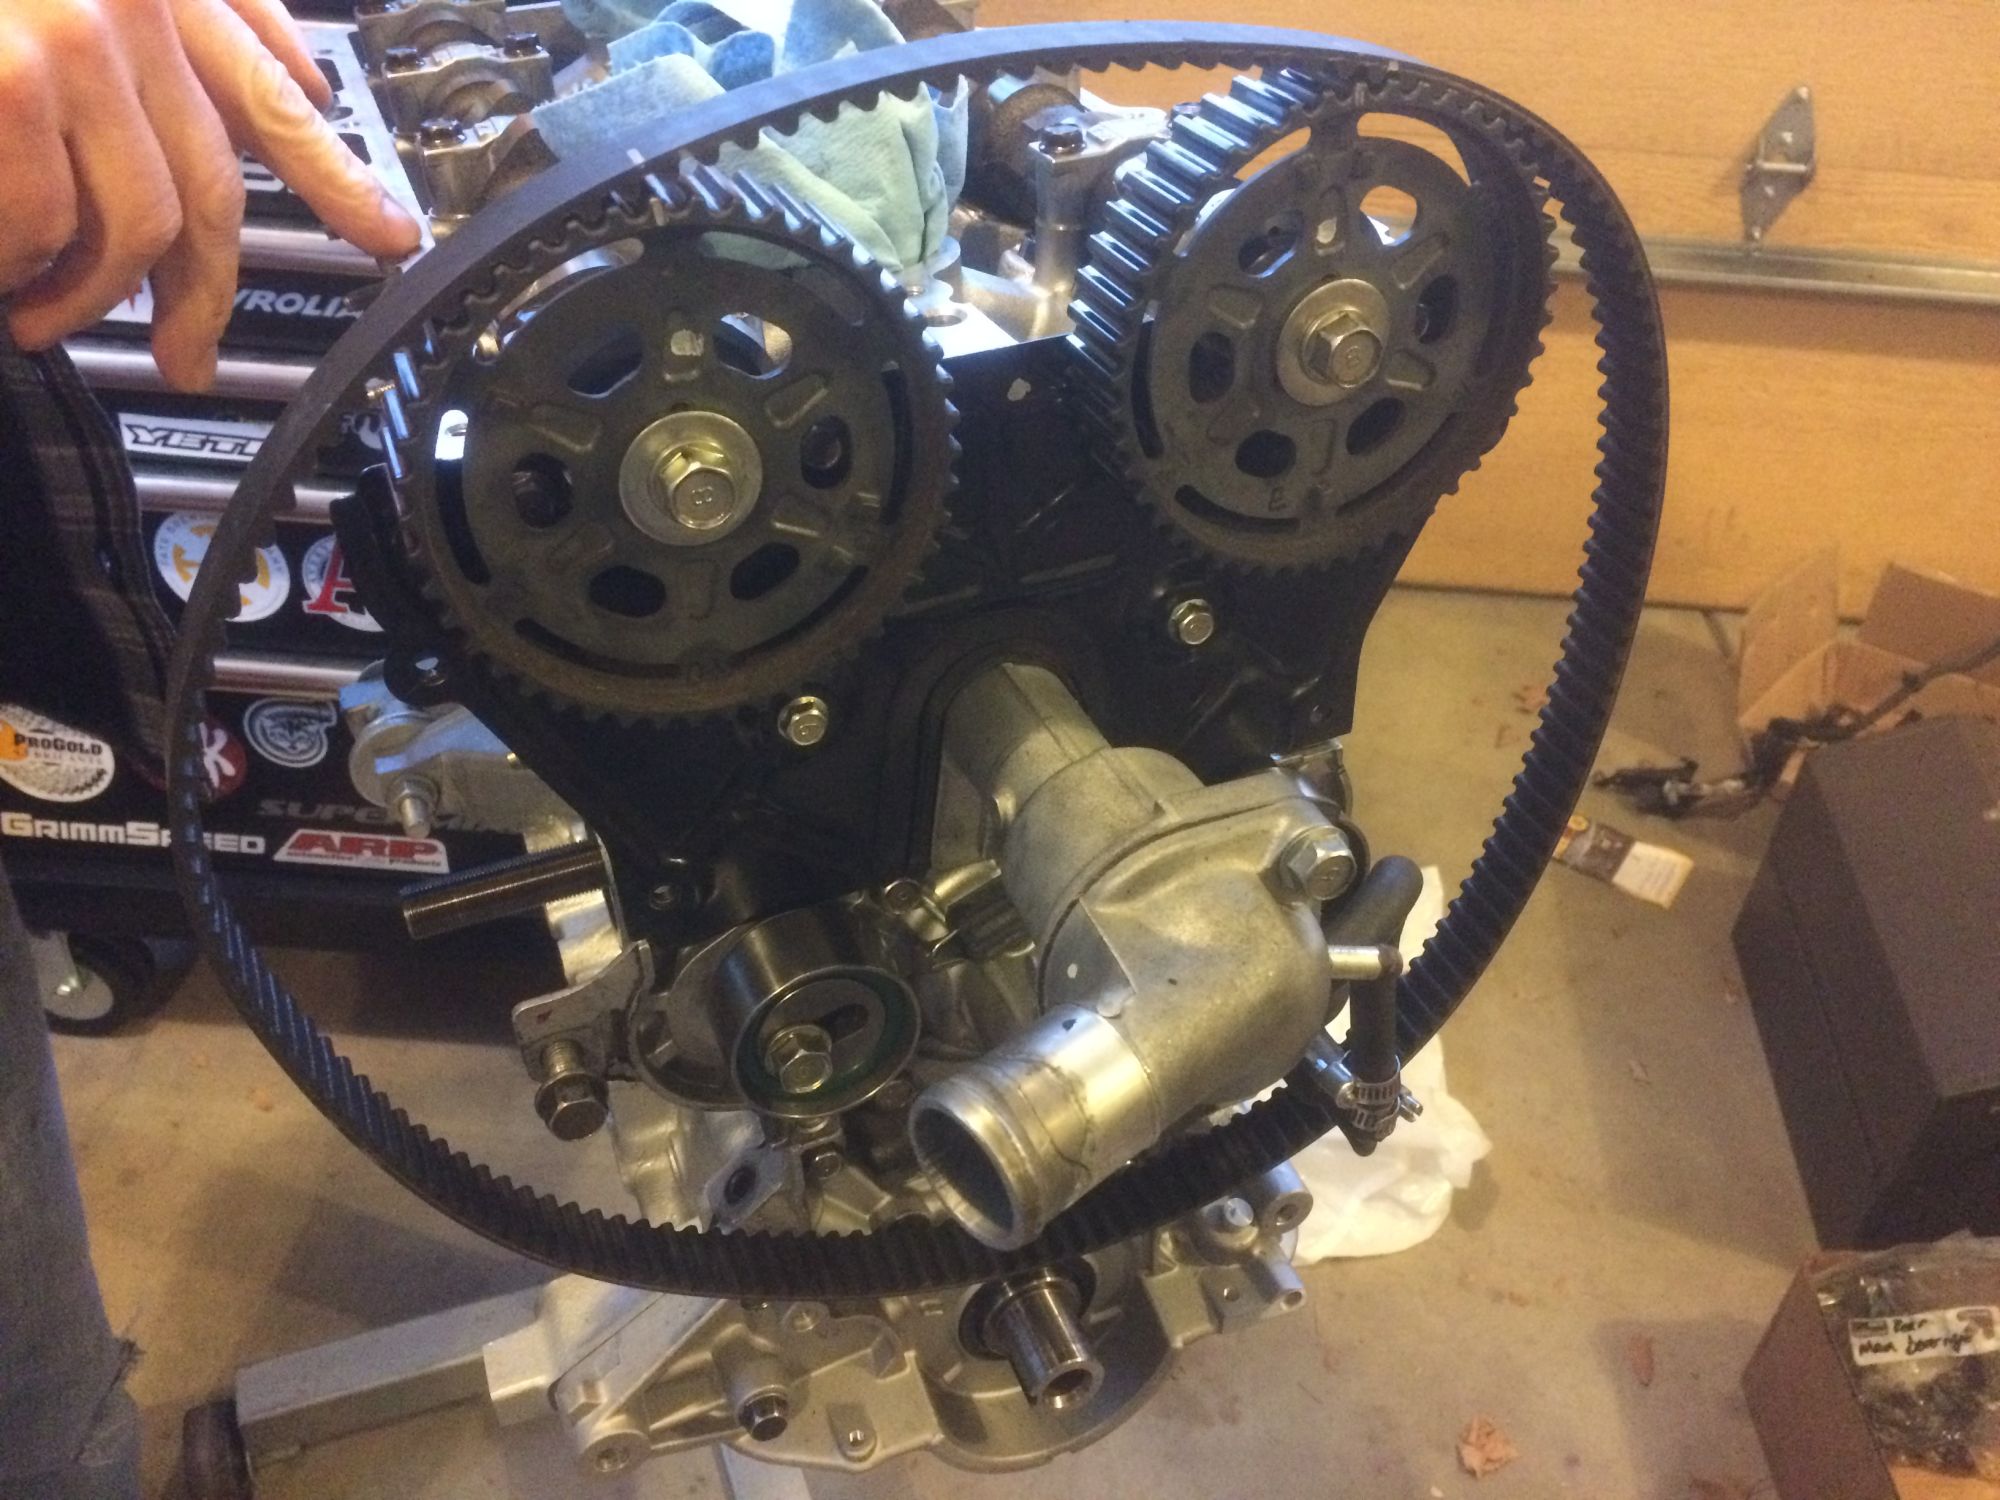
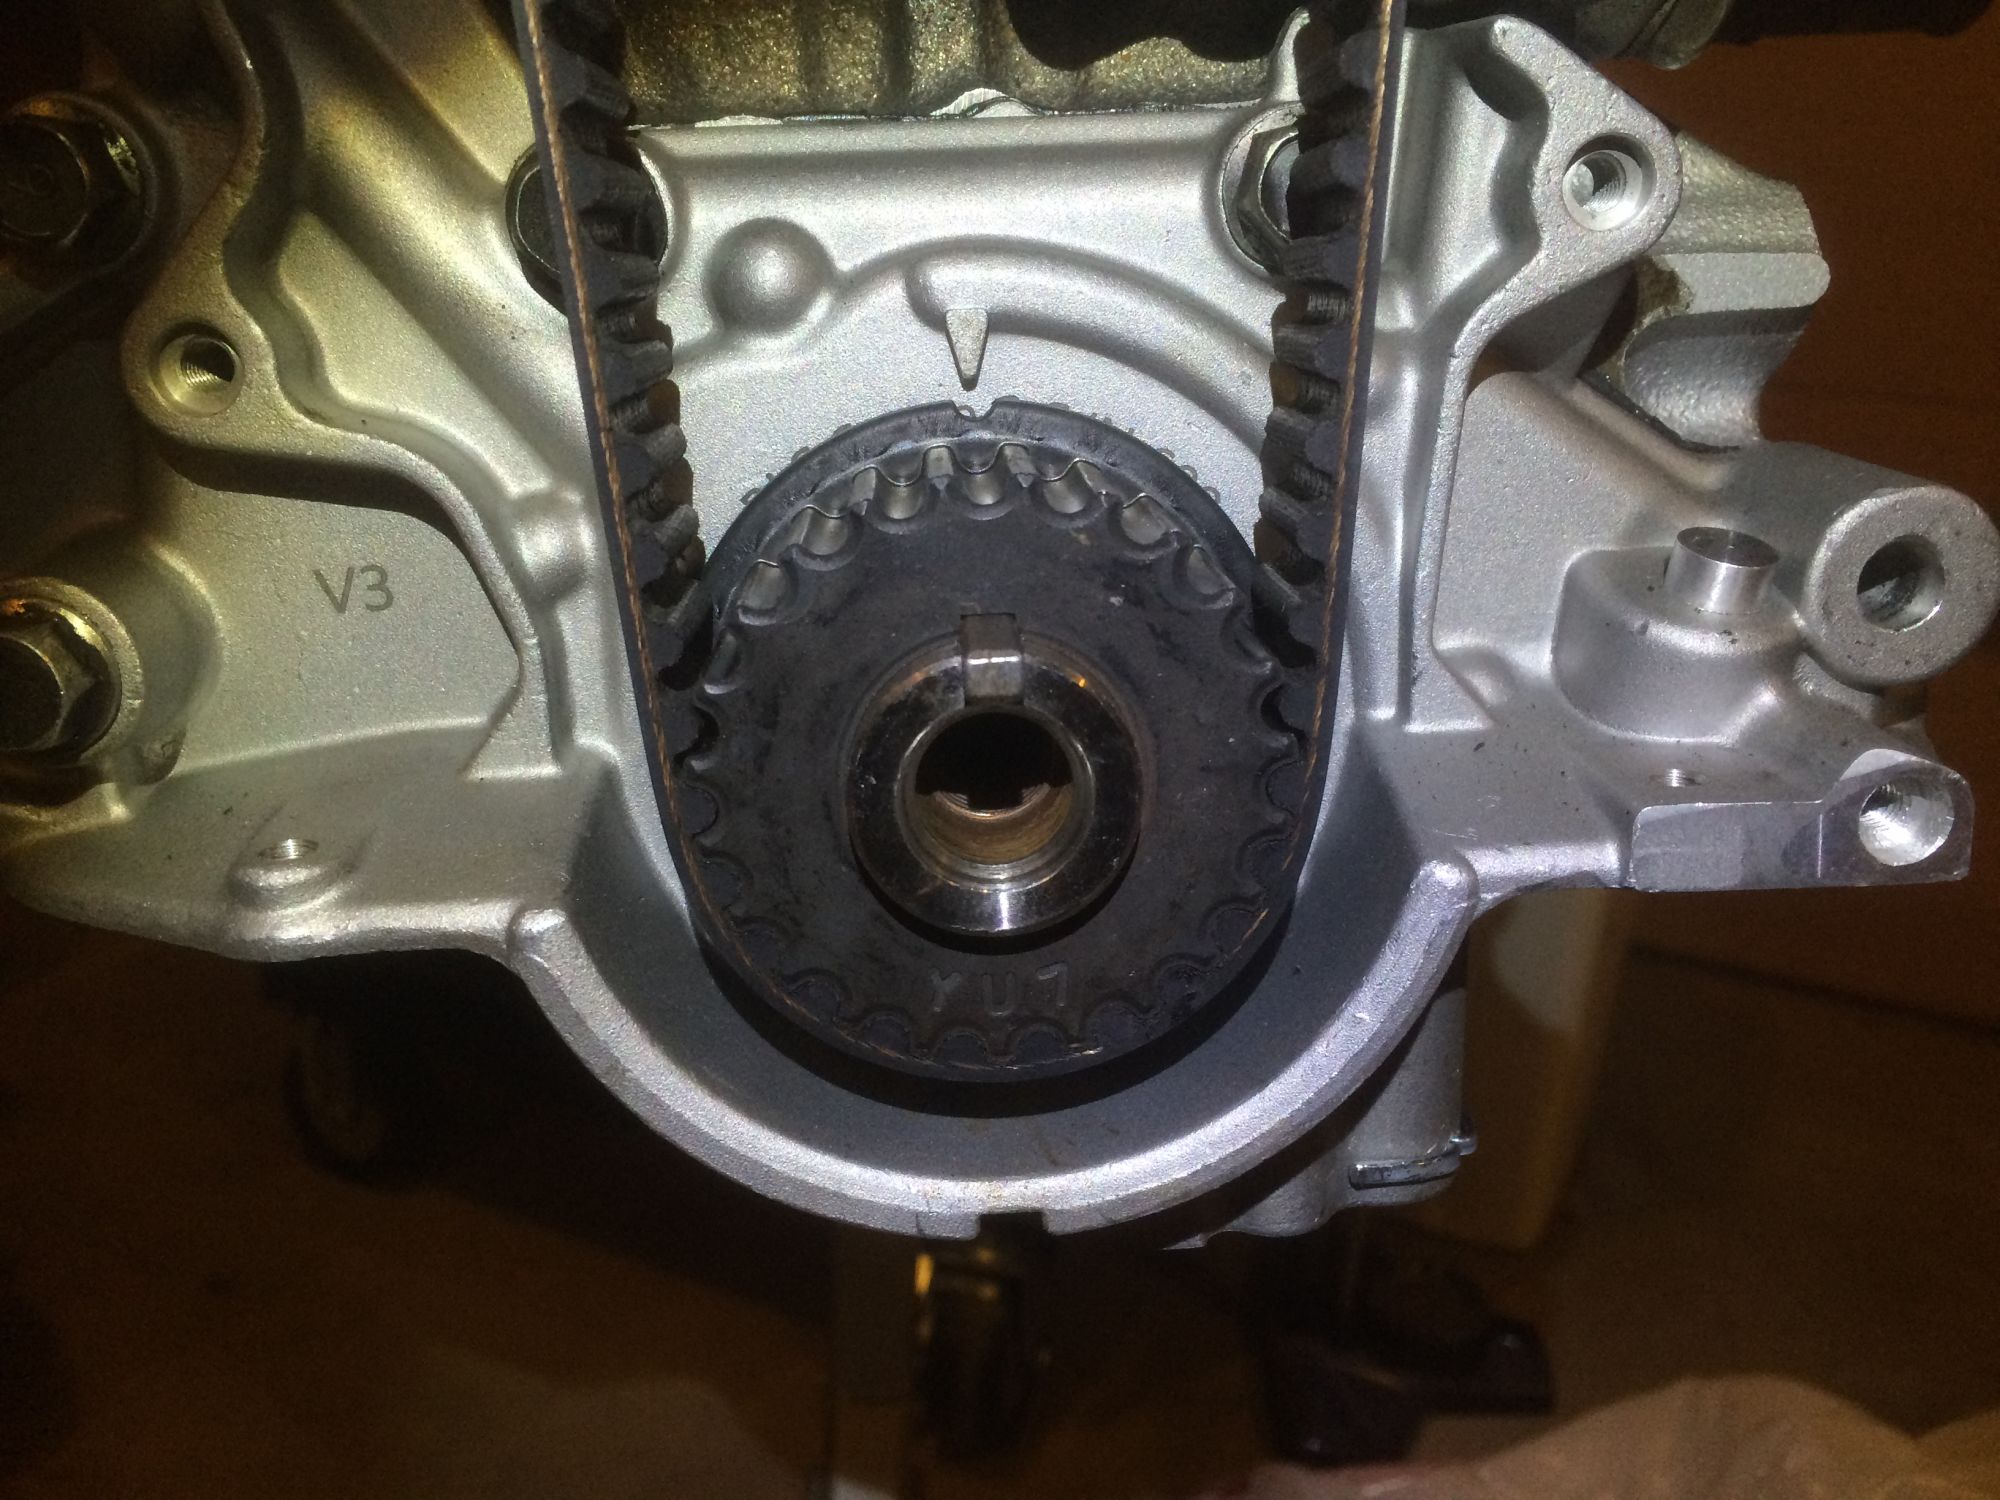
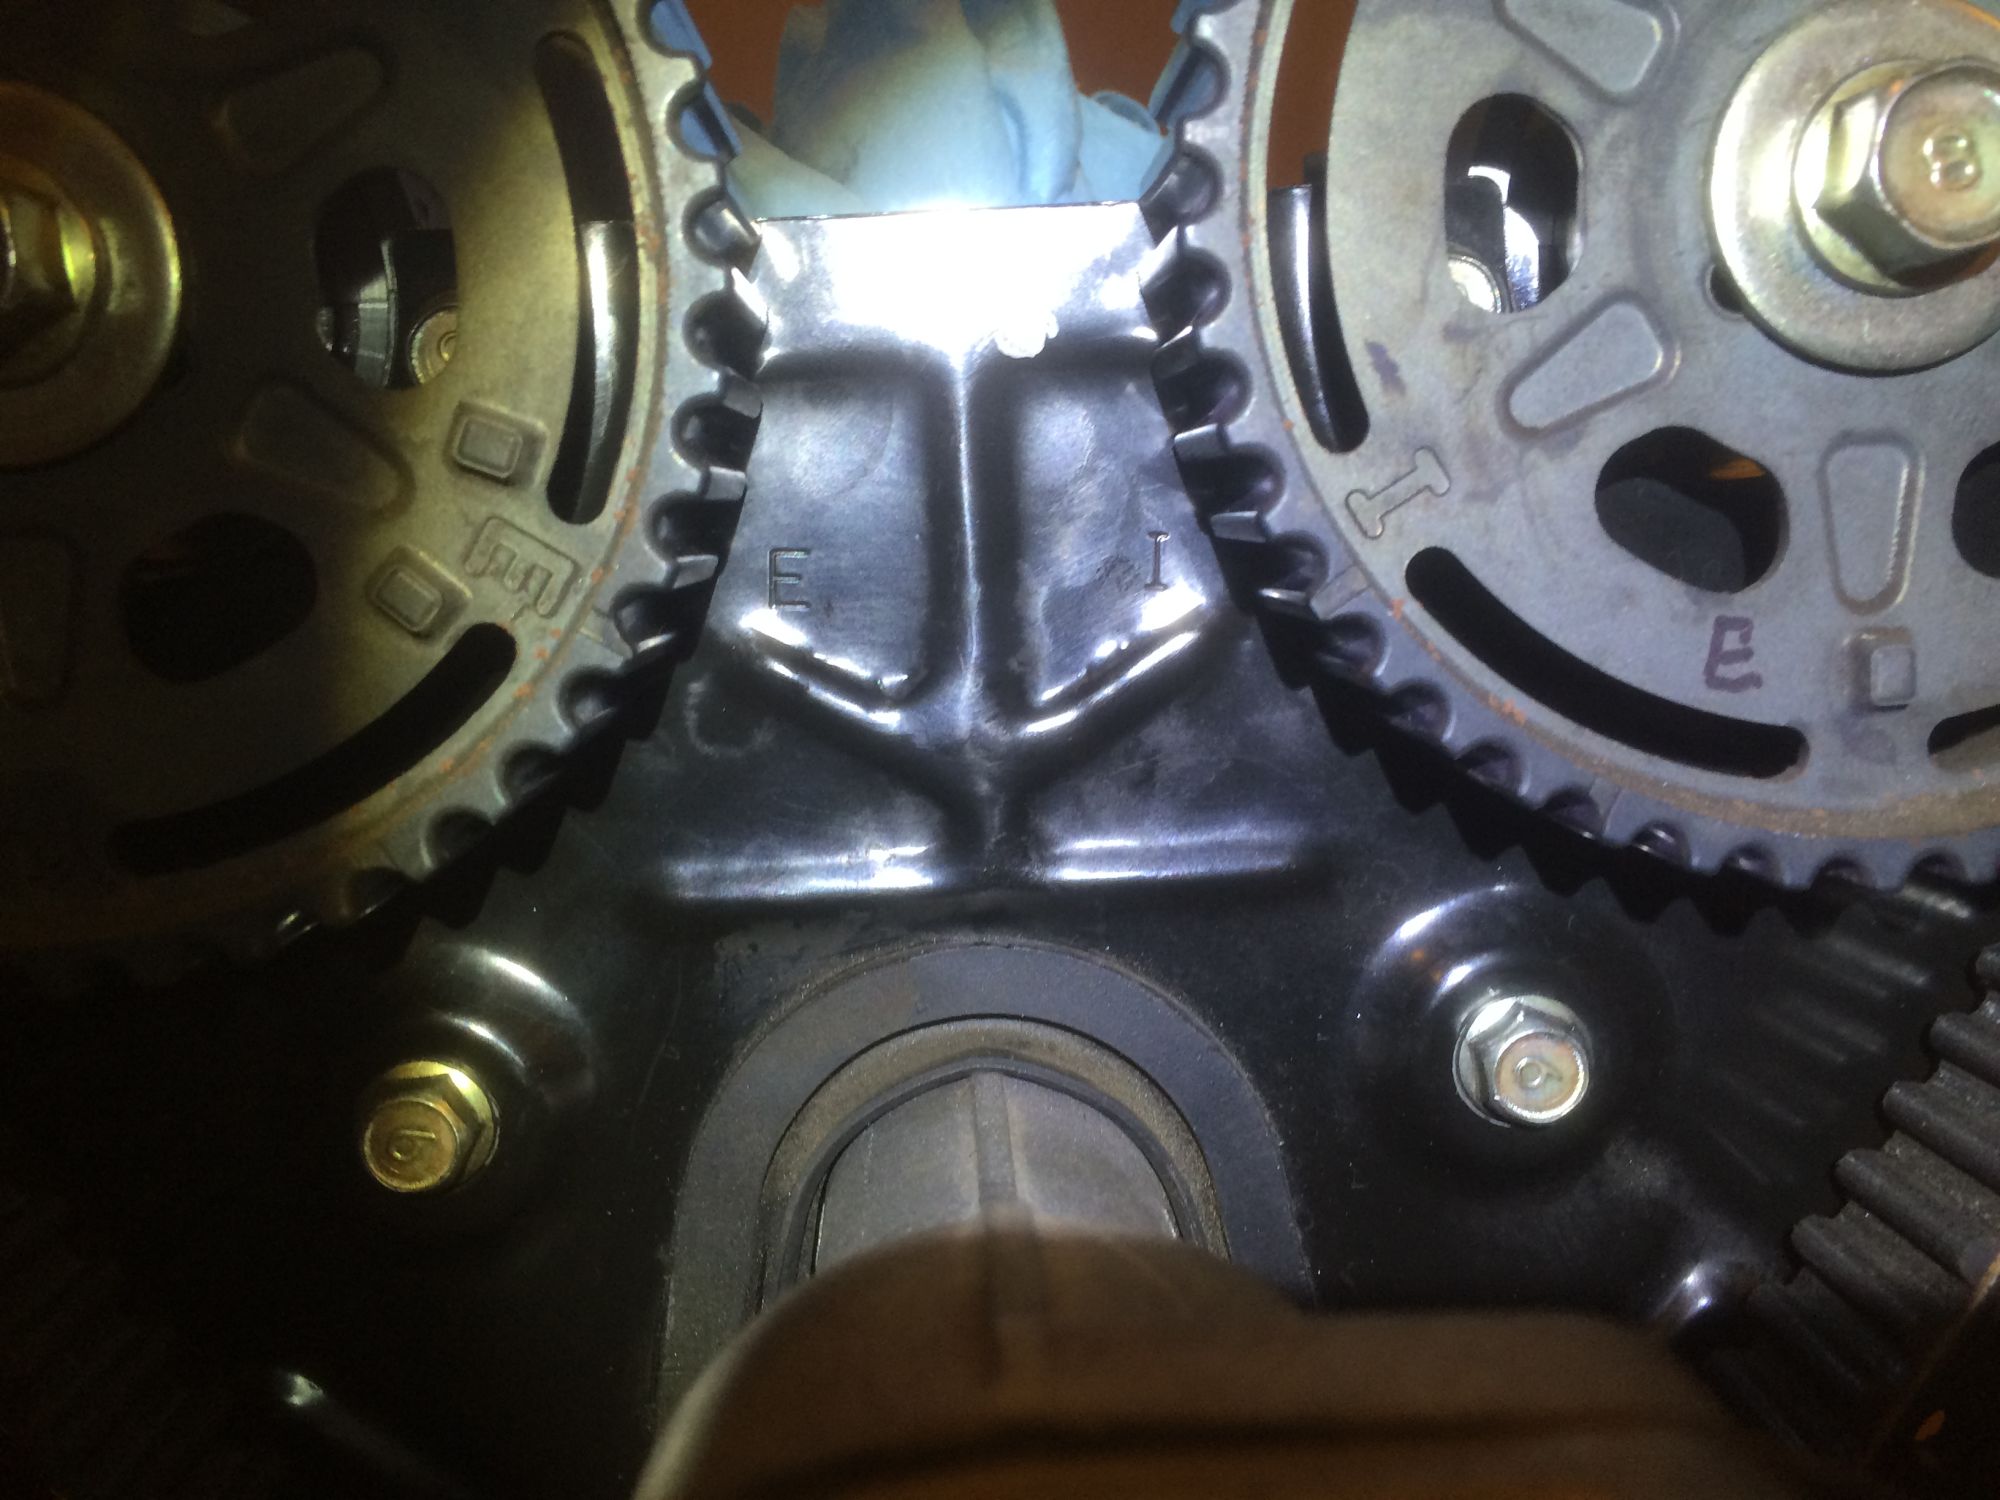
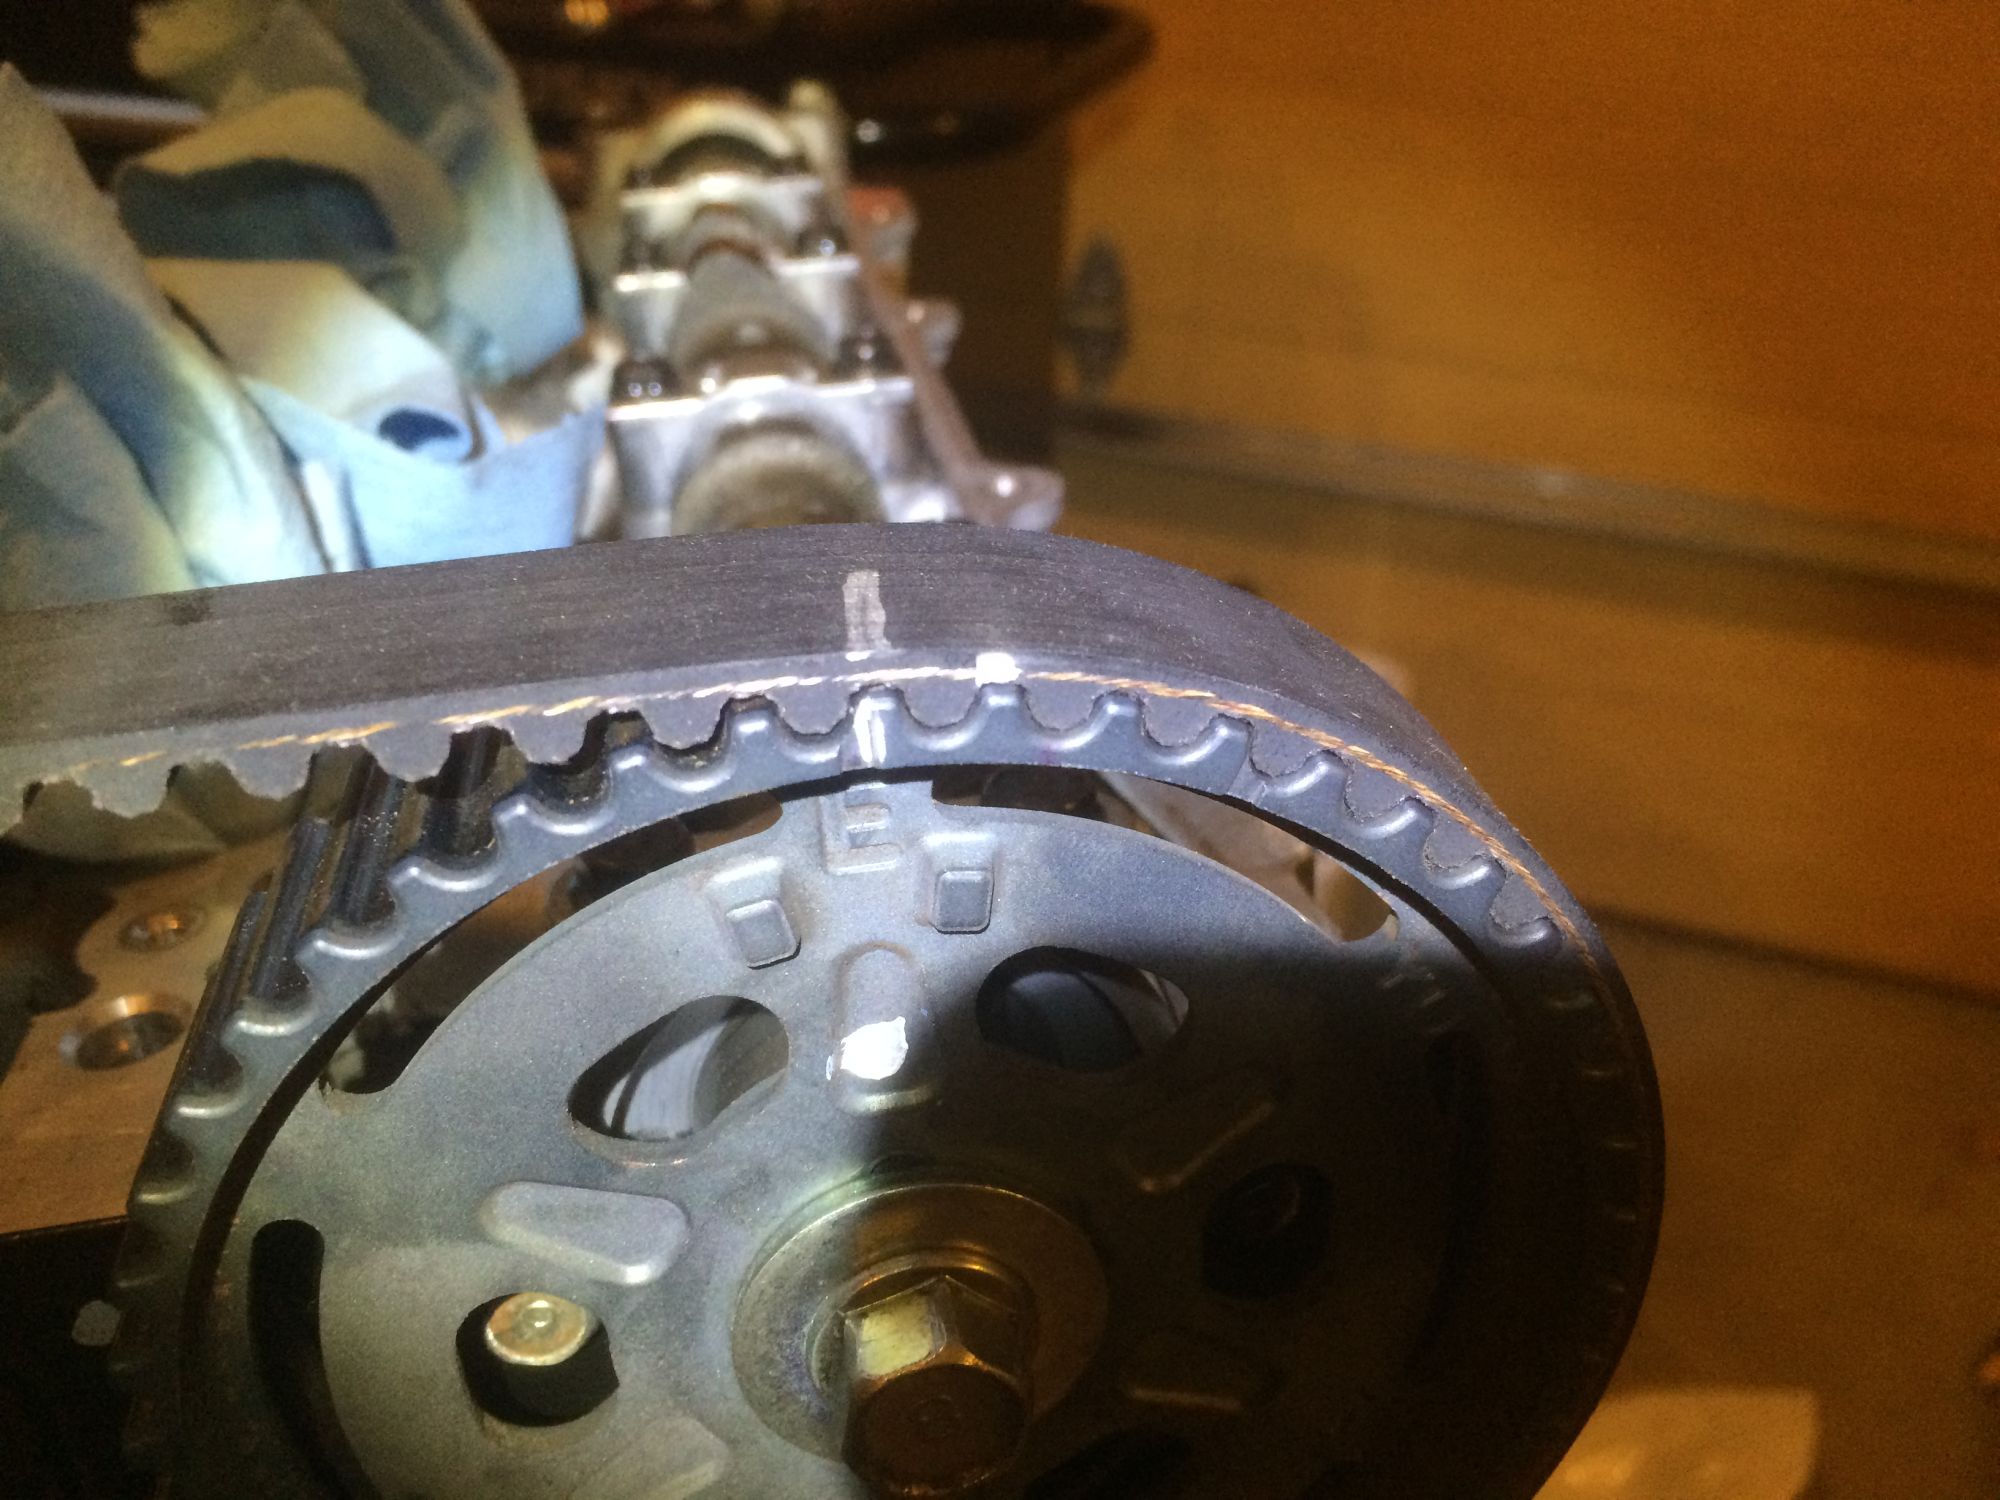
My missing O-ring showed up, allowing me to bolt up the thermostat housing. Now that I had that in place, I was able to move onto getting all my timing related bits together. Fortunately, I had done the timing belt several months back so 1) I still had a fresh belt to work with and 2) my marks on the belt were still very visible. There are great writeups all over the place for this so I won't go into too much detail. But here are some pictures anyways:
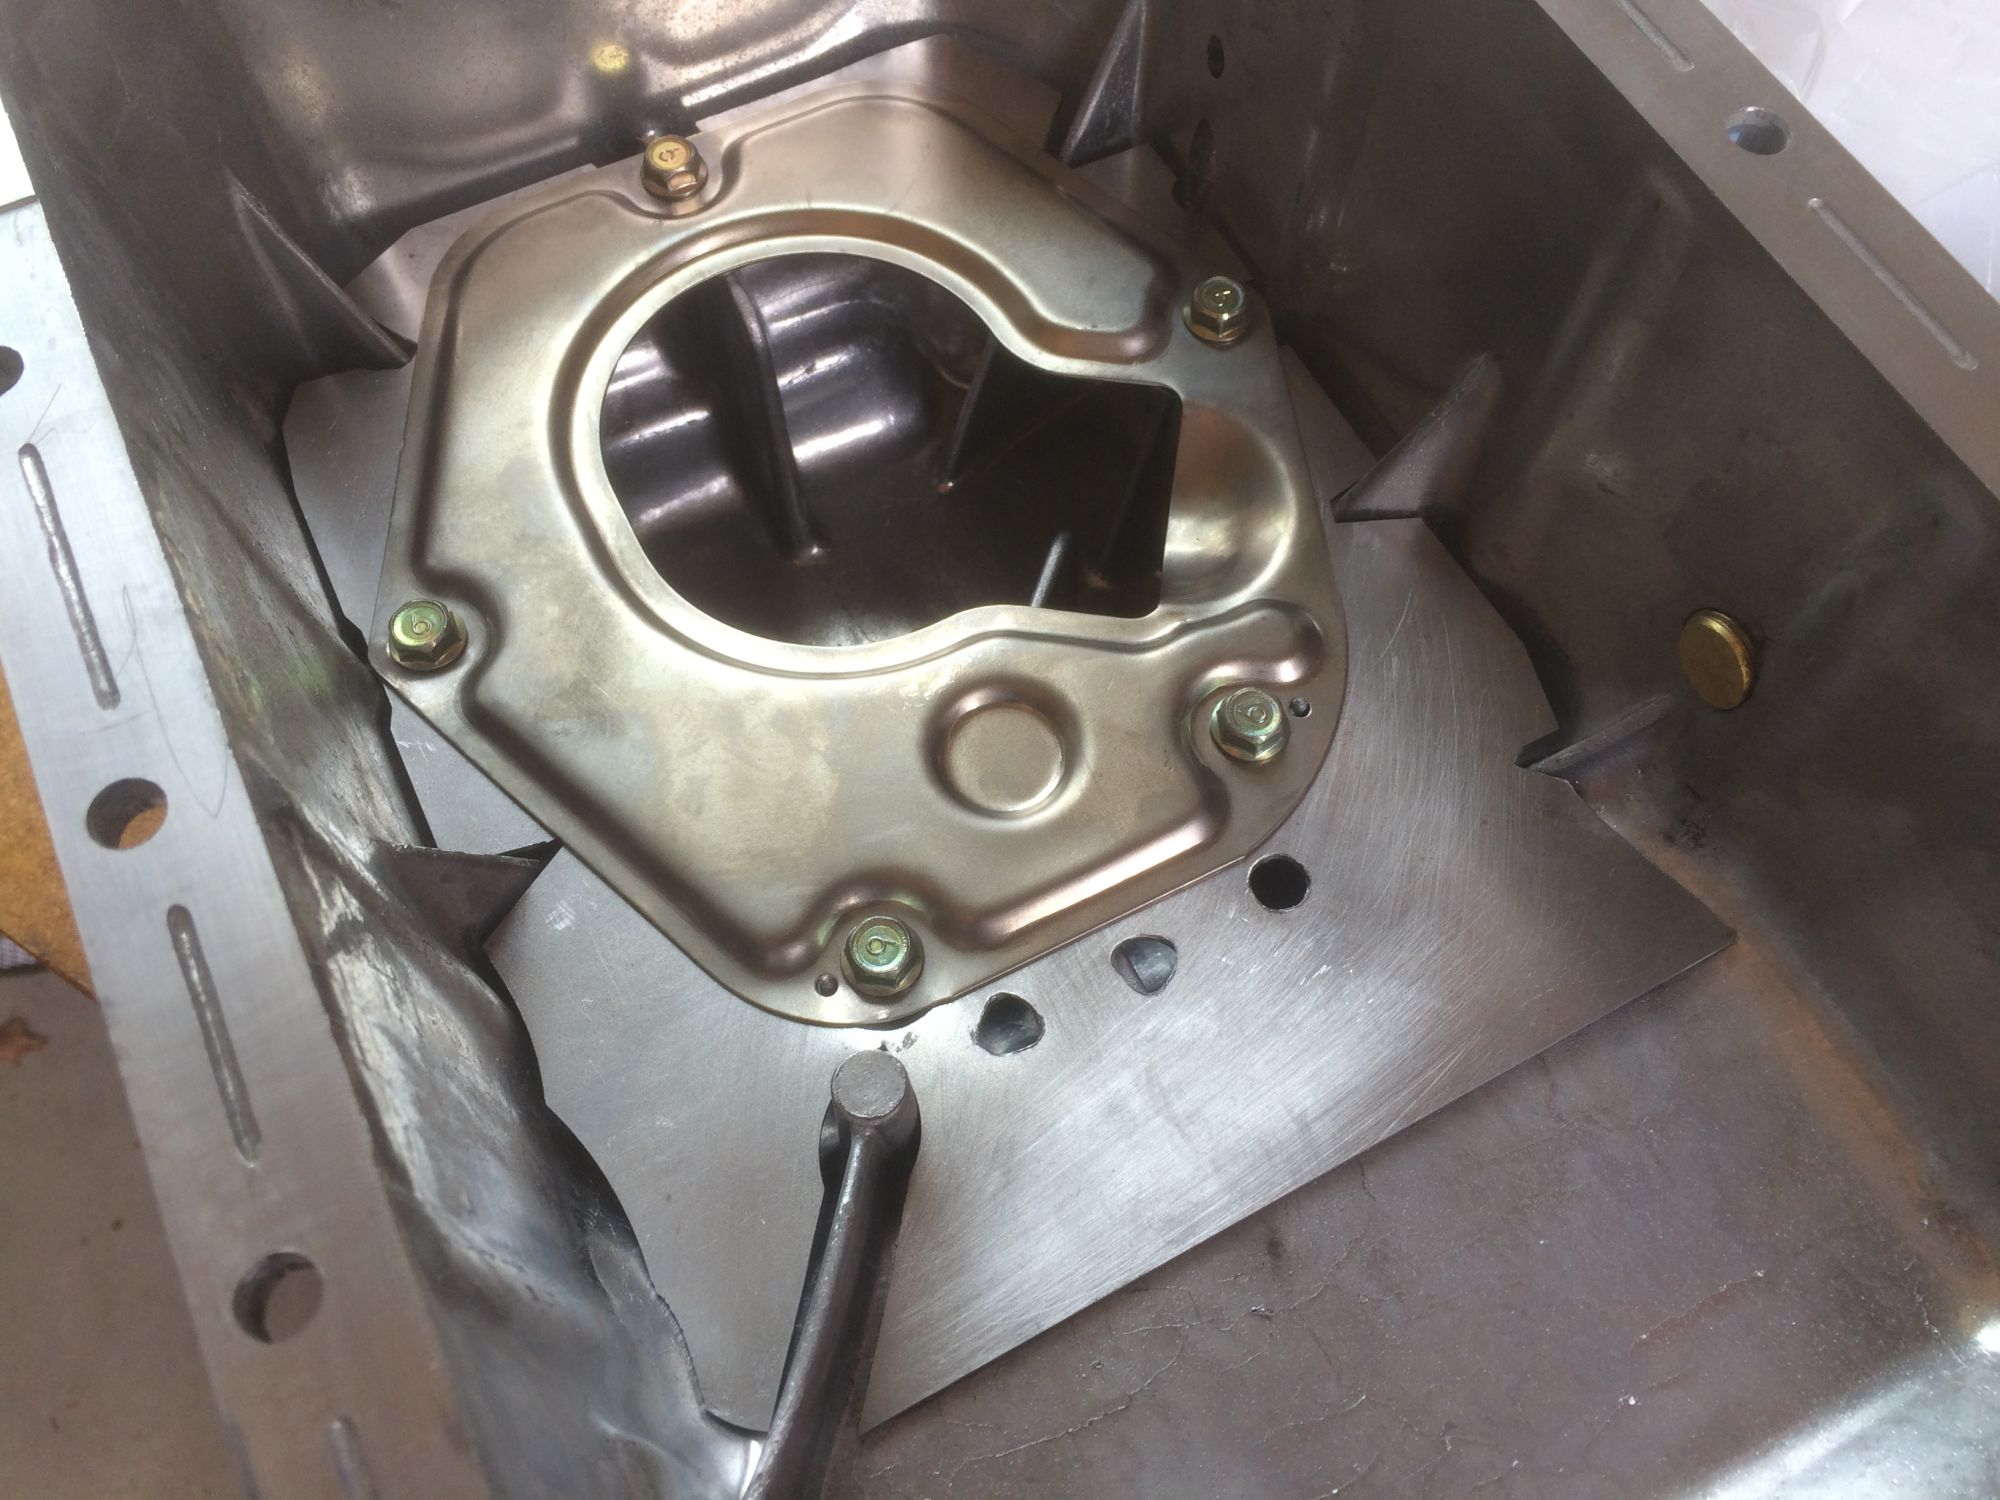
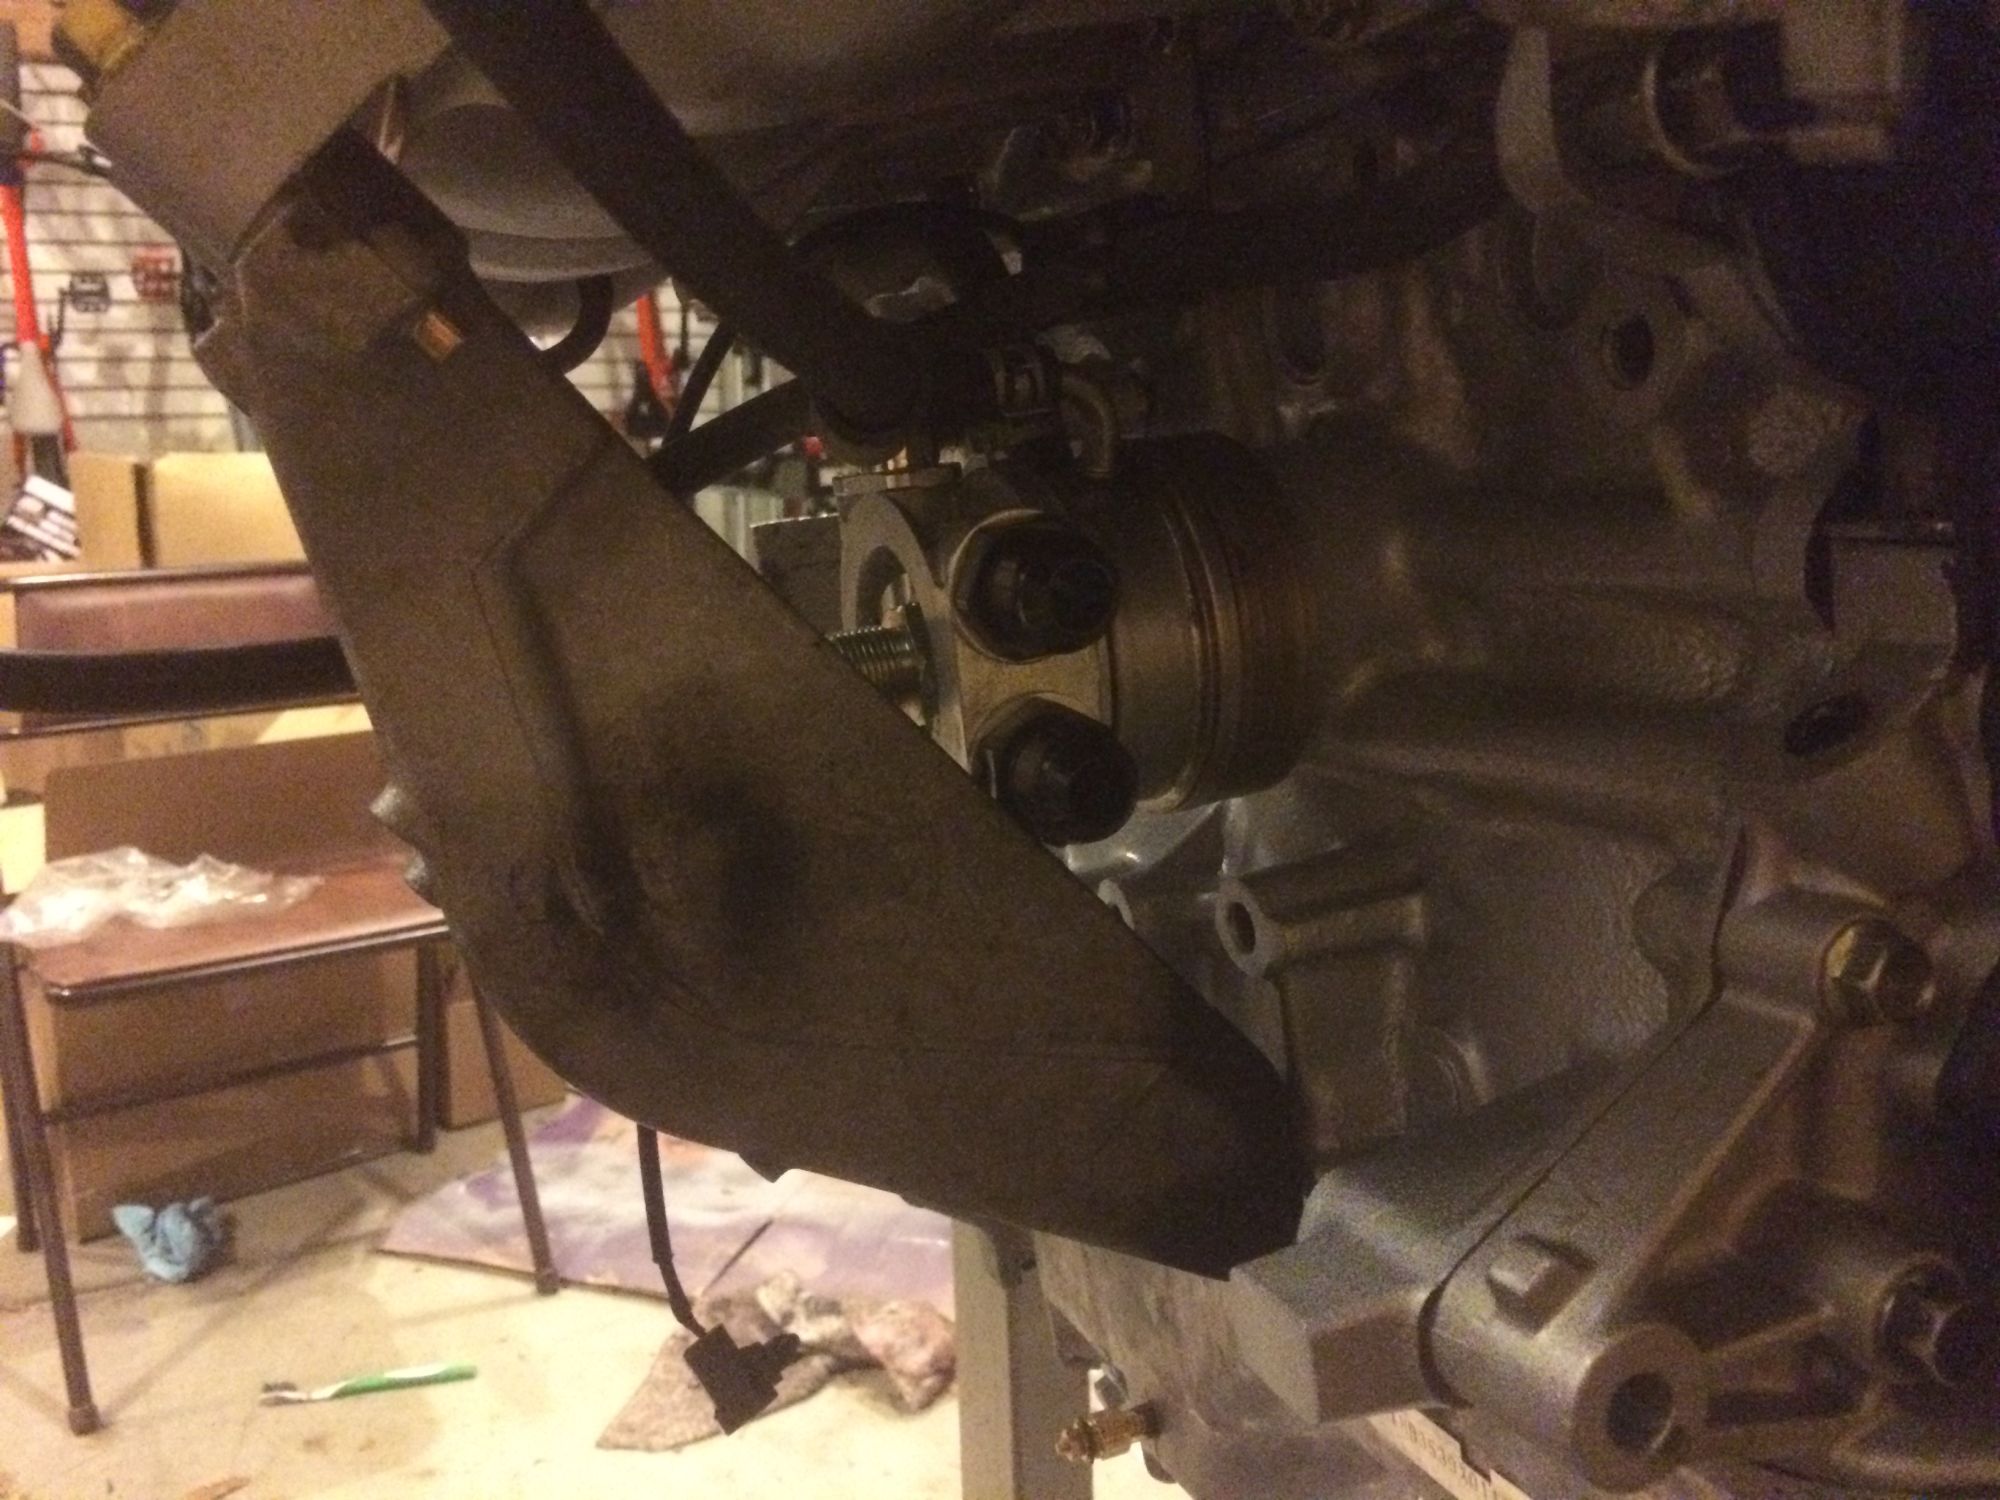
Next up was all my oil pan related stuff. I trimmed the 949 Racing baffle to fit and bolted it under the stock baffle. Due to a little concern about how the baffle might restrict oil flowing back into the bottom of the pan, I drilled three small holes. I should still get a lot of resistance to oil pushing forward in the pan under heavy braking as the baffle closes off a lot of the area where that would probably occur.
I know I've been talking about going Rotrex, but I drilled and tapped (and plugged) my pan anyways to make my life easy if I end up with a TRUBO PSHHHHHHH.
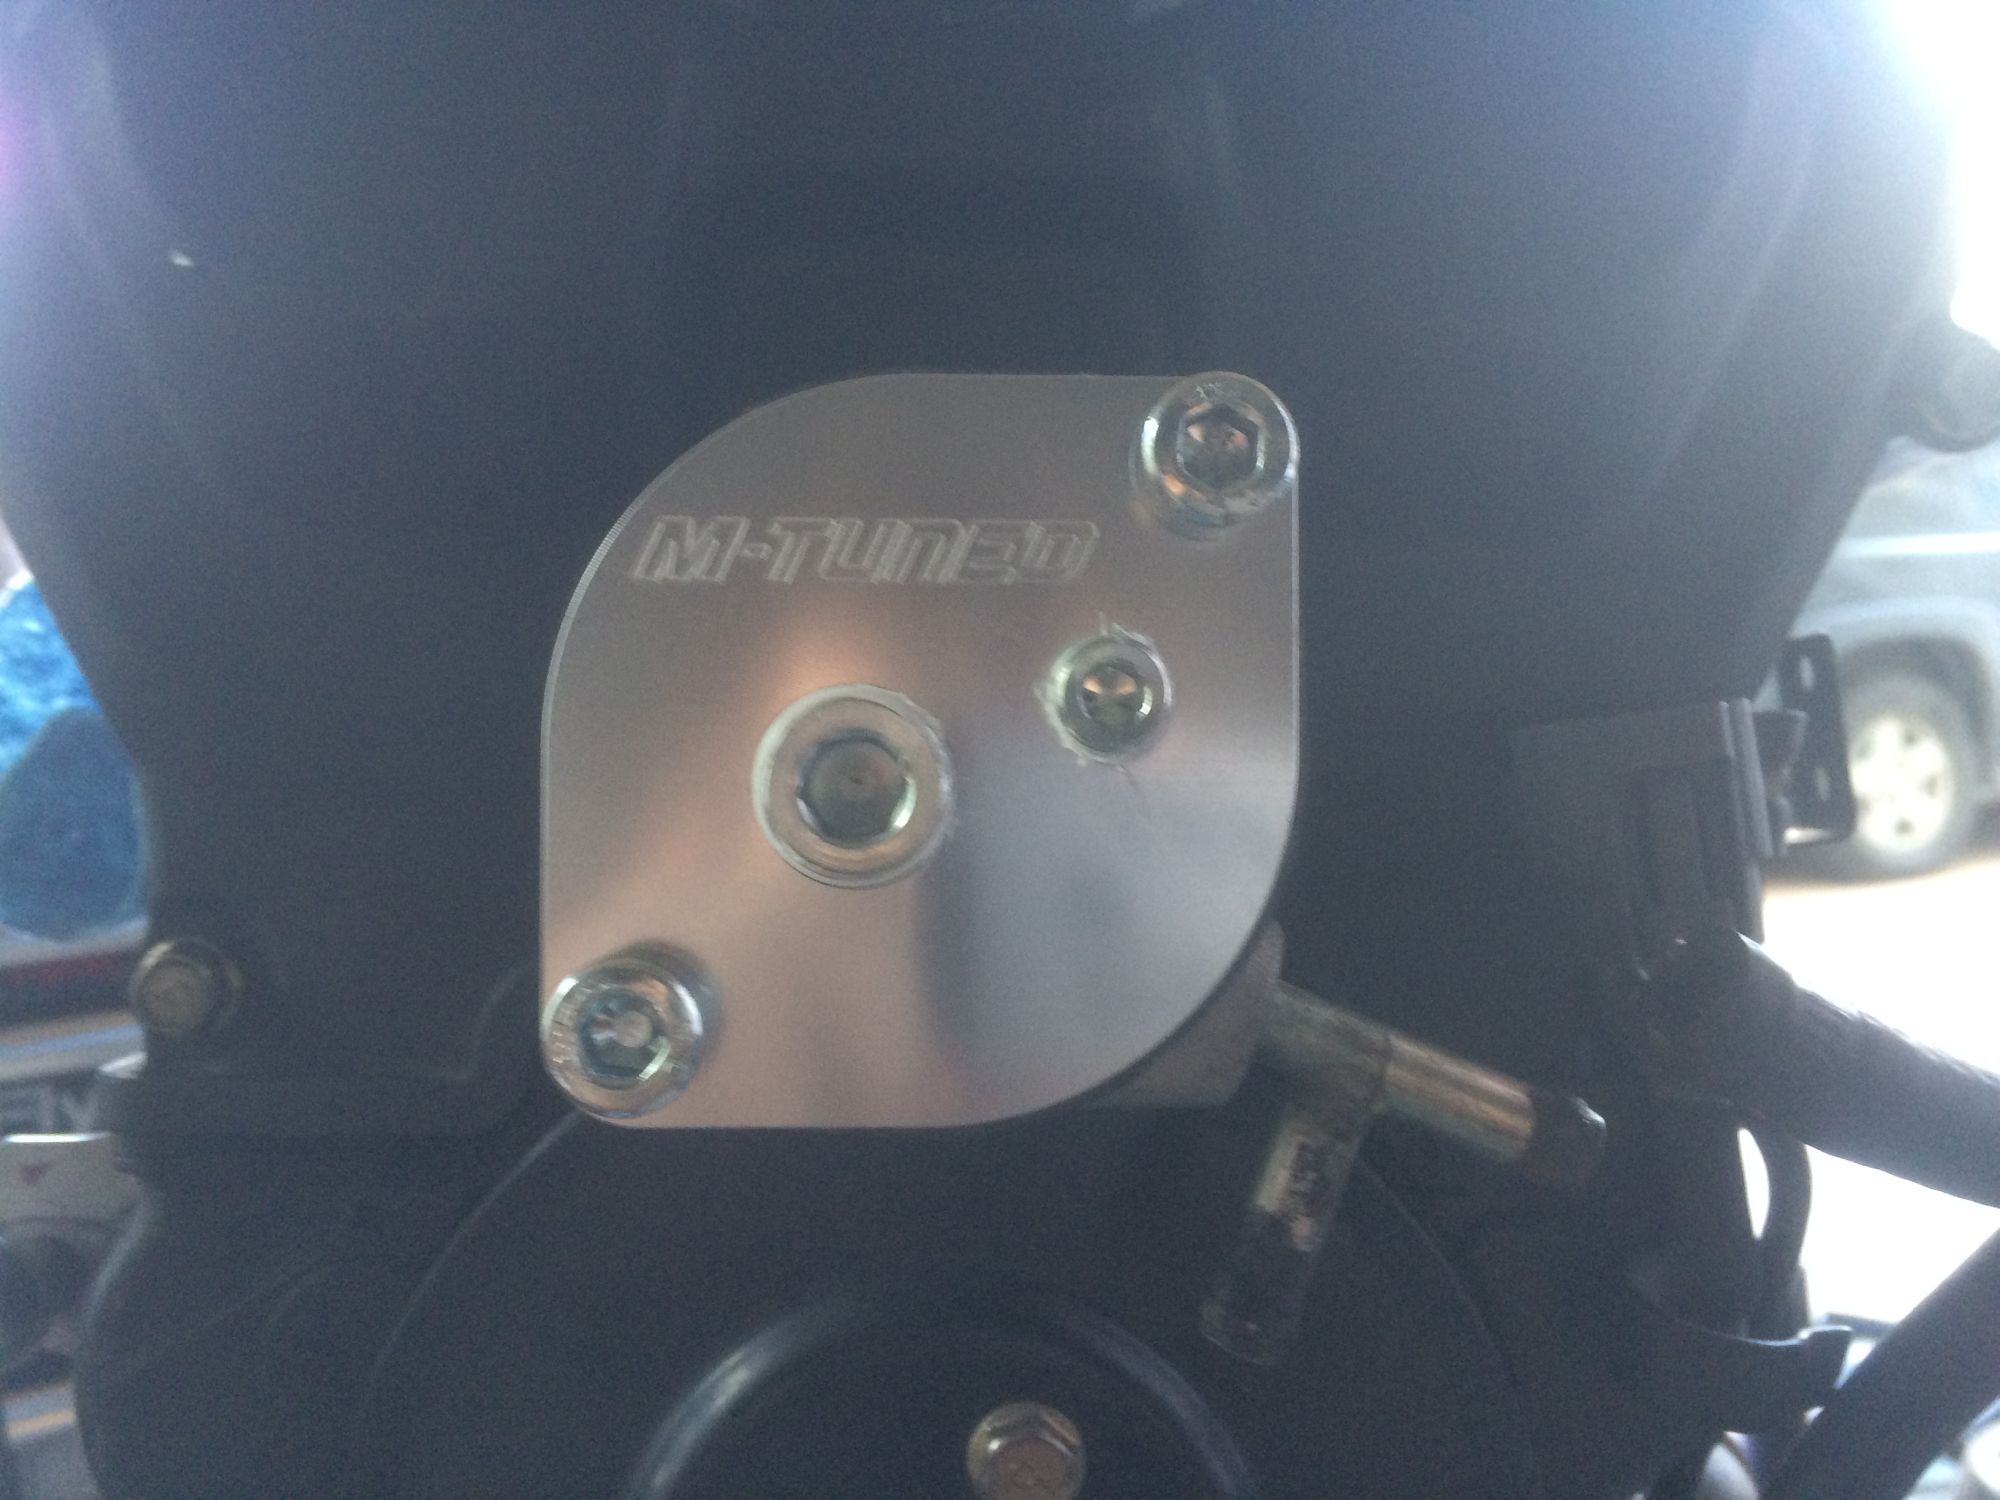
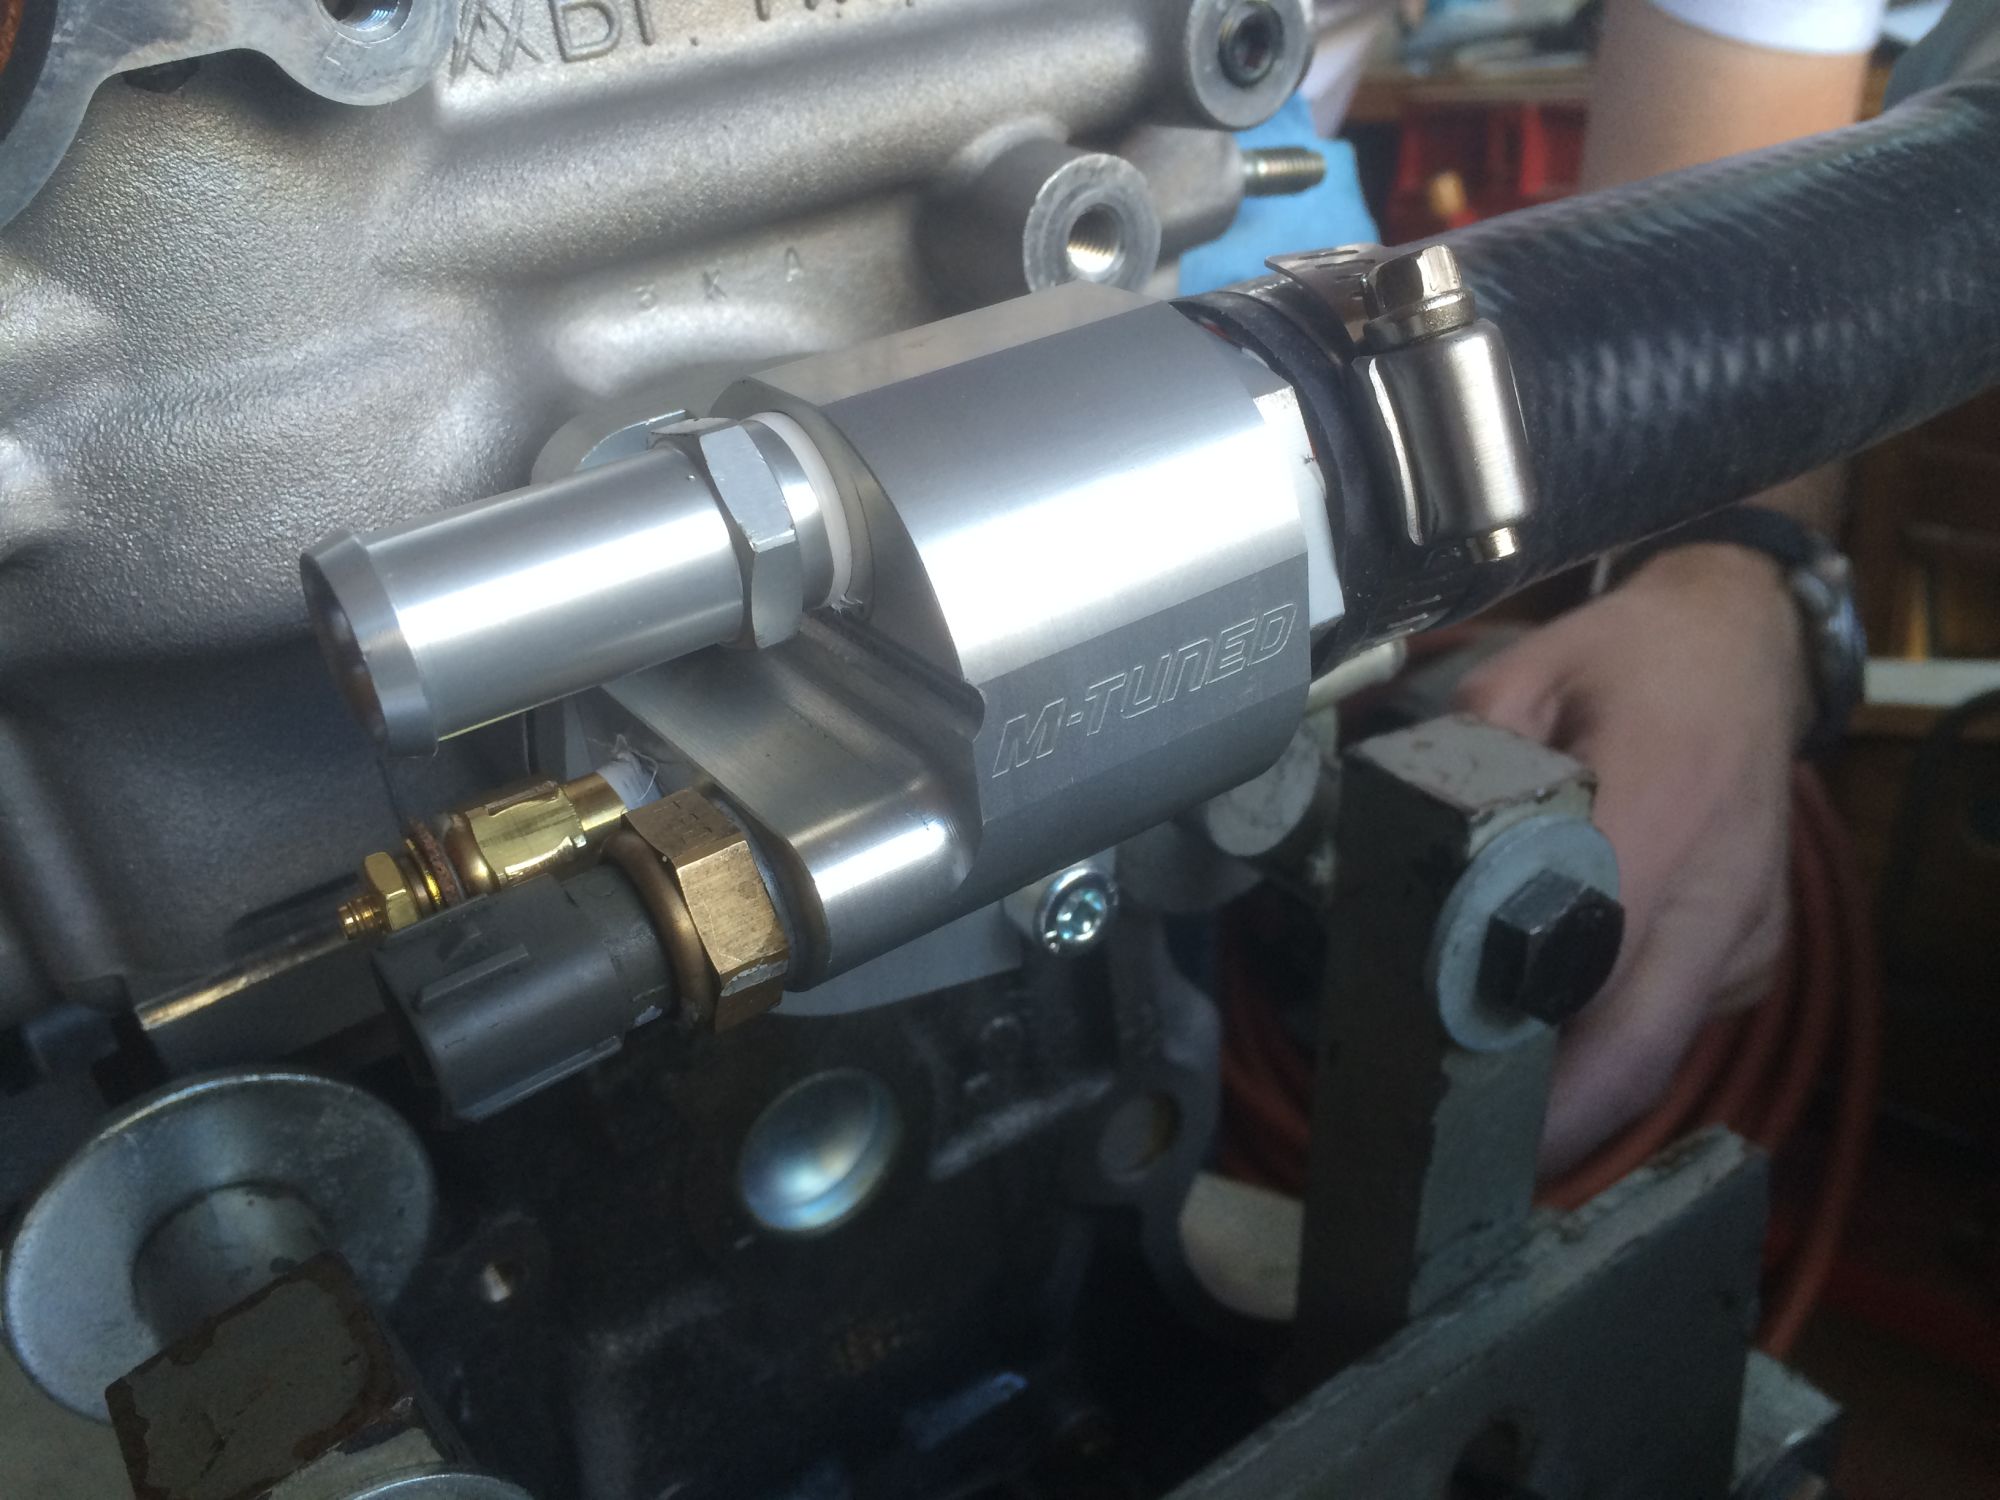
Then I started bolting up the coolant reroute bits. The M-Tuned stuff looks seriously pimp on this motor, +5 style points. There's got to be a horsepower equivalent for that.
And proper cooling of the rear of the engine is a cool perk, too.
I also installed the trigger wheel sensor, leaving about 1mm of gap between it and the teeth.
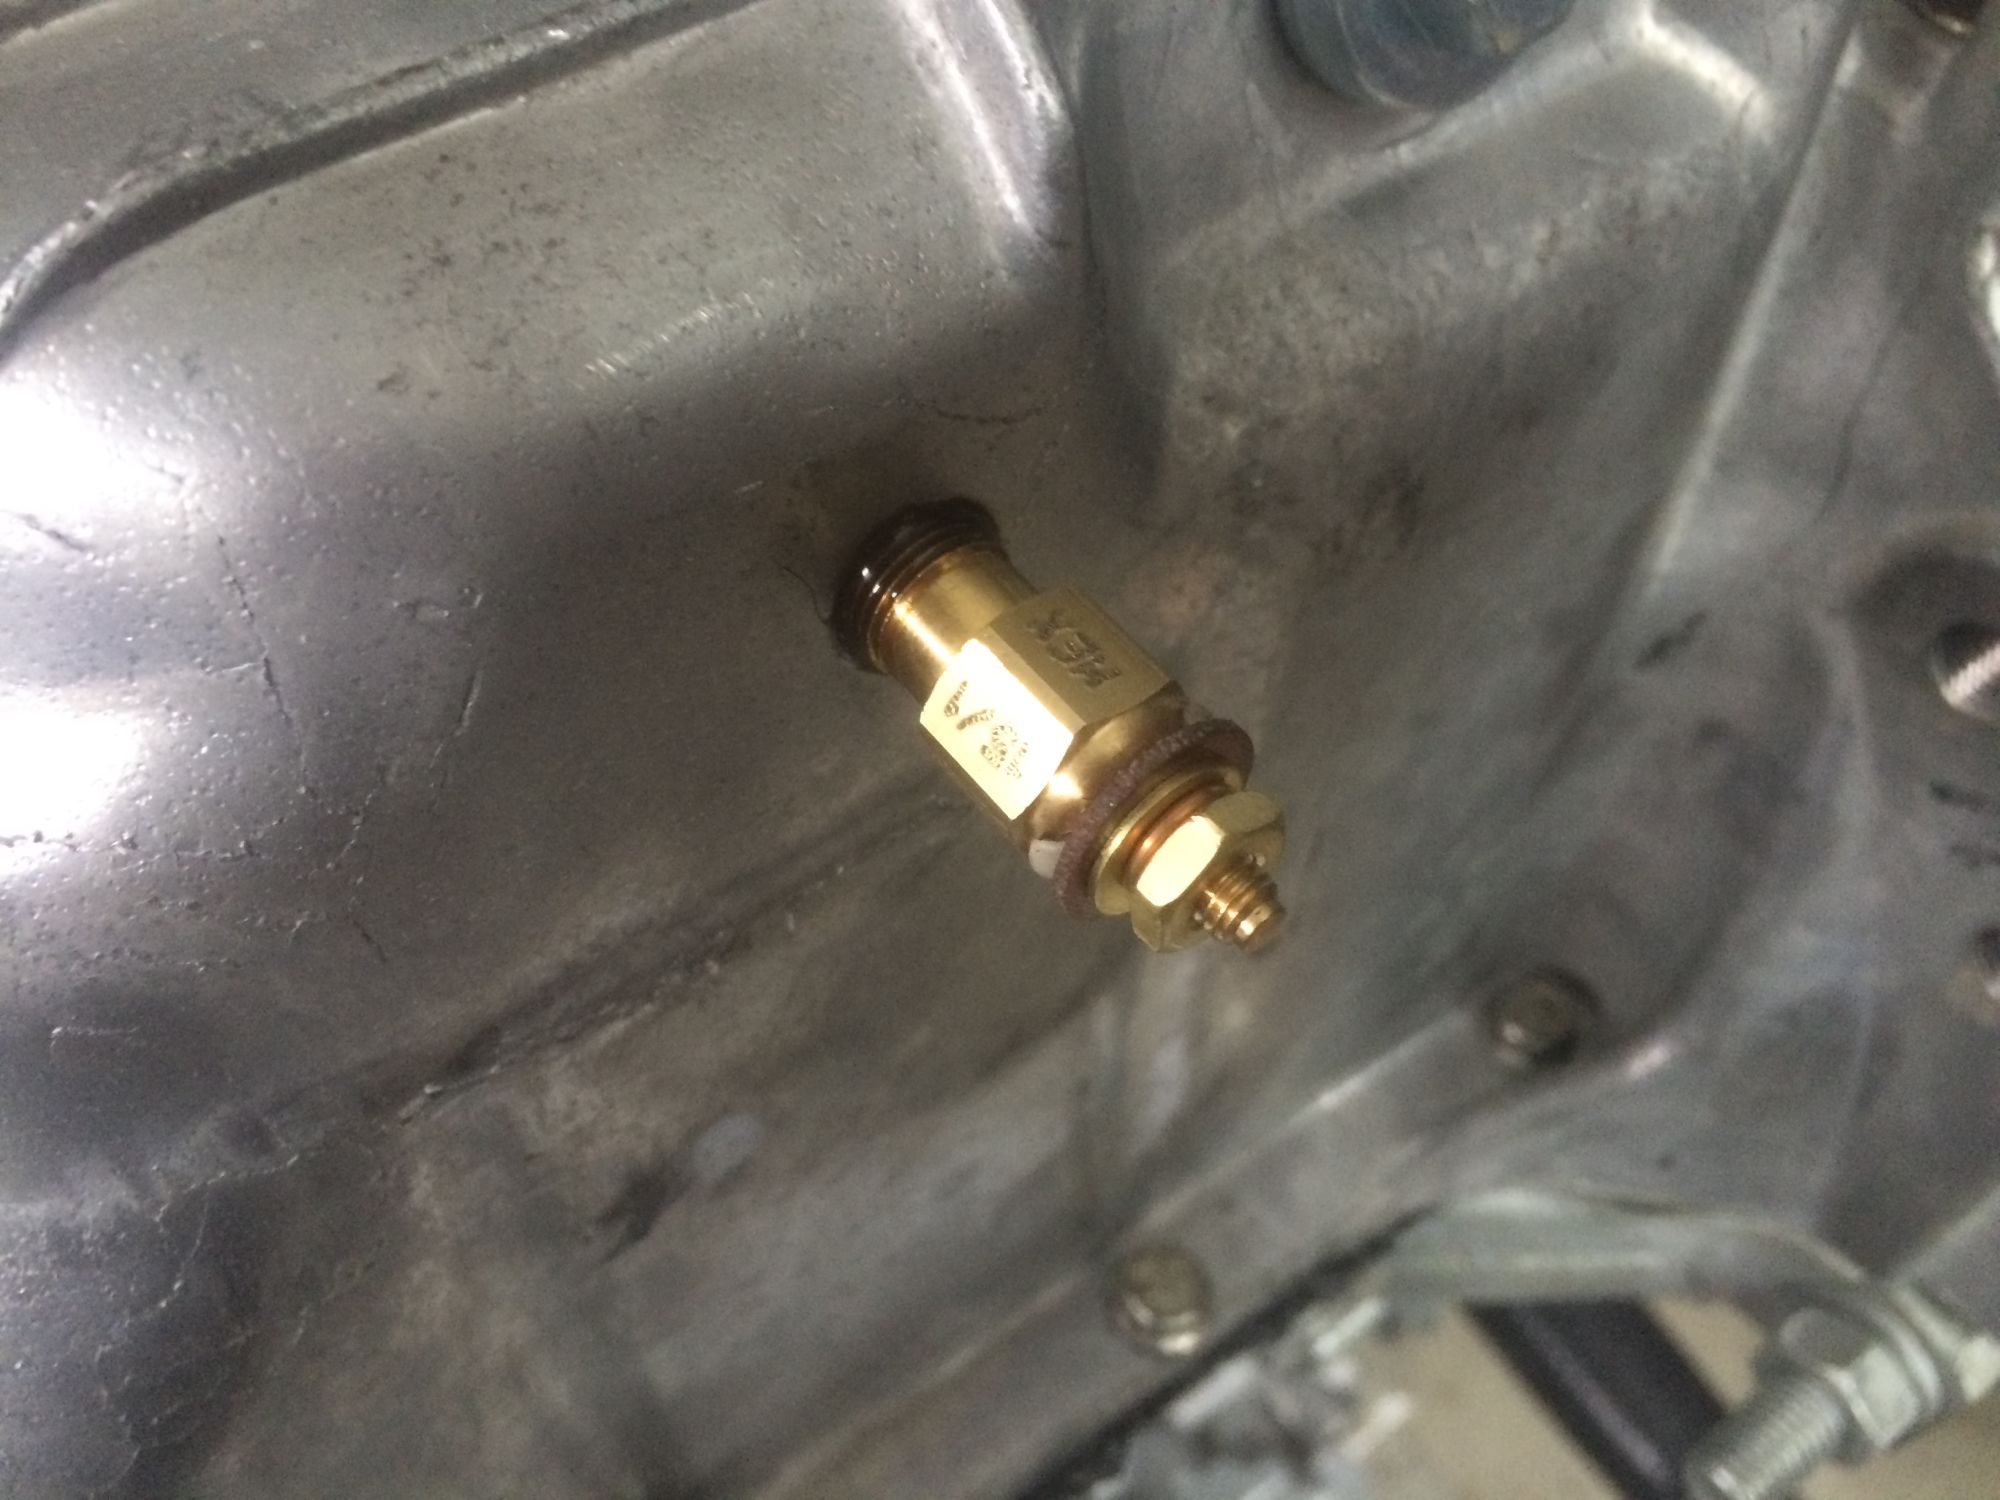
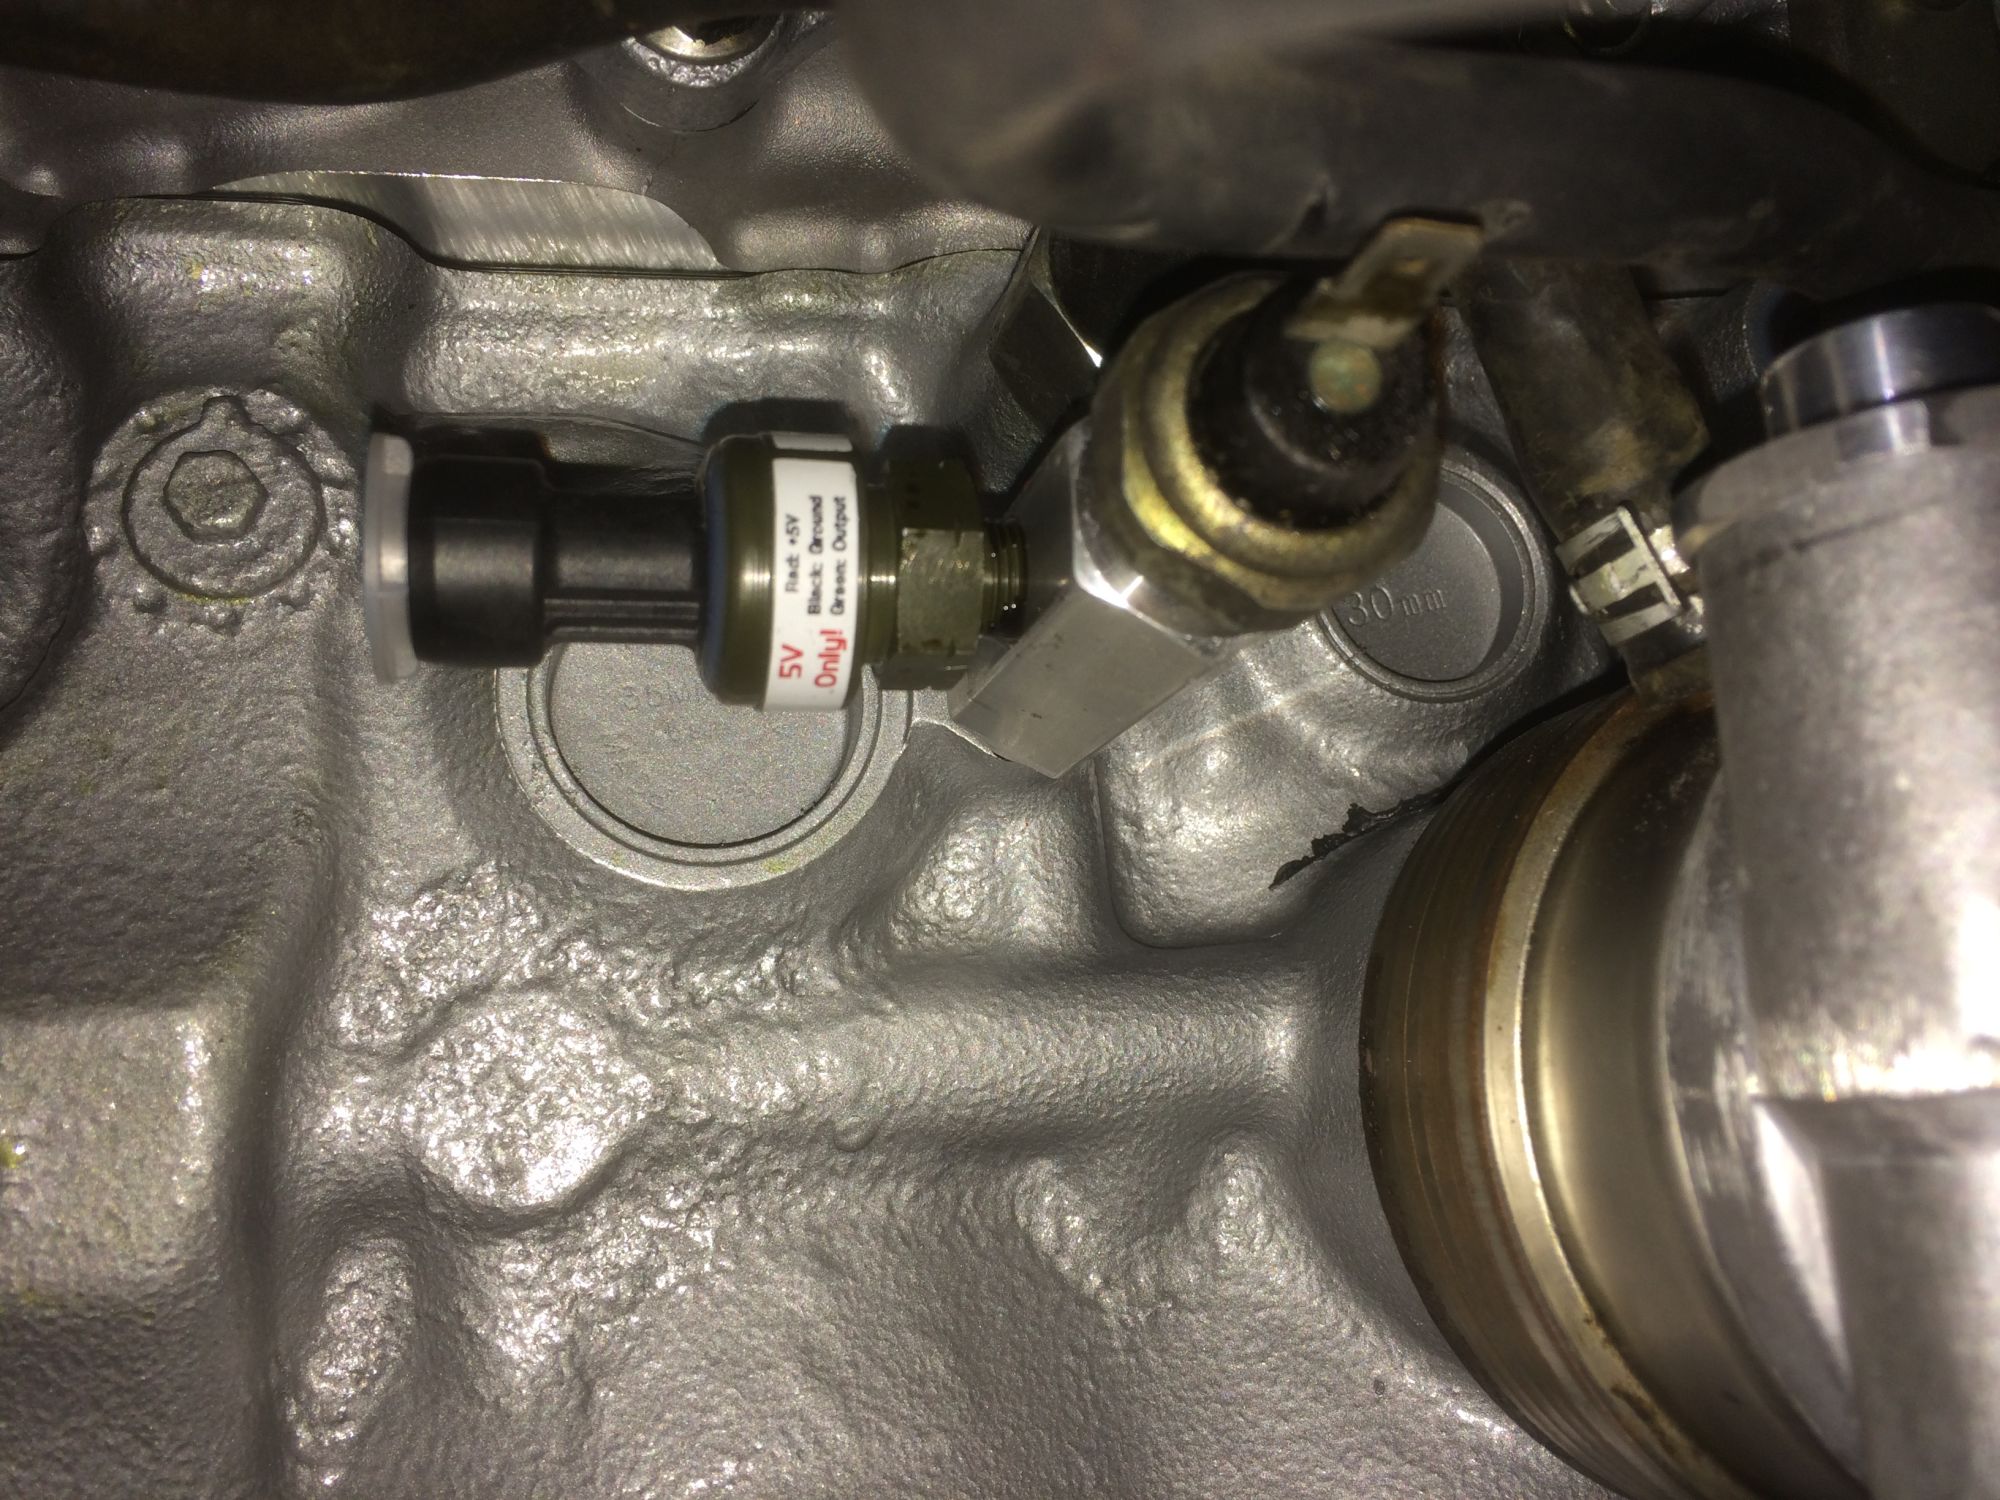
Then I started thinking about where to stick the sensors for my gauges. The rear fitting for the coolant reroute gives me a sweet spot to read water temp off of, but my oil temp and pressure sensors required a bit more thought. I decided to tee the pressure sensor off of the stock oil pressure fitting. I found this <https://www.pegasusautoracing.com/productdetails.asp?RecID=11217> sweet stainless piece with the required 1/8 male BSP fitting and two female fittings... a 1/8 BSP and a 1/8 NPT. Two oil pressure sensors, because more is always better (or something like that).
Now I have to figure out where to run my temp sensor. A lot of people go with the oil pan placement, which seems to be alright, but I don't want to pull and tap my oil pan again. And I don't want to run the risks of the drain plug adapter. I'm thinking of a few options... I could get a 10an fitting so I can run the sensor anywhere inline off of the hose that came with my oil cooler, I could get a remote filter and run it off of that, or....????? Still debating this one. I've got a 1/8 NPT tap at my disposal, so drilling holes in other **** is always an option.
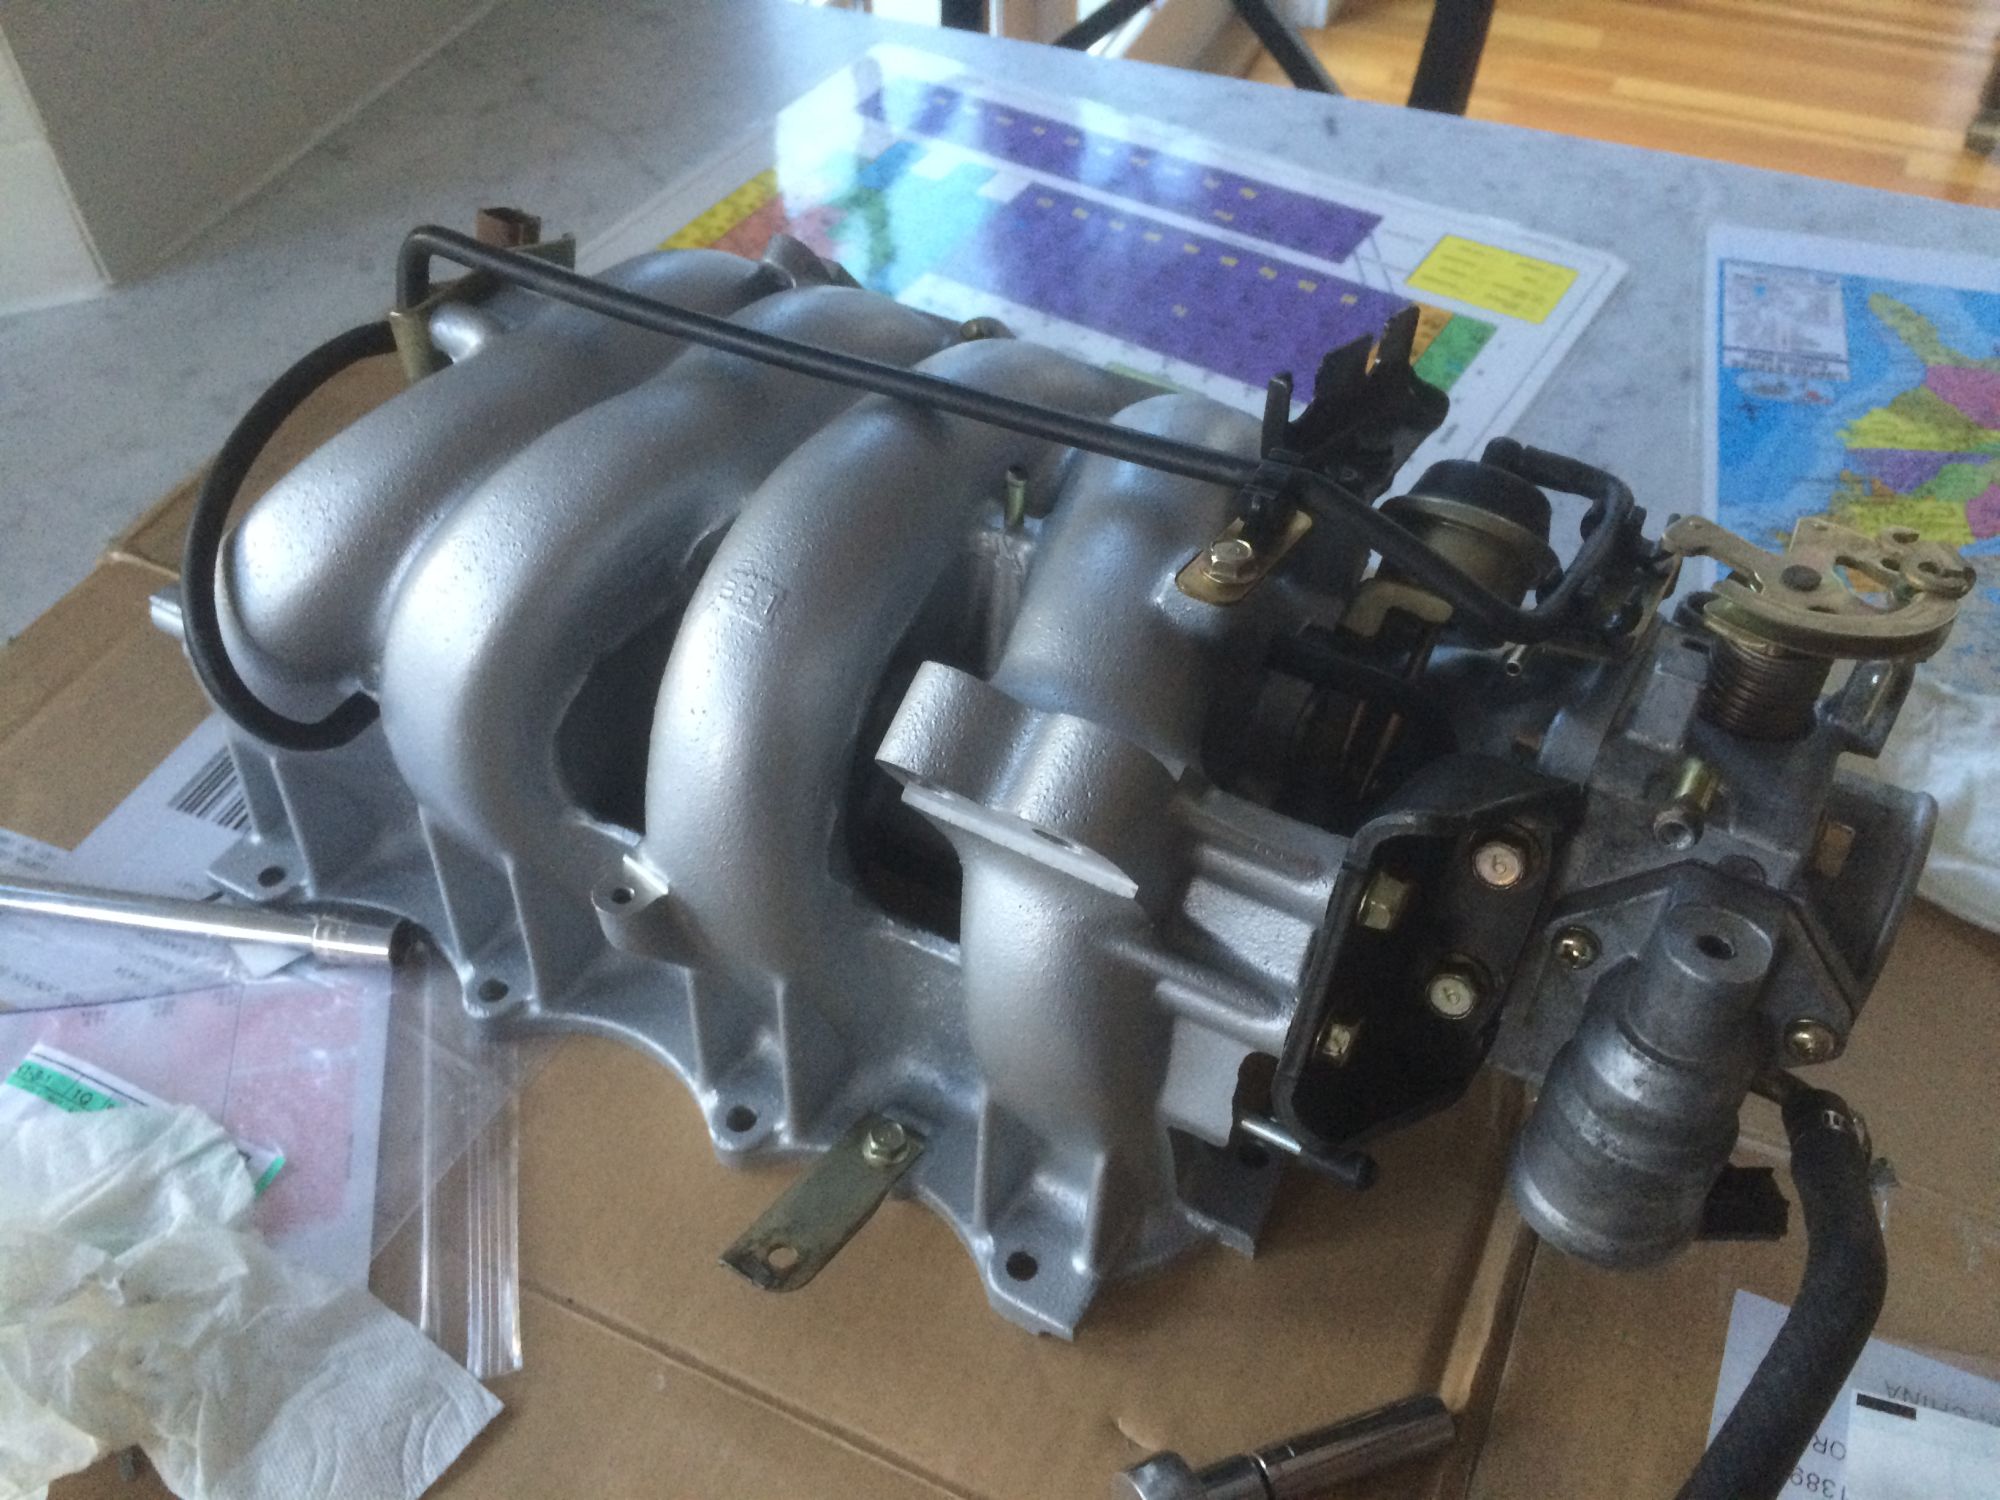
Oh, and I bolted up my intake manifold. Looks pretty sexy with the paint job, IMO.
I also pulled my injectors off and gave them a gasoline and toothbrush cleaning. Will that do anything to help their performance? Probably not. But do they look better now? They certainly do.
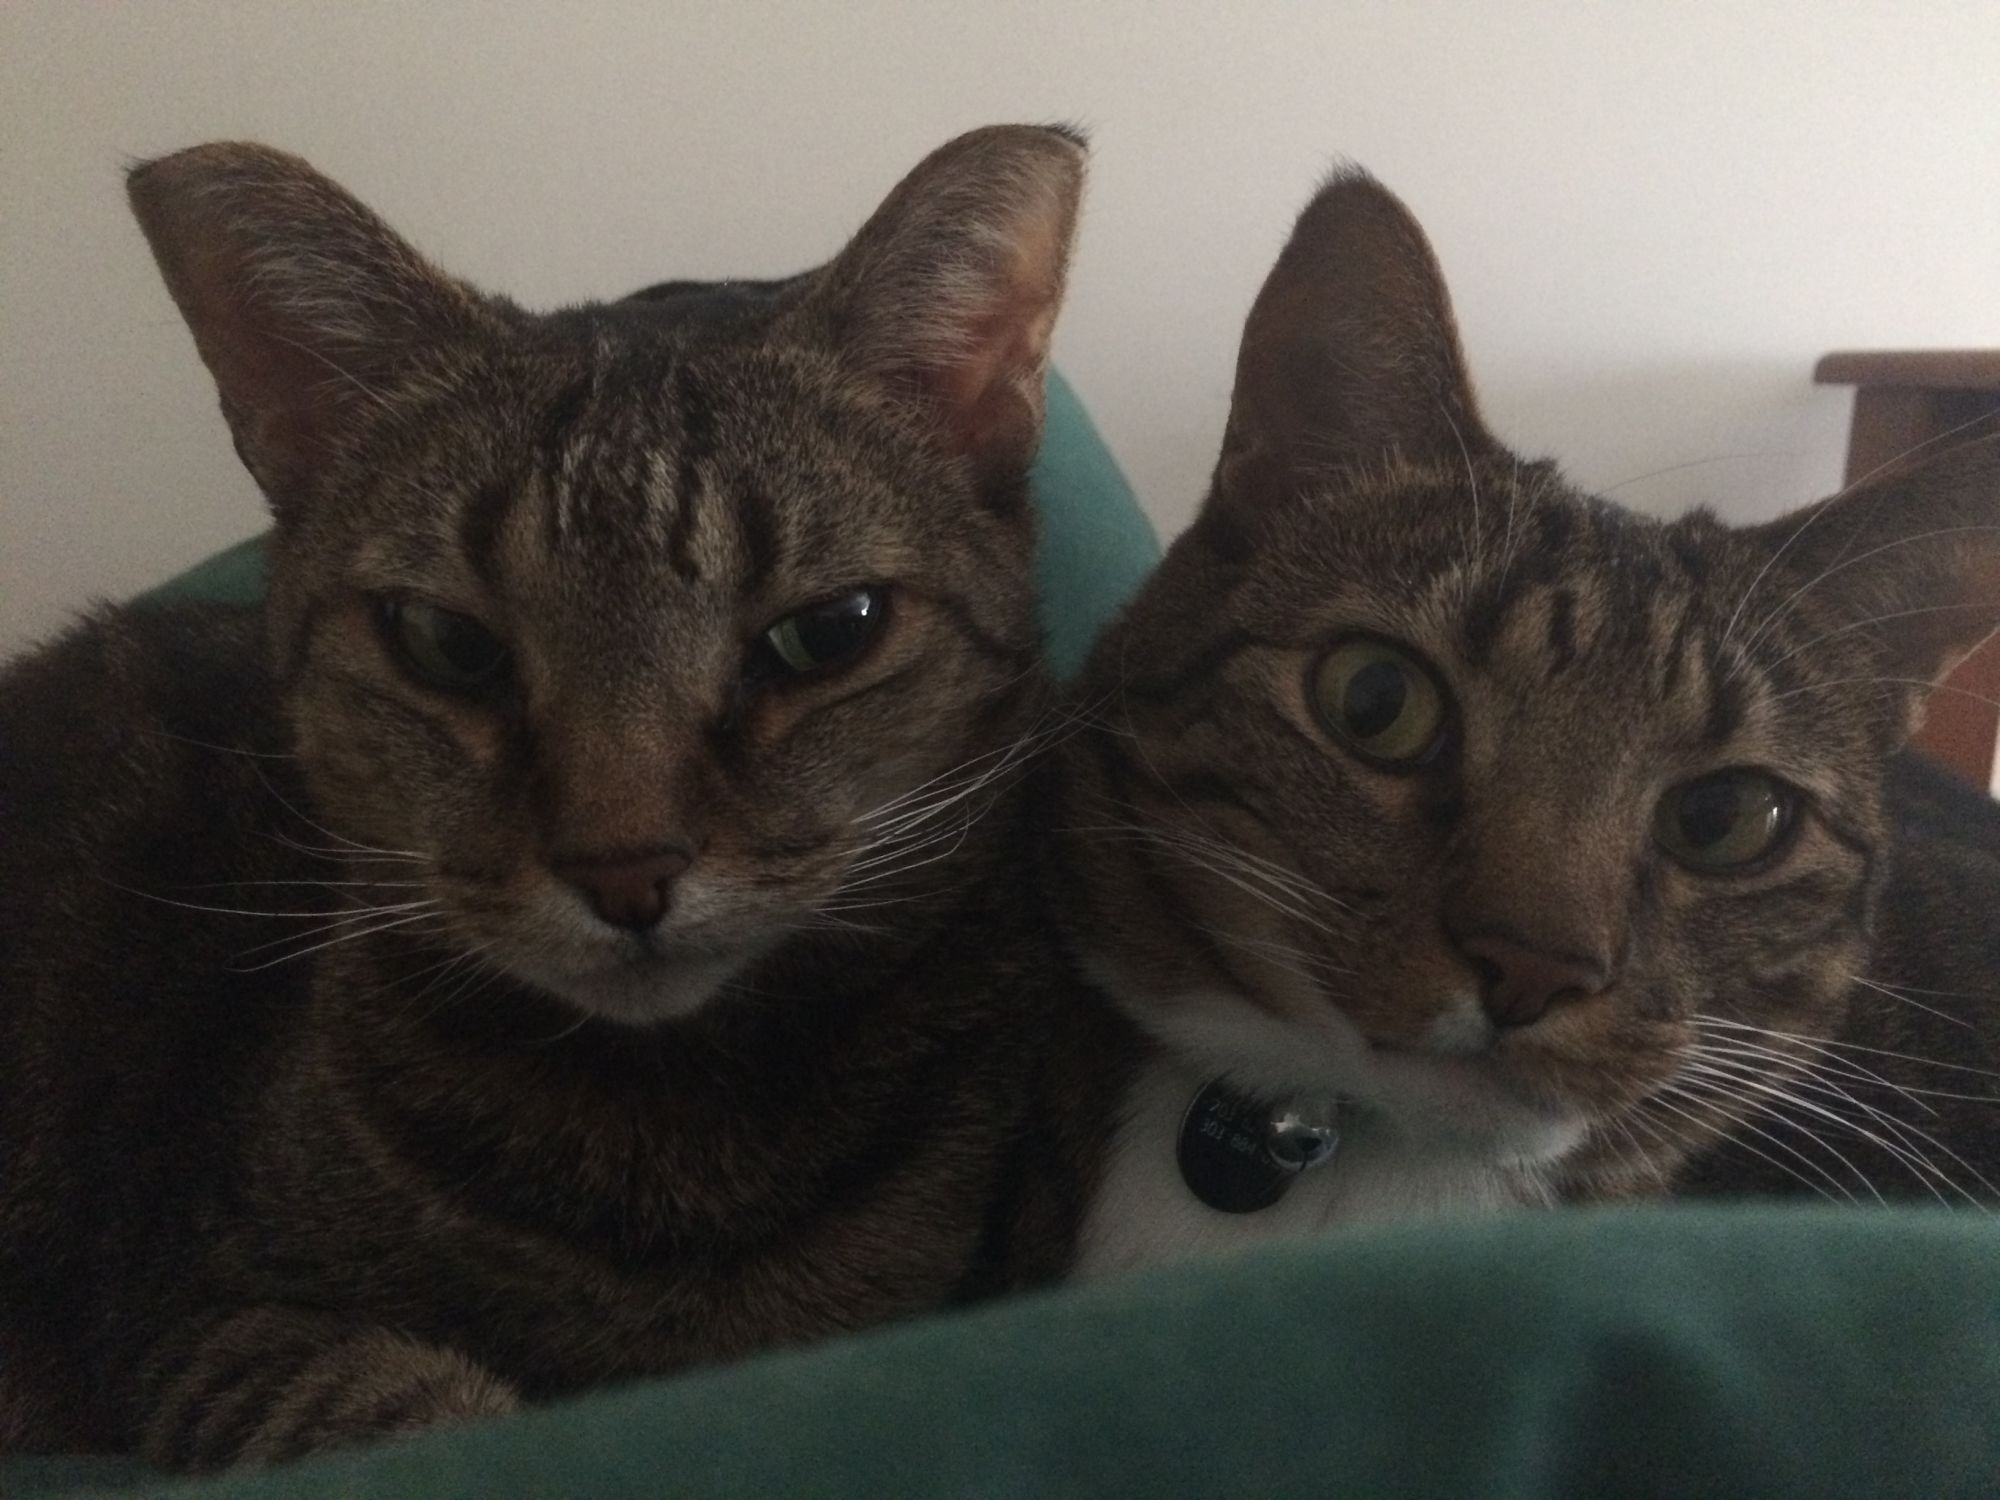
Because I'm a man of my word, kitty. Because I also like to surprise people, two kitties.
This installment is titled: "Snow made my friends lame, so I spent St. Patrick's day in the garage with Irish whiskey instead"
I was in the middle of a call with my boss when the entire corporate network shut down... Surprise early dismissal from work
On top of that, it had been snowing in Boulder since pretty early in the day and all my friends decided to be lame and stay home instead of going out with the intention of pissing green in the morning. Not saying I don't like my friends, but my OTHER friends, BP4W and whiskey, can be more reliable.
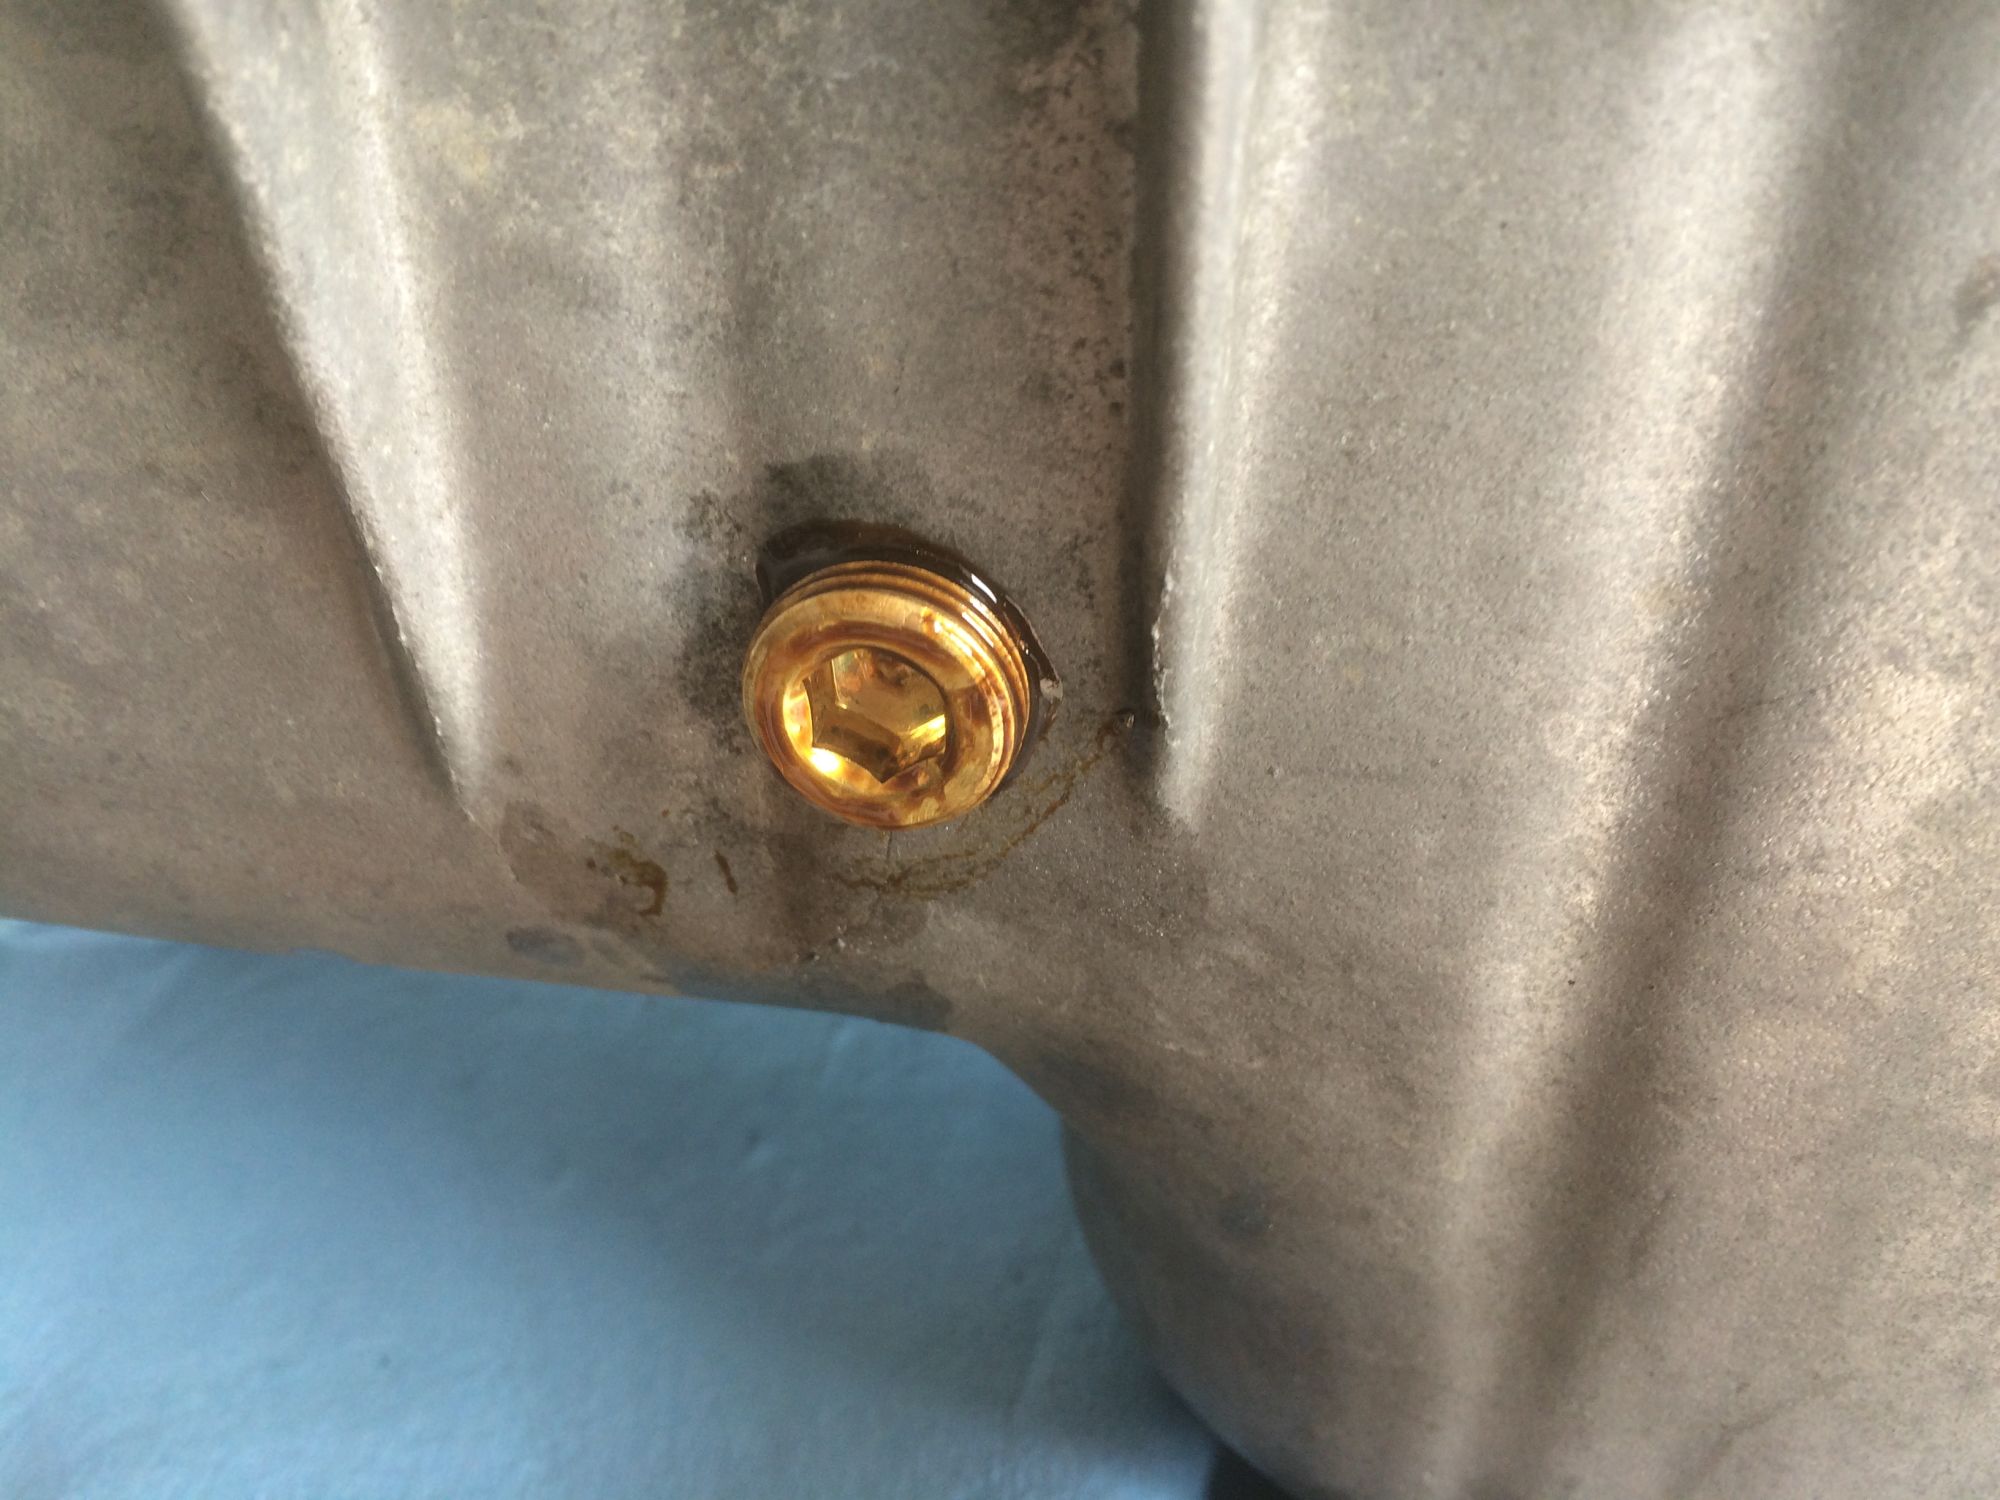
So I put another hole in my oil pan, because what better way to prevent leaks than drilling more holes?
Then I popped off the upper half of my intake manifold to get the fuel rail and injectors on. Snapped one of the bolts for the manifold bracket when reinstalling it, but enough was exposed to pull it out with some pliers.
My adapter for the oil pressure sensors showed up, so I stuck that on.
I also stuck my oil cooler sandwich plate on.
The intake manifold support bracket was interfering with the hose fitting, so I took it to the round edge of a belt sander for some clearance.
The box of parts for this motor is starting to thin out, so it's turning into a case of "dig through the remaining bags and parts, pick something, and stick it on". Attached a couple brackets and hoses.
And to keep you monsters satisfied, here's another cat. This time with an uncomfortably close angle.
Great progress so far, looking forward to this thing coming together.
It sounds like this is the first motor you've assembled. Fun fact: Did you know piston rings have an "up" and a "down"? It looks like you're really doing your research so I'm sure you already knew that. Just thought I'd mention it since I only learned that AFTER I assembled a motor the first time and I can confirm that it does make a difference.
Yes I did... thanks for the tip though! I would not want to put it back in the car and THEN find out that I screwed up with something like that. Any and all "protips" are greatly appreciated
In this post, Nick thinks out loud about (how to avoid) blowing trannies. This post could also be titled "My Struggle", a title which I'm sure the PO of my car would approve of.
My debate between the Rotrex and EFR comes down (heavily) to my drivetrain... I currently have a 5sp/4.3 torsen.
I could get an EFR 6758 and run it at super low boost with a goal of around 200-230whp and drive it nicely until I save up for a 6sp/3.63. At which point I could turn it way up.
Or I could do the Rotrex C30-94 and shoot for 300whp for similar torque numbers to the EFR at super low boost, drive it nicely, and still save up for a 6sp/3.63 but maintain a little confidence that I'm not a gnat's *** away from grenading my transmission while on the 5sp.
Or I say "**** it", get the EFR and turn up the boost, and hope that I can find a good deal on a 6sp before I inevitably grenade the 5sp. And then live with shitty short gearing until I break down and get a 3.63 R&P.
And then there's the 3.9 R&P which is better than my 4.3 but would still land me shorter gearing with a 6sp.
 02-17-2016, 02:47 PM


 0
0