91 BRG SE build
 07-13-2014, 03:59 AM
#1
Junior Member
Thread Starter

Join Date: Jun 2014
Posts: 48
Total Cats: 0
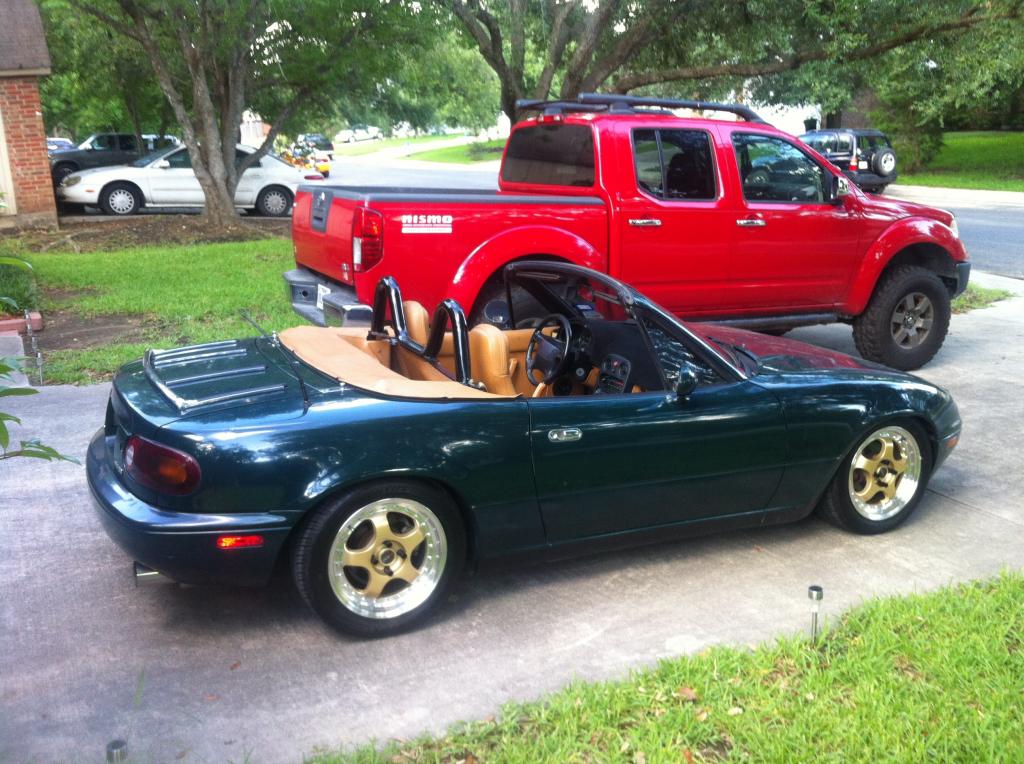
First off, have read through some build threads already and a ton of the information already posted on mt.net, there are some bad *** cars out there!
Secondly, I type a lot and love to take pics of progress. Ill do my best to keep them relevant (both my comments and pics lol)!
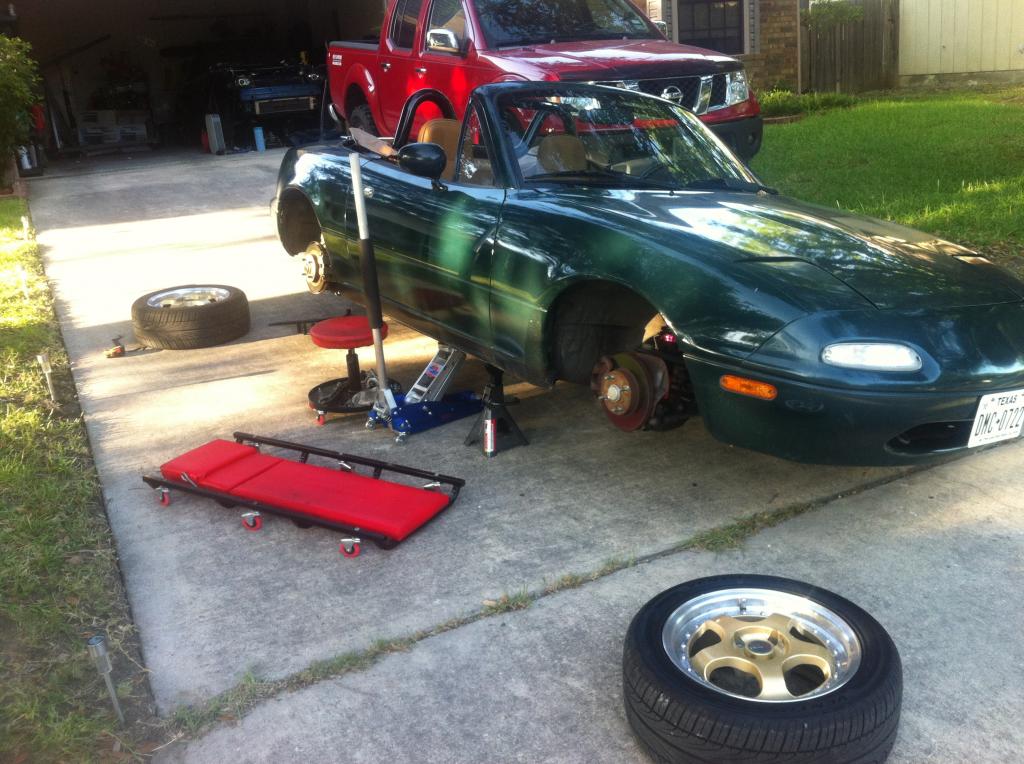
I was always into muscle cars (RWD) but have been away from that scene for years since my 94Z28 that was a fully built LT1 got totaled 2k miles into its set up (thanks to a senior citizen and the Rocky Mountains lol). Since then Ive had a plethora or rides, and most recently, my 1991 BRG Miata.
I missed the RWD a lot and wanted something small enough to be able to put it in the garage with my other car/project (04 Cavalier, swapped motor, supercharged, etc etc). Even though Ws6's and SS's were in my sights, I had decided size and track ability was my primary goal, and cost and just drivability/fun factor was 2nd....so the Porsche 914 and Miata's came across my searches quite a bit for either a V8 swap or a nice fun turbo set up. Finally finding this one I own now and have not regretted it since a few weeks ago!
What I know:
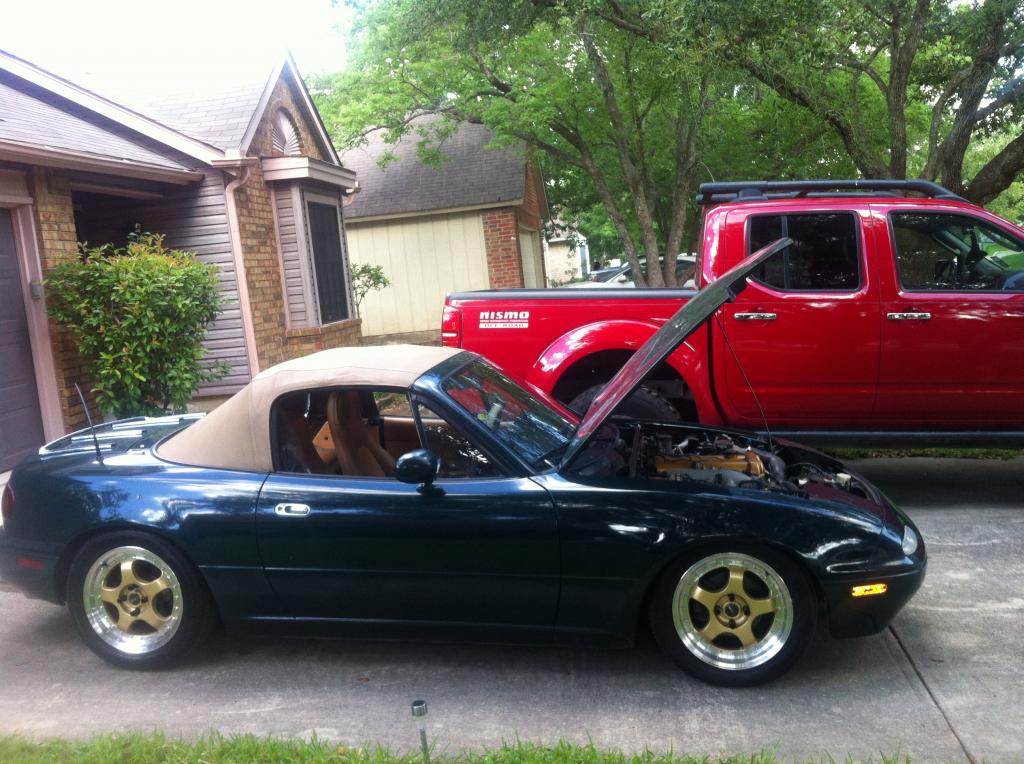
1991 Miata, British Racing Green, Special Edition.
I purchased it with (all brand new parts) coil overs, wheels/tires, header/exhaust, and supposedly a 'new' engine (this Im pretty sure is not the case) but it does have a painted vc. It also has power brakes, steering, ABS, tan leather interior (seats with speakers), and an after market deck. It came with brand new speakers for the doors since the current ones are shot, a set of driving lights (round fogs), and a front lip spoiler still in plastic wrapping. Haven't even taken it out yet lol. I also believe from what I've had a few people tell me, with my options it should also have the Torsen diff. I have not verified what its got..but I have already acquired a local 1.8 rear with a 94 R package driveshaft just incase it goes any time soon.
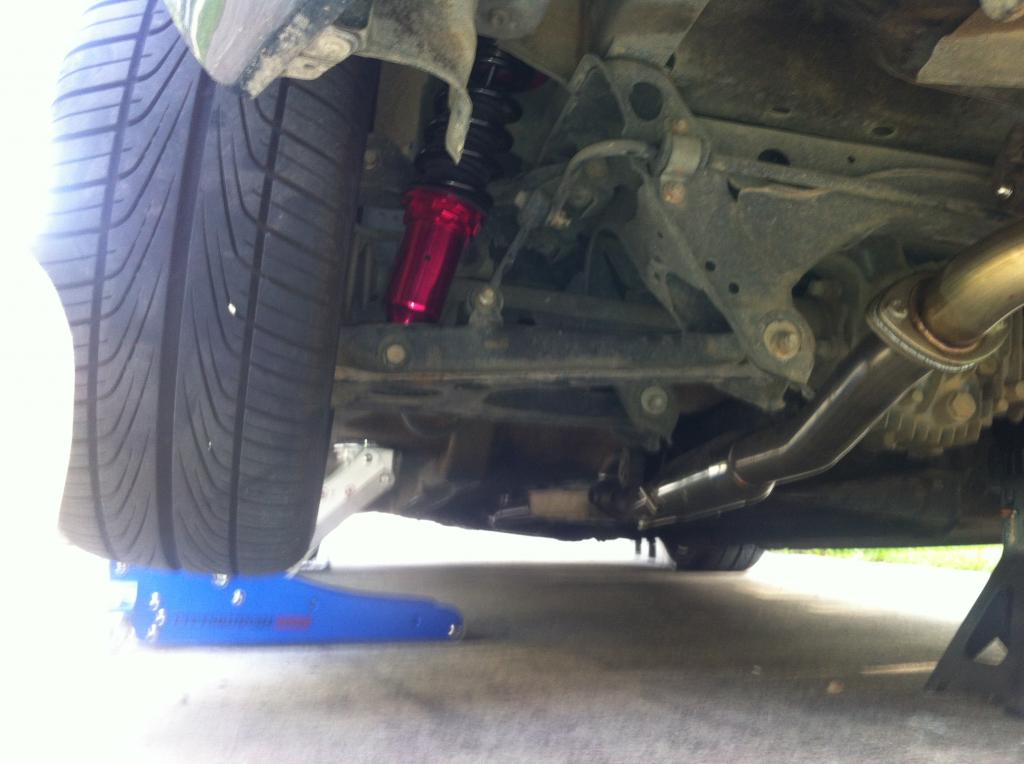
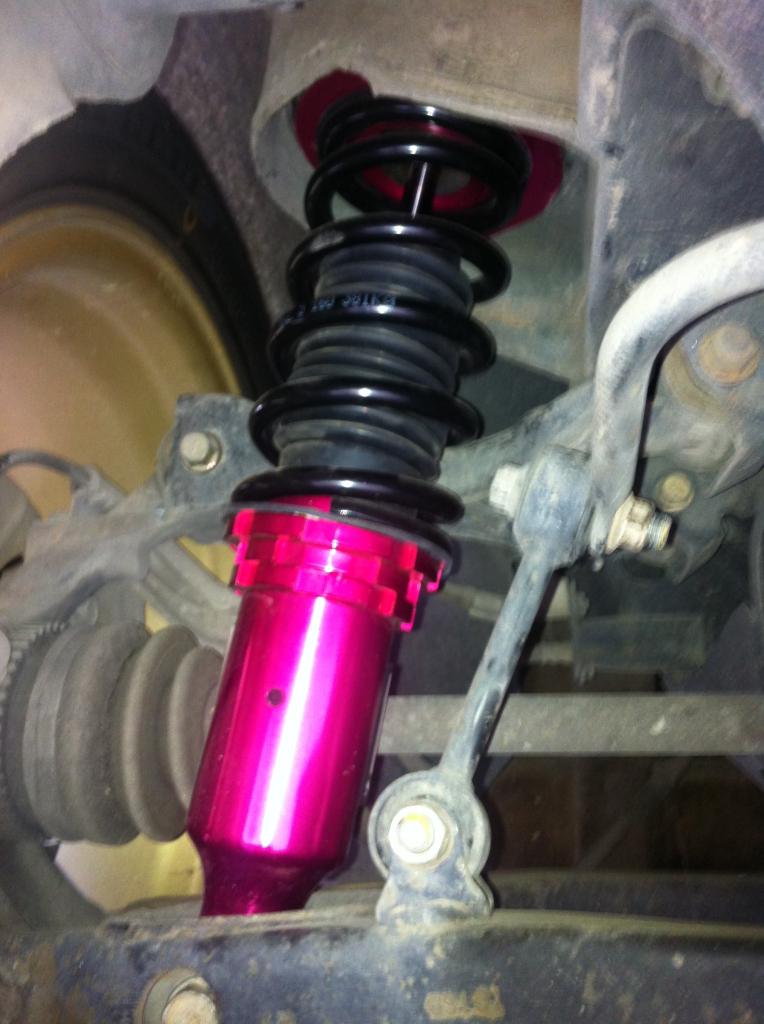
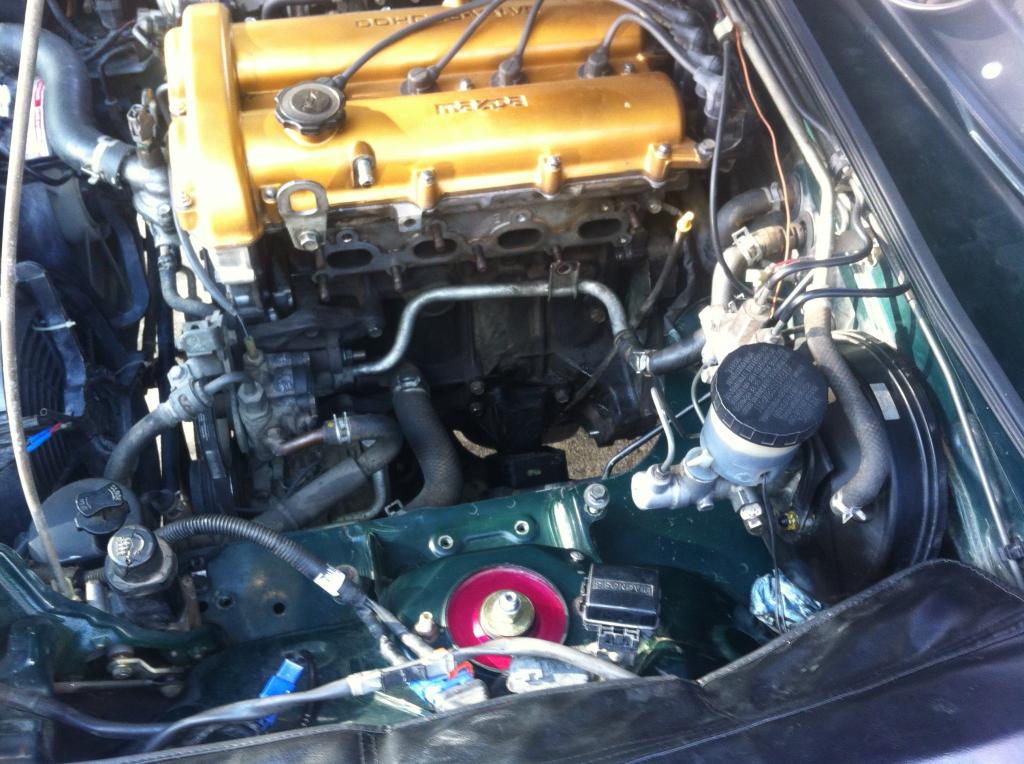
So far I immediately rolled the front fenders..the guy had it un-drivable it was so low. Swapped the brand new Nardi **** out with a brand new ball shifter that matched the shift boot (black with green). I dropped in new Bosch plugs, oil, air filter, and raised the front coil overs about 1/2 to 3/4". ill go higher soon, I just couldn't drive it with it rubbing the fenders.
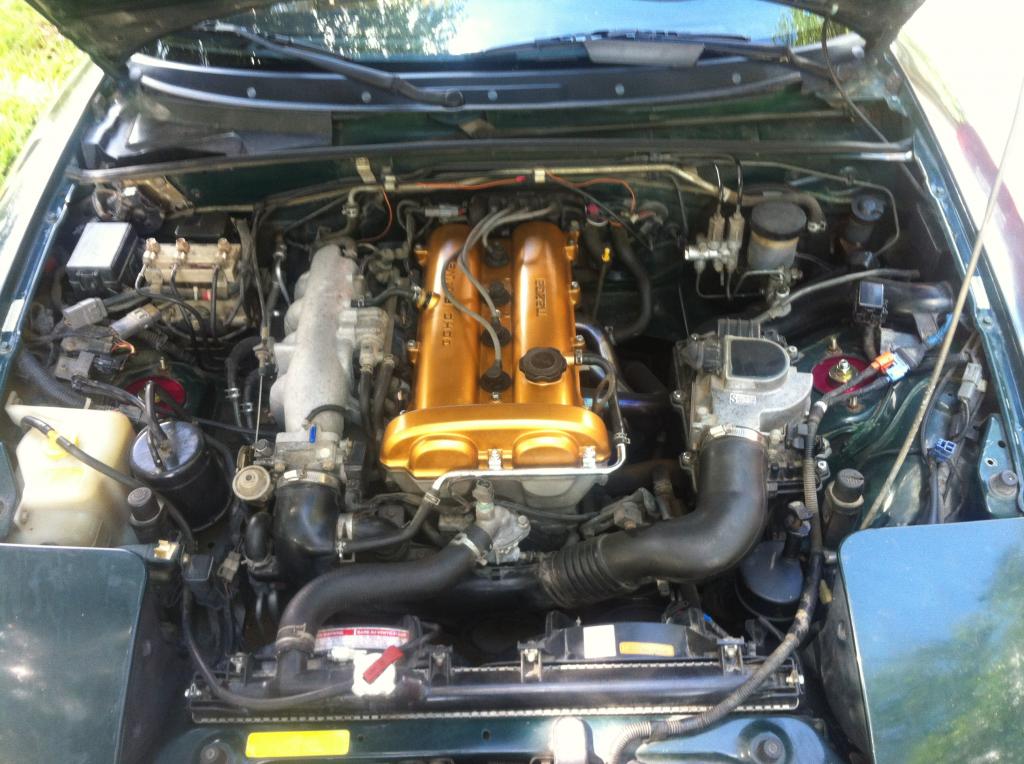
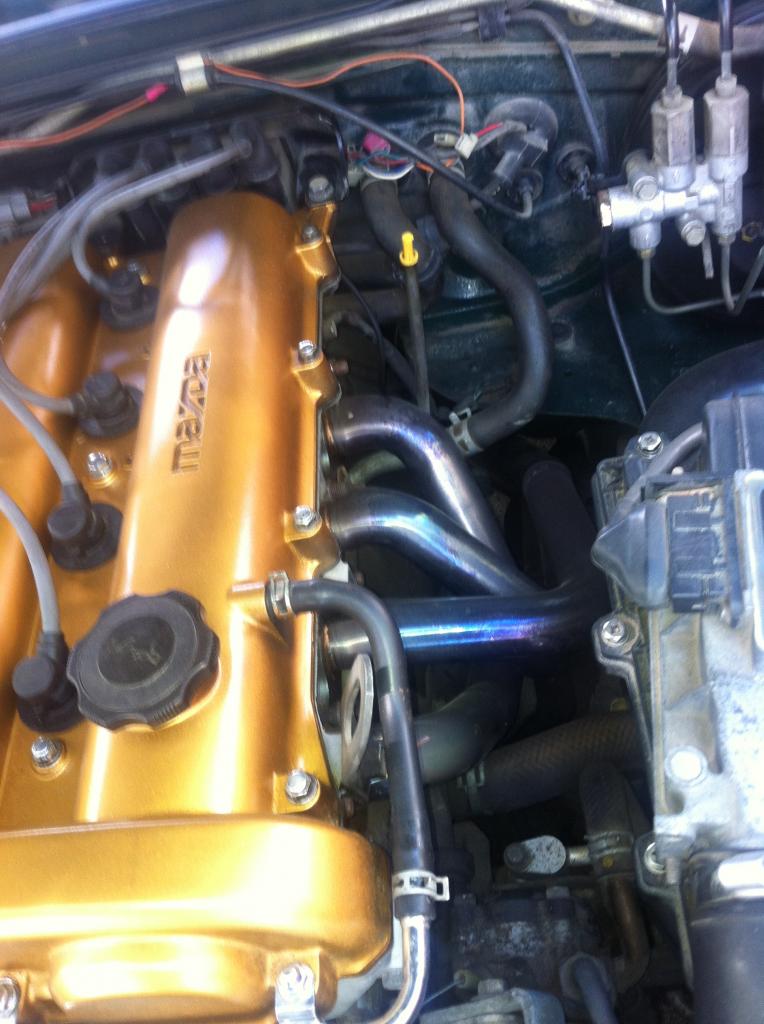
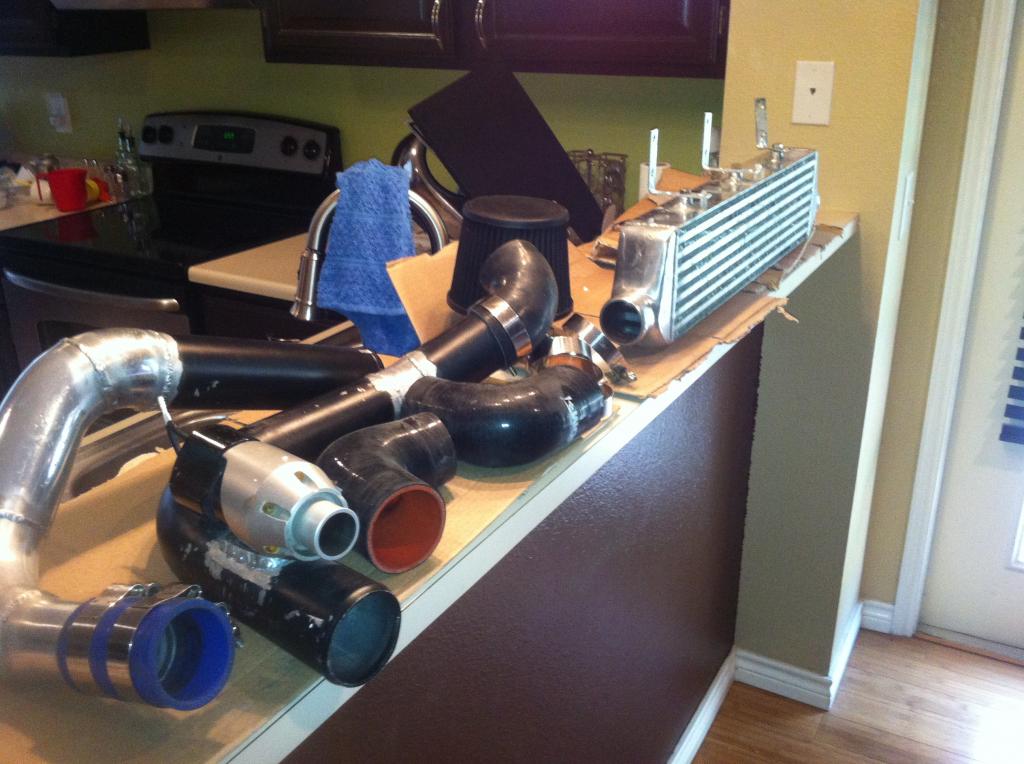
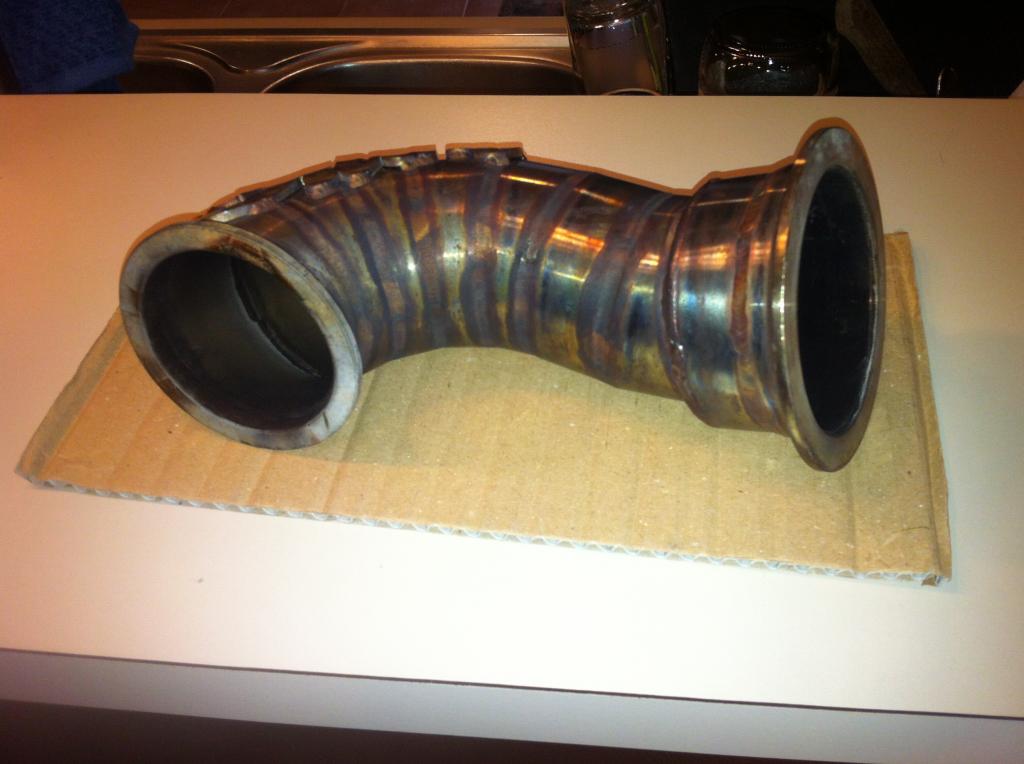
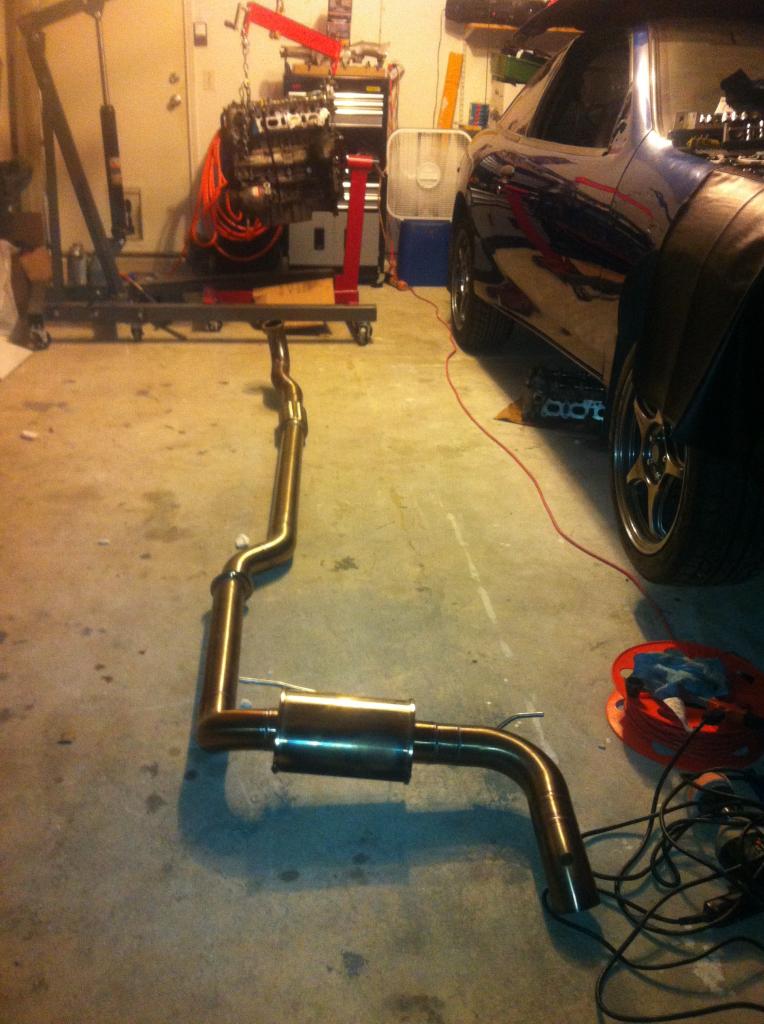
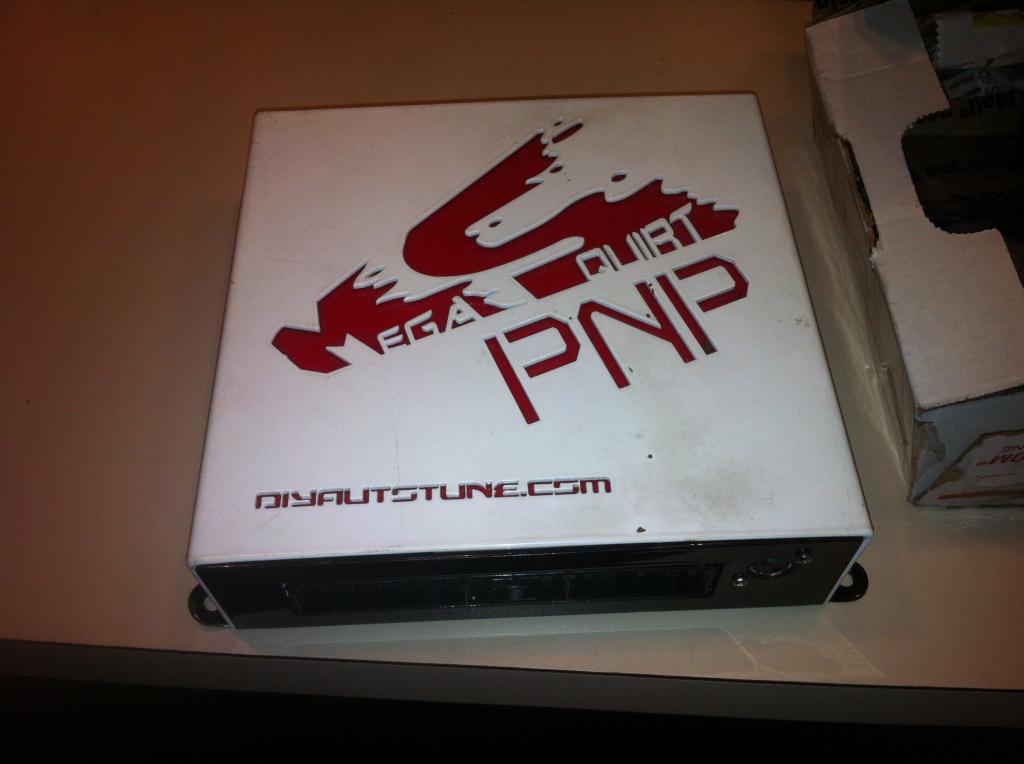
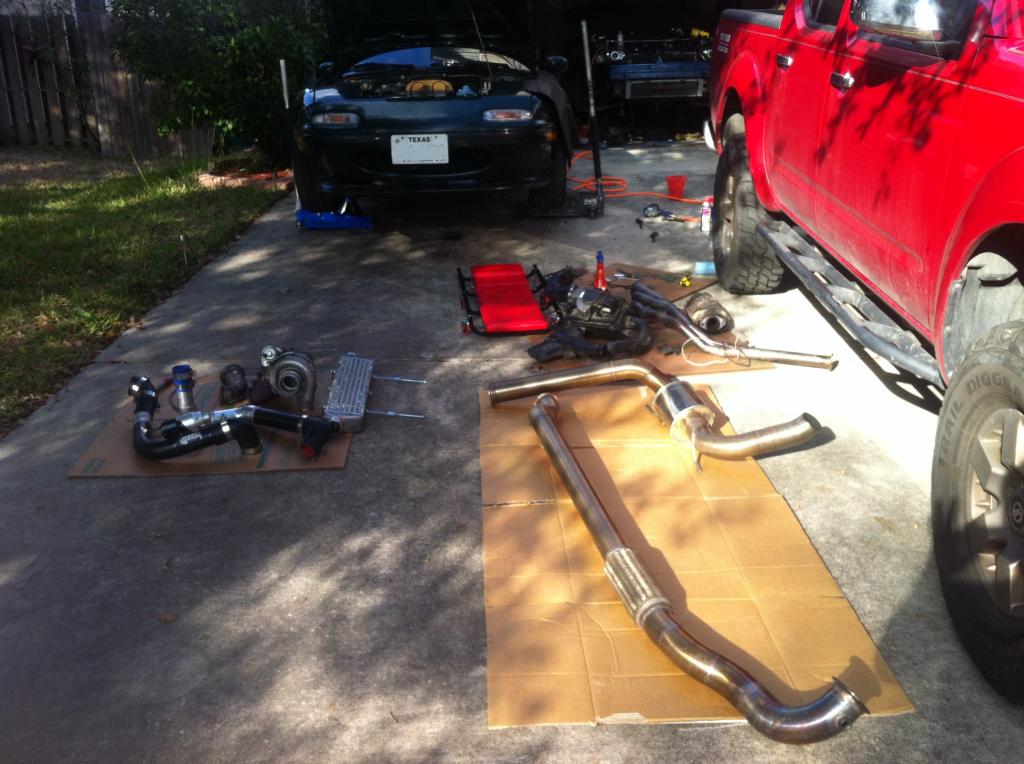
I have already purchased a proven turbo set up from someone on this forum with MSPNP pre-tuned for the kit, as well as the included intercooler, custom welded piping, turbo manifold, dp, and full very nice exhaust! It actually all finally arrived YESTERDAY!!! Christmas This supposedly made over 240 Rwhp (I even have the dyno sheets) on the nearly stock 1.6L engine.
I need to get my cav back on the road before I attempt the turbo set up as I don't need two cars sitting on jack stands in the garage taking up space! I need one to drive at least after work and on weekends as driving is my one true passion! My daily for now is my 06 NISMO 4x4 truck but it gets worse MPG than probably a damn Wrangler lol.
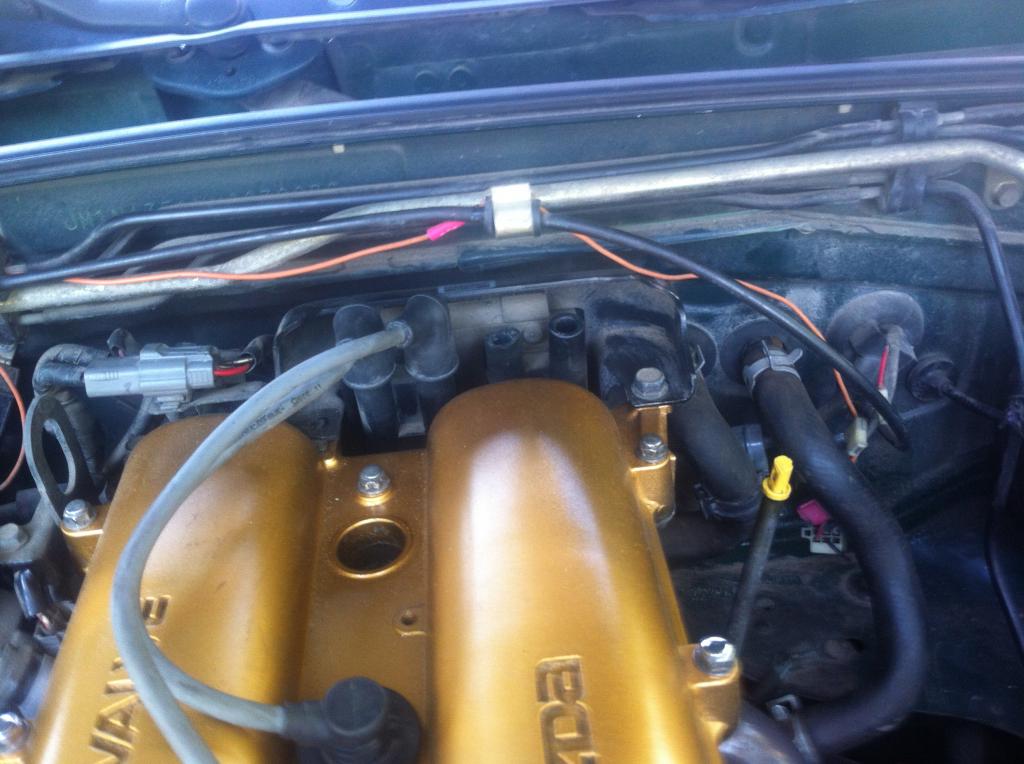
On to the pics!
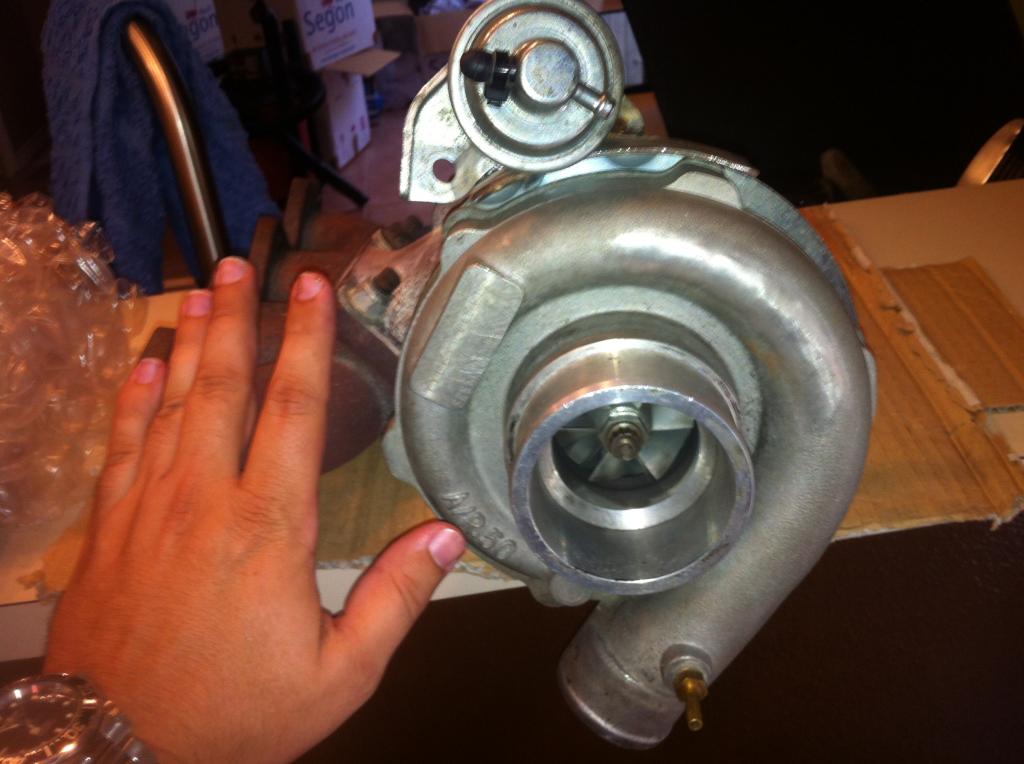
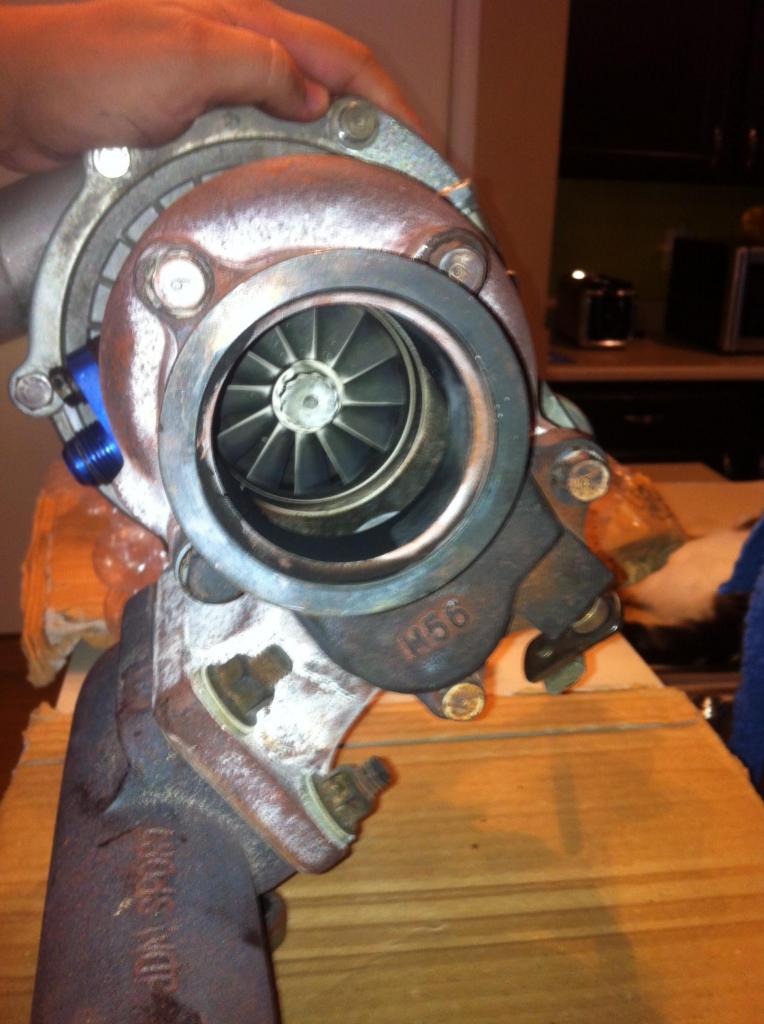
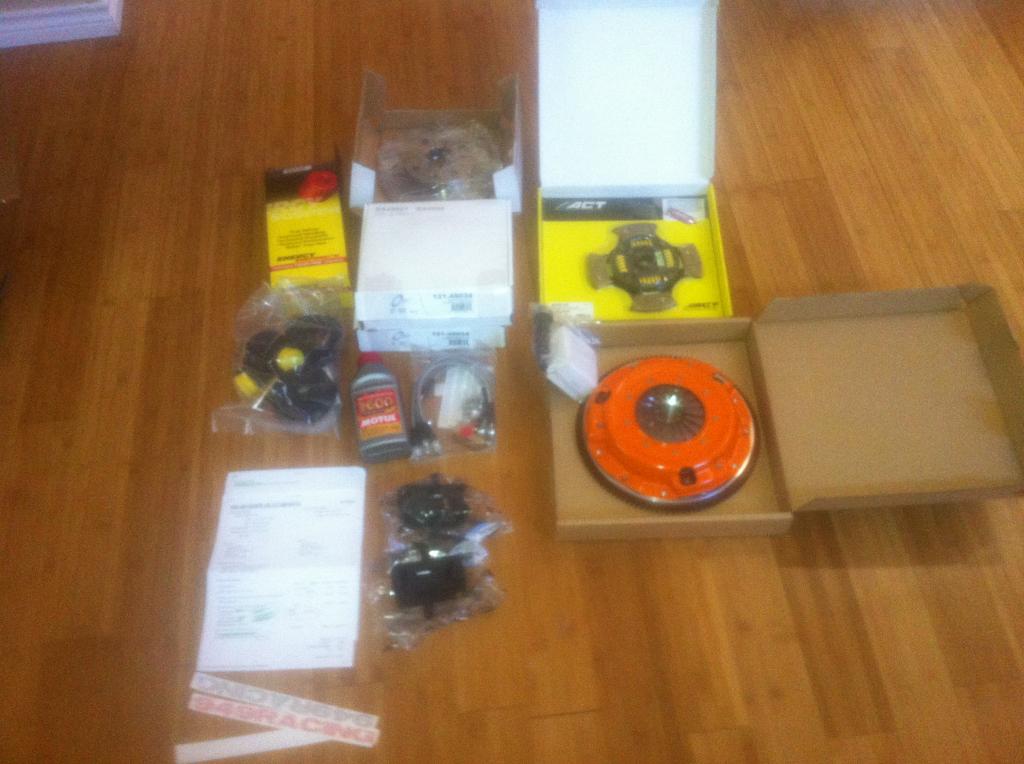
And the turbo parts
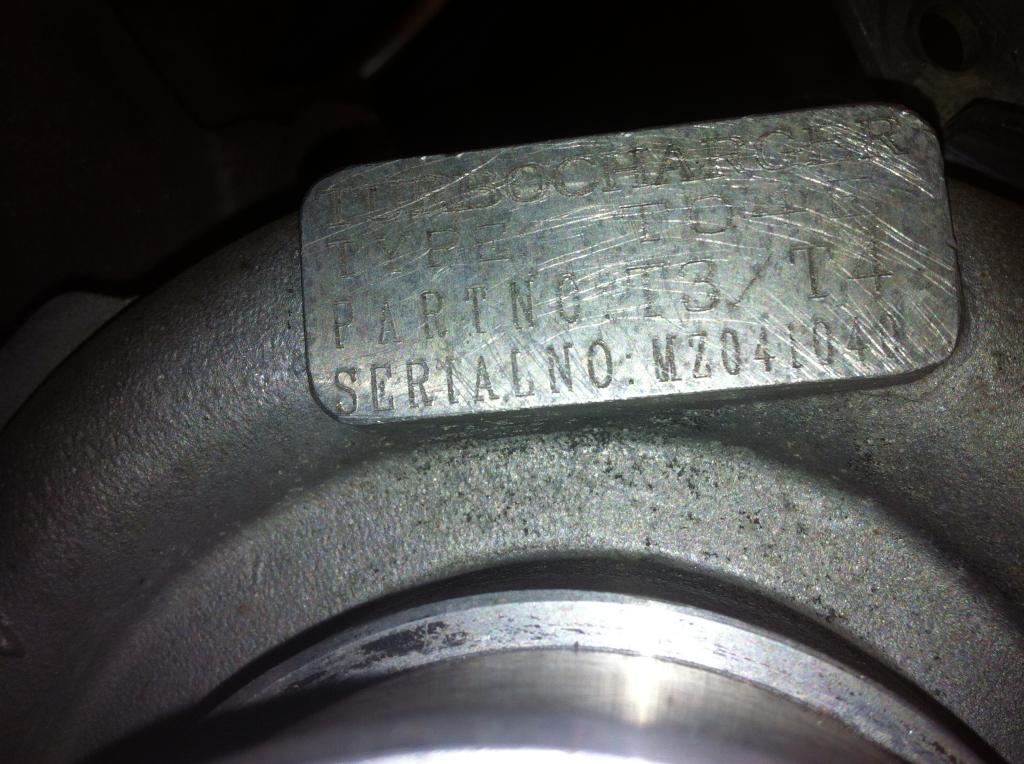
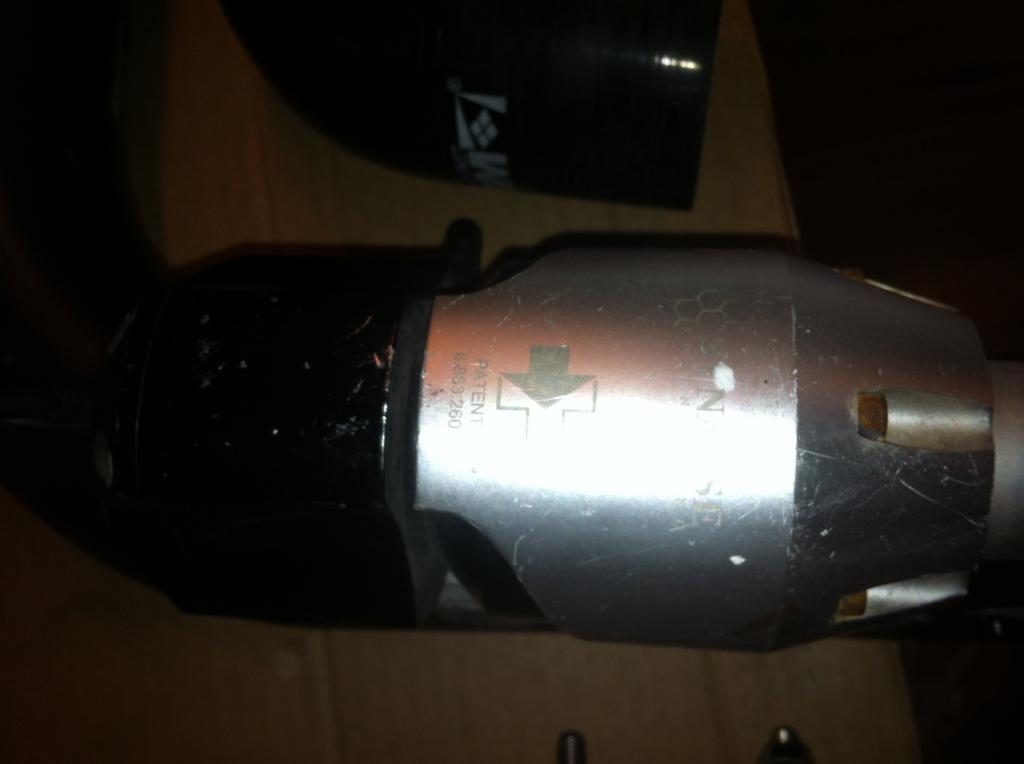
(I have a bunch of pics, these are just the basics). I still have not identified the turbo but Ive got the basic information off the serial plate/tag (just haven't searched Google yet lol)
Secondly, I type a lot and love to take pics of progress. Ill do my best to keep them relevant (both my comments and pics lol)!
I was always into muscle cars (RWD) but have been away from that scene for years since my 94Z28 that was a fully built LT1 got totaled 2k miles into its set up (thanks to a senior citizen and the Rocky Mountains lol). Since then Ive had a plethora or rides, and most recently, my 1991 BRG Miata.
I missed the RWD a lot and wanted something small enough to be able to put it in the garage with my other car/project (04 Cavalier, swapped motor, supercharged, etc etc). Even though Ws6's and SS's were in my sights, I had decided size and track ability was my primary goal, and cost and just drivability/fun factor was 2nd....so the Porsche 914 and Miata's came across my searches quite a bit for either a V8 swap or a nice fun turbo set up. Finally finding this one I own now and have not regretted it since a few weeks ago!
What I know:
1991 Miata, British Racing Green, Special Edition.
I purchased it with (all brand new parts) coil overs, wheels/tires, header/exhaust, and supposedly a 'new' engine (this Im pretty sure is not the case) but it does have a painted vc. It also has power brakes, steering, ABS, tan leather interior (seats with speakers), and an after market deck. It came with brand new speakers for the doors since the current ones are shot, a set of driving lights (round fogs), and a front lip spoiler still in plastic wrapping. Haven't even taken it out yet lol. I also believe from what I've had a few people tell me, with my options it should also have the Torsen diff. I have not verified what its got..but I have already acquired a local 1.8 rear with a 94 R package driveshaft just incase it goes any time soon.
So far I immediately rolled the front fenders..the guy had it un-drivable it was so low. Swapped the brand new Nardi **** out with a brand new ball shifter that matched the shift boot (black with green). I dropped in new Bosch plugs, oil, air filter, and raised the front coil overs about 1/2 to 3/4". ill go higher soon, I just couldn't drive it with it rubbing the fenders.
I have already purchased a proven turbo set up from someone on this forum with MSPNP pre-tuned for the kit, as well as the included intercooler, custom welded piping, turbo manifold, dp, and full very nice exhaust! It actually all finally arrived YESTERDAY!!! Christmas
This supposedly made over 240 Rwhp (I even have the dyno sheets) on the nearly stock 1.6L engine.I need to get my cav back on the road before I attempt the turbo set up as I don't need two cars sitting on jack stands in the garage taking up space! I need one to drive at least after work and on weekends as driving is my one true passion! My daily for now is my 06 NISMO 4x4 truck but it gets worse MPG than probably a damn Wrangler lol.
On to the pics!
And the turbo parts
(I have a bunch of pics, these are just the basics). I still have not identified the turbo but Ive got the basic information off the serial plate/tag (just haven't searched Google yet lol)

Reply
 0
0

0
07-13-2014, 04:11 AM
#2
Junior Member
Thread Starter
Join Date: Jun 2014
Posts: 48
Total Cats: 0
I am reading through build threads and seeing what a lot of people are doing with custom fabrication. First off, you guys amaze me at how easy you make it look! I don't have welding experience. I can build anything Ive ever tried, swapped my own motors, fuel pumps, clutches, etc...but if it requires custom welding, Im out. So that's part of the reason I went with this prefabbed custom kit that seemed to be in great shape and well put together by the PO.
If anyone has any information on the turbo or blow off valve, intercooler, or anything, I am all ears with advice.
Im never the fastest on the road, nor the most skilled builder out there. So I can always learn from someone!
Currently, I have priced out a brake upgrade, clutch upgrade, and am looking to prep for the turbo build.
I wanted to know what people thought of the 949 SuperMiata Stage1 brake upgrade?
I need brakes, and I want to upgrade with better front pads (XP8), their OEM rear pads (1521), and steel lines. Instead of OEM parts. Im holding off on big brake upgrades for now since I don't want to drop that much more money on them and I plan on driving it more street, occasional track.
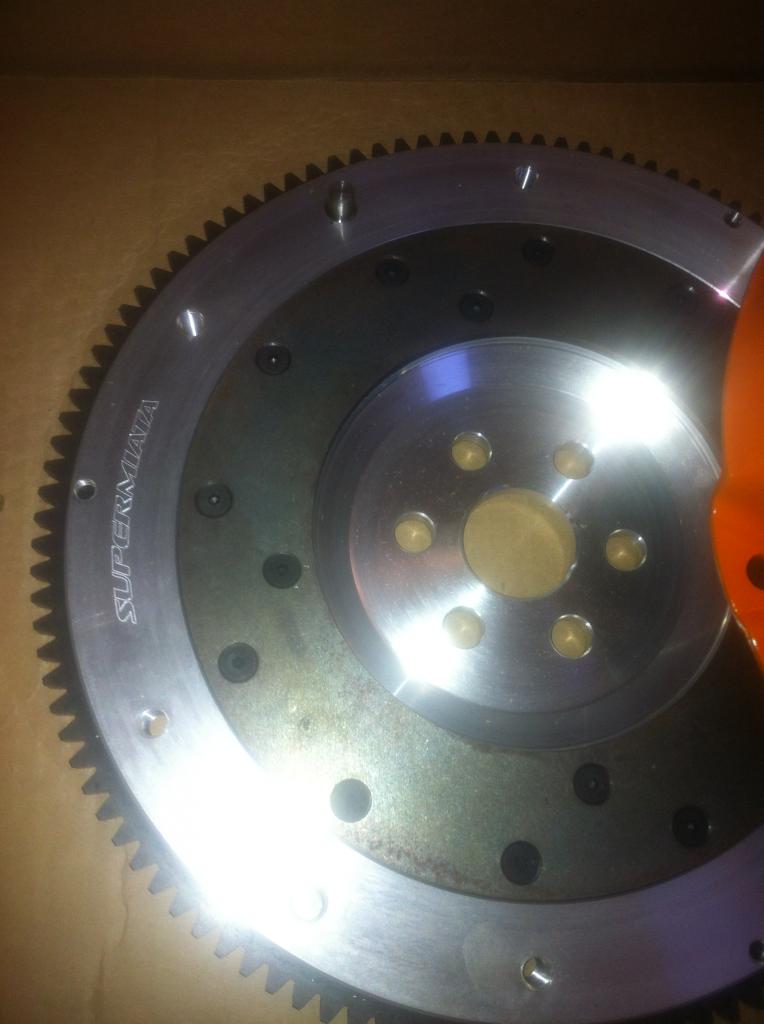
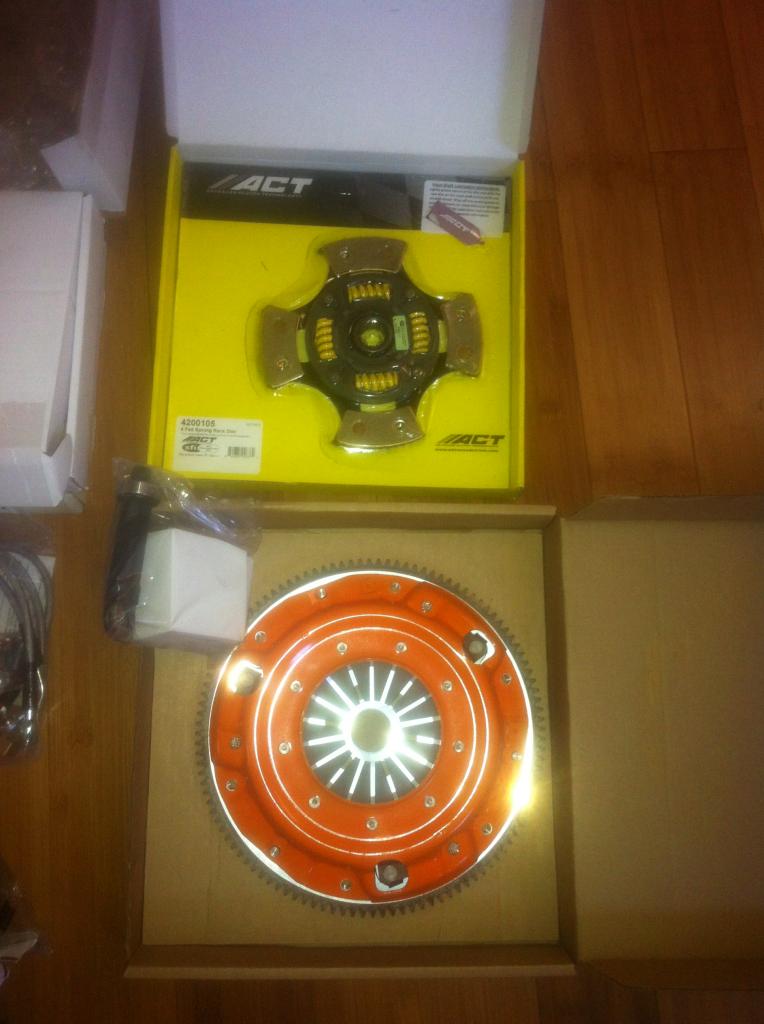
For the clutch, and some transmission parts, I sourced this Happy Meal kit from FM... I figure even though my stock clutch feels great, the added power wont be usable on it. So a lightweight FW and clutch upgrade good for more than my intended goal should suffice.
Are there better/more cost effective upgrades or are these pretty well tested and worth the cost? As soon as I read enough supporting the purchases, Ill pull the trigger on them ASAP!!
If anyone has any information on the turbo or blow off valve, intercooler, or anything, I am all ears with advice.
Im never the fastest on the road, nor the most skilled builder out there. So I can always learn from someone!
Currently, I have priced out a brake upgrade, clutch upgrade, and am looking to prep for the turbo build.
I wanted to know what people thought of the 949 SuperMiata Stage1 brake upgrade?
I need brakes, and I want to upgrade with better front pads (XP8), their OEM rear pads (1521), and steel lines. Instead of OEM parts. Im holding off on big brake upgrades for now since I don't want to drop that much more money on them and I plan on driving it more street, occasional track.
For the clutch, and some transmission parts, I sourced this Happy Meal kit from FM... I figure even though my stock clutch feels great, the added power wont be usable on it. So a lightweight FW and clutch upgrade good for more than my intended goal should suffice.
Are there better/more cost effective upgrades or are these pretty well tested and worth the cost? As soon as I read enough supporting the purchases, Ill pull the trigger on them ASAP!!
Reply
0
0
07-13-2014, 03:48 PM
#3

Where in TX?
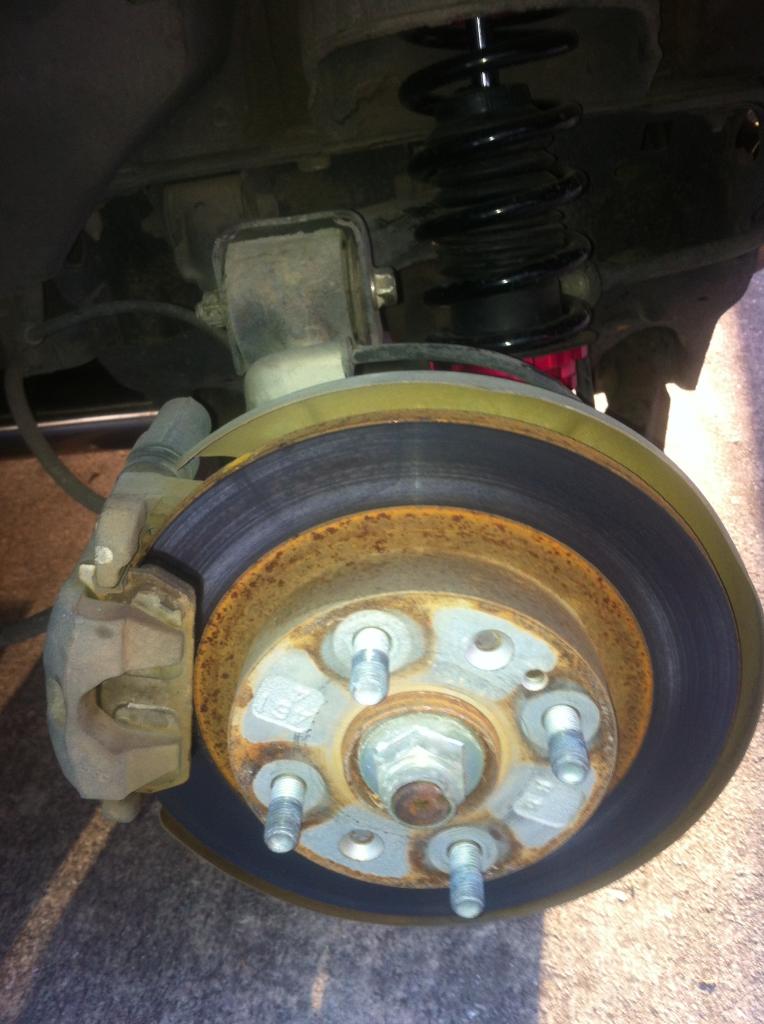
1994 was the switchover point from 6" diffs to 7" diffs. All Torsens are 7" diffs. If you have a limited slip on your car and it is original (suspect that you do), it will be a VLSD. You'll want to swap that out before you turbo. A VLSD in good shape will bring some money from racers that can't upgrade to a 7" diff or who want to save weight, so don't toss it.
Miata OEM brakes are quite good. They do tend to taper pads with a lot of track use, but they can withstand a bunch of heat and give predictable feel. After all, SM guys use them.
Reply
0
0
07-14-2014, 02:06 AM
#5
Junior Member
Thread Starter
Join Date: Jun 2014
Posts: 48
Total Cats: 0
hornetball, thanks for the info!
I am in San Antonio (Converse actually). Just bought a house and have time and space to do my projects finally!
Yeah Im not too fond of the style bar. Its literally only held on by the two upper seat belt bolts... Ive been eyeing the hard dog (one that's track spec'd)
I do plan on getting new brakes very soon, so that's why I needed to know the info on that kit fro 949. It doesn't mention the size at all...as in if its the same or an upgrade. I plan on upgrading the front pads for country hill cruising, where Ill be hard on them. A few hours of heavy braking will put most OEM pads into submission! lol
Are there any better kits out there for clutch upgrades besides that FM Happy Meal set up with the lighter flywheel? Like I said, Im ready to pull the trigger on both the brakes and clutch, but want to make sure Im getting my money's worth or if I should find something else. Unfortunately I haven't had much time to shop around this weekend as I was busy restoring the headlights on my gf's car, my truck, and was actually playing with the Miata a bit. Turns out the exhaust was missing two bolts lol... but all is good and she seems to be running pretty good.
I do notice that during acceleration from a light it tends to want to hesitate or hiccup every now and then, like a tuning issue. With new plugs and fresh oil, air filter seems okay, I need to test my fuel pressure and see if its having any issues feeding the engine. Perhaps this is normal for a 1991 1.6L engine though...its around the same time carbs were still somewhat popular lol
Reply
0
0
07-14-2014, 04:07 AM
#6
Junior Member

Join Date: Oct 2013
Location: Portugal
Posts: 116
Total Cats: 26
Nah, hesitate or hiccup it�s not usual in any way 
The only time when my car hesitated was when the O2 sensor was disconnected. And you can check your ignition timing.
What brand of coils are those? This car has Clubricer written all over it from the previous owner. Luckily you will save it from the Lowlife/Gaystance �scene�
The only time when my car hesitated was when the O2 sensor was disconnected. And you can check your ignition timing.
What brand of coils are those? This car has Clubricer written all over it from the previous owner. Luckily you will save it from the Lowlife/Gaystance �scene�
Reply
0
0
07-14-2014, 05:16 PM
#7
Moderator


iTrader: (12)
Join Date: Nov 2008
Location: Tampa, Florida
Posts: 20,652
Total Cats: 3,011
Go with the 949 Racing 11.75 kit or don't bother going new.
I have the M-tuned Corrado kit (11 inch) for sale locally. Tampa Bay Miatas • Login
Your 1.6 rotors are 9 inches or so.
The 1.8 cars use a 10 inch rotor which you could also upgrade to.
I have the M-tuned Corrado kit (11 inch) for sale locally. Tampa Bay Miatas • Login
Your 1.6 rotors are 9 inches or so.
The 1.8 cars use a 10 inch rotor which you could also upgrade to.
Reply
0
0
07-16-2014, 02:13 AM
#8
Junior Member
Thread Starter
Join Date: Jun 2014
Posts: 48
Total Cats: 0
sixshooter, the reason I'm looking at the kits is because the pads are getting bad in the front and the rotors could be replaced. Basically, when I buy a car regardless of its history or how new parts are, Ill typically buy my own new parts and replace them myself so I know whats what. Plugs, fluids, brakes, etc.
I was thinking $400 isn't bad for 4 rotors, upgraded pads, and stainless steel lines even if they're stock size. Truthfully I'll prob get a lot more street use than track time so it'd be fine I'm sure. I'll save up and when I'm ready, get the big brake kit after driving her for a while and getting to really feel for whether she NEEDS the upgrade or not.
I have been going back and forth on the clutch set up. I was reading the forum today about 949's SM ceramic 4puck clutch set up with the aluminum flywheel. For roughly the same cost as the FM Happy Meal it SEEMS to get better reviews, but the FM also comes with the bypass for the starter interlock. Of course that's only $8 off FM's site..but do any of you guys run the bypass?
I want to pull the trigger on the clutch and brake set up like, yesterday. I need this stuff in so when I do go to install the turbo, its ready.
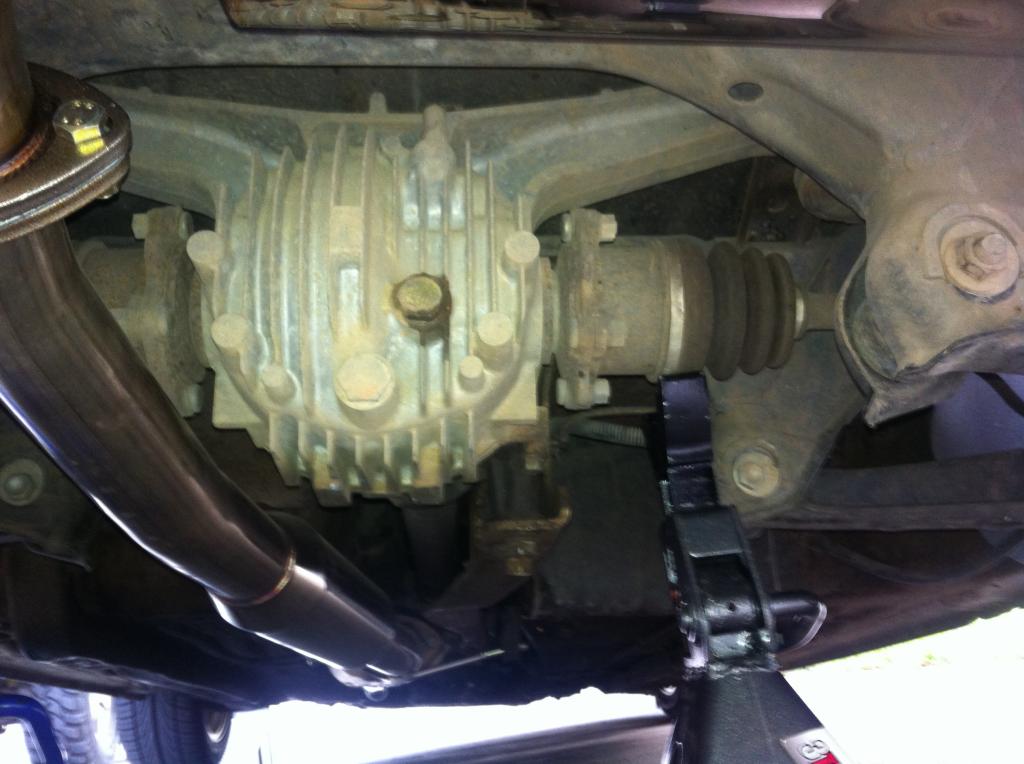
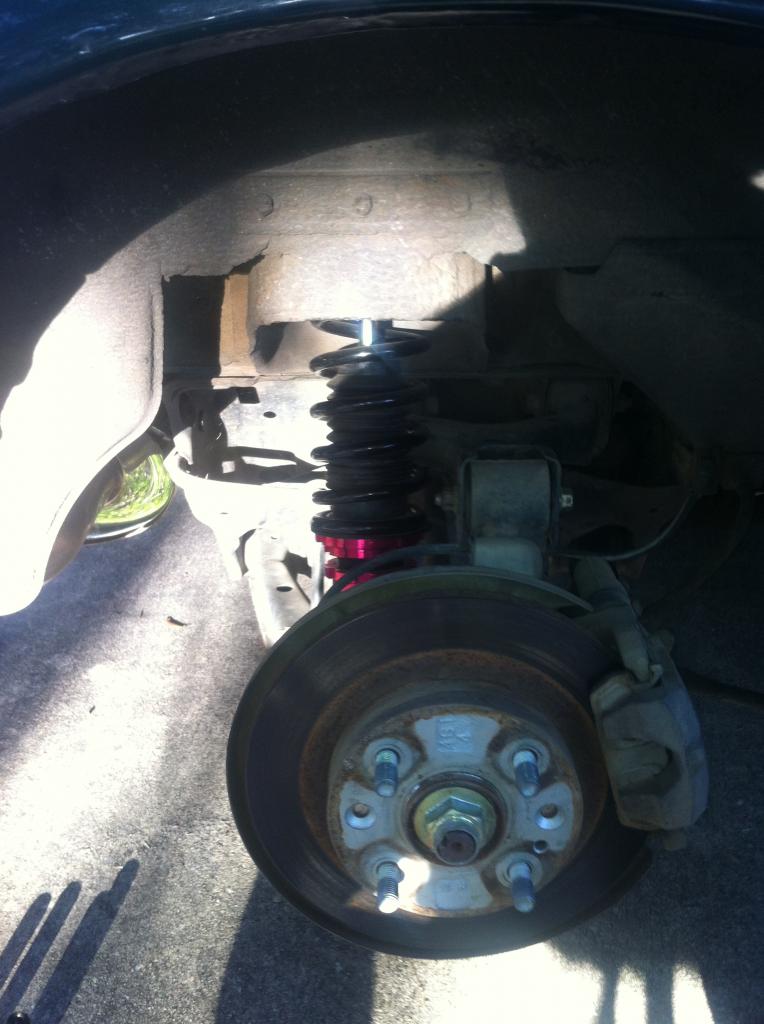
Im also curious as to whether or not my rear end is stock. When I was adjusting the coil overs on Monday after work, I noticed the rear had brand new looking hardware for the rear components. As if it were recently replaced. With a stock rearend and original looking bushings, its obvious those were upgraded, but perhaps the rear was...
I guess dropping the rear is going to be my only way to tell if its original, and even then may not be easy to identify. Id like to knock out the rear end and clutch and brakes, get some miles on the new upgrades, then think about the turbo install.
I was thinking $400 isn't bad for 4 rotors, upgraded pads, and stainless steel lines even if they're stock size. Truthfully I'll prob get a lot more street use than track time so it'd be fine I'm sure. I'll save up and when I'm ready, get the big brake kit after driving her for a while and getting to really feel for whether she NEEDS the upgrade or not.
I have been going back and forth on the clutch set up. I was reading the forum today about 949's SM ceramic 4puck clutch set up with the aluminum flywheel. For roughly the same cost as the FM Happy Meal it SEEMS to get better reviews, but the FM also comes with the bypass for the starter interlock. Of course that's only $8 off FM's site..but do any of you guys run the bypass?
I want to pull the trigger on the clutch and brake set up like, yesterday. I need this stuff in so when I do go to install the turbo, its ready.
Im also curious as to whether or not my rear end is stock. When I was adjusting the coil overs on Monday after work, I noticed the rear had brand new looking hardware for the rear components. As if it were recently replaced. With a stock rearend and original looking bushings, its obvious those were upgraded, but perhaps the rear was...
I guess dropping the rear is going to be my only way to tell if its original, and even then may not be easy to identify. Id like to knock out the rear end and clutch and brakes, get some miles on the new upgrades, then think about the turbo install.
Reply
0
0
 07-30-2014, 03:26 AM
#10
Junior Member
Thread Starter
Join Date: Jun 2014
Posts: 48
Total Cats: 0
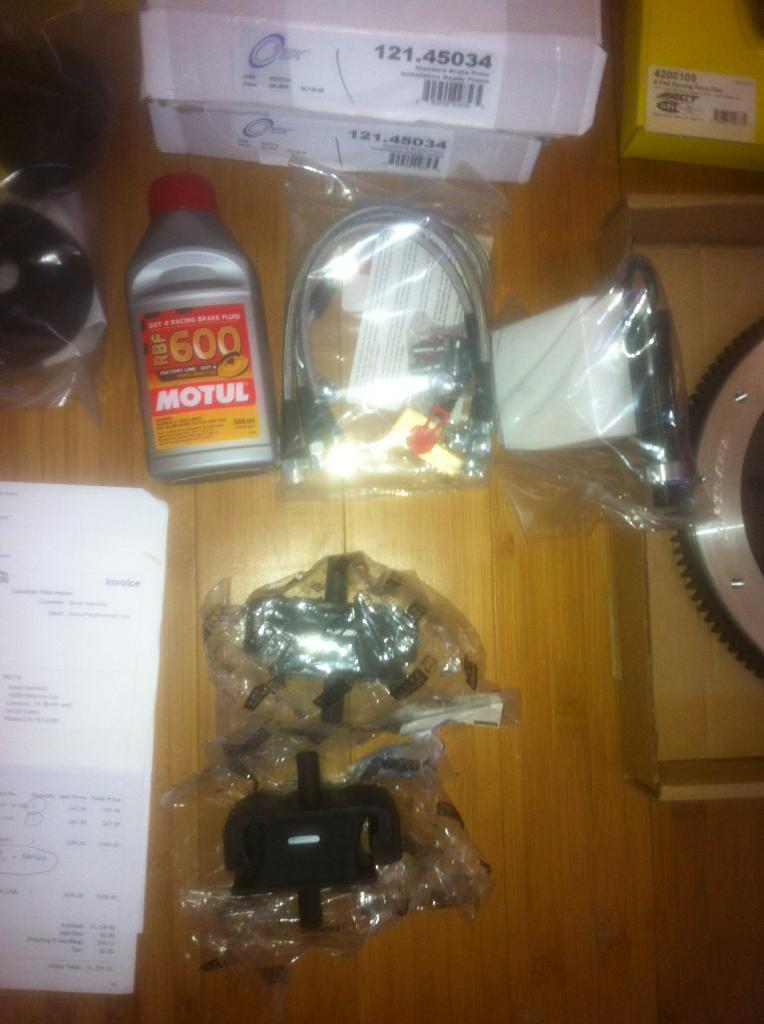
K so I got some parts in. I decided since it wasn't that expensive, I just went ahead and got the 949 parts I wanted for the time being to hold me over (my brakes are showing typical signs of being bad in the front). I'll look into wheel/big brake options later. Being new to me, I just go all new when I can if its a high mileage part. Plus who doesn't love wrenching on their car even if something's not really broken 
Also, I've been trying to troubleshoot this slight hesitation at low RPMs when I give it a blip on the throttle. Kind of like a sputter or misfire. It seemed to be a simple ignition or fuel issue and its really only noticed from idle to a quick stab at the throttle. if I roll into the throttle it doesn't do it at all. and I don't notice any issues throughout the RPM range as I'm casually driving either.
So far in the last week or so I have done a few very simple maintenance tasks that are eating at me.
*I put in all new oil and filter.
*I dropped in fuel treatment and ran a few tanks.
*I dropped in new plugs.
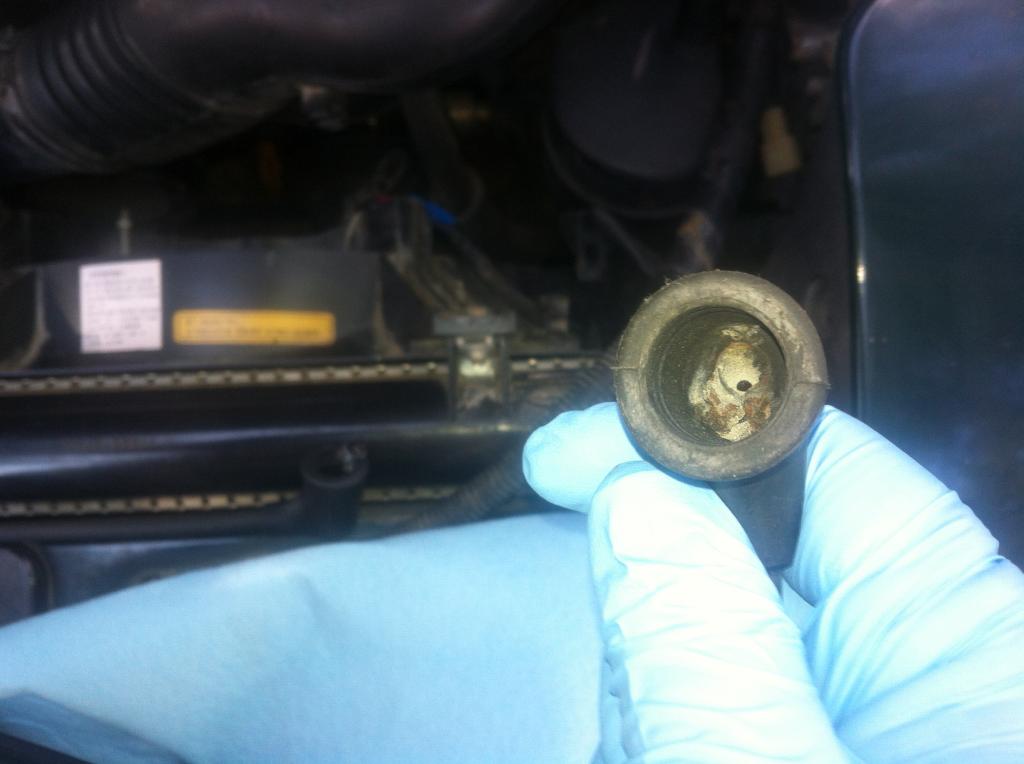
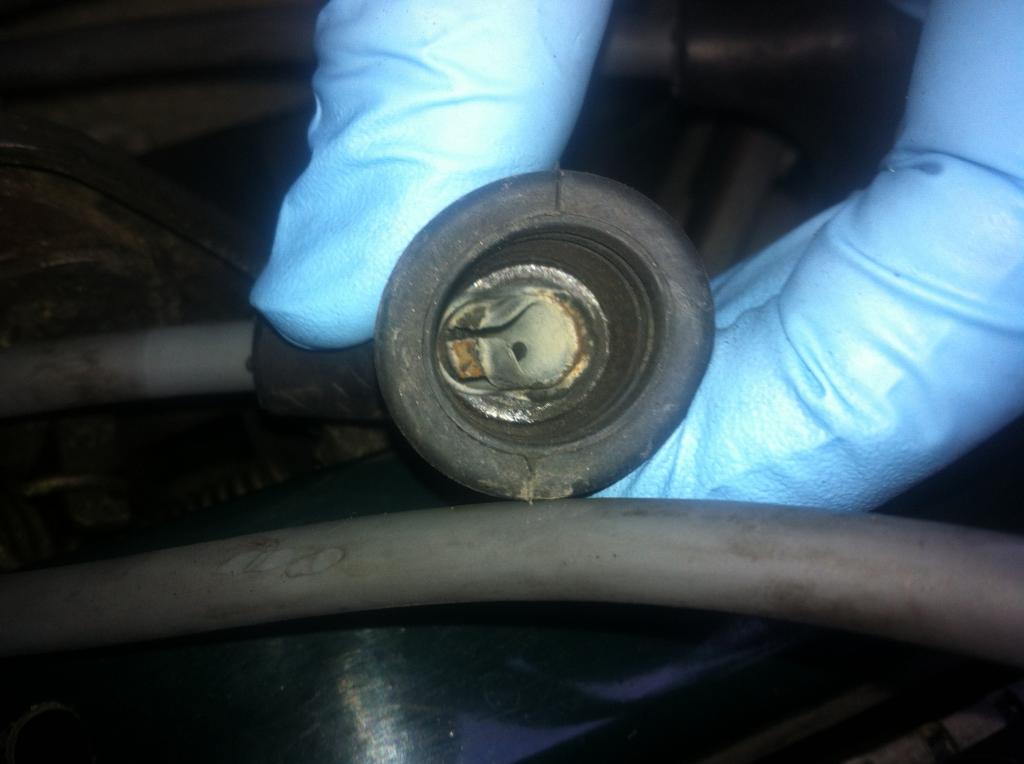
*I dropped in new wires this weekend, and I found something interesting. The coil packs were broken up on two of them. Very brittle and clogging up the contacts down inside the packs...how it was functioning without being really noticeable is beyond me...
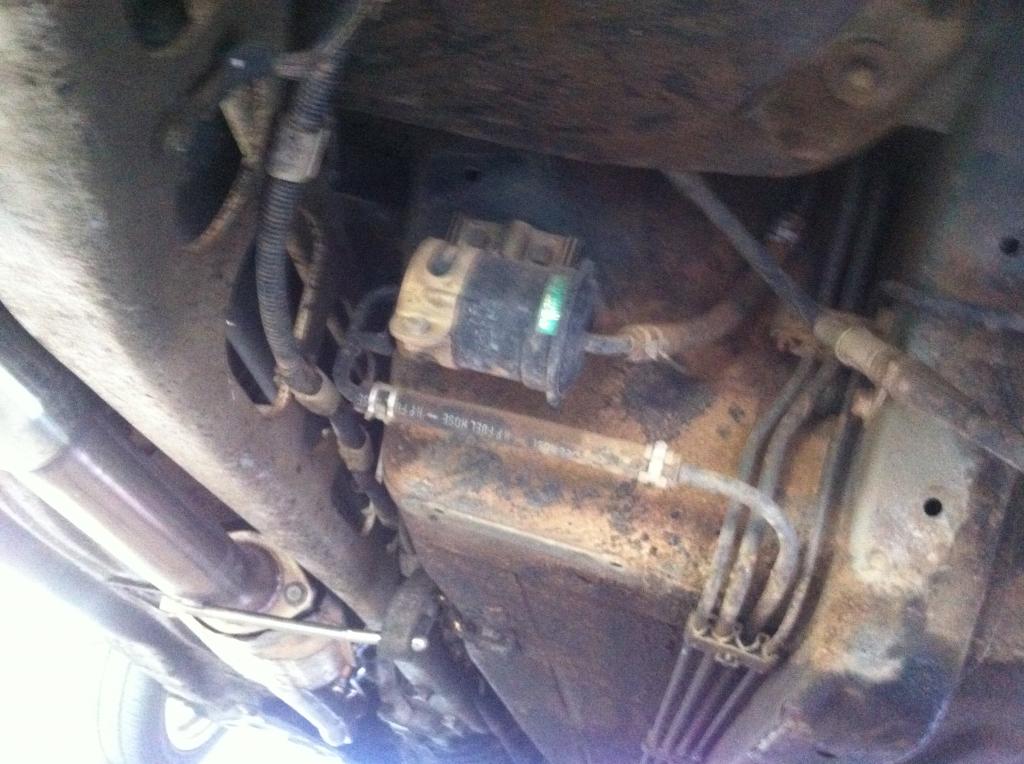
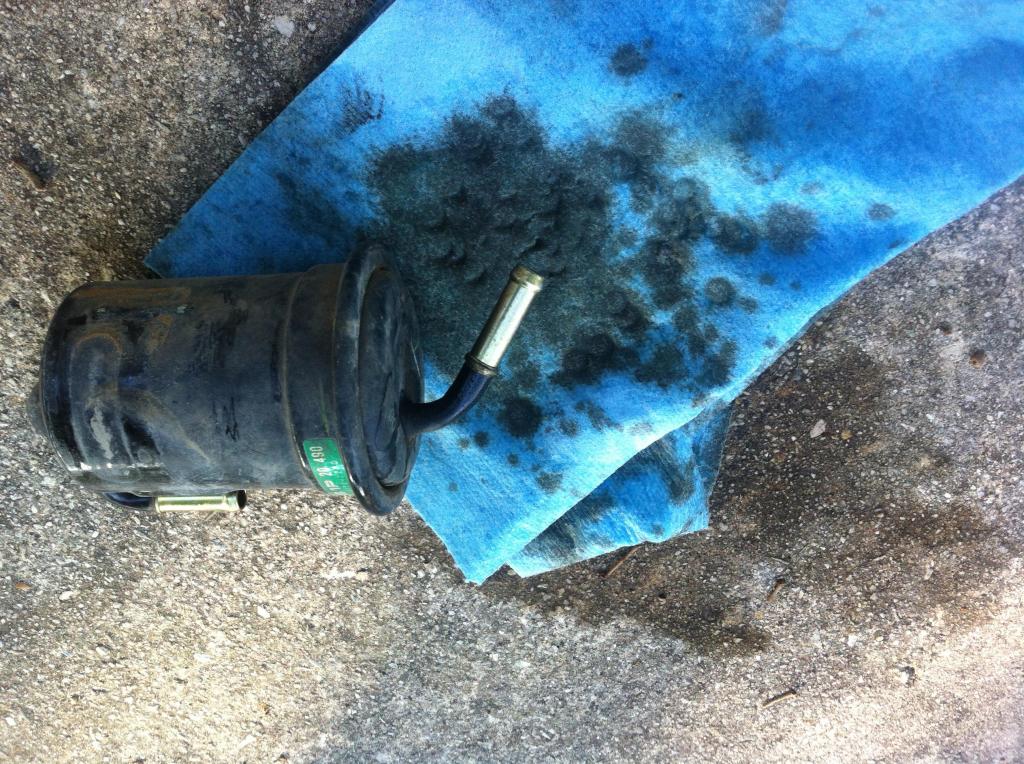
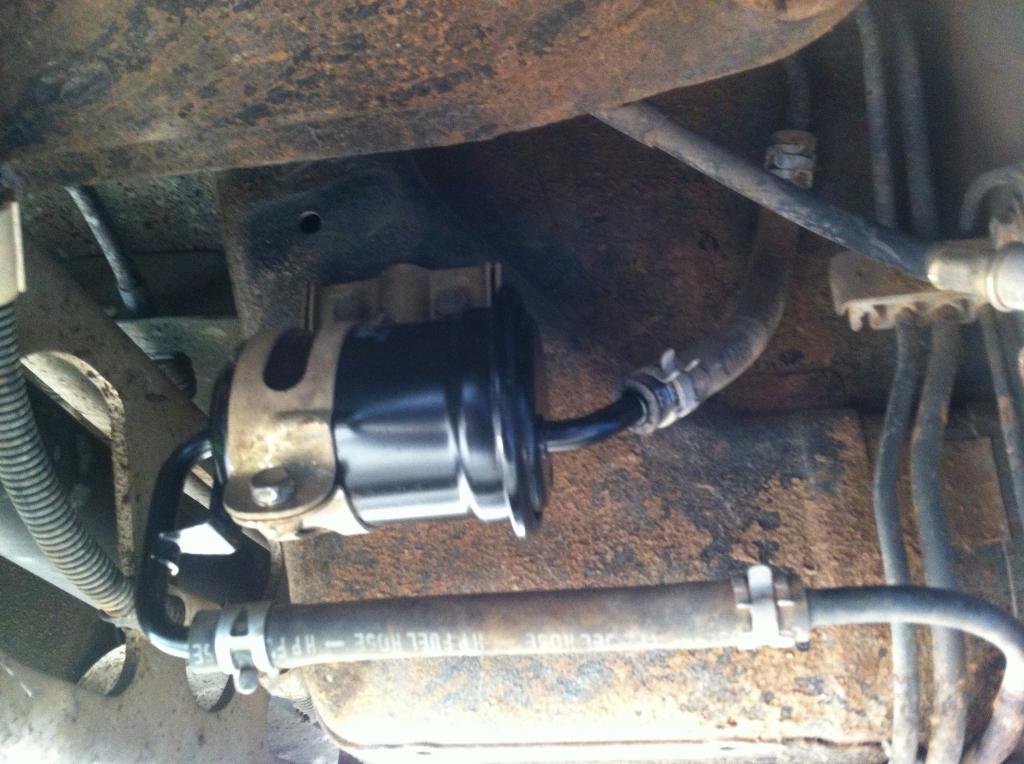
*I also did a new fuel filter yesterday.
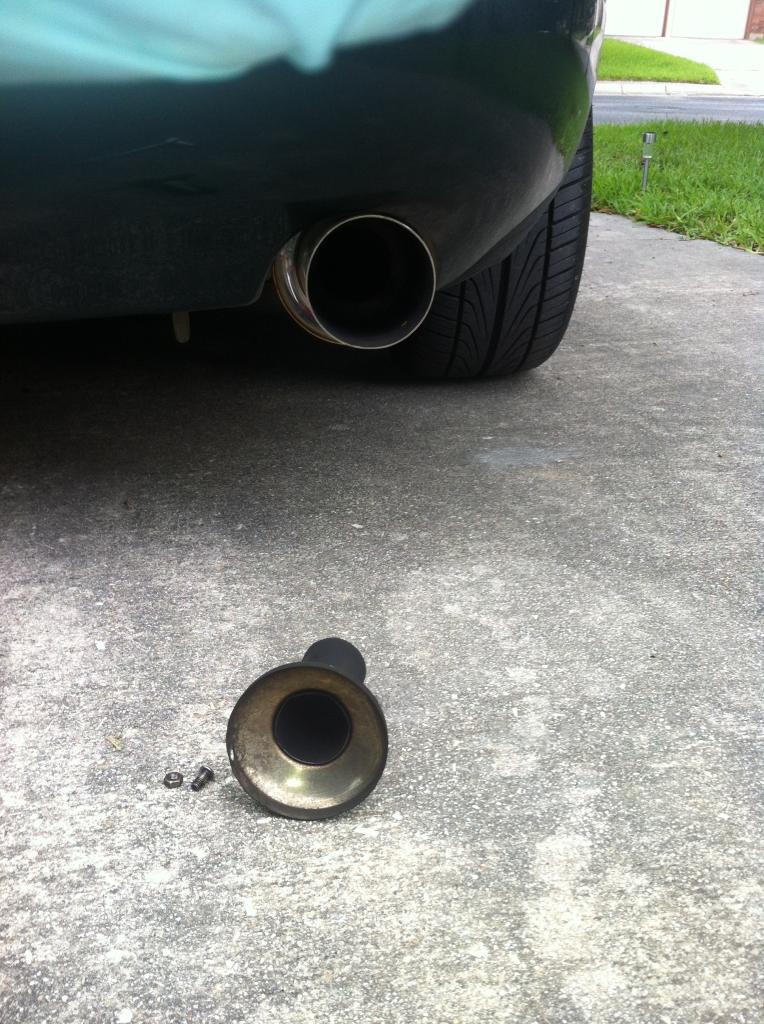
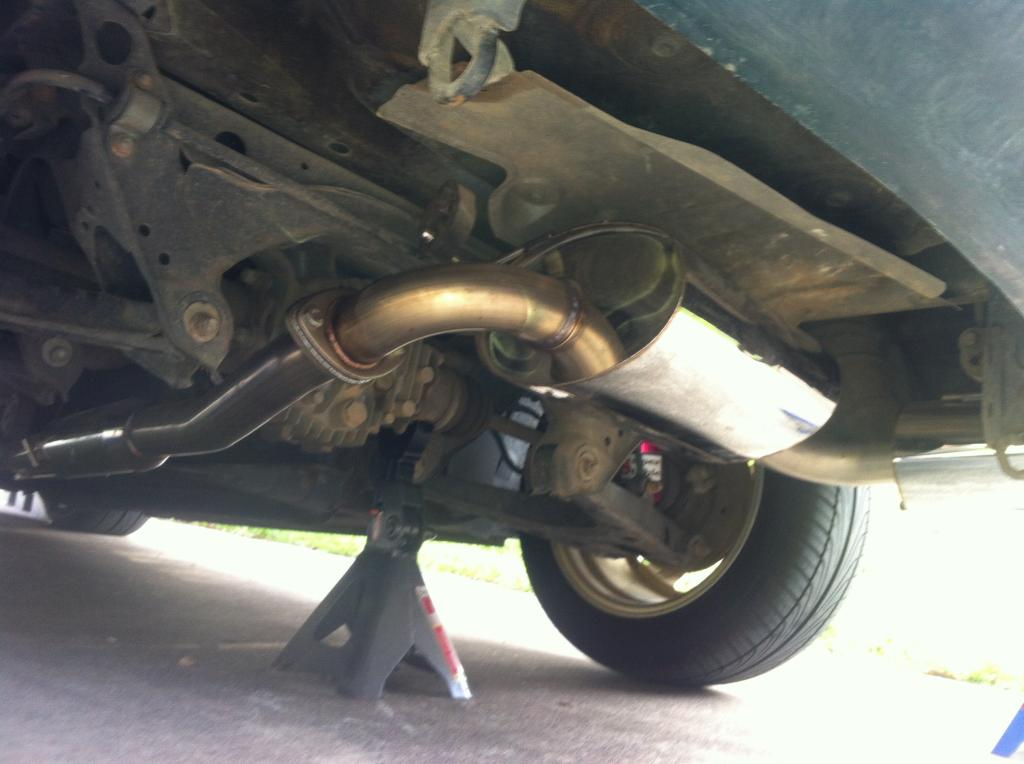
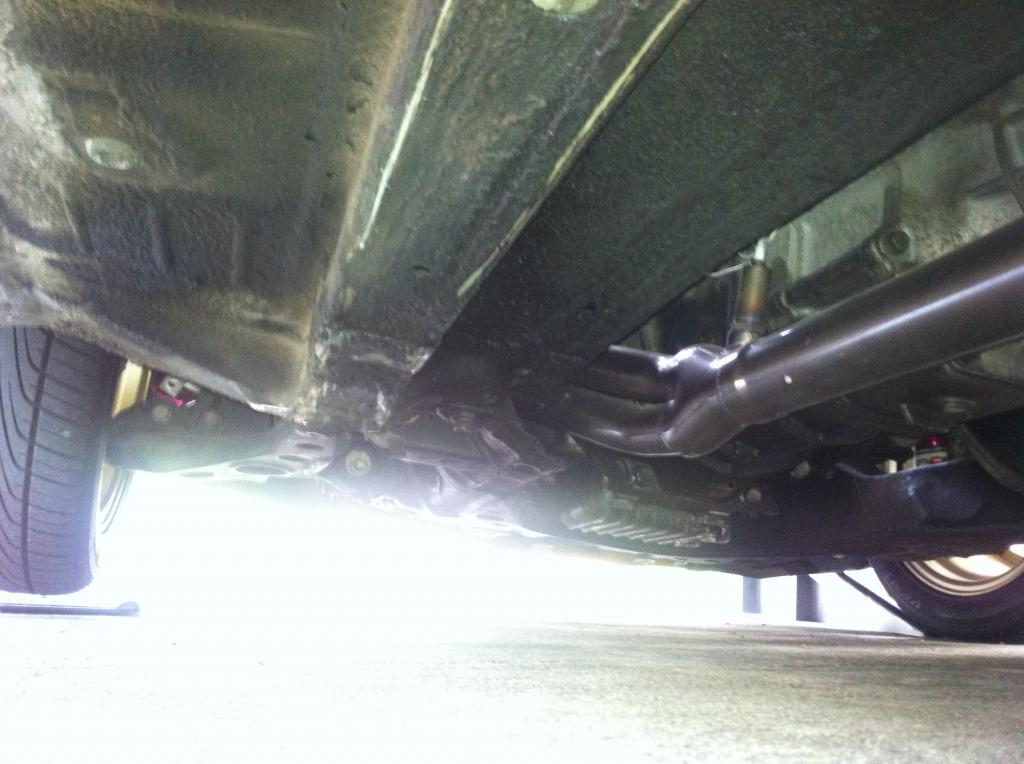
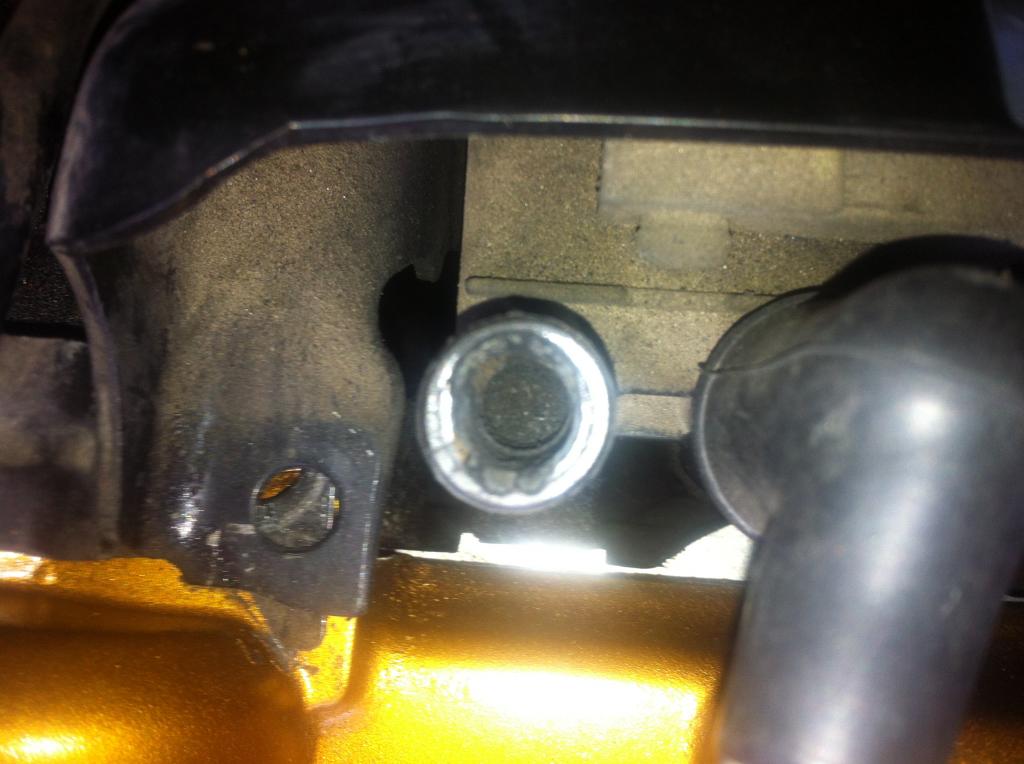
*I tighted up a few loose bolts on the exhaust on both sides of the cat. Its got a slight leak where the header runs into the front of the cat and has been bothering me. Basically I think its just from being loose (and was actually missing a bolt?!) and the new gasket that was on it must have burnt up or broke away at some point in the few hundred miles that were put on it since it was installed by the PO. I bought some exhaust leak putty but Im going to remove the cat first and make sure its not just a gasket issue, then Ill go get some maker and just make my own.
So to remedy the broken up coil issue, I found a used ignition coil pack to swap in for $20 locally just to check and see if it helps.
I also picked up some thick rubber pieces (like packing squares) from Lowes to see about getting rid of a suspension creaking noise I have from the coil over spring rubbing on the housing (front passenger). The rubber seal/bushing in there was thin and basically broke off even as new as these are. It makes an embarrassingly loud noise (like a squeaky strut) on any kind of bump or incline.
Long update of things but basically I'm good now on parts and need to start looking at the clutch install process as well as the brakes and rear end. I still need to source some rear axles for the 1.8diff I have sitting in my garage.
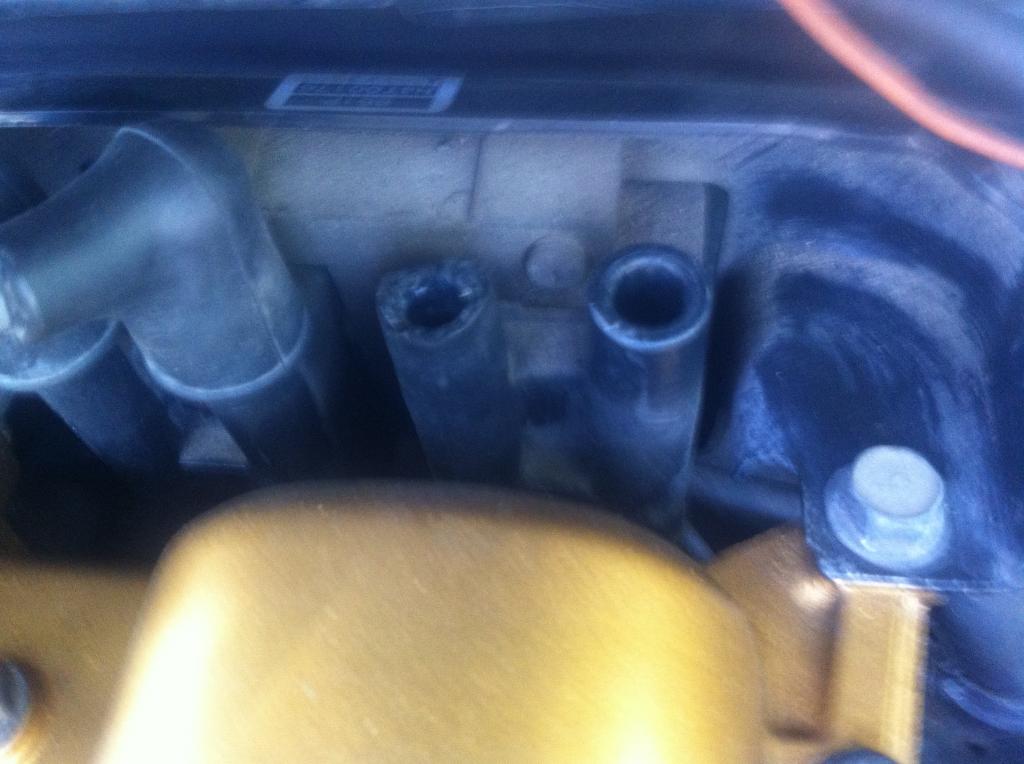
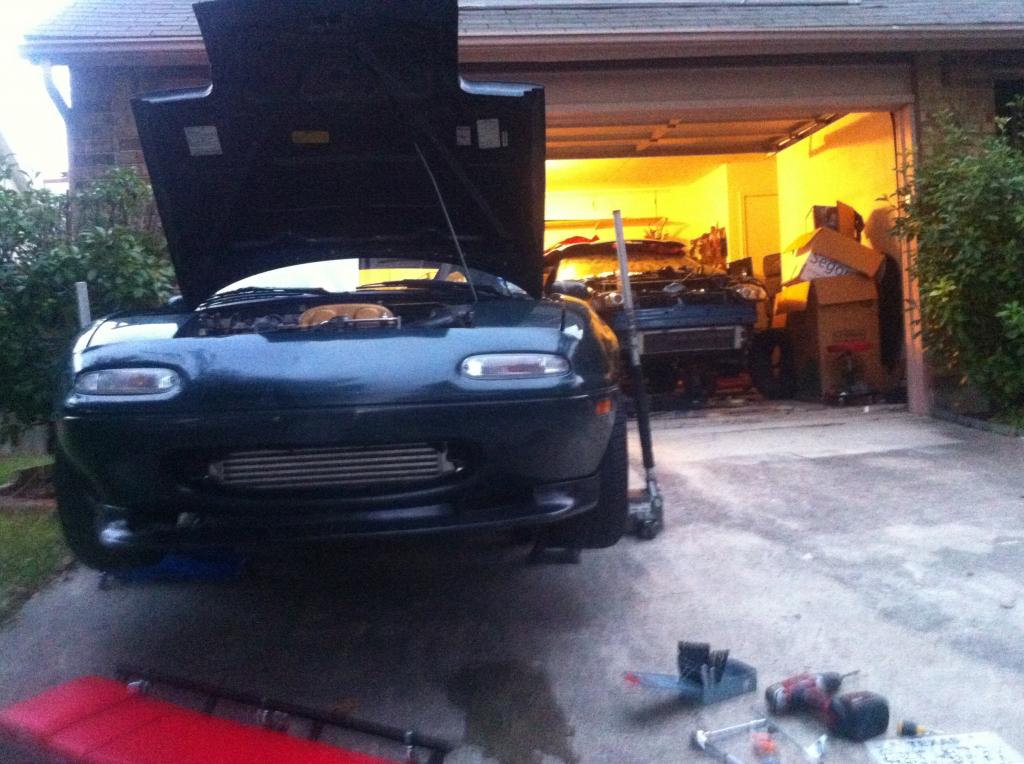
Here are the pics of everything up to this moment of what I've got and have done or need to do.
filter replacement
ignition wire replacement
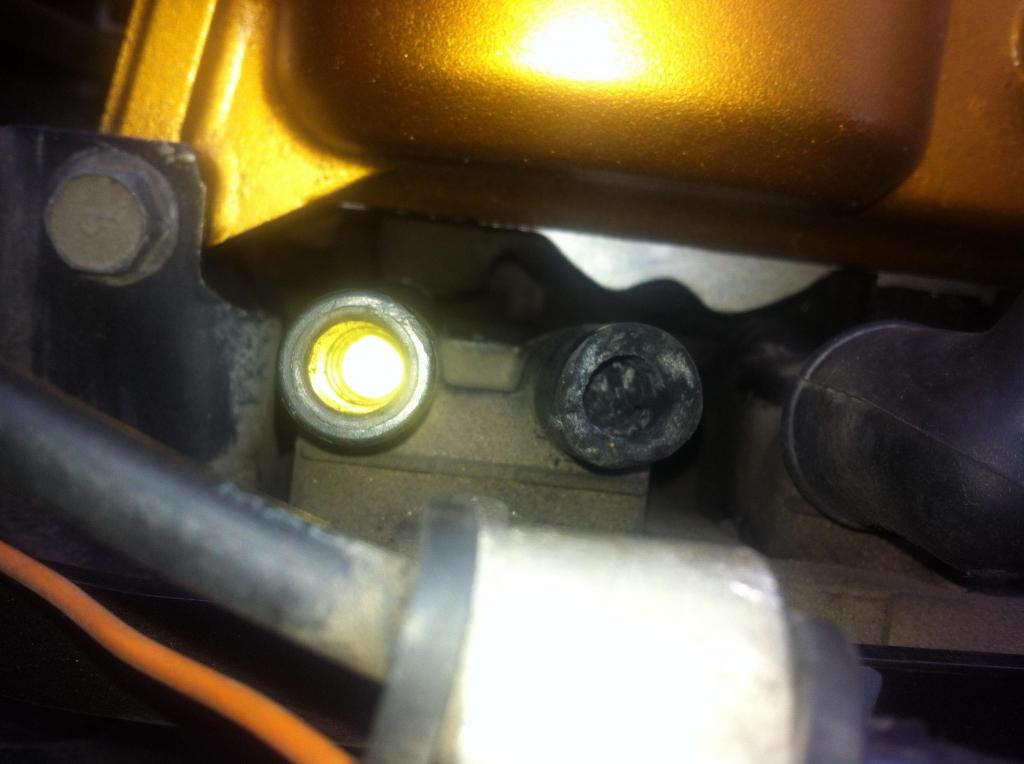
I cleaned out the coils, cleaned up the contacts so you could see metal down in there and put in the new wires. I didn't really notice much of a difference but I know from the look of those boot connectors it HAD to make a difference.

Also, I've been trying to troubleshoot this slight hesitation at low RPMs when I give it a blip on the throttle. Kind of like a sputter or misfire. It seemed to be a simple ignition or fuel issue and its really only noticed from idle to a quick stab at the throttle. if I roll into the throttle it doesn't do it at all. and I don't notice any issues throughout the RPM range as I'm casually driving either.
So far in the last week or so I have done a few very simple maintenance tasks that are eating at me.
*I put in all new oil and filter.
*I dropped in fuel treatment and ran a few tanks.
*I dropped in new plugs.
*I dropped in new wires this weekend, and I found something interesting. The coil packs were broken up on two of them. Very brittle and clogging up the contacts down inside the packs...how it was functioning without being really noticeable is beyond me...
*I also did a new fuel filter yesterday.
*I tighted up a few loose bolts on the exhaust on both sides of the cat. Its got a slight leak where the header runs into the front of the cat and has been bothering me. Basically I think its just from being loose (and was actually missing a bolt?!) and the new gasket that was on it must have burnt up or broke away at some point in the few hundred miles that were put on it since it was installed by the PO. I bought some exhaust leak putty but Im going to remove the cat first and make sure its not just a gasket issue, then Ill go get some maker and just make my own.
So to remedy the broken up coil issue, I found a used ignition coil pack to swap in for $20 locally just to check and see if it helps.
I also picked up some thick rubber pieces (like packing squares) from Lowes to see about getting rid of a suspension creaking noise I have from the coil over spring rubbing on the housing (front passenger). The rubber seal/bushing in there was thin and basically broke off even as new as these are. It makes an embarrassingly loud noise (like a squeaky strut) on any kind of bump or incline.
Long update of things but basically I'm good now on parts and need to start looking at the clutch install process as well as the brakes and rear end. I still need to source some rear axles for the 1.8diff I have sitting in my garage.
Here are the pics of everything up to this moment of what I've got and have done or need to do.
filter replacement
ignition wire replacement
I cleaned out the coils, cleaned up the contacts so you could see metal down in there and put in the new wires. I didn't really notice much of a difference but I know from the look of those boot connectors it HAD to make a difference.
Reply
0
0
07-30-2014, 03:32 AM
#11
Junior Member
Thread Starter
Join Date: Jun 2014
Posts: 48
Total Cats: 0
Im also going to tackle the R134 conversion soon. I'm tired of not having A/C in south Texas. I plan on cruising this across south TX on local Miata/Club days and the long drives will only be a recipe for ball soup for hours on end otherwise lol.
I'm also looking at the best solution for a CLEAN heat shielding solution for the lines and hoses as well as the transmission housing. I don't like the cheap tape look. Im thinking some black wrap will be better and there was this heat blanket stuff in 9"x12" sheets for $15 at Lowes (used for open flames when welding in sensitive areas). I figure a few sheets of those would cover all the lines and reservoirs. Unless others have some better solutions (and cheaper?!)
I'm also looking at the best solution for a CLEAN heat shielding solution for the lines and hoses as well as the transmission housing. I don't like the cheap tape look. Im thinking some black wrap will be better and there was this heat blanket stuff in 9"x12" sheets for $15 at Lowes (used for open flames when welding in sensitive areas). I figure a few sheets of those would cover all the lines and reservoirs. Unless others have some better solutions (and cheaper?!)
Reply
0
0
07-31-2014, 01:30 AM
#12
Junior Member
Thread Starter
Join Date: Jun 2014
Posts: 48
Total Cats: 0
Tightened up the exhaust at the flange where the header goes into the Cat. The leak there will require either a new gasket or leak stuff to just close it off for now. Basically the contour of the stock cat flange doesn't 100% match the flange on the aftermarket exhaust. so the two bolts are tight but the top is still bowed slightly.
Also swapped in the new (used) ignition module/coils.... no change that I can tell.
Im hoping this fairly normal and just has something to do with the way the MAF/tb work. Its only from idle, otherwise runs fine. Im hoping the MS set up and tune fixes that Ill try to get a video of it soon.
really not much else to do besides start planning when to do the brakes and clutch set up.
I need to finish putting my cavalier back together before I boost the Miata though, I don't want two projects on jack stands lol.
I also need to find a decent solution for my gauges. I am thinking under the radio on the bottom since the stock radio is there and isn't used. I also found a custom one on some pictures somewhere where its a custom pod holder on the top of the center console, sort of like where Subarus have theirs. I may just get a 2 gauge holder on the A-pillar though and call it a day. That's where my Cav gauges are and they look fine.
Reply
0
0
12-23-2014, 11:18 PM
#13
Junior Member
Thread Starter
Join Date: Jun 2014
Posts: 48
Total Cats: 0
well Ive been driving and tinkering with the yata since I last posted. I guess I've just been lazy, but I have everything necessary to do the install. The only thing Im missing (lost during my move..?) is my tap and die set...so I may have to go get a 3/8" drill and tap for the oil return adapter I picked up today.
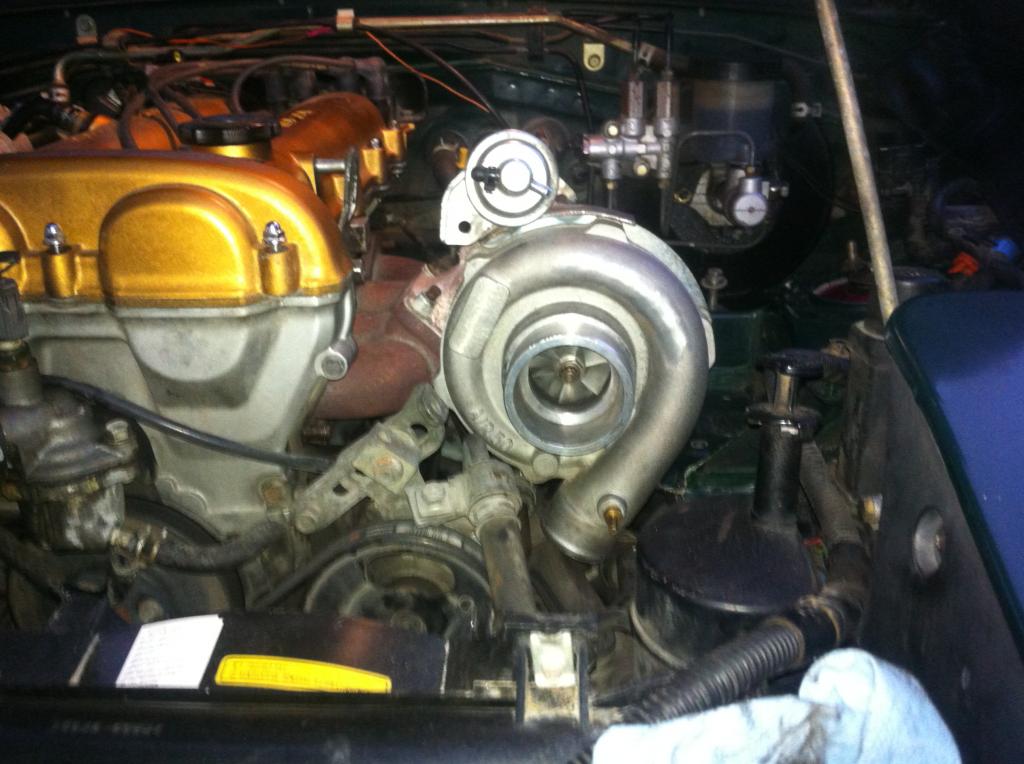
Got the intercooler test fitted, but still need to test fit with the pipes. The PO had deleted PS and AC, where as I have those. So the piping may not work without major modifications.
Mocked up. I drilled out the two bolt holes that hold on the bumper (theres a ton more and it hasnt lost any support) on either side of the hinge. I ran an M8 bolt down into the top of the IC where I have M8 threaded bungs welded onto it. Very convenient!
I laid everything else out and all I have to do is go back through some posts on here Ive been reading at work about how to wire up the TPS, IAT, wideband, etc. I have my 2 pod gauge holder and my AEM boost and UEGO ready to go in as well. Basically my goal is to have everything IN by next week over this Christmas week/weekend.
I will install the clutch/flywheel/diff/brake upgrades/etc after I have her running right. I have a local mega squirt source who will work on mine if it needs tweaking, but its pre-tuned by the PO for his set up, which should be good enough to get it running and drivable. Ill be very easy on the rear end and components, especially since my stock clutch wont like any extra power lol.
Reply
0
0
12-27-2014, 03:22 PM
#14
Junior Member
Thread Starter
Join Date: Jun 2014
Posts: 48
Total Cats: 0
Got her in yesterday. Everything was fairly smooth. Exhaust does touch the steering shaft a bit, and the power steering/AC are in the way of the IC piping and oil return.
Im currently looking into the depowered rack mod and deleting AC (but want to keep the blower functionality so I have heat and 'cool' air when desired).
Today will consist of tearing out the dash to get the gauges installed and researching the TPS/O2 sensor wiring Ill need to do. I will also swap the factory ECU out with the MSPNP Ive got.
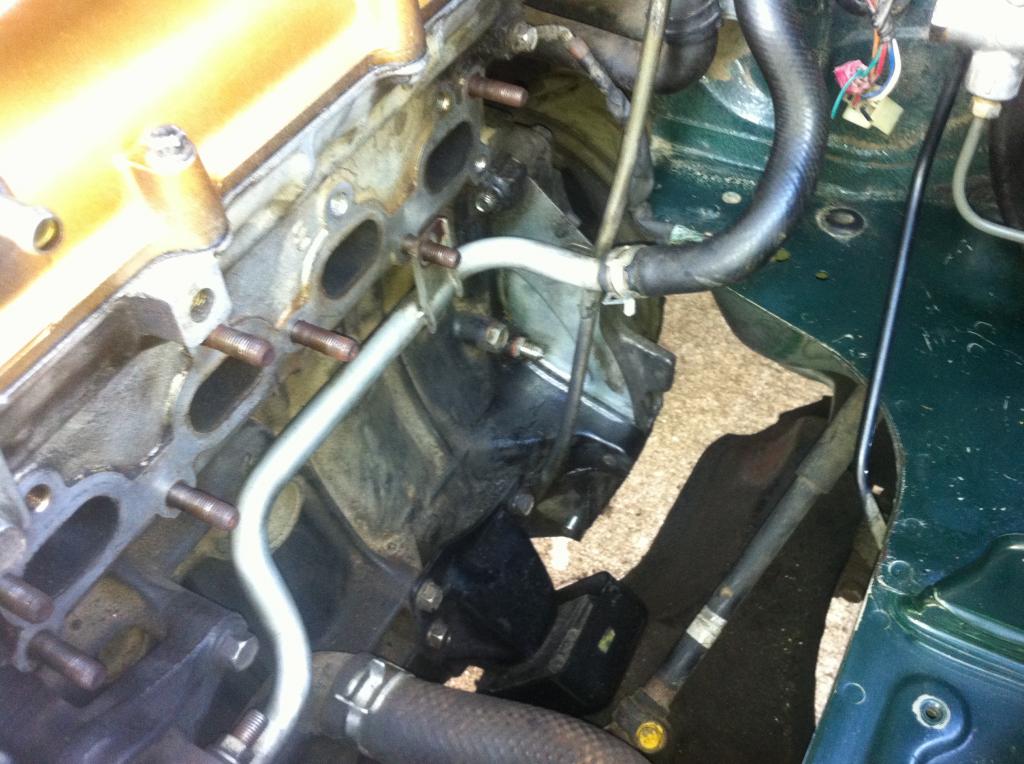
was dark when I finished so the exhaust pics and other stuff will come later. Also cleaned up the bay a little. I would like to pain the manifold and fix a few things while theres more space too. I noticed my CAS was leaking and there is a new leak from the brake master cylinder
Im currently looking into the depowered rack mod and deleting AC (but want to keep the blower functionality so I have heat and 'cool' air when desired).
Today will consist of tearing out the dash to get the gauges installed and researching the TPS/O2 sensor wiring Ill need to do. I will also swap the factory ECU out with the MSPNP Ive got.
was dark when I finished so the exhaust pics and other stuff will come later. Also cleaned up the bay a little. I would like to pain the manifold and fix a few things while theres more space too. I noticed my CAS was leaking and there is a new leak from the brake master cylinder
Reply
0
0
12-30-2014, 12:23 AM
#15
Junior Member
Thread Starter
Join Date: Jun 2014
Posts: 48
Total Cats: 0
Got the 550cc injectors in today.
Got the IC all bolted up and solid as can be.
Swapped the modified TPS sensor in.
I realized after reading a few posts the UEGO WB sensor shouldn't be placed so close to the turbo..but the PO had it just after the DP right about where the factory one was. I heard it needs to be further down just before or after the cat (or in my case, flex pipe). I could remove that section, take the UEGO bung that was supplied and get a plug for the current one I guess...
Still going to have to delete the AC/PS because the IC piping will not fit, and the oil return is not going to the pan as is.
So Im going to get the WB/Boost gauges installed and mostly wired up, then figure out how I want to do this. I can source a partially depowered rack locally (in trade for my full exhaust system), then I can do the full FM depowered method. I just need to research how complicated it is removing all the AC/PS stuff..i tend to over complicate things because I often cant believe how simple this stuff is.
But cant wait to eventually fire her up for the first time!!
Reply
0
0
01-05-2015, 07:38 PM
#17
Junior Member
Thread Starter
Join Date: Jun 2014
Posts: 48
Total Cats: 0
sixshooter, I need to measure it but thanks for the info. I think its much closer than 18".
I just removed the AC and PS. I was reading up on some posts I searched through and I want to keep the heat/cool air blowing into the cabin. If I just remove the stuff in the engine bay (condenser, ac compressor, all the lines, I think theres a canister too on the pss fender)., will I be good to go?
I also came across this post regarding a long bolt "holding the ac condenser" to the motor...did he mean compressor? and is this relevant on a 91? I removed all 4 bolts holding the AC on and the 6 or 7 holding the big bracket on, then just left it.
MX-5 Miata Forum - View Single Post - AC Removal
Reply
0
0
01-05-2015, 08:54 PM
#18
Junior Member
Thread Starter
Join Date: Jun 2014
Posts: 48
Total Cats: 0
Nevermind..it was obvious when I went to look at it again. I wouldn't of even though of that :/
But I just tapped the sleeve out of the bracket that the bolt was bolted through before, and bolted that back in with the OEM bolt. I don't see any issues with this..?
Im going to order the PS delete kit (I think ive seen them for around $50) and then Ill do a proper FM depower mod when I get ahold of a friends steering rack. Then I can prep it and just swap the two when Im ready.
Tomorrow after work Ill test fit the pipes for the IC, but I know I still need to remove the lines for the AC on the intake side as the prefabbed pipes rub it and I cant install the pipe with the current coupler...id have to get a longer one.
Have yet to do the gauges..but those will come soon. I still will need to remove the DP and exhaust piece so I can have the AEM supplied bung welded to the exhaust further down, Im very sure the current one is under 12" from the turbo. Ill go measure just to be sure...
Reply
0
0
01-07-2015, 10:44 PM
#19
Junior Member
Thread Starter
Join Date: Jun 2014
Posts: 48
Total Cats: 0
 soon....very soon!
 got the AC and PS all out.
got the cold/hot IC piping all in.
got the MBC installed.
got the oil return tightened down and just need to drill/tap the oil pan.
got the IAT sensor in but need to run the two wires (if I recall to the MAF, 2/6 plugs or something)
Basically she's all test fitted and ready for proper installment.
I need to run the vacuum lines for the MS, Boost gauge, and BOV.
I need to install and run the wiring for the gauges (been putting this off lol).
THEN Phase 2, she'll be good for the test run, and Ill do the upgraded clutch, lw flywheel, motor mounts.
Phase 3, brake upgrade waiting to go in.
Phase 4 rear diff/bushings waiting to go in. I need to source some axles, I think ill grab ABS 99 from Advanced auto (like 130$ pair or something).
Before I get crazy I also need to fix the master cylinder leak for the brakes...not sure how/why that started but its a new issue. Also need to change out the valve cover because the CAS is leaking bad. I didn't see a gasket/seal for that, so Im guessing its leaking where the CAS goes into the valve cover gasket?
Soon...she's just about there!
Reply
0
0
01-13-2015, 12:55 AM
#20
Junior Member
Thread Starter
Join Date: Jun 2014
Posts: 48
Total Cats: 0
Well I was drilling and tapping the oil pan for the oil return...everything was going well until I measured the fitting to the hole I drilled...I thought 'this isn't right, its too small still'...so I drilled one step larger...OOPS.
So now my 5/8-18 -10AN is too small.
I need to drill out to 11/16" and tap for a 3/4-16 (the tap I have next in size).
But where to find a -10AN 3/4" fitting with 16 thread pitch. Ive only found 14 online so far...but my tap is for 16. go figure.
Other than that...I got my power steering depower kit from miataroaster installed.
I also got the AEM boost/wb gauges into the A-pillar mounted in the gauge pod.
-Just need to tap the wires into the radio or ECU or something and those are set.
-Wire up the IAT to the AFM connector (I believe that's what I saw in some instructions).
Everything is ready to go after that and test fitted. I just hope I can find a fitting now that I can adapt for my oil return or it'll be the only thing keeping me from firing her up for the first time in a few weejs since the turbo went in!
Reply
0
0


