My turbo prep rebuild page
 01-11-2009, 01:06 AM
#41
Elite Member
Thread Starter
iTrader: (1)
Join Date: Feb 2008
Location: Birmingham Alabama
Posts: 7,930
Total Cats: 45
Well my goal is around 200, so 250 is my upper range. I do want the 2560, but at $200 more, its hard to justify with my power goals. I do expect eventually I will want more than 250, but only once I get the 6 speed. I may look for used deals. I may even piece together all I need finding peoples used stuff. Used 2560, someone upgrading, and buy a BEGi manifold and DP, and ebay intercooler. May be able to get a basic kit together for under $2k, then add a bit more later for the little accessories like cold air box.

Reply
 0
0

0
01-11-2009, 02:52 AM
#42
Elite Member
iTrader: (5)
Join Date: Jul 2006
Location: Central California
Posts: 2,543
Total Cats: 4
Why are you only looking at the t25 series turbos? Have you considered a t3 or Mitsubishi turbo? A TD05 16g would be a great turbo, as is the Greddy TD04 14(b?) for a quicker spooling setup. There are also the T3 60 trim turbos, which is what I am working on hooking up right now and from what Ive seen a t3 60 with a .48 hotside is very similar to a 2560 and a t3 50 .48 would be similar to the 2554. I just want to make sure you dont limit yourself.

Reply
0
0
01-11-2009, 03:49 AM
#43
Elite Member
Thread Starter
iTrader: (1)
Join Date: Feb 2008
Location: Birmingham Alabama
Posts: 7,930
Total Cats: 45
Not really not looking, but if I get a BEGi setup, it will come with either the 2554 or 2560 (or 2860). I guess they do have a T3 manifold dont they. I may end up going that route, since Mitsubishi turbos are quite a bit cheaper than any Garrett T25/28 (arent the 16g and 14b still T25?). And a Super 60 w/ .48 would be nice, but does anyone make an internally wastegated model? All of the ones Ive seen have been external.
Also, how many people in the Miata world run ball bearing vs journal bearing? Ive heard a similar size journal bearing turbo will spool ~200-400rpm later than a ball bearing turbo. Im pretty sure I would want ball bearing.
While Im at it...

Bit closer
Also, how many people in the Miata world run ball bearing vs journal bearing? Ive heard a similar size journal bearing turbo will spool ~200-400rpm later than a ball bearing turbo. Im pretty sure I would want ball bearing.
While Im at it...
Bit closer
Reply
0
0
01-11-2009, 10:43 PM
#44
Elite Member
Thread Starter
iTrader: (1)
Join Date: Feb 2008
Location: Birmingham Alabama
Posts: 7,930
Total Cats: 45
And yet again...
Money has yet again struck at my saving for turbo build. My 7 or 8 year old 17'' Dell LCD took a dump on me earlier this week, and hasnt worked right since. So I went out today and bought a much needed upgrade, 24'' Samsung. I think I stole it from BestBuy because online price was $450, but I only paid $261... oh well, their loss. Such a huge change with a large monitor. I do have a stuck pixel though, which Im trying to cure now. So thats another ~$300 out of my turbo funding.
Money has yet again struck at my saving for turbo build. My 7 or 8 year old 17'' Dell LCD took a dump on me earlier this week, and hasnt worked right since. So I went out today and bought a much needed upgrade, 24'' Samsung. I think I stole it from BestBuy because online price was $450, but I only paid $261... oh well, their loss. Such a huge change with a large monitor. I do have a stuck pixel though, which Im trying to cure now. So thats another ~$300 out of my turbo funding.
Reply
0
0
01-14-2009, 07:00 AM
#45
Elite Member
Thread Starter
iTrader: (1)
Join Date: Feb 2008
Location: Birmingham Alabama
Posts: 7,930
Total Cats: 45
... And you thought you did a good job, and got it all clean... hah!
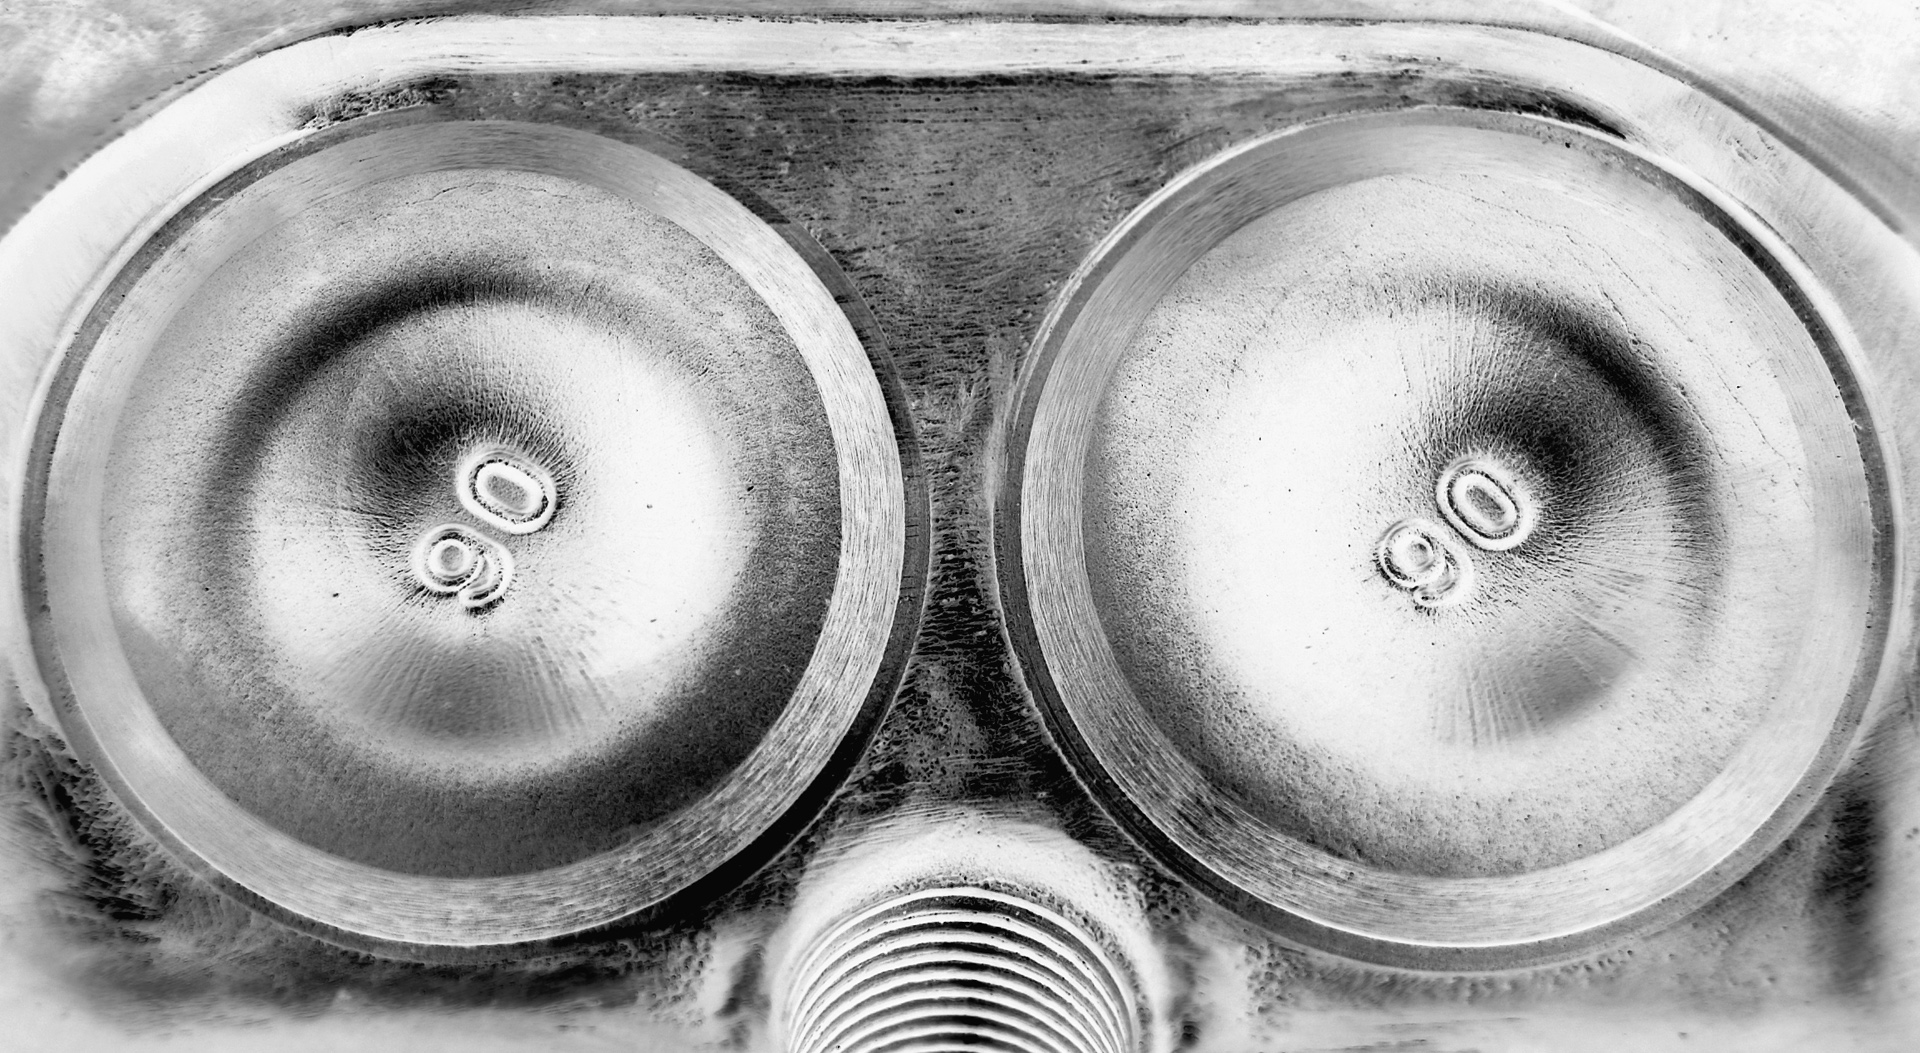
When everything looked good with the naked eye, some tinkering with photos reveal alot of missed stuff I thought my valves were smooth as silk, and the combustion chamber looked decent under normal lighting. Might try this on future detailed jobs. Almost artistic.
Worked even better in full picture resolution with monitor on 1920x1200
When everything looked good with the naked eye, some tinkering with photos reveal alot of missed stuff
I thought my valves were smooth as silk, and the combustion chamber looked decent under normal lighting. Might try this on future detailed jobs. Almost artistic.Worked even better in full picture resolution with monitor on 1920x1200
Reply
0
0
01-16-2009, 03:31 AM
#46
Elite Member
Thread Starter
iTrader: (1)
Join Date: Feb 2008
Location: Birmingham Alabama
Posts: 7,930
Total Cats: 45
Goddamn taxes! I was expecting a return this year, but instead I owe. Son of a bitch! I never got my $300 refund from last year thanks to messed up paper work. Maybe I can get them to take that off what I owe (unlikely, those bastards)  Honestly, I never even noticed none of my federal taxes werent being withheld, so I owe the full amount this year. I would have taken a $25 a paycheck loss to avoid paying taxes, if I had known. Shame on me. This on top of my new monitor, bah! Just had to vent somewhere.
Honestly, I never even noticed none of my federal taxes werent being withheld, so I owe the full amount this year. I would have taken a $25 a paycheck loss to avoid paying taxes, if I had known. Shame on me. This on top of my new monitor, bah! Just had to vent somewhere.
Reply
0
0
01-18-2009, 09:23 AM
#47
Elite Member
Thread Starter
iTrader: (1)
Join Date: Feb 2008
Location: Birmingham Alabama
Posts: 7,930
Total Cats: 45
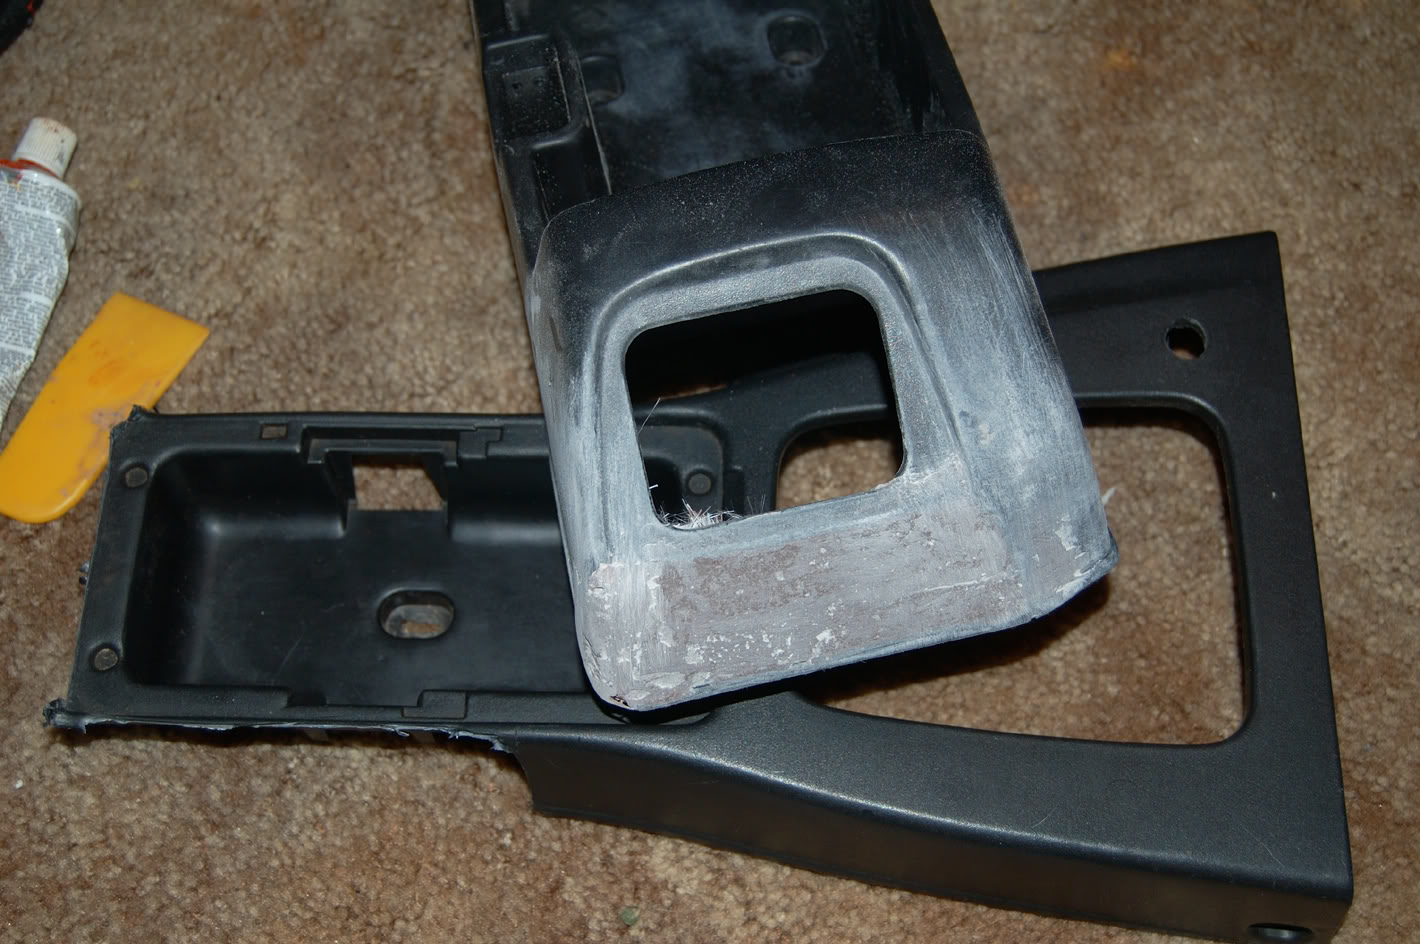
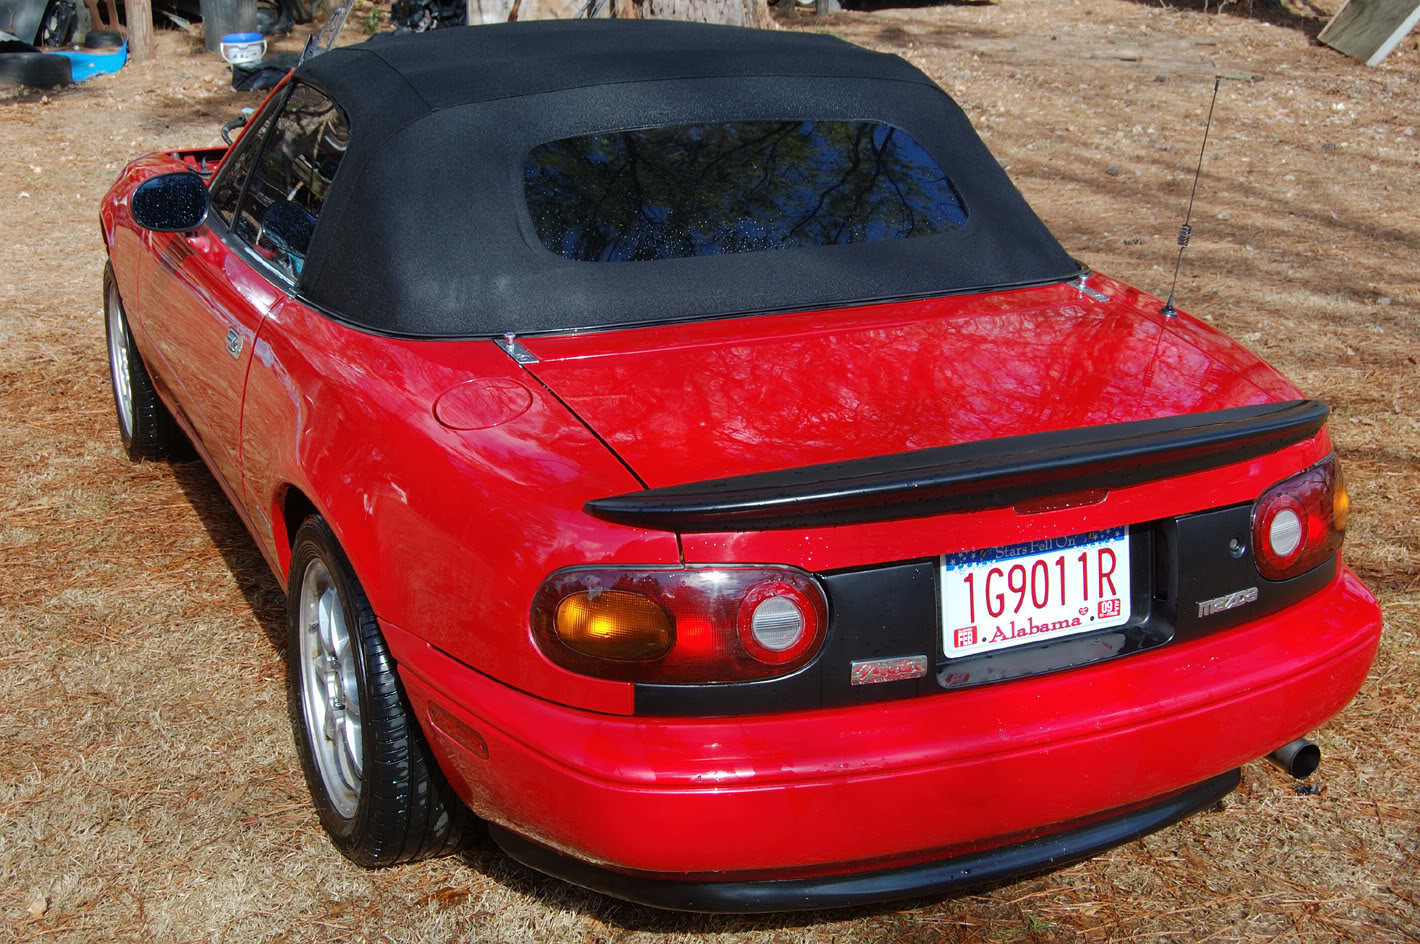
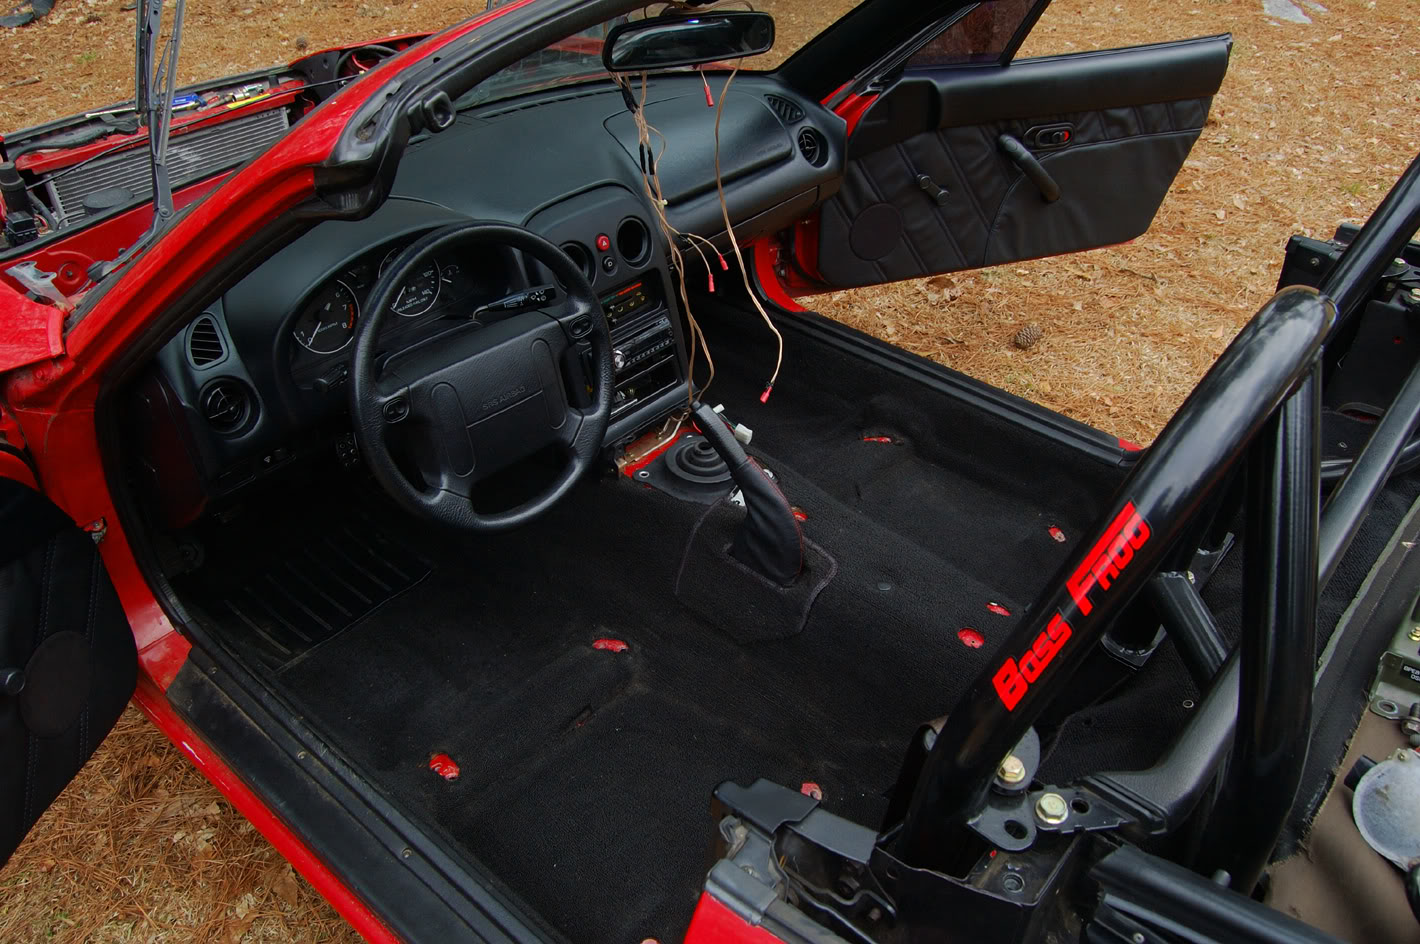
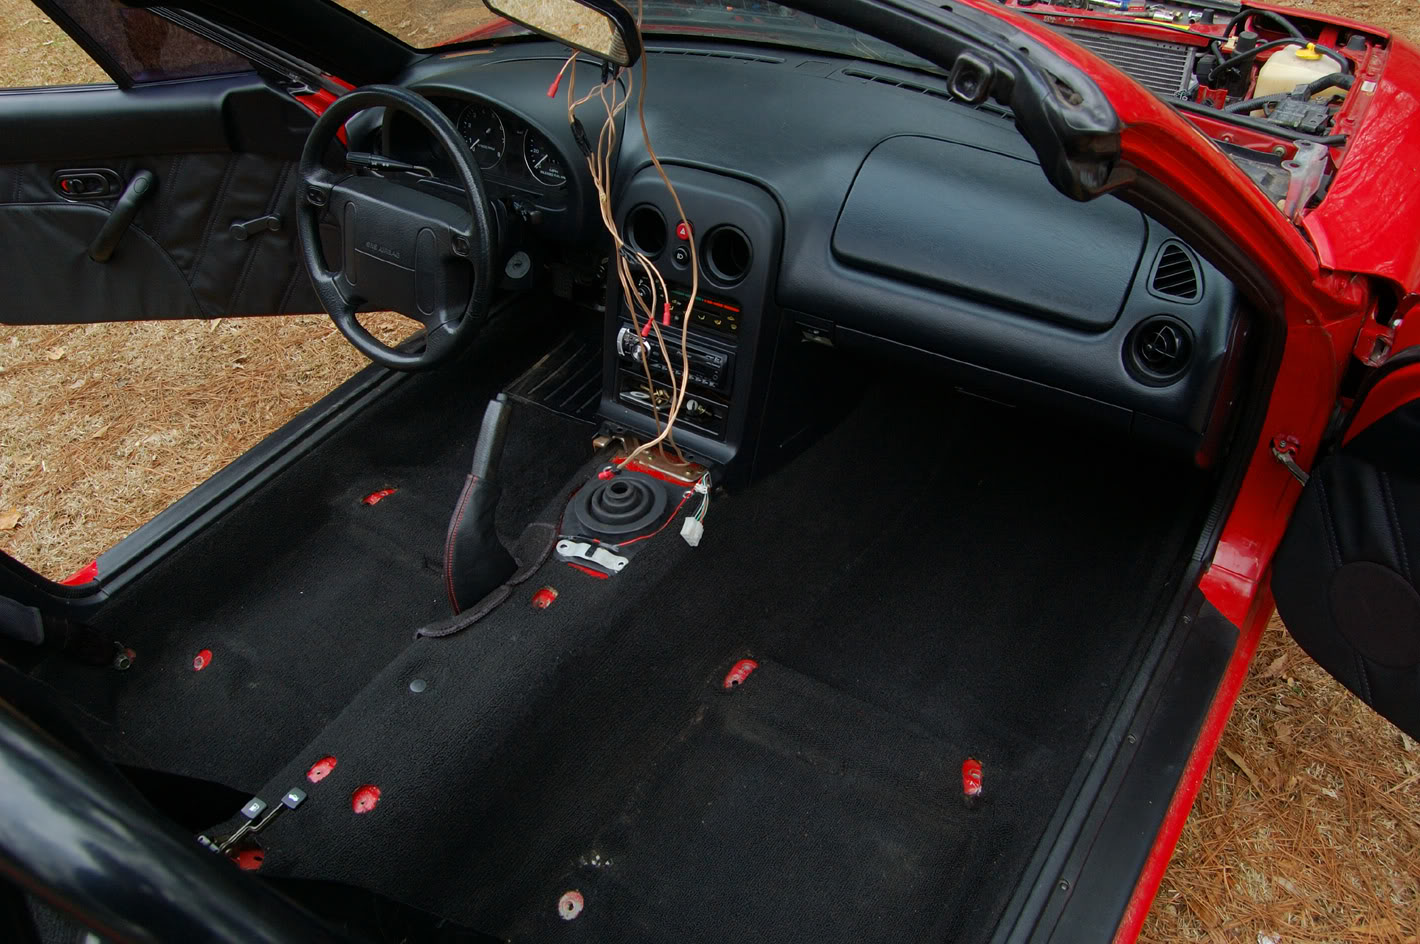
Been playing with a fun little project last night through this morning. Shorty console, and glove box. My console was cracked on the side right around where the window switch blank was, so I went ahead and cut it there, and cut just in front of the coin holder thing. Most people taper the section behind the shifter down to a point, or down low to the carpet, but Im making mine more square to make a nice place to mount switches in the future. I pretty much just removed the center section where the e-brake and coin holder is, and just left the surround for the shifter, and the rear section to hide the fuel and trunk pulls. Ive done the rear section fiberglass work, and will start on the front later. I started by "welding" one of the flat pieces of plastic from the ashtray (coin holder) area to the hole left. My camera is on loan, so no pictures right yet. I also found a use for my old door panel material, makes a nice arm rest cover for the glove box lid. Vinyl almost matches my leather perfectly.
Not turbo related, but its overall car progress. Engine should be going back in starting Friday.
Not turbo related, but its overall car progress. Engine should be going back in starting Friday.
Last edited by NA6C-Guy; 01-18-2009 at 09:41 AM.
Reply
0
0
01-18-2009, 06:40 PM
#48
Elite Member
Thread Starter
iTrader: (1)
Join Date: Feb 2008
Location: Birmingham Alabama
Posts: 7,930
Total Cats: 45
Bored:
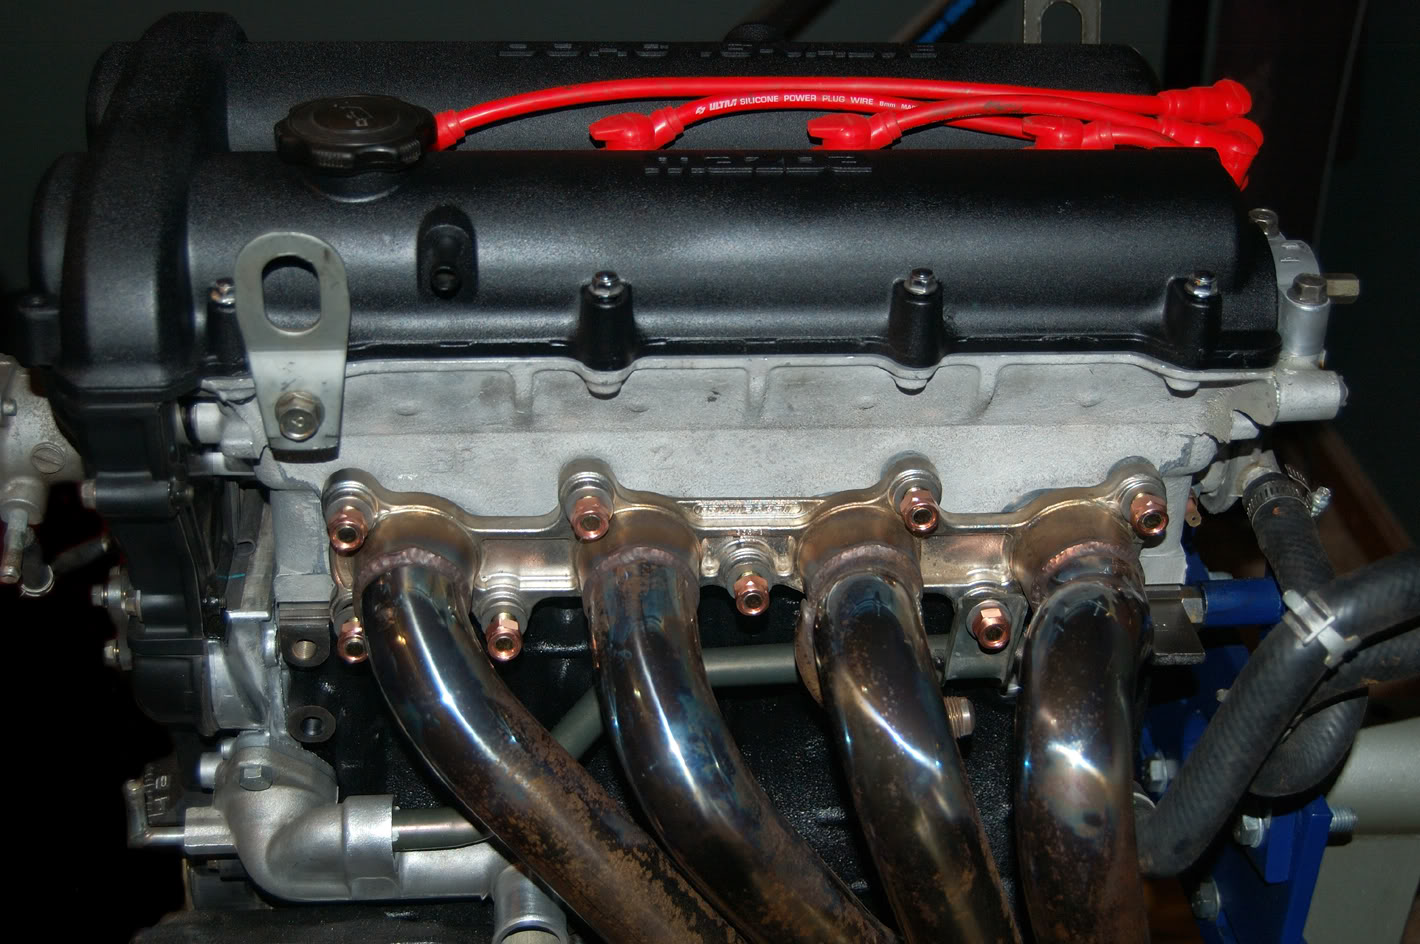
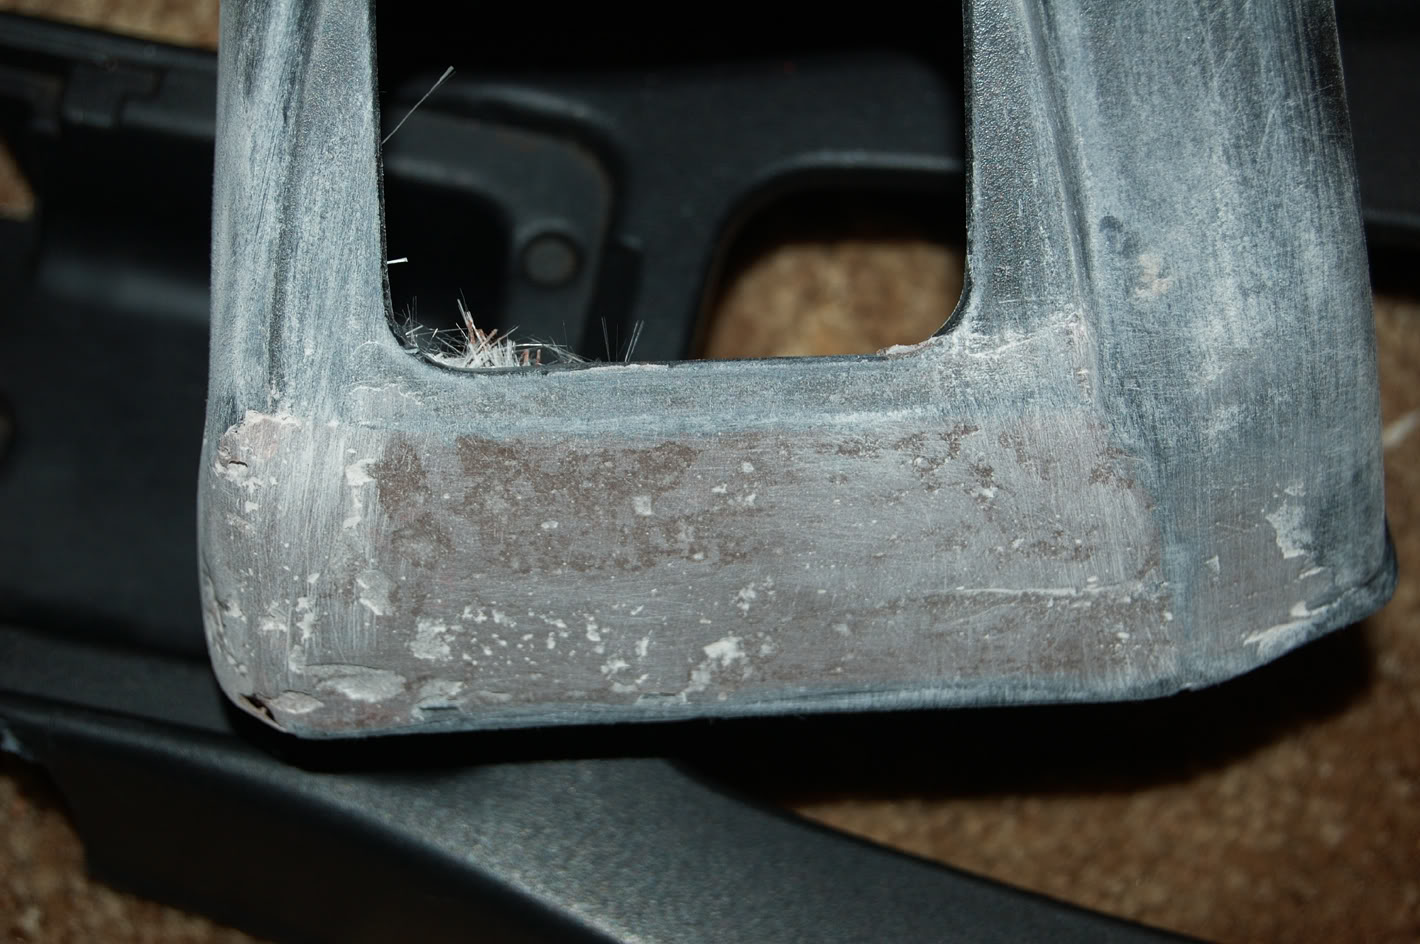
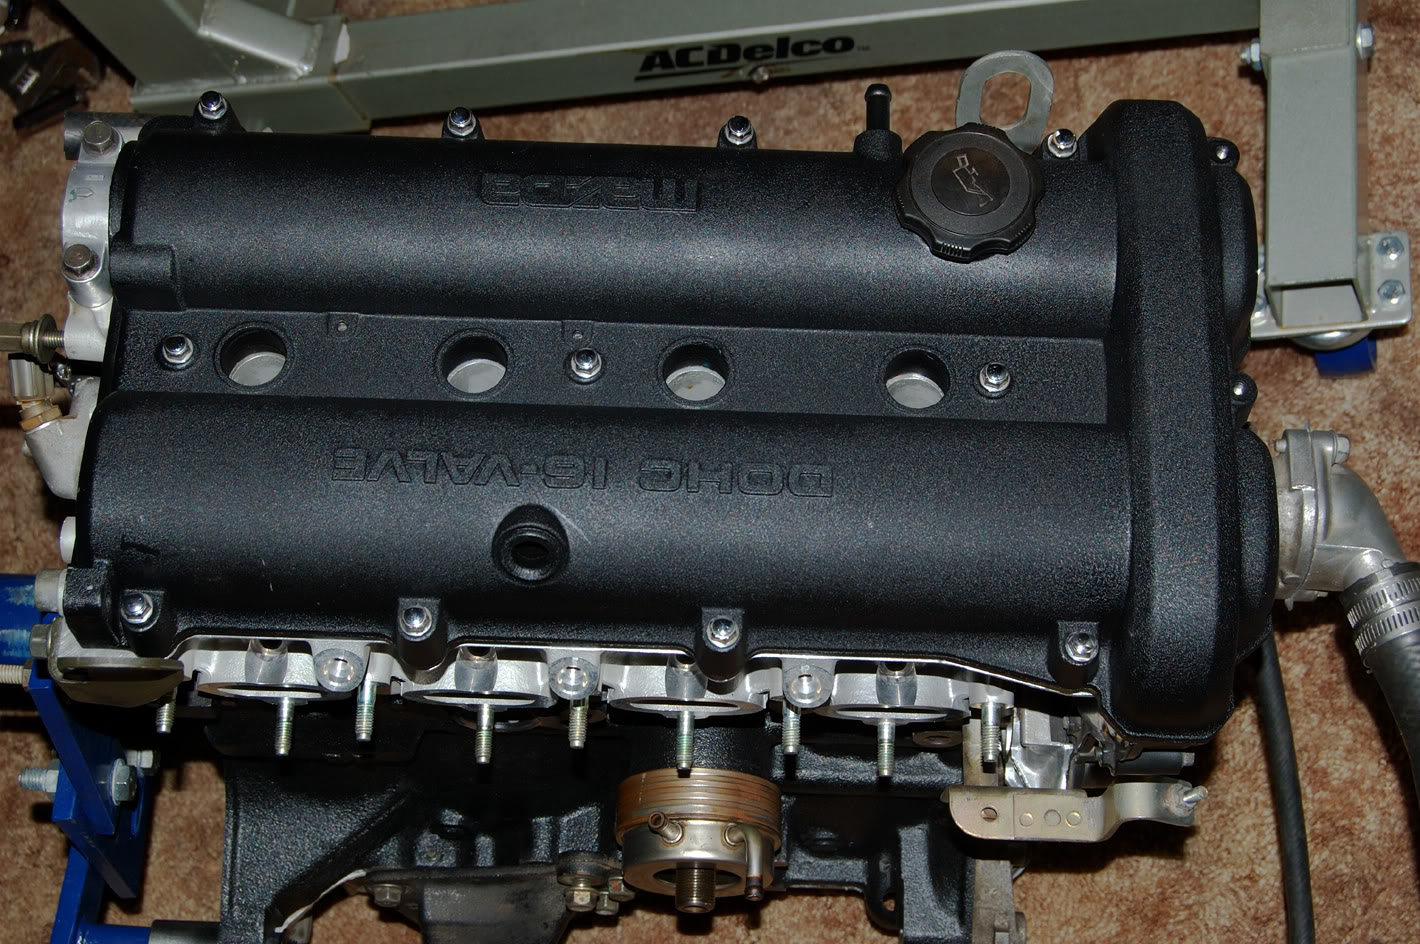
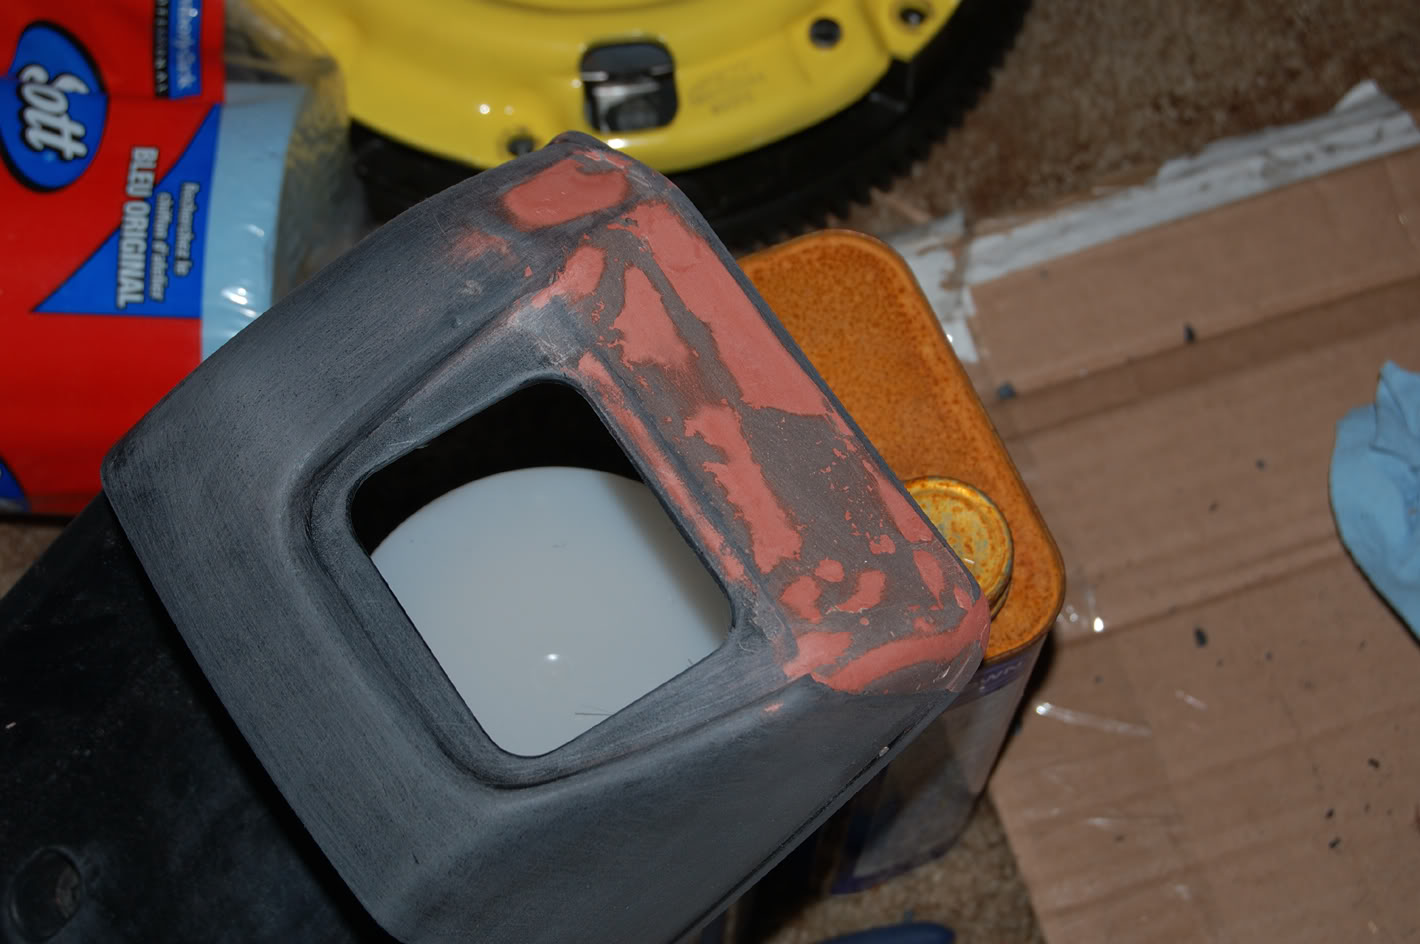
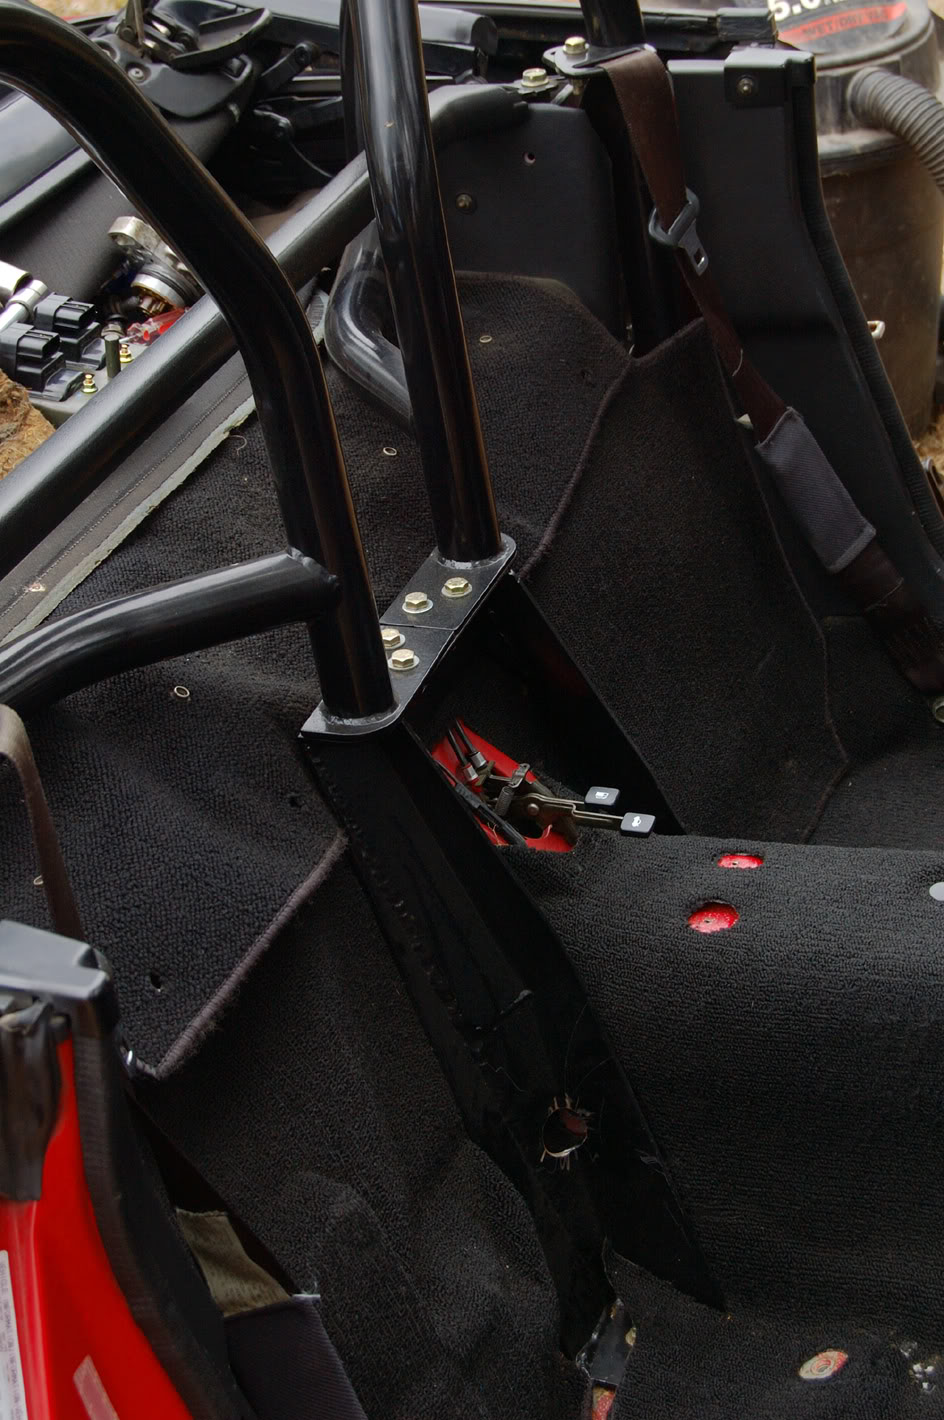
Half *** painted the valve cover. Just cleaned the old wrinkle finish and sprayed some BBQ high temp black over it to cover the scratches. Looks good enough for now. Also some pics of the glove box of the center console.
Yes its ugly, Im not a fiberglass pro by ANY means. Its going to take forever to sand down that curve, it cured too quickly for me to shape it like I wanted. Guess I used too much hardener. Looking pretty good either way. It even has that square edge at the bottom like the rest of the console, since I used the flat side of the console from the ashtray part I cut out.
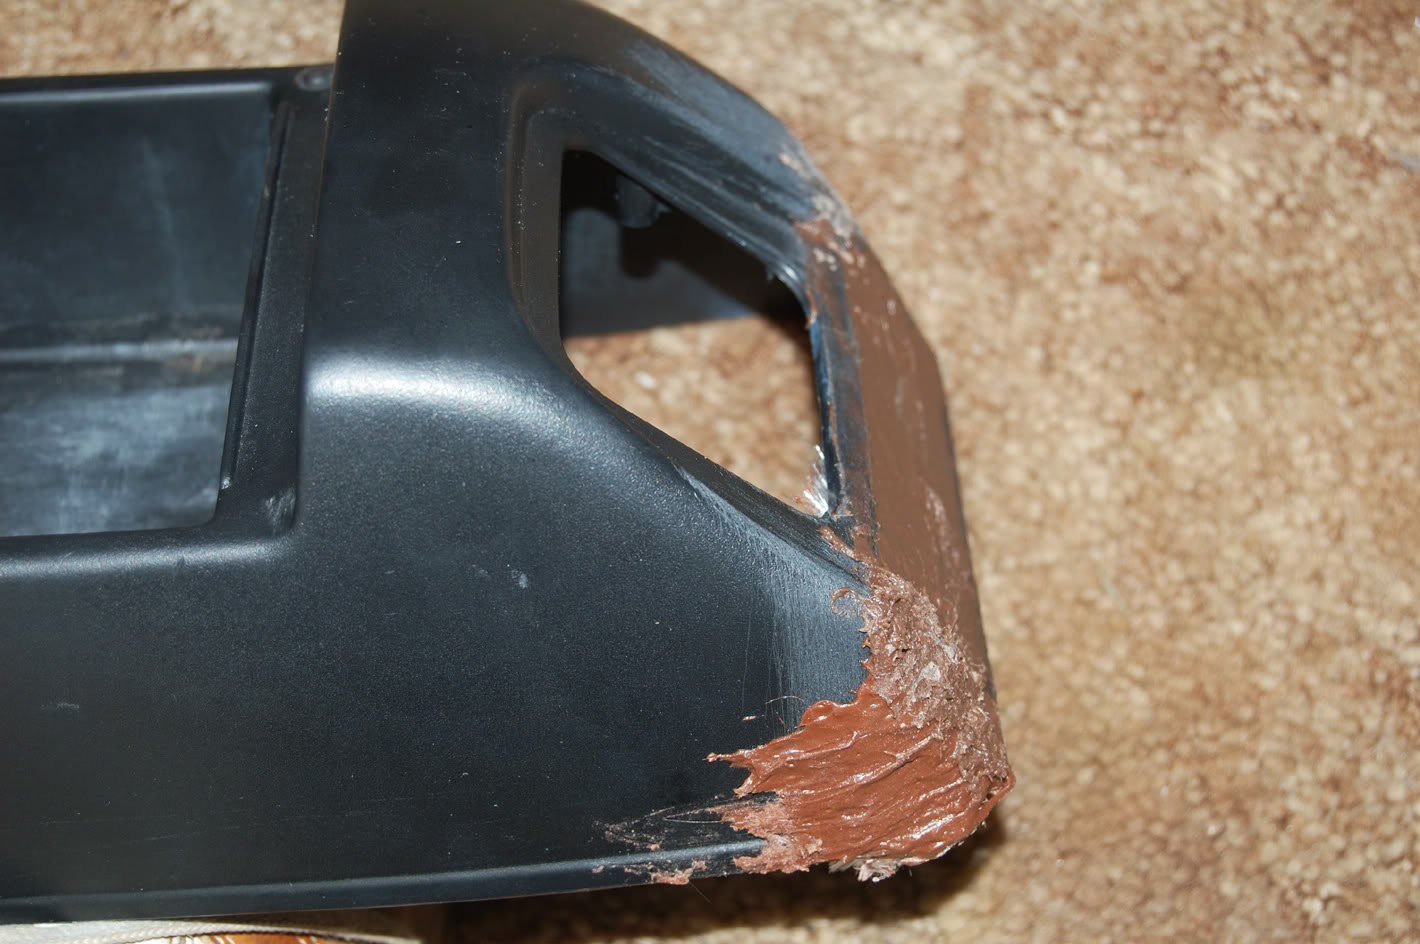
Reply
0
0
01-18-2009, 08:23 PM
#49
Elite Member
Thread Starter
iTrader: (1)
Join Date: Feb 2008
Location: Birmingham Alabama
Posts: 7,930
Total Cats: 45
Not engine related, but Im bored, and I dont have anything else to update. Just did a bit of sanding. Goddamn me for building up the curve on the passanger side so much. There was nothing there so I had to use mat and resin to build that compound curve. I had to sand down about 1/4'' worth, and still have a good bit to go to get it flat and smooth. Finish sanding then do the spot filler, sand some more, paint, sand, ect.
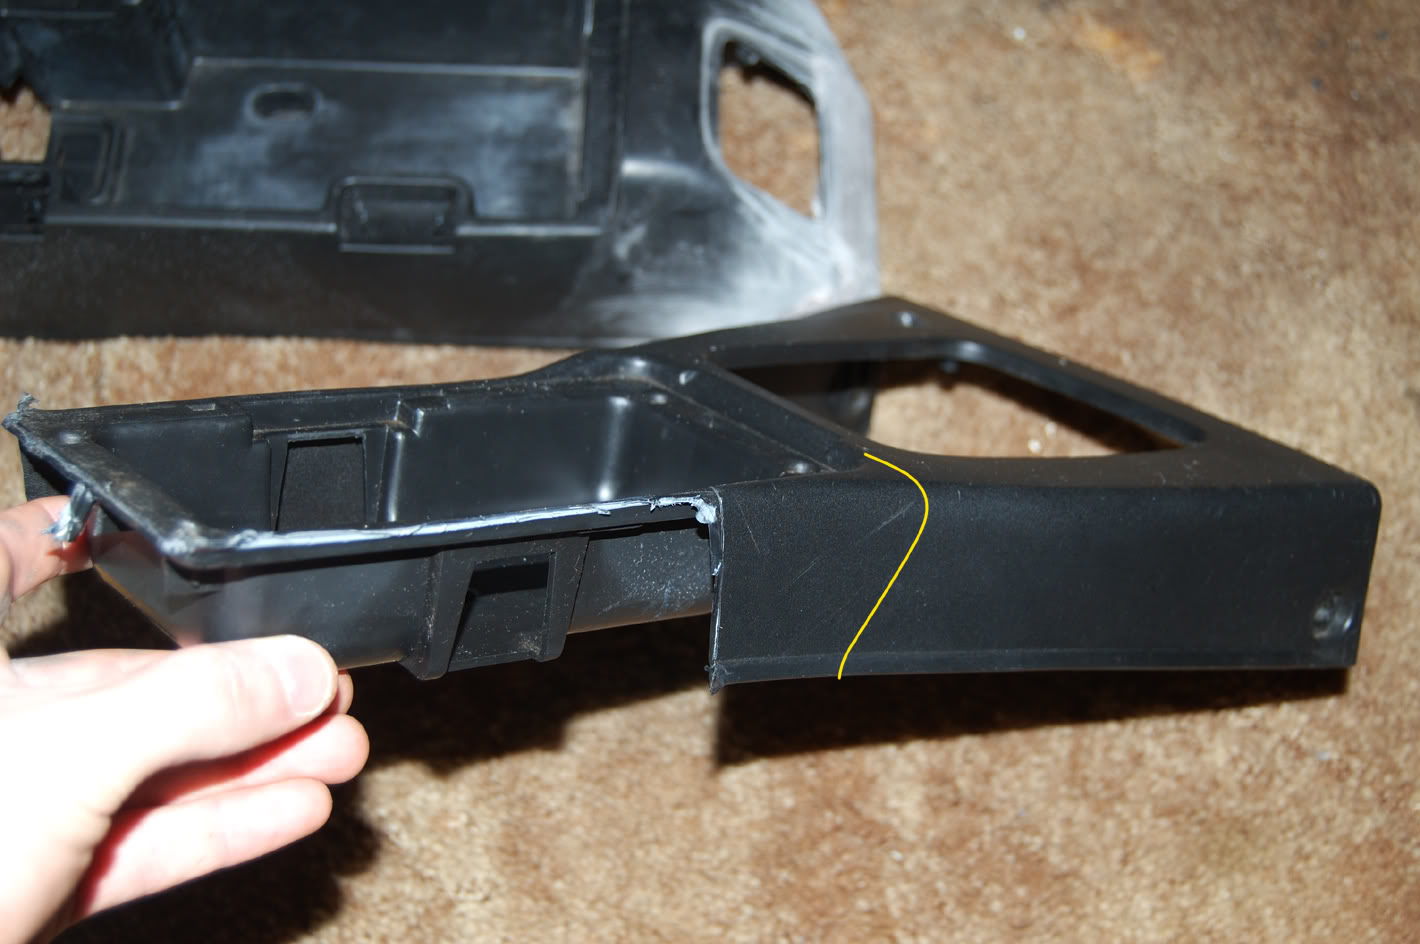
Most people taper that front section more, but Im keeping it nearly at a right angle to make a switch bank, that maybe wont be prone to being accidentally switched while Im shifting.
Most people taper that front section more, but Im keeping it nearly at a right angle to make a switch bank, that maybe wont be prone to being accidentally switched while Im shifting.
Reply
0
0
01-18-2009, 08:49 PM
#50
Next time get the right amount of hardener in there. And use cardboard to something to make a form to glass over. More matt, less resin too. You only want enough resin to get the glass wet.
Also that fiberglass isn't gonna have the same surface finish of the plastic.
Also that fiberglass isn't gonna have the same surface finish of the plastic.
Reply
0
0
01-18-2009, 09:37 PM
#51
Elite Member
Thread Starter
iTrader: (1)
Join Date: Feb 2008
Location: Birmingham Alabama
Posts: 7,930
Total Cats: 45
Yeah I know it, I was going to sand the entire thing, then do alot of primer and alot more sanding to get it all fairly uniform in texture, then paint it. It should be ok I think. Reason I used so much resin and so little mat was the fac that its hard to make the mat hold up in a curve as you apply the resin. I might have been better off with cloth vs mat. I had to pile up the resin to take up about an inch gap left, and to make the curve. It started to cure before I could remove the excess, and I didnt want it to roll up and flake off in chunks, so I left it alone. Im paying for it now though. Next time I will work in smaller steps.
Reply
0
0
01-18-2009, 10:51 PM
#52
Elite Member
Thread Starter
iTrader: (1)
Join Date: Feb 2008
Location: Birmingham Alabama
Posts: 7,930
Total Cats: 45
****, somebody let me borrow their Miata, Im losing my mind. I cant stop staring at my engine, or playing GT4 and racing Miatas. This is the longest Ive gone without having a fun car to drive... since I started driving I guess. Always had something at least decently sporty. Im driving a 91 Accord automatic, a big ragged out with a huge exhaust leak... 
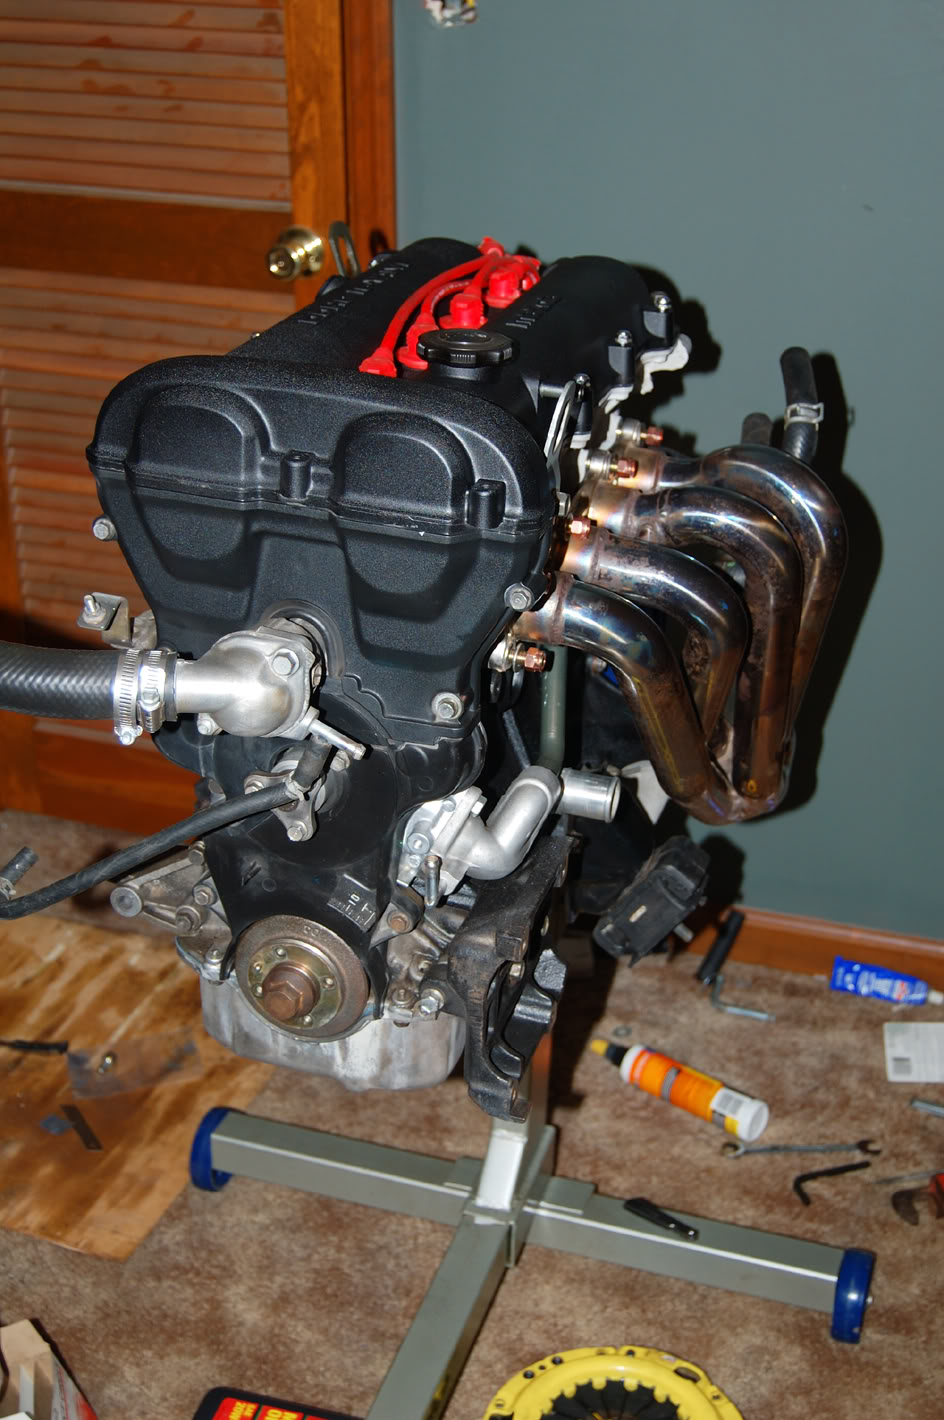
Another picture, pretty much the same as the last 20 or so Ive posted
Another picture, pretty much the same as the last 20 or so Ive posted
Reply
0
0
01-18-2009, 11:03 PM
#53
By some "cloth". It's much thinner than matt and will form much better. Whenever your doing a spot, cut out say 10 pieces of cloth that are the correct size. if you're doing a curve where it won't lay flat, cut it with sissors so it will. Cloth is 10x easier to use than matt. Matt is for doing heavy stuff where cheap and fast matters and strength isn't of ultimate concern. For what you're doing, cloth is the only thing to use.
Reply
0
0
01-22-2009, 06:04 AM
#55
Elite Member
Thread Starter
iTrader: (1)
Join Date: Feb 2008
Location: Birmingham Alabama
Posts: 7,930
Total Cats: 45
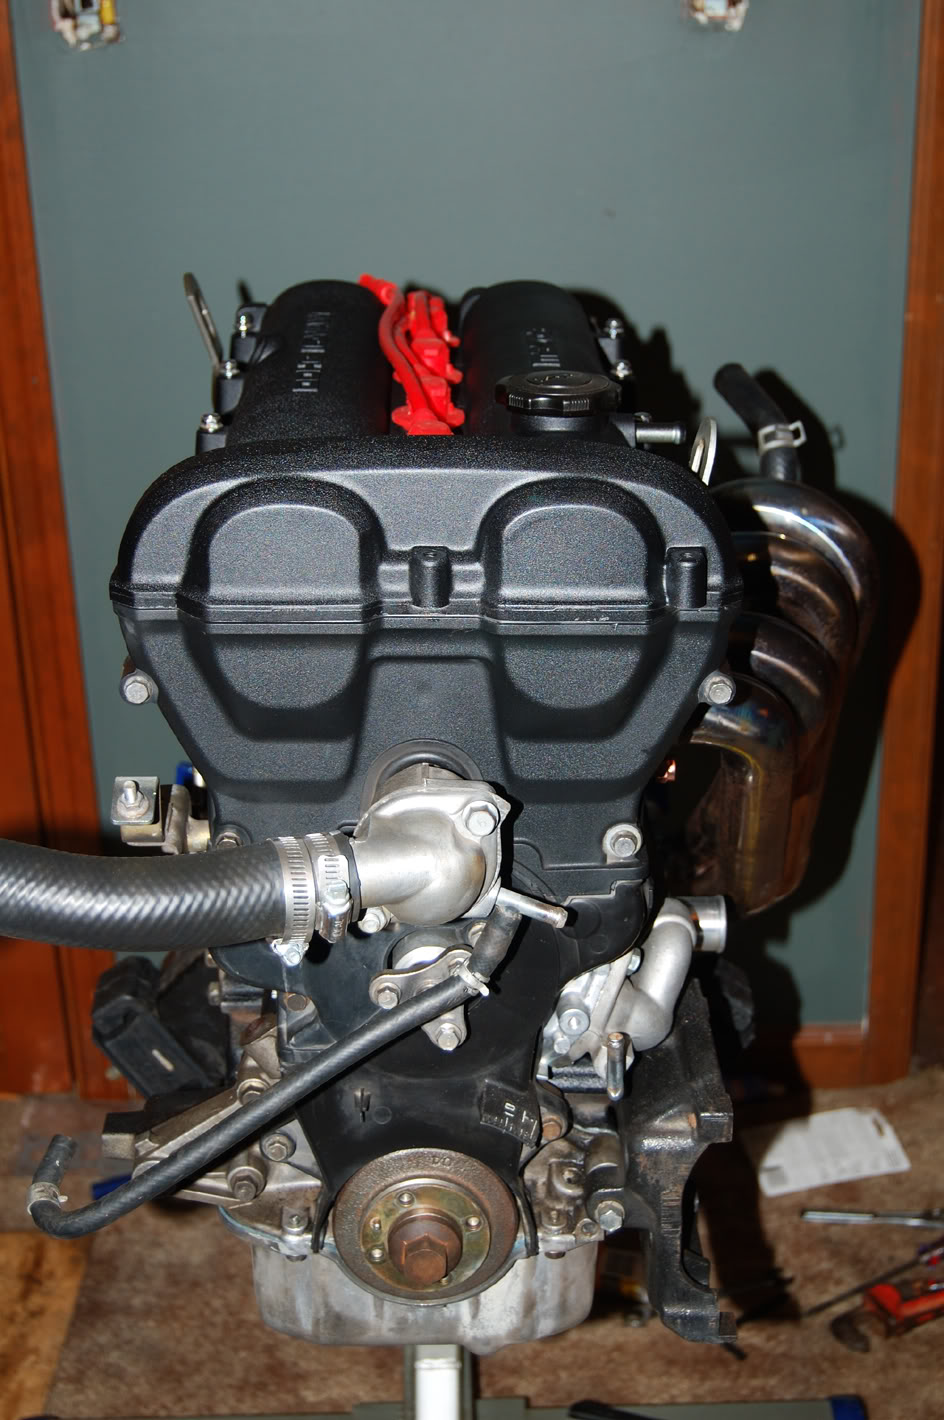
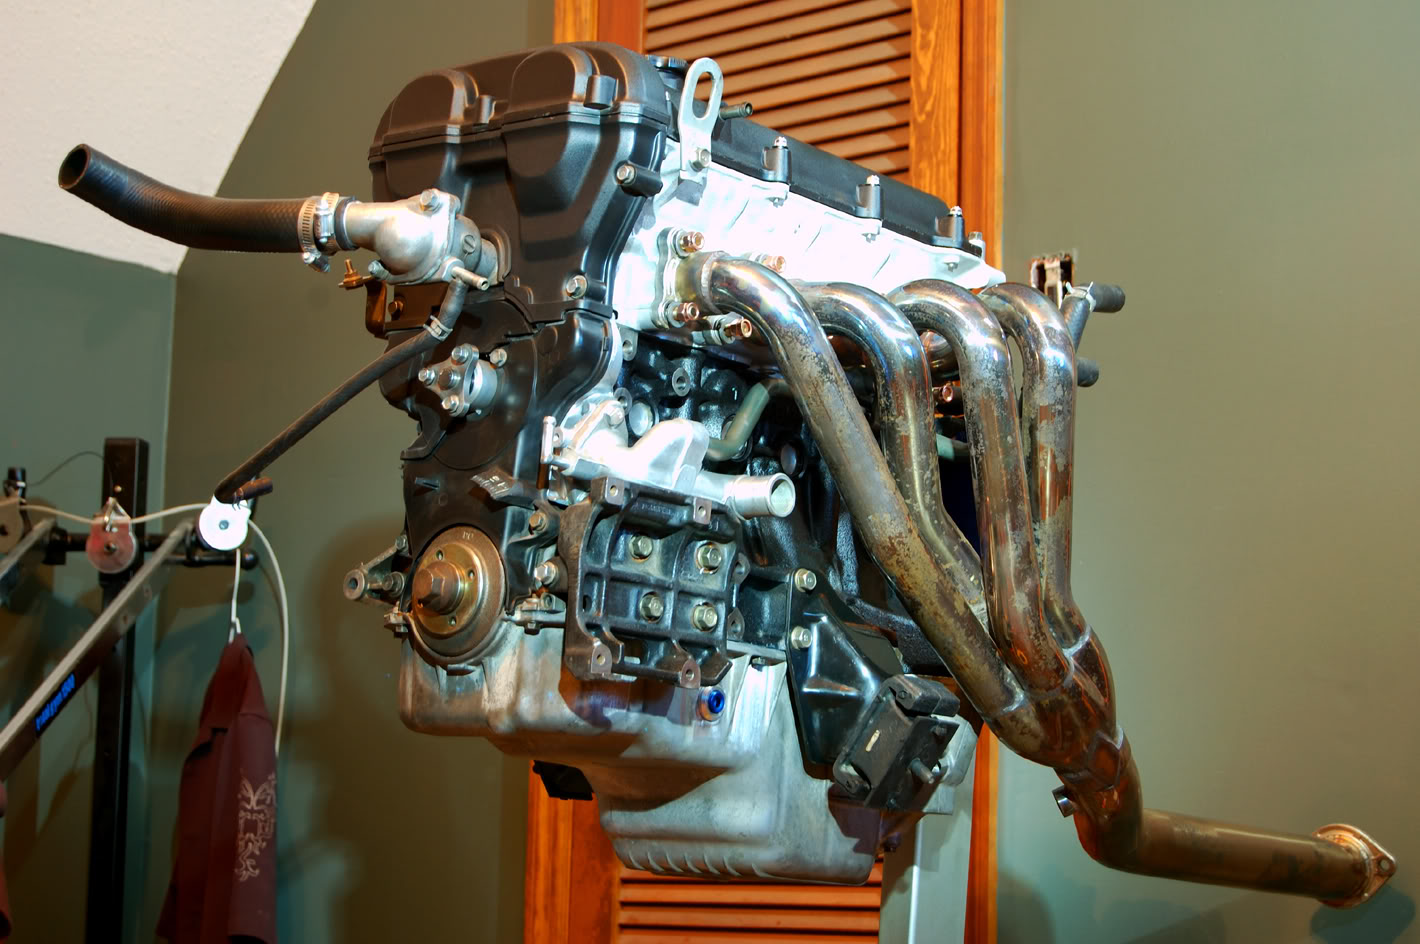
How many of you can get a fully built engine off of a stand by yourself!? Pussies!... and I only smashed my foot, cut my wrist and removed some skin off the top of my hand  That was one of the smarter things Ive done this week.
  It was all going so well until gravity told me to go **** myself, and the engine tumped on its side taking the stand and my footing with it. I wish I had a video of it so I could see how retarded I looked. Engine is fine though, it only fell maybe 6'' onto carpet, so no big deal. Nearly took out my new seat though, luckily it was covered with a $500 leather jacket and some jeans and none of the sharp edges got to the leather (on the seats). The engine is a trickly little bastard though, I thought surely it couldnt weight THAT much. Suprisingly heavy for its size. Guess when you add it up, the weight is there. I bet I cant walk for **** tomarrow.
Yes some more useless photos. I noticed in one of them that I apparently broke the damn plug off of one of the temp sensors on the rear housing. Which one is the grey one with the 2 pin plug? Not the smaller one lower on the housing with the single flat pin. One for the gauge, one for the ecu? One I broke is for the ECU I guess. So I guess I will have to make another damn run to Trussville tomarrow on my way to work. or might it still be ok? It never actually came all the way off, just knocked sideways. I pushed it back down onto the sensor body, since it had little feet that stuck down and locked it into place. Well, only $30, might as well get a new one.
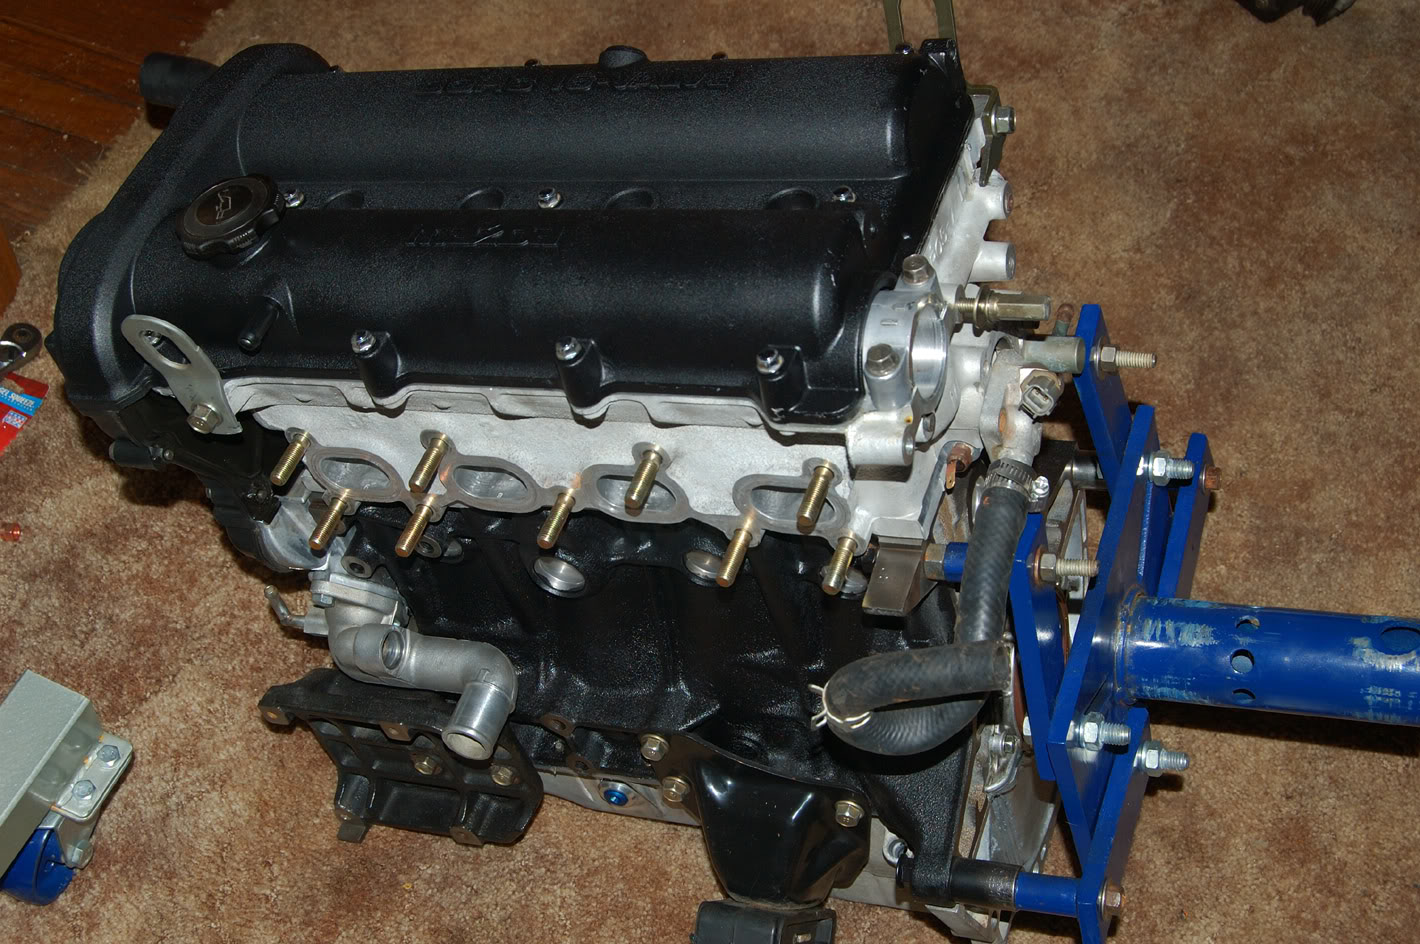

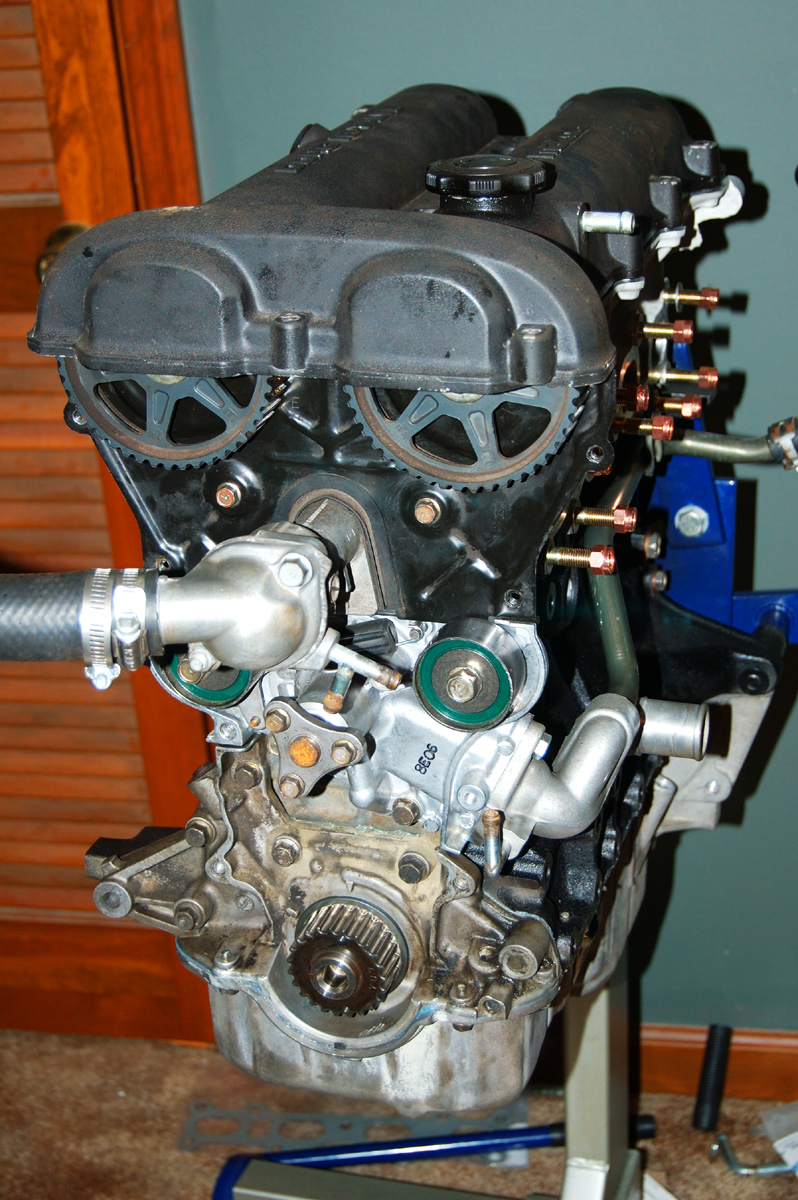
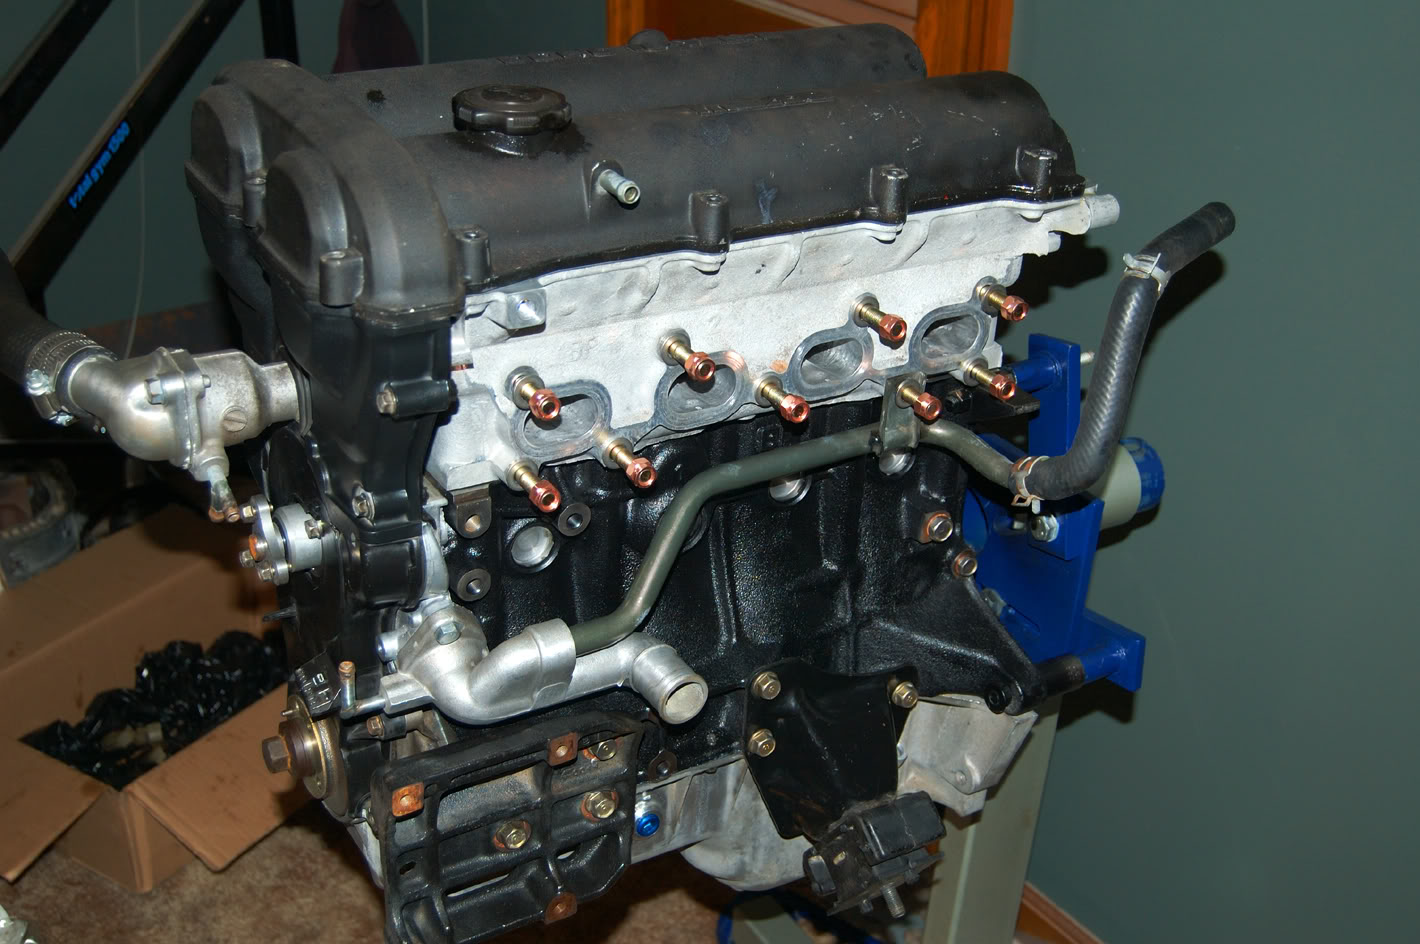
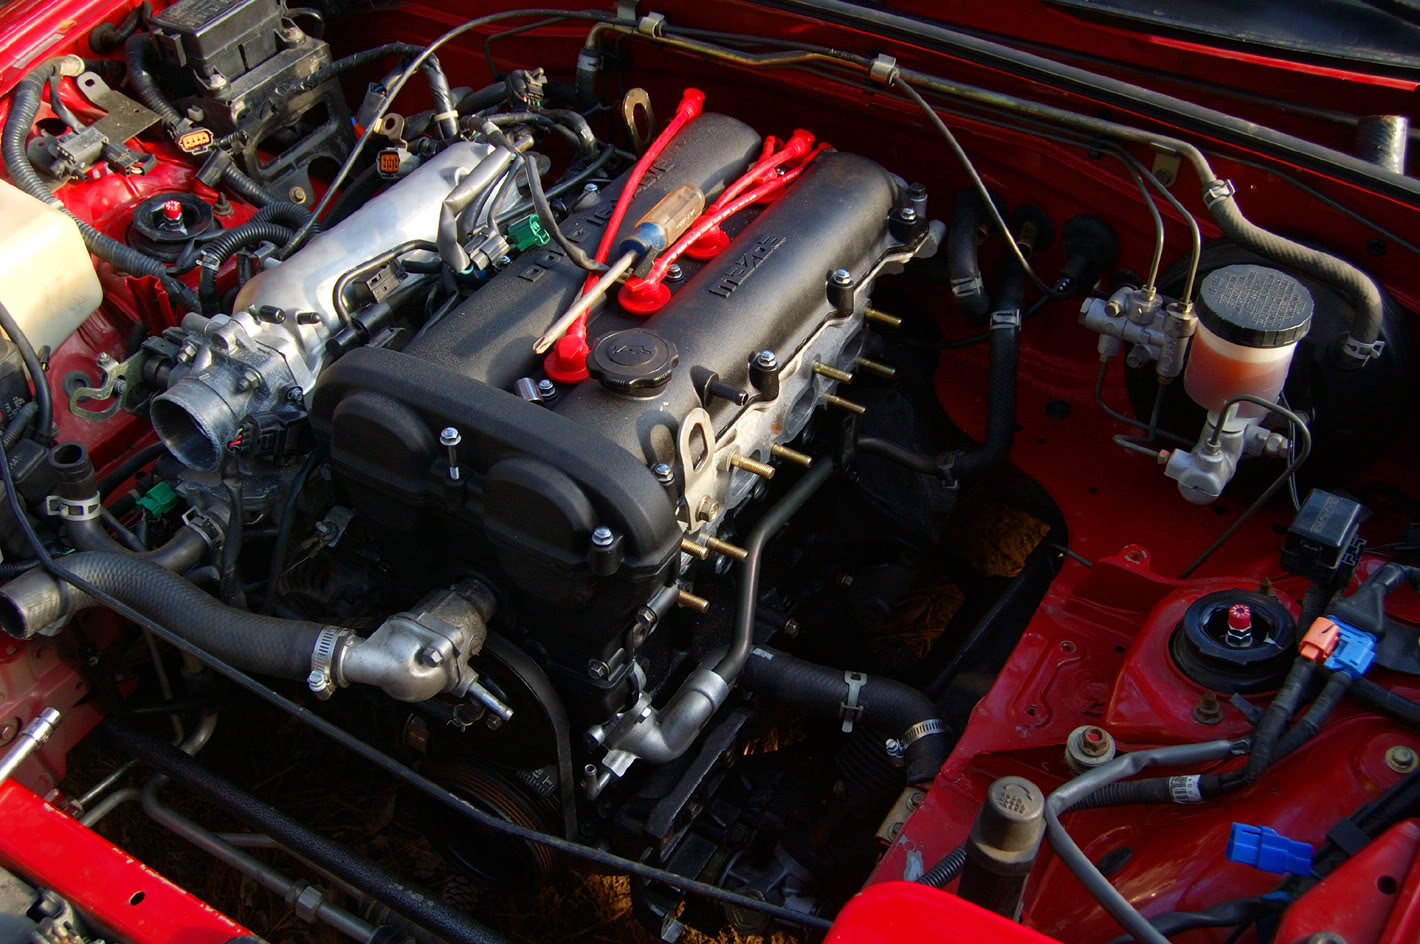
Almost ready for primer and paint.
That was one of the smarter things Ive done this week. It was all going so well until gravity told me to go **** myself, and the engine tumped on its side taking the stand and my footing with it. I wish I had a video of it so I could see how retarded I looked. Engine is fine though, it only fell maybe 6'' onto carpet, so no big deal. Nearly took out my new seat though, luckily it was covered with a $500 leather jacket and some jeans and none of the sharp edges got to the leather (on the seats). The engine is a trickly little bastard though, I thought surely it couldnt weight THAT much. Suprisingly heavy for its size. Guess when you add it up, the weight is there. I bet I cant walk for **** tomarrow.Yes some more useless photos. I noticed in one of them that I apparently broke the damn plug off of one of the temp sensors on the rear housing. Which one is the grey one with the 2 pin plug? Not the smaller one lower on the housing with the single flat pin. One for the gauge, one for the ecu? One I broke is for the ECU I guess. So I guess I will have to make another damn run to Trussville tomarrow on my way to work. or might it still be ok? It never actually came all the way off, just knocked sideways. I pushed it back down onto the sensor body, since it had little feet that stuck down and locked it into place. Well, only $30, might as well get a new one.
Almost ready for primer and paint.
Last edited by NA6C-Guy; 01-22-2009 at 06:46 AM.
Reply
0
0
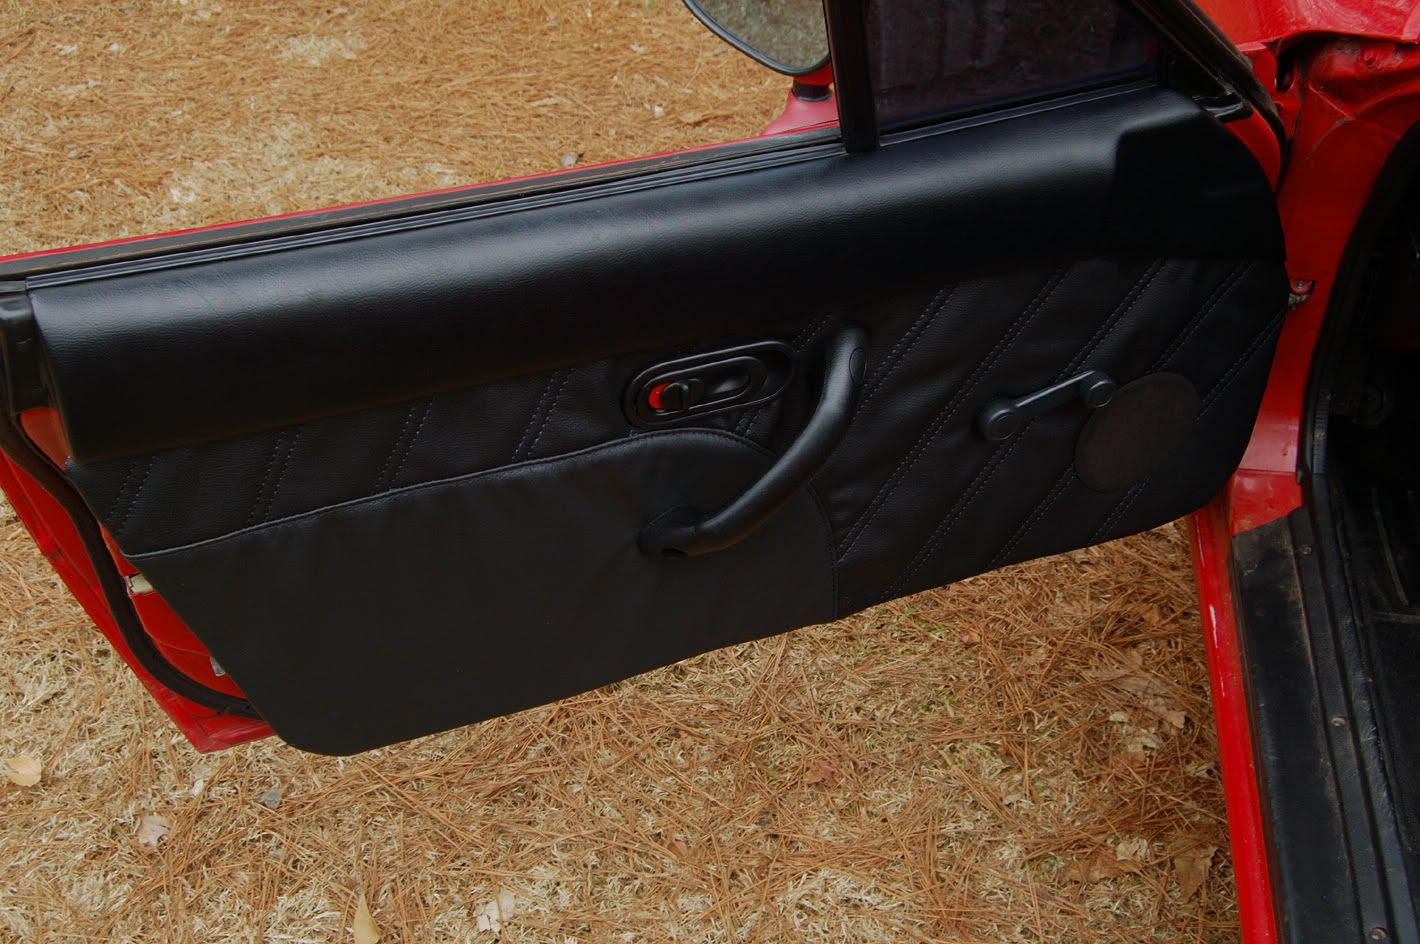
 01-23-2009, 04:28 PM
#58
Elite Member
Thread Starter
iTrader: (1)
Join Date: Feb 2008
Location: Birmingham Alabama
Posts: 7,930
Total Cats: 45
Seat covers and door panels still stacked up in the corner of my room. I wish my seats matched though, the stitching is way different between the 2, as you can see in the up close side by side picture. Oh well, better luck next time.
Reply
0
0
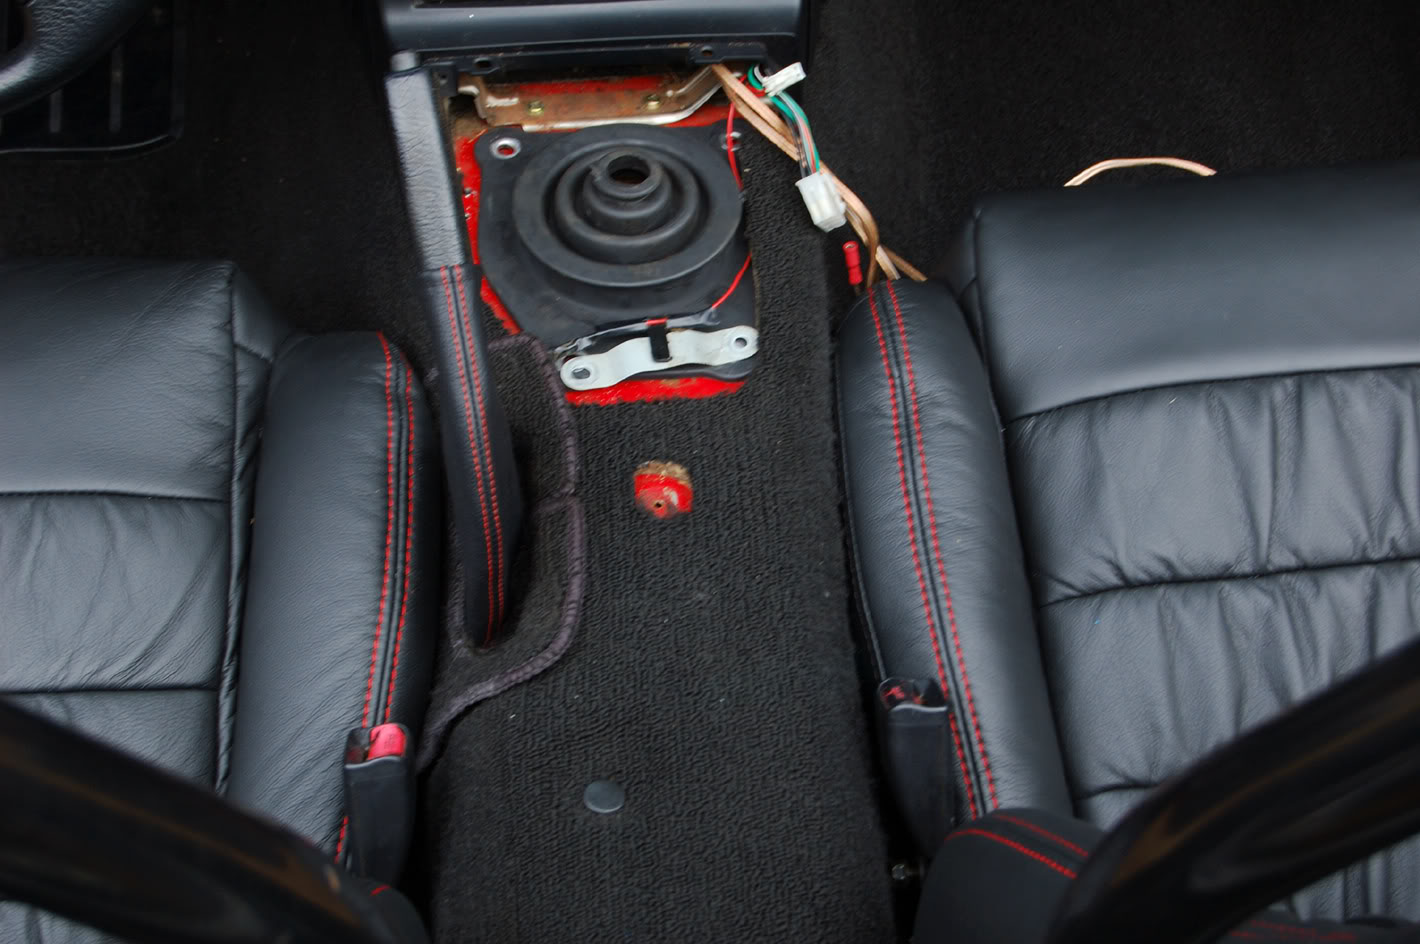
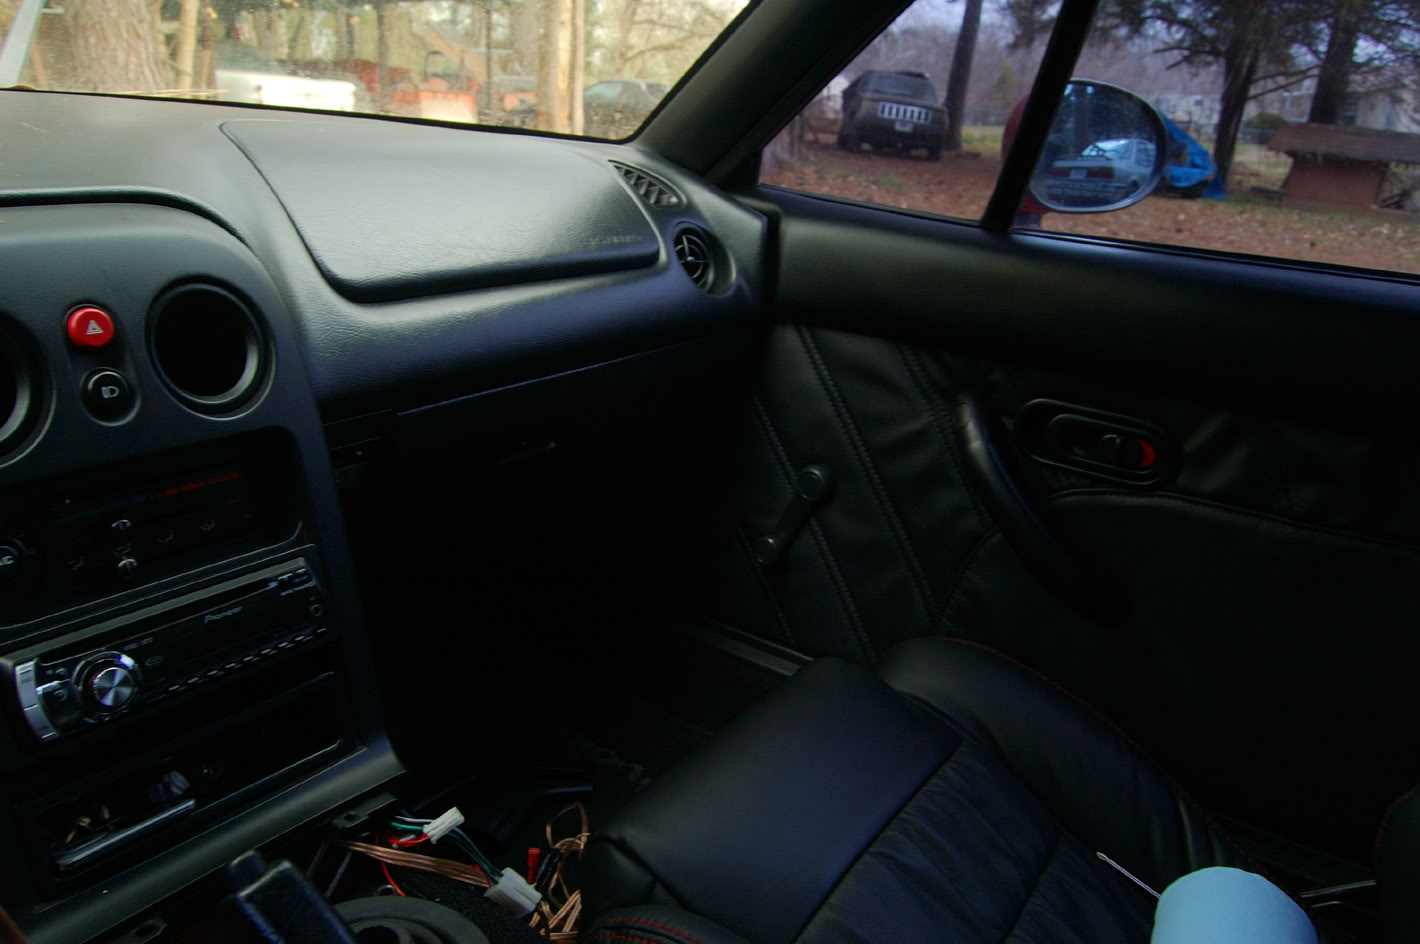
01-24-2009, 05:06 PM
#59
Elite Member
Thread Starter
iTrader: (1)
Join Date: Feb 2008
Location: Birmingham Alabama
Posts: 7,930
Total Cats: 45
Labors of today.
The best mod so far...
Then the other less important...
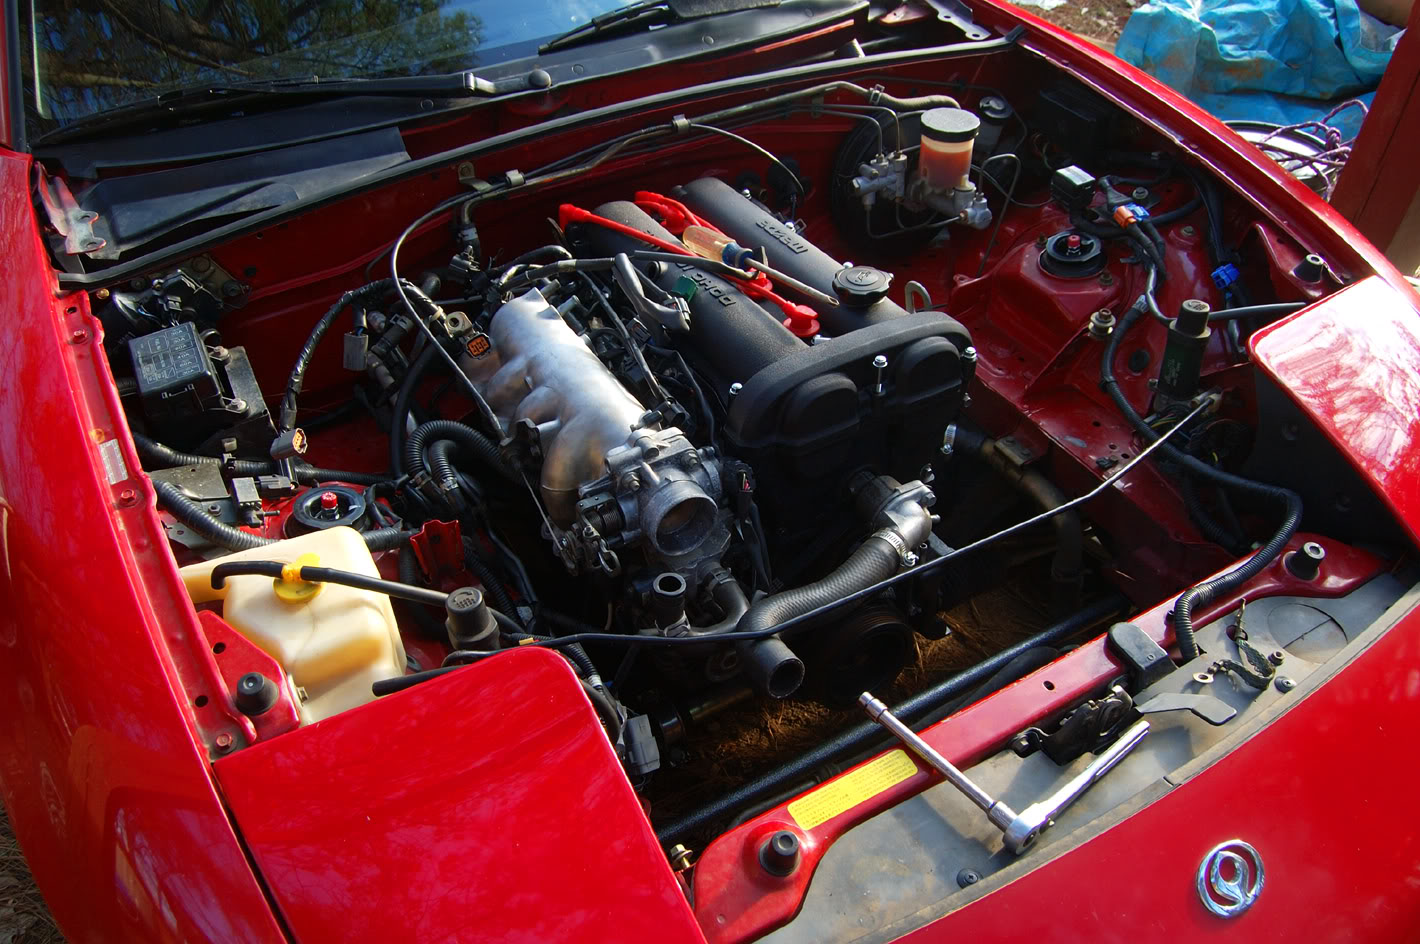
All I lack is drive shaft, PPF bolts, plugs on the top of the trans that are a complete bitch and a half, a few various wires up top and on the rear of the head, then a few hoses, radiator, oil and coolant, a key, and a switch turn. I ordered a WestCo battery last night since I felt $150 was too much for an Optima, so my nearly crapped out off brand will have to do for now if it will hold a charge. Getting that damn PPF to slip onto the square chunk on the side of the trans is a pain in the *** every time. Have to wiggle the engine, move the PPF and trans around to get them lined up. Took nearly half an hour of cussing and a crow bar to make the C shape on the PPF slip over the trans mount section. So hopefully tomarrow is the big day. Wish me luck!
Just to ask, has anyone found anything to put on the heater hoses that keeps them slicked up enough that the next time they come off they arent such a bitch to remove? I thought maybe last time would have helped, I put a light coat of grease on the brass, but after only a few weeks, it was just as much of a bitch as the first time I pulled them. Id like to save myself the slight hassle when I go turbo in a few months. Doubt there is much that can be done. Surely wish it was easy to swap the shitty soft brass for some AN fittings or something.
The best mod so far...
Then the other less important...
All I lack is drive shaft, PPF bolts, plugs on the top of the trans that are a complete bitch and a half, a few various wires up top and on the rear of the head, then a few hoses, radiator, oil and coolant, a key, and a switch turn. I ordered a WestCo battery last night since I felt $150 was too much for an Optima, so my nearly crapped out off brand will have to do for now if it will hold a charge. Getting that damn PPF to slip onto the square chunk on the side of the trans is a pain in the *** every time. Have to wiggle the engine, move the PPF and trans around to get them lined up. Took nearly half an hour of cussing and a crow bar to make the C shape on the PPF slip over the trans mount section. So hopefully tomarrow is the big day. Wish me luck!
Just to ask, has anyone found anything to put on the heater hoses that keeps them slicked up enough that the next time they come off they arent such a bitch to remove? I thought maybe last time would have helped, I put a light coat of grease on the brass, but after only a few weeks, it was just as much of a bitch as the first time I pulled them. Id like to save myself the slight hassle when I go turbo in a few months. Doubt there is much that can be done. Surely wish it was easy to swap the shitty soft brass for some AN fittings or something.
Reply
0
0
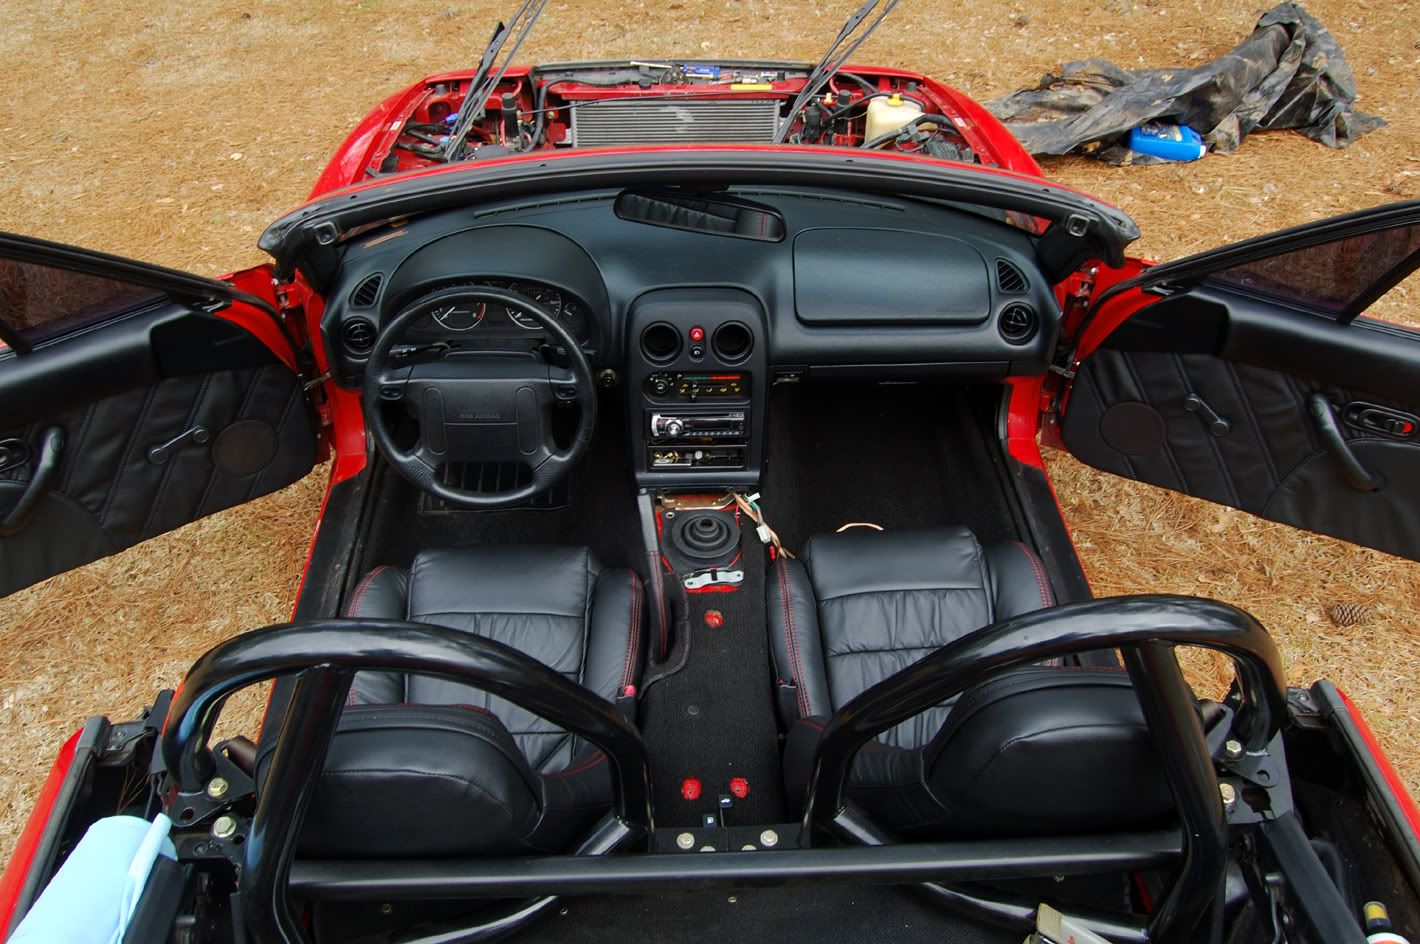
01-25-2009, 06:34 PM
#60
Elite Member
Thread Starter
iTrader: (1)
Join Date: Feb 2008
Location: Birmingham Alabama
Posts: 7,930
Total Cats: 45
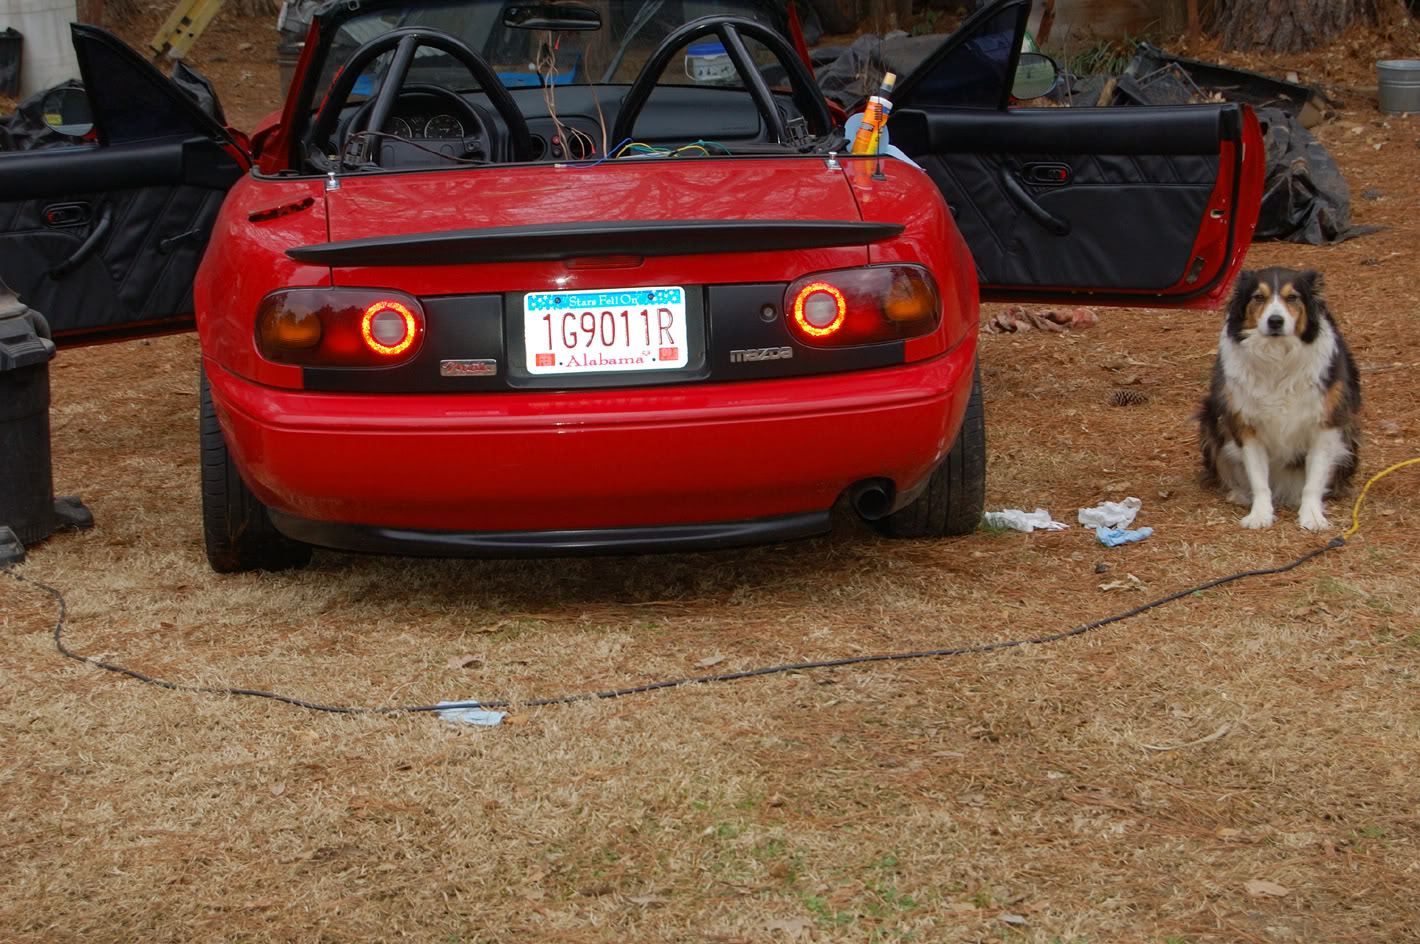
Ahhh yes. Got it all hooked up, stood over it in dread of starting it. Worked up the nerve and climbed in and turned the key. Fired right up, oil pressure within 3 or 4 seconds, and then a pefrectly smooth idle. Happy times. Only thing Im "worried" about right now is the noisy trans. Im not sure if its increased gear noise from the light weight flywheel, or if its something else. It might be a 1/4 quart low, but not enough to cause noise like Im hearing. I also still have some throwout bearing rattle. I thought maybe a new one would cure it, but I guess not. Not a big deal though. If the trans goes, its just time for a 6 speed. Put 20 miles on it and everything seems well. A slight smell of burning fluid, I think from the trans rear seal slinging it on the exhaust, but cant see any smoke or leaks at all. I'll post some pictures tomarrow maybe. Going to drive it to work tomarrow, 25 miles through downtown Birmingham, so maybe I wont be left stranded.
Im also a bit worried about the head bolts. Before I put the valve cover, I checked them again for the 4 time, and still found them loosened a bit. Every time I check after a day or two, the nuts turn just ever so slightly, but still loose compared to what they were. As far as I know I installed the ARP studs correctly, hand tight until they bottom out, then torqued in 4 or 5 steps to 65lb/ft. Maybe its all good.
I also ran into trouble with my broken coolant temp sensor. It broke a few nights ago, the plug came off the body, and today the JB weld gave way and the internal part of the probe came out of the metal housing that screws into the rear coolant housing. I pulled the probe all the way out and looked it. The probe was cracked where it goes into the plug section, but the wires inside seemed to be ok. I filled the crack with JB, pushed it back together, filled the rest of the void, and pushed it back into the metal housing and JBed the plug back onto the housing with a good bit of it. It should hold, and didnt throw a code.
AND, for the final bit. What does the PRC solenoid valve do? Im throwing the 25 code, and I know why, because I broke a nipple off of the valve, and left it unplugged. But what does it do? Can I run ok without it?
Happy times. Only thing Im "worried" about right now is the noisy trans. Im not sure if its increased gear noise from the light weight flywheel, or if its something else. It might be a 1/4 quart low, but not enough to cause noise like Im hearing. I also still have some throwout bearing rattle. I thought maybe a new one would cure it, but I guess not. Not a big deal though. If the trans goes, its just time for a 6 speed. Put 20 miles on it and everything seems well. A slight smell of burning fluid, I think from the trans rear seal slinging it on the exhaust, but cant see any smoke or leaks at all. I'll post some pictures tomarrow maybe. Going to drive it to work tomarrow, 25 miles through downtown Birmingham, so maybe I wont be left stranded.Im also a bit worried about the head bolts. Before I put the valve cover, I checked them again for the 4 time, and still found them loosened a bit. Every time I check after a day or two, the nuts turn just ever so slightly, but still loose compared to what they were. As far as I know I installed the ARP studs correctly, hand tight until they bottom out, then torqued in 4 or 5 steps to 65lb/ft. Maybe its all good.
I also ran into trouble with my broken coolant temp sensor. It broke a few nights ago, the plug came off the body, and today the JB weld gave way and the internal part of the probe came out of the metal housing that screws into the rear coolant housing. I pulled the probe all the way out and looked it. The probe was cracked where it goes into the plug section, but the wires inside seemed to be ok. I filled the crack with JB, pushed it back together, filled the rest of the void, and pushed it back into the metal housing and JBed the plug back onto the housing with a good bit of it. It should hold, and didnt throw a code.
AND, for the final bit. What does the PRC solenoid valve do? Im throwing the 25 code, and I know why, because I broke a nipple off of the valve, and left it unplugged. But what does it do? Can I run ok without it?
Reply
0
0


