When you click on links to various merchants on this site and make a purchase, this can result in this site earning a commission. Affiliate programs and affiliations include, but are not limited to, the eBay Partner Network.
My original plan was to save costs and just run my FM turbo elbow/existing exhaust, BUT apparently a 5 bolt flange is different between T2 and T3 lol god i suck.
So at this point, I'm more concerned with finding someone who offers a T3 down pipe. If they also offer a full 3" exhaust, I'd consider that as well. Any recommendations.
I got the wastegate positioned where I can probably finagle a dump pipe to aim at the ground.
Right now the only two remaining major question marks are: Turbo elbow/down pipe, and how to deal with the power steering line
I responded to your email. I think you are about fucked for building a down pipe without removing a good bit of rear shelf.
I think you can turn the power steering line down a bit.
Whelp, thanks for heads up! haha. I'm going to bring the car to a local shop and see if they can fab something up (I'll also be bringing them the necessary flanges and pipe as well as Flyin Miata's T2 cast turbo outlet for reference). I agree, doing something remote like this could be a nightmare.
Here're a few additional thoughts on the topic:
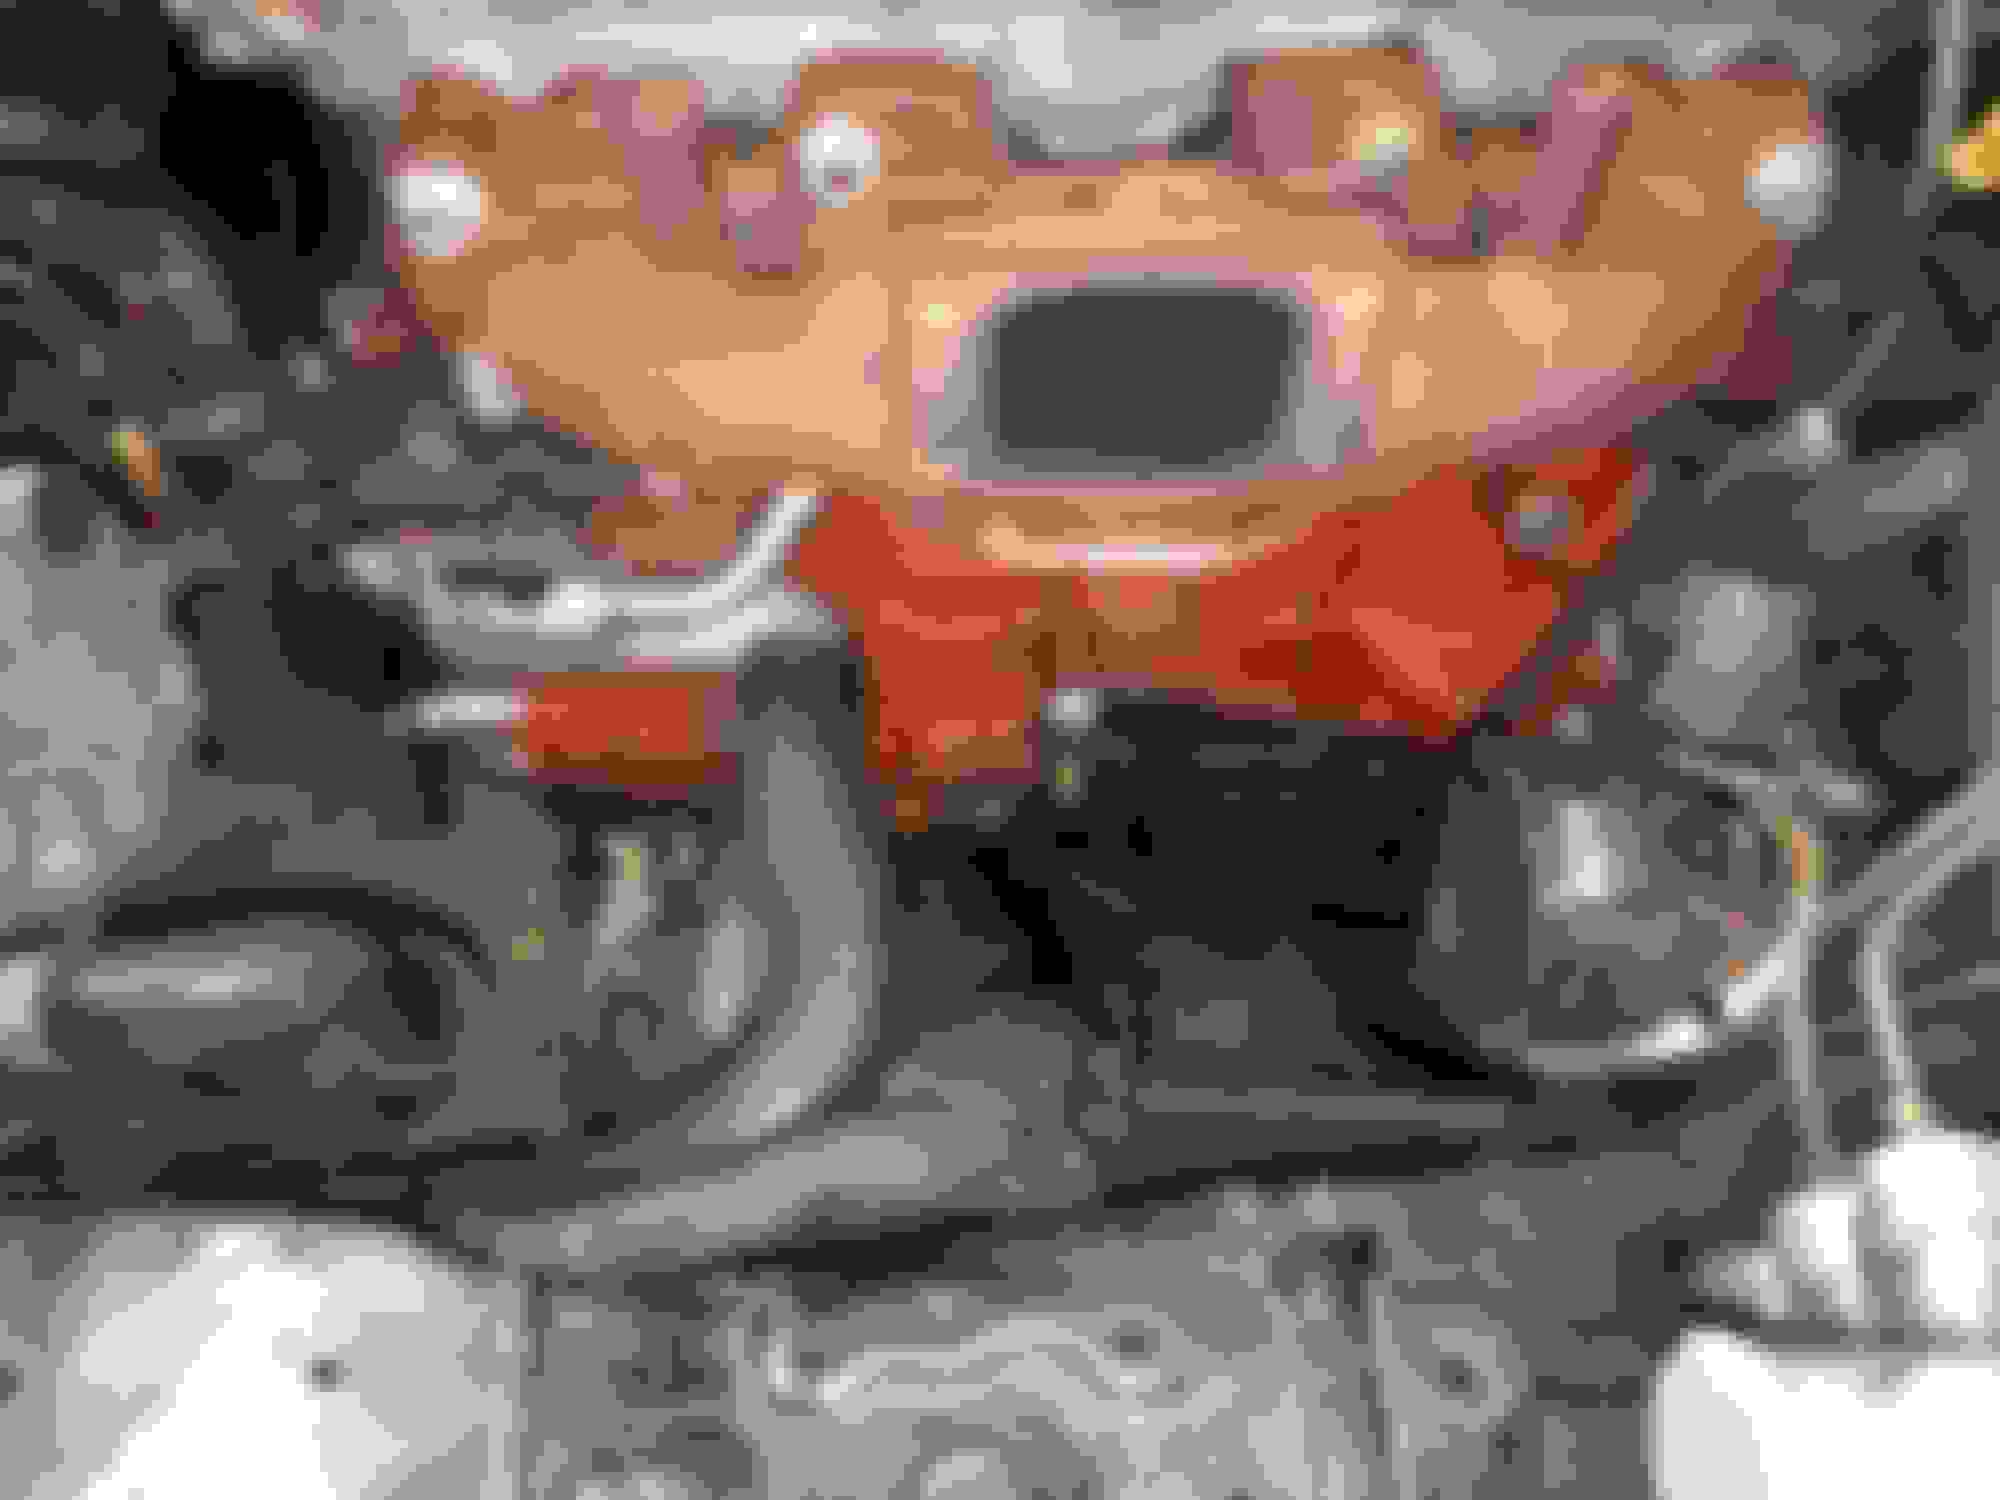
1. The back flange face of the new T3 turbo is slightly FURTHER from the rear shelf than the T2 it's replacing. The downpipe section in the picture is a standard 2.5 Flyin Miata downpipe. I was running the Flyin Miata cast turbo outlet (upper down pipe). If the T2 and Flyin Miata Upper and Lower down pipe fit, is there something I'm not accounting for with the new setup pictured above that's going to eat up space and force me to cut the shelf?
2. In the picture above, the lower downpipe is hanging from it's mounts and is probably about 2 inches lower than it's final resting place.
Whelp, thanks for heads up! haha. I'm going to bring the car to a local shop and see if they can fab something up (I'll also be bringing them the necessary flanges and pipe as well as Flyin Miata's T2 cast turbo outlet for reference). I agree, doing something remote like this could be a nightmare.
Here're a few additional thoughts on the topic:
1. The back flange face of the new T3 turbo is slightly FURTHER from the rear shelf than the T2 it's replacing. The downpipe section in the picture is a standard 2.5 Flyin Miata downpipe. I was running the Flyin Miata cast turbo outlet (upper down pipe). If the T2 and Flyin Miata Upper and Lower down pipe fit, is there something I'm not accounting for with the new setup pictured above that's going to eat up space and force me to cut the shelf?
2. In the picture above, the lower downpipe is hanging from it's mounts and is probably about 2 inches lower than it's final resting place.
You are looking at your CAST FM outlet, which was specifically designed to fit back there without needing the rear shelf cut. Go find a 3" mandrel bent pipe and compare how sharp the bend is compared to the FM outlet. Hell even a 2.5" pipe is going to have a pretty big radius. If you wanted to get a new piece cast that made the bend easy it would be doable. It would just cost you between $20k-$50k for it to get done. Then you would also have a good amount of spares.
I totally think it is "doable", I just think the whole thing is going to be far more complicated and expensive then you think it will be.
Lammmme. This thread is a good sales pitch for anyone considering turboing their miata: Buy a MK Turbo kit in order to avoid this type of nonsense!
After my flanges/piping arrive (hopefully this week), I'm going to head to my local performance/fabrication shop to see if they can save me, lol. Worst case I just do a 90* turn out the hood
Side note: I'm surprised there aren't other documented cases of folks running this type (or a similar) cast T3 manifold.
1. Replacing 28x7x2.25 Tube and Fin, with 29x9X3.0 Bar and Plate. The first installation attempt commences tomorrow morning.
2. Ordered this boost controlled exhaust valve that I'll be welding into the exhaust, pre-cat, to further reduce back pressure. Should be......interesting.
3. Tonight I found out the banjo bolts/fittings that connect the water cooling lines to the turbo, are different sizes between T2 and T3. So I'm going to be delayed a bit figuring out what i need and ordering it.
4. With all the turbo pieces in their final place, my heater by pass pipe (the one that bolts to the underside of your manifold leading to the heater core), was interfering with wastegate. I'm going to reroute it tomorrow (and am expecting to lose quite a bit of the cars ability to heat the cockpit, though not all of it).
5. The materials to build the upper downpipe (two flanges and the pipe) arrived. Once the car is back together, i'll be driving it over to the local performance shop to have them fabricate it.
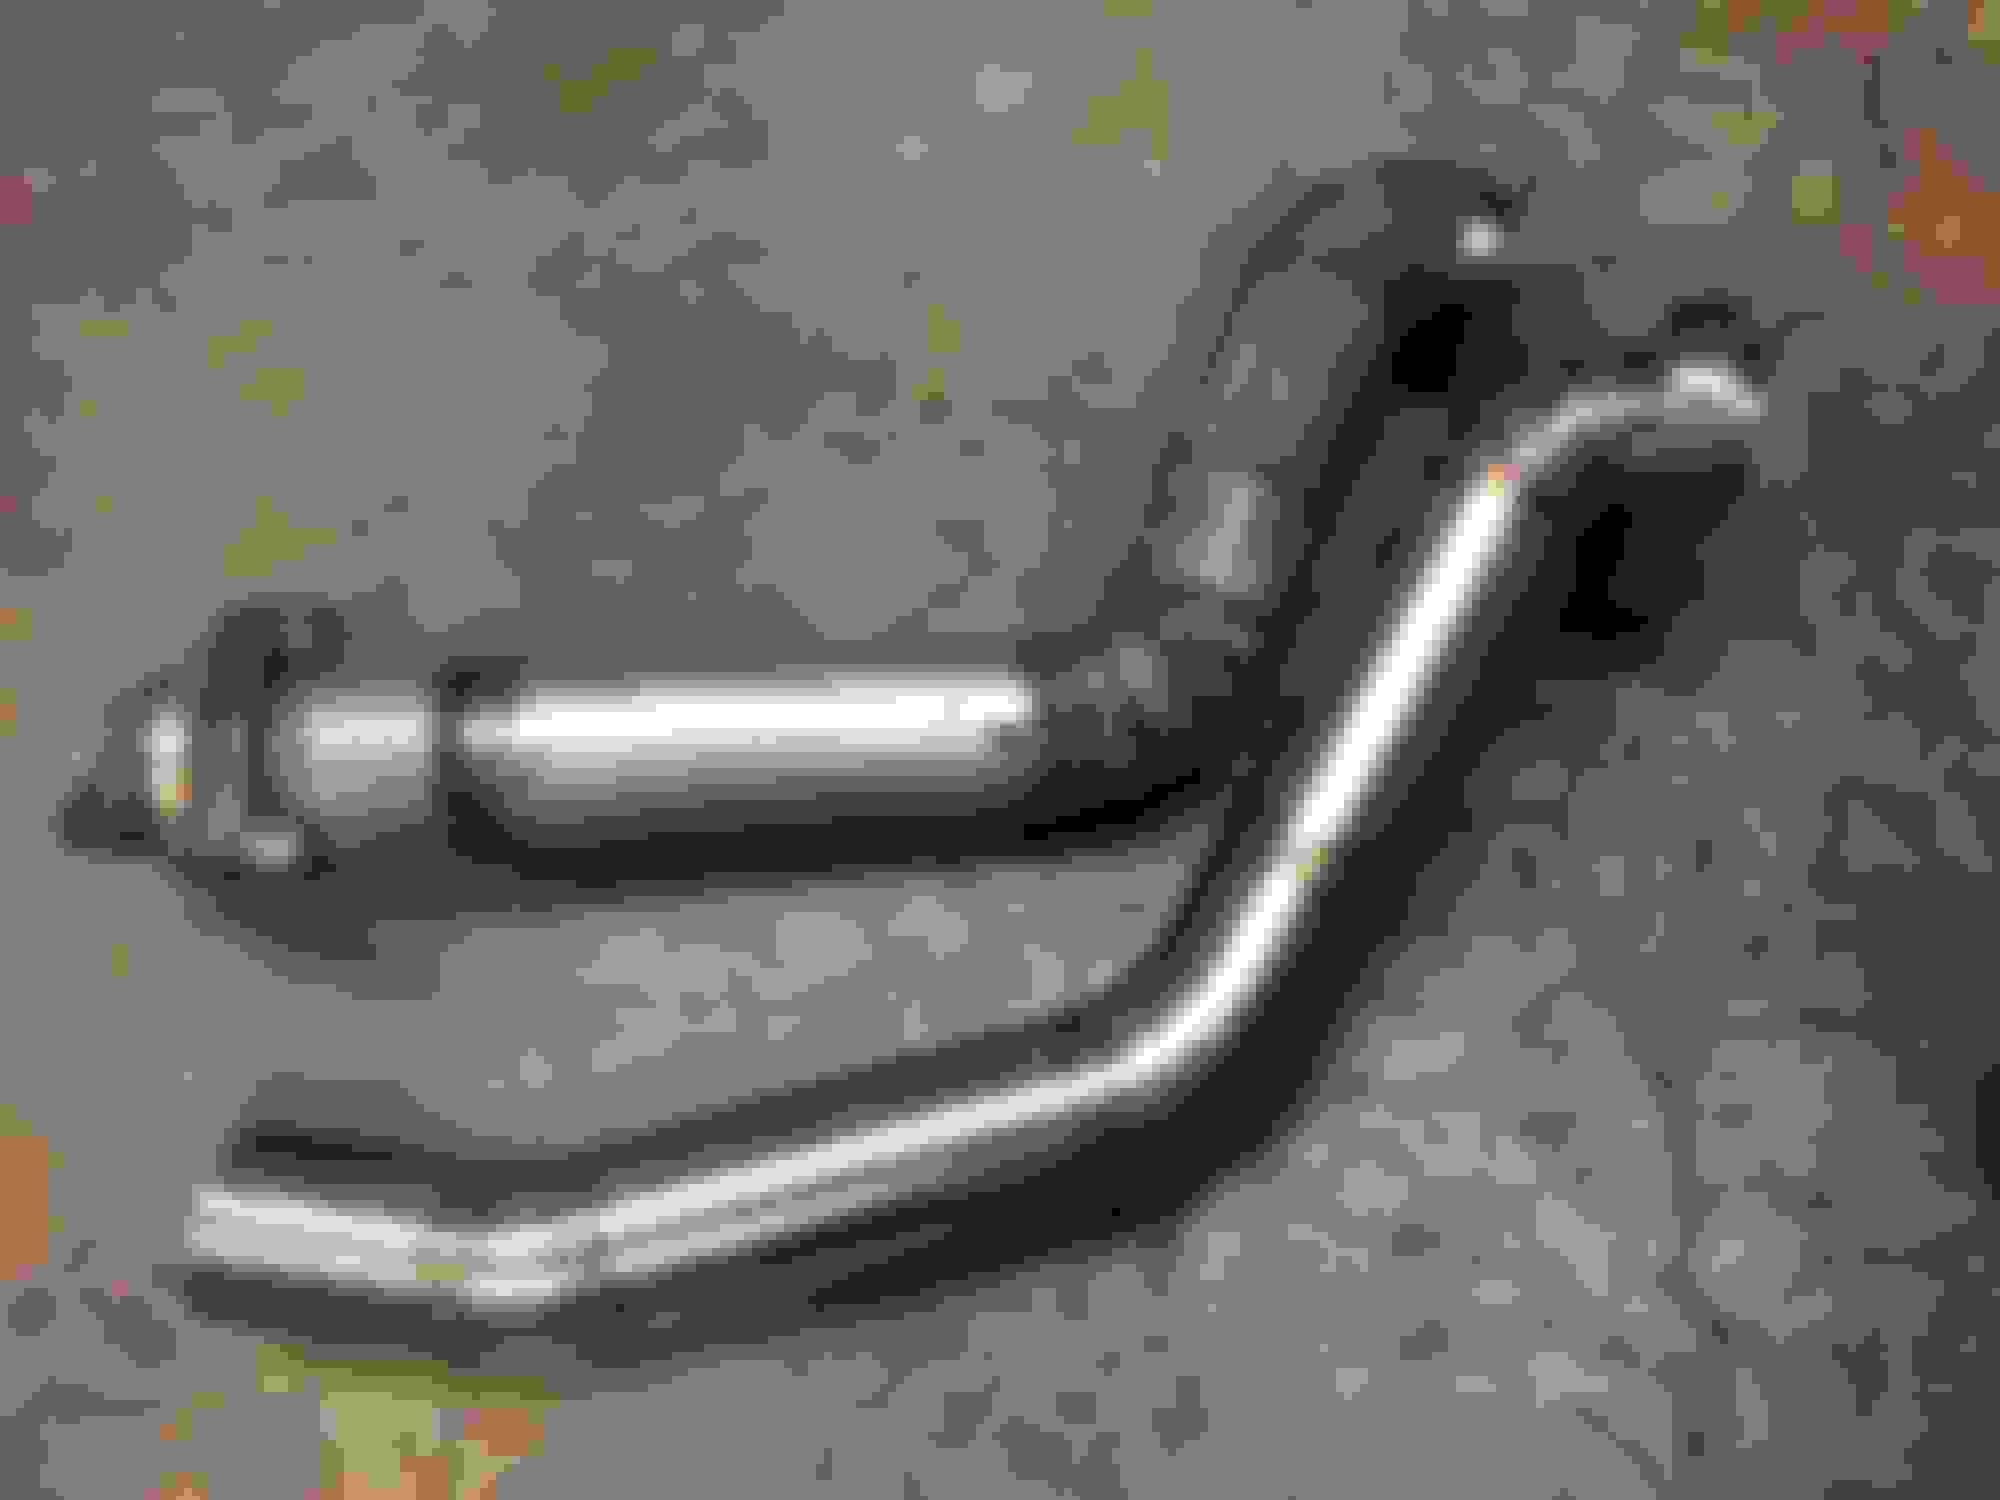
Here's the best I can do to help. It's a comparison of your car and one I had a downpipe made for. Same eBay manifold, with a non-wastegated T3 turbo, which sadly I don't have a photo of, but I think the turbine housing was the same as yours. The owner of this car opted to run a V-band adapter, which encased an internal wastegate. He had to cut the shelf, you can compare the curve of your shelf vs. his.
Here's the final downpipe, shown compared to the one it replaced. I shudder to think what the original owner paid for the first one. That crazy pie cut at the top was necessary to clear even the cut shelf.
We had a lot of discussion between myself and the fabricator, how he should have used just the 5-bolt flange, how that would have required an external wastegate, and how that would in turn require a separated gas downpipe, and how that would be a challenge to fabricate and fit, and how he should have just started with a different manifold, and/or a different turbo. But obviously those decisions were not made by us, and his budget was not unlimited, so we made do.
Wow, the difference in quality is amazing! That's simply a gorgeous piece.
My plan of attack at this point, can essentially be summarized with the images below (don't laugh! lol). Ideally, I'd like to avoid cutting the shelf, but at this point, i'll be happy if this arrangement is successful in any capacity.
1. Intercooler is on and done! Was a pretty uneventful install. Note: The licences plate has since been re-positioned as to not block the intercooler. Waterlines and wastegate lines are also installed.
2. I was quoted ~$350 to make a fully custom upper down pipe, so I decided to see what I could do myself first. Although there were a few setbacks, I feel like I've made great progress.
The center line radius of the original pipe I purchased was too large. Although it did not interfere with the rear shelf, it did force me to push the lower downpipe back so far that it was starting to interfere with the trans tunnel.
I purchased a tight radius 90 degree bend off Amazon. Here it is in comparison to the bend I cut from the U pipe pictured earlier in the thread.
I bolted both flanges to the turbo/lower downpipe, and loosened a few spots in the exhausts. I then used zip ties to positions lower downpipe.
Lastly I positioned the downpipe until I was happy with the alignment. With the zip ties holding the weight of the lower downpipe, I dropped JB weld around the new upper pipe and flanges. Once it's had time to dry, I'll then be unbolting it all and bring it to be welded. Wish me luck lol.
What's the concern with adjusting the rear shelf? I chose the hammer method because I didn't like the idea of removing welded material. The result was just folding the wall downward. 99% could not tell it has been modded and I gained close to 1.5 inches.
I thought it could be structural in some way but if it ends up being in the way it will be bent/cut on mine for sure... either way good luck on your DP! If I had the chance I would go DIY myself too.
What's the concern with adjusting the rear shelf? I chose the hammer method because I didn't like the idea of removing welded material. The result was just folding the wall downward. 99% could not tell it has been modded and I gained close to 1.5 inches.
Some people don't like messing with the body like that. As far as I am aware there is no problem removing that lap if you need to. To me it is no worse then what you have to do to the shock tower area for a FM/Begi manifold.
Update:
The car is entirely buttoned up with the exception of the upper/lower downpipe.
Upper downpipe:
My welder wouldn't touch it until i removed all of the JB weld (which I had applied to keep the shape/placement correct). I created a jig and brought it back. It should be done in a day or two.
Lower downpipe/exhaust cutout:
Here's a pic just playing around with some extra piping and the cutout.
Unfortunately, there's a lot less room under the car than I remembered. So I may just do a very basic application as pictured below. The location shown is right after the front cross member. It's about a 6 to 8 inches before the O2 Sensor. (I was also considering moving it much closer to the turbo and then running exhaust pipe out above the driver side control arm/behind the front wheel, but it's just making it more complicated than it needs to be). Lastly, I'll likely either weld the cut out at a slight angle, or add more pipe to it, just to help direct the exhaust backwards.
I hope you're expecting it to leak, because it 100% will, so take that into consideration before placing it in front of 02 (throw off readings) and/or underneath you (where it will suffocate you with fumes)
 08-17-2018, 10:15 PM

 lol god i suck.
 0
0