Need More Towing Power........

 04-28-2015, 04:03 PM
#122
Senior Member
Thread Starter
iTrader: (2)

Join Date: Sep 2009
Location: Edmonton, AB, Canada
Posts: 1,193
Total Cats: 29
Progress is slow though, too slow for my liking but at least it's on the backside now heading to completion.
Being in Canada we are huge Cadbury people. Since Britain and Canada have huge ties we get tons of Cadbury items. I must say that I prefer it over many other brands.
We get some of the UK market foods as well at specialty shops around here and the Cadbury Galaxie milk chocolate bar towers over the Dairy Milk bar.

Reply
 1
1

1
05-05-2015, 10:37 AM
#123
Senior Member
Thread Starter
iTrader: (2)
Join Date: Sep 2009
Location: Edmonton, AB, Canada
Posts: 1,193
Total Cats: 29
Was excited on my trip to the US to visit HB. Was about what I expected. Great prices, Chinese quality.
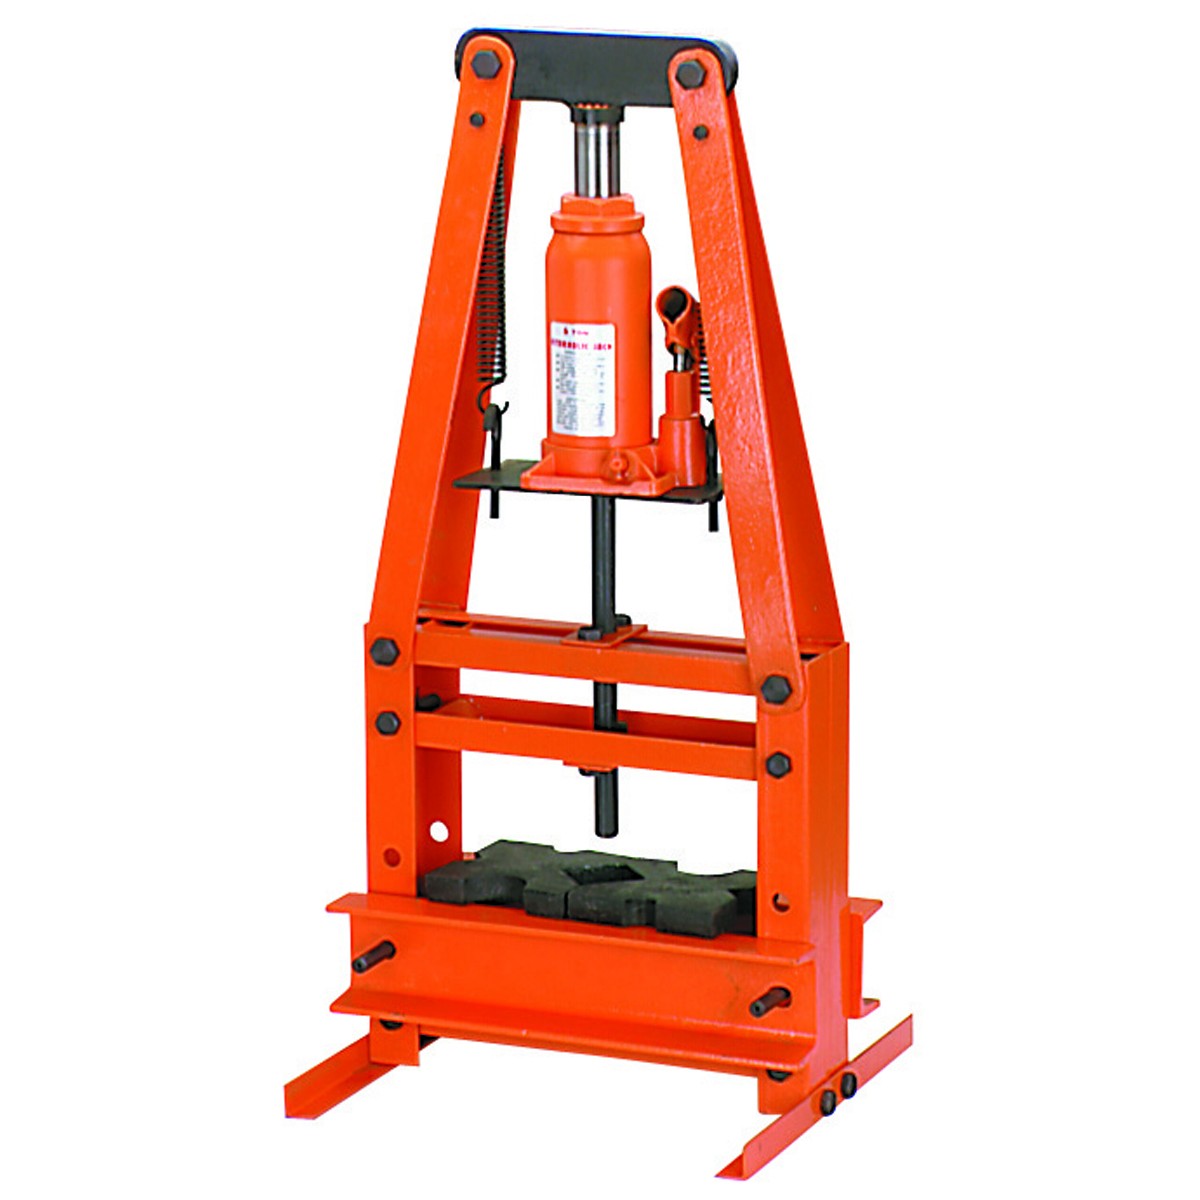
I was after the 6 ton A-Frame Shop Press. Picked it up ($79 US) and assembled it back home in Canada. Intended to install my pilot bearing, but the flywheel was about 2cm to wide for it - boo boo!
So I put in up in the local classifieds (Kijiji.ca is the popular one in Canada) for $100 CDN. Sold right away.
I replaced it with a part from Princess Auto which is the HB equivalent up here. Aquired a 12 ton press for $120 CDN
This
to this...

[IMG] [/IMG]
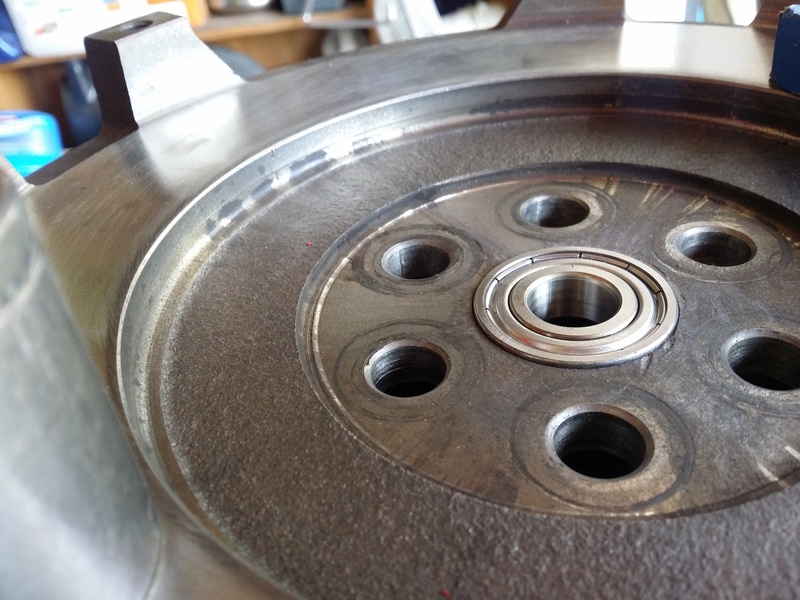
I had both the FM rubber shield pilot bearing and an SKF. I chose the SKF because of the quality of that brand although it is the metal shield variety. Any concerns there ?
I was after the 6 ton A-Frame Shop Press. Picked it up ($79 US) and assembled it back home in Canada. Intended to install my pilot bearing, but the flywheel was about 2cm to wide for it - boo boo!
So I put in up in the local classifieds (Kijiji.ca is the popular one in Canada) for $100 CDN. Sold right away.
I replaced it with a part from Princess Auto which is the HB equivalent up here. Aquired a 12 ton press for $120 CDN
This
to this...
[IMG]
 [/IMG]
I had both the FM rubber shield pilot bearing and an SKF. I chose the SKF because of the quality of that brand although it is the metal shield variety. Any concerns there ?

Reply
0
0
05-07-2015, 12:12 PM
#124
Senior Member
Thread Starter
iTrader: (2)
Join Date: Sep 2009
Location: Edmonton, AB, Canada
Posts: 1,193
Total Cats: 29
Finally got around to trimming the valve stems. A lot easier and quicker than I thought. Had a friend show my how and let me use his shop. Got one half done yesterday - the rest today.
[IMG]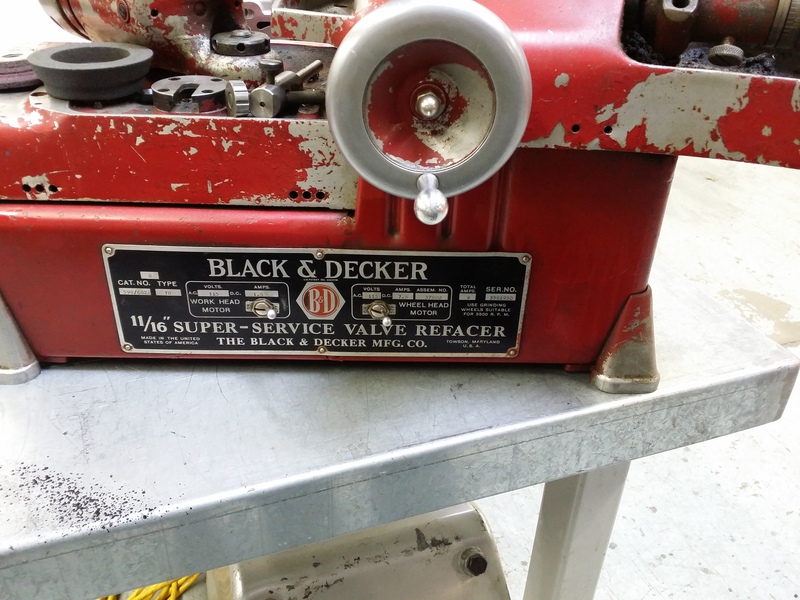 [/IMG]
[IMG]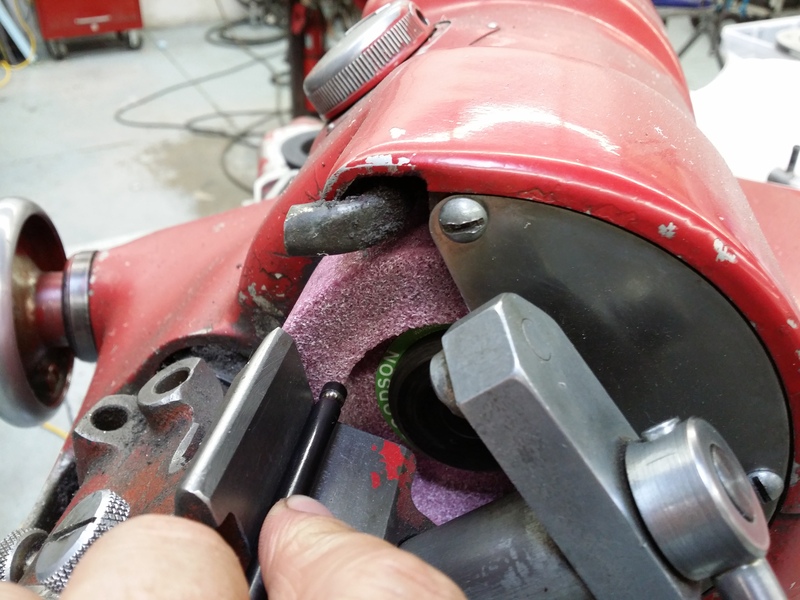 [/IMG]
Dumb mistake though.
I forgot how important it is to protect the machined head gasket surface. I took the head from my bench on a nice piece of new carpet into my minivan and just stuck it down. I remember thinking to make sure it wouldn't move or tip but I forgot to protect the bottom. There is a scratch or 2 around the water holes. Probably need to get it skimmed again. As long as I still have lots of material left I'm ok with this. Just annoying for cost and time lost.
[IMG]
 [/IMG]
[IMG]
 [/IMG]
Dumb mistake though.
I forgot how important it is to protect the machined head gasket surface. I took the head from my bench on a nice piece of new carpet into my minivan and just stuck it down. I remember thinking to make sure it wouldn't move or tip but I forgot to protect the bottom. There is a scratch or 2 around the water holes. Probably need to get it skimmed again. As long as I still have lots of material left I'm ok with this. Just annoying for cost and time lost.
Reply
0
0
05-07-2015, 07:53 PM
#125
Elite Member

Join Date: Mar 2007
Location: Santa Clara, CA
Posts: 5,165
Total Cats: 855
I forgot how important it is to protect the machined head gasket surface. I took the head from my bench on a nice piece of new carpet into my minivan and just stuck it down. I remember thinking to make sure it wouldn't move or tip but I forgot to protect the bottom. There is a scratch or 2 around the water holes. Probably need to get it skimmed again. As long as I still have lots of material left I'm ok with this. Just annoying for cost and time lost.
Post a photo?
I would guess that as long as it's just "around" a water hole or two and not connecting a water hole to an oil hole or near the combustion chamber it's probably fine. Keep in mind that every time you skim it you're raising the compression ratio, which is the leading theory on why my car is pinging a lot more than it used to...
I'm a long way from an expert though.

--Ian
Reply
0
0
05-11-2015, 11:03 AM
#126
Senior Member
Thread Starter
iTrader: (2)
Join Date: Sep 2009
Location: Edmonton, AB, Canada
Posts: 1,193
Total Cats: 29
Didn't get around to a photo. My machinist said he would take off the smallest needed to remove the mark. For the $65 or so cost I'll feel much better about having it perfectly smooth again.
I'm using the Wiseco 8.5:1 so I've got a bit of compression room.
Installing the rear main seal into its holder is so much better than into a block with the pan and holder already RTV sealed & installed. I can see how the seal tools help but in this case I'll be fine without them.
I'm using the Wiseco 8.5:1 so I've got a bit of compression room.
Installing the rear main seal into its holder is so much better than into a block with the pan and holder already RTV sealed & installed. I can see how the seal tools help but in this case I'll be fine without them.
Reply
0
0
05-12-2015, 12:34 AM
#127
Senior Member
Thread Starter
iTrader: (2)
Join Date: Sep 2009
Location: Edmonton, AB, Canada
Posts: 1,193
Total Cats: 29
Kinugawa parts showed up today. They have very respectful Canadian shipping and best prices around on the items I ordered. Water lines for the turbo (only $24.90 but they just went up to $30 now that I look), 3.63psi or as I call it break in spring for the WasteGate, and some WG and Oil seals
[IMG]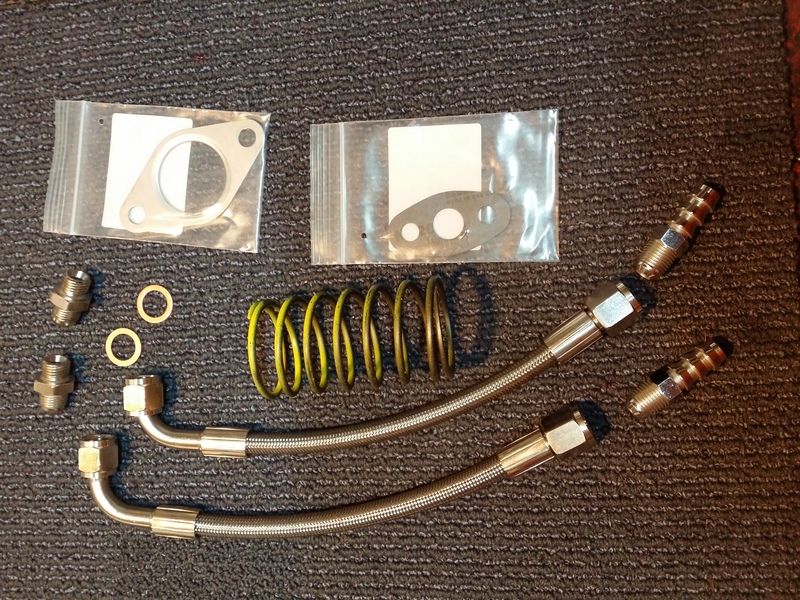 [/IMG]
[IMG]
 [/IMG]
Reply
0
0
05-29-2015, 06:48 PM
#128
Senior Member
Thread Starter
iTrader: (2)
Join Date: Sep 2009
Location: Edmonton, AB, Canada
Posts: 1,193
Total Cats: 29
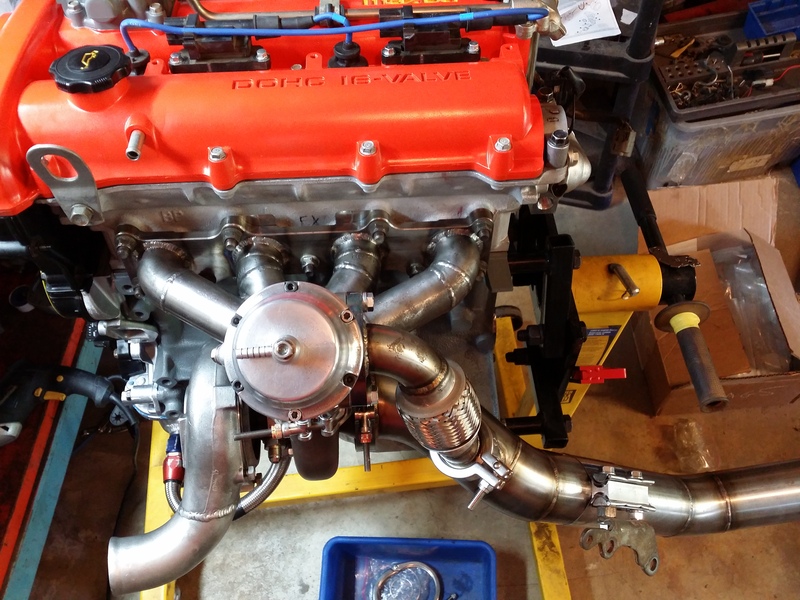
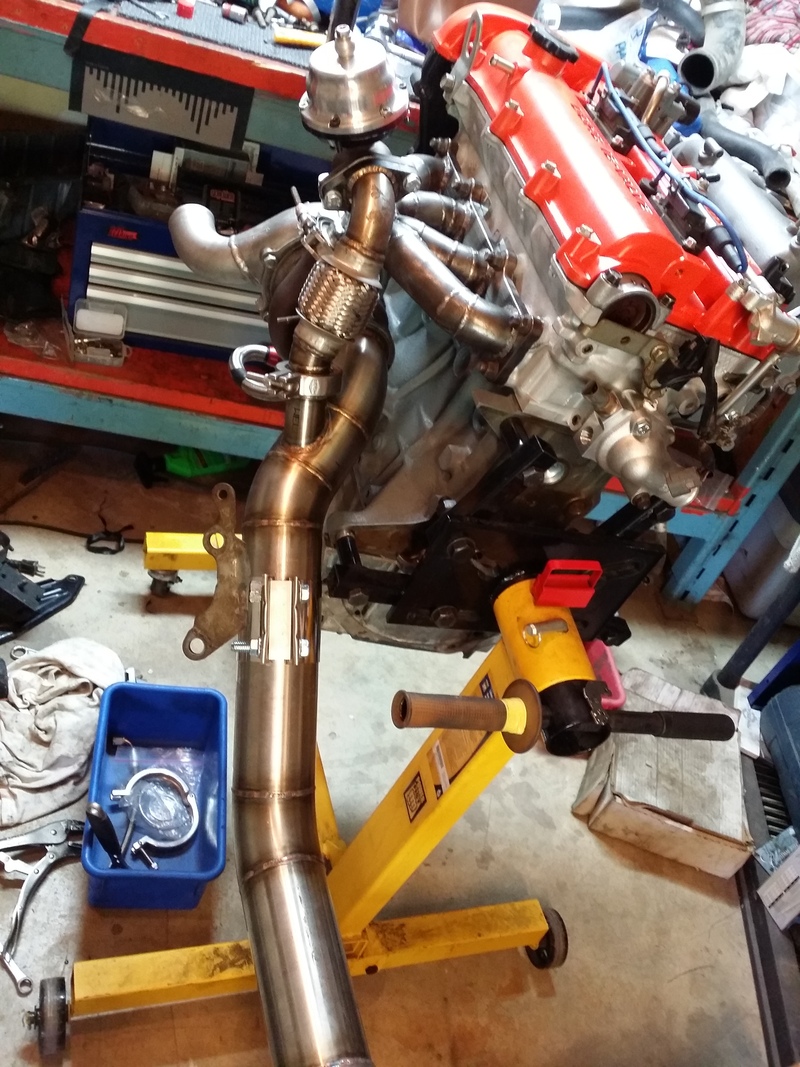
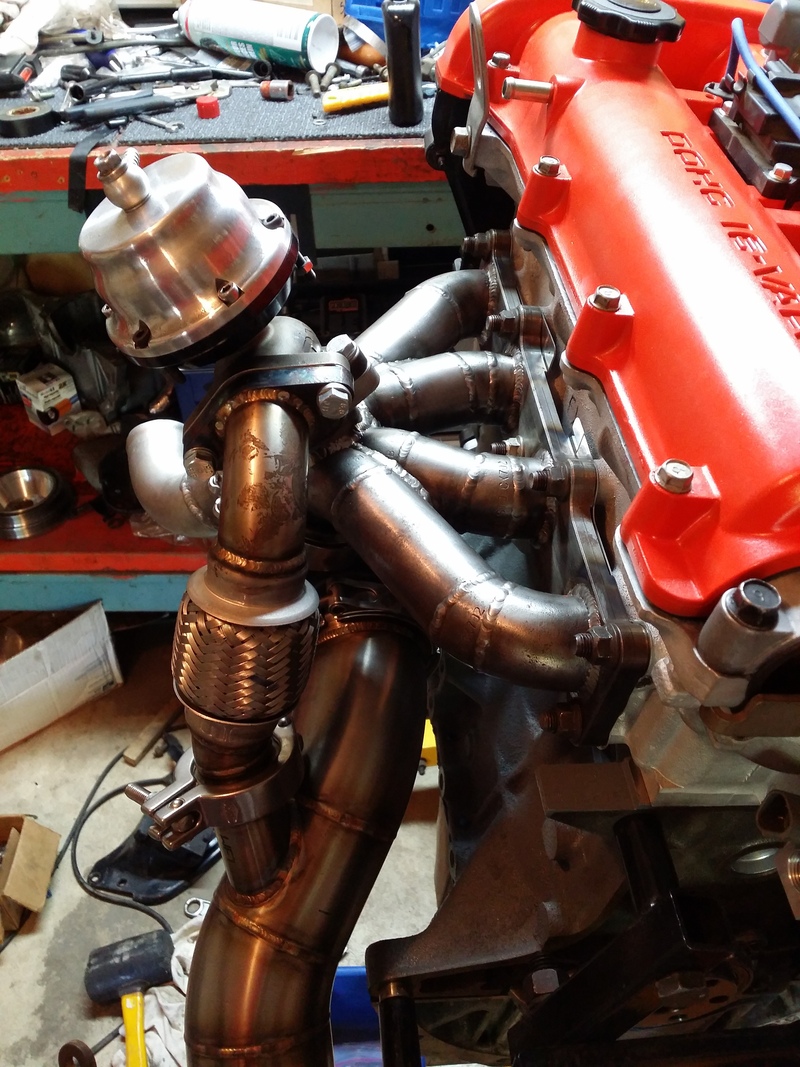
- Head assembled.
- 99-00 Head gasket installed
- ARP head bolts to 60lbs
- MBSP installed
- Oil pan installed
- Rear main seal installed
- Bought MiataRoadsters VVT Viton oil seals kit - installed
- Injector seals installed on DW 600's
- Intake side installed
- Modded the Intake Brace for the oil filter
- Timing done
- Still waiting on a trigger 4 tooth OEM wheel from 949
- Tested the hot side and need to flip/weld the mixing manifold
[IMG]
 [/IMG]
[IMG]
 [/IMG]
[IMG]
 [/IMG]
[IMG]
 [/IMG]
[IMG]
 [/IMG]
Reply
1
1
06-02-2015, 12:46 AM
#130
Senior Member
Thread Starter
iTrader: (2)
Join Date: Sep 2009
Location: Edmonton, AB, Canada
Posts: 1,193
Total Cats: 29
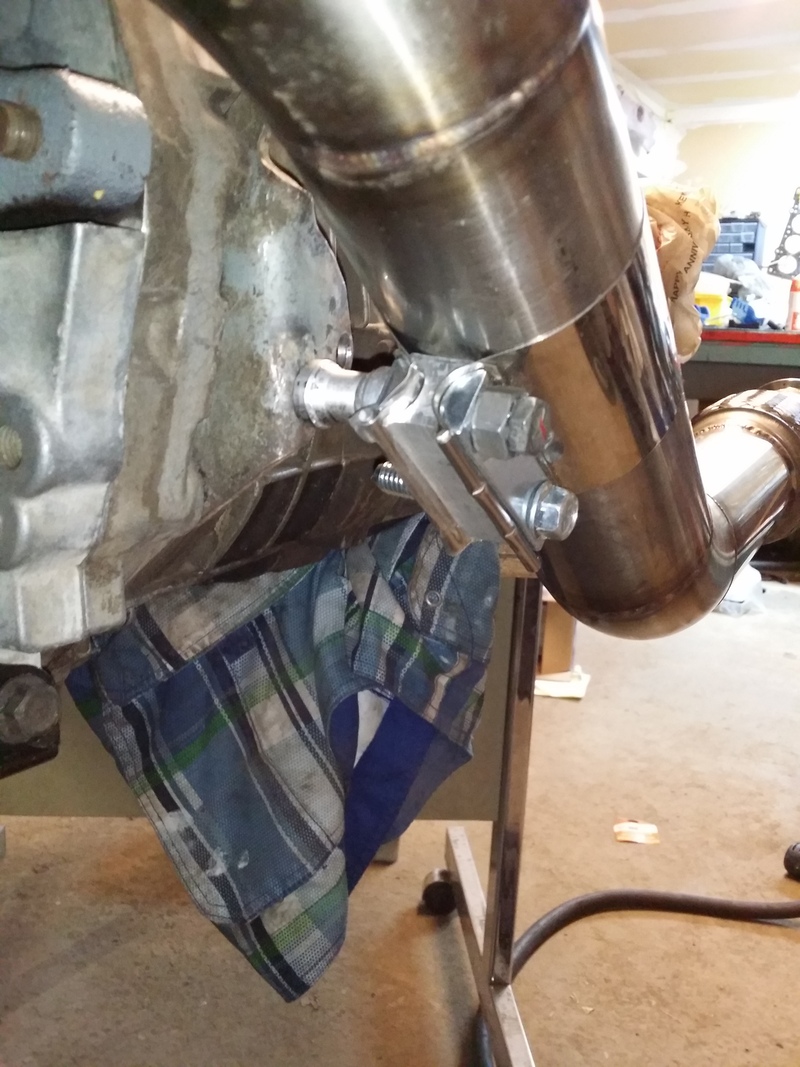
This is how I am making my exhaust brace
More progress on the longblock. Testing the manifold / DP / WG and also the feed lines, coolant reroute etc.
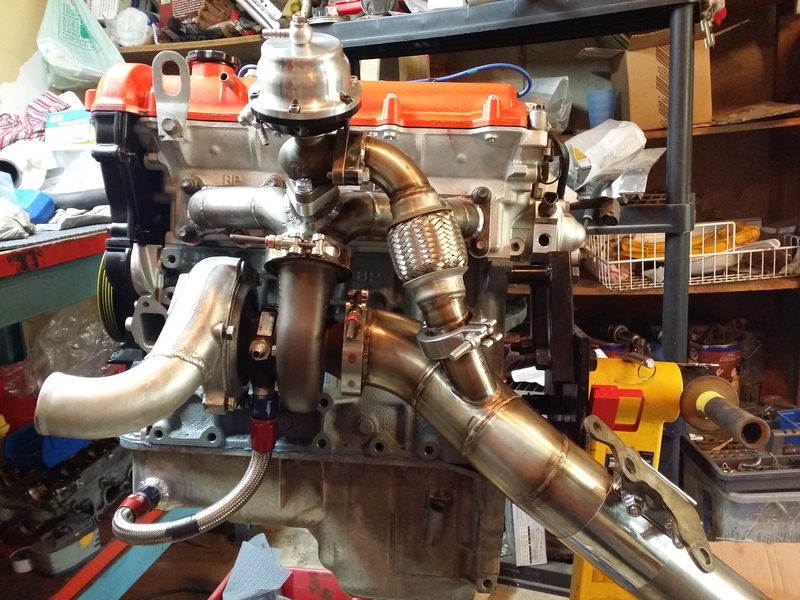

More progress on the longblock. Testing the manifold / DP / WG and also the feed lines, coolant reroute etc.


Reply
0
0
06-02-2015, 01:06 AM
#131
Senior Member
Thread Starter
iTrader: (2)
Join Date: Sep 2009
Location: Edmonton, AB, Canada
Posts: 1,193
Total Cats: 29
Mixing manifold mods needed because of the bottom mount turbo.
Heated up the small tube pulled it out and RTV'd it and repositioned it for the "FLIP"
Put in by way of JB Weld an NPT fitting. Scoring the ID of the manifold and the threads of the fitting should keep it solid. Going to run heater hose all the way in a big arc.
Maybe in the Canadian arctic winters I should run the hose to some coiled copper tube around the manifold then into the heater core for instant and constant hot air!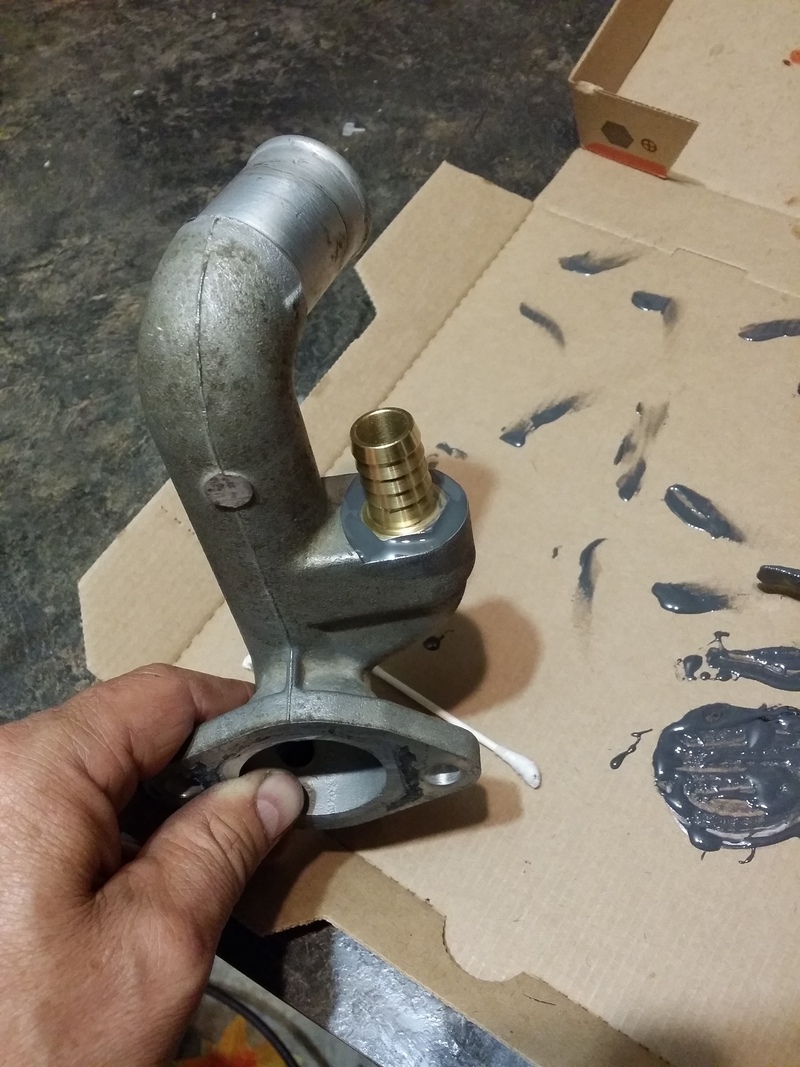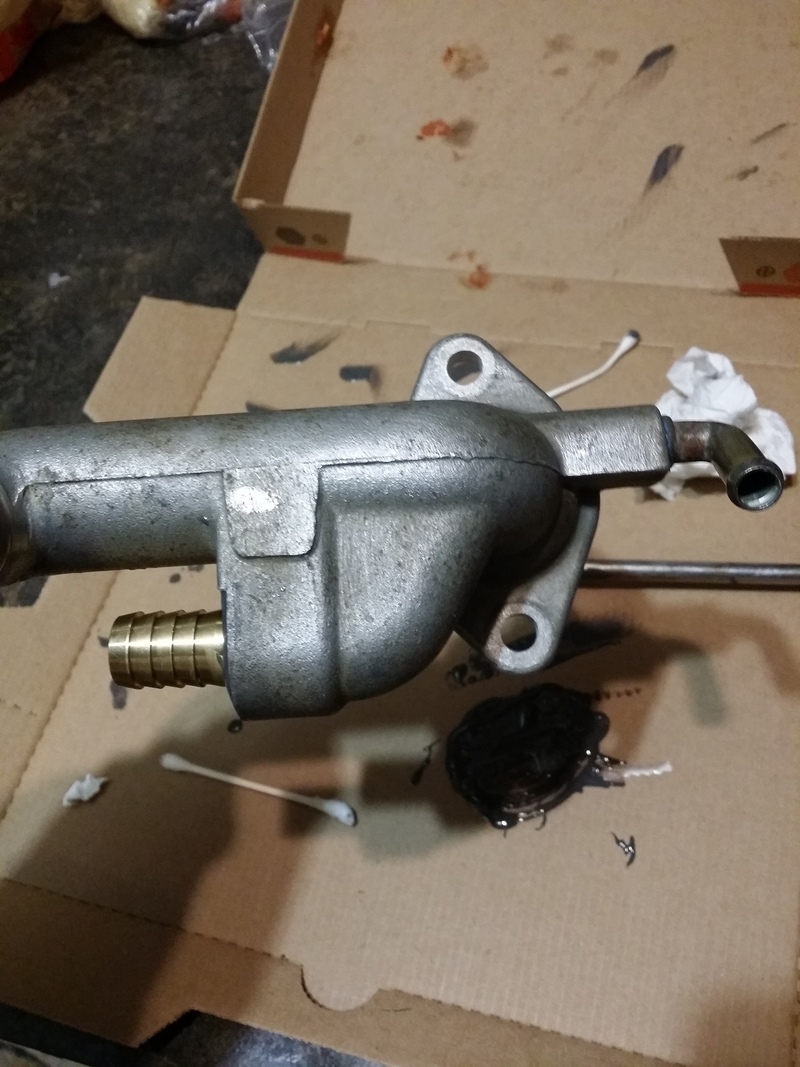


Reply
0
0
06-05-2015, 12:58 AM
#132
Senior Member
Thread Starter
iTrader: (2)
Join Date: Sep 2009
Location: Edmonton, AB, Canada
Posts: 1,193
Total Cats: 29
Just wondering how JB Weld handles Anti-Freeze for extended periods of time ?
6 puck centerforce is in. Used thread sealer on flywheel bolts.
Used ACT pressure plate in as well, its the medium duty one not the Extreme. Figured with the 6 puck I'll get holding power and still reasonable pedal pressure.
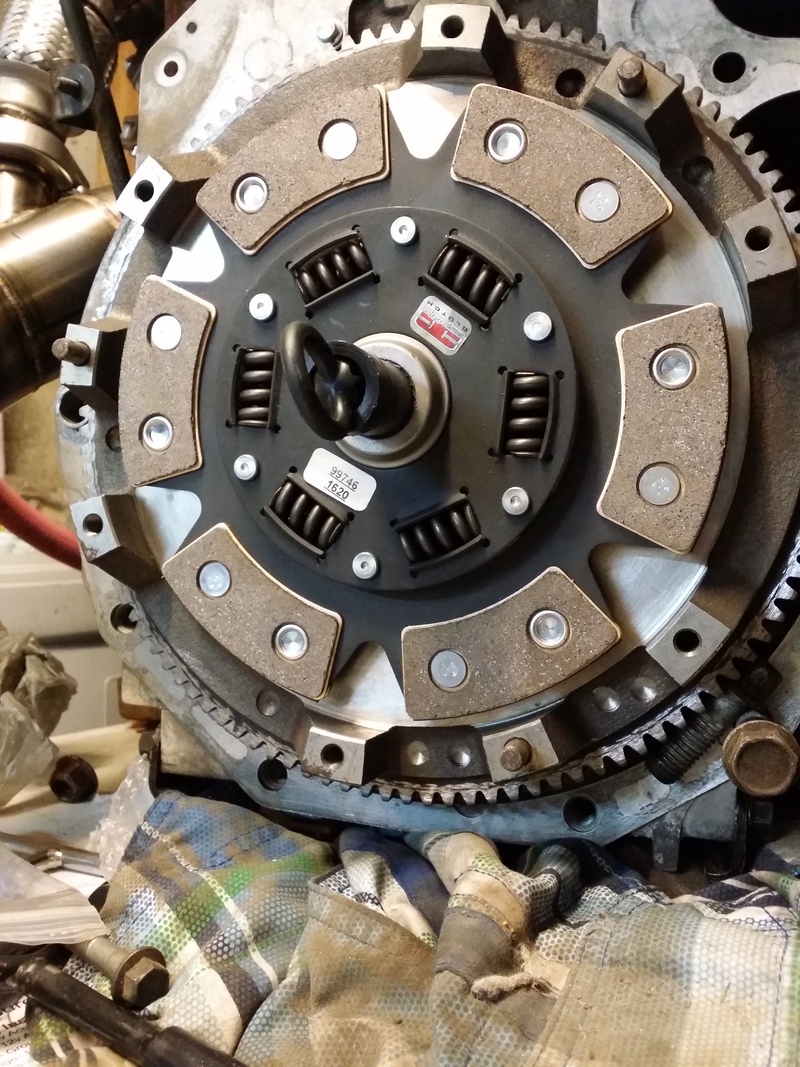
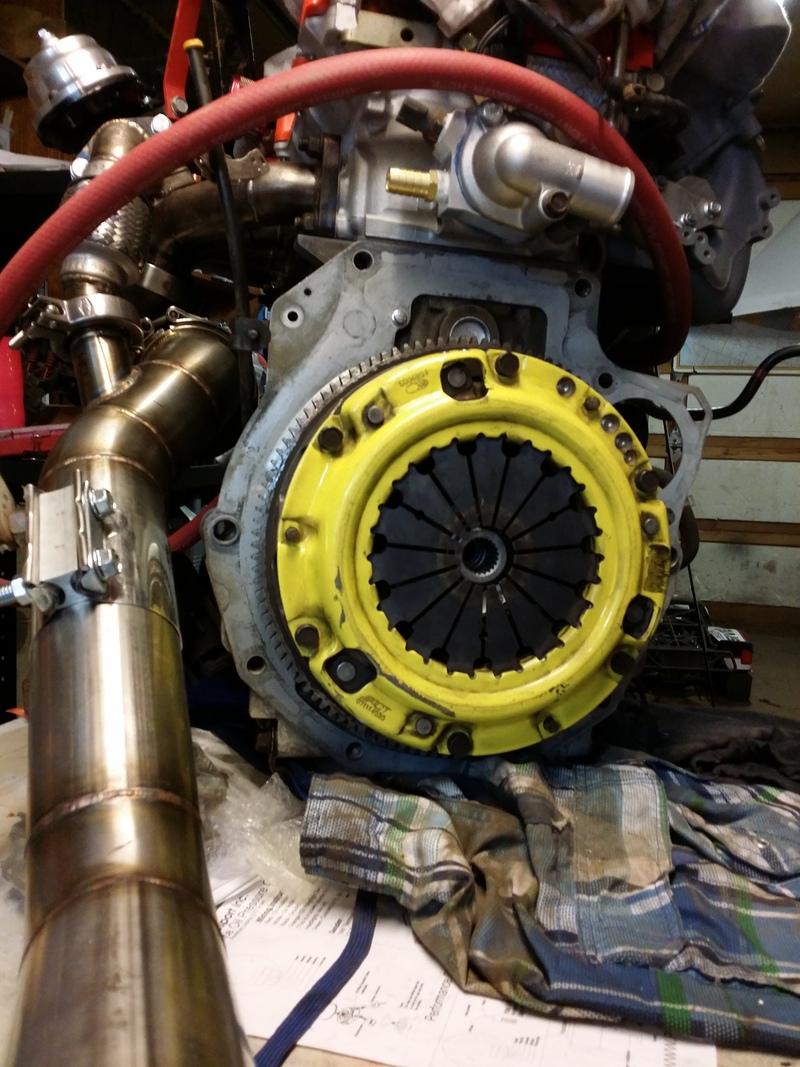
6 puck centerforce is in. Used thread sealer on flywheel bolts.
Used ACT pressure plate in as well, its the medium duty one not the Extreme. Figured with the 6 puck I'll get holding power and still reasonable pedal pressure.


Reply
0
0
06-10-2015, 01:18 AM
#133
Senior Member
Thread Starter
iTrader: (2)
Join Date: Sep 2009
Location: Edmonton, AB, Canada
Posts: 1,193
Total Cats: 29
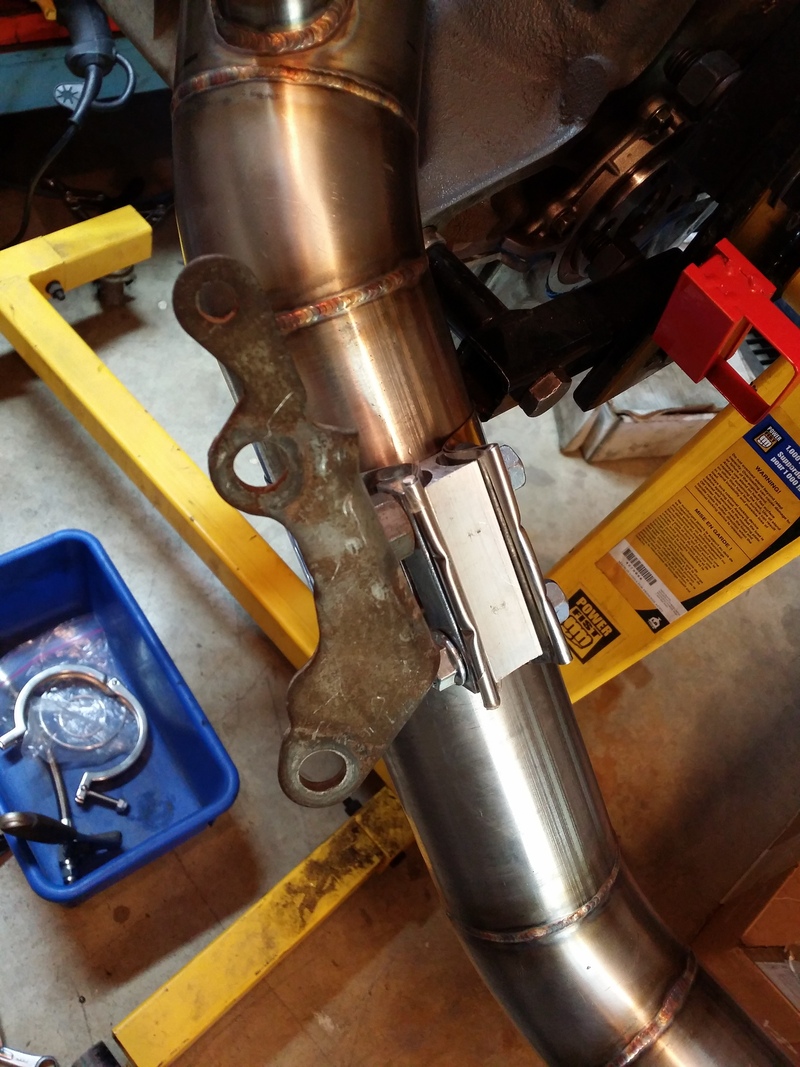
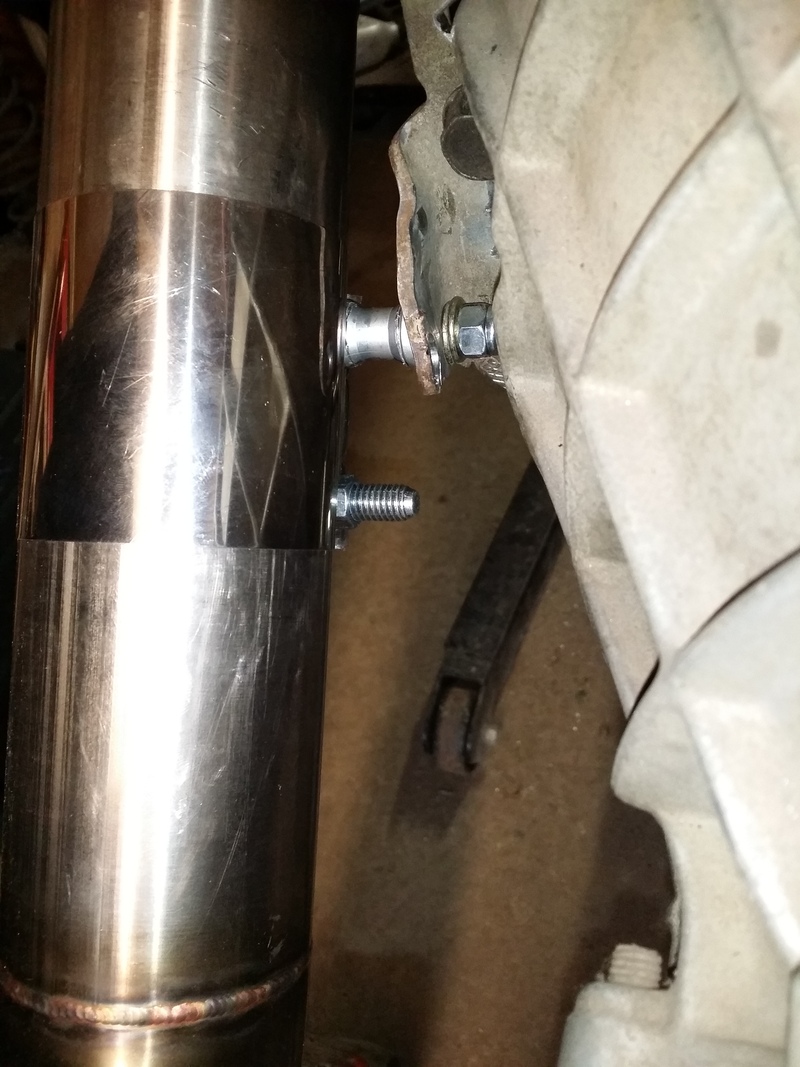
Exhaust brace setup. Seems to work ok as tested by unbolting both Tial V-Bands and having it keep things stable. Time will tell.
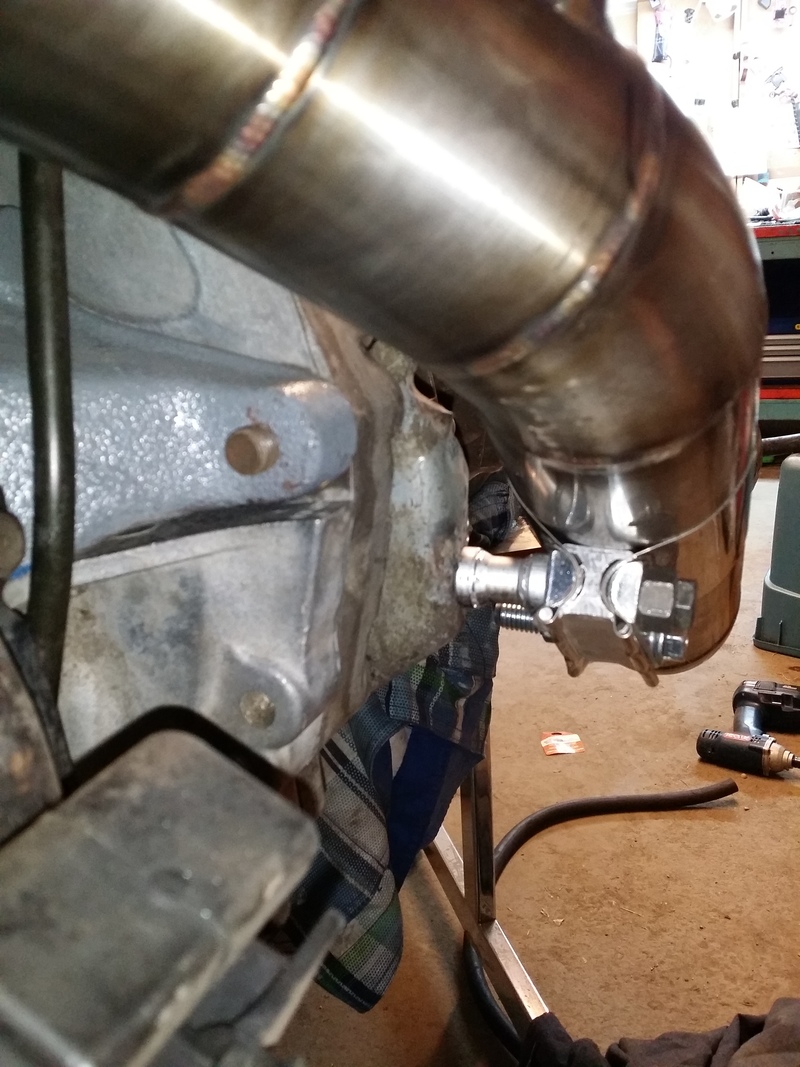
Had to clearance this water neck coming out of the block a little to allow the hose to slip on better. Little hard to see:
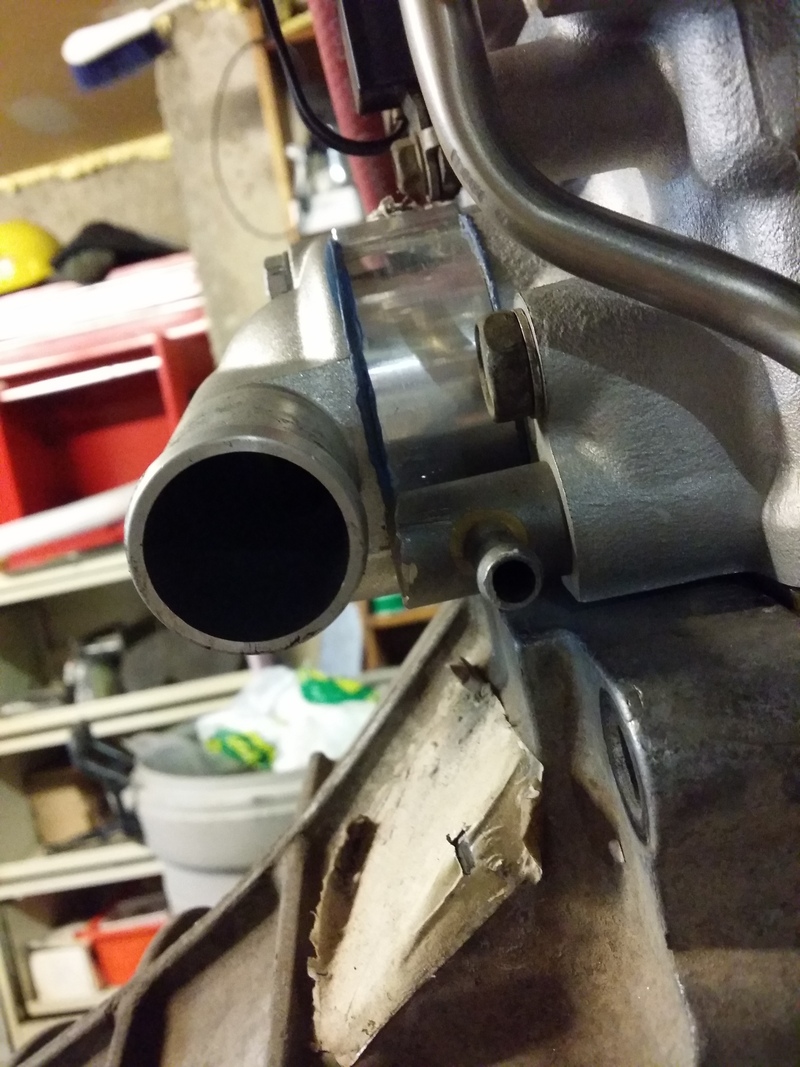


Had to clearance this water neck coming out of the block a little to allow the hose to slip on better. Little hard to see:

Reply
0
0


 06-18-2015, 04:00 AM
#135
Senior Member
Thread Starter
iTrader: (2)
Join Date: Sep 2009
Location: Edmonton, AB, Canada
Posts: 1,193
Total Cats: 29
Got the engine in by myself. Took 4 hours going slow. Had to remove the drivers motor mount plate.
Once in I realized that my turbo drain was rubbing the steering box. Shortened it in the car. Also realized the cold side "turbo to CHRA clamp plate" that was also used to hold the old WG for internally gated turbos was sticking out to far. I was going to buy one so that it looked clean like the other 2 plates but I cheaped out. I stuck it where I thought it would be hidden but as I was dropping the motor it looked like it would rub the steering dust boot. Angle ground it down while in the engine bay. Then after crawling under the car I noticed that the DP was touching the body. My homemade exhaust brace had to be removed cut and reworked. Had to loosen the V-bands and Tial WG and rotate the DP. I sure love the V-bands for that.
Reconnected all of the electrical etc. Reroute lines, radiator, IC etc. Started it without the ECU relay - checked oil pressure but my new to me gauge was not working. Checked cams - looked oiled so I plugged in the relay/fuse. Started but ran really rough. Garage was smoked out with nasty rich fuel smell. Was looking around for leaks etc and found raw fuel dripping from exhaust. Checked the plugs and number 1 was not firing (still nice and white). Found out that the NGK wires for a VVT car (only 2 blue wires in the set since it is OEM COP) don't fit like OEM. The electrode does not protrude far enough into the coil body and make contact. I broke the glue bond on the sheath and was able to pull the wire out to OEM specs. Fired up and sounded better but still rough. Try again tomorrow after fuel has evaporated. Don't want to idle it to long so I can get those rings seated, but I want it sounding cleaner before I do the break in.
I assume since the rings haven't seated that AFR's at idle will be off and it will sound a bit rough. Is this correct ?
Reply
0
0
07-21-2015, 10:22 PM
#137
Senior Member
Thread Starter
iTrader: (2)
Join Date: Sep 2009
Location: Edmonton, AB, Canada
Posts: 1,193
Total Cats: 29
After the excellent help I received on the misfire I have been breaking everything in. Ran it hard with the 4 psi spring. Decided to combine the yellow small (4psi) and the large red and get around 15 psi but that did not work. Would only boost to about 8 psi. It was a hoot at 8 psi. Decided to run just the large sprng and only was getting about 4 psi. The large sprng felt about as stiff as the small yellow so perhaps it was an old maroon color and was rated at 4 psi? Either way I ordered a new 14psi spring so we will see what effect that has.
At 8 psi it was running hard. I cant wait for 15 and then settle around almost 20 I think. We'll see how it goes.
At 8 psi it was running hard. I cant wait for 15 and then settle around almost 20 I think. We'll see how it goes.
Reply
0
0
07-21-2015, 10:27 PM
#138
Senior Member
Thread Starter
iTrader: (2)
Join Date: Sep 2009
Location: Edmonton, AB, Canada
Posts: 1,193
Total Cats: 29
After the rebuild my horn and airbag didn't work. Remote fob activated horn so I knew it was in the clockspring.
Here is what I found and then I fixed it all up.
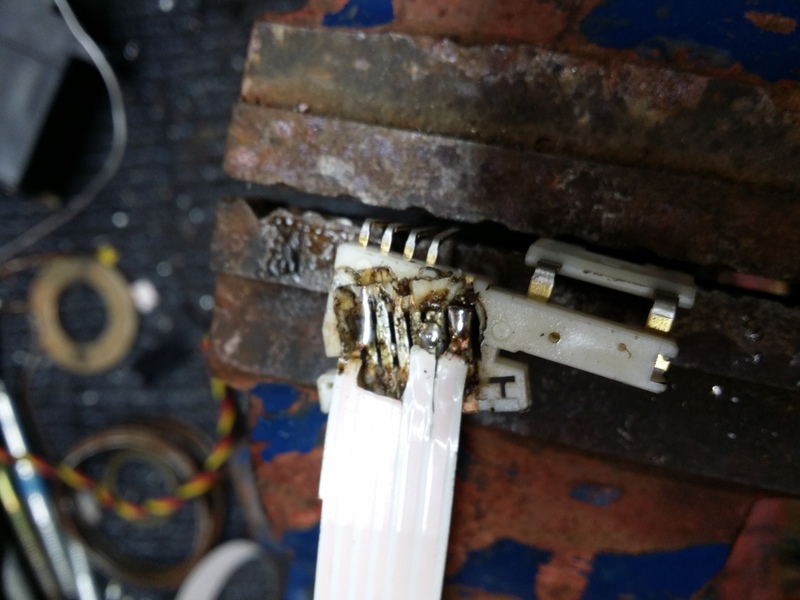
Took it apart. Found broken wires. Made a mess of it trying to be precise. Removed all the solder with my solder sick and thought some more on it. Realized I only needed 3 wires total. Spread the Airbag ones and routed the horn to the far opposite side. Had to route the horn connector all the way up to the steering wheel to the opposite side of OEM. It all works now. That's the way it goes when you are cheap.
Here is what I found and then I fixed it all up.


Took it apart. Found broken wires. Made a mess of it trying to be precise. Removed all the solder with my solder sick and thought some more on it. Realized I only needed 3 wires total. Spread the Airbag ones and routed the horn to the far opposite side. Had to route the horn connector all the way up to the steering wheel to the opposite side of OEM. It all works now. That's the way it goes when you are cheap.
Reply
0
0
07-21-2015, 10:30 PM
#139
Senior Member
Thread Starter
iTrader: (2)
Join Date: Sep 2009
Location: Edmonton, AB, Canada
Posts: 1,193
Total Cats: 29
Did a 2nd gear donut and the clutch is now stuck engaged. - BOOOOOO
Drove home not fully stopping at 2 stop signs and up/down shifting by blipping and being patient.
Going to pull the tranny and have a look. Any guesses what it is; stuck Throwout Bearing, Pilot bearing, disk welded to PP ?? Who knows.
Drove home not fully stopping at 2 stop signs and up/down shifting by blipping and being patient.
Going to pull the tranny and have a look. Any guesses what it is; stuck Throwout Bearing, Pilot bearing, disk welded to PP ?? Who knows.
Reply
0
0


