JCH13's 1991 Every-Color Turbo - Budget+DIY Build
 04-30-2014, 09:59 AM
#1
Junior Member
Thread Starter

Join Date: Nov 2010
Location: NH
Posts: 64
Total Cats: -2
Greetings MiataTurbo,
I've been a long-time mostly lurker here, and I figured it was time to finally start a build thread here in order to seek technical feedback and to share what I've been working on.
A little about myself - I'm a mechanical engineer with professional experience in a number of automotive areas, I spent 3 years in college helping to found and develop an FSAE program, I'm a driver on a Lemons team called Mod Squad racing that races MK2 MR2s, and I have a turbo Miata that's my summer car and autox rig. I am a really serious DIYer. I have earned certifications in TIG welding CroMoly steel and aluminum and own a TIG welder, I have a 4'x4' CNC router and numerous other bits of shop equipment (band saw, table saw, grinders, sanders, drill press, 10 ton press, press brake, etc). I run a small side business doing custom welding and fabrication, mostly for a local medical research facility and other car guys.
Since I have 4 cars in the fleet at the moment I try to do as much works as possible myself and try to avoid any 'throw money at it' solutions. I'm willing to sacrifice some performance in order to keep my Miata as a reasonably affordable hobby. Anything that I can possibly do myself, from making and fixing parts to alignments, I try to do. For me, half the point of having a car like this is to have a project to work on. Thus why I call this a 'budget+diy' build.
Anyway, enough , I just wanted to give a little background on my attitude towards this car/project.
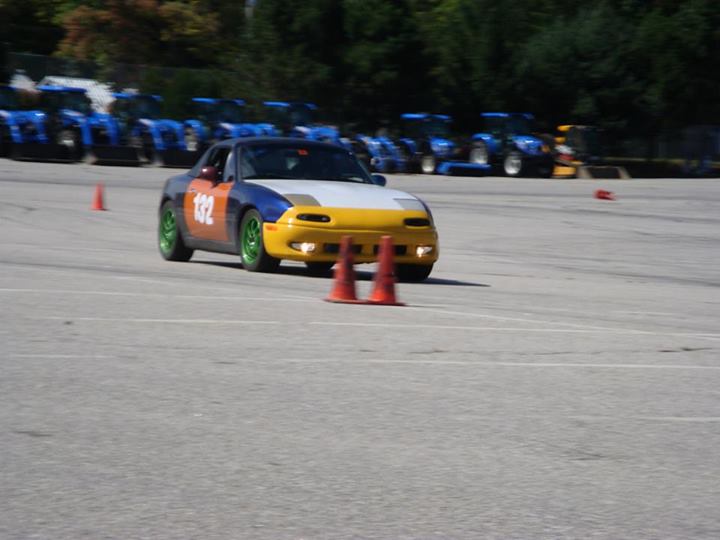
Onto the car... I bought it in the fall of 2010, it's PO had used it as a GRM car. It needed a lot of TLC, but the price was right. I've made a lot of mistakes along the way, enough to warrant replacing the engine two years ago. But it's been a very rewarding experience to work through all of the car's problems and my own mistakes, learn how to drive it fast(er), and to learn more about Miatas and cars in general.
Love it or hate it:
A (mostly complete) mod list:
Chassis/Suspension-
FM NB Stage 2 + NB tophats
225/45-15 RS3 on 15x7.5 C1M wheels
Energy Suspension poly bushings
De-powered rack (remove seal, control valve, and welded splines)
FM frame rails
1992(?) rear sub frame with sport brace
HardDog single diagonal roll bar
Drive Train-
6-puck 'stage 3' clutch (from PO)
4.1 clutch-pack RX7 LSD and 1.8 rear-end conversion
Energy Suspension poly differential bushings
Engine-
MS1 Hi-Res w/ KnockSense MS and LC1 WBO2
Chinese knock-off GT2560 turbo
Cast log manifold
DIY 2.5in ss downpipe+race pipe to 2.5in FM trubo cat-back
RC550 injectors
COP Conversion, still wasted spark
GodSpeed Radiator
No-name oil cooler
In recent work:
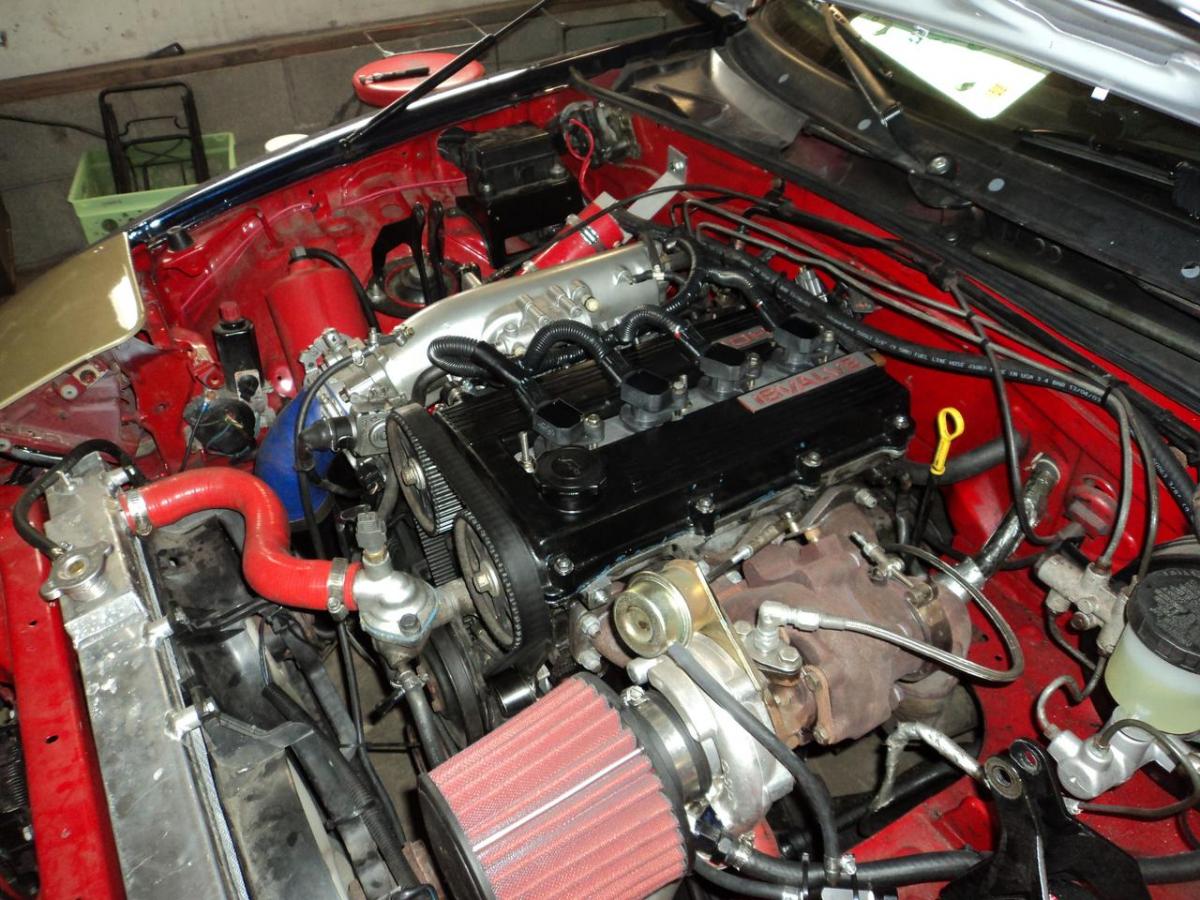
The engine I swapped in 2 years ago had 240k miles on it, but was cheap and available, so I figured I would run it until it died and by then (hopefully) a decent used engine would have surfaced. Well, both of those things happened. Last Friday it lost a bit of power and started having a crap-ton of blow-by. Leakdown numbers on 1-4 were: 4, 36, 7, 40. So, new engine time. Luckily a local guy I just met two weeks ago is selling his 80k mile drivetrain in preparation for an LSx swap. I plan on rebuilding the current engine, hopefully with upgraded rods and cylinders.
A cylinder from the recently-deceased engine. I assume this is just age-related failure, but am looking for other opinions. The crack doesn't look like the ring land failure from its first engine, which was clearly due to ping/knock. This engine showed no signs of knock damage.
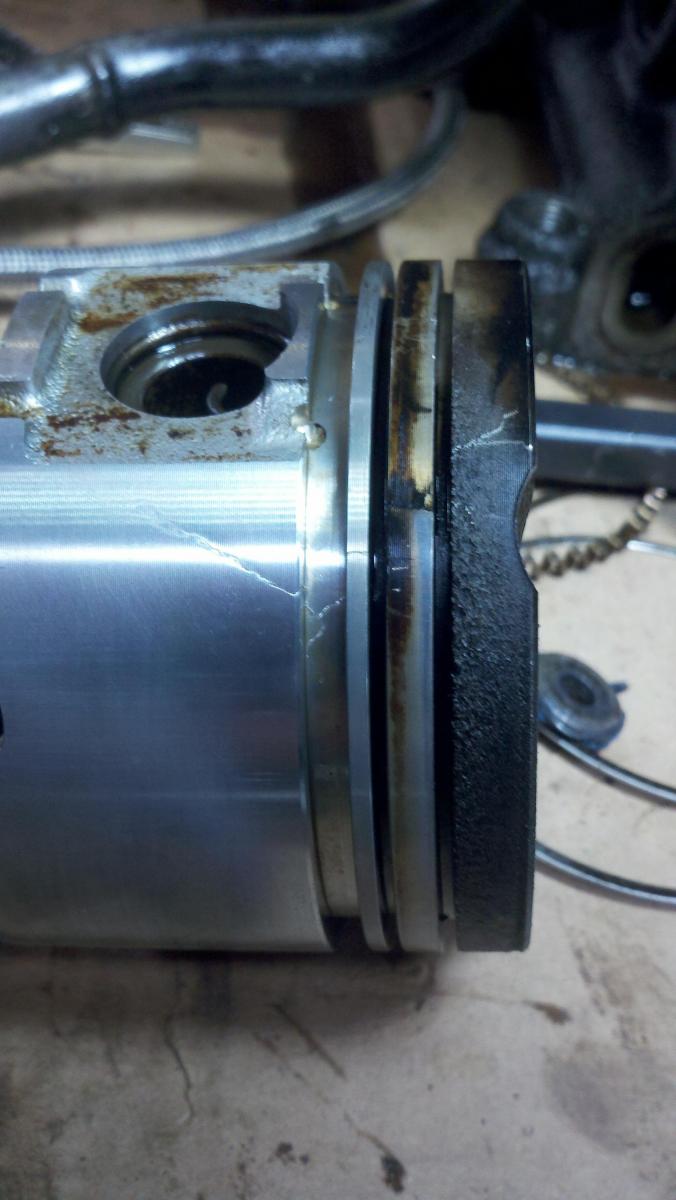
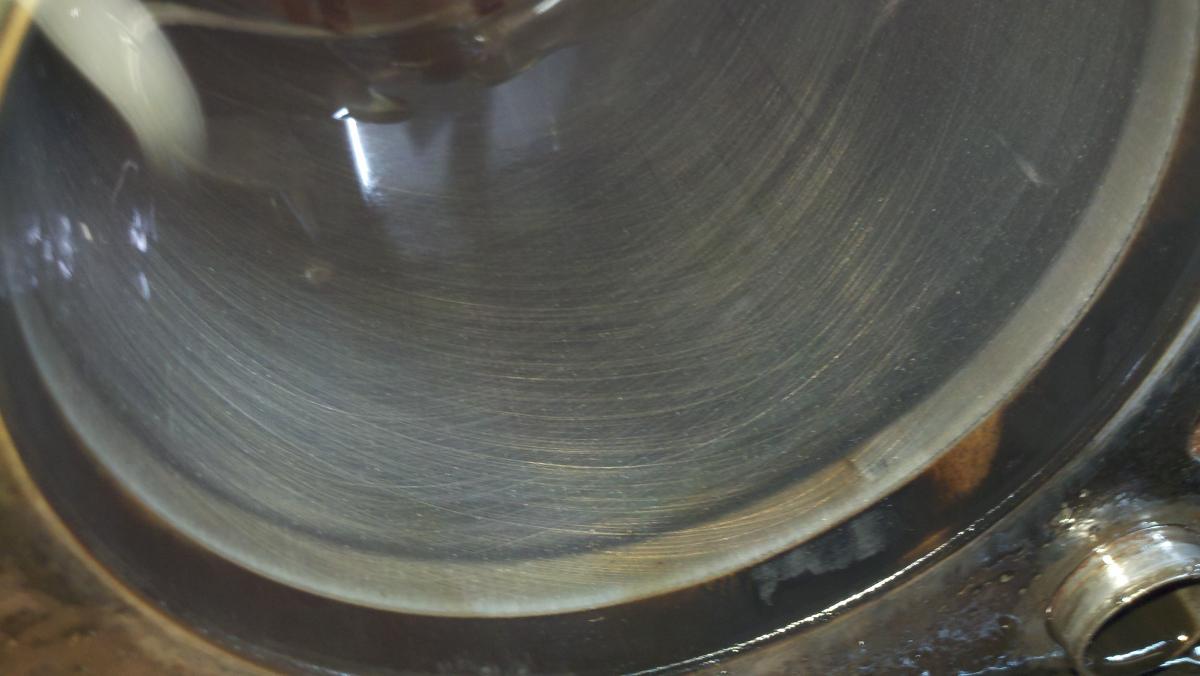
The cylinder bores all still look fantastic on this engine too. I think it will make a good candidate for a rebuild.
Other work that I've done recently...
Braze-welded steering pinion splines.

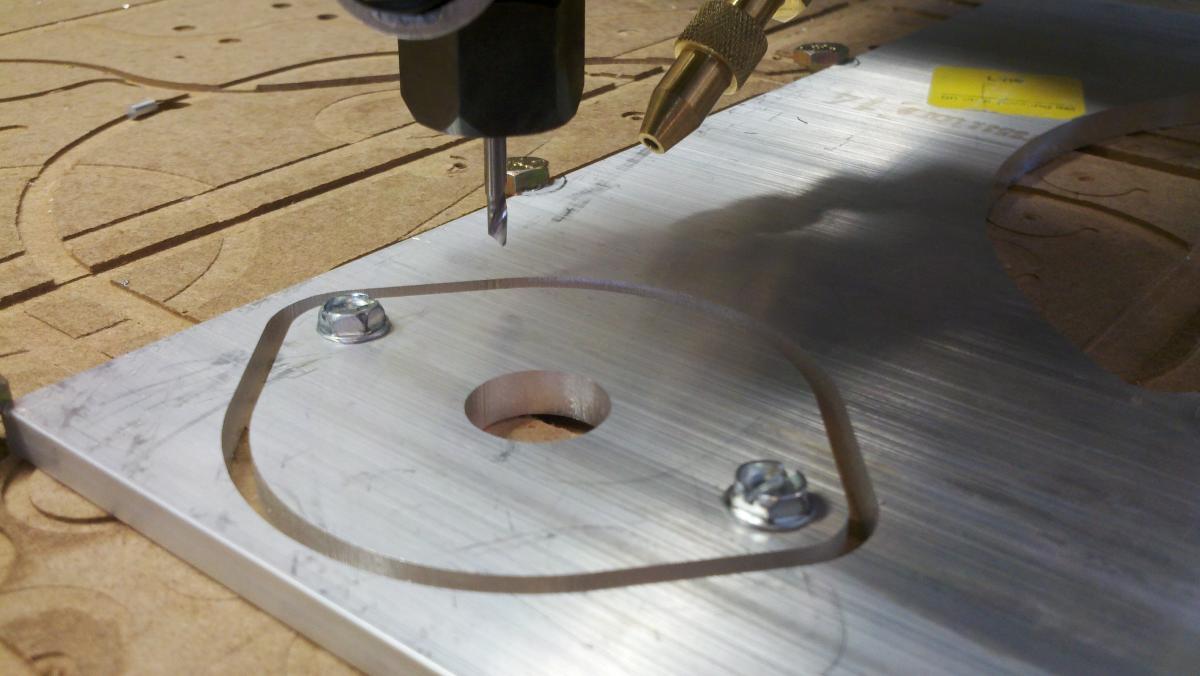
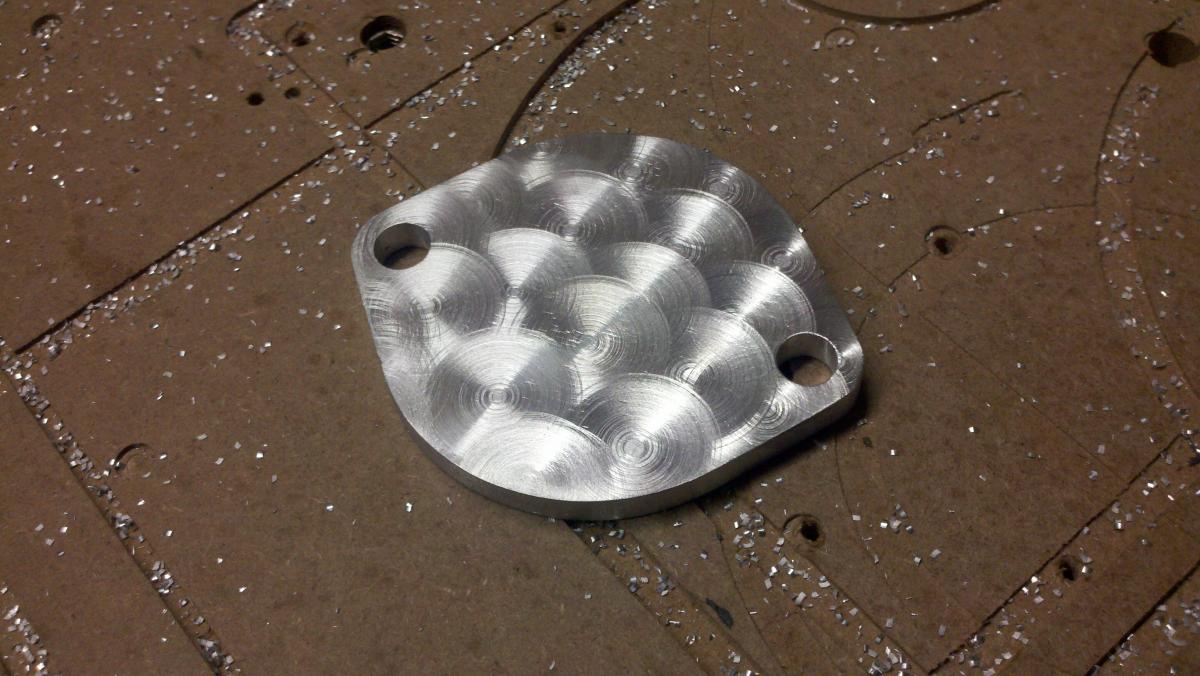
A few different iterations of coolant block-off plates. One for me, one for a D-prep racer in GA.
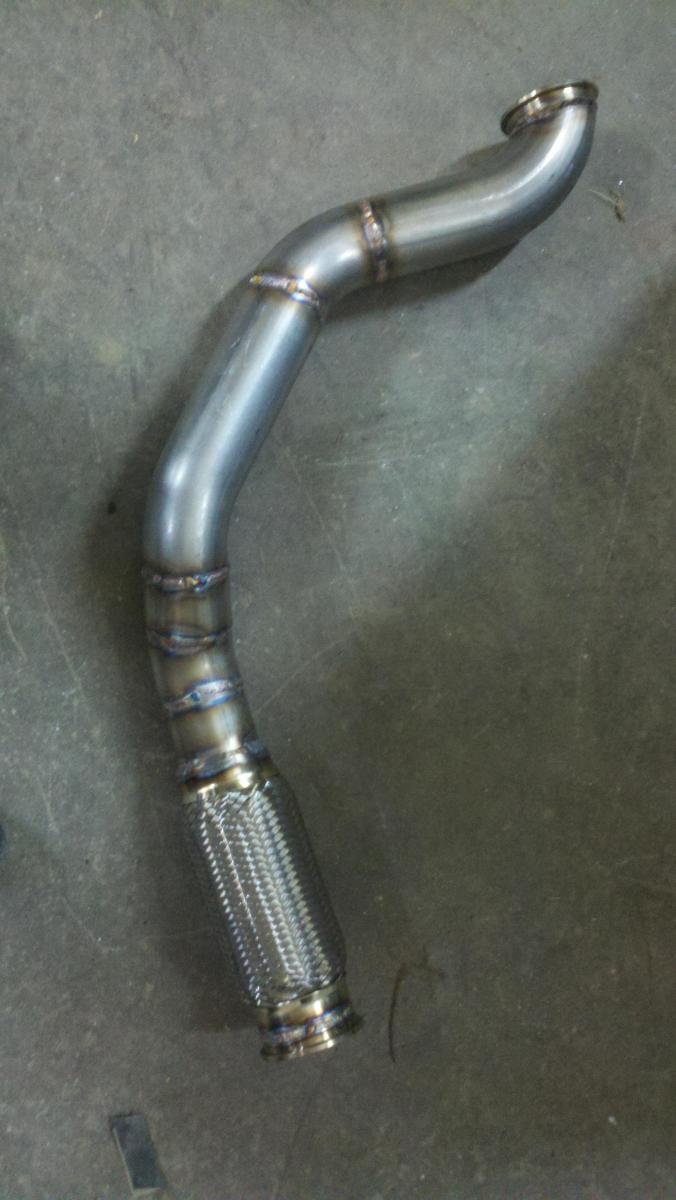
2.5in stainless v-band downpipe.
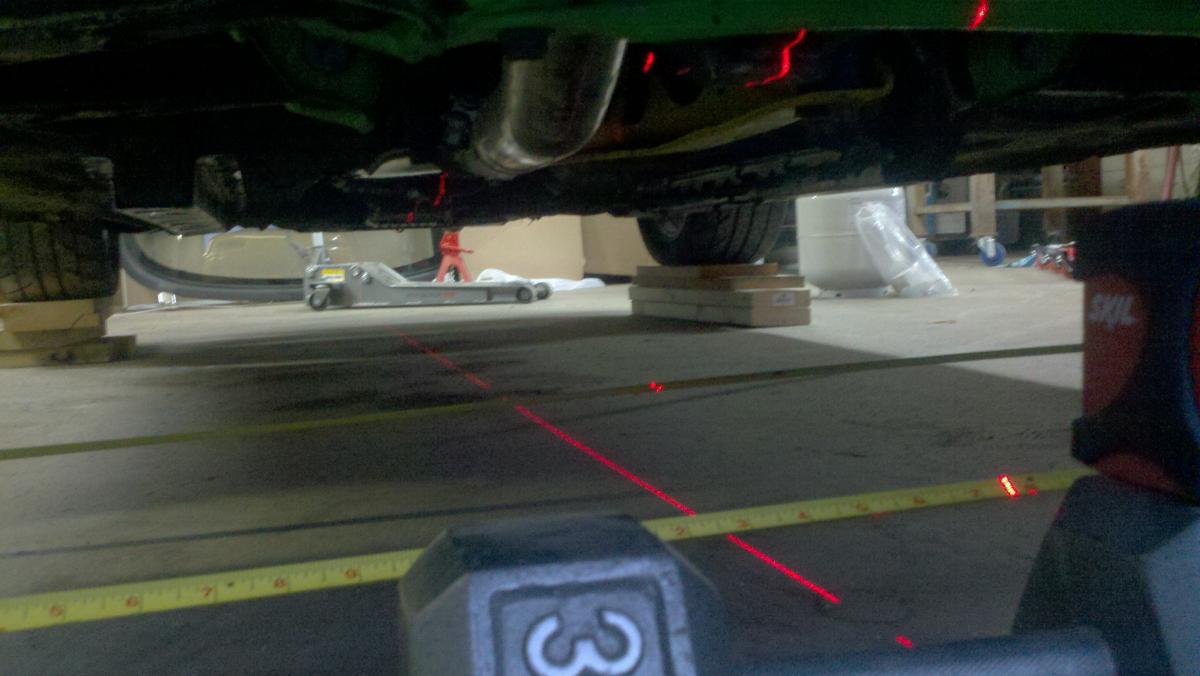
And an alignment using FM hub-stands and lasers.
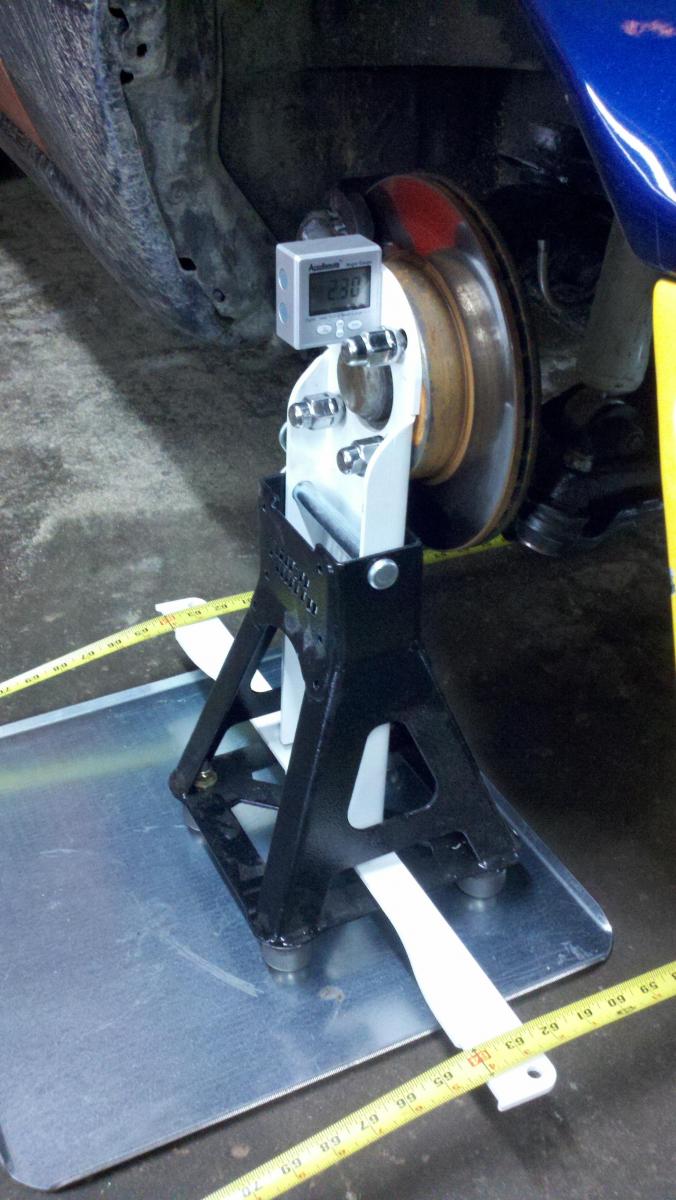
F:
-2.3 camber
4.8 caster
1/16 toe out per side
R:
-1.6 camber
1/16 toe in per side
My immediate plans are to replace the engine, transmission, and clutch and to do a coolant re-route.
Thoughts? Comments? Criticisms? Questions?
*zipping SFI-rated up flame suit*
I've been a long-time mostly lurker here, and I figured it was time to finally start a build thread here in order to seek technical feedback and to share what I've been working on.
A little about myself - I'm a mechanical engineer with professional experience in a number of automotive areas, I spent 3 years in college helping to found and develop an FSAE program, I'm a driver on a Lemons team called Mod Squad racing that races MK2 MR2s, and I have a turbo Miata that's my summer car and autox rig. I am a really serious DIYer. I have earned certifications in TIG welding CroMoly steel and aluminum and own a TIG welder, I have a 4'x4' CNC router and numerous other bits of shop equipment (band saw, table saw, grinders, sanders, drill press, 10 ton press, press brake, etc). I run a small side business doing custom welding and fabrication, mostly for a local medical research facility and other car guys.
Since I have 4 cars in the fleet at the moment I try to do as much works as possible myself and try to avoid any 'throw money at it' solutions. I'm willing to sacrifice some performance in order to keep my Miata as a reasonably affordable hobby. Anything that I can possibly do myself, from making and fixing parts to alignments, I try to do. For me, half the point of having a car like this is to have a project to work on. Thus why I call this a 'budget+diy' build.
Anyway, enough
, I just wanted to give a little background on my attitude towards this car/project. Onto the car... I bought it in the fall of 2010, it's PO had used it as a GRM car. It needed a lot of TLC, but the price was right. I've made a lot of mistakes along the way, enough to warrant replacing the engine two years ago. But it's been a very rewarding experience to work through all of the car's problems and my own mistakes, learn how to drive it fast(er), and to learn more about Miatas and cars in general.
Love it or hate it:
A (mostly complete) mod list:
Chassis/Suspension-
FM NB Stage 2 + NB tophats
225/45-15 RS3 on 15x7.5 C1M wheels
Energy Suspension poly bushings
De-powered rack (remove seal, control valve, and welded splines)
FM frame rails
1992(?) rear sub frame with sport brace
HardDog single diagonal roll bar
Drive Train-
6-puck 'stage 3' clutch (from PO)
4.1 clutch-pack RX7 LSD and 1.8 rear-end conversion
Energy Suspension poly differential bushings
Engine-
MS1 Hi-Res w/ KnockSense MS and LC1 WBO2
Chinese knock-off GT2560 turbo
Cast log manifold
DIY 2.5in ss downpipe+race pipe to 2.5in FM trubo cat-back
RC550 injectors
COP Conversion, still wasted spark
GodSpeed Radiator
No-name oil cooler
In recent work:
The engine I swapped in 2 years ago had 240k miles on it, but was cheap and available, so I figured I would run it until it died and by then (hopefully) a decent used engine would have surfaced. Well, both of those things happened. Last Friday it lost a bit of power and started having a crap-ton of blow-by. Leakdown numbers on 1-4 were: 4, 36, 7, 40. So, new engine time. Luckily a local guy I just met two weeks ago is selling his 80k mile drivetrain in preparation for an LSx swap. I plan on rebuilding the current engine, hopefully with upgraded rods and cylinders.
A cylinder from the recently-deceased engine. I assume this is just age-related failure, but am looking for other opinions. The crack doesn't look like the ring land failure from its first engine, which was clearly due to ping/knock. This engine showed no signs of knock damage.
The cylinder bores all still look fantastic on this engine too. I think it will make a good candidate for a rebuild.
Other work that I've done recently...
Braze-welded steering pinion splines.
A few different iterations of coolant block-off plates. One for me, one for a D-prep racer in GA.
2.5in stainless v-band downpipe.
And an alignment using FM hub-stands and lasers.
F:
-2.3 camber
4.8 caster
1/16 toe out per side
R:
-1.6 camber
1/16 toe in per side
My immediate plans are to replace the engine, transmission, and clutch and to do a coolant re-route.
Thoughts? Comments? Criticisms? Questions?
*zipping SFI-rated up flame suit*
Last edited by jch13; 04-30-2014 at 10:19 AM.

Reply
 2
2

2

 04-30-2014, 10:30 AM
#6
Junior Member
Thread Starter
Join Date: Nov 2010
Location: NH
Posts: 64
Total Cats: -2
The 1.8L swap comes into consideration routinely. But I just can't bring myself to spend the extra money to change the parts I would need to (manifold, downpipe, tuning, etc) when 1.6L engines are a dime a dozen. I paid $425 for the whole 1.6L dressed engine and transmission with 80k miles on it.
... and then a friend of mine is a Weisco dealer and can get me 1.6L pistons for $425, and Pauter has B6ZE rods for $400 off... I know it's not ideal, but it's different (without being horrendously bad/stupid), and quite cost-effective.
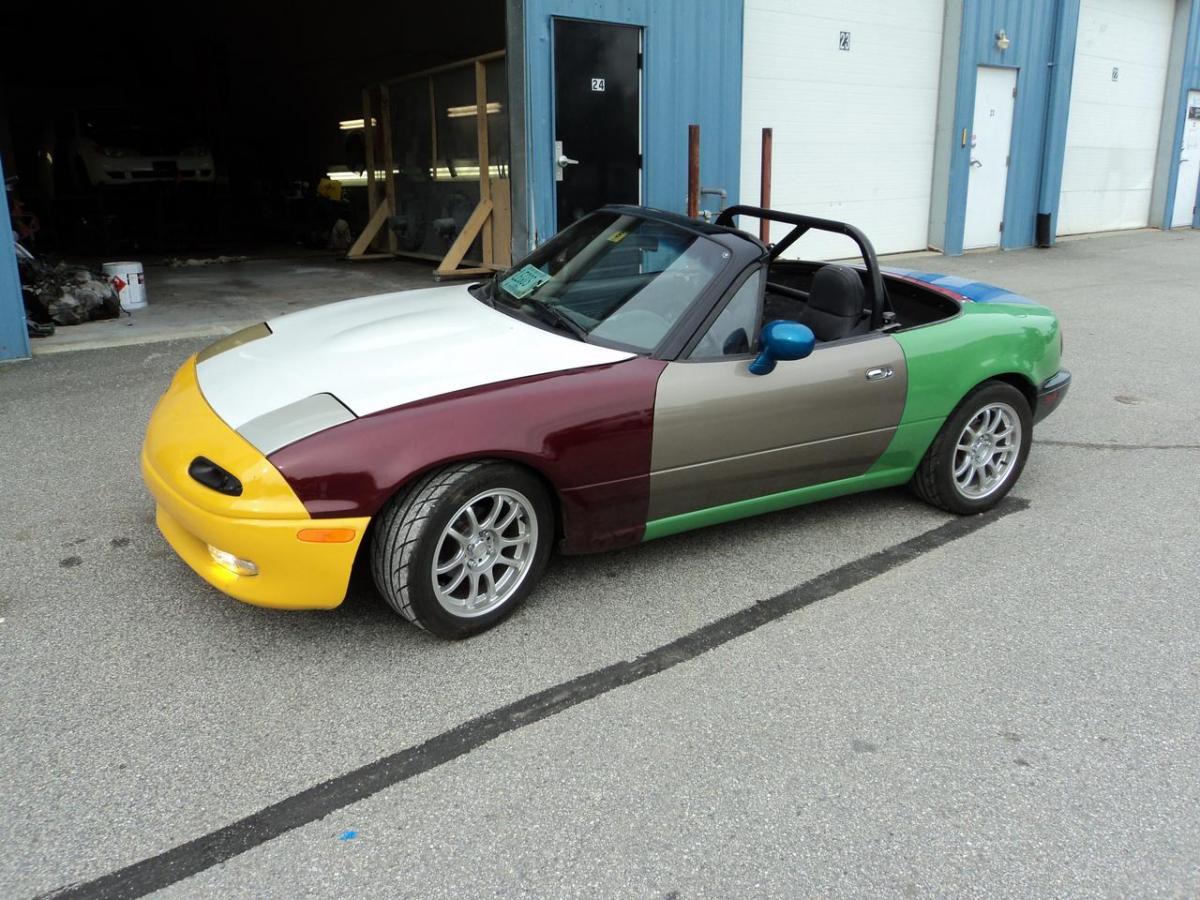
Front bumper is half Miata and half Dodge Neon, with Neon fog lights. Another friend of mine is a one-man bodyshop and he thought it would be a cool project, so I let him graft the two together. He was also the motivating force behind the paint job. I asked him what's the least-expensive way to get paint on it (the old red paint was turning pink) and he said "well, I've got tons of leftover colors, and I've always wanted to try this..." Most of the colors are custom-mixed too, most notably the license surround's purple is a mixture of the blue and maroon/red on the front two fenders.
Reply
0
0
05-01-2014, 12:43 AM
#7
Elite Member
iTrader: (13)

Join Date: Dec 2006
Location: Taos, New mexico
Posts: 6,599
Total Cats: 561
Welcome to the forum! +1 on building a 1.8. Everyone uses the "dime a dozen" excuse for building a 1.6, but really you only need one core to build a motor. What is +$300 or so in the end if you are doing building a ~$2,000 engine. Honestly I'd toss some ebay rods and stock pistons back in that 1.6 and boost the **** out of it for now while you build a proper 1.8 on the side. This all coming from a previous 1.6 turbo owner 
As for your paint job, i'm really torn on it. I stared at your car for a good 5 minutes here trying to figure it out. One one hand the car obviously has flawless bodywork and paint, so it doesn't look nearly as shitty as most cr.net multicolored miatas out there. At the same time, at a glance, it does look like a total hood ride. I will say it's well executed for what it is either way you put it.
As for your paint job, i'm really torn on it. I stared at your car for a good 5 minutes here trying to figure it out. One one hand the car obviously has flawless bodywork and paint, so it doesn't look nearly as shitty as most cr.net multicolored miatas out there. At the same time, at a glance, it does look like a total hood ride. I will say it's well executed for what it is either way you put it.
Reply
0
0
05-01-2014, 09:44 AM
#9
Junior Member
Thread Starter
Join Date: Nov 2010
Location: NH
Posts: 64
Total Cats: -2
@Fireindc
Thanks!
I guess I'll keep my eyes peeled on CL/local FS to see if any 1.8s show up for a good price. I think I have a 1.8L shortblock of unknown condition in my garage somewhere (pretty sure the PO gave me one with the car) but I believe the head was entirely disassembled, not sorted out at all, and it was missing the exhaust cam.
I understand that the engine itself is only going to cost $300-400 more, but other parts like a new exhaust manifold, downpipe, etc add more cost. And I will have to re-tune spark and fuel to boot. I'll jump off that bridge when I get there I suppose.
The paint job is definitely attention-getting, no matter how anyone feels about it. I can't even count the number of times I see other driver's mouthing "what the f..." as I drive by, or the number of thumbs up.
@m2cupcar
Thanks! See sig for my philosophy on being human.
Reply
0
0
05-01-2014, 01:46 PM
#10
Junior Member
Thread Starter
Join Date: Nov 2010
Location: NH
Posts: 64
Total Cats: -2
Ordering misc bits and pieces for putting the new engine in, including a clutch.
I am leaning towards the FM Stage 1 clutch (I have a 1.8 flywheel). Any suggestions or opinions?
Other than that I was planning on replacing the front and rear seals on the transmission, front and rear mains on the engine itself, cam seals, CAS seal, and probably do a timing belt/water pump change while I'm in there.
Having everything apart is making me seriously consider cleaning up all of the wiring and plumbing... what have I done...
Reply
0
0
05-02-2014, 09:09 AM
#12
Junior Member
Thread Starter
Join Date: Nov 2010
Location: NH
Posts: 64
Total Cats: -2
Thus I figure something that can hold 300+lb*ft of torque will be just fine.
Reply
0
0
05-02-2014, 11:28 AM
#15
Junior Member
Thread Starter
Join Date: Nov 2010
Location: NH
Posts: 64
Total Cats: -2
Great, thanks! One more decision done.
Next question(s): is the consensus that 5w-40 is still the oil of choice for turbo Miatas? I'm planning on ordering AMSOIL 5w-40 for the engine and AMSOIL Manual Trans. Gear Lube for the transmission. A friend of mine is an AMSOIL dealer (I guess their program is fairly prolific?) so I can get it for cheap.
Also going to put in Porterfield R4-S brake pads because a friend is a Porterfield dealer and can get them cheap.
Reply
0
0
 05-05-2014, 11:46 AM
#17
Junior Member
Thread Starter
Join Date: Nov 2010
Location: NH
Posts: 64
Total Cats: -2
That's the other oil I've seen mentioned a lot. I think I'll go with that given it's local availability.
Lots of work over the weekend. The new/used replacement engine was in decent shape, but not good enough to just drop in, unfortunately. Initial leakdown numbers, and leakage location, were:
1-13% blow by
2-7% exhaust valve
3-20% exhaust valve
4-12% blow by
After a bit of massaging (nominally letting stuff soak in seafoam overnight) I got:
1-5% blow by
2-8% exhaust valve
3-25% exhaust valve
4-3% blow by
Other clues:
-Oil in plug wells (valve cover gasket clearly never replaced) i.e. ignition severely compromised
-Spark plugs caked black in carbon
-Tons of carbon build-up in exhaust ports
Conclusion: car was running like ****, lots of carbon deposits caked onto everything. Adding seafoam probably freed up the rings a bit, and partly (but not entirely) cleaned off the exhaust valves and seats, causing extra leakage.
Action: disassemble engine head. Clean head, lap valves, reassemble.
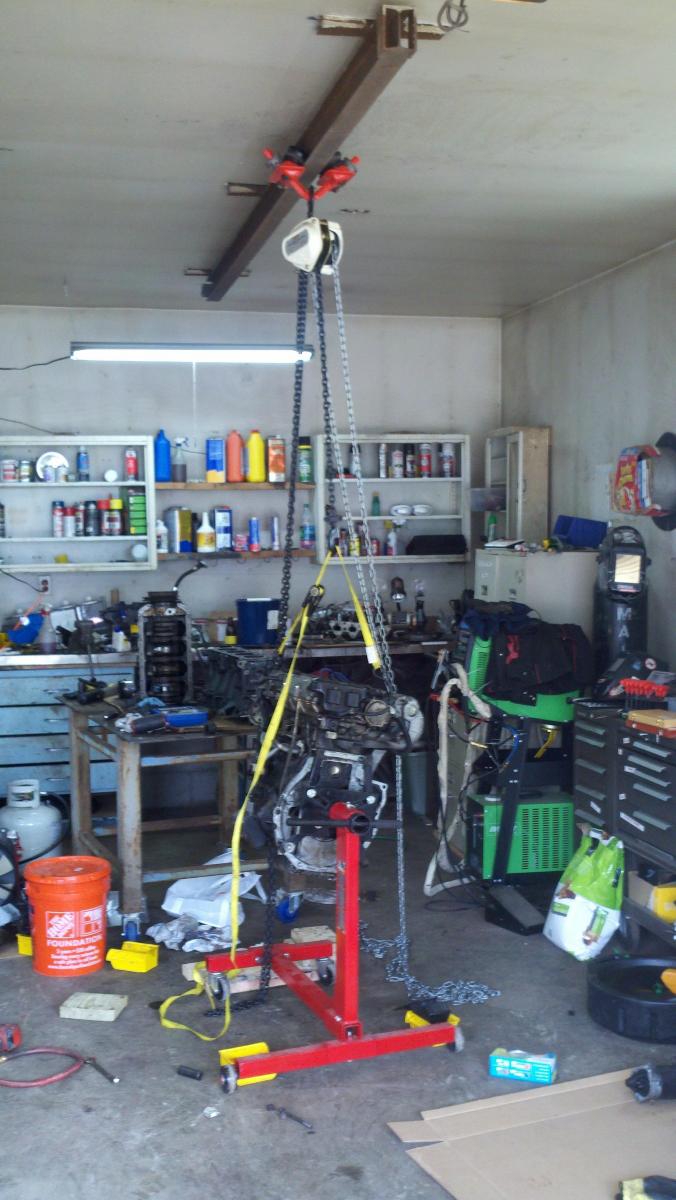
Engine on engine stand. The chain fall is making life really not suck right now. With it I can do everything by myself.
Miata drivetrains have exploded across my garage. It's a disaster.
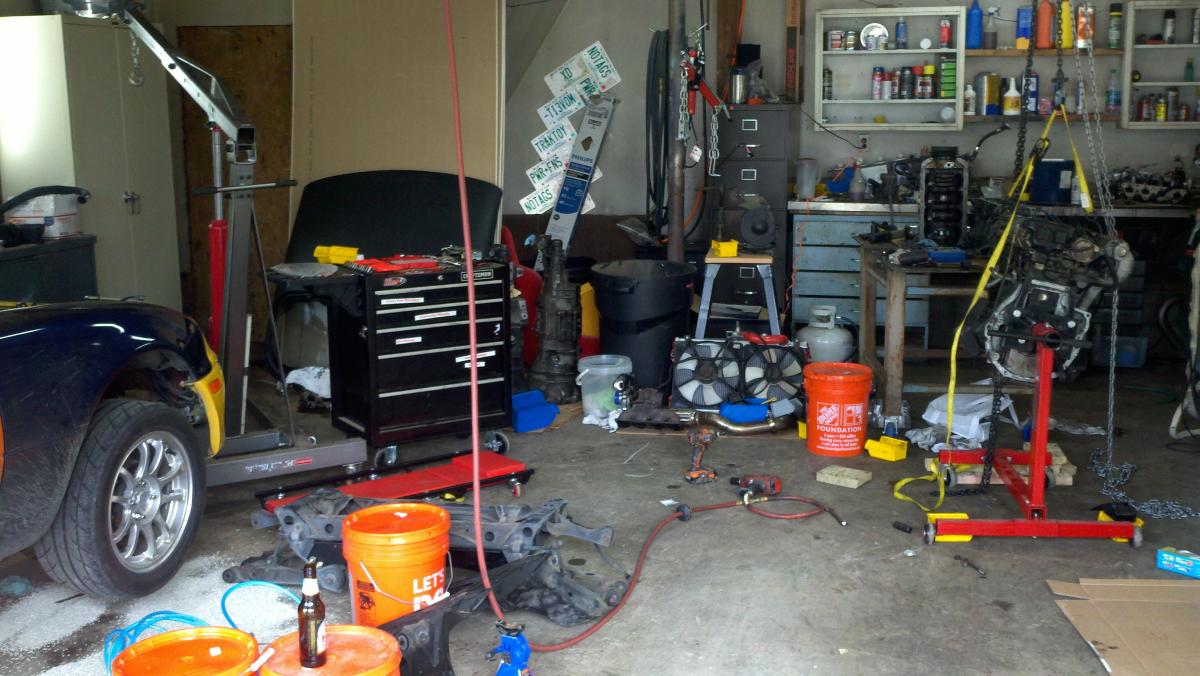
Three blocks, two heads, dressing for two engines, an extra front and rear subframe (I'm welding up a rear subframe for a guy's V8 conversion), and lots of other crap.
Taking the head apart I found several jammed/clogged HLAs. I'll take them apart and clean them.
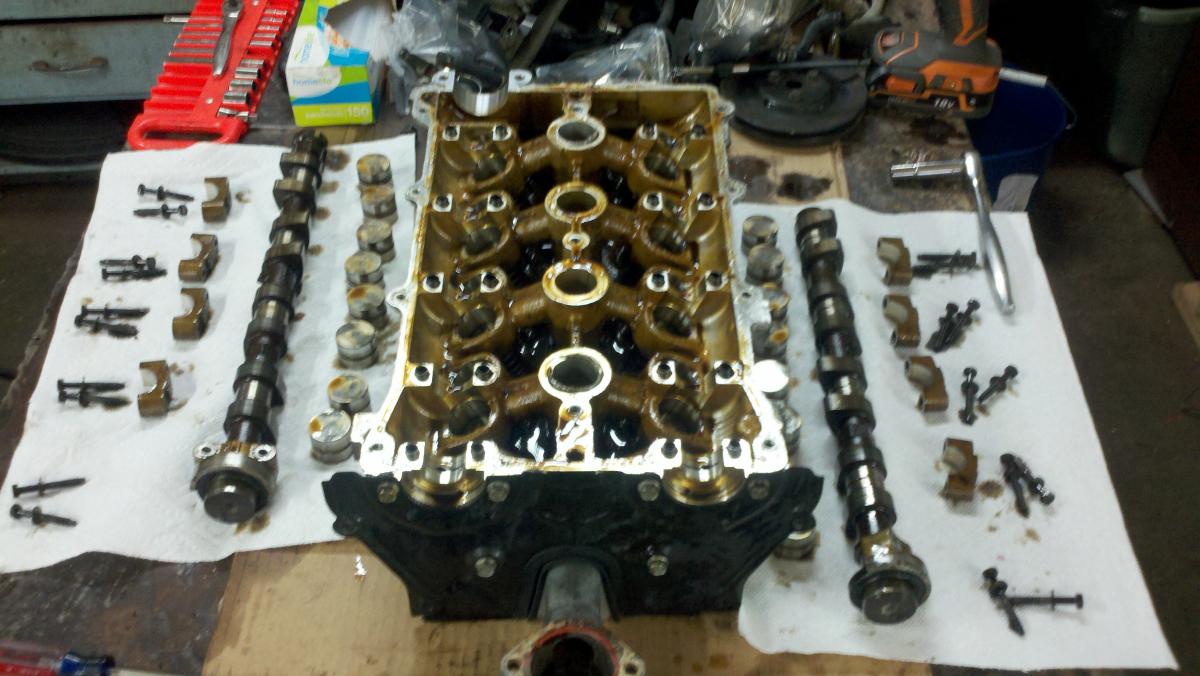
Everything apart and soaking in ATF to clean off the immense amount of carbon buildup (way worse than the engine that came out). Learned how to use a valve spring compressor, made pretty quick work of it all things said and done.
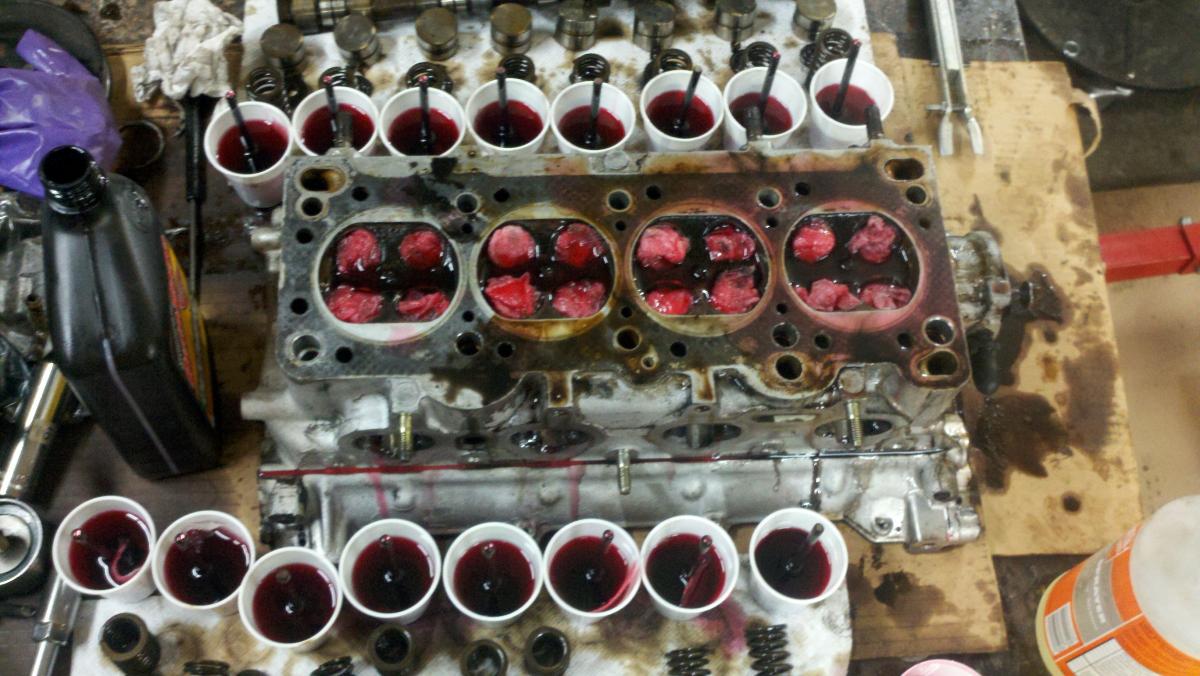
The bottom end looks good. No scoring, decent hatching, smooth movements with no detectable slop. I poured oil on top of each cylinder to prevent rust and to give the rings even more opportunity to free up.
Hopefully tonight I'll be able to clean out the ports and valves and maybe be able to lap the valves. Any tips or advice on lapping?
I ordered new valve guide seals (because why not?) so reassembly will be a little delayed. I could reassemble the block and transmission (when the parts for that arrives) and drop that into the car if I'm still waiting on the head, but I'd rather do it all at once if possible.
Lots of work over the weekend. The new/used replacement engine was in decent shape, but not good enough to just drop in, unfortunately. Initial leakdown numbers, and leakage location, were:
1-13% blow by
2-7% exhaust valve
3-20% exhaust valve
4-12% blow by
After a bit of massaging (nominally letting stuff soak in seafoam overnight) I got:
1-5% blow by
2-8% exhaust valve
3-25% exhaust valve
4-3% blow by
Other clues:
-Oil in plug wells (valve cover gasket clearly never replaced) i.e. ignition severely compromised
-Spark plugs caked black in carbon
-Tons of carbon build-up in exhaust ports
Conclusion: car was running like ****, lots of carbon deposits caked onto everything. Adding seafoam probably freed up the rings a bit, and partly (but not entirely) cleaned off the exhaust valves and seats, causing extra leakage.
Action: disassemble engine head. Clean head, lap valves, reassemble.
Engine on engine stand. The chain fall is making life really not suck right now. With it I can do everything by myself.
Miata drivetrains have exploded across my garage. It's a disaster.
Three blocks, two heads, dressing for two engines, an extra front and rear subframe (I'm welding up a rear subframe for a guy's V8 conversion), and lots of other crap.
Taking the head apart I found several jammed/clogged HLAs. I'll take them apart and clean them.
Everything apart and soaking in ATF to clean off the immense amount of carbon buildup (way worse than the engine that came out). Learned how to use a valve spring compressor, made pretty quick work of it all things said and done.
The bottom end looks good. No scoring, decent hatching, smooth movements with no detectable slop. I poured oil on top of each cylinder to prevent rust and to give the rings even more opportunity to free up.
Hopefully tonight I'll be able to clean out the ports and valves and maybe be able to lap the valves. Any tips or advice on lapping?
I ordered new valve guide seals (because why not?) so reassembly will be a little delayed. I could reassemble the block and transmission (when the parts for that arrives) and drop that into the car if I'm still waiting on the head, but I'd rather do it all at once if possible.
Reply
0
0
05-05-2014, 07:51 PM
#18
Junior Member
Join Date: Oct 2009
Location: Springfield, MO
Posts: 492
Total Cats: 3
How did ATF fluid work for removing carbon from the valves? I tried soaking mine in everything I could think of but nothing dissolved that crap. In the end I used a razor blade and a lot of time to 'pick' it off and then spun them in a drill against sand paper to get the last little bit.
Reply
0
0
05-06-2014, 08:45 AM
#19
Junior Member
Thread Starter
Join Date: Nov 2010
Location: NH
Posts: 64
Total Cats: -2
How did ATF fluid work for removing carbon from the valves? I tried soaking mine in everything I could think of but nothing dissolved that crap. In the end I used a razor blade and a lot of time to 'pick' it off and then spun them in a drill against sand paper to get the last little bit.
I even tried pure simple green in an ultrasonic cleaner. That didn't do much to the exhaust valves, but worked pretty well on the intake valves.
Took most of the HLAs apart last night to clean them out. Baby steps.
Reply
0
0
05-07-2014, 08:40 AM
#20
Junior Member
Thread Starter
Join Date: Nov 2010
Location: NH
Posts: 64
Total Cats: -2
How did ATF fluid work for removing carbon from the valves? I tried soaking mine in everything I could think of but nothing dissolved that crap. In the end I used a razor blade and a lot of time to 'pick' it off and then spun them in a drill against sand paper to get the last little bit.
Reply
0
0


