Pat's Ebay Turbo Compound Boost Build
 02-06-2016, 07:30 AM
#101
Senior Member
iTrader: (1)

Join Date: Sep 2011
Location: Lambertville, NJ
Posts: 1,215
Total Cats: 74
Let's assume the first one has a 7psi spring which will make approx. 150kpa as per wastegate and the second one a 15psi spring (which would result at 200kpa in a single turbo setup) you would get 250kpa, not 300 as a total.

Reply
 0
0

0
02-06-2016, 08:00 AM
#102
Boost Pope


iTrader: (8)
Join Date: Sep 2005
Location: Chicago. (The less-murder part.)
Posts: 33,022
Total Cats: 6,590
Just dropping a pin here so I can find the thread later.
Pat, you're clearly insane. But that said, an idea has been rolling around in the back of my head for several years which I've never had the opportunity to test. You & I need to talk about this.
Pat, you're clearly insane. But that said, an idea has been rolling around in the back of my head for several years which I've never had the opportunity to test. You & I need to talk about this.
Reply
0
0
02-06-2016, 04:08 PM
#104
Elite Member
Thread Starter
iTrader: (16)
Join Date: Aug 2007
Location: Houston, TX
Posts: 9,295
Total Cats: 476
Does anybody know if a regular T3 wastegate actuator will fit my ebay GT28? I want to buy a dual port wastegate can that fits my T2 based GT28 ebay turbo.
Reply
0
0
 02-06-2016, 07:08 PM
#106
Elite Member
Thread Starter
iTrader: (16)
Join Date: Aug 2007
Location: Houston, TX
Posts: 9,295
Total Cats: 476
1.34" center to center on my T2 actuator. Thanks for checking on yours!
I'll post some pics later, making slow progress on getting the front turbo on the car.
I'll post some pics later, making slow progress on getting the front turbo on the car.
Reply
0
0
 02-06-2016, 07:28 PM
#108
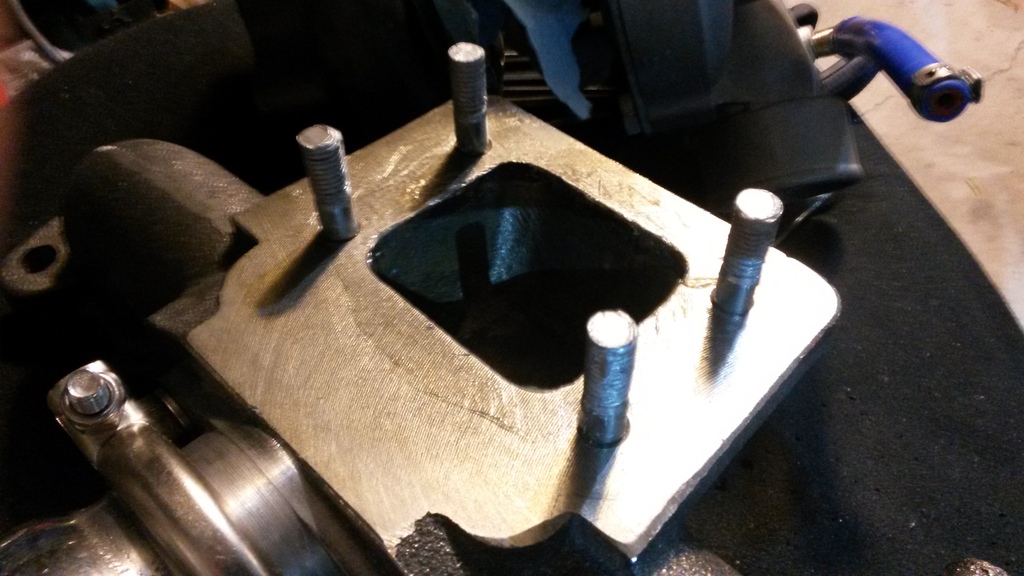
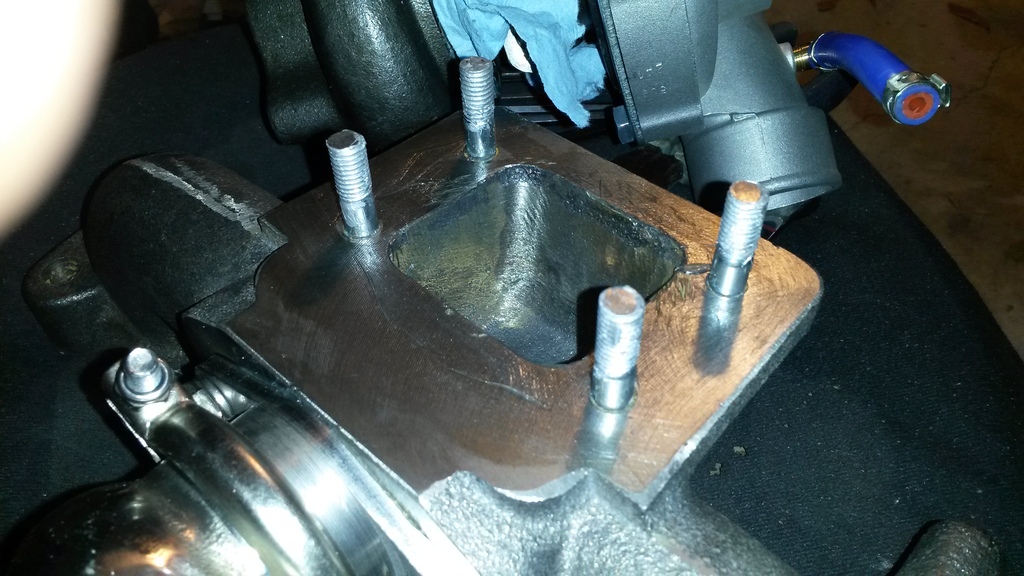
Seems to be the same as what I measure. .22" diameter studs, 1.57" outside distance, makes for about ~1.35" center to center distance, maybe 34mm?
At least as reliably as I can measure without taking the can off, hope it's useful data.
Looks like something like this would fit.
Turbo Wastegate Actuator Dual Port for T3 T3 T4 T04E Turbocharger | eBay
Edit: They say weird things in the description on these two port cans. They all have to work the same, right? Is it just really bad chinglish?
"Second port is for quick release inside hot air. It will be extension actuator life"
Reply
0
0
02-06-2016, 07:42 PM
#109
Elite Member

Join Date: Apr 2010
Location: Newcastle, Australia
Posts: 2,826
Total Cats: 67
If you use those you can choose the reference pressure for the bottom ports, but if you ALSO use the internal gate you cant do this, and it will open based on atmo reference, so you will need to control this wastegate using a different, and more aggressive method. Maybe a boost tee on it to adjust final pressure ratio AFTER the other MAC based tuning is done.
Reply
0
0
02-06-2016, 09:30 PM
#110
Elite Member
Thread Starter
iTrader: (16)
Join Date: Aug 2007
Location: Houston, TX
Posts: 9,295
Total Cats: 476
Seems to be the same as what I measure. .22" diameter studs, 1.57" outside distance, makes for about ~1.35" center to center distance, maybe 34mm?
At least as reliably as I can measure without taking the can off, hope it's useful data.
Looks like something like this would fit.
Turbo Wastegate Actuator Dual Port for T3 T3 T4 T04E Turbocharger | eBay
Edit: They say weird things in the description on these two port cans. They all have to work the same, right? Is it just really bad chinglish?
"Second port is for quick release inside hot air. It will be extension actuator life"
At least as reliably as I can measure without taking the can off, hope it's useful data.
Looks like something like this would fit.
Turbo Wastegate Actuator Dual Port for T3 T3 T4 T04E Turbocharger | eBay
Edit: They say weird things in the description on these two port cans. They all have to work the same, right? Is it just really bad chinglish?
"Second port is for quick release inside hot air. It will be extension actuator life"
Reply
0
0
02-06-2016, 09:31 PM
#111
Elite Member
Thread Starter
iTrader: (16)
Join Date: Aug 2007
Location: Houston, TX
Posts: 9,295
Total Cats: 476
If you use those you can choose the reference pressure for the bottom ports, but if you ALSO use the internal gate you cant do this, and it will open based on atmo reference, so you will need to control this wastegate using a different, and more aggressive method. Maybe a boost tee on it to adjust final pressure ratio AFTER the other MAC based tuning is done.
Reply
0
0
02-07-2016, 01:43 AM
#112
Elite Member
Thread Starter
iTrader: (16)
Join Date: Aug 2007
Location: Houston, TX
Posts: 9,295
Total Cats: 476
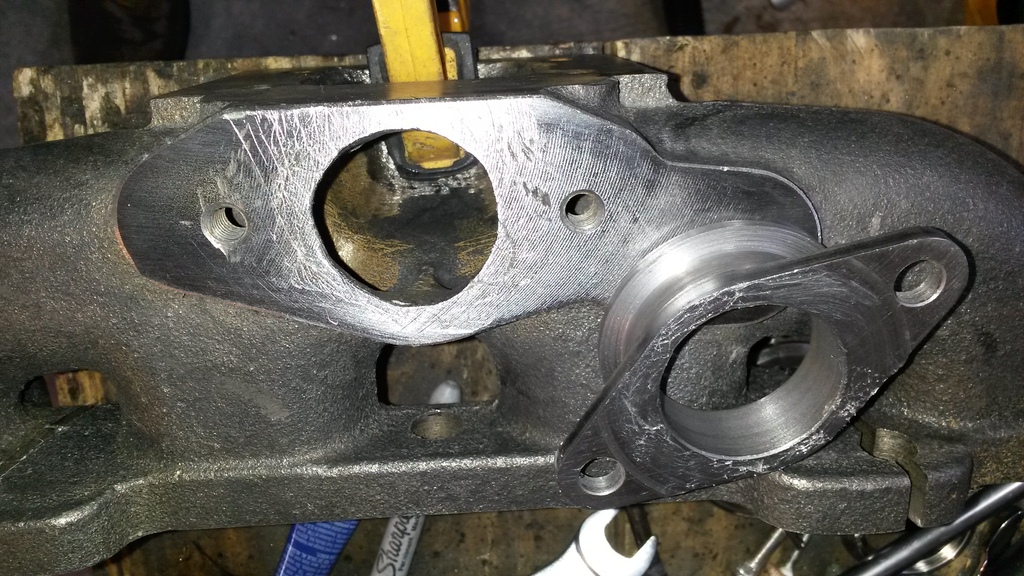
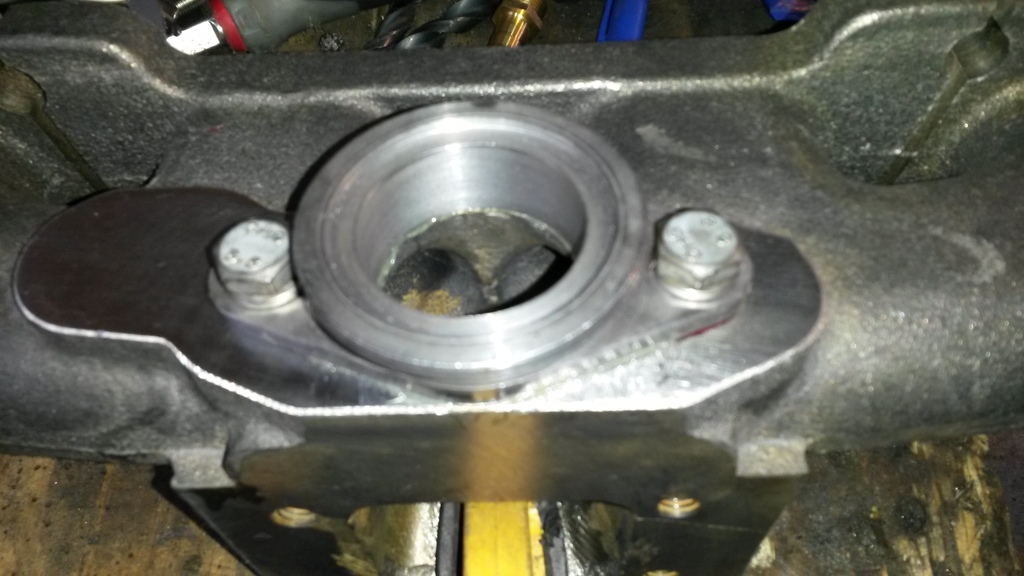
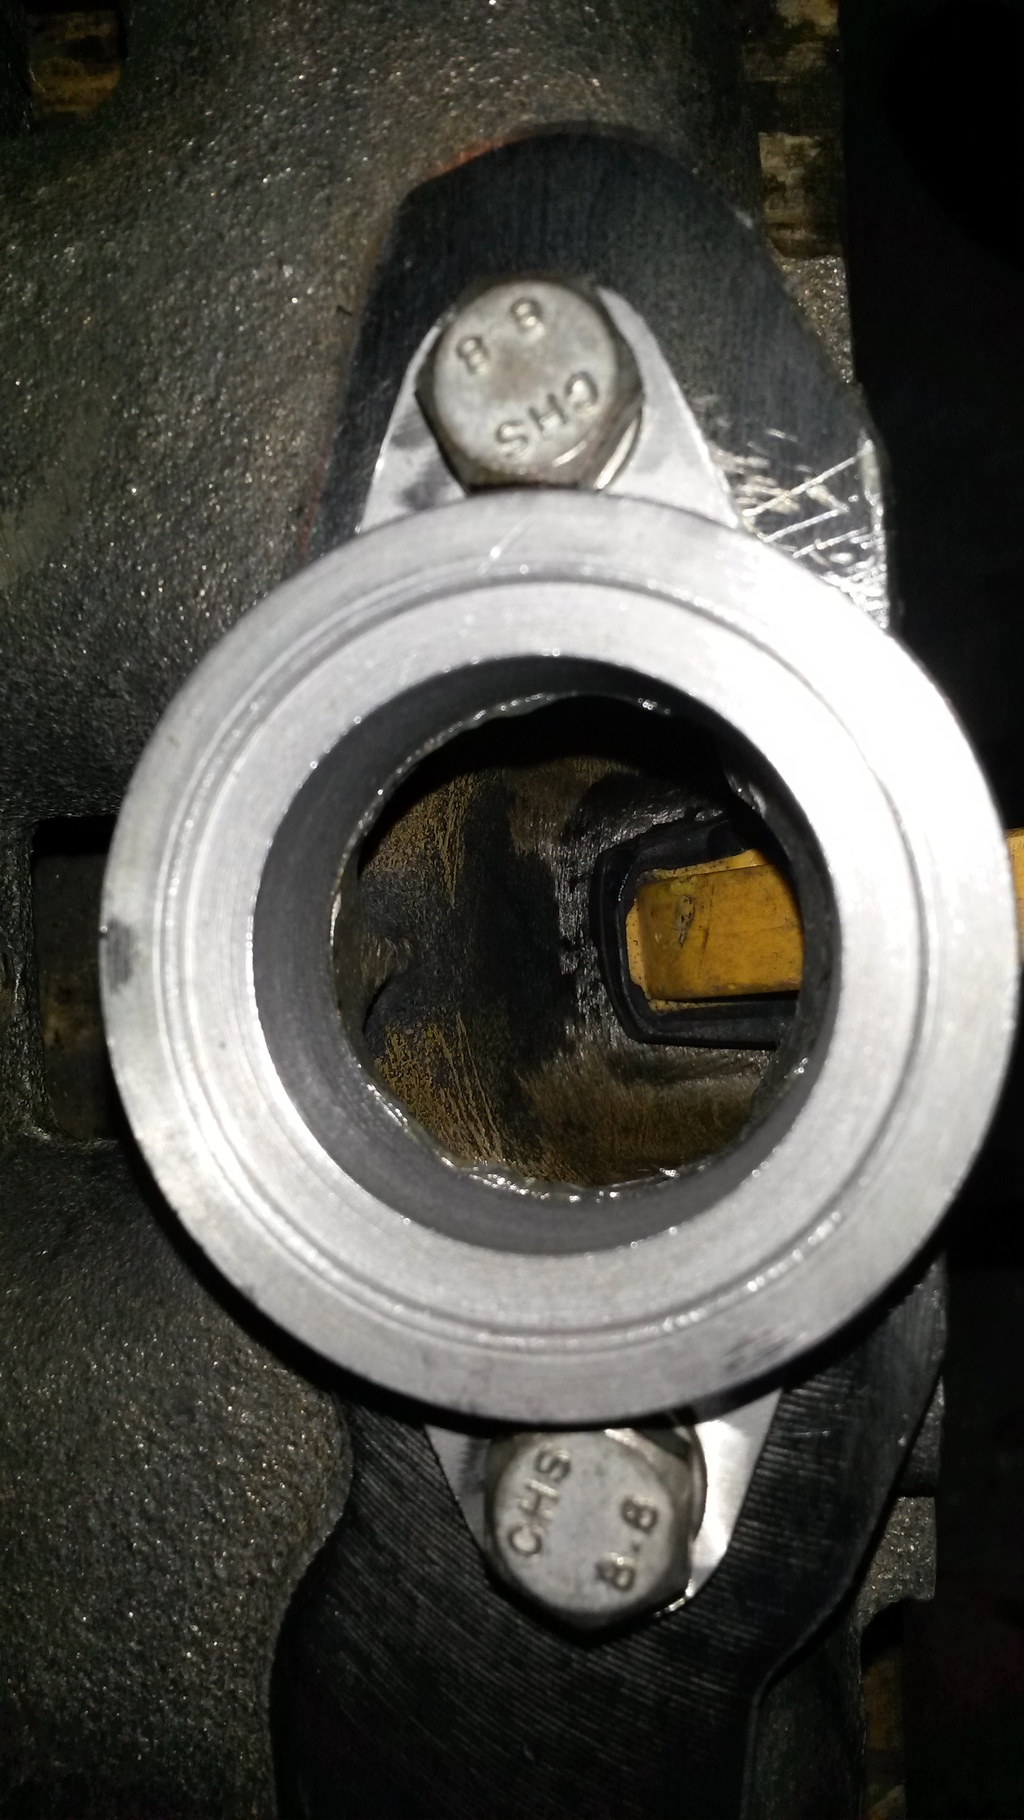
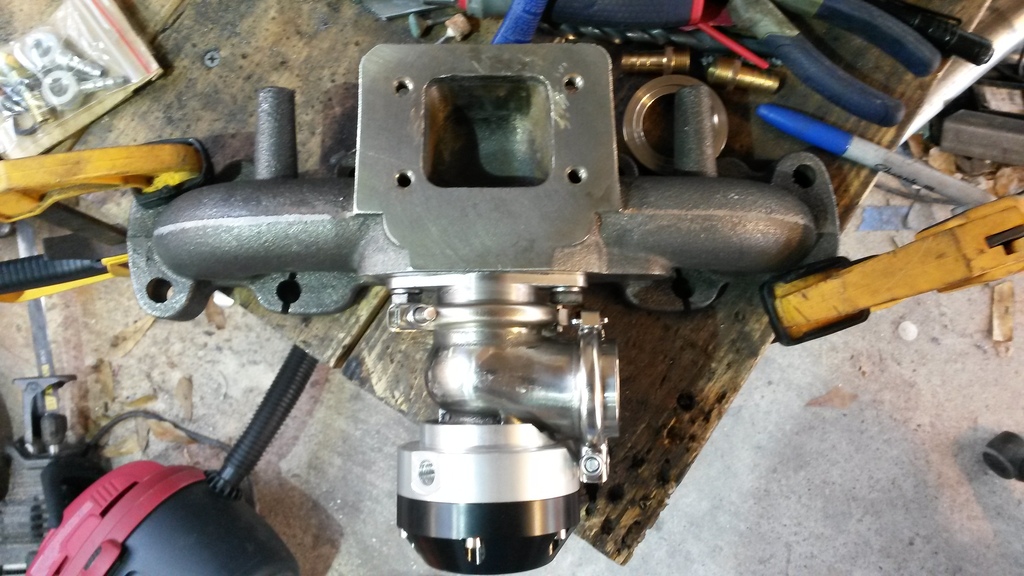
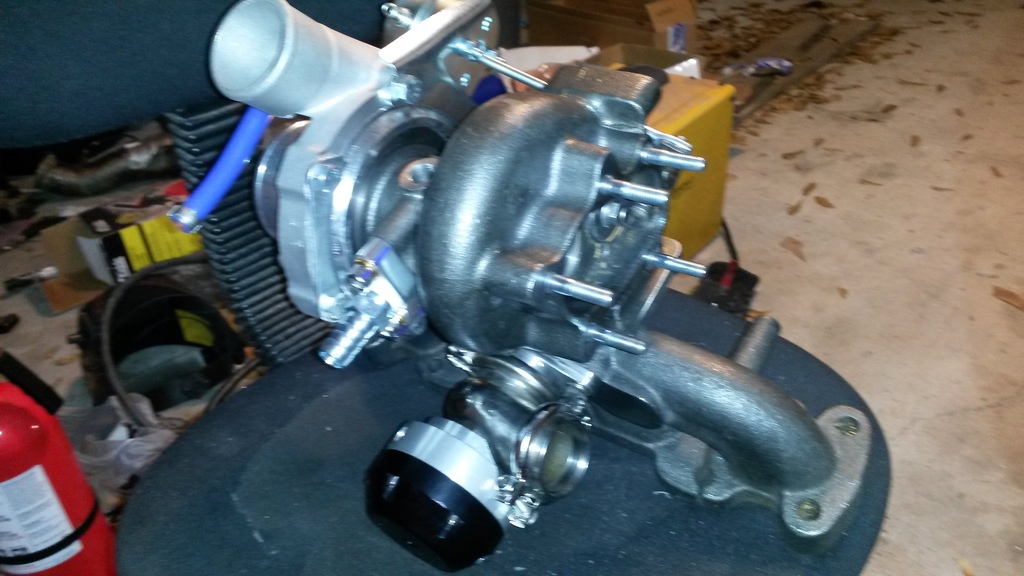
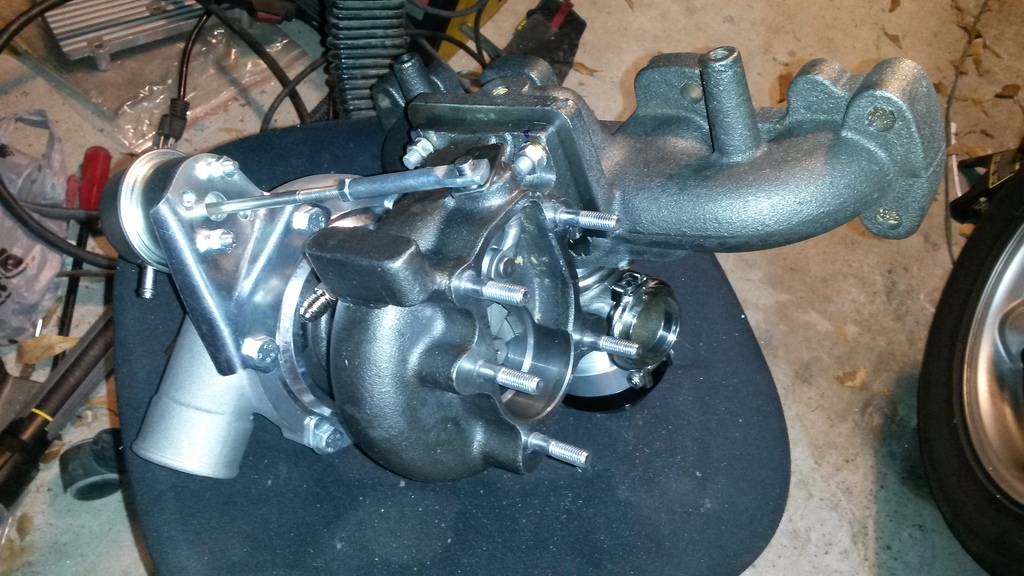
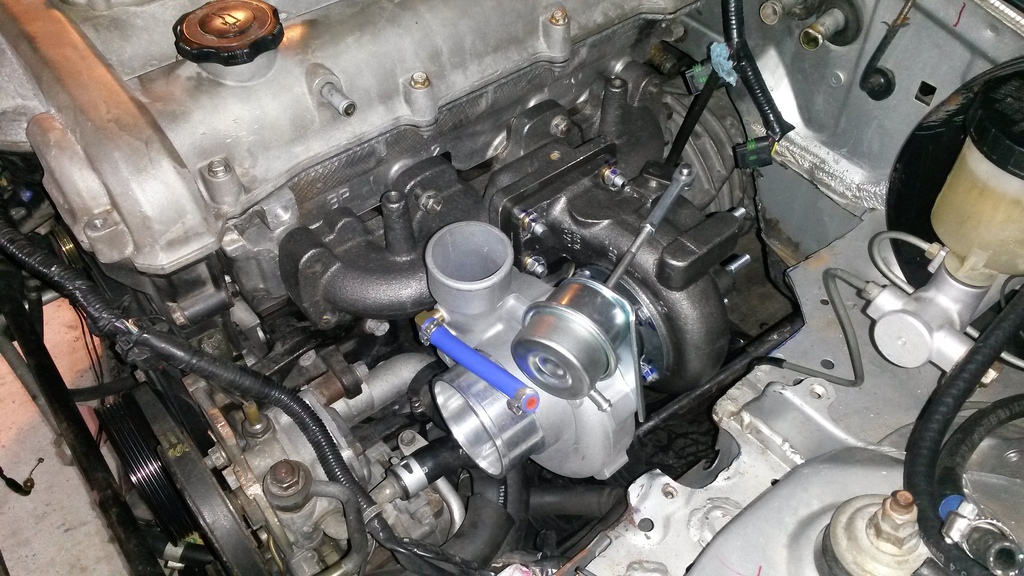
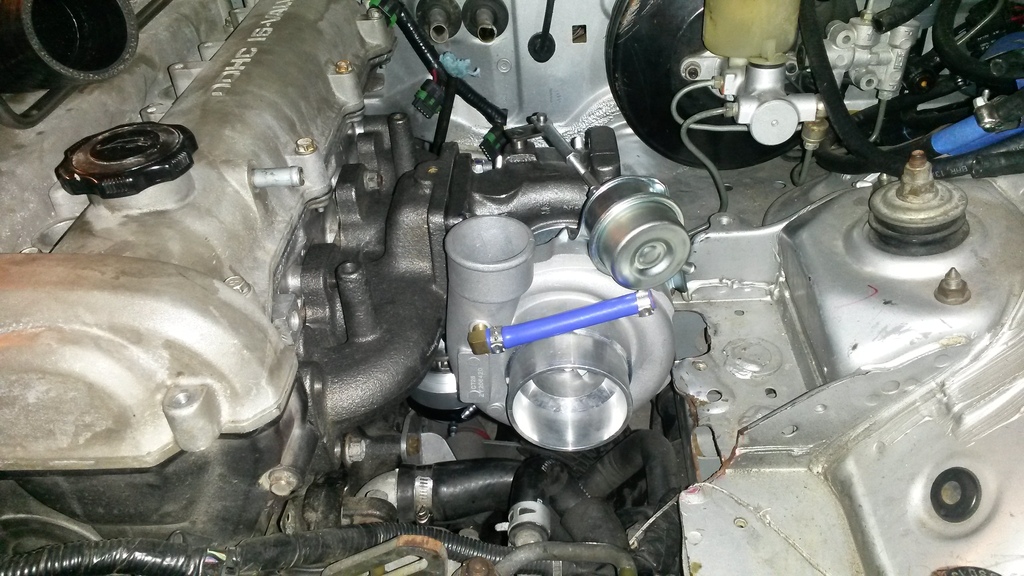
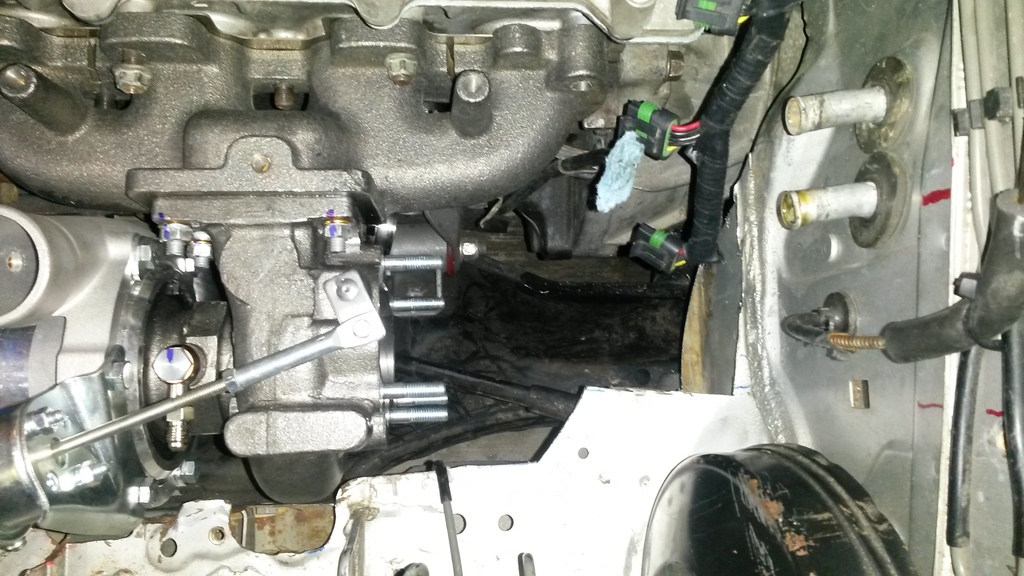
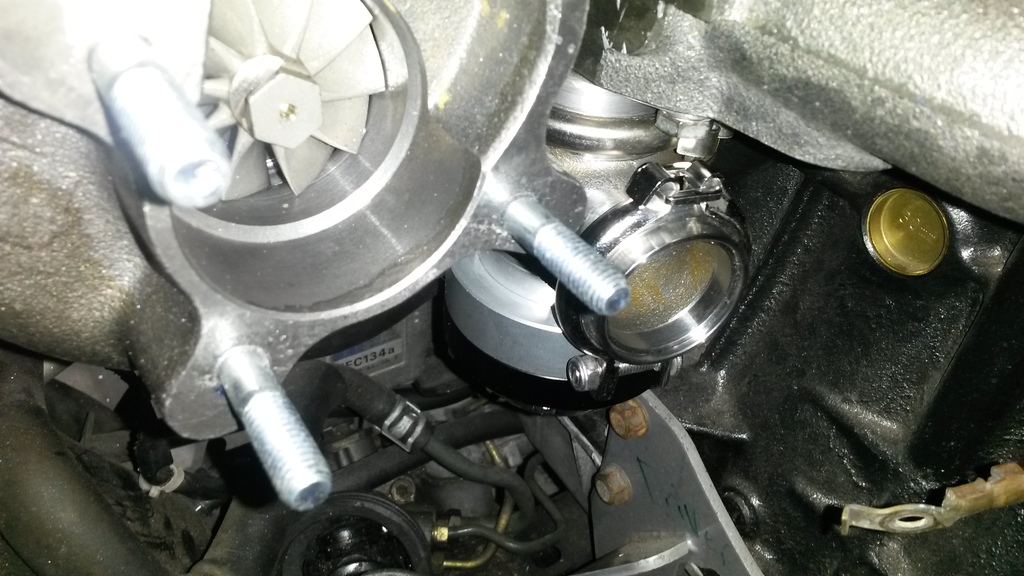
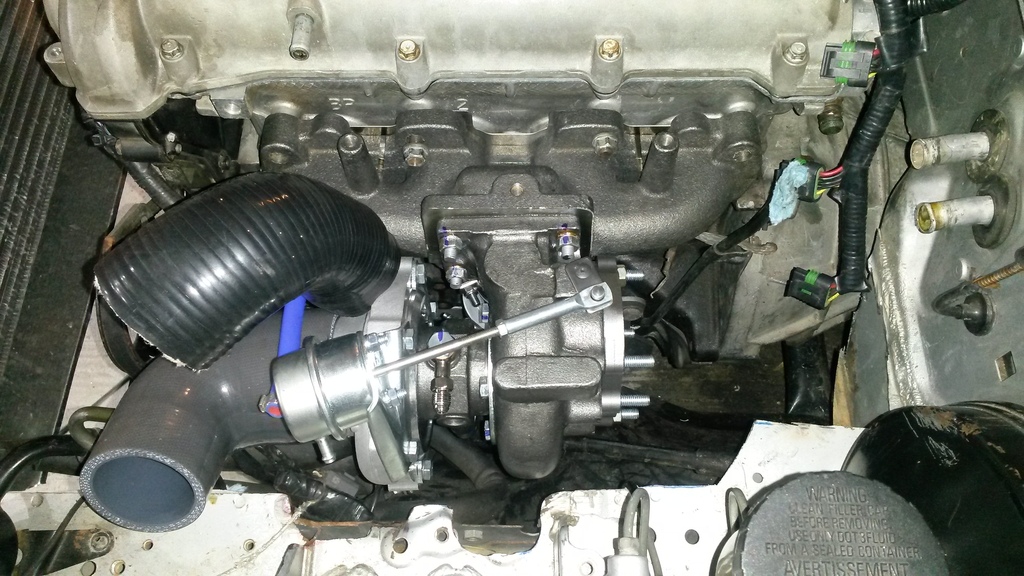
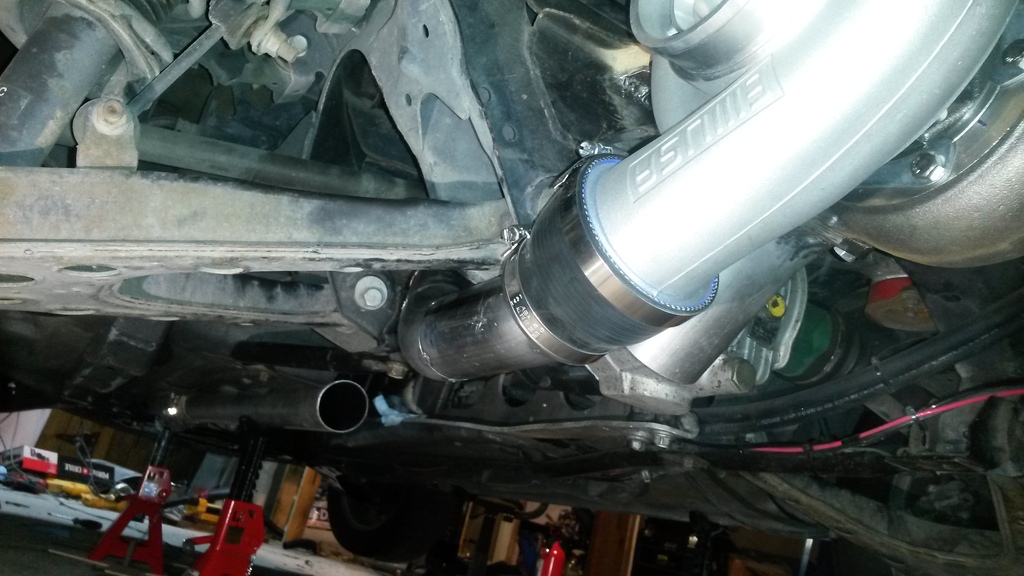
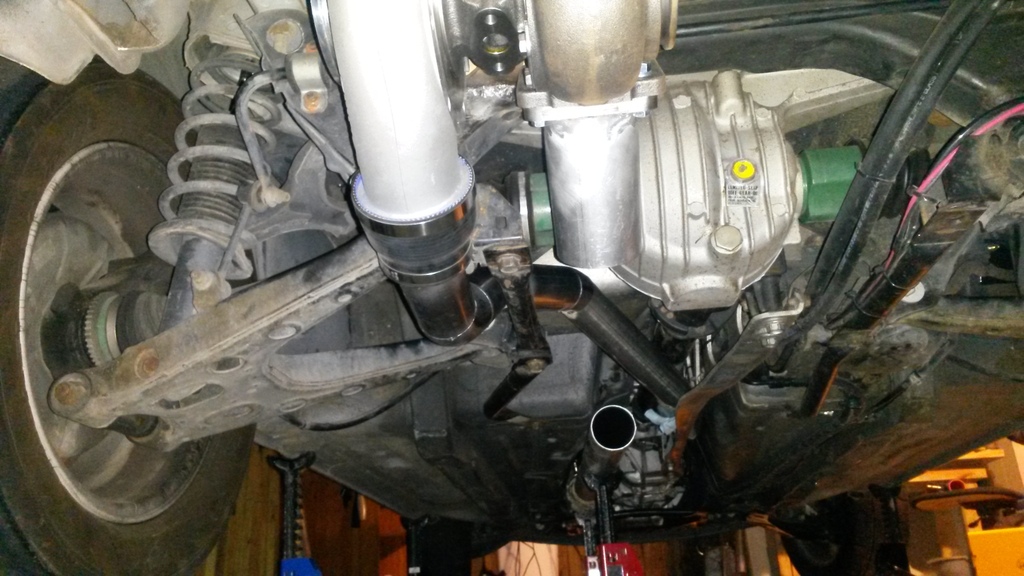
Made some progress. Will be buying some better studs for the turbo/down pipe, but for now running some cheap stuff I bought locally that I had to shorten to make work.
The 38mm gate I bought had a 4 PSI spring in it. I decided I want 16-18 PSI out of the small turbo on wastegate pressure, so I found some springs I had. I measured the stock spring and calculated the stiffness K. Then did the same for the springs I had, and found that cutting and using one of the springs I had, plus the stock spring, would add up to 14.6 PSI in theory. So did that, kind of curious to see how close my math was. I have it all on paper somewhere, n pics of math but the equation is simple.
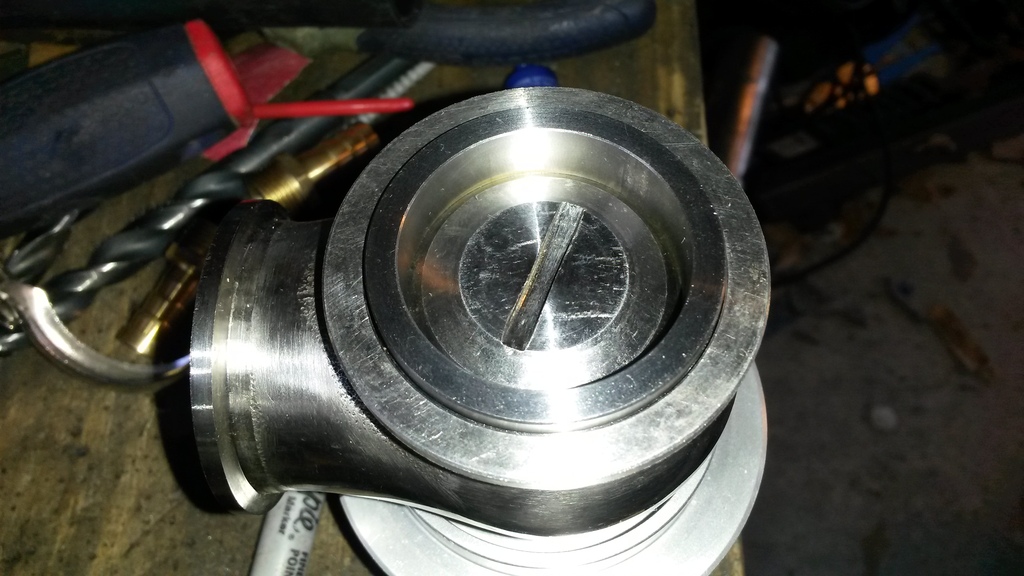
Put the gate together, tore down my old BOV and cleaned it up and reassembled.
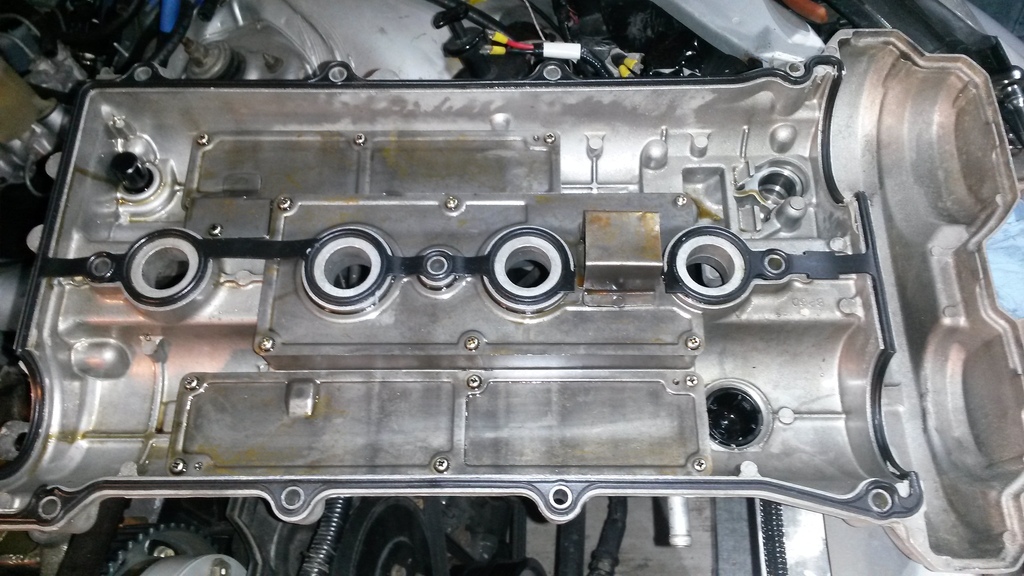
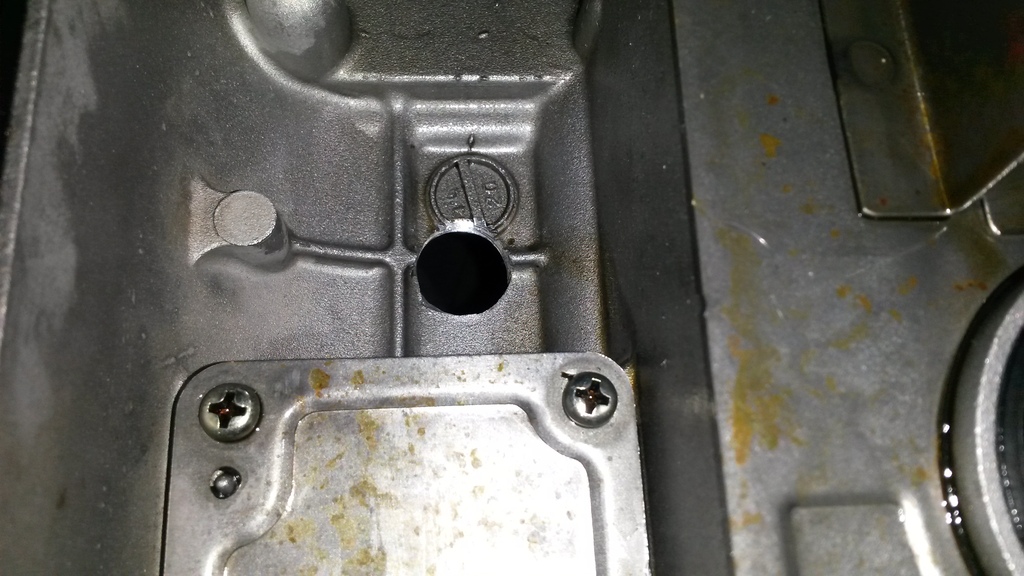
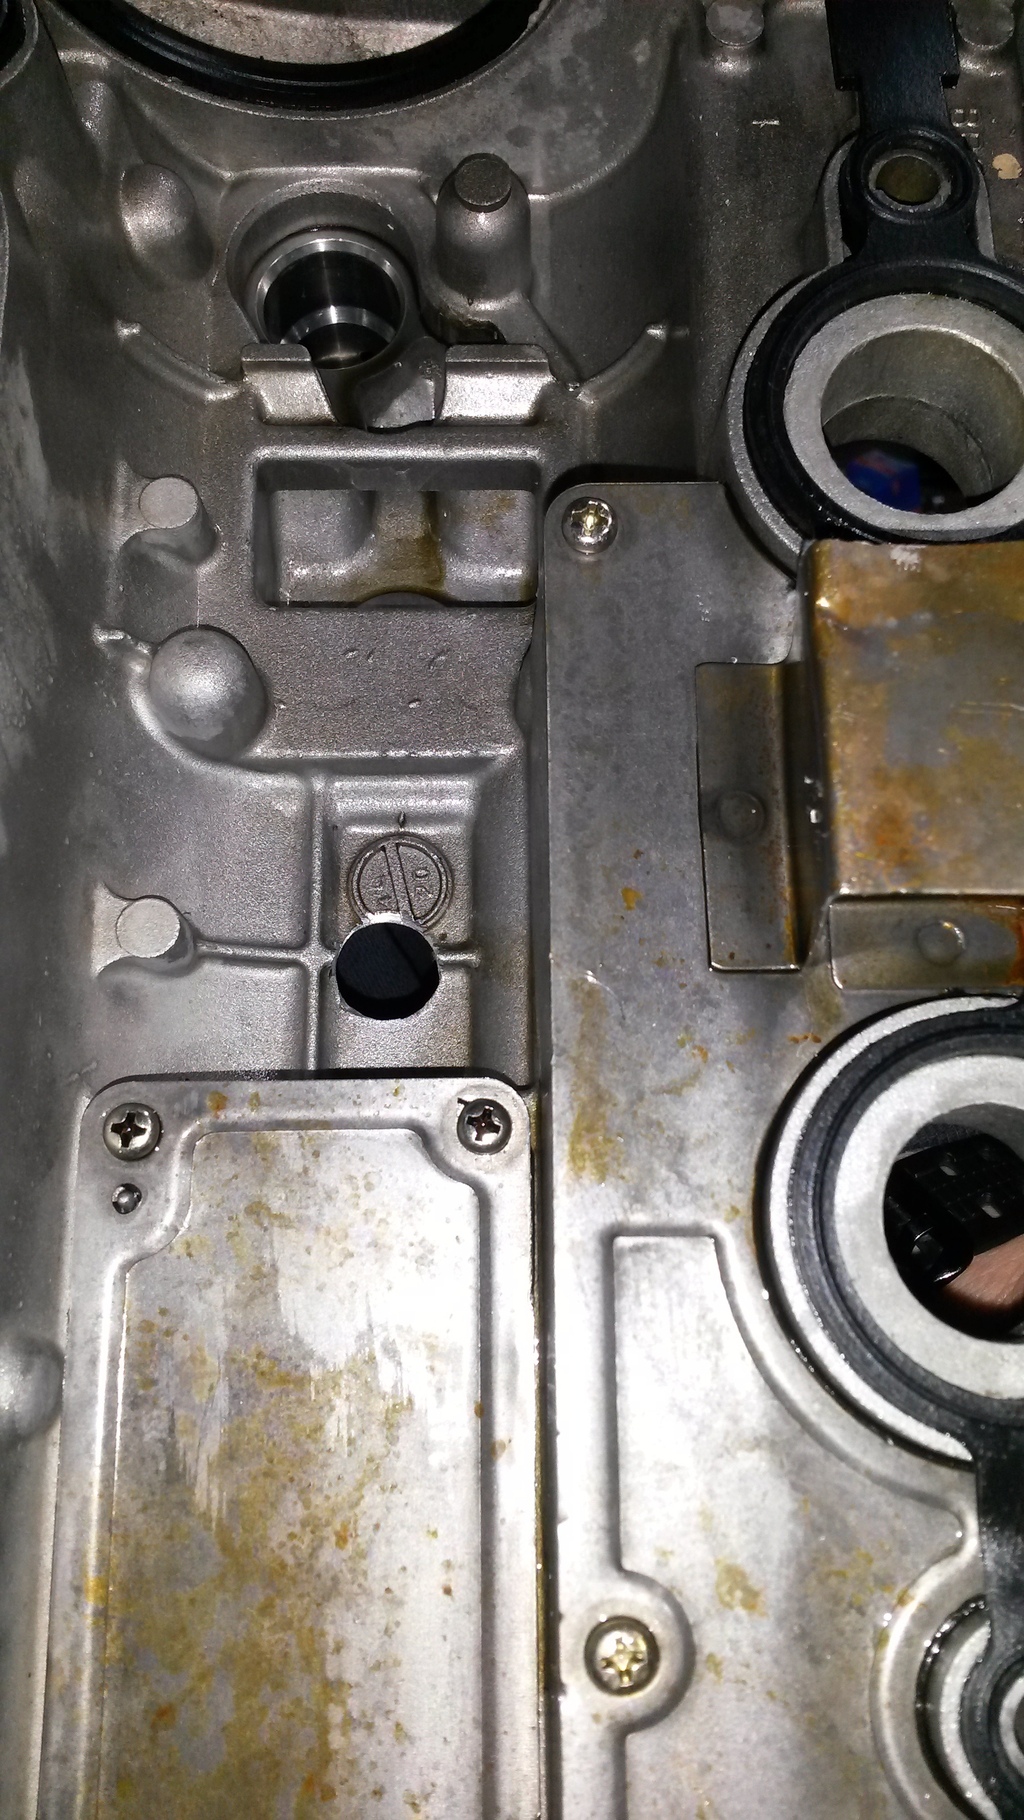
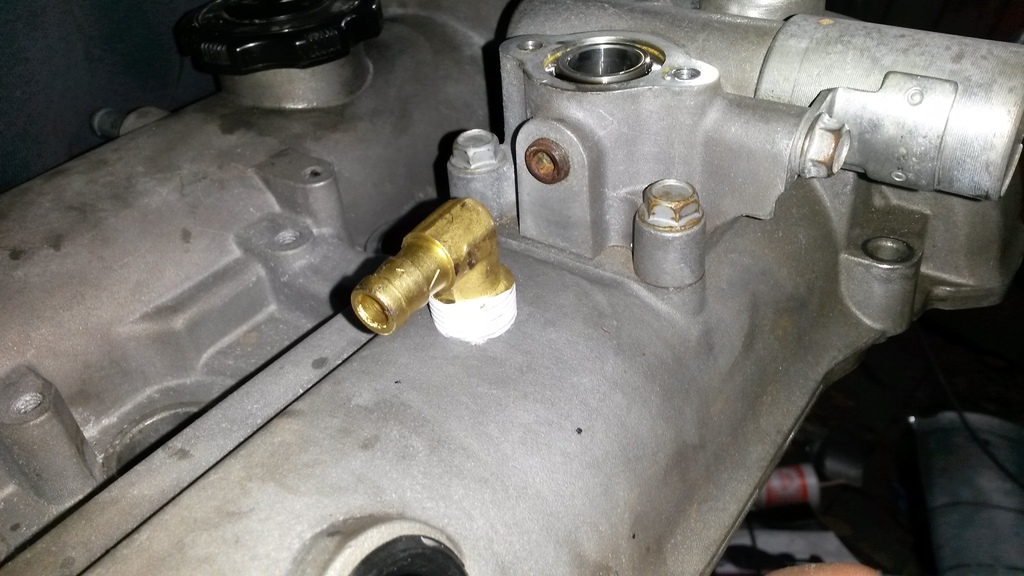
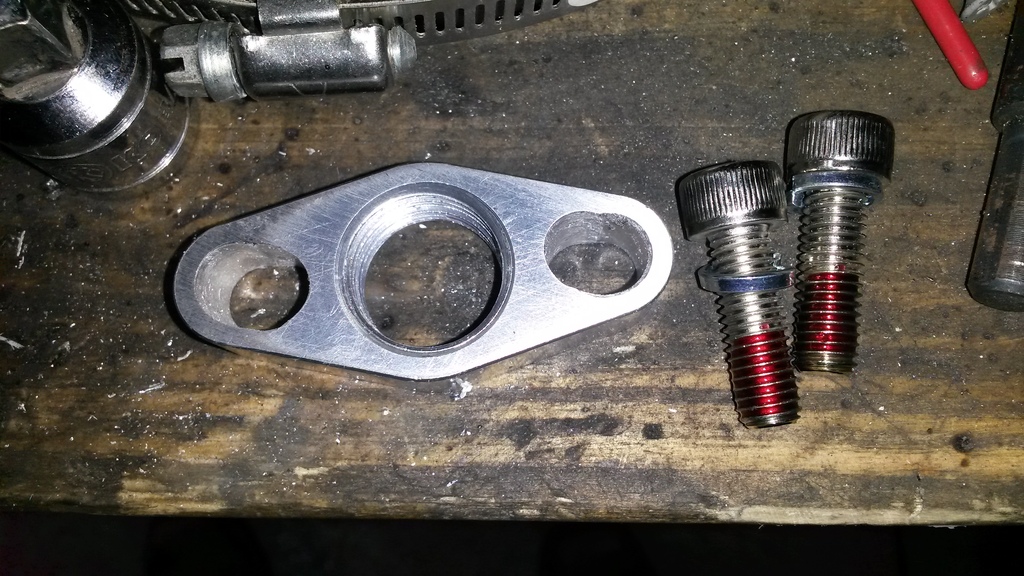
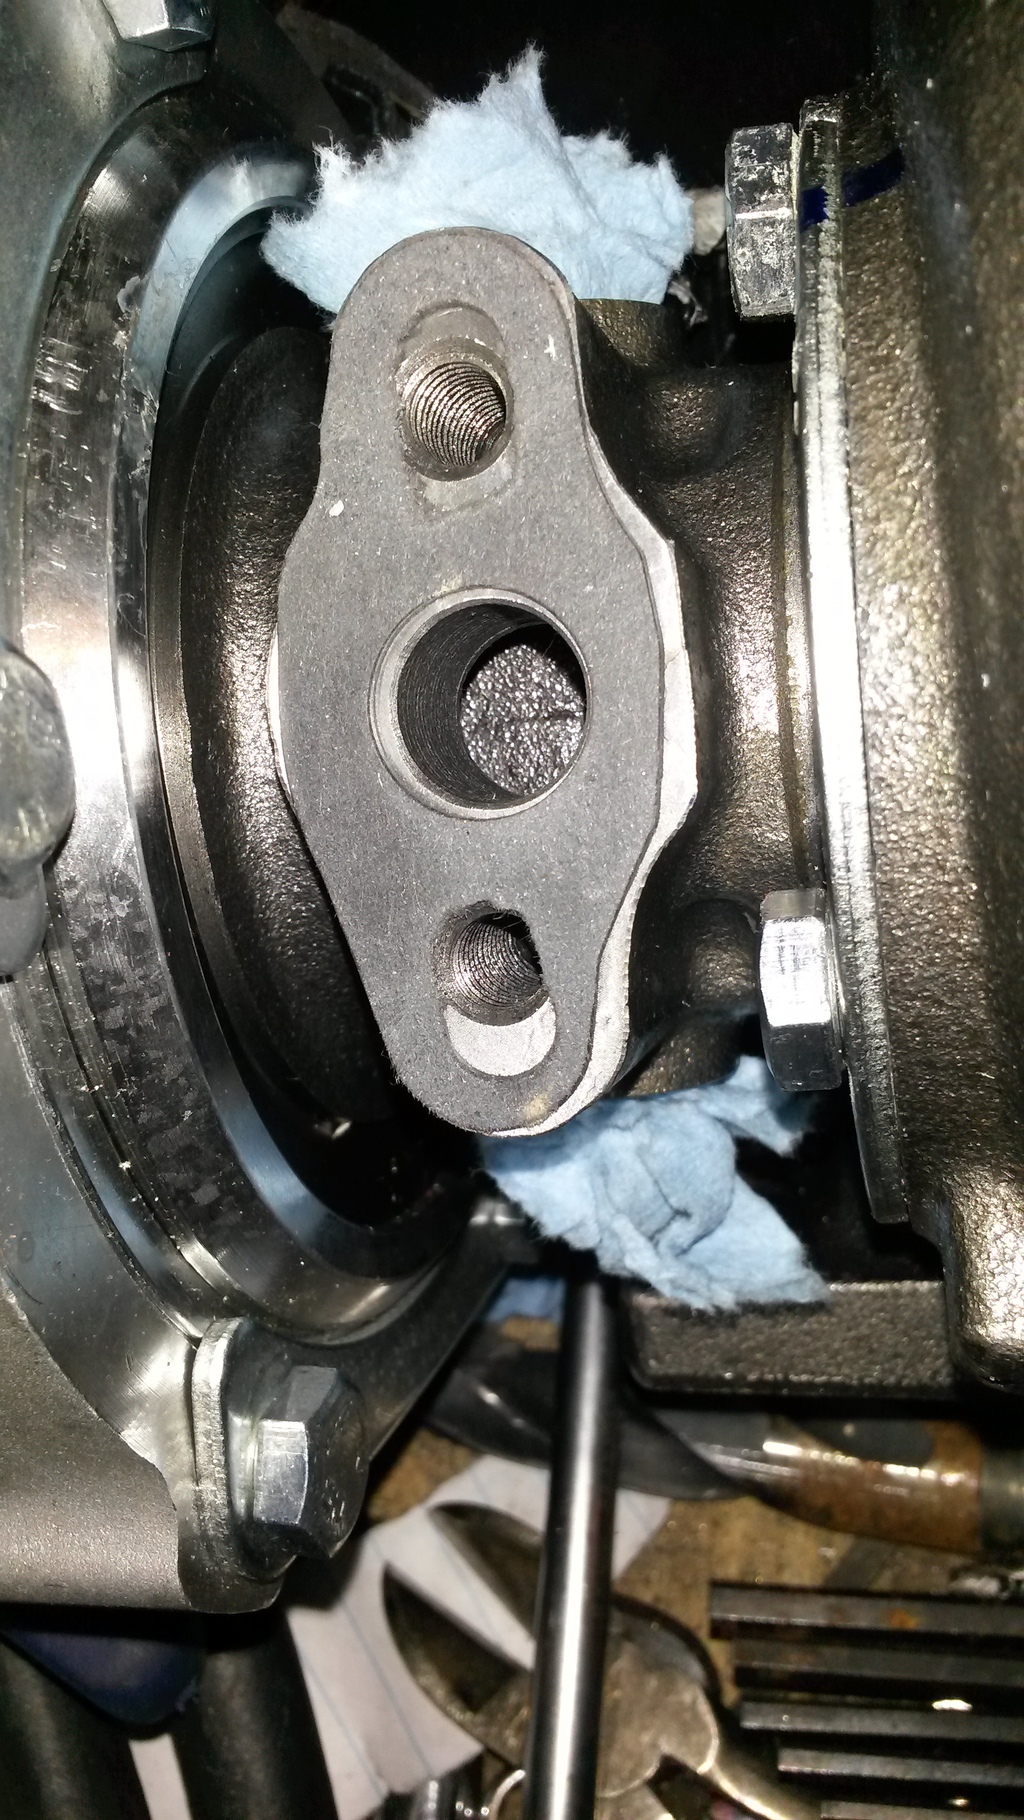
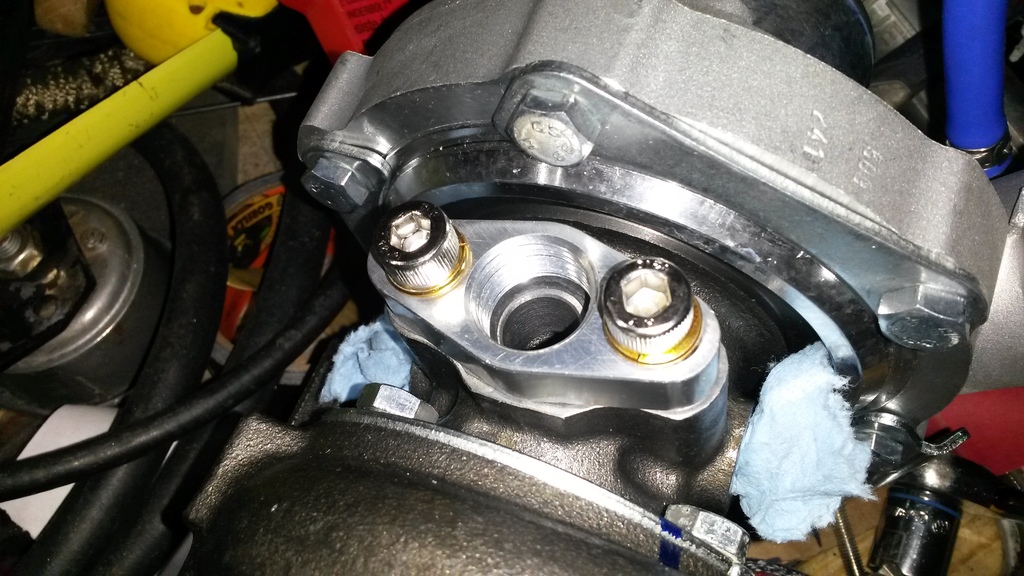
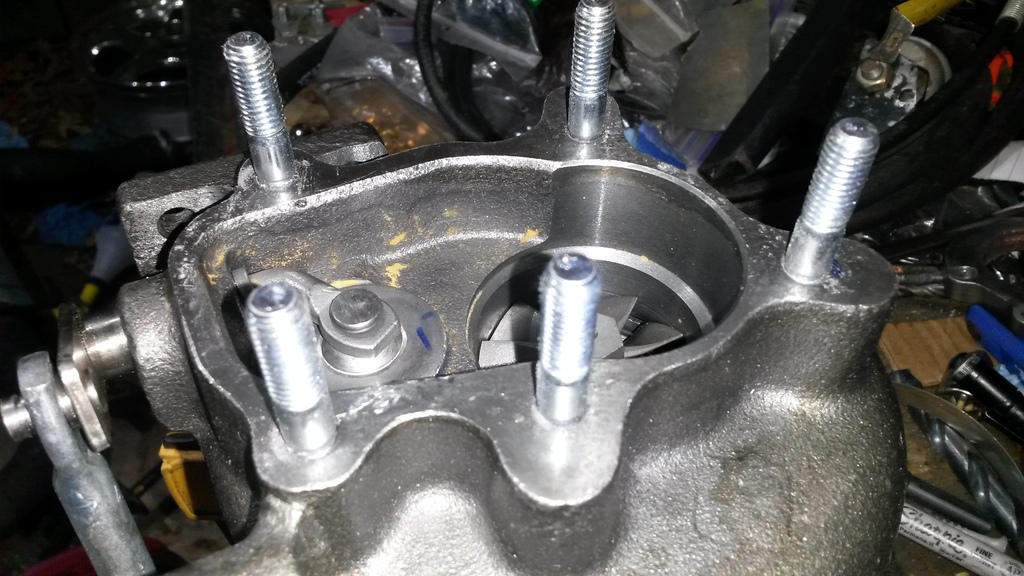
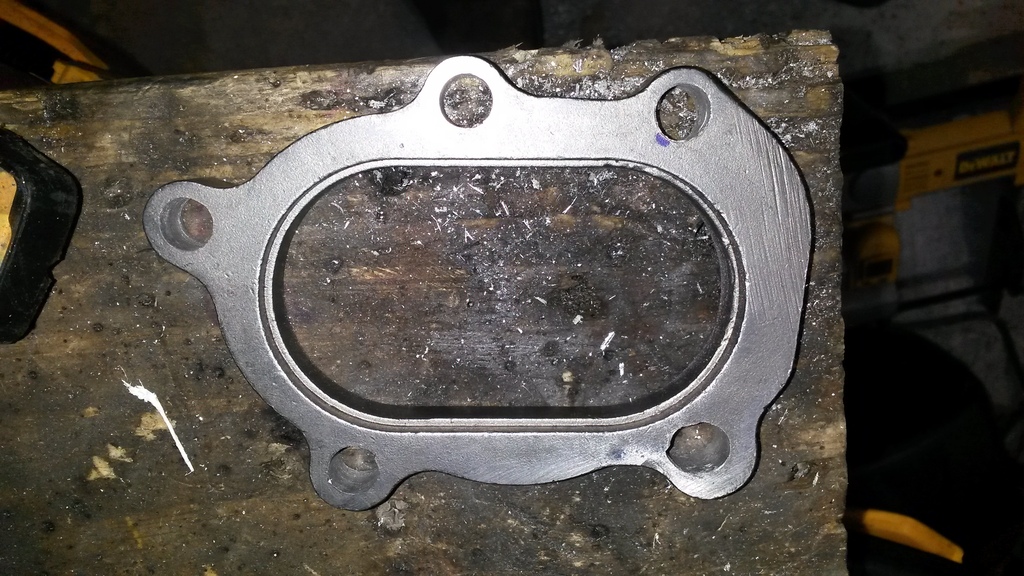
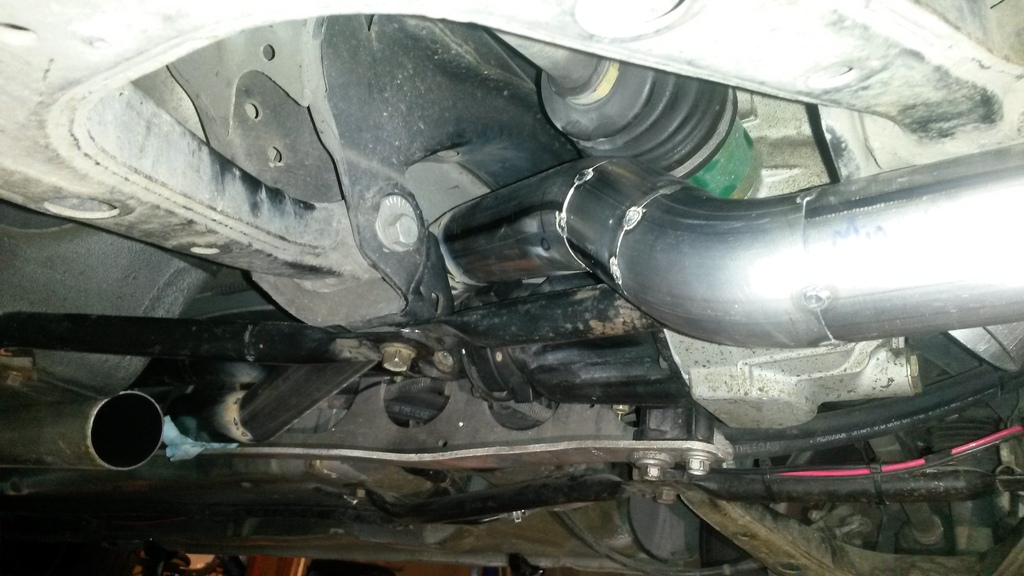
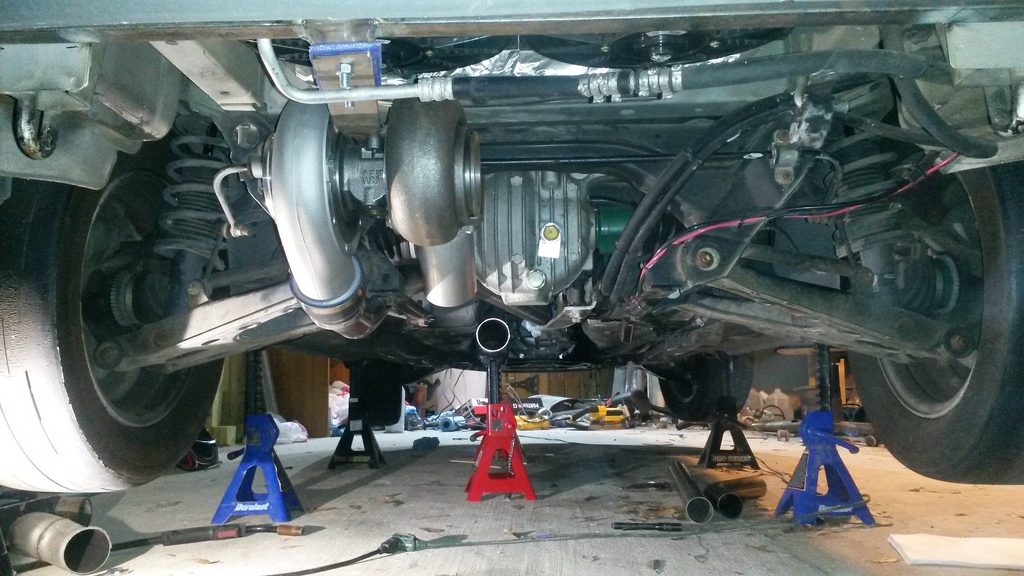
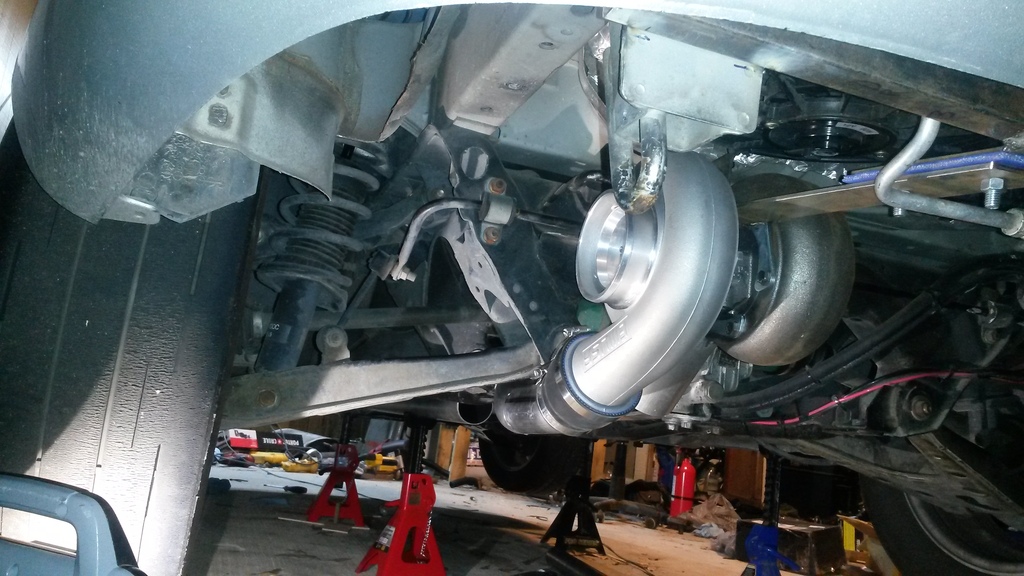
Bought studs, shortened them (sucks...) installed them into manifold, cleaned up mounting surface for turbo flange where nuts meet it as it was crappy ebay quality and cast and not even flat. Put V-band adapter on manifold, 38mm gate on, turbo on, modified the ebay downpipe flange so it fits, modified the ebay drain fitting so it fits, and the gasket. Modified the ebay oil feed bolt so it won't oil-starve the turbo (needs a new bolt, there's is very short...) Installed oil fitting in valve cover and reinstalled. Removed 4 studs from head for longer bolts for ebay manifold.
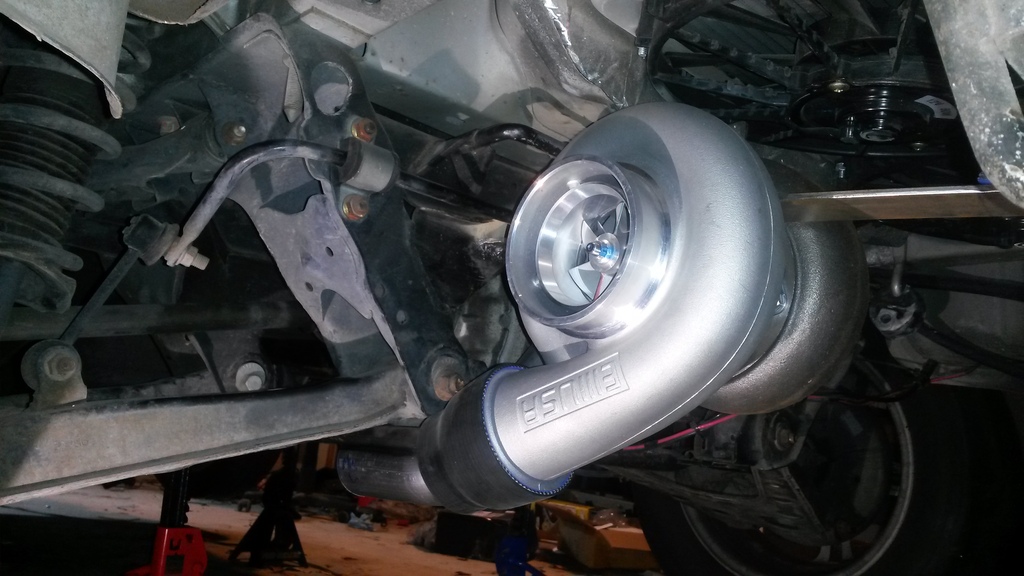
Tons of little crap as you can tell. Anyways finally got it all bolted up, looks pretty good. TON of space, I like that. The SC took up all the space and then some. I like the turbo more just for the ease of servicing and space.
No surprise but ebay parts are cheap and take some massaging to make them work. But I had to keep this cheap so that's how it goes.
Tired of typing, pics.
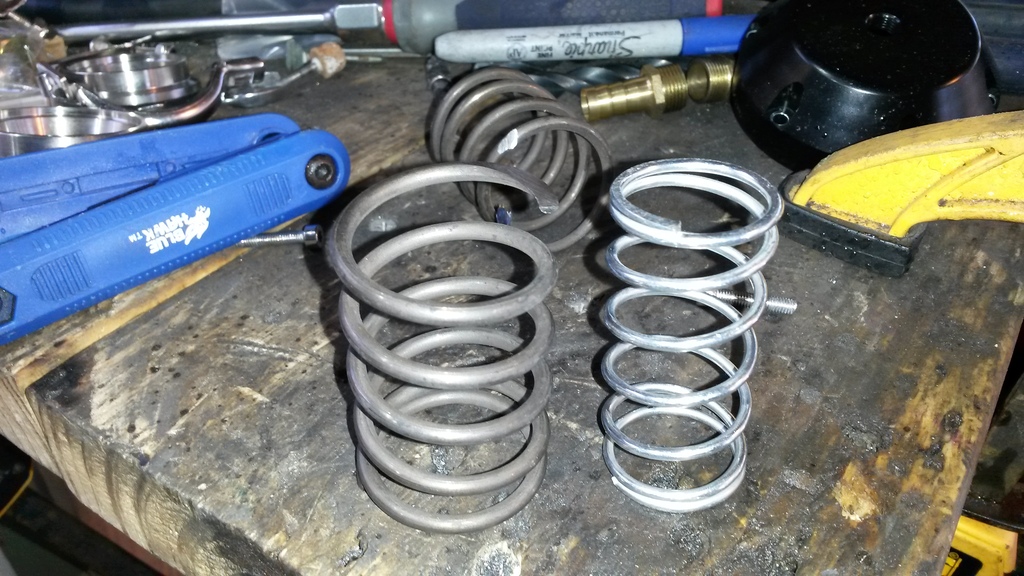
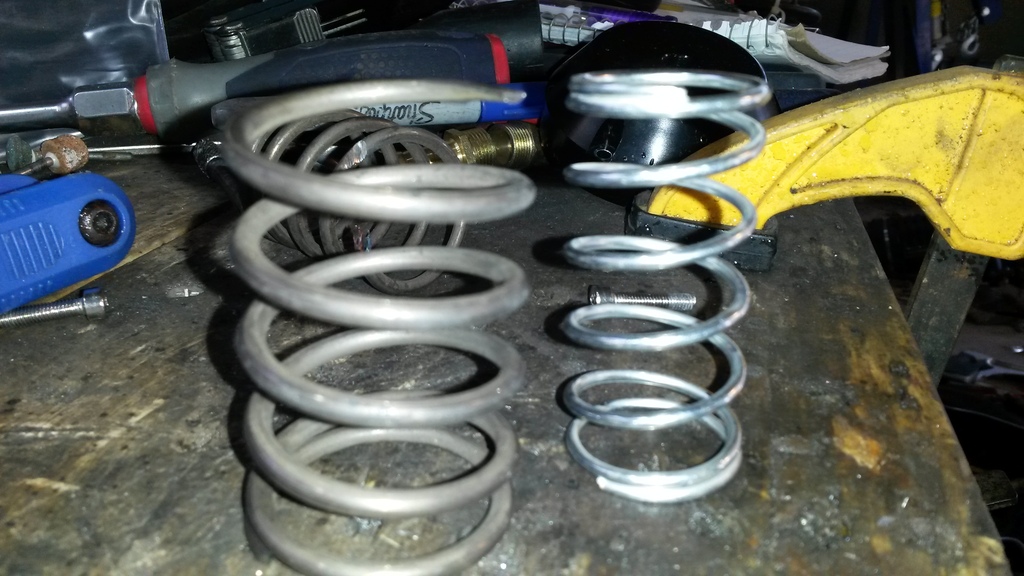
The 38mm gate I bought had a 4 PSI spring in it. I decided I want 16-18 PSI out of the small turbo on wastegate pressure, so I found some springs I had. I measured the stock spring and calculated the stiffness K. Then did the same for the springs I had, and found that cutting and using one of the springs I had, plus the stock spring, would add up to 14.6 PSI in theory. So did that, kind of curious to see how close my math was.
I have it all on paper somewhere, n pics of math but the equation is simple.Put the gate together, tore down my old BOV and cleaned it up and reassembled.
Bought studs, shortened them (sucks...) installed them into manifold, cleaned up mounting surface for turbo flange where nuts meet it as it was crappy ebay quality and cast and not even flat. Put V-band adapter on manifold, 38mm gate on, turbo on, modified the ebay downpipe flange so it fits, modified the ebay drain fitting so it fits, and the gasket. Modified the ebay oil feed bolt so it won't oil-starve the turbo (needs a new bolt, there's is very short...) Installed oil fitting in valve cover and reinstalled. Removed 4 studs from head for longer bolts for ebay manifold.
Tons of little crap as you can tell. Anyways finally got it all bolted up, looks pretty good. TON of space, I like that. The SC took up all the space and then some. I like the turbo more just for the ease of servicing and space.
No surprise but ebay parts are cheap and take some massaging to make them work. But I had to keep this cheap so that's how it goes.
Tired of typing, pics.


Reply
2
2
 02-07-2016, 12:11 PM
#116
Elite Member
Thread Starter
iTrader: (16)
Join Date: Aug 2007
Location: Houston, TX
Posts: 9,295
Total Cats: 476
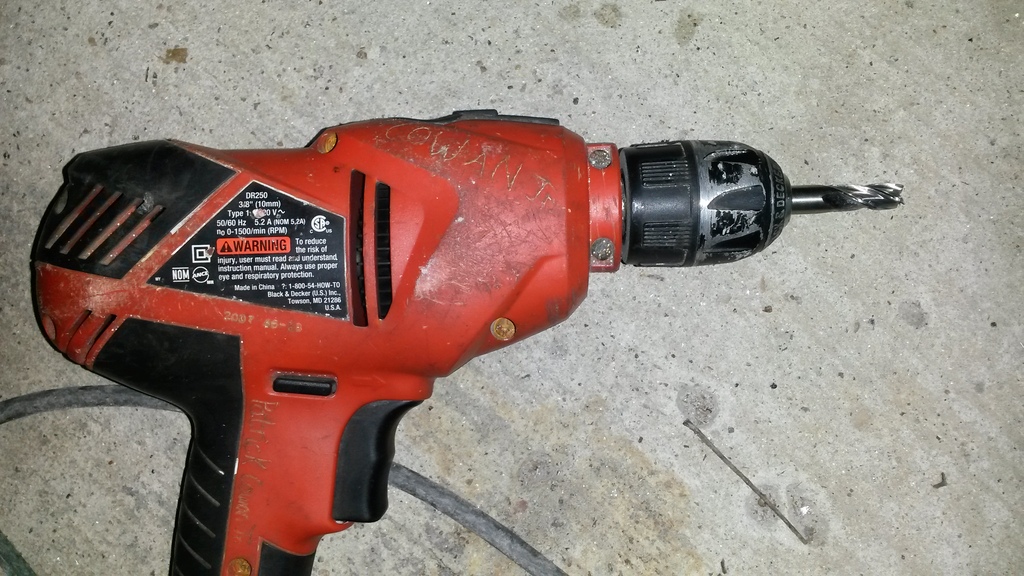
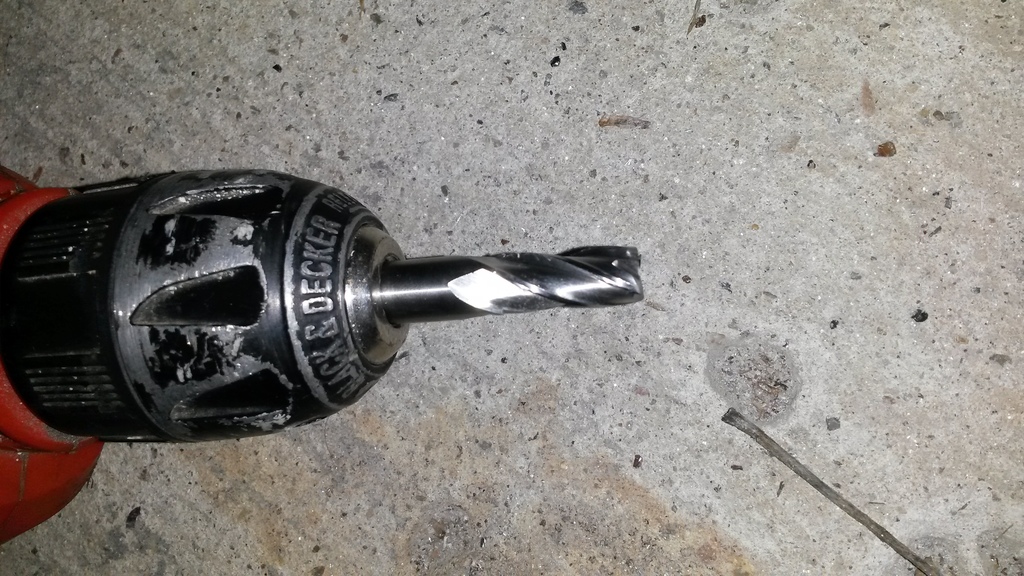
Yeap! In that drill's defense though, it's been through some crap and never died. I have a really fancy 10A dewalt hammer drill 2 speed drill but I don't use it often. I used it to port the exhaust manifold though with a carbide bur in it.
Should have done it about 10 years ago. Highly recommend. I do need to clean up the rough edges, but the extra space is very nice. My boost pipe will be in that area too, so needed the extra room.
I may, we'll see. But it's better to have most of the control done with a spring if you're never going to turn down the boost, improves spool by keeping the gate pinned shut. One of the great things about external gates, that and top ports that help do the same thing.
Also still planning to have it on the road by 2/12/16!
Also still planning to have it on the road by 2/12/16!
Reply
0
0
02-08-2016, 02:24 AM
#118
Elite Member
Thread Starter
iTrader: (16)
Join Date: Aug 2007
Location: Houston, TX
Posts: 9,295
Total Cats: 476
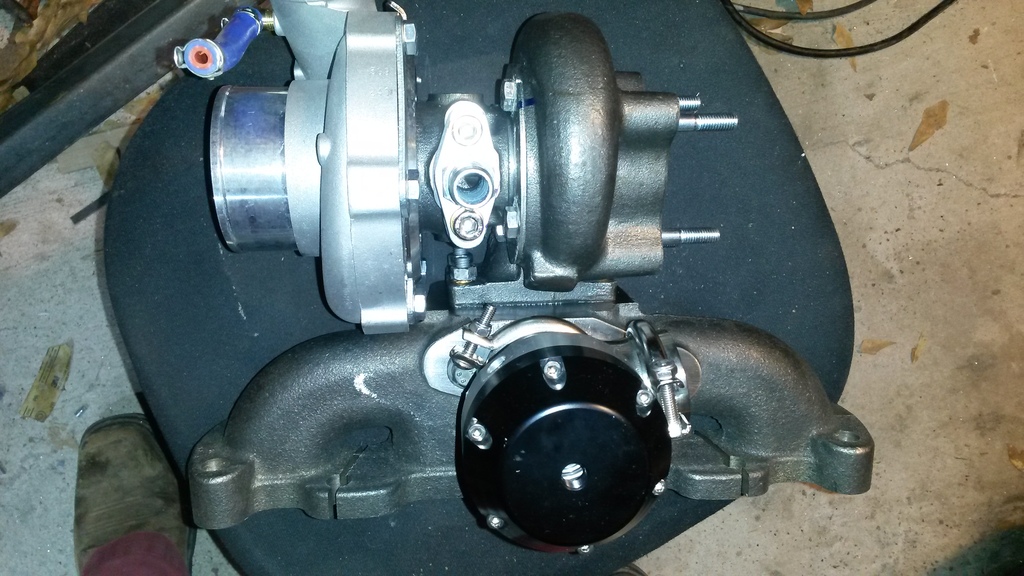
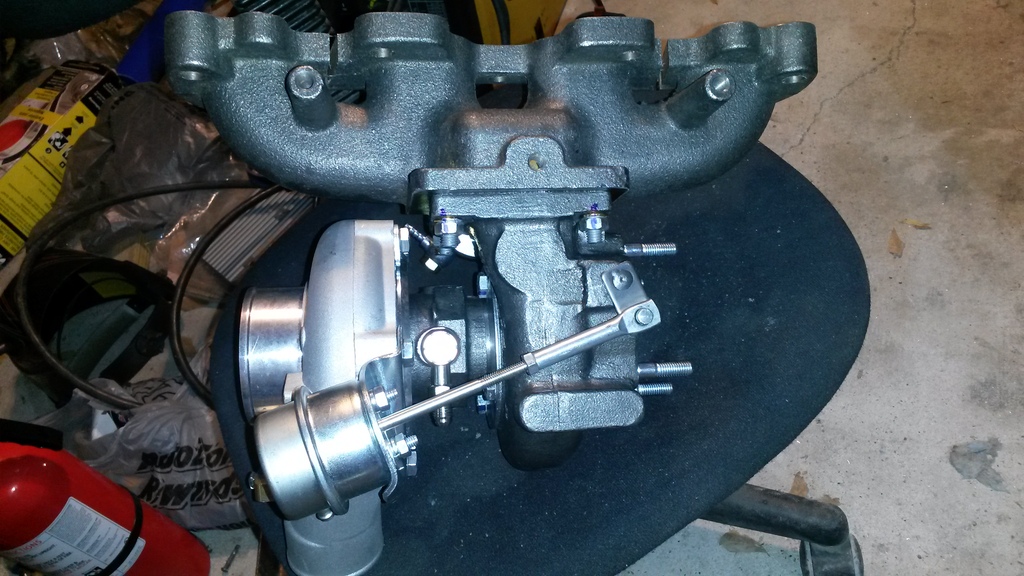
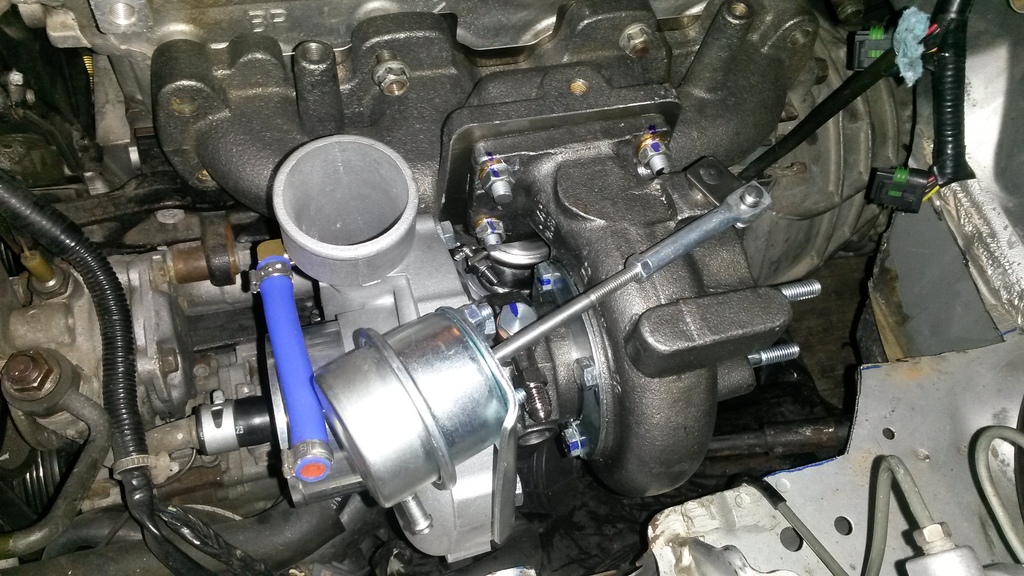
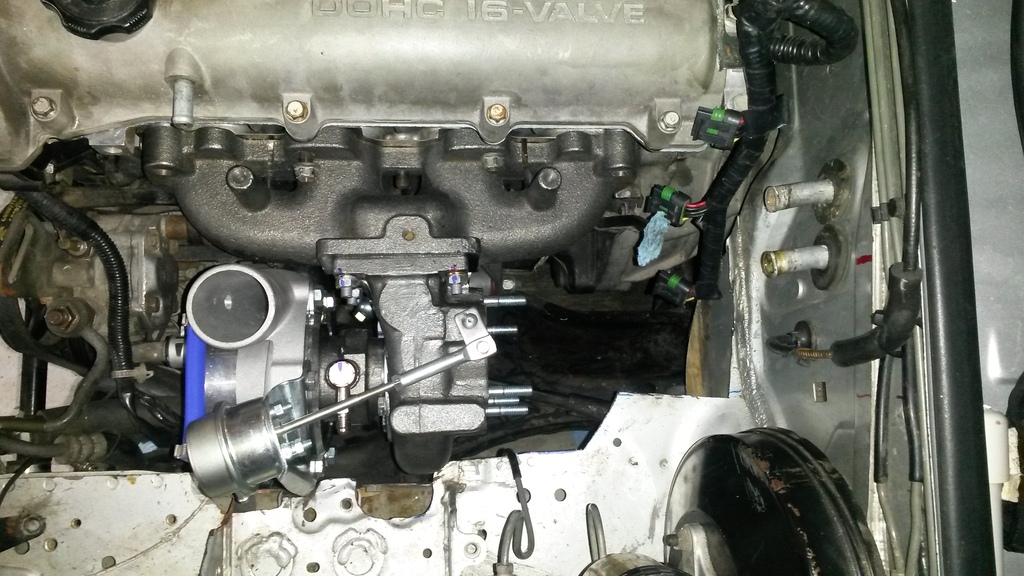
Bolted internal gate shut for now. Welded a bolt to make one long enough... Made some progress on the boost pipe.
Took some measurements and that silicone 180 thing was too low, and looked like crap too.
Decided to test rotating the turbo as suggested again. I lost about 1/4" of clearance where the turbo outlet hangs, but got rid of the ugly U-bend and gained lots of clearance in the back where the silicone was hanging down before. So overall an improvement I think, it looks 10x better at least.
So thanks guys for that suggestion!
And then got to work on the boost pipe, snaking it through all the things. Got it to the PPF. From this point forward (literally) it will just follow the PPF and then up and follow the bellhousing up to the firewall and into the engine bay.

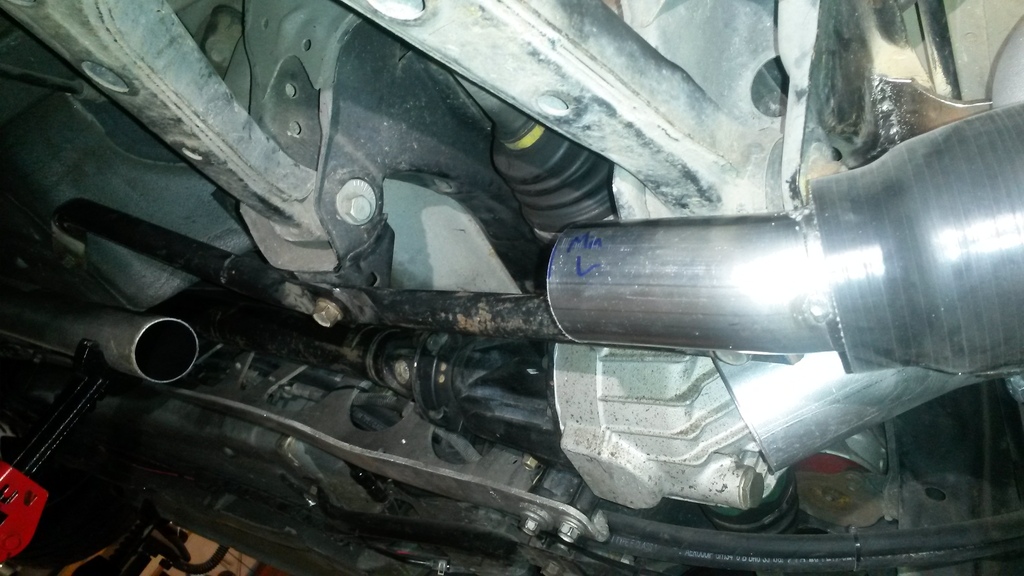
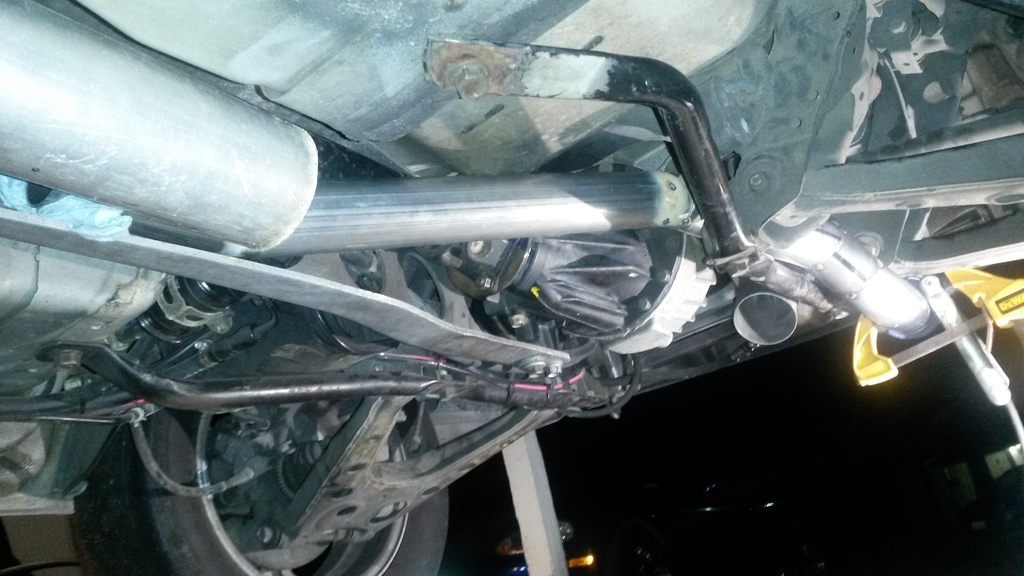
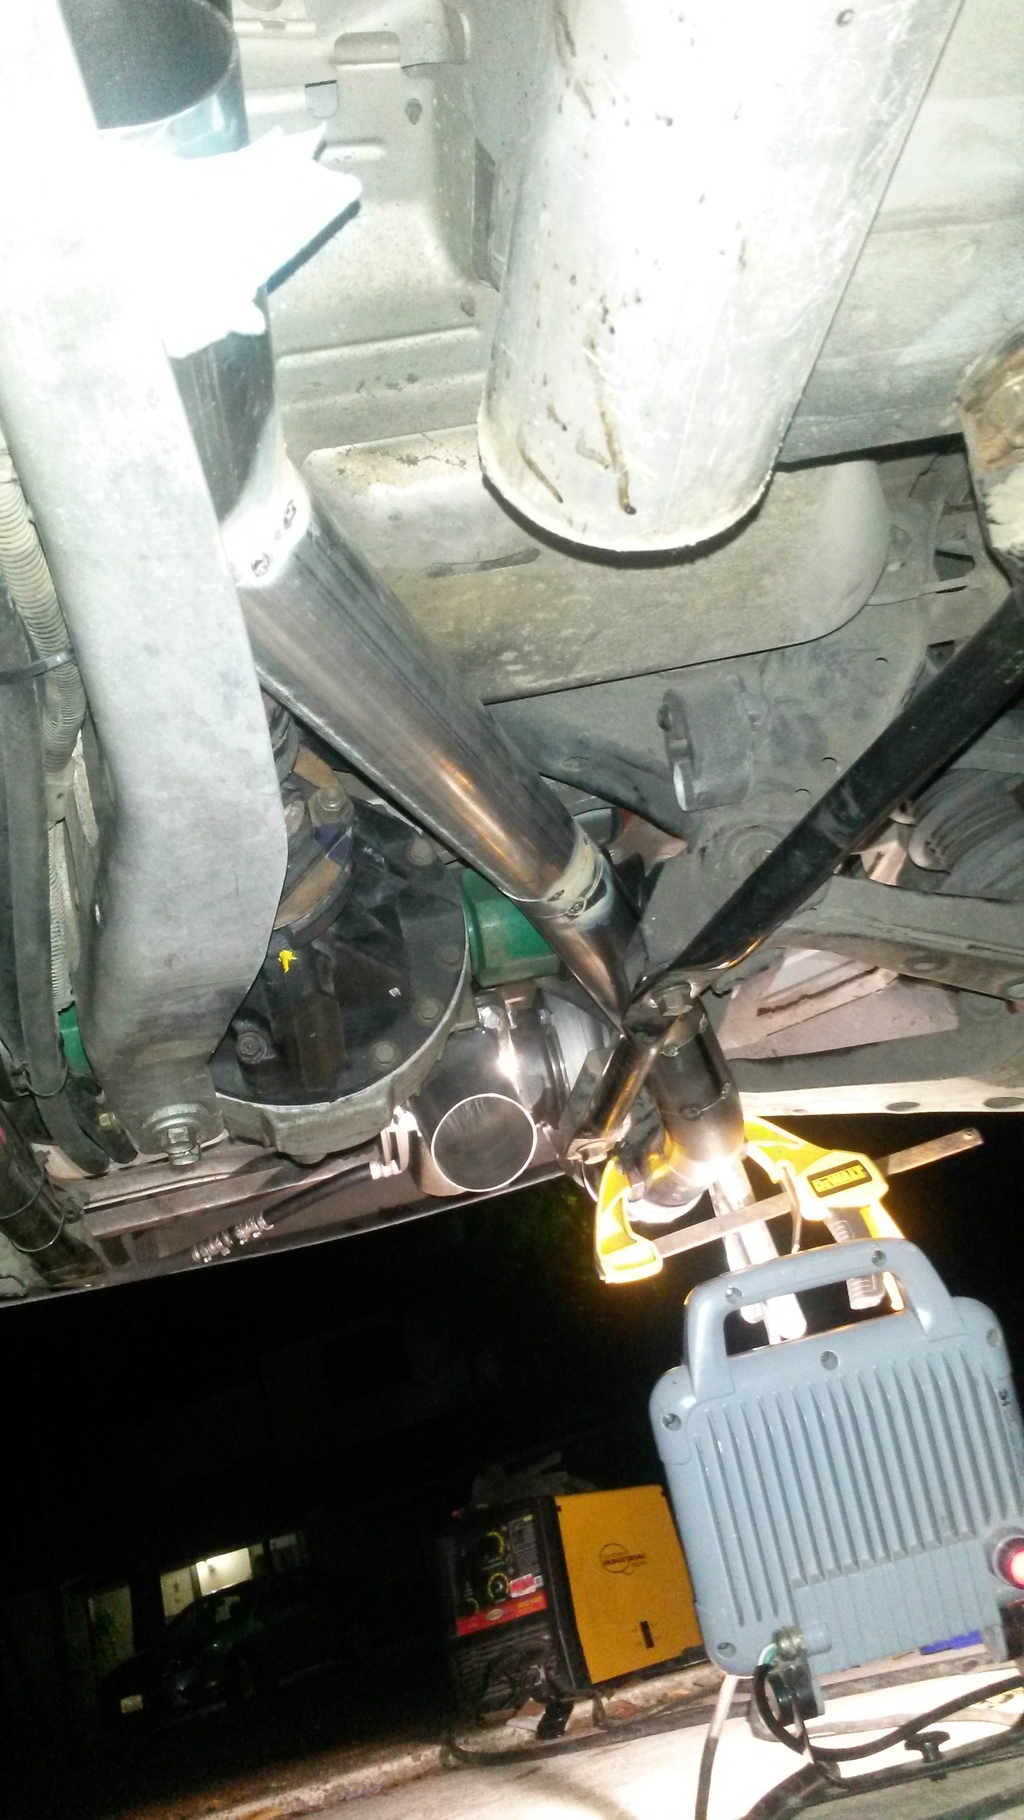
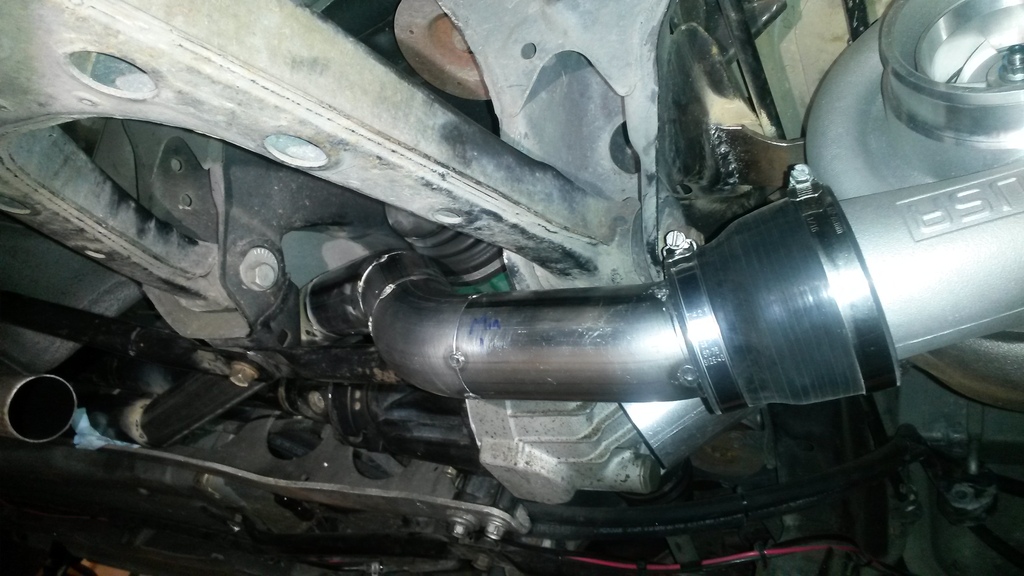

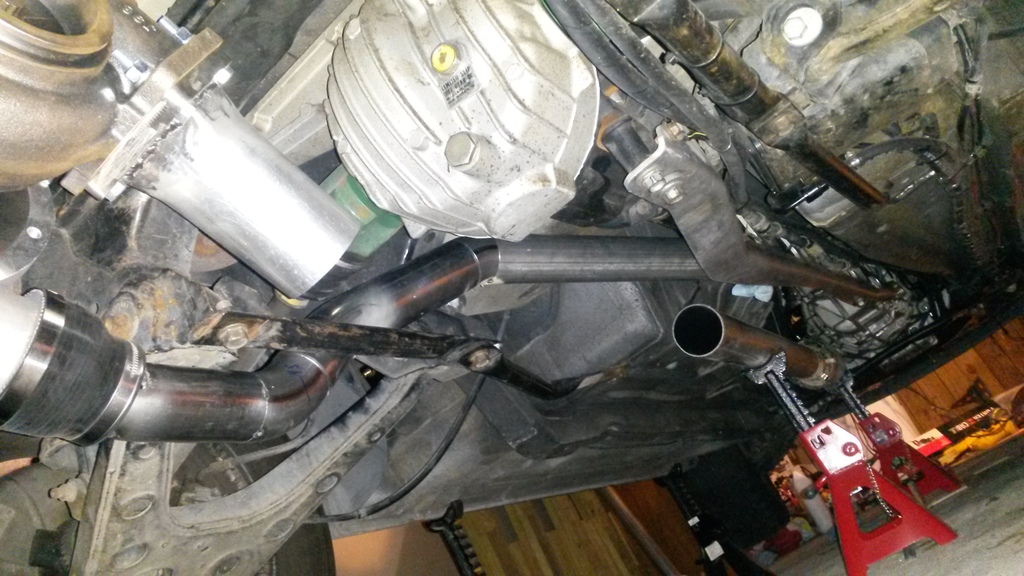
Tomorrow I finish the boost pipe and then a downpipe and exhaust
Took some measurements and that silicone 180 thing was too low, and looked like crap too.
Decided to test rotating the turbo as suggested again. I lost about 1/4" of clearance where the turbo outlet hangs, but got rid of the ugly U-bend and gained lots of clearance in the back where the silicone was hanging down before. So overall an improvement I think, it looks 10x better at least.
So thanks guys for that suggestion!
And then got to work on the boost pipe, snaking it through all the things. Got it to the PPF. From this point forward (literally) it will just follow the PPF and then up and follow the bellhousing up to the firewall and into the engine bay.


Tomorrow I finish the boost pipe and then a downpipe and exhaust
Reply
15
15


