Pat's Ebay Turbo Compound Boost Build
 09-28-2017, 10:58 PM
#1321
Elite Member
Thread Starter
iTrader: (16)
Join Date: Aug 2007
Location: Houston, TX
Posts: 9,296
Total Cats: 476
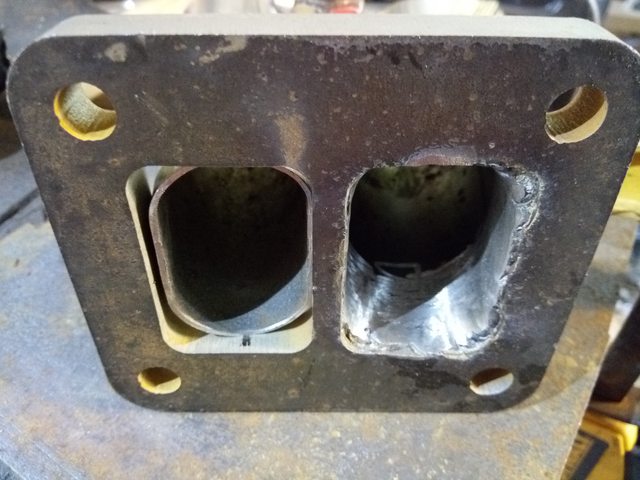
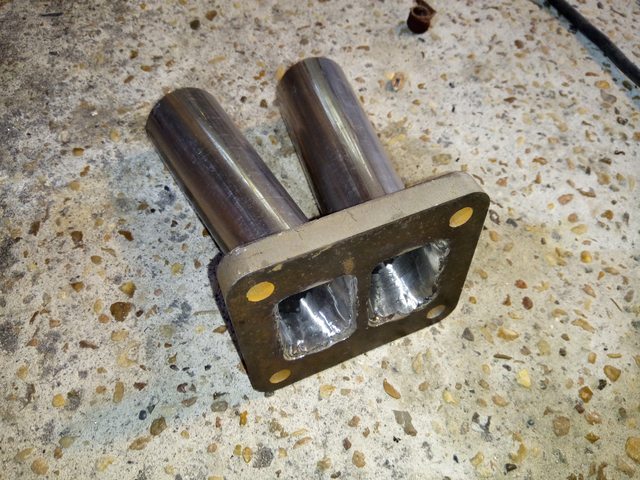
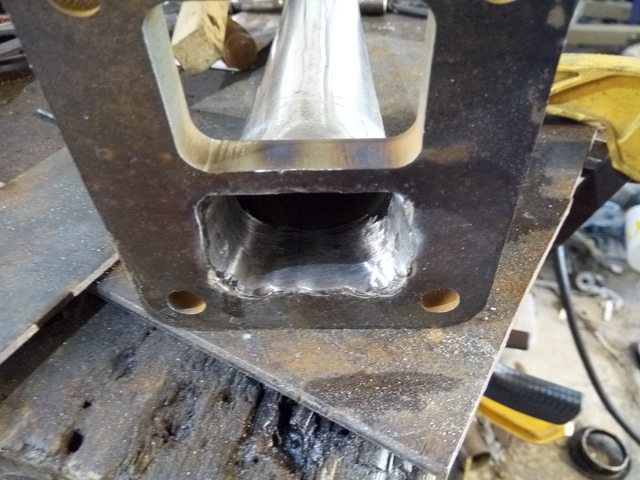
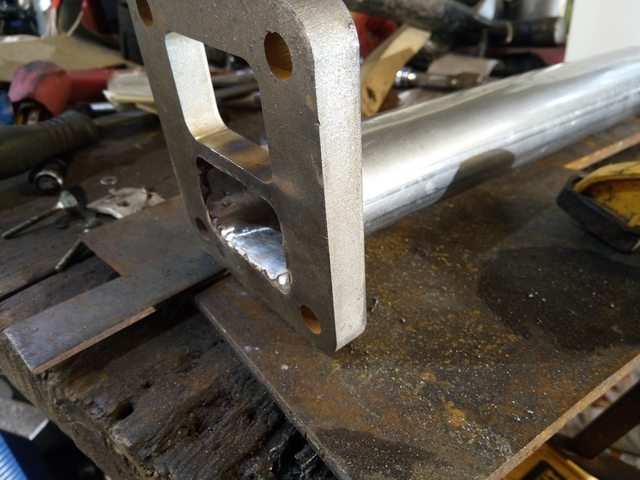
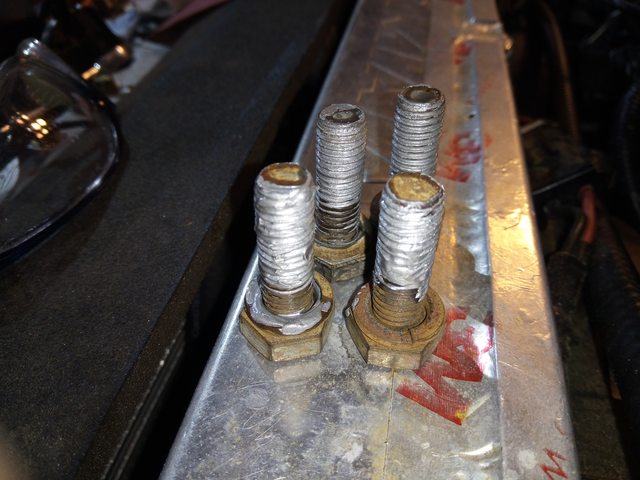
I stitch welded it for a few reasons. It can flex more without cracking a weld so it's stronger in that regard when flexed. Also lighter/easier to do.
 And it does keep warping down which is good, I got lucky and after welding it out, I reinstalled it and all the mounting holes still lined up, so it didn't warp much.

Reply
 1
1

1
09-29-2017, 09:47 AM
#1323
Senior Member
iTrader: (1)

Join Date: Dec 2010
Location: Farmington Hills, MI
Posts: 1,218
Total Cats: 175
Also, if a weld cracks, it'll crank all the way through the weld. You'll hopefully inspect it before full failure, and address the issue. If it's fully welded and a weld cracks, it'll be much more likely to propagate throughout the whole weld and fail the whole part.
Reply
0
0
09-29-2017, 10:34 PM
#1324
Elite Member
Thread Starter
iTrader: (16)
Join Date: Aug 2007
Location: Houston, TX
Posts: 9,296
Total Cats: 476
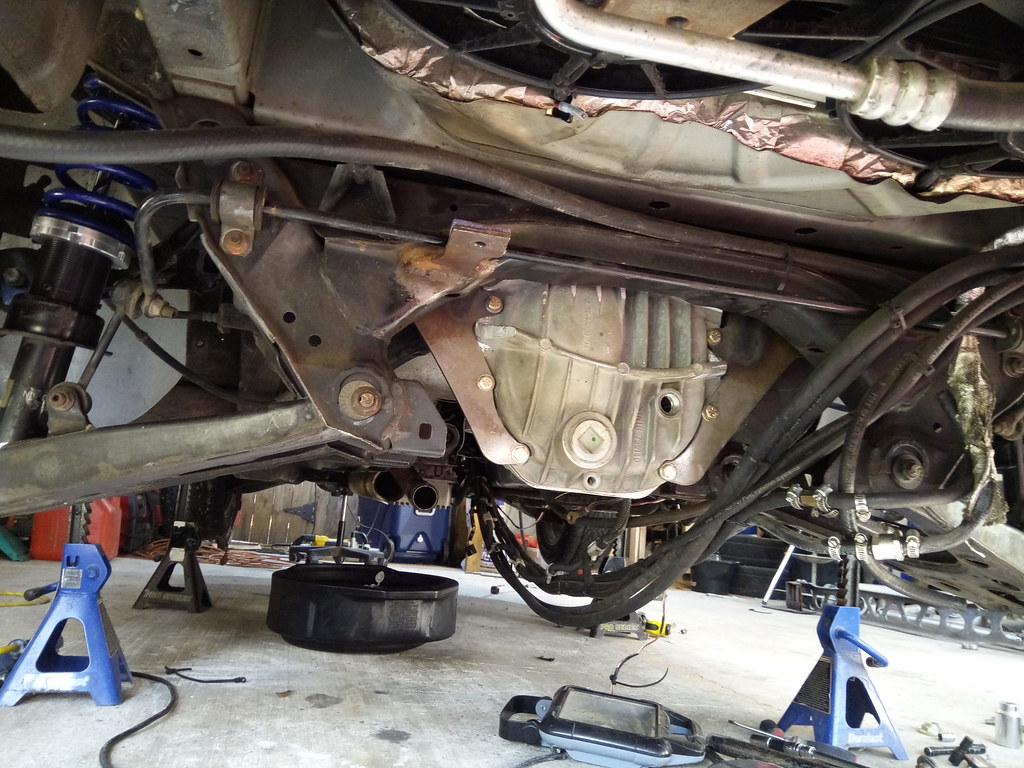
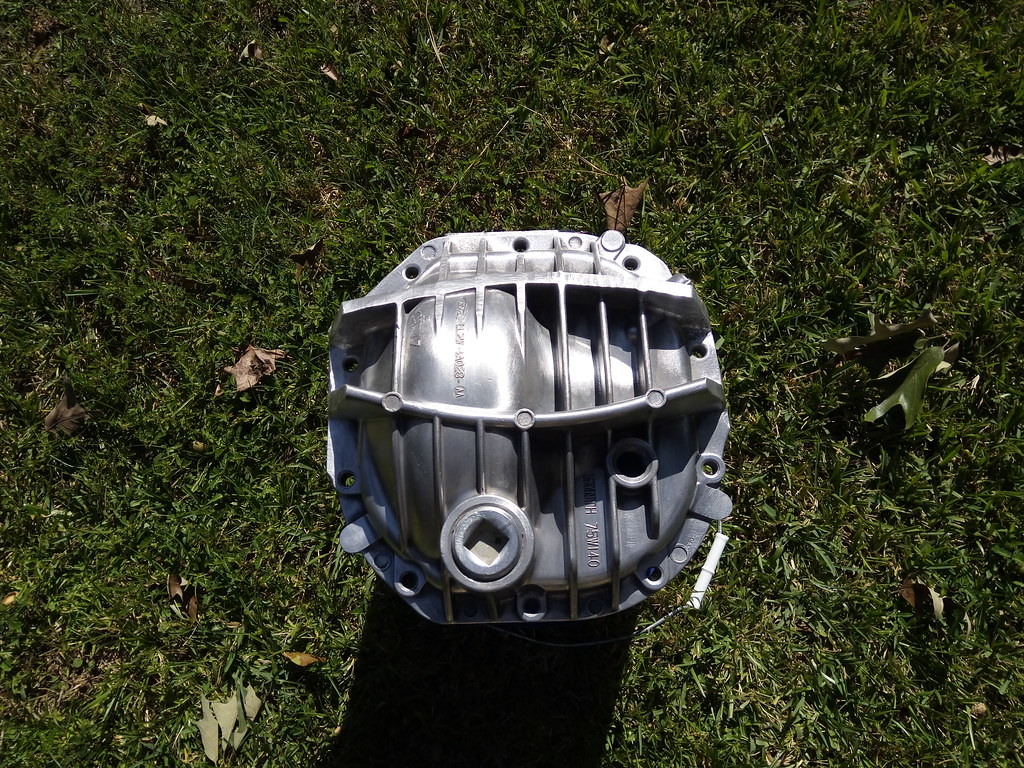
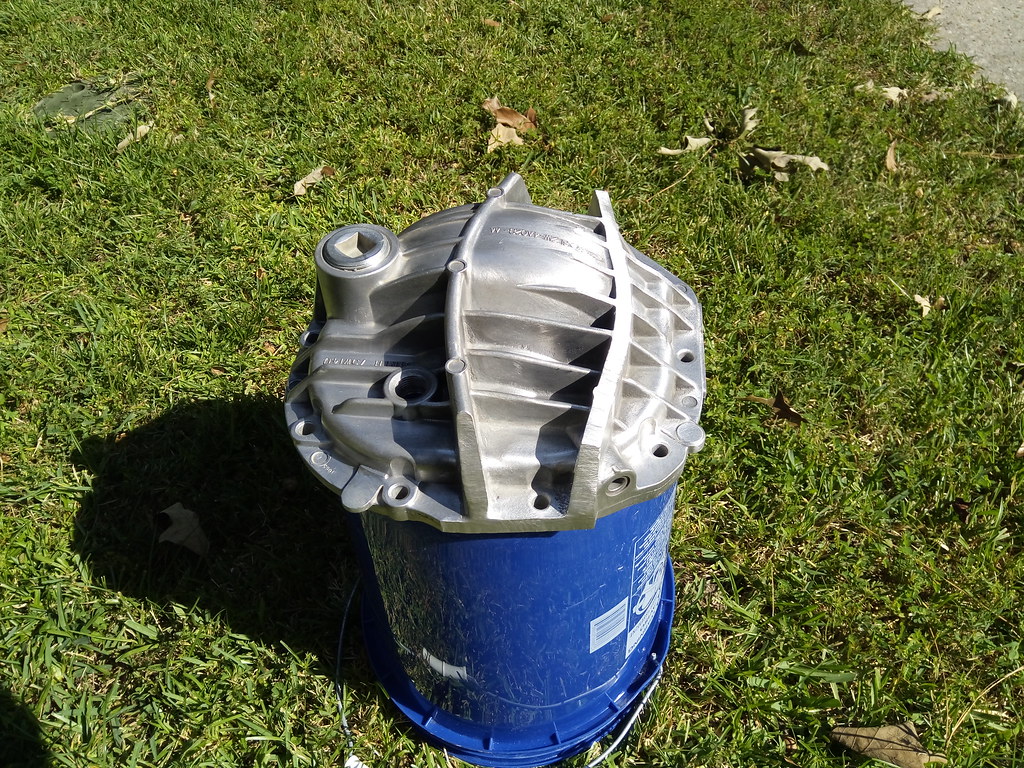
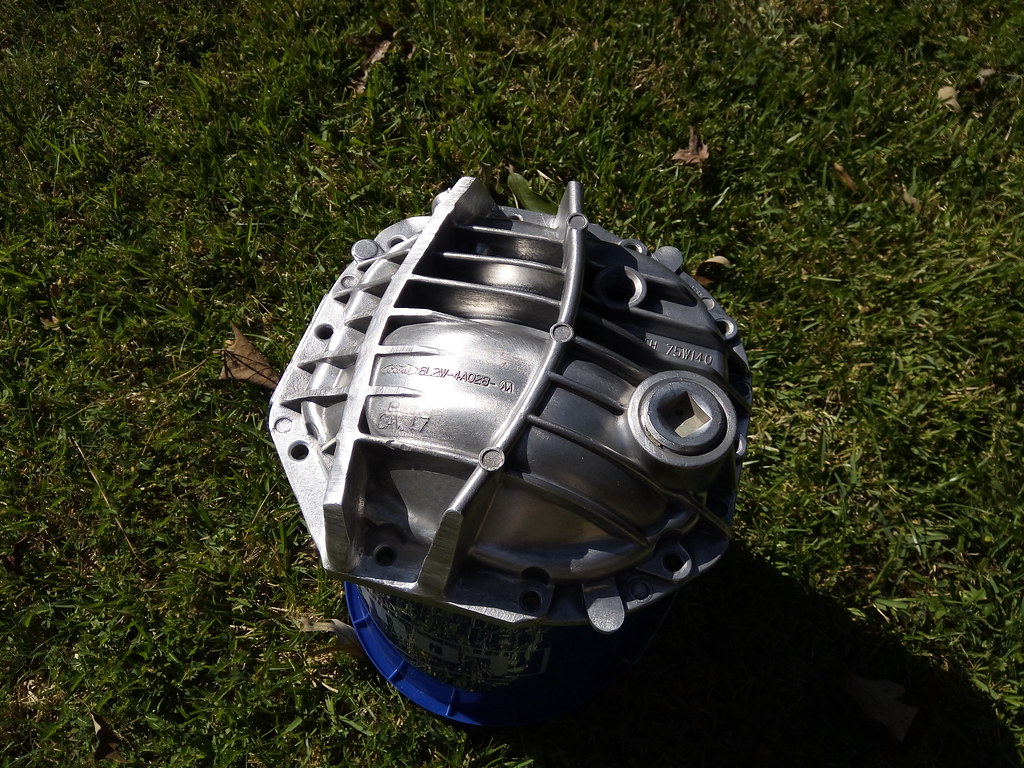
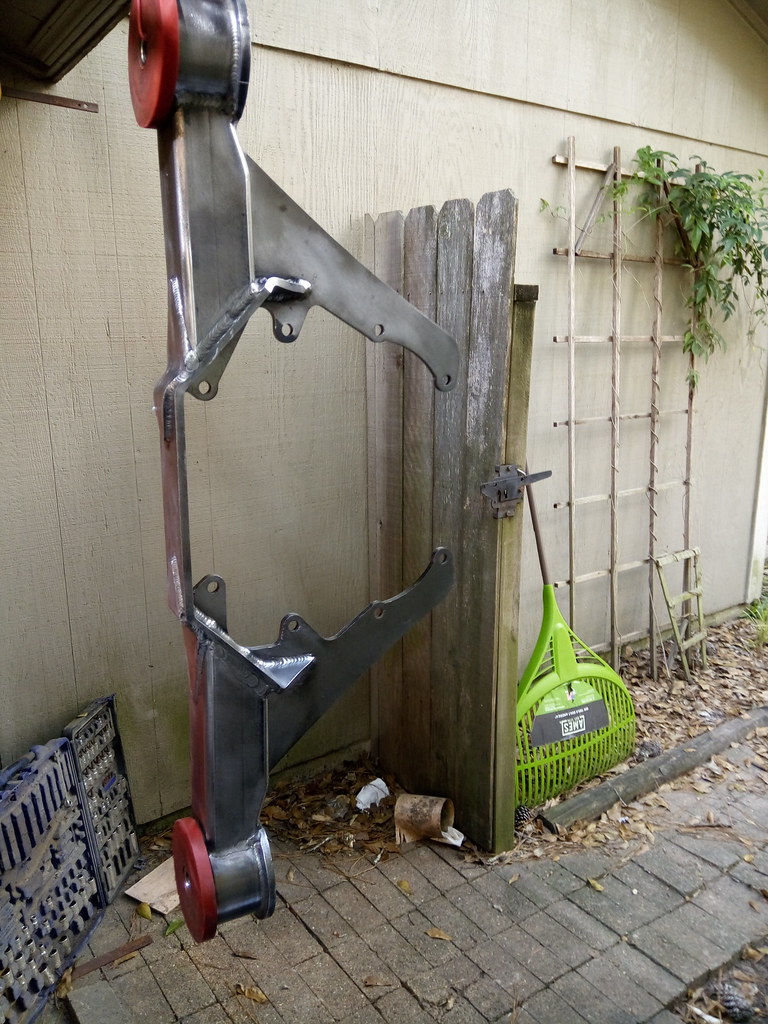
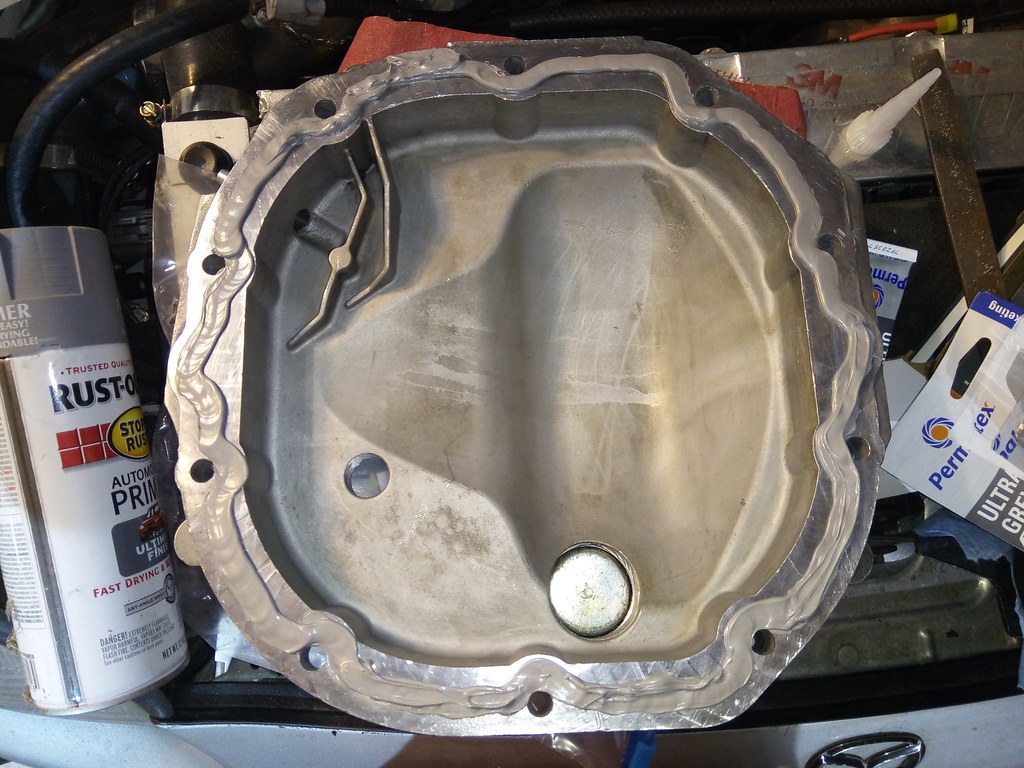
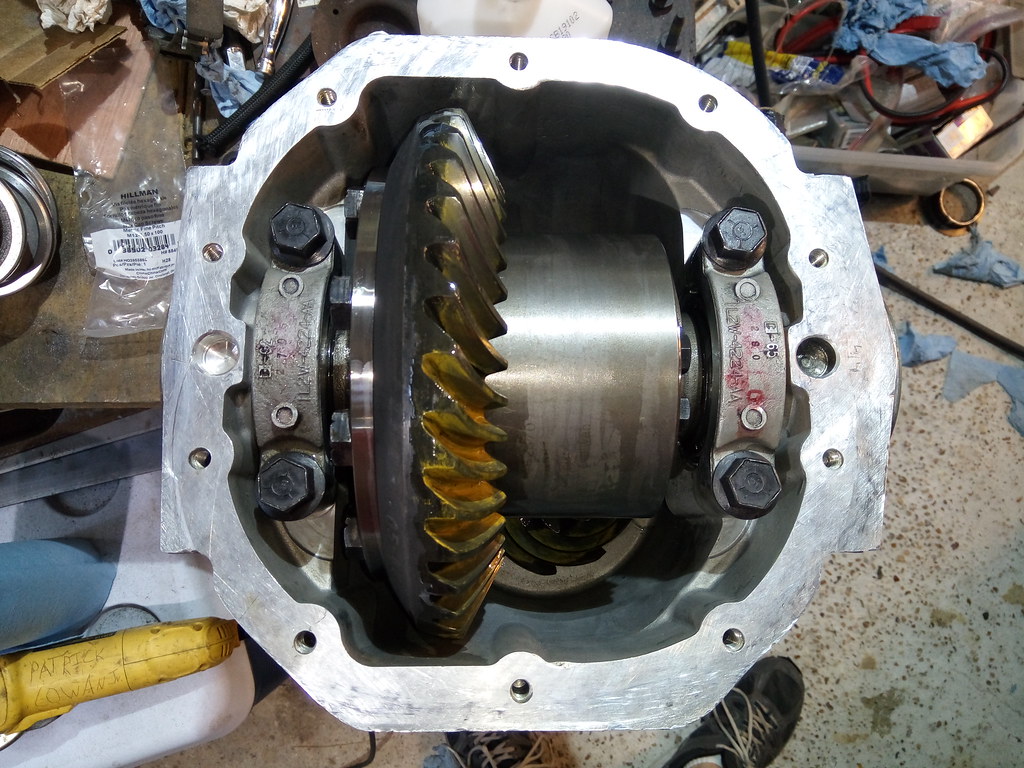
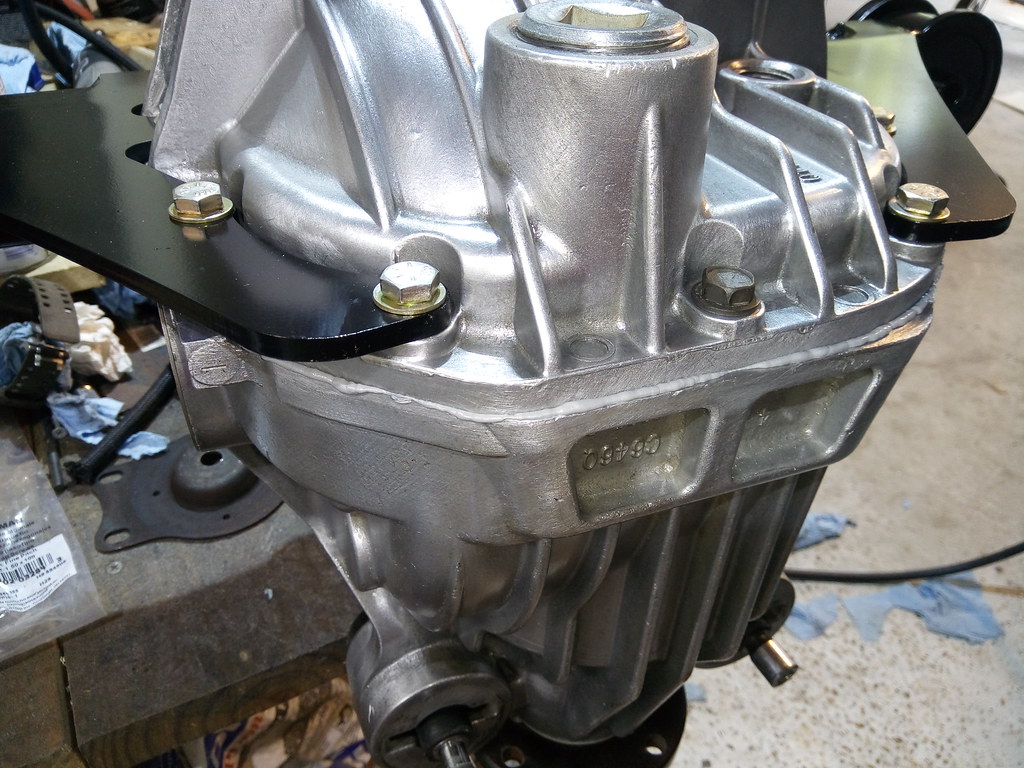
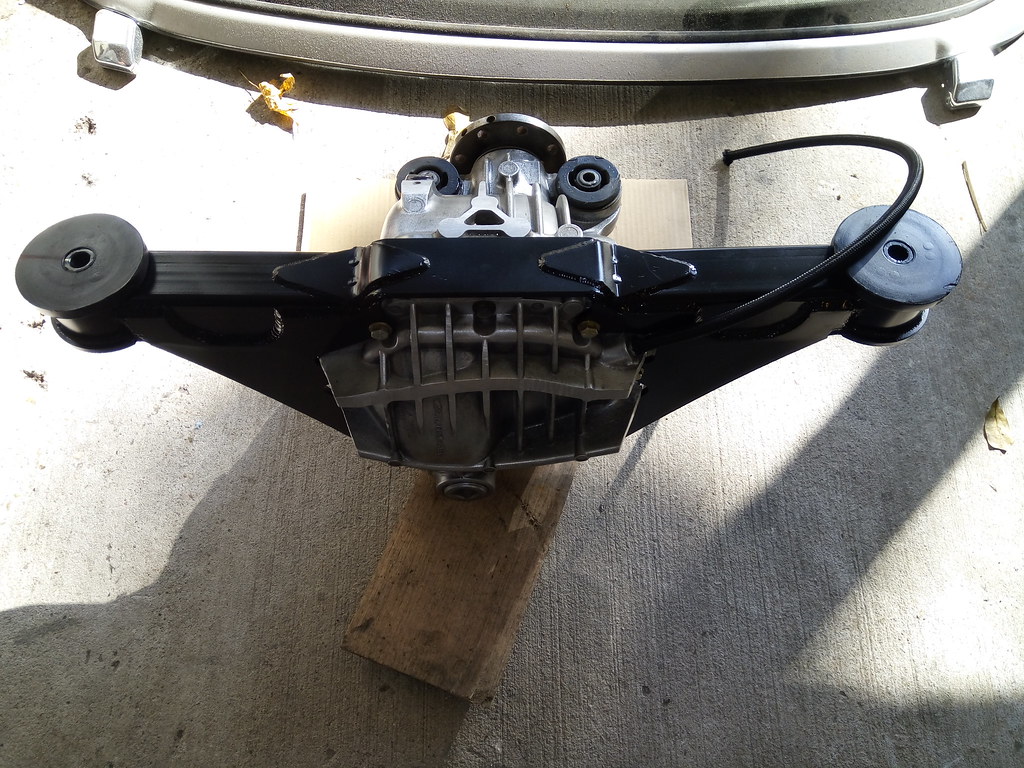
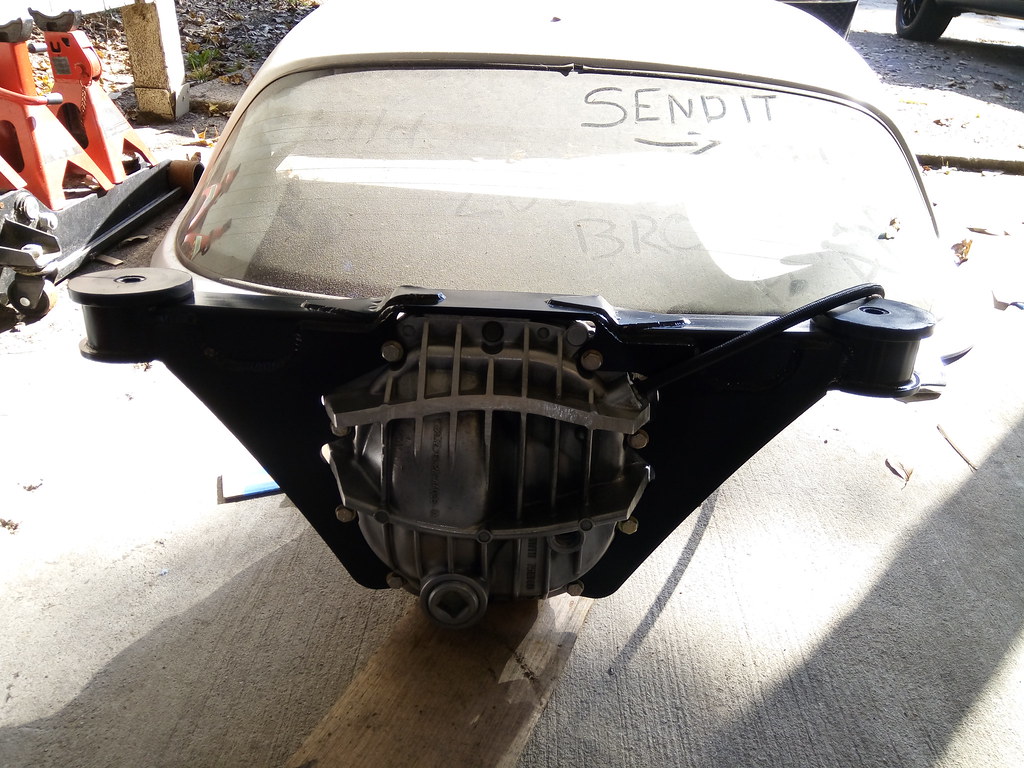
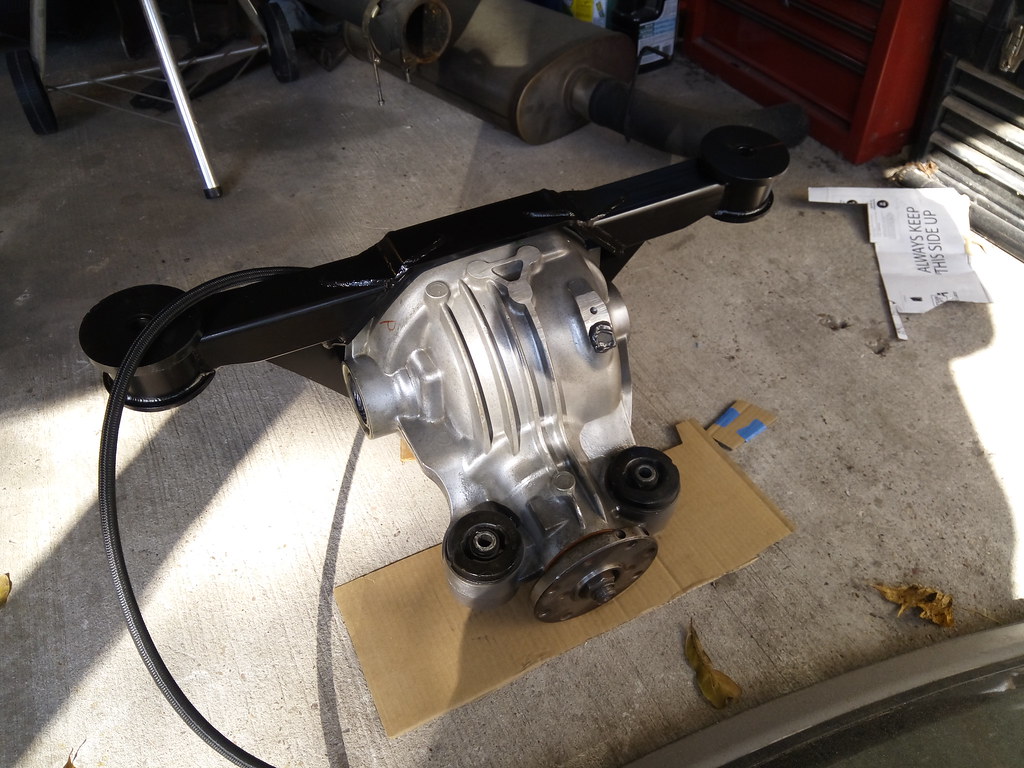
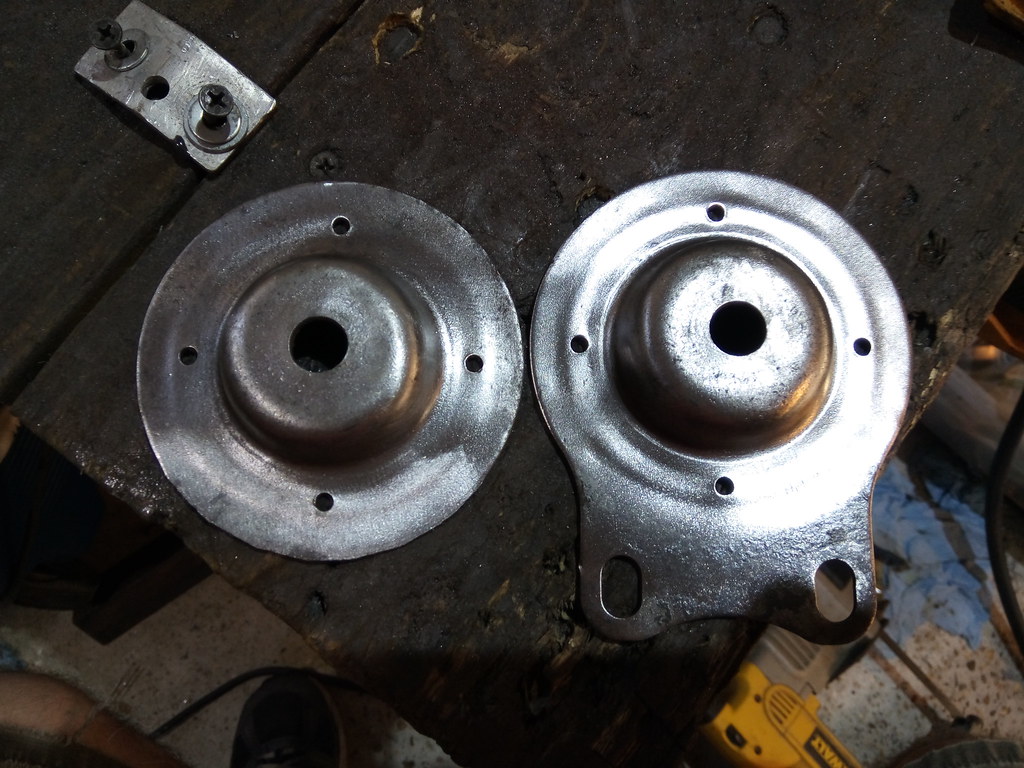
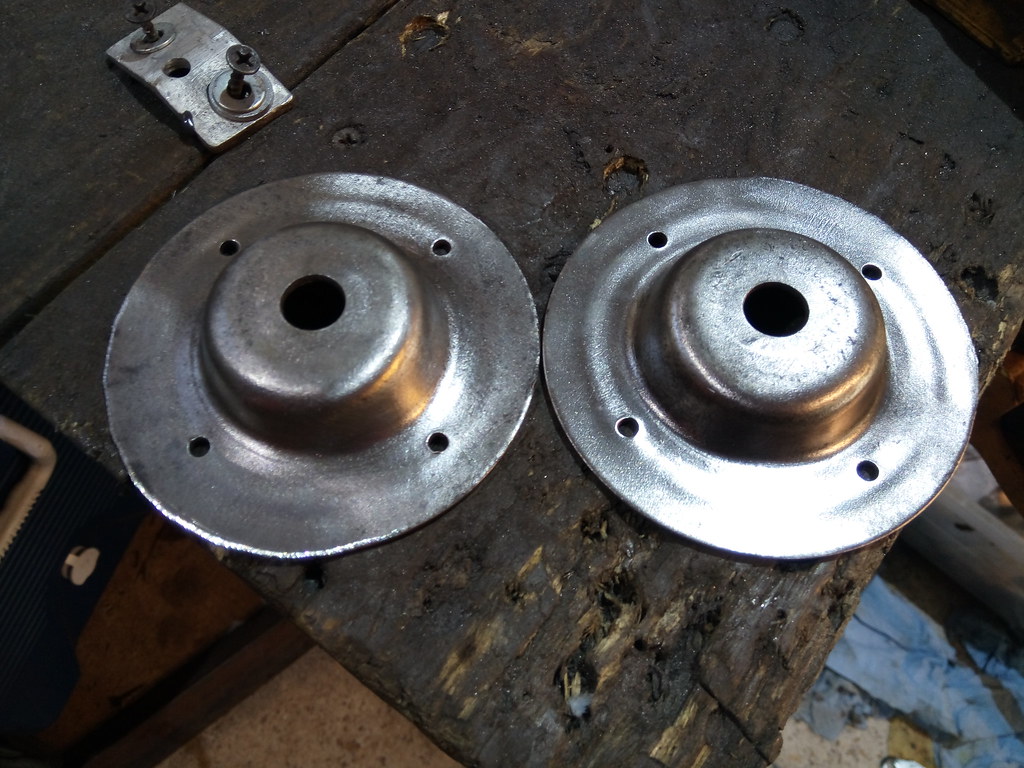
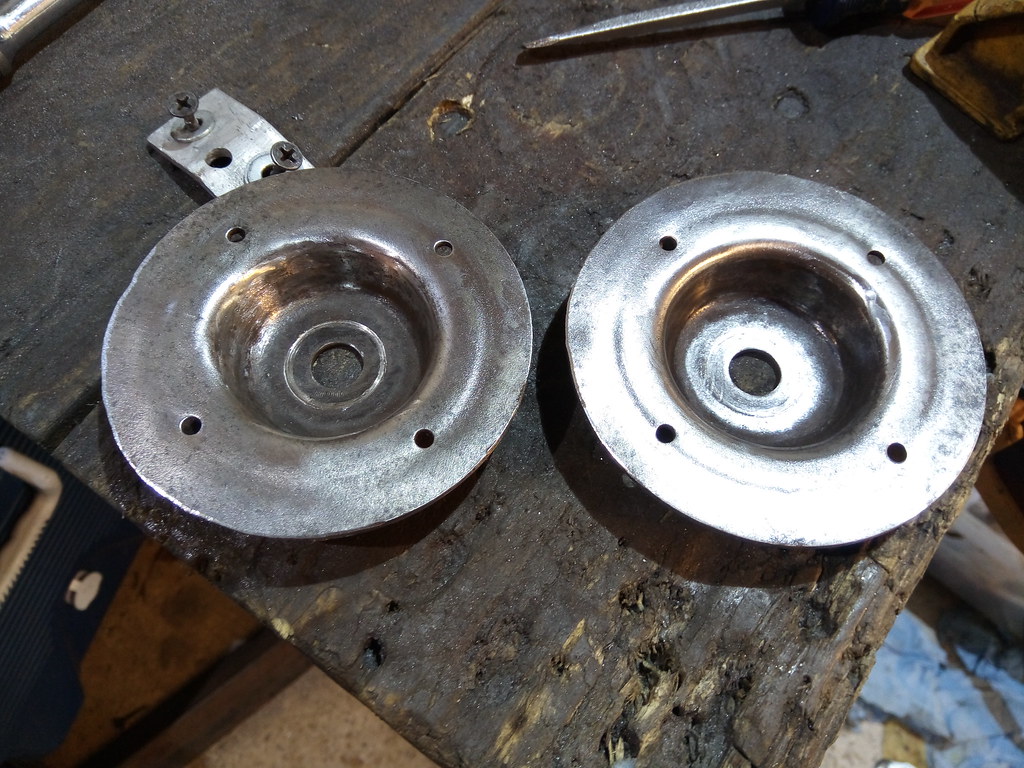
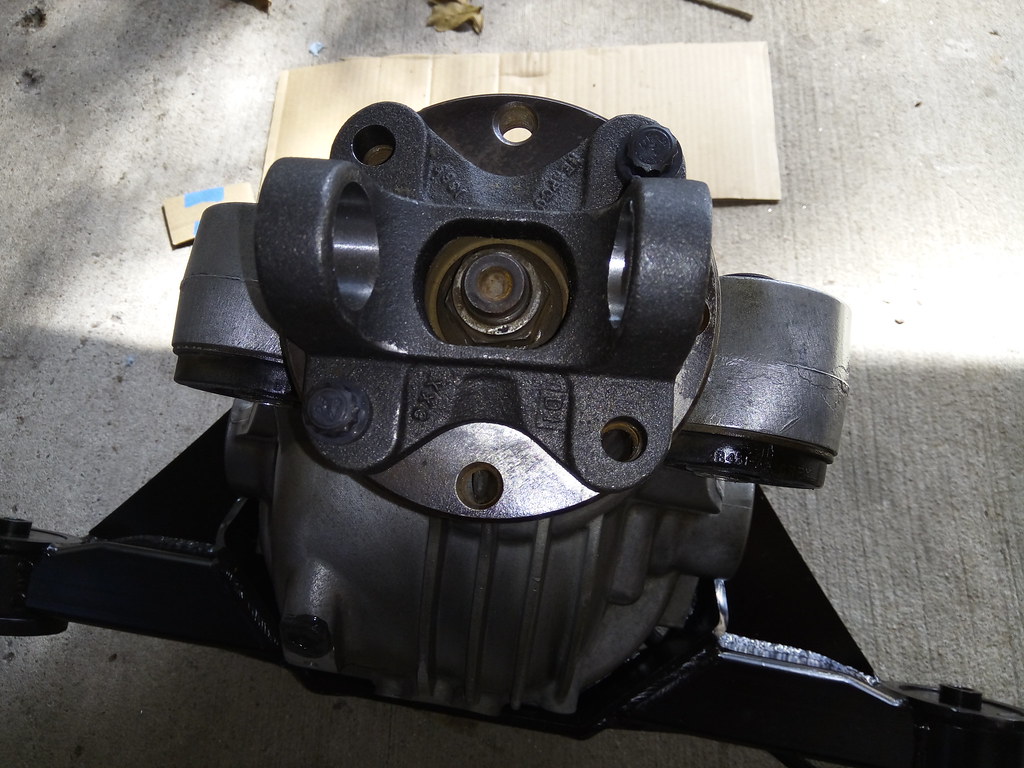
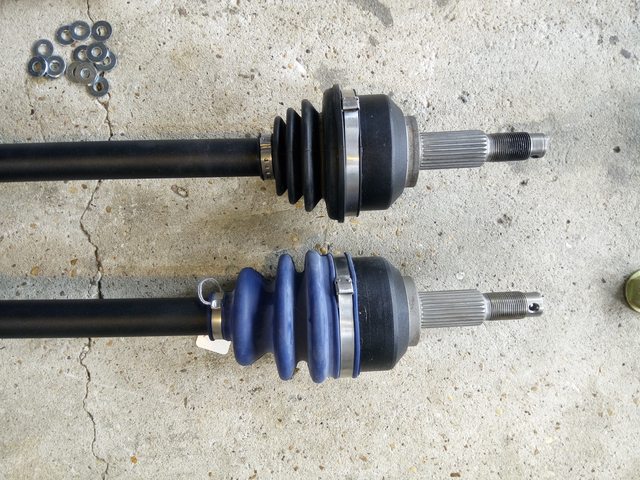
Slow progress better than no progress! Today I called and got some new shorter boots on the way from DSS to fix the ones on my axles. And then I cleaned and painted the diff, cover, and hanger. And that's it, sadly. Cleaning the diff took a few hours. I ended up clear coating it even though I was planning to paint it and the hanger all black. So now it's clear coated aluminum diff, and black hanger. I'll assemble them tomorrow once the paint has dried. I think it's gonna look awesome assembled, so I'll post some pics of that once it's built and in the car!
Pics of what I did today
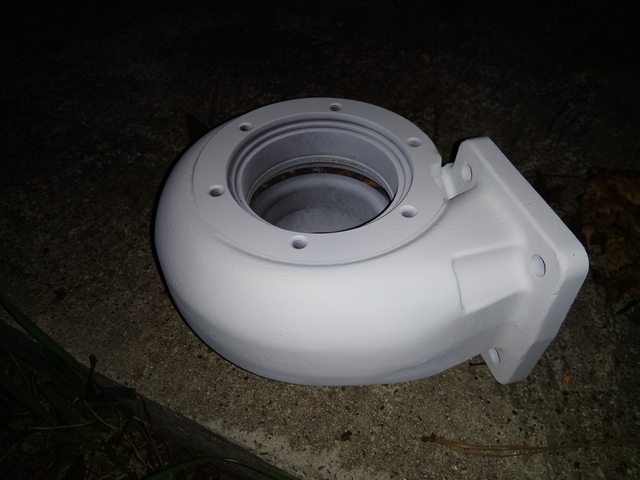
First, a reminder of what this diff and hanger PREVIOUSLY looked like.
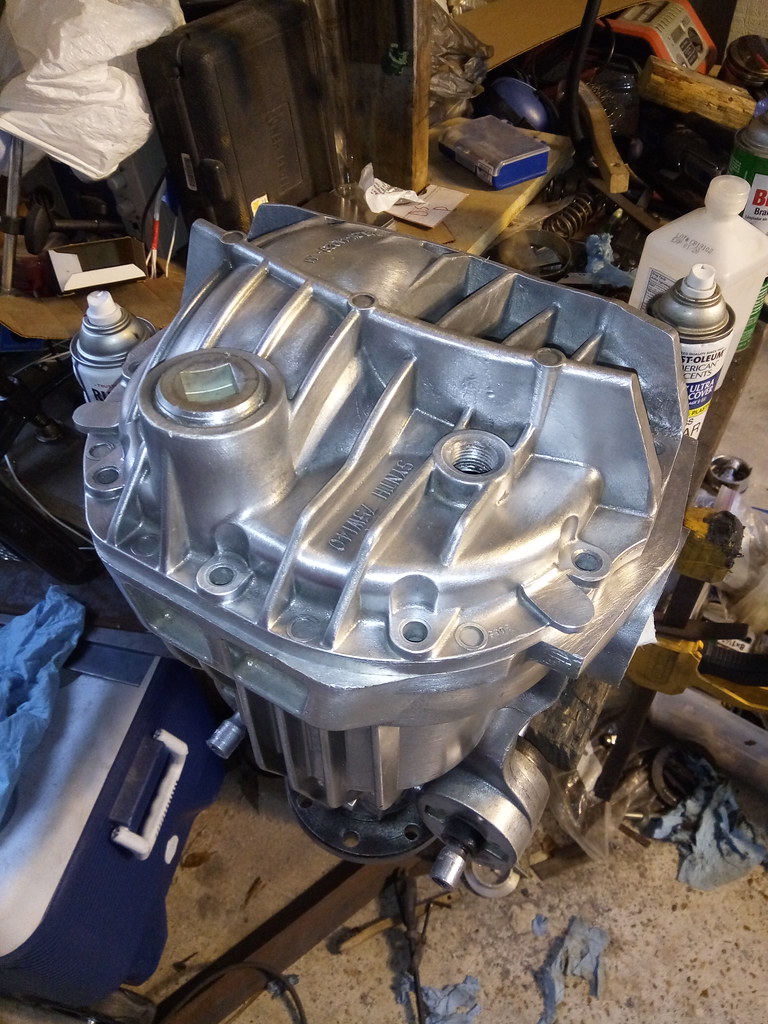
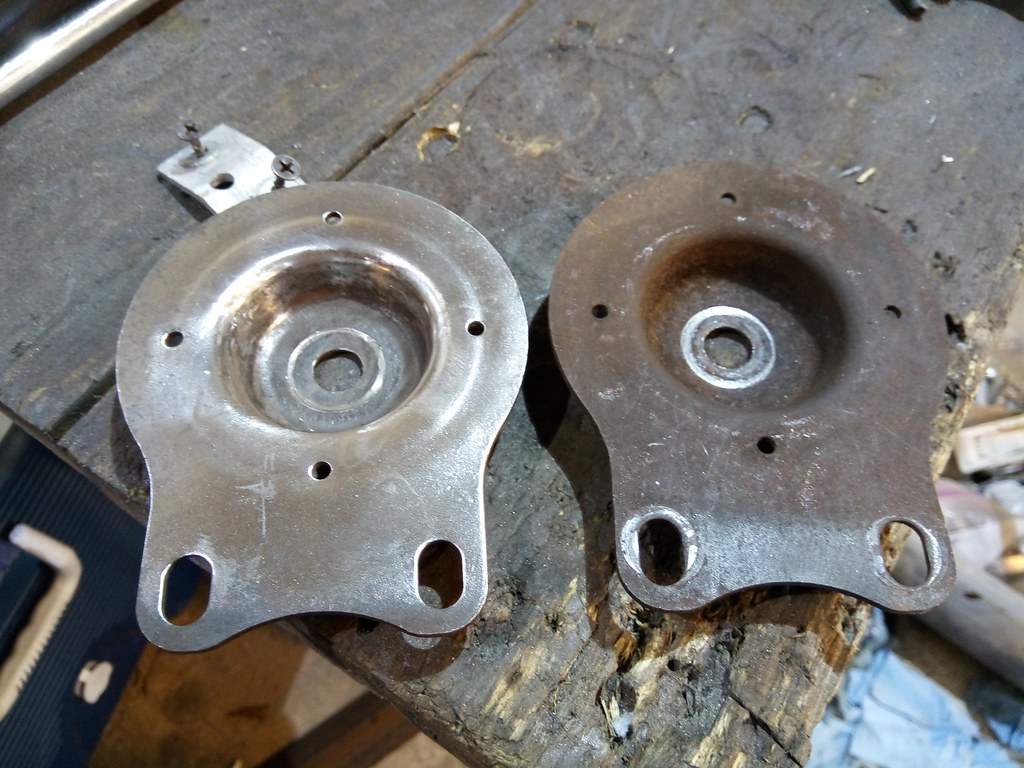
Cleaned
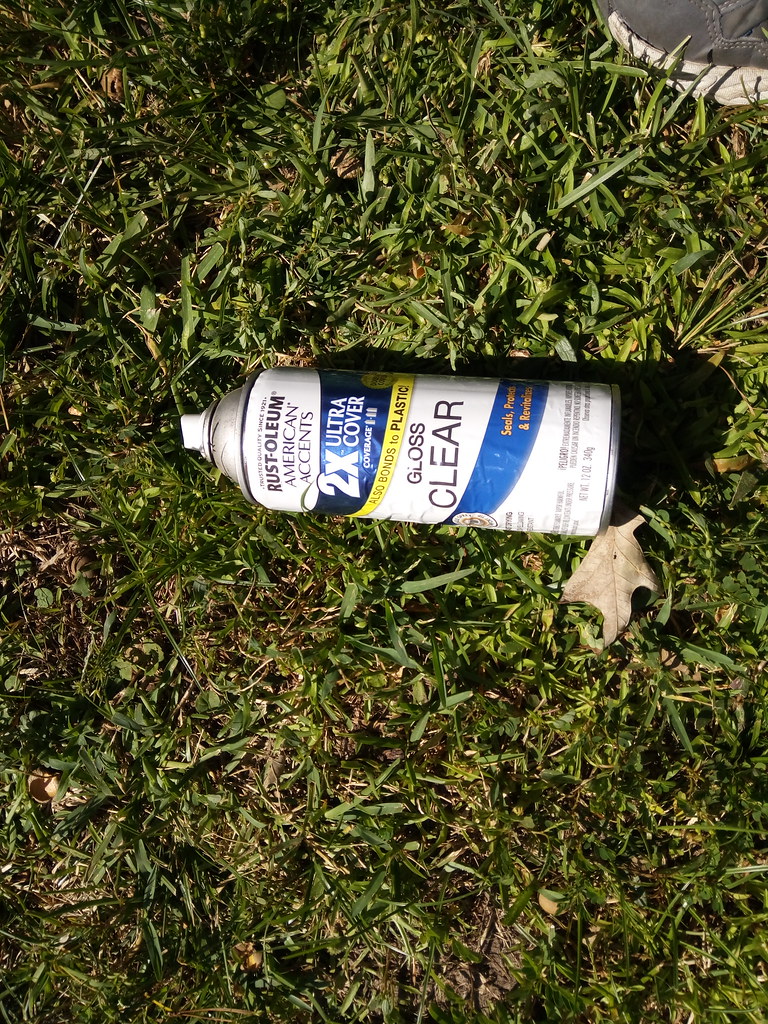
Clearcoat I had laying around
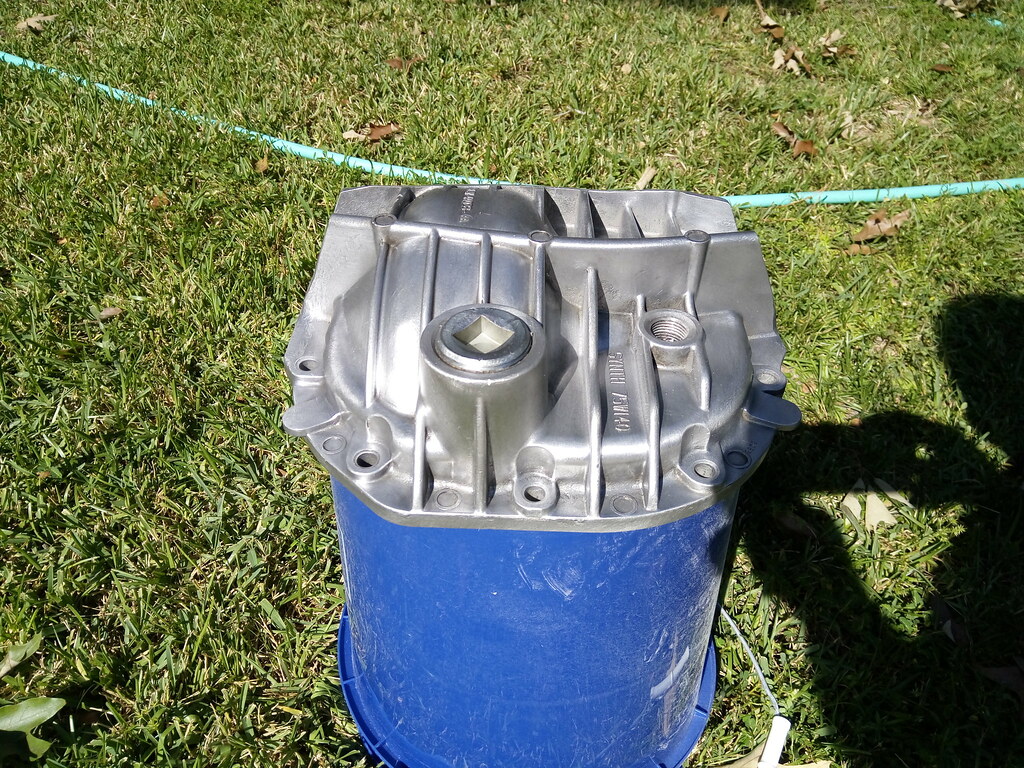
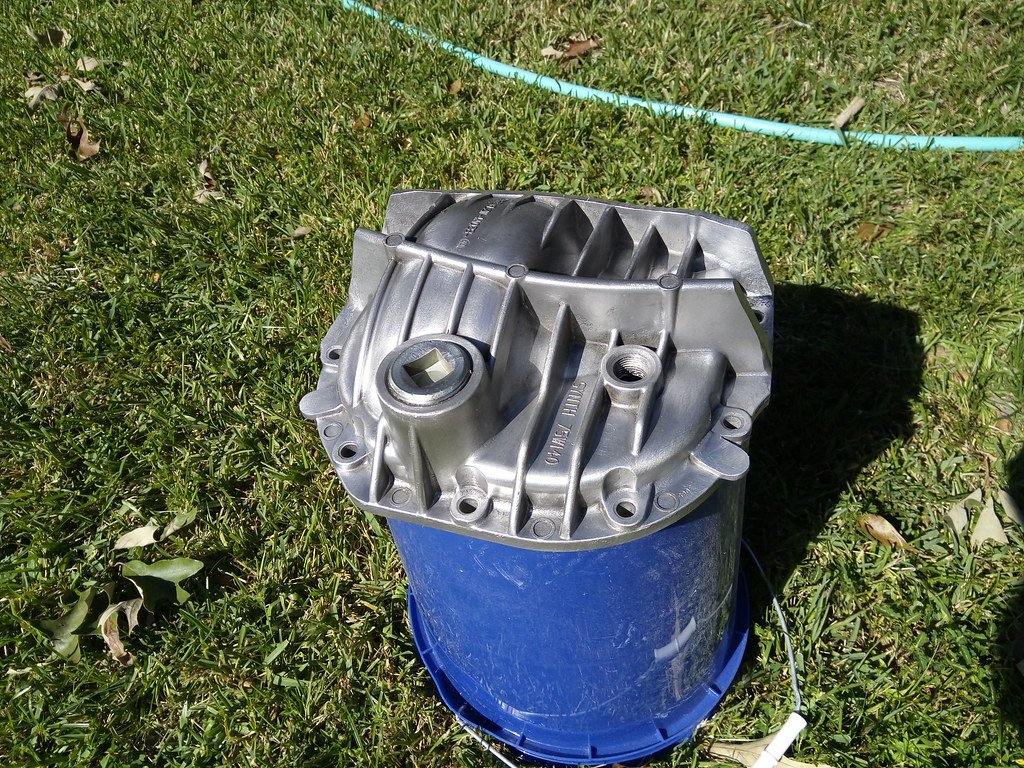
With clear coat applied!
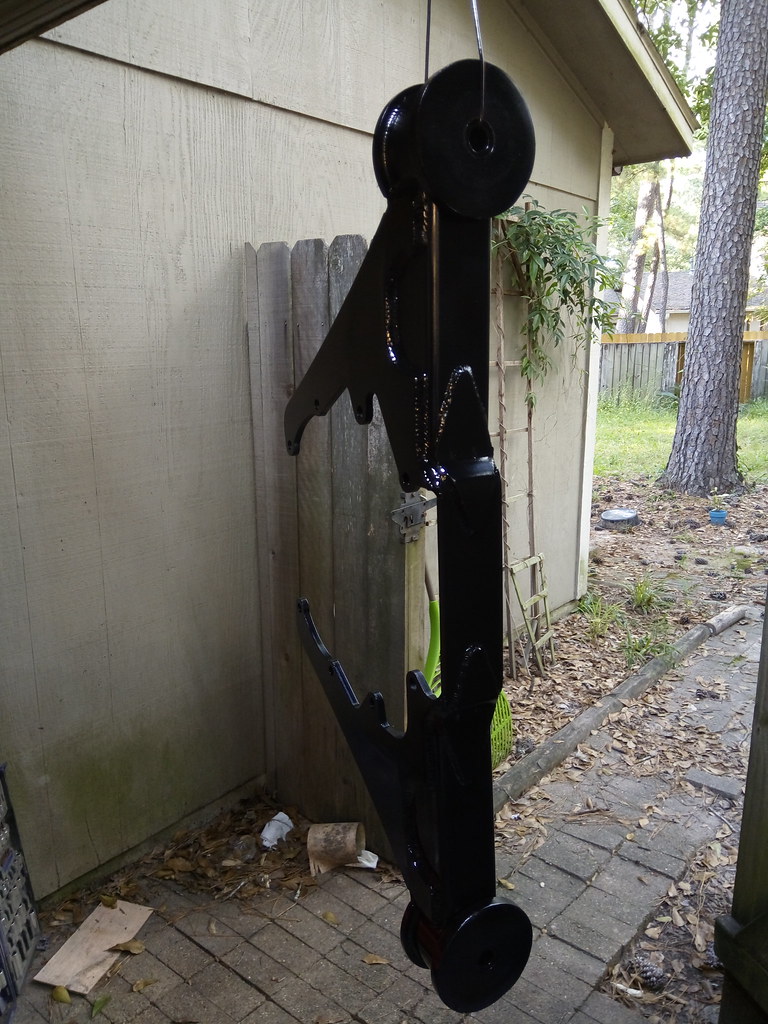
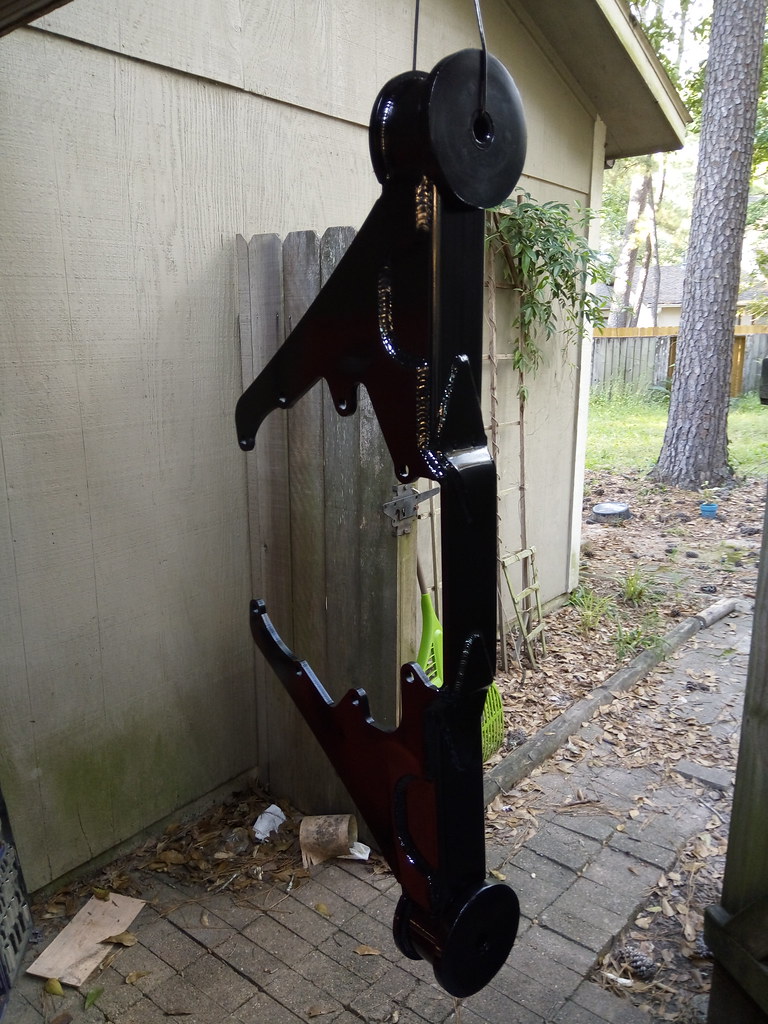
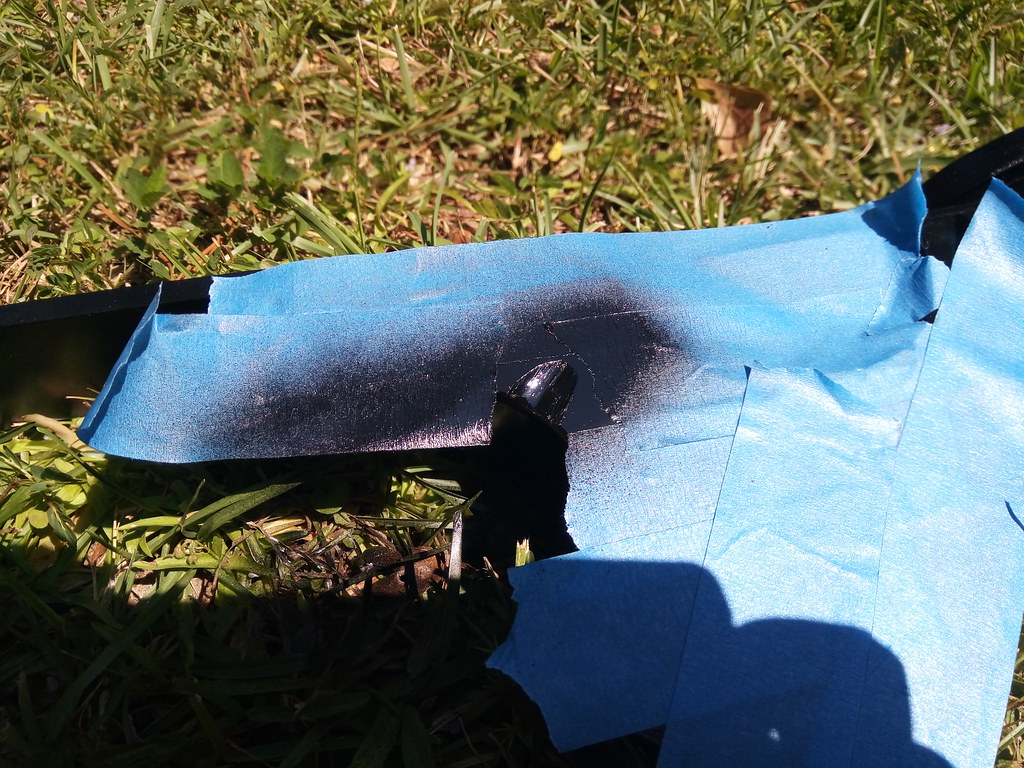
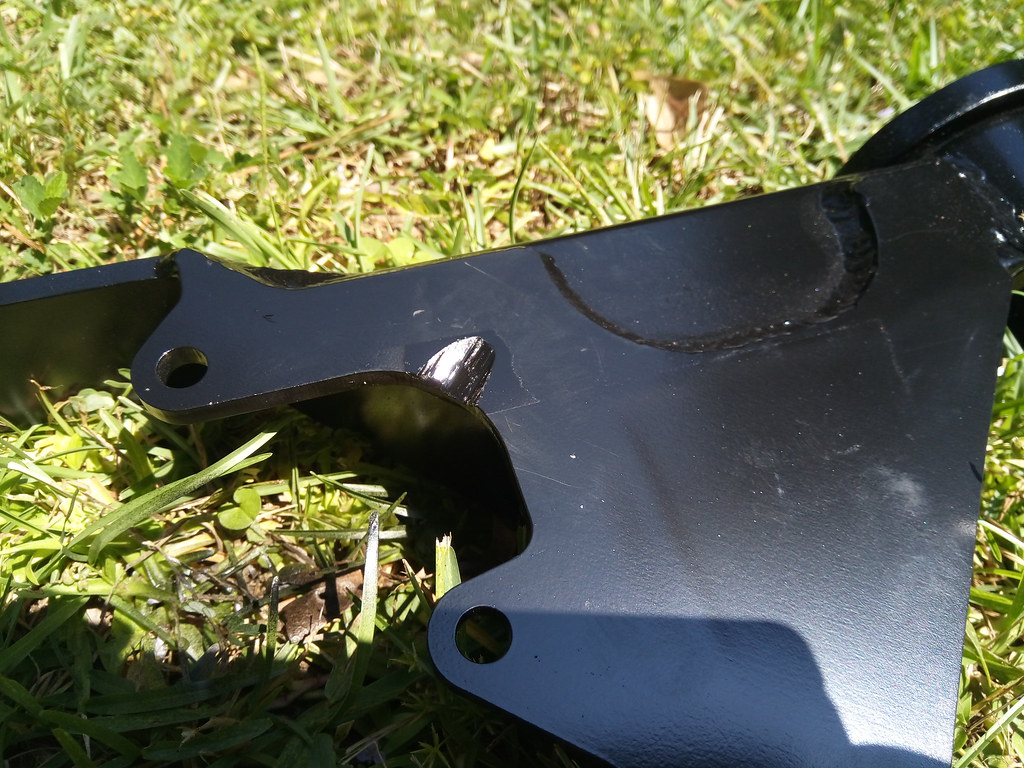
Cleaned the hanger
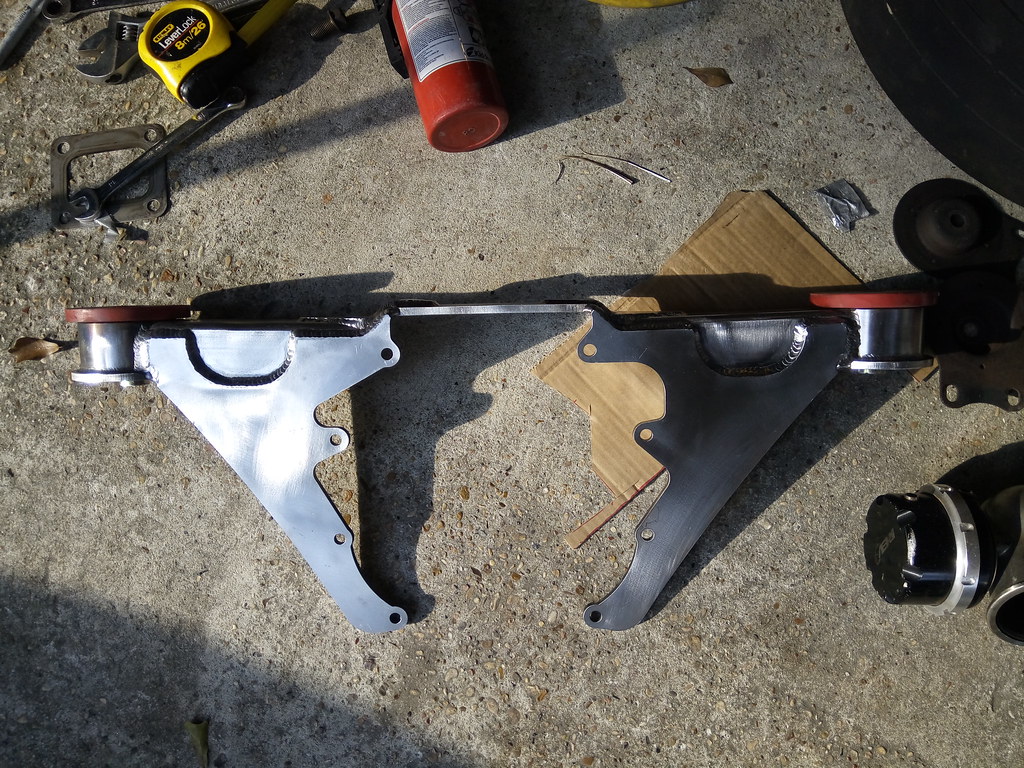
Painted black!
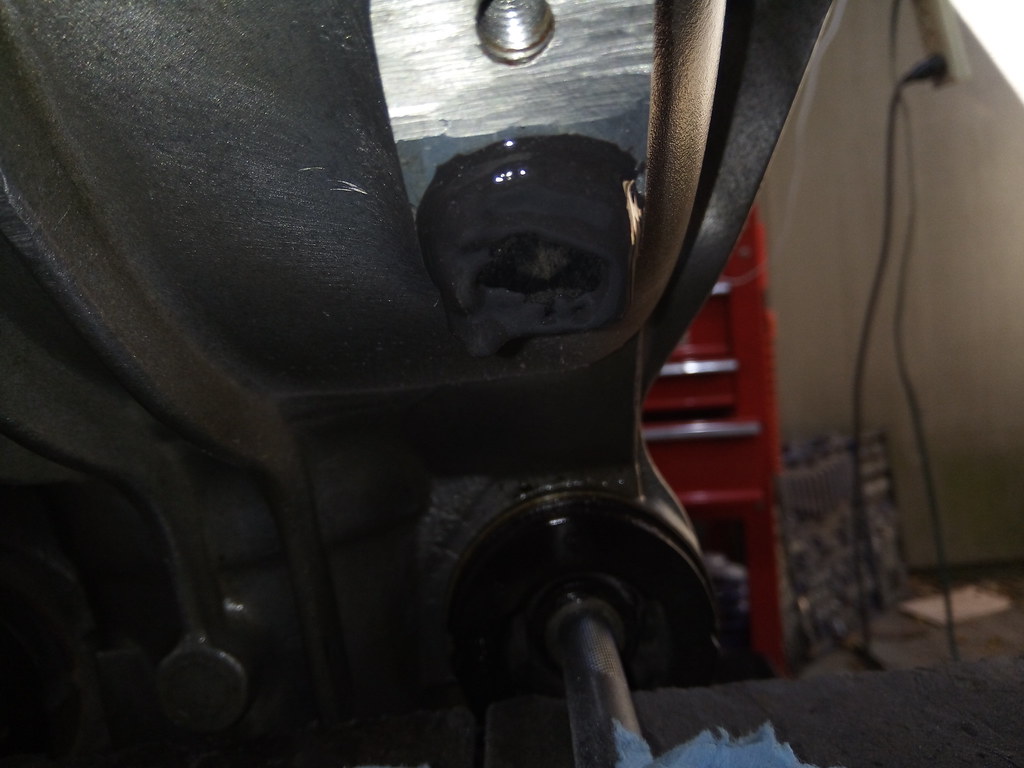
Cover and diff together. Not bolted together yet.

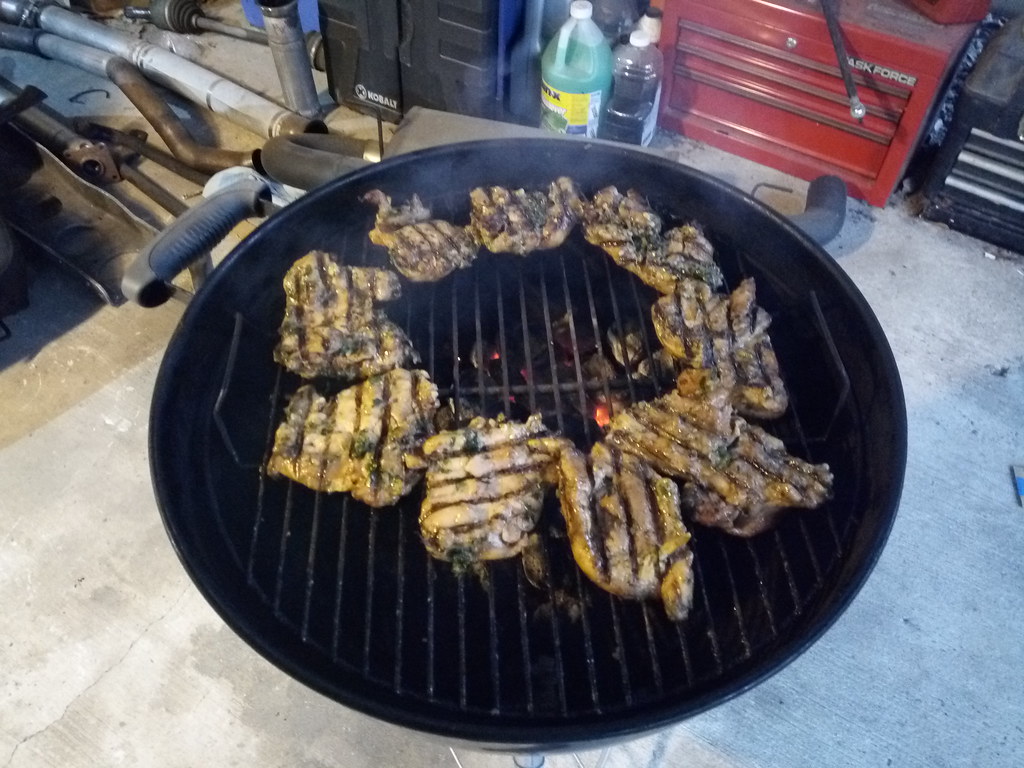
And finally, dinner. This was awesome. Marinated some chicken thighs 3 days with a homemade marinade I made up from google searching. It was the bomb, will do again.
Plan tomorrow is to final clean the diff and housing, RTV, and bolt it all together, install vent into diff cover, JB weld the ABS block off thingy, install fill plug into diff cover, and then final install this assembly into the car. Then swap the front turbo to the 0.63 A/R, actually might do that tonight...
Pics of what I did today
First, a reminder of what this diff and hanger PREVIOUSLY looked like.
Cleaned
Clearcoat I had laying around
With clear coat applied!
Cleaned the hanger
Painted black!
Cover and diff together. Not bolted together yet.
And finally, dinner. This was awesome. Marinated some chicken thighs 3 days with a homemade marinade I made up from google searching. It was the bomb, will do again.
Plan tomorrow is to final clean the diff and housing, RTV, and bolt it all together, install vent into diff cover, JB weld the ABS block off thingy, install fill plug into diff cover, and then final install this assembly into the car. Then swap the front turbo to the 0.63 A/R, actually might do that tonight...
Reply
0
0
10-02-2017, 12:53 AM
#1325
Elite Member
Thread Starter
iTrader: (16)
Join Date: Aug 2007
Location: Houston, TX
Posts: 9,296
Total Cats: 476
Update! Made a bit of progress, and had a small setback too.
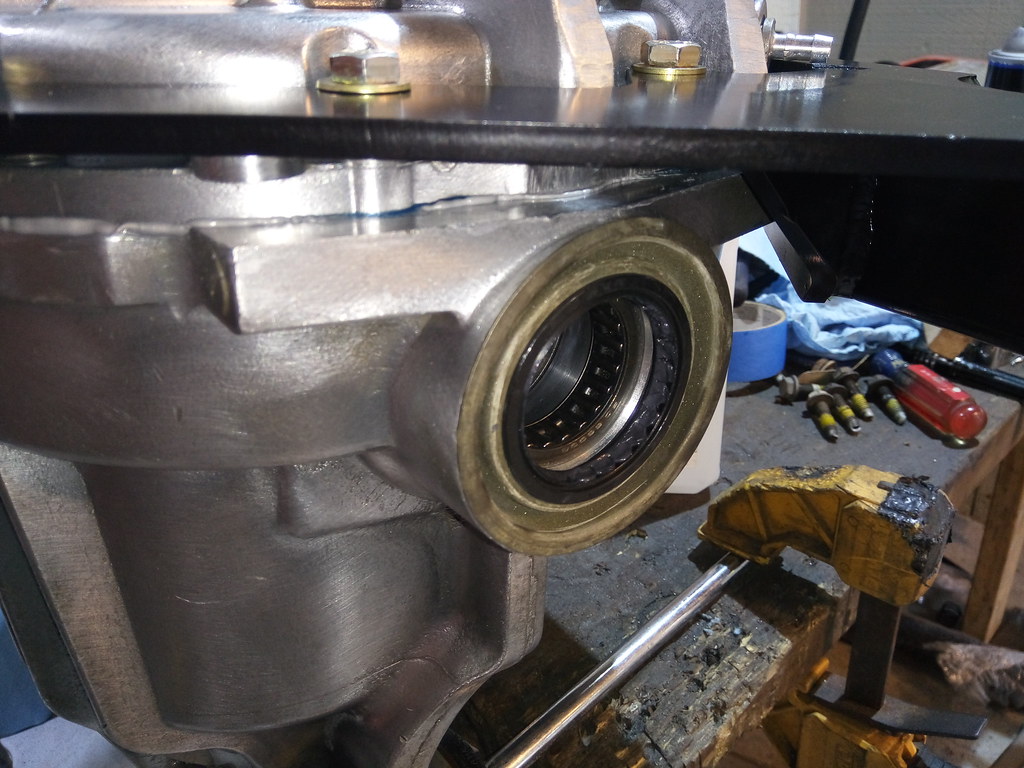
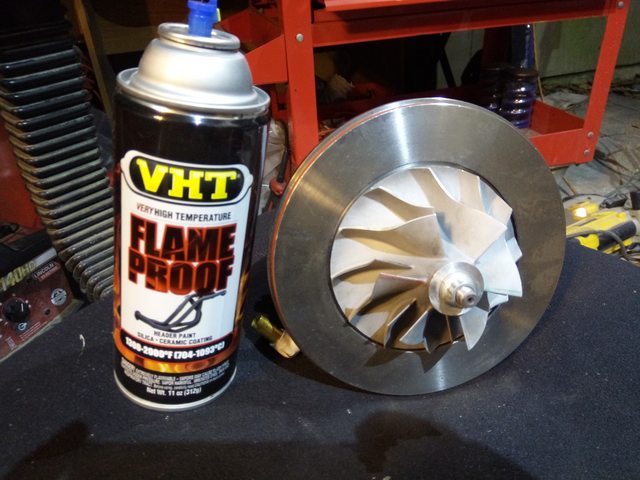
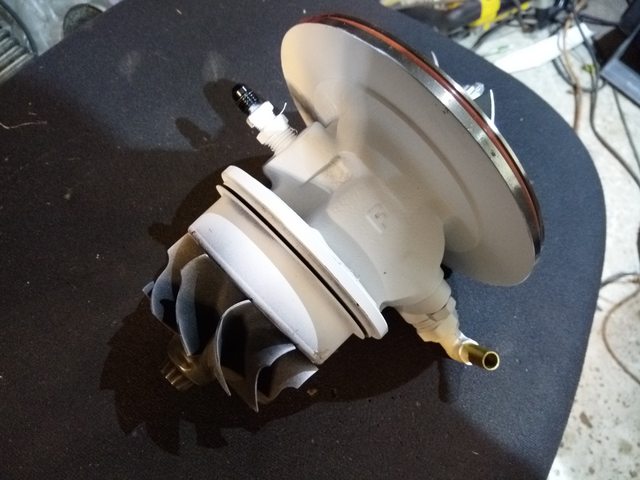
Finished up the diff. I thought the diff hanger would clear the diff vent, but nope. They notched the diff hanger for the vent, just not enough! Uh. So had to grind on the freshly painted diff hanger to fix that issue, and hooked up a hose to it. Lightly oiled the gears and bearings before final assembly so they aren't dry or trying to rust from the cleaning. JB welded the abs block off piece into the diff. I final cleaned the diff and cover, and bolts, and then assembled everything and torqued the cover bolts to spec. I pressed in new axle seals. The little metal thingies that hold the diff bushings in, they were rusty as hell on my car, and also the two spots that normally bolt to the subframe, that doesn't work on this diff so I cut those parts off to save weight. And then I decided to pull the front turbo and swap the 0.86 housing to a 0.63. Got it apart, and.... foreign object damage to front turbo compressor. LOL, ran 6's in the 1/8th with a hurt turbo! It's not that bad, but a simple housing change has now become a swap-in-my-spare scenario. Nice having cheap turbos and having a spare on hand! I'll order a new one to have another spare soon, I'll see if I can get a even smaller A/R just to test it and see how it does. Studying the geometry of the .86 and .63, I think even a smaller one could have some benefits, perhaps.
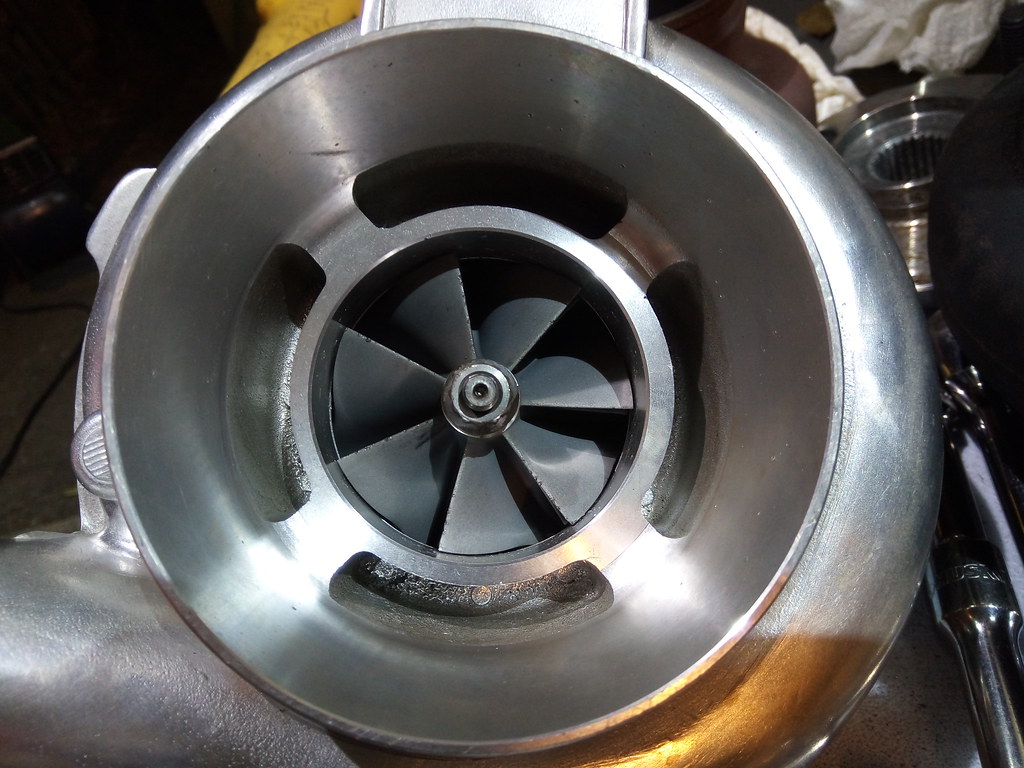
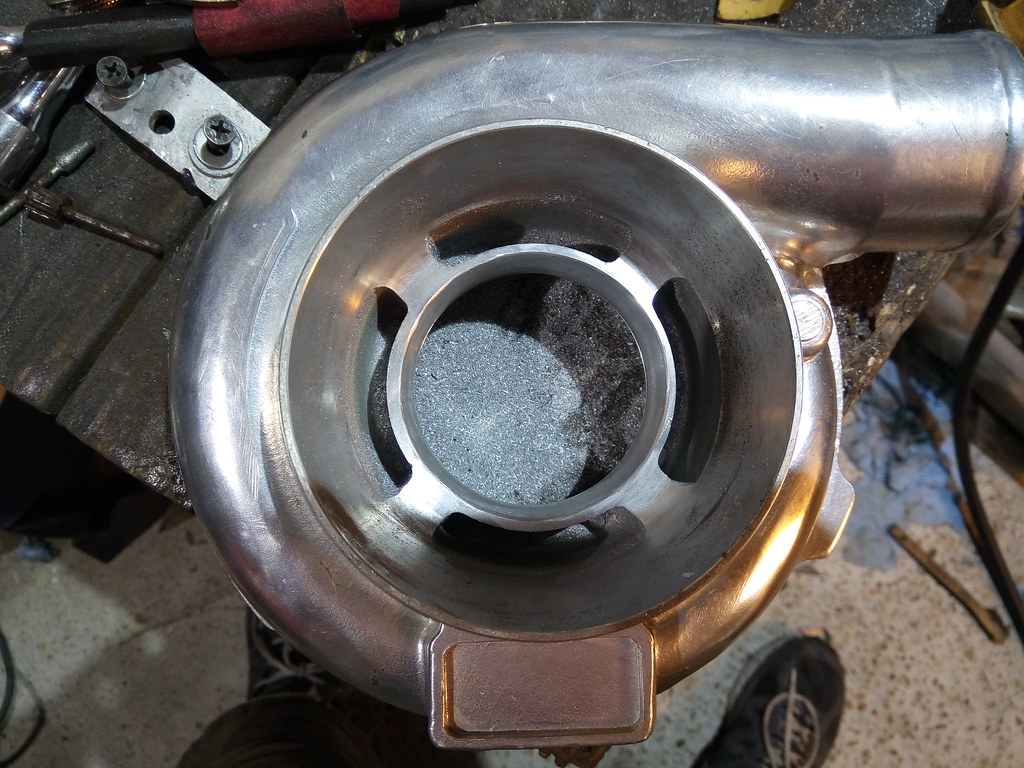
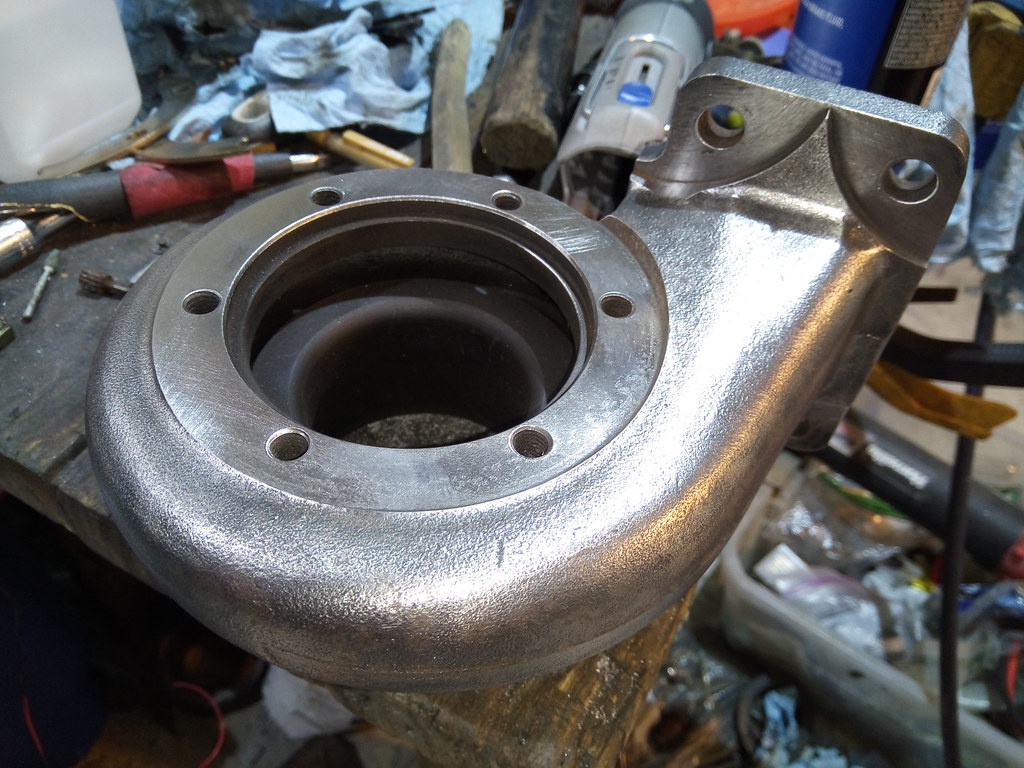
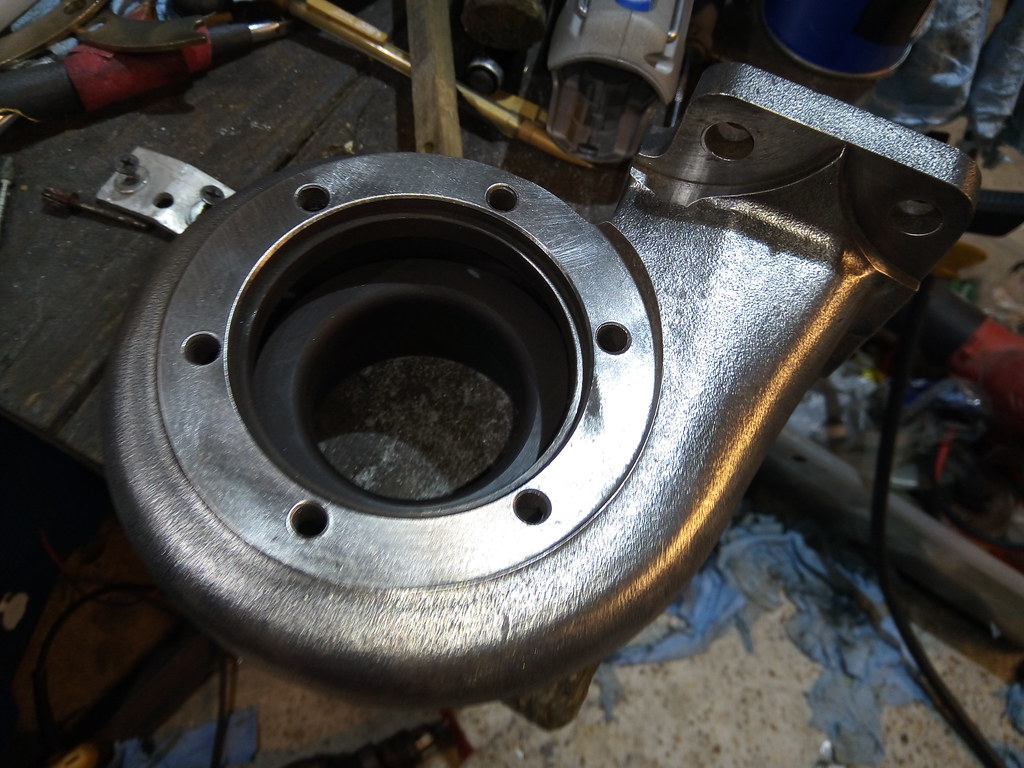
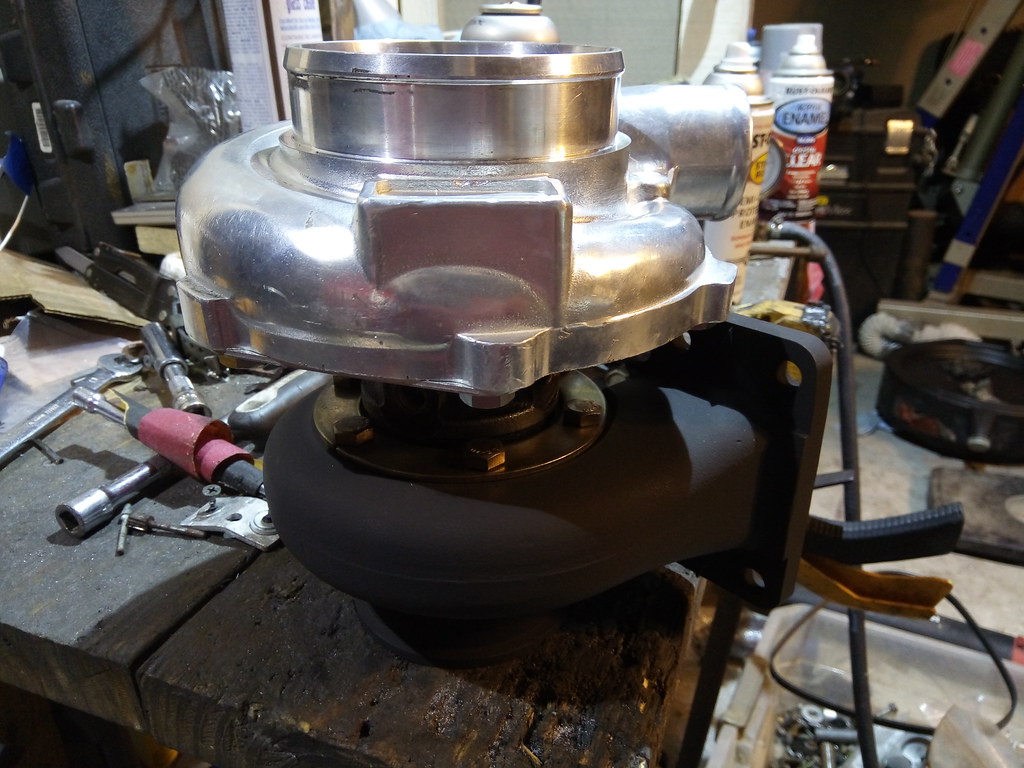
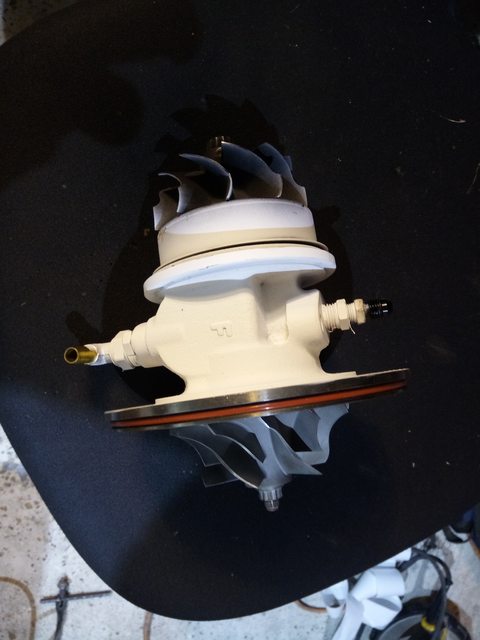
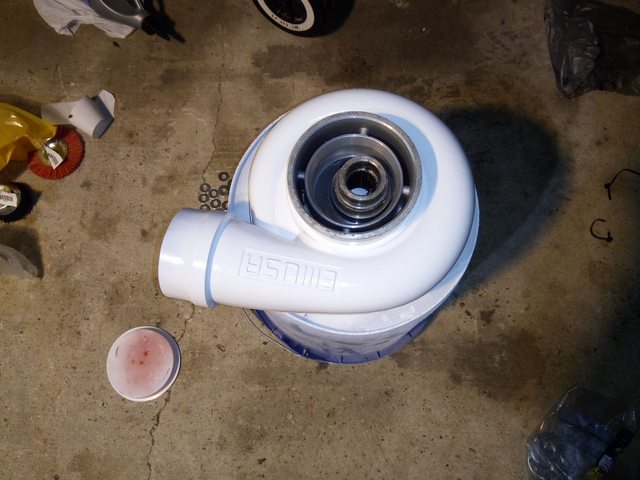
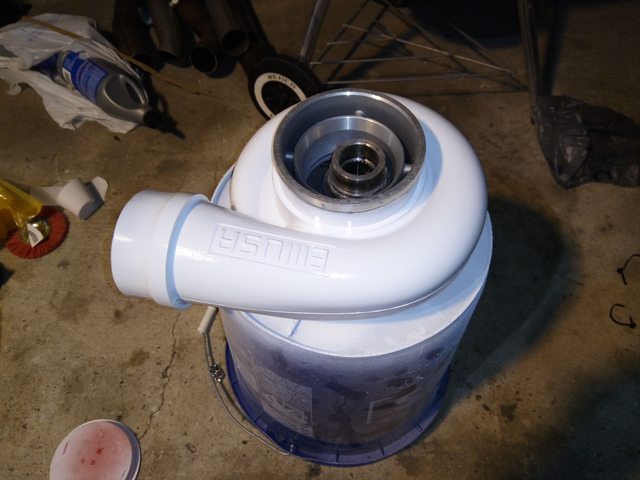
I decided while all the turbo stuff is apart, the ebay turbo's have crap machine work and the inlet to the compressor is just straight, not tapered like any other decent turbo. So I fixed that with a dremel. I actually am going to do a bit more to the leading edge tomorrow, but it's basically done, and the inlet is now ~1/4 inch larger, and tapers to the right size with probably a 5 to 7 degree angle, about what garrett and borg warner do based on my eyecrometer.
Pics!


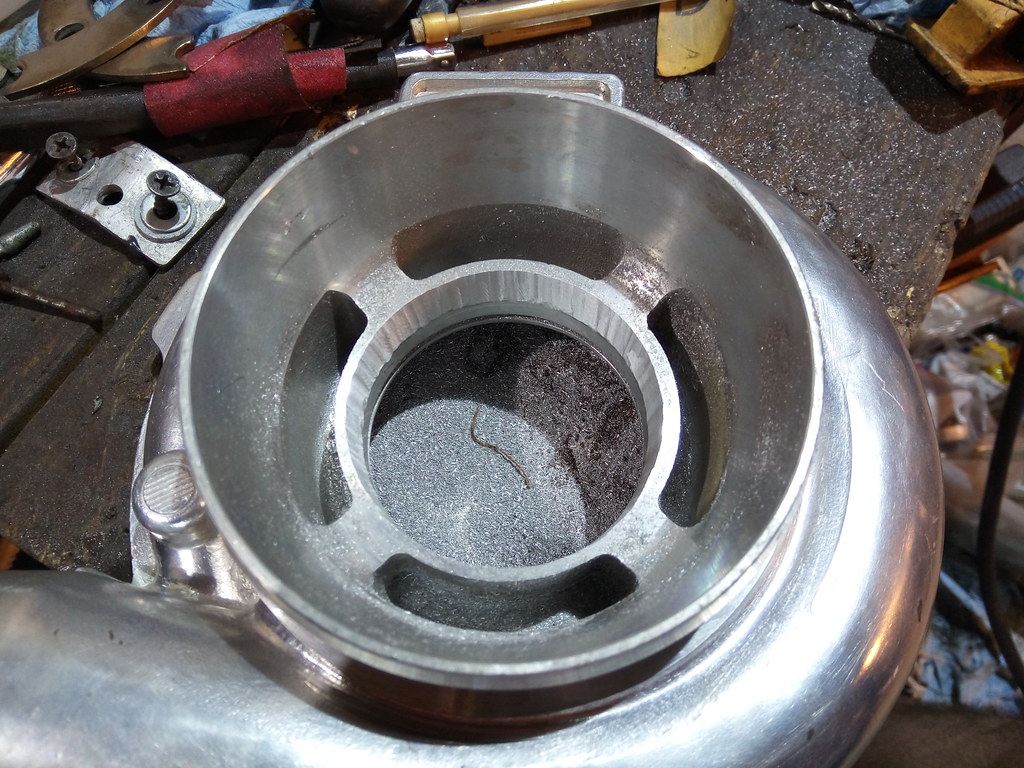
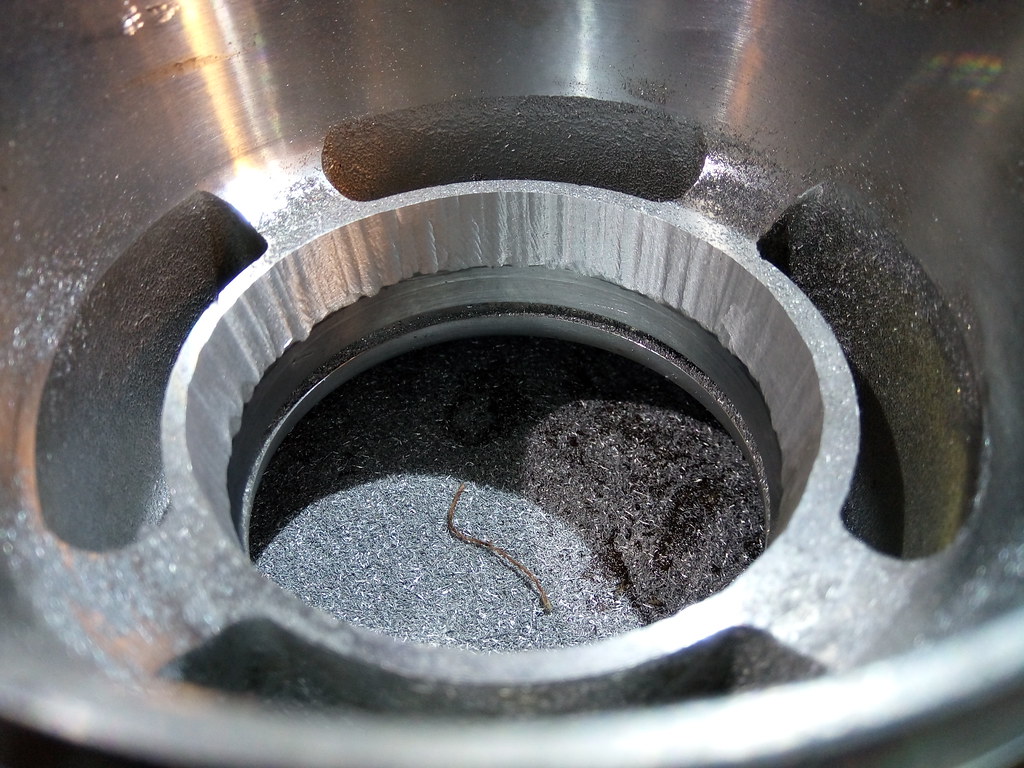
Unmodified compressor housing with damaged compressor wheel on the leading edge.
Finished up the diff. I thought the diff hanger would clear the diff vent, but nope. They notched the diff hanger for the vent, just not enough! Uh. So had to grind on the freshly painted diff hanger to fix that issue, and hooked up a hose to it. Lightly oiled the gears and bearings before final assembly so they aren't dry or trying to rust from the cleaning. JB welded the abs block off piece into the diff. I final cleaned the diff and cover, and bolts, and then assembled everything and torqued the cover bolts to spec. I pressed in new axle seals. The little metal thingies that hold the diff bushings in, they were rusty as hell on my car, and also the two spots that normally bolt to the subframe, that doesn't work on this diff so I cut those parts off to save weight. And then I decided to pull the front turbo and swap the 0.86 housing to a 0.63. Got it apart, and.... foreign object damage to front turbo compressor. LOL, ran 6's in the 1/8th with a hurt turbo! It's not that bad, but a simple housing change has now become a swap-in-my-spare scenario. Nice having cheap turbos and having a spare on hand! I'll order a new one to have another spare soon, I'll see if I can get a even smaller A/R just to test it and see how it does. Studying the geometry of the .86 and .63, I think even a smaller one could have some benefits, perhaps.
I decided while all the turbo stuff is apart, the ebay turbo's have crap machine work and the inlet to the compressor is just straight, not tapered like any other decent turbo. So I fixed that with a dremel. I actually am going to do a bit more to the leading edge tomorrow, but it's basically done, and the inlet is now ~1/4 inch larger, and tapers to the right size with probably a 5 to 7 degree angle, about what garrett and borg warner do based on my eyecrometer.
Pics!
Unmodified compressor housing with damaged compressor wheel on the leading edge.
Reply
1
1


 10-02-2017, 08:54 PM
#1329
Elite Member
Thread Starter
iTrader: (16)
Join Date: Aug 2007
Location: Houston, TX
Posts: 9,296
Total Cats: 476
Thanks! It's coming along ok. I wish it would go faster, some things have went a lot slower than I wanted though. It's ok, it's going to be on the road soon!
Haha, yeah I heard a friend of mine say it a while back and thought it was funny too. I hope to ride wheelies with it in a few weeks.
LOL, haven't heard that one!
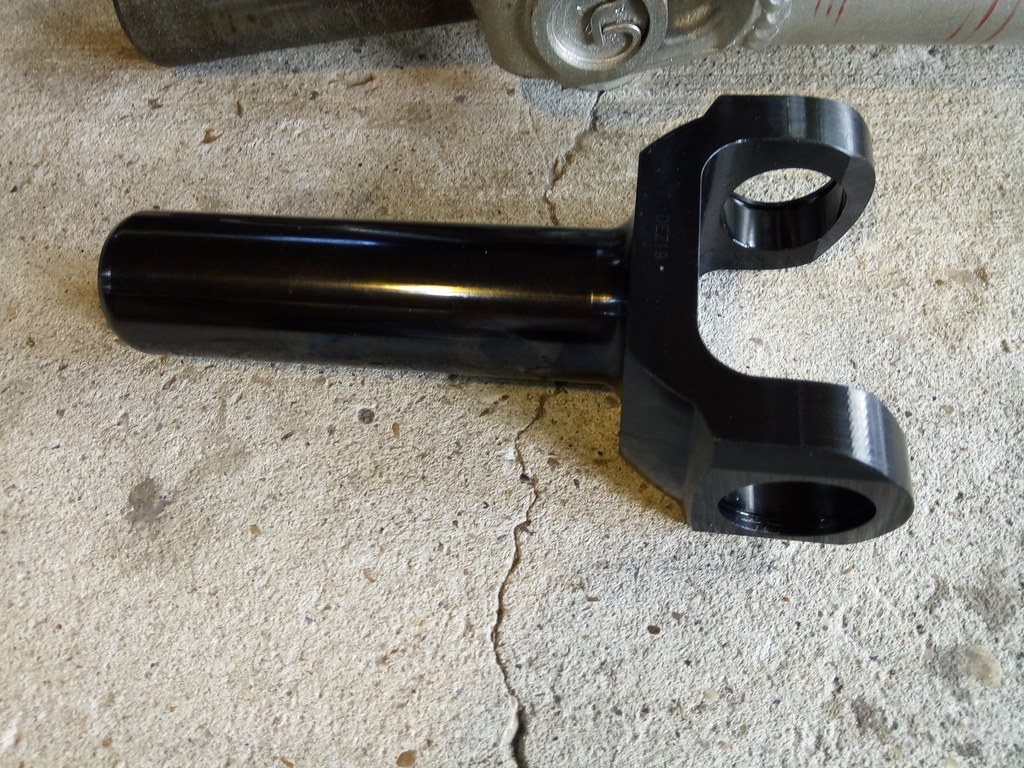
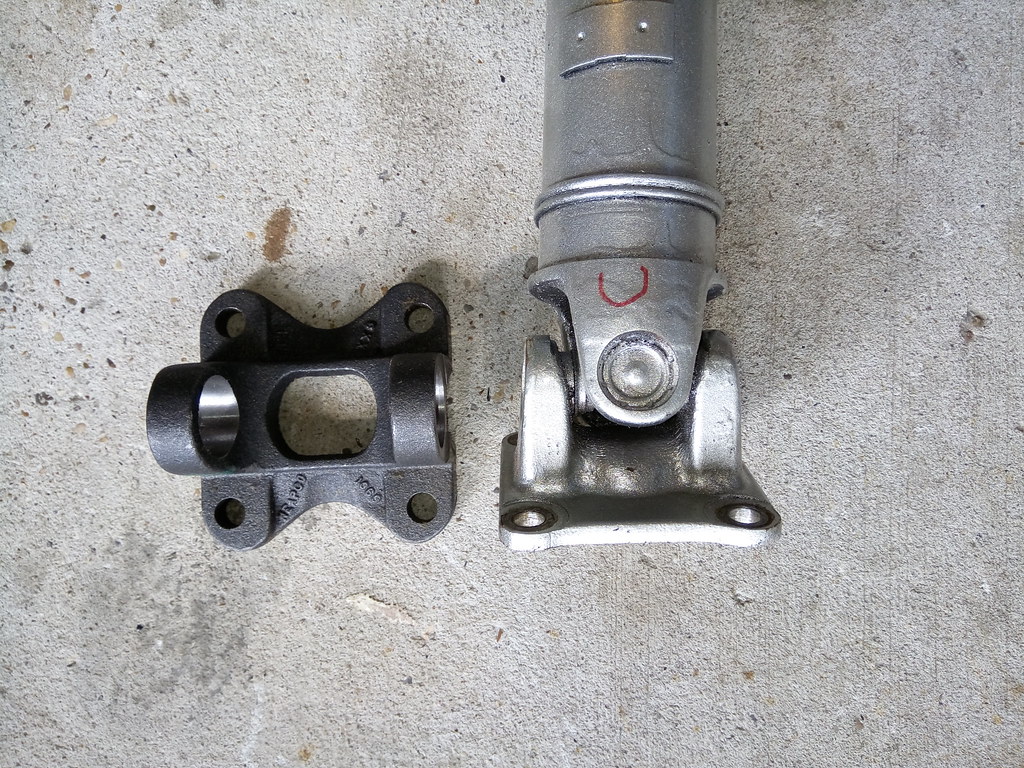
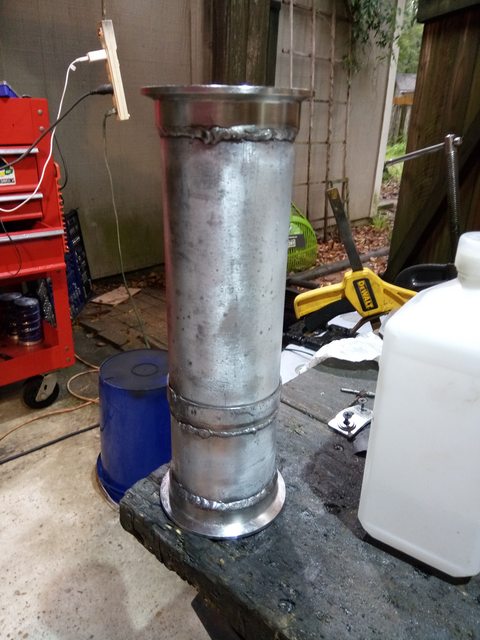
Tiny update, will do a better one tonight or tomorrow, but I called 4 different local shops, and found a place to build me a driveshaft (tube with a pair of weld yokes on it, no slip yoke or flange yoke) for 220 bucks! So I'm bringing them my flange yoke and slip yoke tomorrow so they can get started. There is a small, small chance I may run it with just the front turbo at the track soon.... The parts needed to do the exhaust for the rear turbo STILL haven't even shipped, and I ordered it about a week ago.
LOL, haven't heard that one!
Tiny update, will do a better one tonight or tomorrow, but I called 4 different local shops, and found a place to build me a driveshaft (tube with a pair of weld yokes on it, no slip yoke or flange yoke) for 220 bucks! So I'm bringing them my flange yoke and slip yoke tomorrow so they can get started. There is a small, small chance I may run it with just the front turbo at the track soon.... The parts needed to do the exhaust for the rear turbo STILL haven't even shipped, and I ordered it about a week ago.
Reply
0
0
10-03-2017, 12:36 AM
#1330
Elite Member
Thread Starter
iTrader: (16)
Join Date: Aug 2007
Location: Houston, TX
Posts: 9,296
Total Cats: 476
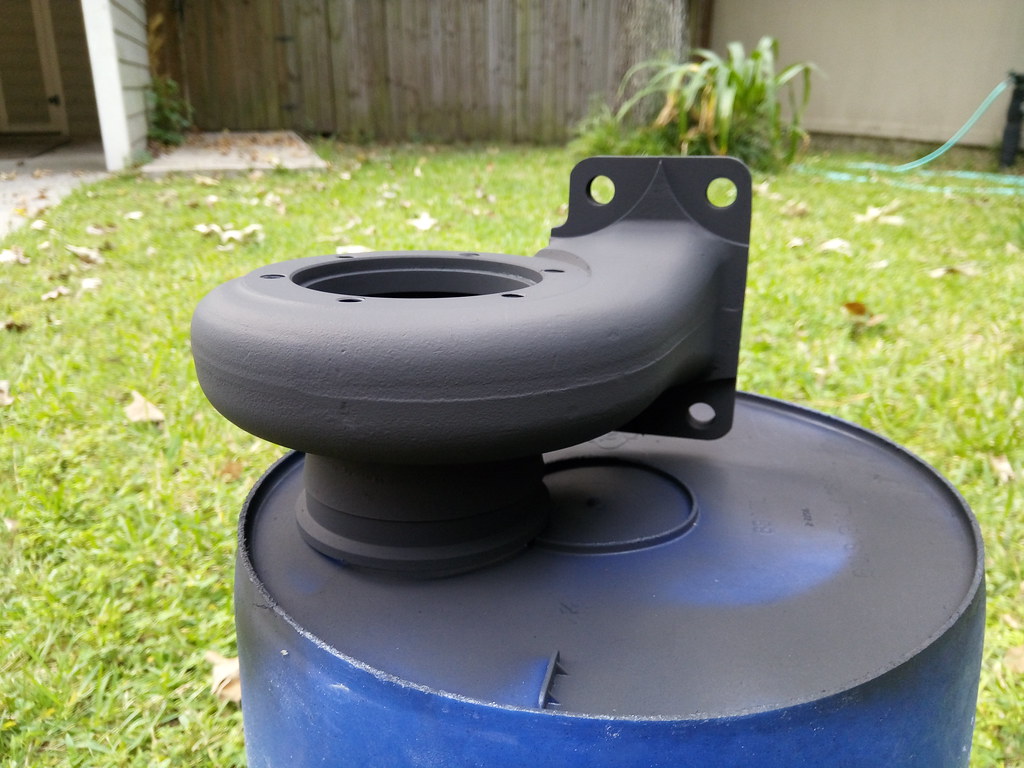
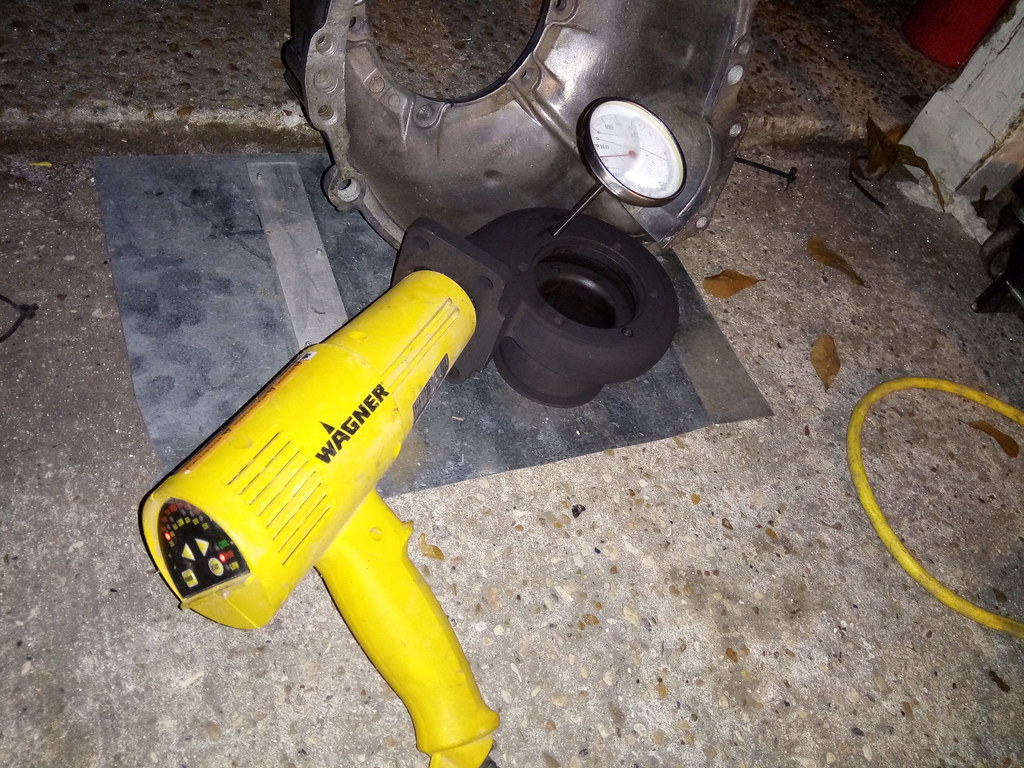
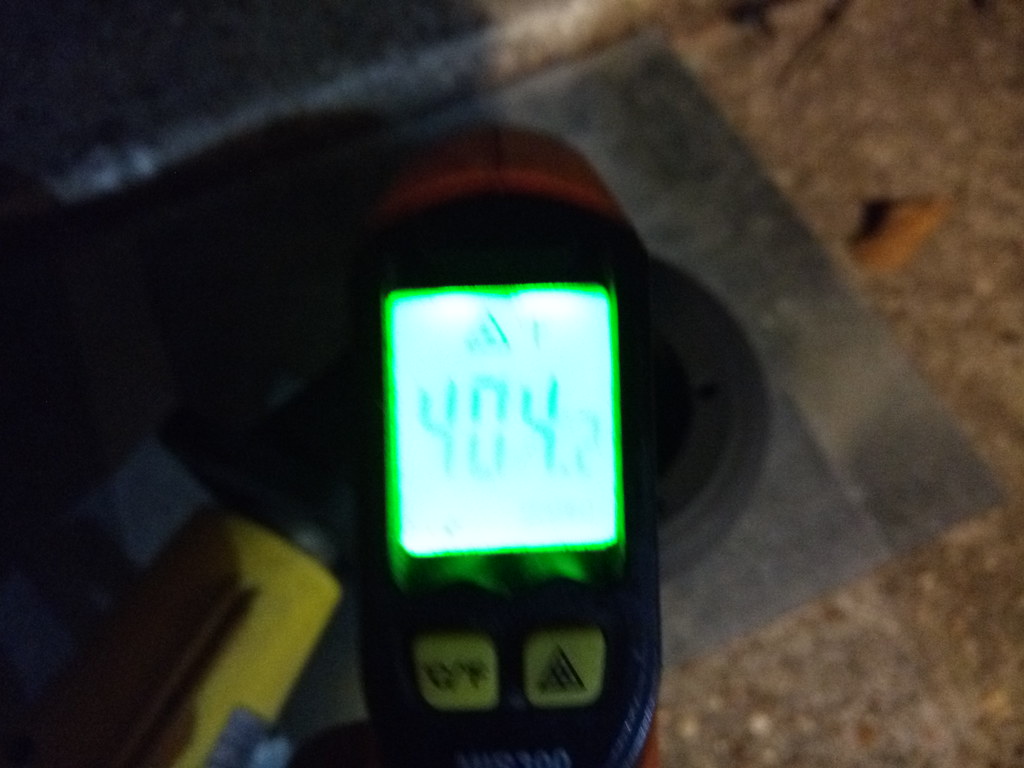
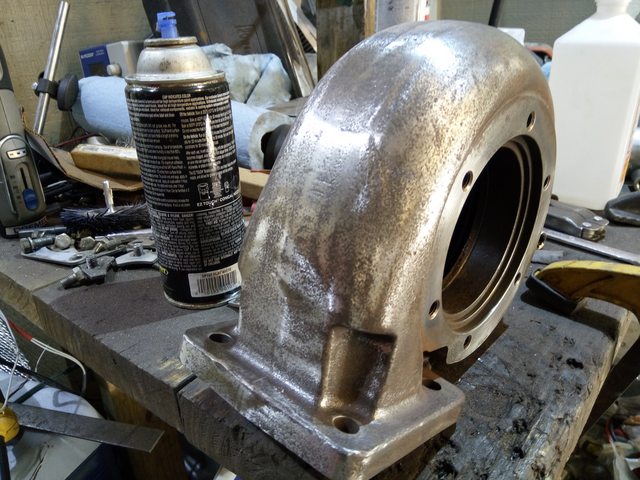
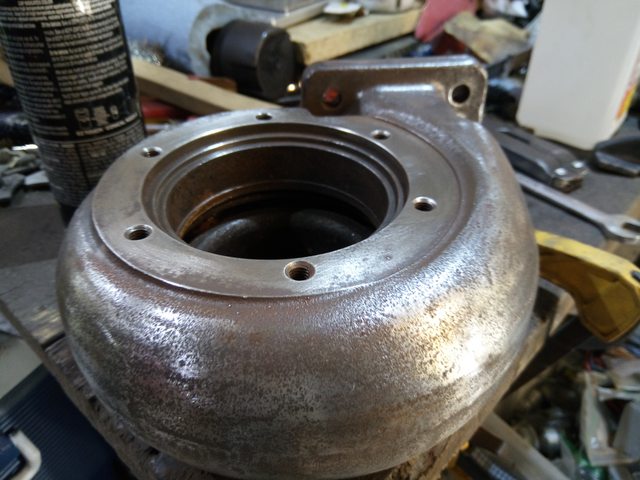
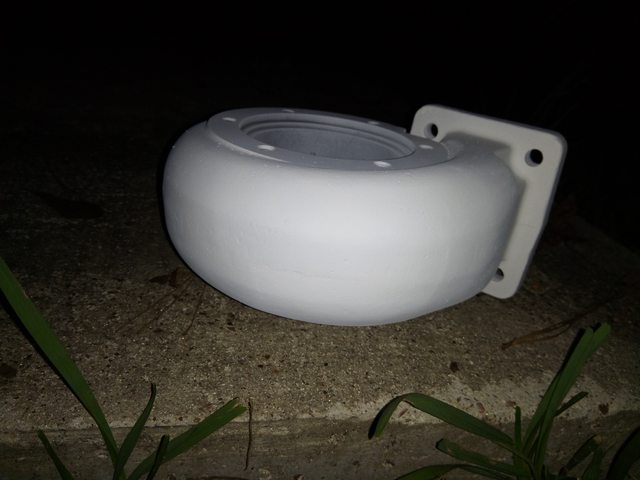
Ok so I finished porting the turbo inlet as I showed last time, basically put a radius/bellmouth on the leading edge. Then cleaned up the 0.63 A/R Turbine housing and hit it with some header paint. Let it sit in the sun a bit, then warmed it to 125*F with a space heater on high for an hour, then put a heat gun blowing into the inlet and gradually raised the heat over the course of about an hour until I got the turbine housing to 400*F, then let it stay there a bit and then shut it off and let it cool naturally. This seems to have helped the paint dry faster. In the past when I used header paint, even after a few days it's very soft and not dried well until the car is driven, but that makes scratching paint on assembly very easy to do. I hope to not scratch this one up too much!
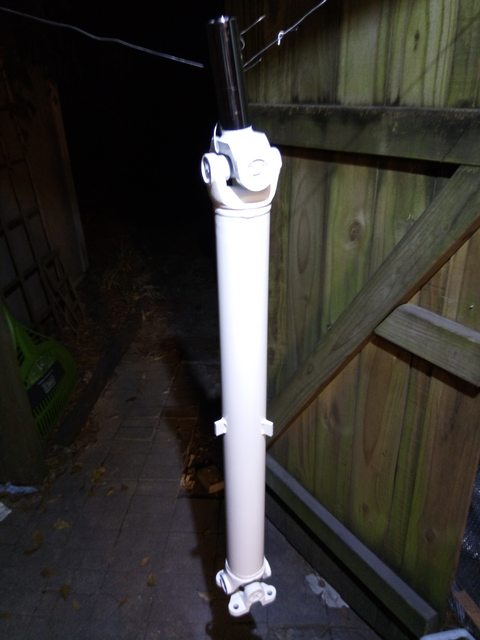
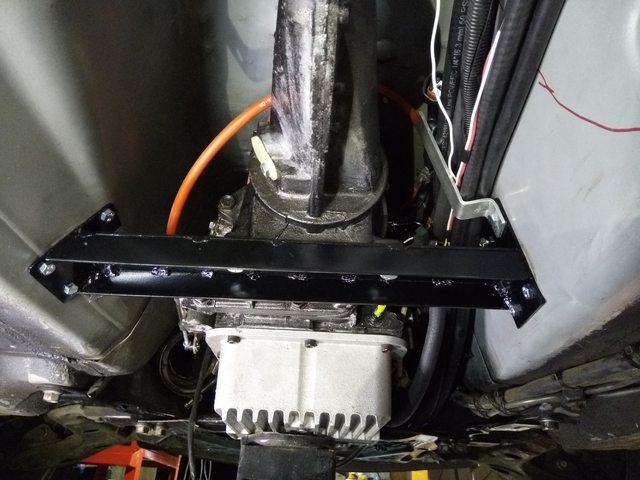
A couple years or so ago, I put a GM 220A alternator on the car. It was a love/hate relationship. It did in fact have a TON of amps, but only once it got up to ~1,400 RPMs. At idle, yeah, worse than stock by a lot. But rev it and it had amps for days. I could run everything in the car (80A for SPAL fans, a/c compressor, power inverter, head lights on high, twin fuel pumps, etc...) and the voltage was rock solid and didn't budge as long as you were above 1,400. Well, a few months ago for whatever reason, this alternator started messing up and no longer holds power like it used to. No idea what's wrong, but I remember the voltage getting worse everywhere, idle and at higher RPMs. I did way way overspin it , so that might be why it's sad. I actually slung out the fan blades on it I spun it so fast! Guess the overdrive pulley + 9,000 RPMs didn't work too well.
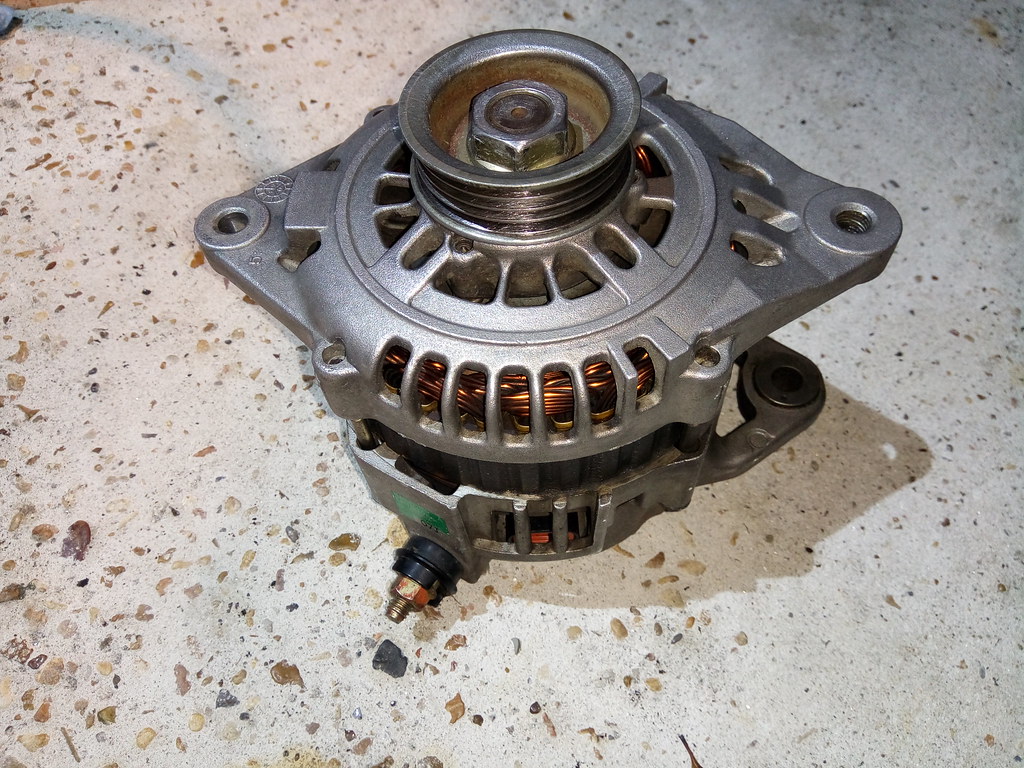
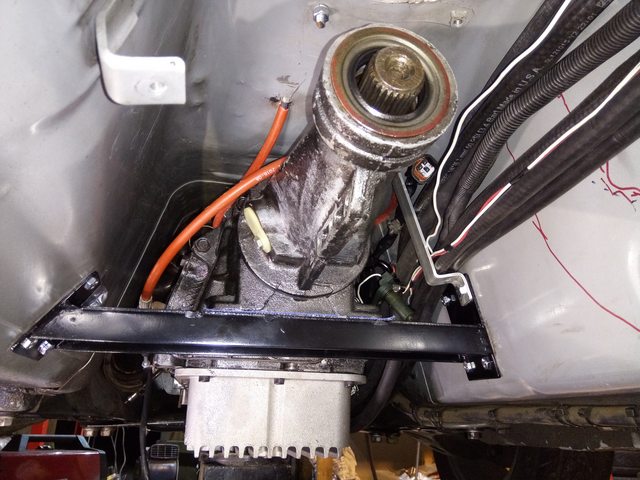
So I bought an alternator from this forum! and cleaned it up, tightened some of the bolts that were all loose(not sure why, guessing someone took it apart, hope it works) and installed it in place of the old GM alternator. It's a 80A alternator from a NB2 miata, so 10 or 15A more than a stock alternator and bolts right up and plugs right in. Forgot that the GM alternator took a longer belt, so I have to buy a new belt tomorrow. Actually, I might have an old one, so I'll check in the shed first now that I think about it... This thing was caked in I don't know what, but it took like 1.5hours to clean it up... It looks normal/clean now, it was a mess when I got it.
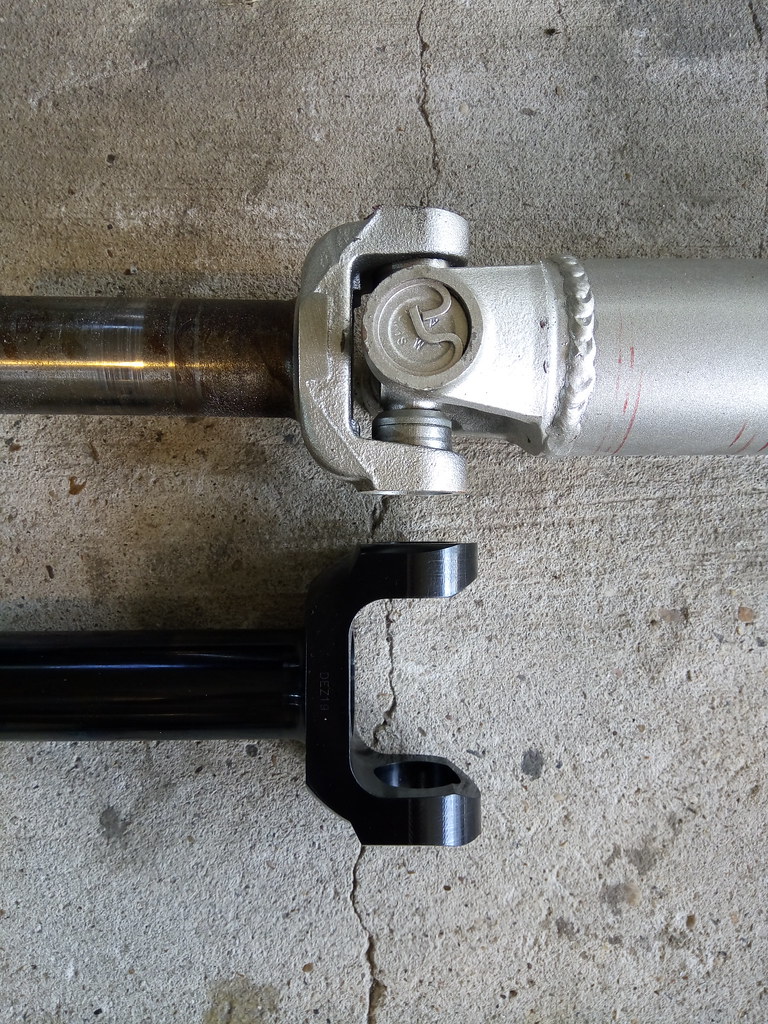
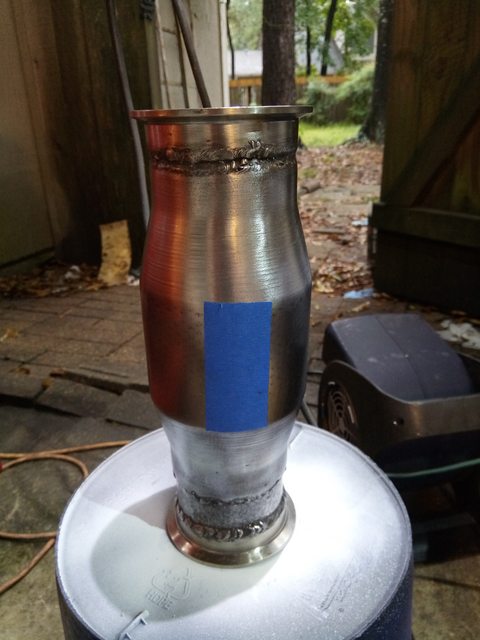
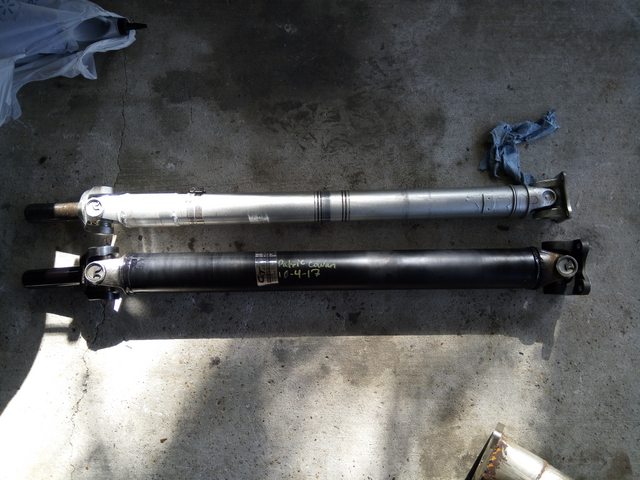
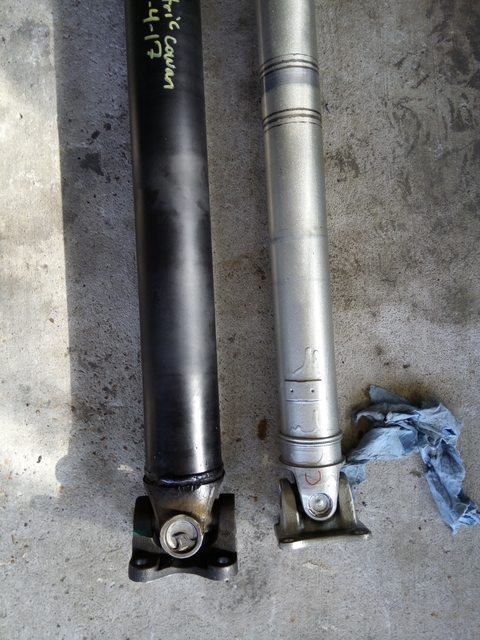
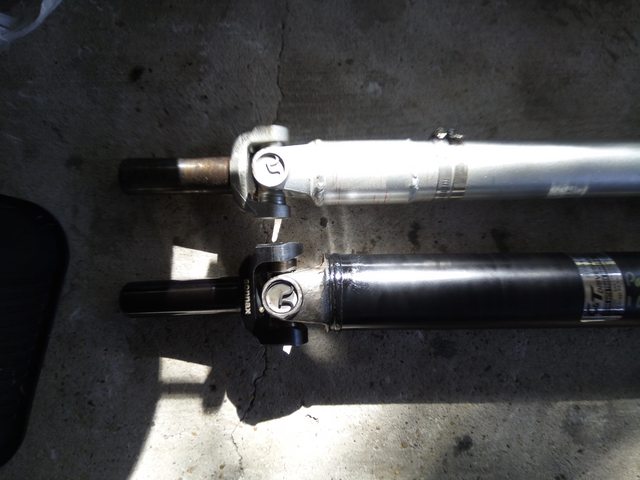
Gotta bring some parts to a local shop so they can make me as sweet bomb proof driveshaft. I bought a chromoly slip yoke that looks sick, and a beefy flange yoke for the diff, they will do the rest and assemble/balance it.
Turbo is reassembled for the most part, now i need to put it on the car, adjust the angle of the CHRA to turbine, and CHRA to compressor, then tighten all those bolts, then final install the front turbo and put in the bolts, Vband, coolant fittings, oil drain hose, and oil feed fitting and feed line.
So this part is up in the air, but I'm going to be waiting for the parts to do the exhaust for the rear turbo for a while, sadly. If I get the driveshaft done quickly, I may run it front turbo only, downpipe dumping under car go race and have fun on Friday! Maybe, I know it will be retardedly loud though and I'd have to put a filter on the front turbo. I'd have to block off the oil feed line, and put the injectors/intake manifold back together, and a few other odds and ends. And this is assuming my DSS axle boots arrive Wednesday and go on without a hitch, and that they solve the clearance problem I currently have. So it's a gamble, but it could happen. I bet it would still be fast one the one turbo, I can run 30 PSI on just that turbo, and I didn't run over that last time with both anyways.
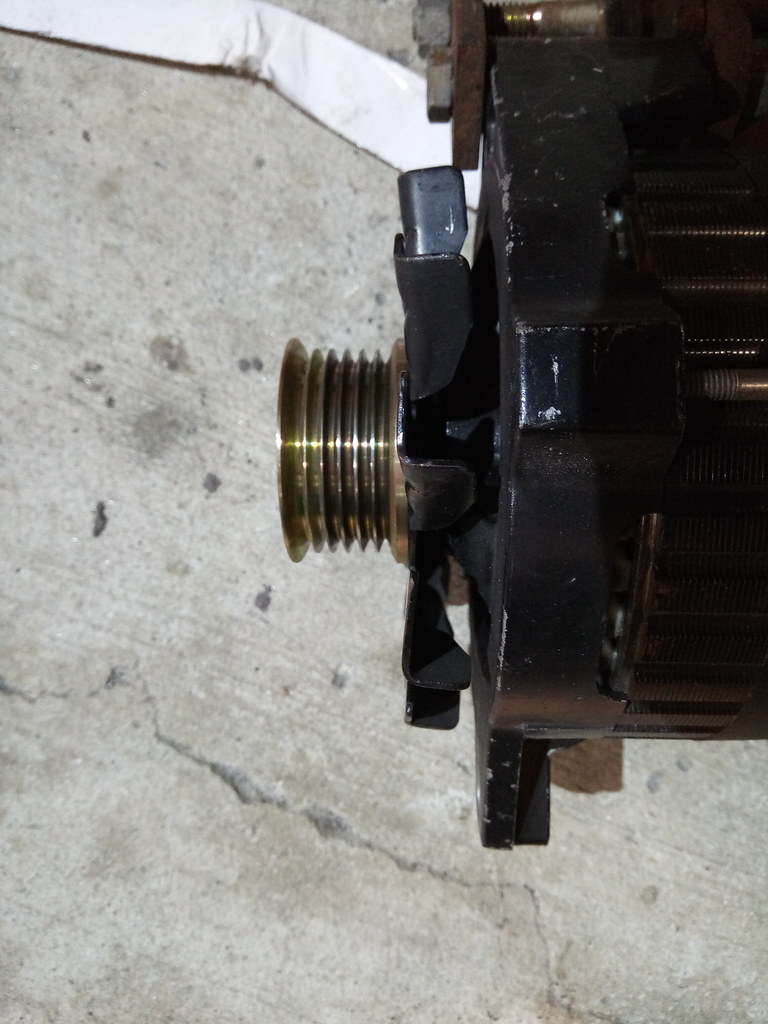
A couple years or so ago, I put a GM 220A alternator on the car. It was a love/hate relationship. It did in fact have a TON of amps, but only once it got up to ~1,400 RPMs. At idle, yeah, worse than stock by a lot. But rev it and it had amps for days. I could run everything in the car (80A for SPAL fans, a/c compressor, power inverter, head lights on high, twin fuel pumps, etc...) and the voltage was rock solid and didn't budge as long as you were above 1,400. Well, a few months ago for whatever reason, this alternator started messing up and no longer holds power like it used to. No idea what's wrong, but I remember the voltage getting worse everywhere, idle and at higher RPMs. I did way way overspin it , so that might be why it's sad. I actually slung out the fan blades on it I spun it so fast! Guess the overdrive pulley + 9,000 RPMs didn't work too well.
So I bought an alternator from this forum! and cleaned it up, tightened some of the bolts that were all loose(not sure why, guessing someone took it apart, hope it works) and installed it in place of the old GM alternator. It's a 80A alternator from a NB2 miata, so 10 or 15A more than a stock alternator and bolts right up and plugs right in. Forgot that the GM alternator took a longer belt, so I have to buy a new belt tomorrow. Actually, I might have an old one, so I'll check in the shed first now that I think about it... This thing was caked in I don't know what, but it took like 1.5hours to clean it up... It looks normal/clean now, it was a mess when I got it.
Gotta bring some parts to a local shop so they can make me as sweet bomb proof driveshaft. I bought a chromoly slip yoke that looks sick, and a beefy flange yoke for the diff, they will do the rest and assemble/balance it.
Turbo is reassembled for the most part, now i need to put it on the car, adjust the angle of the CHRA to turbine, and CHRA to compressor, then tighten all those bolts, then final install the front turbo and put in the bolts, Vband, coolant fittings, oil drain hose, and oil feed fitting and feed line.
So this part is up in the air, but I'm going to be waiting for the parts to do the exhaust for the rear turbo for a while, sadly. If I get the driveshaft done quickly, I may run it front turbo only, downpipe dumping under car go race and have fun on Friday! Maybe, I know it will be retardedly loud though and I'd have to put a filter on the front turbo. I'd have to block off the oil feed line, and put the injectors/intake manifold back together, and a few other odds and ends. And this is assuming my DSS axle boots arrive Wednesday and go on without a hitch, and that they solve the clearance problem I currently have. So it's a gamble, but it could happen. I bet it would still be fast one the one turbo, I can run 30 PSI on just that turbo, and I didn't run over that last time with both anyways.
Reply
0
0
10-05-2017, 02:00 PM
#1332
Elite Member
Thread Starter
iTrader: (16)
Join Date: Aug 2007
Location: Houston, TX
Posts: 9,296
Total Cats: 476
Thanks! It's good to be here and posting some updates.
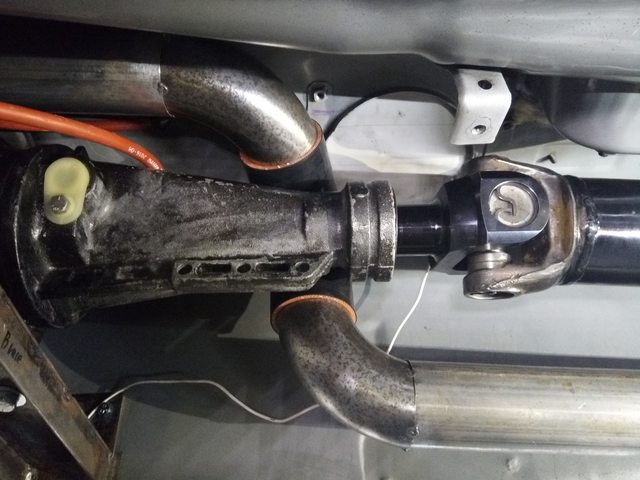
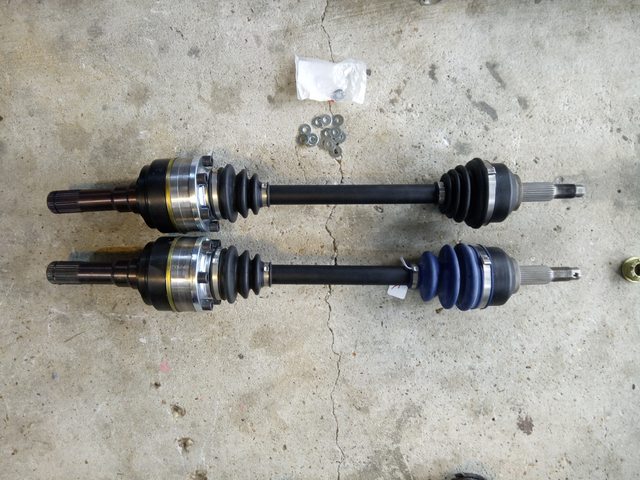
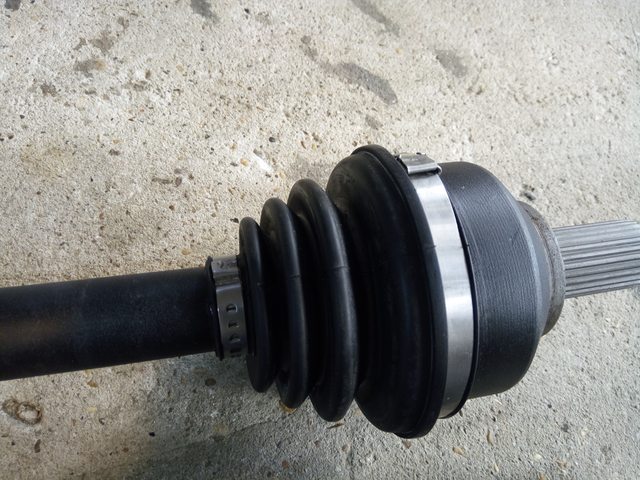
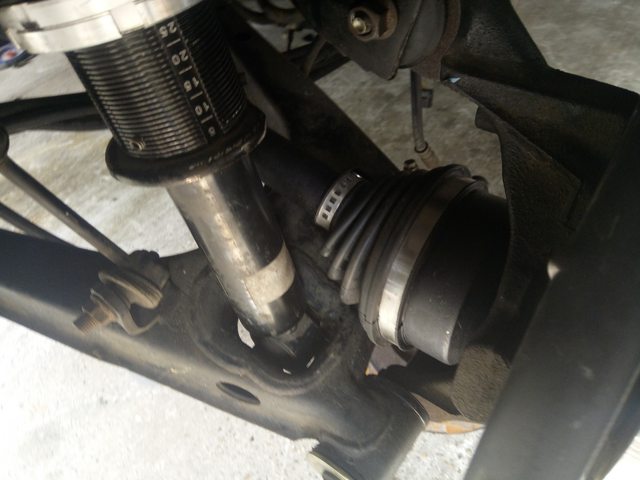
Small update without pics, but yesterday the driveshaft was finished, so I picked it up and installed it. Luckily the length turned out right, and it's not hitting anything*. Ok, it hit a heat shield but that was an easy fix. So then shortly afterwards, my new DSS CV boots showed up, so I installed those. Test fitted and the new boots clear the shocks! It really makes me wonder why/how they sell them this way when everyone who buys them has to then swap the boots.
But I now officially have a built ford transmission, a really strong driveshaft, a built ford 8.8 diff with LSD, and very strong axles completely bolted into/installed/ready to go in my miata!!!!!!! Yeah! At this point the built BP should be the new weak link, not the drivetrain.
Working on rerouting my boost pipe right now. I want it to stay away from the exhaust as much as possible, and be easier to service, and have more clearance around parts and not hurt ground clearance either. I looked into completely changing the routing to get it out of the hot tunnel, but that would affect ground clearance no matter what, so that option is out.
For now the plan is to build the new boost pipe, then paint it, then wrap it with heat reflective wrap or something so it doesn't get heat soaked as bad as before.
Reply
0
0
10-06-2017, 12:17 AM
#1333
Elite Member
Thread Starter
iTrader: (16)
Join Date: Aug 2007
Location: Houston, TX
Posts: 9,296
Total Cats: 476
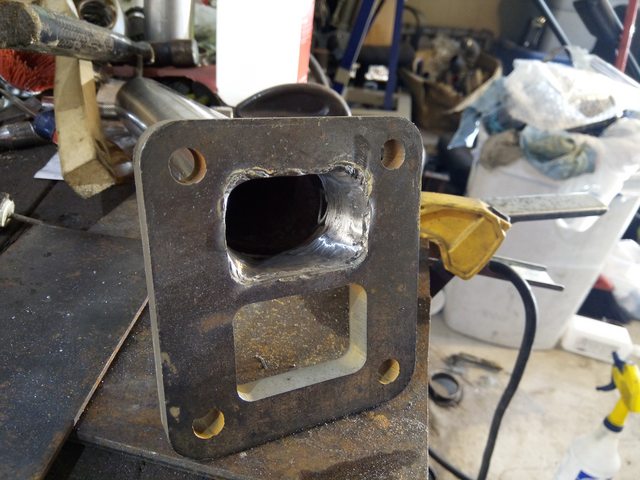
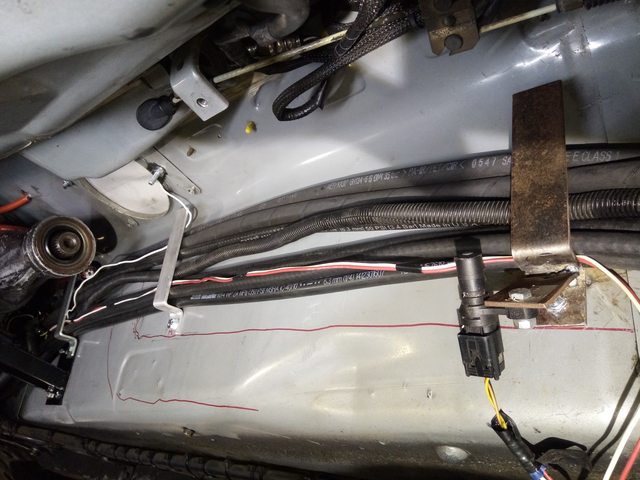
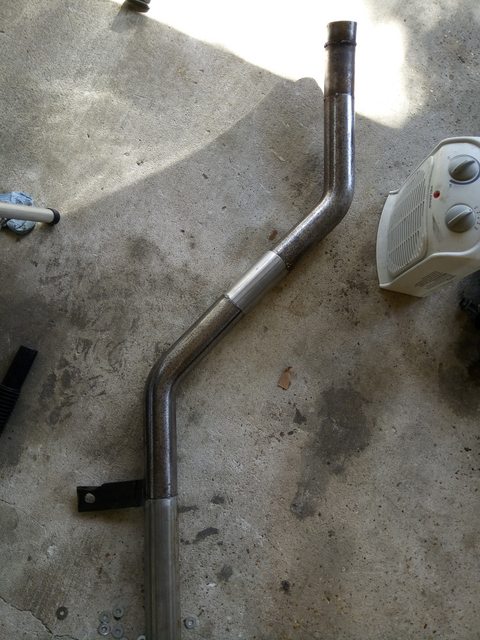
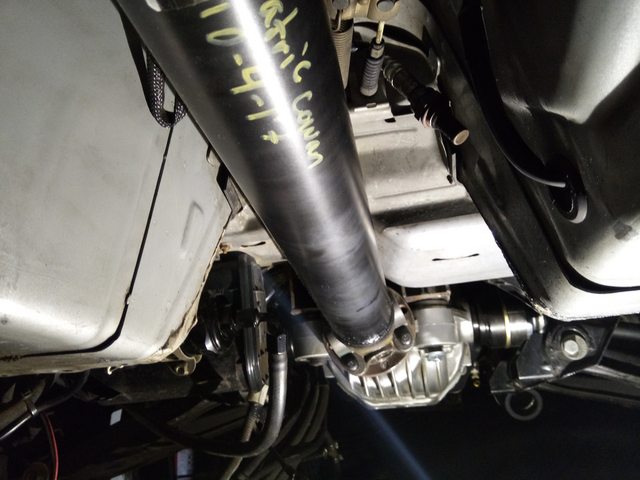
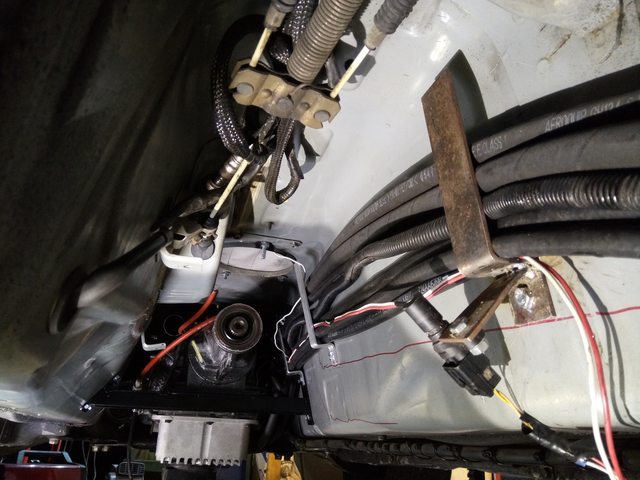
Ok so a small update. I worked on the boost pipe all day. Sadly spent quite a bit of time looking, thinking, measuring, and not building anything. I was trying to find the absolute best way to run the pipe while trying to maintain ground clearance, keep it as far away from the exhaust pipes as possible for as much of the length of the pipe as possible to reduce heatsoak, easy to build with the limited amount of bends/material I have on hand so I don't have to order materials and wait for those, minimize amount of bends needed to build it to reduce pressure drop, and keep clearance from everything so it doesn't' hit anything and rattle. I also wanted to try and improve the fitment of the pipe joints that I have to weld so that I don't accidentally get any splatter from welding into the pipes, as that happened last time and damaged my front turbo. Also better fitment will look better and flow better too.
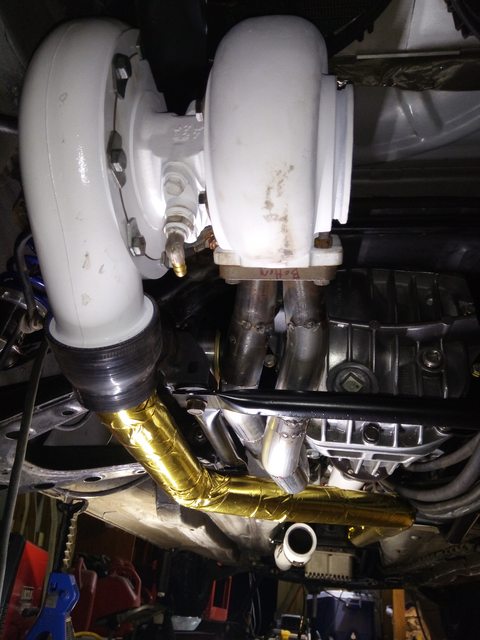
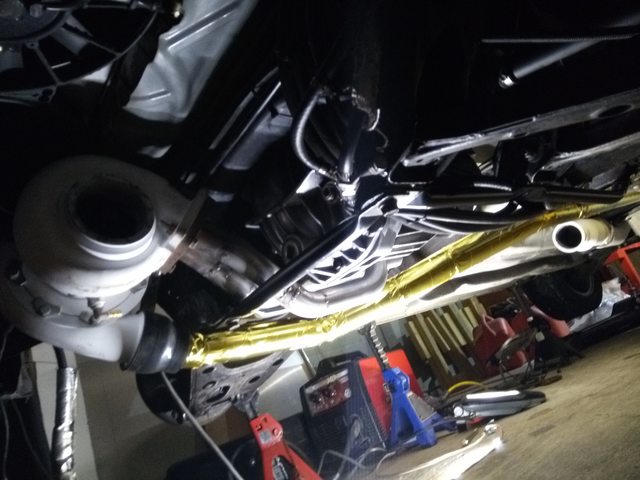
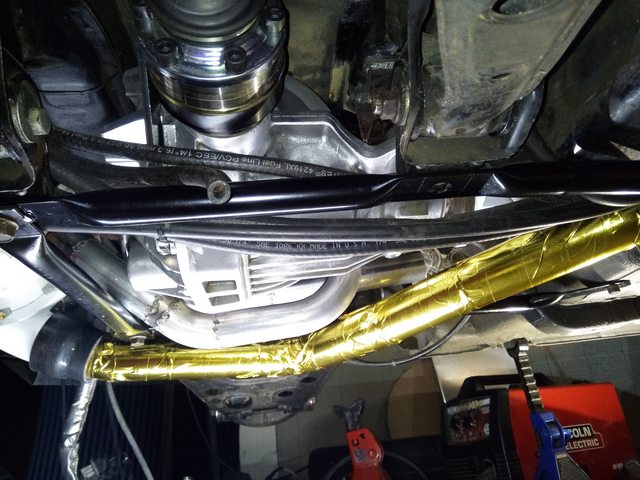
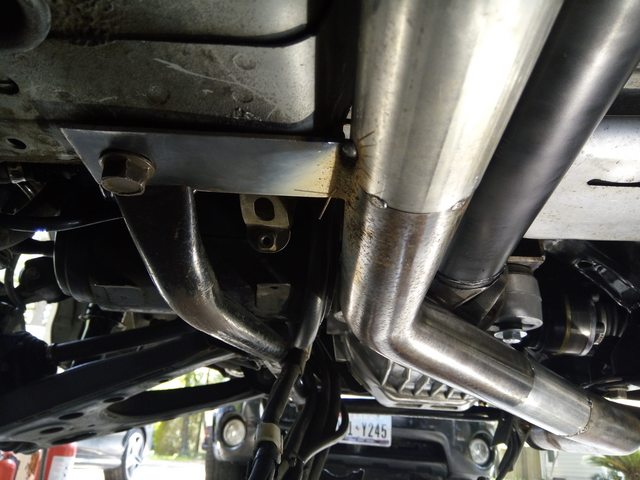
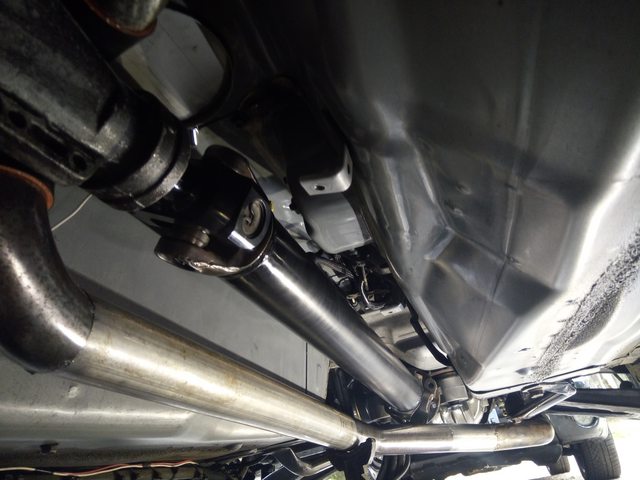
I started from the firewall, and modified my "middle pipe" a bit and it now stops a few inches from the tail housing. Then I tapped a 90* bend to it to cross over the top of the trans from the drivers side, to the passenger side. Then it needs to go down, and then back, but that will come later.
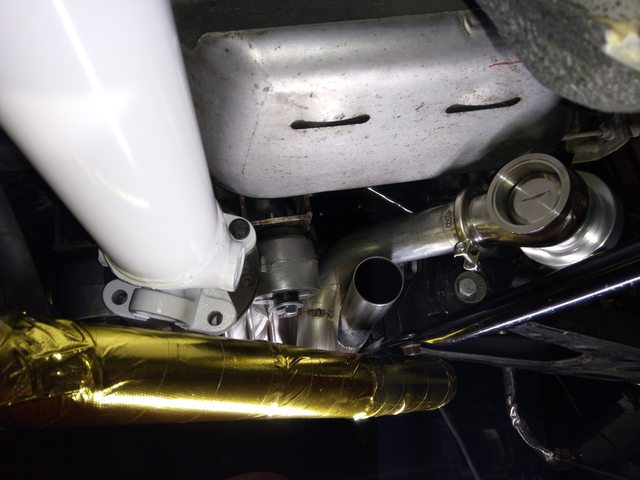
Then I went to the turbo outlet, and started over. That pipe now goes straight forward under the subframe for about 14", then it does a 45 and cuts across the front of the diff, goes a bit then 45's again to land straight in the tunnel on the passenger's side, where it goes forward to the tail housing. Now the two pipes are withing 1ft of each other, and just need a couple bends to connect them. The fitment so far is very good, and it looks nice and should leave quite a bit of clearance for exhaust pipes.
The plan is to finish building that pipe tomorrow. I'm running low on bends now and need a couple of 90's, so I'm going to have to cut and weld some smaller bends together to get a couple of 90* bends.
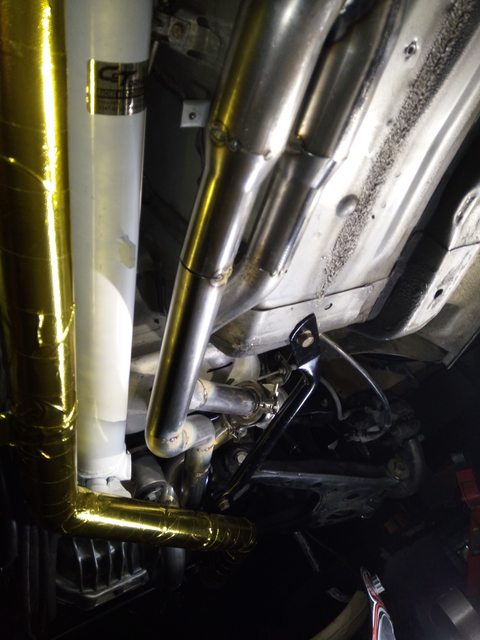
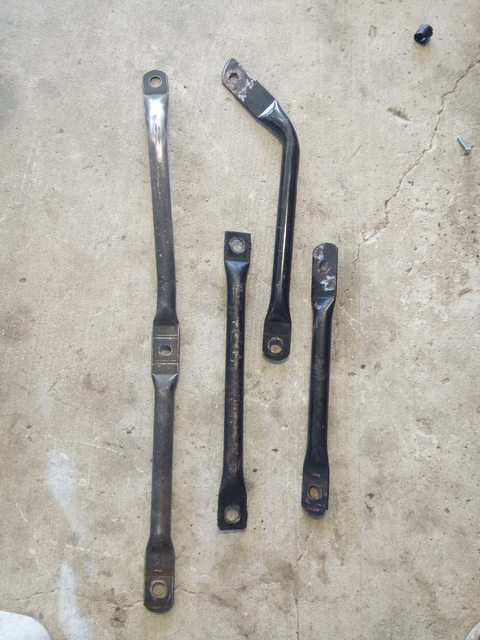
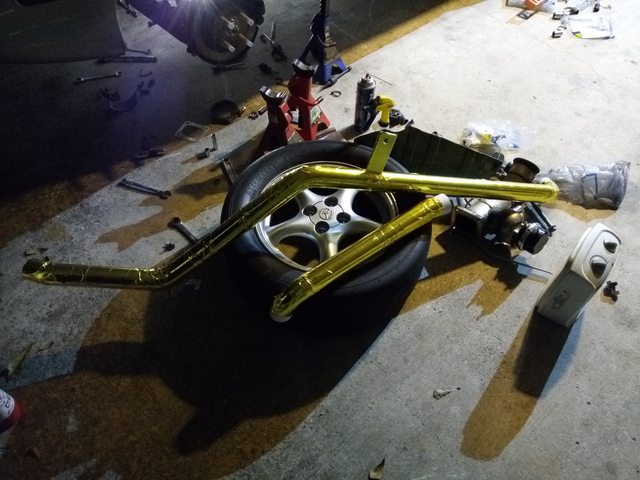
Once it's built and it fits, I'm going to also fab some brackets that will bolt it to the vehicle so it won't move around. Once that's done and I'm happy with the fitment, I'm going to remove it all, clean the outsides of the pipes to clean bare metal, pressure wash the crap out of the insides to get them as clean as possible, then dry, sand, paint, probably bight white or an aluminum finish, as that will reflect the most amount of radiant heat. I bought some cheap gold looking reflective tape, so I'm going to wrap that pipe too to help it reflect heat and not get too hot.
The exhaust under the car, I already painted the downpipe/cat/test pipe all flat white to also help reduce radiant heat. I've actually tested bare steel pipe vs aluminized pipe vs flat black painted pipes, and funny enough the bare pipe radiates the most heat! In theory the black should, but the coating of paint appears to be enough of an insulate to limit the rate of heat transfer. Since I've seen that affect in person, I'm painting these pipes even if I do plan to wrap them with reflective tape since the paint appears to act as a thin insulating barrier.
As previously mentioned, I'm going to be doing some ball status twin scroll spool magic on the rear turbo once parts arrive monday.
I'll hopefully get the boost pipe done tomorrow, and take some pics and post them up.
I started from the firewall, and modified my "middle pipe" a bit and it now stops a few inches from the tail housing. Then I tapped a 90* bend to it to cross over the top of the trans from the drivers side, to the passenger side. Then it needs to go down, and then back, but that will come later.
Then I went to the turbo outlet, and started over. That pipe now goes straight forward under the subframe for about 14", then it does a 45 and cuts across the front of the diff, goes a bit then 45's again to land straight in the tunnel on the passenger's side, where it goes forward to the tail housing. Now the two pipes are withing 1ft of each other, and just need a couple bends to connect them. The fitment so far is very good, and it looks nice and should leave quite a bit of clearance for exhaust pipes.
The plan is to finish building that pipe tomorrow. I'm running low on bends now and need a couple of 90's, so I'm going to have to cut and weld some smaller bends together to get a couple of 90* bends.
Once it's built and it fits, I'm going to also fab some brackets that will bolt it to the vehicle so it won't move around. Once that's done and I'm happy with the fitment, I'm going to remove it all, clean the outsides of the pipes to clean bare metal, pressure wash the crap out of the insides to get them as clean as possible, then dry, sand, paint, probably bight white or an aluminum finish, as that will reflect the most amount of radiant heat. I bought some cheap gold looking reflective tape, so I'm going to wrap that pipe too to help it reflect heat and not get too hot.
The exhaust under the car, I already painted the downpipe/cat/test pipe all flat white to also help reduce radiant heat. I've actually tested bare steel pipe vs aluminized pipe vs flat black painted pipes, and funny enough the bare pipe radiates the most heat! In theory the black should, but the coating of paint appears to be enough of an insulate to limit the rate of heat transfer. Since I've seen that affect in person, I'm painting these pipes even if I do plan to wrap them with reflective tape since the paint appears to act as a thin insulating barrier.
As previously mentioned, I'm going to be doing some ball status twin scroll spool magic on the rear turbo once parts arrive monday.
I'll hopefully get the boost pipe done tomorrow, and take some pics and post them up.
Reply
0
0
 10-06-2017, 11:39 AM
#1336
Elite Member
iTrader: (1)

Join Date: Apr 2014
Location: SF Bay Area, CA
Posts: 3,075
Total Cats: 551
I agree that shields will be superior to wrap, I think opposite sides is good too.
I can't wait to see this thing go again, not to rush you. I know that nobody wants this working more than you.
I can't wait to see this thing go again, not to rush you. I know that nobody wants this working more than you.
Reply
0
0
10-06-2017, 07:35 PM
#1337
Elite Member
Thread Starter
iTrader: (16)
Join Date: Aug 2007
Location: Houston, TX
Posts: 9,296
Total Cats: 476
I am thinking about shielding the exhaust as well. That would be better, hell I'll probably do both.
I'm hoping to have it on the road next week, possibly at the track if everything comes together.
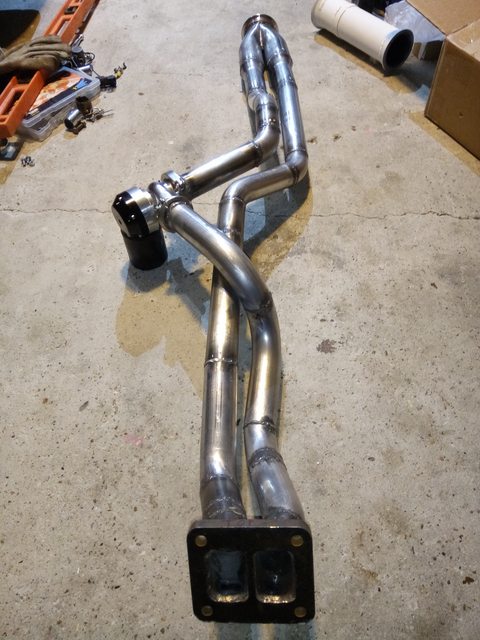
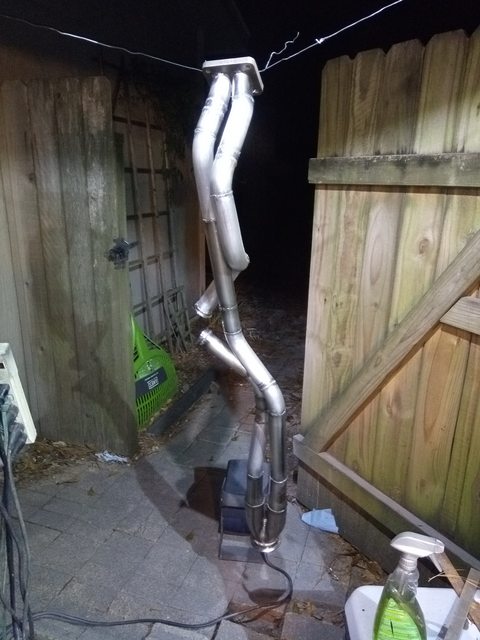
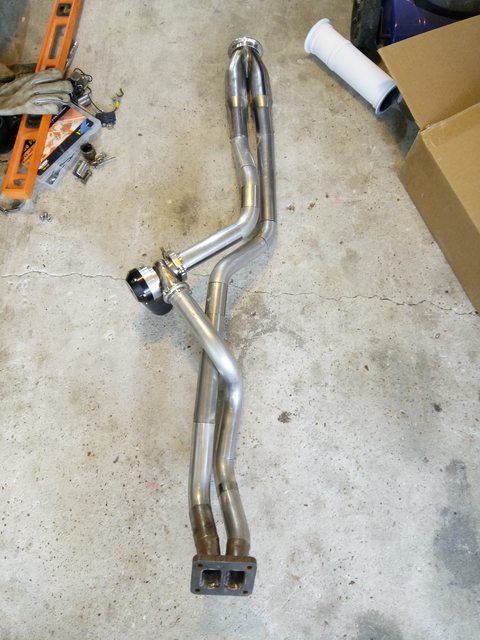
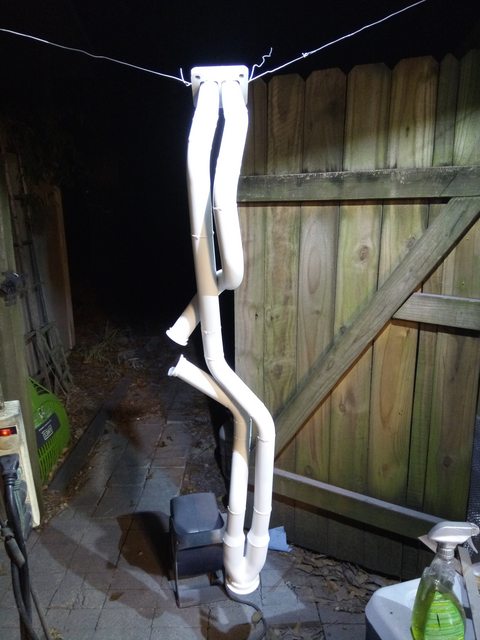
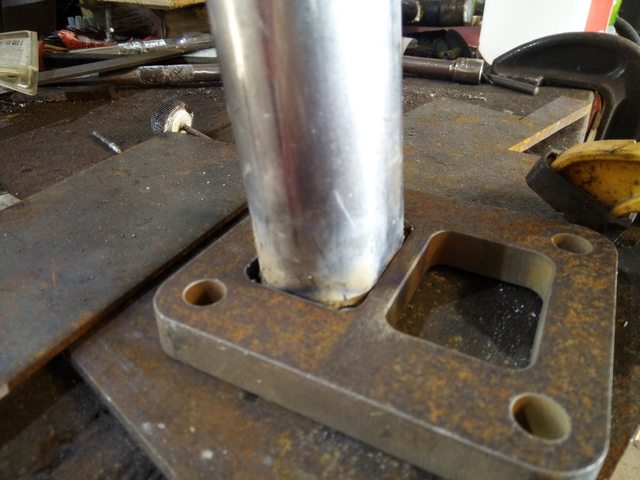
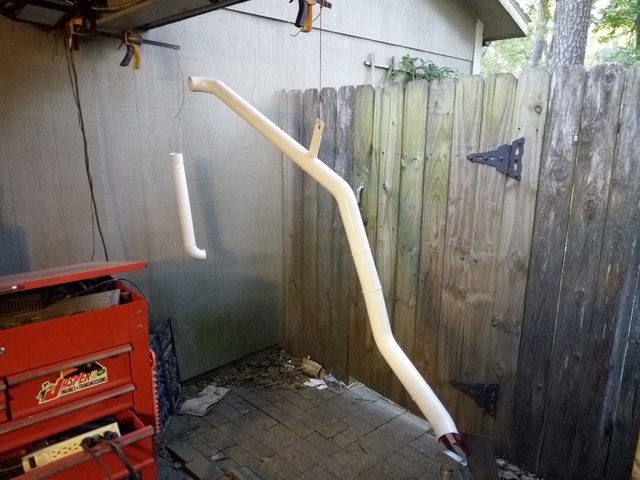
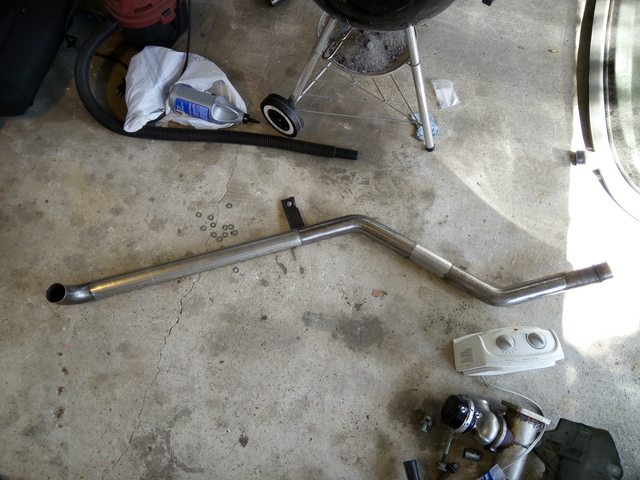
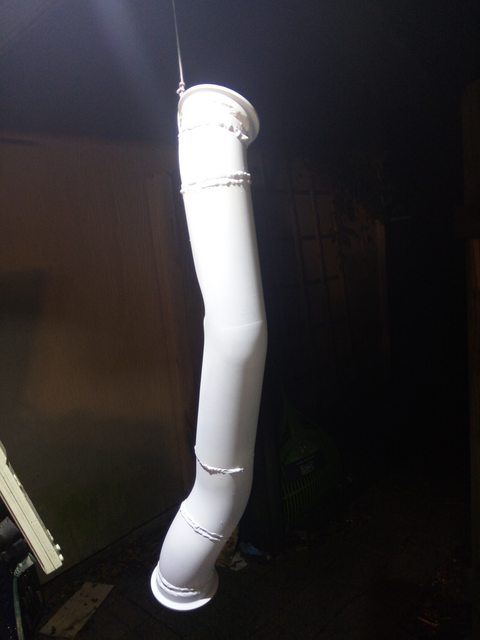
So small update, but today i finished the boost pipes, and put a mounting flange on the big one that needed it, and welded them out, cleaned them, pressure washed them inside/out, sanded them down, and painted them gloss white. The paint is drying now.
I took a few pics, will upload later tonight or tomorrow!
I'm hoping to have it on the road next week, possibly at the track if everything comes together.
So small update, but today i finished the boost pipes, and put a mounting flange on the big one that needed it, and welded them out, cleaned them, pressure washed them inside/out, sanded them down, and painted them gloss white. The paint is drying now.
I took a few pics, will upload later tonight or tomorrow!
Reply
0
0
10-09-2017, 12:57 AM
#1338
Elite Member
Thread Starter
iTrader: (16)
Join Date: Aug 2007
Location: Houston, TX
Posts: 9,296
Total Cats: 476
I got a ton of pics uploading, but it's taking forever. I will post them tomorrow. But a lot is done, a lot has been cleand/painted to make it look better, and several things are now bracketed and not zip tied, or heat shielded, little stuff to help reliability and make it easier to service.
Mandrel bends should arrive tomrrow, then I build exhaust, and then it's almost done!
Mandrel bends should arrive tomrrow, then I build exhaust, and then it's almost done!
Reply
0
0
 10-13-2017, 01:20 AM
#1340
Elite Member
Thread Starter
iTrader: (16)
Join Date: Aug 2007
Location: Houston, TX
Posts: 9,296
Total Cats: 476
Here comes 70 pics!
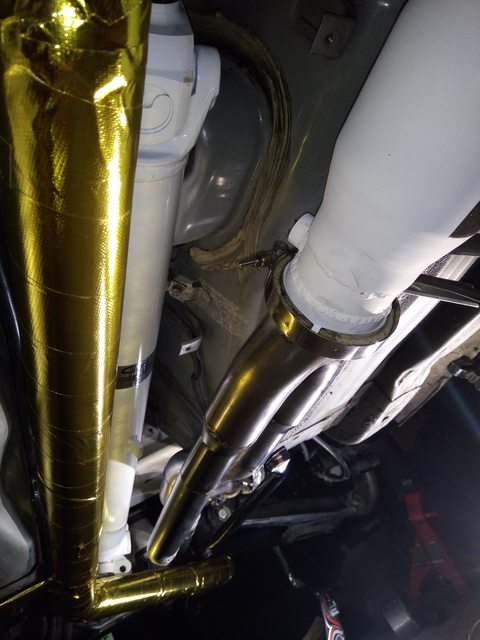
So I've been busy, so I'll try to keep this short and get a lot of pics up. I did some testing to see if white paint vs cheap amazon gold wrap tape, which reflects more radiant heat as I want to insulate my boost pipe from heat and they are close to the exhaust. I cut a piece of metal in half, painted one side of each piece flat black. On the other sides, one is gloss white, the other has the gold foil. Tested on my stove to hit it with lots of radiant heat, gold foil won by a good margin. Tested it with low heat and high heat, same results both times gold won. Also tested putting foil over the paint to see if the coating of paint helped to insulate the metal. Made no difference.
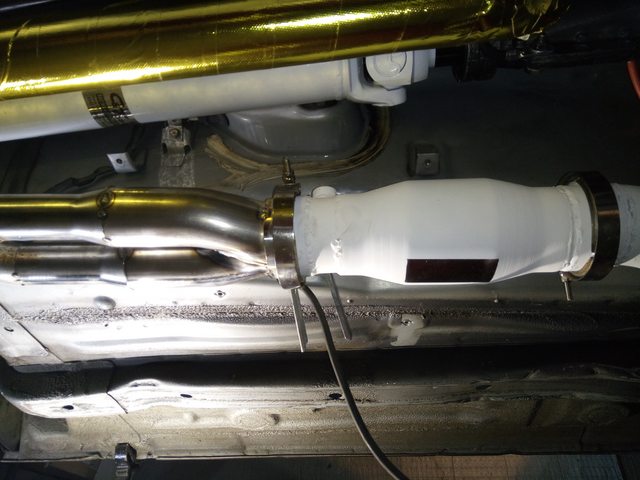
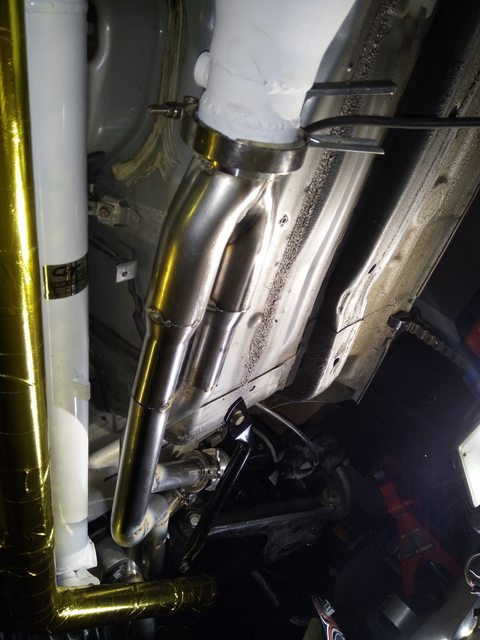
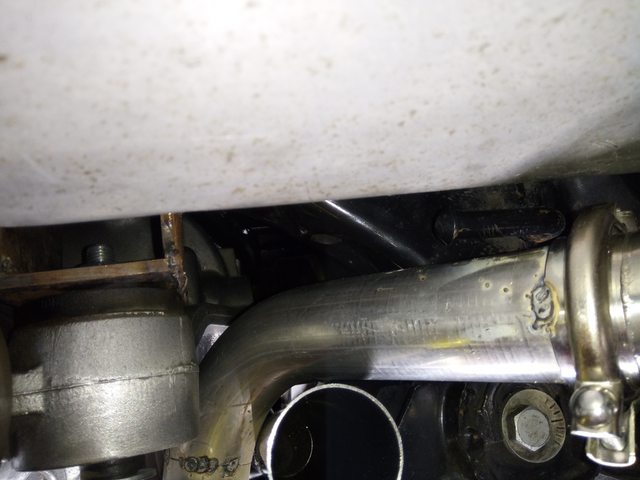
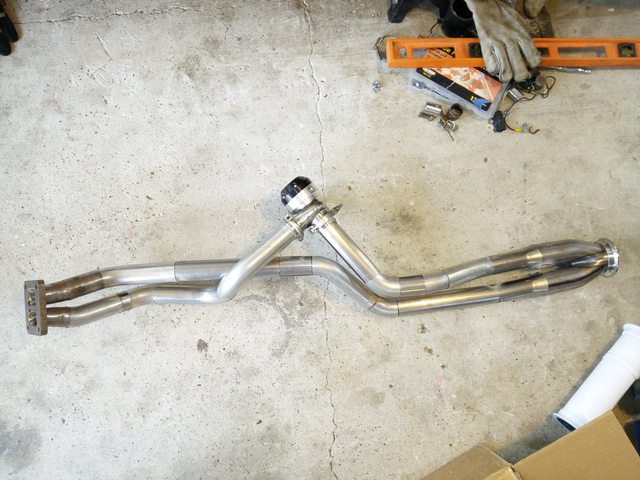
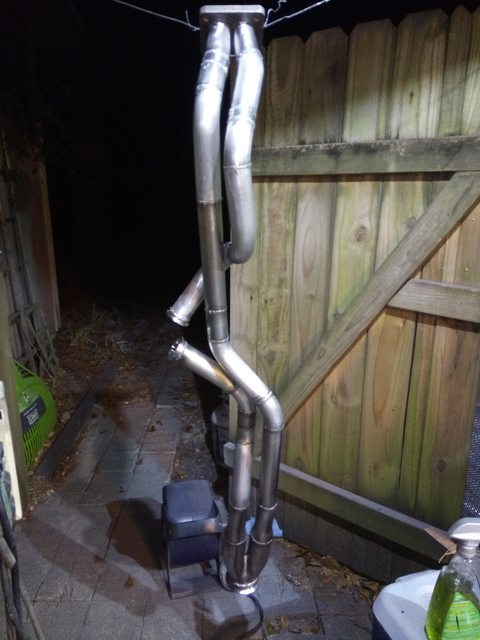
Lots of stuff is built and done. Exhaust after the cat splits into two pipes, and one has a valve to allow me to spool the turbo super fast. Got all that done today, it's ready to be final installed into car tomorrow when paint is dry. I still gotta cut/fit/weld the 60mm wastegate to the 3" exhaust section for rear turbo boost regulation, that happens tomorrow as well as re-remaking the VSS sensor bracket as the one I made hit the boost pipe and has to be again redone. Needs diff oil, trans fluid, oil change, injectors, swap back to E85, put interior back together, lots of little stuff but most of the big stuff is done. Once the wastegate and VSS brackets are done, I think I'm done welding then. Gotta do some hoses/fittings/solenoids to control boost on rear turbo, and valve on rear turbo.
Sorry the order of pics is a mess. I tried flickr, pain to use. This is imgur, easier and faster to use, better than photobucket but it messed up the order of pics.

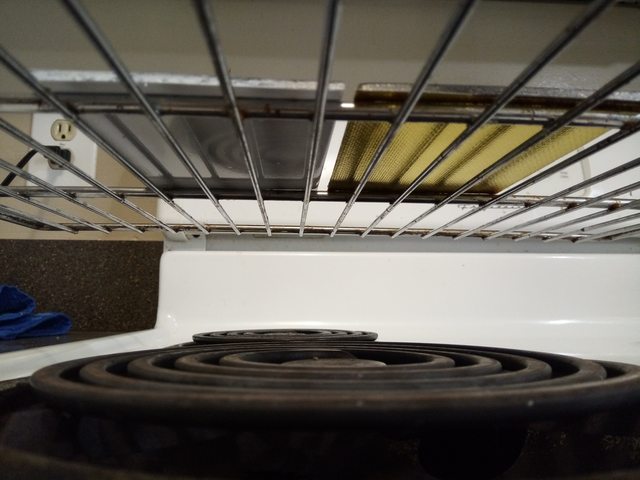
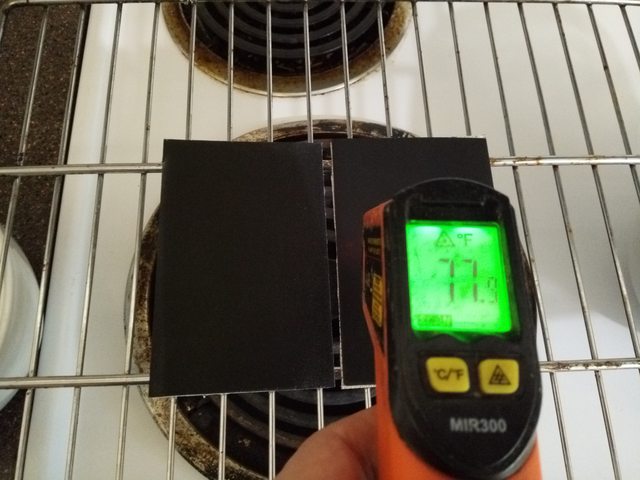
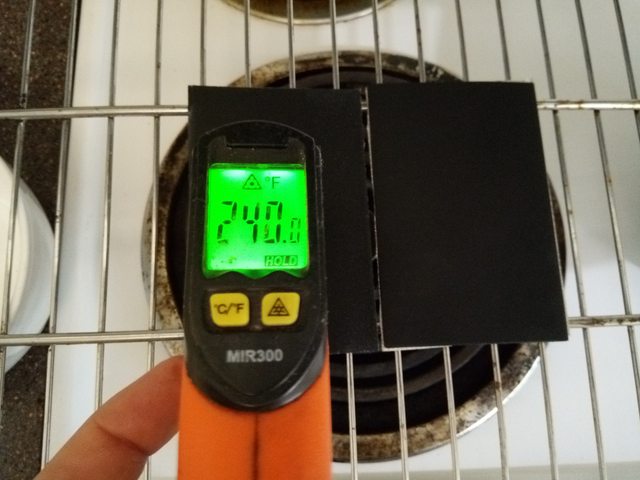
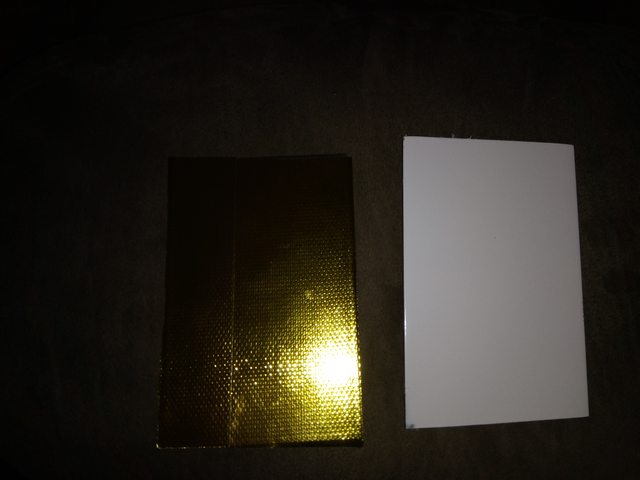

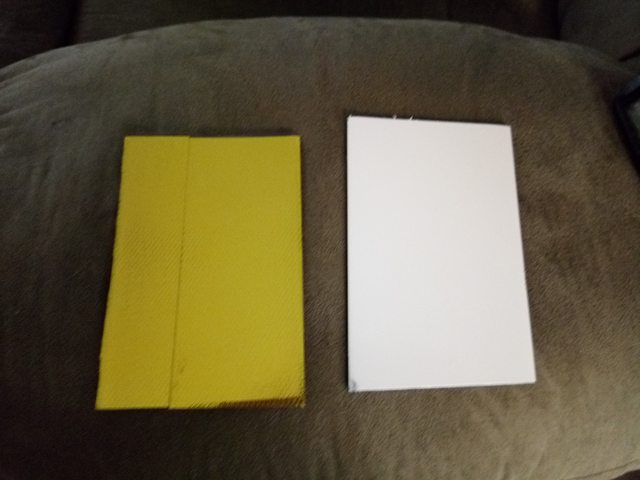
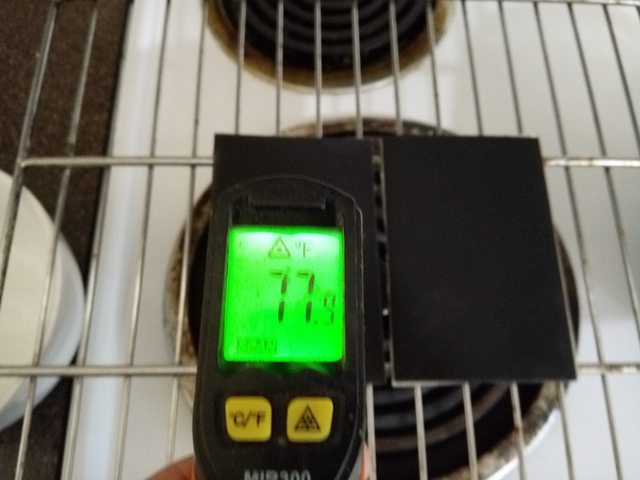
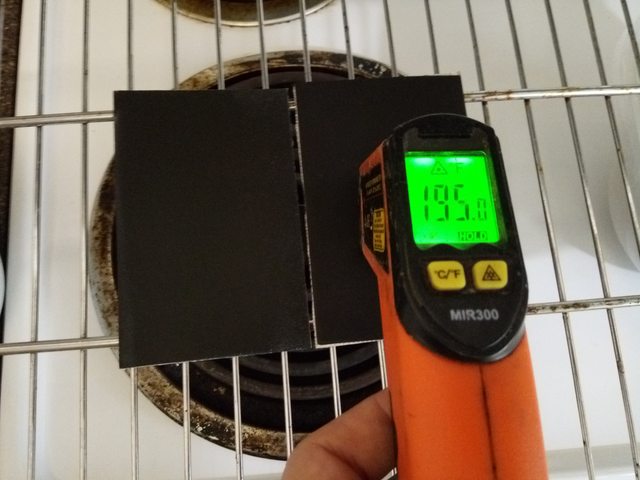
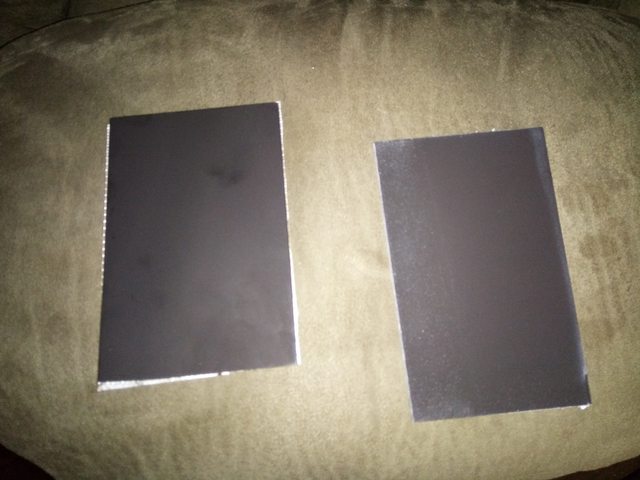
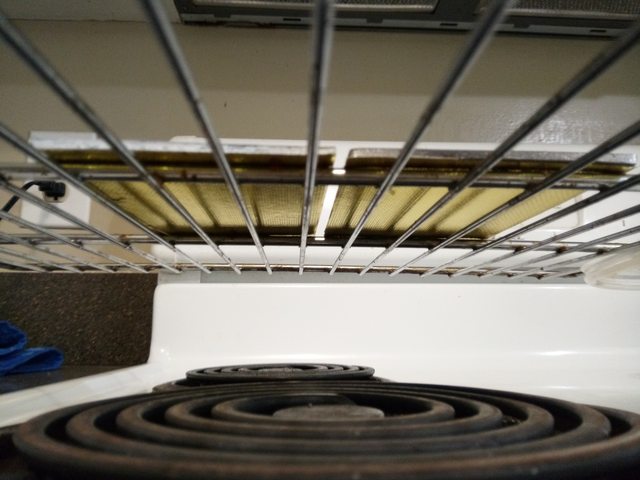
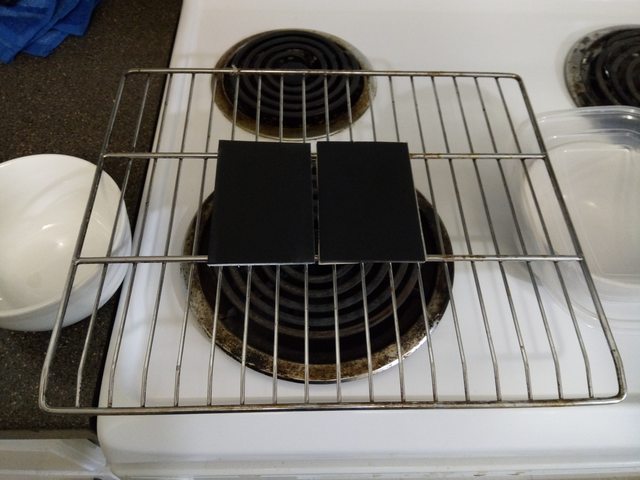
So I've been busy, so I'll try to keep this short and get a lot of pics up. I did some testing to see if white paint vs cheap amazon gold wrap tape, which reflects more radiant heat as I want to insulate my boost pipe from heat and they are close to the exhaust. I cut a piece of metal in half, painted one side of each piece flat black. On the other sides, one is gloss white, the other has the gold foil. Tested on my stove to hit it with lots of radiant heat, gold foil won by a good margin. Tested it with low heat and high heat, same results both times gold won. Also tested putting foil over the paint to see if the coating of paint helped to insulate the metal. Made no difference.
Lots of stuff is built and done. Exhaust after the cat splits into two pipes, and one has a valve to allow me to spool the turbo super fast. Got all that done today, it's ready to be final installed into car tomorrow when paint is dry. I still gotta cut/fit/weld the 60mm wastegate to the 3" exhaust section for rear turbo boost regulation, that happens tomorrow as well as re-remaking the VSS sensor bracket as the one I made hit the boost pipe and has to be again redone. Needs diff oil, trans fluid, oil change, injectors, swap back to E85, put interior back together, lots of little stuff but most of the big stuff is done. Once the wastegate and VSS brackets are done, I think I'm done welding then. Gotta do some hoses/fittings/solenoids to control boost on rear turbo, and valve on rear turbo.
Sorry the order of pics is a mess. I tried flickr, pain to use. This is imgur, easier and faster to use, better than photobucket but it messed up the order of pics.
Reply
9
9


