Churboner Build (not really...)
 02-10-2013, 02:37 AM
#1

Parts are starting to roll in now so thought I'd finally start my first build thread and attempt to keep things somewhat regularly updated. I'm definitely no expert and I'm here to learn so any advice is welcome. I'll try not to be so retarded as I know there's a ton of experience here on MT.
Background:
Goals:
And with the last 2 goals, referencing fast/cheap/reliable rule of thumb, here comes the inevitable wallet rapage (sorry for the length, but trying to keep this updated as my master parts list):
Block
1) Manifold
EMS
Background:
- First time building a motor, first time going FI, first time using standalone (re: noob)
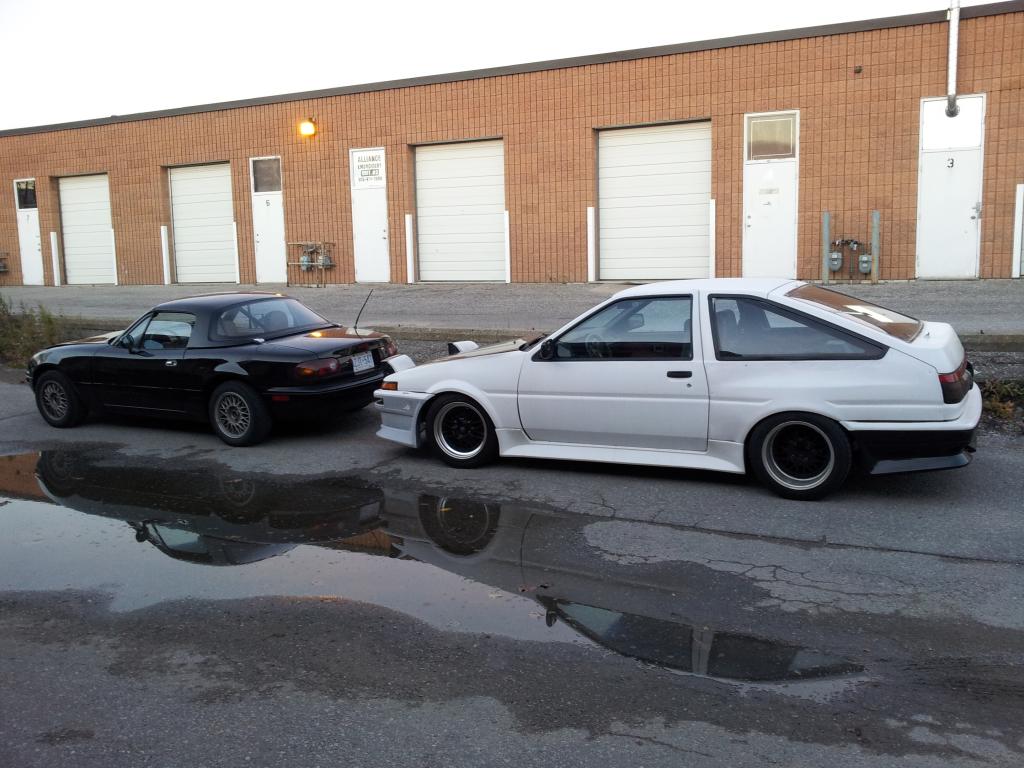
- Chassis is '92 and is my winter beater...for now. This is the 2nd and last winter it'll see. It's obviously not the best condition to build on since there's rust here and there, but I'm using it to learn on and one day hope to use it as a welding guinea pig
- Motor is a BP05 from a friend. At some point it was imported in and there's 0 history available. It's either a '94 or '95 and seems to be pretty low mileage
Goals:
- This is purely a learning project for both building and tracking
- Part time daily/weekender, most time track car
- Reliability a must
- Will be happy with ~220-240whp
- Part time daily/weekender, most time track car
- Reliability a must
- Will be happy with ~220-240whp
And with the last 2 goals, referencing fast/cheap/reliable rule of thumb, here comes the inevitable wallet rapage (sorry for the length, but trying to keep this updated as my master parts list):
Block
- 1mm overbore, plateau hone, and deck
- Supertech 84mm / 8.6:1 pistons and rings (0.0033 ptw clearance)
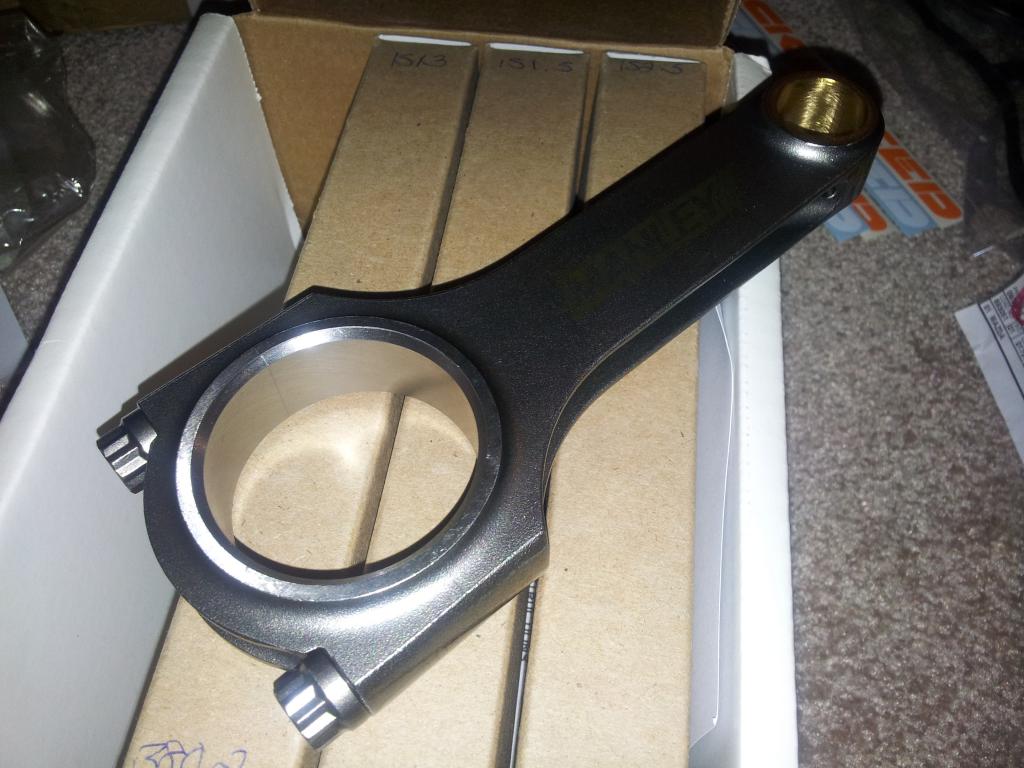
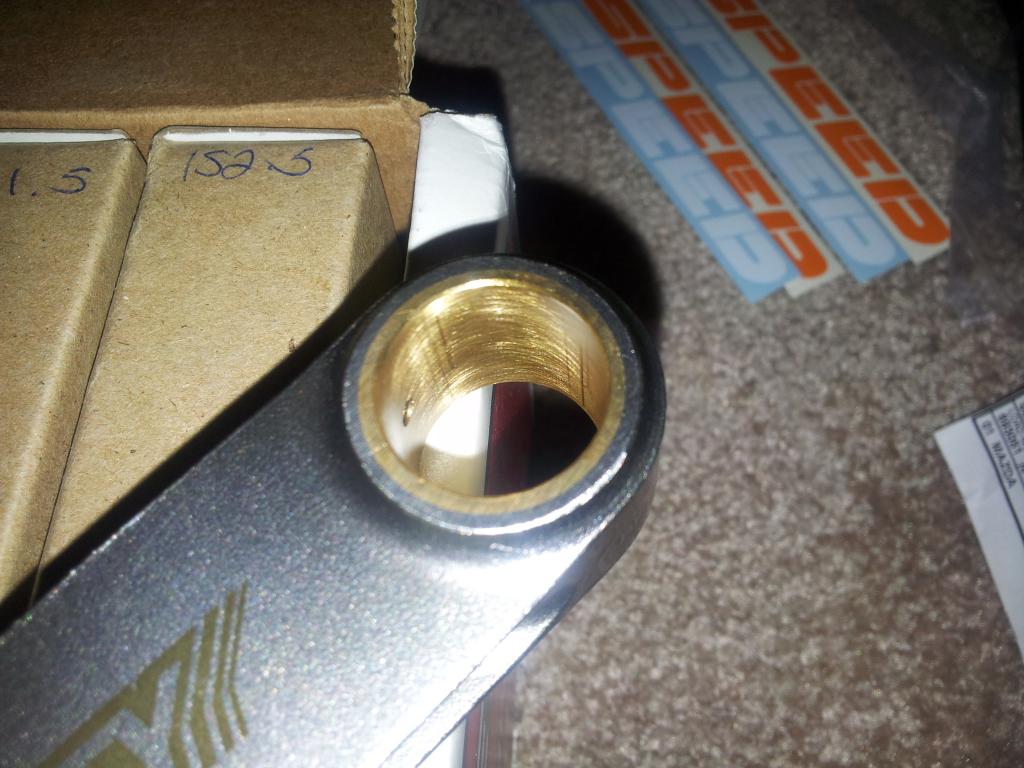
- Manley rods
- ACL race main & rod / std thrust bearings
- ARP main and head studs
- New freeze plugs
- BE street pump w/1 shim (~67 psi)
- Gates WP
- OE gaskets
- SuperMiata harmonic damper w/12+1 wheel
- MazdaComp mounts
- -4AN turbo feed from block port
- -10AN turbo drain to pan
Head- Supertech 84mm / 8.6:1 pistons and rings (0.0033 ptw clearance)
- Manley rods
- ACL race main & rod / std thrust bearings
- ARP main and head studs
- New freeze plugs
- BE street pump w/1 shim (~67 psi)
- Gates WP
- OE gaskets
- SuperMiata harmonic damper w/12+1 wheel
- MazdaComp mounts
- -4AN turbo feed from block port
- -10AN turbo drain to pan
- Decked and cleaned only
- Stock valvetrain
- Supertech viton valve seals
- Stock cams
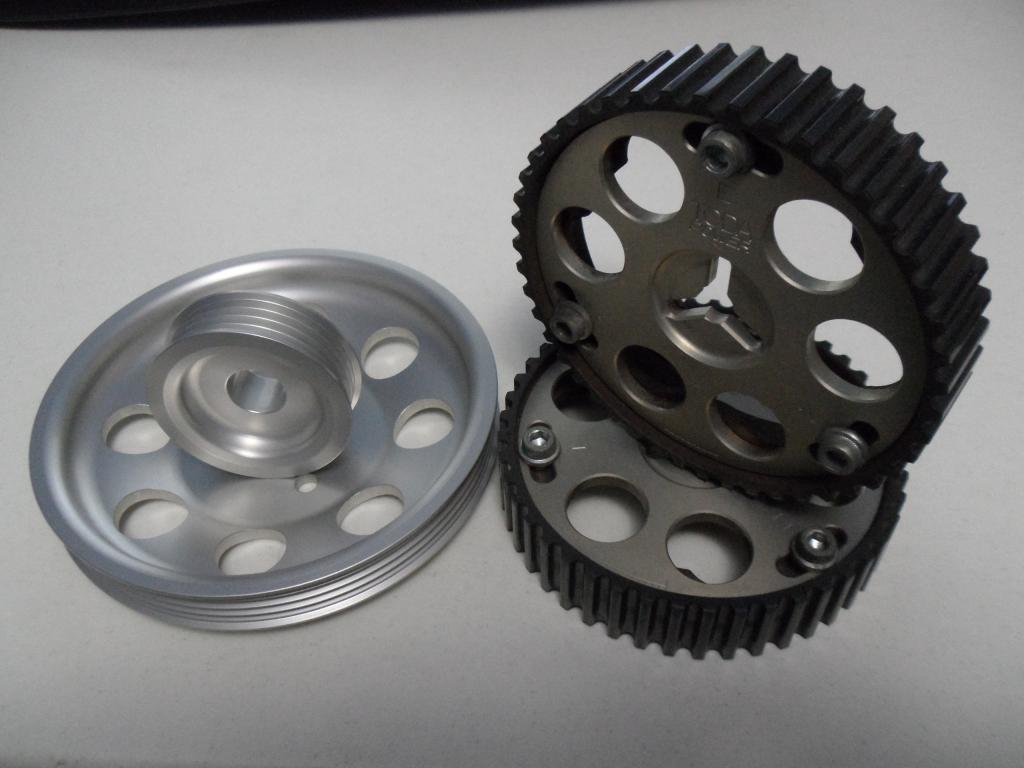
- Toda cam gears
- Gates kevlar belt
- OE gaskets
- Protege VC w/modified PCV
Ignition- Stock valvetrain
- Supertech viton valve seals
- Stock cams
- Toda cam gears
- Gates kevlar belt
- OE gaskets
- Protege VC w/modified PCV
- LS2 coils
- DIY wires from Summit
- NGK BKR7E-11 plugs
Fuel- DIY wires from Summit
- NGK BKR7E-11 plugs
- DIY dual feed rail
- 550cc RX7 injectors or considering FIC 525cc EV14's
- Considering Walbro 190hp
Intake- 550cc RX7 injectors or considering FIC 525cc EV14's
- Considering Walbro 190hp
- Stock manifold w/EGR & canister delete
- Skunk2 64mm TB
- Synapse Synchronic diverter valve (VTA config)
- CX Racing intercooler (21x5.5x2.5 core / 28x5.5x2.5 overall)
- 2" DIY piping
Exhaust- Skunk2 64mm TB
- Synapse Synchronic diverter valve (VTA config)
- CX Racing intercooler (21x5.5x2.5 core / 28x5.5x2.5 overall)
- 2" DIY piping
1) Manifold
- Mild steel ramhorn bottom mount
- T3 flanged (w/TSE inconel kit)
- 2 bolt EWG to be modified to v-band for 38mm Tial MV-S
- Ceramic coated
2) Churbo- T3 flanged (w/TSE inconel kit)
- 2 bolt EWG to be modified to v-band for 38mm Tial MV-S
- Ceramic coated
- Comp A/R: 0.42
- Comp diameters: 43.20 / 60.41
- Exh A/R: 0.48
- Turbine diameters: 45.74 / 62.86
- 2.5" V-band outlet (exhaust to continue as 2.5")
- IWG removed and flapper to be welded
3) Artech DP- Comp diameters: 43.20 / 60.41
- Exh A/R: 0.48
- Turbine diameters: 45.74 / 62.86
- 2.5" V-band outlet (exhaust to continue as 2.5")
- IWG removed and flapper to be welded
- EWG will have dump tube
- Innovate MTX-L AFR kit
4) High Flow Cat / Artech Test Pipe- Innovate MTX-L AFR kit
- Will v-band this to be able to swap test pipe on at track
5) Artech Mid Pipe- 1 resonator but undecided which one and size
6) Axle Back- Undecided which muffler to run (maybe just the usual magnaflow everyone runs)
- Will also v-band this portion to be able to swap a turn down pipe on at track
- Will also v-band this portion to be able to swap a turn down pipe on at track
EMS
- Enhanced MS2 from Reverant
Cooling- Mishimoto dual row rad, fans, t-stat
- Coolant reroute (DIY)
- Considering oil cooler setup
Drivetrain- Coolant reroute (DIY)
- Considering oil cooler setup
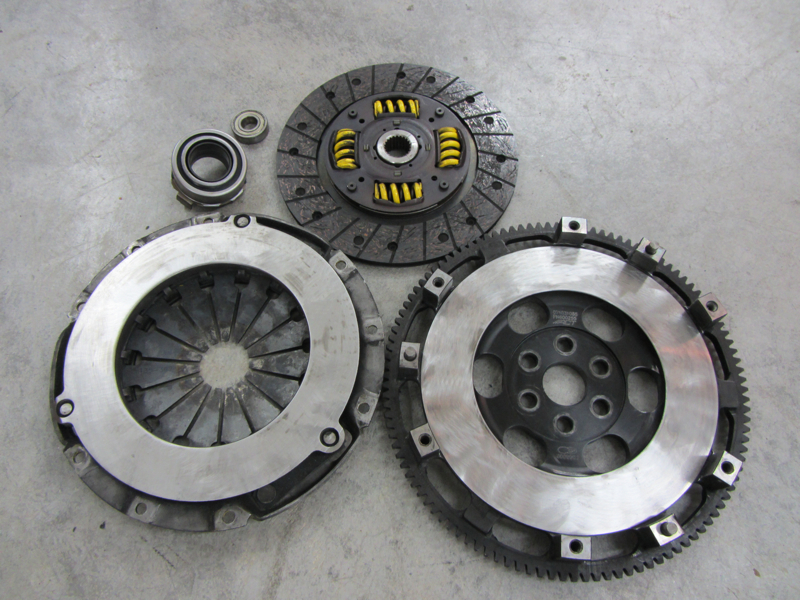
- ACT clutch kit (ZM2-XTSS) and FW (600255)
- 5 speed, will ride it to the ground
- 1.6 open, will ride it until explosion (plan to replace w/torsen)
Suspension / Steering- 5 speed, will ride it to the ground
- 1.6 open, will ride it until explosion (plan to replace w/torsen)
- PS delete
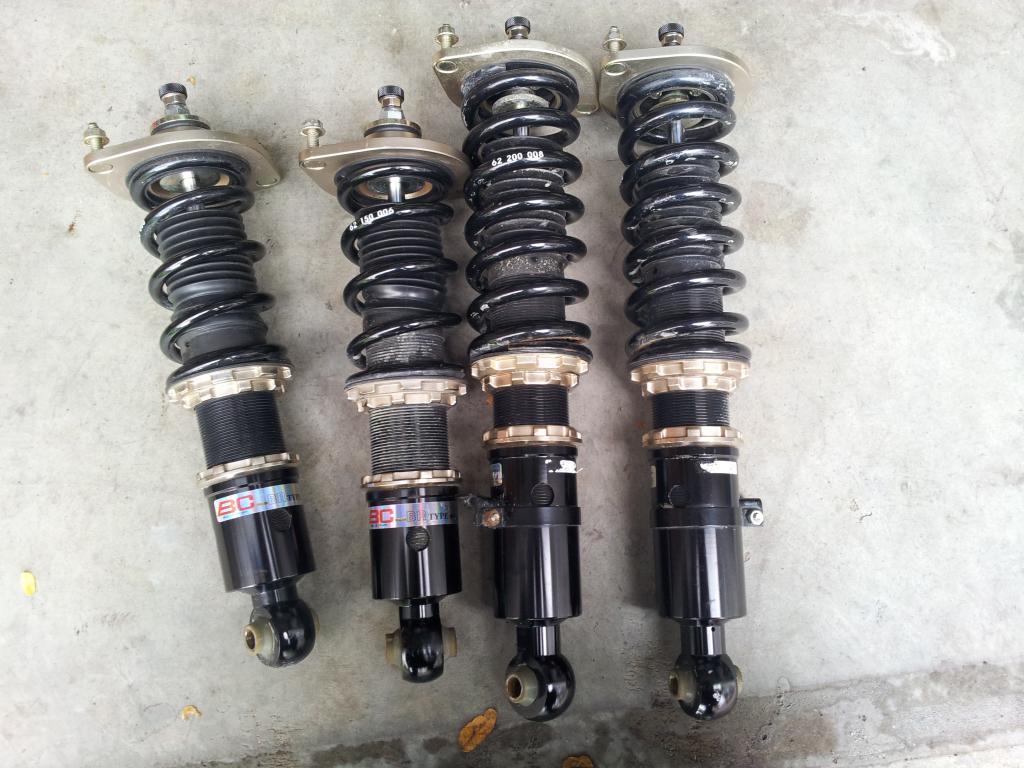
- BC coils (yeah I know, don't hate...I got them for a good deal so will ride these for now and save for Xidas most likely)
- Would like to upgrade sway bars, just waiting on a good deal at the right time
Chassis- BC coils (yeah I know, don't hate...I got them for a good deal so will ride these for now and save for Xidas most likely)
- Would like to upgrade sway bars, just waiting on a good deal at the right time
- EGR roll cage
- Would like to get frame rail reinforcements at some point
Brakes / Wheels / Tires- Would like to get frame rail reinforcements at some point
- Planning on picking up 949's Wilwood BBK kit
- Planning on usual 15x9 6ul's on 225/45 RS3s for street/track
- Have 15x7 +12 MSW Nuova S3's on 205/50 R888s I use for the E30 which I may use for Miata too
Pics to come tomorrow...
- Planning on usual 15x9 6ul's on 225/45 RS3s for street/track
- Have 15x7 +12 MSW Nuova S3's on 205/50 R888s I use for the E30 which I may use for Miata too
Last edited by rkim; 02-10-2013 at 11:05 PM.

Reply
 0
0

0

 02-10-2013, 04:48 PM
#6
Ok so I'll try to make it up for posting so much writing. Here's some history:
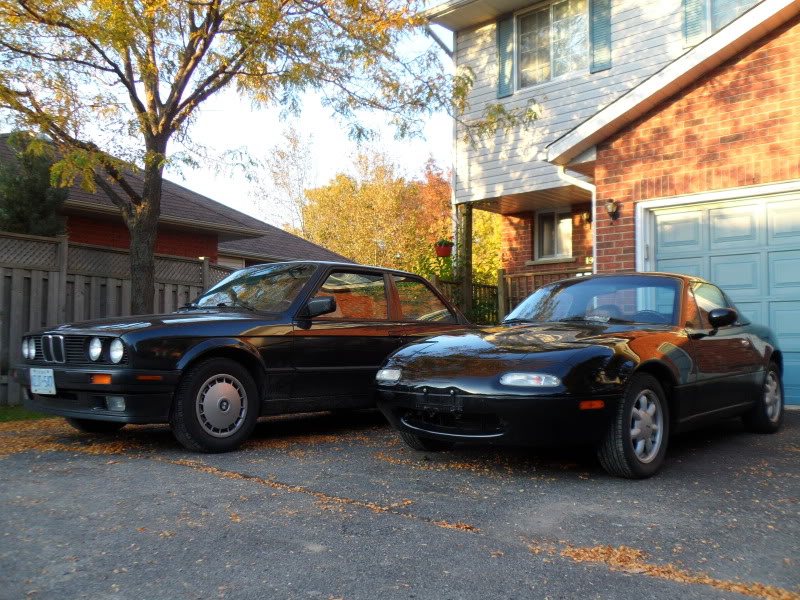
Bone stock (both cars) back in 2011:
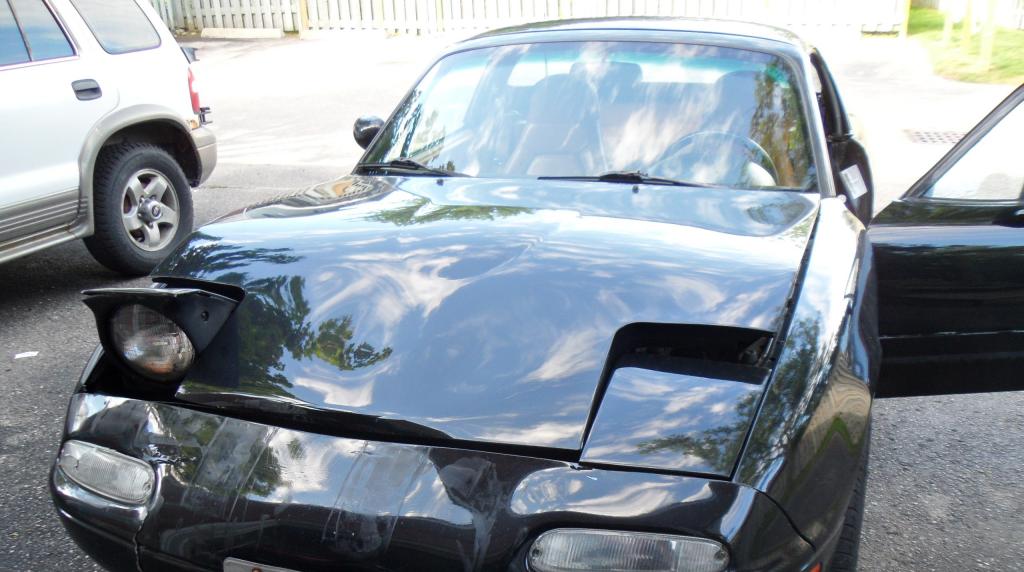
Last June this lady in a CR-V wanted it up the ***, so I gave it to her. Luckily she didn't charge me so I got let off (small scuff to her RR bumper undercover). As you can see I didn't fare so well...Rad support bent back and down, RH lamp assy toast, hood, bumper, done:

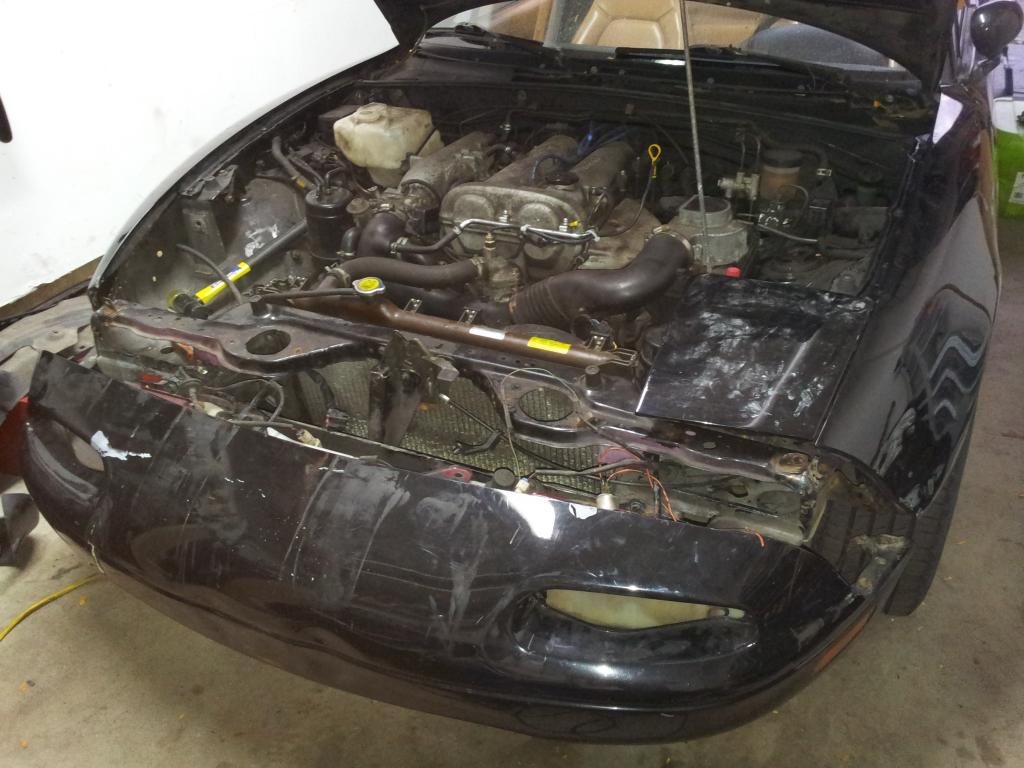
Around the same time, someone locally understeered and flew off an off ramp into a ditch, so he was parting out. Score. Cut out their rad support and snagged the bumper (WHY ARE THERE SO MANY RED MIATAS!) and welded new support on:
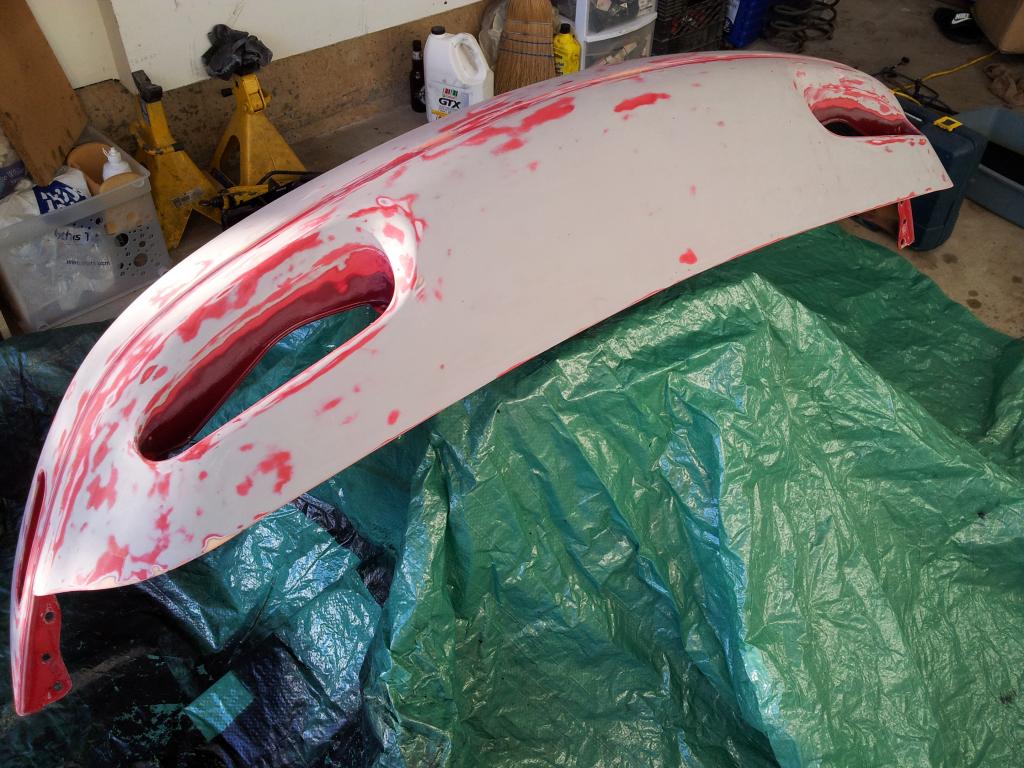
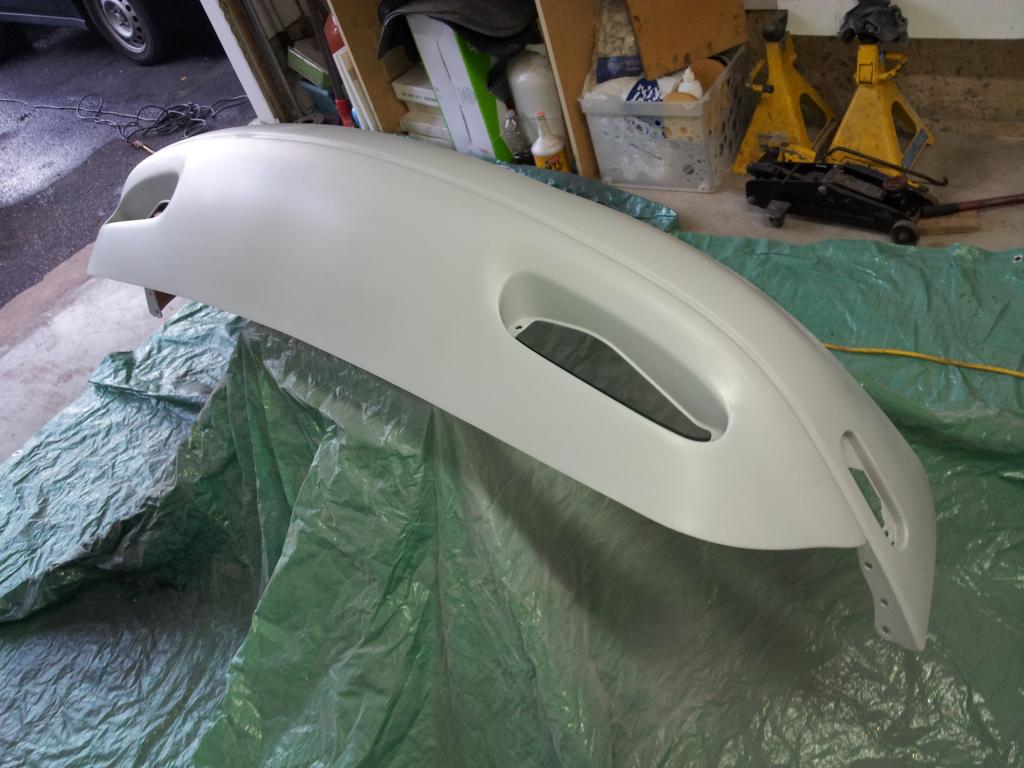
I guess you can call it self-discipline, or just cheap. Didn't want to pay a body shop for the job so I just made do with what I had. Sanding was such a bitch but I was still grateful the Miata bumper is relatively simple. Went down as much as I could to OE primer:
Primed back up:
Then I thought of something stupid. Maybe if I use black sandable primer and load it up, I can wet sand back down and still be left with black:
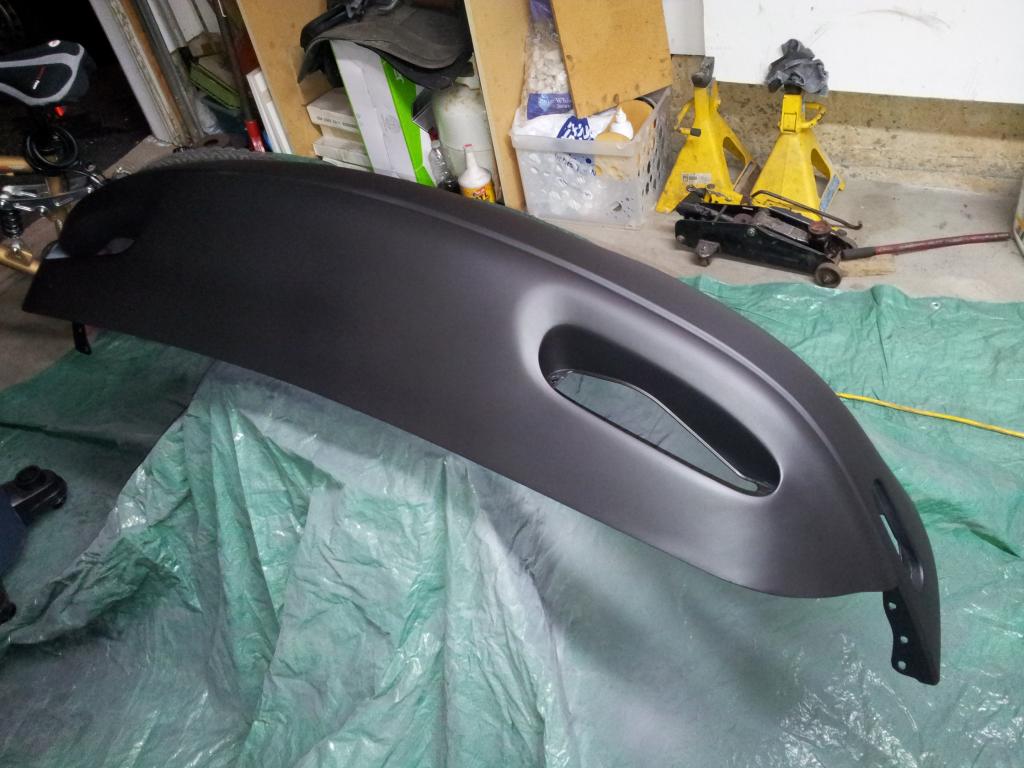
Nope...this stuff was so shitty I could almost rub it off by hand. So I got as much of it off and proceeded to base:
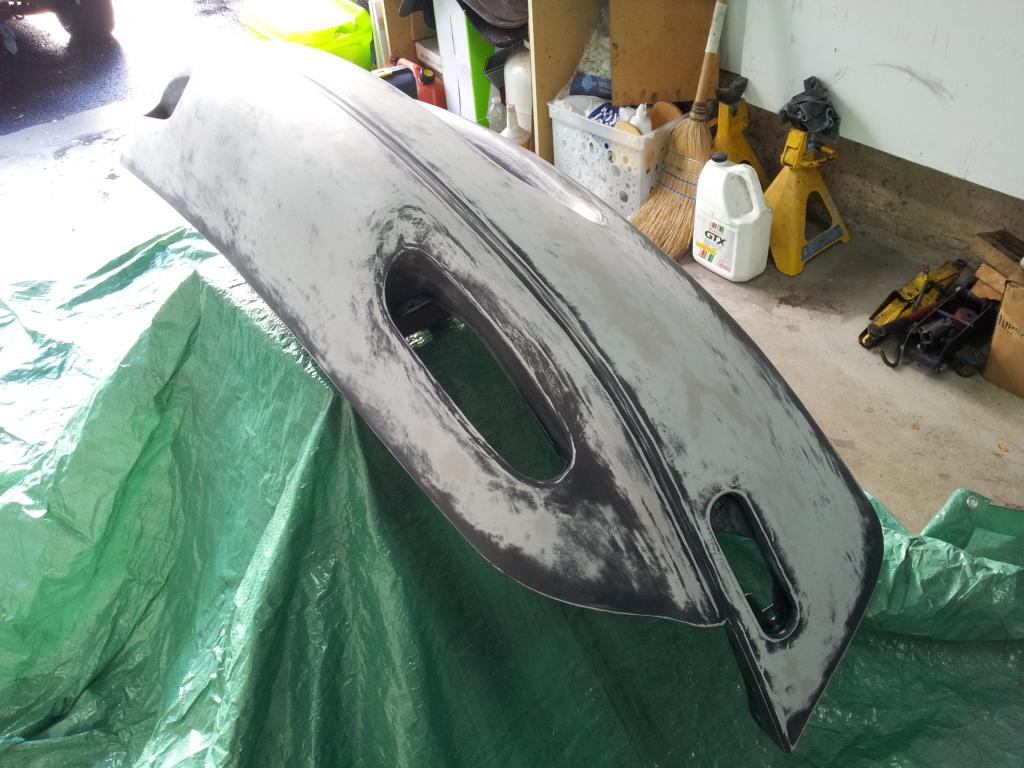
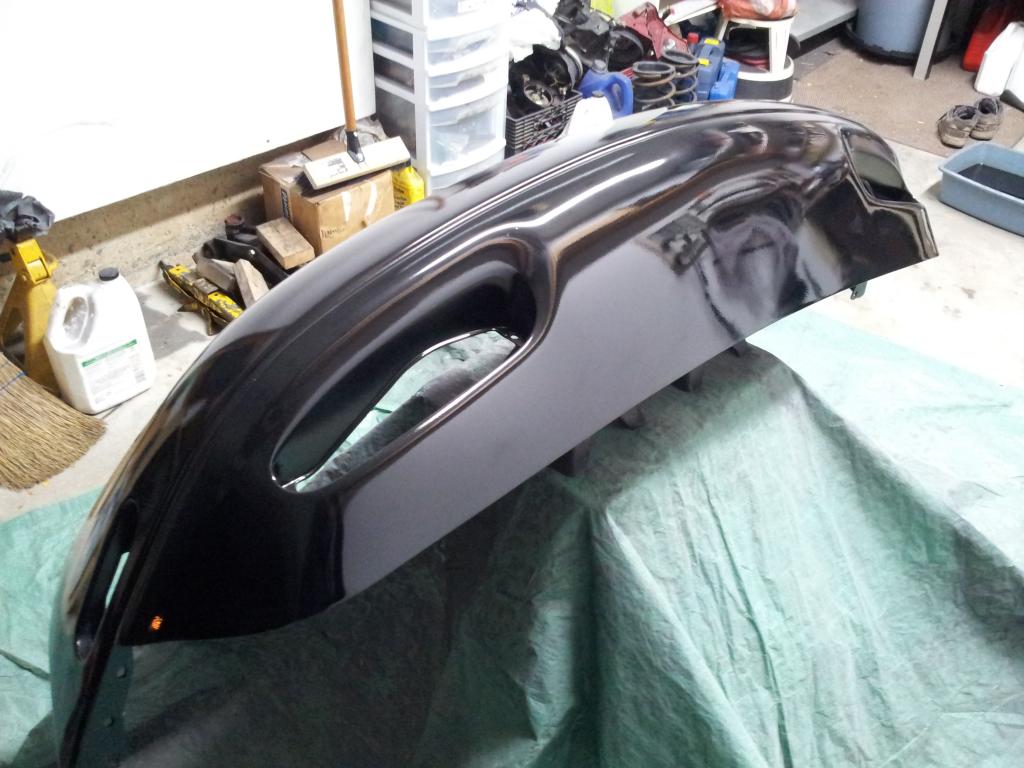
Final clear and now good to go (overspray clean up was also a PITA. Did I mention how much I love body work? :P):
Oh and randomly came across some dude in the middle of nowhere selling some mint Apache IV's for $100! Snagged those up quicktime. He used to run them on his E21 and I don't think he had any idea how much they were really worth:
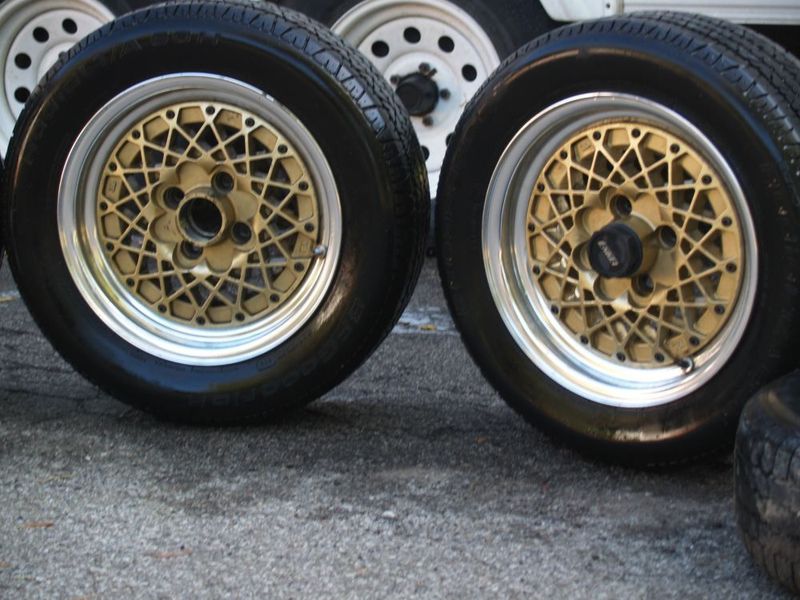
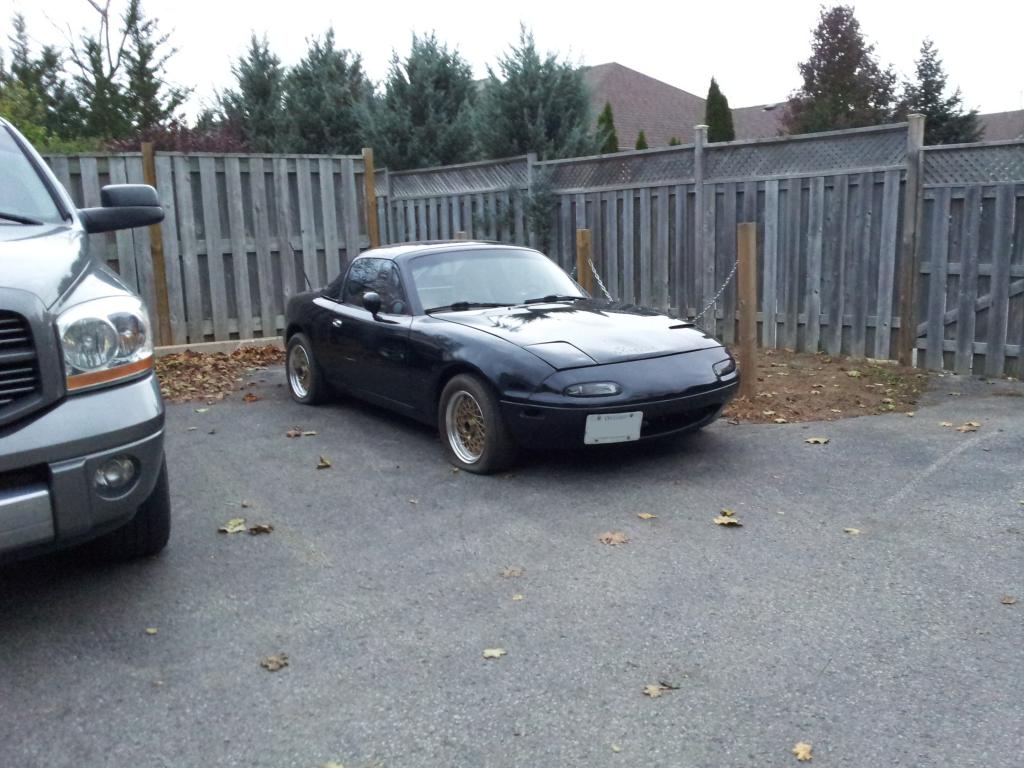
Tires are garbage but just threw it on the Miata to roll around on. Will probably transfer Apache's to E30. Bent hood back as best as I could and threw new bumper on (eventually replaced hood with a slightly scratched OE alum & black one):
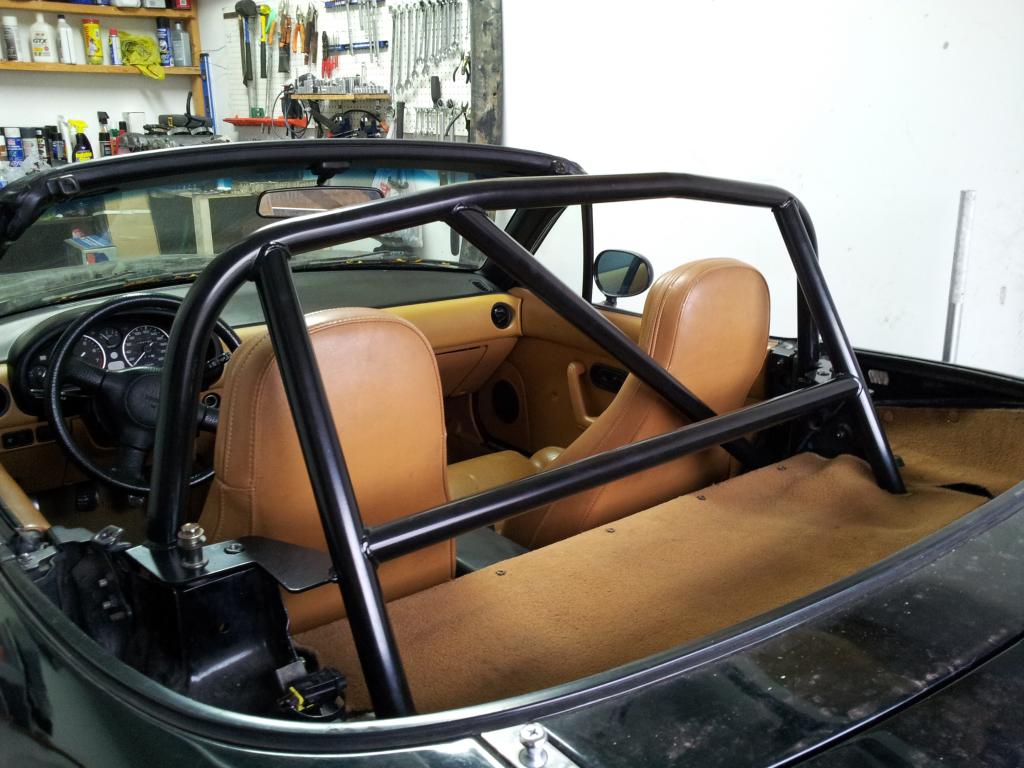
Decided to finally throw in my EGR roll cage too. Fitment was alright. Had to grind out LH seat belt tower hole to get it lined up laterally but it worked out ok in the end:
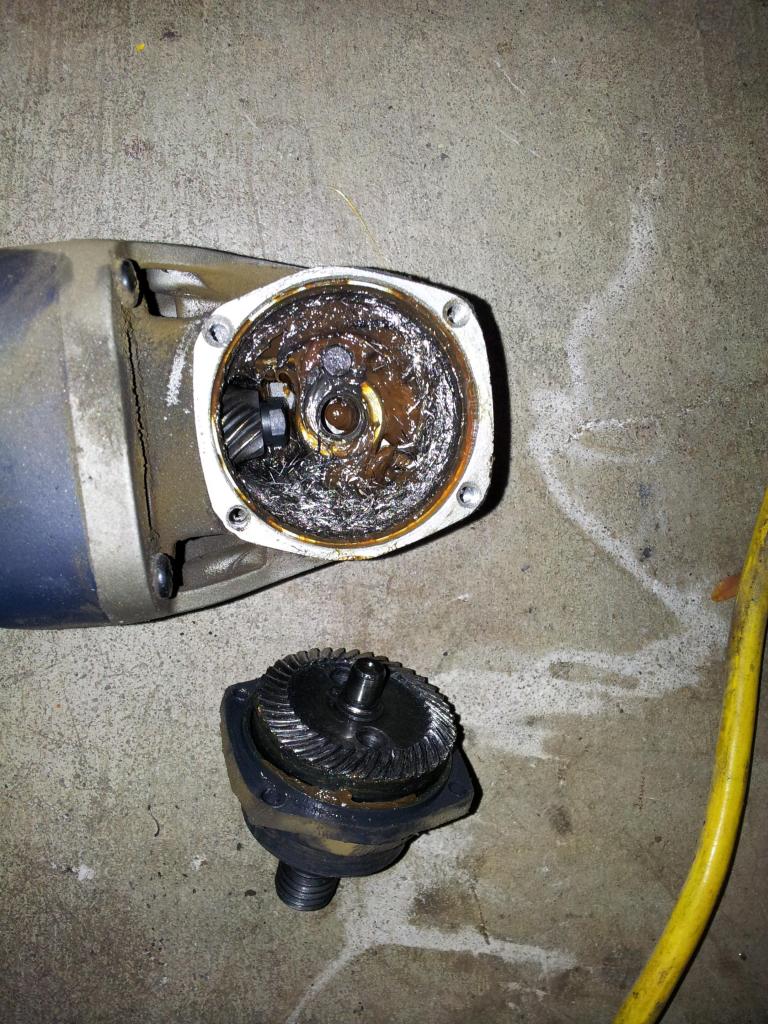
Oh and I was making a license plate brkt and grinder decided to quit. $20 for 4 years of service ain't too bad! Gear teeth were totally fubar'd:

Local NB owner was selling his BC coils. Jumped on a good deal and picked them up:
Cruised out of town to swap hoods with some farmer that was hoarding FC's and Miatas. Met up with my buddy to chill at another friend's shop for a bit:
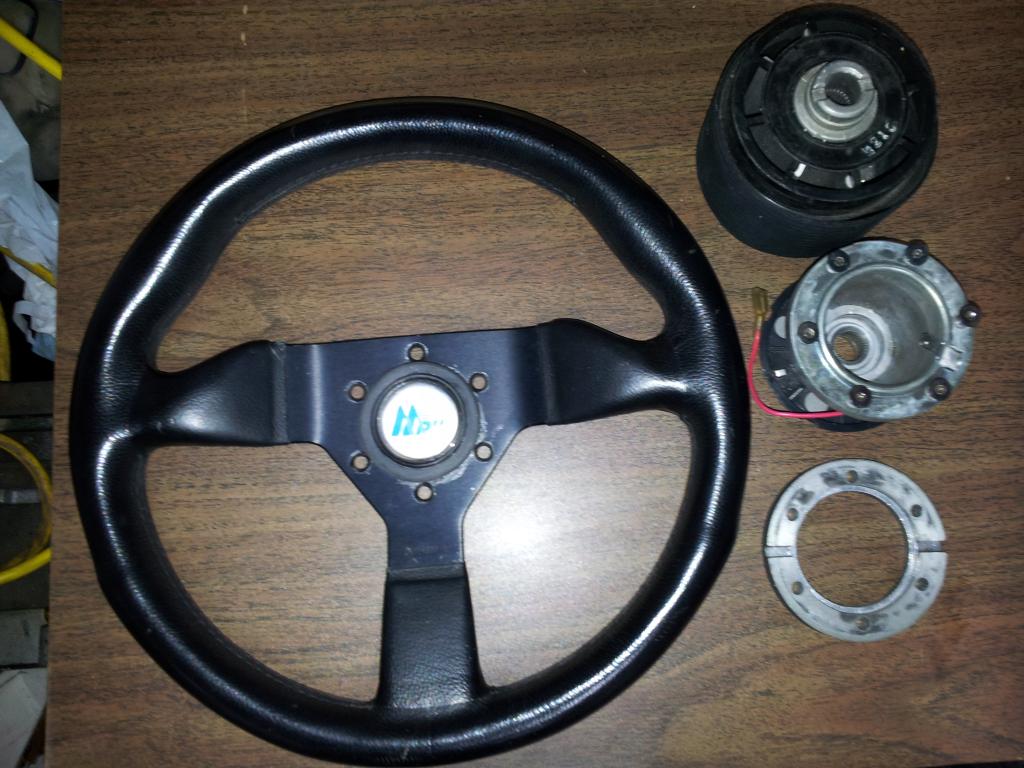
Picked up a Monte Carlo. Disappointed in the gouges around the horn button but not a deal breaker to me:
Man uploading pics is taking forever. Engine stuff next:
Bone stock (both cars) back in 2011:
Last June this lady in a CR-V wanted it up the ***, so I gave it to her. Luckily she didn't charge me so I got let off (small scuff to her RR bumper undercover). As you can see I didn't fare so well...Rad support bent back and down, RH lamp assy toast, hood, bumper, done:
Around the same time, someone locally understeered and flew off an off ramp into a ditch, so he was parting out. Score. Cut out their rad support and snagged the bumper (WHY ARE THERE SO MANY RED MIATAS!) and welded new support on:
I guess you can call it self-discipline, or just cheap. Didn't want to pay a body shop for the job so I just made do with what I had. Sanding was such a bitch but I was still grateful the Miata bumper is relatively simple. Went down as much as I could to OE primer:
Primed back up:
Then I thought of something stupid. Maybe if I use black sandable primer and load it up, I can wet sand back down and still be left with black:
Nope...this stuff was so shitty I could almost rub it off by hand. So I got as much of it off and proceeded to base:
Final clear and now good to go (overspray clean up was also a PITA. Did I mention how much I love body work? :P):
Oh and randomly came across some dude in the middle of nowhere selling some mint Apache IV's for $100! Snagged those up quicktime. He used to run them on his E21 and I don't think he had any idea how much they were really worth:
Tires are garbage but just threw it on the Miata to roll around on. Will probably transfer Apache's to E30. Bent hood back as best as I could and threw new bumper on (eventually replaced hood with a slightly scratched OE alum & black one):
Decided to finally throw in my EGR roll cage too. Fitment was alright. Had to grind out LH seat belt tower hole to get it lined up laterally but it worked out ok in the end:
Oh and I was making a license plate brkt and grinder decided to quit. $20 for 4 years of service ain't too bad! Gear teeth were totally fubar'd:
Local NB owner was selling his BC coils. Jumped on a good deal and picked them up:
Cruised out of town to swap hoods with some farmer that was hoarding FC's and Miatas. Met up with my buddy to chill at another friend's shop for a bit:
Picked up a Monte Carlo. Disappointed in the gouges around the horn button but not a deal breaker to me:
Man uploading pics is taking forever. Engine stuff next:
Reply
0
0
02-10-2013, 05:24 PM
#8
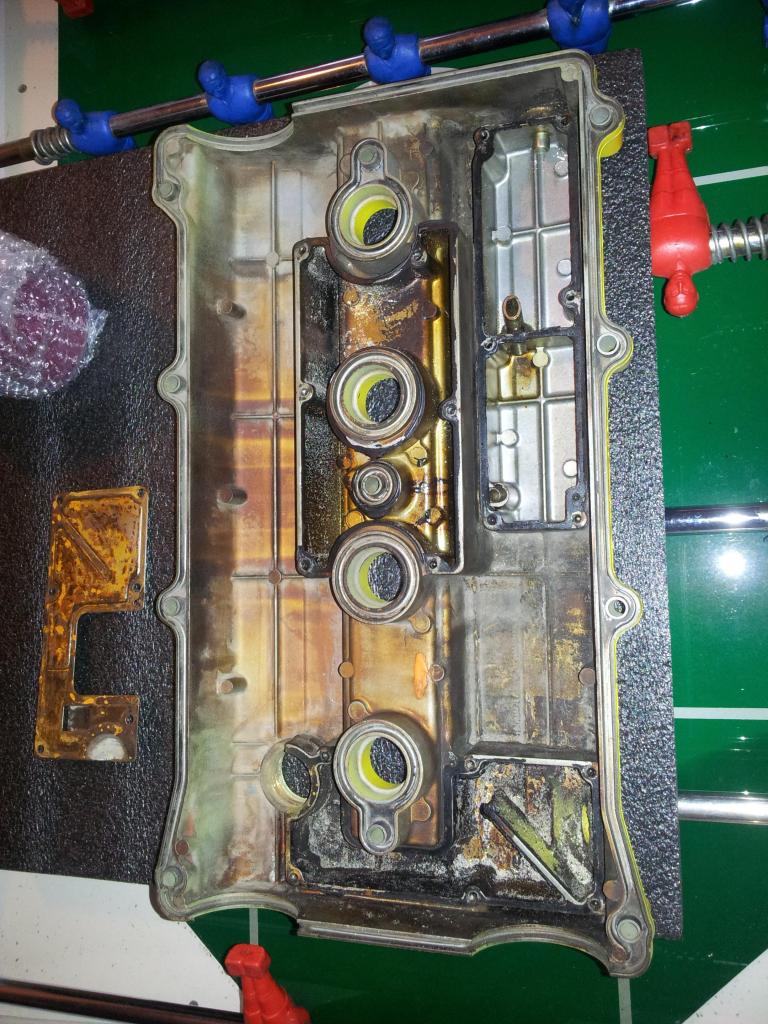
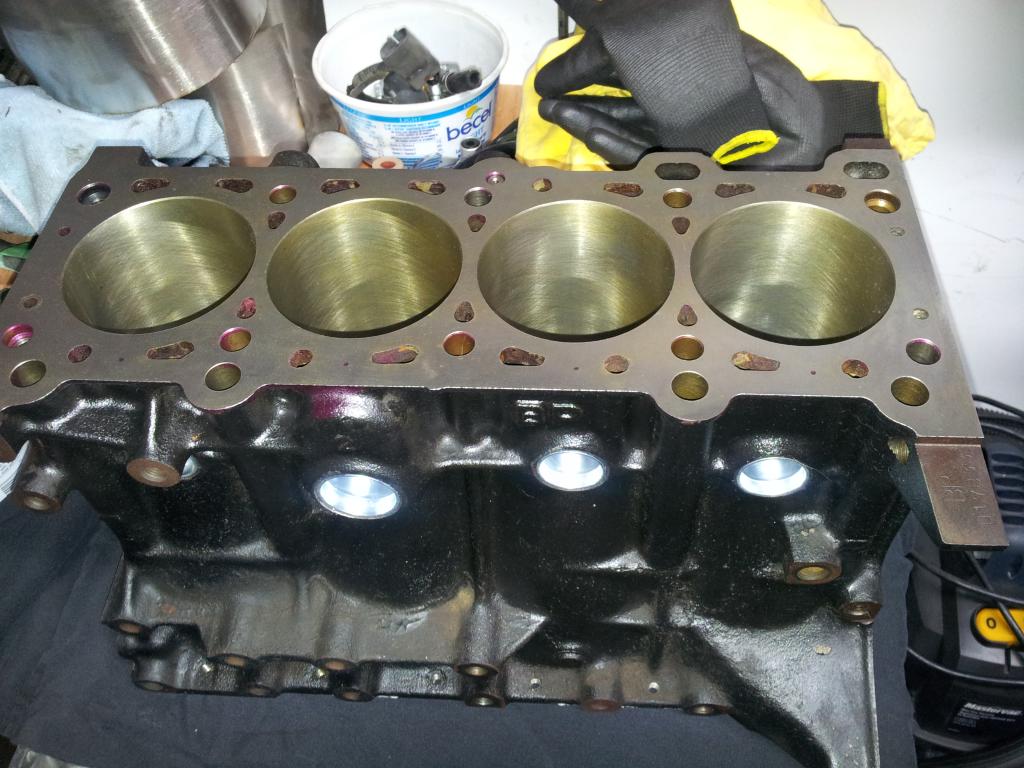
Ok so onto teardown. My friend had already disassembled the head so just the block was left.
Block was already cleaned by hand and looked pretty promising:
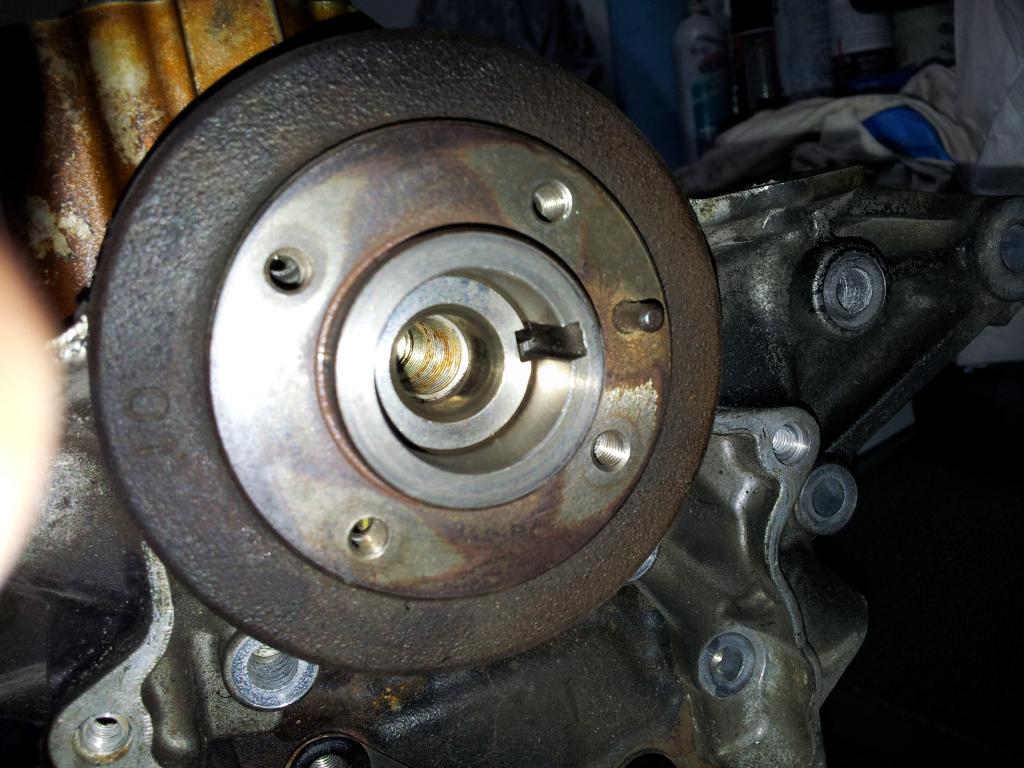
Don't know if this is traditional but had to figure out a way to loosen crank bolt so made up this angle iron piece to bolt to flywheel and brace against engine stand. Worked like a charm:
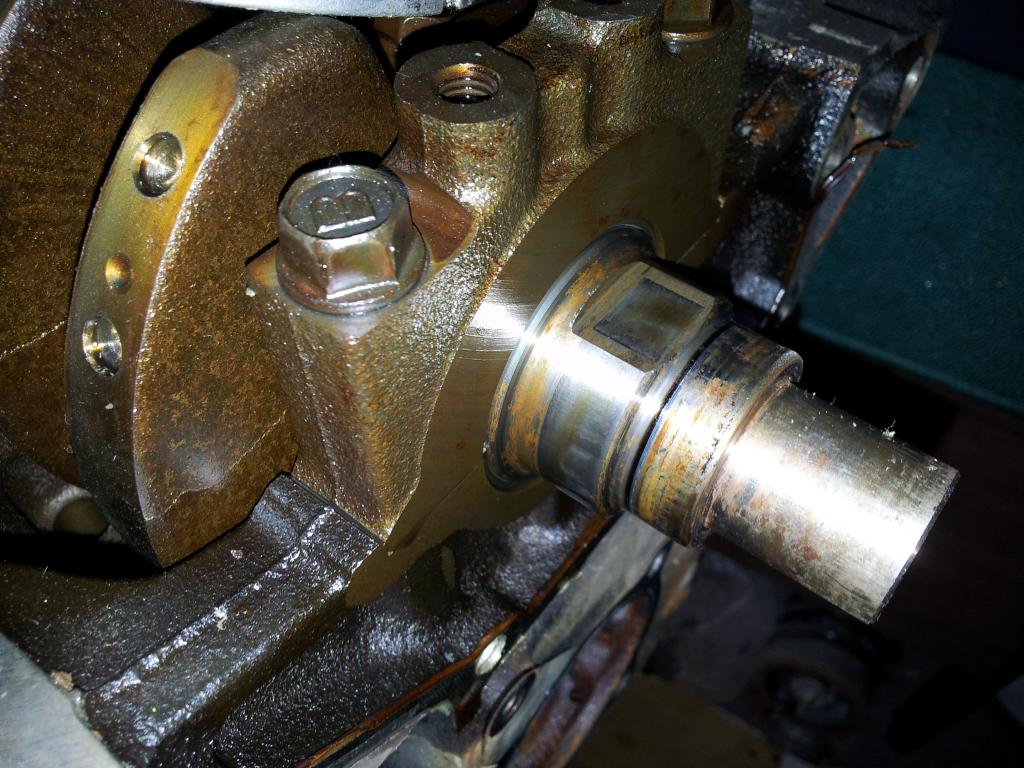
Found a nice surprise also...WTF where's the key? I still can't really think of how or why this happened:
Crank had a bit of damage on one of the oil pump drive flats. Machine shop will rework it for me:
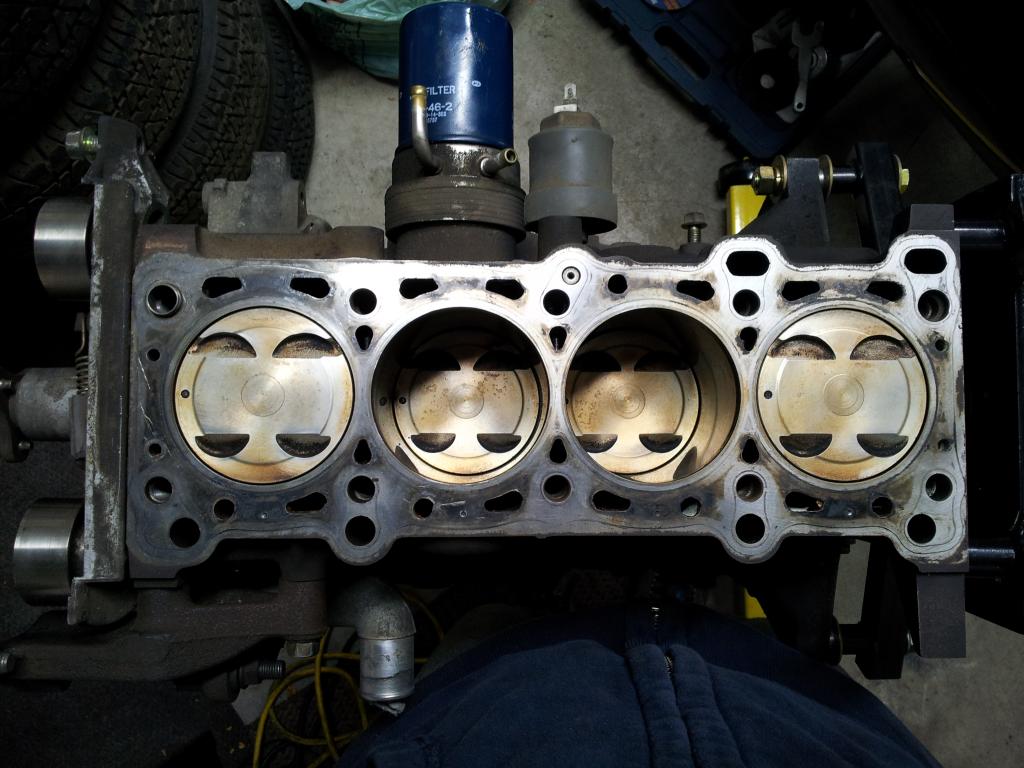
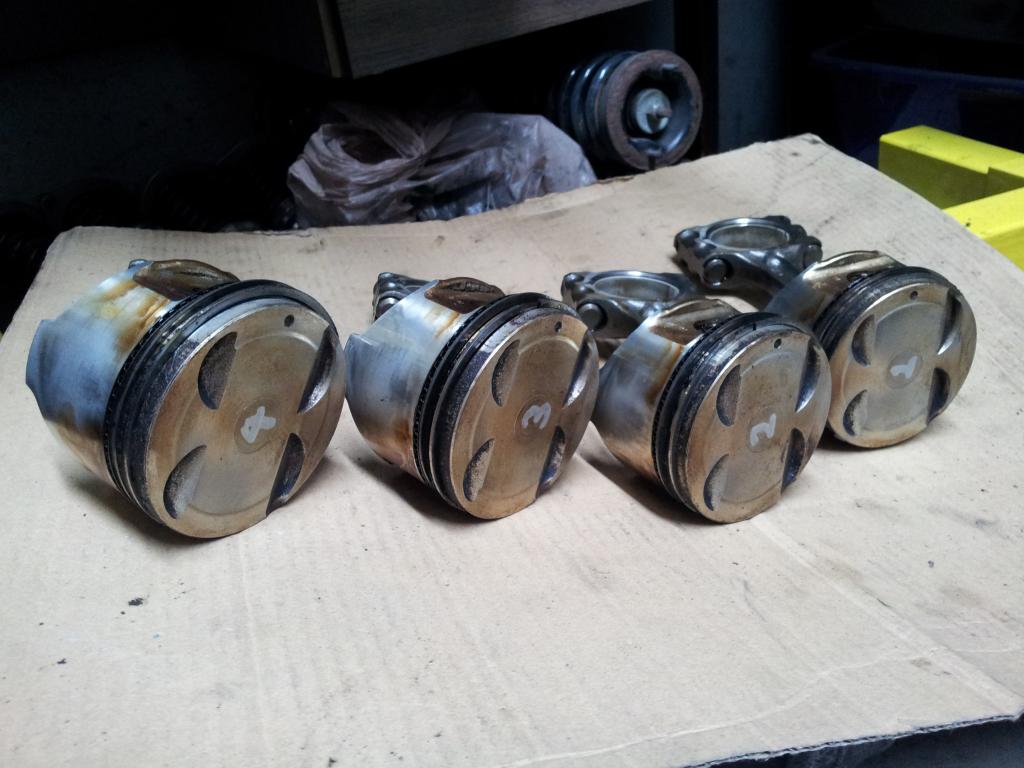
Pistons and bores all seem pretty consistent and can't see anything abnormal. The shop I dropped it off at noted that the motor appeared to be very low mileage so that was good to hear:

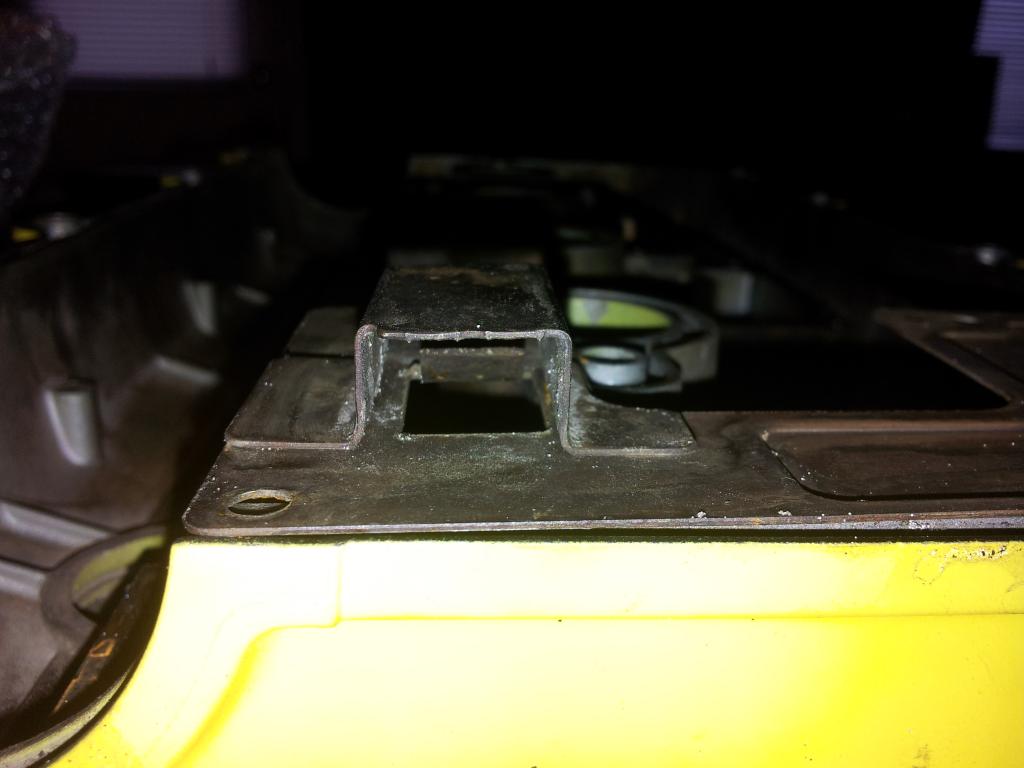
I think the VC confirms that too. Taking off the baffle plates, it looks pretty damn clean inside:
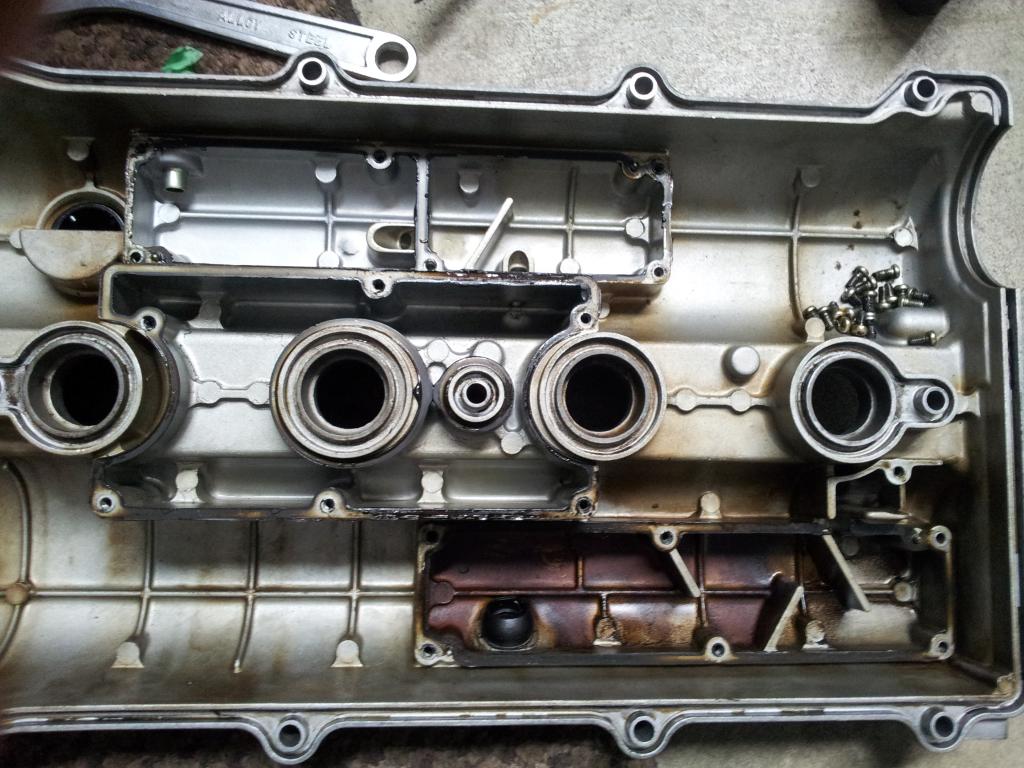
But there's a crack along the whole front exh cam gear section (NBD, was going to grind out if I used it), a hole in the RR RH hump section, and a caved in section beside Mazda:
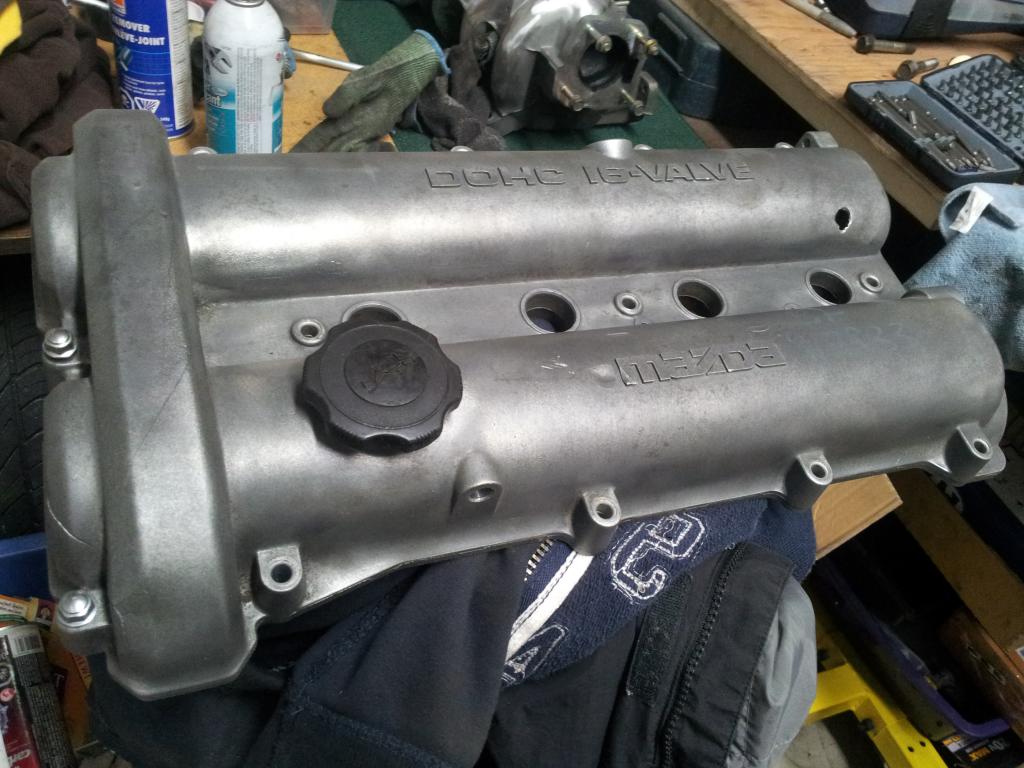
I didn't feel like reworking all this so I jumped on a Protege valve cover:
The RR RH vent port looks good but as you can see the actual PCV section up front is ***. I have a feeling it's because of the way the entry baffle design is and I'm thinking of somehow modifying it so I can still use the PCV port but just route to catch can without filling it so quick (more detail on this later):
So what do you guys do for valve cleaning usually? Any recommendations?

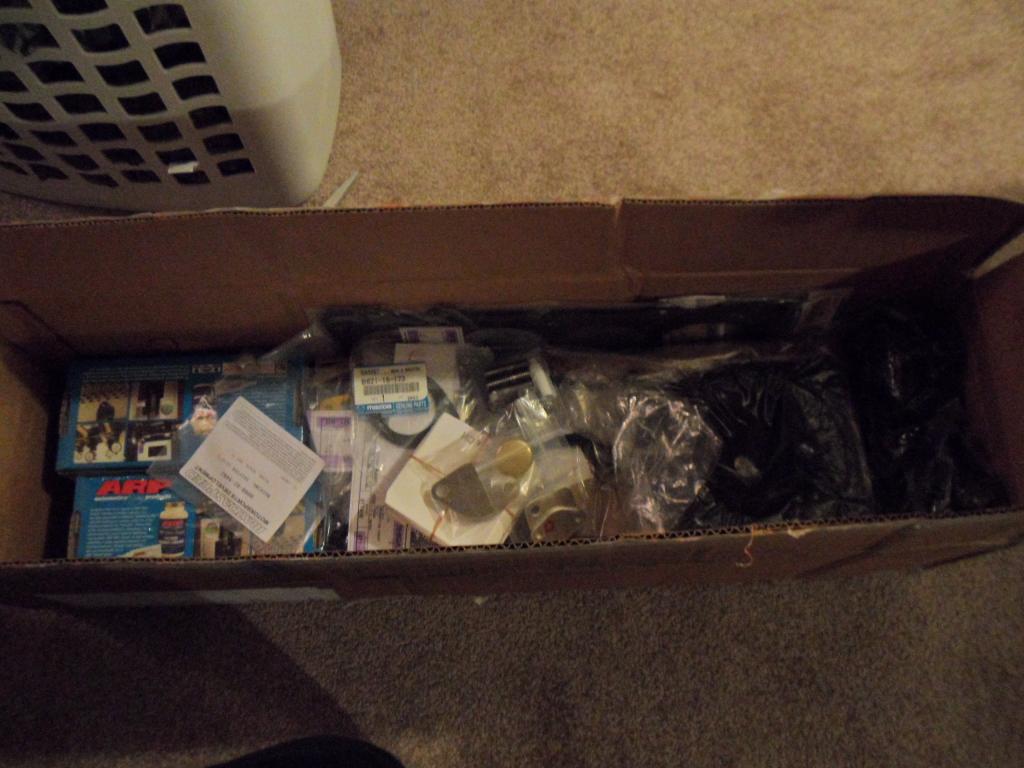
Oh and here's some more pics of parts:

Shoutout to Andrew (TSE) for all the rebuild parts:
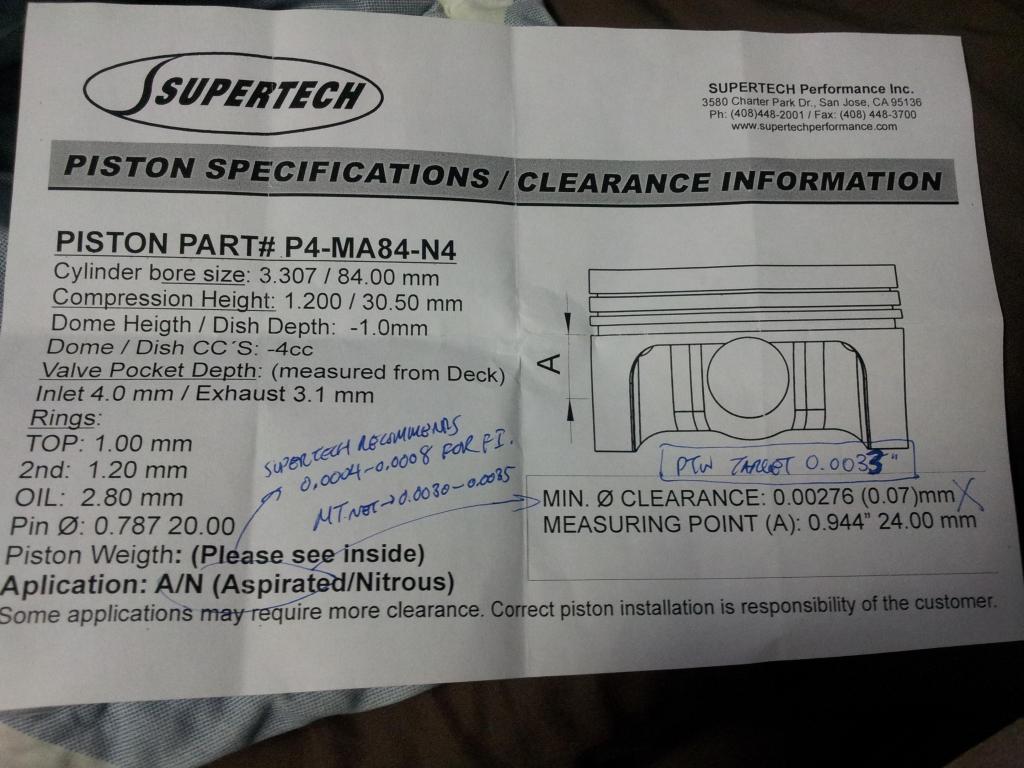
Supertech's were nicely packaged:
Same old, nothing new. Definitely understand the concern for how thin that wall is near intake valve relief:
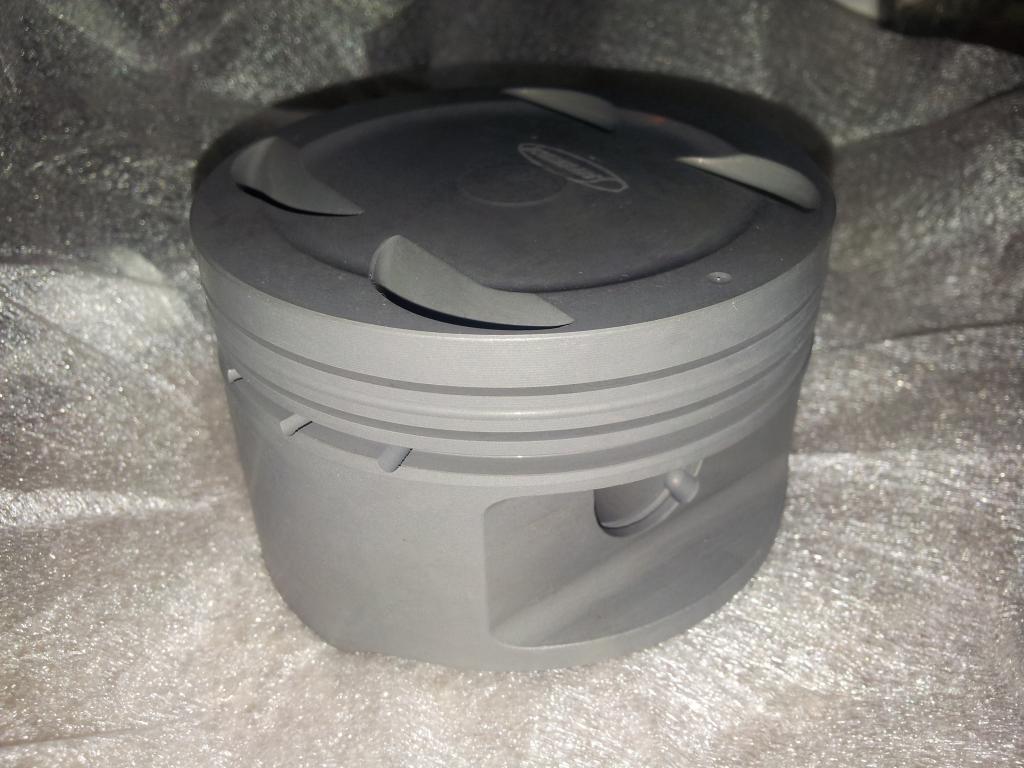
Researched a lot for PTW clearance. Found a MT thread with Andrew mentioning 0.003 for light boost (<300whp) and 0.0035 for heavy track use or high hp. Called Supertech because they only list NA/nitrous app and they recommended 0.0004-0.0008 larger than their spec, which basically puts it at 0.0032-0.0036. So I chose 0.0033 w/e:
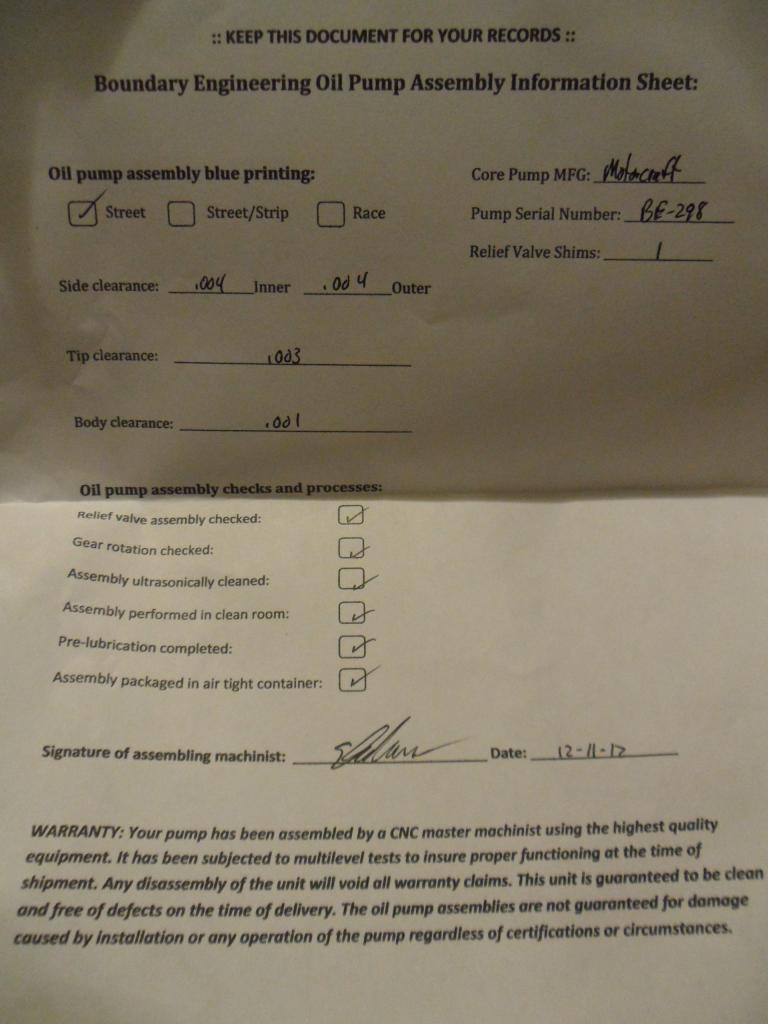
BE Pump sheet:
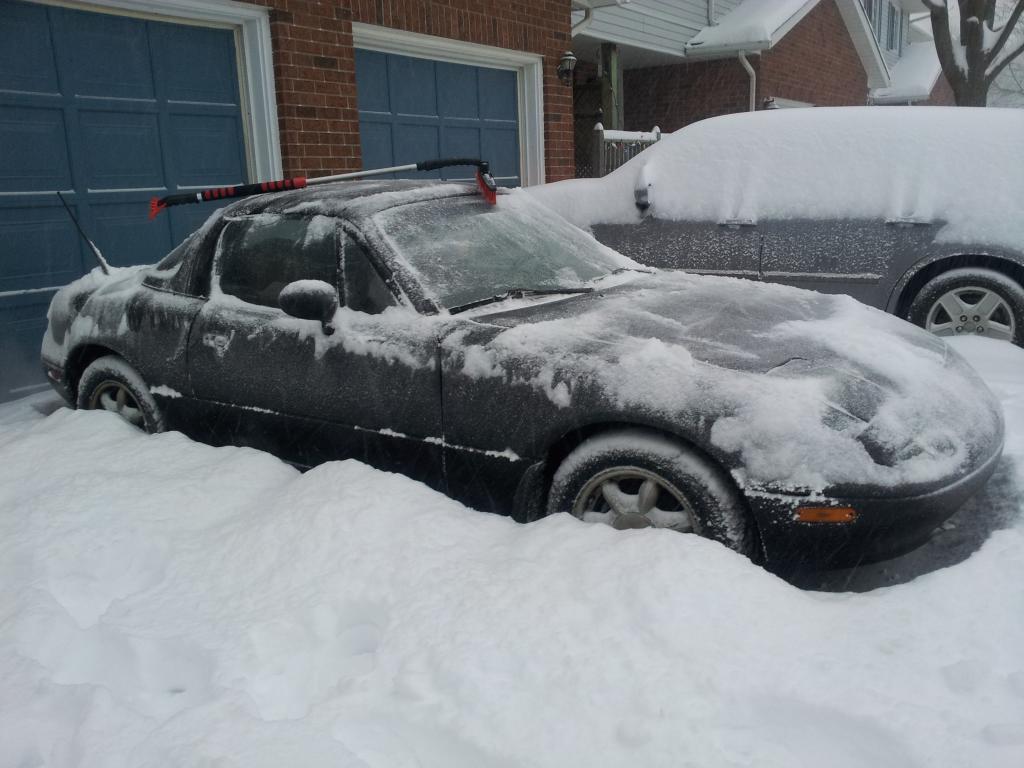
This past Friday we had snowmageddon hit. This was what I woke up to, fuuuu. Struggled to get out of the complex because there's an uphill section after a turn but made it to work. 6 roundabouts to the highway always make my commutes a lot of fun:
That evening I decided to trek it out to pick up a bunch of parts. Slightly sketchy driving 1/4 throttle on black ice on the freeway but fun and nonetheless worth the 3h drive effort:
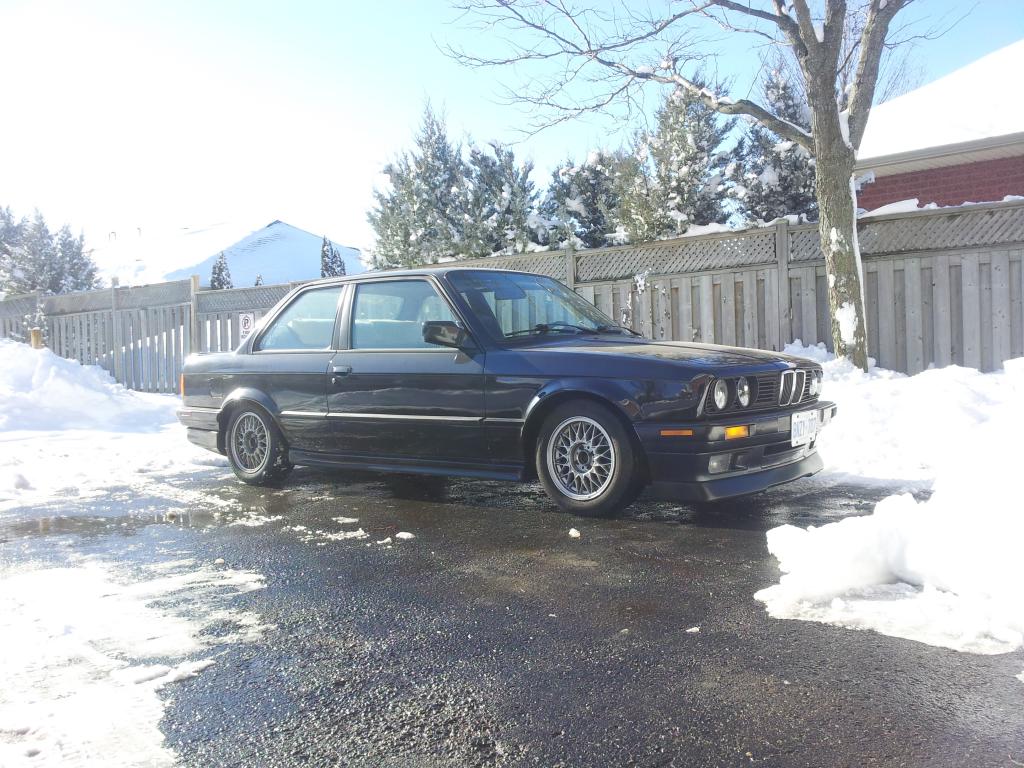
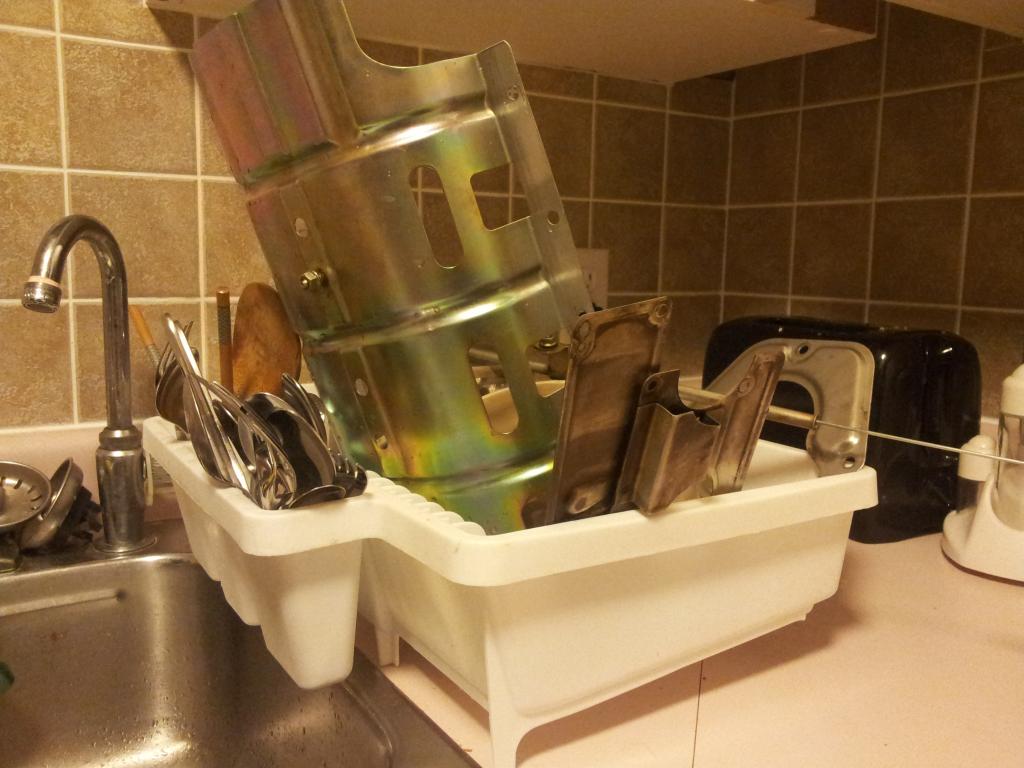
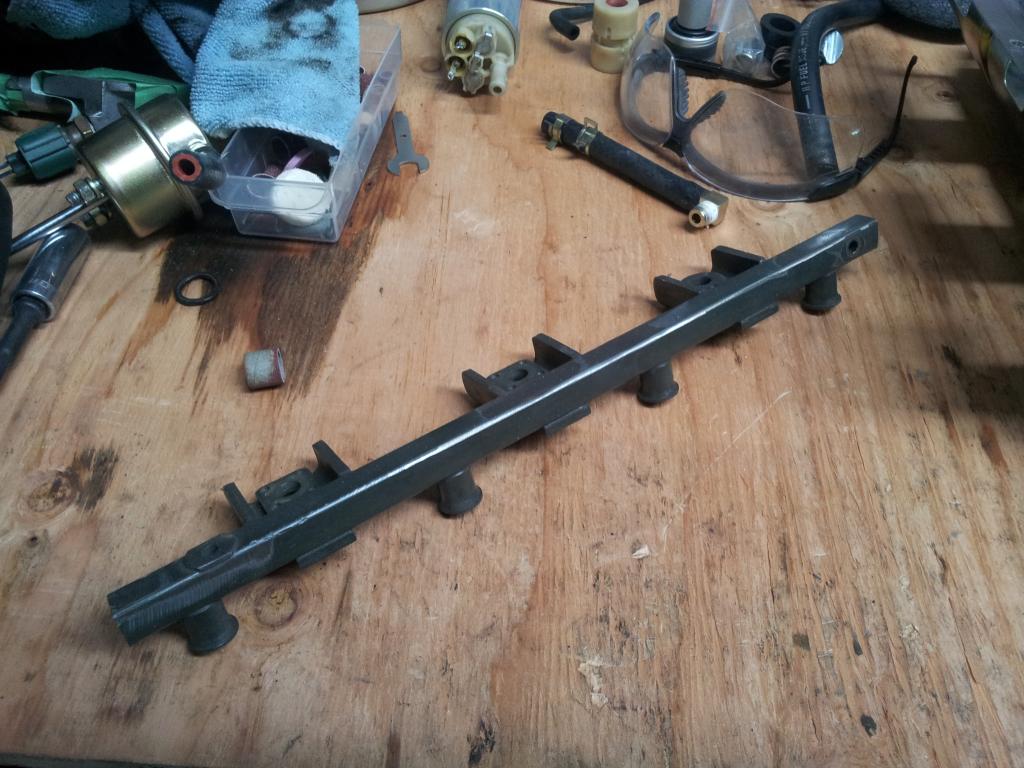
Yesterday spent some time running the E30, cleaning parts, and started to prep fuel rail:
Block was already cleaned by hand and looked pretty promising:
Don't know if this is traditional but had to figure out a way to loosen crank bolt so made up this angle iron piece to bolt to flywheel and brace against engine stand. Worked like a charm:
Found a nice surprise also...WTF where's the key? I still can't really think of how or why this happened:
Crank had a bit of damage on one of the oil pump drive flats. Machine shop will rework it for me:
Pistons and bores all seem pretty consistent and can't see anything abnormal. The shop I dropped it off at noted that the motor appeared to be very low mileage so that was good to hear:
I think the VC confirms that too. Taking off the baffle plates, it looks pretty damn clean inside:
But there's a crack along the whole front exh cam gear section (NBD, was going to grind out if I used it), a hole in the RR RH hump section, and a caved in section beside Mazda:
I didn't feel like reworking all this so I jumped on a Protege valve cover:
The RR RH vent port looks good but as you can see the actual PCV section up front is ***. I have a feeling it's because of the way the entry baffle design is and I'm thinking of somehow modifying it so I can still use the PCV port but just route to catch can without filling it so quick (more detail on this later):
So what do you guys do for valve cleaning usually? Any recommendations?
Oh and here's some more pics of parts:
Shoutout to Andrew (TSE) for all the rebuild parts:
Supertech's were nicely packaged:
Same old, nothing new. Definitely understand the concern for how thin that wall is near intake valve relief:
Researched a lot for PTW clearance. Found a MT thread with Andrew mentioning 0.003 for light boost (<300whp) and 0.0035 for heavy track use or high hp. Called Supertech because they only list NA/nitrous app and they recommended 0.0004-0.0008 larger than their spec, which basically puts it at 0.0032-0.0036. So I chose 0.0033 w/e:
BE Pump sheet:
This past Friday we had snowmageddon hit. This was what I woke up to, fuuuu. Struggled to get out of the complex because there's an uphill section after a turn but made it to work. 6 roundabouts to the highway always make my commutes a lot of fun:
That evening I decided to trek it out to pick up a bunch of parts. Slightly sketchy driving 1/4 throttle on black ice on the freeway but fun and nonetheless worth the 3h drive effort:
Yesterday spent some time running the E30, cleaning parts, and started to prep fuel rail:
Reply
0
0
02-10-2013, 06:01 PM
#9
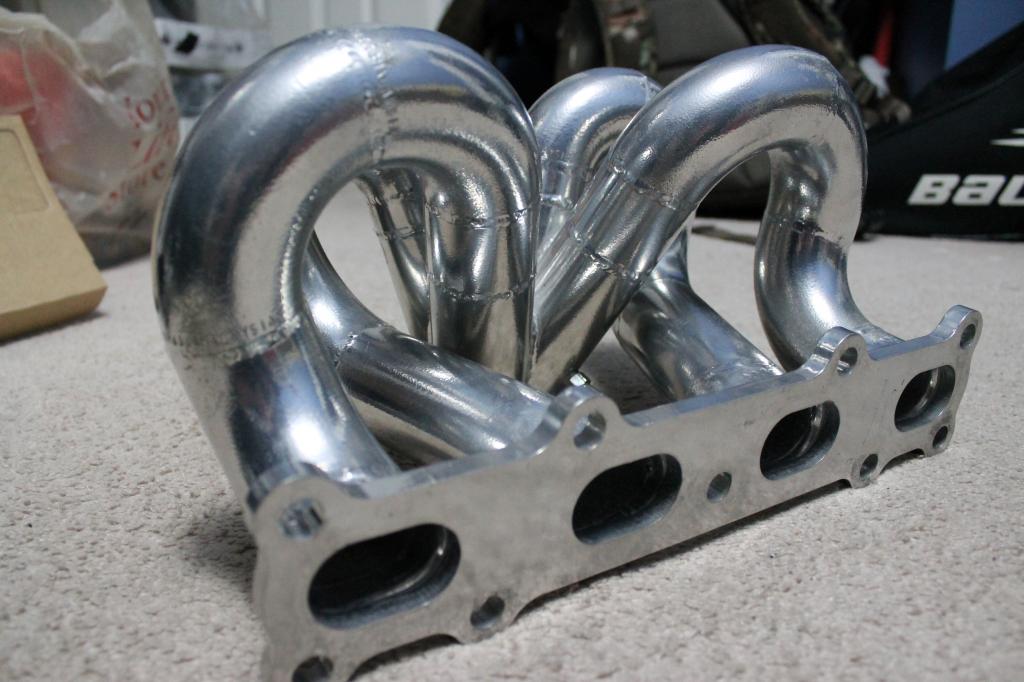
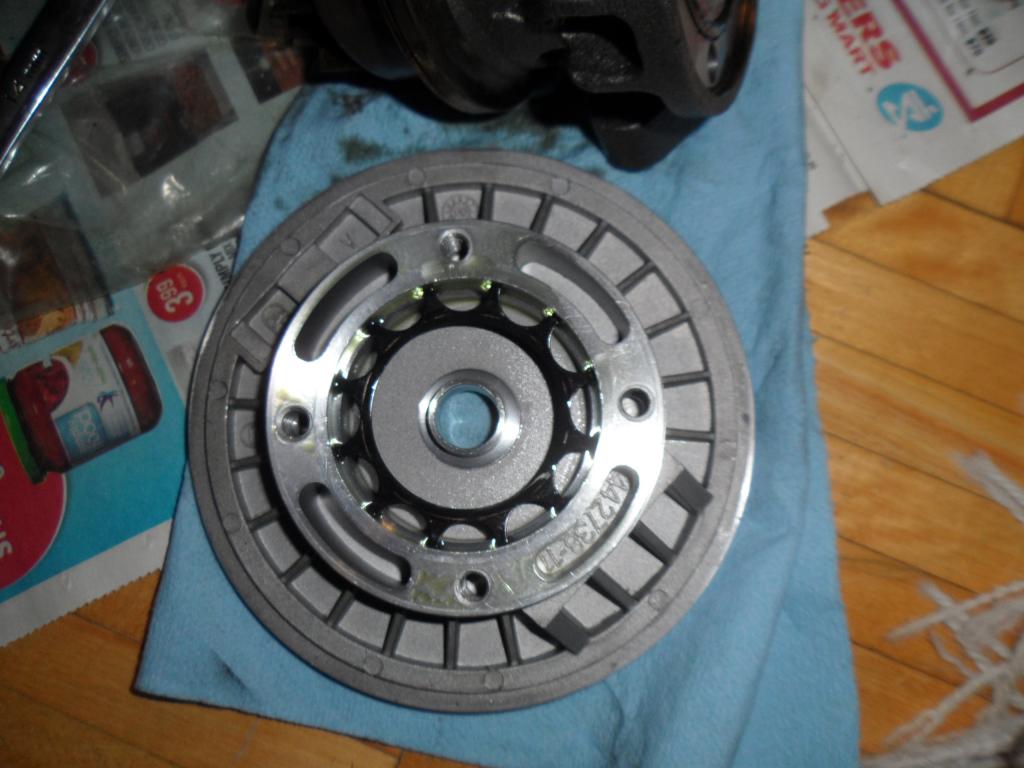
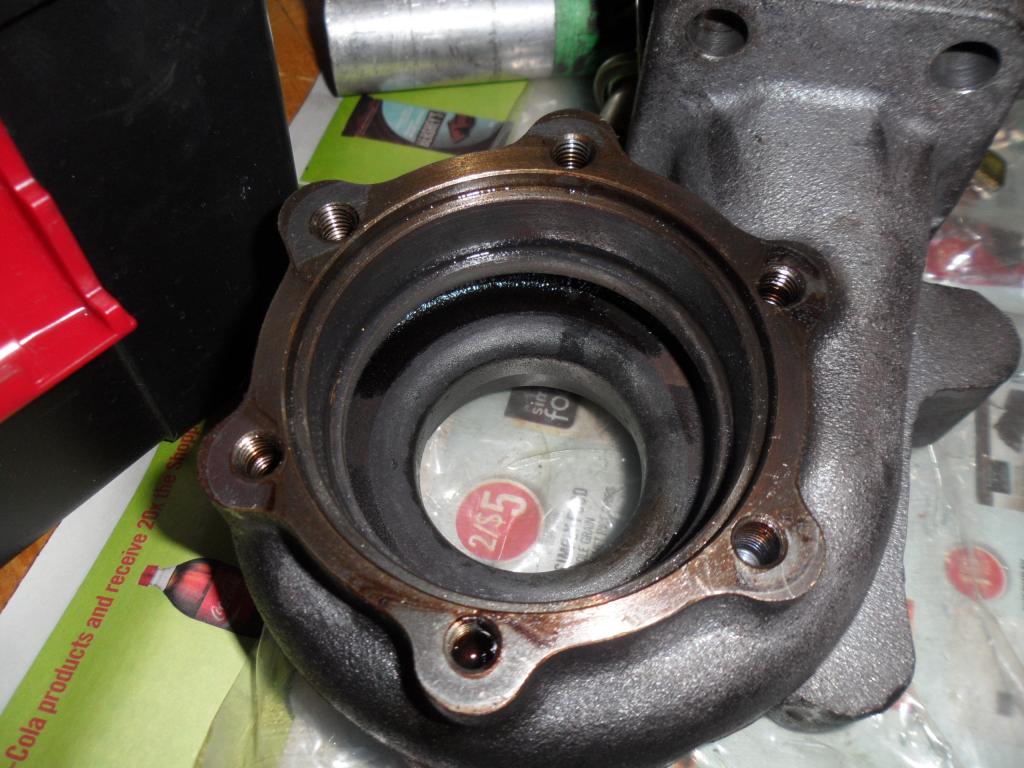
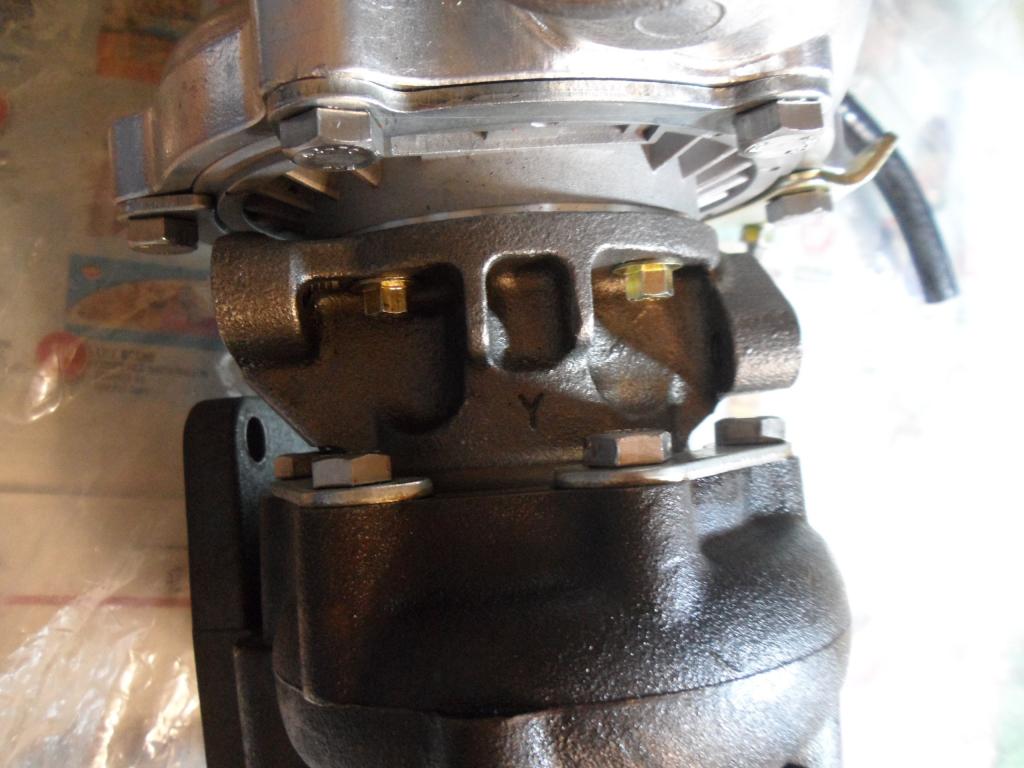
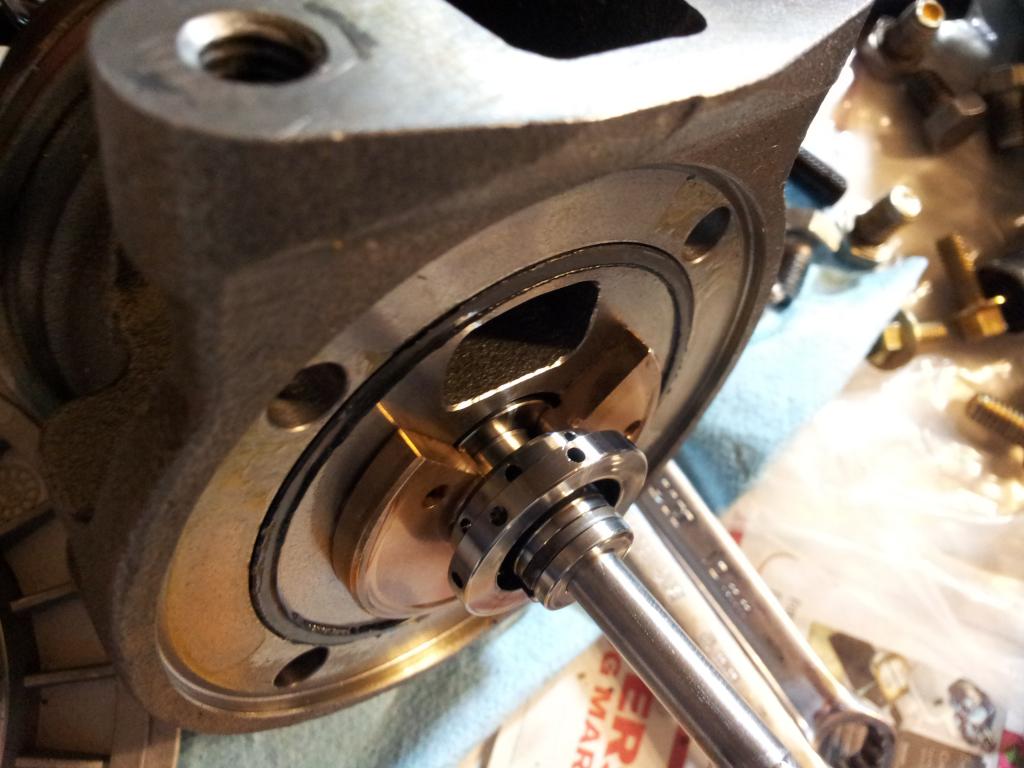
Ok now for churbo pics:
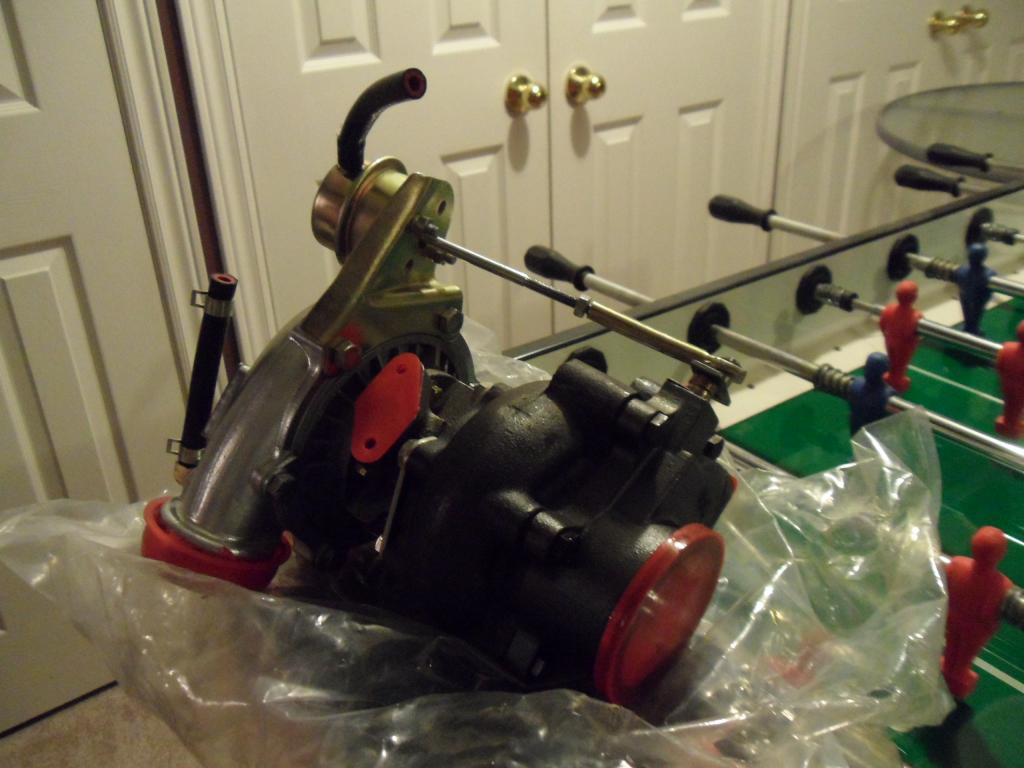
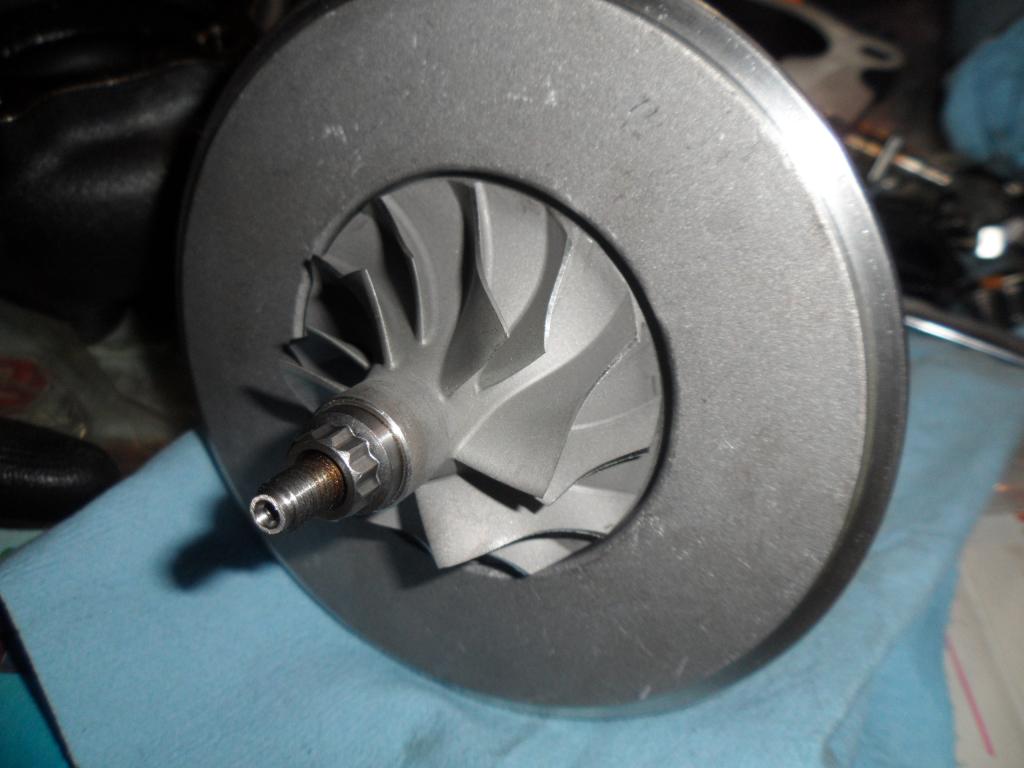
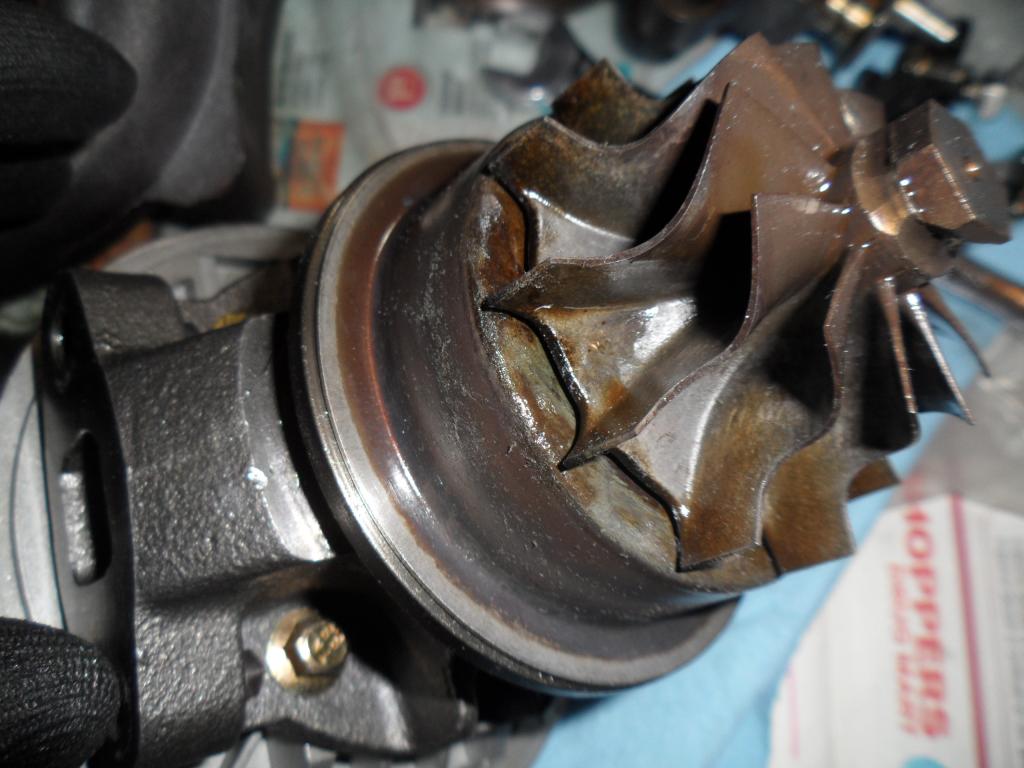
I disassembled it because I wanted to learn more about the CHRA since I tend to learn best hands on. So here's what I noticed:
Almost seems like turbo was made with used parts or maybe they cycle them as part of production. The grease or whatever used is super high in viscosity and appears to be used:
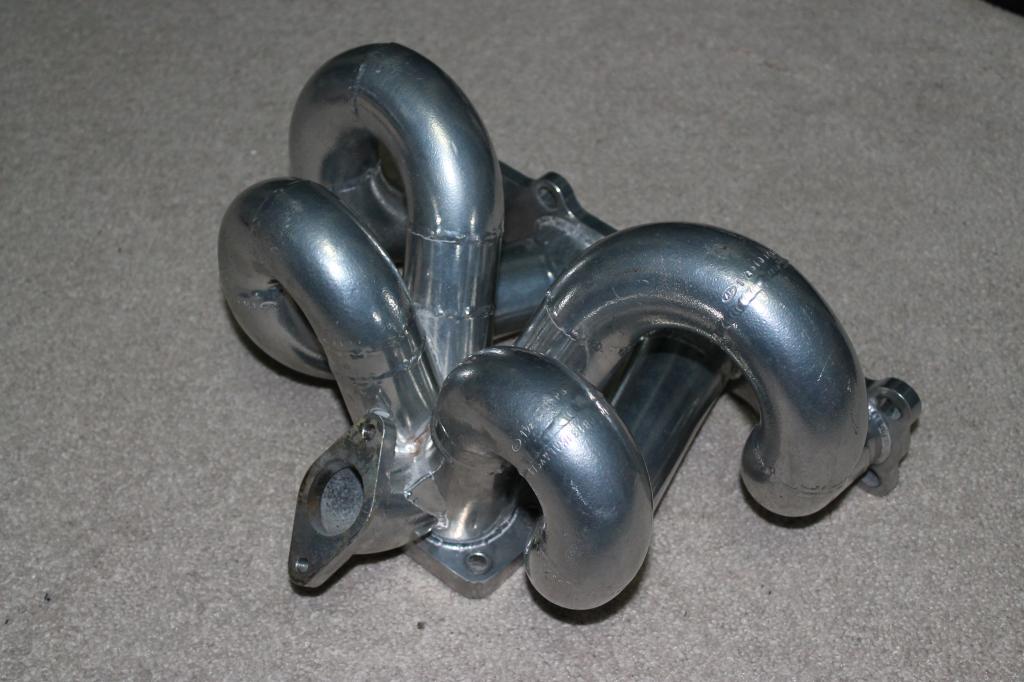
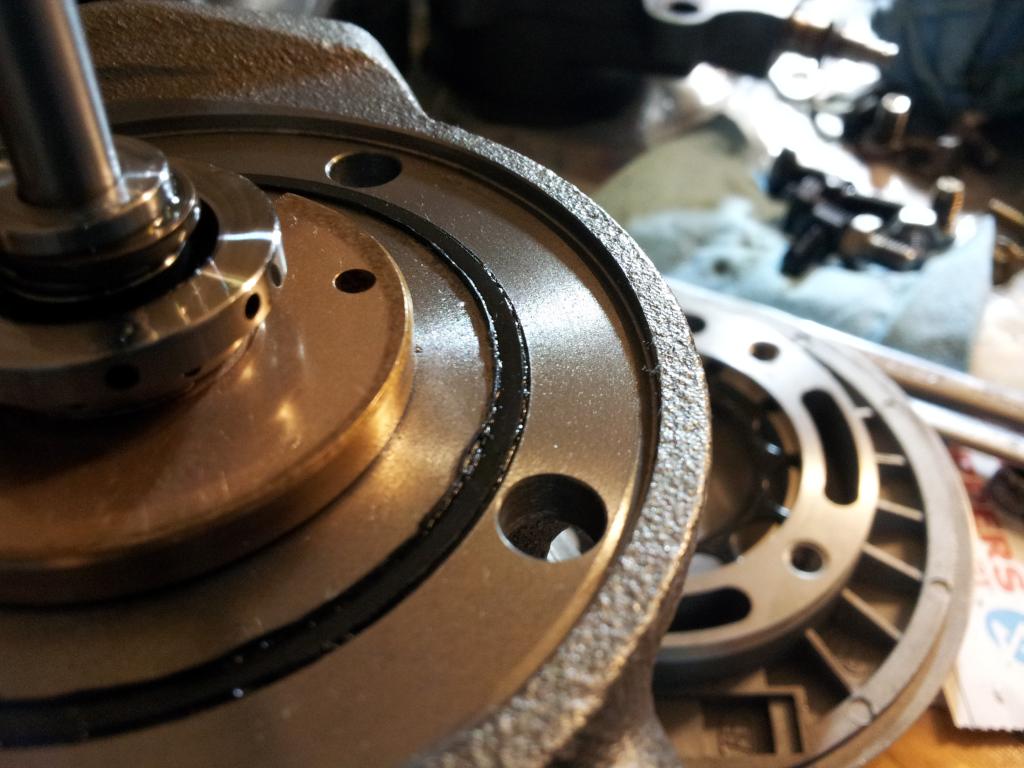
So what's with the notch at the back by the hex? Is that typically the location used to balance CHRA? Seems like a huge chunk missing...

Hardware is pretty crappy, especially those small 5/16's holding comp backing plate. Will definitely everything with a higher grade. Also considering tacking up the bolts that hold the V-band outlet cover to the turbine housing:
This is one thing that's sketching me out but I may just run it and monitor. The seal seems to be poor quality but after removing some of the flash, the shop I'm working with took a look and said it should be fine to use:
So for re-assy, I've read somewhere else that as a rule of thumb I should target about 1/4 turn after nut's snugged up? Besides the usual of loctite and t-handle, is the 1/4 turn rule good enough? I was planning to cross-check with the etched witness mark on the nut/comp wheel anyway but just wondering what you guys typically do for torque.
I disassembled it because I wanted to learn more about the CHRA since I tend to learn best hands on. So here's what I noticed:
Almost seems like turbo was made with used parts or maybe they cycle them as part of production. The grease or whatever used is super high in viscosity and appears to be used:
So what's with the notch at the back by the hex? Is that typically the location used to balance CHRA? Seems like a huge chunk missing...
Hardware is pretty crappy, especially those small 5/16's holding comp backing plate. Will definitely everything with a higher grade. Also considering tacking up the bolts that hold the V-band outlet cover to the turbine housing:
This is one thing that's sketching me out but I may just run it and monitor. The seal seems to be poor quality but after removing some of the flash, the shop I'm working with took a look and said it should be fine to use:
So for re-assy, I've read somewhere else that as a rule of thumb I should target about 1/4 turn after nut's snugged up? Besides the usual of loctite and t-handle, is the 1/4 turn rule good enough? I was planning to cross-check with the etched witness mark on the nut/comp wheel anyway but just wondering what you guys typically do for torque.
Reply
0
0
02-10-2013, 08:57 PM
#11
Oh ok thanks good to know. If your inducer blades are longer than the Garretts, maybe the churbine housing has a larger cross sectional area or something. Have you compared housings and notice any radius difference like the wheels? Either that or maybe exducer's a different size and Garrett outlet won't fit exducer. I'm not surprised it's not compatible...
Reply
0
0
02-10-2013, 10:10 PM
#12
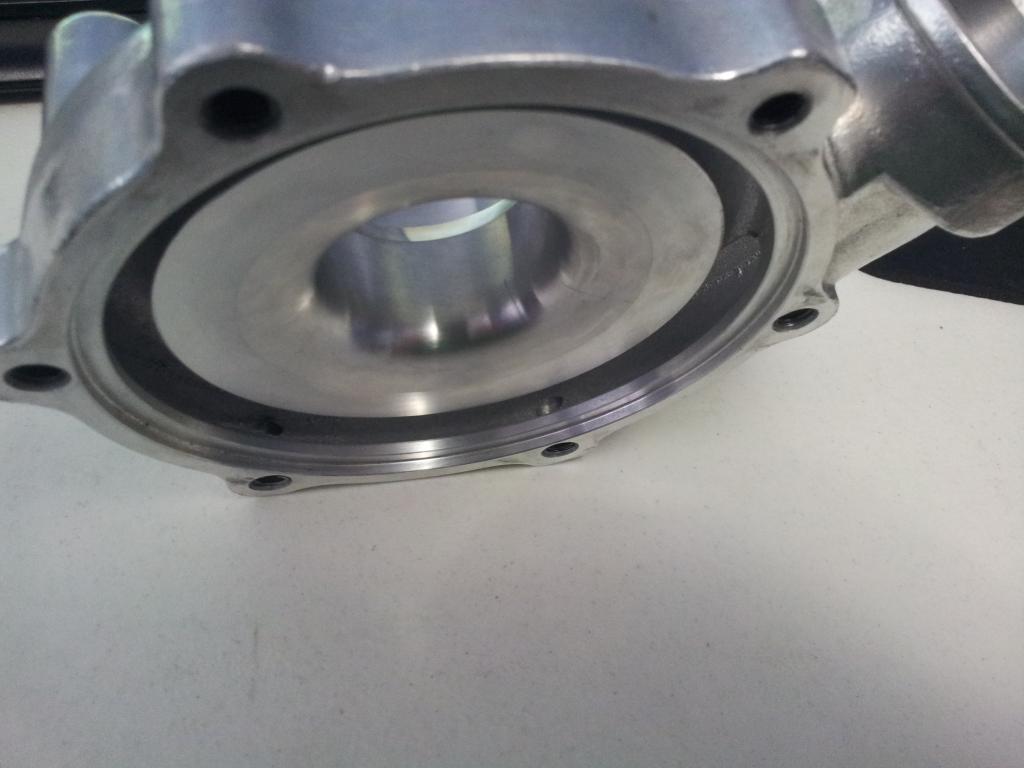
I forgot to mention this for the churbo. Check this out. FWIW, noticed there were 3 mounting holes that weren't blind on comp housing. Went right through into the housing wtf? NBD but guess I'll just throw a layer of teflon tape and bolt her back up. Is this normal for name brand turbos too?
Reply
0
0
02-11-2013, 10:15 AM
#14
Boost Czar


iTrader: (62)
Join Date: May 2005
Location: Chantilly, VA
Posts: 79,493
Total Cats: 4,080
Pretty sure I have that same chinese turbo. Those seals looked the same and sealed fine on mine. Notch by the hex is balancing. I am confused by this turbo since the turbine will not fit into my .48 garrett turbine housing yet it claims to be .48  Inducer blades are visibly longer than the garrett's.
Inducer blades are visibly longer than the garrett's.The turbine wheel is different. The inducer is like 18mm taller in diameter.

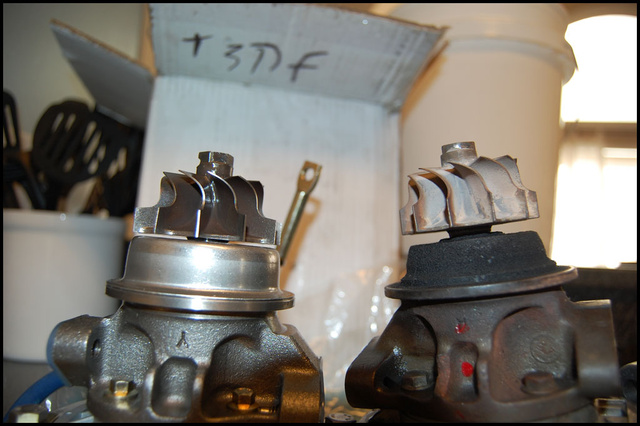
FWIW, this turbo is on par if not better than garrett's 1970s quality. If you doubt it, don't crack open a real garrett and expect anything better. everything you're pointing out is common on a real Garrett. I can snap pics of the exact same **** you're complaining about.
The grease or whatever used is super high in viscosity and appears to be used:
So what's with the notch at the back by the hex? Is that typically the location used to balance CHRA? Seems like a huge chunk missing...
Hardware is pretty crappy, especially those small 5/16's holding comp backing plate. Will definitely everything with a higher grade. Also considering tacking up the bolts that hold the V-band outlet cover to the turbine housing:
This is one thing that's sketching me out but I may just run it and monitor. The seal seems to be poor quality but after removing some of the flash, the shop I'm working with took a look and said it should be fine to use:
Reply
0
0
02-11-2013, 06:32 PM
#15
Thanks Brain. On the topic of grease/assy lube, I was just pointing out the fact that it didn't seem so new and was speculating if it was used before. No biggie I'll use it regardless.
Anyway, better safe than sorry right but good to know some of your pointers on the hardware/seals...
In other news, update from machine shop today. Parts are ready for pickup but I won't have time until Feb 23 so a bit of a wait until next update.
Anyway, better safe than sorry right but good to know some of your pointers on the hardware/seals...
In other news, update from machine shop today. Parts are ready for pickup but I won't have time until Feb 23 so a bit of a wait until next update.
Reply
0
0
 03-04-2013, 11:21 PM
#17
^Thanks Neil.
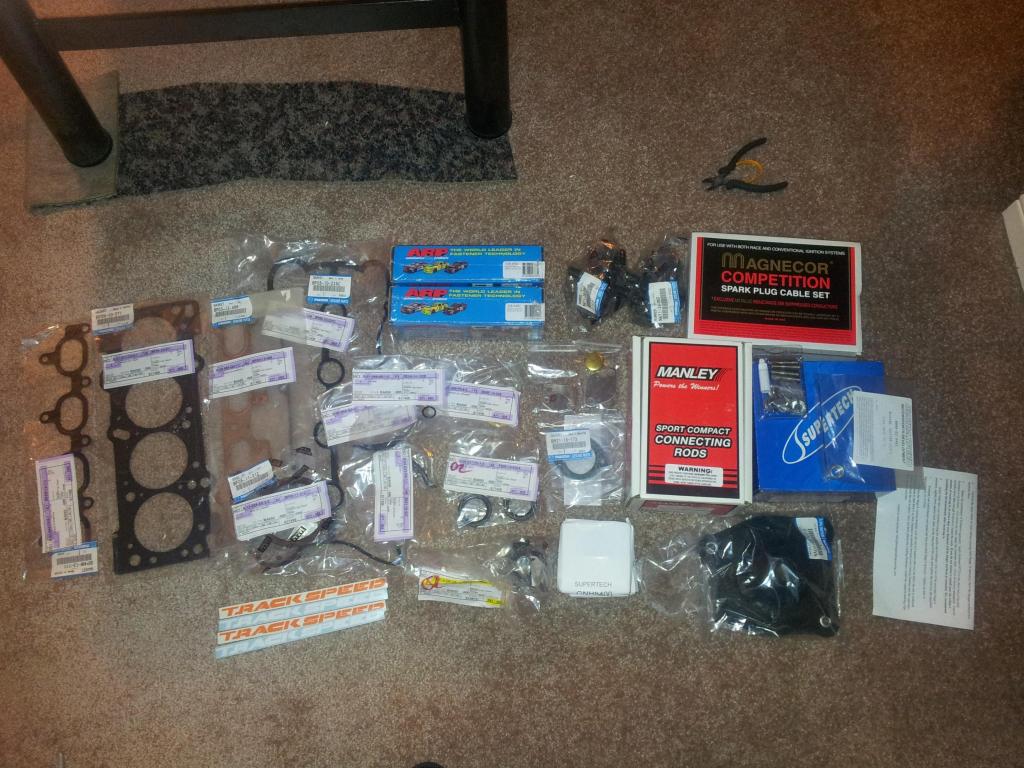
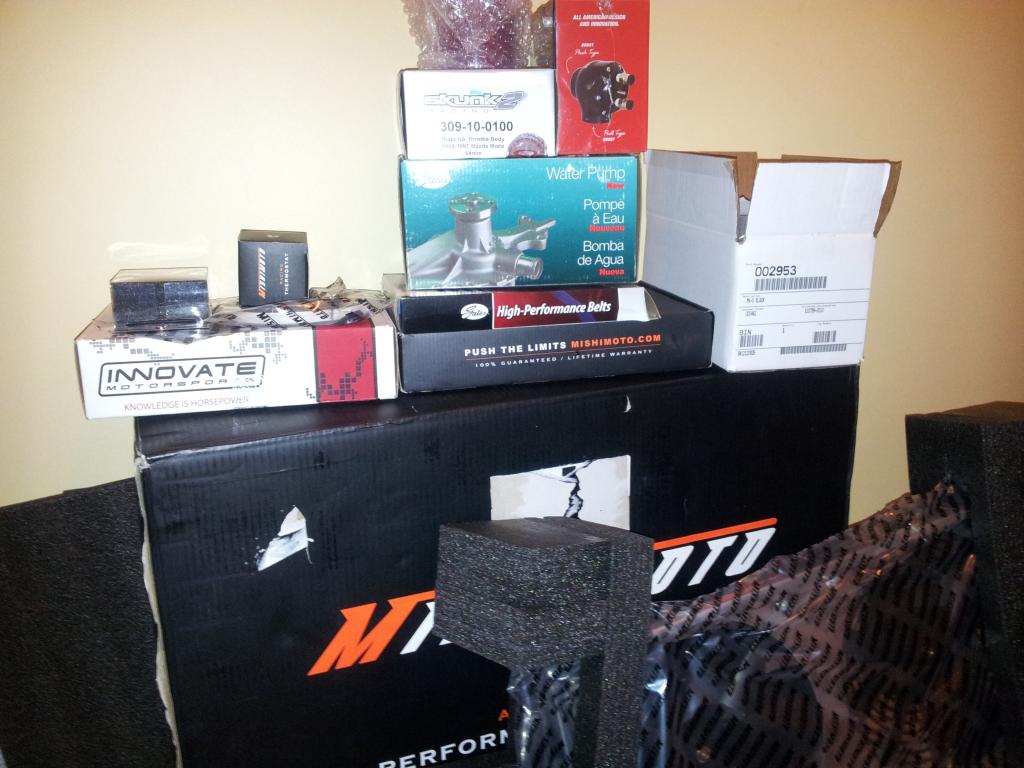
Ok so some updates but nothing too exciting. Ordered a bunch of stuff. FM rails, FIC 525s, Walbro 190 pump, harmonic damper, 12+1 wheel, CX racing intercooler kit, oil cooler kit, plugs, EBC, exh mani stud kit.
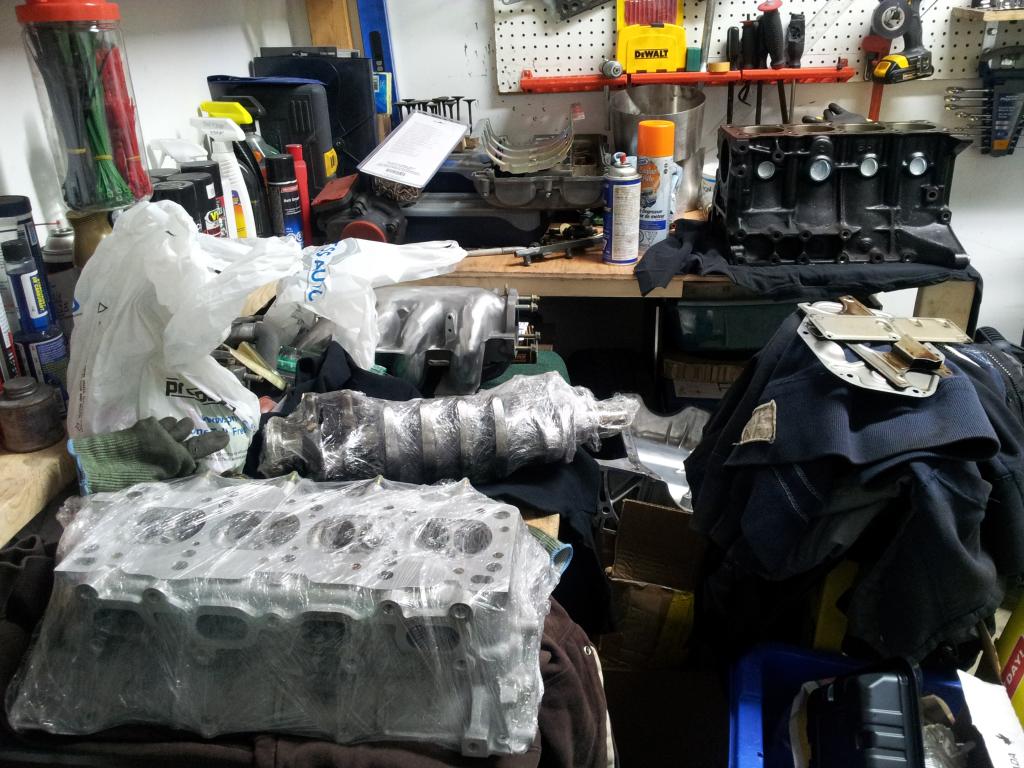
Got the motor back from machining. Block and head turned out great, got my std ACL race brgs, head and oil pan cleaned up nicely.
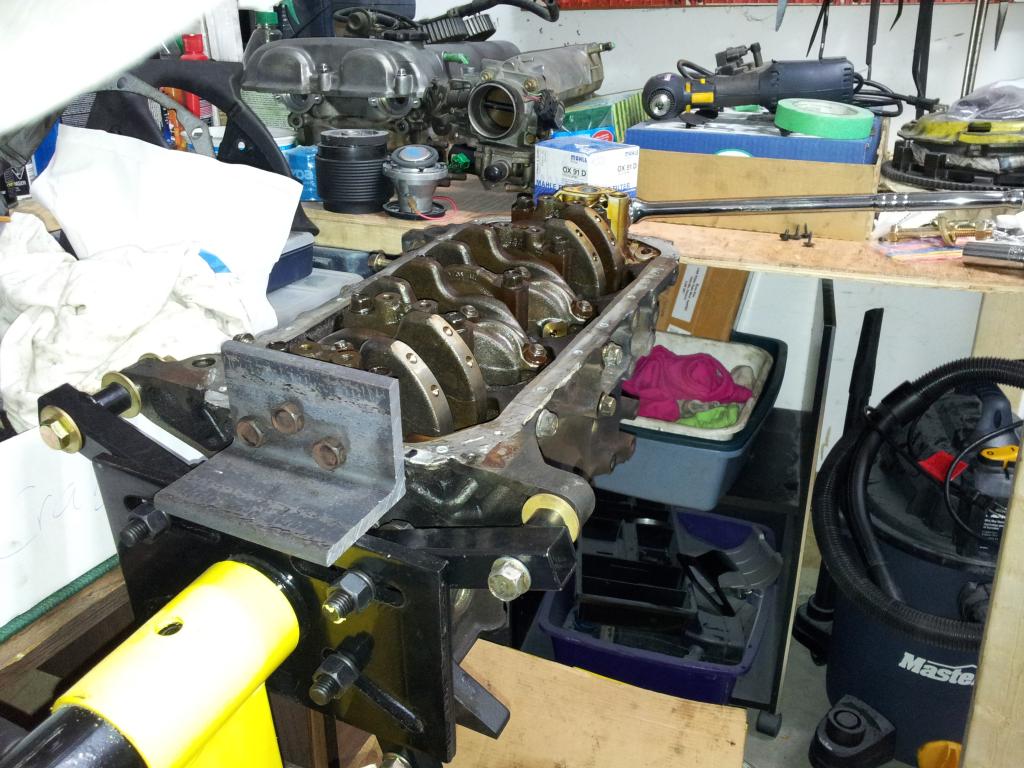
Work area. Kind of crowded but made some space recently:
I think I got the wrong hardware kit sent with the TB. Seem to be missing TPS rotor & adapter, have wrong IACV adapter, etc. Asking Skunk2 to confirm but this is what I have:
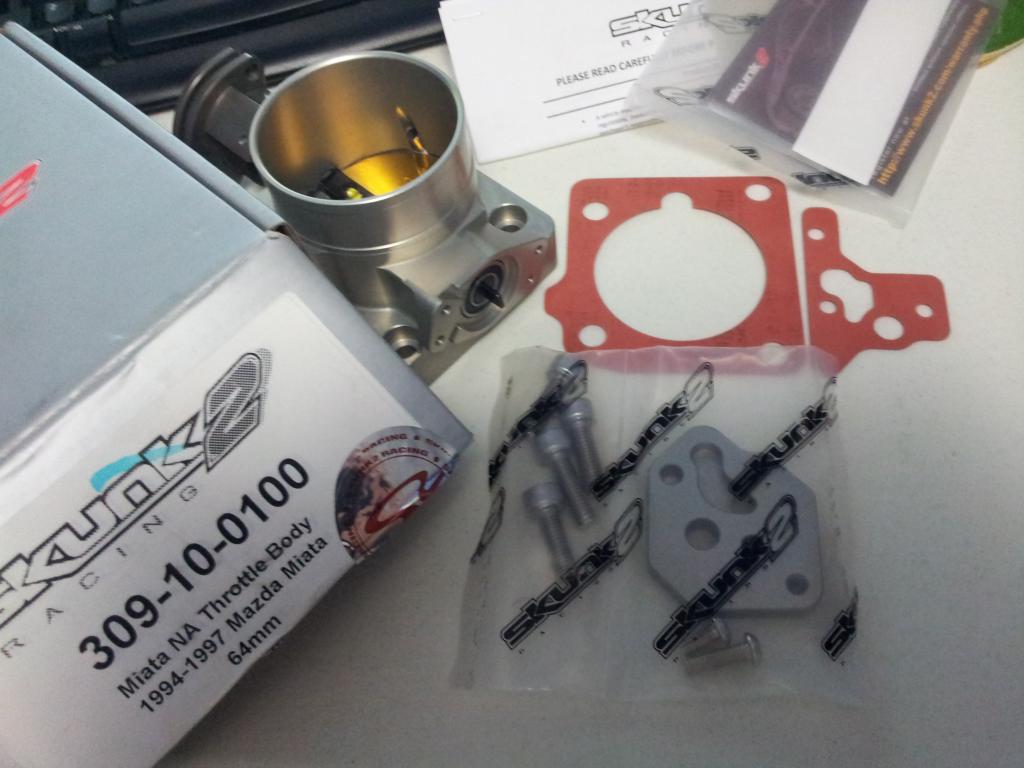
And this is what's on their site:
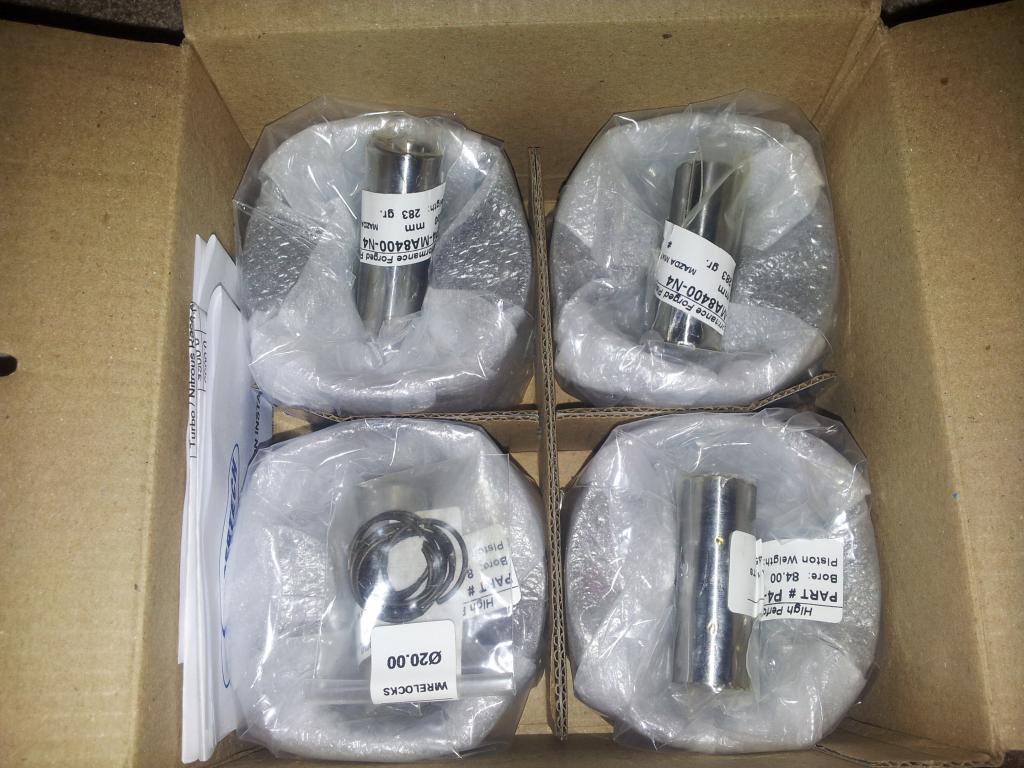
Borrowed a scale from a buddy and started to balance things. First up were the pistons - 8.6:1, 84mm Supertechs.
1) Did a quick repeatability check to ensure scale was good to go. No issues here even turning on and off.
2) Initial msmts:
P1 - 283.4
P2 - 282.8
P3 - 283.1
P4 - 282.8
All clips weighed in at 0.8. I had 97.6, 98.1, 98.1, 97.8 for the wrist pins. Really lucked out and did some mixing to end up with the following final piston/pin combo:
1 - 381.0
2 - 380.9
3 - 380.9
4 - 380.9
Pretty impressed. Didn't have to touch a thing and got within 0.1 so that's done.
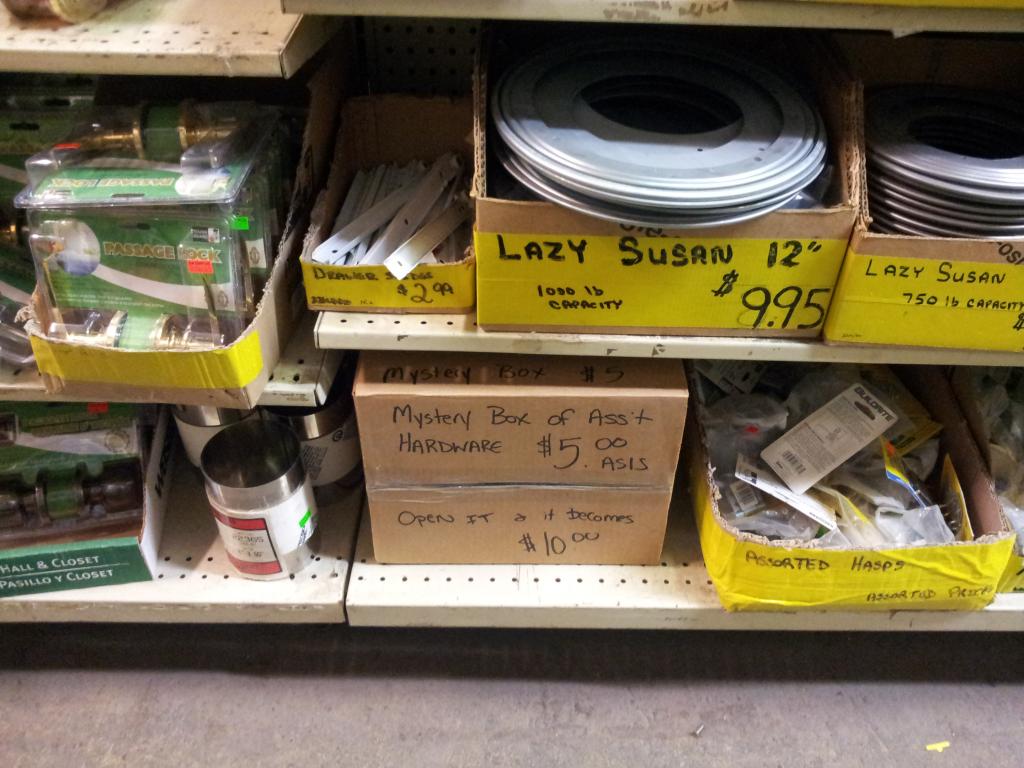
Onto the rods. Shopped around a surplus store to try and make my own balancer. Came across this mystery box. Shook it around and feels about 1/4 full. Too cheap to find out what it is really. It's in a section surrounded by door hinges, bearings, brackets, etc. I have a feeling I'd end up with a box of house related items which would be of no value:
After hunting around for some nylon and hustling a dude off the lathe at the machine shop on campus, managed to get this setup:
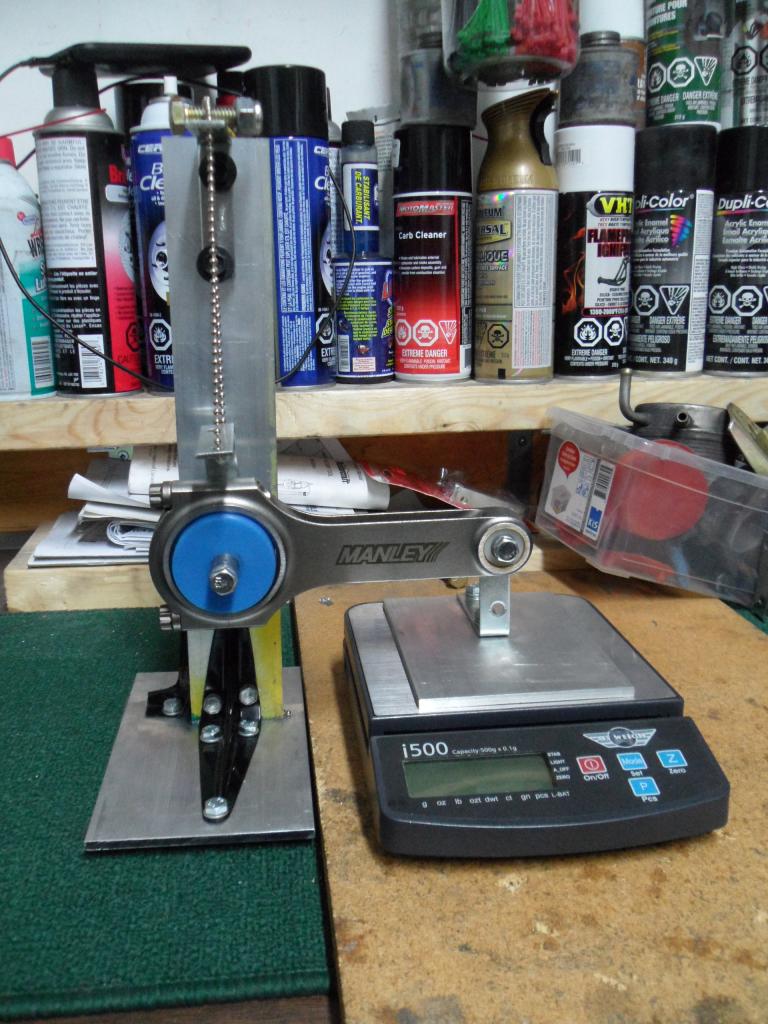
I generally checked it out on the weekend and too sketched out with current repeatability. Even slight side to side variation I get >1g change. I'm going to move ahead and hard mount the big end support, clamp down both base plates to table (no carpet of course), and make sure big and small ends are level after hard mounted, and clamp them at correct big/small end pitch to square everything up and then re-check repeatability.
Ok so some updates but nothing too exciting. Ordered a bunch of stuff. FM rails, FIC 525s, Walbro 190 pump, harmonic damper, 12+1 wheel, CX racing intercooler kit, oil cooler kit, plugs, EBC, exh mani stud kit.
Got the motor back from machining. Block and head turned out great, got my std ACL race brgs, head and oil pan cleaned up nicely.
Work area. Kind of crowded but made some space recently:
I think I got the wrong hardware kit sent with the TB. Seem to be missing TPS rotor & adapter, have wrong IACV adapter, etc. Asking Skunk2 to confirm but this is what I have:
And this is what's on their site:
Borrowed a scale from a buddy and started to balance things. First up were the pistons - 8.6:1, 84mm Supertechs.
1) Did a quick repeatability check to ensure scale was good to go. No issues here even turning on and off.
2) Initial msmts:
P1 - 283.4
P2 - 282.8
P3 - 283.1
P4 - 282.8
All clips weighed in at 0.8. I had 97.6, 98.1, 98.1, 97.8 for the wrist pins. Really lucked out and did some mixing to end up with the following final piston/pin combo:
1 - 381.0
2 - 380.9
3 - 380.9
4 - 380.9
Pretty impressed. Didn't have to touch a thing and got within 0.1 so that's done.
Onto the rods. Shopped around a surplus store to try and make my own balancer. Came across this mystery box. Shook it around and feels about 1/4 full. Too cheap to find out what it is really. It's in a section surrounded by door hinges, bearings, brackets, etc. I have a feeling I'd end up with a box of house related items which would be of no value:
After hunting around for some nylon and hustling a dude off the lathe at the machine shop on campus, managed to get this setup:
I generally checked it out on the weekend and too sketched out with current repeatability. Even slight side to side variation I get >1g change. I'm going to move ahead and hard mount the big end support, clamp down both base plates to table (no carpet of course), and make sure big and small ends are level after hard mounted, and clamp them at correct big/small end pitch to square everything up and then re-check repeatability.
Reply
0
0
03-04-2013, 11:26 PM
#18
Also started to design my coolant reroute spacer. First off, I'm not a fan of paper gaskets. Much prefer o-rings or ring seals.
No biggie on head side I can machine a channel there. For the firewall side mating to the Kia water neck, I don't have too much space between water neck bore and mounting bolt holes and t-stat overlaps too.
I wanted to find a 'C' section square ring seal but no o-ring stores carry this as it's considered specialty I guess.
Did some digging around to find out that the 3rd gen Supra's 7MGTE motors have this same design with a 51.5 mm diameter measuring at base of the seal groove. Miata t-stat I have on hand measures 52.4 right now so I'm going head to the Toyota dealer and test fit it. Will report back later on this.
Seal looks like this:
Reply
1
1
03-04-2013, 11:32 PM
#19
Oh and things are slightly delayed because there's a **** ton of planning that happened recently for a Euro trip with the gf.
Planning on hitting up Paris for about a week, off to Munich for a couple of days, then down to Bologna/Modena/Ravenna and ending in Venice for the next week.
The only thing you guys will probably care about is I've managed to so far plan in the following:
- BMW Welt and Museum tour (going here for a full day)
- Pagani factory tour
- Attempt to hit up Lambo and Ferrari museums
- Visit this random farm El Hombre to take a look at his cheese making but really ultimately to wander around in his collection of old school Maseratis, bikes, tractors, etc (more info on this place here: Panini Classic Car Collection - Museum - euro-t-guide - Italy - What to see - 1)
Btw, can you edit your posts after awhile? I don't see the edit button in my older posts anymore...
Reply
1
1


