Shibby’s 1990 – VVT FM2 – Learn as it breaks
 04-23-2016, 09:44 PM
#1
Junior Member
Thread Starter
iTrader: (4)

Join Date: Oct 2006
Location: Hagerstown, MD
Posts: 229
Total Cats: 39
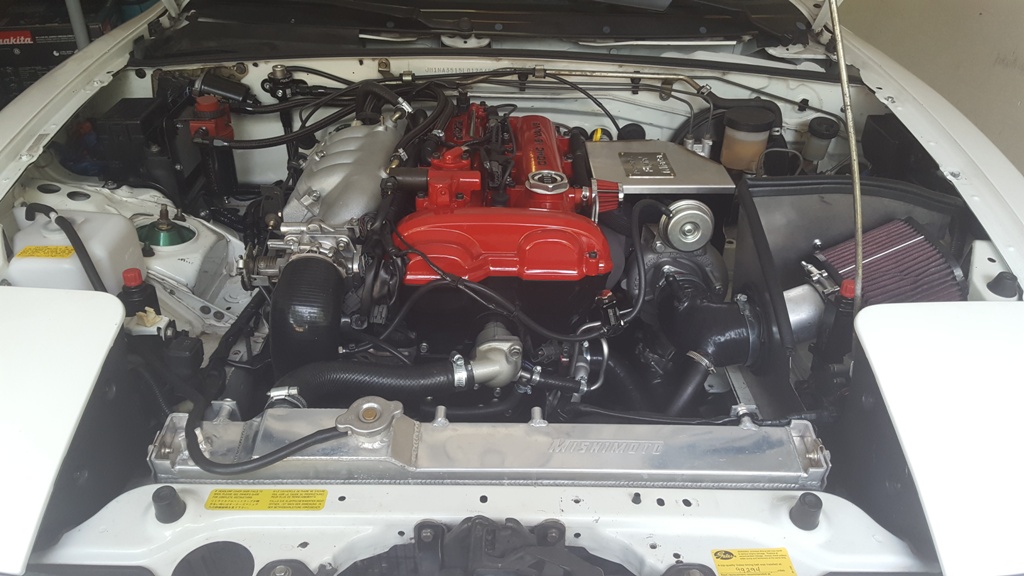
I'm James and this is my second Miata. I previously had a 2001 that I autocrossed a bit, but it was mostly kept stock and didn't really warrant a build thread. This one has been needing a build thread for two years, but I've been too lazy to do anything about it. So, here we go with two years of picture overload.
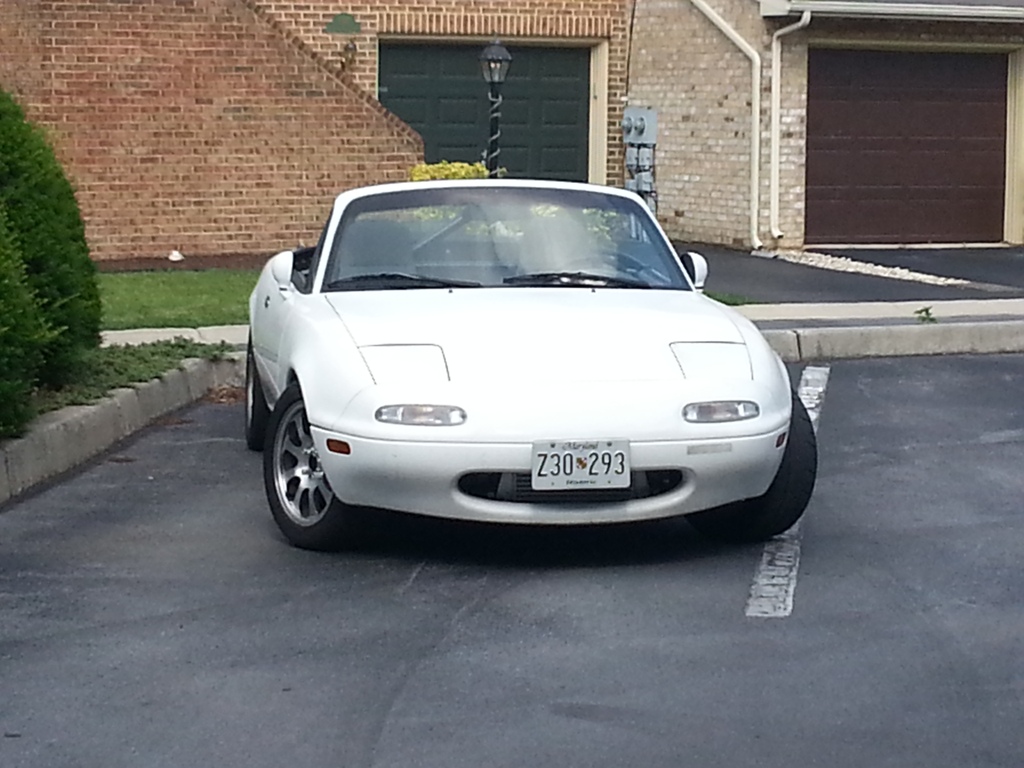
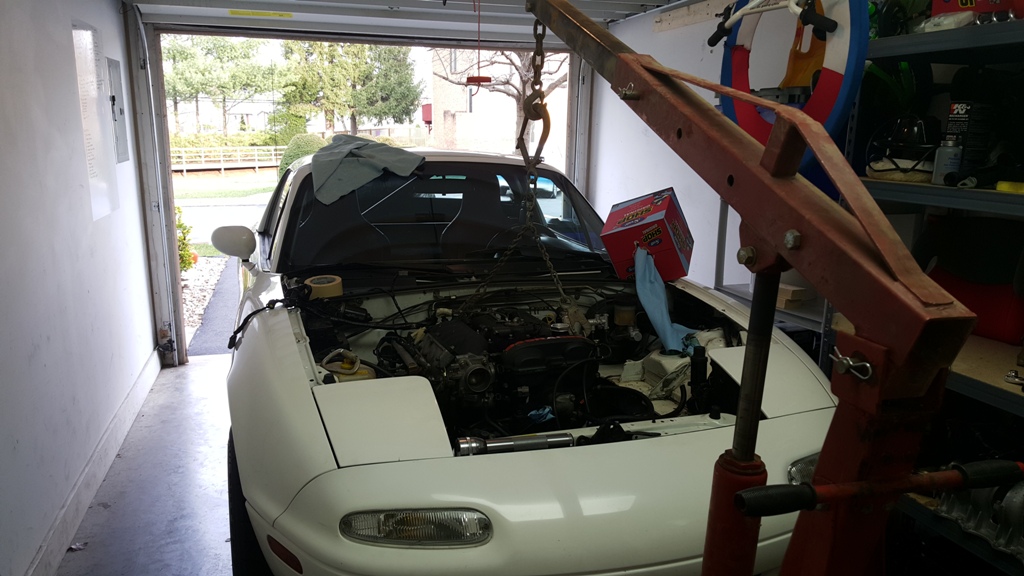
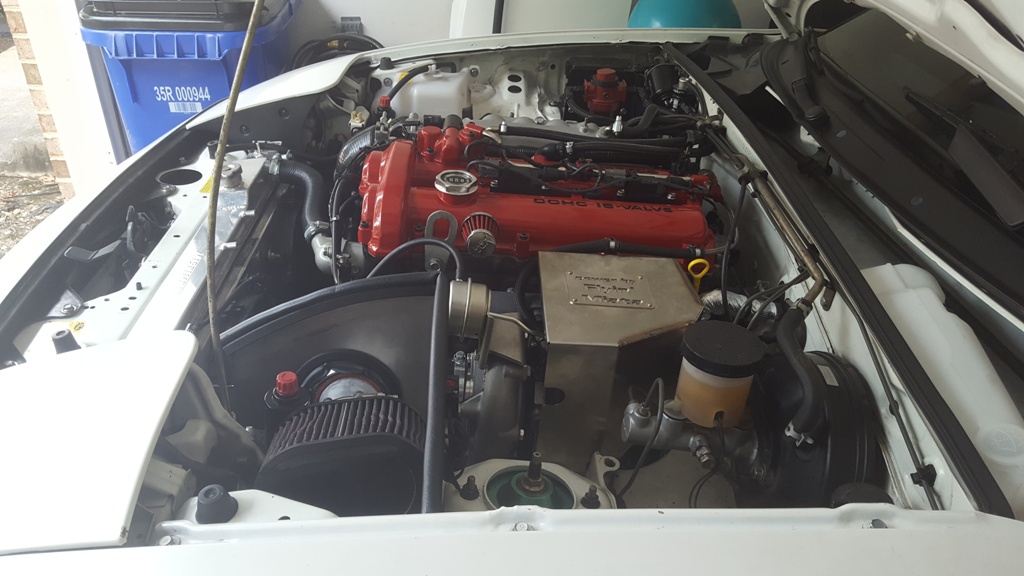
These first series of pictures are how I initially got the car from the previous owner. He sourced the VVT engine (Carillo a-beams, oem 9:1 pistons), ACT Xtreme clutch/Al flywheel, FM2 Intercooled turbo setup on Link ECU, NB exhaust, transmission, driveshaft, and differential from its previous owner who ended up with an LS2 swap. He swapped to MS3X at some point while leaving the Link fuel setup installed with the extra rail for sequential fueling. The car was dyno tuned at 191whp. Also PO installed a rollbar, Tein Flex, FM Rails/Butterfly brace, stainless steel brake lines, DDMworks radio/gauge pod, Racing Beat front swaybar, AR24 15x7 wheels, RE11A tires. Probably some other things that I'm forgetting, but to make a long story short, it was a good base to start with. I paid $4,250 for the car.


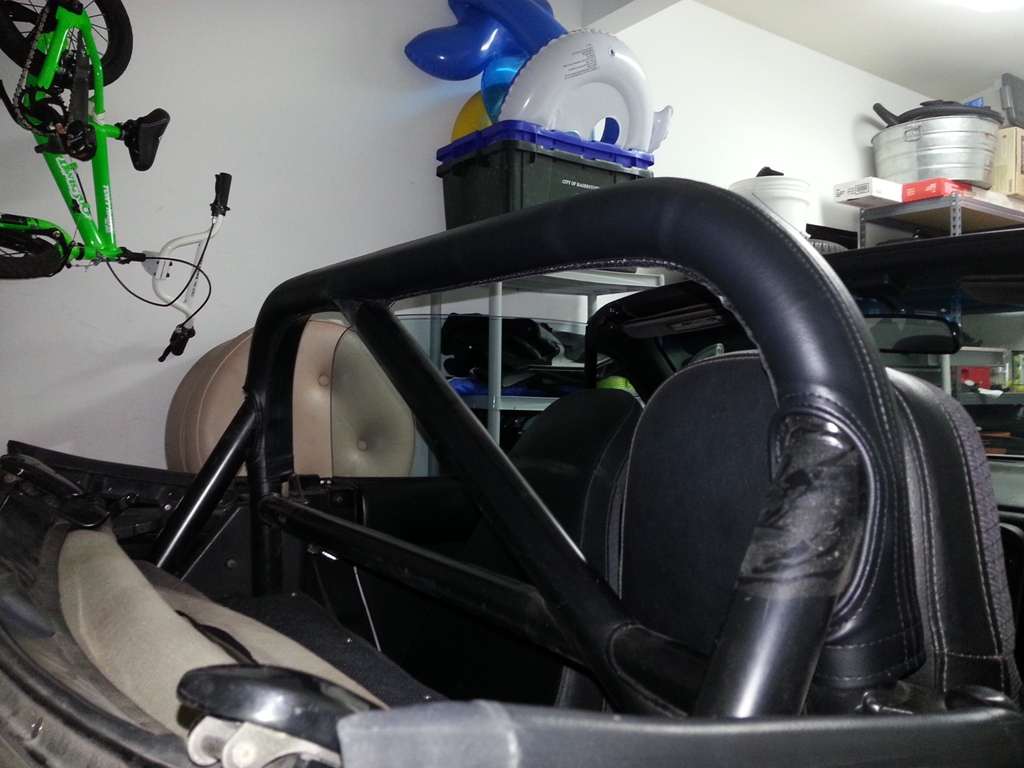
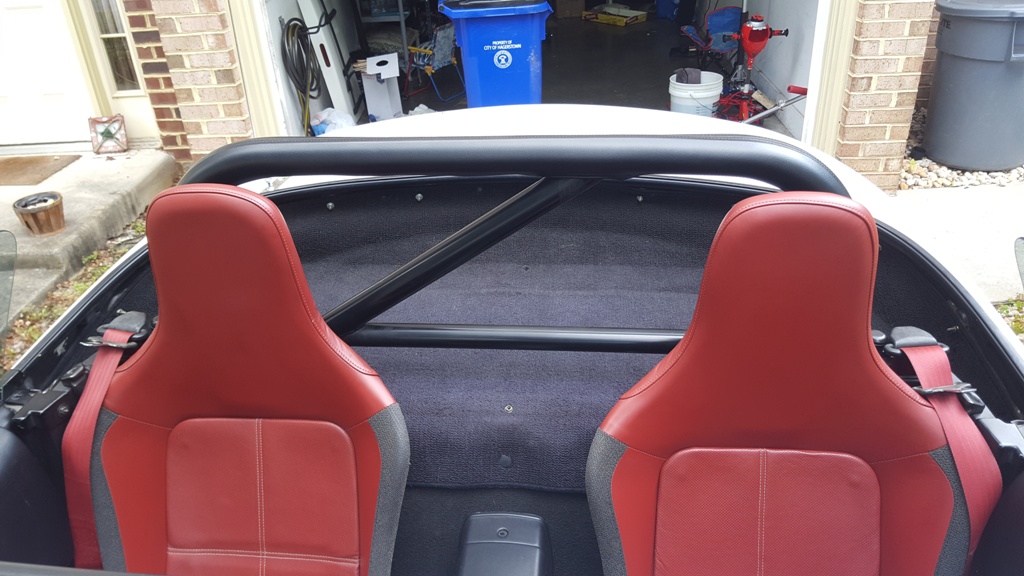
New rollbar padding and cover from Bethania. I couldn't deal with the residue from the tape, but I also couldn't get it off. The cover is nice and fits really well. Also, ditched the softtop.

A few weeks after getting it, the engine started revving up to redline on its own. I'm ashamed of how long it took me to figure out that the cruise control unit must have been installed incorrectly by the previous owner and introduced a vacuum leak when I tried to use cruise. I'm still a little baffled by how it was intermittent and how he never discovered the issue. I guess he didn't try to use cruise control post-swap.

I took the opportunity during the downtime to get the new FM intercooler piping. If you noticed from some of the initial pictures, the alternator belt was rubbing into the old hard pipes. The hard pipes were also a few mm's too tall and were impacting the hood... which made the hood shake when the car was running.


And for my next expensive lesson... understanding boost source. I ended up connecting the recirc valve to the wastegate (lol @ me) and ran the car to about 25psi passing a semi truck on the highway. That was a fun 10 seconds.
This is becoming commonplace.


Those Carrillo rods held up extremely well... this was the only issue.

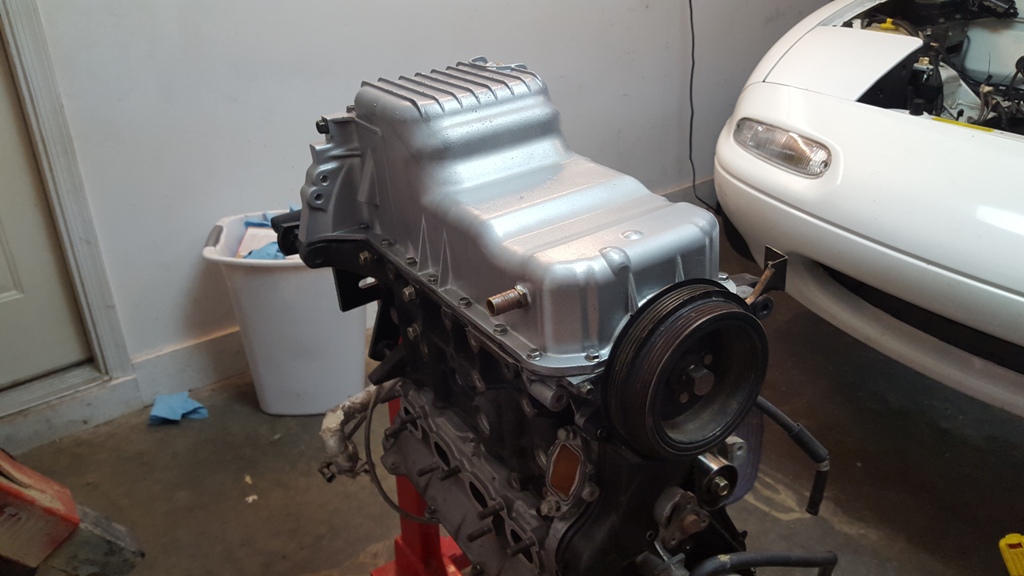
I found a replacement engine on ebay and sold the rods and some other engine parts to cover the cost of the engine. The head was maintained and the block was replaced.

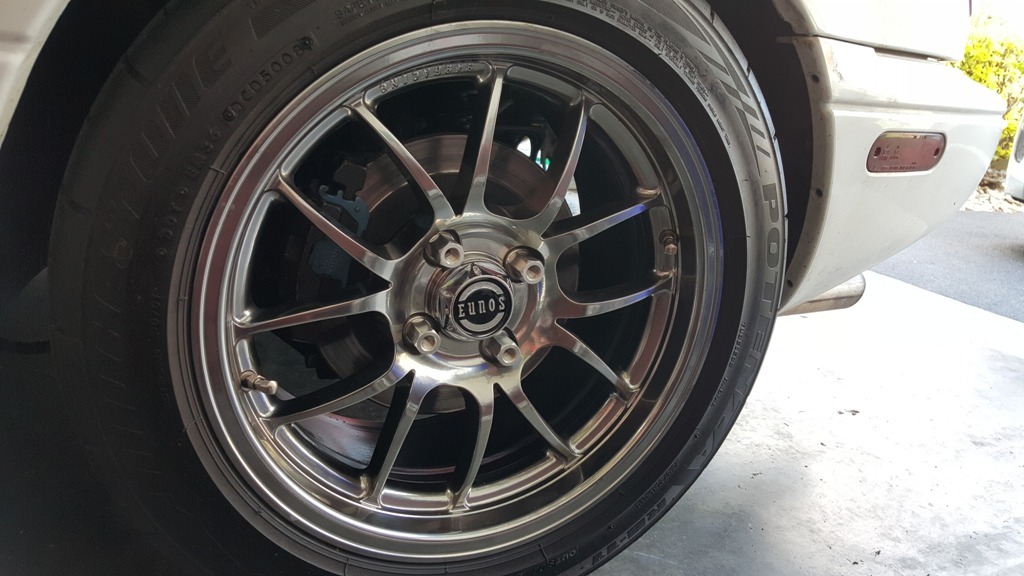
Back on the road again. 15x7 949 wheels.

Redid door cards.

I ended up meeting the guy with the LS2 Miata at this show. He's been a great resource of information to me when I get stuck. I ended up buying a set of 15x8 Nickel wheels and 1.8l brakes from him.


Something is missing...

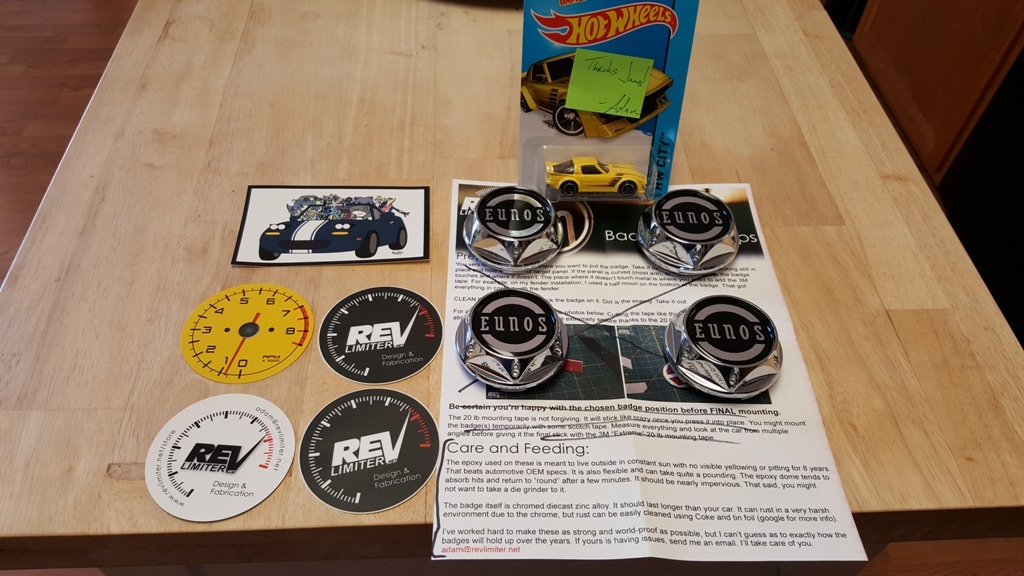
Revlimiter to the rescue. I had these custom made. He ended up making 8 of them (he claims one of them is bad, but it looks good to me), so I have 4 replacements. I'll post them for sale at some point.
I contacted Matos to make me some door pulls. We went through a few iterations before I settled on a type that doesn't lock at all. I've since shortened these to about a visible inch and a half. Also, Lotus seats... but no mounts.

Maintenance day in Virginia. Met a few guys, got some work done, helped some others. I did trans/diff/brake/clutch fluid changes on mine.

Foamectomy looked terrible... I couldn't wait to get rid of these.

Now we're talkin. Flipside mounts came in one at a time and took about 6 weeks from initial order.


Starting to prep for the winter work. My plan for the winter is to ditch the NB exhaust that the PO installed. It's close to fitting, but was banging into the butterfly brace and differential. Also, if you noticed, there was no muffler and it was left exit. I'd like the opposite of both of those. Also, i'm planning to switch the Link fueling system to single primaries, change the rear main seal, and clean up anything else.

Found a hardtop.. drove to Kentucky for it. Damn near mint and color matched.

Starting to come together.

New radiator. I was debating on reroute, but this was keeping temps down for my driving style.

Built a mount. 2x4 + 2 lag bolts = win. Cheap, simple, and out of the way.

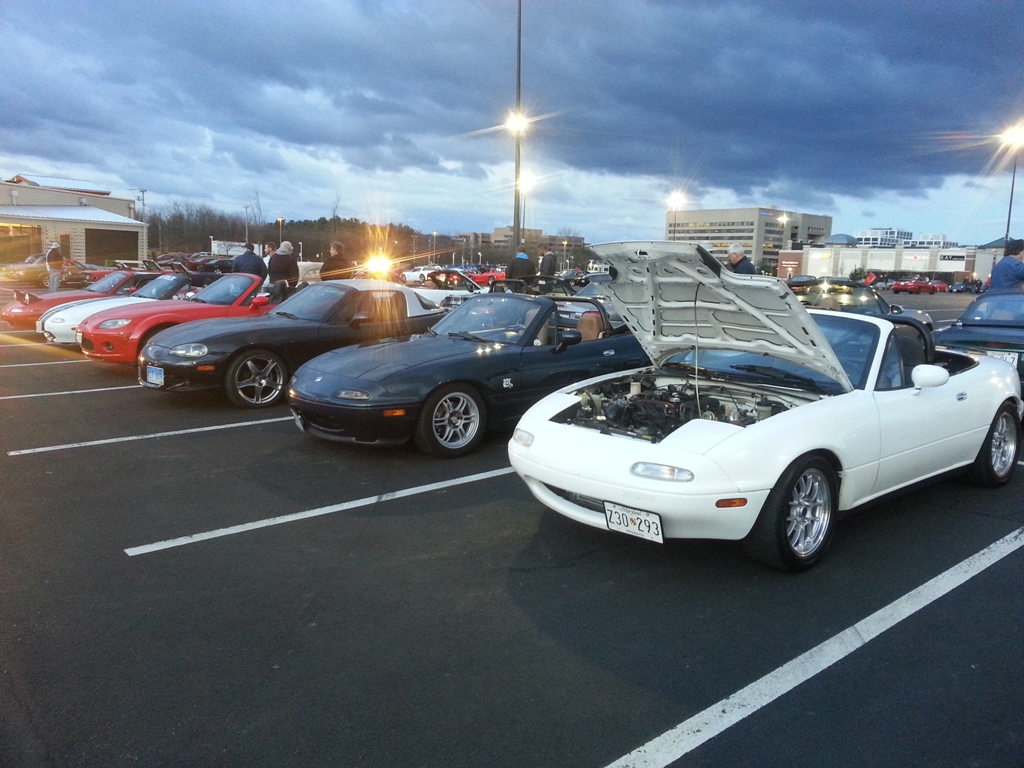
Met some awesome DMV Miata guys. The black one (downmented) is the only one that's not boosted, but the goal there is 400hp. Blue car is psyberoptix. I'm not sure if the owner of the red one is on MT.

Another Revlimiter custom. These are JNC style, with Eunos text, and Prototipo gauge sweeps + LEDs. I'll later switch these back to amber for a more period correct look.

Ruckus! I had one of these, but sold it when I bought the Miata. I missed it a lot and my friend wanted to get one, so we decided to buy them together. He'll be the one helping me with the winter build... which starts...

Now.


Found some 97 upper door pieces. You can see the shortened pulls too.

At this point, I'm starting to realize that having my friend help might make this job run much longer than I had planned.

These first series of pictures are how I initially got the car from the previous owner. He sourced the VVT engine (Carillo a-beams, oem 9:1 pistons), ACT Xtreme clutch/Al flywheel, FM2 Intercooled turbo setup on Link ECU, NB exhaust, transmission, driveshaft, and differential from its previous owner who ended up with an LS2 swap. He swapped to MS3X at some point while leaving the Link fuel setup installed with the extra rail for sequential fueling. The car was dyno tuned at 191whp. Also PO installed a rollbar, Tein Flex, FM Rails/Butterfly brace, stainless steel brake lines, DDMworks radio/gauge pod, Racing Beat front swaybar, AR24 15x7 wheels, RE11A tires. Probably some other things that I'm forgetting, but to make a long story short, it was a good base to start with. I paid $4,250 for the car.
New rollbar padding and cover from Bethania. I couldn't deal with the residue from the tape, but I also couldn't get it off. The cover is nice and fits really well. Also, ditched the softtop.
A few weeks after getting it, the engine started revving up to redline on its own. I'm ashamed of how long it took me to figure out that the cruise control unit must have been installed incorrectly by the previous owner and introduced a vacuum leak when I tried to use cruise. I'm still a little baffled by how it was intermittent and how he never discovered the issue. I guess he didn't try to use cruise control post-swap.
I took the opportunity during the downtime to get the new FM intercooler piping. If you noticed from some of the initial pictures, the alternator belt was rubbing into the old hard pipes. The hard pipes were also a few mm's too tall and were impacting the hood... which made the hood shake when the car was running.
And for my next expensive lesson... understanding boost source. I ended up connecting the recirc valve to the wastegate (lol @ me) and ran the car to about 25psi passing a semi truck on the highway. That was a fun 10 seconds.
This is becoming commonplace.
Those Carrillo rods held up extremely well... this was the only issue.
I found a replacement engine on ebay and sold the rods and some other engine parts to cover the cost of the engine. The head was maintained and the block was replaced.
Back on the road again. 15x7 949 wheels.
Redid door cards.
I ended up meeting the guy with the LS2 Miata at this show. He's been a great resource of information to me when I get stuck. I ended up buying a set of 15x8 Nickel wheels and 1.8l brakes from him.
Something is missing...
Revlimiter to the rescue. I had these custom made. He ended up making 8 of them (he claims one of them is bad, but it looks good to me), so I have 4 replacements. I'll post them for sale at some point.
I contacted Matos to make me some door pulls. We went through a few iterations before I settled on a type that doesn't lock at all. I've since shortened these to about a visible inch and a half. Also, Lotus seats... but no mounts.
Maintenance day in Virginia. Met a few guys, got some work done, helped some others. I did trans/diff/brake/clutch fluid changes on mine.
Foamectomy looked terrible... I couldn't wait to get rid of these.
Now we're talkin. Flipside mounts came in one at a time and took about 6 weeks from initial order.
Starting to prep for the winter work. My plan for the winter is to ditch the NB exhaust that the PO installed. It's close to fitting, but was banging into the butterfly brace and differential. Also, if you noticed, there was no muffler and it was left exit. I'd like the opposite of both of those. Also, i'm planning to switch the Link fueling system to single primaries, change the rear main seal, and clean up anything else.
Found a hardtop.. drove to Kentucky for it. Damn near mint and color matched.
Starting to come together.
New radiator. I was debating on reroute, but this was keeping temps down for my driving style.
Built a mount. 2x4 + 2 lag bolts = win. Cheap, simple, and out of the way.
Met some awesome DMV Miata guys. The black one (downmented) is the only one that's not boosted, but the goal there is 400hp. Blue car is psyberoptix. I'm not sure if the owner of the red one is on MT.
Another Revlimiter custom. These are JNC style, with Eunos text, and Prototipo gauge sweeps + LEDs. I'll later switch these back to amber for a more period correct look.
Ruckus! I had one of these, but sold it when I bought the Miata. I missed it a lot and my friend wanted to get one, so we decided to buy them together. He'll be the one helping me with the winter build... which starts...
Now.
Found some 97 upper door pieces. You can see the shortened pulls too.
At this point, I'm starting to realize that having my friend help might make this job run much longer than I had planned.

Reply
 3
3

3
04-23-2016, 09:45 PM
#2
Junior Member
Thread Starter
iTrader: (4)
Join Date: Oct 2006
Location: Hagerstown, MD
Posts: 229
Total Cats: 39
Another expensive lesson. Don't take a ball-bearing turbo apart too far... or you'll be enjoying a new one.
Bought a midpipe and exhaust from the MT classifieds. Aluminum polished it.

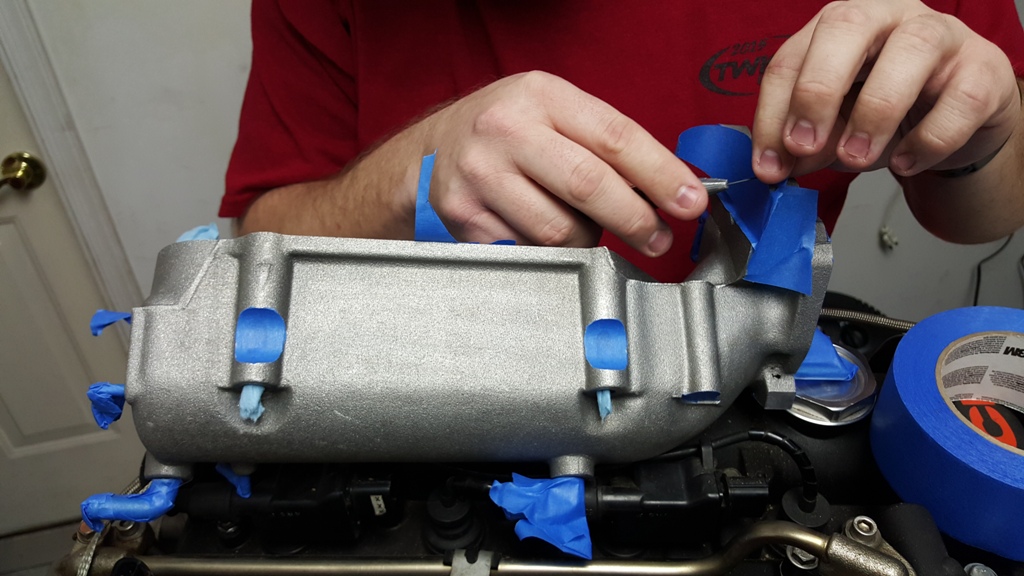
Cleaned up the manifold and painting new turbo :| parts

Black 6an fuel lines, with mtuned rail that was already on the car.

Out of the oven. I doubt these will hold up, but I know that doing nothing will make them rusty. *shrug*

Exhaust installed

99% of things that we took out of the car were cleaned or used a bench grinder with a wire wheel on.
This was the start of a mini-ordeal. I found some hardlines for sale on MT, but they weren't lining up all that well.


Looks good, but there's a problem lurking.

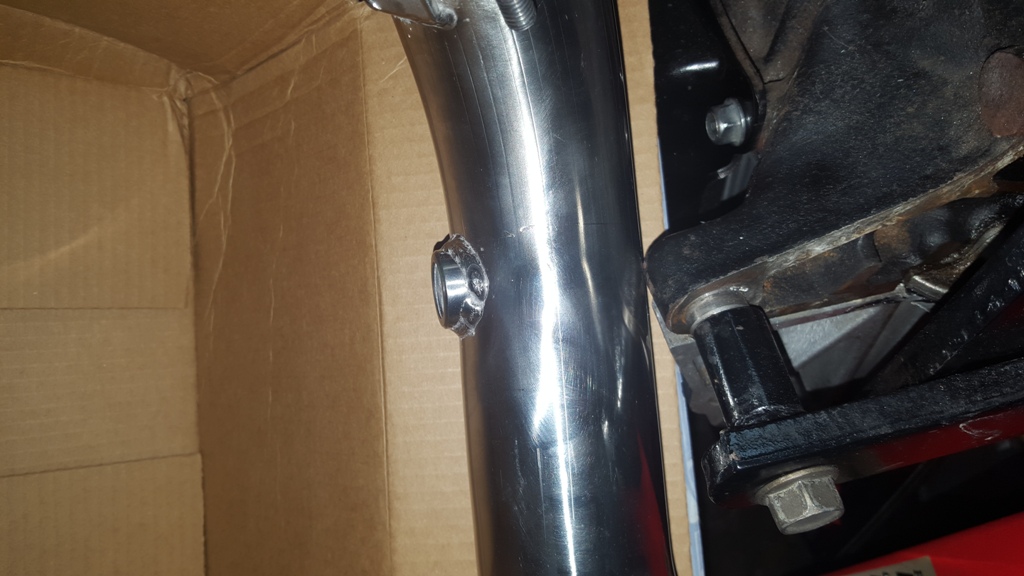
Downpipe is contacting the block. A couple of phone calls and emailed pictures to FM later, it's determined that I have an old Begi style manifold and that's what's causing the misalignment with the block and the hardlines. I'm kinda forced to get the new manifold. FM worked with me a bit on the price. I can't say enough good things about that company.
Enter...

Clearance
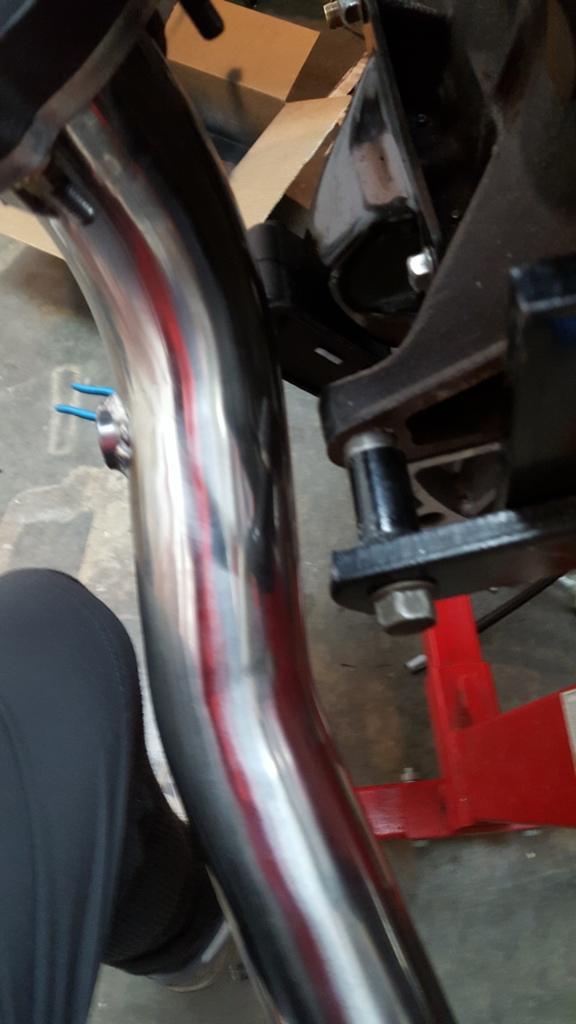
Lines line up!


Now we're cooking. I wasn't planning on doing the timing belt/water pump, but during the manifold downtime, I took the chance.

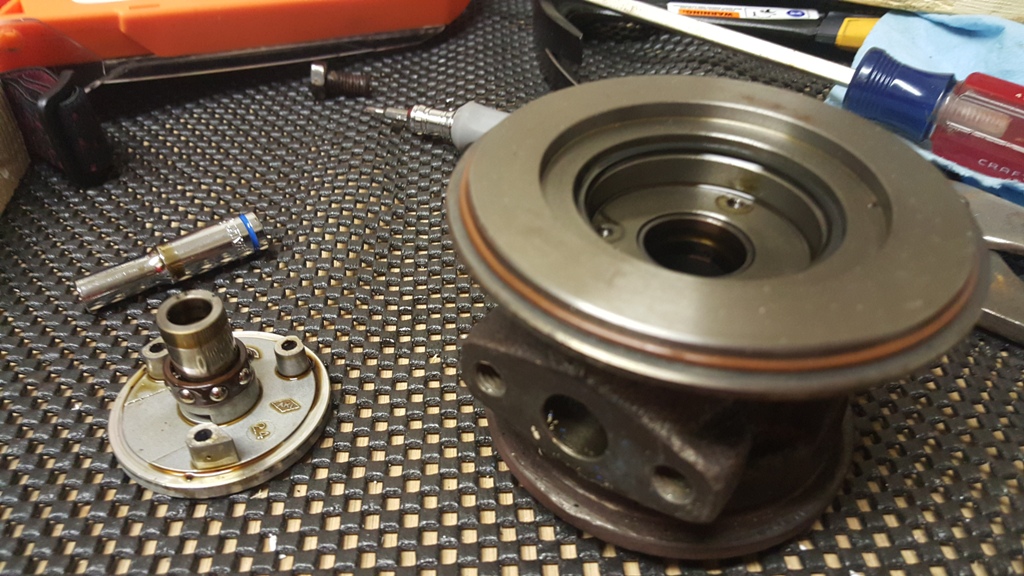
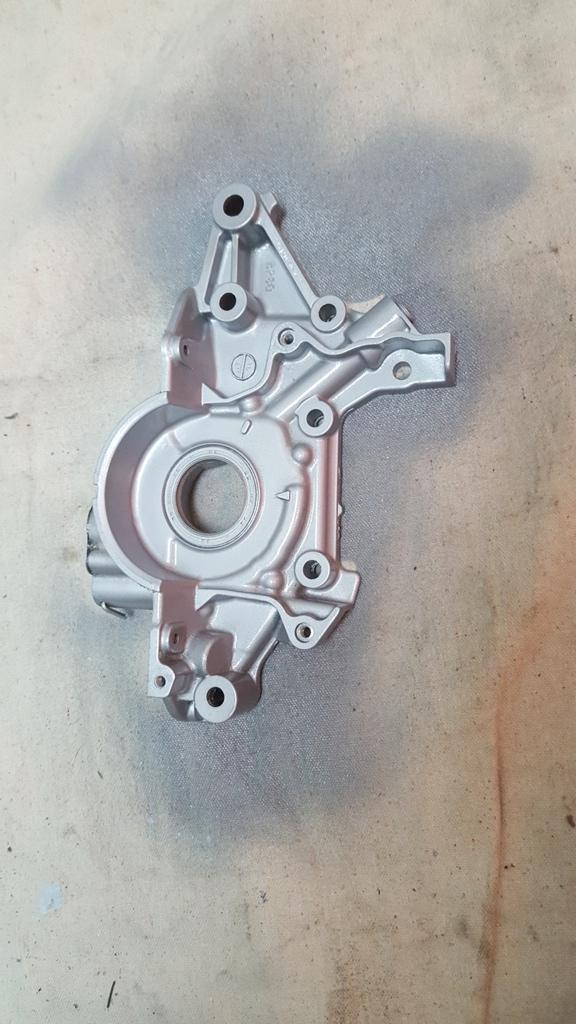
Cleaned and painted oil pump.

Ruckus mods! Lowered seat, handlebars, relocated blinkers, speedo in battery box, underseat storage.

Timing belt. Starting to play around with my options for oil feed routing.

Got the valve cover back from powdercoating. I wanted the color to match the seat, but they had the cover for about 3 months and were still in a holding pattern for the color. We got as close as we could. They also powdered the VVT oil line... I'll sort that out.


Notice anything that we didn't cut out? We didn't either.

Sonofabitch!

In case you still didn't see it, we missed the dash in 16-valve. It's fixed here and starting to look ready for install.

Oil feed routing

Pclips are awesome

Random interior shot.

And it's in.

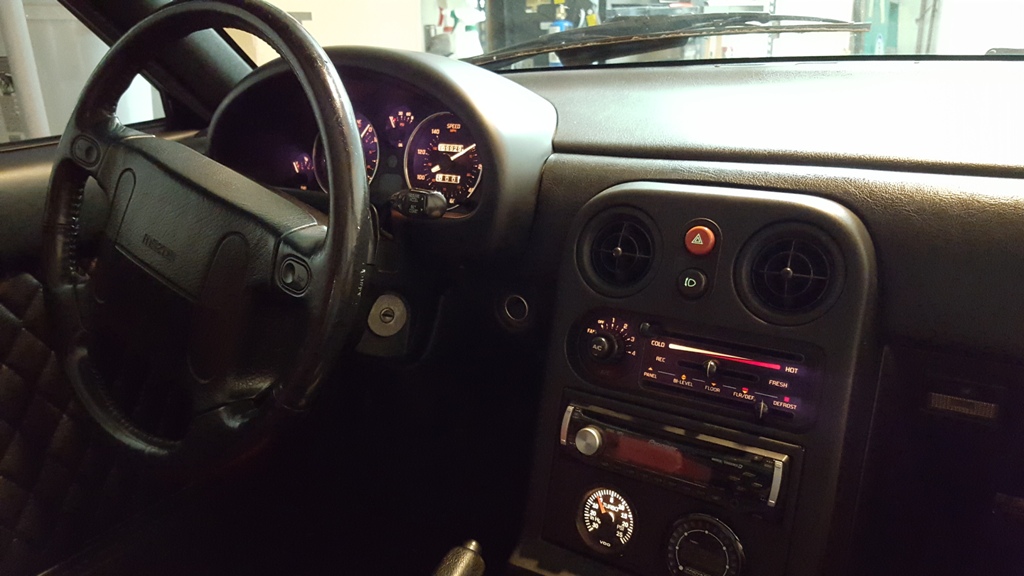
The amber lighting is hard to photograph, but it looks much more pleasing, imo. Oh yeah, the HVAC gauges are redone in JNC style, as well.
Building fuel lines. In retrospect, I should have started the an lines from the tank. Maybe in a future build.

It's alive.

First drive with my son. He's 5.

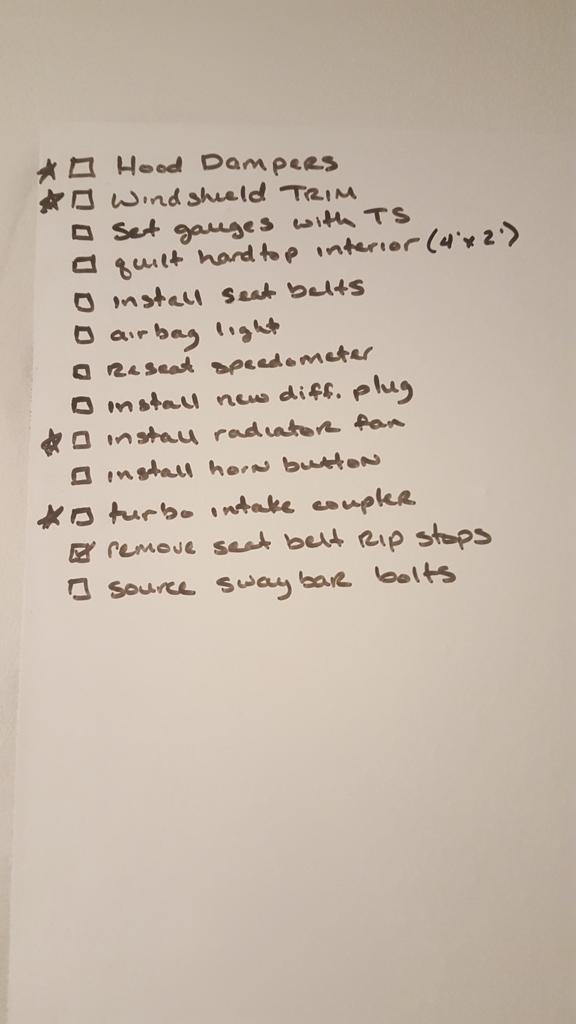
Here's my whiteboard punchlist from the winter. Last picture is my current list.


Got a good deal on 93LE seat belts. I have to get rid of the ripstops with my new steering wheel though. I bought a thread cutter tool, but it was no match for these threads. What worked for me was using the razor blade to cut the knots on one end and using the clippers to pull the opposite stitches out. Took me about 1.5-2 hours to do both. I had visions of offering this job up as a service to others, but f all that.


Revlimiter comes through again.

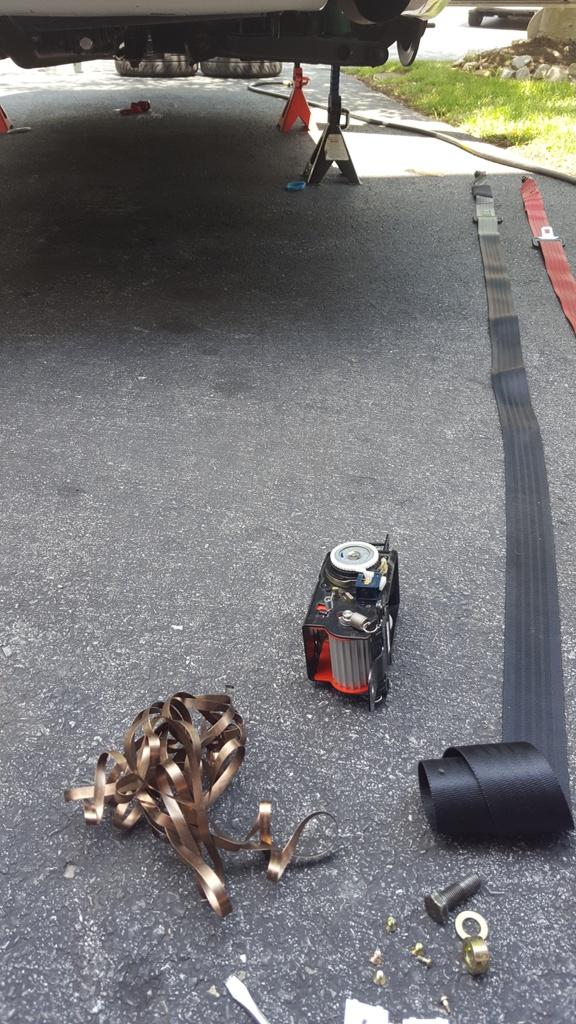
This is about last week. To make a short story short, my jack slipped off of the front subframe. I was trying to move too quickly and didn't have it seated well. The car crashed down and the radiator fan took all the damage. So, a new from Amazon and we're back in business. During this moment of idiocy, I managed to strip the drain plug out of the radiator. No problem right? I'll call Mishimoto and they'll get me a replacement. It comes in the mail a week and a day later... and it's the wrong size. And they have absolutely no idea what to do about it. The needed bolt is a M10x1.25, but it's got a stepped lip and an o-ring.. it's just not something easy to find. They're supposed to get back to me on Monday with a solution. I may end up JB Welding it closed.

New license plate.

Bought a midpipe and exhaust from the MT classifieds. Aluminum polished it.
Cleaned up the manifold and painting new turbo :| parts
Black 6an fuel lines, with mtuned rail that was already on the car.
Out of the oven. I doubt these will hold up, but I know that doing nothing will make them rusty. *shrug*
Exhaust installed
99% of things that we took out of the car were cleaned or used a bench grinder with a wire wheel on.
This was the start of a mini-ordeal. I found some hardlines for sale on MT, but they weren't lining up all that well.
Looks good, but there's a problem lurking.
Downpipe is contacting the block. A couple of phone calls and emailed pictures to FM later, it's determined that I have an old Begi style manifold and that's what's causing the misalignment with the block and the hardlines. I'm kinda forced to get the new manifold. FM worked with me a bit on the price. I can't say enough good things about that company.
Enter...
Clearance
Lines line up!
Now we're cooking. I wasn't planning on doing the timing belt/water pump, but during the manifold downtime, I took the chance.
Cleaned and painted oil pump.
Ruckus mods! Lowered seat, handlebars, relocated blinkers, speedo in battery box, underseat storage.
Timing belt. Starting to play around with my options for oil feed routing.
Got the valve cover back from powdercoating. I wanted the color to match the seat, but they had the cover for about 3 months and were still in a holding pattern for the color. We got as close as we could. They also powdered the VVT oil line... I'll sort that out.
Notice anything that we didn't cut out? We didn't either.
Sonofabitch!
In case you still didn't see it, we missed the dash in 16-valve. It's fixed here and starting to look ready for install.
Oil feed routing
Pclips are awesome
Random interior shot.
And it's in.
The amber lighting is hard to photograph, but it looks much more pleasing, imo. Oh yeah, the HVAC gauges are redone in JNC style, as well.
Building fuel lines. In retrospect, I should have started the an lines from the tank. Maybe in a future build.
It's alive.
First drive with my son. He's 5.
Here's my whiteboard punchlist from the winter. Last picture is my current list.
Got a good deal on 93LE seat belts. I have to get rid of the ripstops with my new steering wheel though. I bought a thread cutter tool, but it was no match for these threads. What worked for me was using the razor blade to cut the knots on one end and using the clippers to pull the opposite stitches out. Took me about 1.5-2 hours to do both. I had visions of offering this job up as a service to others, but f all that.
Revlimiter comes through again.
This is about last week. To make a short story short, my jack slipped off of the front subframe. I was trying to move too quickly and didn't have it seated well. The car crashed down and the radiator fan took all the damage. So, a new from Amazon and we're back in business. During this moment of idiocy, I managed to strip the drain plug out of the radiator. No problem right? I'll call Mishimoto and they'll get me a replacement. It comes in the mail a week and a day later... and it's the wrong size. And they have absolutely no idea what to do about it. The needed bolt is a M10x1.25, but it's got a stepped lip and an o-ring.. it's just not something easy to find. They're supposed to get back to me on Monday with a solution. I may end up JB Welding it closed.
New license plate.
Reply
4
4


 04-24-2016, 11:29 AM
#6
Junior Member
Thread Starter
iTrader: (4)
Join Date: Oct 2006
Location: Hagerstown, MD
Posts: 229
Total Cats: 39
Thanks guys! I'm all about them cats.
Finished up my catch can this morning. DIY style with proper hoses and fittings. Since I'll eventually be relocating my washer bottle to the firewall area, I'm able to use the fuse panel location for mounting. We had to build an adapter mount to locate the can higher for draining purposes.
Here's the link to the can I used. Craftsman - 16009 - Heavy Duty Air Line Filter | Sears Outlet There's also various parts needed that Summit can provide. I can provide a write-up with cost needed if anyone is interested. I bought more fittings than I needed and spent too much on overestimating hose length. I still need to add the copper scrubbers.
Here's building the simple bracket.


Painted the bracket, cleaned up the mounting bolts, used acorn style for the exposed area. Ran 6an hoses with 90* connectors on the can to keep the lines direct.


If anyone has a better idea of mounting the lines here, I'm all ears. I used a 90* elbow that I found at AutoZone off of the valve cover, but couldn't figure out a good option for the intake manifold. We ground down the nipple and put the hose on as far as I could.

Finished up my catch can this morning. DIY style with proper hoses and fittings. Since I'll eventually be relocating my washer bottle to the firewall area, I'm able to use the fuse panel location for mounting. We had to build an adapter mount to locate the can higher for draining purposes.
Here's the link to the can I used. Craftsman - 16009 - Heavy Duty Air Line Filter | Sears Outlet There's also various parts needed that Summit can provide. I can provide a write-up with cost needed if anyone is interested. I bought more fittings than I needed and spent too much on overestimating hose length. I still need to add the copper scrubbers.
Here's building the simple bracket.
Painted the bracket, cleaned up the mounting bolts, used acorn style for the exposed area. Ran 6an hoses with 90* connectors on the can to keep the lines direct.
If anyone has a better idea of mounting the lines here, I'm all ears. I used a 90* elbow that I found at AutoZone off of the valve cover, but couldn't figure out a good option for the intake manifold. We ground down the nipple and put the hose on as far as I could.
Reply
2
2
 04-24-2016, 11:57 AM
#8
Junior Member
Thread Starter
iTrader: (4)
Join Date: Oct 2006
Location: Hagerstown, MD
Posts: 229
Total Cats: 39
I had to oil it to get it past the valve cover grommet. It feels very solid.
It's a Dorman PCV Elbow #46022. The internet says it's for a 97-04 Ford. Dorman Products - 46022
Here's a Summit link. Dorman PCV Breather Hoses 46022 - Free Shipping on Orders Over $99 at Summit Racing
Off to go look at your build..
Edit: We have made quite a few decisions in line with each other. High five!
Reply
1
1


 04-25-2016, 09:01 PM
#13
Junior Member
Thread Starter
iTrader: (4)
Join Date: Oct 2006
Location: Hagerstown, MD
Posts: 229
Total Cats: 39
This build thread thing is pretty motivating.
Master craftsman stuff ahead...
So, last week, the bolt to my apparently older style Mishimoto radiator sheared off when I was fixing the fan screwup. This bolt is unobtainium.. even from Mishimoto. They're supposedly looking into the depths of their bolt buckets to find me a new one.
In the meantime.. the broken bolt on the left, my best attempt at recreating it on the right. I slathered it with RTV and bolted it in. It's actually good, so far.


Got to drive tonight. Blurry shot indicates speed.

Anyone know what these air deflector/guides are actually called? Part number for a 90? I'd like to replace all 3.

On tap for tomorrow is the paint matched to valve cover front swaybar.

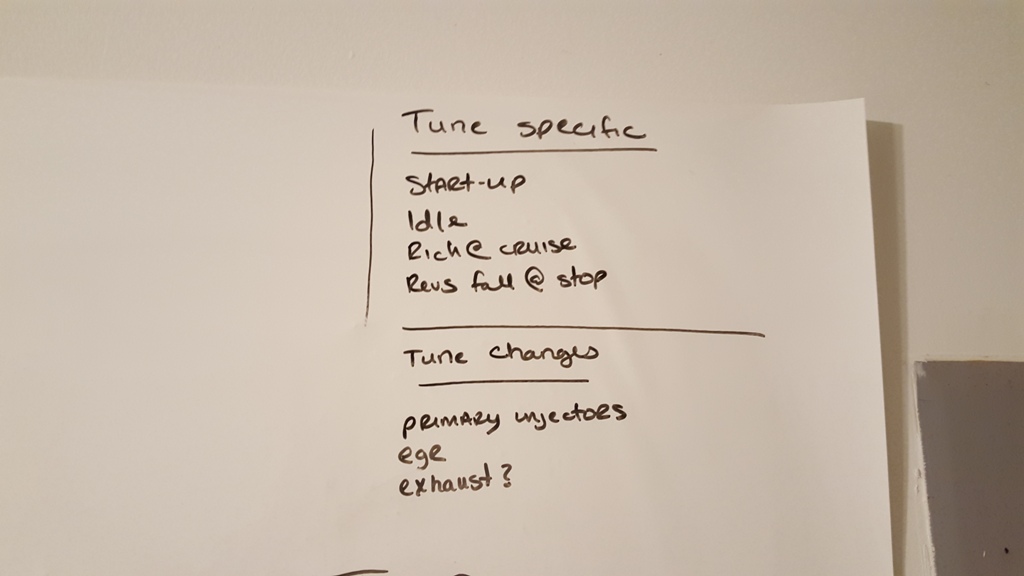
On tap for Friday is a road tune from a local Miata/Megasquirt referral. Hopefully everything goes well.
Master craftsman stuff ahead...
So, last week, the bolt to my apparently older style Mishimoto radiator sheared off when I was fixing the fan screwup. This bolt is unobtainium.. even from Mishimoto. They're supposedly looking into the depths of their bolt buckets to find me a new one.
In the meantime.. the broken bolt on the left, my best attempt at recreating it on the right. I slathered it with RTV and bolted it in. It's actually good, so far.
Got to drive tonight. Blurry shot indicates speed.
Anyone know what these air deflector/guides are actually called? Part number for a 90? I'd like to replace all 3.
On tap for tomorrow is the paint matched to valve cover front swaybar.
On tap for Friday is a road tune from a local Miata/Megasquirt referral. Hopefully everything goes well.
Reply
0
0
06-03-2016, 12:24 PM
#14
Junior Member
Thread Starter
iTrader: (4)
Join Date: Oct 2006
Location: Hagerstown, MD
Posts: 229
Total Cats: 39
Mini-update.
The car is tuned on the 8psi wastegate. I have an EBC to add in at some point. It's very good with the exception of cold-start and intermittent oscillations at idle. We'll keep working on those as time allows.
Un-level Cappuccino bottle from rushing the job. I still have to extend the power and connect the lines. I rarely use the washer bottle, so it hasn't been a priority.

Color matched swaybar installed
Mishimoto found the plug. I received 4 different drain plugs over four separate shipments from Mishimoto during this ordeal. They finally got it right. A couple of weeks after I got the correct one, I was sent the fourth one (was incorrect too). No idea what happened there.
Building the intake shroud. I saw this hint to use wooden dowels to get the height correct in my searches and found it pretty clever. I'm running the shroud now, but it's still not 100% complete. We'll be making final adjustments soonish.


I found a white trunk from a localish partout.

The paint match is a bit off. Mine was painted early in its life from hail damage.. which explains why my white paint is still on the car at all. I'll be polishing the car within the next couple of months.. hopefully that helps the paint match better.

Also picked up a used Voodoo shift **** and the last piece I needed for the air deflector.

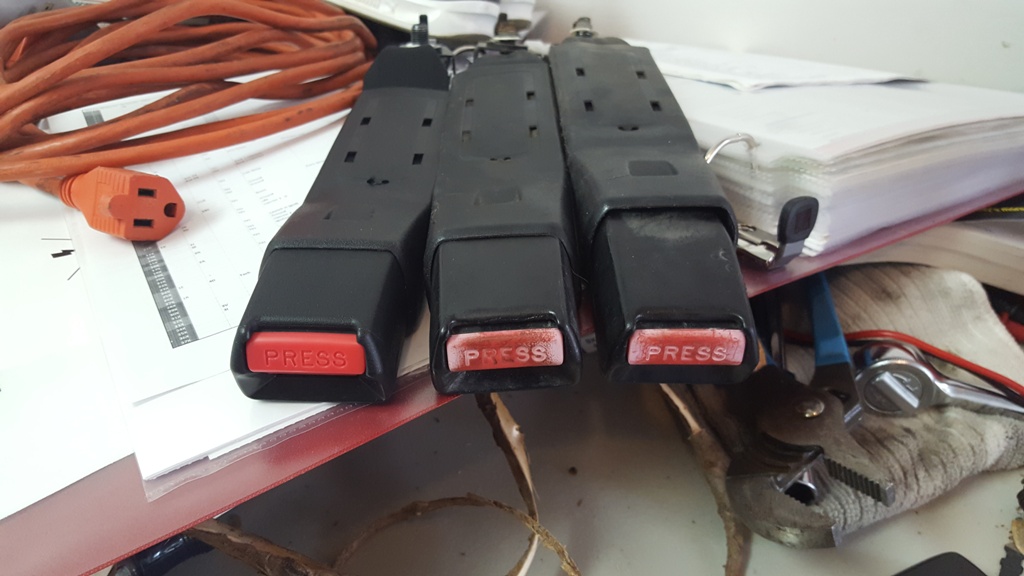
New seat belt receivers.

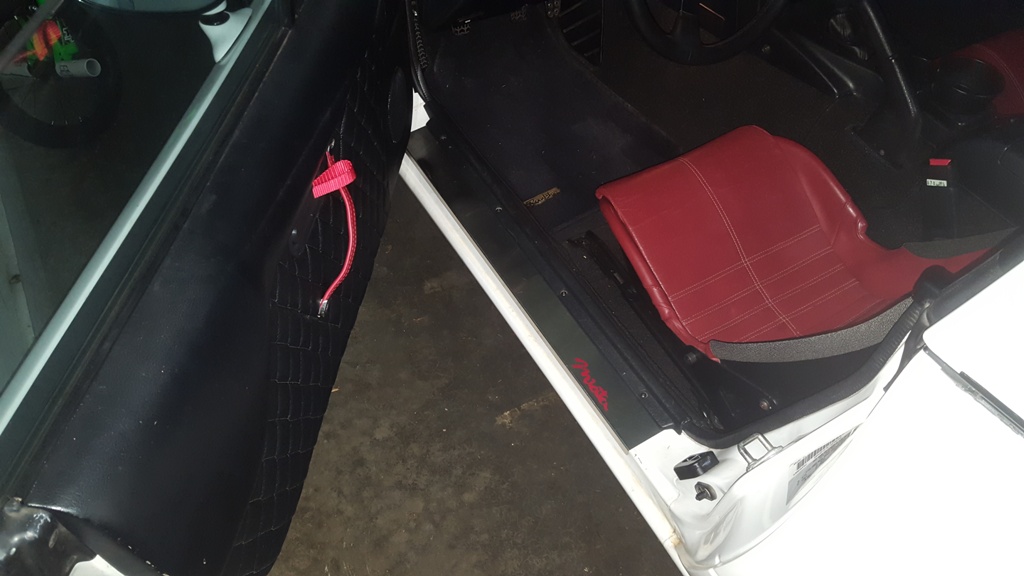
Door sills added
I need to get the car in the air again to fix a few issues.
There's an oil leak (about an inch in circumference overnight) from what I thought was the turbo drain. I've tightened both bolts, but it's still leaking. I literally can't find where the leak is coming from.
I've got the 65-75mph shimmy. I need to check to make sure the PPF is aligned and if it's okay, bring the tires back for another attempt at balancing.
Muffler exhaust is touching the bumper cutout on the upper right portion and burned it a bit. I have the poly hangars, but I may end up having to use muffler straps to align it.
Replace slow leaking diff plug.
Interior
Install 93LE seatbelts - I have to remove the rollbar to install seatbelts, right?
Remove airbag light
Set coolant temp with TunerStudio
Reseat speedometer - Hopefully I don't have to buy a new cable
Adjust steering wheel one tooth more to center it
Engine bay
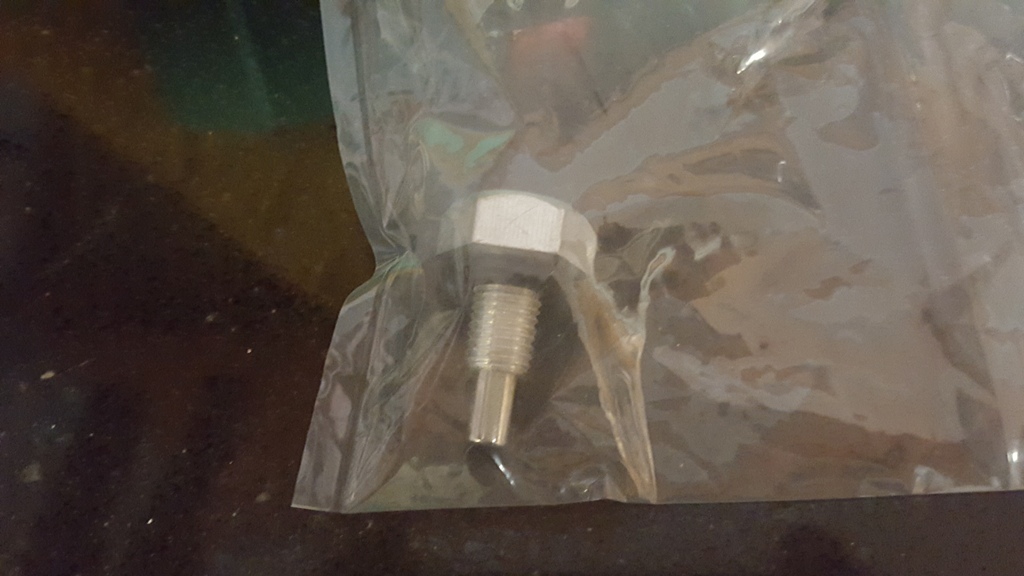
Install radiator plug
Finish intake shield
Fire sleeve the coolant feed where it's contacting the manifold
Washer bottle power and fluid feed
Install EBC on backside of intake shield
The car is tuned on the 8psi wastegate. I have an EBC to add in at some point. It's very good with the exception of cold-start and intermittent oscillations at idle. We'll keep working on those as time allows.
Un-level Cappuccino bottle from rushing the job. I still have to extend the power and connect the lines. I rarely use the washer bottle, so it hasn't been a priority.
Color matched swaybar installed
Mishimoto found the plug. I received 4 different drain plugs over four separate shipments from Mishimoto during this ordeal. They finally got it right. A couple of weeks after I got the correct one, I was sent the fourth one (was incorrect too). No idea what happened there.
Building the intake shroud. I saw this hint to use wooden dowels to get the height correct in my searches and found it pretty clever. I'm running the shroud now, but it's still not 100% complete. We'll be making final adjustments soonish.
I found a white trunk from a localish partout.
The paint match is a bit off. Mine was painted early in its life from hail damage.. which explains why my white paint is still on the car at all. I'll be polishing the car within the next couple of months.. hopefully that helps the paint match better.
Also picked up a used Voodoo shift **** and the last piece I needed for the air deflector.
New seat belt receivers.
Door sills added
I need to get the car in the air again to fix a few issues.
There's an oil leak (about an inch in circumference overnight) from what I thought was the turbo drain. I've tightened both bolts, but it's still leaking. I literally can't find where the leak is coming from.
I've got the 65-75mph shimmy. I need to check to make sure the PPF is aligned and if it's okay, bring the tires back for another attempt at balancing.
Muffler exhaust is touching the bumper cutout on the upper right portion and burned it a bit. I have the poly hangars, but I may end up having to use muffler straps to align it.
Replace slow leaking diff plug.
Interior
Install 93LE seatbelts - I have to remove the rollbar to install seatbelts, right?
Remove airbag light
Set coolant temp with TunerStudio
Reseat speedometer - Hopefully I don't have to buy a new cable
Adjust steering wheel one tooth more to center it
Engine bay
Install radiator plug
Finish intake shield
Fire sleeve the coolant feed where it's contacting the manifold
Washer bottle power and fluid feed
Install EBC on backside of intake shield
Reply
0
0
 07-30-2016, 09:19 PM
#17
Junior Member
Thread Starter
iTrader: (4)
Join Date: Oct 2006
Location: Hagerstown, MD
Posts: 229
Total Cats: 39
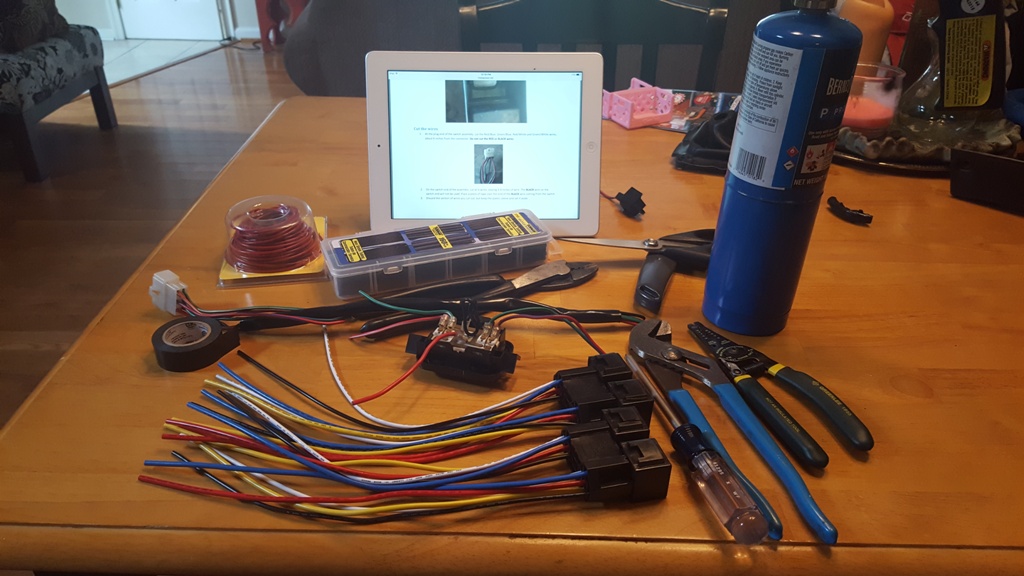
Window Relays – Used this link. I’m horrible at wiring, so there’s a lot of excess, but they work much faster.
100k. Meaningless milestone. Only the chassis and the body are at 100k.

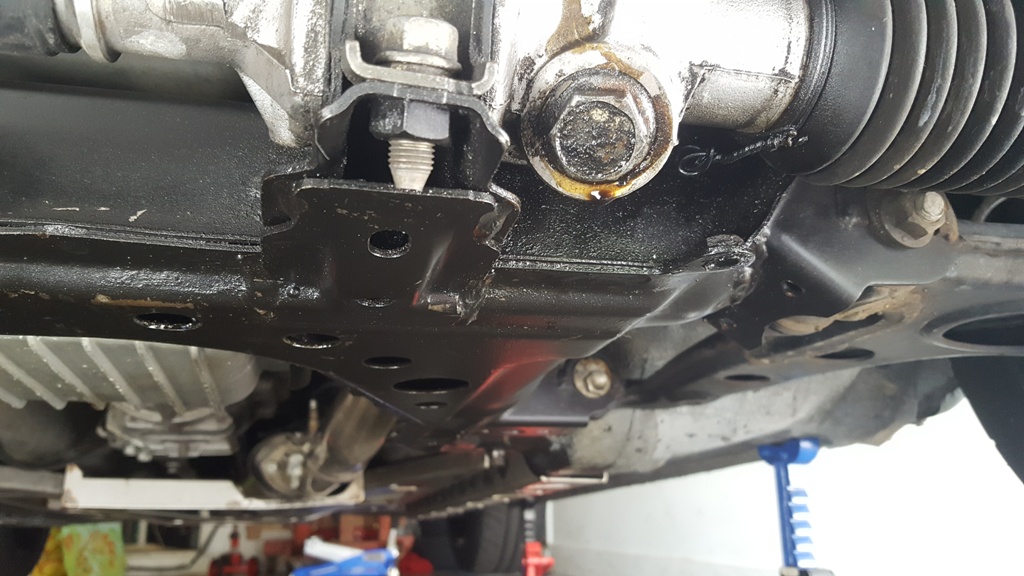
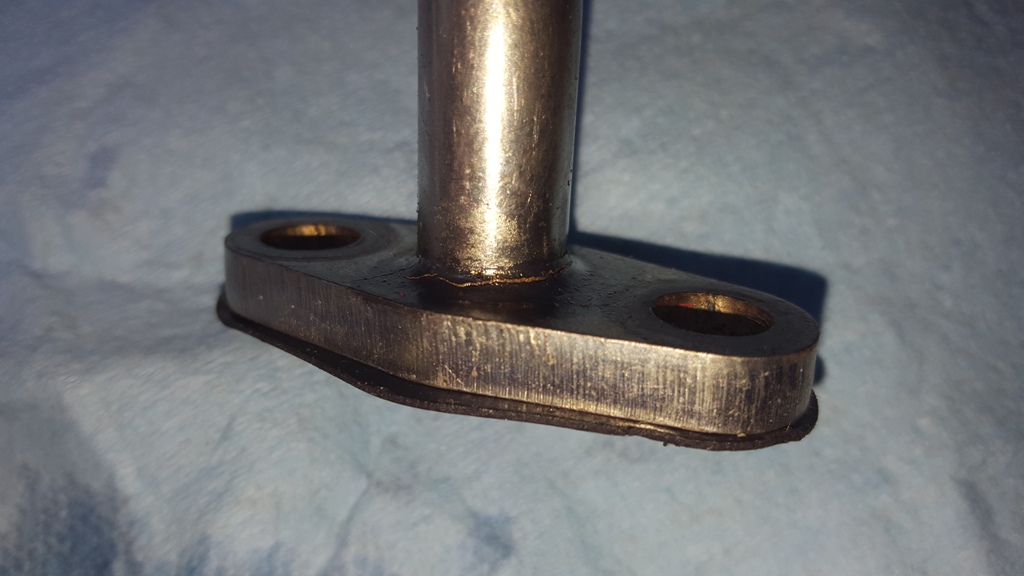
Garage Floor showing a leak. This has been leaking since the winter build was completed, but it wasn’t so much (and I don’t drive a ton) that I was super concerned about doing it. I figured out that it was coming from the turbo drain and tightened both bolts on the underside of the turbo. Still leaked.
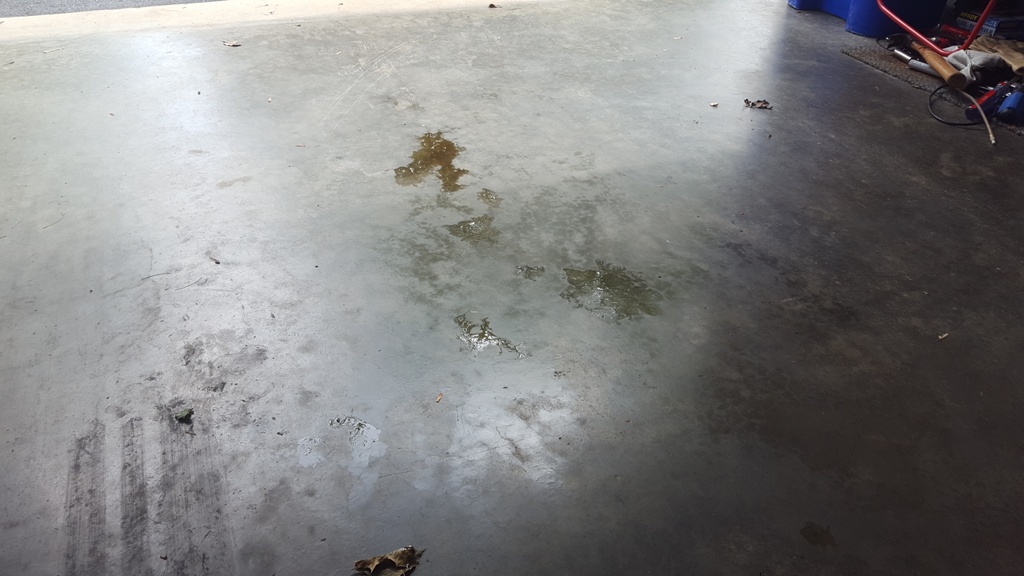
This is the lowest point where the oil was leaking from.
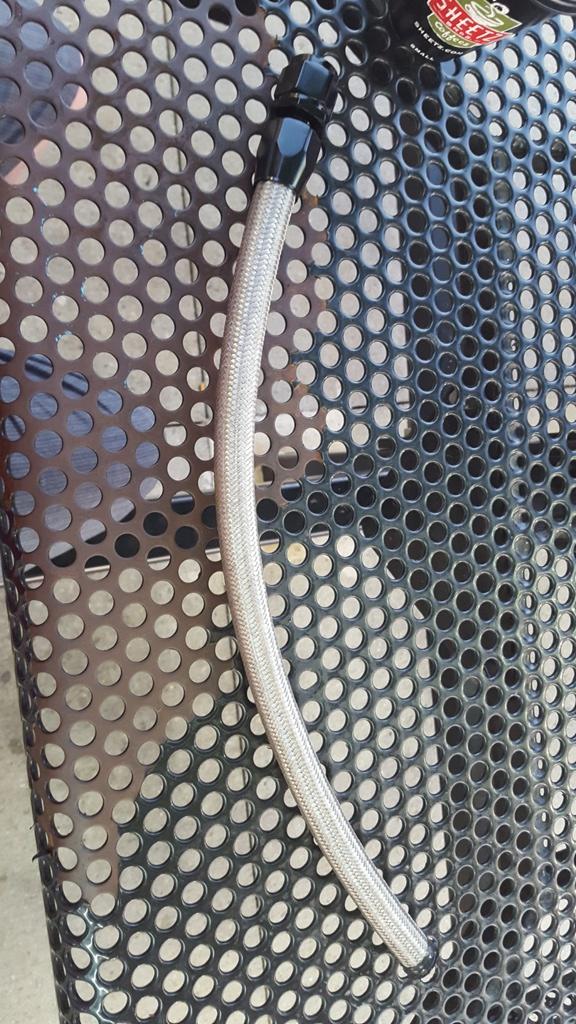
Flyin Miata hardline developed a crack around the mounting face. I brought it to a local speed shop to get welded, but he was unable to do it.
He got me setup with a 10an line and the correct turbo fitting. All set for now.
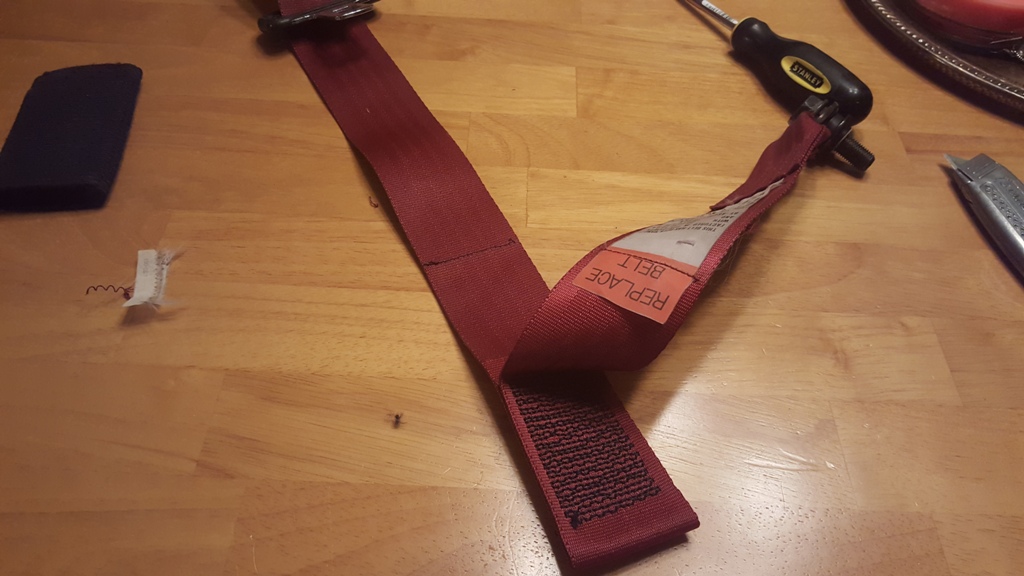
Starting seat belt swap

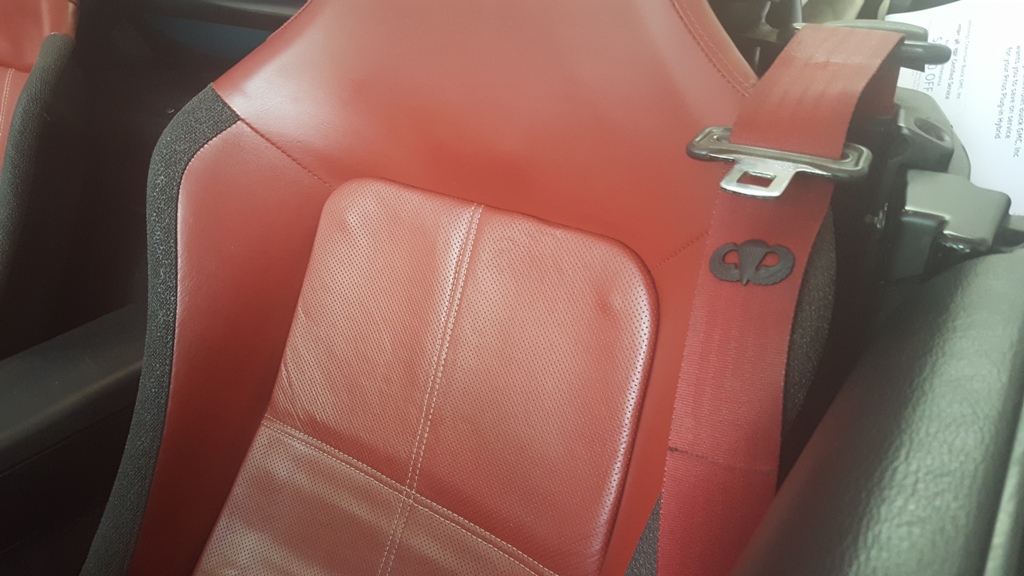
I don't know how the previous seatbelts were threaded through the seat belt risers that exist to avoid the rollbar. The only way we could figure out how to install the riser was to completely disassemble the seatbelts. In a brilliant stroke of genius, we attempted the work on the existing black/faded belts. We ended up destroying both of them in the process, so it was good that we tested on those and not the 93LE ones. If you're not careful with the reel assembly upon disassembly/reassembly, the spring will uncoil violently. This was equal parts traumatizing and hilarious. So...if anyone needs a random seatbelt part for any reason, I'm your guy.
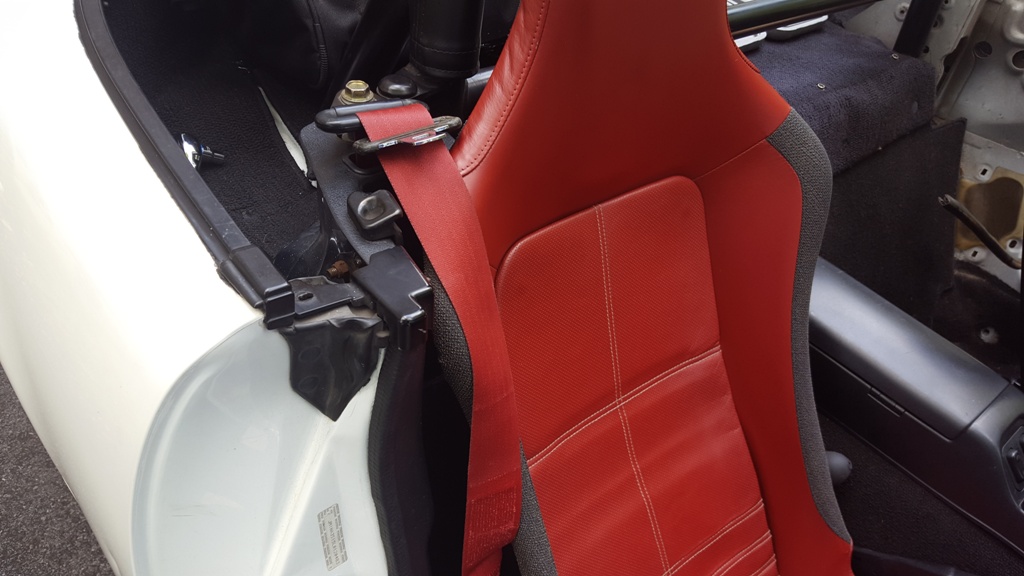
I had to remove the little grommet that keeps the belts in place since I removed the ripstops before. Thought this was a subtle way of getting a little bit of my military history into the build. Those are paratrooper/airborne wings for those not in the know.
Hood alignment was a bit high due to not clearing the intake shield enough.
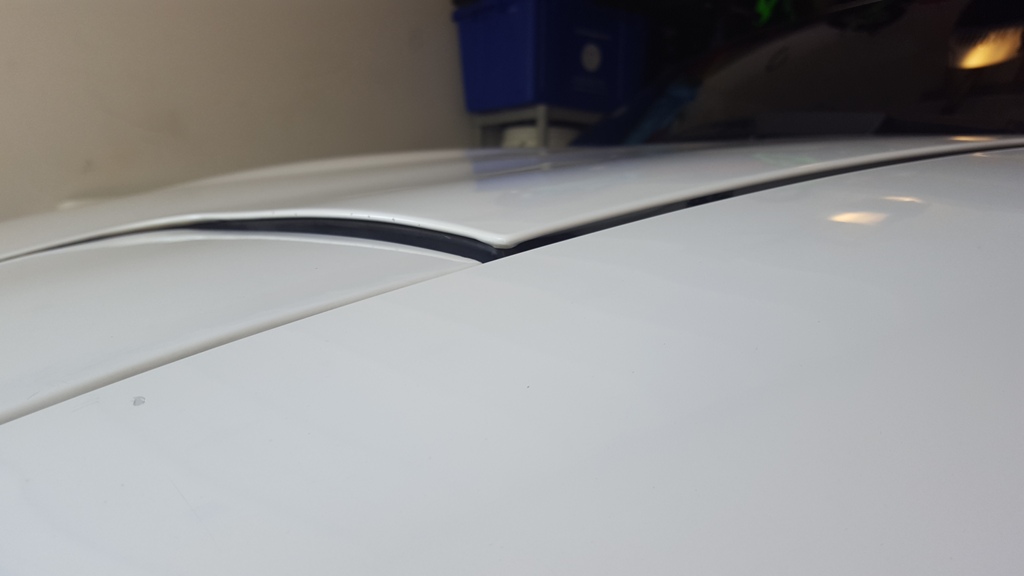
Fixed.
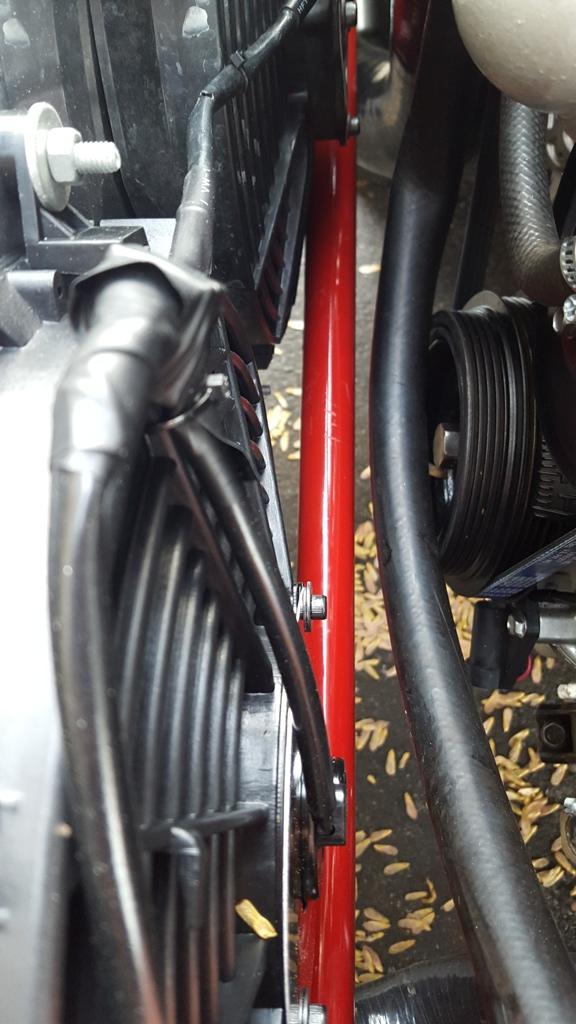
Heater Core Line was extremely close (touching) the upper downpipe. I emailed FM to see what the solution is and then read the instructions. Should have done that in reverse. I ended up having the pry the line with a tool leveraged against the downpipe and got it out of the way.
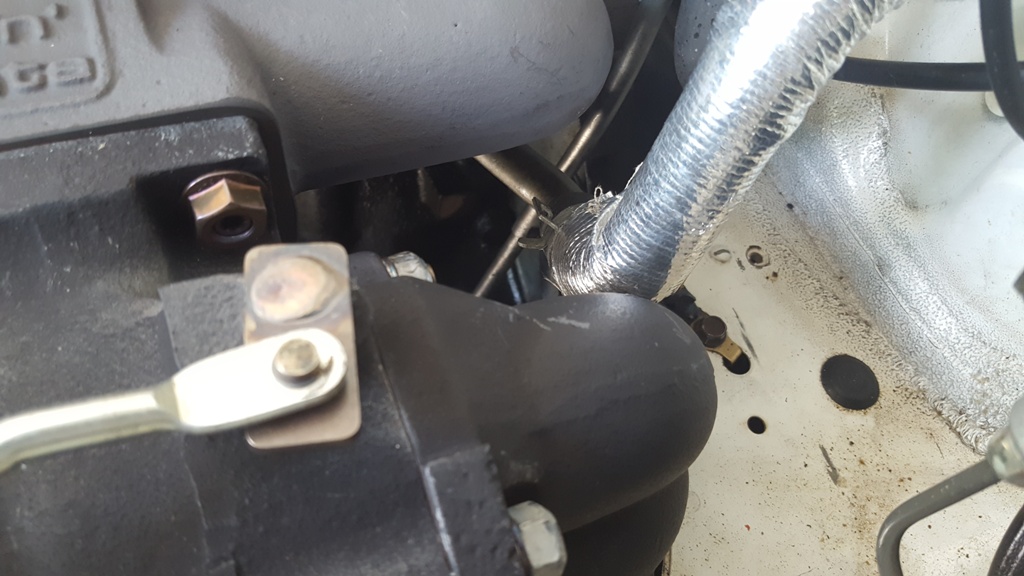

Probably a fire hazard
Probably not a fire hazard. This is 1/2" heat resistant tubing for up to 1200 degrees. https://www.wirecare.com/products.asp?prodline=FGL
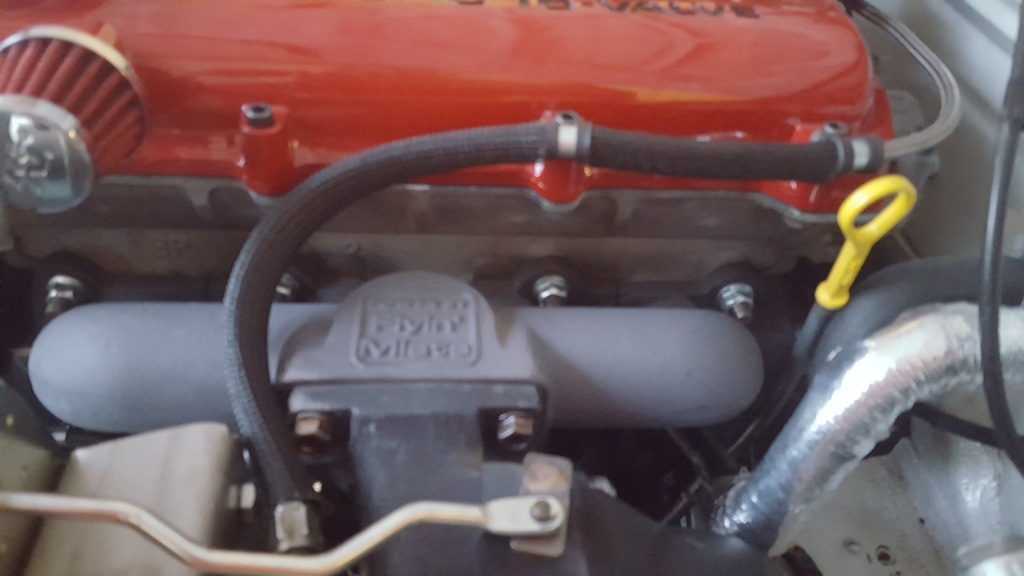
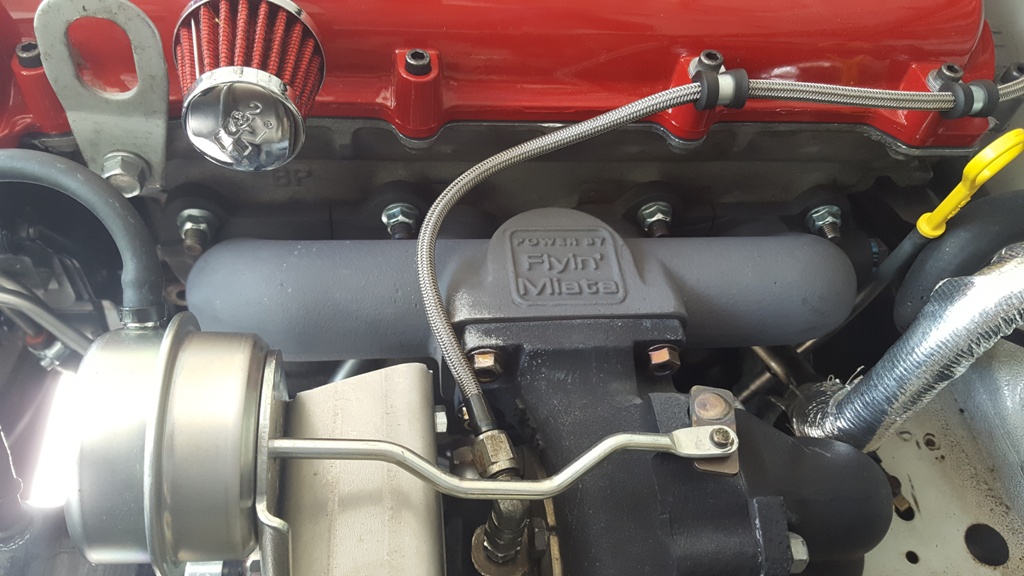
Added an FM turbo shield from a member here.
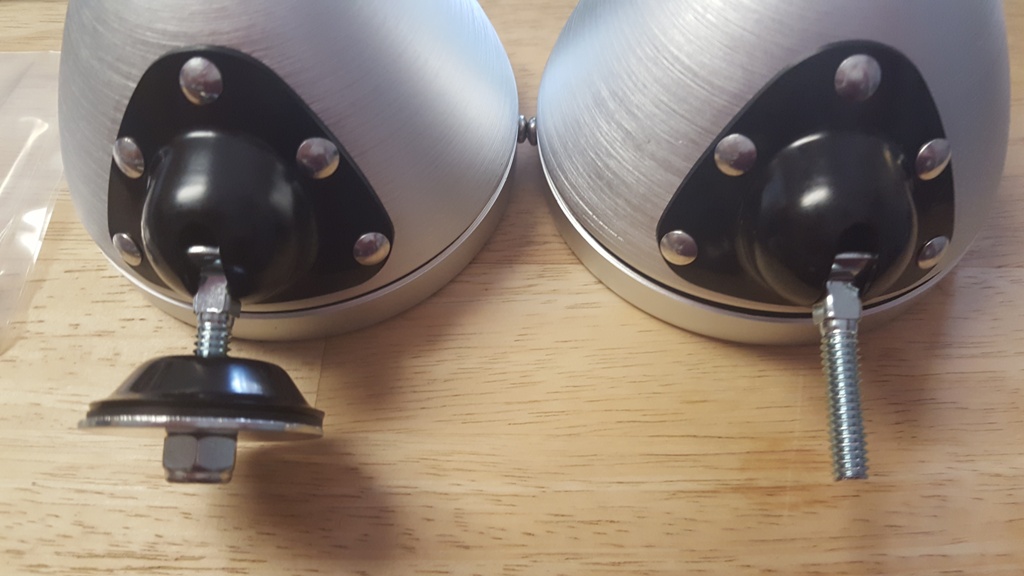
New mirrors. This is a semi-interesting story. These are the new Moss supplied Raydyot mirrors. My initial delivery was missing the parts that come pre-installed (see pic) on the mirror. I called them and asked them for the missing parts. They sent me two new complete mirrors. So, now I have 4 mirrors and the assembly parts for 3. I called them back and they said to just keep it all. Again, if anyone needs any parts on these for any reason, I'm your guy.
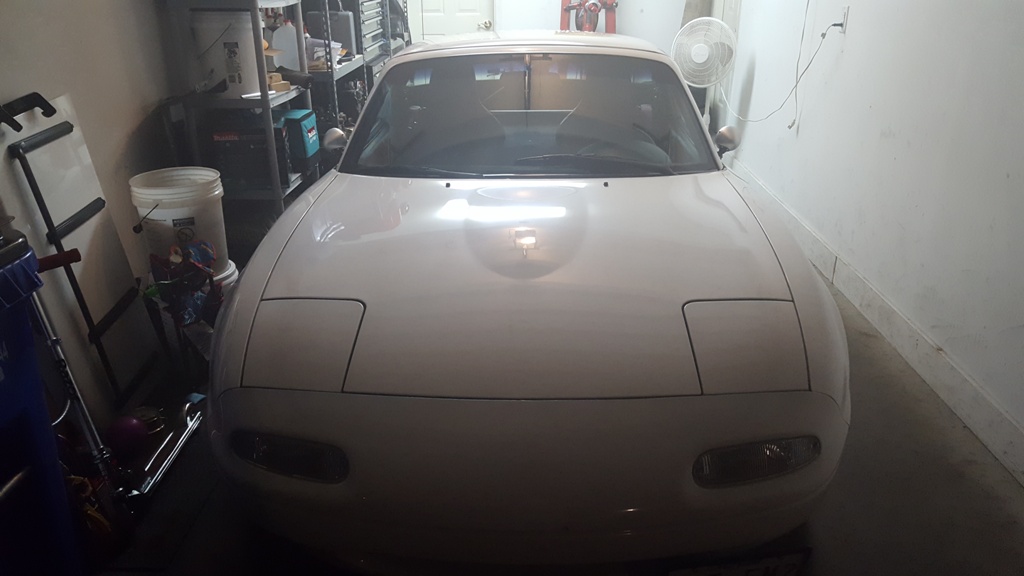
Much tighter to the body of the car than the factory mirrors. I'm still adjusting to the lack of rear visibility.
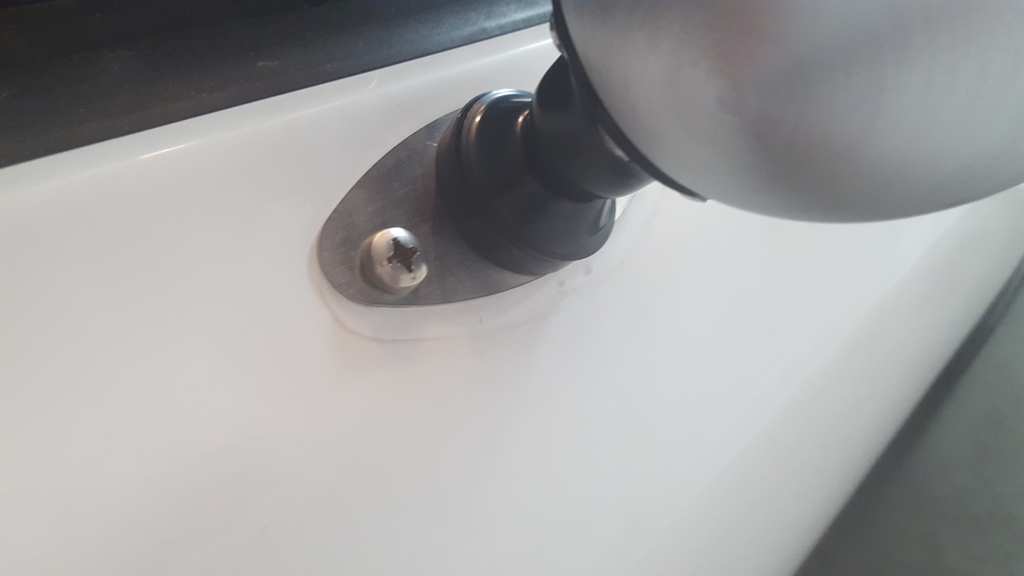
This is how the mounts looks up close. It's not well photographed from what I could see in other posts.
Next project that I'll be working is shifting the butterfly brace all the way down the slot adjusters. I'm getting chassis vibrations cruising around 40mph and 75mph and a lot more through the mph range on decel. I already adjusted the PPF frame to within spec, but I'm still getting the vibrations. I'm hoping clearing the exhaust more will solve it.
100k. Meaningless milestone. Only the chassis and the body are at 100k.
Garage Floor showing a leak. This has been leaking since the winter build was completed, but it wasn’t so much (and I don’t drive a ton) that I was super concerned about doing it. I figured out that it was coming from the turbo drain and tightened both bolts on the underside of the turbo. Still leaked.
This is the lowest point where the oil was leaking from.
Flyin Miata hardline developed a crack around the mounting face. I brought it to a local speed shop to get welded, but he was unable to do it.
He got me setup with a 10an line and the correct turbo fitting. All set for now.
Starting seat belt swap
I don't know how the previous seatbelts were threaded through the seat belt risers that exist to avoid the rollbar. The only way we could figure out how to install the riser was to completely disassemble the seatbelts. In a brilliant stroke of genius, we attempted the work on the existing black/faded belts. We ended up destroying both of them in the process, so it was good that we tested on those and not the 93LE ones. If you're not careful with the reel assembly upon disassembly/reassembly, the spring will uncoil violently. This was equal parts traumatizing and hilarious. So...if anyone needs a random seatbelt part for any reason, I'm your guy.
I had to remove the little grommet that keeps the belts in place since I removed the ripstops before. Thought this was a subtle way of getting a little bit of my military history into the build. Those are paratrooper/airborne wings for those not in the know.
Hood alignment was a bit high due to not clearing the intake shield enough.
Fixed.
Heater Core Line was extremely close (touching) the upper downpipe. I emailed FM to see what the solution is and then read the instructions. Should have done that in reverse. I ended up having the pry the line with a tool leveraged against the downpipe and got it out of the way.
Probably a fire hazard
Probably not a fire hazard. This is 1/2" heat resistant tubing for up to 1200 degrees. https://www.wirecare.com/products.asp?prodline=FGL
Added an FM turbo shield from a member here.
New mirrors. This is a semi-interesting story. These are the new Moss supplied Raydyot mirrors. My initial delivery was missing the parts that come pre-installed (see pic) on the mirror. I called them and asked them for the missing parts. They sent me two new complete mirrors. So, now I have 4 mirrors and the assembly parts for 3. I called them back and they said to just keep it all. Again, if anyone needs any parts on these for any reason, I'm your guy.
Much tighter to the body of the car than the factory mirrors. I'm still adjusting to the lack of rear visibility.
This is how the mounts looks up close. It's not well photographed from what I could see in other posts.
Next project that I'll be working is shifting the butterfly brace all the way down the slot adjusters. I'm getting chassis vibrations cruising around 40mph and 75mph and a lot more through the mph range on decel. I already adjusted the PPF frame to within spec, but I'm still getting the vibrations. I'm hoping clearing the exhaust more will solve it.
Last edited by Shibby; 07-31-2016 at 08:52 AM.
Reply
0
0
07-31-2016, 08:50 AM
#19
Junior Member
Thread Starter
iTrader: (4)
Join Date: Oct 2006
Location: Hagerstown, MD
Posts: 229
Total Cats: 39
Thanks a lot. Yeah, I had to break down and get the receivers new. I wasn't able to find a clean enough set used. They're so expensive for what they are.
https://parts.com/index.cfm?fuseacti...itle%3D-BUCKLE
https://www.parts.com/index.cfm?fuse...itle%3D-BUCKLE
https://parts.com/index.cfm?fuseacti...itle%3D-BUCKLE
https://www.parts.com/index.cfm?fuse...itle%3D-BUCKLE
Reply
0
0
07-31-2016, 03:06 PM
#20
Junior Member

Join Date: Jul 2016
Location: Bay Area
Posts: 355
Total Cats: 33
Thanks a lot. Yeah, I had to break down and get the receivers new. I wasn't able to find a clean enough set used. They're so expensive for what they are.
https://parts.com/index.cfm?fuseacti...itle%3D-BUCKLE
https://www.parts.com/index.cfm?fuse...itle%3D-BUCKLE
https://parts.com/index.cfm?fuseacti...itle%3D-BUCKLE
https://www.parts.com/index.cfm?fuse...itle%3D-BUCKLE
Reply
0
0


