When you click on links to various merchants on this site and make a purchase, this can result in this site earning a commission. Affiliate programs and affiliations include, but are not limited to, the eBay Partner Network.
Well because the weather was good last night I managed to get the exhaust fitted. There's a noticeable improvement in spool/power and I seemed to have cured a strange vibration that was off putting by swapping them, so I can only presume this must have been part of the exhaust making contact with the chassis somewhere.
However, it's so quiet... I was really hoping for a little more sound but I didn't realise that silencing box really is quite so effective. I think what I might do is just make a rear 2.5 inch section to bolt on at the end of the FM pipe and run this for fun days out in the sun and then swap back to the FM back box for track days etc.
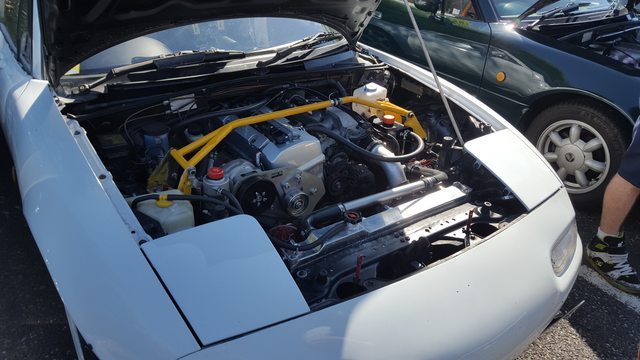
So once I've got the COPs sorted, and ducted the rad properly I think I'll be getting it to a tuner for some professional mapping and hopefully get some good safe power.
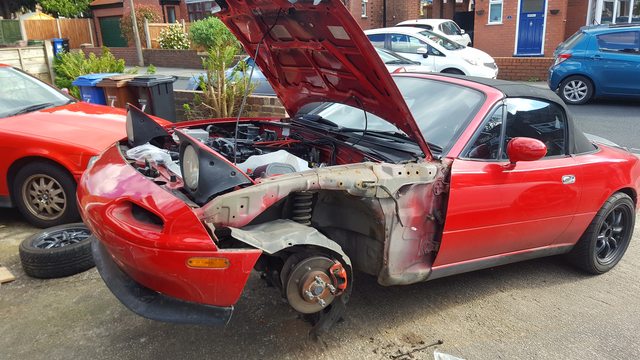
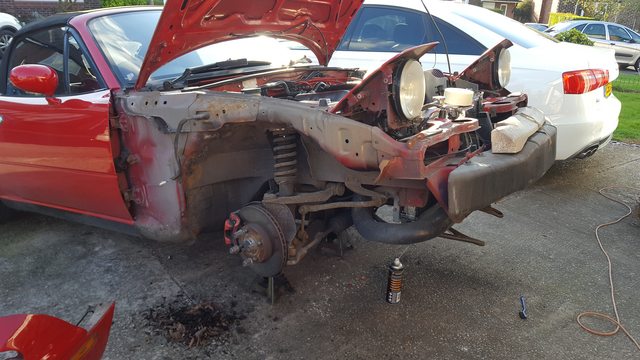
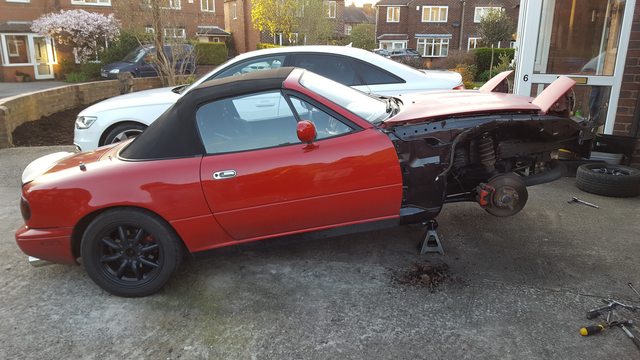
Finally managed to find a few spare hours in the lovey sunshine so I made a start on the car.Began by stripping the front quarters and front bumper off, what a ******* this was! if the bolts didn't snap by themselves then I had to either cut them out with the dremel or drill them out!Once they were off though I was pleasantly surprised with how clean it was under there, I still needed to brush the whole area down to remove loose dirt but other than that, only a little surface rust here and there. The driver side front wing had an absolute ton of mulch in it though, I'm sure that's visible under the car in some of the photos.
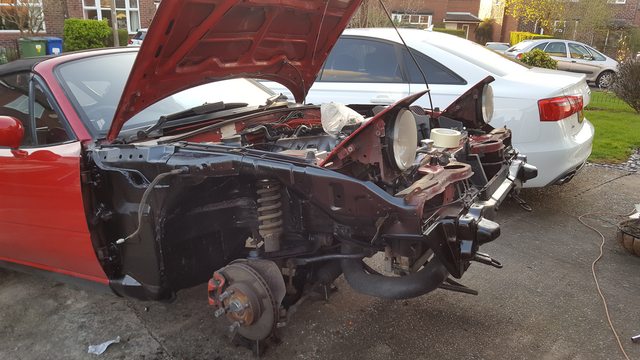
Then once I'd cleaned up, I used Dinitrol aerosols to spray on, very impressed with this stuff, went on easy and gives a really nice clean matt black look.
Anyway, here's some pics:
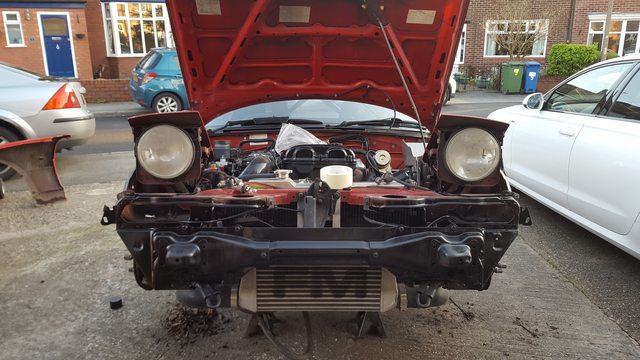
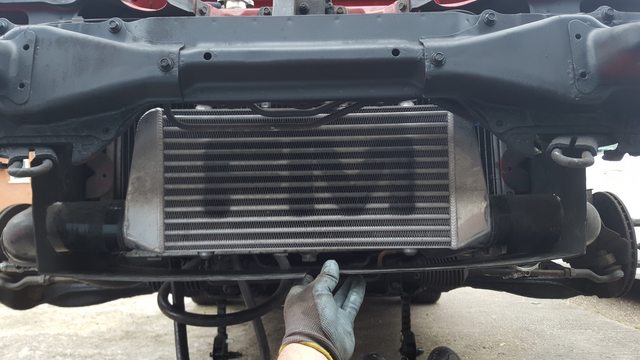
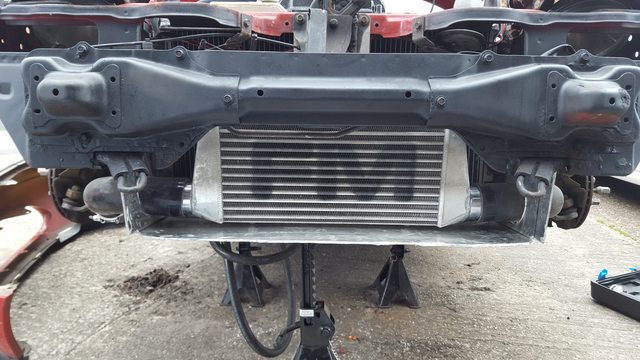
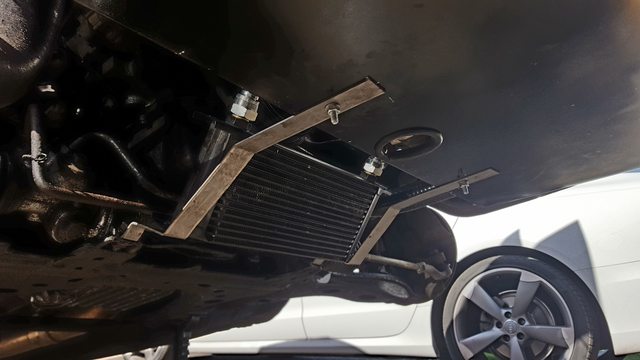
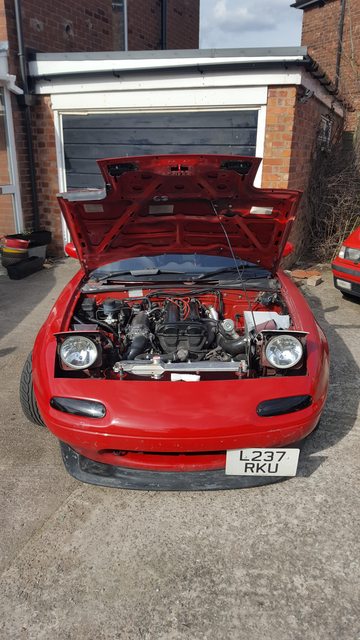
Next up before the panels go back on is relocating the oil cooler in front of the rad, and ducting the whole lot with sheet aluminium. I'll also look at fitting the Wilwoods soon, just awaiting on parts arriving at work so I can fit them, I'll have to do the master cylinder and brake lines at another point, I don't have the tools. As for relocating the oil cooler, I'm looking at removing that cross member at the front and having a much thiner plate welded in place that I could possibly mount the oil cooler on. I think some people on here have done this, so I need to check their builds.
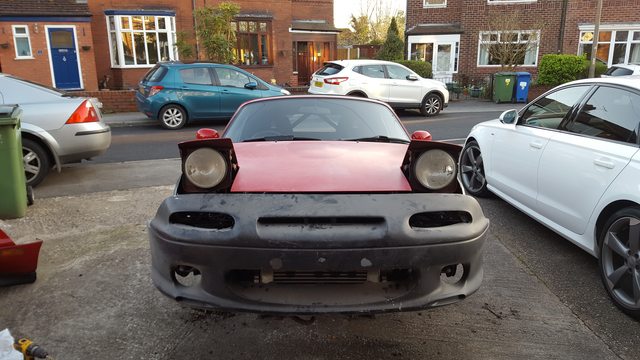
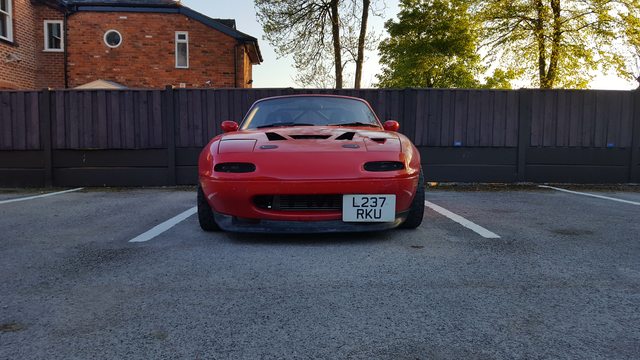
And my last decision... Do I go with this front bumper?
It's an Rs Aizawa repliaca that I've had for a couple of years. It needs a little work in places but I think it's a much better fit for my purposes, the extra vent above the normal mouth provides more flow to the rad and then there's the two handy fog light holes either side that should get some cool air into the wheel wells.
Open to peoples opinions on this, I just think it's nice to have something that's not just the normal bumper and GV lip.
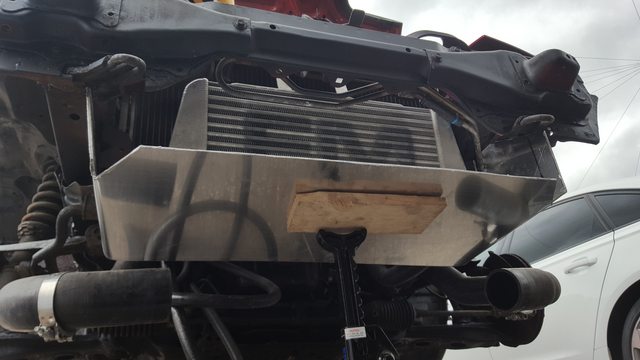
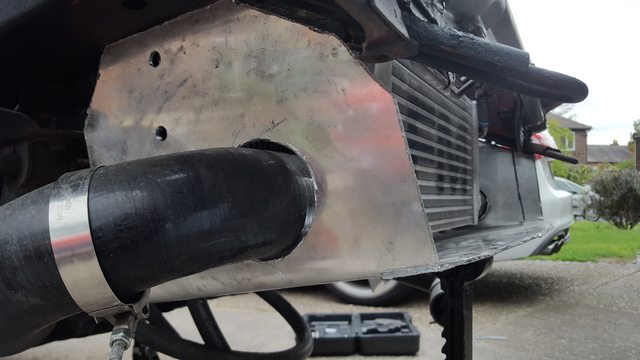
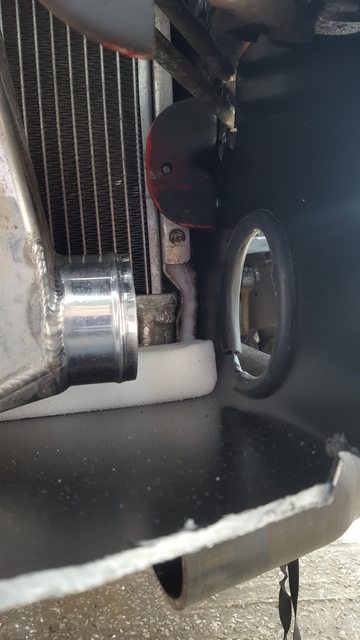
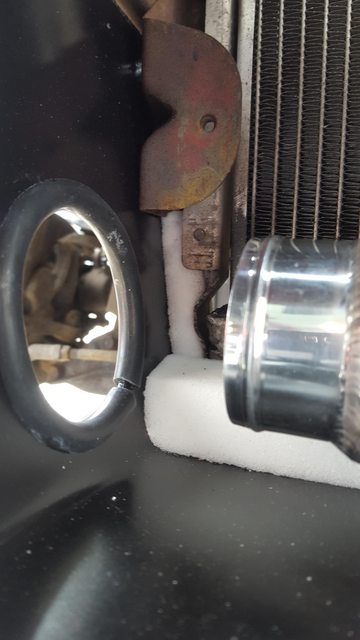
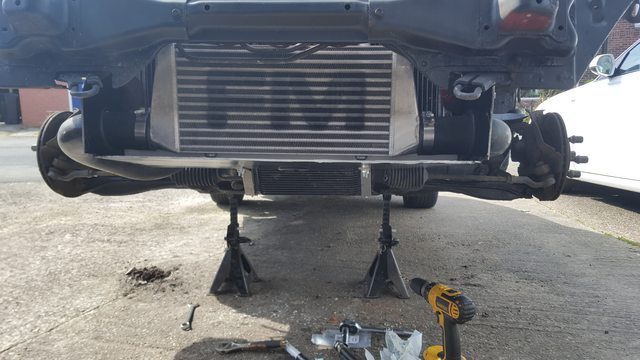
Had a busy day on the car, got stuck into making the air damn out of the ali I'd bought... Started by making a template of where I needed to cut and then laid that out on the sheet, what became apparent quite quickly was how I really should have bought thinner ali... maybe even just 1mm. It took some serious cutting to get through 3mm and cut a neat shape out of it, and then bending each end up was an absolute nightmare!
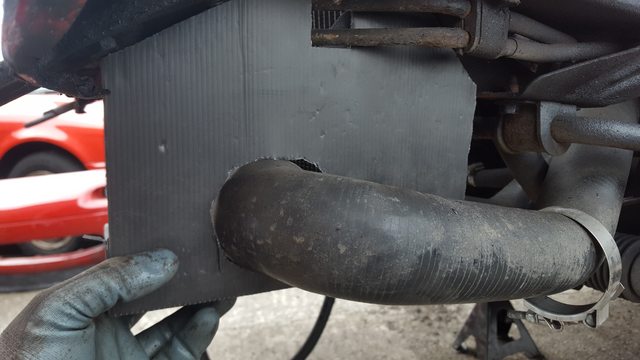
I got there in the end though, and it fits pretty well. I decided to paint it black because by the end it was covered in a lot of scratches and I though it'd look better. I also sliced through one side of some vac hose and glued that on round the shape edges that the intercooler hoses will go through to protect them.
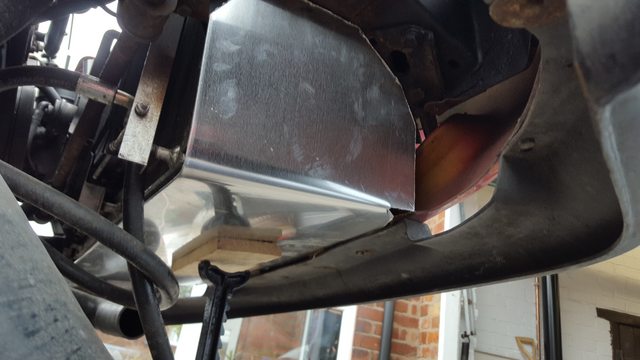
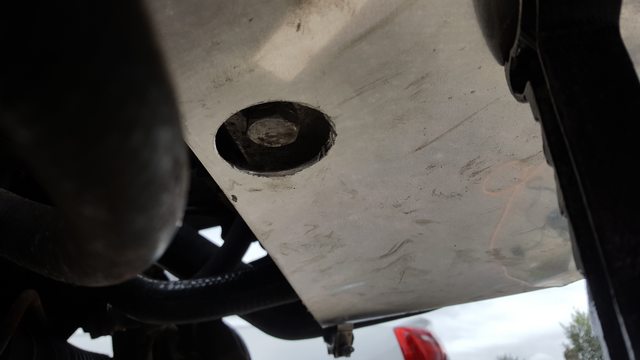
I also did this around the hole I cut for the coolant drain in the radiator.
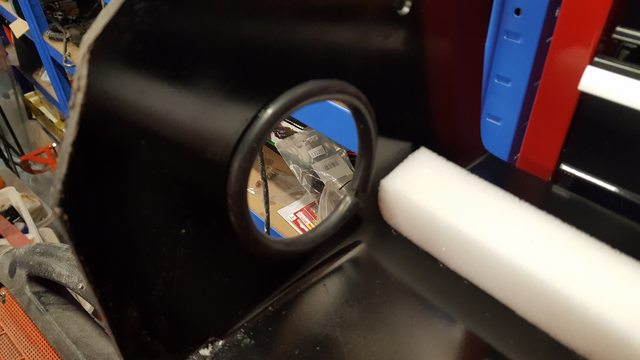
The white stuff is foam... I didn't really want metal on metal around the rad so there's little gaps that will get squished by that and then it should seal nicely. Now air could technically vortex and go up and around the bumper through a gap that exists there, it's only minor and I think I've probably done enough now to cure any worry of overheating.
I've also got enough ali left from the sheet I bought to make an undertray/splitter too which is useful.
Next up is going to be fitting the aerocatches and possibly doing the bonnet vents as I picked up some mesh today from B&Q to fill the voids once they have been cut.
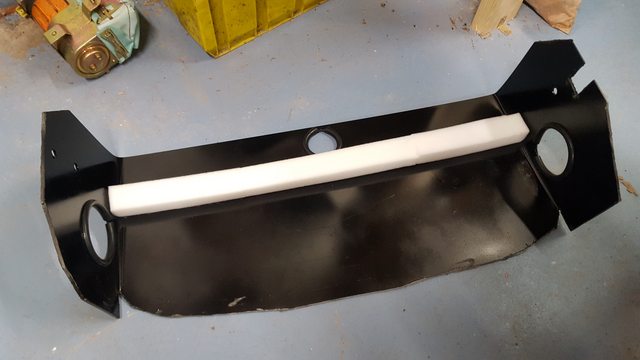
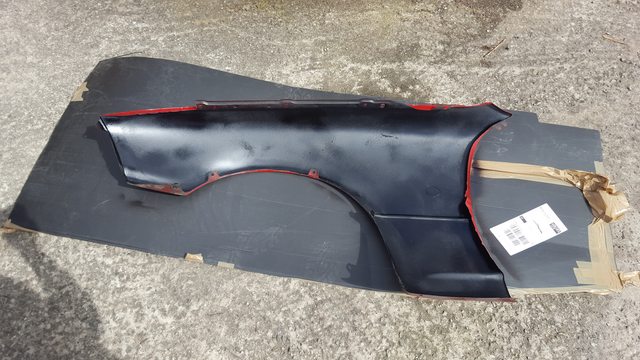
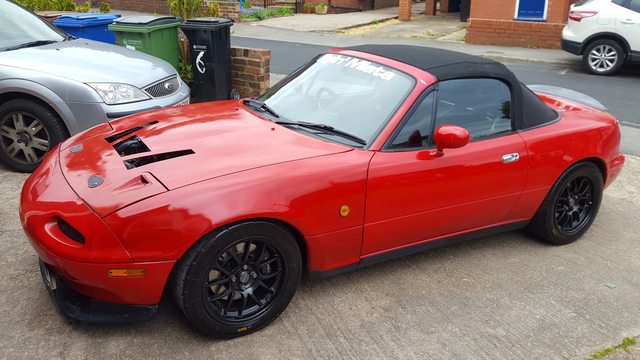
This also turned up... I decided the naff job I did was worth replacing as I'm coming up to getting it resprayed soon so figured I best sort the exterior bits I want sorting beforehand.
Still got an absolute ton of jobs to do on this car to get it ready for shows/track but I'm powering through the jobs now!
I've decided to use the stock bumper as well... when I was planning the air dam I realised that the bottom of the other is too high to make a neat splitter in the future and I'd have to drop the bottom of it somehow to make it flat.
More updates to come over the following days/weeks/months!
Got another bunch of hours with the car today so I made some more progress.
Started off with the aero catches, what a bastard these things were, first time I've ever fit something like this and I feel like the underside of the bonnet has been butchered but at least they fit well and I could bin off the clunky stock latch. I'm thinking of getting some under bonnet insulation to hide anymore cutting work I do. I presume eBay will be able to provide this.
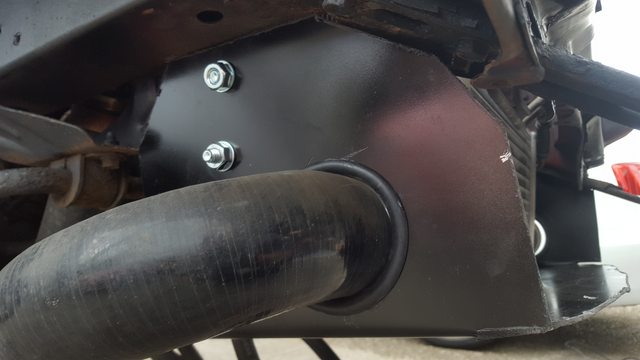
After that I fit the air dam, added some extra foam in all the gaps I could find and now it's pretty well bloody sealed. With the slam panel fitted there is very very little where the air could go now other than straight through the radiator and out of the engine bay.
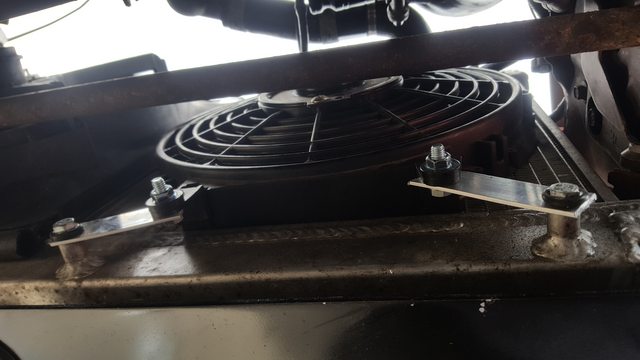
As I was moving the oil cooler to the PAS rack it freed up some space on the back of the rad for a second fan, so I happened to have a slimline one hanging around in the garage so I made up some brackets and fit that, and wired it up, I also routed the wiring through some insulation that I used to seal the other rad fan to hide the wires.
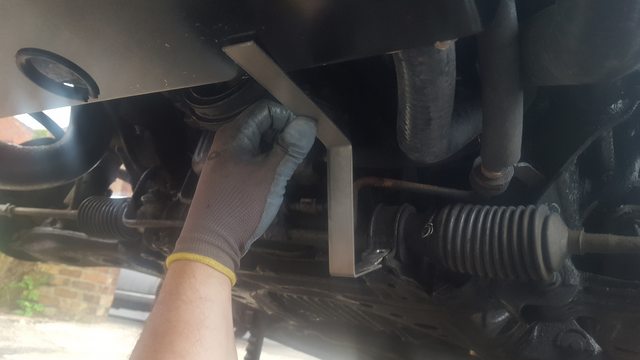
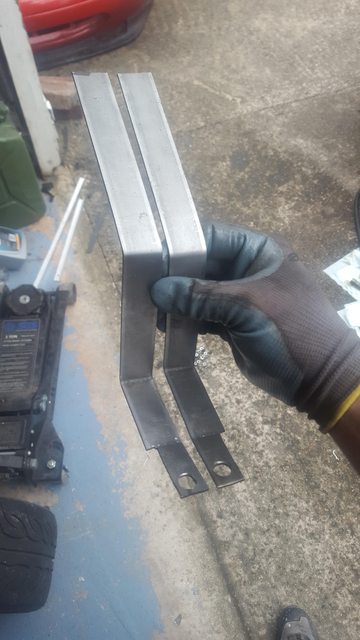
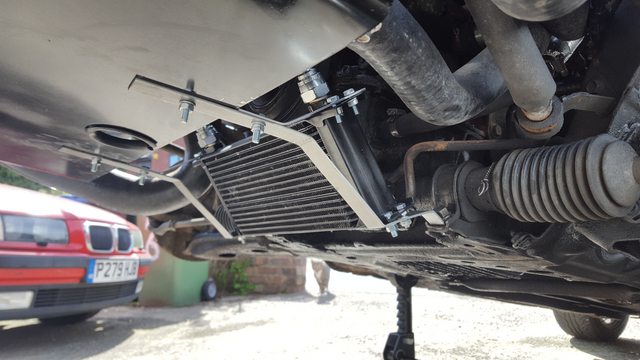
I also started on the brackets for the oil cooler on the PAS rack, the idea for these brackets is now that they will also be bolted onto the bottom of the air dam giving a strong place to mount the oil cooler. Unfortunately the rain halted me at the end of the day or I'd of finished the oil cooler off.
Anyway, here's some pictures of today's work... I'm hoping to get another day on the car before I go back to work and I imagine I should get a lot done if I do.
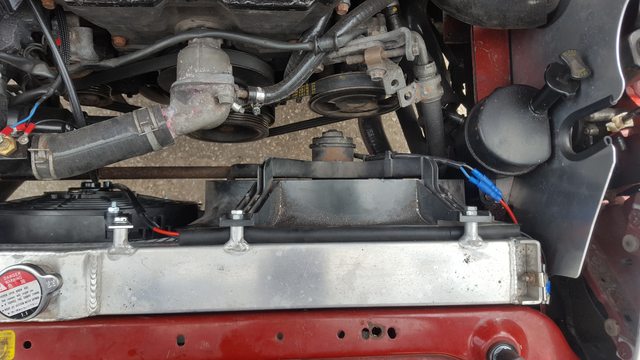
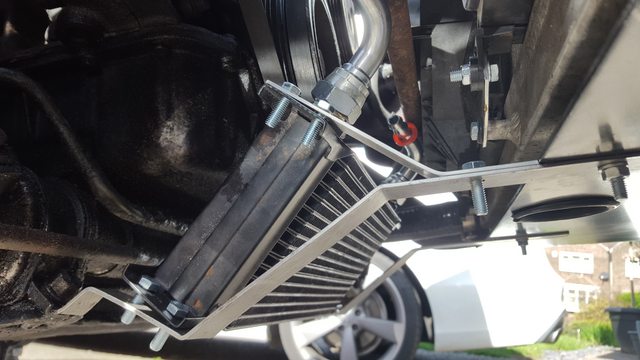
Finally got the oil cooler mounted on the pas rack, turned out the cause of some weird steering issues was also a loose steering rack bolt! The brackets I made bolt onto both the PAS rack and also the air dam that I've made, I also added some support brackets for the top of the cooler with it being on an angle I figured it might need supporting so all the stress isn't focused around the lower mounts. I've added some mesh in front to protect it from any debris, I don't think it should affect air flow too much but if it does then I will replace with some less fine mesh.
I also re fitted all the front panels today... for this I had to drill out 5 bolts and re-tap them as a lot snapped off when I removed them initially. I sprayed any rust I found with rust converter and then under-sealed behind the quarter panels too.
I've taken it for a short drive, everything seems fine so far, there's a strong cool breeze in the mouth of the bumper when the rad fans come on so the air dam must be doing it's business well. I'm going to take it for a proper drive once traffic has died down a bit and open it up, make sure the oil connections are all sealed once the oils nice and hot.
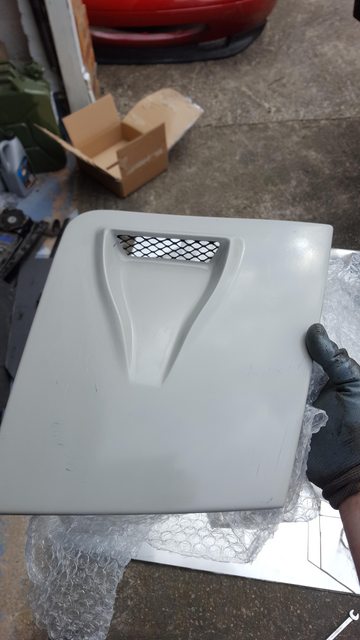
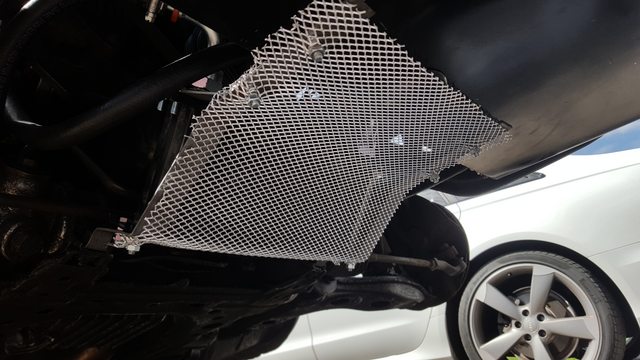
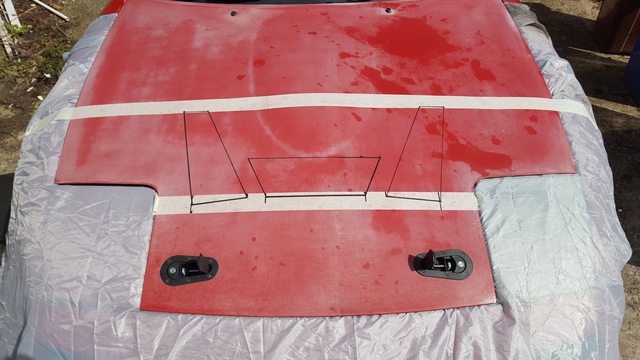
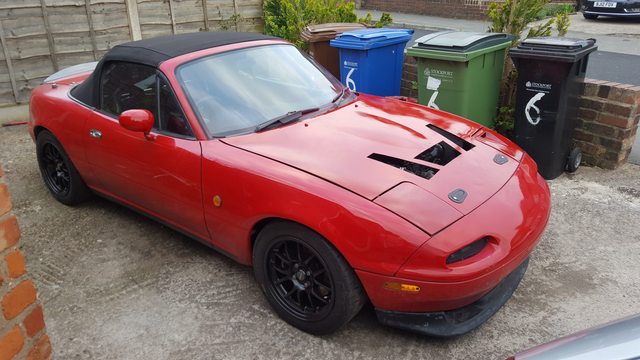
Got around to cutting the bonnet vents, what a pain in the **** this was! removing the bonnet skin underneath was a pain. Overall I'm pretty happy with them, I still need to actually attach the mesh underneath so they're not just holes, Ideally I would have used louvers but I couldn't find any that I liked other than the really expensive singular ones.
Having removing the bracing under part of the bonnet here the vents are I am amazed how non-rigid it now is around that area. Hopefully this won't be to much of a problem to paint.
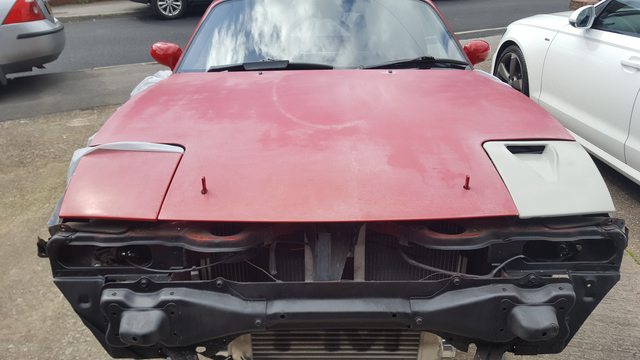
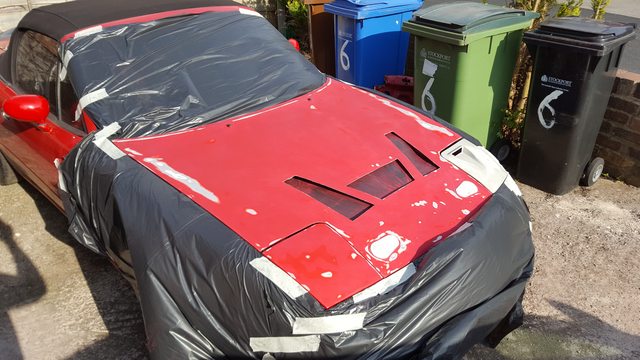
I'm getting closer to getting the respray done now, thank god... the bonnet is in such a bad state it's a joke!
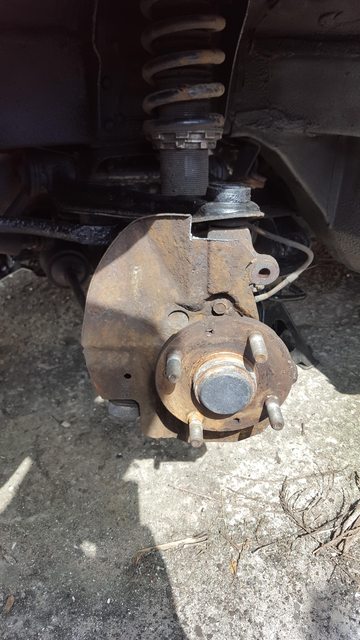
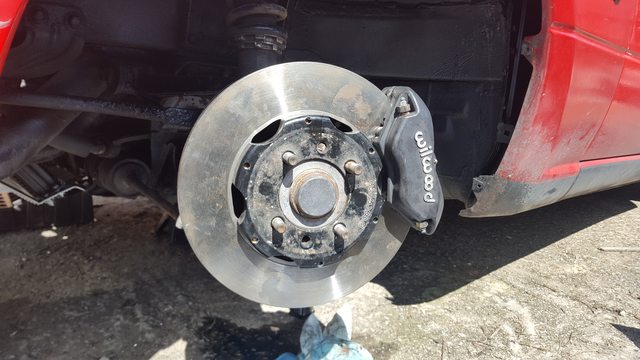
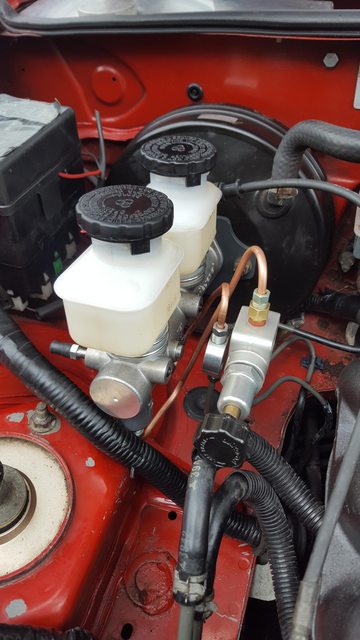
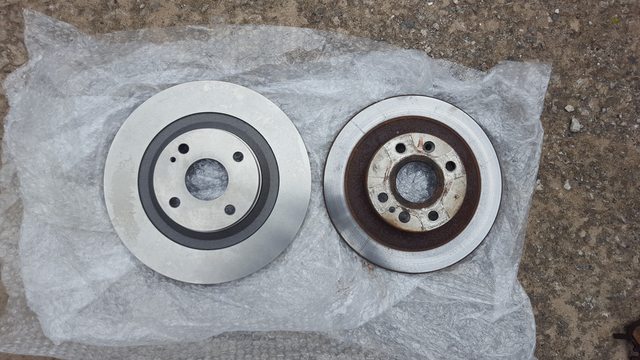
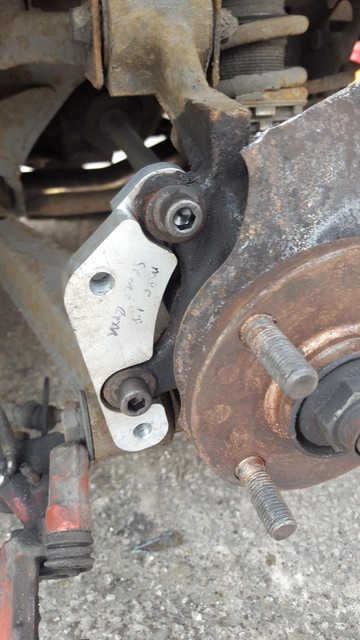
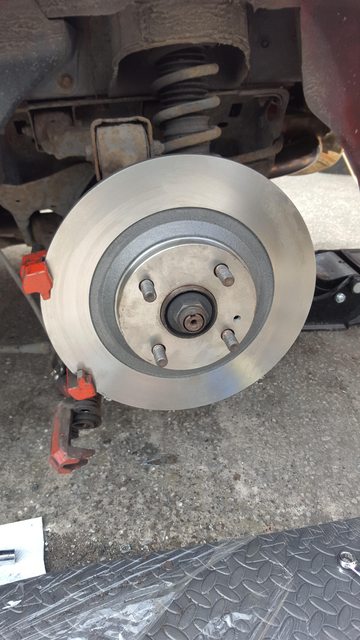
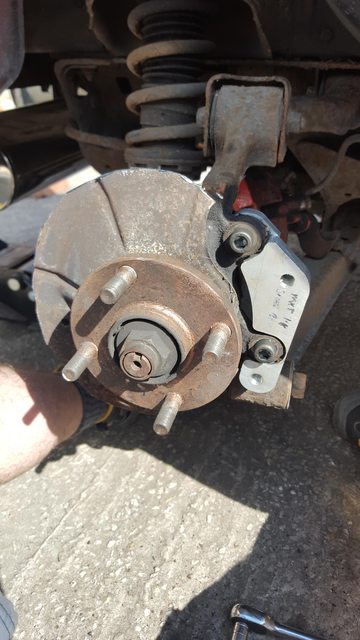
As the weather was good and I was in the mood for more I decided to have a go at fitting the Wilwoods... having used copper slip on all the stock bolts for the standard brakes with a tap of a rubber mallet they were all loose and came off nice and easy. I built the rotors up and used some thread lock on the bolts to keep them safe from vibrations making them loose.
The kit bolts up really nicely, the brake pads slide in so easily, the only real pain was bleeding them and even that wasn't too much hassle.Took the car out and bedded the brakes in which absolutely stunk!
I definitely need to fit the other master cylinder to improve the brake pedal feel but other than that they are lovely and reassuring to use!I had to cut bits of the dust shield away that would otherwise make contact with the disc and caliper, nothing the angle grinder and a few seconds of grinding couldn't resolve!
.
My COPs bracket from Skuzzle motorsport turned up, as well as my coolant reroute spacer from the group buy on here. So soon I will wire up the COPs and get those mounted. I'm not sure whether to attempt the coolant reroute just yet or keep it fresh for the new engine build. As I reckon that's just a pain in the **** job.Hopefully my order from FreakyParts will be delivered soon enough, which has the brackets for the rear brakes in it along with the larger discs.There's not many jobs left aside from those mentioned, mainly just undersealing underneath and once that's done I will be getting it resprayed.
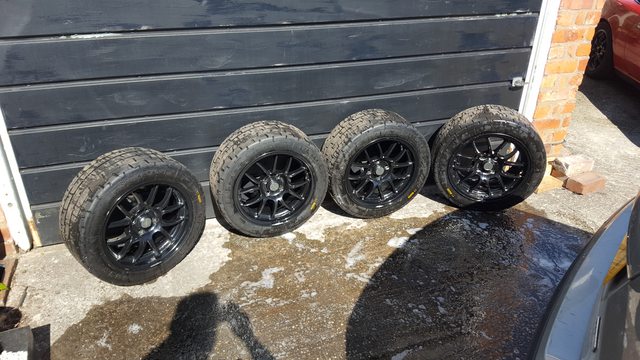
I made the very long drive down to Bournemouth from Manchester to collect these:
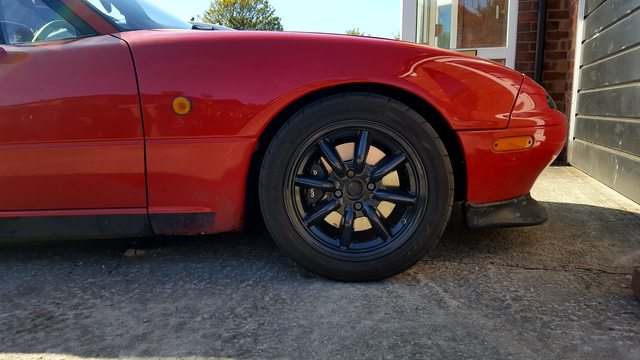
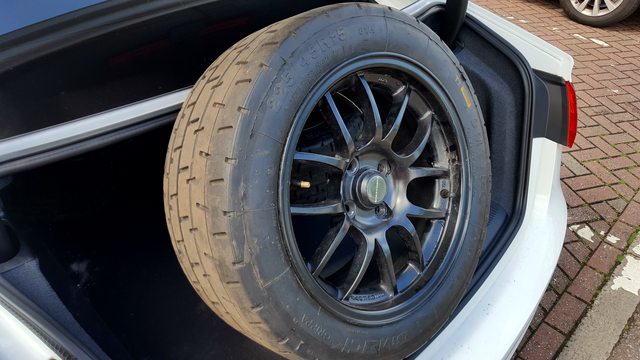
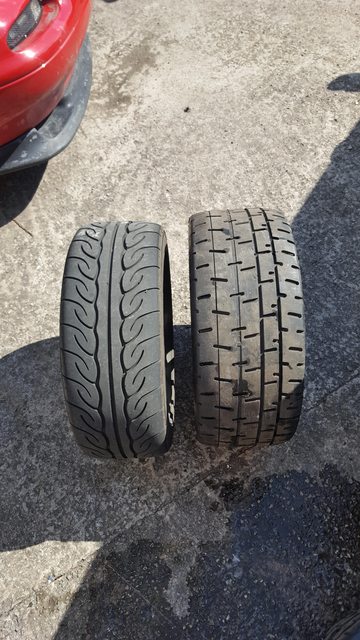
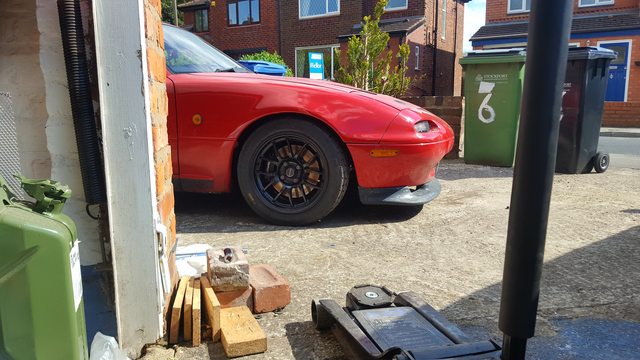
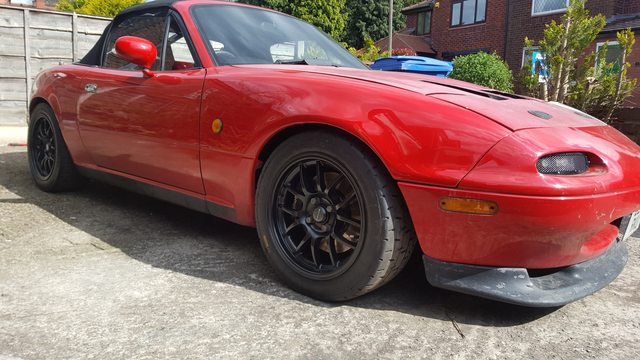
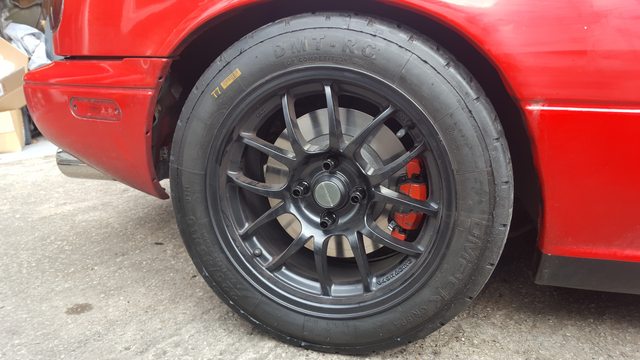
949Racing 6ULs in 15x8 with 225/45 DMACK tyres. They are epic!I've been after a good deal on some 6ULs for a long time now, they were the only wheel I could consider swapping my Wats for. I still have the Wats, and I don't know what to do with them yet. But the fact was I needed and wanted more grip, as the engine build is looming now, and decided to make the journey when I saw these come up.There's quite a difference in width from the other tyre, I think there would be more if DMACKs had rim protection.
I absolutely love the look of these things, and they came up in the right color too. I wanted to keep the red and black theme going.
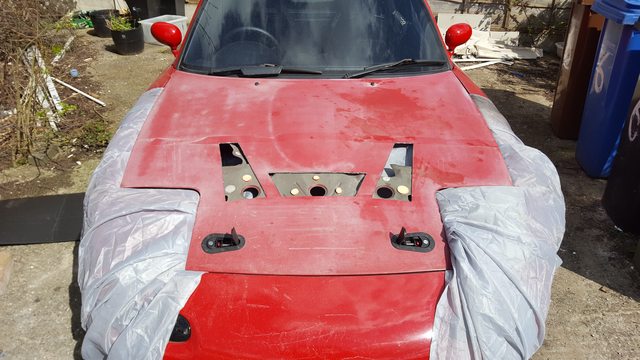
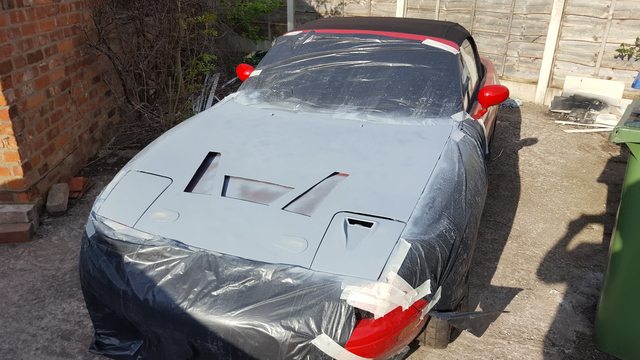
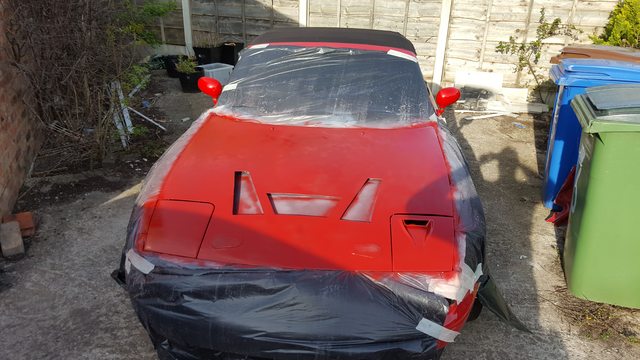
I have bought some hub spacers, 13mm ones and also some longer studs. The plan is to roll the arches and with these fitted I should get quite an aggressive look whilst still having a reasonable offset as they are a higher offset than my Wats.Another thing I started was respraying the bonnet. I only wanted to do something that looked better than the current state it was in, unfortunately I don't know what to make of it so far.I sanded the crap off it, and used some finer grit afterwards which gave a nice finish, primed it and then sprayed two cans of classic red. Now, 2 cans turned out to be no where near enough, so I had to stop at this point. The paint looks a bit 'meh' at the moment. But I am going to finish it off with two more cans, maybe flat it after the first to even the colouring and remove any runs. And then I have a lacquer to apply.
Even if this turns out ok I think I will end up replacing the bonnet with another red one and just redo the aerocatches as the bonnet is far too flexible after having the bracing cut away.
I'm going to finish off the bonnet tonight, and then this week I am getting the brake lines made up for the new Wilwood master cylinder. Hopefully my brake parts will turn up this week too and then I'm aiming to make the Bunch of Fives meet in North Wales on the Sunday.
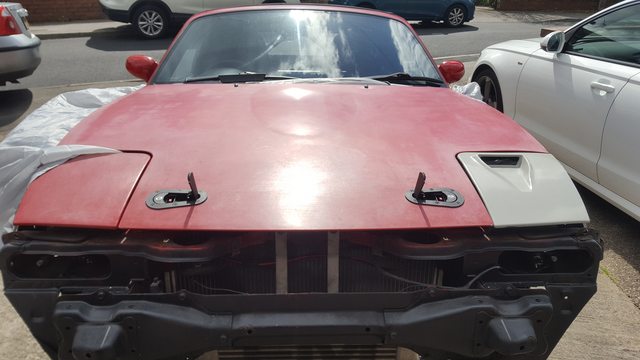
Well, I finished off the bonnet last night. It looks terrible in person, as does the rest of the paintwork on this car though. The main reason for doing it though was because it looked absolutely shocking originally. So I think I can deal with it like this for a few weeks, gives me chance to source another bonnet, and then have the car resprayed.
Had the first drive with the new wheels, to work this morning. They felt good. Did manage a slight **** out moment when they were cold but nothing different to how the AD08Rs behaved.The end of modifications (for now) is in sight. I'm dropping the car off to have the master cylinder and new brake lines made on Thursday/Friday. Then I've still got coolant reroute to fit, COPs to wire and knock sensor to wire up. My brake kit from FreakyParts and longer studs and 13mm spacers just to bring the 6ULs out slightly for a more aggressive look.All being well I should be at the Bunch of Fives meet on Sunday so you can all laugh at my paintwork there.
-Lew
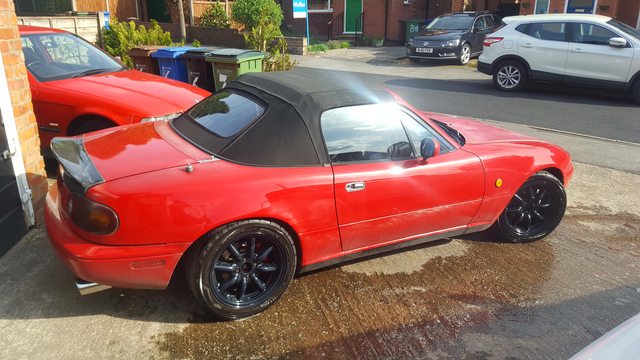
Had a good few days, dropped the car off at a mates garage, got him to fit the Wilwood master cylinder and bias valve. And run fresh ATE Type 200 fluid through the whole system. The brakes feel amazing now, really really happy with them and I've yet to overhaul the rears with bigger discs and axxis ultimates.Gave the car a rare wash, cleaned the interior and spayed some lacquer on the dull quarter panel I had. Car looks semi reasonable now until you get up close. It's ok enough to live with for now though.Popped over to the bunch of fives meet in North Wales today, that was a good turnout, plenty of different cars and I finally got to see Matts F20 Mk1 in person, and luckily he obliged when I asked for a passenger ride. Turns out that thing is outrageous!It's really made me want to get the engine build done so I can squeeze the most out of the GT2560R so I think I might try pushing the engine build now.Anyway, some pics:
I keep forgetting to sort some pics of my bonnet... I'll get them at some point!
Brake update:
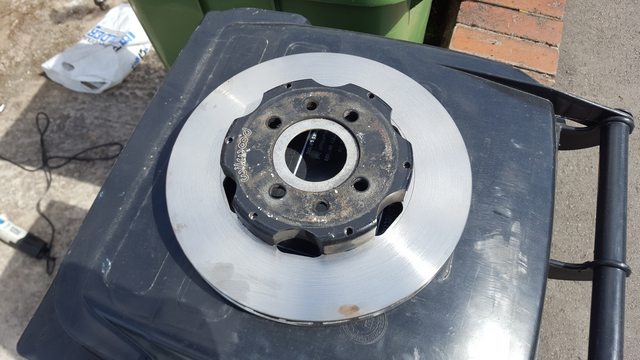
The parts to fit the rear brakes had all arrived now, so I set about doing those today. Pretty easy job really, I've done the rear brakes a few times now so everything came apart nicely. The only thing different to normal was fitting the caliper spacing brackets and also cutting away quite a lot of the dust shield in order to fit the 276mm discs.
I've been out with them and the car feels so good now. Done a little tuning, including bouncing off the limiter to get the high ends of the table. A good few heavy stops to bed the pads in, the car is an absolute monster now!-Lew
It's been quite a few months since I last updated this... a long standing dream of mine has always been to become a pilot. Through the last few months I've been trying to figure out if I could afford to go to an airline academy which lasts 18 months and would put me straight into a first officer seat of a British Airways/EasyJet plane...
Initially I was looking at breaking the Miata, selling my Audi bla blah to fund it and so I was selling off some spare parts and preparing to break the car.
Having made the 4 hour drive there for an open day, to discuss the finance, I discovered that it's totally out of reach. So instead I've paid for a package at a local airport to do my PPL (Private Pilots License) in a Cessna 152.
Which leaves me not necessarily needing to sell the Miata anymore... but don't know what to do with it now!
It 100% needs a respray as the paintwork is shocking beyond belief. But then I start looking at forged parts again! Why do these cars have to be so bloody addictive.
Anyway... some pics of flying stuff;
Although I haven't changed much on the car in the mean time, I did swap in some new chunky ARBs and adjustable drop links, along with a lovely small OMP wheel:
Also picked up a clean 6 speed box from our 2005 SVT model, not sure what that translates to in Miata spec.
Forgot I had this:
Got married! that's probably important
And I think that's about it... Hopefully if I decide I can afford to keep the car then I'll be looking at taking it back to quite OEM looking externally and making it into more of a sleeper. I really miss it looking clean, that way I get to see the horrified looks on Porsche drivers faces when they're left behind
Well, actually did some things on the 5 this weekend!
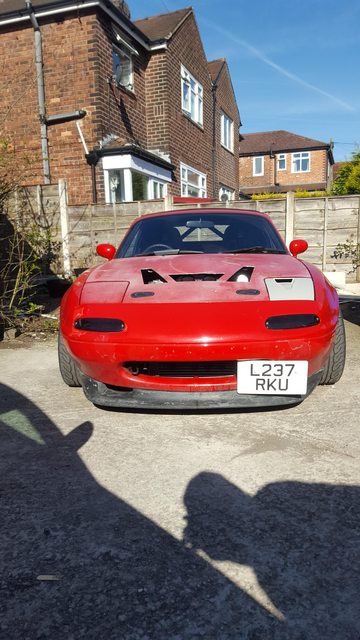
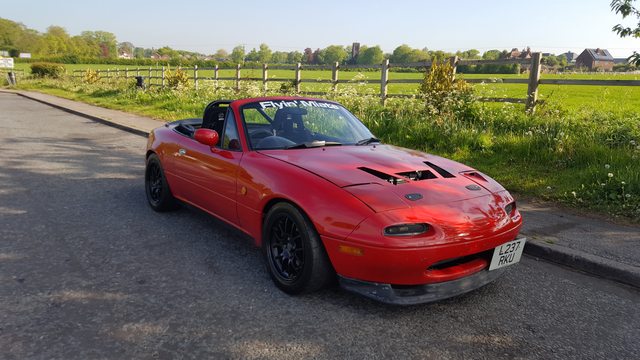
Drove up to see Carl @ CBS Autos to replace my bonnet and pick up some other stuff. Great guy, big help and sorted me out. I'm going back to a fairly OEM look so I can surprise people with the power
I think it looks much much cleaner this way... I think the more mature I get the more I appreciate that the OEM got it right first time...Then on Sunday I went to the North Wales Bunch of Fives mince pie meet! Meet up with some familiar faces, always good to chat with Vince.
And then we finished the day off going to watch the planes at the Airport pub again.
Doesn't matter how many times I see the A380 it never ceases to amaze me that man created such an engineering masterpiece.
I have some parts arriving tomorrow that you lot will be interested in :P


 03-22-2017, 03:57 PM


 0
0


 It's an Rs Aizawa repliaca that I've had for a couple of years. It needs a little work in places but I think it's a much better fit for my purposes, the extra vent above the normal mouth provides more flow to the rad and then there's the two handy fog light holes either side that should get some cool air into the wheel wells.
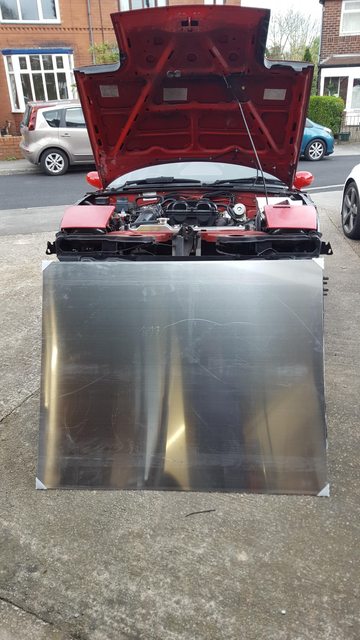


 .
.
 I have bought some hub spacers, 13mm ones and also some longer studs. The plan is to roll the arches and with these fitted I should get quite an aggressive look whilst still having a reasonable offset as they are a higher offset than my Wats.Another thing I started was respraying the bonnet. I only wanted to do something that looked better than the current state it was in, unfortunately I don't know what to make of it so far.I sanded the crap off it, and used some finer grit afterwards which gave a nice finish, primed it and then sprayed two cans of classic red. Now, 2 cans turned out to be no where near enough, so I had to stop at this point. The paint looks a bit 'meh' at the moment. But I am going to finish it off with two more cans, maybe flat it after the first to even the colouring and remove any runs. And then I have a lacquer to apply.
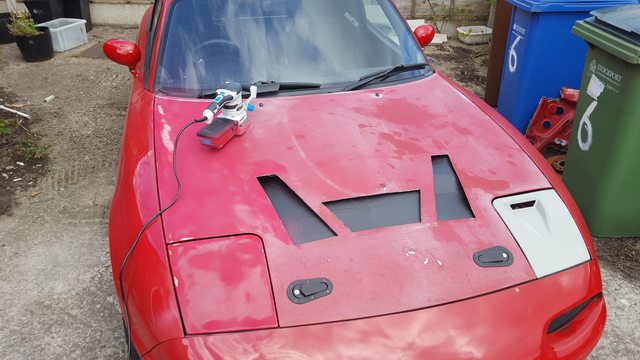
 I've been out with them and the car feels so good now. Done a little tuning, including bouncing off the limiter to get the high ends of the table. A good few heavy stops to bed the pads in, the car is an absolute monster now!-Lew