White turd
 03-02-2016, 08:06 PM
#1
Junior Member
Thread Starter

Join Date: Jan 2015
Location: Trona,ca
Posts: 73
Total Cats: -3
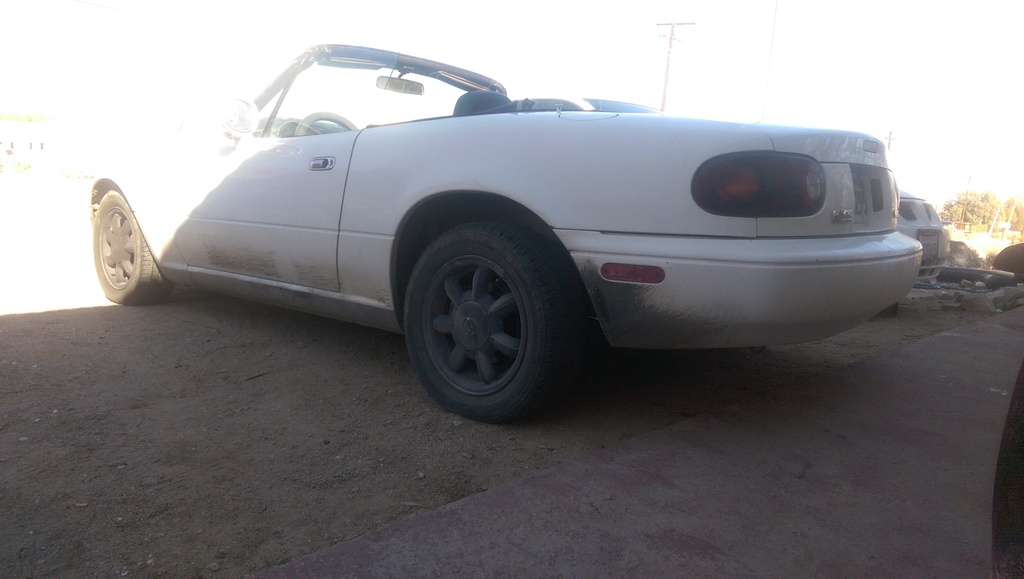
Been away from miatas for a while. It's been one of 2 cars that I miss. Love how cheap you can pick them up and how "cheap" parts can be.
I bought my room mate his Miata for $700 with the plan of buying mine shortly after,things took a dump and I had to wait a while to get started on my own. I ended up picking up a 93 auto that's stuck in first gear....not the best start but it was cheap and I already have some parts for it so not a deal breaker.
A few shots

Pass side window was broken and quickly swapped out off of my parts car...free

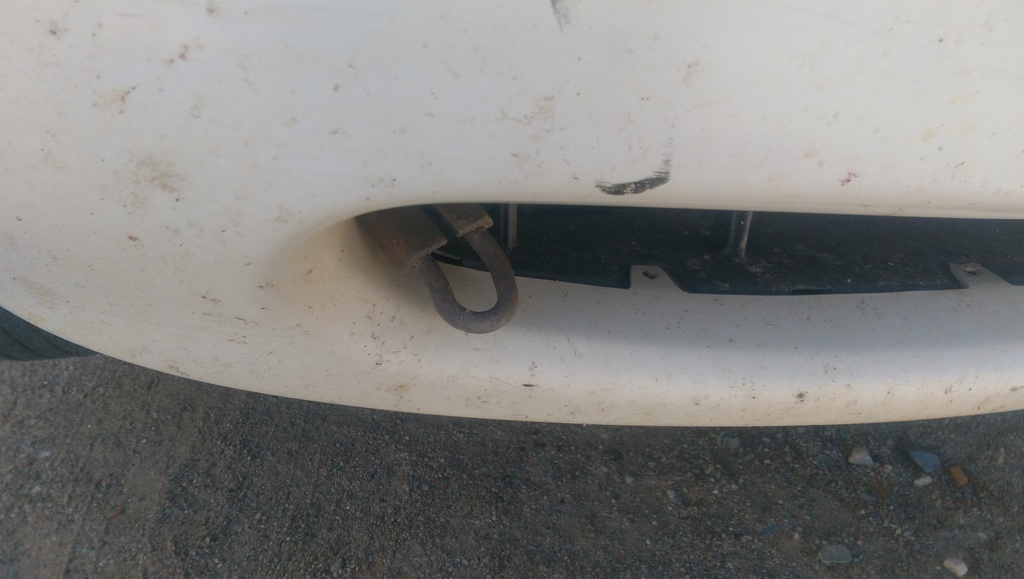
And because I'm me and I have a bad habbit of breaking down baby teeth were swapped for a tow hook I picked up used... $40

I'll be a bit slow on updates because we have some big projects
Going on with Ivan's car. I'll have to get some shots of it up when I get a chance.
Thanks
Bone
I bought my room mate his Miata for $700 with the plan of buying mine shortly after,things took a dump and I had to wait a while to get started on my own. I ended up picking up a 93 auto that's stuck in first gear....not the best start but it was cheap and I already have some parts for it so not a deal breaker.
A few shots


Pass side window was broken and quickly swapped out off of my parts car...free

And because I'm me and I have a bad habbit of breaking down baby teeth were swapped for a tow hook I picked up used... $40


I'll be a bit slow on updates because we have some big projects
Going on with Ivan's car. I'll have to get some shots of it up when I get a chance.
Thanks
Bone

Reply
 0
0

0
03-03-2016, 03:54 PM
#2
Junior Member
Thread Starter
Join Date: Jan 2015
Location: Trona,ca
Posts: 73
Total Cats: -3
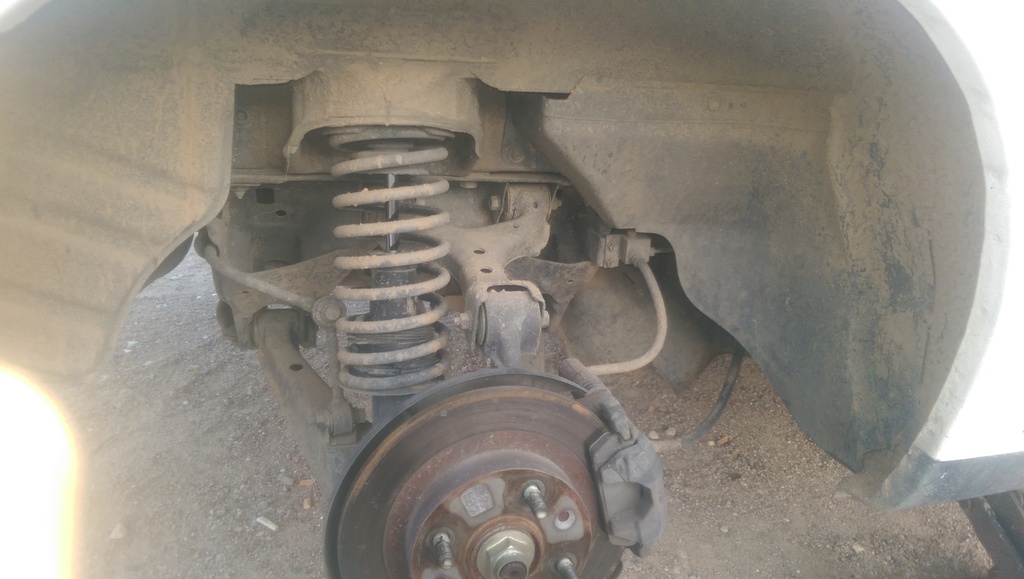
Off to get started on the suspension.
Picked up some jic Fla-2's for $700. I was going to wait to put them on till I was able to get the brass bushings for the poly kit I already have,but desired to go ahead and pit these on now and get poly on when I get it set up how I wanted.
New/used toys fresh out of the box.

Old set up still dirty from the test drive aka doughnuts on a wet dirt road.
Always choose the right tools for the job...So far this one is my favorite.

And finally the new shock in place.

Ran out of daylight before getting to the fronts so I'll get to those soon.
Left the hight settings where the po had them set till I can get it on the road and set it where I want them.
Bone
Picked up some jic Fla-2's for $700. I was going to wait to put them on till I was able to get the brass bushings for the poly kit I already have,but desired to go ahead and pit these on now and get poly on when I get it set up how I wanted.
New/used toys fresh out of the box.

Old set up still dirty from the test drive aka doughnuts on a wet dirt road.

Always choose the right tools for the job...So far this one is my favorite.

And finally the new shock in place.

Ran out of daylight before getting to the fronts so I'll get to those soon.
Left the hight settings where the po had them set till I can get it on the road and set it where I want them.
Bone
Reply
0
0
03-04-2016, 05:32 PM
#3
Junior Member
Thread Starter
Join Date: Jan 2015
Location: Trona,ca
Posts: 73
Total Cats: -3
got the fronts finished

And how it sits for now

Spent the first part of the day setting the ride hight on my buddies car still have a bit to go taking it on a 6-8 hour drive tomorrow to go pick up a hardtop for it.
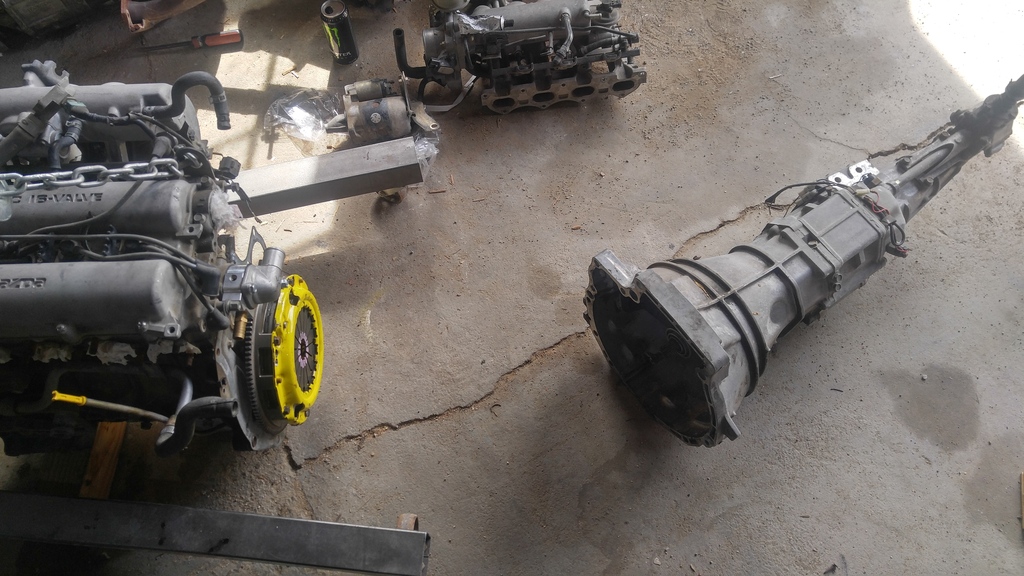
Getting close to time to pull the motor pm it and get the new trans in.

And how it sits for now

Spent the first part of the day setting the ride hight on my buddies car still have a bit to go taking it on a 6-8 hour drive tomorrow to go pick up a hardtop for it.

Getting close to time to pull the motor pm it and get the new trans in.
Reply
0
0
04-20-2016, 10:48 PM
#4
Junior Member
Thread Starter
Join Date: Jan 2015
Location: Trona,ca
Posts: 73
Total Cats: -3
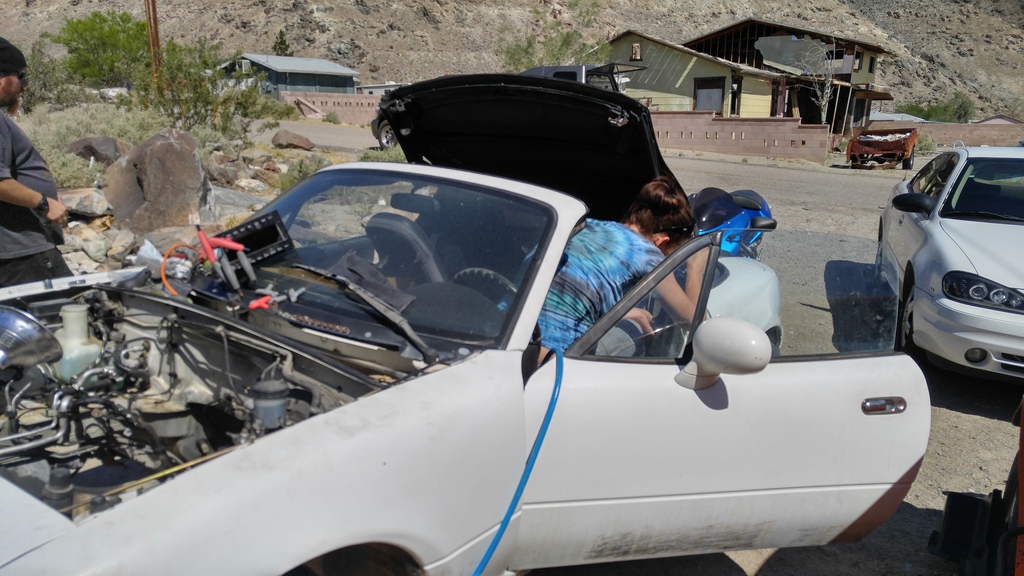
Well after a while of nothing and a few 60+ hour work weeks and installing a ffs into my buddies car. I can finally get back to the car.
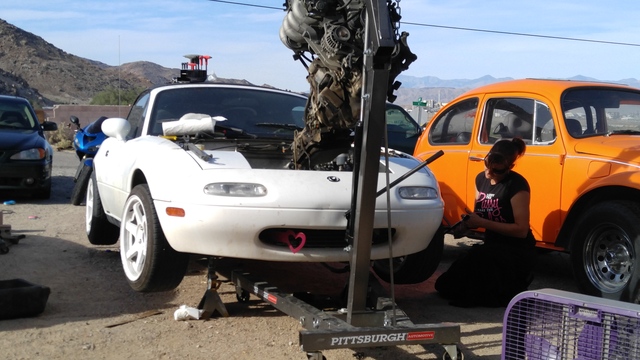
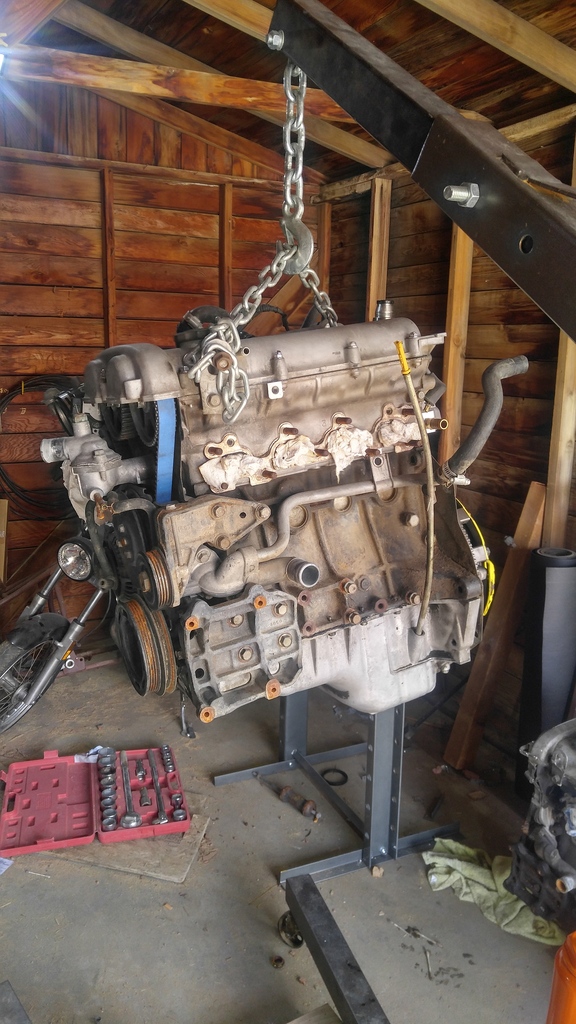
I've had the motor 90% out for the last three weeks. After 30 minutes she was out.
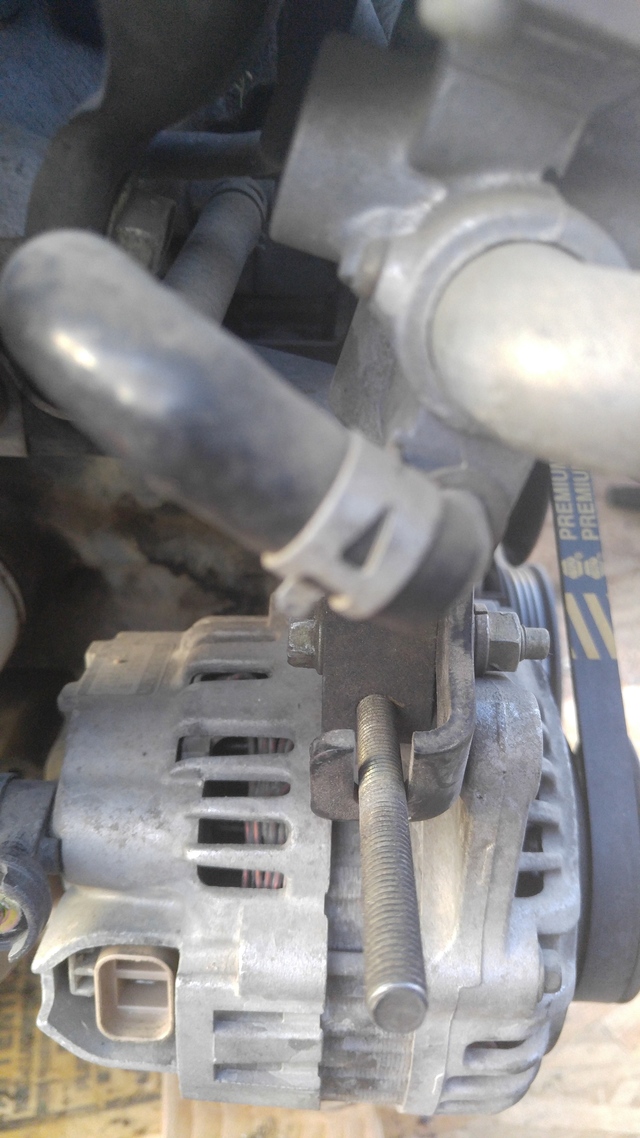
Pulled the trans off and started to look around and found out the belt was too long to the alternator,but the p.o. had a 1 of a kind solution to that too.

No adjuster needed
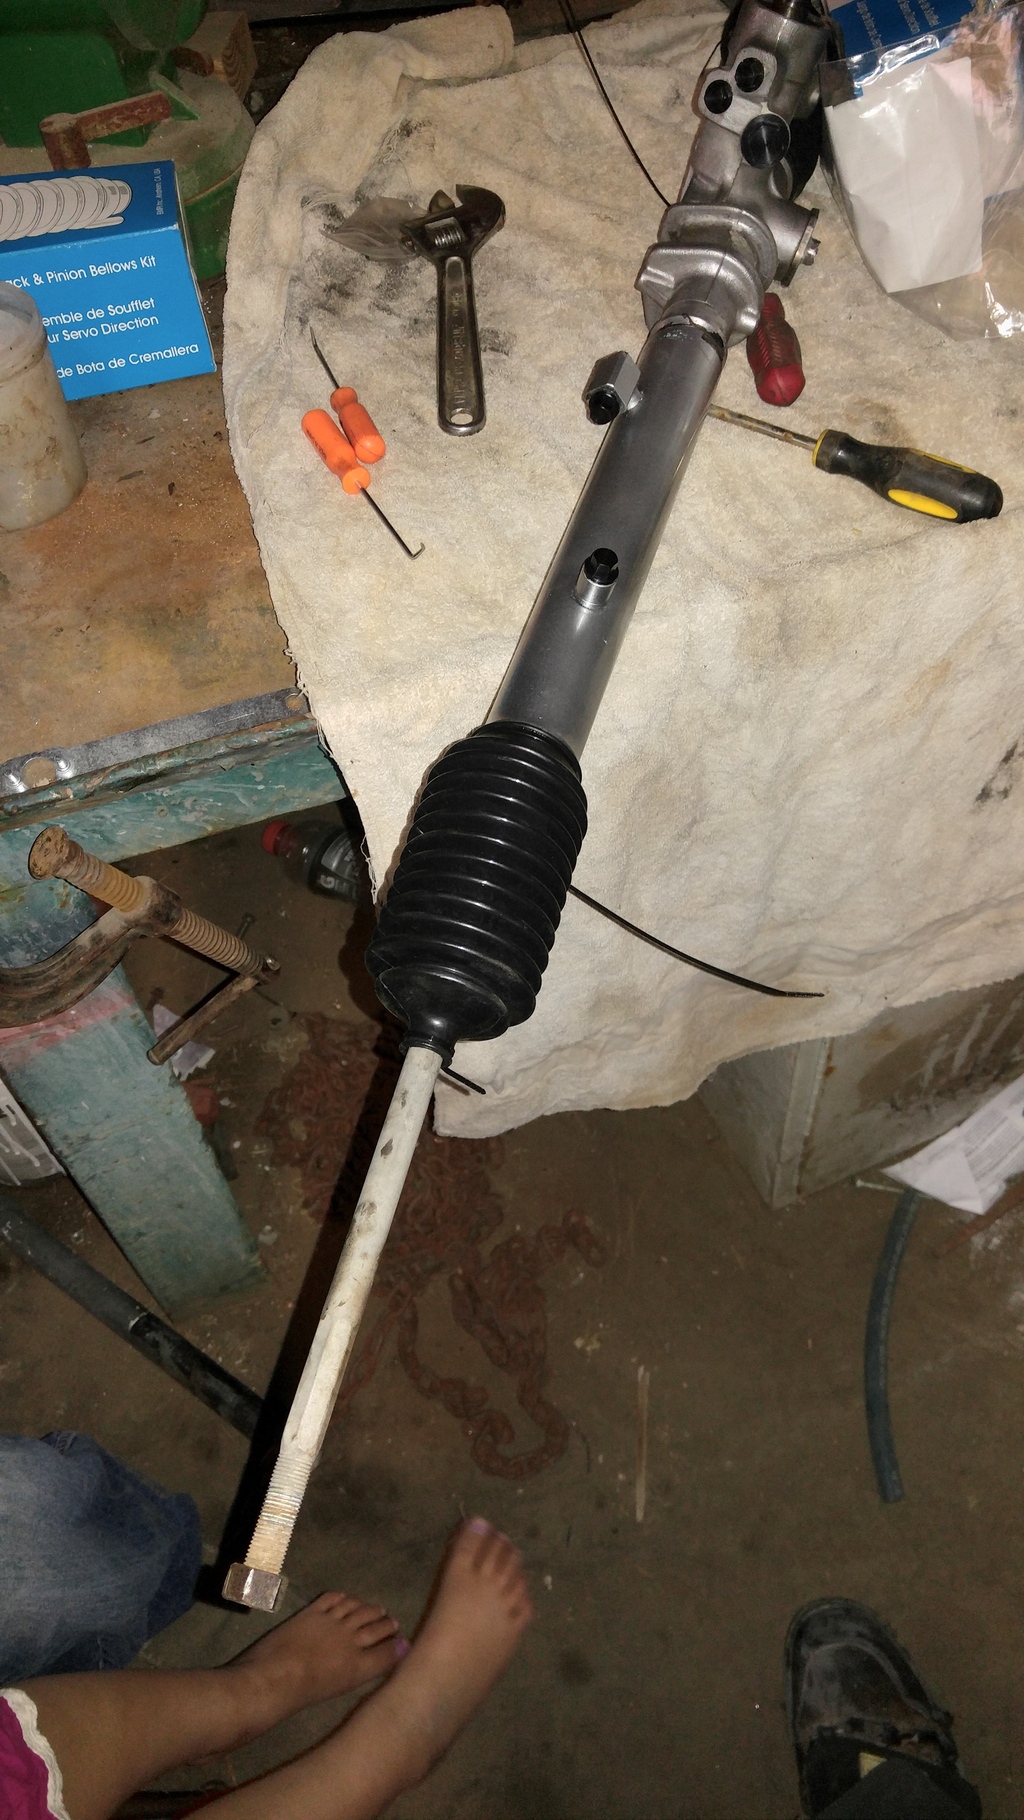
Off to pull the steering rack to depower it.
Time to pull it apart...
And the end note for the day...

Perfectly round..
Get back to more of it tomorrow.
I've had the motor 90% out for the last three weeks. After 30 minutes she was out.

Pulled the trans off and started to look around and found out the belt was too long to the alternator,but the p.o. had a 1 of a kind solution to that too.

No adjuster needed

Off to pull the steering rack to depower it.


Time to pull it apart...

And the end note for the day...

Perfectly round..
Get back to more of it tomorrow.
Reply
0
0
04-21-2016, 11:38 PM
#5
Junior Member
Thread Starter
Join Date: Jan 2015
Location: Trona,ca
Posts: 73
Total Cats: -3
Got about 1\2 Wash through the timing belt water pump job tonight finish it up some time this weekend if we get time.
Have to do a lets run andhopefully pick up a hardtop for my car.
Timing belt/water pump kit 214
Rear main seal 14
Have to do a lets run andhopefully pick up a hardtop for my car.
Timing belt/water pump kit 214
Rear main seal 14
Reply
0
0


 04-22-2016, 01:07 PM
#8
Junior Member
Thread Starter
Join Date: Jan 2015
Location: Trona,ca
Posts: 73
Total Cats: -3
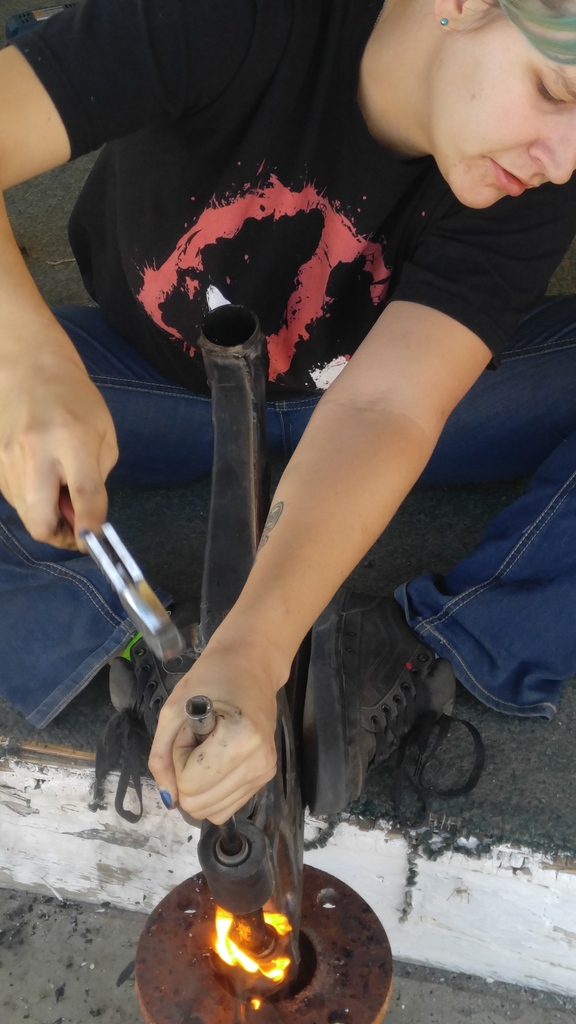
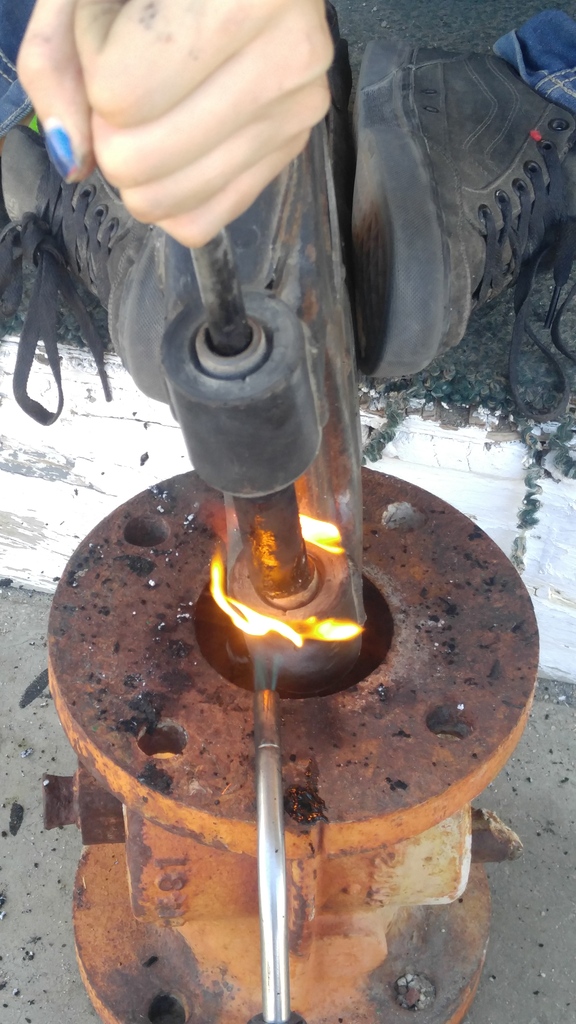
figures...
She was working on it off to the side and couldn't get it so I grabbed the impact...
But on the bright side I make really good round billets ��
I'll go back over it tonight...
And get it patched back up.
I have a manual rack but wanted to try the power rack for once.
She was working on it off to the side and couldn't get it so I grabbed the impact...
But on the bright side I make really good round billets ��
I'll go back over it tonight...
And get it patched back up.
I have a manual rack but wanted to try the power rack for once.
Reply
0
0
04-23-2016, 02:06 PM
#9
Junior Member
Thread Starter
Join Date: Jan 2015
Location: Trona,ca
Posts: 73
Total Cats: -3
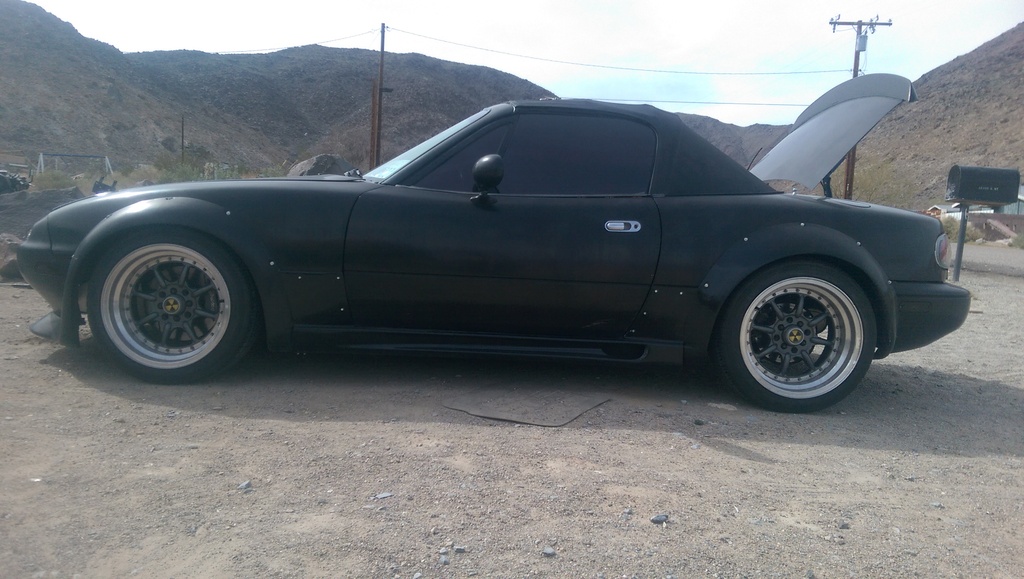
It was too windy yesterday to work on the car. So took a road trip to get some parts. And 2k later I have this.
So off to work bright and early this morning..
Old top comes off
Far too early for me ��
New too goes on


So off to work bright and early this morning..
Old top comes off
Far too early for me ��

New too goes on


Reply
1
1


 04-24-2016, 04:42 PM
#12
Junior Member
Thread Starter
Join Date: Jan 2015
Location: Trona,ca
Posts: 73
Total Cats: -3
Joe that's a friend's bug we are working on.its been a project of his for a few years and now it's my turn to tackle it.
Son. I've been after one of theses tops since they first came out. I remember trying to swing the chaser c.f. hardtop and trying for the autokonexion add on.
Well back to working 12 hour days,but as soon as they cut my hours a bit I'll be back on the motor and steering rack.
Son. I've been after one of theses tops since they first came out. I remember trying to swing the chaser c.f. hardtop and trying for the autokonexion add on.
Well back to working 12 hour days,but as soon as they cut my hours a bit I'll be back on the motor and steering rack.
Reply
0
0
05-21-2016, 01:29 AM
#13
Junior Member
Thread Starter
Join Date: Jan 2015
Location: Trona,ca
Posts: 73
Total Cats: -3
YThe lovely weather has continued.
80-100� all week long no wind just beautiful. On the weekends it's another story 60-70� out with 30 mph wind and gusts up to 65 hafta love this time of year.
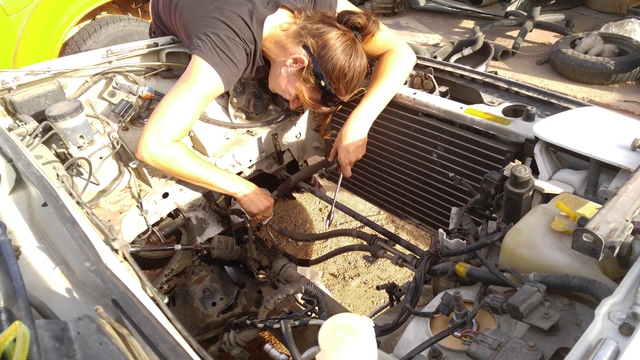
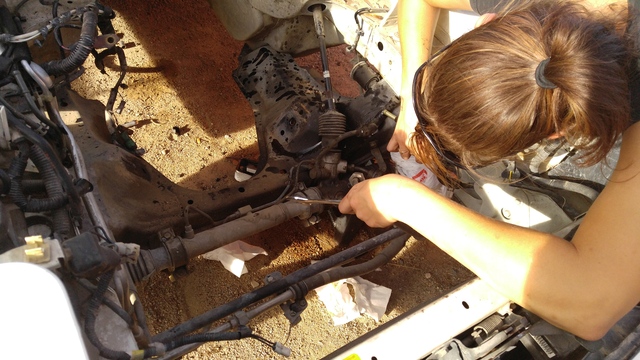
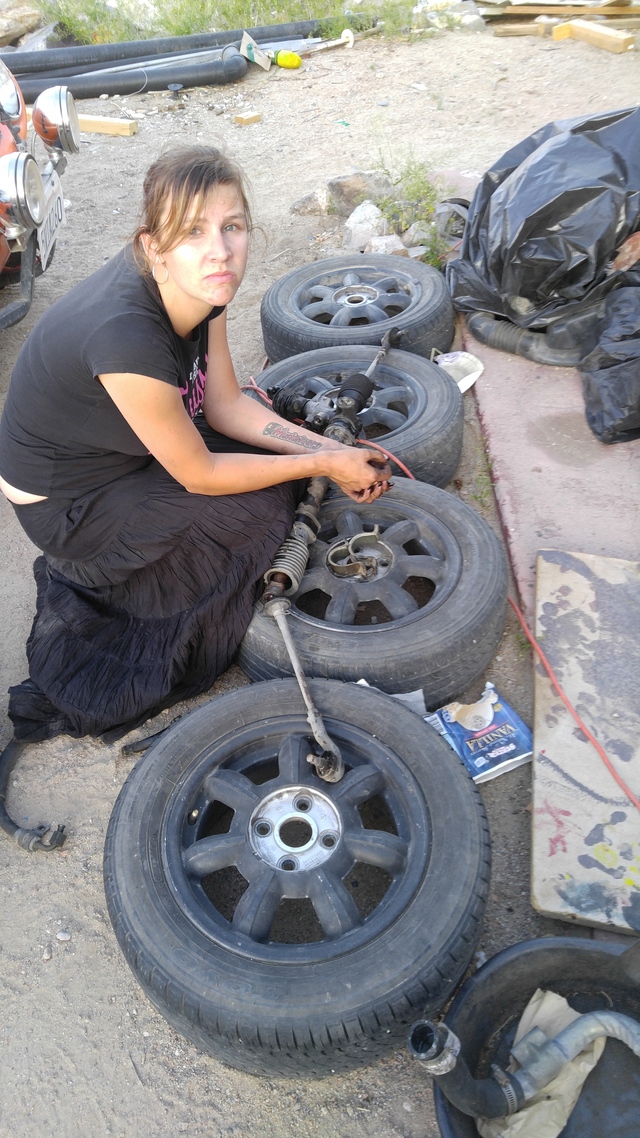
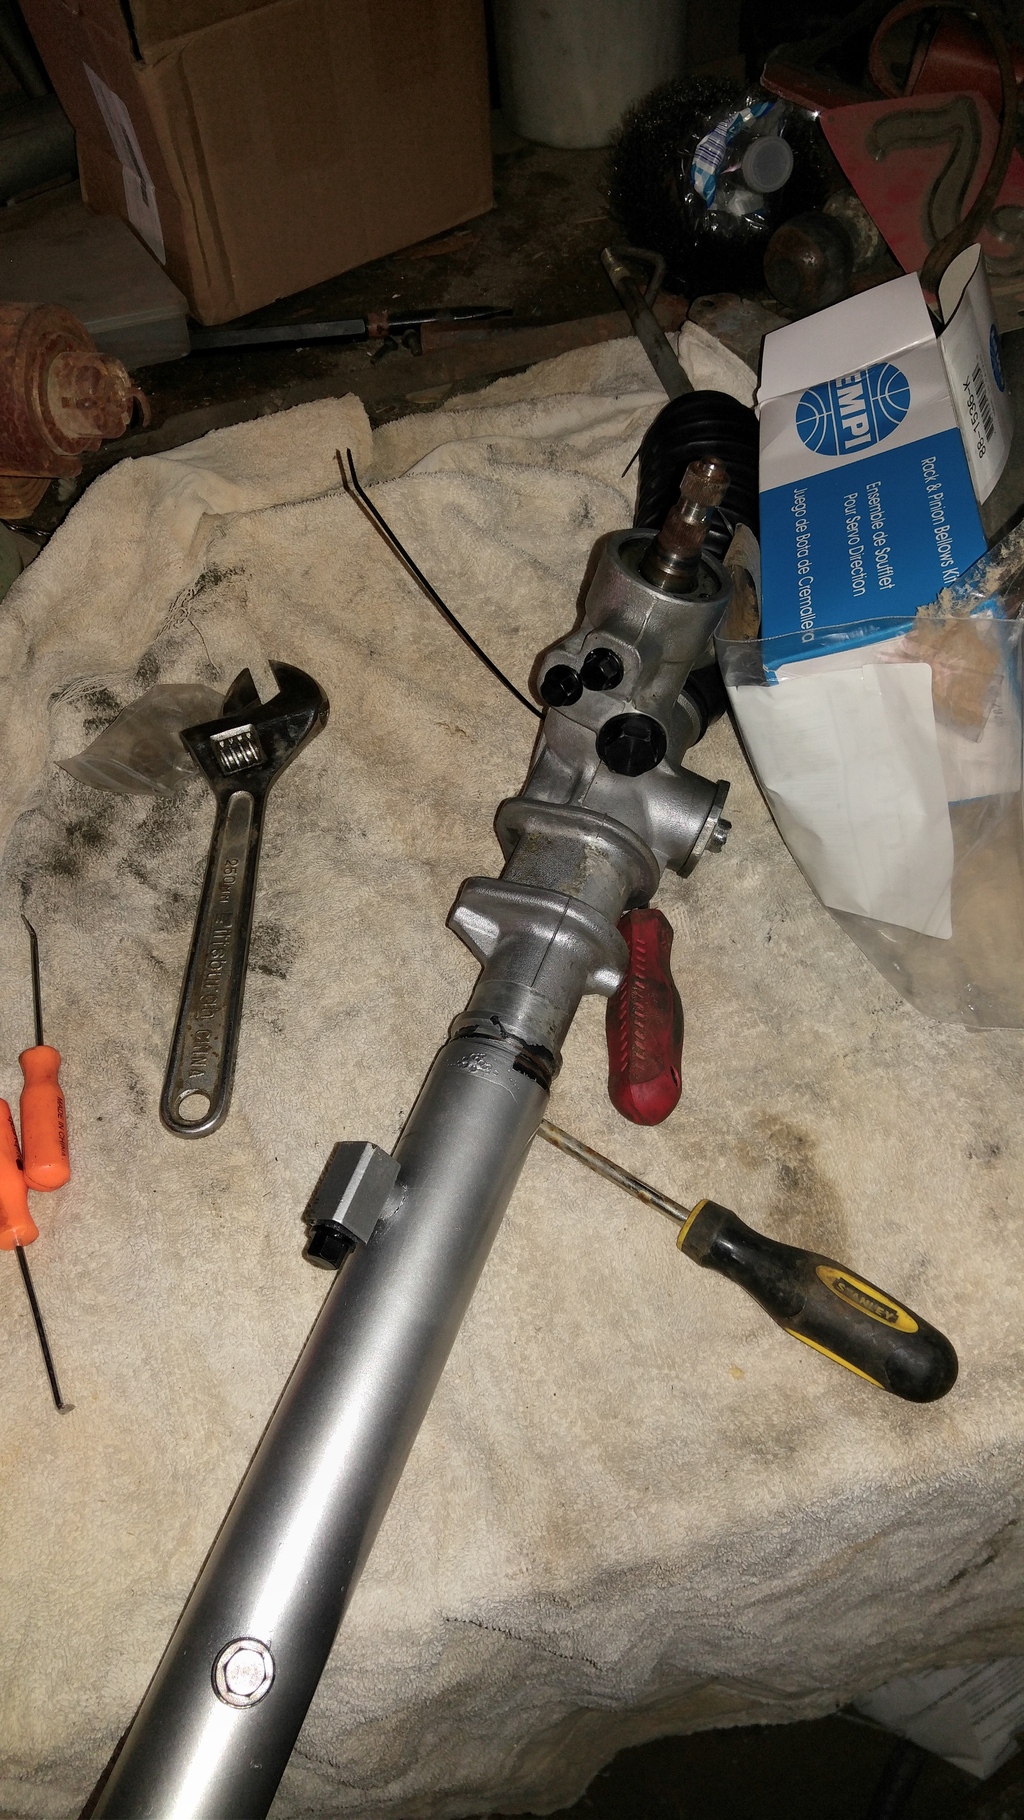
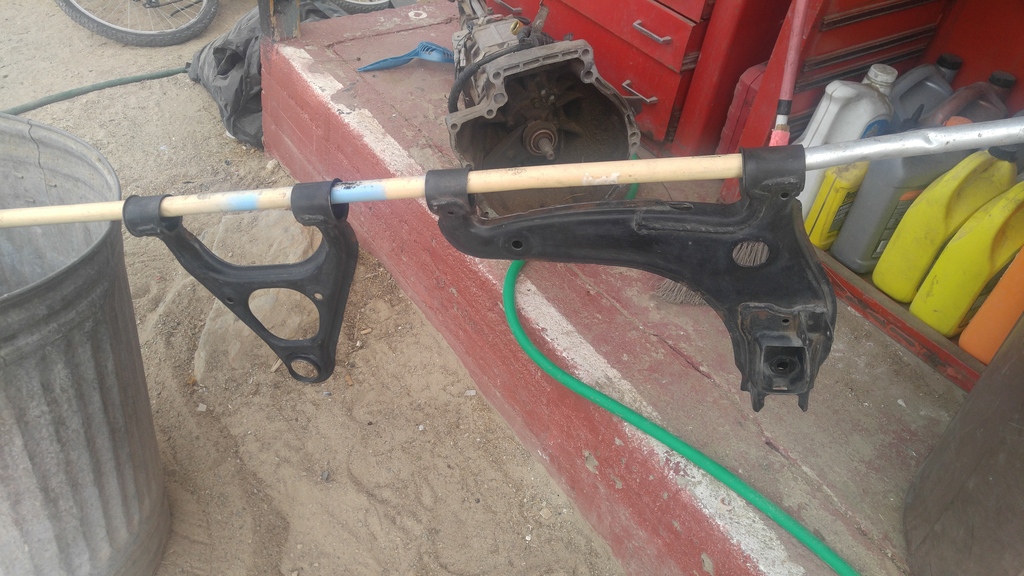
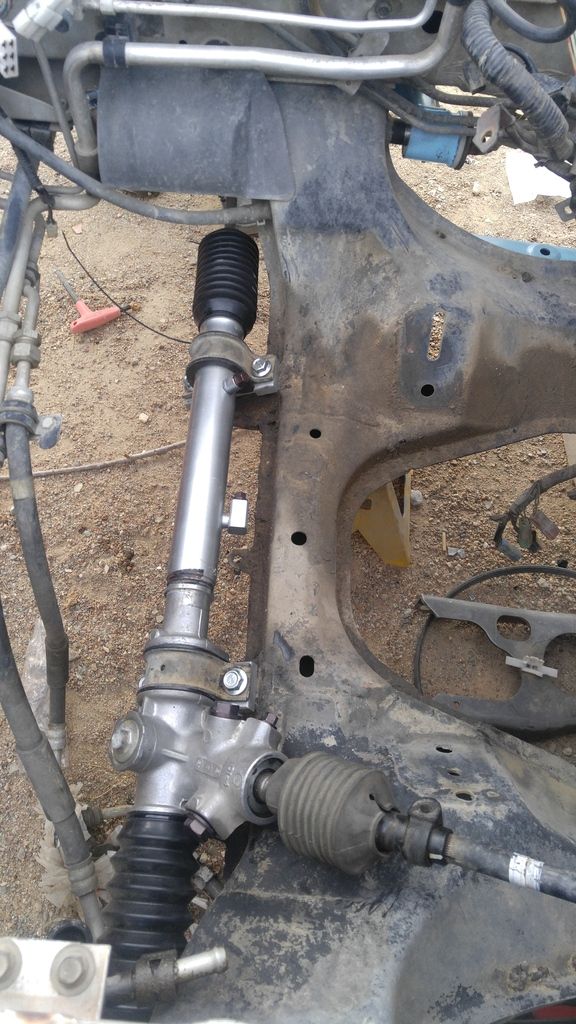
Over the last 3 weeks I've been able to finish up the steering rack. Pulled it apart and cleaned the he'll out of it,then thought it be a good idea to paint it a different color.
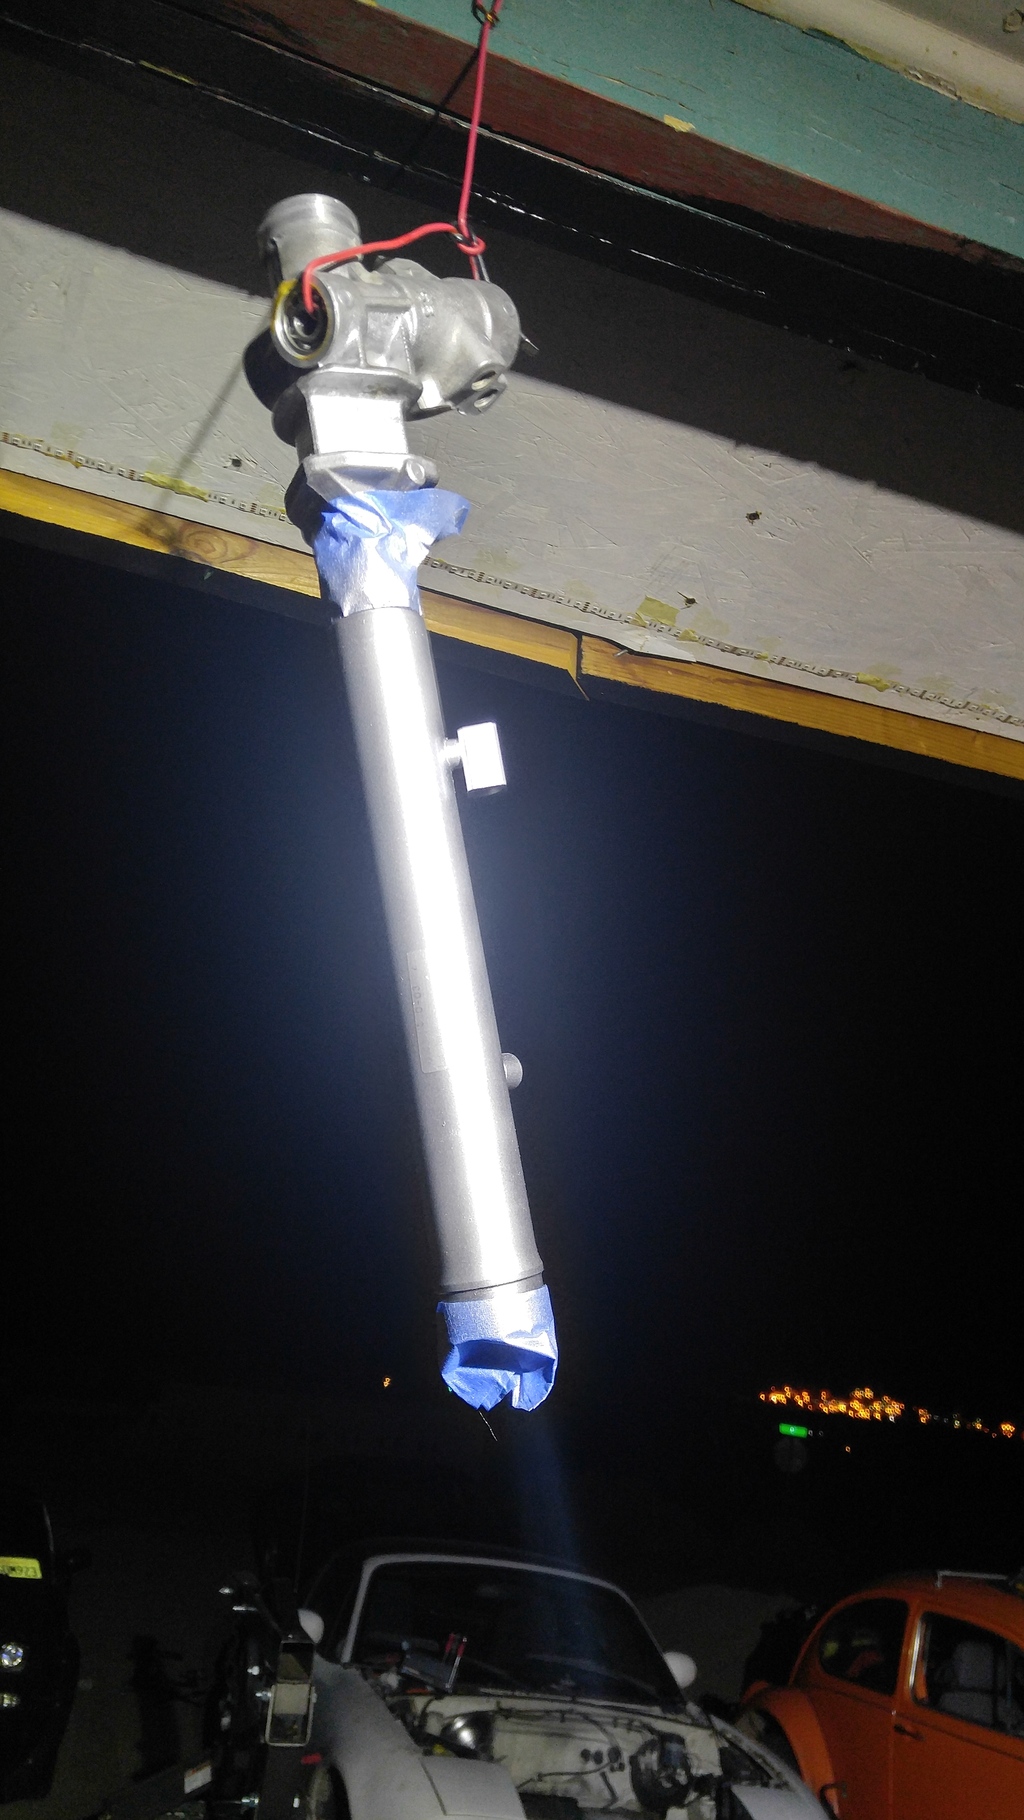
I greased the he'll out of it and got it back into one piece last weekend. The old boots were torn up so I ordered a new set. When I got off graveyard this morning I had to watch the kids,so might as well take them out to the shop.
New boots and miata roadster power steering plugs installed.
If I get a chance I'll put the new polly mount bushings,steering rack spacers and le tie rod ends on it into the car.
I'm starting to look at front and rear wheel bearings. Even though it's a street car I'm looking at repacking them with good grease and arp wheel studs. The new bronze bushings and upper derlin bushings should be in soon so then the suspension should be new from end to end.
Steering rack boots $18
Musta roadster plugs $50
80-100� all week long no wind just beautiful. On the weekends it's another story 60-70� out with 30 mph wind and gusts up to 65 hafta love this time of year.
Over the last 3 weeks I've been able to finish up the steering rack. Pulled it apart and cleaned the he'll out of it,then thought it be a good idea to paint it a different color.

I greased the he'll out of it and got it back into one piece last weekend. The old boots were torn up so I ordered a new set. When I got off graveyard this morning I had to watch the kids,so might as well take them out to the shop.
New boots and miata roadster power steering plugs installed.


If I get a chance I'll put the new polly mount bushings,steering rack spacers and le tie rod ends on it into the car.
I'm starting to look at front and rear wheel bearings. Even though it's a street car I'm looking at repacking them with good grease and arp wheel studs. The new bronze bushings and upper derlin bushings should be in soon so then the suspension should be new from end to end.
Steering rack boots $18
Musta roadster plugs $50
Reply
0
0
11-12-2016, 06:22 PM
#15
Junior Member
Thread Starter
Join Date: Jan 2015
Location: Trona,ca
Posts: 73
Total Cats: -3
Finally little by little she is getting there.Been working 60 hours a week and only been able to nibble little by little bit we are getting there.
Removing the stock bushings.
Then sanded and cleaned the he'll out of the control arms.
And then started to make them pretty.
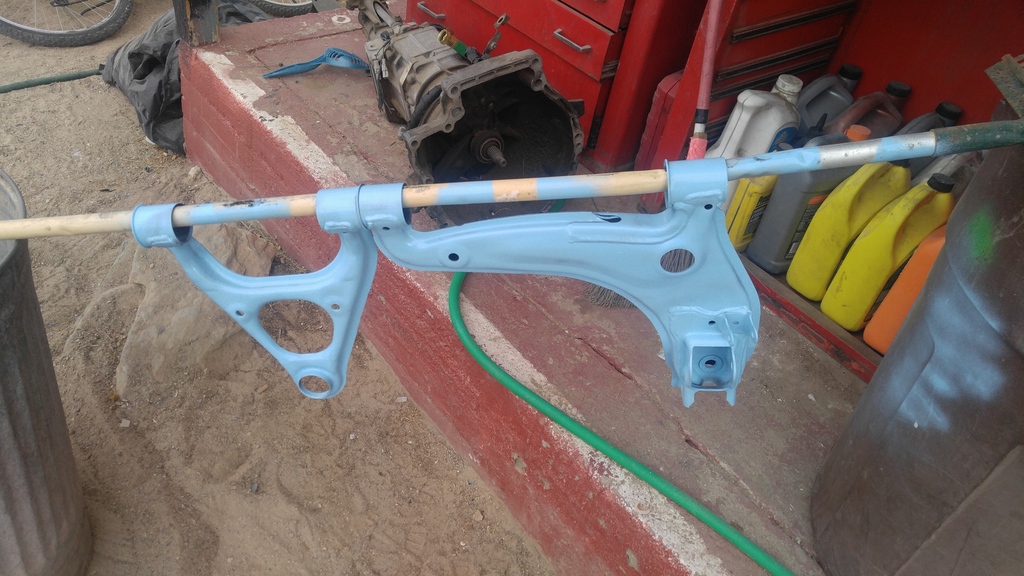
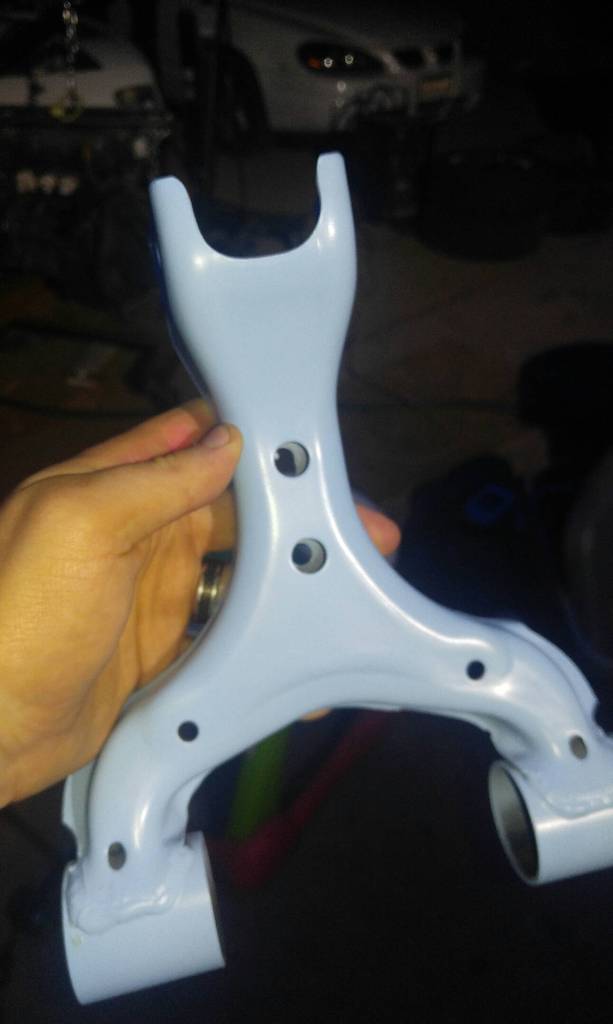
Then ran out of the light blue paint... Because I planned it out so well using 5 year old spray cans. So driver side got a Diffrent color.
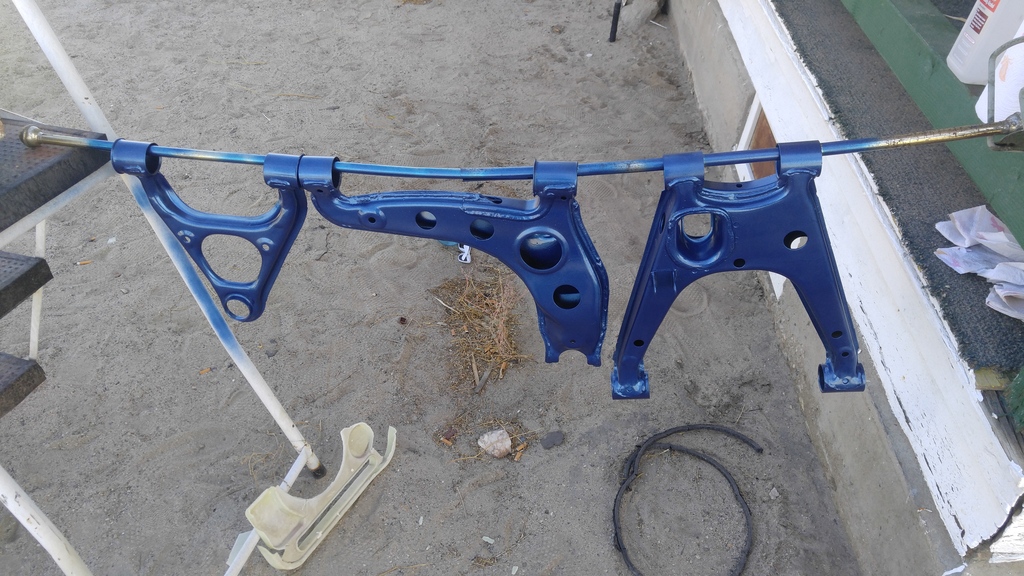
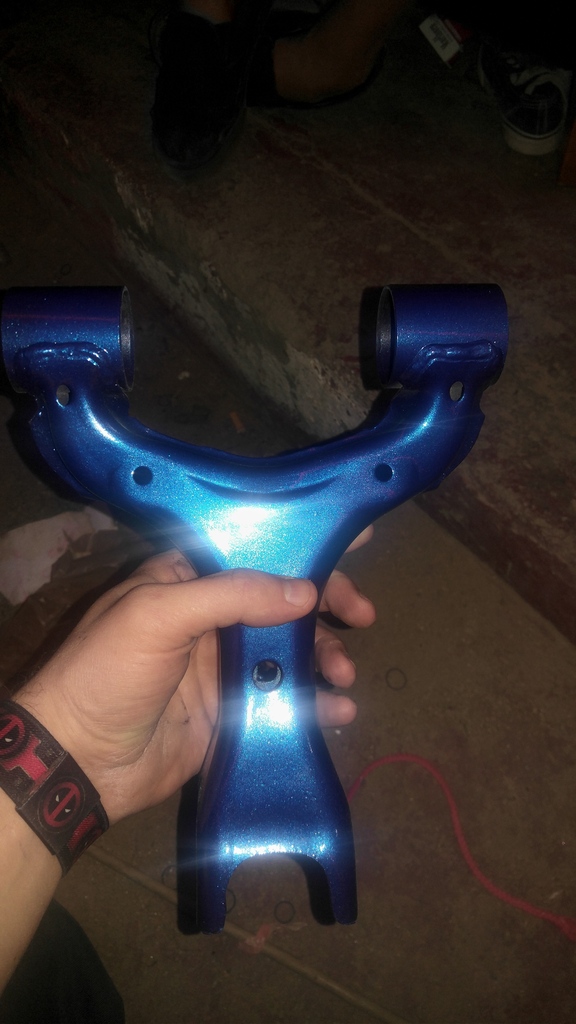
I really like the dark blue better if I go to do another set some time I'll do them all up like this.
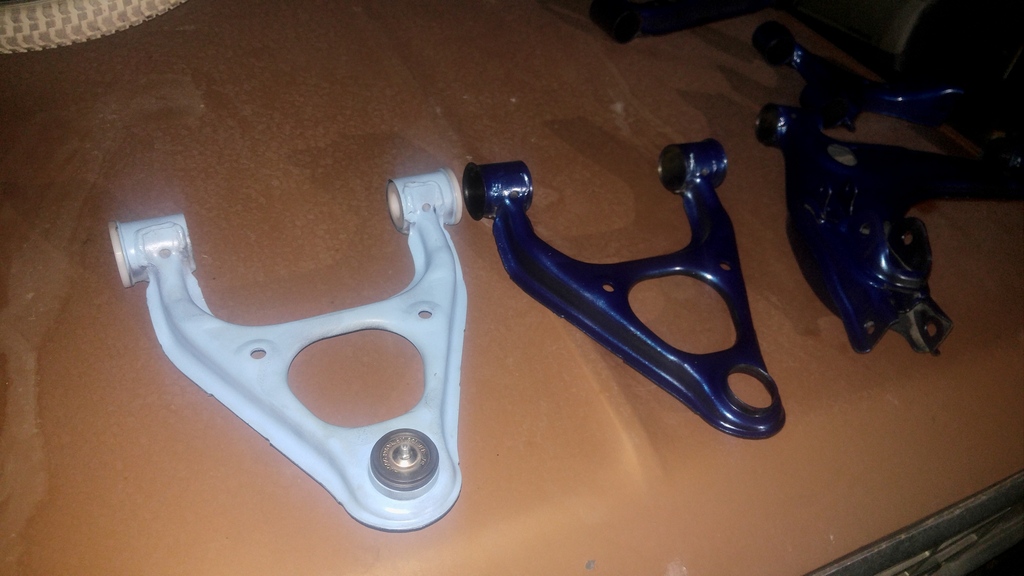
New upper ball jpints
Lower ball joints
Sad fab derlin uppers bushings
Polly lower bushings w/bronze bushings
Le tie rod ends
Removing the stock bushings.


Then sanded and cleaned the he'll out of the control arms.

And then started to make them pretty.


Then ran out of the light blue paint... Because I planned it out so well using 5 year old spray cans. So driver side got a Diffrent color.


I really like the dark blue better if I go to do another set some time I'll do them all up like this.

New upper ball jpints
Lower ball joints
Sad fab derlin uppers bushings
Polly lower bushings w/bronze bushings
Le tie rod ends

Reply
0
0
11-12-2016, 06:53 PM
#17
Junior Member
Thread Starter
Join Date: Jan 2015
Location: Trona,ca
Posts: 73
Total Cats: -3
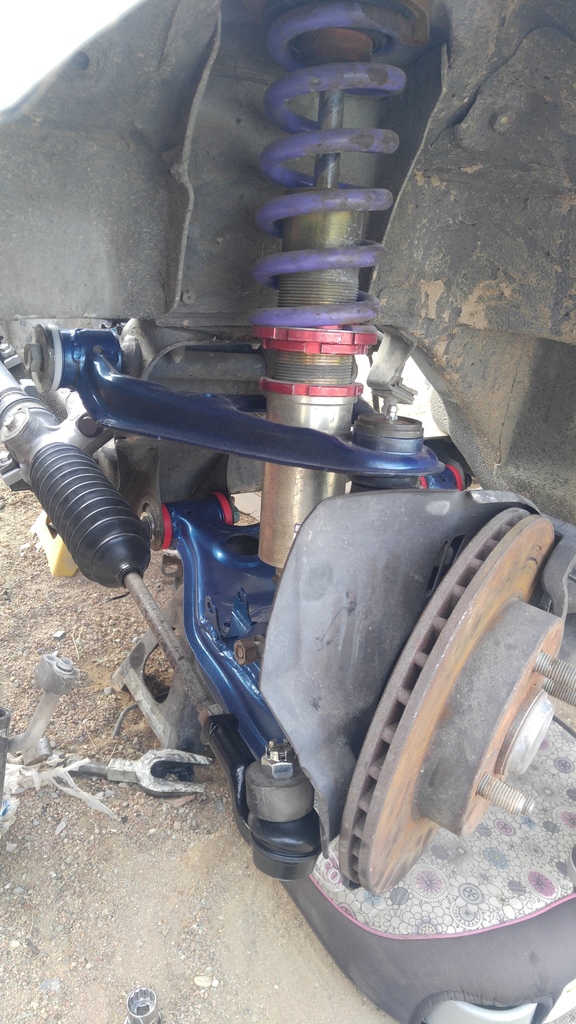
Steering rack finally put back in place sitting on garage star spacers. Only 7 months after pulling it off....
Steering rack spacers $55
Steering rack bolts $5
Steering rack boots $18
Le rodend link $143.03
Steering rack poly mounts $34
Alignment bolts $80
Garage star spacers $49.50
Polly bushings $225
Bronze bearing kit and derlin bushings $385
Think that's all of it...I think

Steering rack spacers $55
Steering rack bolts $5
Steering rack boots $18
Le rodend link $143.03
Steering rack poly mounts $34
Alignment bolts $80
Garage star spacers $49.50
Polly bushings $225
Bronze bearing kit and derlin bushings $385
Think that's all of it...I think
Reply
0
0
03-04-2017, 06:02 PM
#18
Junior Member
Thread Starter
Join Date: Jan 2015
Location: Trona,ca
Posts: 73
Total Cats: -3
Weather this year has sucked And when it's been nice I've slept through it or I've been sick. Now that the excuses at our of the way.
I removed and oil pan and cleaned the hell out of it. Got it back on last night.
Out the new rear main on this morning, along with the F1 flywheel and the ACT HD clutch and pressure plate.
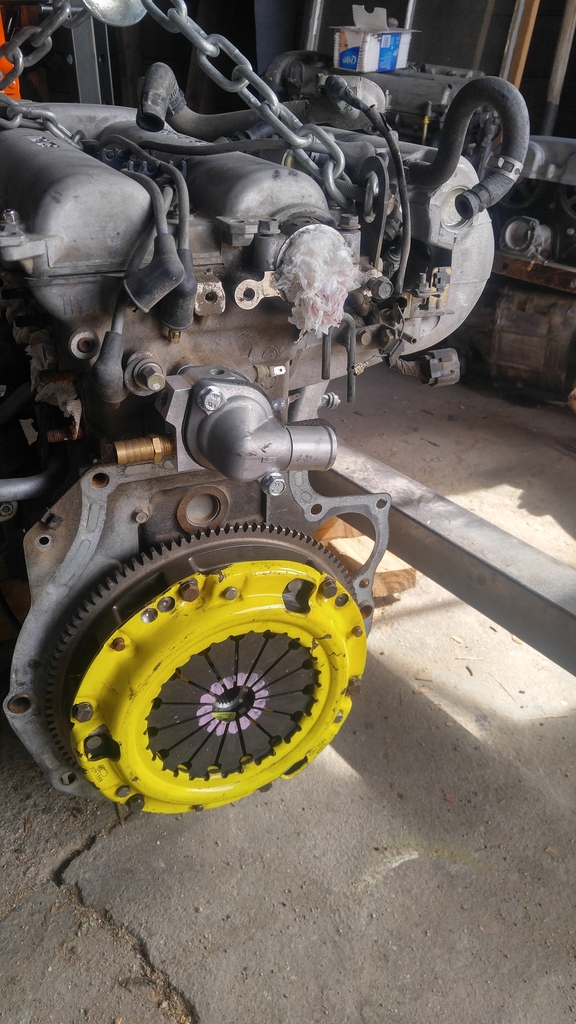
Out a new throw out hearing in the trans and clutch form because mine didn't come with one. Getting everything ligned up.
The fun part of the day was pushing the car up hill to the back yard and getting the car to the motor..all ready to go in.
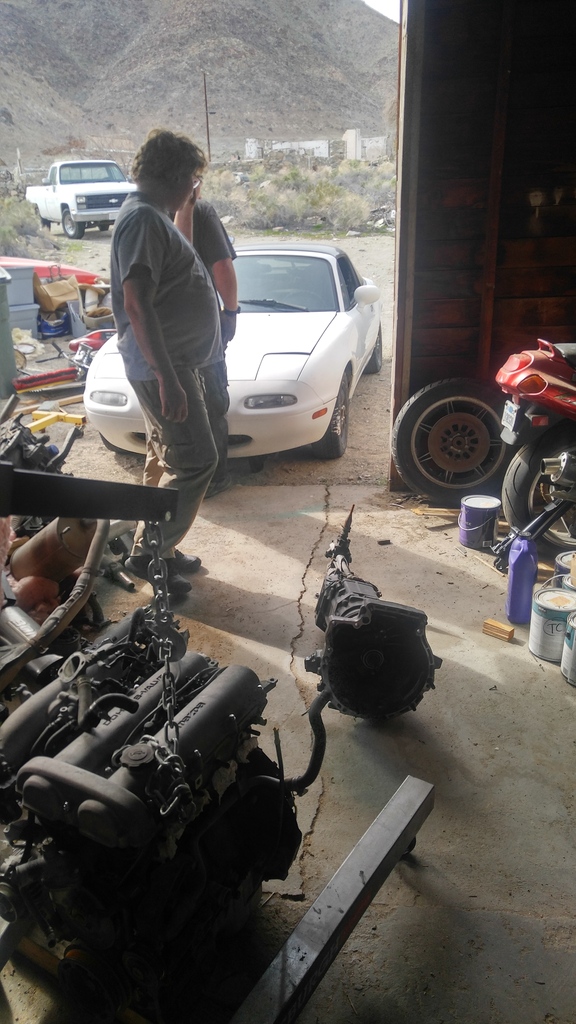
After all that I'm taking a lunch break,then back to it.
94 5 speed $125
Act hd clutch/pp $265
Throw out bearing $36
F1 flywheel $100
Rear main seal $14
Coolant reroute $80
I removed and oil pan and cleaned the hell out of it. Got it back on last night.

Out the new rear main on this morning, along with the F1 flywheel and the ACT HD clutch and pressure plate.

Out a new throw out hearing in the trans and clutch form because mine didn't come with one. Getting everything ligned up.

The fun part of the day was pushing the car up hill to the back yard and getting the car to the motor..all ready to go in.

After all that I'm taking a lunch break,then back to it.
94 5 speed $125
Act hd clutch/pp $265
Throw out bearing $36
F1 flywheel $100
Rear main seal $14
Coolant reroute $80
Last edited by bonez8; 03-04-2017 at 06:07 PM. Reason: Adding stuff
Reply
0
0
03-06-2017, 01:37 AM
#19
Junior Member
Thread Starter
Join Date: Jan 2015
Location: Trona,ca
Posts: 73
Total Cats: -3
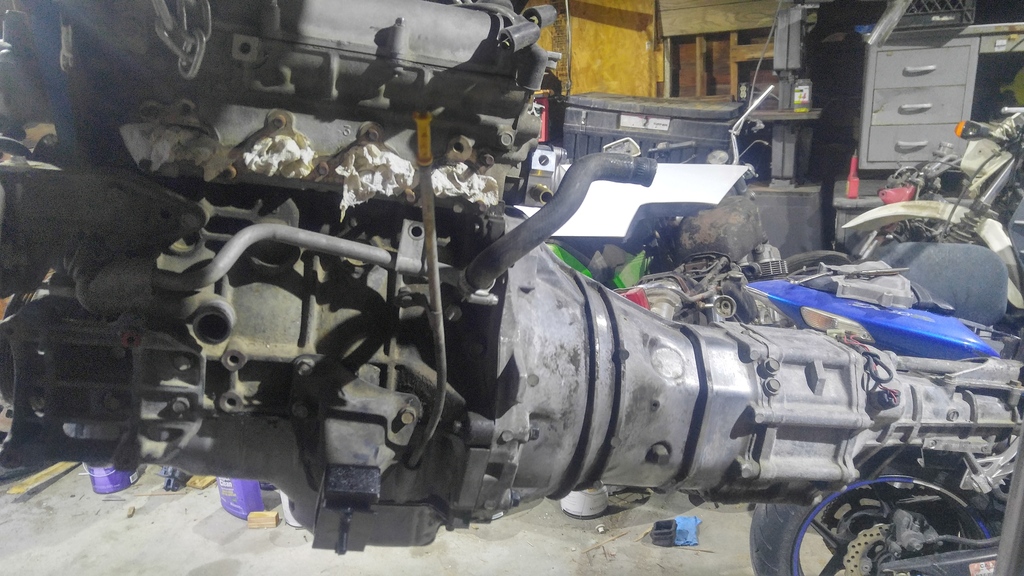
Transmission is On and motor mounts in place.
Rereading through the auto/manual swap to figure out the last bit of wiring that needs to be done.
Guide I'm using is here...
Miata Community Wiki | Automatic To Manual Conversion
Got as far as starting to go through the wires and the wind kicked up...
Ganna see how far I can get once the weather clears up. I have a meet in the next town over to get to and I really want to take the car there. It's on the 18th and I still have to figure out what all I need to finish up and hopefully get it here. Oh and get all the paper work strait on it...if I even can afford that..
Megan motor mounts $110
Last edited by bonez8; 03-06-2017 at 01:38 AM. Reason: Adding stuff as always
Reply
0
0


