My turbo prep rebuild page
 12-19-2008, 05:24 PM
#1
Elite Member
Thread Starter
iTrader: (1)
Join Date: Feb 2008
Location: Birmingham Alabama
Posts: 7,930
Total Cats: 45
I HOPE to hell this is the last time I have to pull this damn engine. I got the engine and trans out today, and started stripping it apart. Sucks working out in the muddy yard, dont have a garage or paved area to work on. Soon I hopefully will build my garage and have a good place to work.
Ive had the head off the car 4 times before, in the last few months. I originally had the engine out to replace the head gasket, and new clutch and flywheel. Upon first start up, I had a head gasket sealing issue, and I havent been able to fix it yet. Ive done everything but machine the deck block, so this time the block will get stripped, machined, and then rebuilt with new bearings and rings.
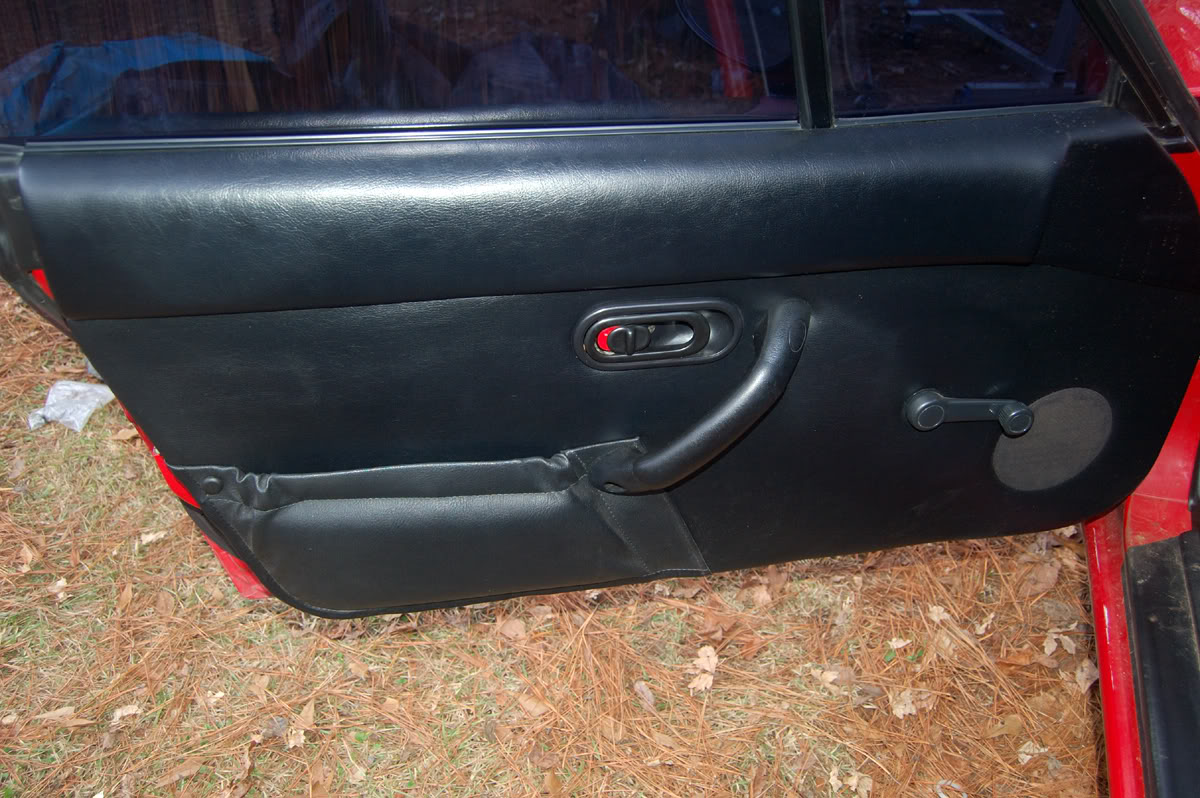
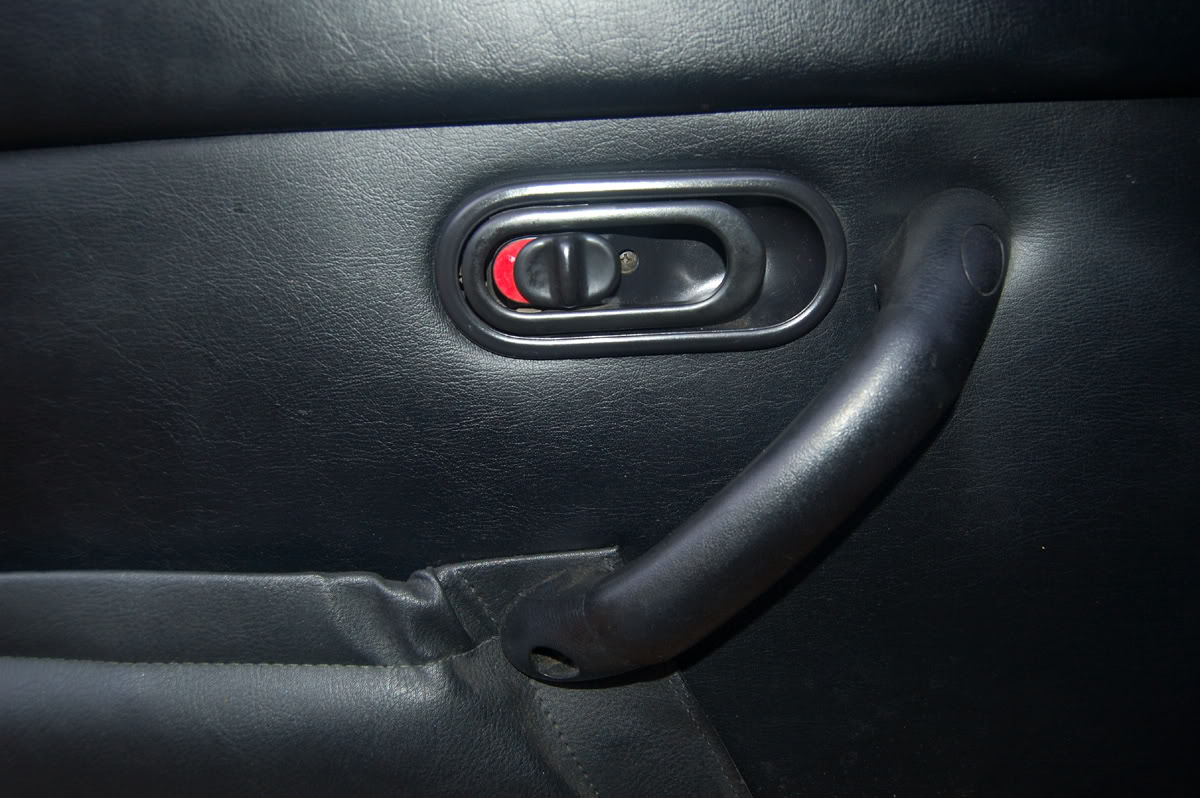
Here it is in the mud, drying out from all of the rain we have had over the last 2 or 3 weeks. I left the passanger window down So the inside got soaked. Fortunately I have Katzkin seat leather and door panels on the way, should be on my door step Wednesday. Black with red stitching, should match nice with my Nardi "deep corn" steering wheel and Redlinegoods black w/ red stitching boots.
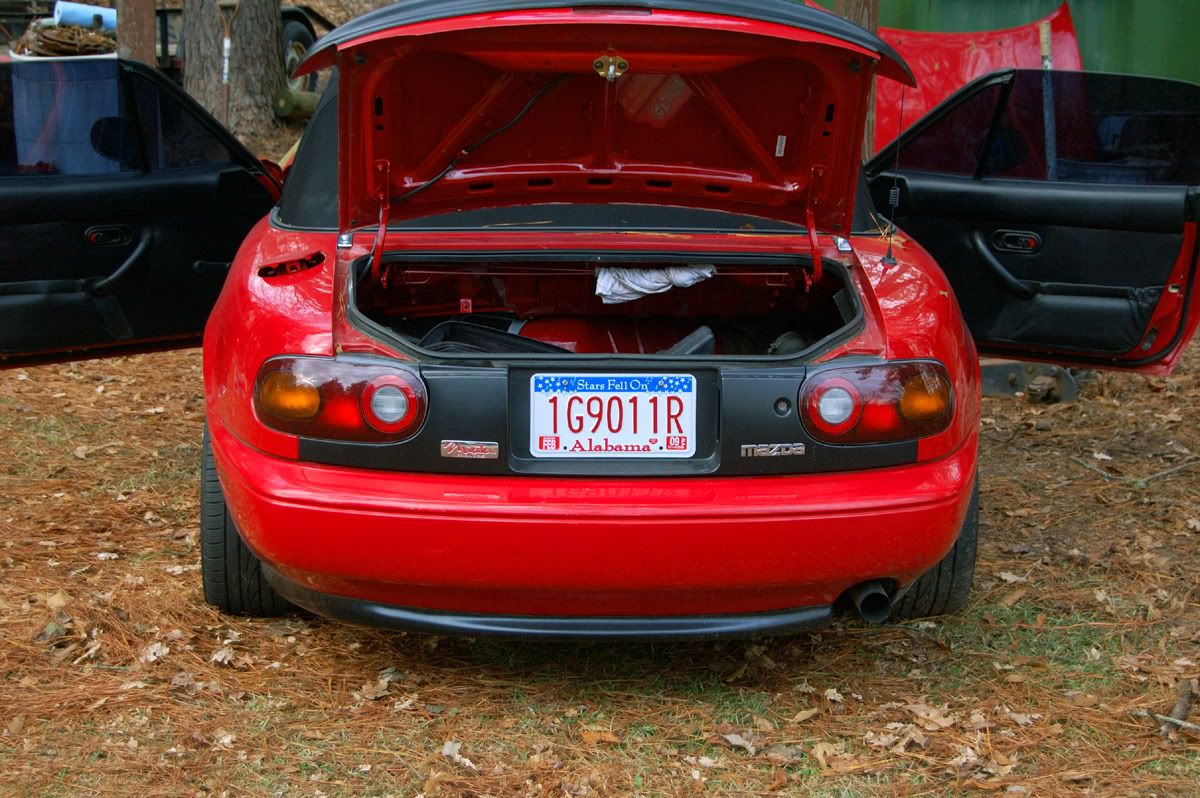
Inside used to be so clean, I guess a few months of non use and working will dirty it up.
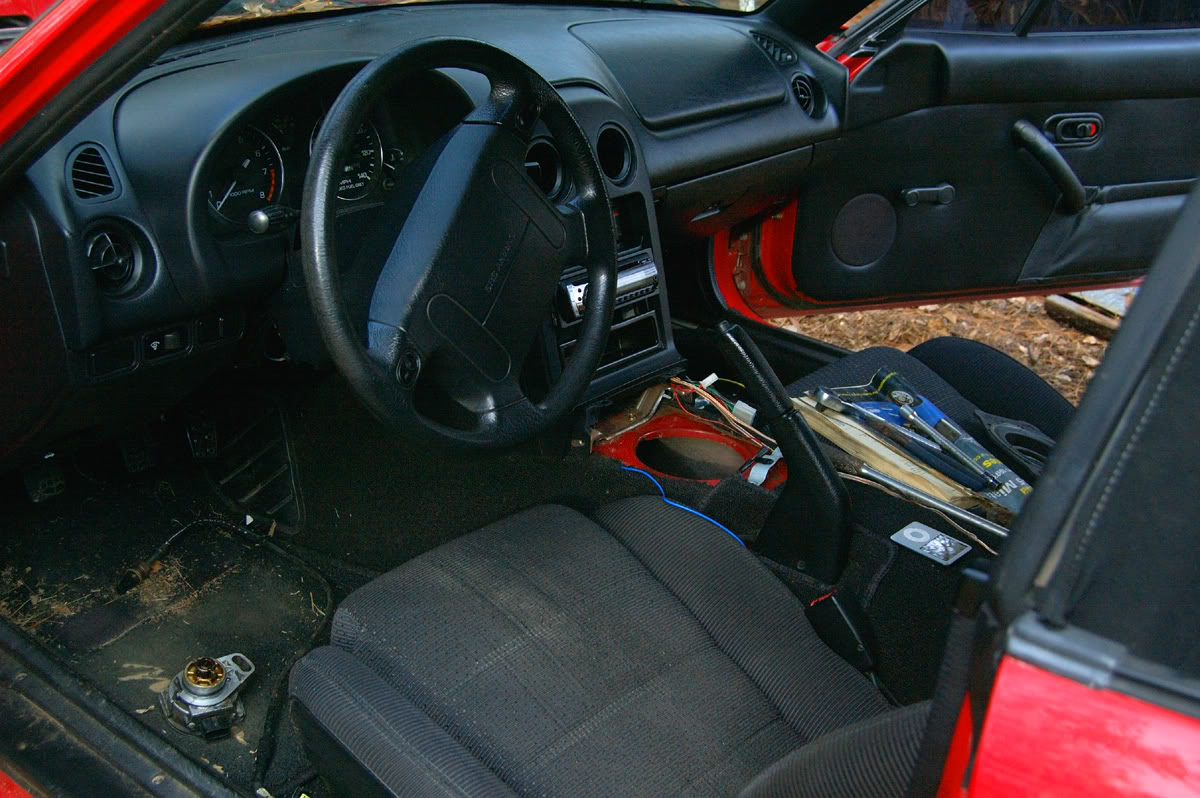
The work area, nice huh? Being poor sucks...
Little bit of rust forming, its sat for months in the weather, so its no wonder.
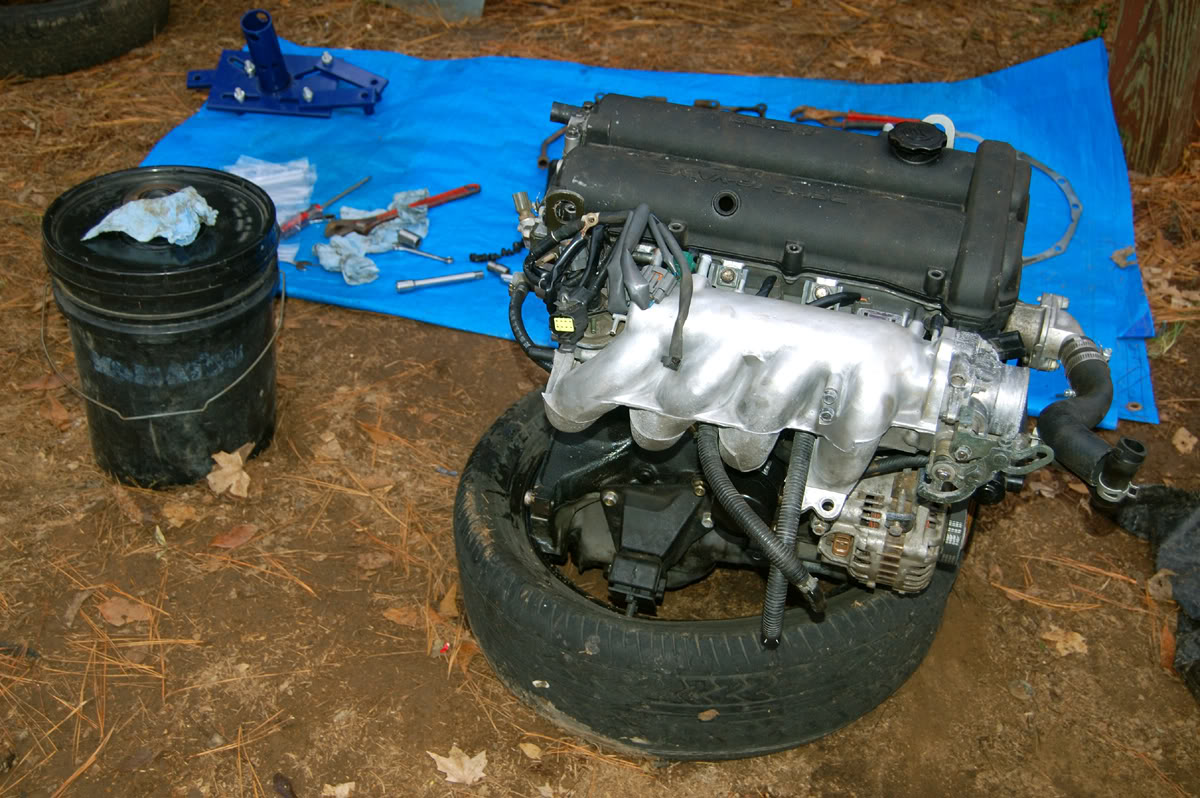
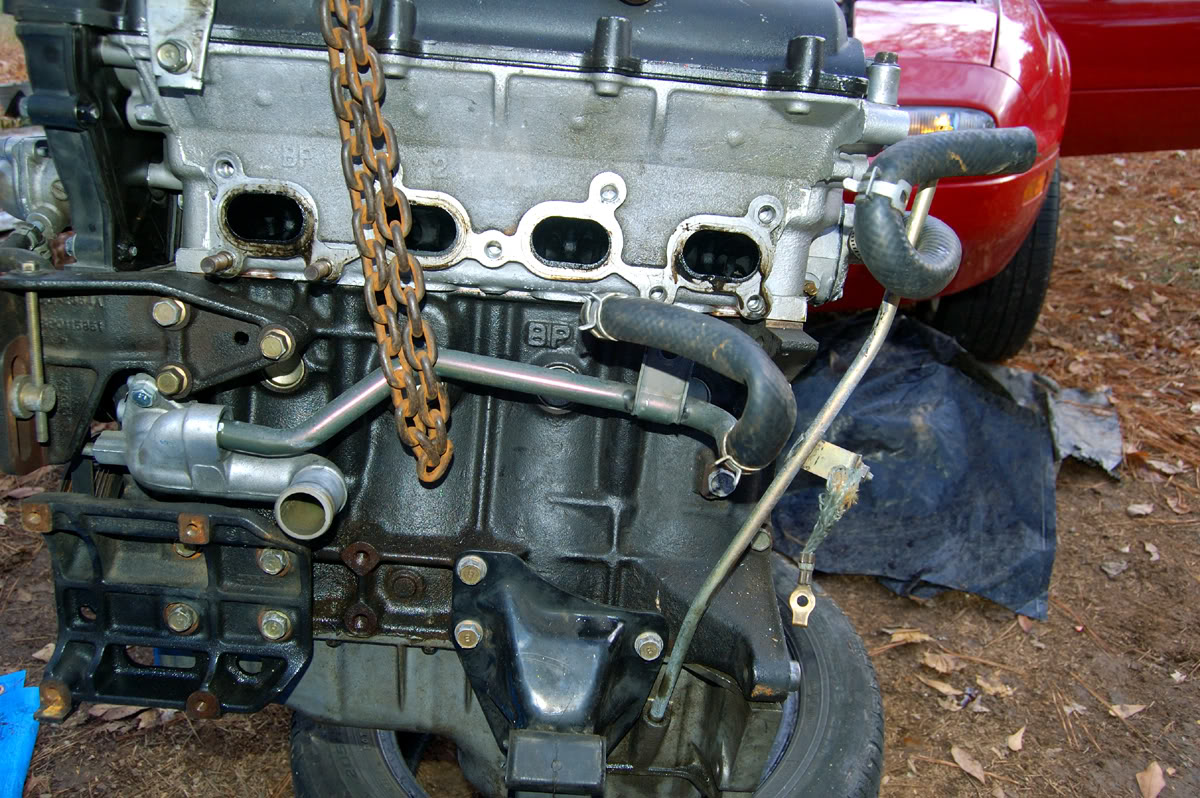
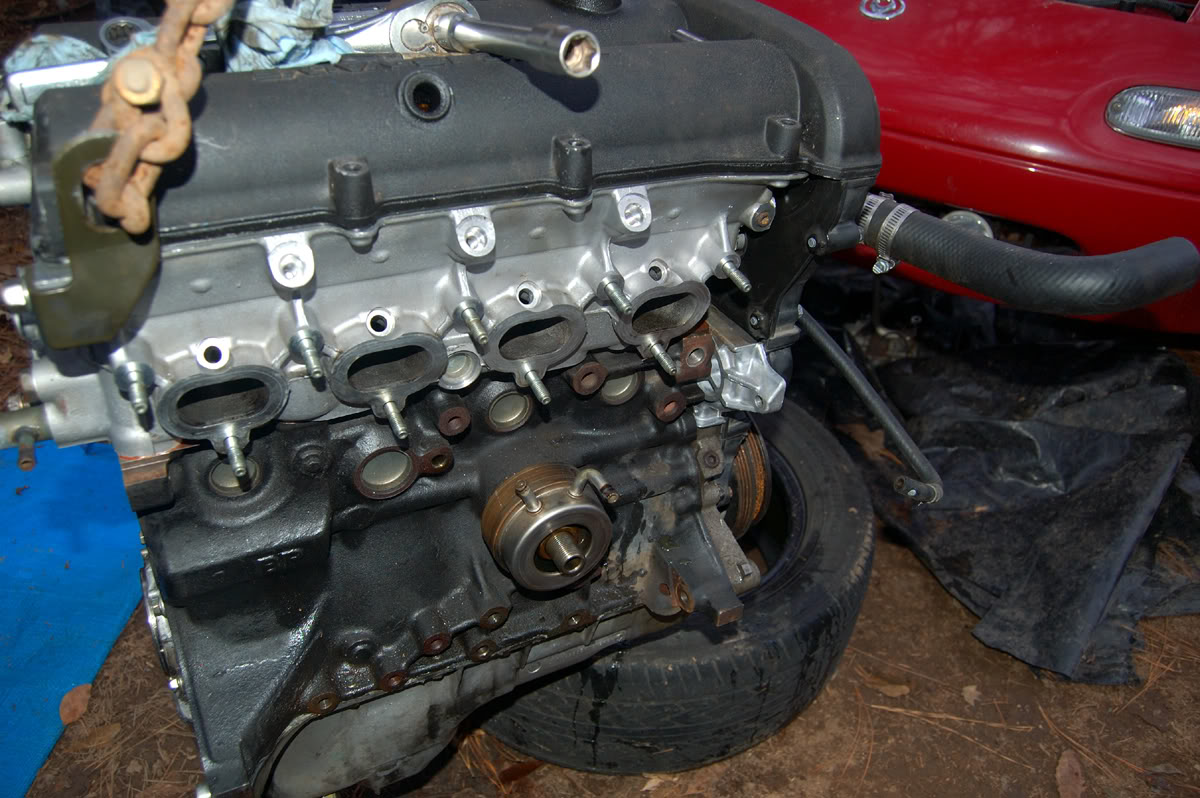
Look at those poor oil soaked exhaust ports. I look forward to doing a detailed cleaning, and painting of the engine and brackets. Didnt get too much into detail last time, not this time though.
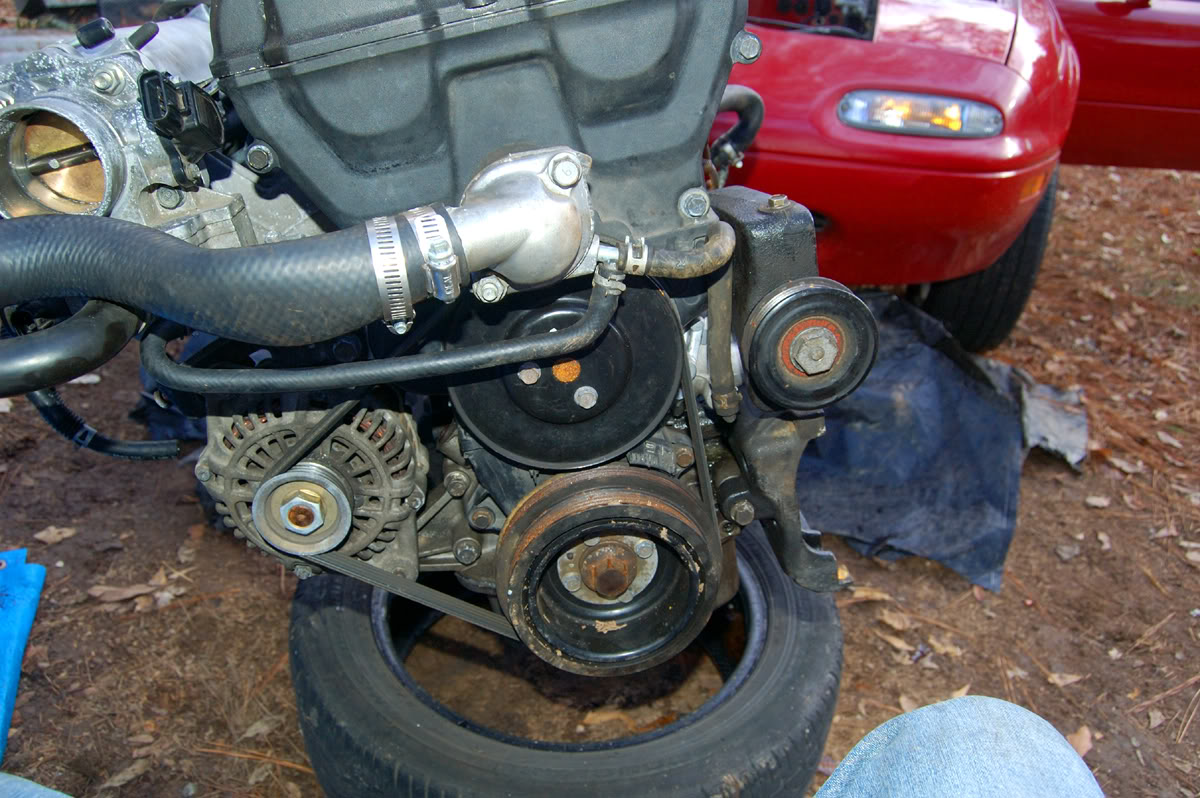
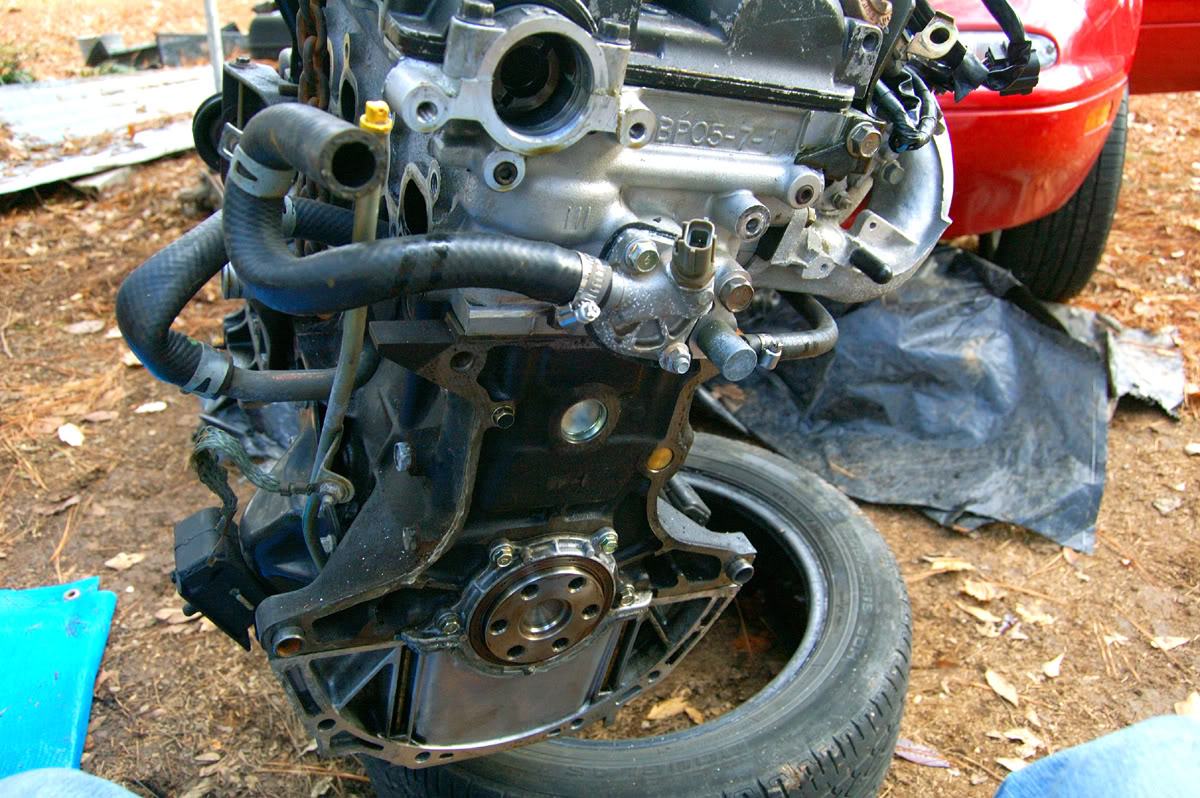
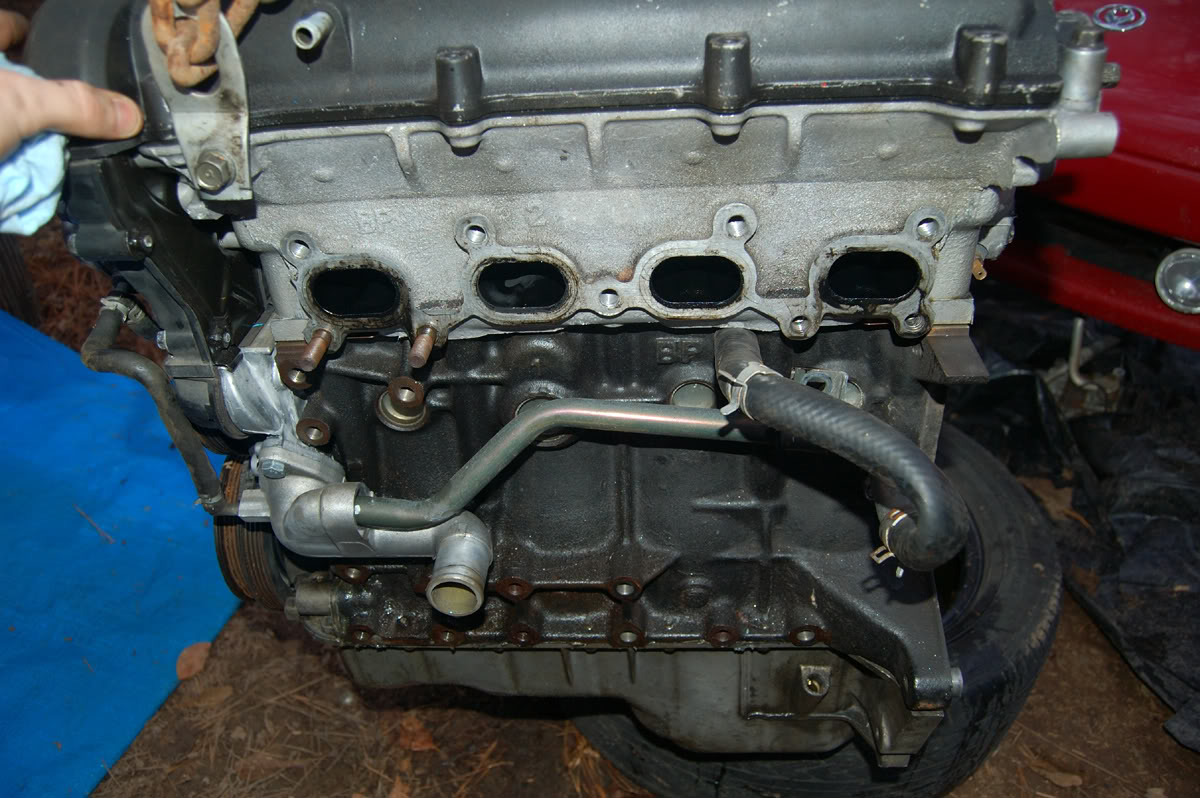
Bell housing/rear of head. I gotta find out a way to make my new engine stand bracket bolt up. Only 2 usable holes on the block, and the rest are on the oil pan. Not going to be able to get to the bolts with the bracket on, so I guess I will have to remove the pan and rear engine **** before bolting it up.
I plan on starting block tear down tomarrow. Still have some gaskets and seals Im going to probably need when I put it back together, so I have to make a list of those and find them at Trussville. When I rebuild, its going to use stock pistons and rods, since it shouldnt see over 250whp ever, I plan to shoot for 180ish with a 2554. I have a J-I crank scraper, just a little something to probably give me a headache.
Now the question section. The engine has 110k miles, should I leave the pistons and rods together, or should I try to replace the bushings/bearings on the rod for the wrist pins? Its probably still fine, so why fix whats not broken.
I will post pictures as I get deeper into the tear down/rebuild. Im sure I will have some more questions as I go. PS, the bolt on the lower rear block for the water reroute came right out. I was worried it would break and I would have to drill it out like that picture in the Hyper reroute page. I also need to drill and tap, or weld a bung in on the pan for the oil return. Im pleased with having a car from the south, everything is so rust free and clean. It lived in Florida for its first 10 years, and lived here in Alabama for the last 4 or 5. Makes working so much easier. It also helps that the engine was pulled recently, so all of the bolts are still fairly loose and not frozen up.
PSS, one more question. Should standard blue Loctite hold up to the heat of the exhaust studs? It says 300 degrees I think, but that seems like it would be passed by the heat from the exhaust area. Only high temp stuff they had was red, and I dont want the studs to be that permanent.
Ive had the head off the car 4 times before, in the last few months. I originally had the engine out to replace the head gasket, and new clutch and flywheel. Upon first start up, I had a head gasket sealing issue, and I havent been able to fix it yet. Ive done everything but machine the deck block, so this time the block will get stripped, machined, and then rebuilt with new bearings and rings.
Here it is in the mud, drying out from all of the rain we have had over the last 2 or 3 weeks. I left the passanger window down
So the inside got soaked. Fortunately I have Katzkin seat leather and door panels on the way, should be on my door step Wednesday. Black with red stitching, should match nice with my Nardi "deep corn" steering wheel and Redlinegoods black w/ red stitching boots.Inside used to be so clean, I guess a few months of non use and working will dirty it up.
The work area, nice huh?
Being poor sucks...Little bit of rust forming, its sat for months in the weather, so its no wonder.
Look at those poor oil soaked exhaust ports. I look forward to doing a detailed cleaning, and painting of the engine and brackets. Didnt get too much into detail last time, not this time though.
Bell housing/rear of head. I gotta find out a way to make my new engine stand bracket bolt up. Only 2 usable holes on the block, and the rest are on the oil pan. Not going to be able to get to the bolts with the bracket on, so I guess I will have to remove the pan and rear engine **** before bolting it up.
I plan on starting block tear down tomarrow. Still have some gaskets and seals Im going to probably need when I put it back together, so I have to make a list of those and find them at Trussville. When I rebuild, its going to use stock pistons and rods, since it shouldnt see over 250whp ever, I plan to shoot for 180ish with a 2554. I have a J-I crank scraper, just a little something to probably give me a headache.
Now the question section. The engine has 110k miles, should I leave the pistons and rods together, or should I try to replace the bushings/bearings on the rod for the wrist pins? Its probably still fine, so why fix whats not broken.
I will post pictures as I get deeper into the tear down/rebuild. Im sure I will have some more questions as I go. PS, the bolt on the lower rear block for the water reroute came right out. I was worried it would break and I would have to drill it out like that picture in the Hyper reroute page. I also need to drill and tap, or weld a bung in on the pan for the oil return. Im pleased with having a car from the south, everything is so rust free and clean. It lived in Florida for its first 10 years, and lived here in Alabama for the last 4 or 5. Makes working so much easier. It also helps that the engine was pulled recently, so all of the bolts are still fairly loose and not frozen up.
PSS, one more question. Should standard blue Loctite hold up to the heat of the exhaust studs? It says 300 degrees I think, but that seems like it would be passed by the heat from the exhaust area. Only high temp stuff they had was red, and I dont want the studs to be that permanent.

Reply
 0
0

0
12-19-2008, 05:43 PM
#2
Cpt. Slow

iTrader: (25)
Join Date: Oct 2005
Location: Oregon City, OR
Posts: 14,179
Total Cats: 1,129
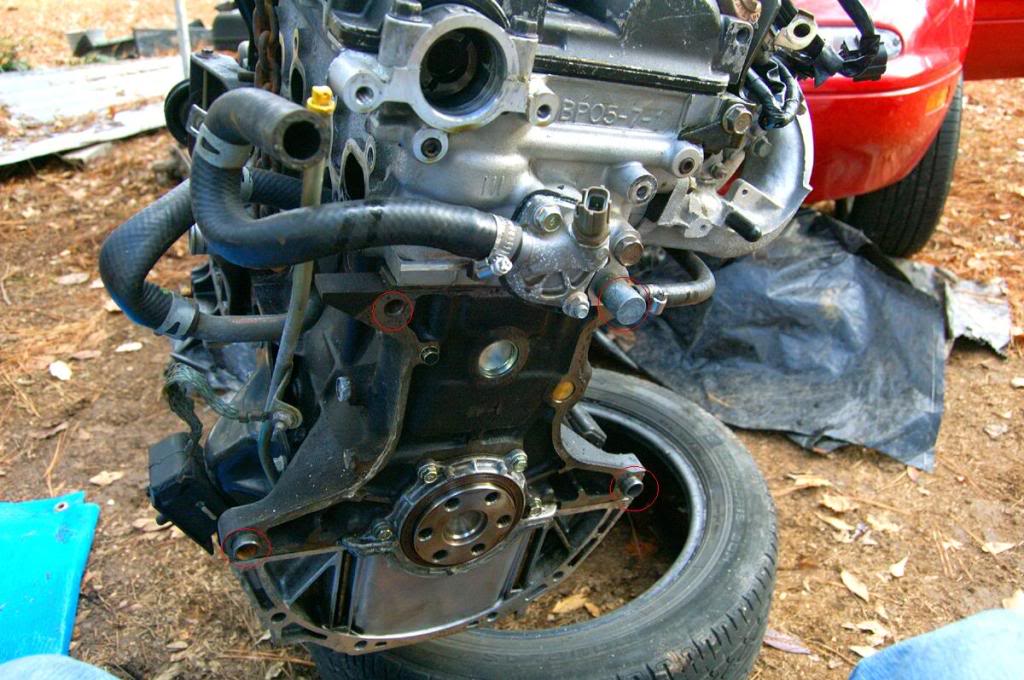
put sockets over the pins to keep from crushing/bending them. Obviously the upper right hole is not the coolant fitting, its behind there, but not visible. And remember, its easiest to bolt up the bracket, then use the engine lift to put it into the stand.

Reply
0
0
12-19-2008, 05:48 PM
#4
Elite Member
Thread Starter
iTrader: (1)
Join Date: Feb 2008
Location: Birmingham Alabama
Posts: 7,930
Total Cats: 45
Yeah, my issue is the dowels/pins on the block. The upper 2 holes are fine, but the lower 2 are thrown off since they stick out 3/4'' further. I bolted the arms on the bracket on the back side for the 2 lower holes, but I need ~1/2'' spacers to tkae up the gap it caused. I can make it work, just need to find the right stuff to make it work. Im also worried because where the bell housing bolts go through the bracket is too deep, and the bolts only thread in maybe 4 threads ~1/2'' into the block. Id hate to have to go locate 4 longer bolts of the right thread pitch and size just for this. Id also hate to rip threads out or mess up the bolts.
Reply
0
0
12-19-2008, 06:01 PM
#5
Cpt. Slow
iTrader: (25)
Join Date: Oct 2005
Location: Oregon City, OR
Posts: 14,179
Total Cats: 1,129
yeah, once I used sockets, I had to space the upper ones towards the block with some large nuts. I think the PPF bolts work well here. they might be too long if I recall correctly, I had to spend some time with washers/sockets (used as spacers) to get it to work
Reply
0
0
12-19-2008, 06:02 PM
#6
Elite Member
Thread Starter
iTrader: (1)
Join Date: Feb 2008
Location: Birmingham Alabama
Posts: 7,930
Total Cats: 45
Forgot to tell more about the cars history, and the last time I "rebuilt" it a few months ago. Its a 110k mile R package sans Bilsteins. I traded them for Illumina's (yeah I know, its no longer an R package), but still have the shocks and may rebuild and use them on another project car. Stock springs, short Ground Control bump stops, all new OEM bushings, FM frame rail braces, FM sways and end link bushings, need to upgrade to Heim joints. Also will try for FCM mounts soon, since I want my ride to be slightly lower. 8'' 6UL's around the corner, already riding on Heliums with 205/50/15 Falken 912's. Im sticking with stock springs I think, though the FM springs are calling me. Gone this far, might as well do springs too. Car has a Boss Frog double hoop MAXX rollbar, and have the padding and vinyl covers on the way.
Last time, the engine got all new external gaskets and seals, FM 10.3lb flywheel, ACT HD clutch and stianless clutch line. Competition engine mounts since the old stock mounts were both torn in half, which made for a slightly rough idle, and a really nice shifter wobble when going on/off throttle. Front of the engine got new t/b, w/p, idler pulley and tensioner with spring, main seals, ect. Pretty much everything brand new except the oil pump and internals. So Im pretty much good to go once I rebuild the internals and bolt it back up.
Im not going too extreme since its going to be a daily driver, and maybe a track car every now and then. Do plan to go 6 speed and 3.6 gear once I go turbo. Going with the BEGi-S with upgrades and a MSPnP. Shooting for 160-180whp starting out, maybe upped to 200-225 in the following months once I get the 6 speed and rear gear. Also need to keep it mild since I want it to be reliable. Surely an 80-100% increase in power will be enough fun for a daily driver that will see 50 miles a day, 5 days a week, and not spend too much time down.
Reply
0
0
12-20-2008, 01:14 AM
#7
Elite Member
Thread Starter
iTrader: (1)
Join Date: Feb 2008
Location: Birmingham Alabama
Posts: 7,930
Total Cats: 45
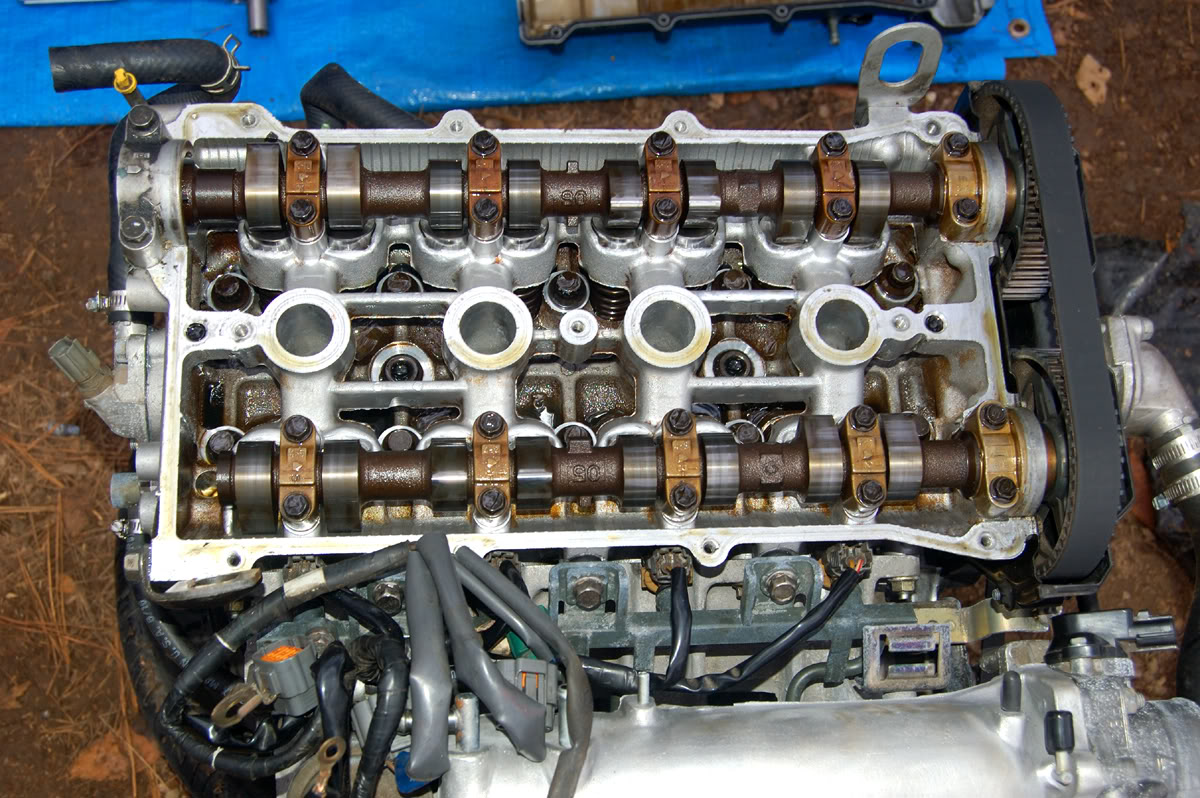
2 more I missed earlier, nothing really. Clean inside of the head. Its magic what synthetic oil does... or alot of cleaning a few months ago... 
Some skeletal remains of my Miata's dead relatives...
Its like a tombstone. Right next to my engine hoist too. Maybe thats not a bad sign, or bad luck or something.
Here is a question, electrical question to be exact. Does the battery provide any kind of anti corrosion properties to the chassis and engine? Ive noticed that any time I let my car sit very long with the battery not hooked up, anything aluminum gets oxidized. Every little aluminum bit on the chassis and engine has white powder on it. Doest seem to do this with the battery hooked up. Was thinking maybe a very low draw through the grounds help reduce this or something. Im not up on my electrical stuff at all. Maybe thats not oxidation, cant think of the right term... (Notice the fuel rail in the picture above. It was perfectly clean and that green color when I had it off last time, a month or two ago. Now its got a white powder all over it) or is the rail steel? Hell I dont know. All of the nipples on the intake manifold are that way, along with throttle body, and various bits on the chassis.
Reply
0
0
 12-20-2008, 03:19 PM
#9
Elite Member
Thread Starter
iTrader: (1)
Join Date: Feb 2008
Location: Birmingham Alabama
Posts: 7,930
Total Cats: 45
Thanks, and yes it does. Hopefully as soon as its back up and running I can have the turbo within 4-6 months. Have some of the stuff, but need some other junk.
Reply
0
0
12-20-2008, 04:47 PM
#10
Elite Member
Thread Starter
iTrader: (1)
Join Date: Feb 2008
Location: Birmingham Alabama
Posts: 7,930
Total Cats: 45
Another day of work done. Got a good bit done today, when I had time between beers and relaxing.
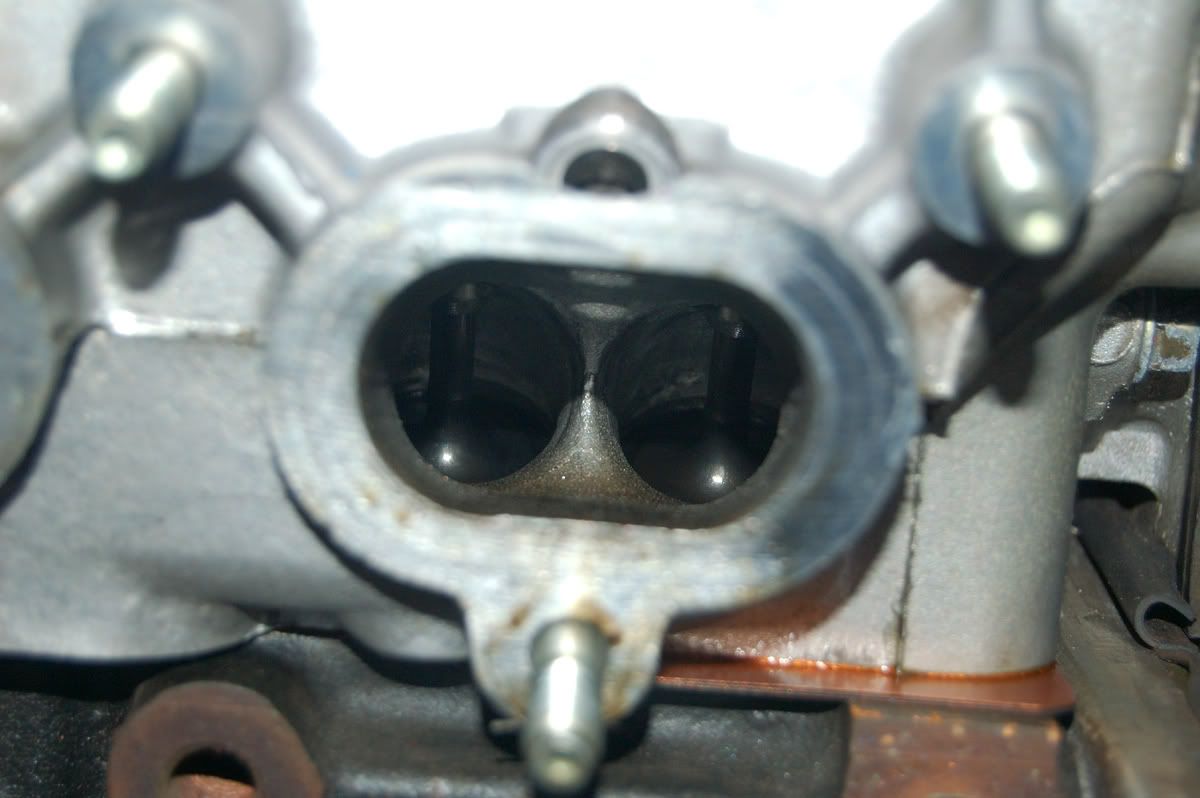
Started by finishing stripping the manifold and fuel rail off the head, pulling remaining hoses and the likes.
Took a peek into the port.
Finally ready to pull the head... for the 4th time! This better be the last time for a while.
All of my parts go to the storage room.

Smaller and dirtier parts go to the secondary parts storage.
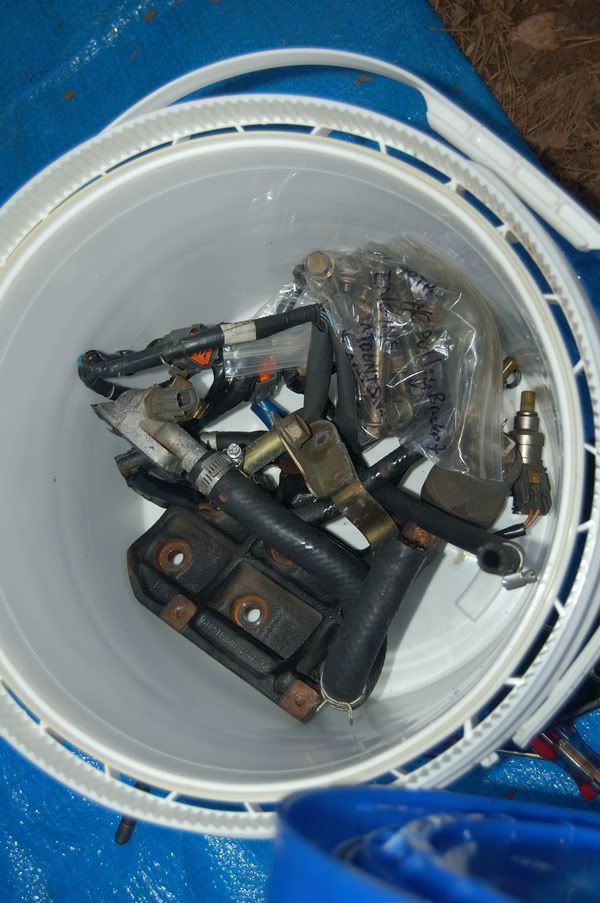
That is one handy bucket! Large diameter, and a screw on ratcheting lid with seal, so its water tight.
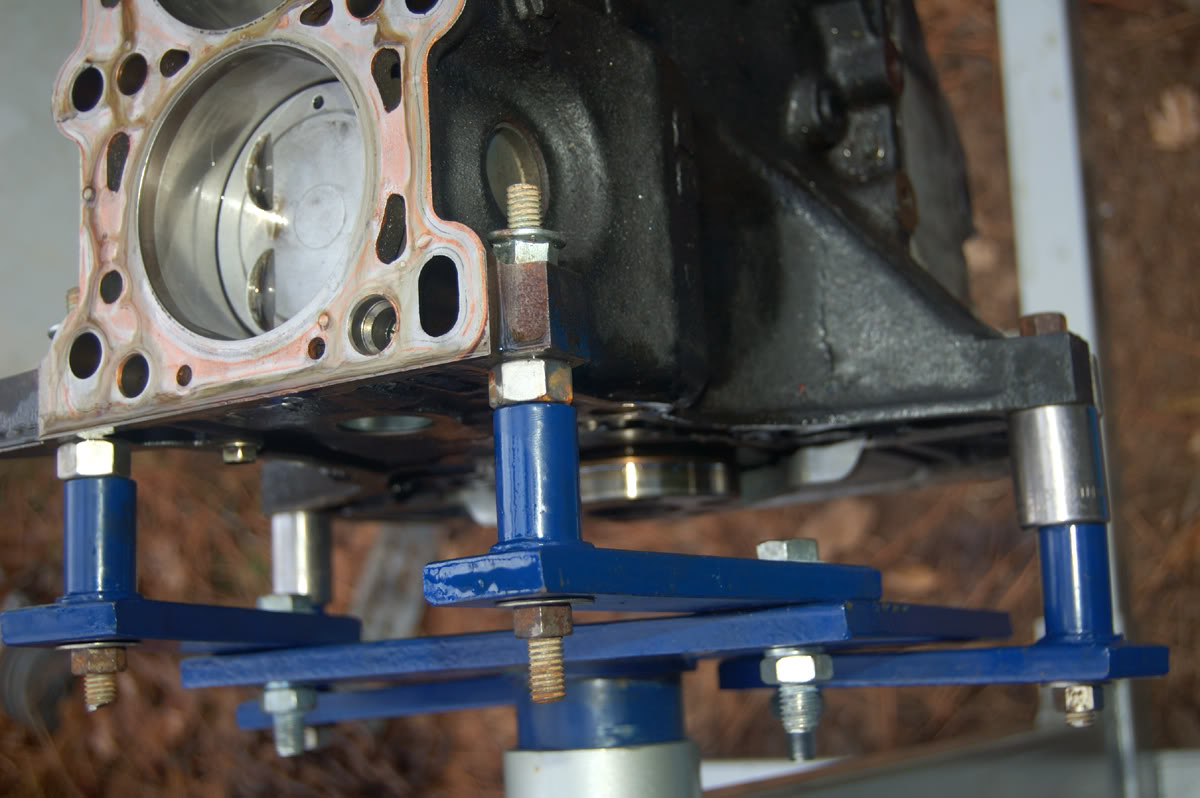
So now its time to put the block on the stand. This part took me like an hour. Had to make myself 4 studs out of some all-thread I had laying around. got to make some sparks with my cutting saw though! Gotta love that burning metal smell, reminds me of a welding shop. Its not pretty, but its on there. Almost cut them too short!
Ready to start tear down tomarrow. Im going to be checking everything before/as I take it apart to see what the condition was like. The end play feels good, I was expecting more.
More to come tomarrow.
Started by finishing stripping the manifold and fuel rail off the head, pulling remaining hoses and the likes.
Took a peek into the port.
Finally ready to pull the head... for the 4th time! This better be the last time for a while.
All of my parts go to the storage room.
Smaller and dirtier parts go to the secondary parts storage.
That is one handy bucket! Large diameter, and a screw on ratcheting lid with seal, so its water tight.
So now its time to put the block on the stand. This part took me like an hour. Had to make myself 4 studs out of some all-thread I had laying around. got to make some sparks with my cutting saw though! Gotta love that burning metal smell, reminds me of a welding shop. Its not pretty, but its on there. Almost cut them too short!
Ready to start tear down tomarrow. Im going to be checking everything before/as I take it apart to see what the condition was like. The end play feels good, I was expecting more.
More to come tomarrow.
Reply
0
0
12-20-2008, 04:59 PM
#11
Elite Member
Thread Starter
iTrader: (1)
Join Date: Feb 2008
Location: Birmingham Alabama
Posts: 7,930
Total Cats: 45
For Chriscar
They would look better cleaned up a bit, but you get the idea. Like I said, near perfect shape. A little cloth/fabric paint on the speaker grills and its good to go. The flash of the camera made some weird looking spots that look like faded areas. I assure you they arent.
They would look better cleaned up a bit, but you get the idea. Like I said, near perfect shape. A little cloth/fabric paint on the speaker grills and its good to go. The flash of the camera made some weird looking spots that look like faded areas. I assure you they arent.
Reply
0
0
12-21-2008, 11:43 AM
#12
Elite Member
Thread Starter
iTrader: (1)
Join Date: Feb 2008
Location: Birmingham Alabama
Posts: 7,930
Total Cats: 45
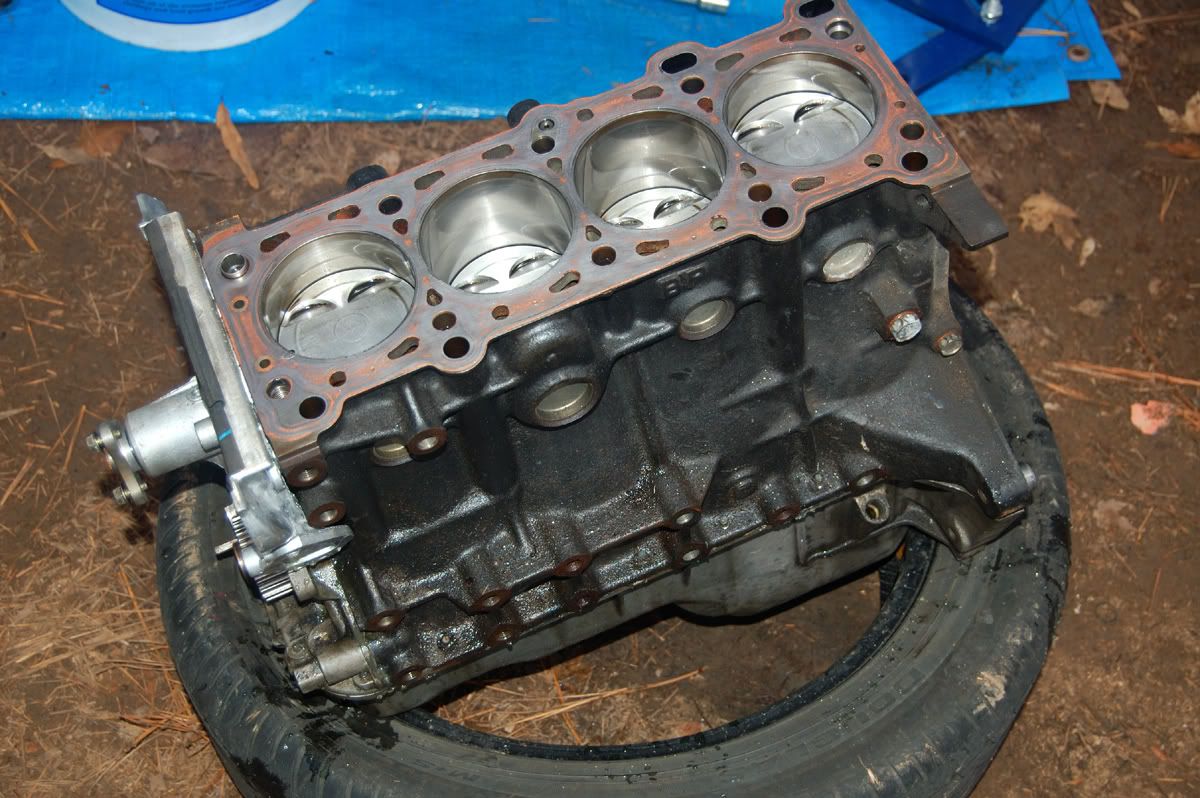
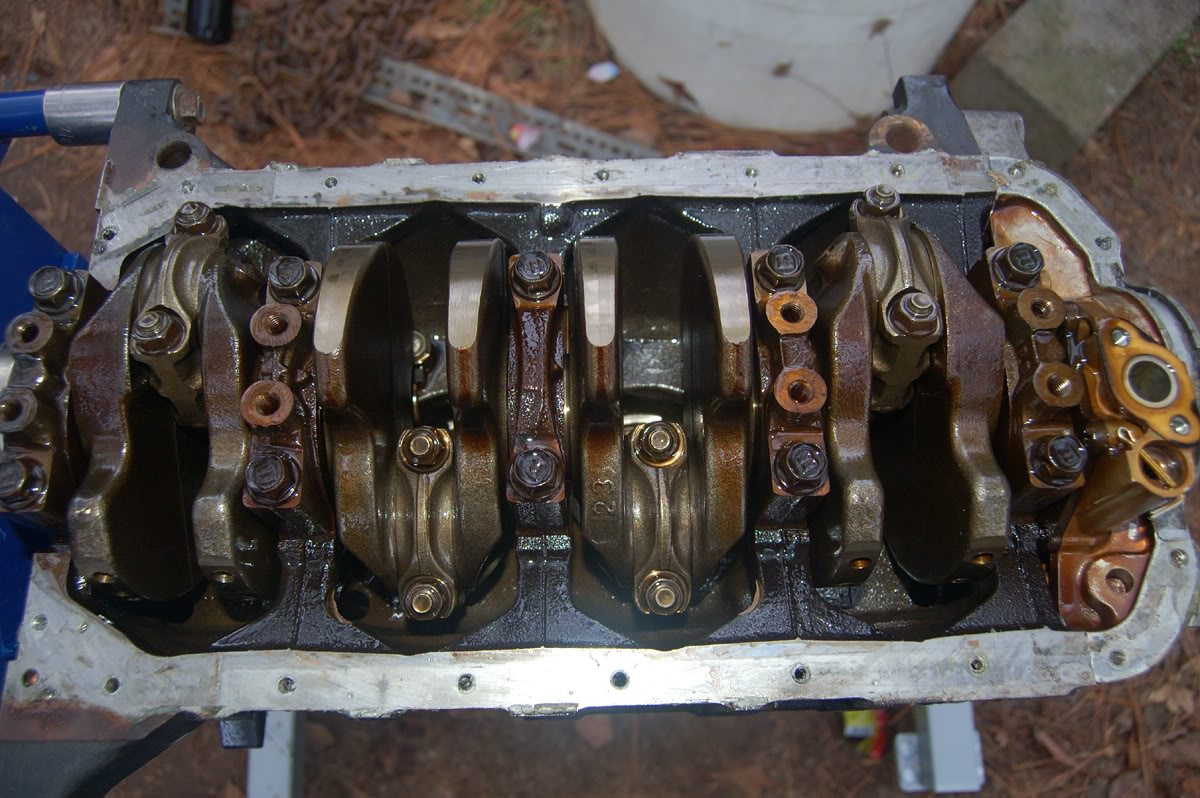
Rods and pistons out. trying to lose some weight before I carry the block and stand up 20+ stairs.
Im pleased to find no flaws with either pistons or rods, and very pleased with the minimal bearing and crankshaft wear. I guess it goes to show how important regular oil changes are.
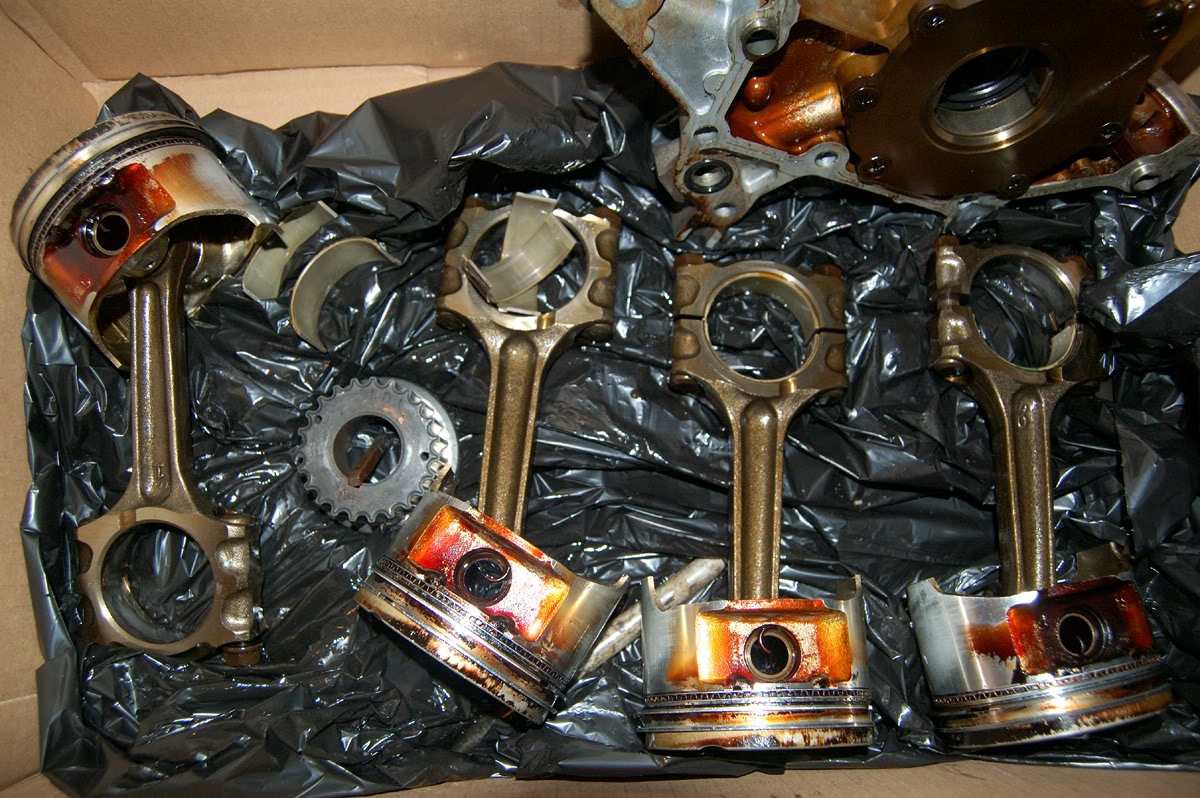
Average bearing wear:
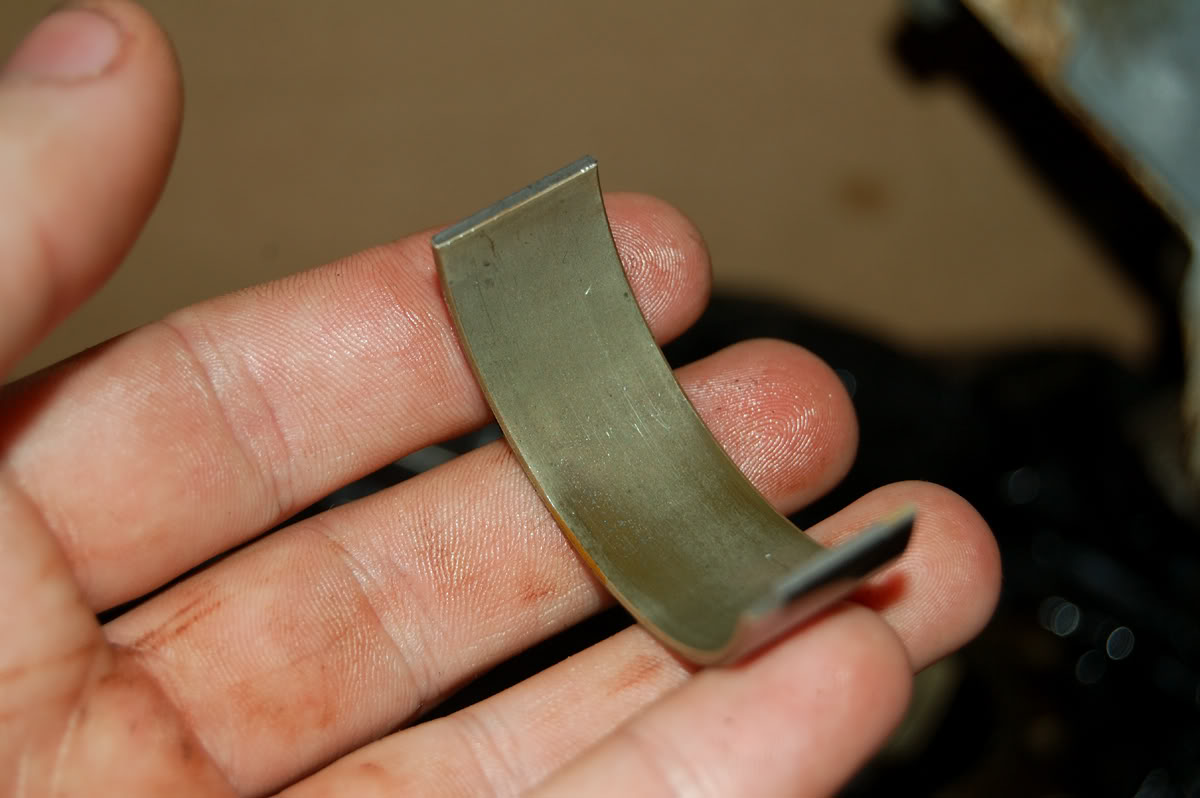
1 rod bearing had 1 or 2 grooves in it, but they were very shallow and I cant see anything on the crankshaft side of things, so it doesnt worry me.
Im pleased to find no flaws with either pistons or rods, and very pleased with the minimal bearing and crankshaft wear. I guess it goes to show how important regular oil changes are.
Average bearing wear:
1 rod bearing had 1 or 2 grooves in it, but they were very shallow and I cant see anything on the crankshaft side of things, so it doesnt worry me.
Reply
0
0
12-21-2008, 02:52 PM
#13
Elite Member
Thread Starter
iTrader: (1)
Join Date: Feb 2008
Location: Birmingham Alabama
Posts: 7,930
Total Cats: 45
Inside and torn down. Block is as far down as it can go, except for that one copper washer on the #3 oil squirter...
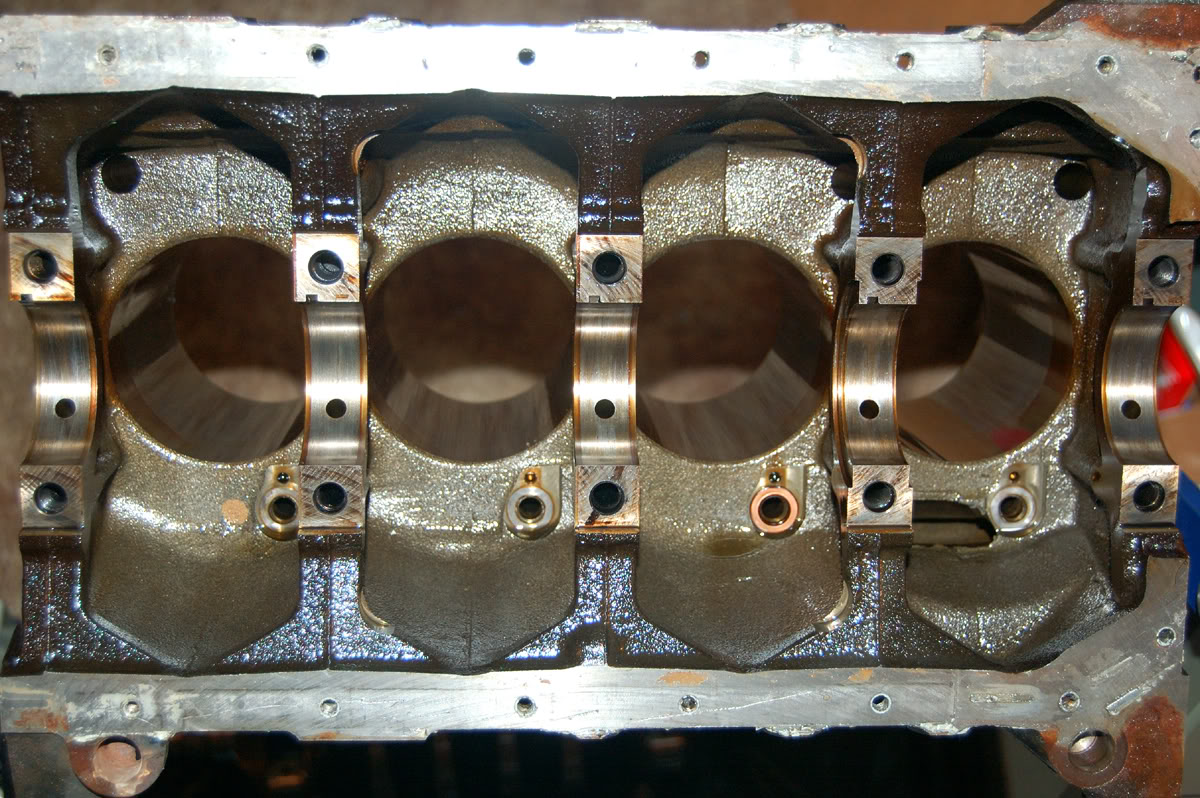
Now I just need to bring it to the shop and have the deck machined, and maybe get them to hot tank it, since its so damn cold outside. Then hone and reverse.
Now I just need to bring it to the shop and have the deck machined, and maybe get them to hot tank it, since its so damn cold outside. Then hone and reverse.
Reply
0
0
12-22-2008, 12:11 AM
#15
Elite Member
Thread Starter
iTrader: (1)
Join Date: Feb 2008
Location: Birmingham Alabama
Posts: 7,930
Total Cats: 45
Ok... wtf... get the $&#@ out! Let me calm myself...
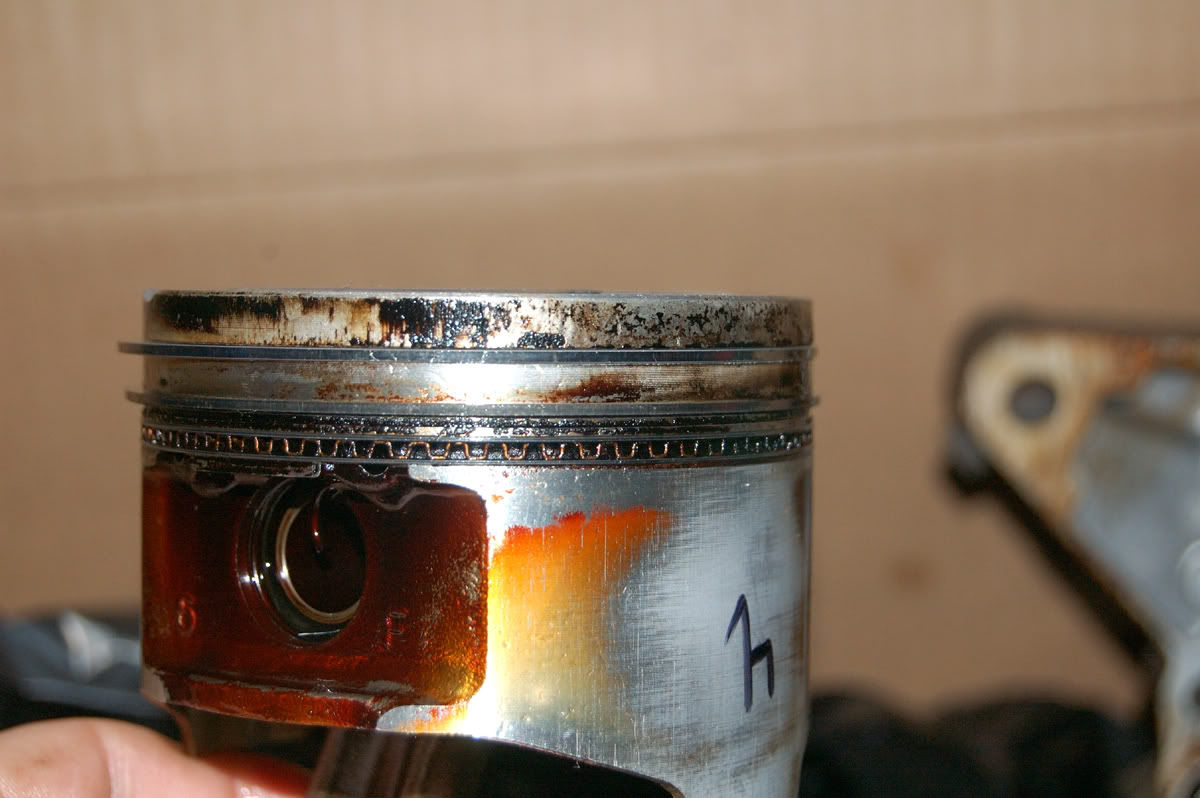
Ok, I will try and make it short. Some of you may recall me posting several months ago about my head gasket issues for the first time. I had rebuilt the head (also had it machined .015 off) and installed it only to find rough idle and smoke. At that time it was coolant smoke, so I figure head gasket... Pull the head and what do I find? A staple between 2 layers of the gasket. So I get a new gasket and reinstall, all is well right? No, still smokes. Only this time I think it was oil smoke, so I thought, same problem, just different fluid leaking through the head gasket. I blame the head all along, and have it checked by a machine shop for flatness, it seems fine. So the next 2 head gaskets Im still blaming the head, or the block deck.
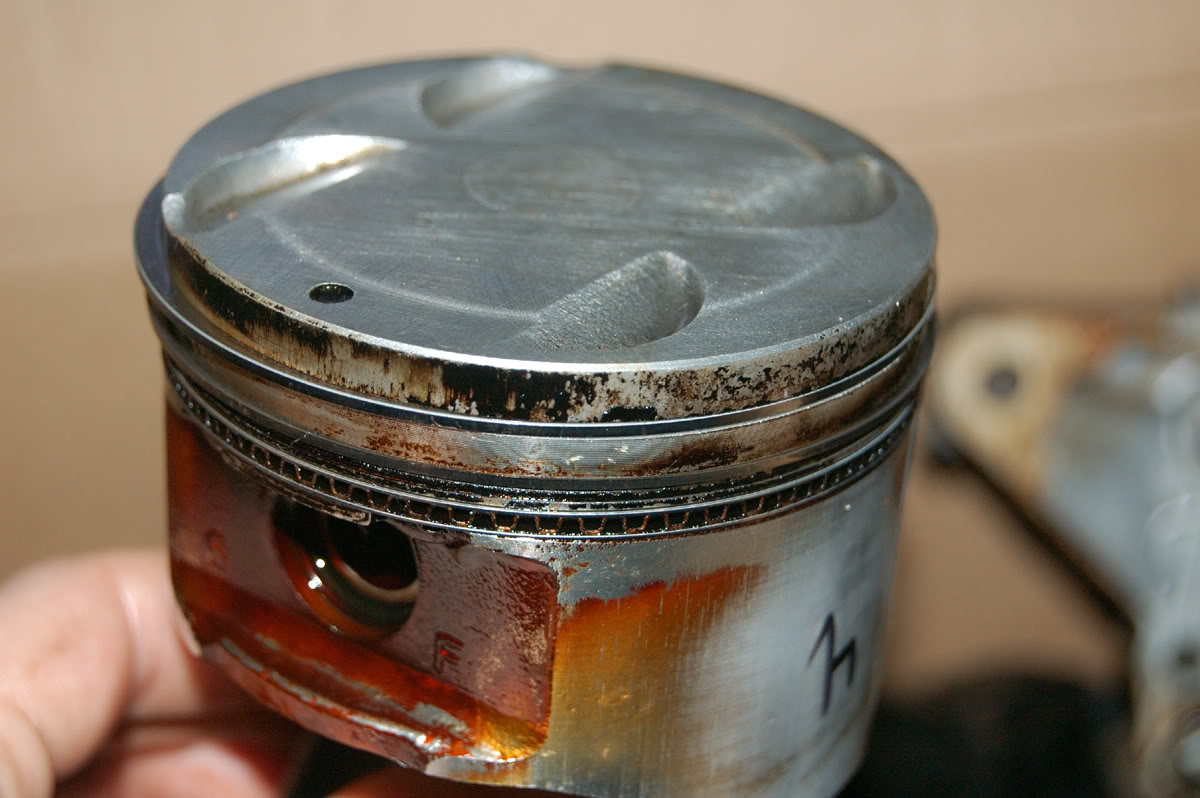
I pulled the pistons today but didnt look them over closely since it was cold as ***** outside, and I had to go somewhere. Well sitting here thinking about the machine shop this week, I decide to go look the pistons over. Now note that I had the machine shop that checked my head over for flatness tell me that Mazda back in the day had tons of recalls for **** oil control rings, and they felt this was my problem. They would collapse and cause massive oil burning issues. They had tons of people come through for head rebuilds, and they made them sign papers stating that they didnt think the head machine work would fix their issues. It didnt. SO, what do I find just now. All 4 pistons have the oil control rings stuck in their grooves, completely flush with the pistons outer edge. So of course they arent going to control oil when they arent pushing against the walls at all.
Has anyone else ever seen this, and do you think this is my issue? So far, as far as I could tell the other times, the block was no more than .002 out of flatness, and the block was freshly machined. Or could this even cause enough oil loss to cause a rough idle and an engine that wants to die with any kind of load. It spits and sputters under accel, and leaves smoke, more at rest, reving with no load, and a light smoke under load. I kept coming up with excuses and ideas that didnt fully make sense, but I couldnt accept that the oil control rings all suddenly froze up at once, after sitting for a month or two, never being touched. This would explain coolant burning the first time, also probably some oil, (from the staple) and oil the rest of the times.
You can see what I speak of at the top of post #12. I took pictures but didnt even notice, I was in a rush out the door.
So? What say you?
PS, yes I realise oil control rings dont spring out as much as the compression rings, but these are completely stuck, with only maybe .010 between the ends. I cant push them in, nor make them push out of the grooves. Guess they will have to be forced out.
Ok, I will try and make it short. Some of you may recall me posting several months ago about my head gasket issues for the first time. I had rebuilt the head (also had it machined .015 off) and installed it only to find rough idle and smoke. At that time it was coolant smoke, so I figure head gasket... Pull the head and what do I find? A staple between 2 layers of the gasket. So I get a new gasket and reinstall, all is well right? No, still smokes. Only this time I think it was oil smoke, so I thought, same problem, just different fluid leaking through the head gasket. I blame the head all along, and have it checked by a machine shop for flatness, it seems fine. So the next 2 head gaskets Im still blaming the head, or the block deck.
I pulled the pistons today but didnt look them over closely since it was cold as ***** outside, and I had to go somewhere. Well sitting here thinking about the machine shop this week, I decide to go look the pistons over. Now note that I had the machine shop that checked my head over for flatness tell me that Mazda back in the day had tons of recalls for **** oil control rings, and they felt this was my problem. They would collapse and cause massive oil burning issues. They had tons of people come through for head rebuilds, and they made them sign papers stating that they didnt think the head machine work would fix their issues. It didnt. SO, what do I find just now. All 4 pistons have the oil control rings stuck in their grooves, completely flush with the pistons outer edge. So of course they arent going to control oil when they arent pushing against the walls at all.
Has anyone else ever seen this, and do you think this is my issue? So far, as far as I could tell the other times, the block was no more than .002 out of flatness, and the block was freshly machined. Or could this even cause enough oil loss to cause a rough idle and an engine that wants to die with any kind of load. It spits and sputters under accel, and leaves smoke, more at rest, reving with no load, and a light smoke under load. I kept coming up with excuses and ideas that didnt fully make sense, but I couldnt accept that the oil control rings all suddenly froze up at once, after sitting for a month or two, never being touched. This would explain coolant burning the first time, also probably some oil, (from the staple) and oil the rest of the times.
You can see what I speak of at the top of post #12. I took pictures but didnt even notice, I was in a rush out the door.
So? What say you?
PS, yes I realise oil control rings dont spring out as much as the compression rings, but these are completely stuck, with only maybe .010 between the ends. I cant push them in, nor make them push out of the grooves. Guess they will have to be forced out.
Reply
0
0
12-26-2008, 03:29 AM
#16
Elite Member
Thread Starter
iTrader: (1)
Join Date: Feb 2008
Location: Birmingham Alabama
Posts: 7,930
Total Cats: 45
Oil pan drilled, ordered a 3/8'' NPT bung, I couldnt make myself do it any other way. Drilling and tapping just doesnt assure me enough to fully trust it holding. Its going to be plugged for now of course. Also went ahead and ordered 8AN fittings and 3' of hose, as well as a 45* NTP to 8AN adaptor. Do you guys think 3' will be enough. I cant see how I would need more than that as even a straight shot from oil drain on the turbo, to the oil pan bung is only about 18''. I might have to snake it around the a/c bracket a bit, but that couldnt be much.
Got the block back from the shop a few days ago, and its now sitting in my floor waiting for places to open up again after christmas so I can go swap in my broken torque wrench, and go purchase some new tools. My feeler gauges are rusty, hone is junk, and my micrometers are lost, and werent worth a **** to start with. So maybe the block will be assembled starting Sunday. The head still needs to be stripped down again, tanked to remove the oil sludge from the ports (not really needed, but Im a very OCD and ---- person when it comes to little **** like that), then might have it machined once again since the mating surface has a few minor gouges from setting it on objects. Also probably not required, but Ive come this far and Im not cheaping out now. Plus the shop is a block away from my work, so why not. I also have to get the shop to get the allignment dowel out of the head. Its pushed all the way into the bore, and I have no idea how to get it out. I will let them mess with it.
Are allignment dowels something most Mazda dealerships carry in stock, or can get? Id guess so, since the BP is such a popular engine. The one from the block got all messed up when they pulled it out, cause it was really stuck.
Just updating progress, if not only for my own record. Plus Im bored, thank god Christmas is over, back to business as usual.
Reply
0
0
12-27-2008, 11:19 PM
#17
Elite Member
Thread Starter
iTrader: (1)
Join Date: Feb 2008
Location: Birmingham Alabama
Posts: 7,930
Total Cats: 45
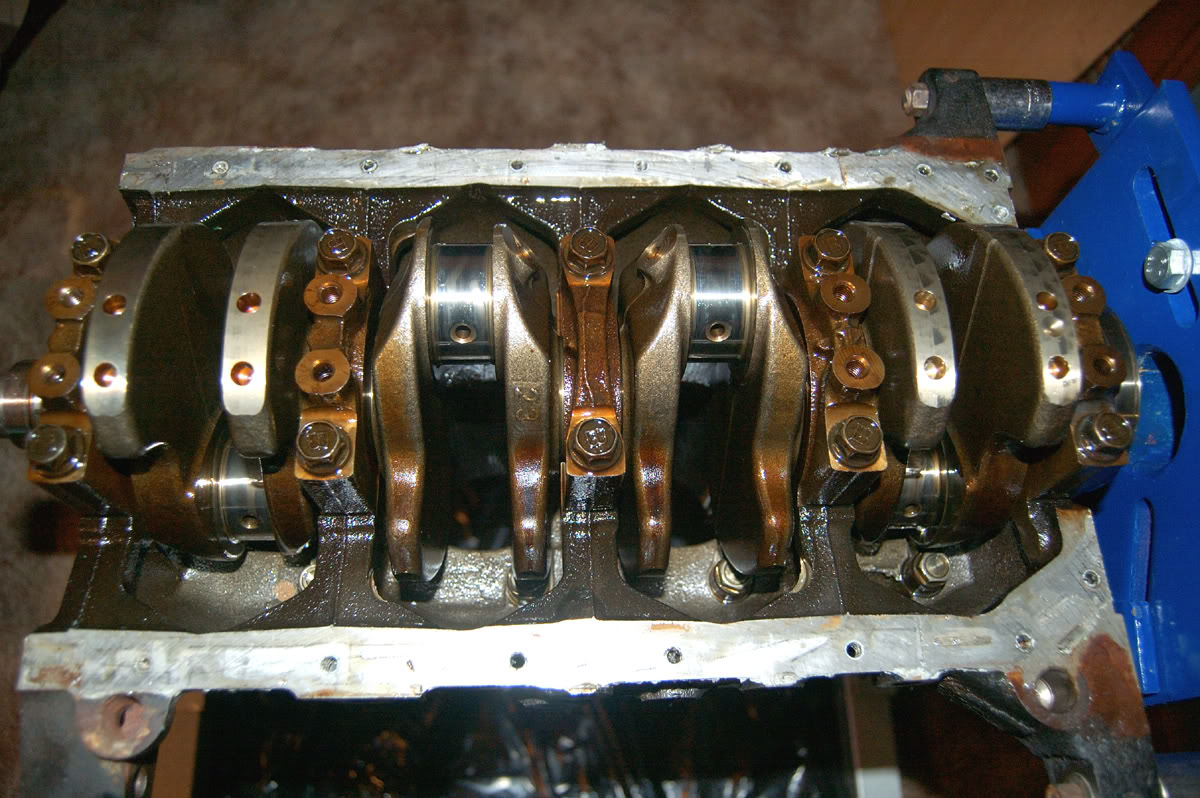
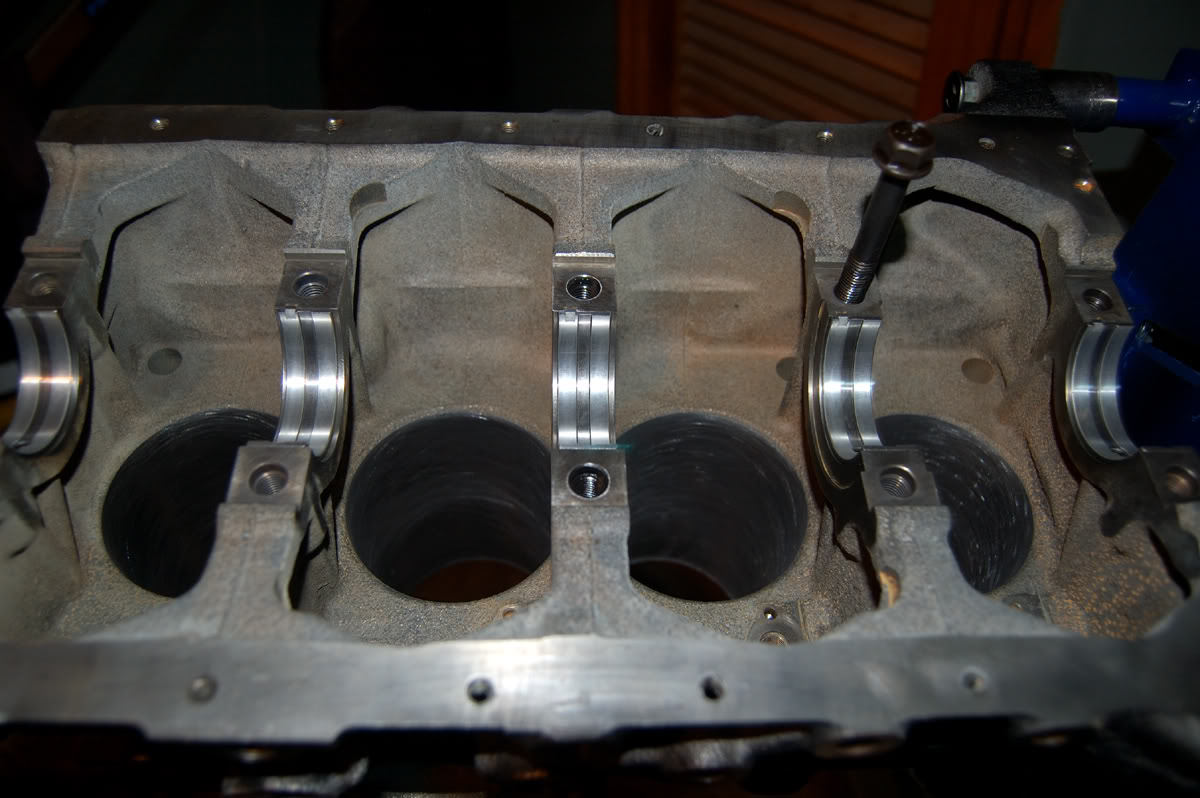
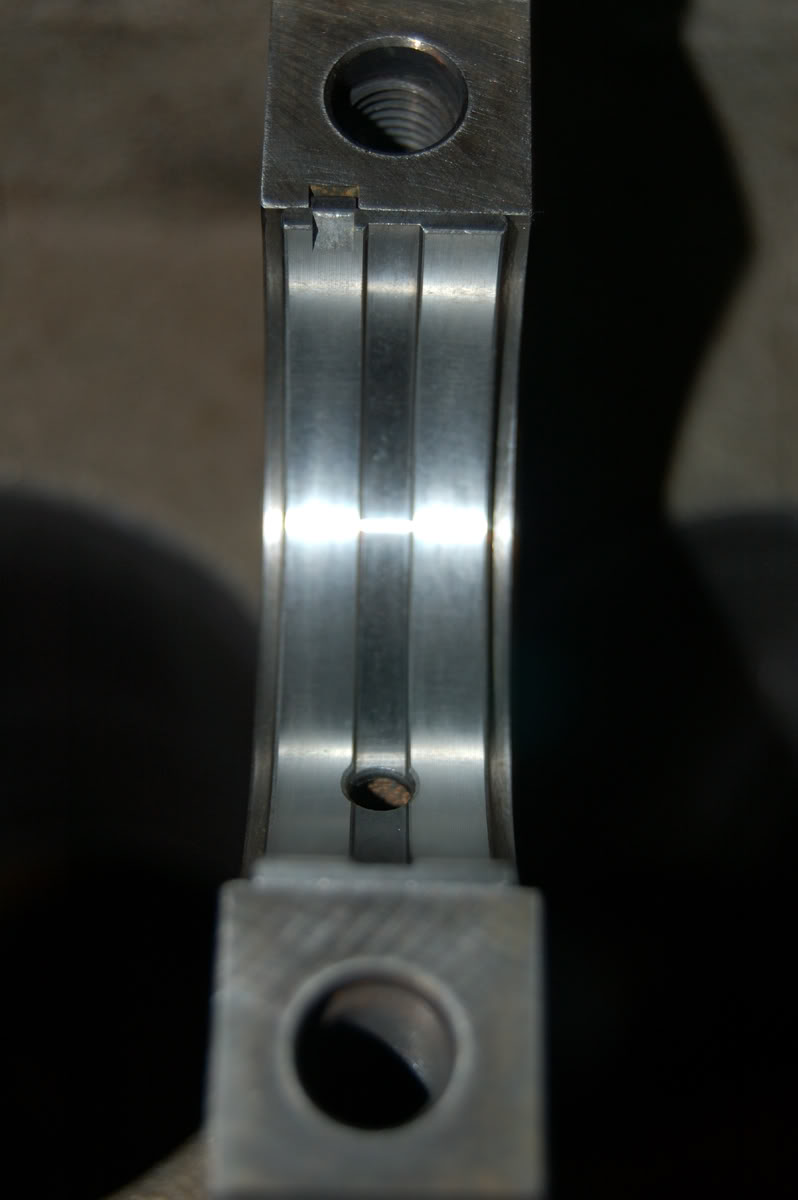
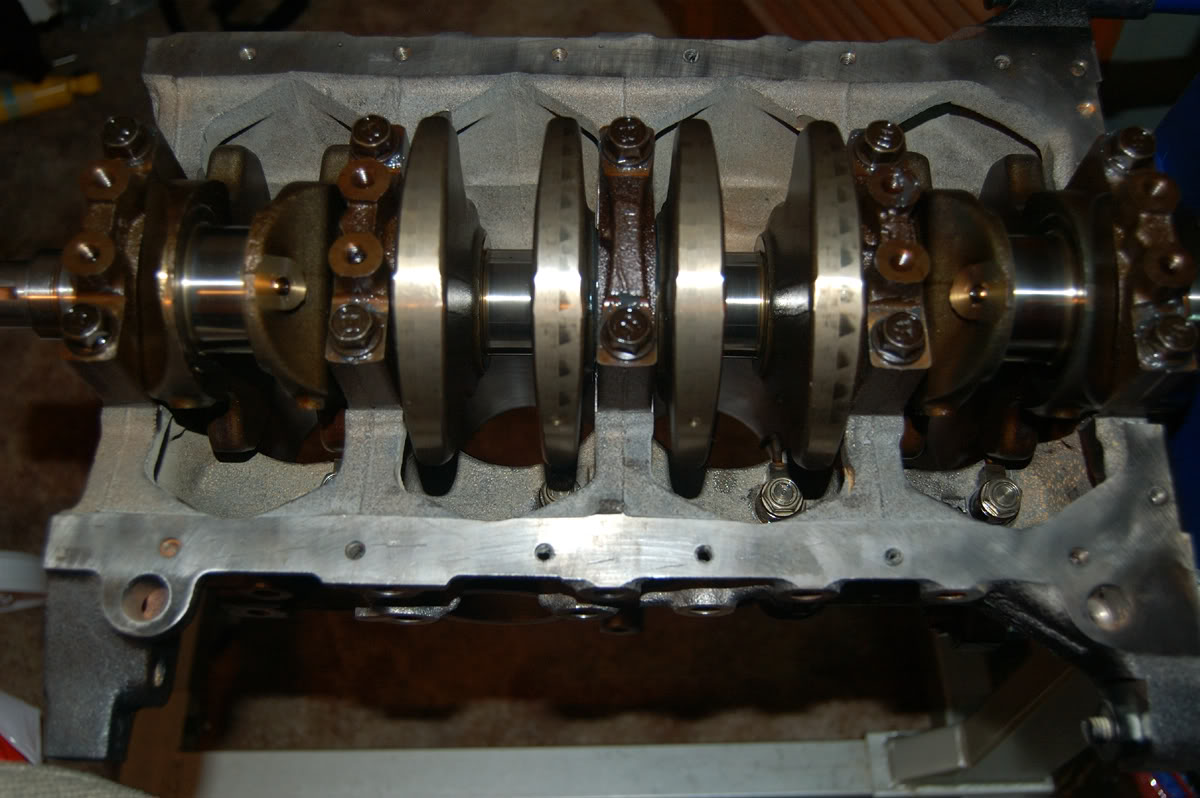
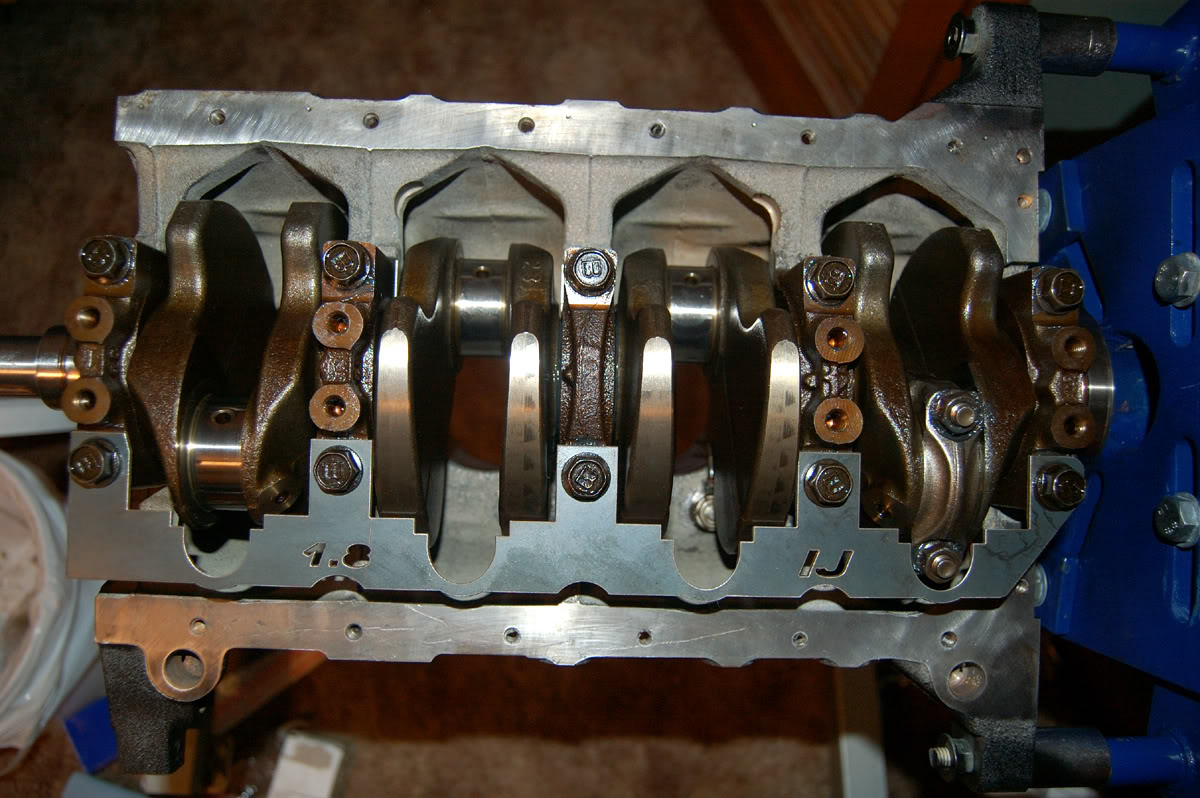
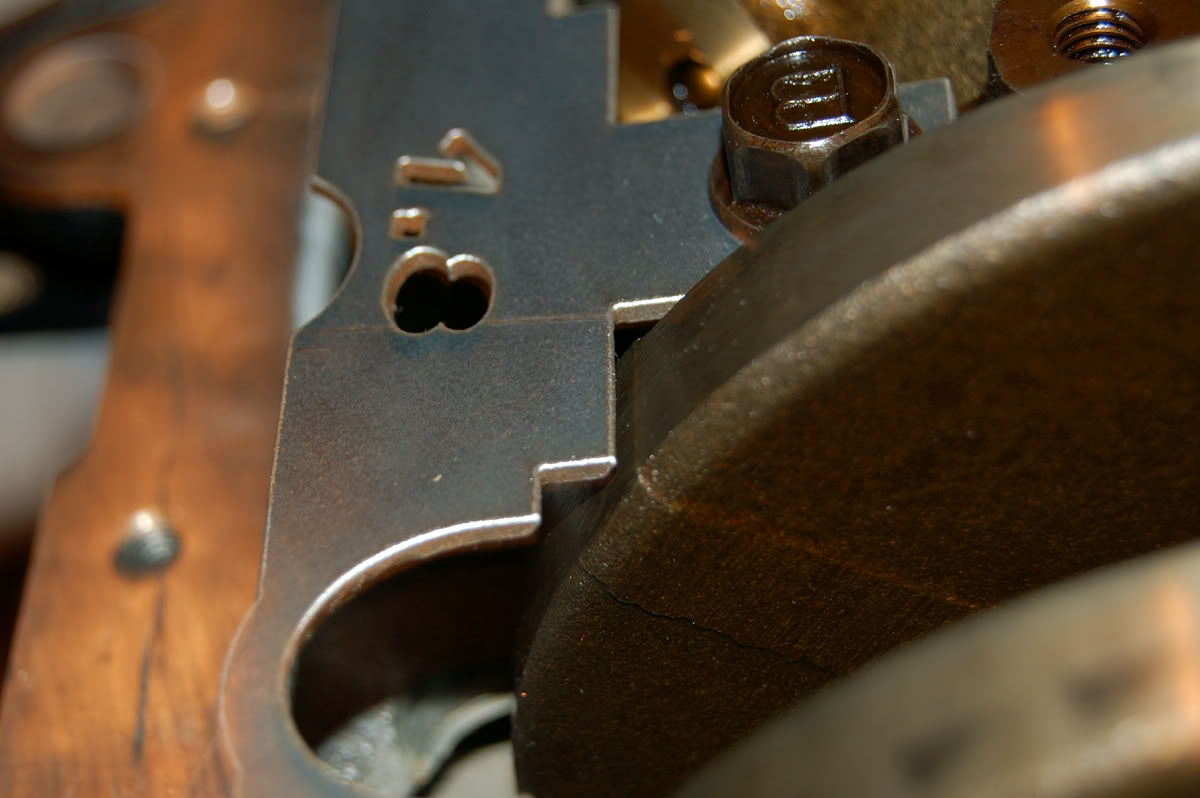
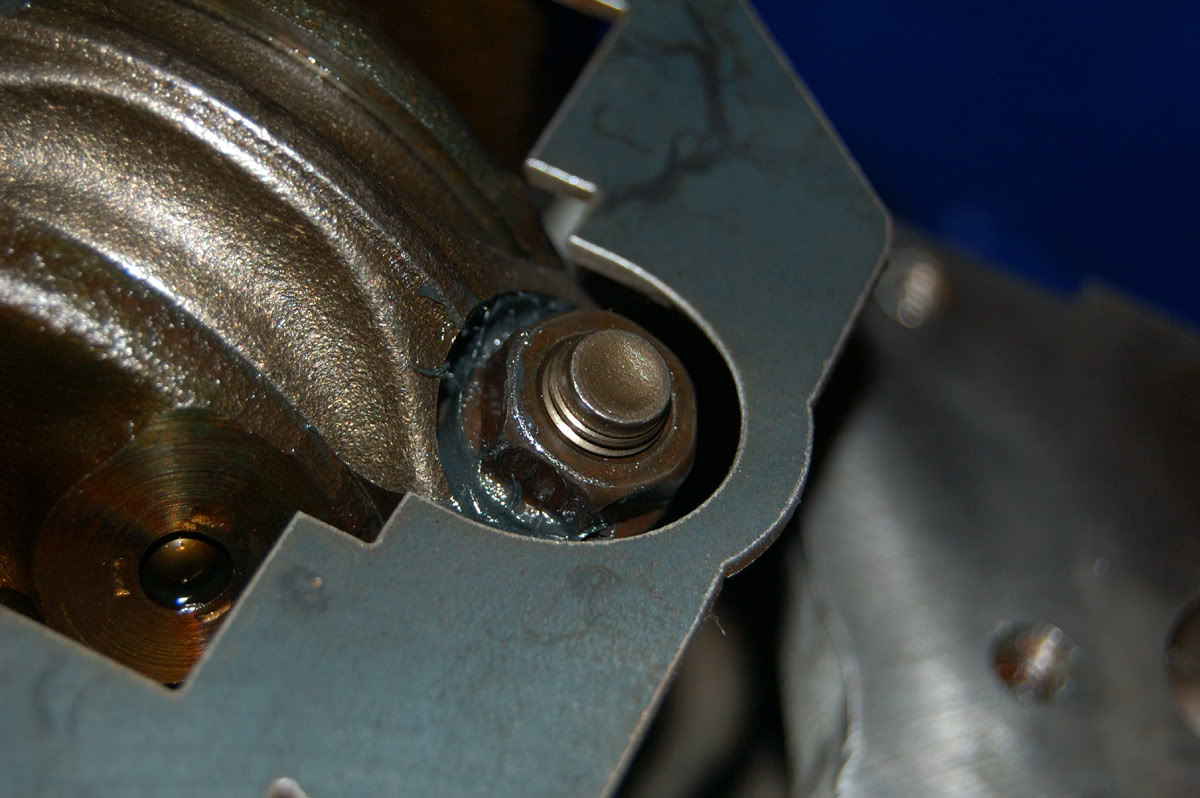
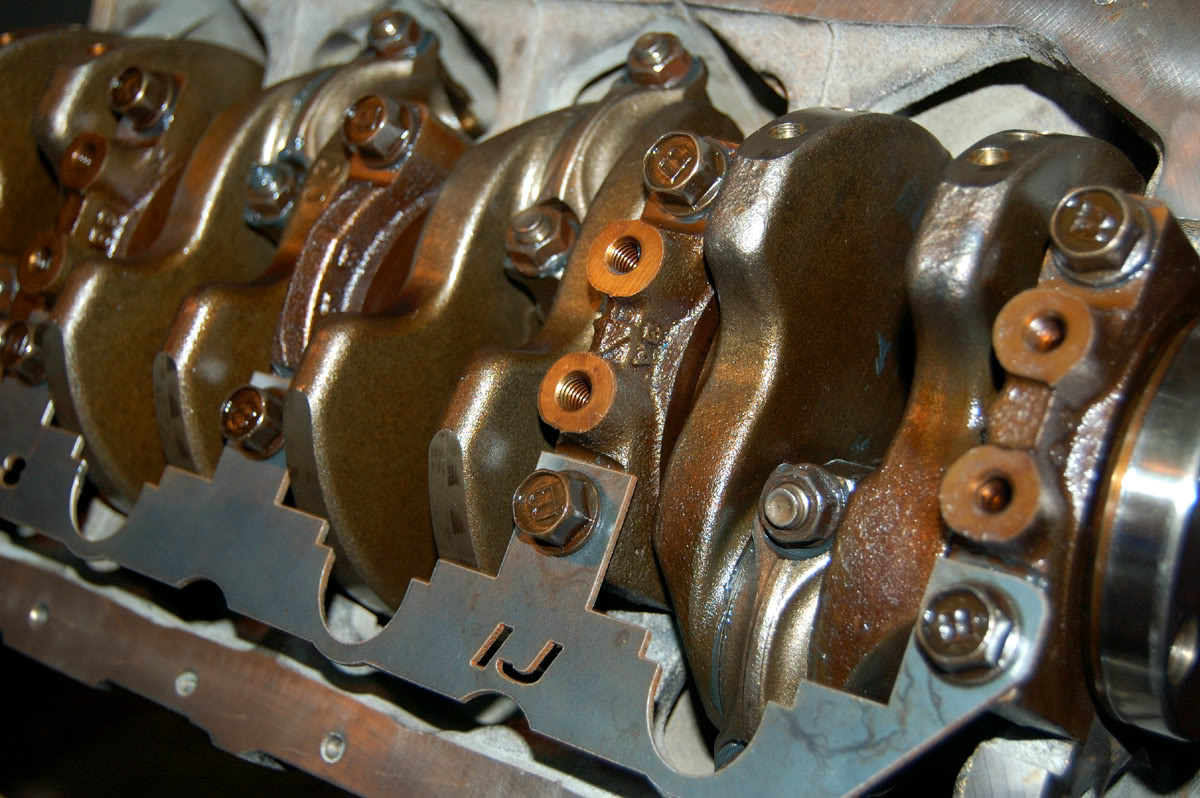
Crank and squirters back in. Tolerances are a bit loose for my liking, but they will work. Endplay was ~.008, service limit is .012, standard is .0032-.0111, so good. Bearing clearance was a bit loose for my liking also, but still within service limit. Standard is .0007-.0014, mine was about .00175, so over, but service limit is .004, so still well within limits. So far so good. Going to install one piston/rod tonight, others arent cleaned yet. Ring clearances are good it seems. I havent checked since the final hone yet though, but I would imagine still fine.
EDIT:
Oops, forgot the crank scraper. Had to undo all of the bearing main bolts and install the scraper, then torque them again. Happy to announce the I-J scraper fit perfectly the first time with great clearances. I-J say .030-.060 on most applications, but some dare to run it as low as .010, mine have no surfaces closer than .025 and none further than .032. So right at a good level. No contact as you can see. I can see how this will help with getting slinging oil off the counterweights.
Lookin' good!
Last edited by NA6C-Guy; 12-28-2008 at 01:26 AM.
Reply
0
0
12-28-2008, 01:32 PM
#18
Tour de Franzia
iTrader: (6)
Join Date: Jun 2006
Location: Republic of Dallas
Posts: 29,085
Total Cats: 375
shoulda radiuses those oil galley holes. Nice crank scraper. I hate looking at builds and seeing **** i should have done to mine, rendering my motor an inferior boat anchor.
Reply
0
0
12-28-2008, 03:14 PM
#19
Elite Member
Thread Starter
iTrader: (1)
Join Date: Feb 2008
Location: Birmingham Alabama
Posts: 7,930
Total Cats: 45
We will see whos engine is a boat anchor once (if) mine starts and runs well. Maybe it will grenade after 10k miles, who knows. I figured I would go with the crank scraper since it was only a $60 part and if it didnt do anything but look fancy, oh well.
Reply
0
0
12-28-2008, 10:11 PM
#20
Elite Member
Thread Starter
iTrader: (1)
Join Date: Feb 2008
Location: Birmingham Alabama
Posts: 7,930
Total Cats: 45
 Rotating assembly done, I think... I hope... All thats left to do down there is have the 3/8'' NPT bung welded into the pan, which I dont trust myself enough to do, on aluminum at least. Then put the front pumps on, windage tray and pickup, then bolt the pan back on and hopefully by then I will have the head apart and back together, so I can bolt it on and then bolt the trans back on and put it back in. Might be done soon enough to start to drop it back in by Saturday, but Im not going to rush it. Ive waited 4 months, another week or two wont hurt.
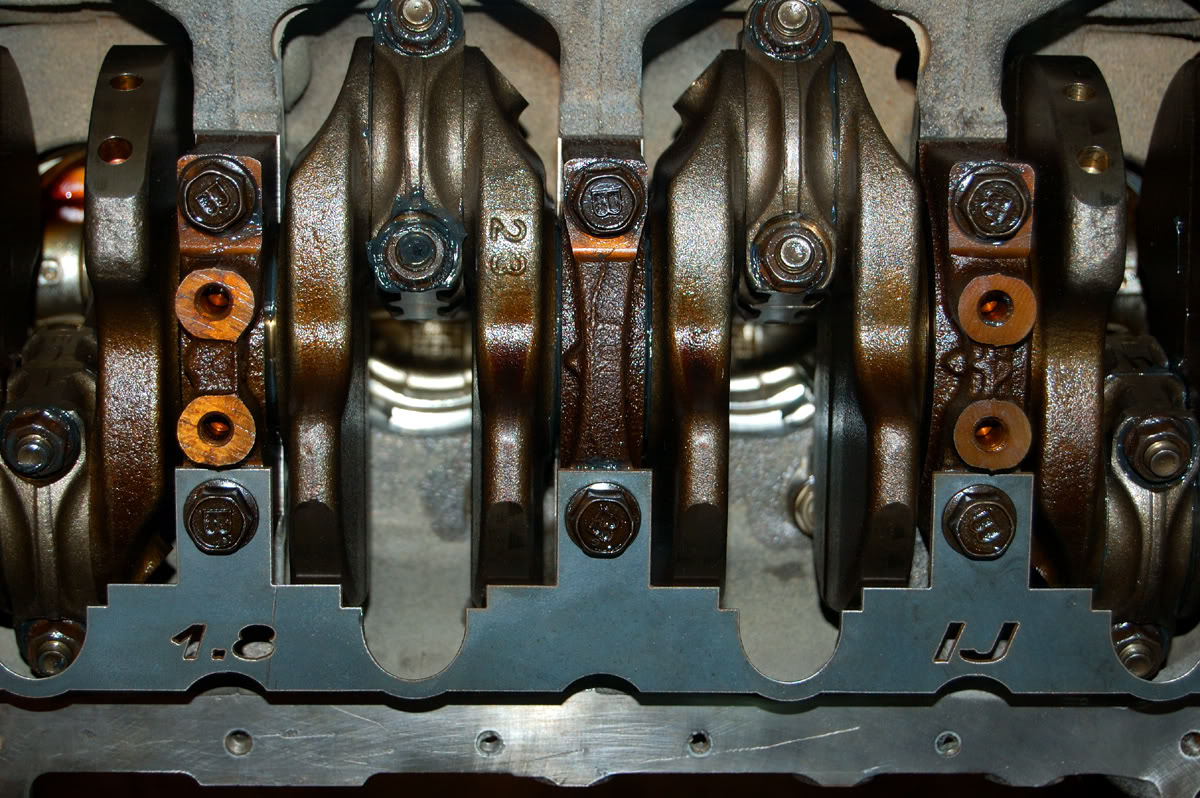
Also, I never had anyone comment on my findings with the oil control rings. Ive never had a car with oil rings stuck, what kind of problems would this cause? I can see excessive oil consumption, but would it really be enough oil to cuase some of my issues from before? All 4 stuck firmly in groove. Ive had a few people from machine shops tell me that was my problem, and others and myself say that while it would be a problem, it still doesnt explain everything. I never found any other proof though, so that is really the only evidence I have that anything was wrong. I still swear up and down it was the head gasket/block deck/head, but I have yet to find any real proof, except for the first time with the staple in the head gasket.
One more question/comment. Am I right in assuming (from what I saw) the only oil drainage our pistons have from the oil control rings is the 4 dimples which look as if they let oil drain behind the lower oil ring into the area around the wrist pins? Im guessing thats how they work. I had to go back and look at some pictures because suddenly it popped into my head how oil got around the rings, since I didnt recall seeing any actual holes. I see now though, if thats how they actually work, and mine werent just completely plugged with junk that I couldnt poke out with a pick.
Last edited by NA6C-Guy; 12-28-2008 at 10:39 PM.
Reply
0
0


