DIY 1.8 Turbo kit install w/pics, parts lists, write up etc NB1
 05-26-2016, 03:42 AM
#1
Junior Member
Thread Starter
iTrader: (1)

Join Date: Feb 2011
Location: Minot, ND
Posts: 255
Total Cats: 21

*I DID NOT REALIZE I COULD STILL EDIT THIS THREAD! IT'S DEC 10, 2020 AS I'M TYPING THIS BUT I WILL BE MAKING SMALL LITTLE CHANGES TO THE POST THIS WEEK. ENJOY!*
GREETINGS!
- Intro and Parts list
- One last drive, drain fluids, remove intake & air box
- Remove Exhaust Manifold (and exhaust)
- Oil feed & return
- Install Turbo Manifold and Turbo!
- Intercooler install and pipe routing
- Clutch Install and Rear Main seal
- Injectors
- Vacuum lines, IAT, Gauges
- Megasquirt
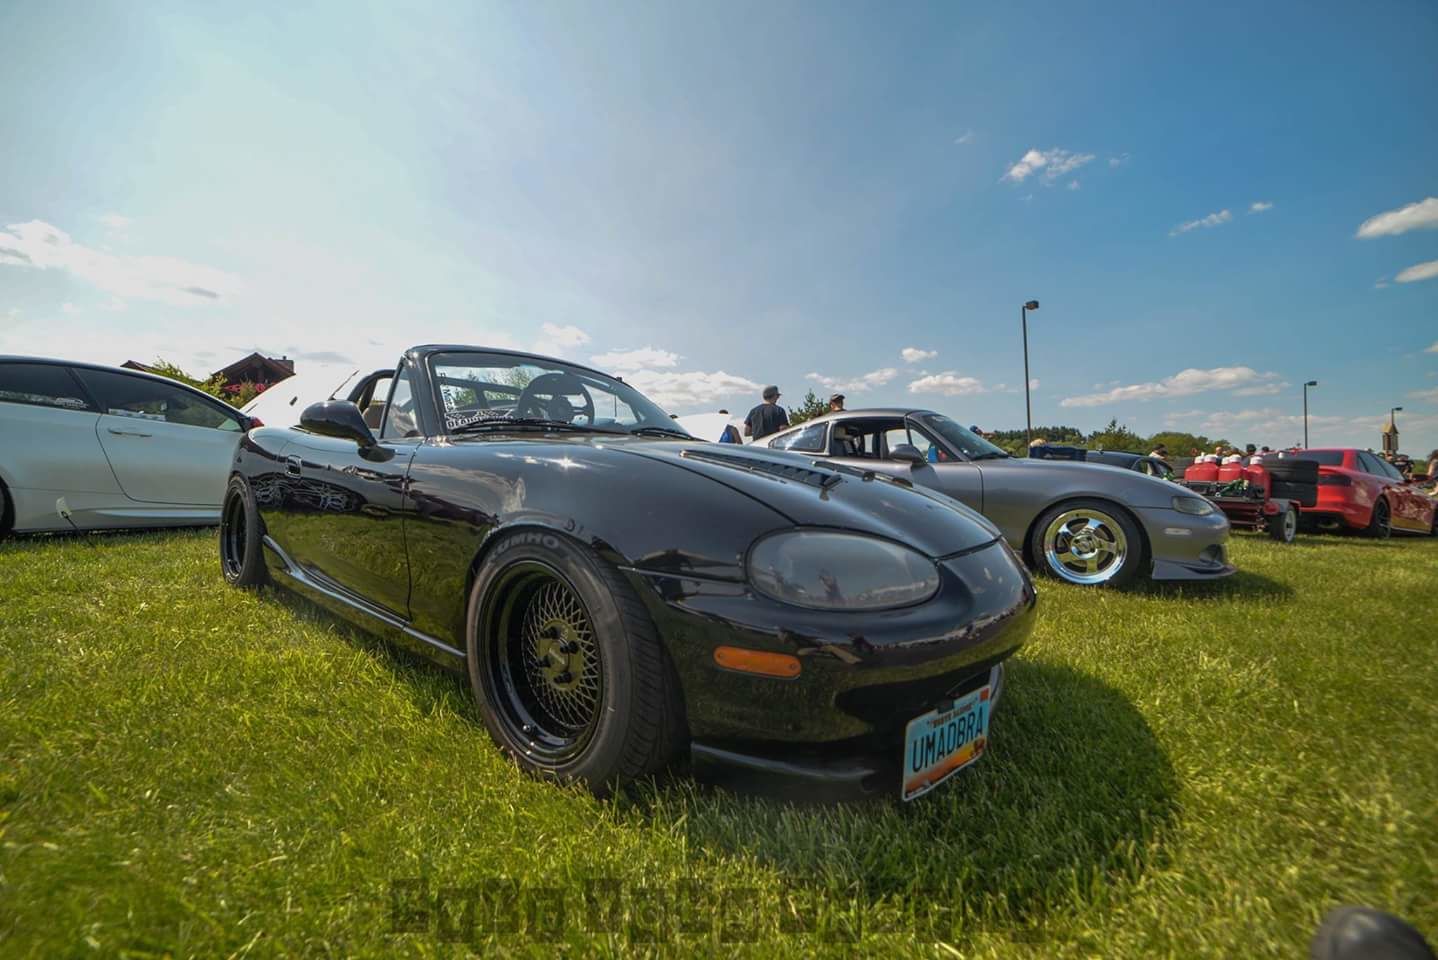
PART ONE----- I have once again boosted my Miata. (I have replaced my original setup I made in 2011). I wanted to recreate a thread for the purpose of helping others. Now when it comes down to adding a turbo to your Miata, also take into account other parts you could be replacing while you're "under" there (FOR EXAMPLE: Brakes, Clutch, Fluids, Cooling, Mounts/ bushings etc)
With that said, let's get to a general parts list.
Prices and options will be around cost before/after shipping. Give or take a few dollars here and there.
No specific order of importance here:
*Huge edit: Kraken sells a cast manifold, with turbo elbow/downpipe and full exhaust for a reasonable price. Search for their kit online
*Fab9tuning also offers a nice manifold but again, I'm aiming for budget turbo build here
- Flying Miata cast Manifold $400 (or something close in quality)
- Flying Miata level 1 Clutch kit $350 + shipping
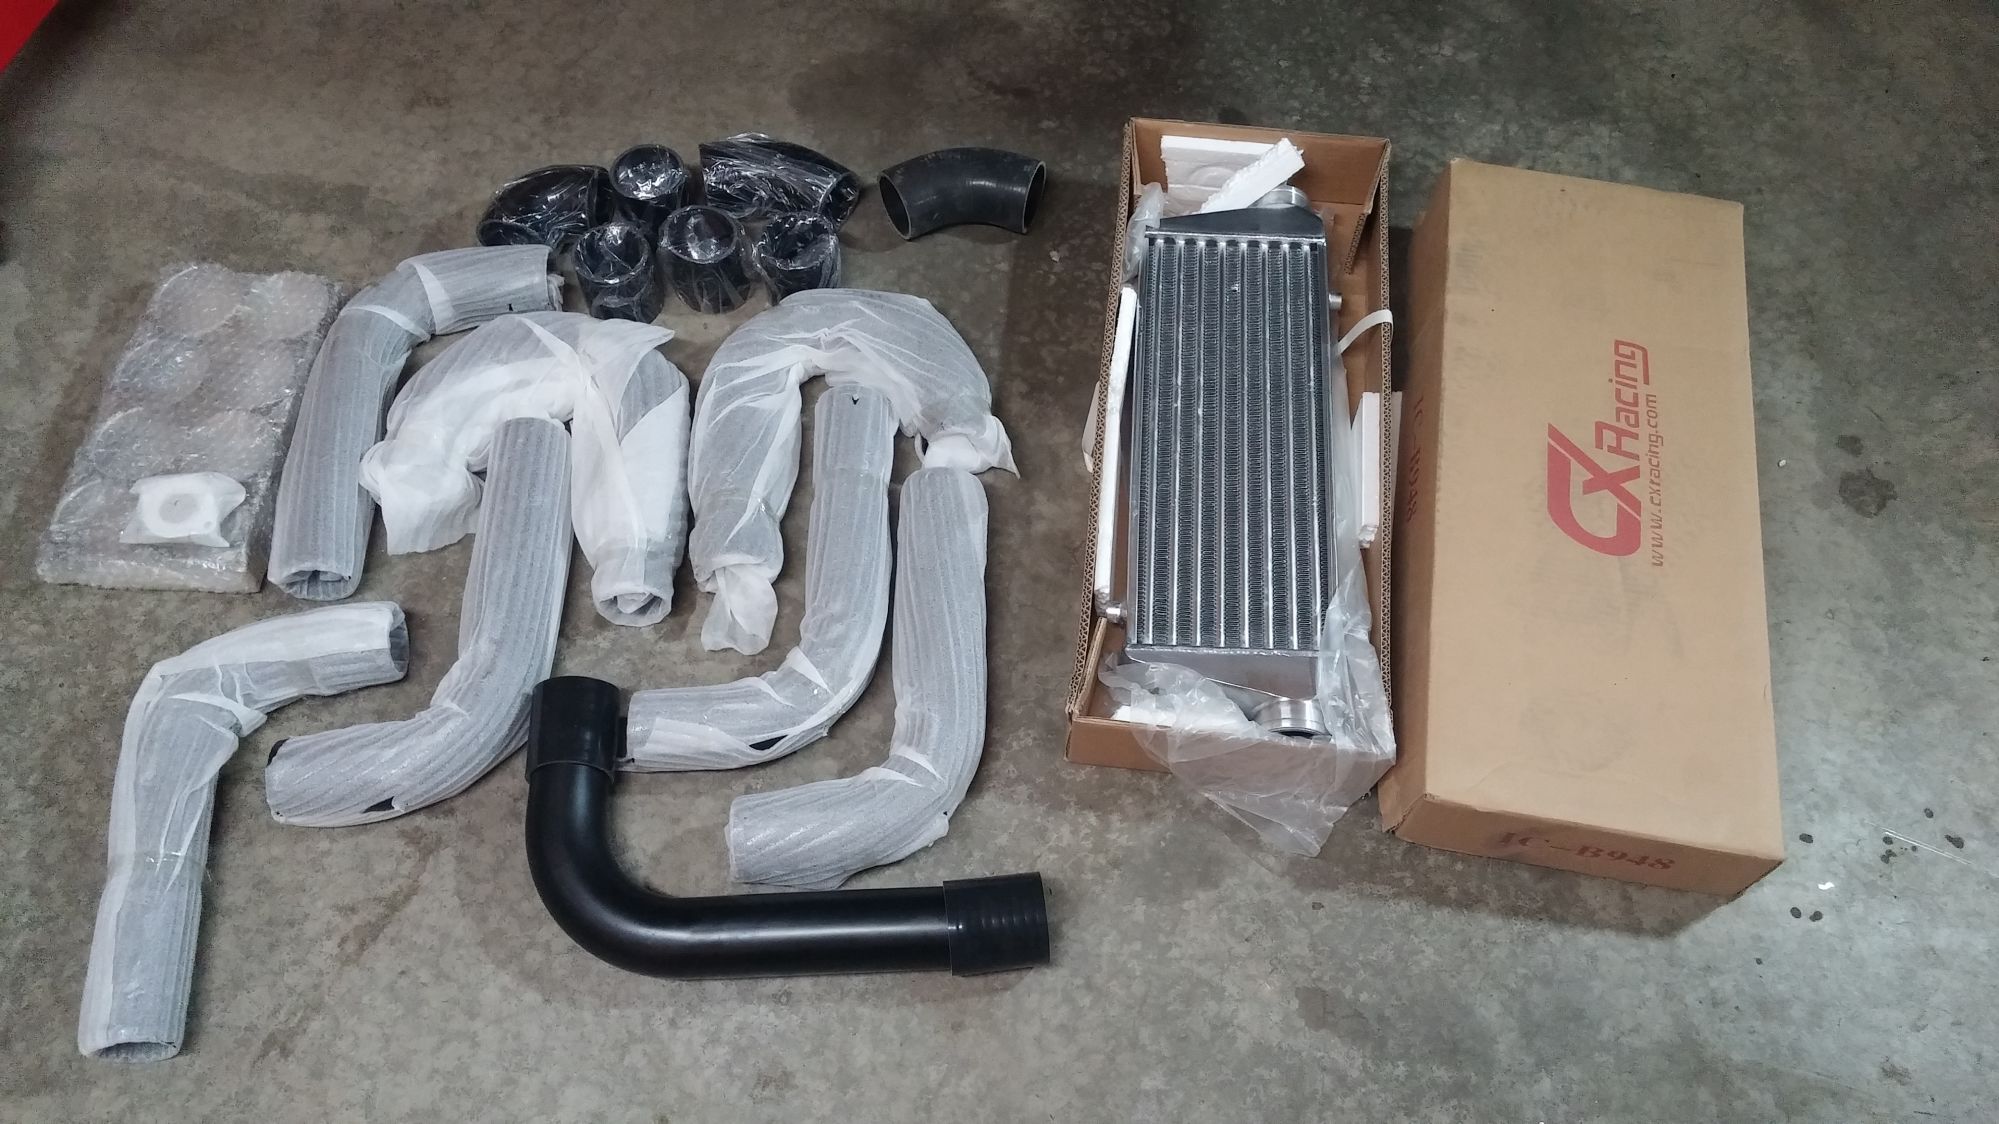
- CXracing intercooler and piping $200 (smallish intercooler and their universal piping kit- be sure to get one that has J's L's and U's etc. You will not need any straight only pieces)
- NGR type S Blow off valve $165 (excellent piece, I love the sound and it's very responsive/uses Greddy style flange)
- Turbos will range from $200 to $1200 or more depending on what route you want to go. I'm running a small t3 Air Research from a Saab that I rebuilt. You can find good deals on slightly used name brand turbos. Please do your research before jumping on one.
-Oil feed tee. The PROPER one is $26 OR oil filter sandwich plate $35
-Oil feed line w/ fittings : anywhere between $30-80 depending
-Oil return line : hose barb and heater hose; cheapo route $15
-LC1 or AEM wideband $170 - $250
-RX8 Denso 425cc plug and play injectors: used $100-200 OR FIC/other similar brands are $300-$500 new
-Flyin Miata boost gauge $70
-Megasquirt 3 ECU built by "......" or bought used $600-800( can purchase new from DIY Autotune or get with completely different ECU altogether but expect to spend over $1,000 easy)
-A Pillar gauge pod from Flying Miata $50 (or vent install)
-Fuel Pump- around $100 or so
**Items and such not listed:
----downpipe: will vary depending on style of turbine housing. Please research and plan ahead for fab work if you're not going with a pre-fabbed kit.
----wastegate "things": Again, depending on the turbo you pick up, it may already include an internal gate mounted to the compressor housing or as with mine or similar, you can modify a bracket to bolt to the compressor housing and then connect the rod at the swing arm.
----having your blow off valve flange and IAT bung welded to your intercooler piping.
----Coolant reroute: I'm not going into detail about this but if you own a Miata, you know the benefit to performing this upgrade. Now would be a good time since the trans will be off and it'll help clean up room for your cold side piping to throttle body. Prices vary from diy, to vendors selling kits. Google is your friend here. I have not done this job yet sadly but one day I will.
----EGR block off plate. simple and easy if you choose to delete it. purchase your manifold according to the setup you plan to run. I have deleted my EGR.
So not including turbo and using rough numbers here, All these parts listed go for around $2800. Keep in mind you will find things used, or on sale. Plenty of money can be saved sourcing out some used deals. A popular choice for turbo is the t25 from a Nissan SR20Det motor. These can be found for $100 and rebuilding them is easy, there's even a video on youtube if you're up for it. I've ran a garrett t3 from a SVO mustang, a godspeed t3t4 super60, and now my current T3 Air research .48 AR hot side from an older Saab. I rebuilt this turbo with a G-POP shop kit and it is doing excellent. To each their own, we all just want more power right.
When it's all said and done, expect to spend around $3k easy for a solid diy kit with ecu, clutch etc. I know it can be done cheaper but that's just a number to put a safe figure on it.
Maintenance items:
-Oil and filter $40
-Fuel Filter $20
-gaskets: oil pan (if you go that far), exhaust manifold, rear main seal, intake plenum/ manifold $ can you put you around $50
-gear oil for trans. $20 a qt for ford motorcraft XT-M5-QS or buy some other good stuff. Need at least 2 quarts.
-differential fluid. I'm running lucas synthetic 75w90. Choose at your leisure
-brake pads and rotors: your car is going to be in the air, why not knock out replacing all your rotors and pads.
Step TWO------ Take your car for it's last ride in the N/A life, maybe even make some videos for some comparison afterwards.
Pull it into your garage, put it up on 4 stands, and have 4 pans/buckets ready to drain your coolant, motor oil, gear oil, and/or differential oil if needed.
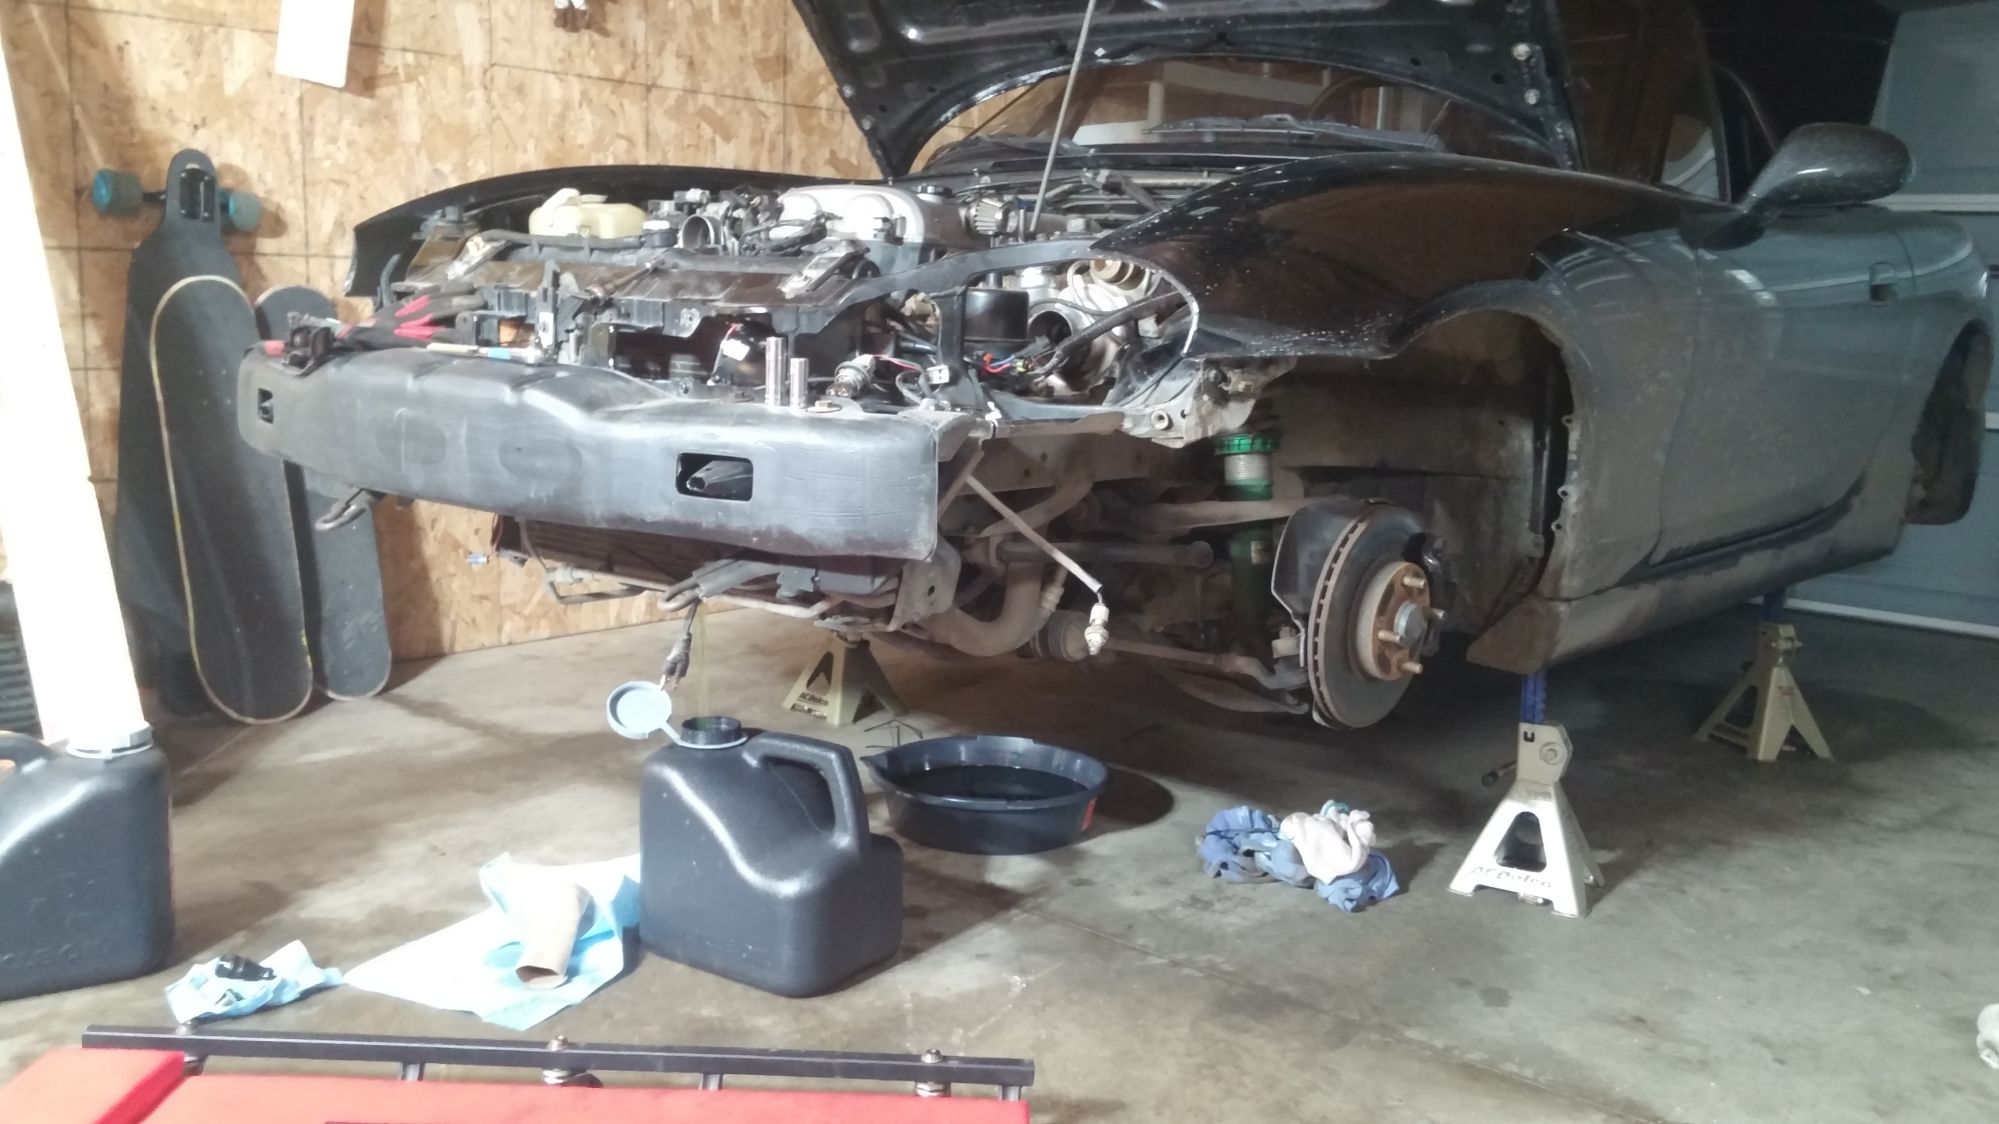
Now everything is drained, clean up your spills, put back in the plugs and let's proceed. (don't forget to fill everything you drained once that time comes)
*Let's make this clear one more time. I have a 2000 Mazda Miata, some things may be different for your Miata, and if you see me talking about megasquirt things but you are not going the megasquirt route, ignore it.
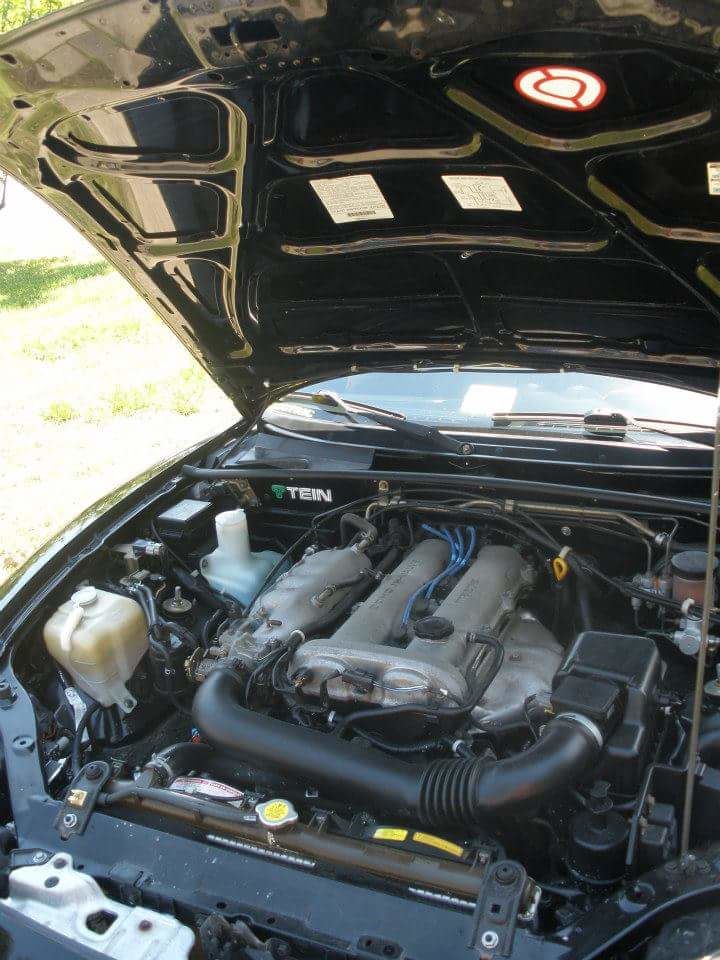
Get plenty of lighting available. Remove your airbox and intake tube, be careful with the AIT plug since you'll reuse that for megasquirt things.
STEP THREE-----The exhaust manifold, cat, and exhaust are simple enough. If you already have some sort of cat-back exhaust, then you're one step ahead of the game.
The EGR tube will be a pain but if you're deleting it, go ahead and remove the 2 bolts holding it in the back of the intake manifold.
Next let's tackle the tedious work: Oil return and feed.
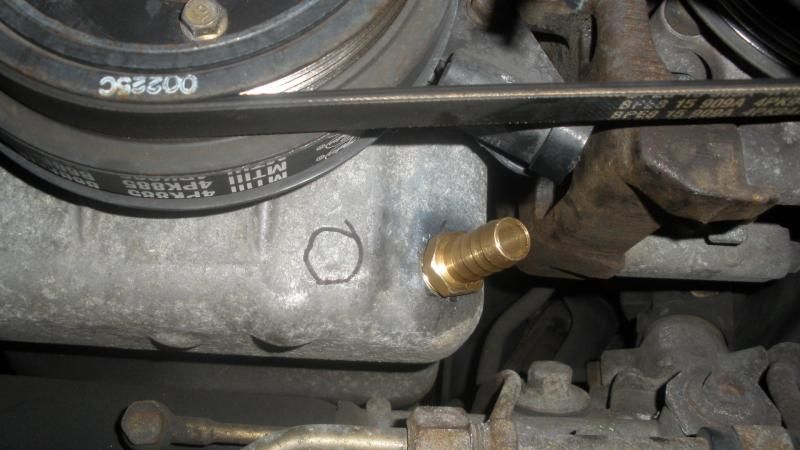
STEP FOUR-----OIL RETURN: Now I have tapped the pan with it in the car and out of the car. Even when I had my motor out of the car (this 2nd time around) I still tapped it with the pan on the motor. I did not want to deal with removing the pan
Here is what I picked up from Menards (similar to Home Depot or Lowes)
The cool thing with the drill bit is that you can carefully open it, use it, clean it, and return it for a refund. The sucker is about $40. Be sure to get this one as it steps up quick, the longer bits can hit your oil pick up tube and I don't need to explain why that is a bad deal.
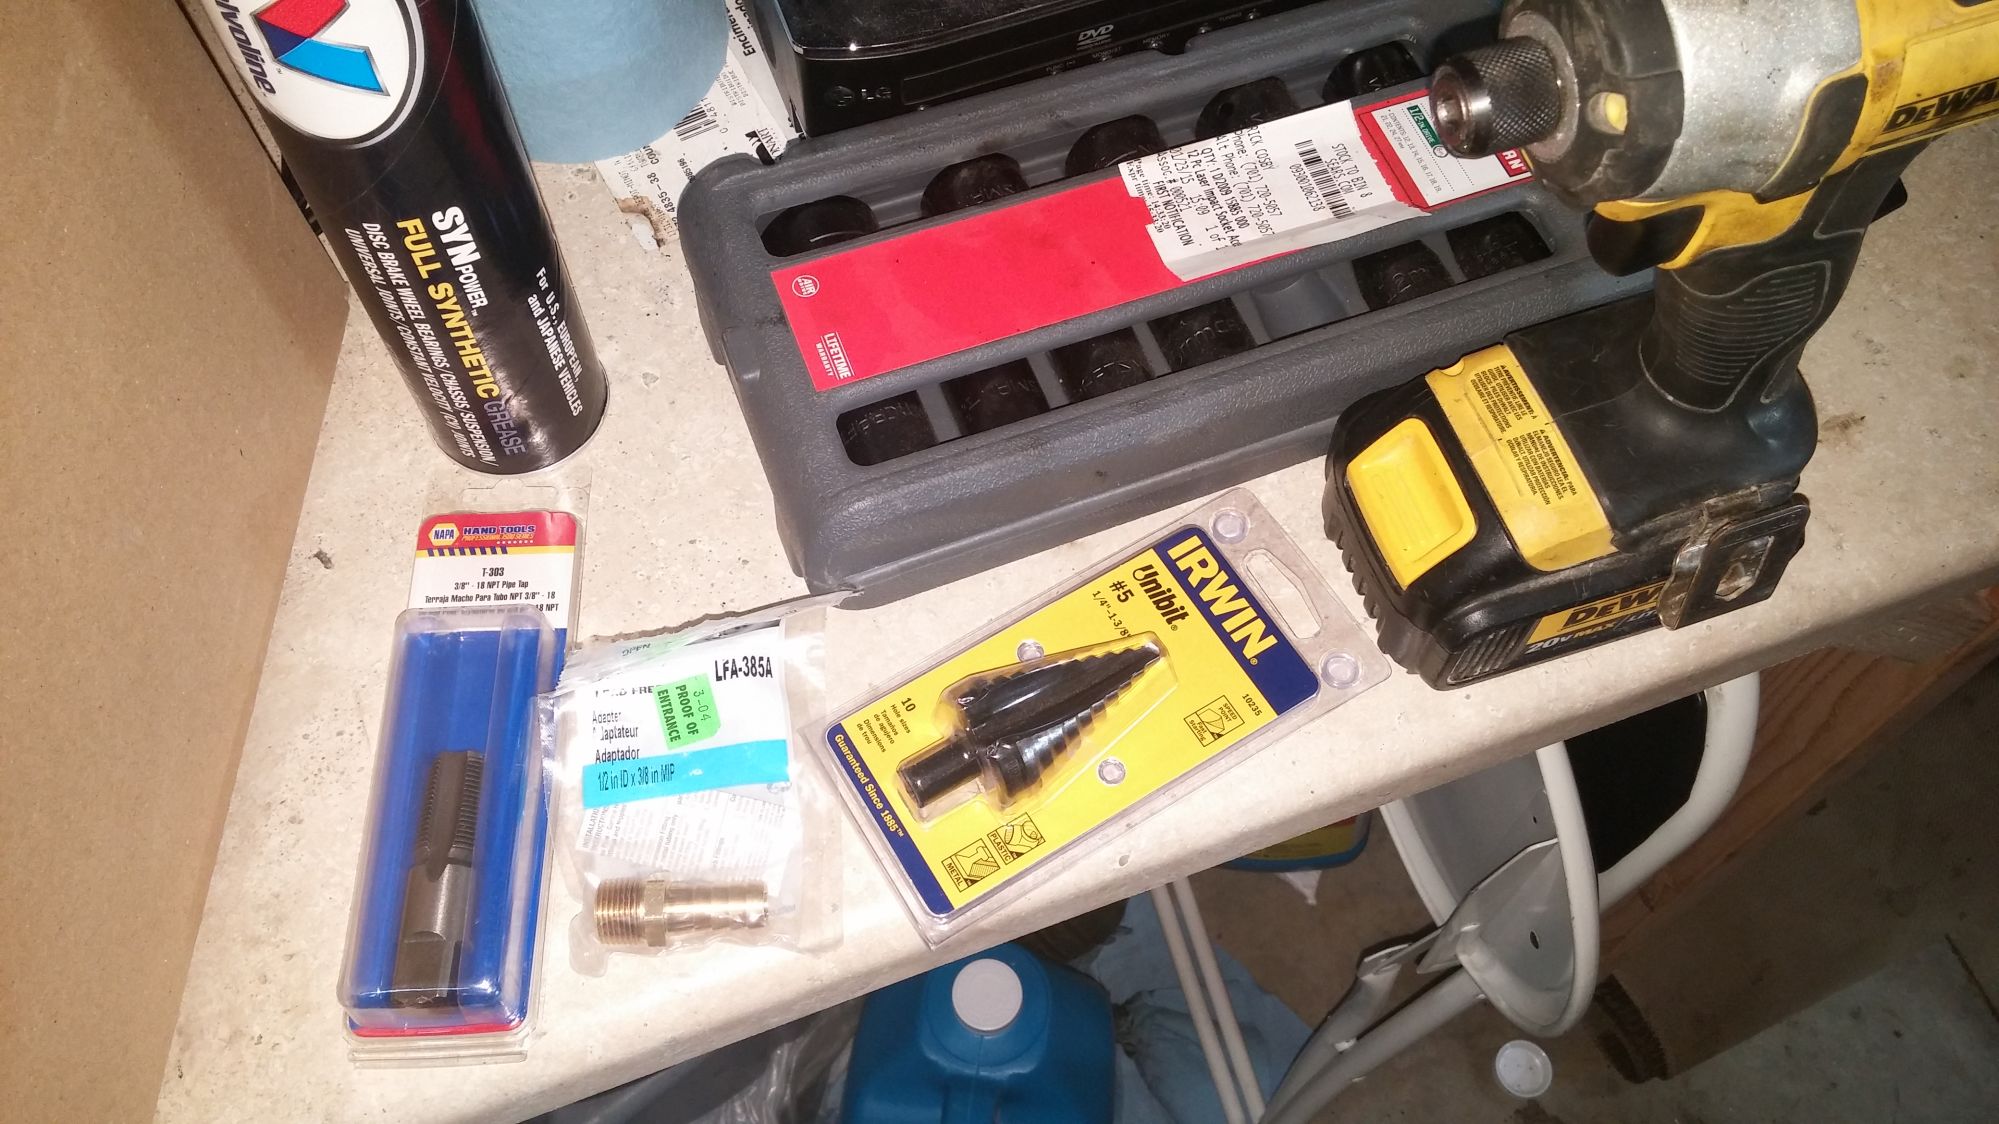
If you're keeping A/C, there is a spot right under the bracket that is suitable. On my old setup, I drilled into the corner of the pan; it was still functional but routing my drain line to it was a pain in the ***. I'm glad this 2nd time around I chose the under A/Cbracket spot. Look up Flyin' Miata's turbo kit install pdf if you want the measurements for proper placement.
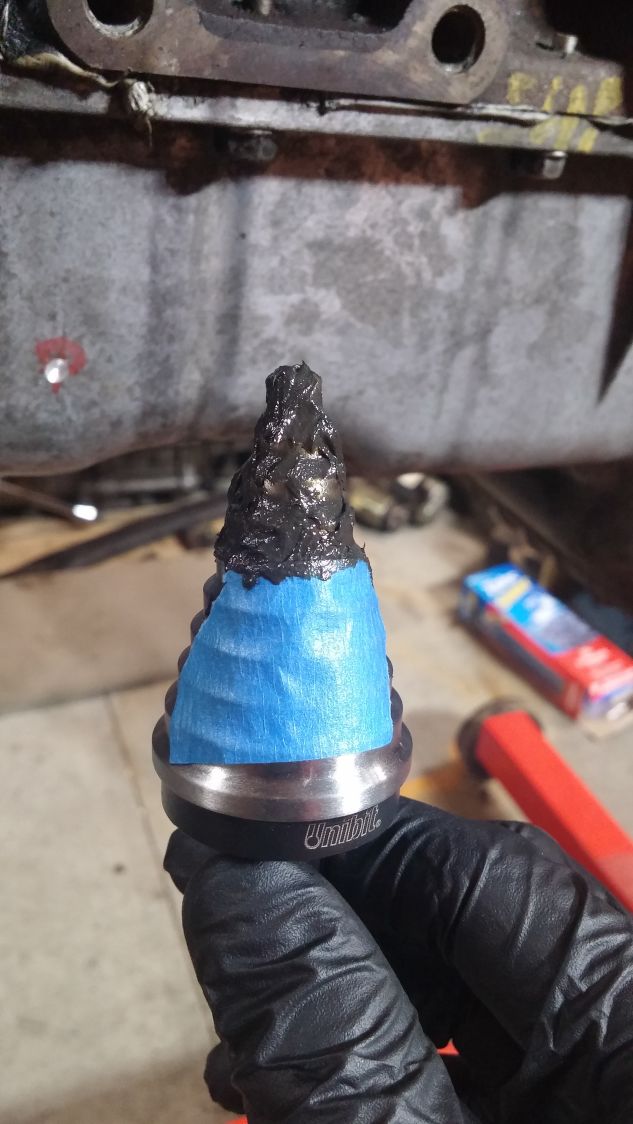
Keep your bit greased and press on. Clean it off time to time and reapply.
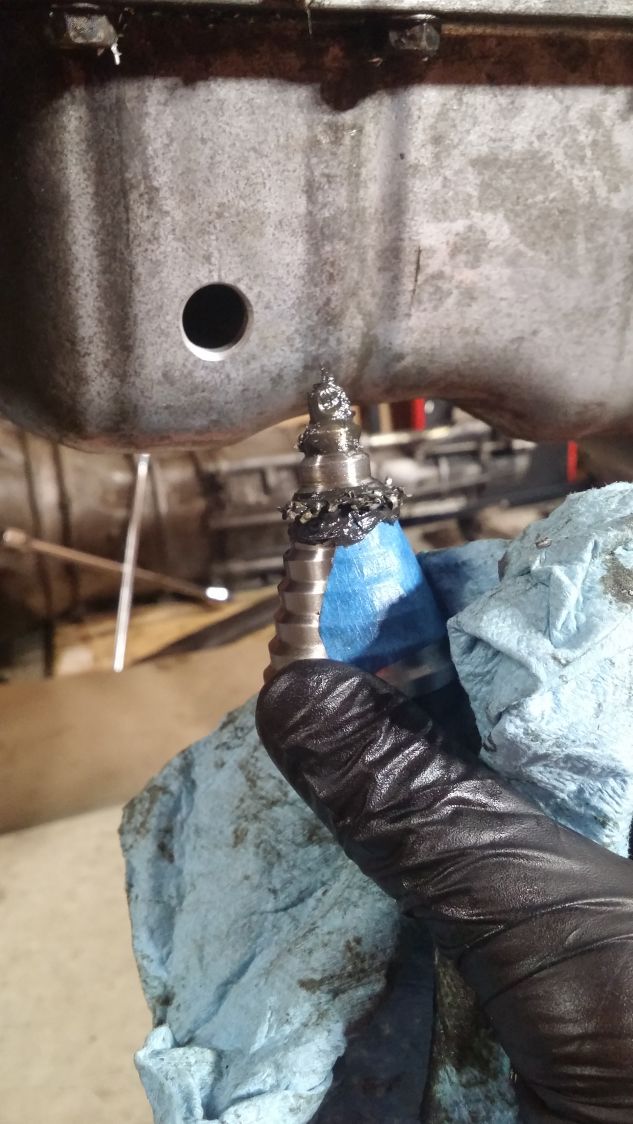
The bit is marked on the steps so you know when you've reached you're desired hole size. I kept a piece of painters tape on it so I could monitor how close I was to that size.
Now tap it and use your pinky to get all the filings you can out. The bit will catch most of them but there will still be some in the pan directly beneath the hole and inner edges.
-- You can also use the compressed air method, flush with mineral spirits method, or somewhere I've seen it where oil was just left in the motor so it would ooze out and push filings out once you punctured but I've been content with my procedure.
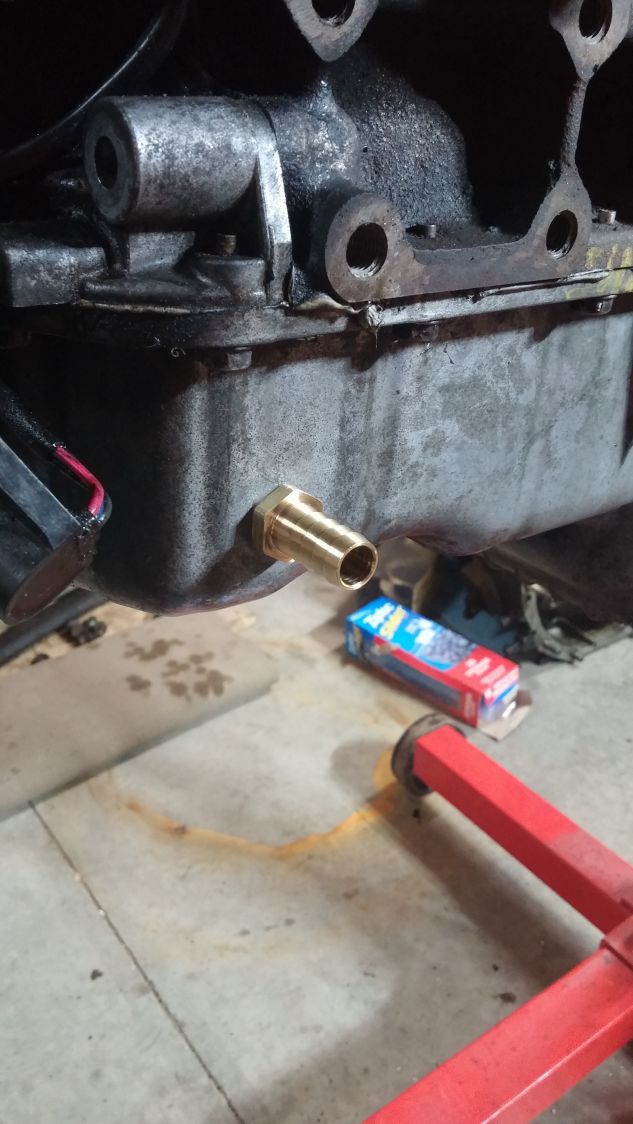
For the hose barb, I put just JB weld on the last bit of threads and threaded it in slowly. Never had issues doing this and now your oil return is functional.
The following 2 pics were done on the car on my original setup.
Last edited by sickmiatabra; 12-10-2020 at 09:21 AM. Reason: I have been wanting to edit this forever. Had no idea I was allowed to still.

Reply
 2
2

2
05-26-2016, 03:53 AM
#2
Junior Member
Thread Starter
iTrader: (1)
Join Date: Feb 2011
Location: Minot, ND
Posts: 255
Total Cats: 21
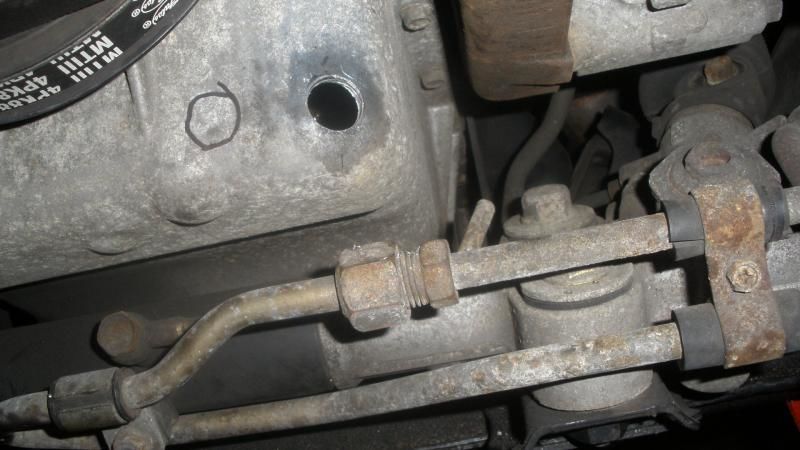
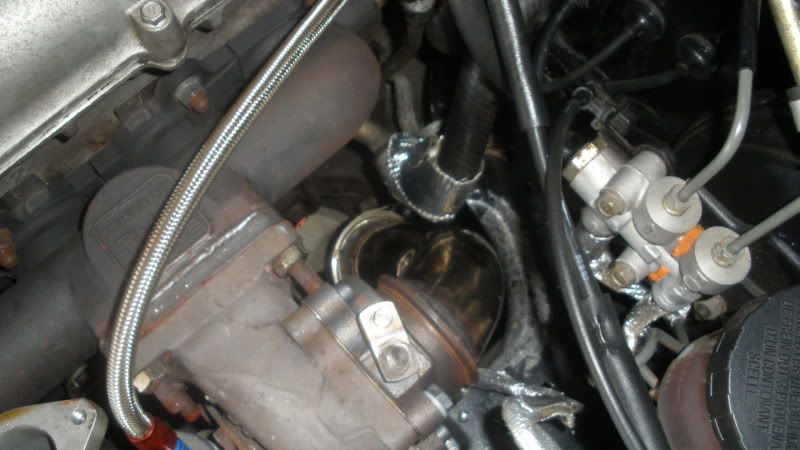
Oil Feed: Here's another "I've done both" scenarios. You can go with the oil filter sandwich plate, install is a BREEZE, just be sure to keep the holes facing to the rear when tightening the nut. Pics may explain. With the sandwich plate, some taller oil filters will not fit unless you remove the brace.
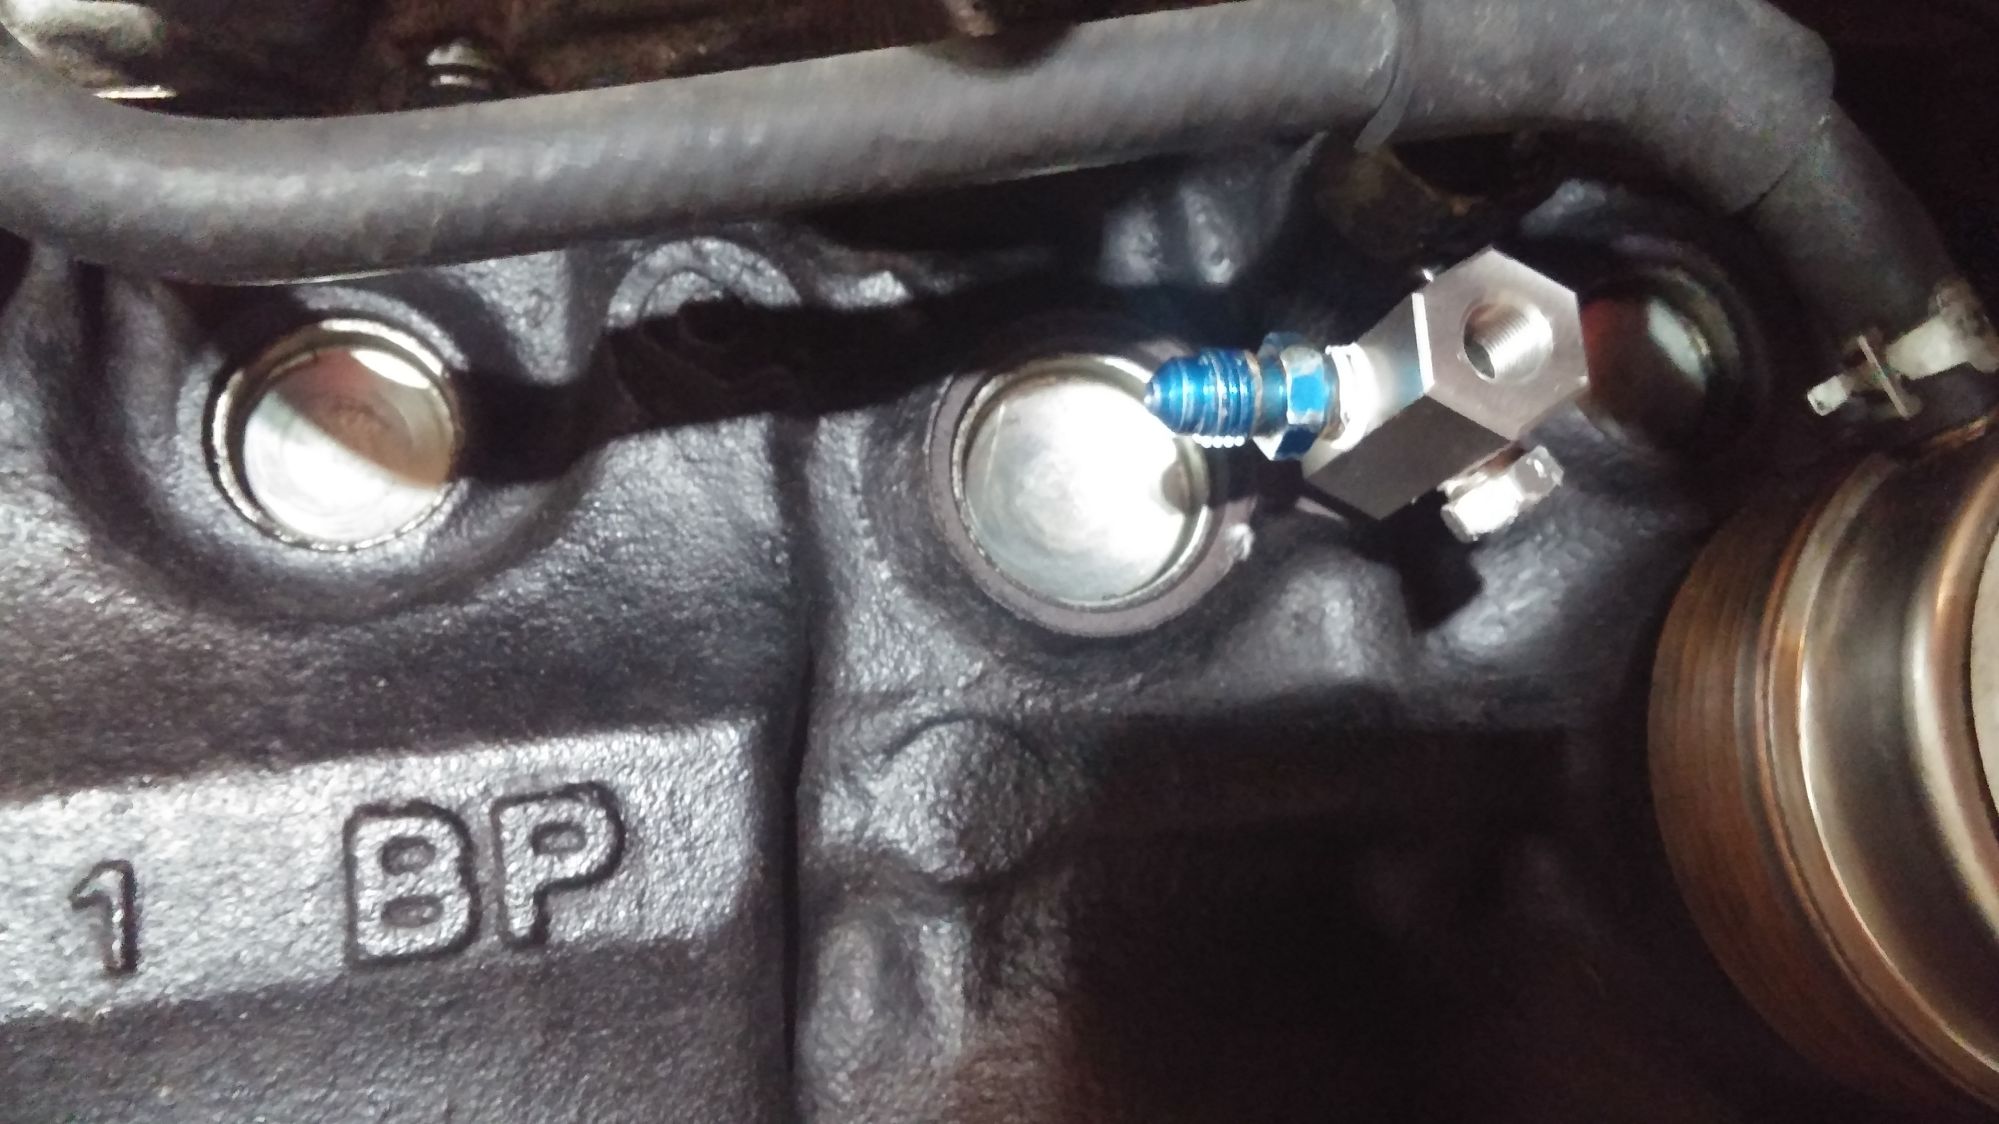
Proper Oil feed tee.
The male thread for this tee is 1/8" BSPT (same as oil pressure sending unit). You have the option of one or two ports for the tee from the site. I chose 2 ports in hopes one would face to the rear of block when tight.
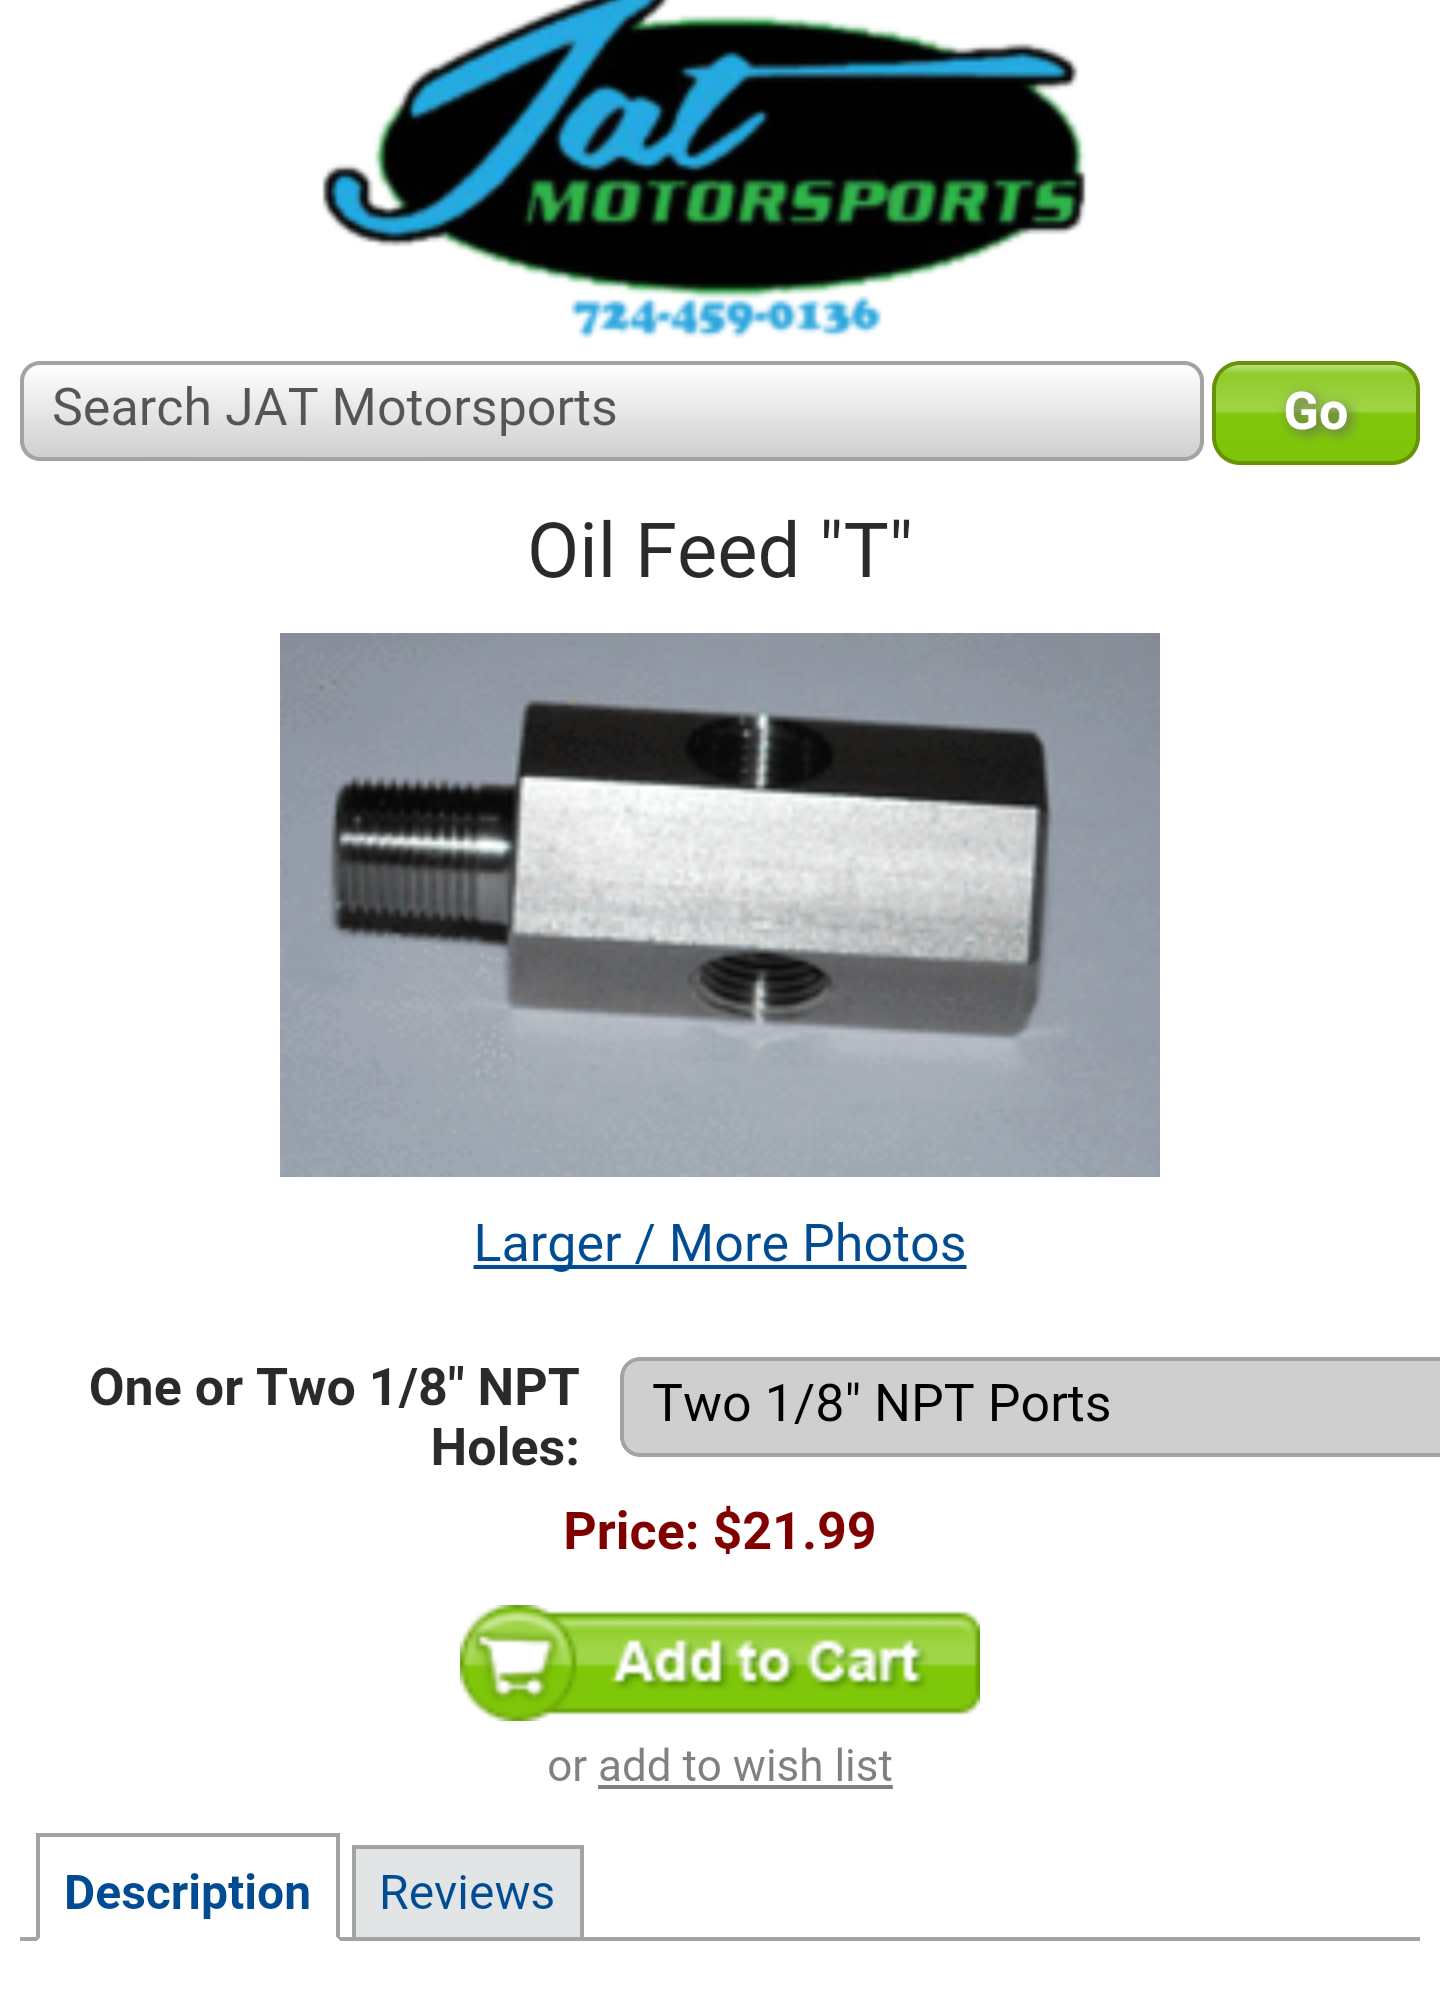
**DISCLAIMER. This is the old setup. I also do not run Fram filters anymore lol, this picture was taken years ago.
Now you have the basic essentials for your turbo.
If you're running a water cooled turbo, I cannot help there. I've only ran oil cooled.
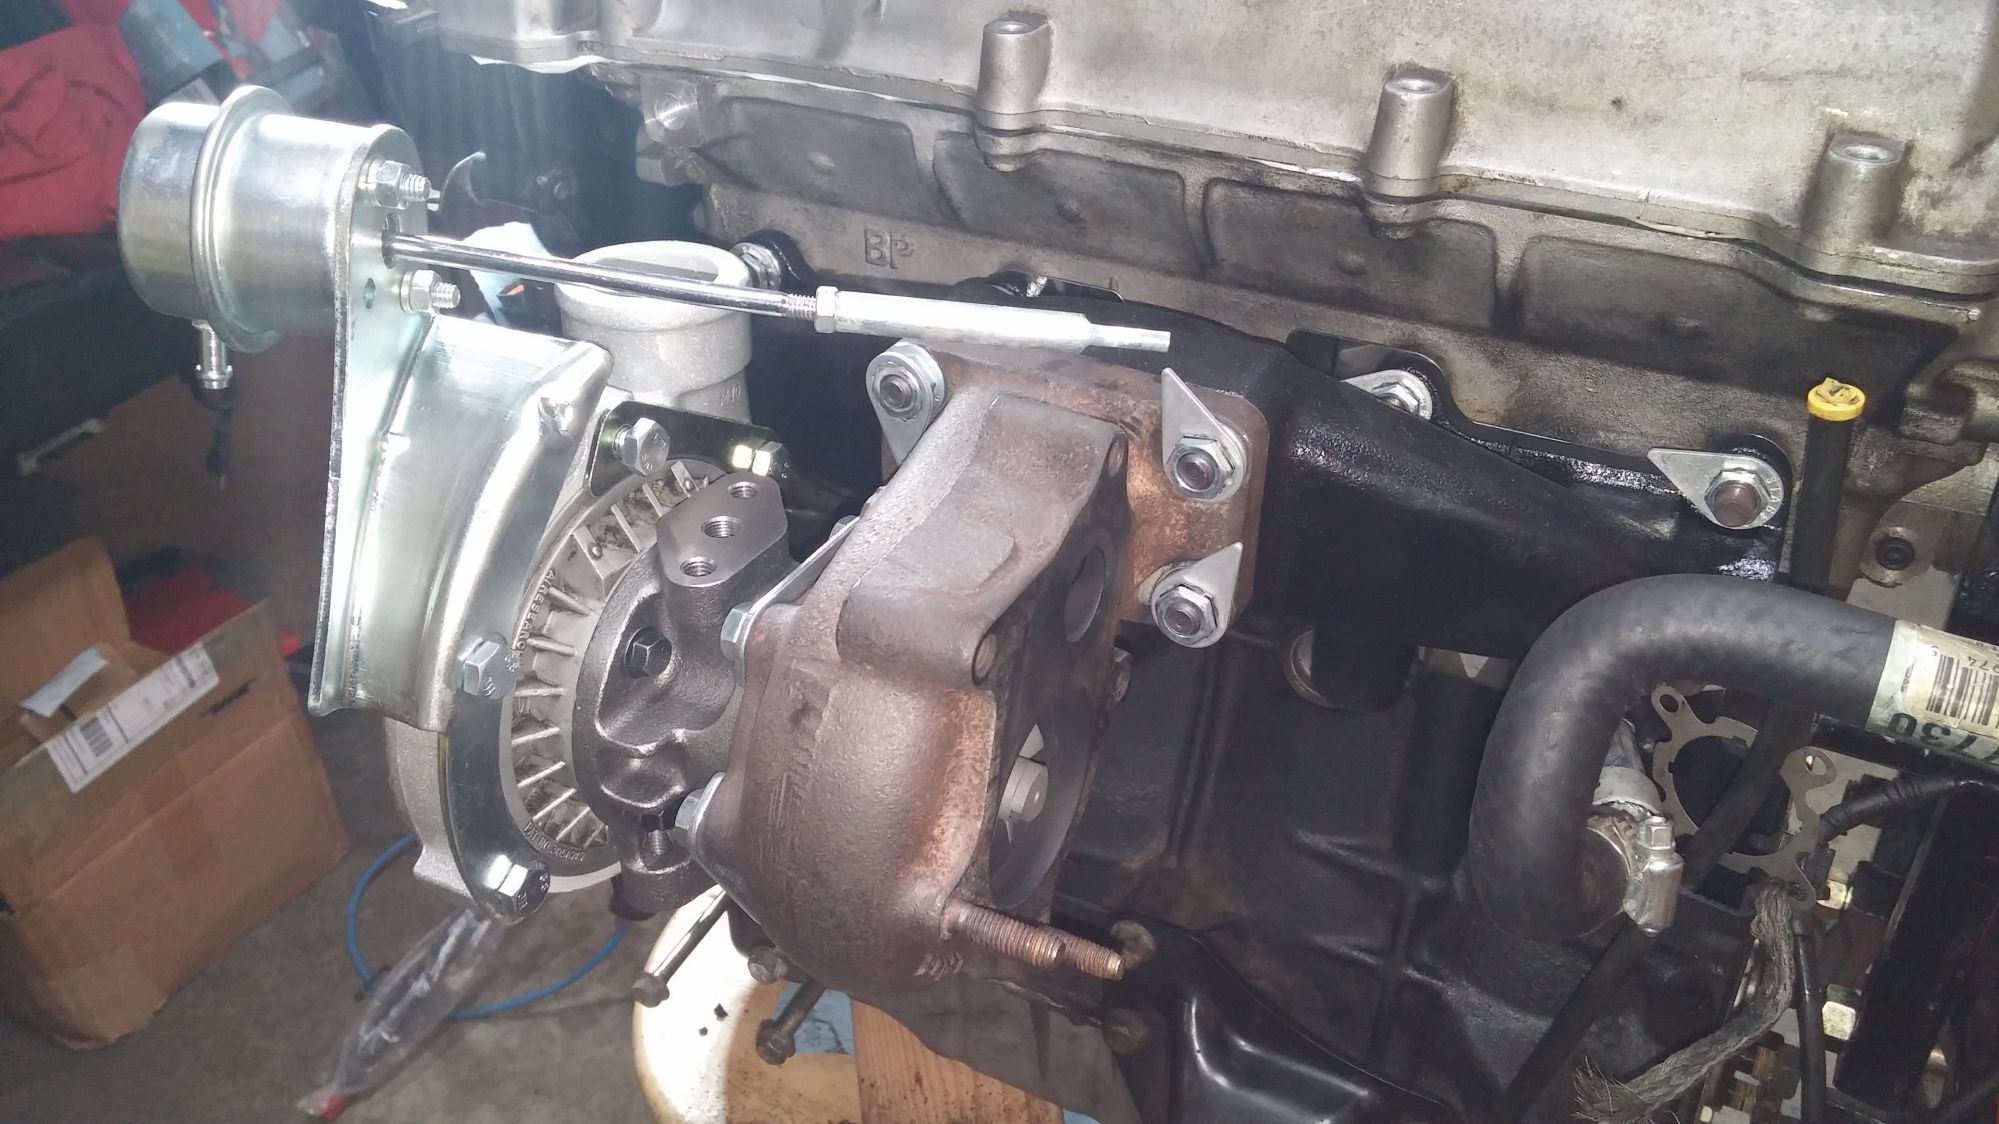
STEP FIVE---- Turbo and Manifold install:
This is pretty straight forward but I'll cover the basics. For your manifold install, be sure to use a quality gasket. I used stage 8 hardware on my studs just to be over cautious.
Picture taken before I rebuilt the turbo.
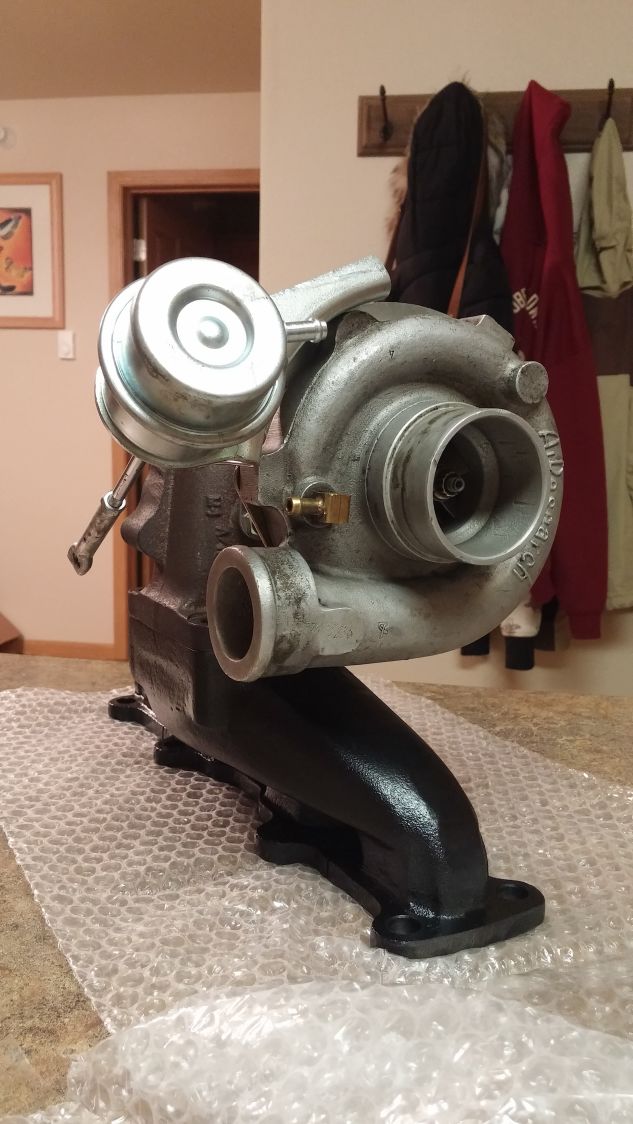
A tip to anyone planning to run stage 8, find you're thread pitch and then order in "bulk". For either my turbo or manifold studs (can't remember which at the moment), I found a Camaro stage 8 kit for the same price and it came with plenty of spares. If this is confusing, please PM me and I'll explain it better.
Picture taken after rebuild and compressor housing powdercoated to match valve cover
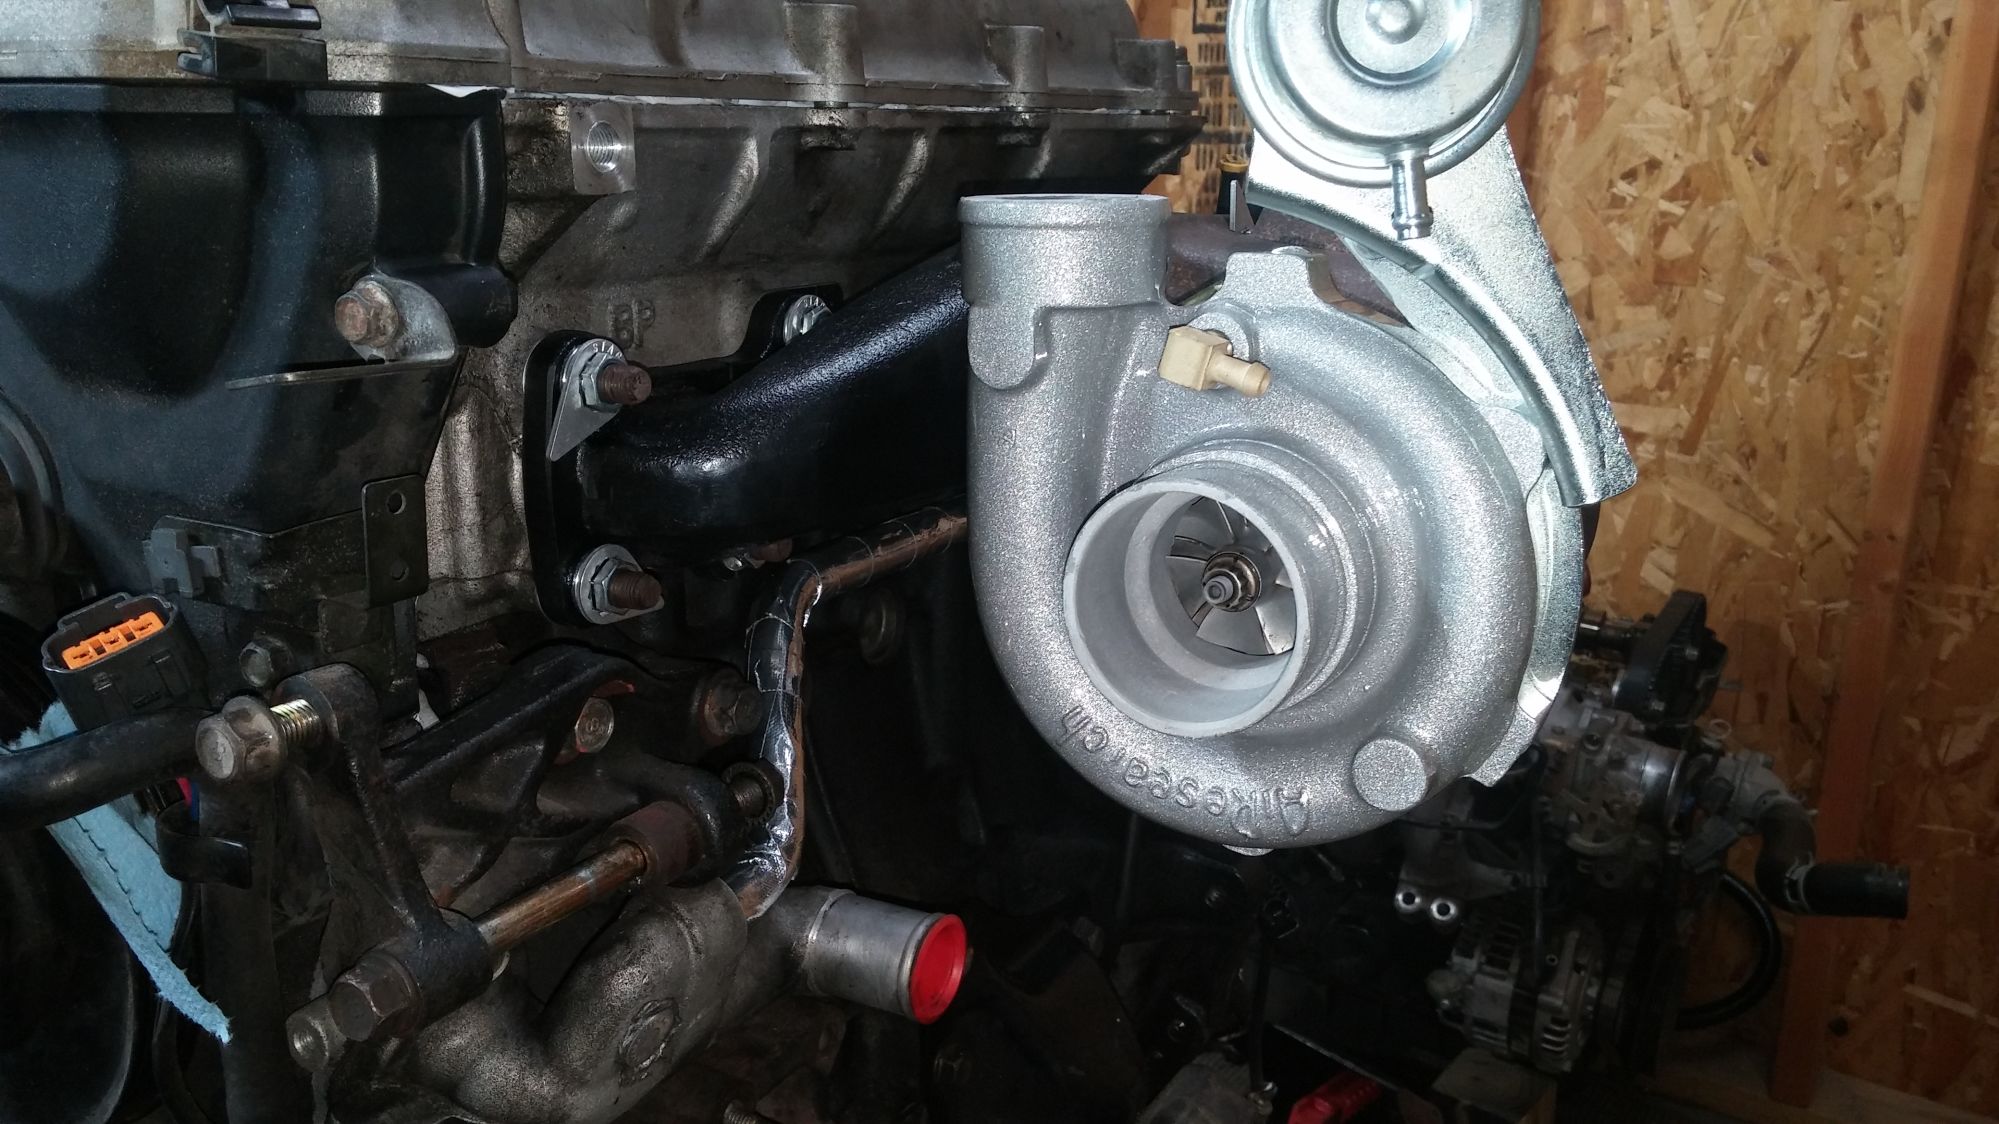
For turbo goodness, get an idea of how you are planning to route your intercooler piping so that you can clock the compressor housing to suit your needs. It can still be clocked once it's on the motor but it's way easier when it's off the car. Also be sure that your center section is rotated so that the Oil feed port is directly on top and the drain port is directly on bottom.
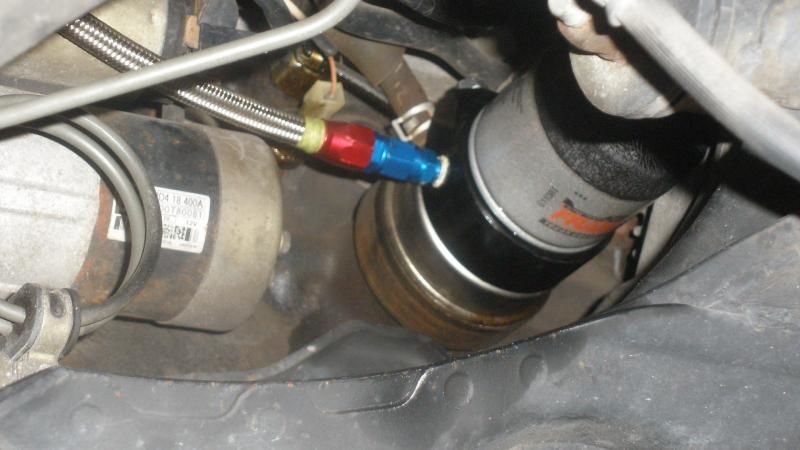
Now attach your feed and return line.
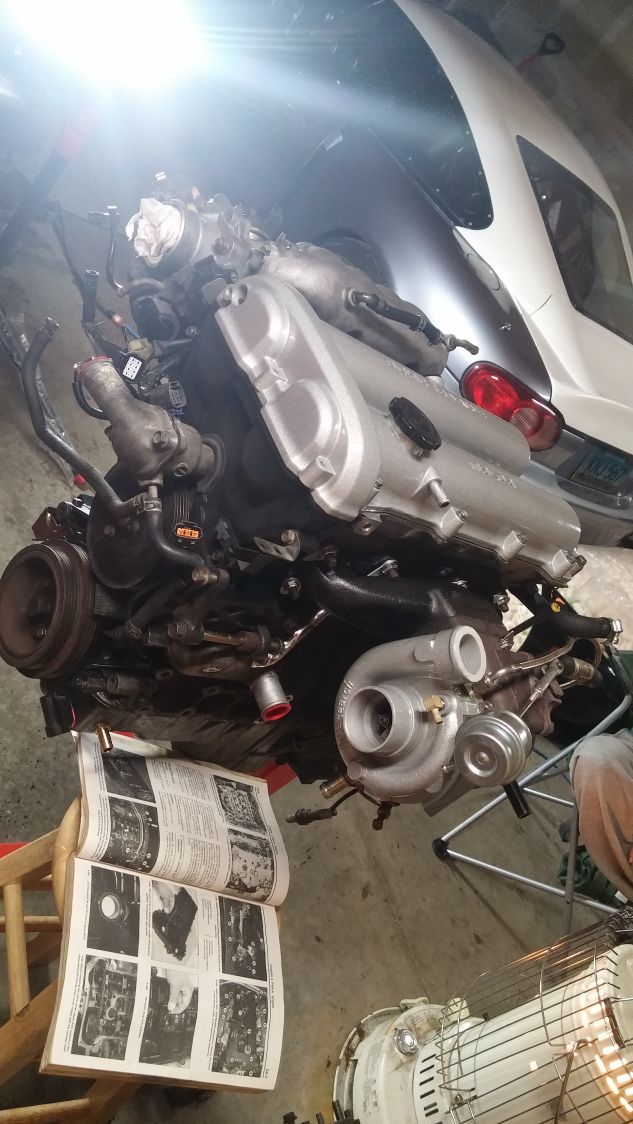
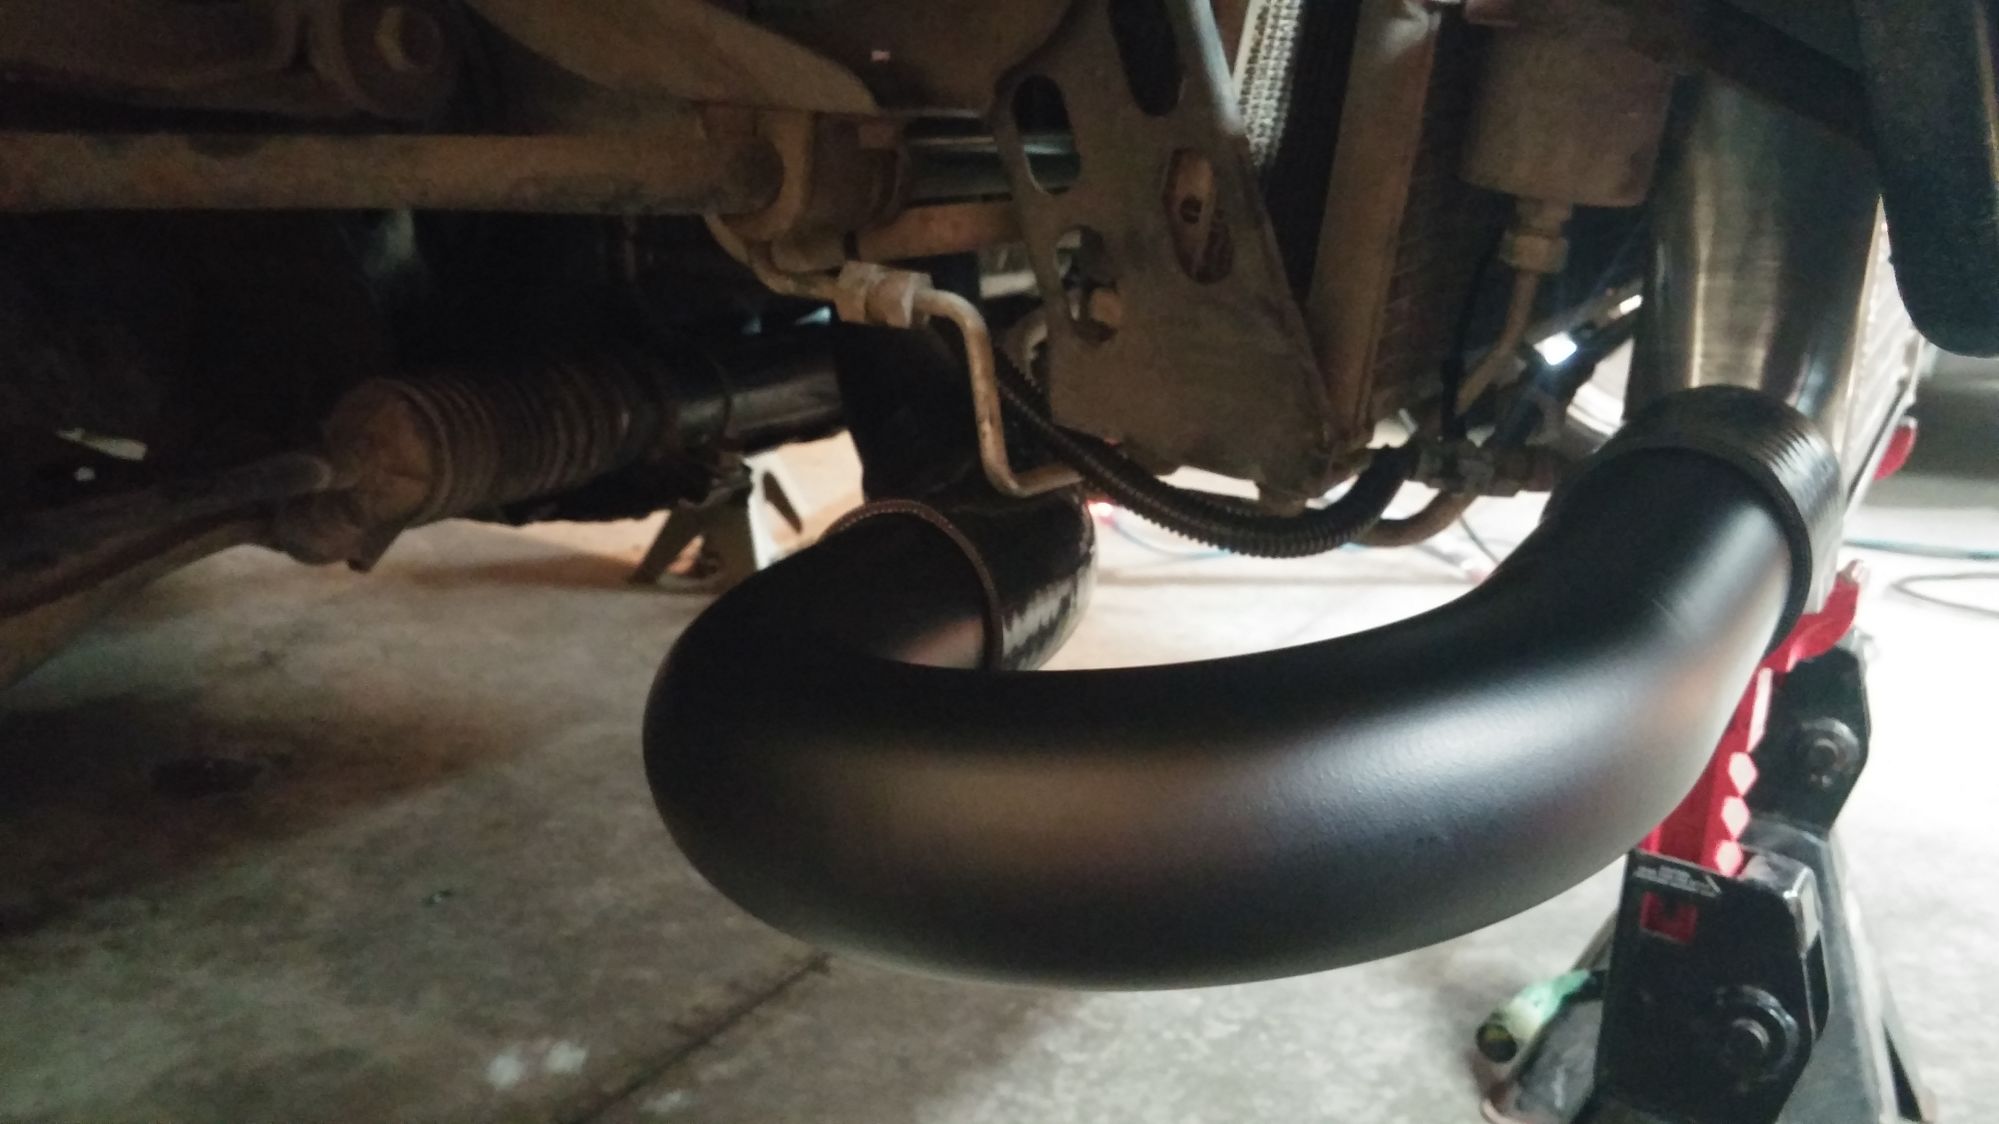
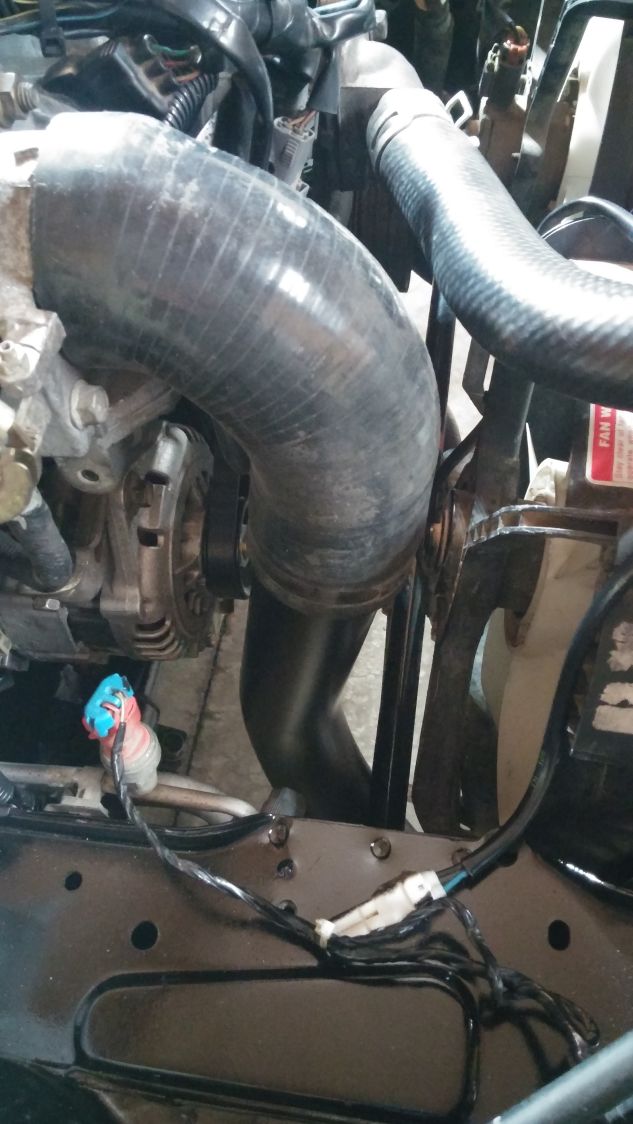
The elbow to downpipe section will be tight but here is a pic of how mine sits (I am no longer running that turbo or manifold in picture. The hammered out frame lip is painted now so excuse these old pictures here lol)
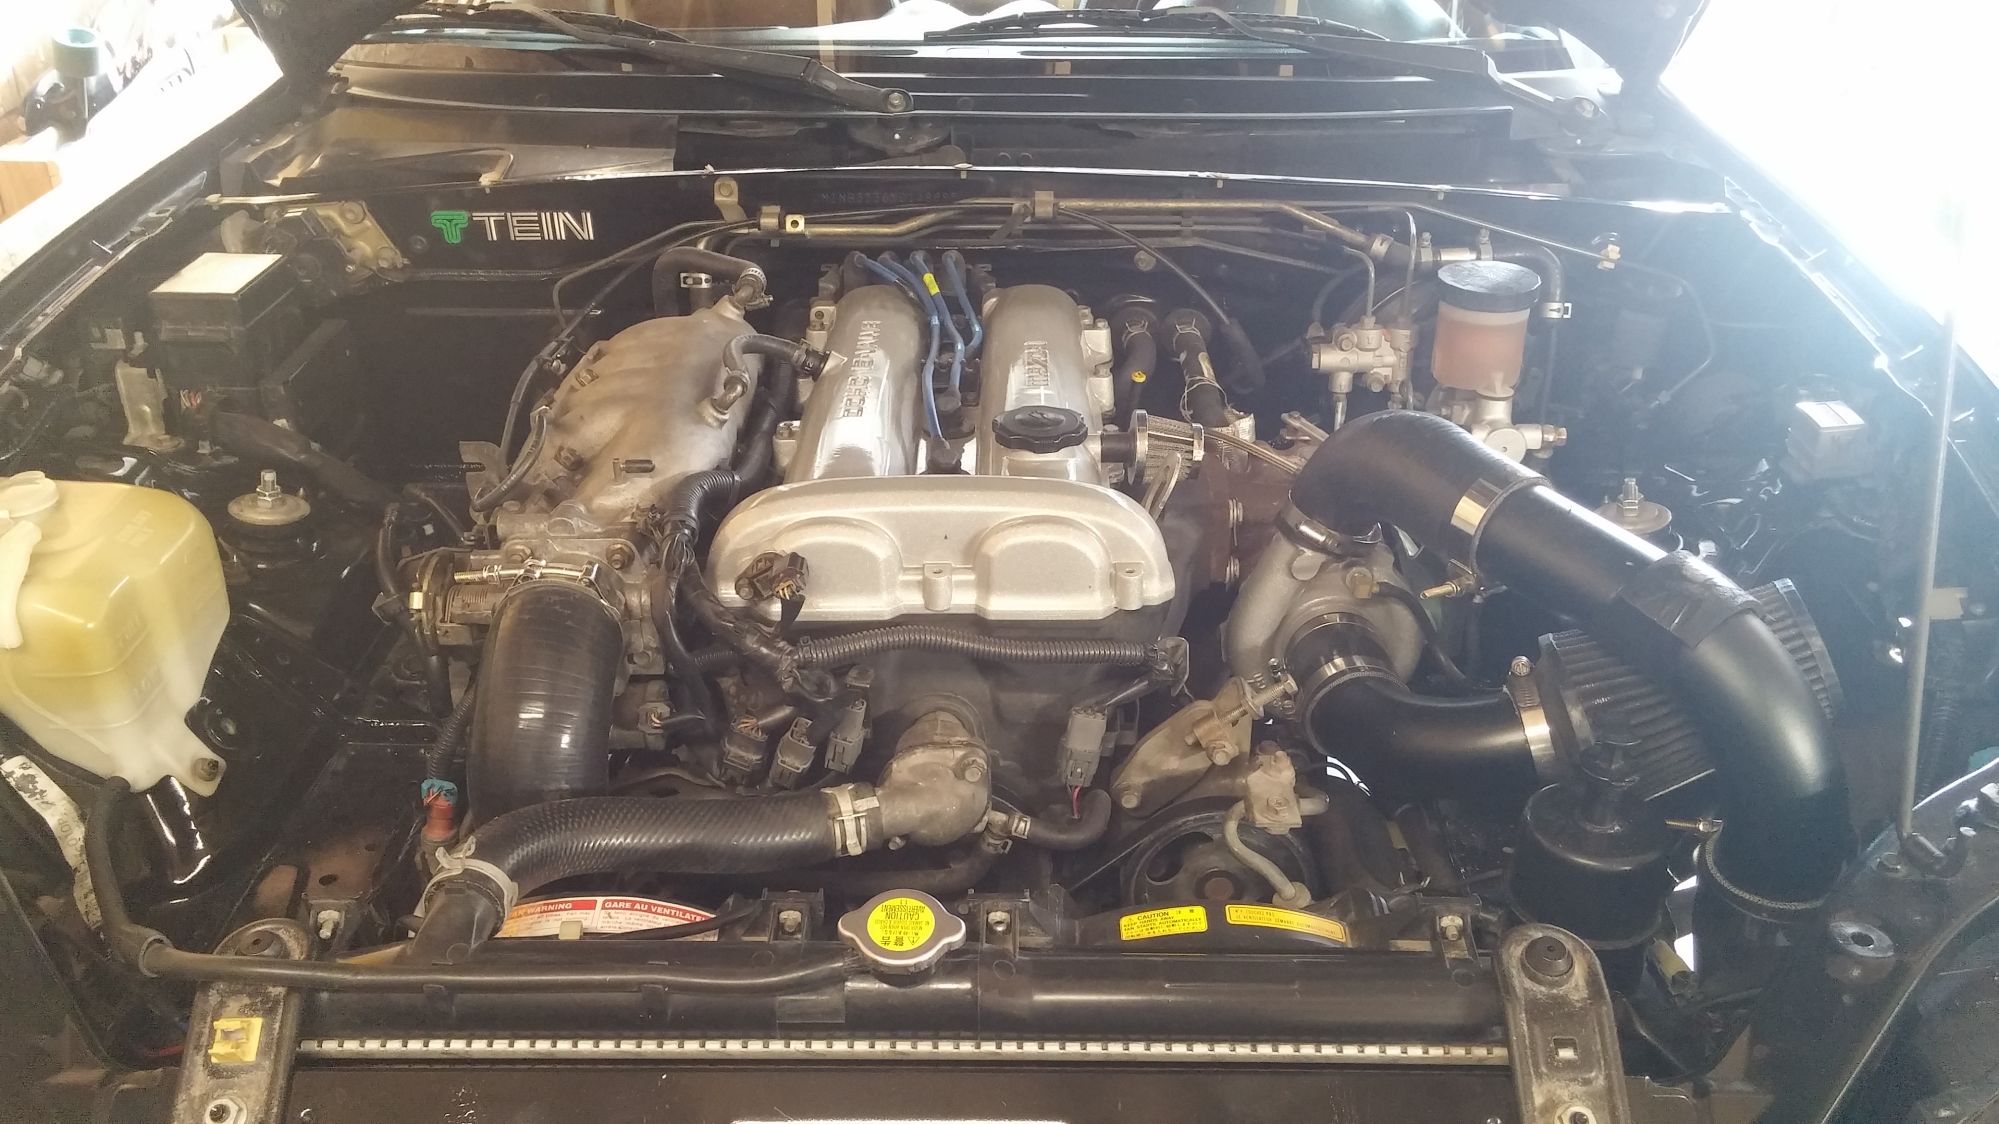
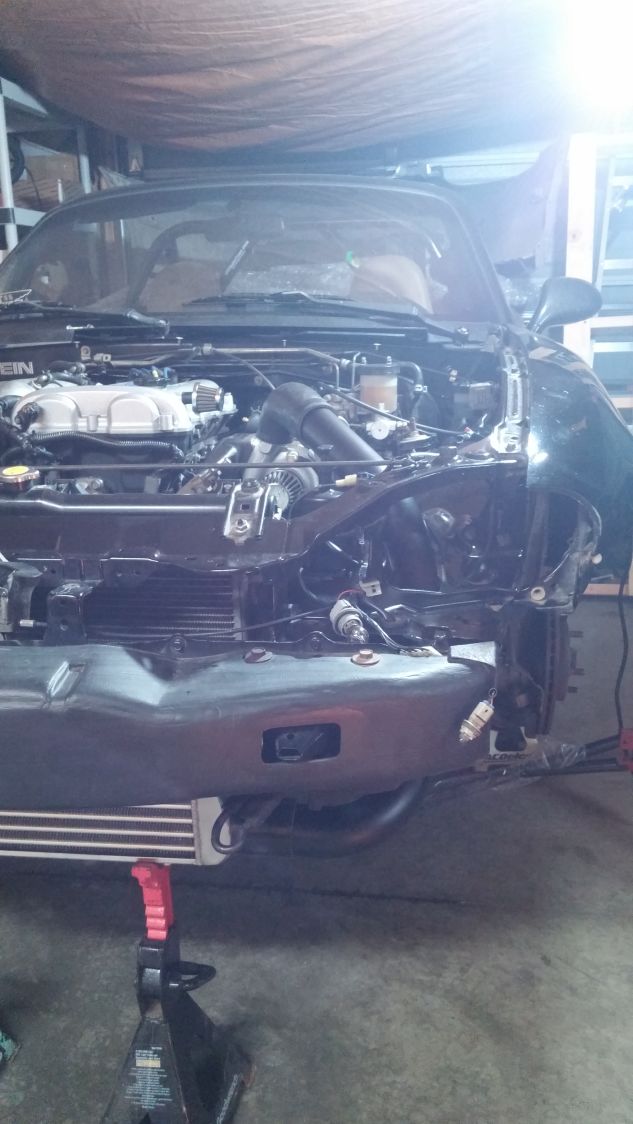
STEP SIX------- Intercooler and piping.
This all depends on your setup. I'm keeping A/C and P/S so this over approach is simple. The NB has a small hole behind the driver headlight; I've cut this out just a little more to accommodate my hot side piping. When ordering a universal piping kit, go ahead and get one that has a bunch of 90's and at least one "U" or "J". Straights are not needed.
Proper Oil feed tee.
The male thread for this tee is 1/8" BSPT (same as oil pressure sending unit). You have the option of one or two ports for the tee from the site. I chose 2 ports in hopes one would face to the rear of block when tight.
**DISCLAIMER. This is the old setup. I also do not run Fram filters anymore lol, this picture was taken years ago.
Now you have the basic essentials for your turbo.
If you're running a water cooled turbo, I cannot help there. I've only ran oil cooled.
STEP FIVE---- Turbo and Manifold install:
This is pretty straight forward but I'll cover the basics. For your manifold install, be sure to use a quality gasket. I used stage 8 hardware on my studs just to be over cautious.
Picture taken before I rebuilt the turbo.
A tip to anyone planning to run stage 8, find you're thread pitch and then order in "bulk". For either my turbo or manifold studs (can't remember which at the moment), I found a Camaro stage 8 kit for the same price and it came with plenty of spares. If this is confusing, please PM me and I'll explain it better.
Picture taken after rebuild and compressor housing powdercoated to match valve cover
For turbo goodness, get an idea of how you are planning to route your intercooler piping so that you can clock the compressor housing to suit your needs. It can still be clocked once it's on the motor but it's way easier when it's off the car. Also be sure that your center section is rotated so that the Oil feed port is directly on top and the drain port is directly on bottom.
Now attach your feed and return line.
The elbow to downpipe section will be tight but here is a pic of how mine sits (I am no longer running that turbo or manifold in picture. The hammered out frame lip is painted now so excuse these old pictures here lol)
STEP SIX------- Intercooler and piping.
This all depends on your setup. I'm keeping A/C and P/S so this over approach is simple. The NB has a small hole behind the driver headlight; I've cut this out just a little more to accommodate my hot side piping. When ordering a universal piping kit, go ahead and get one that has a bunch of 90's and at least one "U" or "J". Straights are not needed.
Last edited by sickmiatabra; 06-01-2016 at 11:58 PM. Reason: correction spotted!
Reply
4
4
05-26-2016, 04:03 AM
#3
Junior Member
Thread Starter
iTrader: (1)
Join Date: Feb 2011
Location: Minot, ND
Posts: 255
Total Cats: 21
Get creative with your mounting points for your Intercooler. PM me if you need some ideas, I just don't have any pics of my hardware here.
I'm running 2.5 piping all around, with a 2" to 2.5" silicone coupler for the compressor housing and a 2.5" 90 for the throttle body. If you are not doing a coolant reroute, you will need to cut the upper rad hose just a little bit to make room. You don't want that hot line rubbing your "cold" side but I'm no thermal engineer here.
No pictures of this but my IAT sensor is installed in the pipe directly after the intercooler (throttle body side). This is a megasquirt related thing but when I had this sensor close to the throttle body as it should be, it would experience a good bit of heat soak and make hot starts extra lame. I know there are ways to tune around this, but I just moved it out of the engine bay.
My Blow off valve is placed right below the driver headlight. I used to have it on the straight coming off the compressor housing and will eventually move it back to this location. The turbo never surged once, it would blow off under all conditions, even in reverse if you hit it hard enough lol.
STEP SEVEN------ Clutch and rear main seal
I suppose this is optional until the stock goes (mine lasted about 4 months before it was toast and I had my FM level 1 on stand by) Do not go with an ebay kit...... *in before rants of quality ebay clutches* I don't care Lol. Do it right or do it twice.
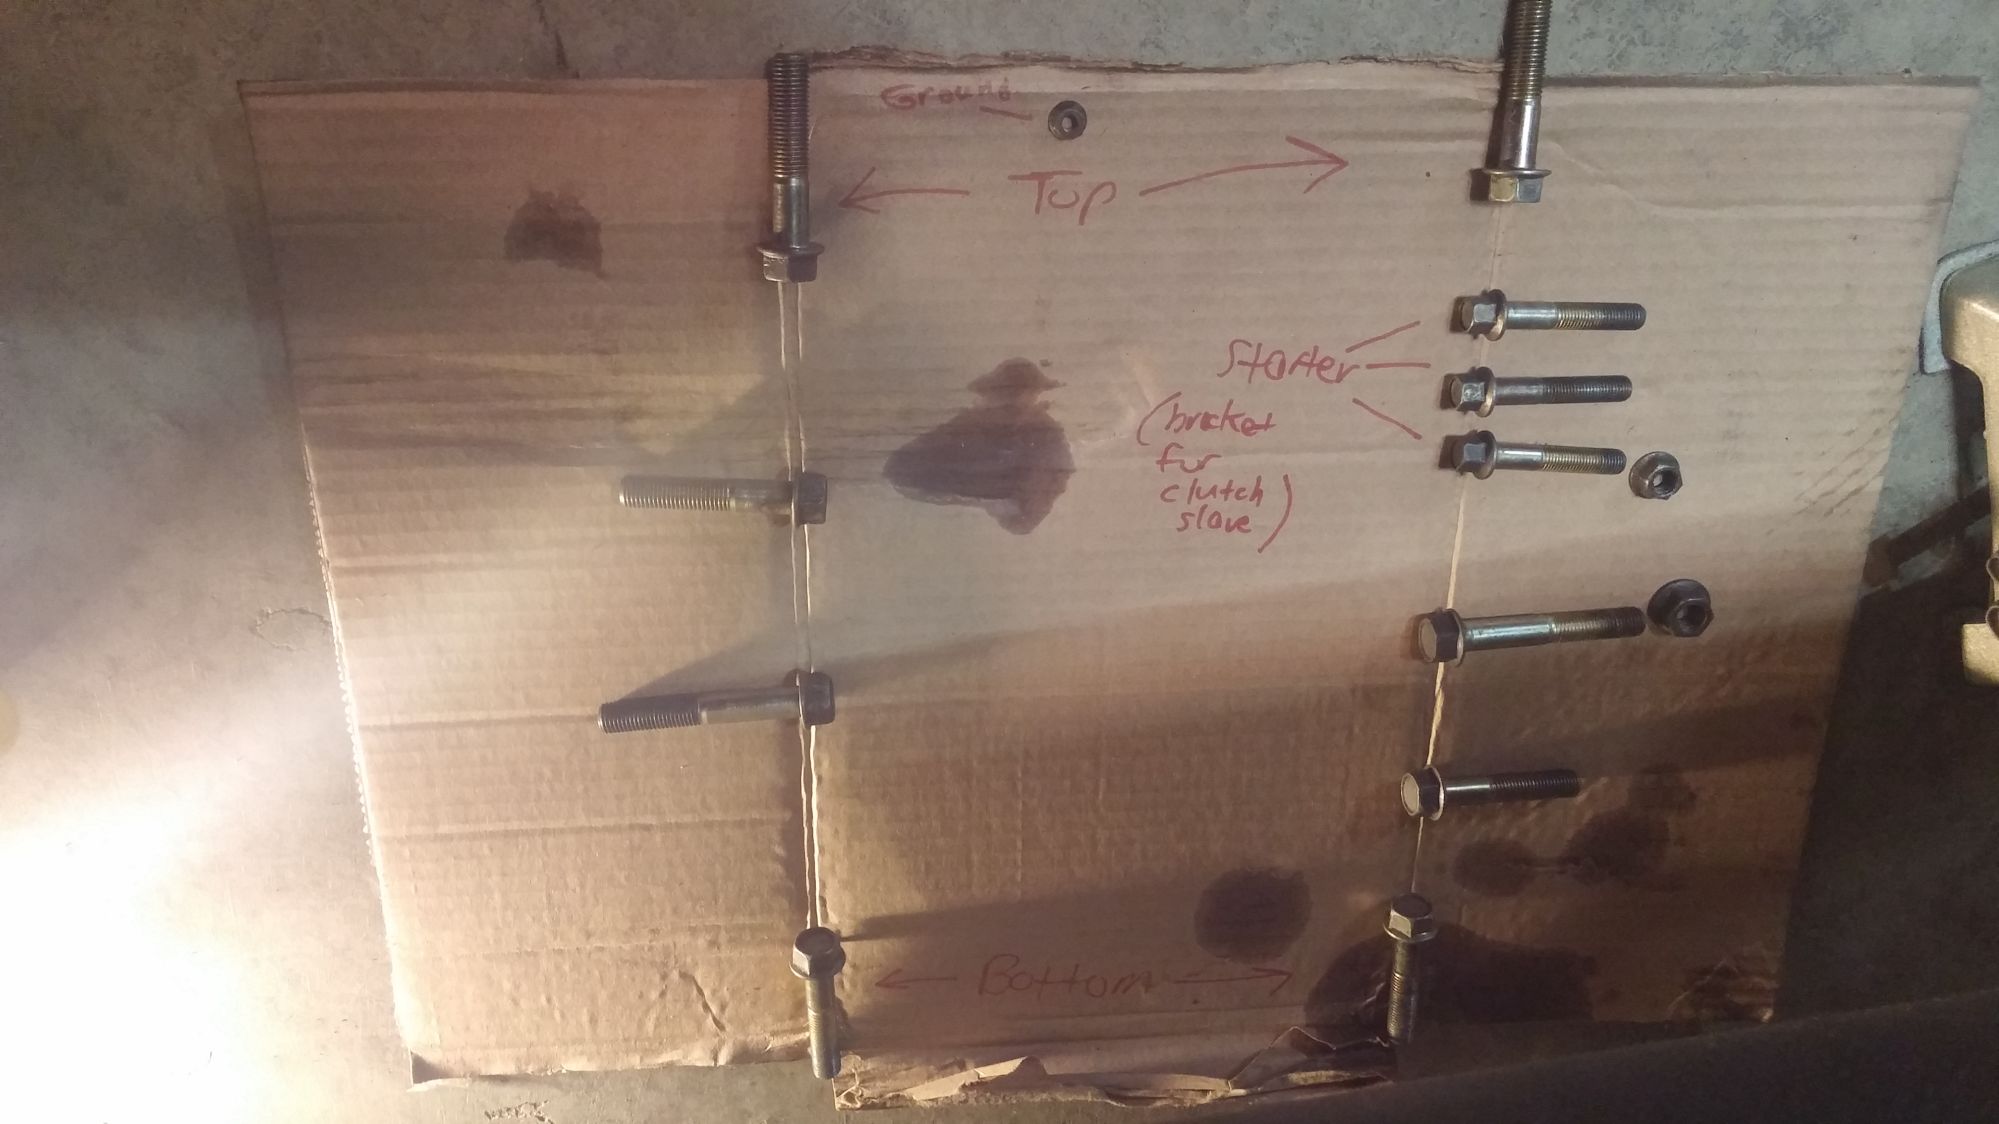
Dropping your trans is nothing but nuts and bolts as everything else is. **make sure your battery is disconnected** Have plenty of extensions and swivels ready,disconnect shifter assembly, harnesses, and clips. Here is a pic of my diagram I use when I want an easy install on the way back in Lol.
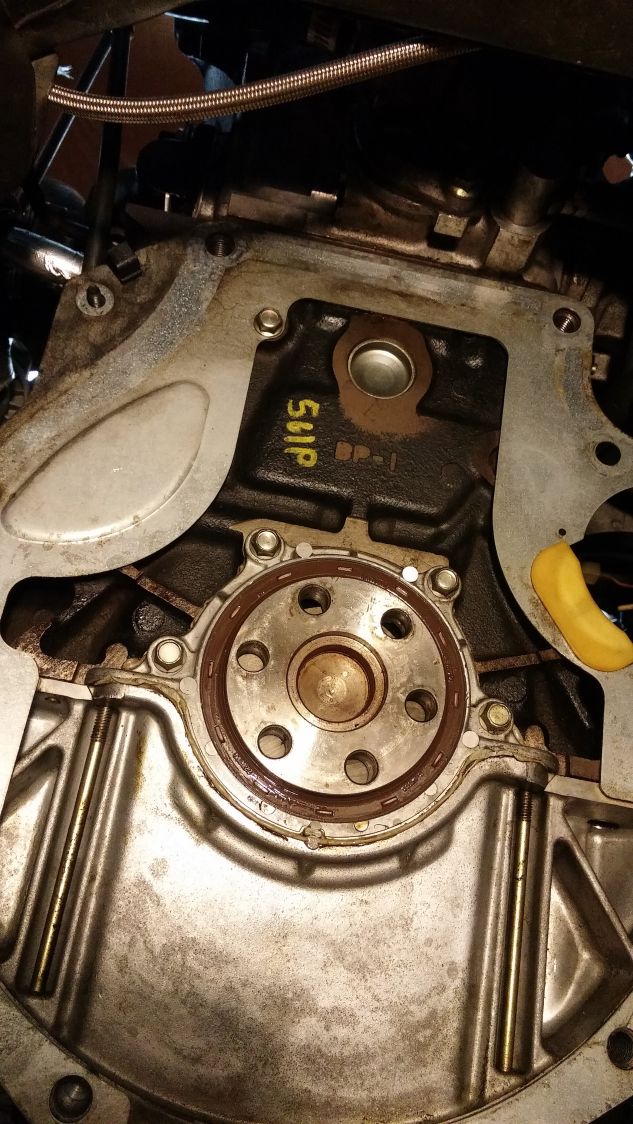
The rear main is seal is definitely optional but hey, why not right? Flyin Miata sells a pretty cool tool for installation if you're hesitant.
For clutch install here are some pointers: (i'm skipping removal because this is straight forward. Have your flywheel resurfaced or maybe you got a new one with your kit)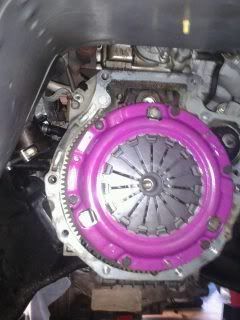
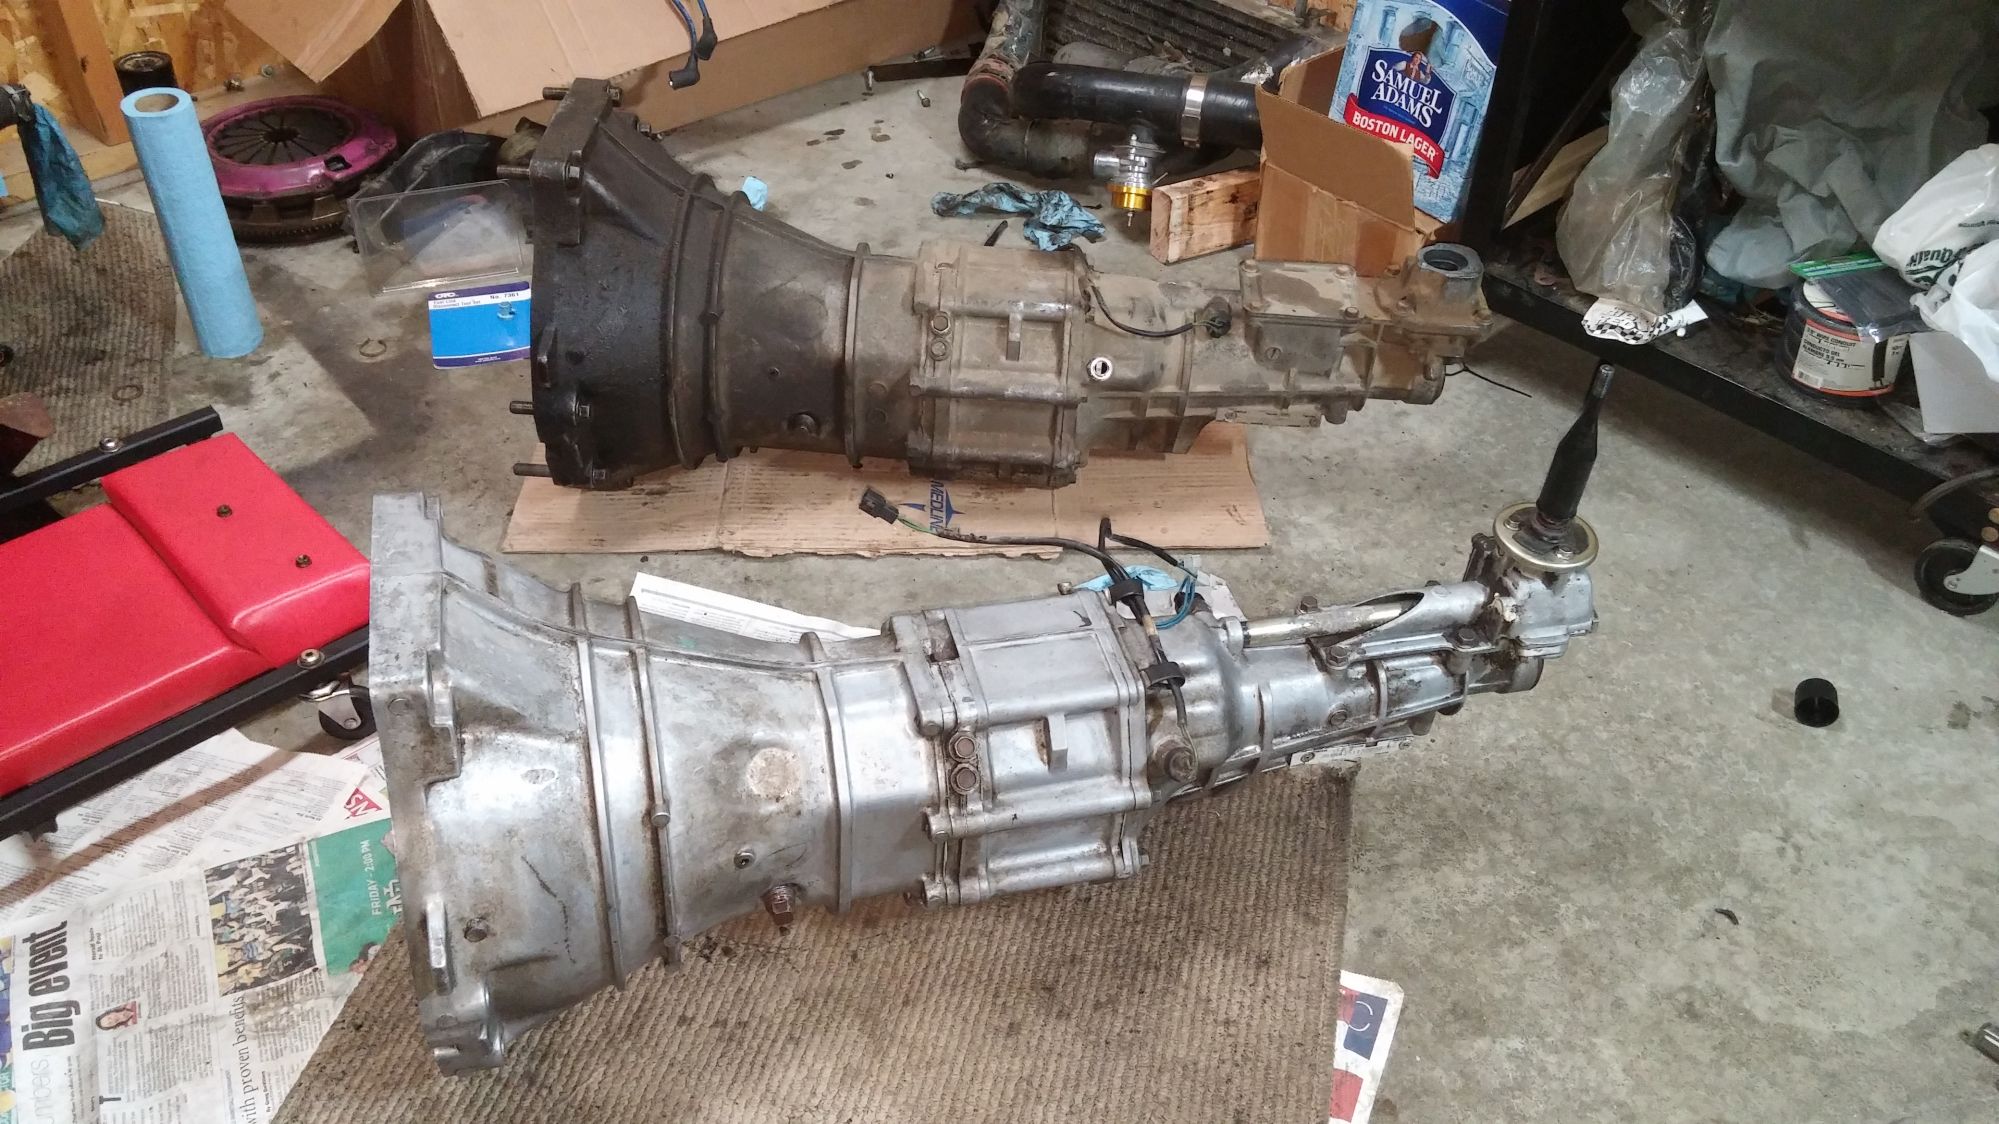
Now you're ready for them gains.
STEP 8------ INJECTORS This will be short, sweet, and from my own experience. I've had 0 issues running the RX-8 yellow Denso's part #195500-4450. 425cc and they are plug and play. Be sure to order a rebuild kit from injector rehab or other reputable vendors so that you will have new O-rings and the stoppers that sit in the head.
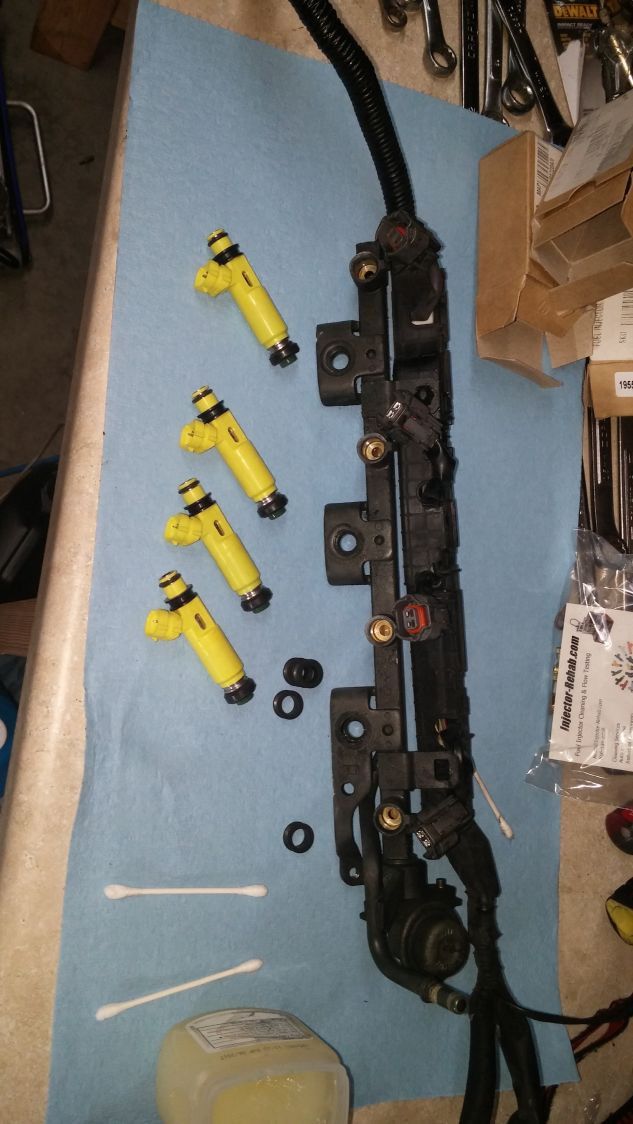
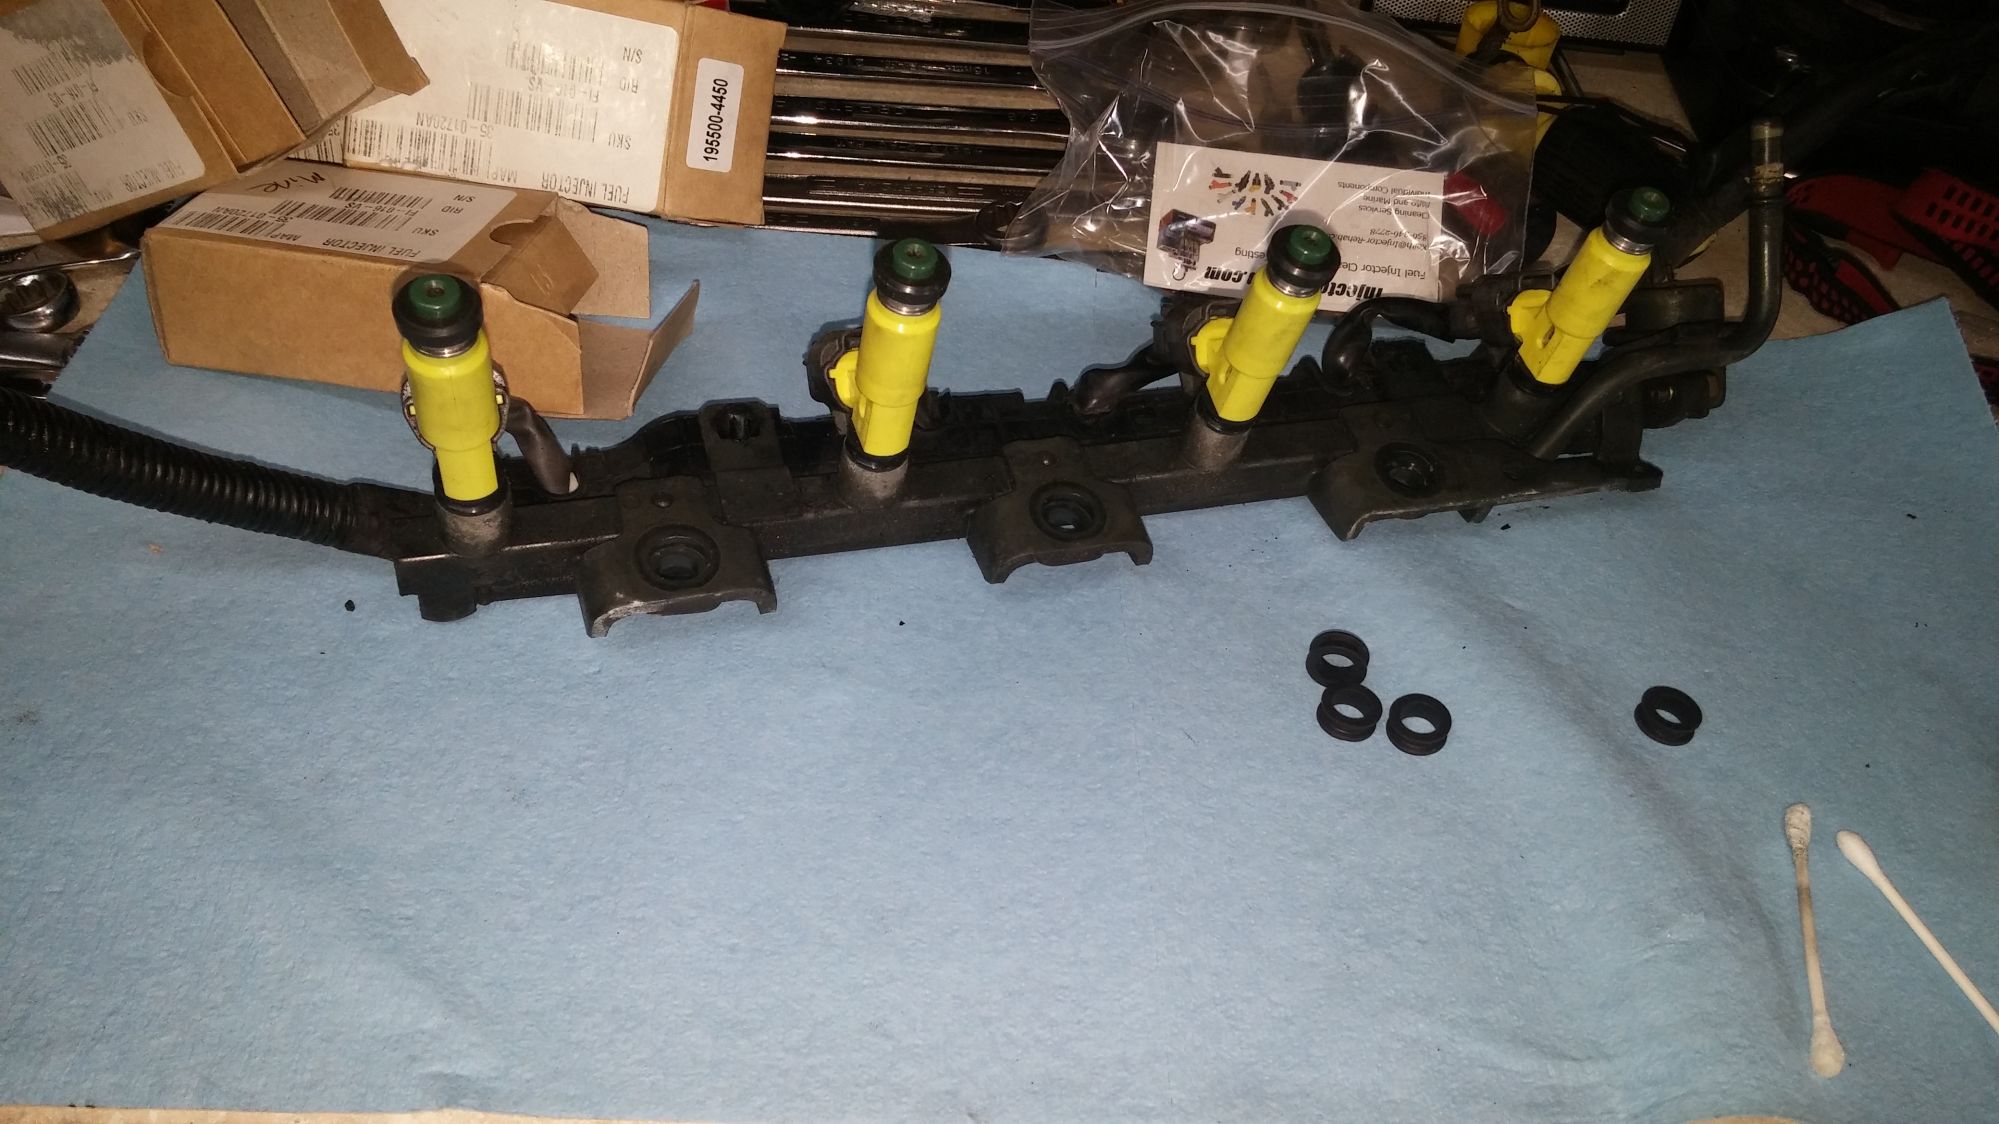
Change some settings in Megasquirt, really just one and the map is still scaled the same. PM me for info here.The stock fuel system in the NB ( I will vouch for at least the 99-00 models) can handle a good bit. I upgraded to the RX8 injectors when I raised my boost to 10psi via controller and wanted the added precaution there. My stock fuel pump finally died about 3 months ago at 137k, 39k miles being under forced induction. I am now running a Deatsch Werks DW200 255lph Pump.
I'm running 2.5 piping all around, with a 2" to 2.5" silicone coupler for the compressor housing and a 2.5" 90 for the throttle body. If you are not doing a coolant reroute, you will need to cut the upper rad hose just a little bit to make room. You don't want that hot line rubbing your "cold" side but I'm no thermal engineer here.
No pictures of this but my IAT sensor is installed in the pipe directly after the intercooler (throttle body side). This is a megasquirt related thing but when I had this sensor close to the throttle body as it should be, it would experience a good bit of heat soak and make hot starts extra lame. I know there are ways to tune around this, but I just moved it out of the engine bay.
My Blow off valve is placed right below the driver headlight. I used to have it on the straight coming off the compressor housing and will eventually move it back to this location. The turbo never surged once, it would blow off under all conditions, even in reverse if you hit it hard enough lol.
STEP SEVEN------ Clutch and rear main seal
I suppose this is optional until the stock goes (mine lasted about 4 months before it was toast and I had my FM level 1 on stand by) Do not go with an ebay kit...... *in before rants of quality ebay clutches* I don't care Lol. Do it right or do it twice.
Dropping your trans is nothing but nuts and bolts as everything else is. **make sure your battery is disconnected** Have plenty of extensions and swivels ready,disconnect shifter assembly, harnesses, and clips. Here is a pic of my diagram I use when I want an easy install on the way back in Lol.
The rear main is seal is definitely optional but hey, why not right? Flyin Miata sells a pretty cool tool for installation if you're hesitant.
For clutch install here are some pointers: (i'm skipping removal because this is straight forward. Have your flywheel resurfaced or maybe you got a new one with your kit)
- be sure to wear some powder free nitrile/ equivalent gloves. Never touch the flywheel or clutch disc/ friction surface of pressure plate with anything but said gloves!
- Be sure your new throw out bearing is installed properly, then double check, then triple check that again to make sure it is properly installed.
- Grease can be your enemy here. Sparingly use it on the splines/pilot bearing area. I use Lucas Red N Tacky. PM if you have any questions here
- Have a torque wrench ready to go for your flywheel and pressure plate bolts. No guesstimating here lol.
- Reinsert the alignment tool a few times to make sure it goes in smooth and does not bind
Now you're ready for them gains.
STEP 8------ INJECTORS This will be short, sweet, and from my own experience. I've had 0 issues running the RX-8 yellow Denso's part #195500-4450. 425cc and they are plug and play. Be sure to order a rebuild kit from injector rehab or other reputable vendors so that you will have new O-rings and the stoppers that sit in the head.
Change some settings in Megasquirt, really just one and the map is still scaled the same. PM me for info here.The stock fuel system in the NB ( I will vouch for at least the 99-00 models) can handle a good bit. I upgraded to the RX8 injectors when I raised my boost to 10psi via controller and wanted the added precaution there. My stock fuel pump finally died about 3 months ago at 137k, 39k miles being under forced induction. I am now running a Deatsch Werks DW200 255lph Pump.
Last edited by sickmiatabra; 05-27-2016 at 01:25 AM. Reason: typo
Reply
4
4
05-26-2016, 04:11 AM
#4
Junior Member
Thread Starter
iTrader: (1)
Join Date: Feb 2011
Location: Minot, ND
Posts: 255
Total Cats: 21
STEP 9?----------- Gauges, Megasquirt, miscellaneous.
You'll need a vacuum source for megasquirt. I used the Begi vacuum block that installs in the brake booster line right at the master cylinder. No pictures of it close up in car but you could zoom in on the pic in first post of this thread. Very simple and comes with 3 ports, 2 plugs.
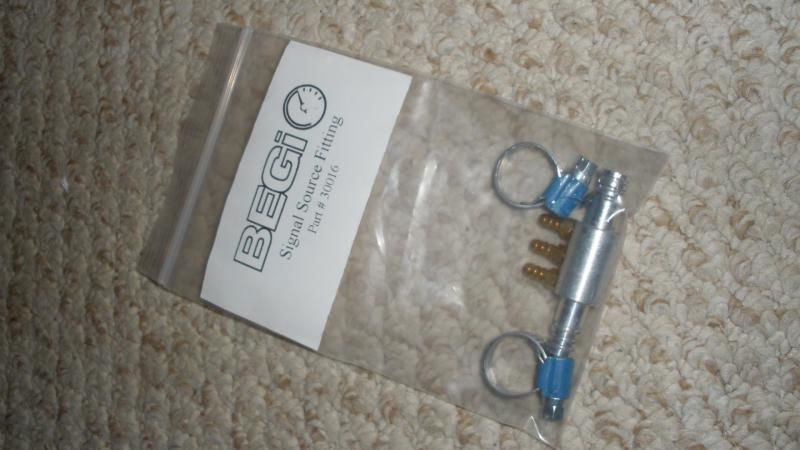
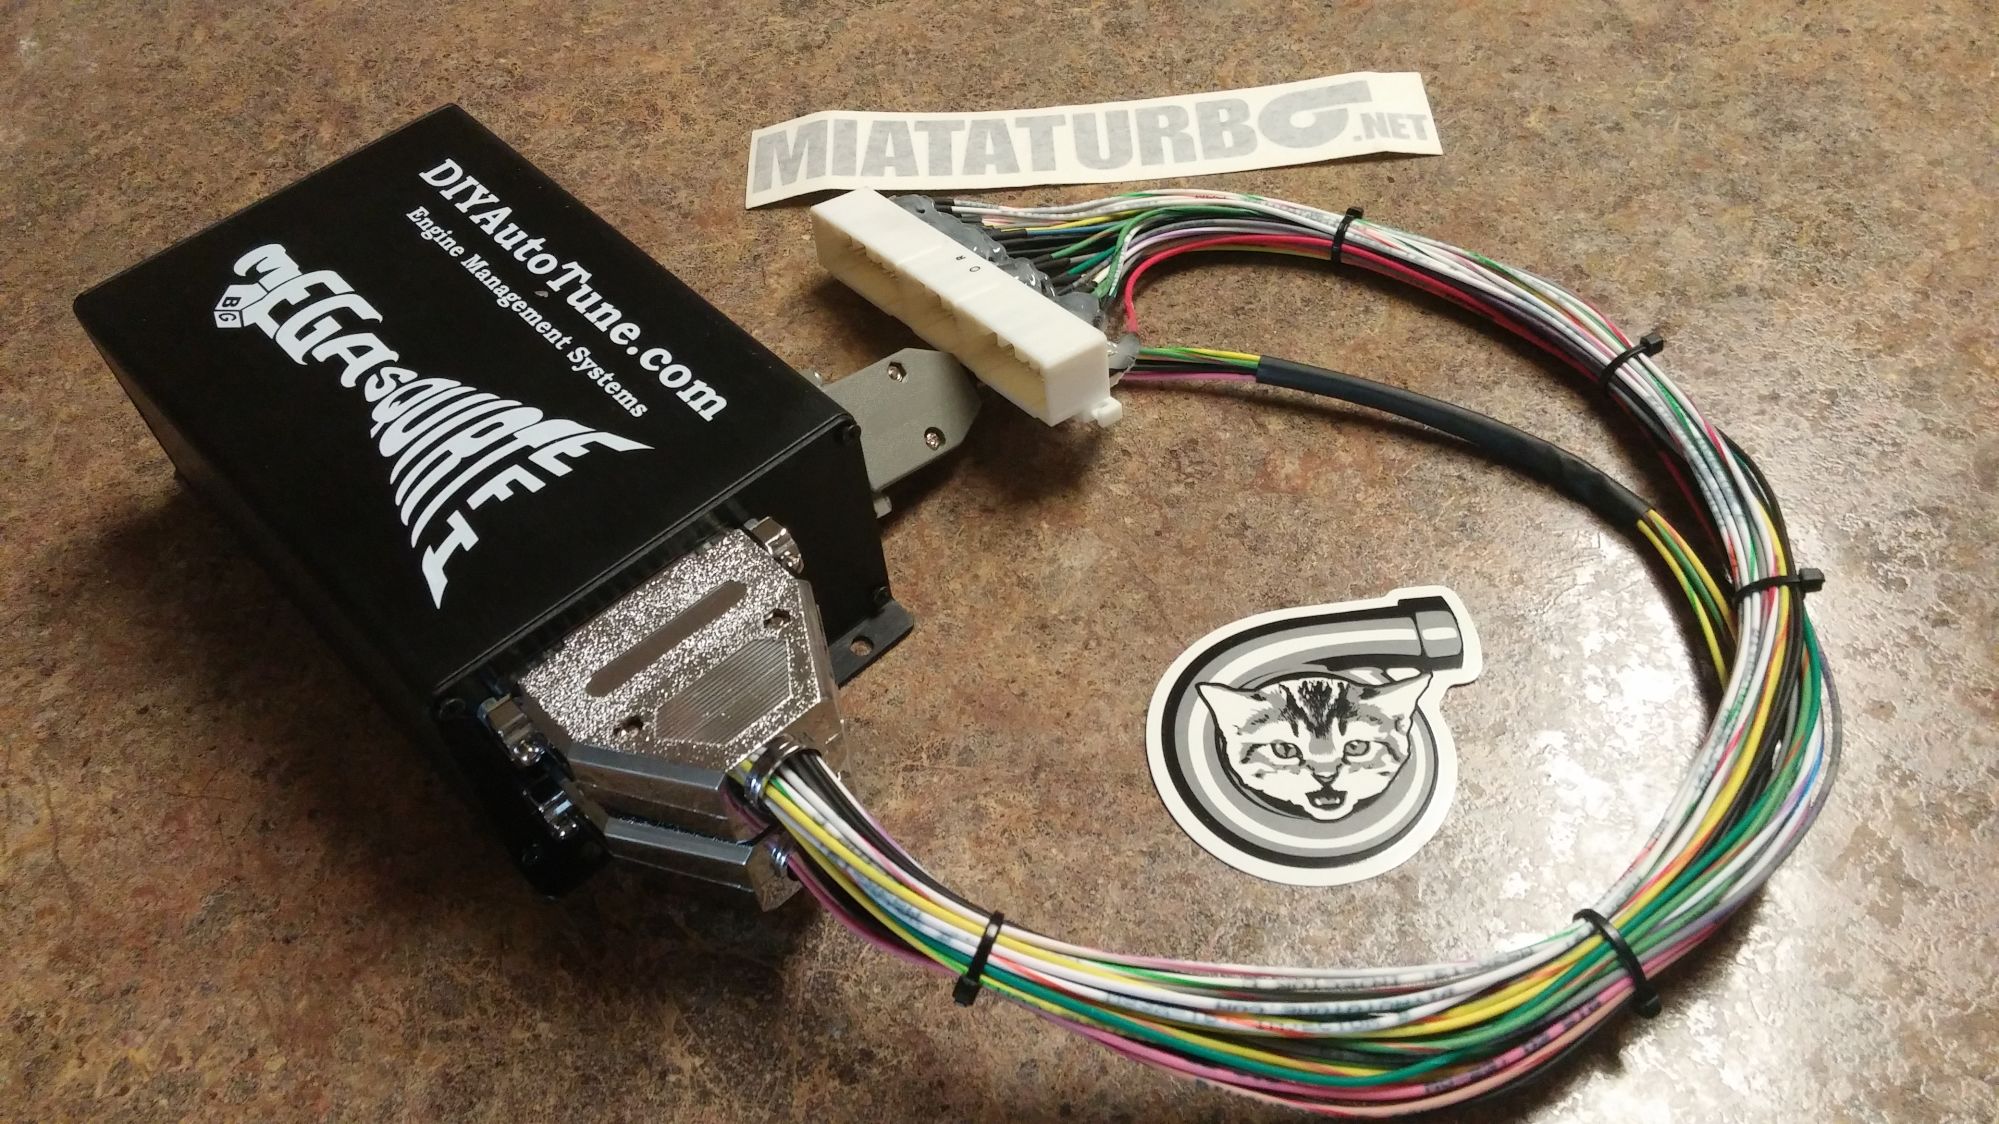
Megasquirt is deserving of it's own thread. Many have success, many have problems. I won't go into super hardcore detail but I'll sum it up for NB1 (1999-2000)
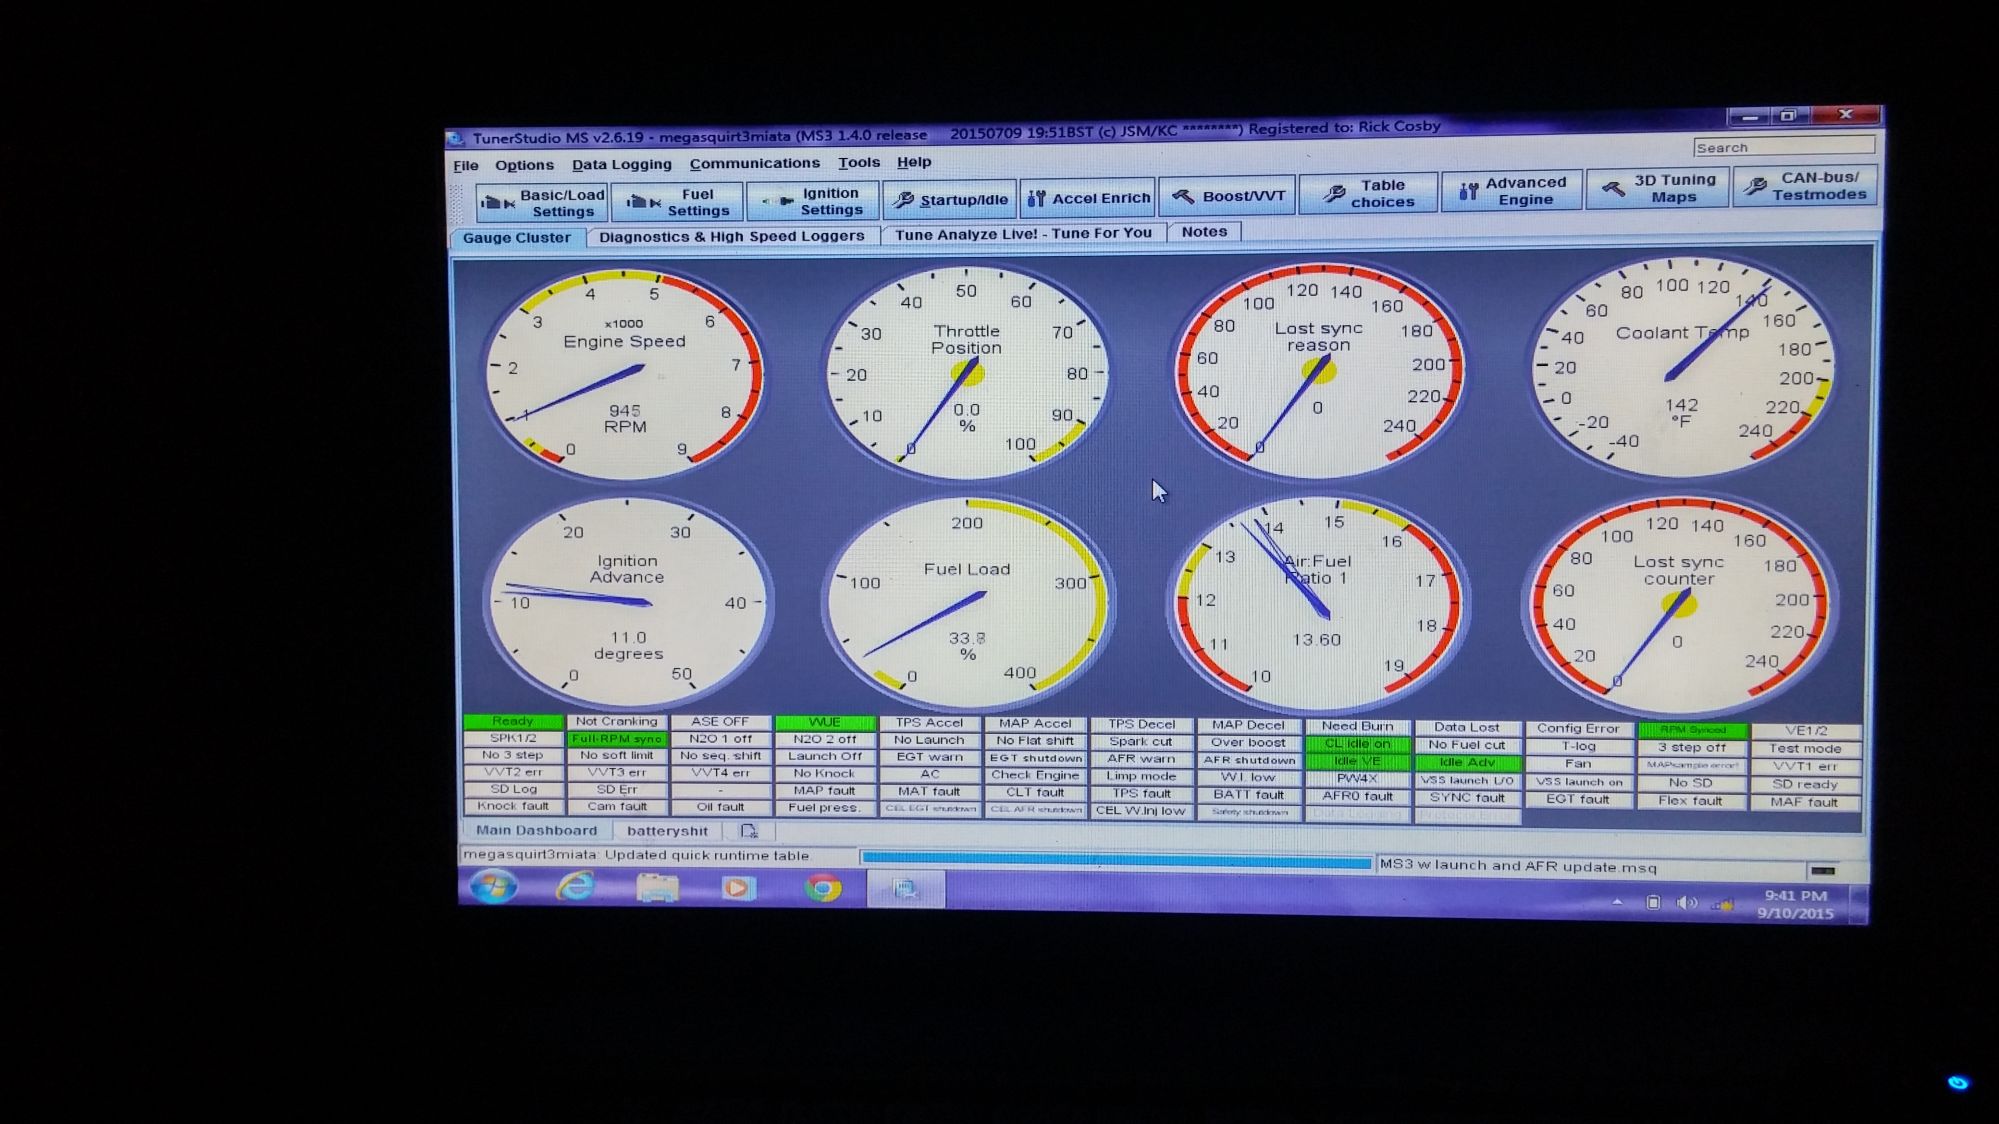
I'll post some links to some useful megasquirt tips and tricks in an edit tomorrow. I still have to proofread this entire thread but this will do for now.Thank you for reading and hope someone can find this useful. I'll just leave these here. EDITS of this thread/post to take place soon. It's 3A.M. .......i'm calling it a day now lol.
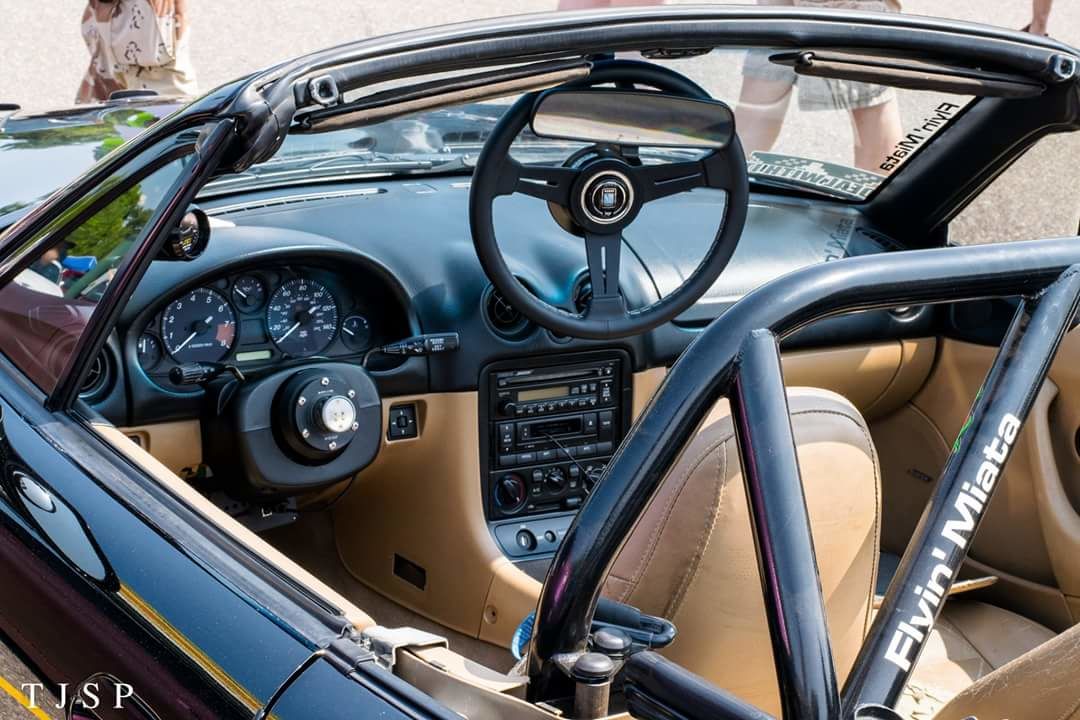

You'll need a vacuum source for megasquirt. I used the Begi vacuum block that installs in the brake booster line right at the master cylinder. No pictures of it close up in car but you could zoom in on the pic in first post of this thread. Very simple and comes with 3 ports, 2 plugs.
Megasquirt is deserving of it's own thread. Many have success, many have problems. I won't go into super hardcore detail but I'll sum it up for NB1 (1999-2000)
- You are going to reuse the IAT plug that was in your stock instake system (not the sensor, just the plug/clip itself. It will plug into your new GM IAT sensor.
- Source out Vacuum for your new ECU.
- Be sure you have the appropriate USB to serial/ serial to serial/ or apparently there's Bluetooth now. You have to make sure your computer can communicate with MS.
- Be sure you have a base tune and project folder in Tunerstudio. Skim over your settings and become familiar with them.
- Once you have the appropriate base tune to start with and you can communicate via laptop, make sure you have sent or "burned" this tune to Megasquirt.
- Be sure to calibrate ALL your sensors (CLT, IAT, TPS, and sync your wideband as well) and burn these settings at well.
- Cranking/ starting will be hit or miss at first but you have settings in there for cranking rpm, and also pulsewidths etc to get your fuel where it needs to be.
- Once it is running, google the sync timing procedure, it's simple and easy to do. You will just need a timing light and hopefully a helping hand to spot you on corrections.
- Once vehicle is at operating temp, tune your IDLE VE table. Now the next time you have a cold start, you can tune your warm up enrichment, ASE, etc.
- Set your AFR target table as you see fit for cruising, and under load.
- Pay for the registered version so that you can use the Autotune feature and have at it
I'll post some links to some useful megasquirt tips and tricks in an edit tomorrow. I still have to proofread this entire thread but this will do for now.Thank you for reading and hope someone can find this useful. I'll just leave these here. EDITS of this thread/post to take place soon. It's 3A.M. .......i'm calling it a day now lol.
Last edited by sickmiatabra; 05-26-2016 at 08:55 AM.
Reply
4
4

 05-31-2016, 12:31 AM
#7
Junior Member
Thread Starter
iTrader: (1)
Join Date: Feb 2011
Location: Minot, ND
Posts: 255
Total Cats: 21
I know in the pictures you really can't see what the hardware is resting on, but I assure you they are already up against housing and runners so even it were to loosen just a 12th of a turn, it's not going to go any further. I can take close ups another time but I am beyond pleased with these. My old setup, I had nuts/ bolts back out all the time. It became a routine to have a 13mm sitting in the car with me haha.
Reply
0
0
06-01-2016, 11:33 AM
#8
Junior Member
Thread Starter
iTrader: (1)
Join Date: Feb 2011
Location: Minot, ND
Posts: 255
Total Cats: 21
silly me,t he setup is right. I tricked myself into seeing something that was not there.
Last edited by sickmiatabra; 06-01-2016 at 11:44 PM. Reason: overlooked an overlook. lol. Nothing is wrong.
Reply
0
0

 06-01-2016, 11:54 PM
#13
Junior Member
Thread Starter
iTrader: (1)
Join Date: Feb 2011
Location: Minot, ND
Posts: 255
Total Cats: 21
It is true you want to have them resting against something. The problem is that there's still a little play in the grooves of the precuts for the "flags" and what happens is, I go to set them to the desired location, but the surfaces around the runners/structure starts to slope up causing it to hit before I can rest the entire flag down and fit the lock in clip on.
So the outcome is what you see, they are positioned as far as the can go counter clockwise so that it will not allow the nut to back out (as you already know) sadly, it won't be the strongest point of the flag applying the force, it will be the underside/inner edge of the flag grounding out on the curvature.
If I ever have the setup off again. I'll take a dremel to these locations to make sure the entire triangle is flat up against a point.
/rant Lol.
Reply
0
0
06-11-2016, 09:39 PM
#18
Junior Member
Thread Starter
iTrader: (1)
Join Date: Feb 2011
Location: Minot, ND
Posts: 255
Total Cats: 21
Thank man. I was trying to spread some knowledge here!
Can anyone explain to me how to upload videos properly. The linked video in previous reply is just a quick launch and flat shift video.
I need to know how to properly upload these before I continue to make any more :(
Thanks for any help.
Can anyone explain to me how to upload videos properly. The linked video in previous reply is just a quick launch and flat shift video.
I need to know how to properly upload these before I continue to make any more :(
Thanks for any help.
Reply
0
0
06-11-2016, 10:17 PM
#19
Elite Member

Join Date: Sep 2015
Location: San Jose, CA
Posts: 1,939
Total Cats: 117
Thank man. I was trying to spread some knowledge here!
Can anyone explain to me how to upload videos properly. The linked video in previous reply is just a quick launch and flat shift video.
I need to know how to properly upload these before I continue to make any more :(
Thanks for any help.
Can anyone explain to me how to upload videos properly. The linked video in previous reply is just a quick launch and flat shift video.
I need to know how to properly upload these before I continue to make any more :(
Thanks for any help.
Reply
0
0


