When you click on links to various merchants on this site and make a purchase, this can result in this site earning a commission. Affiliate programs and affiliations include, but are not limited to, the eBay Partner Network.
Thanks for the photos! I don't have an AC compressor, but I do have PS. I think I'm going to try to flip the PS inlet 180 towards the front of the car and try to run the turbo down like you originally had tried.
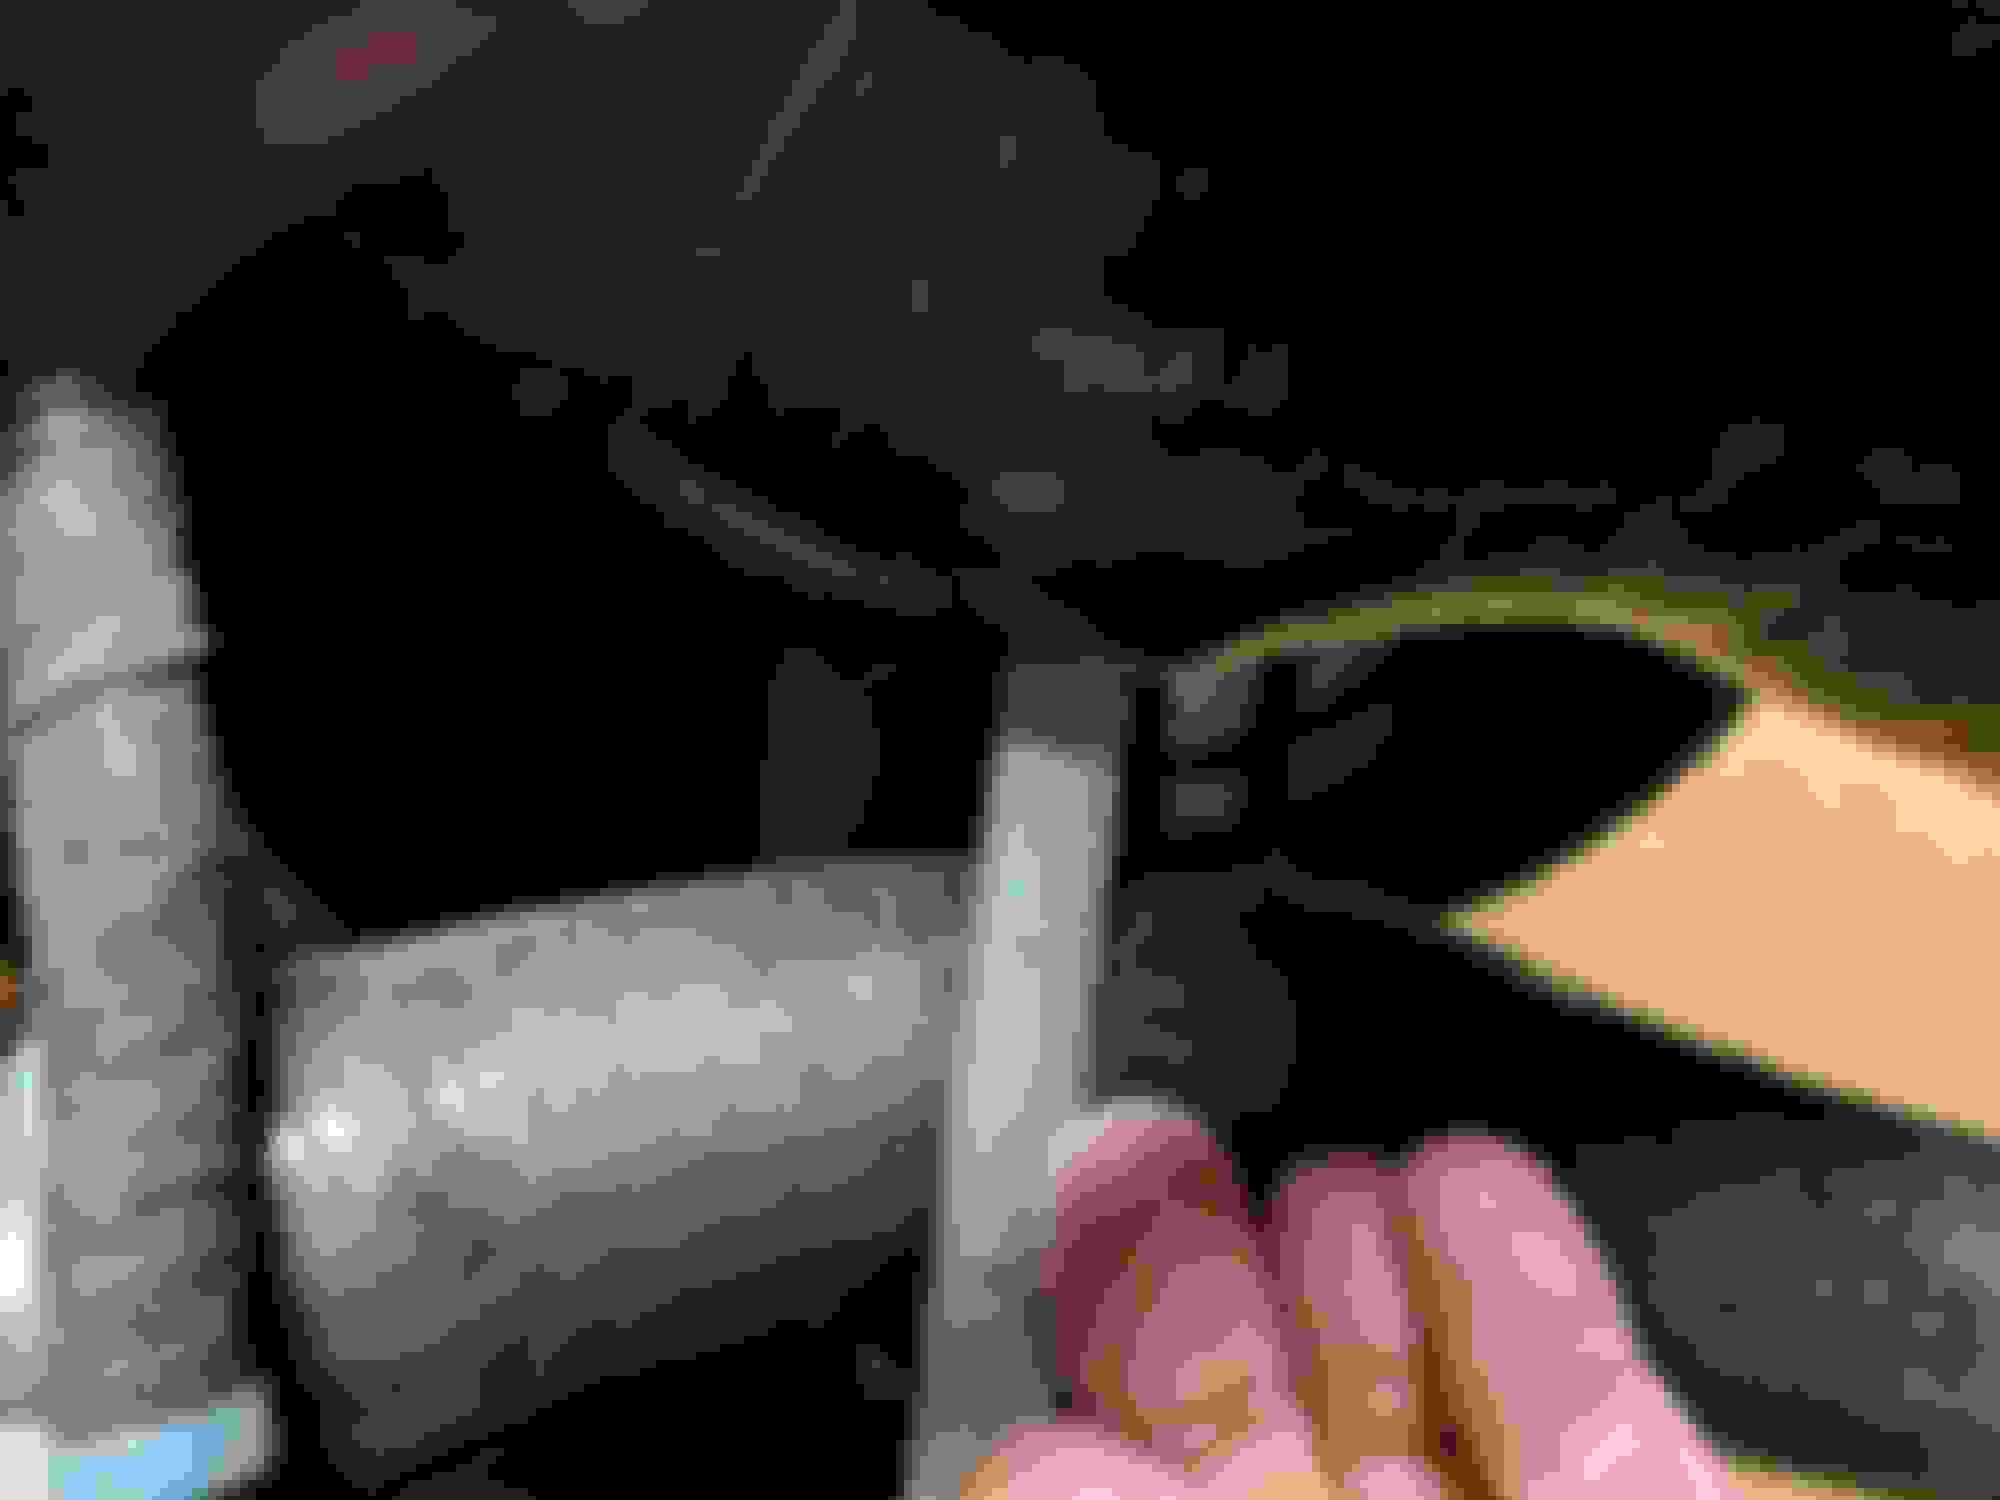
PS hose has to go. Also swap to an NB-style lower radiator hose which will give more room Once you move those two, there's room. It's very tight to the A/C compressor. A new PS hose/fitting is on my shortlist, but in the interim, you can order some 15mm OD tube from McMaster and bend your own. Mine wraps around the backside of the IC pipe, along a similar path but in metal form which leaves room for the IC pipe. It's the low-pressure side so there's no concern with the hose popping off.
notch your frame and clock the compressor housing further down. if you're comfortable with that. theres many different levels of notching it, which go from cutting the pinch weld and hammering it down to full out notch with weld in plates. Mine is a mixture of the two.
also you could ditch PS, or since thats the low pressure side you can cut that hard pipe down some and use a flex hose to move it where you need it.
There is if you don't want everything rubbing up against everything else. I have your turbo kit with a manual rack and no a/c and that was even tight. I wasn't cool with my rad hose (one piece from rad to inlet) rubbing on my compressor outlet. No offense man but this kit fits like crap on an NA. The dp wouldn't clean the tub below the heater core hoses, had to cut and notch the pin weld there, I had to bang in the floor a bit behind the gas pedal. And notch my hood to clear the wg actuator. Amongst other things. Just giving my input for my similar problem
The lower radiator hose interference is 100% BS, sorry. Not sure what to say about that other than "no ******* way". I don't know who made your lower hose but if it's OEM or OEM-style, there should be no interference, not even close. I have an NA race car on my rack right now, in fact, with an NB lower hose and my EFR kit, and there's a solid 3/4" of clearance all the way around the compressor outlet coupler. Clocking it deeper into the frame rail would just reduce the clearance I have. I've done half a dozen installs now with OEM lower rad hoses and none of them hits there. The OEM hose goes behind the compressor outlet with room to fit the drain line between the two, even.
The DP clearance to the tub is a known issue, we're going to tweak the DP fitment to hopefully cure the footwell issues. About 30% of cars need a tiny bit taken off the rear edge of the package shelf (less than 1/4" in all cases I've seen). No need to weld afterwards, that area is stitch welded and you aren't taking off enough material to compromise those welds. The mods there are far less extreme than what FM requires for installing their kit. The footwell issue affects fewer cars but more drastically. There is a lot of variance in the footwells, up to 3/4" or so. For NAs, maybe 1 in 10 cars has the issue, less for NBs. I have yet to see a car here with a "big" footwell, unfortunately.
The WG actuator does hit the hood on the NA. There isn't room to lower the turbo and clear the frame rail and the PS pump at the same time. BW's available "cheater bracket" kit cures this issue completely. If you have hood vents in an NA, it's also a non-issue since the bracing that causes the interference is deleted with Singular's hood vents.
On my every-option NB, the only mods required to fit the kit were the 15mm metal PS hose I mentioned above. The compressor outlet sits against the A/C compressor but just barely, not hard enough to cause any issues even in the long-term.
I appreciate the thorough reply and acknowledgment of known issues. My lower rad hose is a FM2 hose from when I was running an FM2 kit. Same with my compressor outlet. I already had notched my frame for my fm2 so I just simply extended it another 2inches and gave myself the extra room I wanted. Was it necessary. No. But it helped. My car seems to just have all the issues possible.
Yeah, the FM hose and our outlet are going to want to locate exactly the same real estate. The OEM hose actually curves backwards slightly, around the back of the turbo, and then tucks up against the frame rail before turning down towards the ground/radiator. The comp outlet sits completely inboard and forward of the OEM hose. Going back to an OEM hose may have required tweaking the lower FM2 hose as well.
I see. It's been over 4 years since I've seen it with the oem style. Well either way. That was my solution. Might work for someone else. Might not. Thanks for the help.
after some internal turmoil, i decided to remove the A/C. had it evacuated and pulled the equipment last week. happy with the decision. got the nb lower radiator hose in there as well.
working on the reroute of the power steering hose this week. other than that just busy hard finding time to get to the car. i'm still waiting on a TSE part that would complete the build so really just taking my time. Hoping to get to the intercooler pipe soon, will update when i do.
I am interested to see how you are going to use the NB lower. I have tried to mock up the FM lower using an NB lower hose with undesirable results. FM mentioned that a 1.6 lower should be used, but I have not tried that yet.
Also, planning to flip/bend the P/S fitting 180 degrees to make room for the turbo.
3x aluminum bends. One 90deg, one 60deg, one 45deg. These will be welded together. The idea is to get behind the swaybar, then wrap up and around it from behind. The 45deg bend is last in the sequence, and the piping comes up between the alternator, frame rail, and sway bar. The 90deg and 60deg can swap places depending on the exact path you take. Tuck it as tight as you can to the pulleys to leave clearance for fans.
90deg 2.5" to 2.5" (OEM TB) or 2.75" (Skunk2 TB) coupler into throttle body
The only other secret is to keep all the piping inboard of the sway bar on either side. That ensures clearance for the wheel/tire at full lock.
Before I could weld, I would fit all the pipes with 2" painters tape, then transport to a welder for tacking and welding. To trim/adjust silicone couplers, use a hose clamp as a guide and a brand new razorblade in a box knife. Fresh blades go through silicone like butter, and the guide makes the cut foolproof.
Beadroll both pipes when you're done and use good stainless worm-drive clamps.
 04-21-2018, 09:54 PM


 0
0


 The OEM hose actually curves backwards slightly, around the back of the turbo, and then tucks up against the frame rail before turning down towards the ground/radiator. The comp outlet sits completely inboard and forward of the OEM hose. Going back to an OEM hose may have required tweaking the lower FM2 hose as well.