
Miata LFX Swap (Singular Motorsports & Good-Win Racing)
 05-08-2016, 10:19 AM
#241
Boost Pope


iTrader: (8)
Join Date: Sep 2005
Location: Chicago. (The less-murder part.)
Posts: 33,019
Total Cats: 6,587
Seems like they could have made it a bit more complex if they'd really put some work into it. I mean, Porsche managed to add an unreliable intermediate shaft to the valvetrain drive without sacrificing any chains.

Reply
 0
0

0


 05-10-2016, 03:23 PM
#246
Supporting Vendor

Thread Starter
iTrader: (3)

Join Date: Jul 2006
Location: San Diego
Posts: 3,303
Total Cats: 1,216
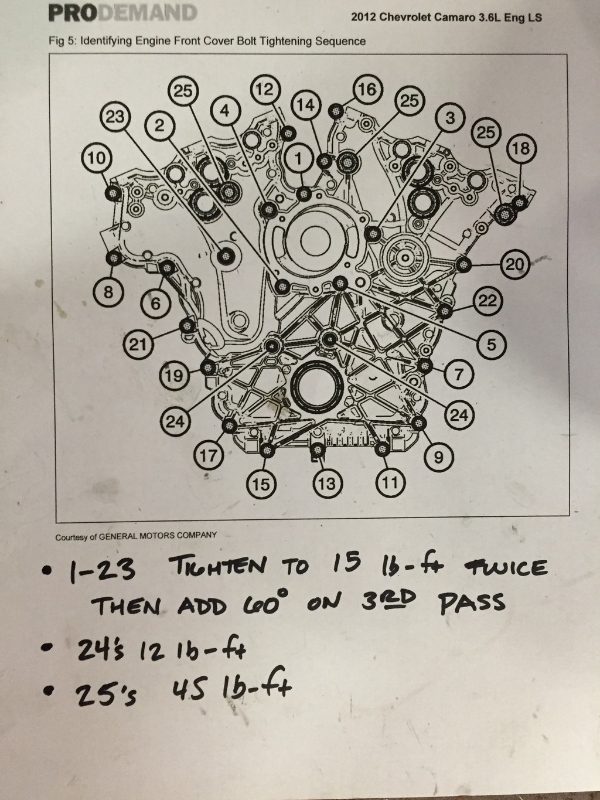
Slightly more involved tightening sequence than a BP motor XD
Getting the engine back together and closer to ready for first test-fit. Stripped the wiring harness off of it:
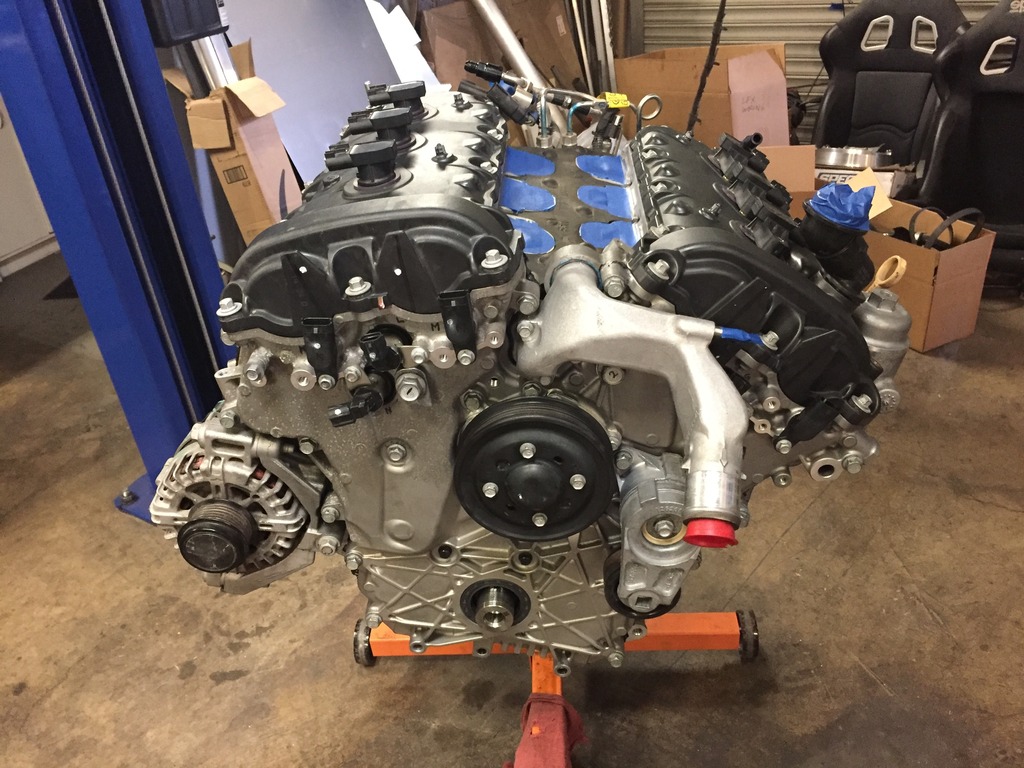
Back of the engine (with thermostat housing removed). Clear shot of the high pressure fuel pump for the direct injection on the back (A measly 1600 psi), with the EFI to AN fitting from the V8R fuel line kit on the end:

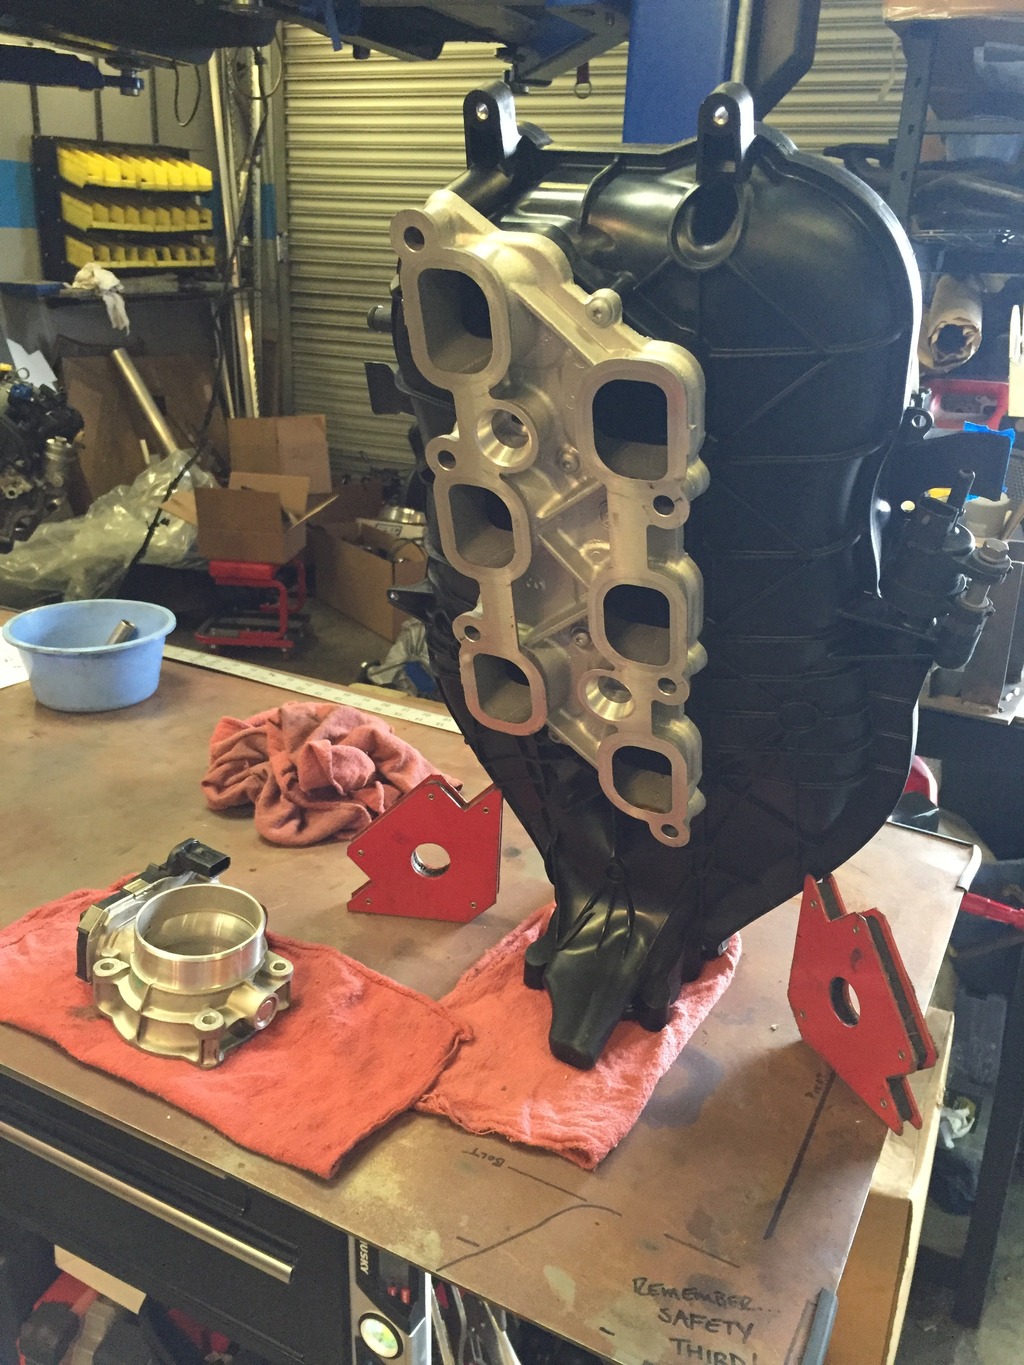
Underside of the composite intake manifold while it dries after cleaning:
Getting the engine back together and closer to ready for first test-fit. Stripped the wiring harness off of it:
Back of the engine (with thermostat housing removed). Clear shot of the high pressure fuel pump for the direct injection on the back (A measly 1600 psi), with the EFI to AN fitting from the V8R fuel line kit on the end:
Underside of the composite intake manifold while it dries after cleaning:
Reply
2
2

 05-11-2016, 02:48 PM
#249
Supporting Vendor
Thread Starter
iTrader: (3)
Join Date: Jul 2006
Location: San Diego
Posts: 3,303
Total Cats: 1,216
Not really, 1-23 are all M8 bolts, so the torque spec on them is relatively tiny. Those bolts will be fine. They could have just as easily just set a slightly higher torque spec for the third pass to get the same effect.
Credit goes to Moti for that one. One of my favorites from my days working at Blackbird Fabworx.
Credit goes to Moti for that one. One of my favorites from my days working at Blackbird Fabworx.
Reply
0
0
05-11-2016, 02:48 PM
#250
Supporting Vendor
Thread Starter
iTrader: (3)
Join Date: Jul 2006
Location: San Diego
Posts: 3,303
Total Cats: 1,216
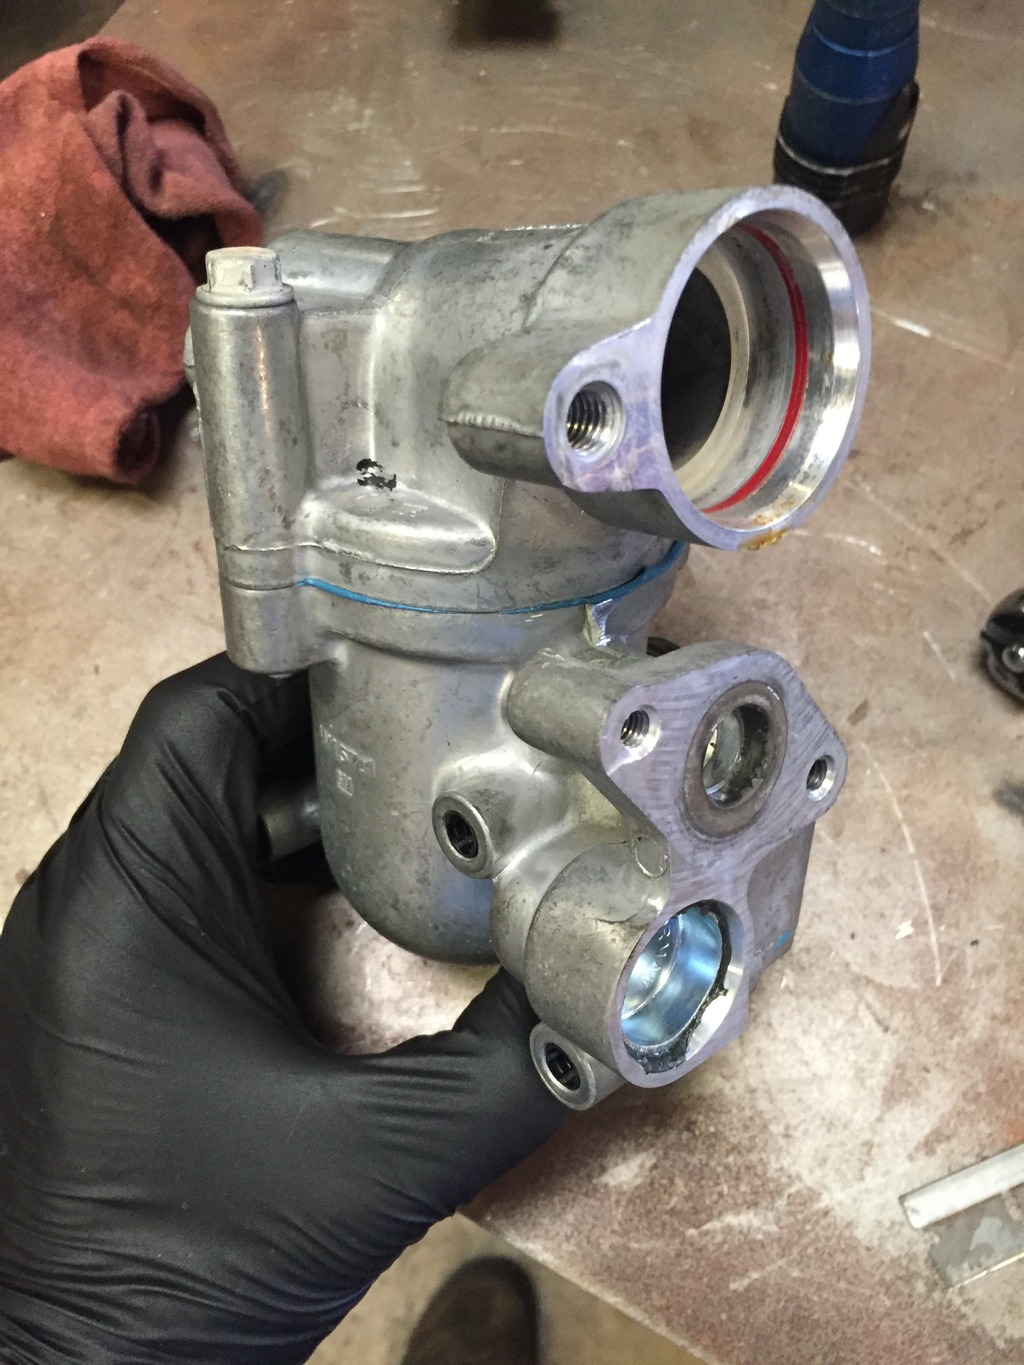
Thermostat housing. After looking at the coolant flow layout, we're pretty sure the heater line in/out (lower two holes) are not critical to coolant flow when thermostat is closed like on the BP motor. Used freeze plugs to seal those up, part number 555-007 (~0.47") and 555-016 (~0.38").
New thermostat (PN 73580) and gasket (PN 35781) installed as well.
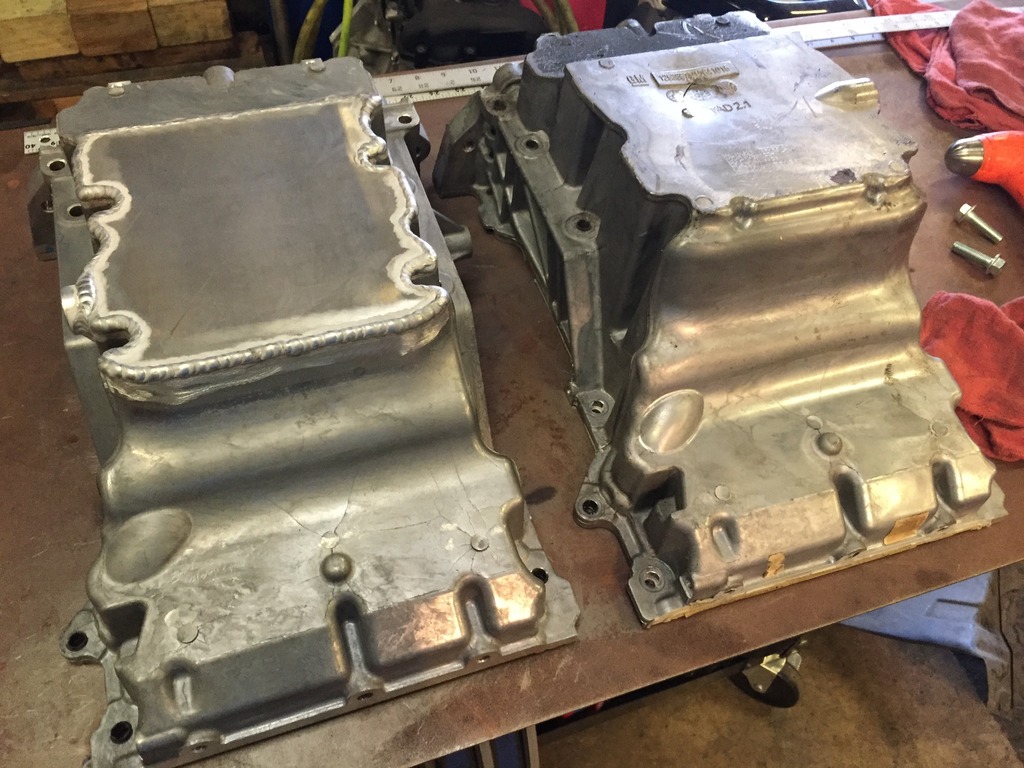
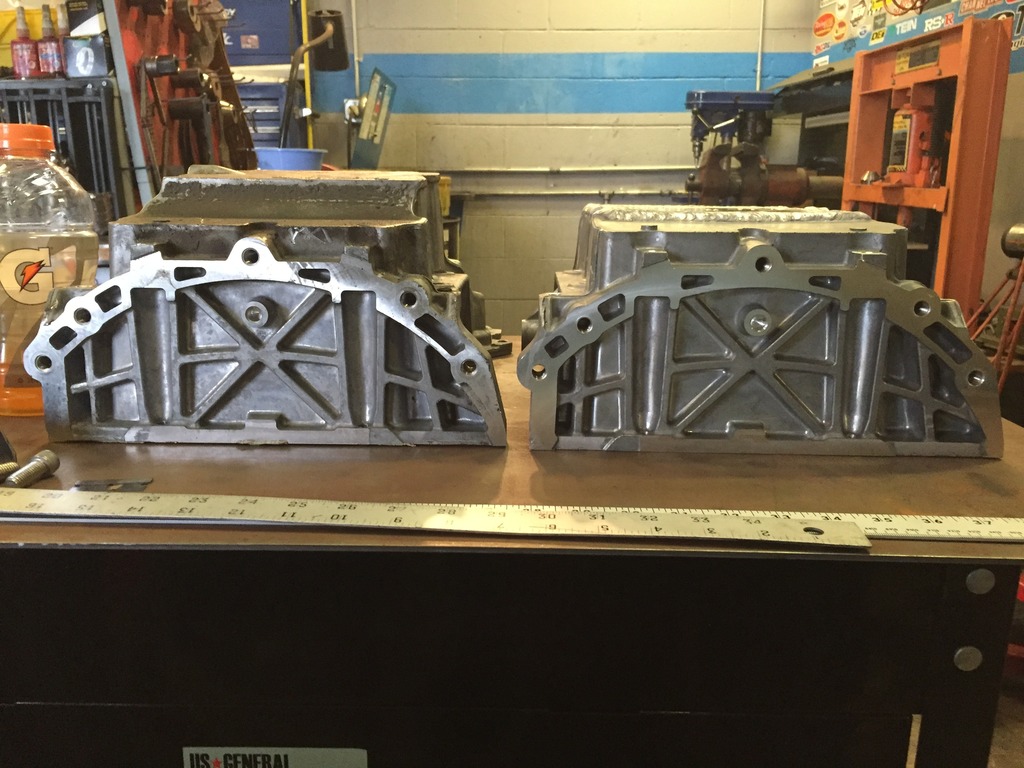
V8R modified pan beside stock pan. Higher clearance and the drain hole is moved to the left side:
New V8R pan is on the engine,
Picked a location for the SMI gauge's oil temp sensor, just above the drain plug in the pan:
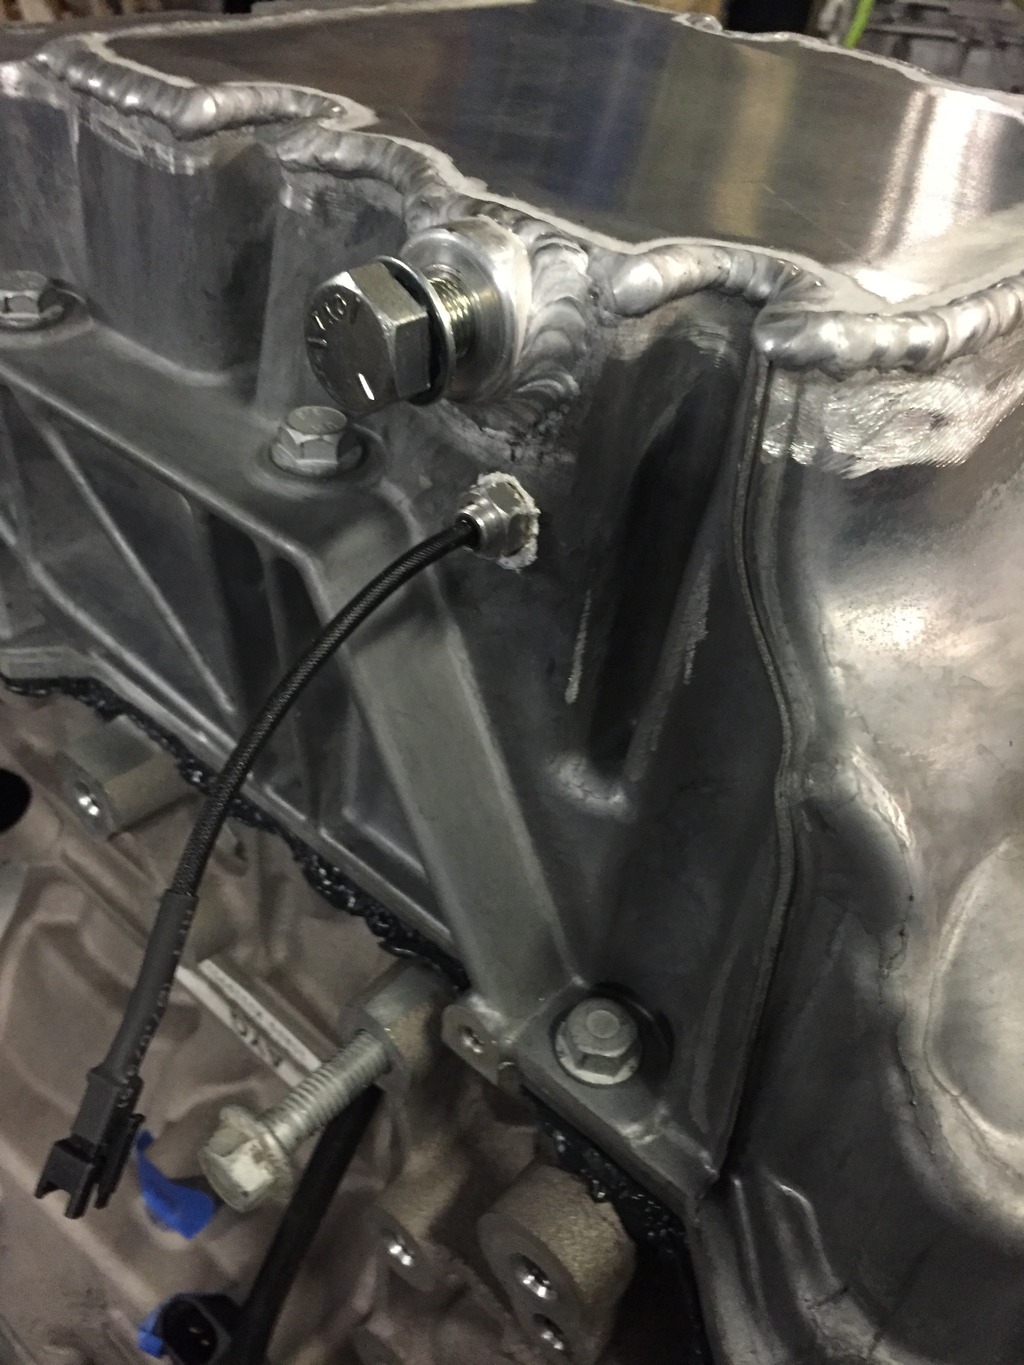
I also think I found a spot for the SMI water temp sensor where there is a water jacket plug in the block, but first I need to figure out what threads that plug is and then try to find an adapter.
Excited for the progress! So far I'm about 65 hours in, 40 of which are must-do's for the swap, the other 25 hours on "while I'm in there" stuff. First test-fit of the engine will be soon so I can start looking at logistics for cooling and exhaust as well as mock up the transmission which will allow me to do final placement of the frame rails and the differential pinion angle.
New thermostat (PN 73580) and gasket (PN 35781) installed as well.
V8R modified pan beside stock pan. Higher clearance and the drain hole is moved to the left side:
New V8R pan is on the engine,
Picked a location for the SMI gauge's oil temp sensor, just above the drain plug in the pan:
I also think I found a spot for the SMI water temp sensor where there is a water jacket plug in the block, but first I need to figure out what threads that plug is and then try to find an adapter.
Excited for the progress! So far I'm about 65 hours in, 40 of which are must-do's for the swap, the other 25 hours on "while I'm in there" stuff. First test-fit of the engine will be soon so I can start looking at logistics for cooling and exhaust as well as mock up the transmission which will allow me to do final placement of the frame rails and the differential pinion angle.
Reply
2
2
05-11-2016, 09:25 PM
#251
Some nanny backed the family Sprinter into my wife's car last week so we're driving around in a new Chevy Impala, complete with LFX engine. While Chevy has effectively silenced any engine growl, it hasn't stopped the bite. This big car moves out! I can only imagine what's going to happen when it gets stuffed into Ryan's car. 
Reply
0
0
05-12-2016, 11:50 AM
#252
Supporting Vendor
Thread Starter
iTrader: (3)
Join Date: Jul 2006
Location: San Diego
Posts: 3,303
Total Cats: 1,216
There's always an up-side, you get to play with an LFX!
I agree, a car with quite literally half the weight of the original car the engine came from sounds like a great recipe to me.
I agree, a car with quite literally half the weight of the original car the engine came from sounds like a great recipe to me.
Reply
0
0
05-12-2016, 01:37 PM
#255
Supporting Vendor
Thread Starter
iTrader: (3)
Join Date: Jul 2006
Location: San Diego
Posts: 3,303
Total Cats: 1,216
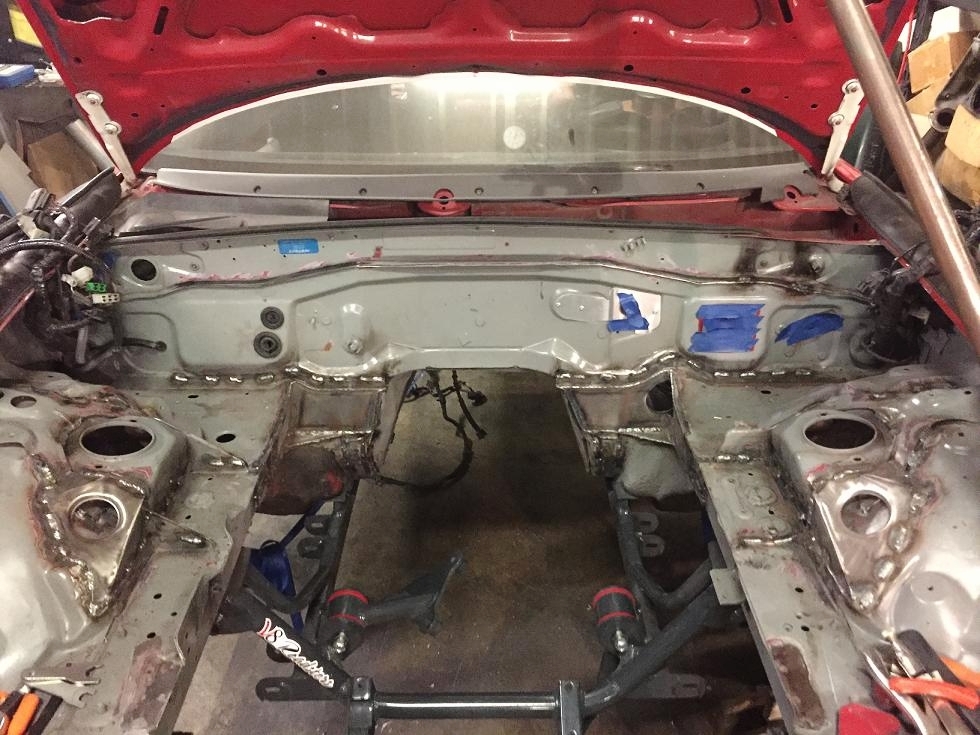
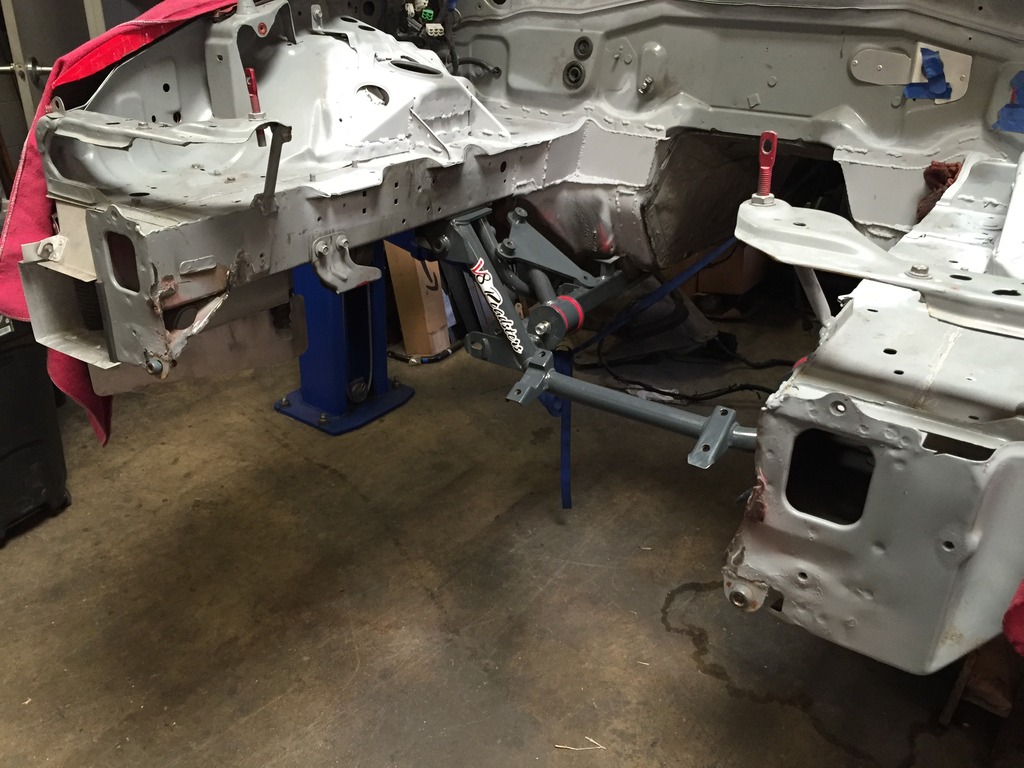
Final work on the engine bay after much stripping of seam sealer goo and paint removal - stitch welded the shock towers, frame rails and firewall.
Some might also remember that I had triangular shock tower gussets, those were something I made almost a decade ago, with my first welder when I had very little idea what I was doing...
It was time for those to go, but for primarily nostalgic reasons I made new versions of those gussets, this time with dimpled holes for more strength and some much improved welding
Sprayed all the welds with primer for the moment, will be painting the whole bay once all the test fits of the engine and other parts is done.
The existing cross-brace between the frame rails in the front was another area that I originally did many years ago and needed an update. That brace also had brackets for the now gone V-mounted intercooler, so a new version will be needed. Once the stitch welds had cooled I cut the old cross brace out, which has the added benefit of making ingress/egress for the engine test fitting nice and easy:
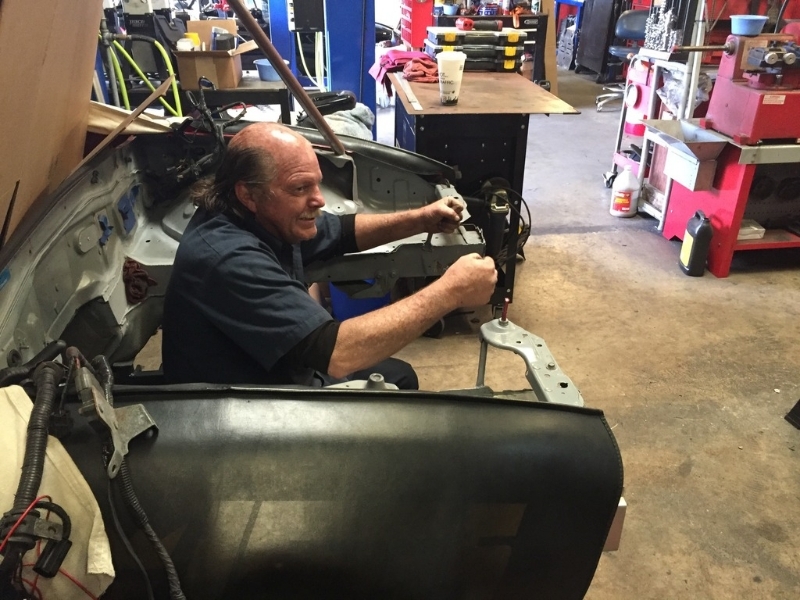
Rocky (Resident Miata Yoda and shop owner) wants the car to be running already:
Engine bay is ready to rock and roll for test-fitting the engine!
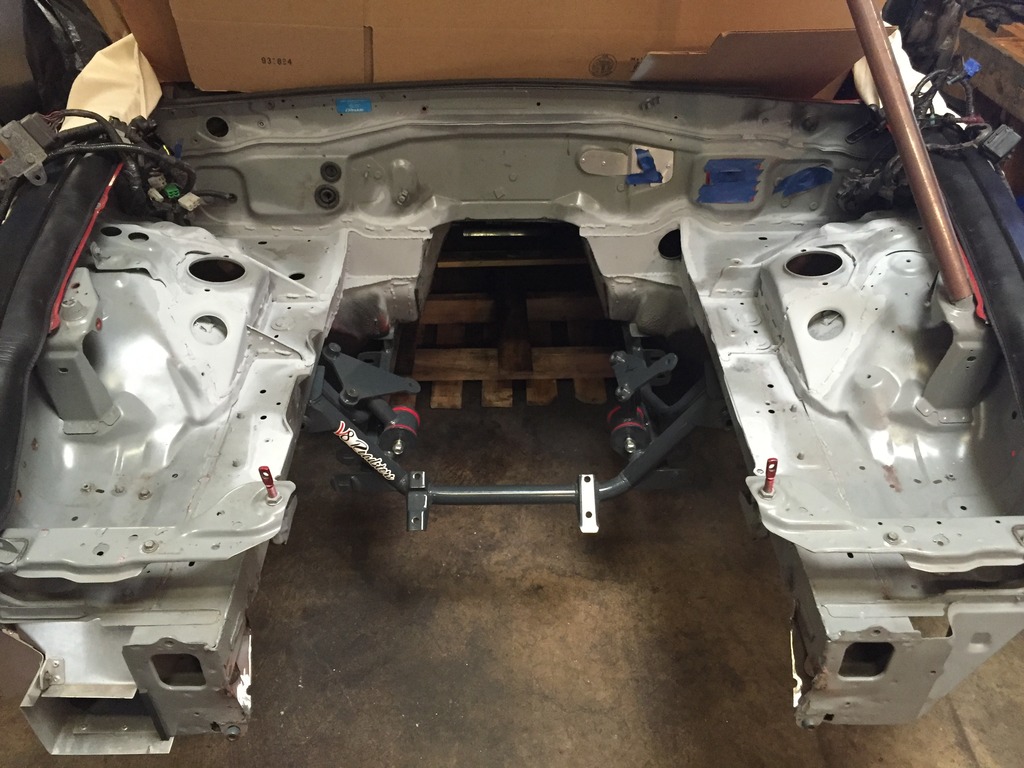
Note: in this photo, one thing was left to do before the engine could fit; the firewall area around the holes for the heater hoses needs to be massaged with a mallet to clear the high pressure fuel pump protrusion on the back of the LFX's left head. I did that after taking this pic, and it's not a very pretty sight for now, but once test fitting is done I'll come up with a clean way to finish that area.
Some might also remember that I had triangular shock tower gussets, those were something I made almost a decade ago, with my first welder when I had very little idea what I was doing...
It was time for those to go, but for primarily nostalgic reasons I made new versions of those gussets, this time with dimpled holes for more strength and some much improved welding
Sprayed all the welds with primer for the moment, will be painting the whole bay once all the test fits of the engine and other parts is done.
The existing cross-brace between the frame rails in the front was another area that I originally did many years ago and needed an update. That brace also had brackets for the now gone V-mounted intercooler, so a new version will be needed. Once the stitch welds had cooled I cut the old cross brace out, which has the added benefit of making ingress/egress for the engine test fitting nice and easy:
Rocky (Resident Miata Yoda and shop owner) wants the car to be running already:
Engine bay is ready to rock and roll for test-fitting the engine!
Note: in this photo, one thing was left to do before the engine could fit; the firewall area around the holes for the heater hoses needs to be massaged with a mallet to clear the high pressure fuel pump protrusion on the back of the LFX's left head. I did that after taking this pic, and it's not a very pretty sight for now, but once test fitting is done I'll come up with a clean way to finish that area.
Reply
0
0
05-12-2016, 04:51 PM
#256
Supporting Vendor
Thread Starter
iTrader: (3)
Join Date: Jul 2006
Location: San Diego
Posts: 3,303
Total Cats: 1,216
First test-fit. Yeah baby!
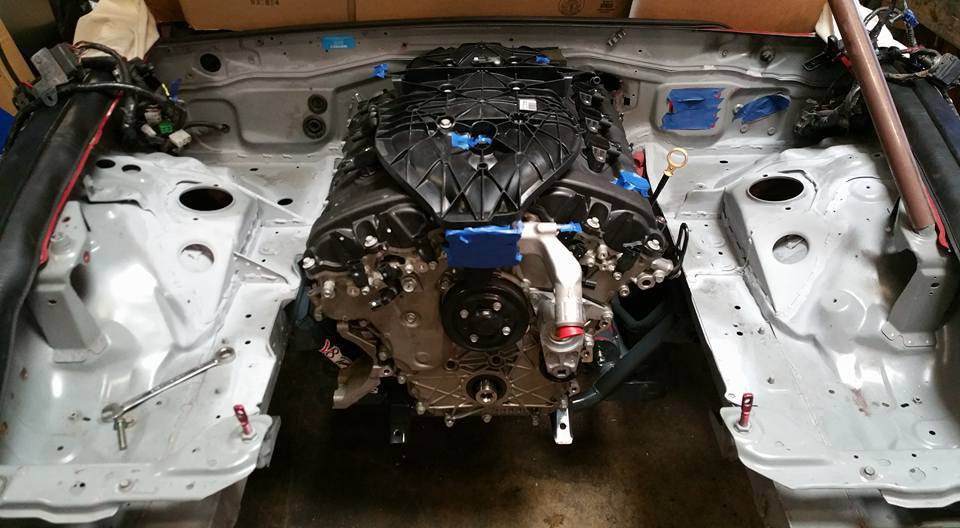
Notes... Remove the alternator and oil filter housing before it goes in, it makes navigating the engine between the frame rails much easier. Once engine is in you can bolt those back on.
I hammered more on the firewall by the heater hose holes than it turns out I needed to, but it's nice to have room to work back there. Once the engine is back out I'll probably cut that section out and weld in a new recessed wall there.
Reply
0
0
 05-13-2016, 12:44 PM
#258
Supporting Vendor
Thread Starter
iTrader: (3)
Join Date: Jul 2006
Location: San Diego
Posts: 3,303
Total Cats: 1,216
Just took some measurements off a Miata here at the shop and compared to the LFX sitting in my engine bay:
BP motor - front of the engine sits 22" forwards of the pinch weld on the back of the firewall at center.
The LFX has a staggered length because "V", right bank (Passenger side) sits 21.5" forwards from the same point on the firewall and left bank (Driver's side) sits 20.5" forwards of that point.
So, the motor sits further back than a BP, that's good. Add to this that the BP I was measuring for example had an MP62 blower bolted to the side of that, that's not light and it's positioned with all of its mass on the front 2/3rds of the BP motor. All superchargers are like this because they need the pulley to align with the other pulleys on the front of the engine. Then add the extra weight of intercooler way up on the nose... in other words, just about any way you can make close to the same power as the LFX with a BP, the motor's center of mass is actually much worse than the LFX.
Reply
0
0
05-13-2016, 08:27 PM
#259
Senior Member

Join Date: Oct 2011
Location: The Race Track & St Pete FL
Posts: 638
Total Cats: 57
I was look at taking of my aluminum plate under the intake manifold and make a carbon composite one with 2 stock throttle bodies or 1 105mm. After looking at intake mods, the stock intake manifold is a bottle neck.
On the oil pan I had it welded up to make fit in my 1993 for $40
On the oil pan I had it welded up to make fit in my 1993 for $40
Reply
0
0


