
Miata LFX Swap (Singular Motorsports & Good-Win Racing)
 05-16-2016, 03:22 AM
#261
Supporting Vendor

Thread Starter
iTrader: (3)

Join Date: Jul 2006
Location: San Diego
Posts: 3,303
Total Cats: 1,216
I won't be doing anything like this for now, need to get good baseline numbers before tweaking bits for any additional power. I have a few things in mind though.


Reply
 0
0

0
05-16-2016, 03:22 AM
#262
Supporting Vendor
Thread Starter
iTrader: (3)
Join Date: Jul 2006
Location: San Diego
Posts: 3,303
Total Cats: 1,216
Transmission and differential!
With the engine in place I could finalize placement of the rest of the drivetrain downstream.
Transmission bolted up without issues. The trans has a mount in the rear that bolts to a crossmember which ties in with the framerails, so leave the framerails unmounted until you have the transmission bolted up to dictate their placement.
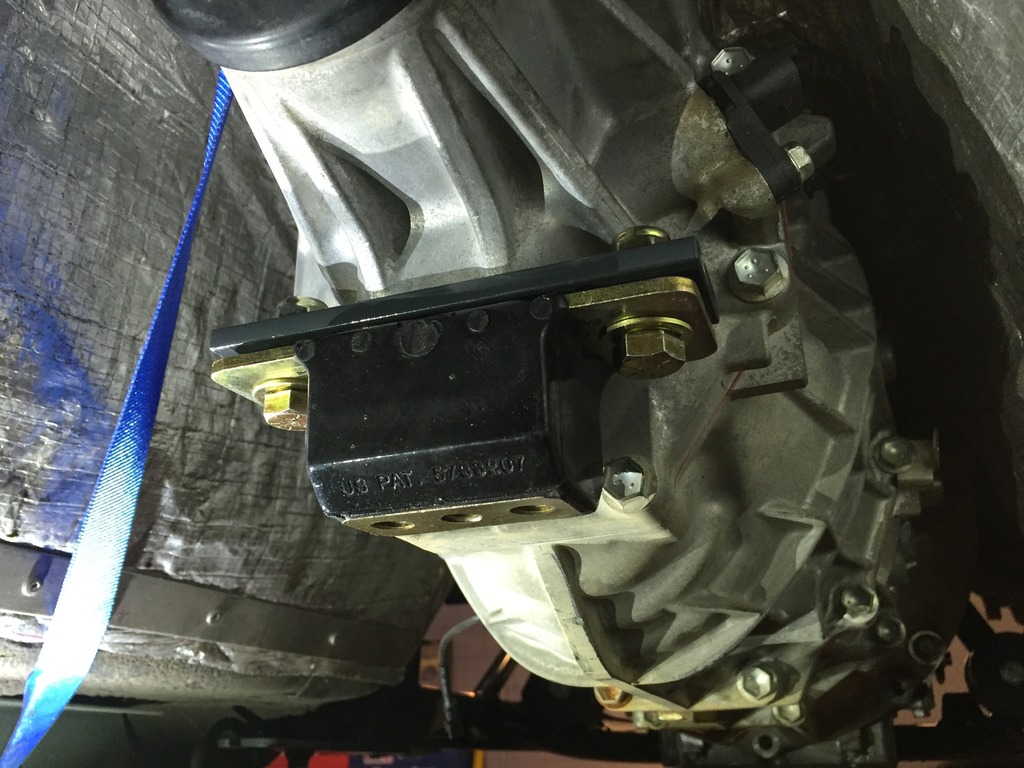
V8R uses an energy suspension poly bushing in the rear diff mount. Here's the mount bolted up without the crossmember in place:
**Note the ratcheting strap: the chassis is strapped to the lift front and rear, with everything down to the subframes going in/out multiple times you don't want to need to keep track of how much weight is on each end of the car so it doesn't fall off the lift.
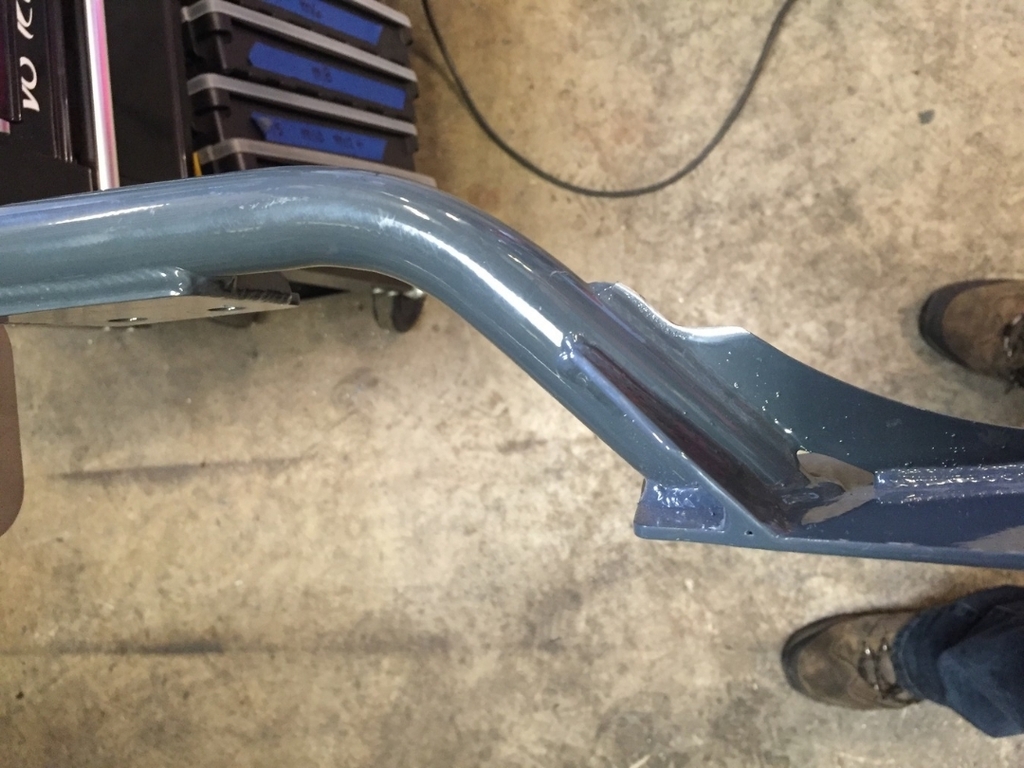
Here's the crossmember added. The crossmember interfered with the passenger side corner of the transmission tunnel and floor, which you can see in this pic:

Taking this notch out of the crossmember fixed the interference and then everything could square up:
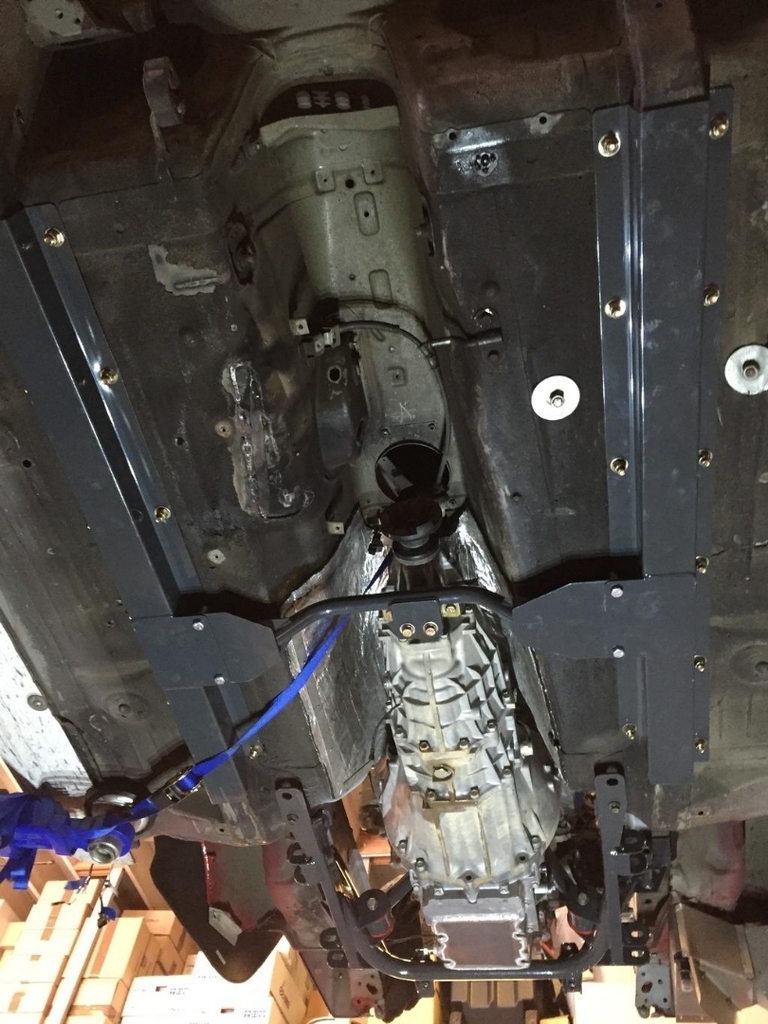
With the crossmember bolted up, the framerails could be bolted in their final resting place. Lots of drilling and then torquing bolts (2 person job - one person in the car with a wrench on top):
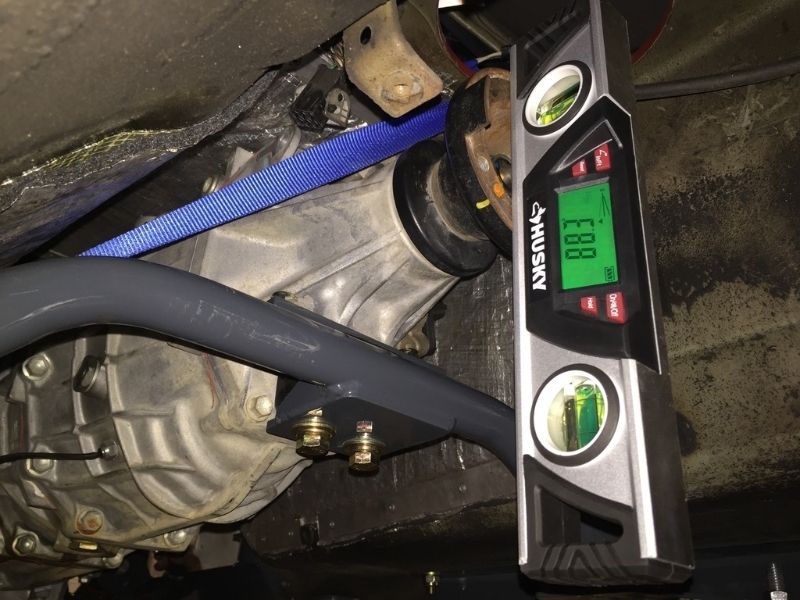
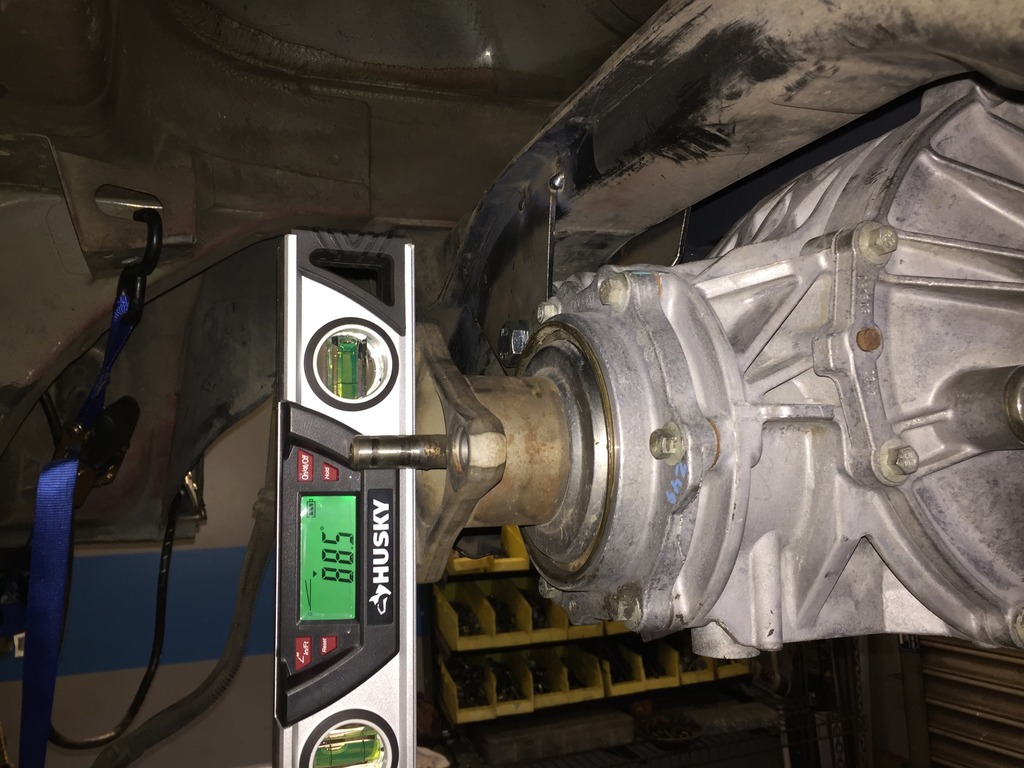
Checking the transmission angle. It's sitting at 1.7� nose-up here. With the rear trans mount torqued down it cinches down to 1.6�:
Moving on to the diff!
V8R's diff mount kit includes a bracket that bolts to the two ears on the back of the Getrag diff which then slide up on to the same two long studs in the rear subframe that the Miata diff bolts to. The kit also includes two bare steel tabs that get welded to the subframe for the Getrag's front mount:
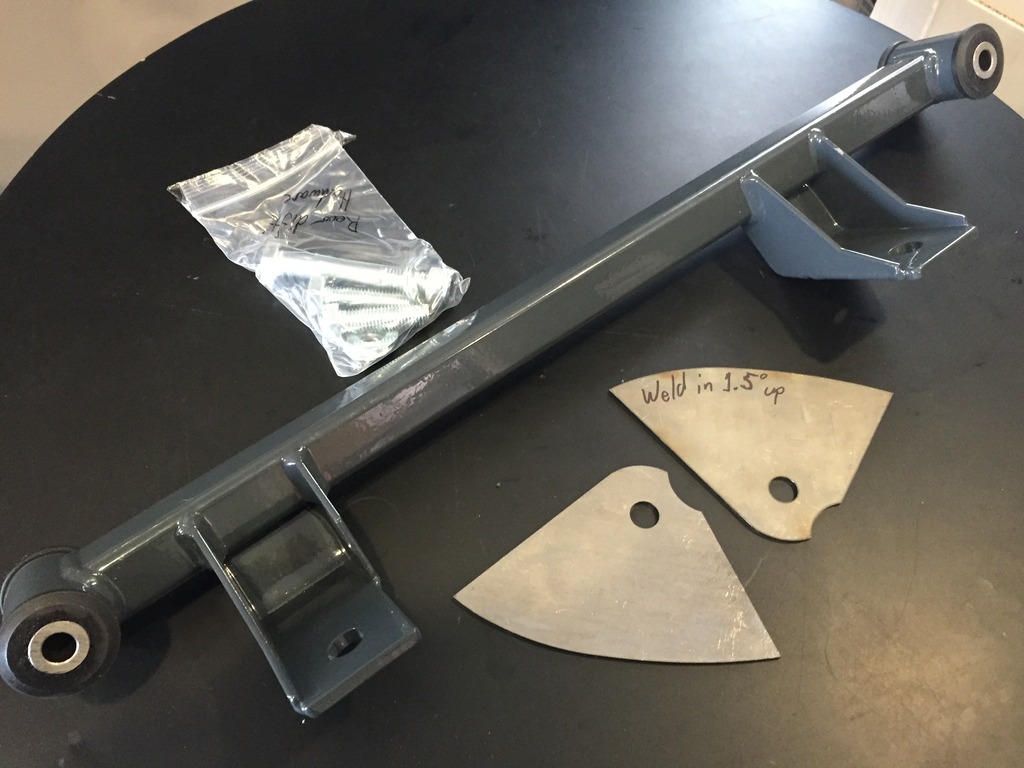
V8R's instructions are to weld the front mount in so that the pinion angle is 1.5� nose-up, which looks perfect now that we know the transmission's angle.
Bolt the rear mount to the diff and then bolt that to the subframe. I forgot to specify I wanted the diff's factory mounting bolts when I got the diff from the yard so I had to source some - they're M14x2.0, two 45mm long for the rear and one 90mm for the front plus lock washers for all three and a nut for the front.
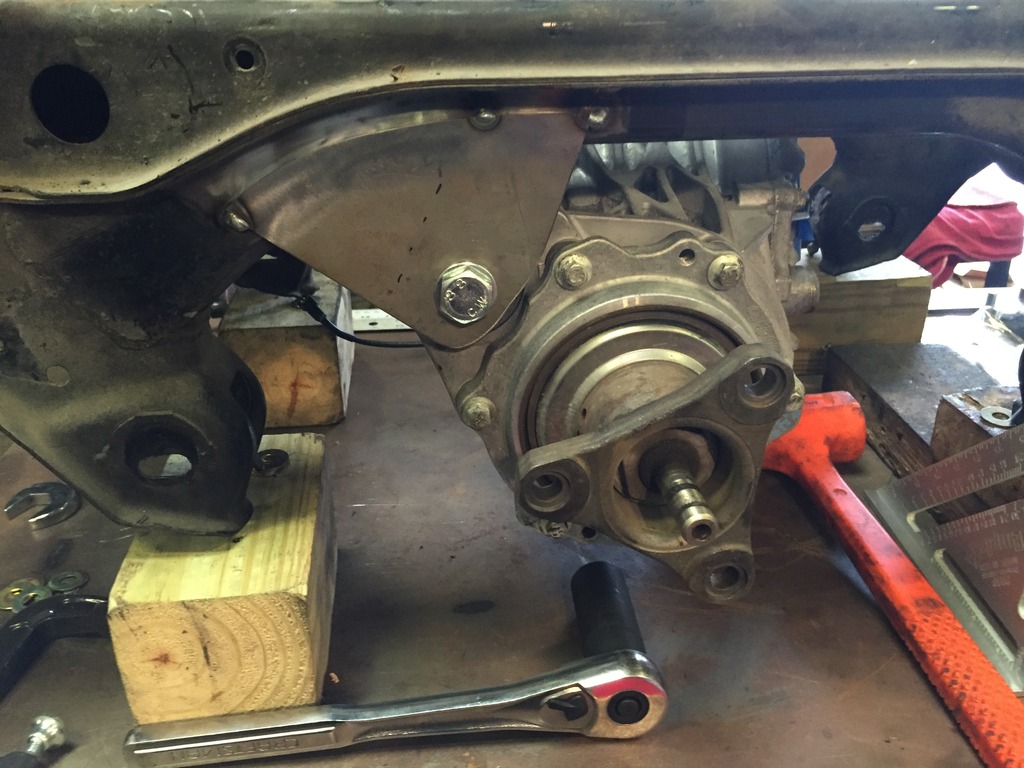
The rear mount has roughly the correct angle preloaded into it, so with the diff mounted to the subframe you just shim the nose as necessary to dial in the exact angle. I needed to shim the nose down a bit, you can see the shim stack in the background of this pic:
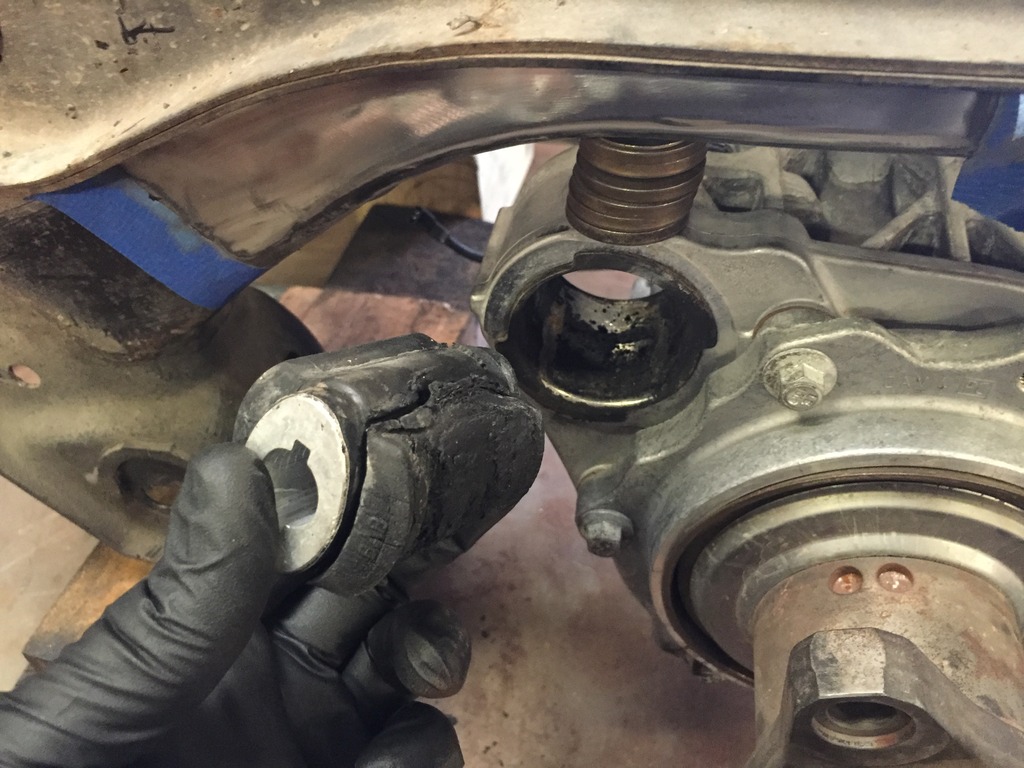
Also pictured is the fun discovery that the front factory bushing was completely shot - it just popped out in my hand. Obviously this had to be replaced. Despite most of the bushing already being out, the tough part of the bushing removal was still to be done. You have to remove the steel sleeve that the bushing was once connected to. It does not come out gently:
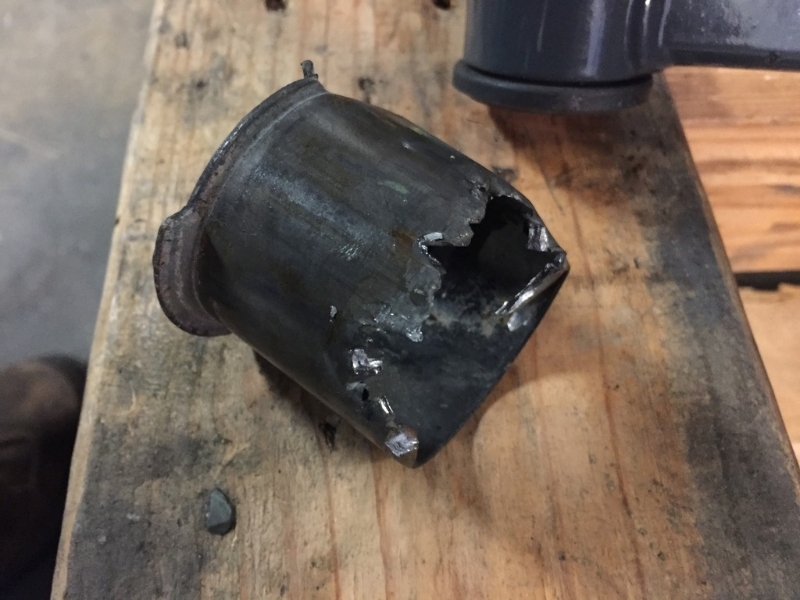
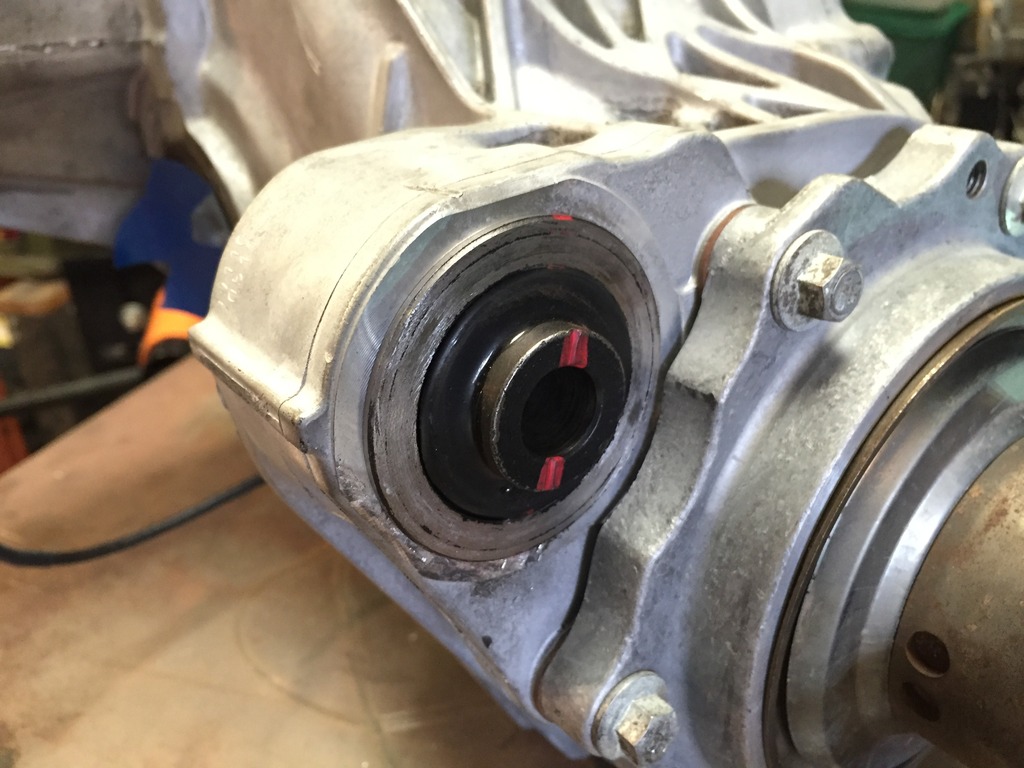
The factory design is prone to fast wear under hard use because it's soft and has a lot of air gap around the center sleeve. On a street car you'll want the factory bushing (Moog PN K200641), but for track use I chose a poly replacement. There are a couple on the market, I settled on one from Creative Steel - this is the "street" durometer which is 75A. We air-hammered this in which was nice and easy. I don't envy someone trying to press this in considering the proximity to the housing:
With that lovely side-track behind us, back to the front mount...
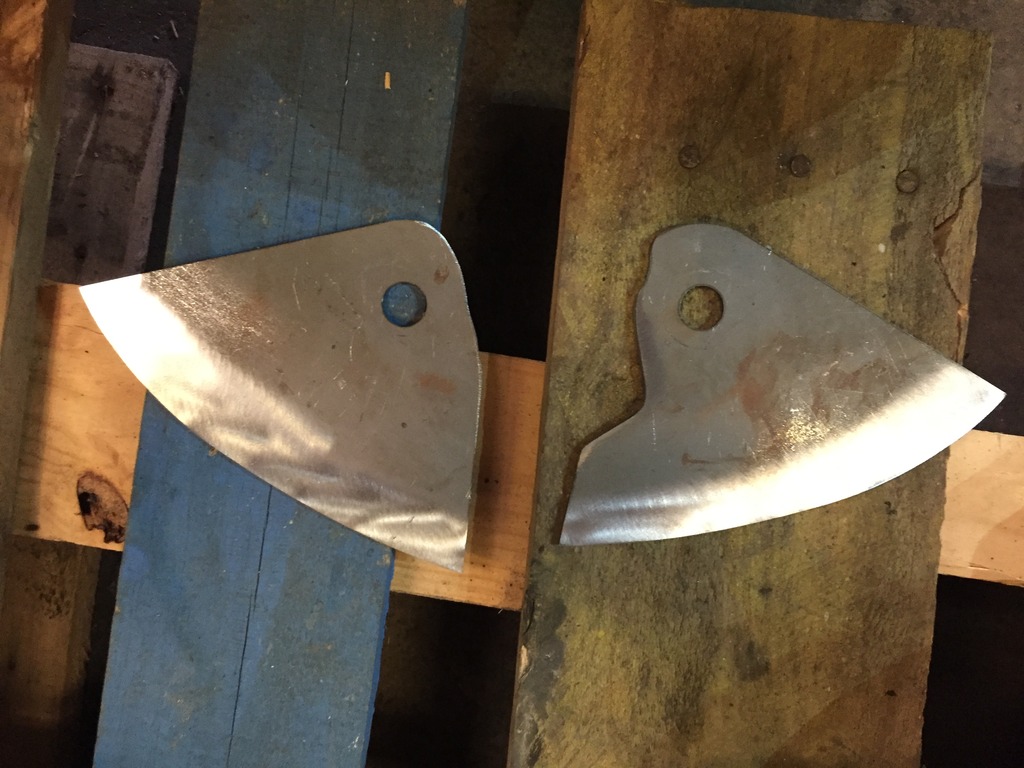
The two steel tabs are identical, but I found they both needed some grinding to clear the housing better. The front just got a bit of clearancing on the outer radius by the hole. The rear tab needed to be notched:
More than one way to tackle setting the pinion angle prior to welding, my method to eliminate variables as much as possible was to set the whole assembly on the bench and shim the subframe to dead level and then shim the diff to the 1.5�:
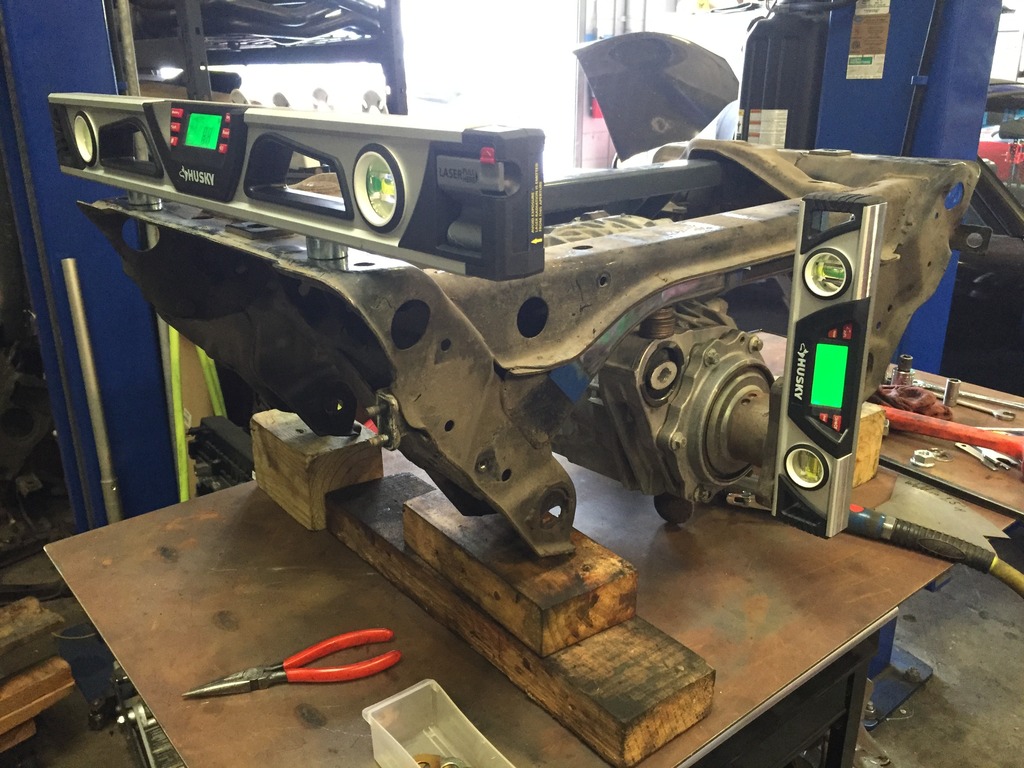
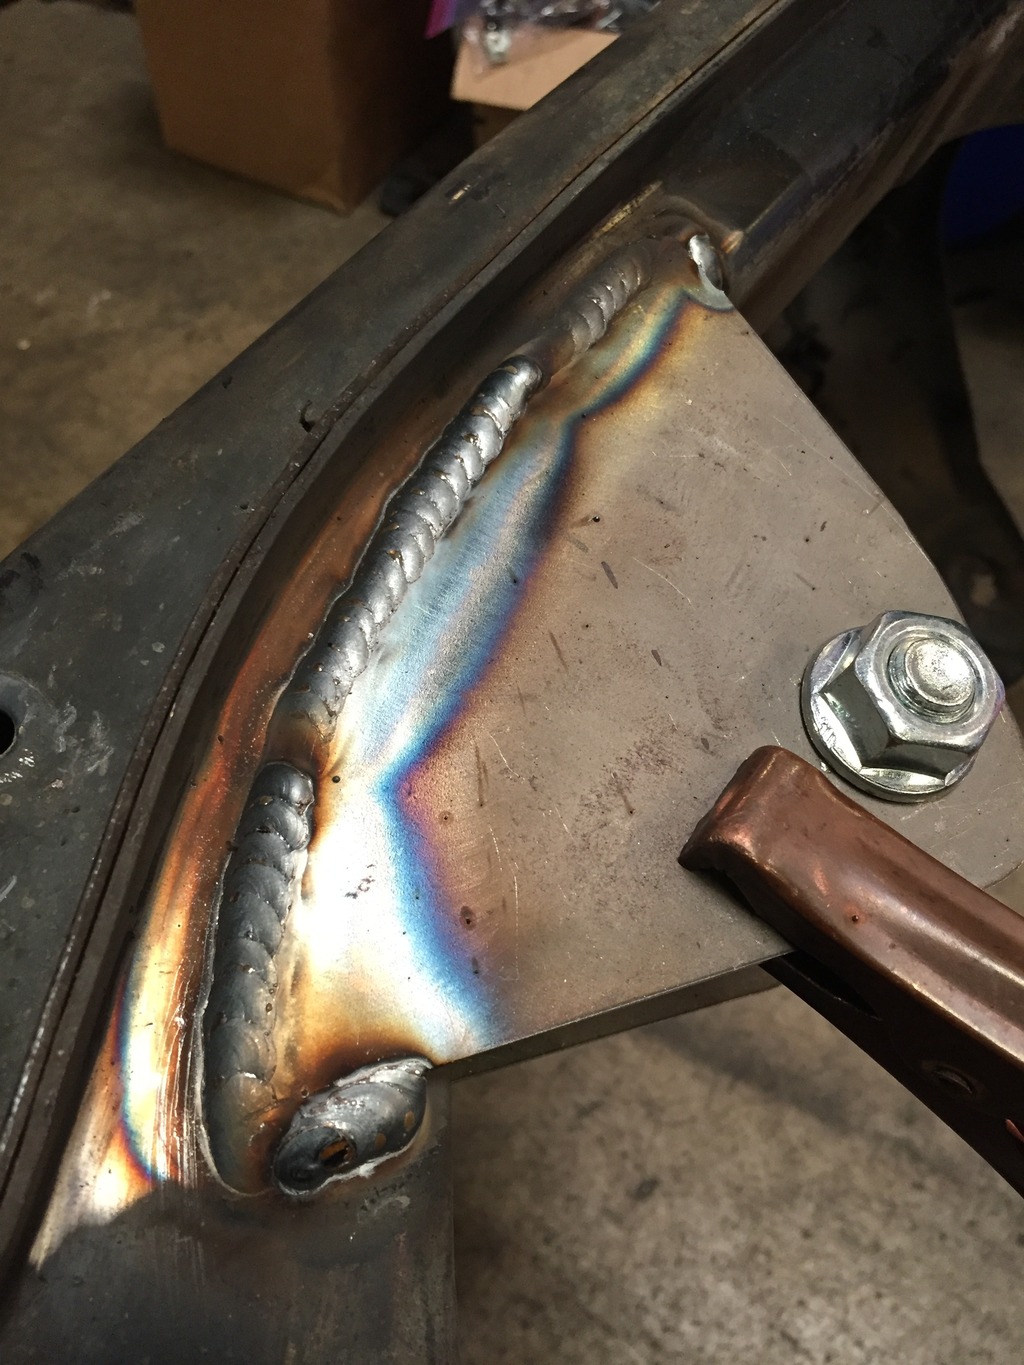
Then tack-weld the tabs in place:
Rear tab tack welded in, you can see why I notched that tab:
These are tack welded ONLY at this point. Always test fit in the car and measure before finalizing. The car might not be dead level on the rack or jack stands, and that transmission angle that was measured is relative to actual horizontal, not to the car. Measure many, many times and weld once.
Turns out, the car is level on the rack Diff sits at 1.5� nose-up, matching the transmission's angle within 0.1�:
Subframe comes BACK out again, and final welding can happen. Diff is removed from the subframe for this of course. I cut a length of steel tube to match the length of the diff's front mount and bolted that between the tabs while welding to prevent warping. Don't leave the diff in there to serve that purpose, you'll melt the bushing.
That's it! Subframe will get cleaned and painted now along with some other parts.
With the engine in place I could finalize placement of the rest of the drivetrain downstream.
Transmission bolted up without issues. The trans has a mount in the rear that bolts to a crossmember which ties in with the framerails, so leave the framerails unmounted until you have the transmission bolted up to dictate their placement.
V8R uses an energy suspension poly bushing in the rear diff mount. Here's the mount bolted up without the crossmember in place:
**Note the ratcheting strap: the chassis is strapped to the lift front and rear, with everything down to the subframes going in/out multiple times you don't want to need to keep track of how much weight is on each end of the car so it doesn't fall off the lift.
Here's the crossmember added. The crossmember interfered with the passenger side corner of the transmission tunnel and floor, which you can see in this pic:
Taking this notch out of the crossmember fixed the interference and then everything could square up:
With the crossmember bolted up, the framerails could be bolted in their final resting place. Lots of drilling and then torquing bolts (2 person job - one person in the car with a wrench on top):
Checking the transmission angle. It's sitting at 1.7� nose-up here. With the rear trans mount torqued down it cinches down to 1.6�:
Moving on to the diff!
V8R's diff mount kit includes a bracket that bolts to the two ears on the back of the Getrag diff which then slide up on to the same two long studs in the rear subframe that the Miata diff bolts to. The kit also includes two bare steel tabs that get welded to the subframe for the Getrag's front mount:
V8R's instructions are to weld the front mount in so that the pinion angle is 1.5� nose-up, which looks perfect now that we know the transmission's angle.
Bolt the rear mount to the diff and then bolt that to the subframe. I forgot to specify I wanted the diff's factory mounting bolts when I got the diff from the yard so I had to source some - they're M14x2.0, two 45mm long for the rear and one 90mm for the front plus lock washers for all three and a nut for the front.
The rear mount has roughly the correct angle preloaded into it, so with the diff mounted to the subframe you just shim the nose as necessary to dial in the exact angle. I needed to shim the nose down a bit, you can see the shim stack in the background of this pic:
Also pictured is the fun discovery that the front factory bushing was completely shot - it just popped out in my hand. Obviously this had to be replaced. Despite most of the bushing already being out, the tough part of the bushing removal was still to be done. You have to remove the steel sleeve that the bushing was once connected to. It does not come out gently:
The factory design is prone to fast wear under hard use because it's soft and has a lot of air gap around the center sleeve. On a street car you'll want the factory bushing (Moog PN K200641), but for track use I chose a poly replacement. There are a couple on the market, I settled on one from Creative Steel - this is the "street" durometer which is 75A. We air-hammered this in which was nice and easy. I don't envy someone trying to press this in considering the proximity to the housing:
With that lovely side-track behind us, back to the front mount...
The two steel tabs are identical, but I found they both needed some grinding to clear the housing better. The front just got a bit of clearancing on the outer radius by the hole. The rear tab needed to be notched:
More than one way to tackle setting the pinion angle prior to welding, my method to eliminate variables as much as possible was to set the whole assembly on the bench and shim the subframe to dead level and then shim the diff to the 1.5�:
Then tack-weld the tabs in place:
Rear tab tack welded in, you can see why I notched that tab:
These are tack welded ONLY at this point. Always test fit in the car and measure before finalizing. The car might not be dead level on the rack or jack stands, and that transmission angle that was measured is relative to actual horizontal, not to the car. Measure many, many times and weld once.
Turns out, the car is level on the rack
Diff sits at 1.5� nose-up, matching the transmission's angle within 0.1�:Subframe comes BACK out again, and final welding can happen. Diff is removed from the subframe for this of course. I cut a length of steel tube to match the length of the diff's front mount and bolted that between the tabs while welding to prevent warping. Don't leave the diff in there to serve that purpose, you'll melt the bushing.
That's it! Subframe will get cleaned and painted now along with some other parts.
Last edited by ThePass; 05-22-2016 at 10:28 PM.
Reply
3
3
05-16-2016, 05:31 PM
#263
Supporting Vendor
Thread Starter
iTrader: (3)
Join Date: Jul 2006
Location: San Diego
Posts: 3,303
Total Cats: 1,216
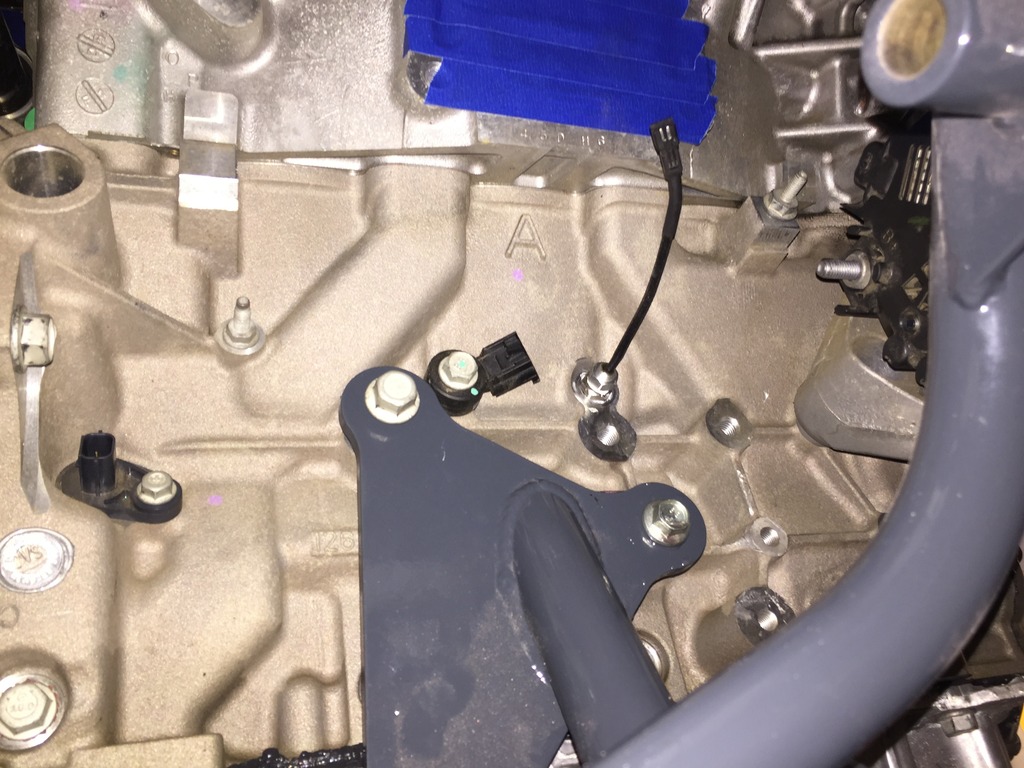
Location found for the SMI water temp gauge's sensor. This port is plugged with an allen head bolt, confirmed it goes to a water jacket because I got a face full of coolant when I pulled the plug despite having the motor upside-down a dozen times..
Right side of the block:
Right side of the block:
Reply
1
1
05-16-2016, 05:31 PM
#264
Supporting Vendor
Thread Starter
iTrader: (3)
Join Date: Jul 2006
Location: San Diego
Posts: 3,303
Total Cats: 1,216
Location found for the SMI water temp gauge's sensor. This port is plugged with an allen head bolt, confirmed it goes to a water jacket because I got a face full of coolant when I pulled the plug despite having the motor upside-down a dozen times..
Right side of the block:

Right side of the block:
Reply
1
1
05-16-2016, 05:48 PM
#265
Supporting Vendor
Thread Starter
iTrader: (3)
Join Date: Jul 2006
Location: San Diego
Posts: 3,303
Total Cats: 1,216
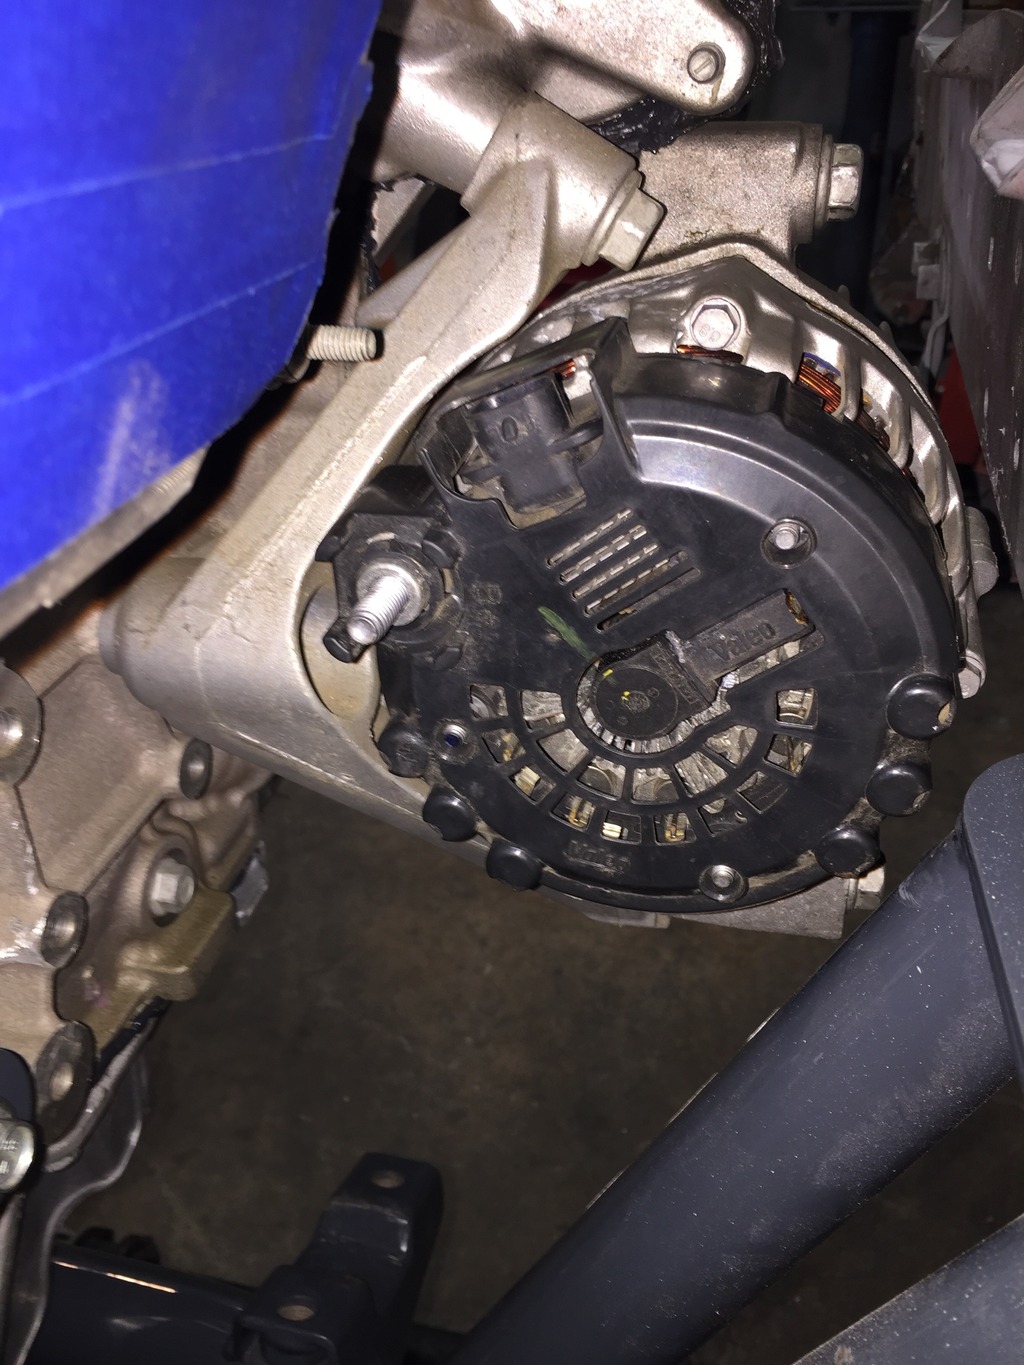
Alternator on the LFX had a bit of a clearance issue - the stud on the back contacts the subframe.
Solution we came up with was to clock the alternator. Four M4 bolts holding the front and rear together (remember to mark the studs position before clocking), then remove the plastic cover on the rear and finally remove the small plastic cover over the brushes in the center on the back:
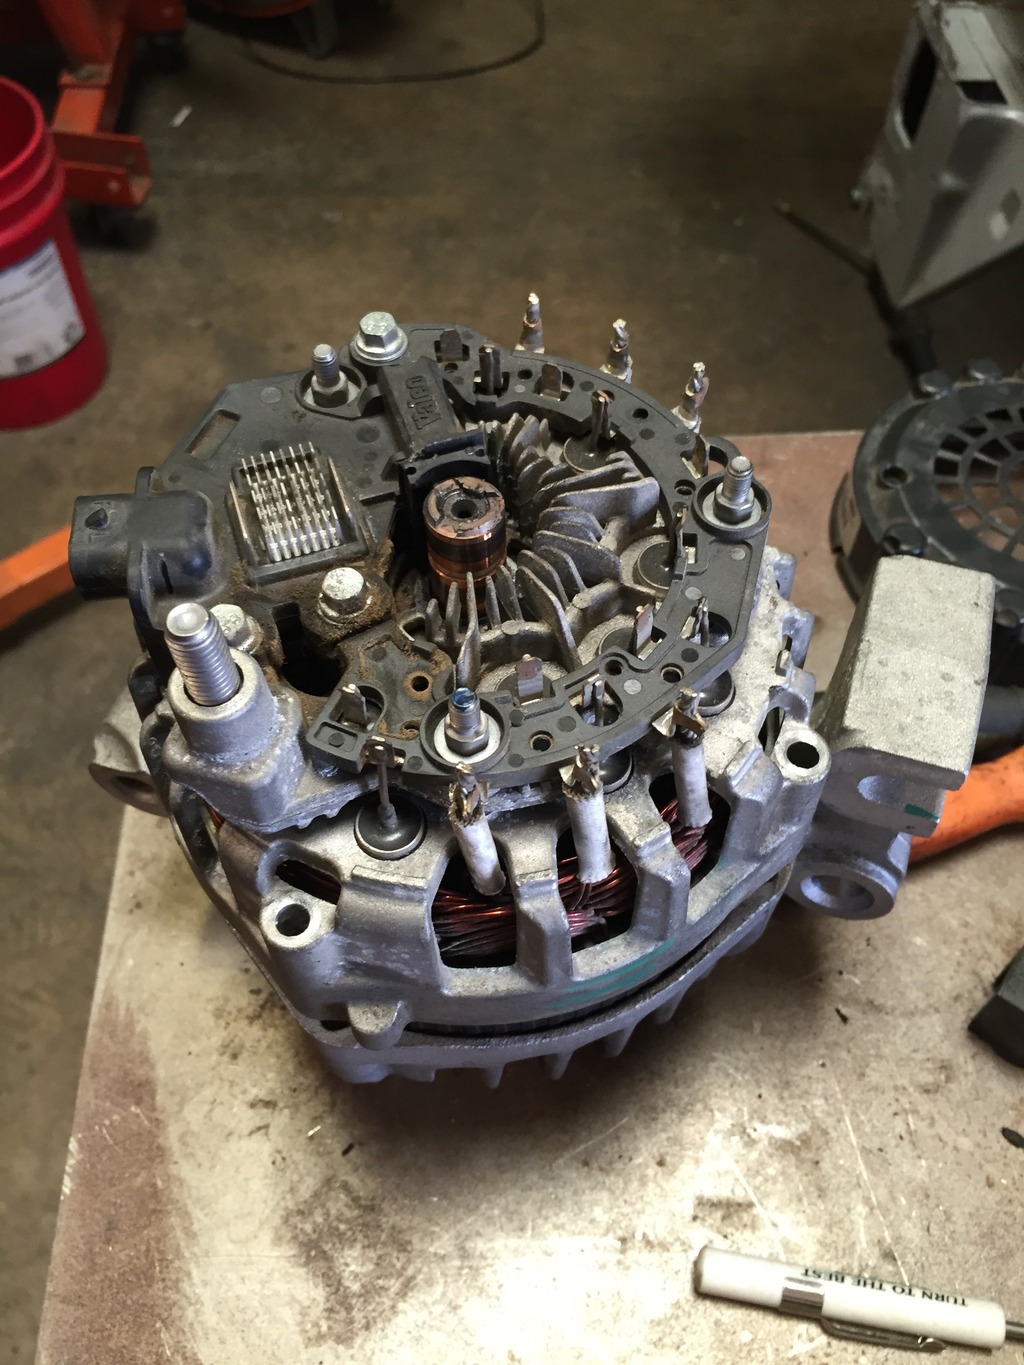
pull the two halves apart, rotate the assembly 180� and drop them back together. You have to push the brushes in for the center shaft to slide all the way back in.
With the alternator clocked, the stud is nice and far away from the subframe:
Solution we came up with was to clock the alternator. Four M4 bolts holding the front and rear together (remember to mark the studs position before clocking), then remove the plastic cover on the rear and finally remove the small plastic cover over the brushes in the center on the back:
pull the two halves apart, rotate the assembly 180� and drop them back together. You have to push the brushes in for the center shaft to slide all the way back in.
With the alternator clocked, the stud is nice and far away from the subframe:
Reply
3
3

 05-16-2016, 06:33 PM
#268
Senior Member

Join Date: May 2007
Location: Atlanta
Posts: 997
Total Cats: 156
edit: it looks like the 2 pin control socket is different - ours exits the rear whereas yours exits top. Different alternators? Ours was a 2013 pullout.
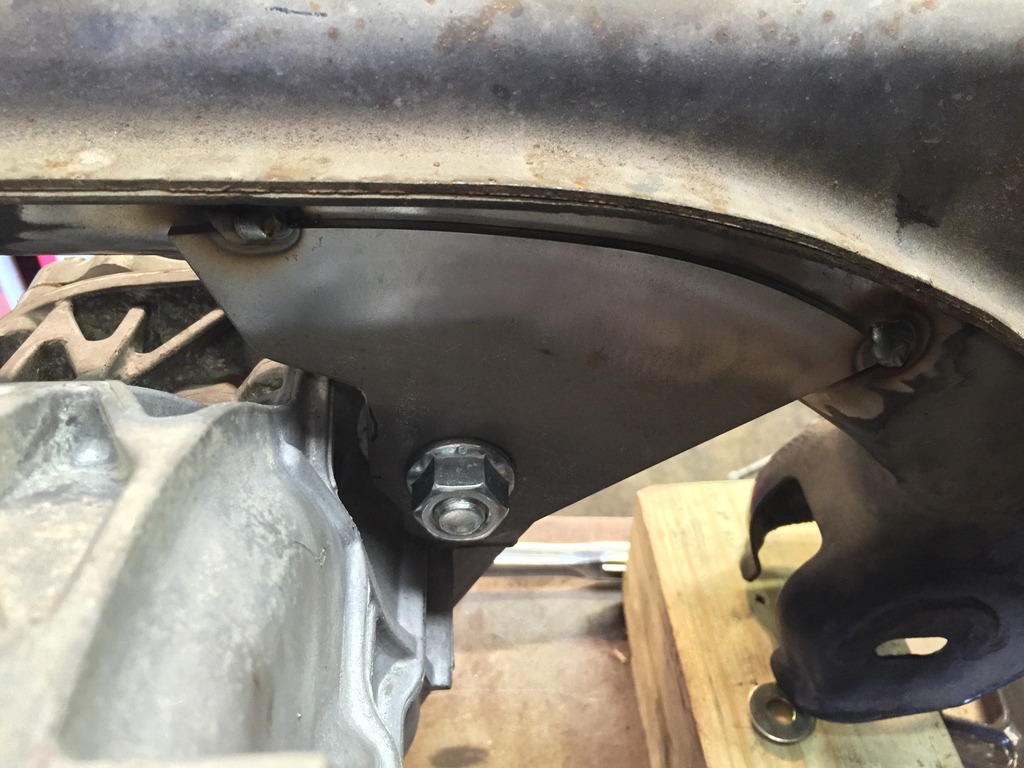
We didn't have any alternator clearance issues - other than replacing a stud with a bolt on the mounting plate. It's close, but clears the frame by a 1/2in - annoying (not impossible) to get a socket on it from up top, easier to use wobble extensions from the trans tunnel. I'm just worried about that clocking with the exhaust in place, especially if you route the water like we did with the CTS radiator pipe.
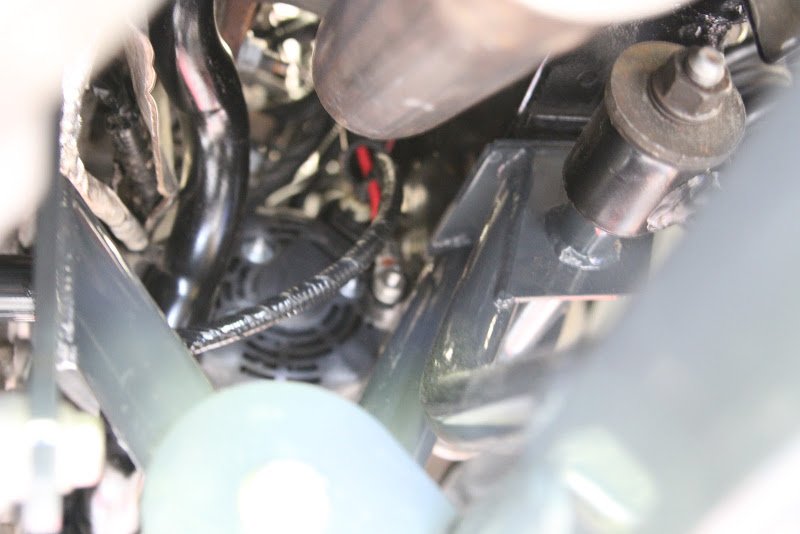 forgive the blurry depth of field, best shot I could find.
We didn't have any alternator clearance issues - other than replacing a stud with a bolt on the mounting plate. It's close, but clears the frame by a 1/2in - annoying (not impossible) to get a socket on it from up top, easier to use wobble extensions from the trans tunnel. I'm just worried about that clocking with the exhaust in place, especially if you route the water like we did with the CTS radiator pipe.
forgive the blurry depth of field, best shot I could find.
Reply
0
0
05-16-2016, 06:50 PM
#269
Supporting Vendor
Thread Starter
iTrader: (3)
Join Date: Jul 2006
Location: San Diego
Posts: 3,303
Total Cats: 1,216
Definitely looks like we have different alternators, that's interesting. Mine is from a 2012. Based off your build thread I went to replace the top stud with a bolt only to find mine was already a 3-bolt setup, no stud; no problem removing it with the engine in.
Clearance with the exhaust should be fine, it's not that close. I don't plan to use the CTS coolant hard line, your search for that alternate coolant line was at least in part due to using an NA/NB radiator which has the in and out on opposite sides of the car from what the LFX was set up for. I'll be using an NC radiator, which has the flow direction reversed compared to NA/NB and therefore don't need to criss-cross the coolant lines. This should also make the LFX's upper coolant outlet work well as-is (all a guess for the moment because I haven't gotten to the cooling layout yet).
Clearance with the exhaust should be fine, it's not that close. I don't plan to use the CTS coolant hard line, your search for that alternate coolant line was at least in part due to using an NA/NB radiator which has the in and out on opposite sides of the car from what the LFX was set up for. I'll be using an NC radiator, which has the flow direction reversed compared to NA/NB and therefore don't need to criss-cross the coolant lines. This should also make the LFX's upper coolant outlet work well as-is (all a guess for the moment because I haven't gotten to the cooling layout yet).
Reply
0
0
05-16-2016, 06:57 PM
#270
Senior Member
Join Date: May 2007
Location: Atlanta
Posts: 997
Total Cats: 156
That explains it - looks like you're making shittons of progress. Our crossmember piece looks similar but we didn't have to grind on it to make it fit. Very neat clocking the alternator, didn't know you could do that. And before someone mentions it - yes, we put a rubber cap over the alternator stud and slipped heat shielding over the wire. I really do need to finish my writeup - Summer is coming and we're beginning to look for A/C parts. 
Reply
0
0


 05-22-2016, 10:00 PM
#275
Supporting Vendor
Thread Starter
iTrader: (3)
Join Date: Jul 2006
Location: San Diego
Posts: 3,303
Total Cats: 1,216
Quiet for a few days but the work continues! Much Tetris-ing of various parts while I work on layout for radiator/cooling, power steering, and oil cooling all at once because they all need to interrelate to make the best use of space. Looking at lots of options among universal parts for reservoirs, lines, fittings, coolers, etc. and checking measurements to see what can fit where, ordering materials for what needs to be made custom, etc.
At the center of it all, I'm adapting our Goodwin Racing triple-pass NC radiator to this project, with custom mounts of course. More details once I've got things together more:
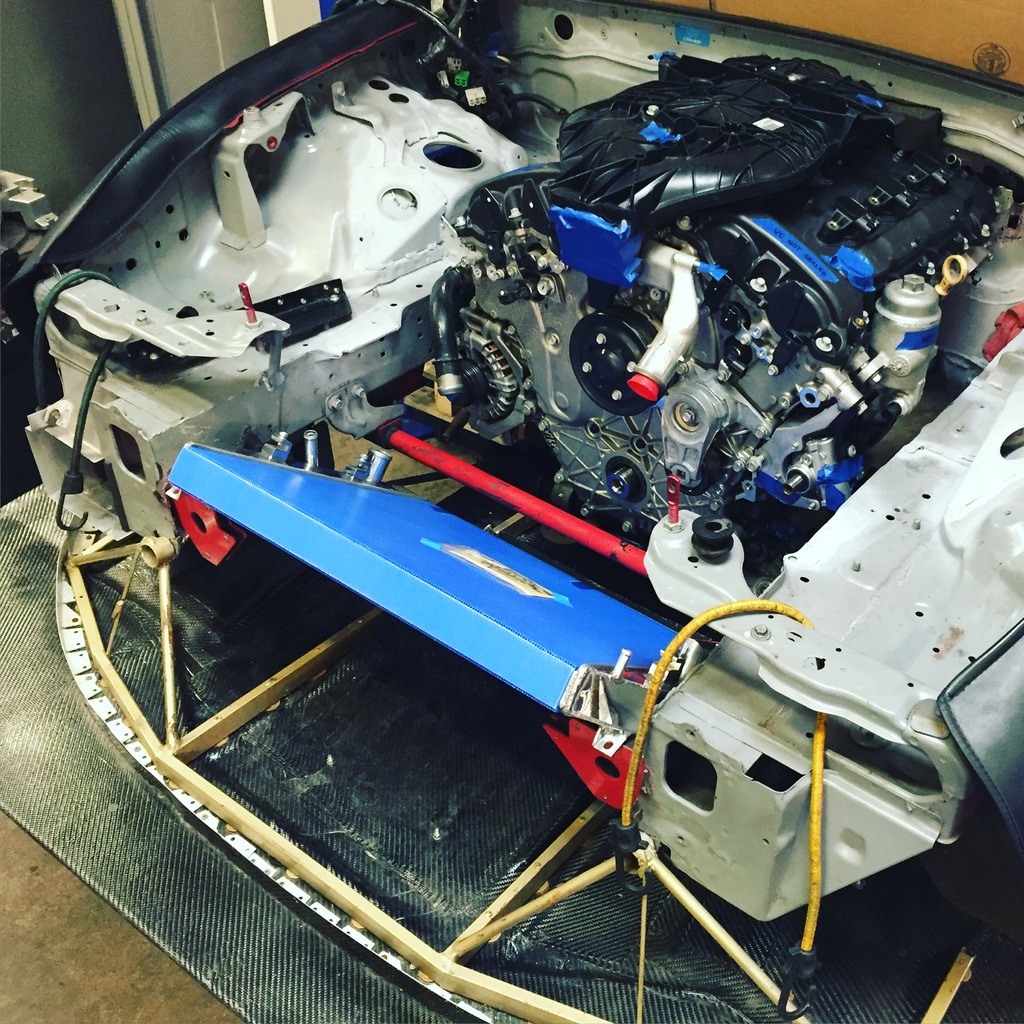
At the center of it all, I'm adapting our Goodwin Racing triple-pass NC radiator to this project, with custom mounts of course. More details once I've got things together more:
Reply
2
2
 05-27-2016, 03:29 AM
#278
Supporting Vendor
Thread Starter
iTrader: (3)
Join Date: Jul 2006
Location: San Diego
Posts: 3,303
Total Cats: 1,216
Parts on order for cooling and power steering. Was able to get just about everything I needed with just a couple items 1-2 weeks out... except for one thing - just about every 1.25" silicone hose manufacturer is on backorder right now, Samco was 6-10 weeks and has to come from the UK for the specific hoses I need so looks like I'm going with HPS which is 2-3 weeks. Sigh.
In the mean time... Sean and I bought a TIG welder! For my previous V-mount setup each time I needed to weld aluminum I had to transport all the parts down to another location and borrow time on a TIG. This will be coming in handy very soon for the coolant and intake pipes. Finally got it set up with gas and started playing with it, spending time before work each day practicing:
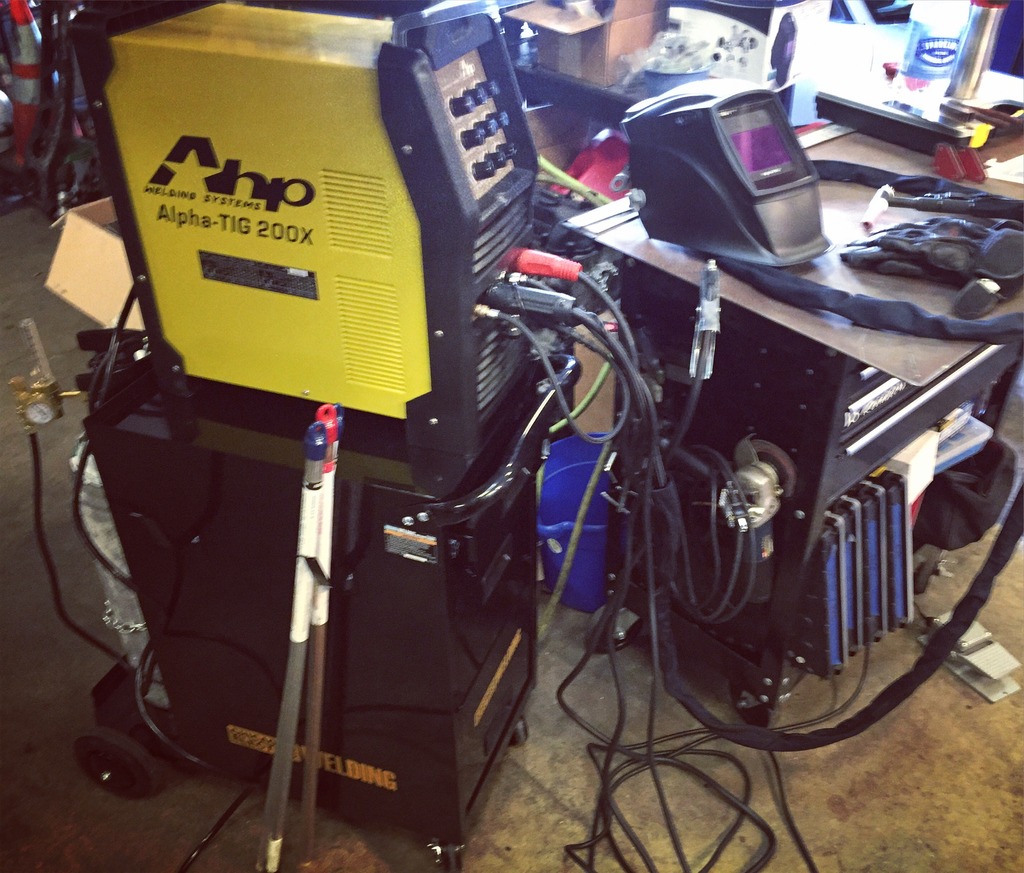
In the mean time... Sean and I bought a TIG welder! For my previous V-mount setup each time I needed to weld aluminum I had to transport all the parts down to another location and borrow time on a TIG. This will be coming in handy very soon for the coolant and intake pipes. Finally got it set up with gas and started playing with it, spending time before work each day practicing:
Reply
1
1
05-27-2016, 03:19 PM
#279
Junior Member

Join Date: Jan 2016
Posts: 55
Total Cats: 5
Just got a 1.25 elbow with 6" legs from Speedway earlier this week: Free Shipping @ Speedway Motors, The Racing and Rodding Specialis
I'm running AC and a heater so I cut a section of the coolant return pipe out and shortened the bend around the back of the engine with that elbow.
The link I posted works. Not sure how they did it. That's not what I copy/pasted.
I'm running AC and a heater so I cut a section of the coolant return pipe out and shortened the bend around the back of the engine with that elbow.
The link I posted works. Not sure how they did it. That's not what I copy/pasted.
Reply
0
0
05-27-2016, 04:21 PM
#280
Supporting Vendor
Thread Starter
iTrader: (3)
Join Date: Jul 2006
Location: San Diego
Posts: 3,303
Total Cats: 1,216
Just got a 1.25 elbow with 6" legs from Speedway earlier this week: Free Shipping @ Speedway Motors, The Racing and Rodding Specialis
I'm running AC and a heater so I cut a section of the coolant return pipe out and shortened the bend around the back of the engine with that elbow.
The link I posted works. Not sure how they did it. That's not what I copy/pasted.
I'm running AC and a heater so I cut a section of the coolant return pipe out and shortened the bend around the back of the engine with that elbow.
The link I posted works. Not sure how they did it. That's not what I copy/pasted.
Reply
0
0


