

what is the carbon can for and can i get rid of it?


Thread Starter
Junior Member
iTrader: (1)
Joined: Sep 2009
Posts: 78
Total Cats: 0
From: Pittsburgh, pa
Hello guys im trying to clean up my engine bay and make some room. Im running a 1.6 miata(soon to be 1.8) running on megasquirt, dont need to worry about emisions. I want to get rid of the carbon can and just wondering what it does and if i have to route anything special once i do.
Also while were on the topic what else is unnecessary under the hood? thanks
Also while were on the topic what else is unnecessary under the hood? thanks
Reply
 0
0

0


I'm Miserable!
Joined: Jun 2009
Posts: 1,866
Total Cats: 0
From: albany, ga
the gas tank is a closed system, the carbon cansister traps gas vapors and later while running at certain times will let them be sucked into the engine to burn them there instead of letting them escape to atmo. Another emissions device that also keeps the vapors from building up pressure in the gas tank
Reply
0
0


Is it better to cap it or just put a hose from where the canister goes to the subframe?
Reply
0
0
Joined: Jun 2006
Posts: 29,085
Total Cats: 375
From: Republic of Dallas
I never thought of that, running a hose to the ground sounds like a good idea.
Reply
0
0
Cap it, and your **** will blow up like NOS does in fast & furious (though N2O isn't even flammable, let alone combustible)
Pull that black bitch out of there, it is connected to 2 hard pipes on the chassis. Take a length of hose and connect those two hard pipes and consider the job finished.
Pull that black bitch out of there, it is connected to 2 hard pipes on the chassis. Take a length of hose and connect those two hard pipes and consider the job finished.
Reply
0
0

I pulled mine all the way back to the fuel filter and then bent it up in the passenger rear fender well as far as I could get it. I have not seen any fuel come out of it even with the 255 pump.
Reply
0
0

It has been a while since I looked at the charcoal cannister, so I could be wrong. I removed mine a while back (from my track car). If you remove the canister but do not remove the control valves, the tank will still vent. Regardless of what you remove, you should connect the two hard lines with a short hose. That will at least dump any accumulated fuel down through the subframe.
There is a control solenoid on top of the gas tank. I believe it is controlled by one of the solenoids near the charcoal canister - the one that gets a vacuum signal from the intake manifold. If you remove the vacuum tube, my guess is that the vent will never open anyway.
There is a control solenoid on top of the gas tank. I believe it is controlled by one of the solenoids near the charcoal canister - the one that gets a vacuum signal from the intake manifold. If you remove the vacuum tube, my guess is that the vent will never open anyway.
Reply
0
0

I've recently done this to mount my WI pump in the charcoal cannister location. Before doing it, I searched in vain for a schematic of the fuel vent system on the net. Anyone have one of these? I think it would answer a lot of questions if it were posted.
Reply
0
0
Schematic:
Solenoid "Closed"
|VTA|--|purge solenoid|--|charcoal canister|--|VTA|
Solenoid "Open"
|fuel tank|--|purge solenoid|--|charcoal canister|--|VTA|
Solenoid Diagram
Off<----------------------->On
|VTA|==\Solenoid/==|Fuel Tank|
................||........................
................||........................
................||........................
.....|Charcoal Canister|............
Reply
0
0
Reply
0
0

link to very good write up with pics:
http://www.mx5nutz.com/forum/index.p...5&#entry223895
[quote name='COLINK@JDMPASSION' date='22 April 2008 - 07:10 AM' timestamp='1208873406' post='223895']
Tool required
10mm spanner/socket
pair of pliers
2 or 3 small cable wraps
stanley knife
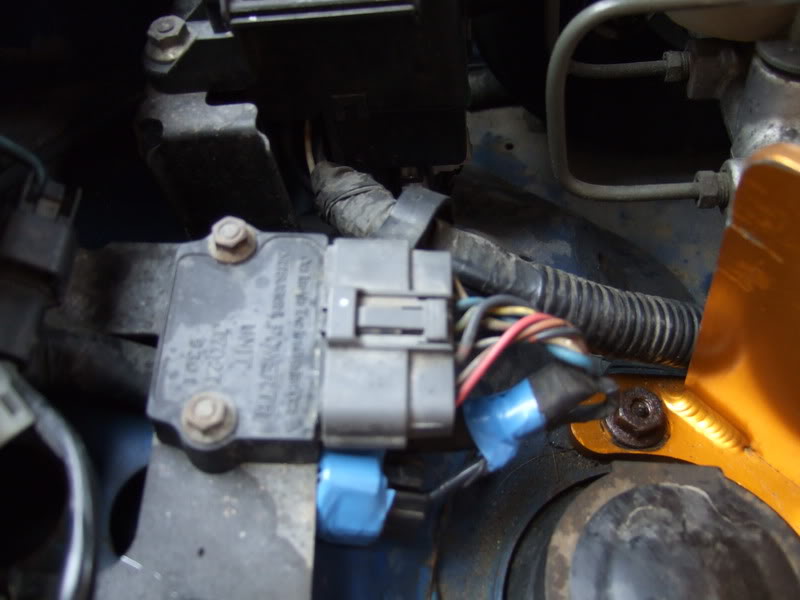
Positioned at the side of the radiator header tank is the charcoal canister see picture
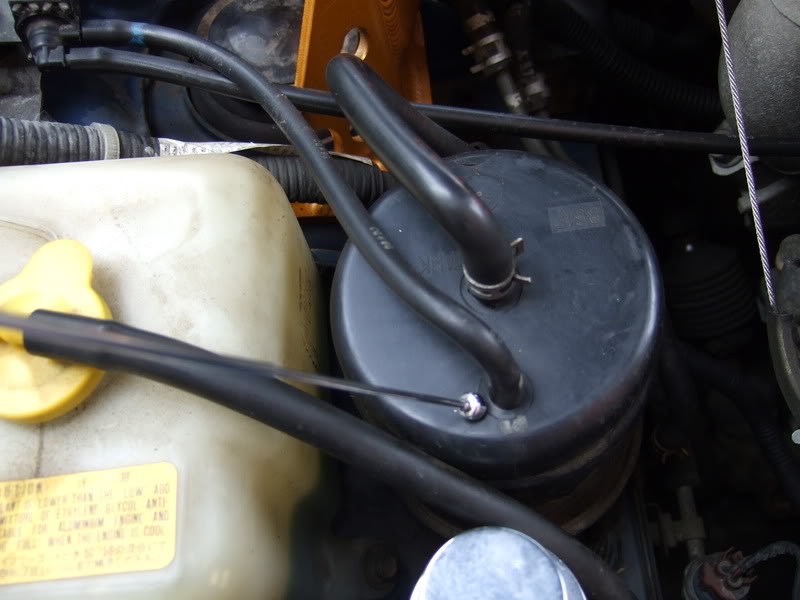
if you remove the top two hoses on the canister one pulls off and the other has a clip on it
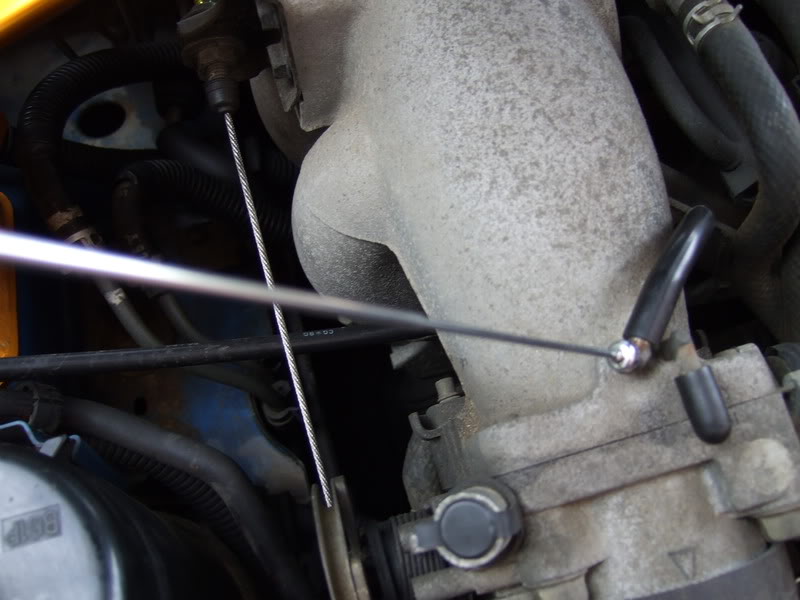
there is a hose connected to the throttle body this must be took off this is again a push fit
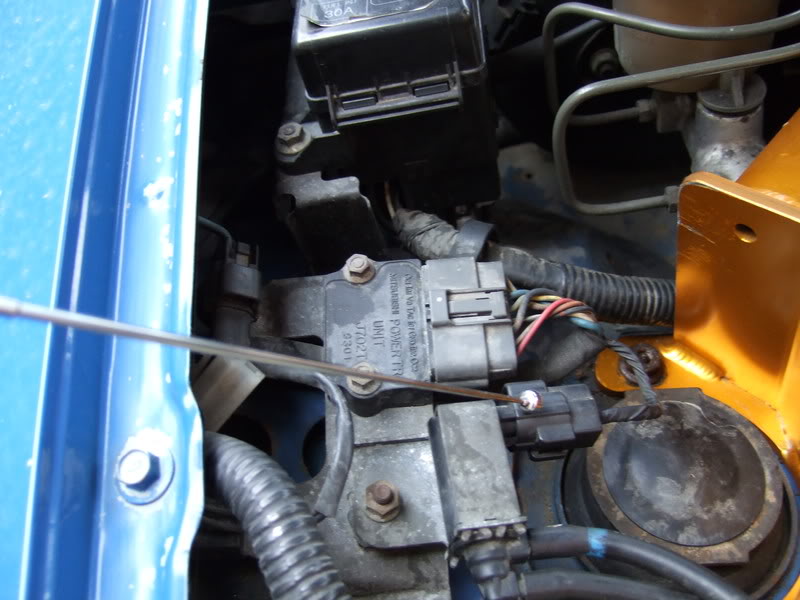
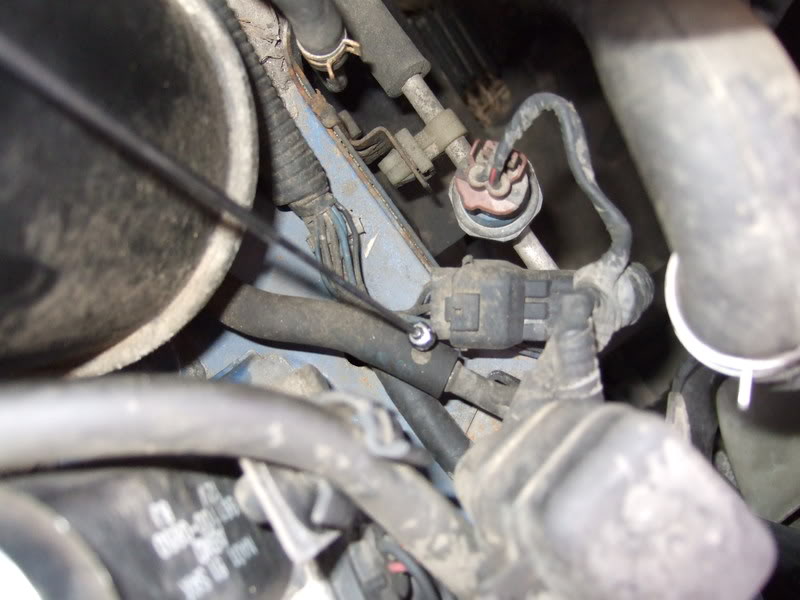
just above the header tank there is a connector this must be unplugged as well
now the two bottom hoses must be diconnected one has a clip on the other is a push fit
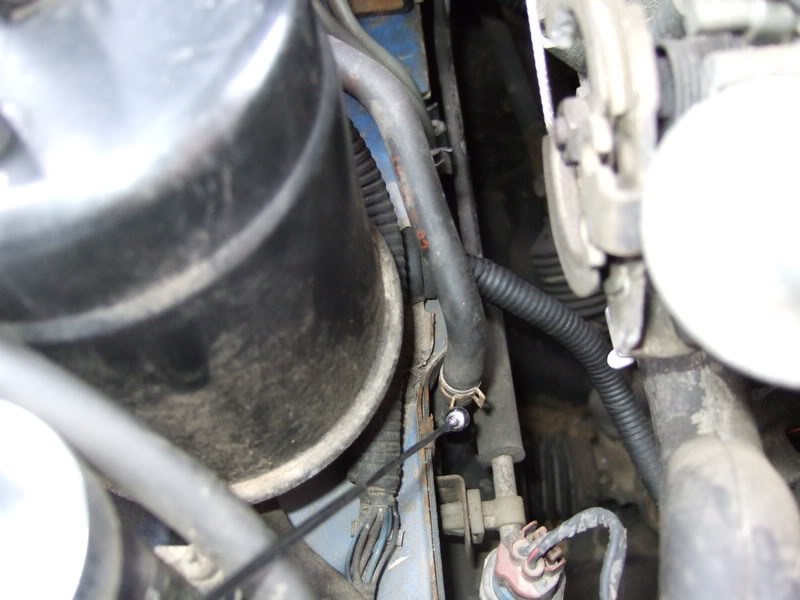
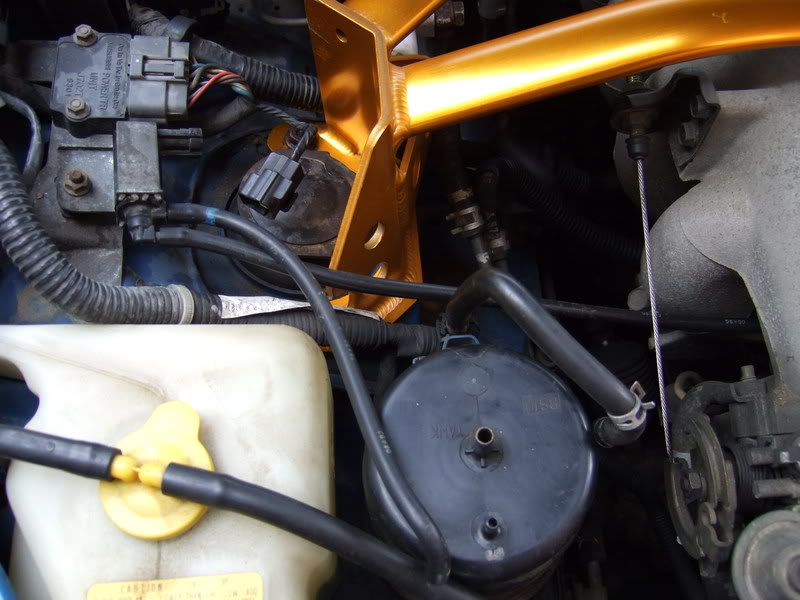
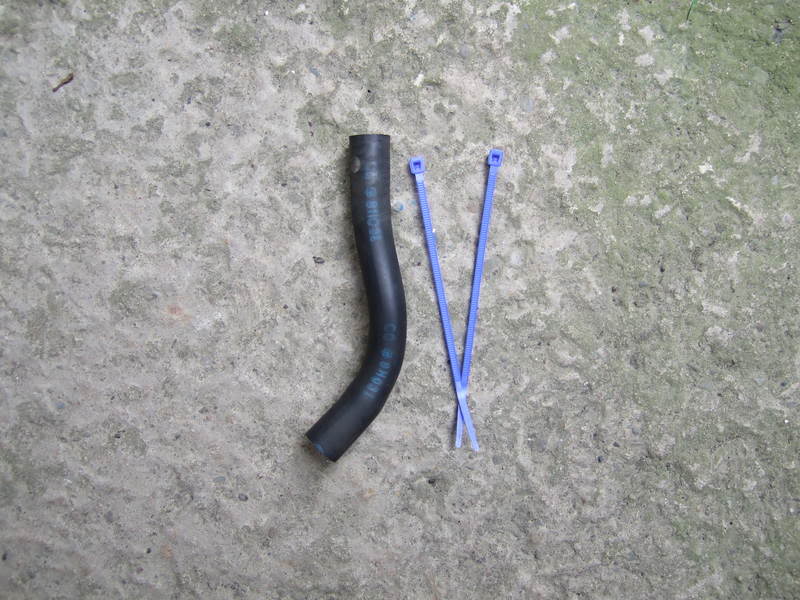
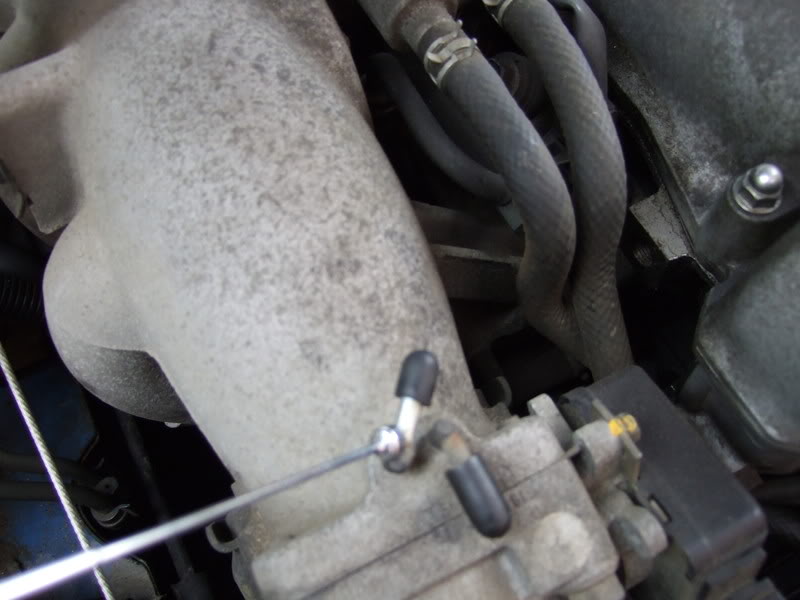
once these have been disconnected the canister can be lifted out, you will be left with two open ended pipes see picture
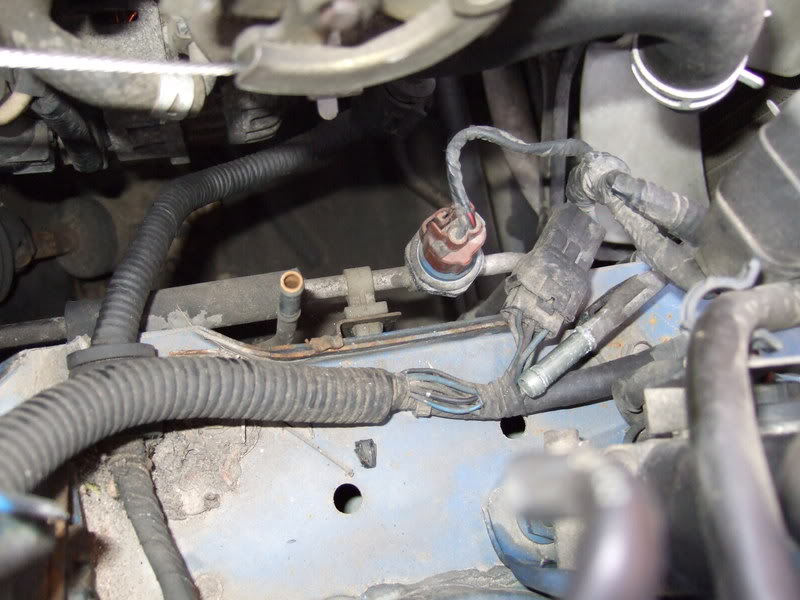
by using the bottom pipe from the canister you can join the two pipes together with the two cable wraps as in the pictures

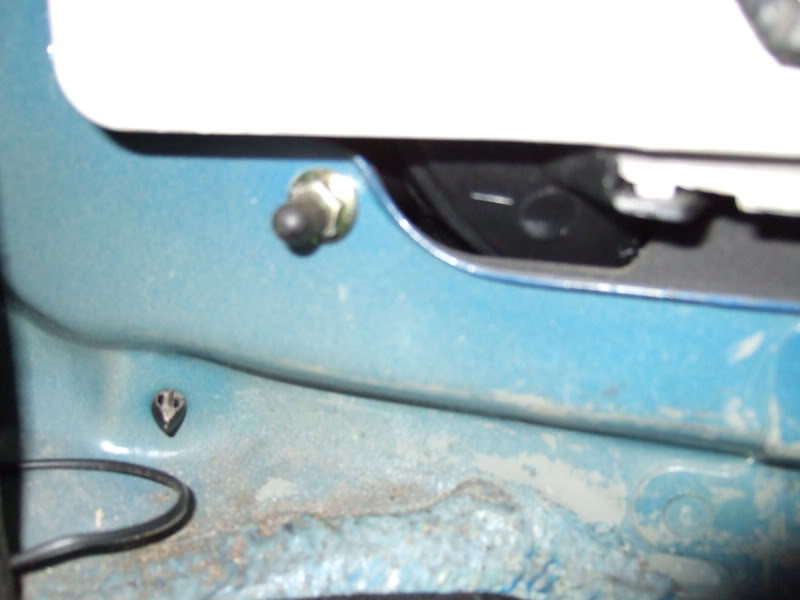
with the connector that you took off i just taped it back to the wiring loom see picture
on the throttle body you will have the open ended connection see picture
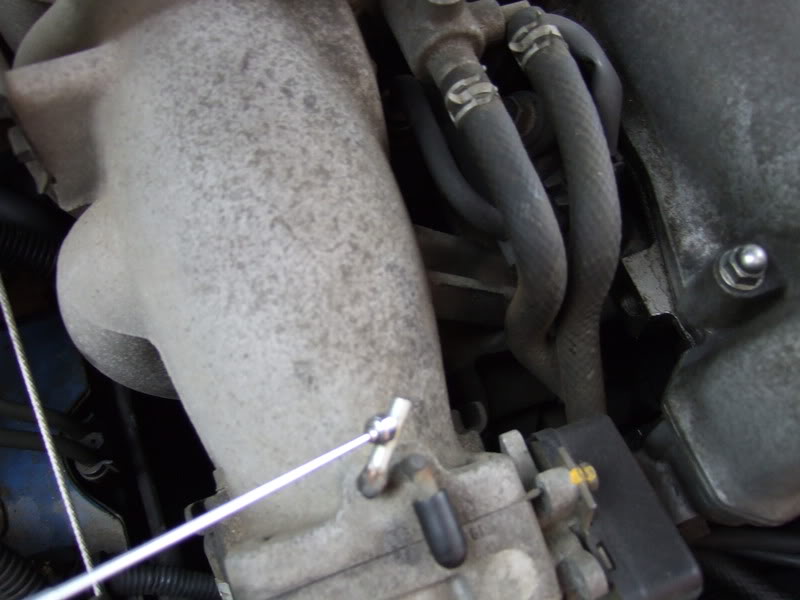
this needs to be blocked off,i used a blank that was on the end of one of the fixing bolts on the rear lights see picture, this must be blocked off so if you cannot find one of the rear light blanks then use a peice of the small section pipe from the canister fold over and use a cable wrap to make a blank.
so that it is like this
if you remove the bracket that the canister was attached to(two 10mm bolts) then this is what you have taken out
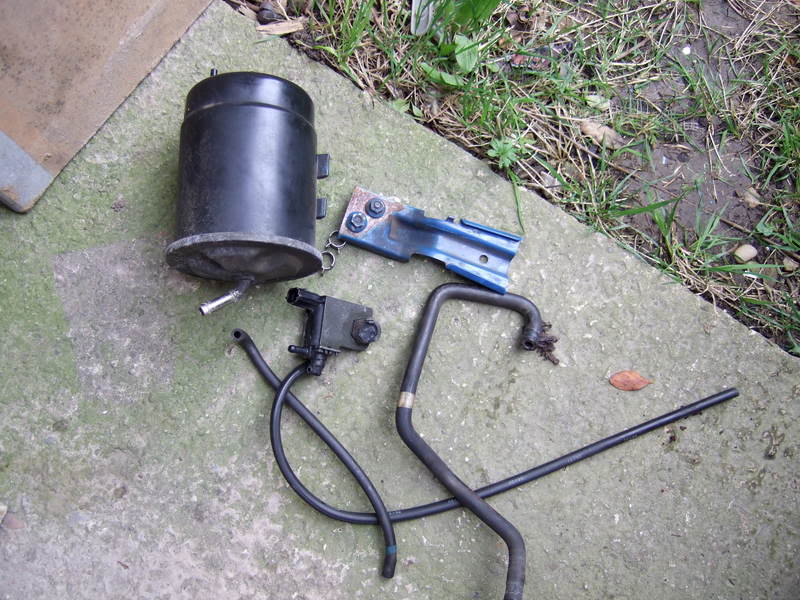
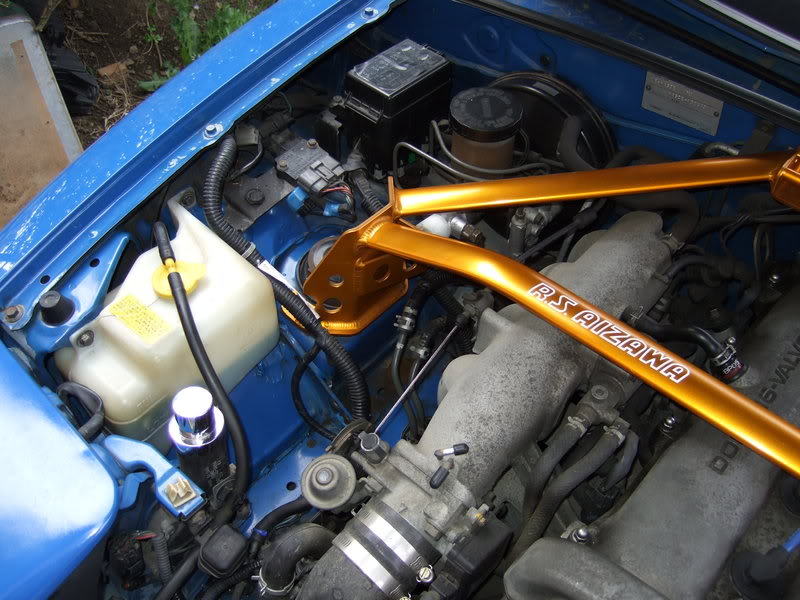
here is a picture of the engine bay minus the charcoal canister
i must say it took me longer to upload the pictures and write this article than it did to do the job.
[/quote]
http://www.mx5nutz.com/forum/index.p...5&#entry223895
[quote name='COLINK@JDMPASSION' date='22 April 2008 - 07:10 AM' timestamp='1208873406' post='223895']
Tool required
10mm spanner/socket
pair of pliers
2 or 3 small cable wraps
stanley knife
Positioned at the side of the radiator header tank is the charcoal canister see picture
if you remove the top two hoses on the canister one pulls off and the other has a clip on it
there is a hose connected to the throttle body this must be took off this is again a push fit
just above the header tank there is a connector this must be unplugged as well
now the two bottom hoses must be diconnected one has a clip on the other is a push fit
once these have been disconnected the canister can be lifted out, you will be left with two open ended pipes see picture
by using the bottom pipe from the canister you can join the two pipes together with the two cable wraps as in the pictures
with the connector that you took off i just taped it back to the wiring loom see picture
on the throttle body you will have the open ended connection see picture
this needs to be blocked off,i used a blank that was on the end of one of the fixing bolts on the rear lights see picture, this must be blocked off so if you cannot find one of the rear light blanks then use a peice of the small section pipe from the canister fold over and use a cable wrap to make a blank.
so that it is like this
if you remove the bracket that the canister was attached to(two 10mm bolts) then this is what you have taken out
here is a picture of the engine bay minus the charcoal canister
i must say it took me longer to upload the pictures and write this article than it did to do the job.
[/quote]
Reply
0
0


OK. Found a diagram in the factory service manual:
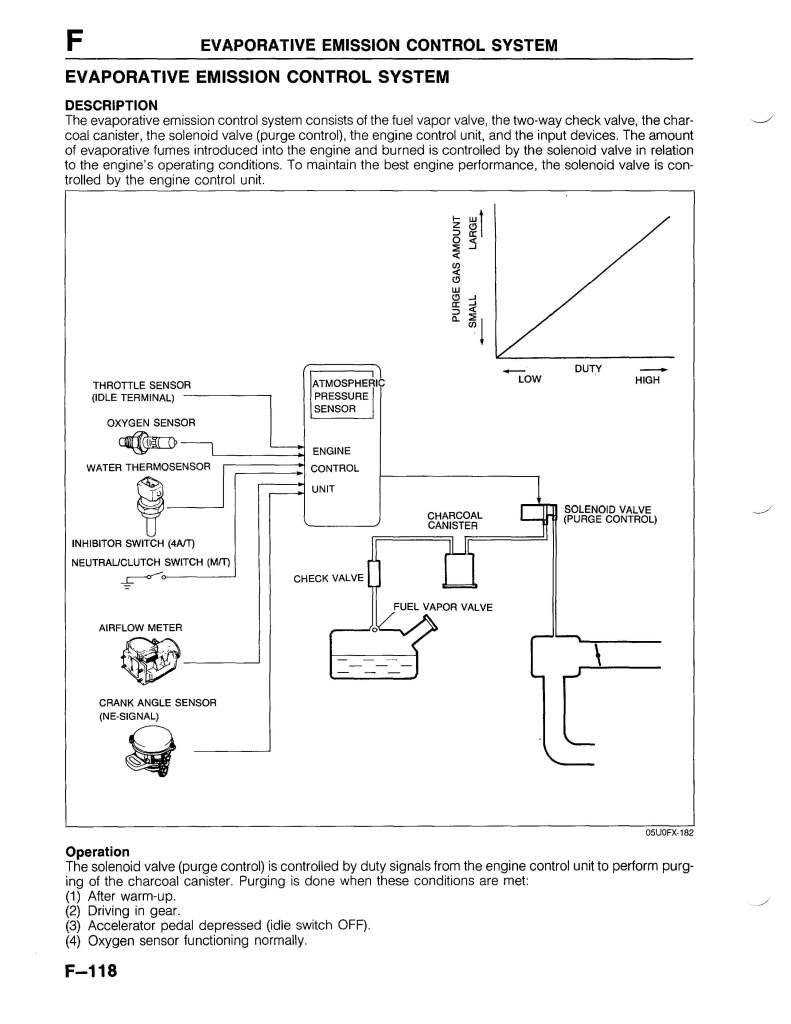
So, when you do the mod as shown in the pictures above, this is what you're doing:
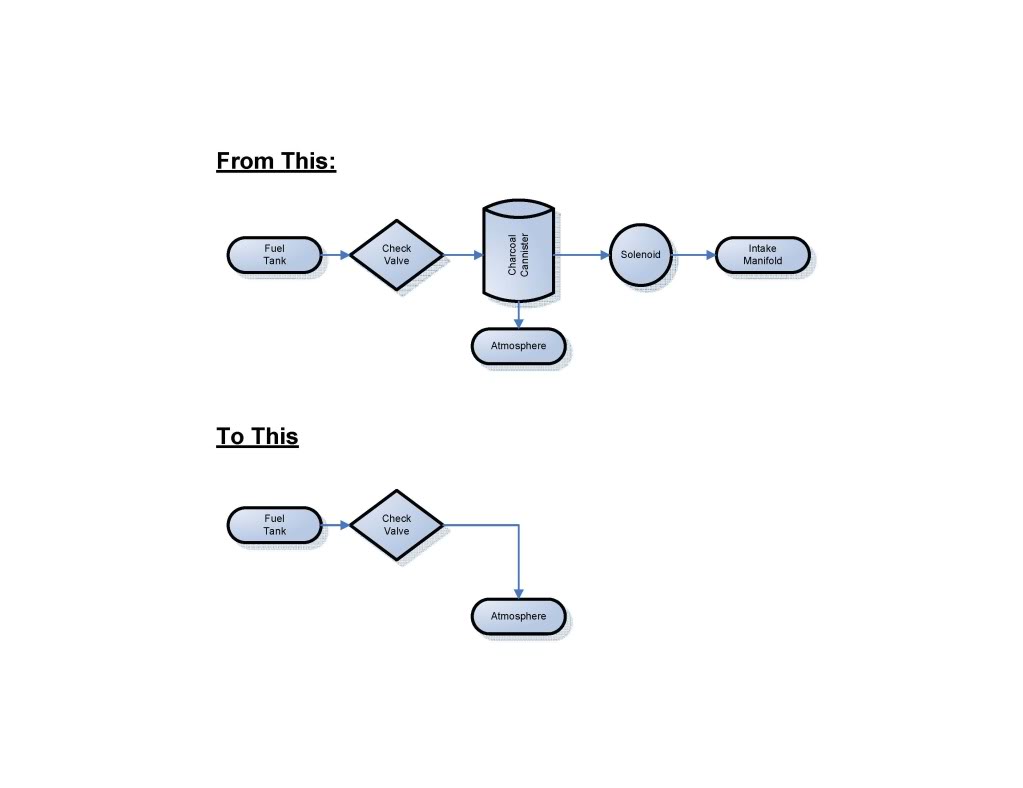
I've already done the mod and feel much better now.
So, when you do the mod as shown in the pictures above, this is what you're doing:
I've already done the mod and feel much better now.
Reply
0
0


