Lexan hard top window install, with pictures!
 01-09-2009, 12:58 AM
#1
Cpt. Slow

Thread Starter
iTrader: (25)
Join Date: Oct 2005
Location: Oregon City, OR
Posts: 14,179
Total Cats: 1,129
I've recently started replacing my hardtop window with a lexan (polycarbonate) replacement. First a little history: my dad bought the car about 7 years ago with a plastic window already installed, which was only about 1/16" thick, maybe a little less (seemed to be the same thickness as the soft top window). The story was that the PO drove off with the top unlatched and it flew off. Other damage includes some paint chips and some cracks in the upper corner of the window 'cutout'. When we bought the car you couldn't even tell it was plastic until you touched it or looked really close, it was very clear. In the last 1-2 years, its been slowly turning opaque, warping, and cracking. Much like what happens to soft top windows. If you're familiar with those effects, you'll know what I'm talking about. Some of you will also remember my winter storm story of my carport collapsing on top of my car and doing even more paint and fiber glass damage, that story is here:
https://www.miataturbo.net/forum/t29515/
All this background is to prepare you for the pictures, the hard top is not very pretty, and I am in no way attempting to make it so, seeing as though this is a track only car.
Here's some �before� pictures to give you an idea of how bad the old window was:
opaquage:
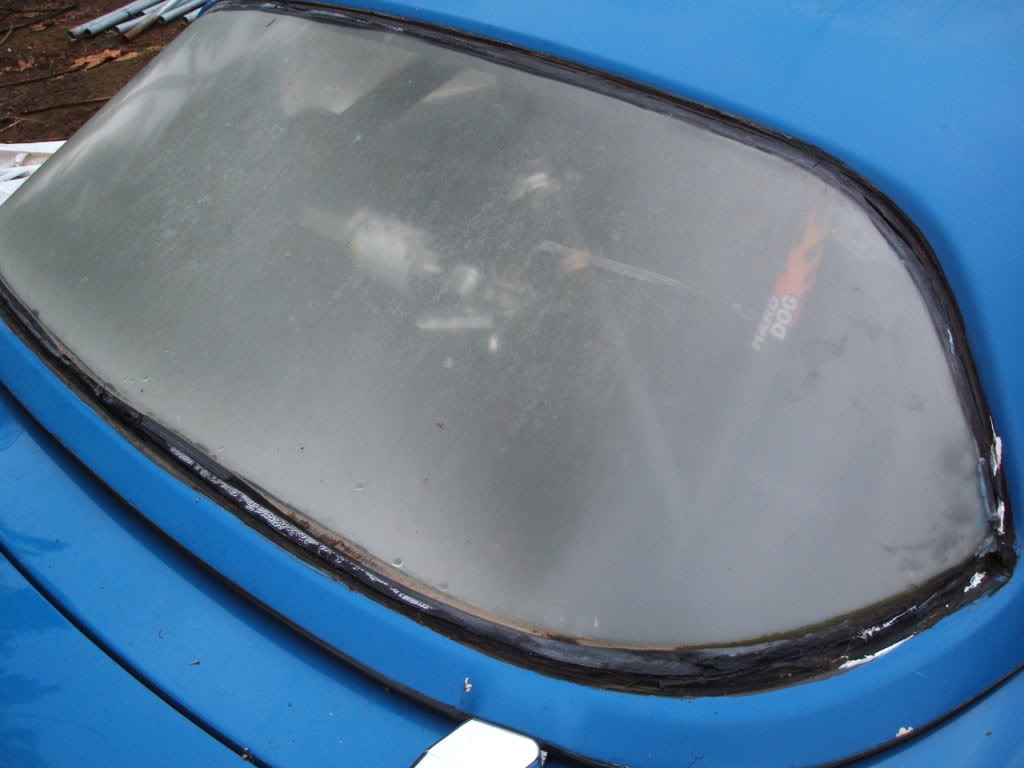
crackage:
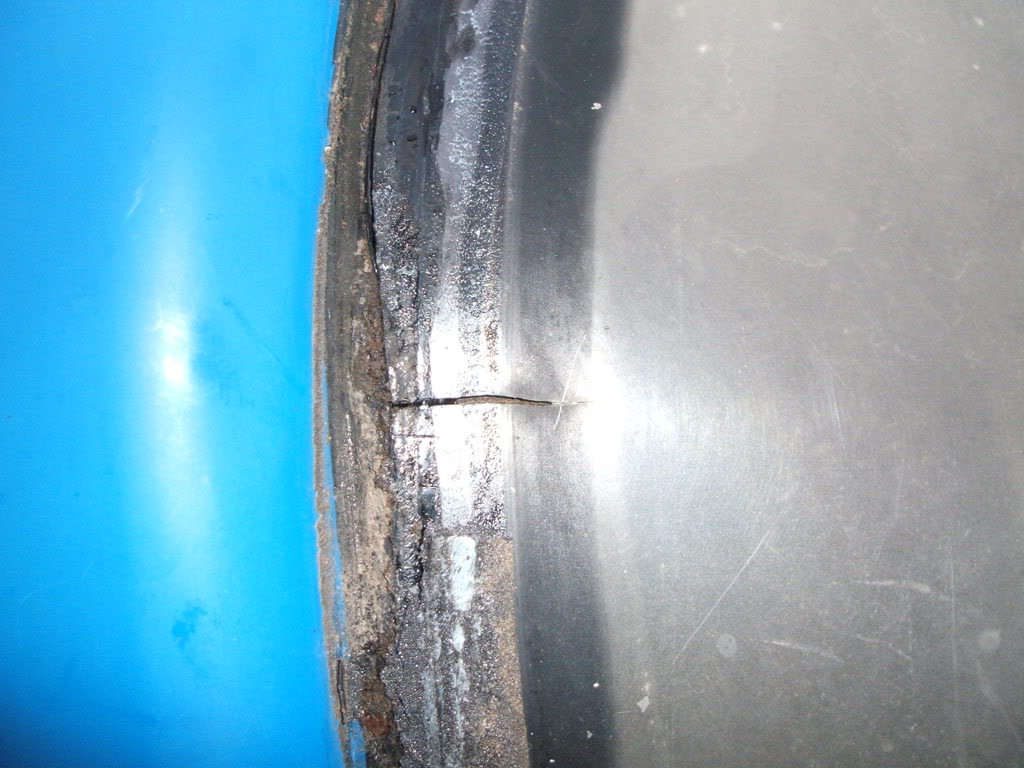
warpage:
This nastiness was some temporary sealant fixes so it wouldn't leak or tear the window off while driving, it was mostly hidden by the rubber trim, this shot makes it look real ugly. Its just whatever was in the caulking gun at the time, one time it was white caulk, another time it was blue silicone. I was just happy the silicone matched the paint
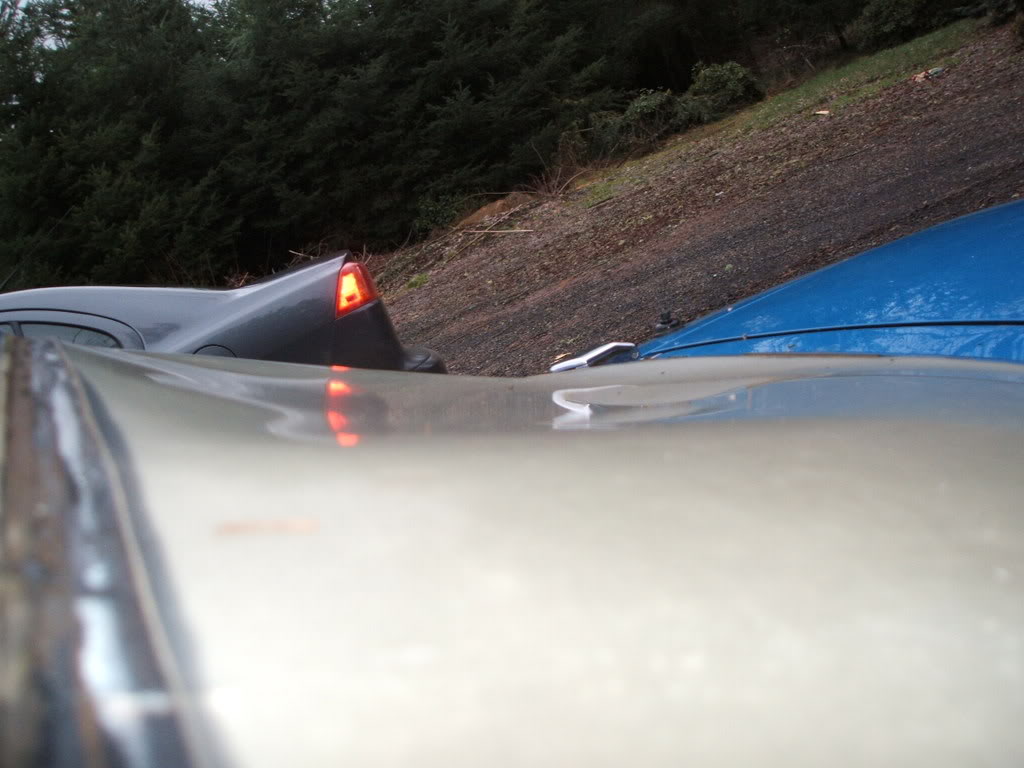
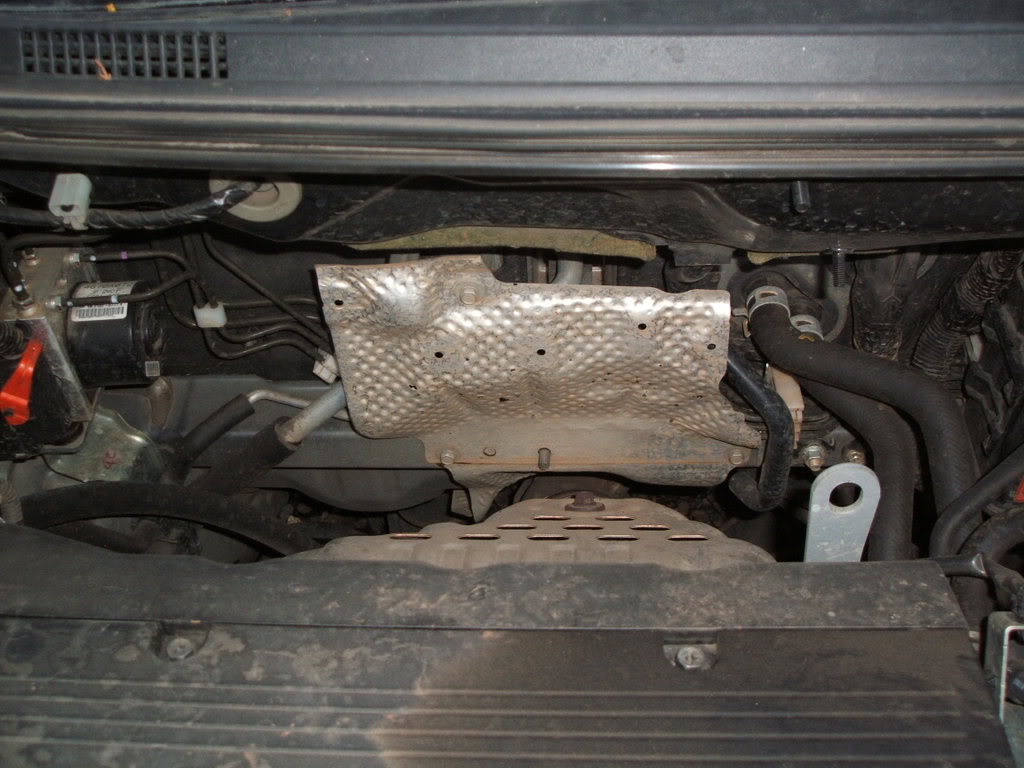
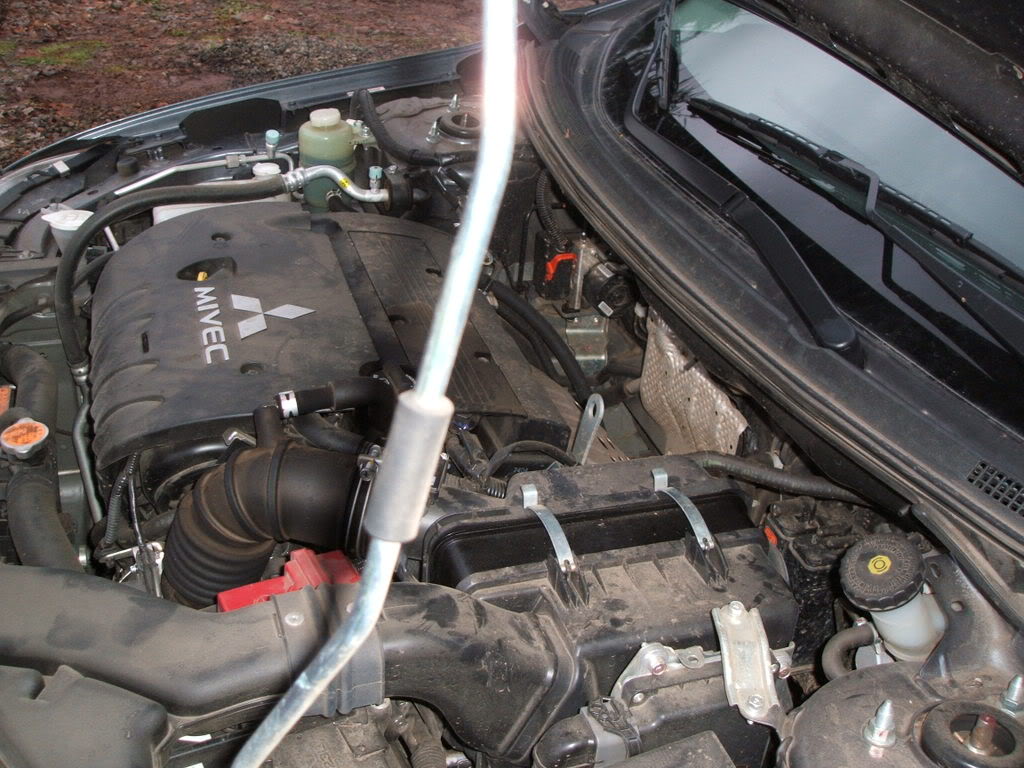
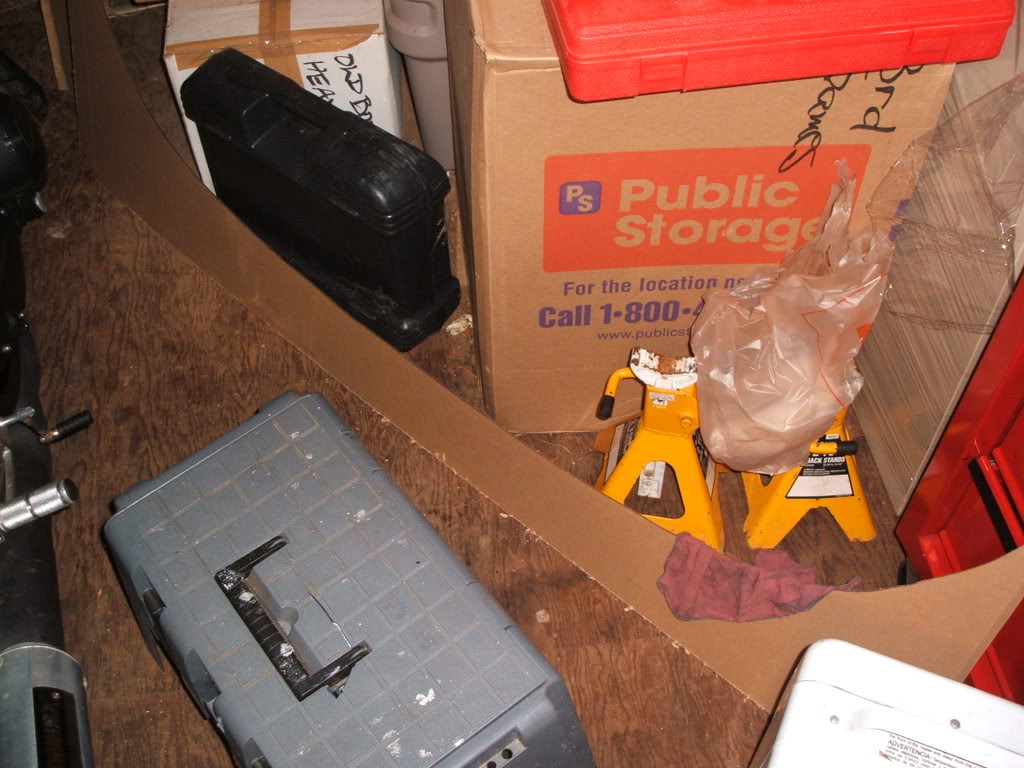
This is fairly off topic but a while ago there was a thread about daily driver engine bays, and while I was outside taking pictures I took some of mine. Gravel driveways and dusty roads FTMFL!
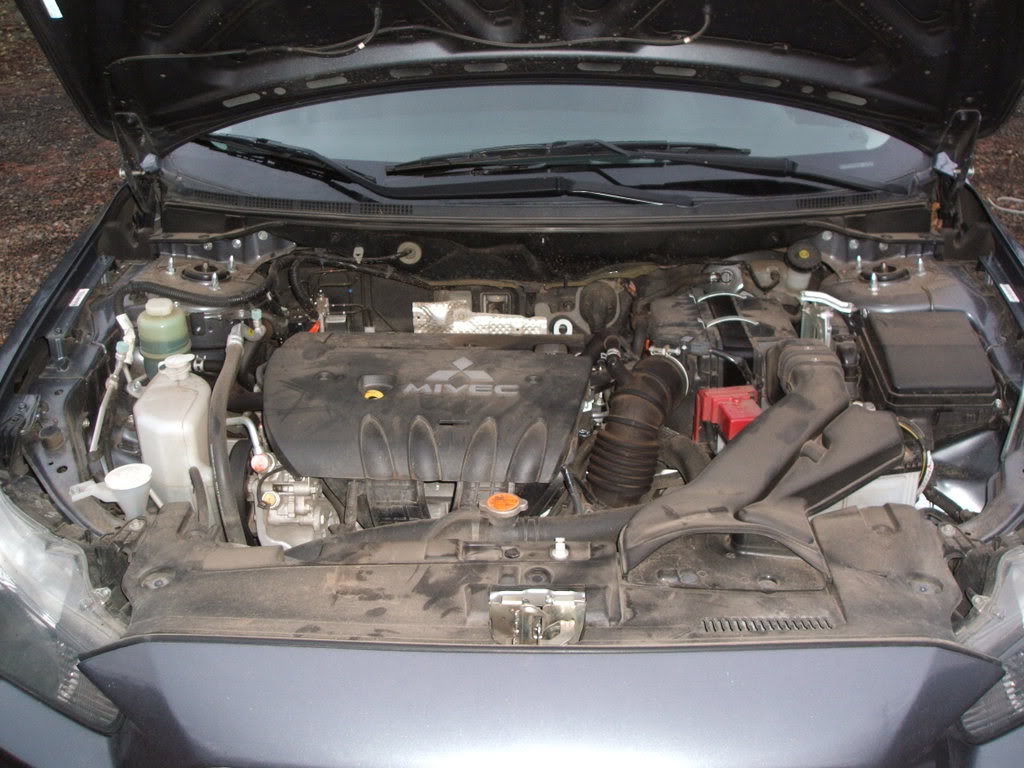
what do you think could back there?
https://www.miataturbo.net/forum/t29515/
All this background is to prepare you for the pictures, the hard top is not very pretty, and I am in no way attempting to make it so, seeing as though this is a track only car.
Here's some �before� pictures to give you an idea of how bad the old window was:
opaquage:
crackage:
warpage:
This nastiness was some temporary sealant fixes so it wouldn't leak or tear the window off while driving, it was mostly hidden by the rubber trim, this shot makes it look real ugly. Its just whatever was in the caulking gun at the time, one time it was white caulk, another time it was blue silicone. I was just happy the silicone matched the paint
This is fairly off topic but a while ago there was a thread about daily driver engine bays, and while I was outside taking pictures I took some of mine. Gravel driveways and dusty roads FTMFL!
what do you think could back there?

Reply
 0
0

0
01-09-2009, 12:59 AM
#2
Cpt. Slow
Thread Starter
iTrader: (25)
Join Date: Oct 2005
Location: Oregon City, OR
Posts: 14,179
Total Cats: 1,129
Teardown:
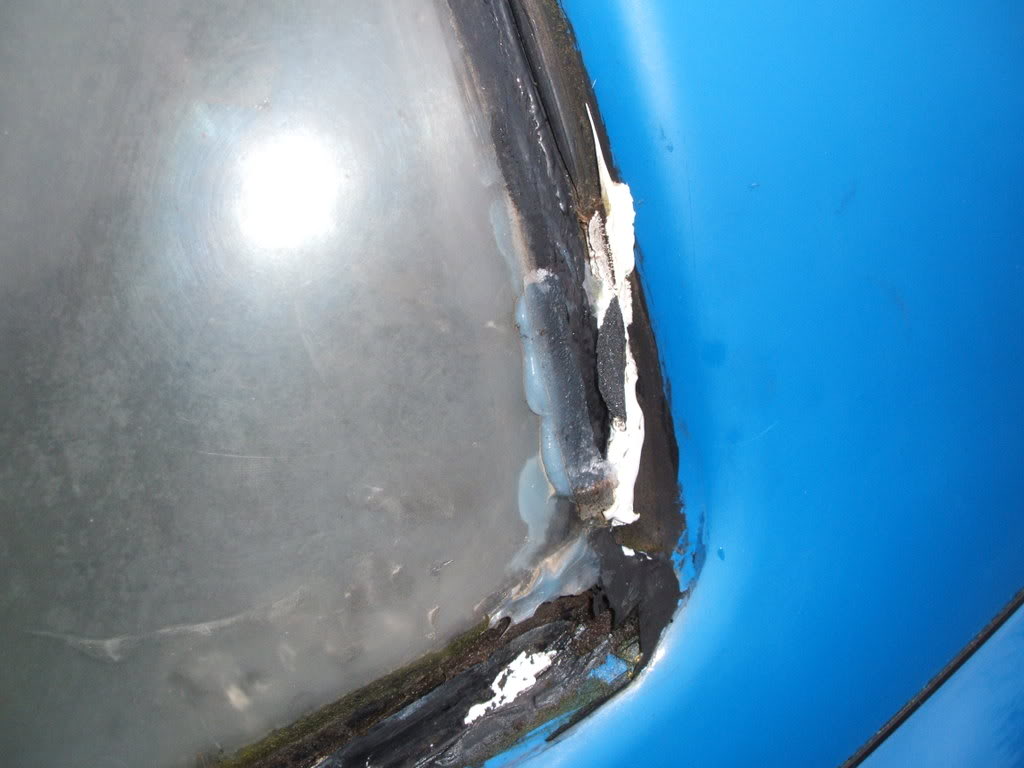
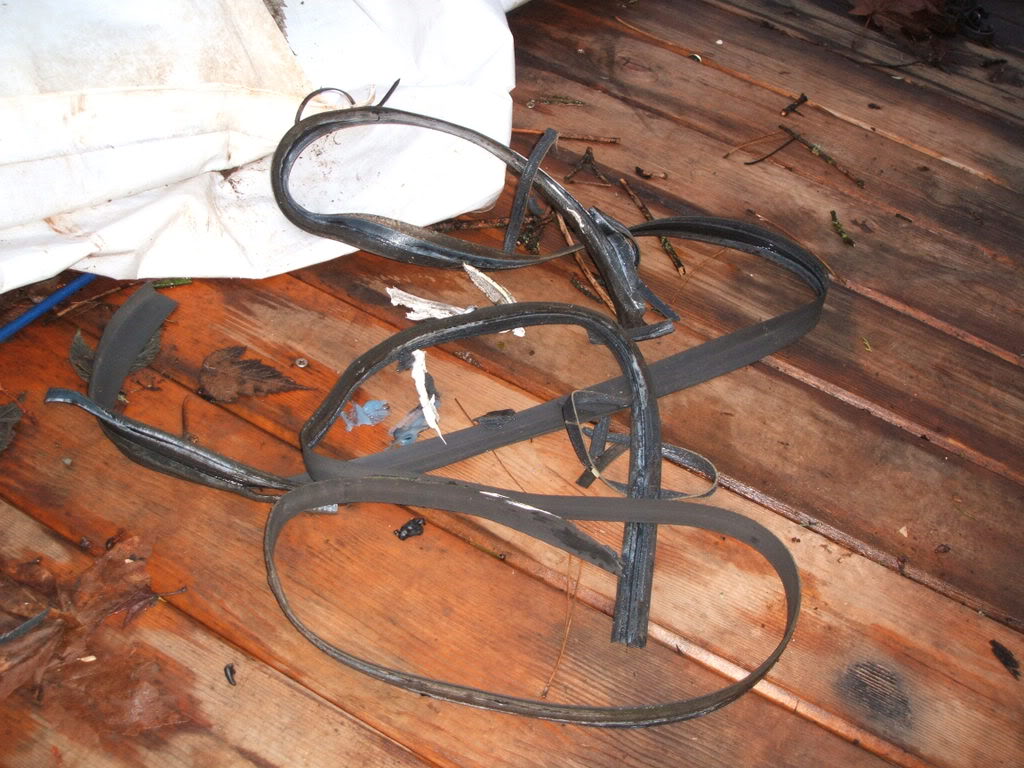
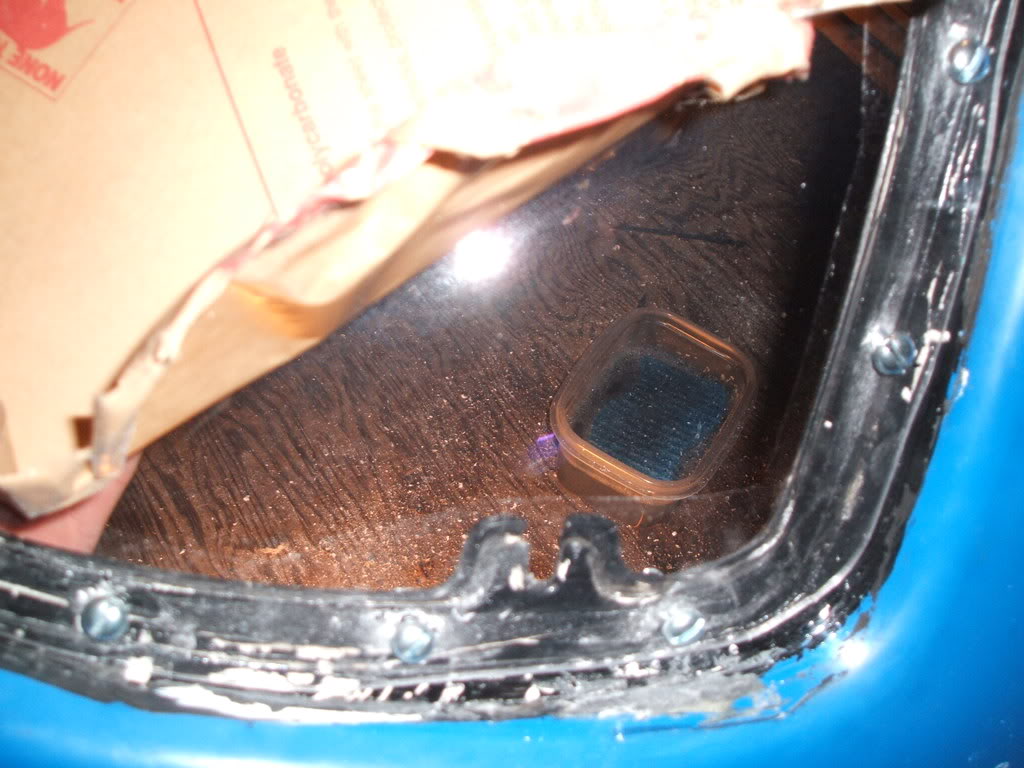
heres the pile of rubber trim that had a line of double sided tape on it, and lined the outside of the window. It covered a lot of mold, cracks, and the bottom edge of the window which was curling inward pretty badly. Even with this it was still ugly. If anyone's going to make a window, don't try to cover it with a piece of trim. Spend some time making the rivet/bolt pattern with sealant underneath pretty.
Heres the pile of tar that was used to seal the window. I should note that besides the one corner pictured above and a ~3� crack that happened during the storm I had no leaks, so it was doing its job. That said it probably negated any weight savings over a glass window. It was disgusting, some of it was still very tacky. It acted exactly like silly putty. This is not all of it by any means.
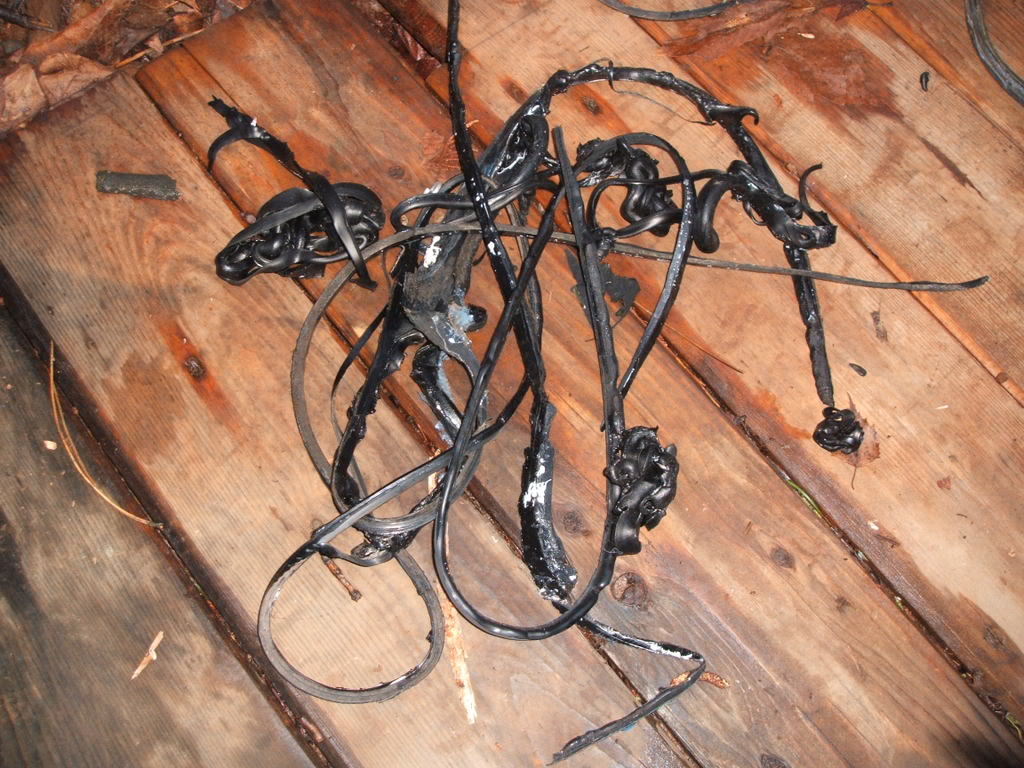
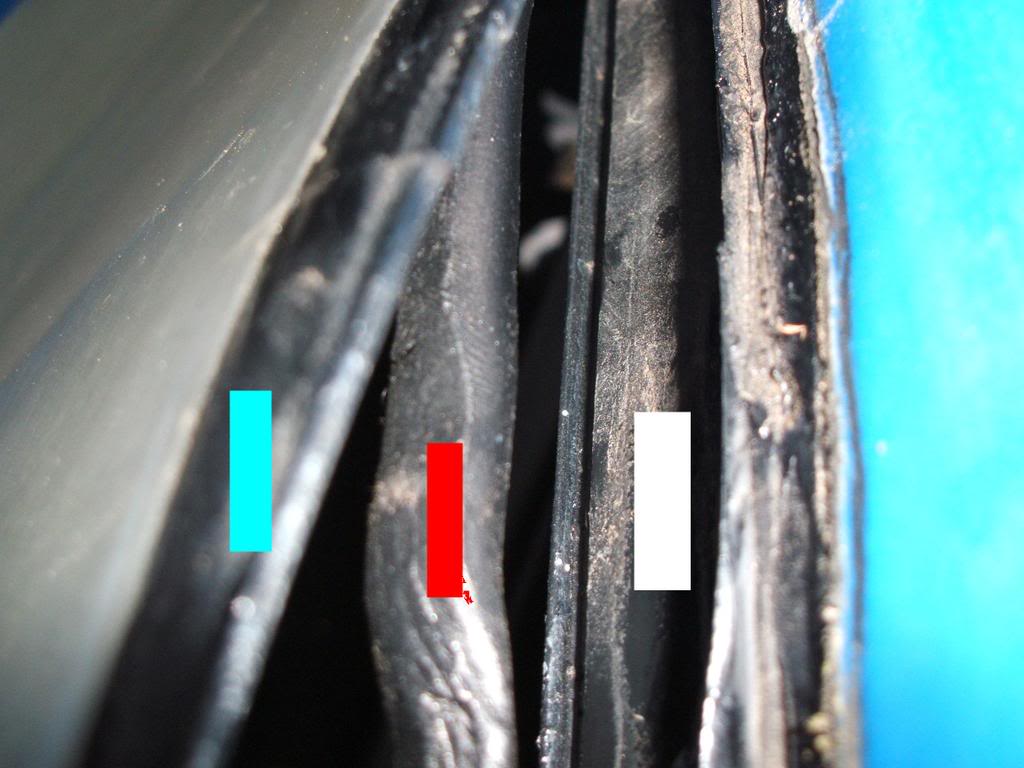
Here's a crazy picture to show you how much tar was being used to seal the old window. The blue square is over the edge of the old window, the white square is the hard top lip, and the red square is the terd of tar previously sandwiched between the two.
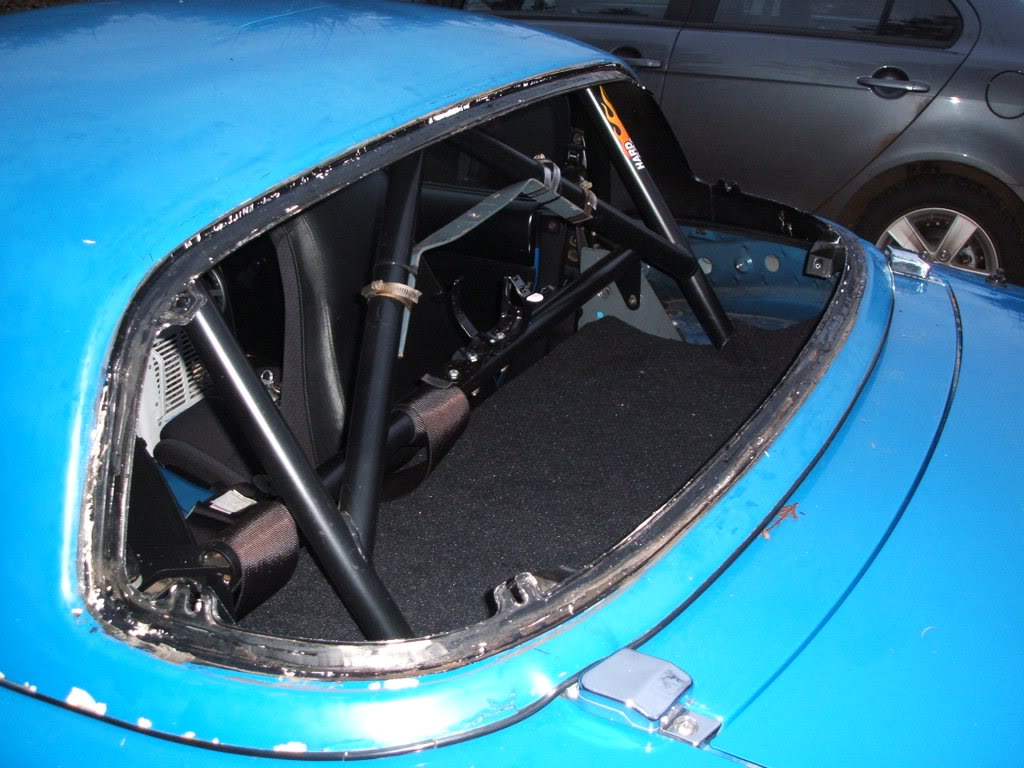
Look the window is all installed, pretty clear, eh?
heres the pile of rubber trim that had a line of double sided tape on it, and lined the outside of the window. It covered a lot of mold, cracks, and the bottom edge of the window which was curling inward pretty badly. Even with this it was still ugly. If anyone's going to make a window, don't try to cover it with a piece of trim. Spend some time making the rivet/bolt pattern with sealant underneath pretty.
Heres the pile of tar that was used to seal the window. I should note that besides the one corner pictured above and a ~3� crack that happened during the storm I had no leaks, so it was doing its job. That said it probably negated any weight savings over a glass window. It was disgusting, some of it was still very tacky. It acted exactly like silly putty. This is not all of it by any means.
Here's a crazy picture to show you how much tar was being used to seal the old window. The blue square is over the edge of the old window, the white square is the hard top lip, and the red square is the terd of tar previously sandwiched between the two.
Look the window is all installed, pretty clear, eh?
Reply
0
0
01-09-2009, 01:01 AM
#3
Cpt. Slow
Thread Starter
iTrader: (25)
Join Date: Oct 2005
Location: Oregon City, OR
Posts: 14,179
Total Cats: 1,129
Cutting:
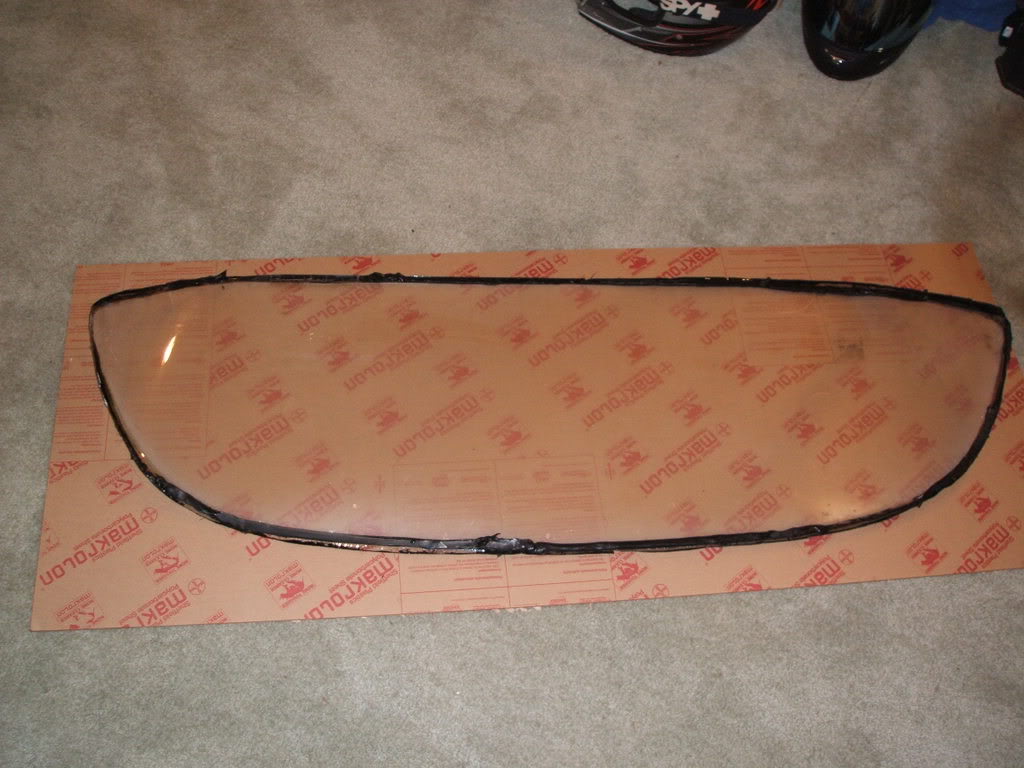
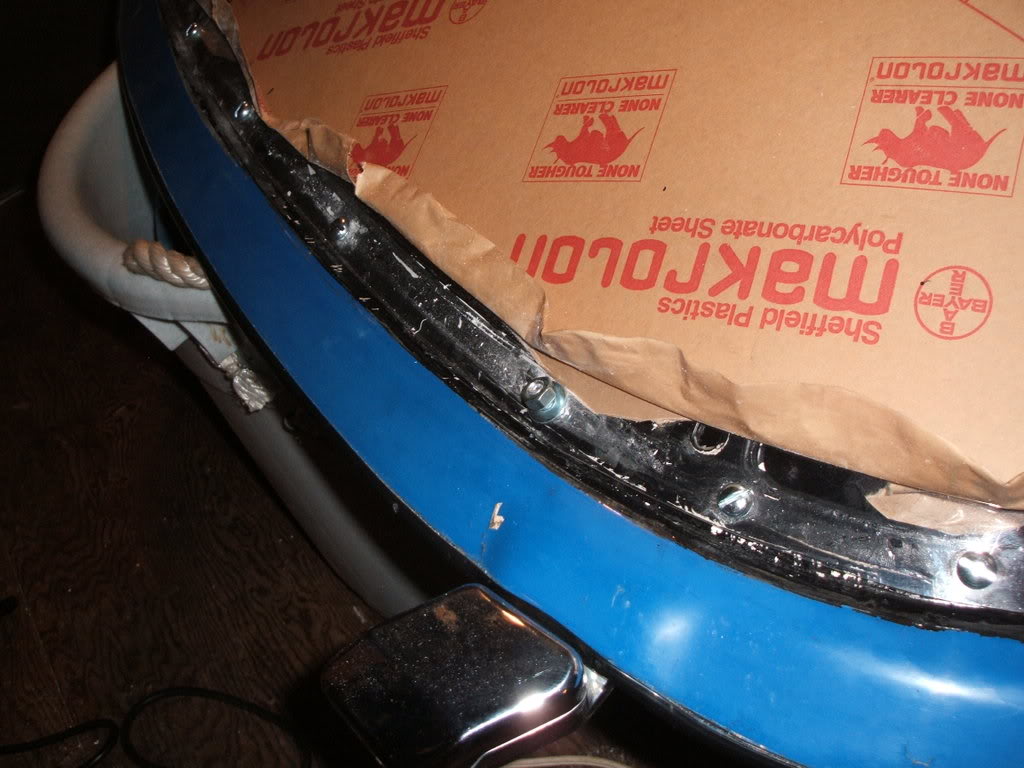
Heres the old window in my room laid out on my 60�x24� sheet of lexan, which is a perfect size and apparently there is enough left over to replace the triangle windows in the doors. I traced it as best as I could with my crappy �template�. Any poor fit of the window is because of the damaged curled edge, I just had to guess how big it would be if it was straightened. I also haven't used a jigsaw before, much less cut lexan, so any poor fit of my window can be blamed on that as well
heres the piece of scrap left over from my cutting, those triangles at the edges are about 12�x12�, which gives you and idea of how material is left over.
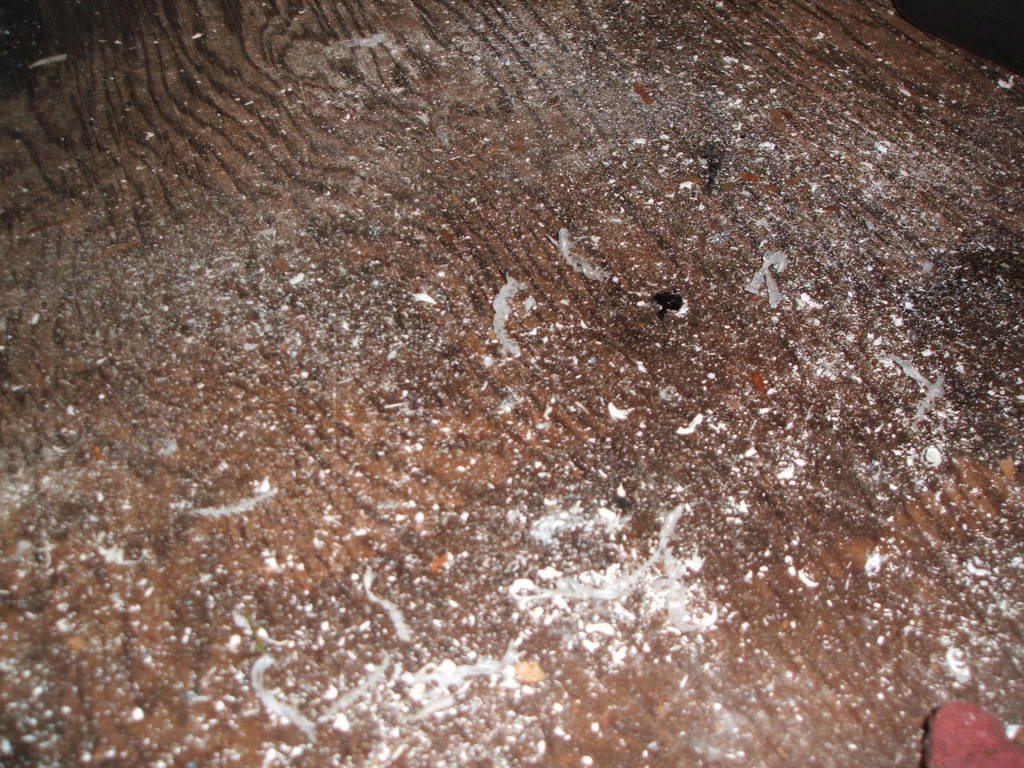
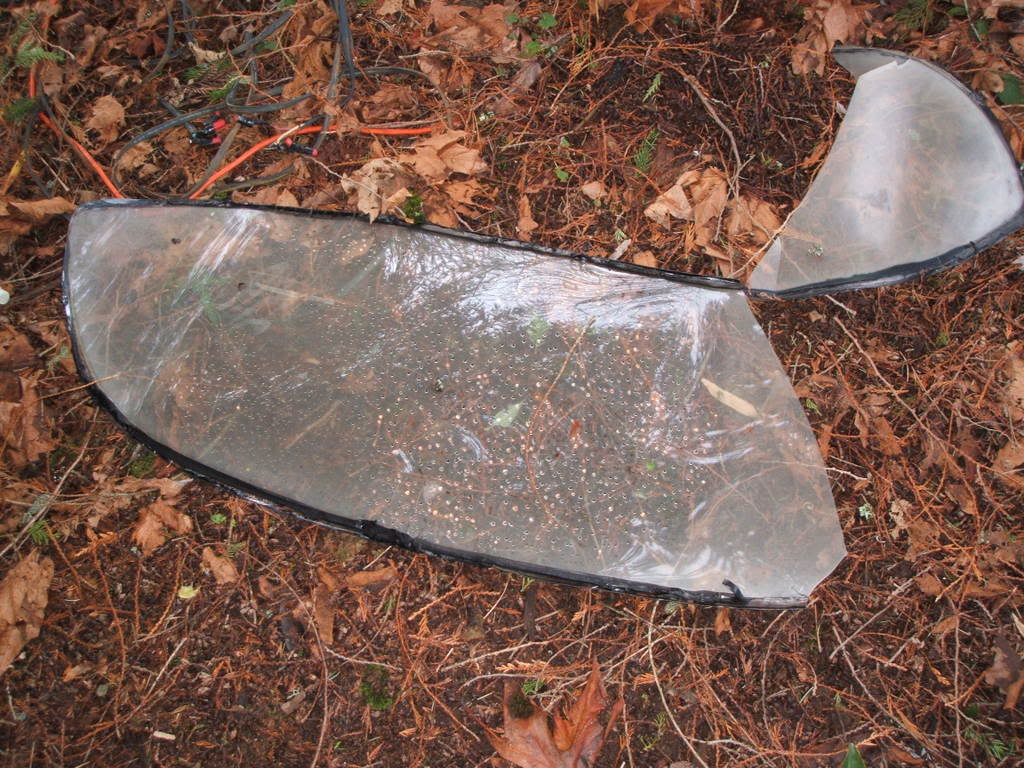
This damn dust sucks, its the chips from drilling the lexan, which makes surprisingly sharp chips, and fiberglass dust, WHICH SUCKS! It was the worst part. It got everywhere, including a bunch of slivers in my forearms.
Heres the old window in my room laid out on my 60�x24� sheet of lexan, which is a perfect size and apparently there is enough left over to replace the triangle windows in the doors. I traced it as best as I could with my crappy �template�. Any poor fit of the window is because of the damaged curled edge, I just had to guess how big it would be if it was straightened. I also haven't used a jigsaw before, much less cut lexan, so any poor fit of my window can be blamed on that as well
heres the piece of scrap left over from my cutting, those triangles at the edges are about 12�x12�, which gives you and idea of how material is left over.
This damn dust sucks, its the chips from drilling the lexan, which makes surprisingly sharp chips, and fiberglass dust, WHICH SUCKS! It was the worst part. It got everywhere, including a bunch of slivers in my forearms.
Reply
0
0
 01-09-2009, 01:07 AM
#5
Cpt. Slow
Thread Starter
iTrader: (25)
Join Date: Oct 2005
Location: Oregon City, OR
Posts: 14,179
Total Cats: 1,129
Fitment:
These are just a bunch of pictures once I bolted it up, started with one in middle of the top and bottom, then spaced three more to either side 6� apart, which brought me to the corners. I then started going 3� apart. Might be over kill, but once I clean everything up and paint the lip, I think the bolt pattern will look kinda racey. (notice thats an �A�, not �I�)
�Ooh, ahh!�
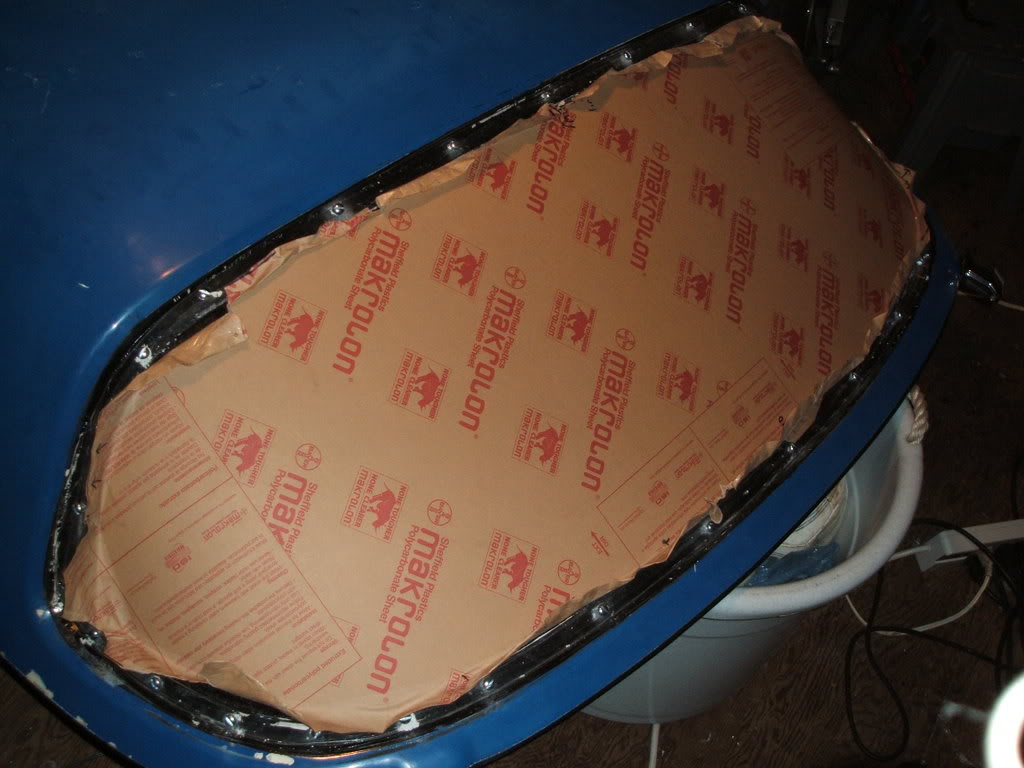
You can see more of the stupid dust in this picture, it gets between the window and lip so it can more effectively annoy you.
Corner of the window, see what I mean about a crappy hardtop? Its got crap paint, crap window, crap fiberglass. Its a model after catalytic converters, so it won't run on regular gas. Sorry about the glare.
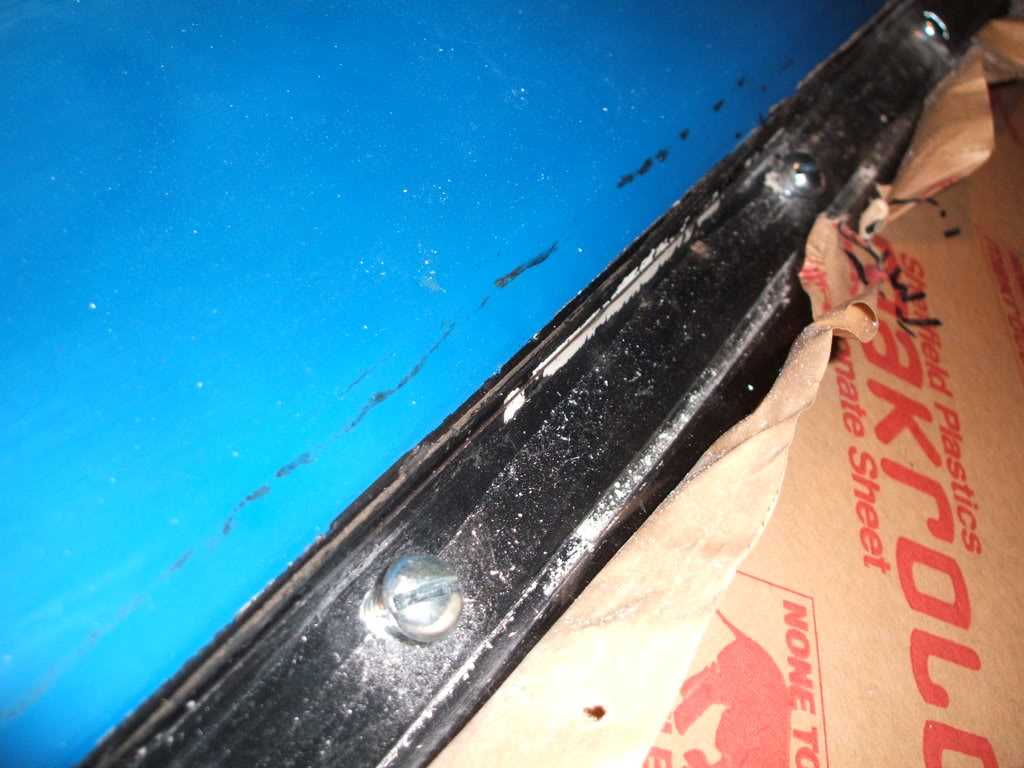
This is a bit of a warning for ya, if you do what I did and start in the middle going 6� between bolts, you'll hit some weird structure thats on the inside of the hardtop, right to inside edge of the strikers. My hole barely grazed it but I couldn't fit a nut underneath, so my temporary fix is to put the nut/bolt on upside down. I move my hole on the other side over about 1/2� to avoid this, but be careful if you're doing the same thing.
As you can see I left both sides of the protective sheet on as long as possible to avoid any scratches as I moved it around my incredibly cramped and currently unorganized work space (stuffed storage shed half emptied then filled with the tools and parts from my carport). Careful when you're drilling through it, its so easy to drill it will grab the flutes of the drill bit and pull it through, pushing against the tougher fiberglass and pulling your window up. Luckily I'm apparently an amazing driller and avoided any cracks. I suggest you use the slower setting on your drill if you have the option.
So thats it, I hope you like it. And I hope it helps some of you, ask me any questions you want, no promises that I'll have answers though. More pictures will follow as I do final fitment (there are a still a few edges that prevent it from sitting down fully against the hard top lip, again due to my crappy template) paint, and finally seal it for good.
These are just a bunch of pictures once I bolted it up, started with one in middle of the top and bottom, then spaced three more to either side 6� apart, which brought me to the corners. I then started going 3� apart. Might be over kill, but once I clean everything up and paint the lip, I think the bolt pattern will look kinda racey. (notice thats an �A�, not �I�)
�Ooh, ahh!�
You can see more of the stupid dust in this picture, it gets between the window and lip so it can more effectively annoy you.
Corner of the window, see what I mean about a crappy hardtop? Its got crap paint, crap window, crap fiberglass. Its a model after catalytic converters, so it won't run on regular gas. Sorry about the glare.
This is a bit of a warning for ya, if you do what I did and start in the middle going 6� between bolts, you'll hit some weird structure thats on the inside of the hardtop, right to inside edge of the strikers. My hole barely grazed it but I couldn't fit a nut underneath, so my temporary fix is to put the nut/bolt on upside down. I move my hole on the other side over about 1/2� to avoid this, but be careful if you're doing the same thing.
As you can see I left both sides of the protective sheet on as long as possible to avoid any scratches as I moved it around my incredibly cramped and currently unorganized work space (stuffed storage shed half emptied then filled with the tools and parts from my carport). Careful when you're drilling through it, its so easy to drill it will grab the flutes of the drill bit and pull it through, pushing against the tougher fiberglass and pulling your window up. Luckily I'm apparently an amazing driller and avoided any cracks. I suggest you use the slower setting on your drill if you have the option.
So thats it, I hope you like it. And I hope it helps some of you, ask me any questions you want, no promises that I'll have answers though. More pictures will follow as I do final fitment (there are a still a few edges that prevent it from sitting down fully against the hard top lip, again due to my crappy template) paint, and finally seal it for good.
Reply
0
0


 01-09-2009, 01:57 AM
#9
Cpt. Slow
Thread Starter
iTrader: (25)
Join Date: Oct 2005
Location: Oregon City, OR
Posts: 14,179
Total Cats: 1,129
the window was probably 58", there's not much material left over on the edges, only the 3-4" on the top.
when I roughed it out, I brought the two ends to a point, so I could get rid of that large piece of unused material. The weight of that piece hanging off the edge makes it very hard to cut those two ends nicely, which are the hardest/sharpest corners of the window.
One more hint I forgot to add, the top looks like its straight, so I put that edge flush with one of the edges of the blank when I traced it out, but I wouldn't suggest doing that, it appears to have a very slight curve to it.
My dad actually bought the sheet of lexan for me as a Christmas gift. He said it was $67 I think. He just went to a local plastic shop in Sherwood, OR. He also got a piece of 3/8" thick lexan thats about 12"x4" for free so he would have something that he could wrap and physically fit under the tree, I guess they had a bunch of scrap laying around. I'll have to think of a use for it.
Reply
0
0
 01-09-2009, 06:29 PM
#12
Cpt. Slow
Thread Starter
iTrader: (25)
Join Date: Oct 2005
Location: Oregon City, OR
Posts: 14,179
Total Cats: 1,129
It was nasty. It looked "better" with the rubber trim hiding all the mold, the curled edge, and most of the small cracks along the edge, but I'm surprised I passed tech at the track days, if I didn't know better I would of thought it would blow out at 110mph.
I dropped my template on the ground yesterday from about 2' up, and it broke in half.
I dropped my template on the ground yesterday from about 2' up, and it broke in half.
Reply
0
0
01-09-2009, 08:21 PM
#14
Cpt. Slow
Thread Starter
iTrader: (25)
Join Date: Oct 2005
Location: Oregon City, OR
Posts: 14,179
Total Cats: 1,129
Thanks, 1/8"
heres that crack I mentioned after I dropped it from 2'
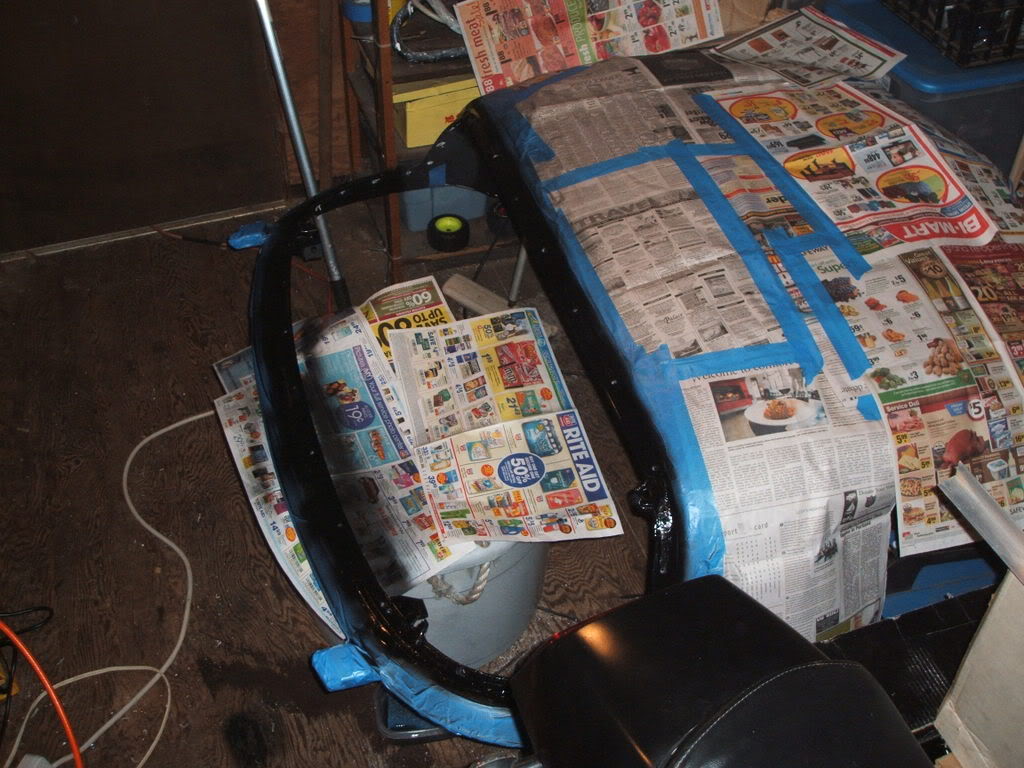
masking almost complete, you can hardly tell its masked!
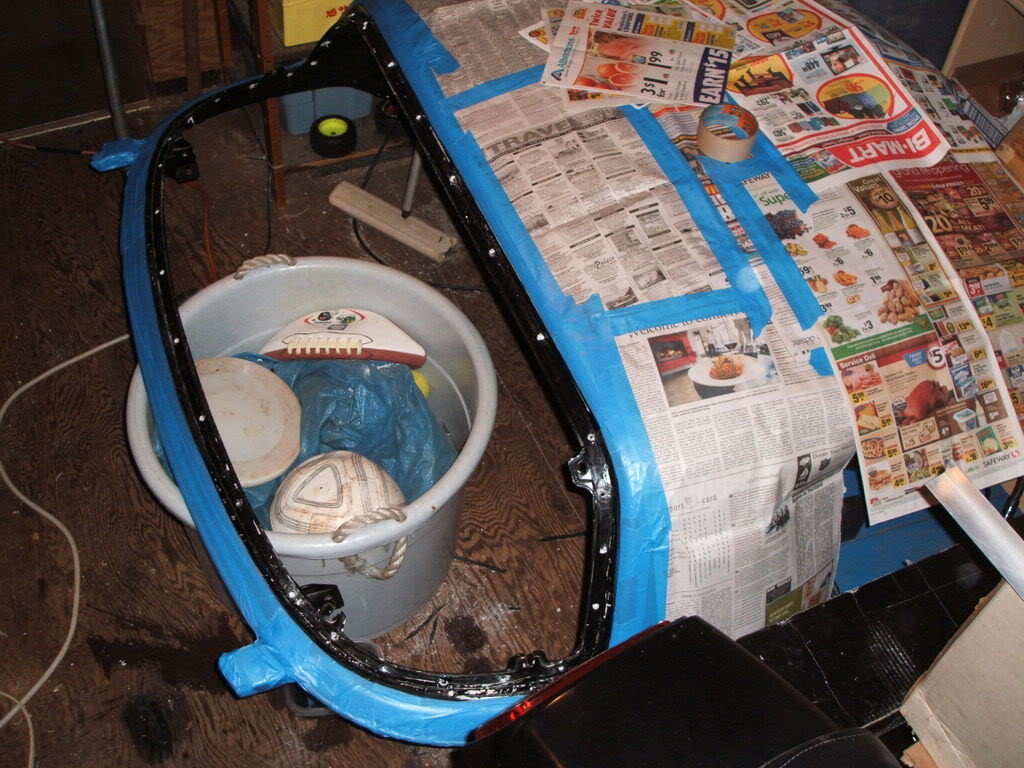
painted. I considered doing the whole hard top black, but I don't have much room in my shed and its a lot more prep work, plus I'd want to fix the fiber glass damage first. And I'm not sure how it would look. Does anyone have pictures of a mariner blue miata with a black hard top? Flat or satin.
Before I removed the window from yesterday I did drill a hole next to the one I had to mount upside down, so that empty hole will probably be the biggest ugly bit on the window. Maybe I'll glue a bolt head over the hole, just to see people's reaction.
The window is also now deburred and trimmed. I used my angle grinder with a paint remover wheel on it (feels like a really stiff scotch brite pad), which worked great. Tomorrow once the paint dries I'll be unmasking the top, fitting the window once more to make sure it doesn't need more trimming and then it'll pretty much be done, aside from sealing.
And for your enjoyment here's a pretty sunset picture taken from my roof looking out over my back yard. Kinda surprised me, you sure can miss a lot when you spend all day in a shop/shed/garage. Apologies for my bad photography.

Thats what we call the McMansion in the background and they're our closest neighbors. Huge house with the 3 car garage you can see and all I've seen come out of it is a early 90's Jeep Cherokee and a similar vintage Ford Taurus. Different strokes for different folks I suppose.
heres that crack I mentioned after I dropped it from 2'
masking almost complete, you can hardly tell its masked!
painted. I considered doing the whole hard top black, but I don't have much room in my shed and its a lot more prep work, plus I'd want to fix the fiber glass damage first. And I'm not sure how it would look. Does anyone have pictures of a mariner blue miata with a black hard top? Flat or satin.
Before I removed the window from yesterday I did drill a hole next to the one I had to mount upside down, so that empty hole will probably be the biggest ugly bit on the window. Maybe I'll glue a bolt head over the hole, just to see people's reaction.
The window is also now deburred and trimmed. I used my angle grinder with a paint remover wheel on it (feels like a really stiff scotch brite pad), which worked great. Tomorrow once the paint dries I'll be unmasking the top, fitting the window once more to make sure it doesn't need more trimming and then it'll pretty much be done, aside from sealing.
And for your enjoyment here's a pretty sunset picture taken from my roof looking out over my back yard. Kinda surprised me, you sure can miss a lot when you spend all day in a shop/shed/garage. Apologies for my bad photography.
Thats what we call the McMansion in the background and they're our closest neighbors. Huge house with the 3 car garage you can see and all I've seen come out of it is a early 90's Jeep Cherokee and a similar vintage Ford Taurus. Different strokes for different folks I suppose.
Reply
0
0

 01-10-2009, 02:35 AM
#18
Cpt. Slow
Thread Starter
iTrader: (25)
Join Date: Oct 2005
Location: Oregon City, OR
Posts: 14,179
Total Cats: 1,129
boileralum: it says its scratch resistant, who knows though.
johndoe: Its actually not that bad. its a /\ shape, the left side being the 3 car garage, the right side being the main portion of the house, with some obvious depth to it though. We call it the McMansion because every other house on the street is fairly old and crappy (read, Oregon City rednecks), and that house was the newest and biggest until my parents built their house two years ago. Although its a very space efficient and beautiful design, its not nearly as large as the one pictured.
cardriverx: my hand held rivet gun I bought at harbor frieght, although fairly useful, doesn't hold 1/4" rivets. When I looked at the price of a new rivet gun and a bunch of 1/4" rivets, I said to hell with it and bought a bunch of nuts and bolts, which you can never have too many of. All from home depot:
box of 1/4-20x1 qty. 50 bolts: $6
box of 1/4" washers qty. 100: $4
box of 1/4-20 nuts qty. 100: $5
not too bad if you ask me.
I also didn't know how I could make it fit right without ever having to take it back off again, I'd have to cut the rivets each time if I use them.
Reply
0
0
01-10-2009, 06:29 PM
#20
Cpt. Slow
Thread Starter
iTrader: (25)
Join Date: Oct 2005
Location: Oregon City, OR
Posts: 14,179
Total Cats: 1,129
Thanks, I thought it was damn funny, but no one commented, thanks Mobius
The window itself is all finished and bolted on, looks damn good. Although I used a white paint pen to make a few marks for where I needed to trim the window, and I need to get it off, does anyone know if goo-gone would be a good idea on lexan? Maybe I should just test it on a piece of scrap...
It does look very good though, except since its 30 degrees outside it fogged before I even carried the HT to the car, so its basically no different from the old window!
Pictures will come once I find my camera
Reply
0
0


