
99-00 Bi-Xenon Headlight Retrofit

Thread Starter
Elite Member
iTrader: (33)
Joined: Jan 2007
Posts: 2,522
Total Cats: 36
From: Newnan, GA
This setup you're about to see may not be quite the same quality/output overall of some we've seen in the past (thinking of Godless Commie's at the moment), however, they are probably easier to complete (no cutting or modification to the housings or projectors required) and the parts are relatively inexpensive while being of very good quality. I highly recommend that while you handle the parts that you wear latex gloves, especially the projector shrouds or any of the chrome pieces. They easily pick up oily fingerprints and when cleaned improperly, can lightly scratch, leaving a hazed finish.
* I assume no responsibility for you screwing up your headlights, getting pulled over, or any other problematic issues you may encounter.
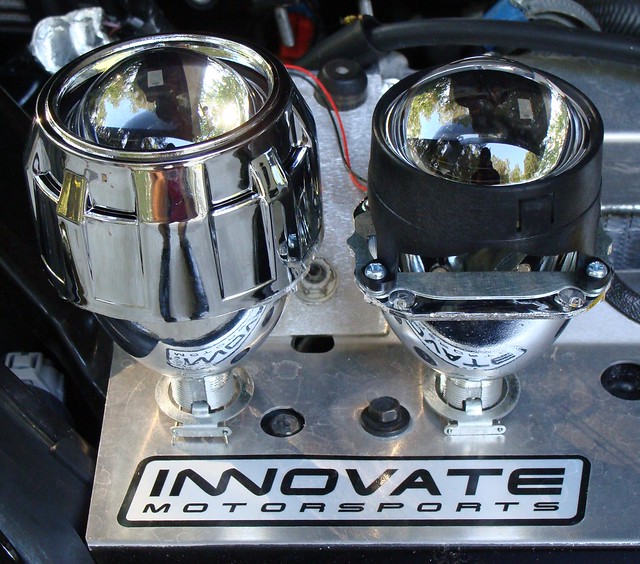
For this project I'm using Morimoto Mini H1 Bi-Xenon projectors (with Mini Gatling shrouds) from theretrofitsource.com. These projectors have low-beam/high-beam capability and include parts to make the retrofit a mostly bolt-in affair.
First, we have the projectors:

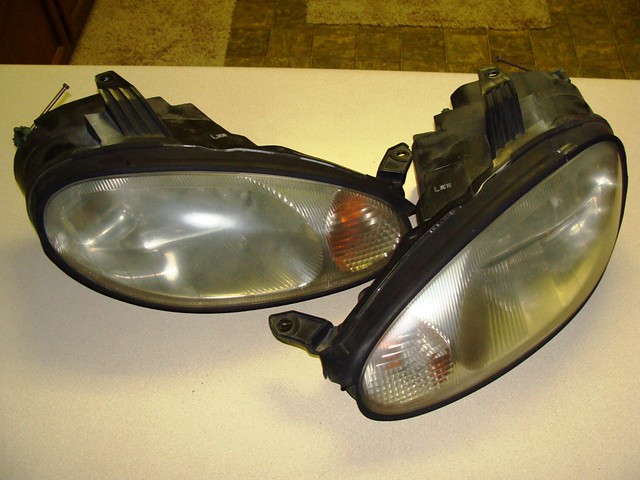
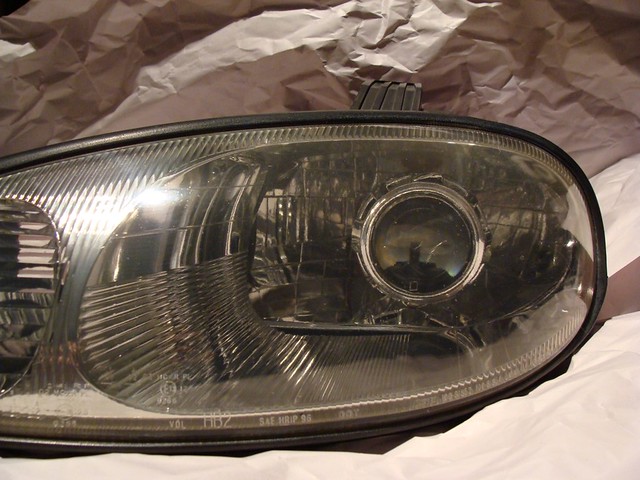
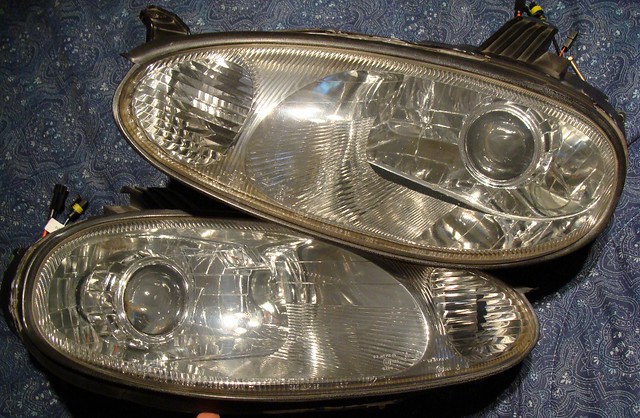
Then we have our donor headlight assemblies, remove the rubber boot, bulbs, and unscrew/remove the clip that holds the main bulb in place:
Preheat the oven to 220�, while it's warming up, prepare a cookie pan by covering it with aluminum foil (helps prevent the pan from stinking of burnt plastic, although no odor is really produced). Place the headlight in the oven for 10-12 minutes, I found it worked best to use the rack in the middle. Time will depend on your oven obviously, less time is better.
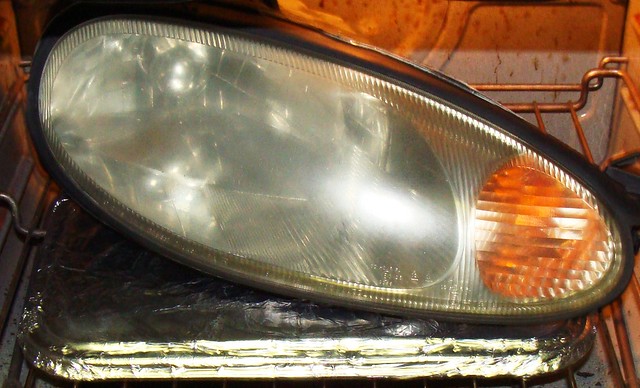
Put on a pair of soft leather or vinyl gloves and remove the headlights from the oven. Carefully use a flat head screwdriver and pry the lens from the housing, too hard and you'll damage the housing or lens, they're plastic so they get soft when hot. If the housing doesn't want to come apart easily, put it in the oven for a couple more minutes. When it's at the proper heat it will come apart easily with just a little assistance with a screwdriver. The sealant will stretch as you pull the two pieces apart, just let it break, making sure that the sealant doesn't get on the lenses. (Reinstalling the lenses is the opposite of these steps, heat and push back together, but we'll get to that later.)

After removing the reflector lens (it's clipped in) I loosely mounted the projectors in the housing to see what things will look like:


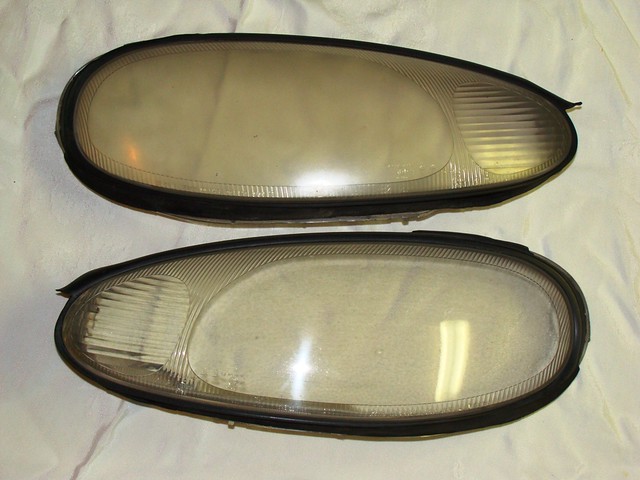
My donor headlight lenses were a little foggy so I started some polishing work on them (3M Restoration Kit, goes in your drill, works really well):
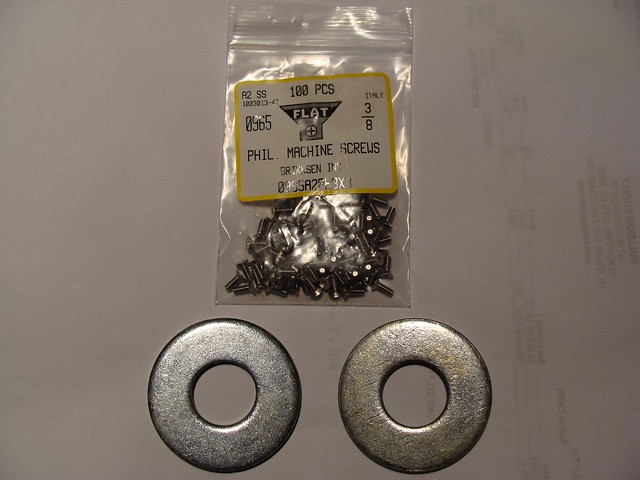
Here's the hardware you'll need: very small M3x8mm flat-topped Philips head machine screws (in stainless) and 7/8" fender washers. The fender washers sit between the projector and the headlight reflector and seat the projector in the correct position. The screws hold the bulb retainer in place and need to be flat-topped so the bulb can be installed properly.
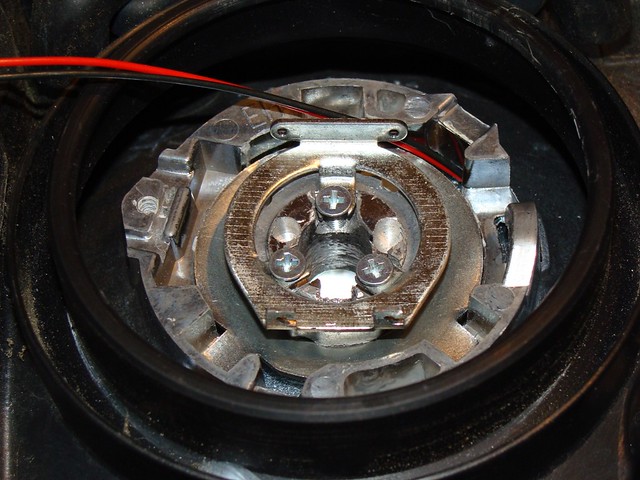
The provided H4 adapter ensures that your projector is straight and level. Here's the back side with the hardware installed (note: the top of the screws may end up being slightly above the bulb mount platform, this is ok):
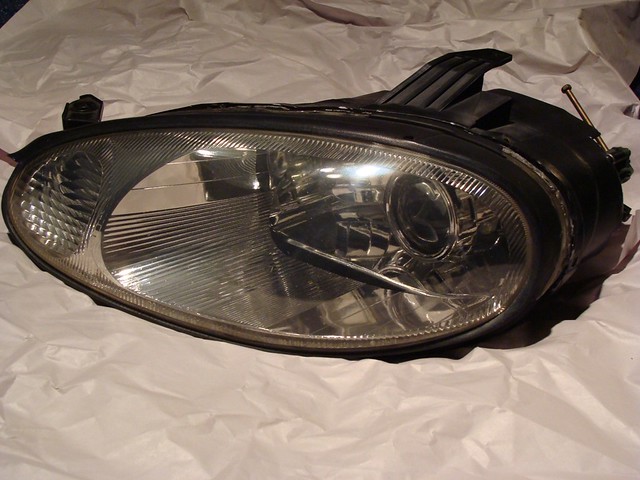
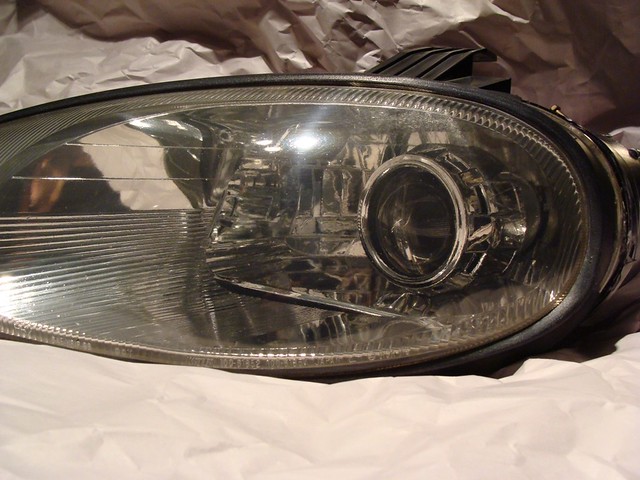
So now your headlights should look something like this (lens on loosely):
Here's a couple modifications you should do and are recommended by some on HIDPlanet, but are not required. First here's the cutoff shield as sent by TRS (make sure you do not ruin or change the bend in the actual cutoff shield):
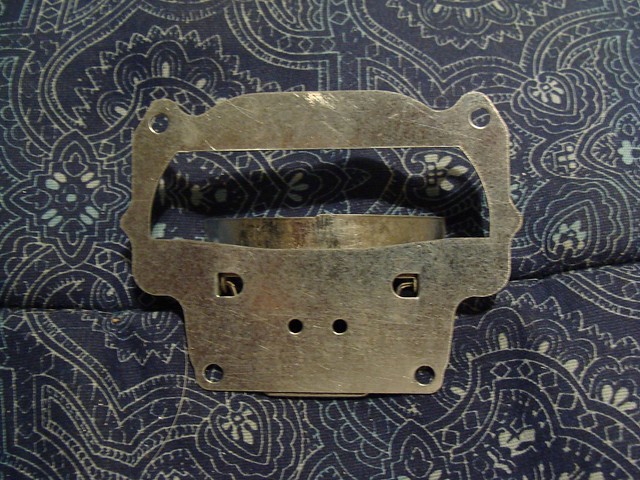
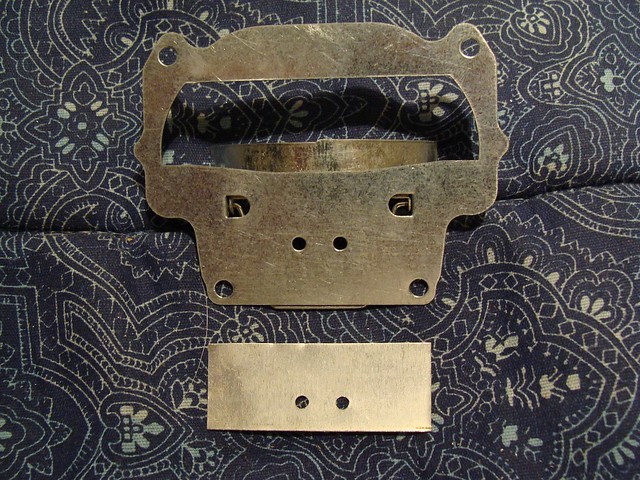
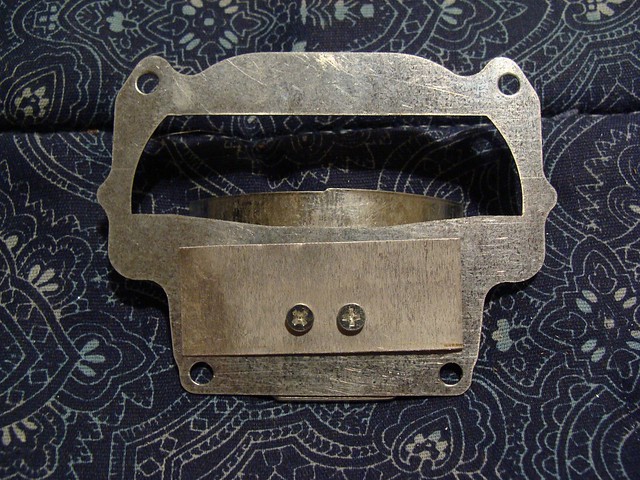
Notice that there are 2 "D" shaped holes in the shield, these will throw some light up into the air, so if little things like that bother you, get some aluminum flash and make a block-off plate:
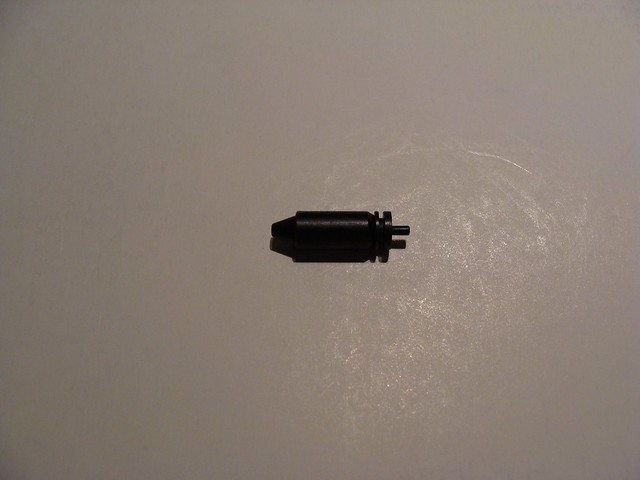
Some people reported that most of the Gen I solenoids and some of the Gen II solenoids were sticking when alternating between low beams and high beams, (these projector units are Gen II and Gen III just came out), but preventative measures never hurt. Here's the solenoid plunger as sent:
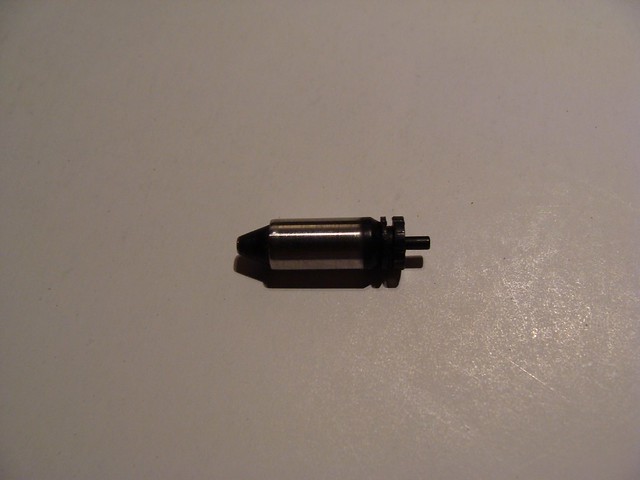
Get your drill, both medium and fine grit sandpaper, and sand the tip just a bit, careful not to take too much material off:

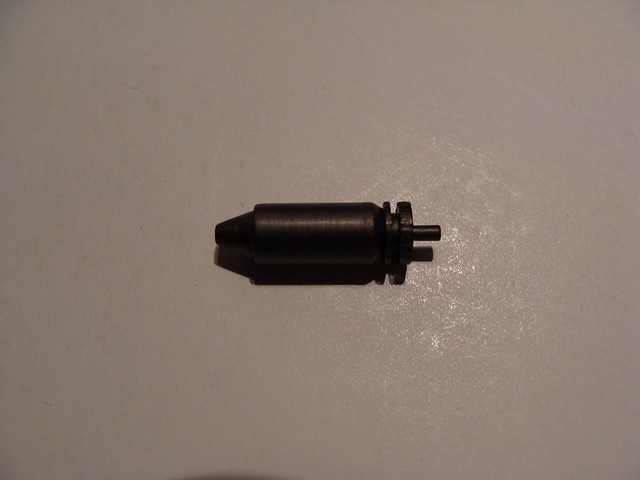
Then spray with graphite lube (which is for high-temp use, good here since HIDs create a ton of heat):
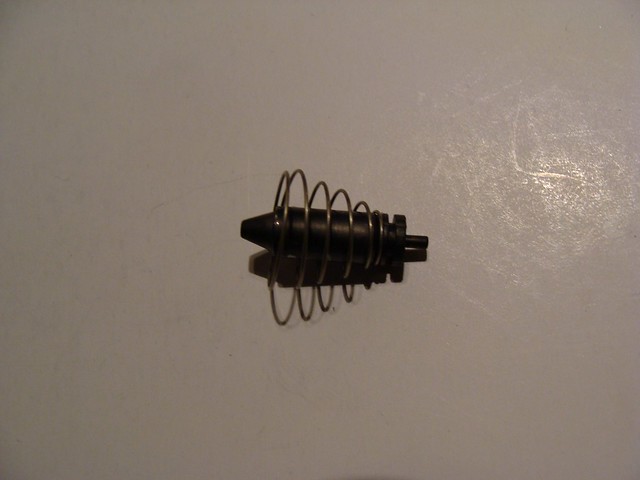
Then reinstall the spring, after making sure to stretch it out some as well:
Then reassemble everything.

Now, tear the front end off the car...
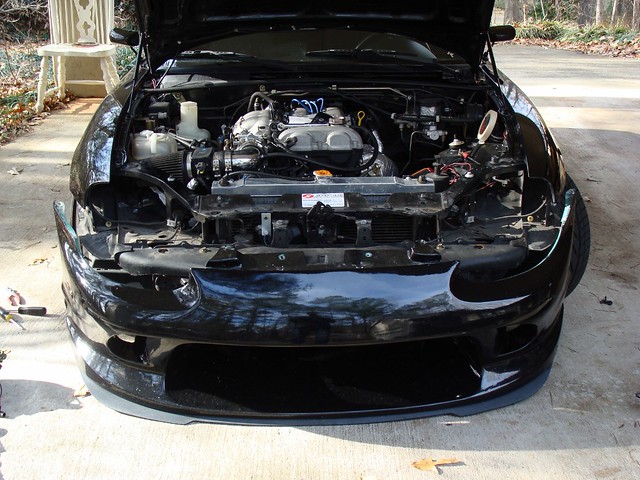
...and install the new headlights. The bumper is just loosely mounted and the lenses are not on the lights, so ignore the gaps and fitment.
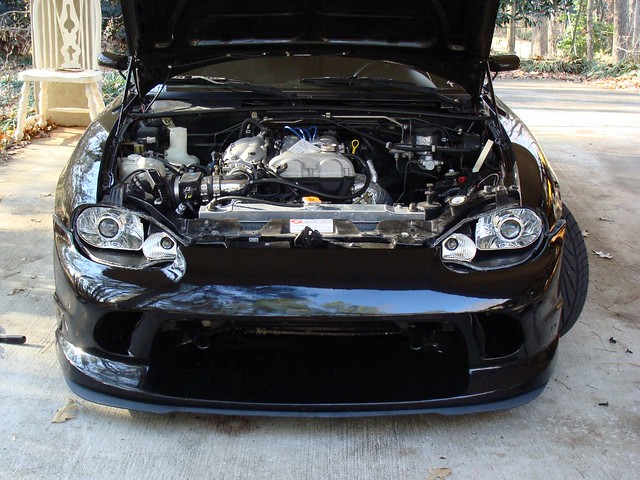
Here, the lenses are loosely mounted to see how the final product will look (I like these headlights a lot more without the amber cover for the turn signals):
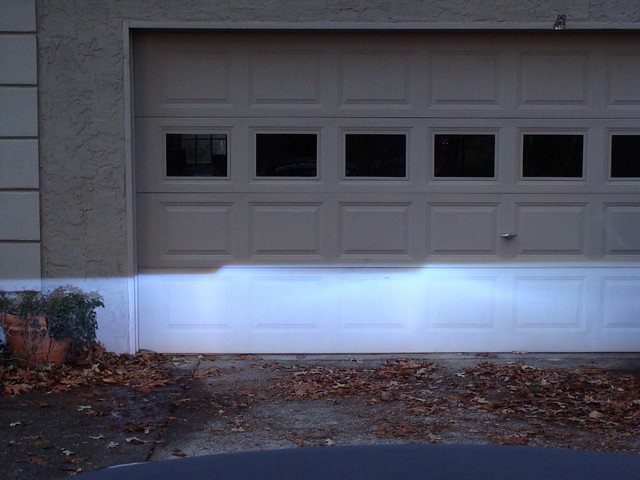
And here's the cutoff after installation, looks like this will work well when it's completed and adjusted properly:
Where things are currently at as of today: I didn't like how the shrouds attach to the projectors. They clip on in three places, are hard to clip on, and seem to pop off easily anyway. People on HIDPlanet suggest using JB Weld, high temp silicone, or other methods to ensure they stay on. Not a fan of that, especially when it would be difficult to fix should one of those methods fail. However the most recent generation of these projectors include a revised shroud that attaches via four screws in existing holes in the projector, which is a lot more secure. So those are being shipped tomorrow and I'm returning these shrouds to them. And I took the lazy way out and asked for a relay harness too, complete PnP. So the final install is put off just a little longer.
* I assume no responsibility for you screwing up your headlights, getting pulled over, or any other problematic issues you may encounter.
For this project I'm using Morimoto Mini H1 Bi-Xenon projectors (with Mini Gatling shrouds) from theretrofitsource.com. These projectors have low-beam/high-beam capability and include parts to make the retrofit a mostly bolt-in affair.
First, we have the projectors:
Then we have our donor headlight assemblies, remove the rubber boot, bulbs, and unscrew/remove the clip that holds the main bulb in place:
Preheat the oven to 220�, while it's warming up, prepare a cookie pan by covering it with aluminum foil (helps prevent the pan from stinking of burnt plastic, although no odor is really produced). Place the headlight in the oven for 10-12 minutes, I found it worked best to use the rack in the middle. Time will depend on your oven obviously, less time is better.
Put on a pair of soft leather or vinyl gloves and remove the headlights from the oven. Carefully use a flat head screwdriver and pry the lens from the housing, too hard and you'll damage the housing or lens, they're plastic so they get soft when hot. If the housing doesn't want to come apart easily, put it in the oven for a couple more minutes. When it's at the proper heat it will come apart easily with just a little assistance with a screwdriver. The sealant will stretch as you pull the two pieces apart, just let it break, making sure that the sealant doesn't get on the lenses. (Reinstalling the lenses is the opposite of these steps, heat and push back together, but we'll get to that later.)
After removing the reflector lens (it's clipped in) I loosely mounted the projectors in the housing to see what things will look like:
My donor headlight lenses were a little foggy so I started some polishing work on them (3M Restoration Kit, goes in your drill, works really well):
Here's the hardware you'll need: very small M3x8mm flat-topped Philips head machine screws (in stainless) and 7/8" fender washers. The fender washers sit between the projector and the headlight reflector and seat the projector in the correct position. The screws hold the bulb retainer in place and need to be flat-topped so the bulb can be installed properly.
The provided H4 adapter ensures that your projector is straight and level. Here's the back side with the hardware installed (note: the top of the screws may end up being slightly above the bulb mount platform, this is ok):
So now your headlights should look something like this (lens on loosely):
Here's a couple modifications you should do and are recommended by some on HIDPlanet, but are not required. First here's the cutoff shield as sent by TRS (make sure you do not ruin or change the bend in the actual cutoff shield):
Notice that there are 2 "D" shaped holes in the shield, these will throw some light up into the air, so if little things like that bother you, get some aluminum flash and make a block-off plate:
Some people reported that most of the Gen I solenoids and some of the Gen II solenoids were sticking when alternating between low beams and high beams, (these projector units are Gen II and Gen III just came out), but preventative measures never hurt. Here's the solenoid plunger as sent:
Get your drill, both medium and fine grit sandpaper, and sand the tip just a bit, careful not to take too much material off:
Then spray with graphite lube (which is for high-temp use, good here since HIDs create a ton of heat):
Then reinstall the spring, after making sure to stretch it out some as well:
Then reassemble everything.
Now, tear the front end off the car...
...and install the new headlights. The bumper is just loosely mounted and the lenses are not on the lights, so ignore the gaps and fitment.
Here, the lenses are loosely mounted to see how the final product will look (I like these headlights a lot more without the amber cover for the turn signals):
And here's the cutoff after installation, looks like this will work well when it's completed and adjusted properly:
Where things are currently at as of today: I didn't like how the shrouds attach to the projectors. They clip on in three places, are hard to clip on, and seem to pop off easily anyway. People on HIDPlanet suggest using JB Weld, high temp silicone, or other methods to ensure they stay on. Not a fan of that, especially when it would be difficult to fix should one of those methods fail. However the most recent generation of these projectors include a revised shroud that attaches via four screws in existing holes in the projector, which is a lot more secure. So those are being shipped tomorrow and I'm returning these shrouds to them. And I took the lazy way out and asked for a relay harness too, complete PnP. So the final install is put off just a little longer.
Last edited by RotorNutFD3S; Jan 12, 2011 at 04:25 PM.
Reply
 0
0

0

Thread Starter
Elite Member
iTrader: (33)
Joined: Jan 2007
Posts: 2,522
Total Cats: 36
From: Newnan, GA
Damn, I forgot to post that. The projectors are $120/pair from TRS, the hardware was $8 (had to buy 100 screws, lol), the relay harness was $30 from TRS, and I ordered some cheap eBay HIDs ($40) so I could test all of this first and not be out a ton of money for some higher quality HIDs. And the donor headlights were provided by a local forum member in exchange for my current housings when I'm done with all of this.
Reply
0
0


That's awesome Eric. Thanks for making me want to spend more money. Are you going to paint the housings black? Would look boss if you do.
__________________
Best Car Insurance | Auto Protection Today | FREE Trade-In Quote
__________________
Best Car Insurance | Auto Protection Today | FREE Trade-In Quote
Reply
0
0


Reply
0
0


Thread Starter
Elite Member
iTrader: (33)
Joined: Jan 2007
Posts: 2,522
Total Cats: 36
From: Newnan, GA
 And agreed.
I can try to get a better picture from the top.
Reply
0
0
Thread Starter
Elite Member
iTrader: (33)
Joined: Jan 2007
Posts: 2,522
Total Cats: 36
From: Newnan, GA
They might fit then. The projectors are about 4.5" long from the tip of their lens to their base. Then about another 0.5" of threads for attachment hardware.
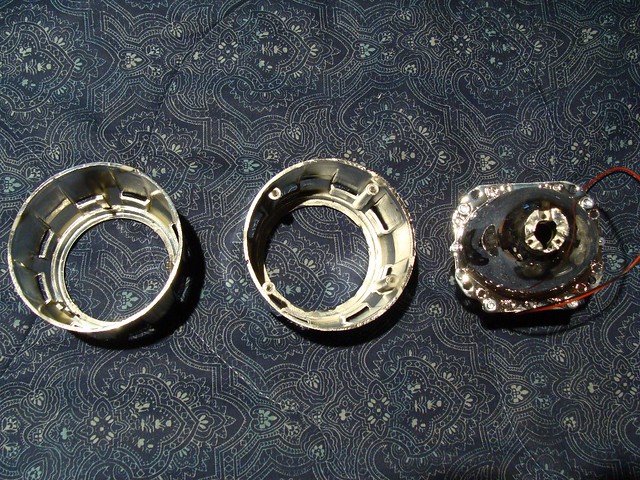
Got the new shrouds and my harness in today, the shrouds definitely will add some peace of mind to the project. Want to finish it this week, but more than likely will be a weekend project.
Old vs. New:
Relay Harness:
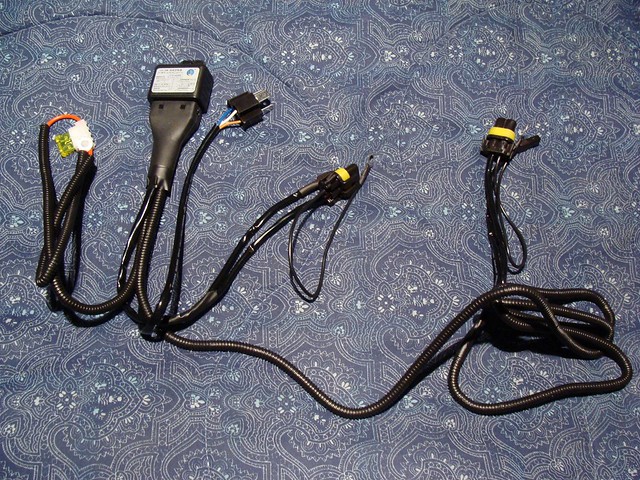
8 connections total: one 12v supply, plug in the headlight harness, plug in each ballast and bi-xenon solenoid connector, and a ground at each ballast connector.
Got the new shrouds and my harness in today, the shrouds definitely will add some peace of mind to the project. Want to finish it this week, but more than likely will be a weekend project.
Old vs. New:
Relay Harness:
8 connections total: one 12v supply, plug in the headlight harness, plug in each ballast and bi-xenon solenoid connector, and a ground at each ballast connector.
Reply
0
0
Thread Starter
Elite Member
iTrader: (33)
Joined: Jan 2007
Posts: 2,522
Total Cats: 36
From: Newnan, GA
The new shrouds are now installed, definitely a much better design for keeping them in place.
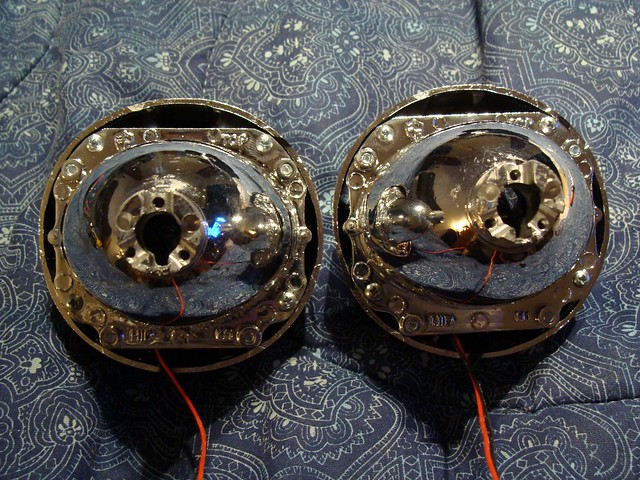
I then reinstalled the projectors into the housings (they had to come out in order to secure the new shrouds in place) and figured it would be a good time to figure out how to seal the rear rubber bulb cover. It was easy, I put three 5/8" rubber washers (find them on the plumbing aisle) onto the back of each bulb and then popped the cover into place. So now these are ready to go back onto the car (going to check them one more time with the lenses off to make sure everything is still ok) and stay there.
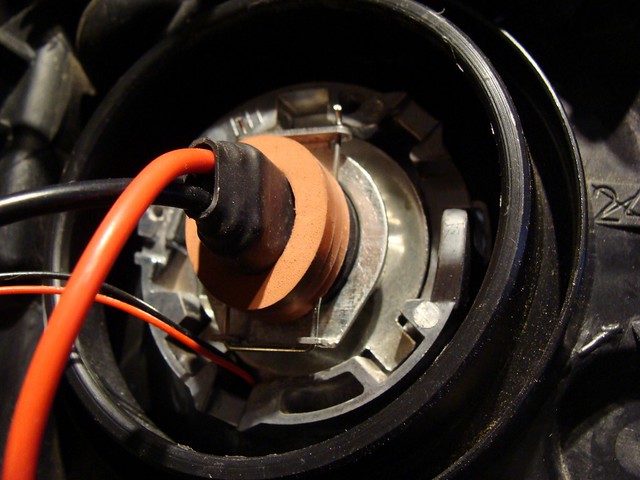
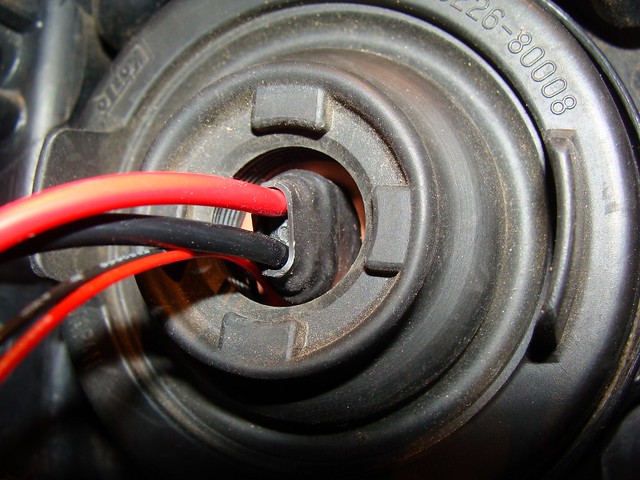
I then reinstalled the projectors into the housings (they had to come out in order to secure the new shrouds in place) and figured it would be a good time to figure out how to seal the rear rubber bulb cover. It was easy, I put three 5/8" rubber washers (find them on the plumbing aisle) onto the back of each bulb and then popped the cover into place. So now these are ready to go back onto the car (going to check them one more time with the lenses off to make sure everything is still ok) and stay there.
Last edited by RotorNutFD3S; Jan 5, 2011 at 10:43 PM.
Reply
0
0
Do they come with the new shrouds or would I need to request them. Is that harness just for hi-beam?
__________________
Best Car Insurance | Auto Protection Today | FREE Trade-In Quote
__________________
Best Car Insurance | Auto Protection Today | FREE Trade-In Quote
Reply
0
0
Thread Starter
Elite Member
iTrader: (33)
Joined: Jan 2007
Posts: 2,522
Total Cats: 36
From: Newnan, GA
From what I read, if you order the projectors now you get the new style shroud that I now have (you could always call TRS and make sure, great customer support from them!). With the new gen. they also supposedly include a thick rubber washer that does the work that the fender washers did (seems to be a common issue with H4 headlights), but I haven't seen what it looks like and I don't know if it works. Godless Commie is correct, you'll have low and hi-beam capability and it will all be controlled like stock.
Reply
0
0
Thread Starter
Elite Member
iTrader: (33)
Joined: Jan 2007
Posts: 2,522
Total Cats: 36
From: Newnan, GA
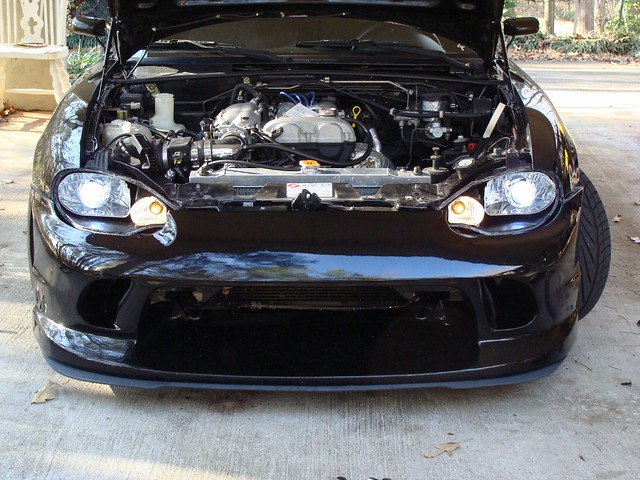
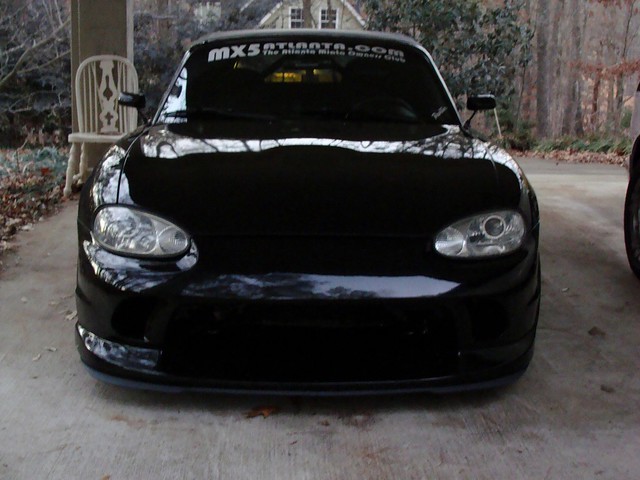
Thanks Jared.They're officially done and in the car! Ran out of light so I'll have to take some daytime shots later. But I can definitely can see much better at night after taking a quick test drive.
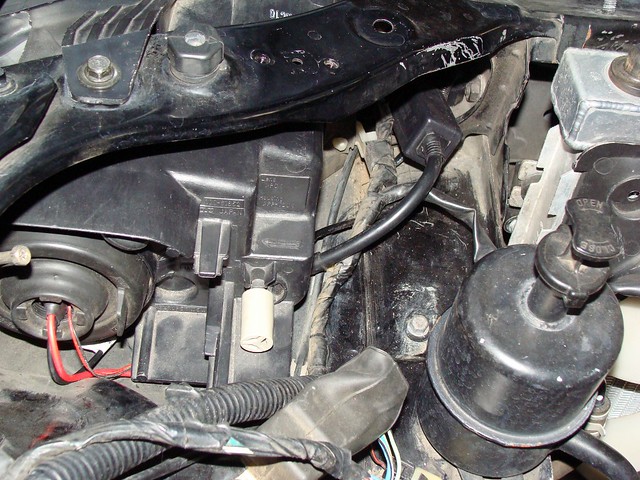
I hid the ballasts up under the headlights, so this is all that's exposed if you look behind the headlight housing:
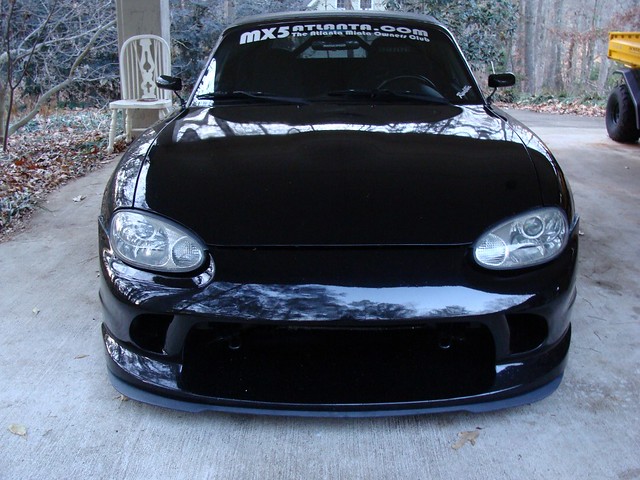
And here's a quick blurry shot using all the light I had left:
Reply
0
0
That's great. I'd love to hear more about specifically how you mounted the ballasts under the headlights. Or at least where you bolted them down (to the headlight itself?).
Mine are chillin behind the headlights and annoy me greatly, so I want to "clean it up" and mount them somewhere thats not visible.
overall I think this came out looking great for you man.
definitely a good alternative to better lighting for the 99-00 folks that don't want to switch bumpers or run the newer lights.
the ONLY thing I would have done differently is paint the housings black, but thats just me
Reply
0
0


