Heat Transfer Question
 09-16-2015, 11:38 PM
#21
Elite Member
Thread Starter
iTrader: (16)
Join Date: Aug 2007
Location: Houston, TX
Posts: 9,297
Total Cats: 476
Something like this: Insulated Heat Shield (1990-2015)
It's more fun to build something, but ...
these guys have already engineered it, it works and it's easy.
I've used them since I put my aftermarket header on.
It's more fun to build something, but ...
these guys have already engineered it, it works and it's easy.
I've used them since I put my aftermarket header on.
How well does their shield work on your setup?

Reply
 0
0

0
09-17-2015, 12:18 AM
#22

I love heat transfer problems!
Your primary concern is radiant heat, which in this case is probably at least an order of magnitude more important than convective heat transfer. Focus on radiant heat.
If possible, you should try to keep the stock heat shield, and polish it. Also, building a heatshield to go under the stock heatshield is going to be really hard in my opinion, there just isn't any space there.
Whatever you do, never paint anything on a heatshield black! I know you have heard of blackbody radiation. Painting anything on the heatshield black will result in high levels of emissivity and absorbtion, and low levels of reflectivity. Black anywhere would be a lose-lose-lose.
The biggest bang for your buck in terms of $$$ vs. fabrication skills vs. effectiveness would be this:
Fab one heat shield with an air gap just above the stock heat shield, if you don't care about how clean it looks, I would hand bend it by hand and mallet until there is a ~ 1/4" gap above the stock heat shield. You want the shiny side towards the stock heat shield, not the SC. If you are going to stop here, I would recommend hand polishing the bare side as best you can.
To go up a step in effectiveness with the tradeoff being more money and time invested, I would find thin insulation that is capable of withstanding about 1000F, and place this between the stock heat shield and the fabricated heat shield, and place the shiny side towards the SC. When you do this, the side facing the stock heat shield doesn't matter in terms of surface finish.
If you wanted to go even another step in terms of effectiveness, you would create another stainless heatshield around the underside of the SC, with the shiny side facing the SC. Hand polish the other side.
Reply
0
0
09-17-2015, 01:33 AM
#23
Elite Member
Thread Starter
iTrader: (16)
Join Date: Aug 2007
Location: Houston, TX
Posts: 9,297
Total Cats: 476
I love heat transfer problems!
Your primary concern is radiant heat, which in this case is probably at least an order of magnitude more important than convective heat transfer. Focus on radiant heat.
If possible, you should try to keep the stock heat shield, and polish it. Also, building a heatshield to go under the stock heatshield is going to be really hard in my opinion, there just isn't any space there.
Whatever you do, never paint anything on a heatshield black! I know you have heard of blackbody radiation. Painting anything on the heatshield black will result in high levels of emissivity and absorbtion, and low levels of reflectivity. Black anywhere would be a lose-lose-lose.
The biggest bang for your buck in terms of $$$ vs. fabrication skills vs. effectiveness would be this:
Fab one heat shield with an air gap just above the stock heat shield, if you don't care about how clean it looks, I would hand bend it by hand and mallet until there is a ~ 1/4" gap above the stock heat shield. You want the shiny side towards the stock heat shield, not the SC. If you are going to stop here, I would recommend hand polishing the bare side as best you can.
To go up a step in effectiveness with the tradeoff being more money and time invested, I would find thin insulation that is capable of withstanding about 1000F, and place this between the stock heat shield and the fabricated heat shield, and place the shiny side towards the SC. When you do this, the side facing the stock heat shield doesn't matter in terms of surface finish.
If you wanted to go even another step in terms of effectiveness, you would create another stainless heatshield around the underside of the SC, with the shiny side facing the SC. Hand polish the other side.
Your primary concern is radiant heat, which in this case is probably at least an order of magnitude more important than convective heat transfer. Focus on radiant heat.
If possible, you should try to keep the stock heat shield, and polish it. Also, building a heatshield to go under the stock heatshield is going to be really hard in my opinion, there just isn't any space there.
Whatever you do, never paint anything on a heatshield black! I know you have heard of blackbody radiation. Painting anything on the heatshield black will result in high levels of emissivity and absorbtion, and low levels of reflectivity. Black anywhere would be a lose-lose-lose.
The biggest bang for your buck in terms of $$$ vs. fabrication skills vs. effectiveness would be this:
Fab one heat shield with an air gap just above the stock heat shield, if you don't care about how clean it looks, I would hand bend it by hand and mallet until there is a ~ 1/4" gap above the stock heat shield. You want the shiny side towards the stock heat shield, not the SC. If you are going to stop here, I would recommend hand polishing the bare side as best you can.
To go up a step in effectiveness with the tradeoff being more money and time invested, I would find thin insulation that is capable of withstanding about 1000F, and place this between the stock heat shield and the fabricated heat shield, and place the shiny side towards the SC. When you do this, the side facing the stock heat shield doesn't matter in terms of surface finish.
If you wanted to go even another step in terms of effectiveness, you would create another stainless heatshield around the underside of the SC, with the shiny side facing the SC. Hand polish the other side.
It's function over form for me, so whatever works the best and is reliable is what I'll do, looks be damned if required to make it work well.
The SC bracket is all flat surfaces, no curves. So mounting stainless sheet metal to it to will be as simple as cut and mount it. Easy to do that. That's about the only low hanging fruit though.
Material should arrive Thursday evening, so I'm optimistic I'll get to do some testing to see how effective some of the things discussed are. Right now my basic idea is to build some simple little bracket that will hold a sample in the same spot, about 1/2" away from a header primary. Then try different things as mentioned here and see how each works. I'll be using an IR heat gun, so I'll be sure and slap a piece of black tape on the sample to take my measurements. That and test putting a piece under the OEM shield to see how effective that is too.
Reply
0
0
09-17-2015, 09:43 AM
#24

Whatever you do, never paint anything on a heatshield black! I know you have heard of blackbody radiation. Painting anything on the heatshield black will result in high levels of emissivity and absorbtion, and low levels of reflectivity. Black anywhere would be a lose-lose-lose.
And if the black side is facing towards the sc, how much would be absorbed? Does it matter since it'll be right next to the header?
Black tape would be thicker than paint, and way thicker than anodized metal. It may be more of a heat insulator when applied. And if that's true, it could work as a means on keeping heat away from the SC, as long as the tape glue doesn't melt into goo.
Reply
0
0
09-17-2015, 10:26 AM
#25
You want low emissivity for the heatshield, not high emissivity. High emissivity on the side towards the SC would mean that almost every bit of heat the heatshield absorbs from the header would be emitted straight at the SC.
Sure, black paint on the outside surface of the heat shield facing the SC would make the heatshield "cooler", but a cooler heatshield means that it in turn would have a greater temp difference from the header, and this delta T would drive more header to heat shield radiant heat transfer.
Many engineering heat transfer books have sections regarding heat shield design. Every source I have ever found has shown that you should decrease emissivity everywhere, and if possible, insulate the layers between heat shield layers
Reply
0
0
09-17-2015, 02:33 PM
#26
Elite Member

Join Date: Jul 2005
Posts: 6,420
Total Cats: 84
+1. Painting any side black is a terrible idea. That would make it cooler, but the reason it cools is because it will radiate heat... into the 'charger!
If you are forced to use a shield with only 1 shiny side, you orient it so the shiny side *stays clean* or can be cleaned. In the real world this is the most important factor.
Also, it will be better to mount it near the 'charger rather than the header, because you need some airflow between the header and the heatshield so the heatshield doesn't get so hot and re-radiate heat into the 'charger. Additionally placing it close to the header will make it run hot and discolor, raising its emissivity.
Reply
0
0
09-17-2015, 03:02 PM
#27
I see what you guys are getting at now. The black will still emit towards the sc, where as I was just thinking the black side 'should' emit to get rid of the heat coming from the header asap. But the panel isn't a heatsink, and shouldn't be black to emit out the heat from the header.
+1 imaginary prop for Jason

+1 imaginary prop for Jason
Last edited by Girz0r; 09-18-2015 at 01:13 PM.
Reply
0
0
09-17-2015, 07:09 PM
#28
Elite Member
Thread Starter
iTrader: (16)
Join Date: Aug 2007
Location: Houston, TX
Posts: 9,297
Total Cats: 476
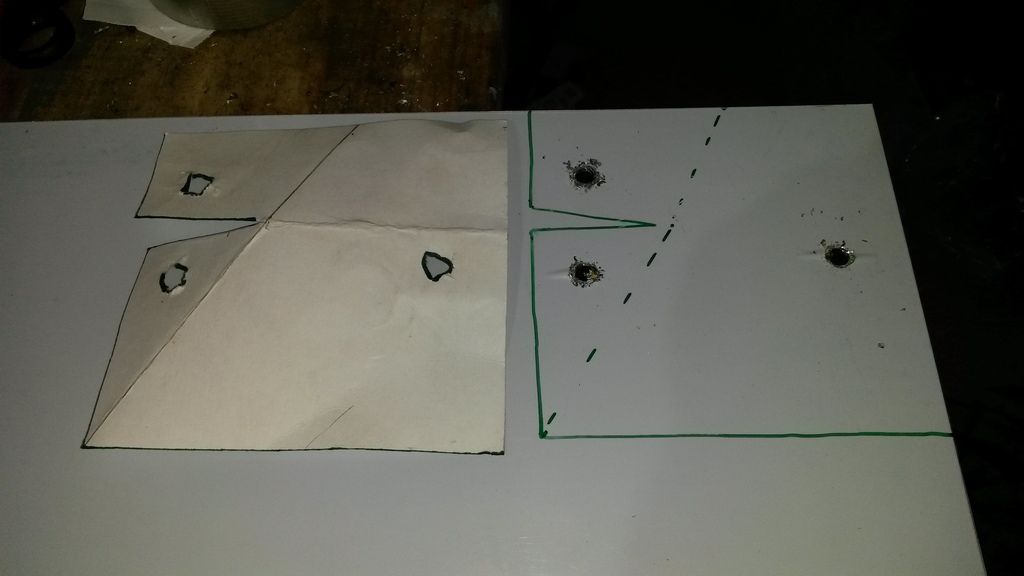
Ok so did a bit of testing just now. Made a quick little piece to cover a corner on the header (which is the closest to the SC). I made the shield very tight to the header here, as I have to be able to access both header studs shown while the heat shield is in place. And, because when I made I wanted it to fit under the stock heat shield if possible.
Anyways testing results below, this is 2 days of testing results.
I set idle to 1,800 and retarded timing some to drive up EGTs. Got the primaries to glow a very light red. All test were done by idling engine for 45 minutes to let everything get up to temp. All temps taken with a cheapo IR heat gun.
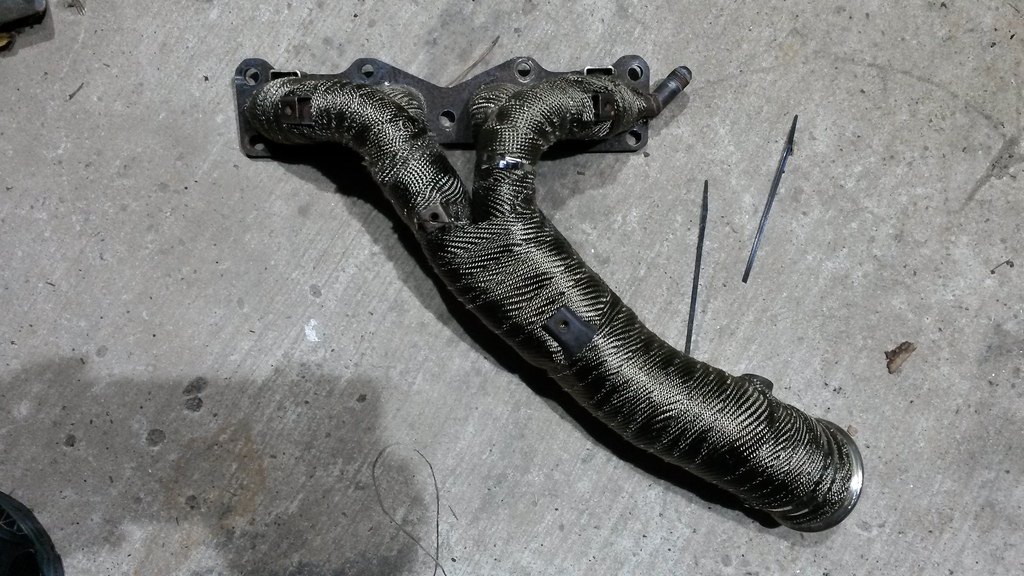
Test 1: Wrapped primaries, no heat shield.
Primaries ~610*F about 5" away from header flange. Lots of radiant heat coming off of them. At 1" away I can only hold my hand there about 1.5 seconds.
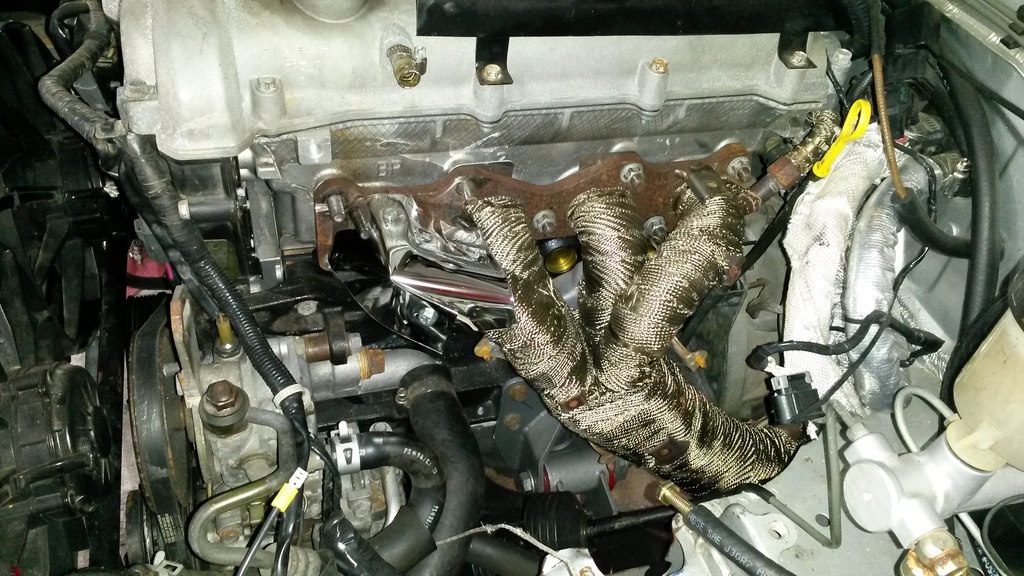
Test 2: Wrapped primaries, stock OEM heat shield (with 2 cutouts to access header studs)
Sheet metal temps vary from 230*F to 320*F depending on location. Radiant heat down a lot compared to no shield. Two cuts in shield to access header studs show primaries are >620*F (over temp range of IR Heat gun). Lots of radiant heat coming through these access spots relative to heat shield. At 1" away, I can hold my hand above the OEM shield about 10 seconds.
Test 3: Same as Test 2, but idle returned to normal for 5 min
Sheet metal temps dropped to 200-250*F.
Test 4: Wrapped primaries, small stainless heatshield on forward corner of header to test Stainless Steel effectiveness. Single layer, shiny side facing out.
Primaries 550-600*F. I put a piece of black tape on the stainless to measure its temp. Tape temp was 320*F. Measuring off of the shiny surface showed 150-160*F. Radiant heat very low from stainless, less that the OEM shield for sure. At 1" away, I can hold my fingers near the stainless shield until my arm is being burned from the primaries, about 25 seconds. Fingers were warm but not being burned.
Conclusion so far: Stainless shield was about the same temp as OEM shield, but emits less radiation than the OEM shield. How much less is hard to quantify, but it's very noticeable.
Next test I'm planning is to make another piece, same as the corner piece I just made and put a layer of DEI Titanium between them, reinstall, and test that as a double wall with insulator. Letting car cool off right now.
Pics
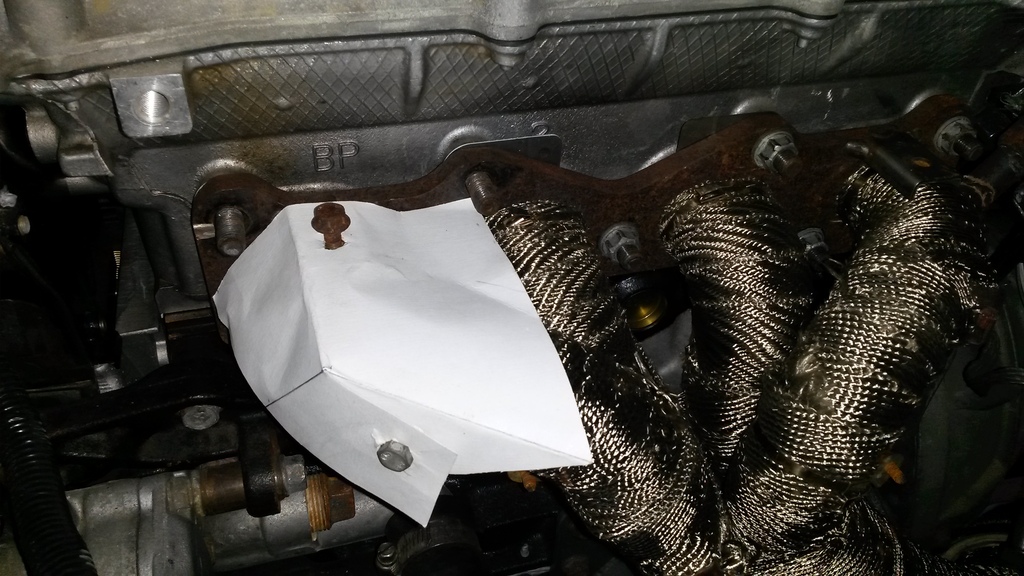
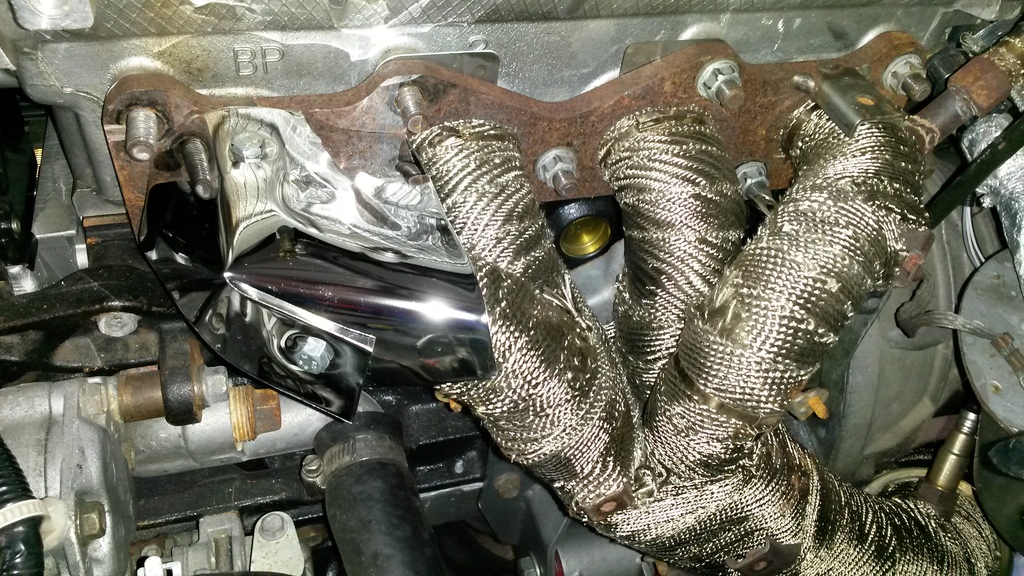
Last piece shows location of tape
Anyways testing results below, this is 2 days of testing results.
I set idle to 1,800 and retarded timing some to drive up EGTs. Got the primaries to glow a very light red. All test were done by idling engine for 45 minutes to let everything get up to temp. All temps taken with a cheapo IR heat gun.
Test 1: Wrapped primaries, no heat shield.
Primaries ~610*F about 5" away from header flange. Lots of radiant heat coming off of them. At 1" away I can only hold my hand there about 1.5 seconds.
Test 2: Wrapped primaries, stock OEM heat shield (with 2 cutouts to access header studs)
Sheet metal temps vary from 230*F to 320*F depending on location. Radiant heat down a lot compared to no shield. Two cuts in shield to access header studs show primaries are >620*F (over temp range of IR Heat gun). Lots of radiant heat coming through these access spots relative to heat shield. At 1" away, I can hold my hand above the OEM shield about 10 seconds.
Test 3: Same as Test 2, but idle returned to normal for 5 min
Sheet metal temps dropped to 200-250*F.
Test 4: Wrapped primaries, small stainless heatshield on forward corner of header to test Stainless Steel effectiveness. Single layer, shiny side facing out.
Primaries 550-600*F. I put a piece of black tape on the stainless to measure its temp. Tape temp was 320*F. Measuring off of the shiny surface showed 150-160*F. Radiant heat very low from stainless, less that the OEM shield for sure. At 1" away, I can hold my fingers near the stainless shield until my arm is being burned from the primaries, about 25 seconds. Fingers were warm but not being burned.
Conclusion so far: Stainless shield was about the same temp as OEM shield, but emits less radiation than the OEM shield. How much less is hard to quantify, but it's very noticeable.
Next test I'm planning is to make another piece, same as the corner piece I just made and put a layer of DEI Titanium between them, reinstall, and test that as a double wall with insulator. Letting car cool off right now.
Pics


Last piece shows location of tape

Reply
0
0
09-17-2015, 07:37 PM
#29
Elite Member
Thread Starter
iTrader: (16)
Join Date: Aug 2007
Location: Houston, TX
Posts: 9,297
Total Cats: 476
You want low emissivity for the heatshield, not high emissivity. High emissivity on the side towards the SC would mean that almost every bit of heat the heatshield absorbs from the header would be emitted straight at the SC.
Sure, black paint on the outside surface of the heat shield facing the SC would make the heatshield "cooler", but a cooler heatshield means that it in turn would have a greater temp difference from the header, and this delta T would drive more header to heat shield radiant heat transfer.
Many engineering heat transfer books have sections regarding heat shield design. Every source I have ever found has shown that you should decrease emissivity everywhere, and if possible, insulate the layers between heat shield layers
Sure, black paint on the outside surface of the heat shield facing the SC would make the heatshield "cooler", but a cooler heatshield means that it in turn would have a greater temp difference from the header, and this delta T would drive more header to heat shield radiant heat transfer.
Many engineering heat transfer books have sections regarding heat shield design. Every source I have ever found has shown that you should decrease emissivity everywhere, and if possible, insulate the layers between heat shield layers
+1. Painting any side black is a terrible idea. That would make it cooler, but the reason it cools is because it will radiate heat... into the 'charger!
If you are forced to use a shield with only 1 shiny side, you orient it so the shiny side *stays clean* or can be cleaned. In the real world this is the most important factor.
Also, it will be better to mount it near the 'charger rather than the header, because you need some airflow between the header and the heatshield so the heatshield doesn't get so hot and re-radiate heat into the 'charger. Additionally placing it close to the header will make it run hot and discolor, raising its emissivity.
If you are forced to use a shield with only 1 shiny side, you orient it so the shiny side *stays clean* or can be cleaned. In the real world this is the most important factor.
Also, it will be better to mount it near the 'charger rather than the header, because you need some airflow between the header and the heatshield so the heatshield doesn't get so hot and re-radiate heat into the 'charger. Additionally placing it close to the header will make it run hot and discolor, raising its emissivity.
My next test will be putting an insulating layer and another layer of stainless on top of it and retest. If I go that route, I'll most likely have to ditch the OEM shield though. But the initial testing of one layer of SS seems to already outperform the OEM shield!
Reply
0
0
09-17-2015, 07:57 PM
#30
That's some hella shiny stainless! Source?
If you were local I would loan you my IR temp gun, it's good for over 2250F, has programmable emissivity, and has a very high distance to spot size (measures a very small area), that way you could get more accurate data.
When you are measuring temps with cheapo IR guns, towards the top of their range they get really inaccurate. The last time I compared my gun to a friends whose max temp is like 720F, we measured the temp of his catalytic converter to see if its working. His gun just so happened to say that his cat was 710F, which I thought was rather close to the max temp of the gun. Measuring the temp of his cat with my gun, in the same spot, said 950F...a huge difference.
 A really effective test wouldn't be to measure the temp of the tape on the heat shield, but rather get a piece of scrap aluminum and place it approximately where your SC would go, and place a piece of black tape on that to measure from. This way you can quantify how effective your setup is at reducing the heat going to the SC.
I like how you are actually testing this. Could you run a control test with just the header to evaluate the effectiveness of that DEI wrap?
If you were local I would loan you my IR temp gun, it's good for over 2250F, has programmable emissivity, and has a very high distance to spot size (measures a very small area), that way you could get more accurate data.
When you are measuring temps with cheapo IR guns, towards the top of their range they get really inaccurate. The last time I compared my gun to a friends whose max temp is like 720F, we measured the temp of his catalytic converter to see if its working. His gun just so happened to say that his cat was 710F, which I thought was rather close to the max temp of the gun. Measuring the temp of his cat with my gun, in the same spot, said 950F...a huge difference.
A really effective test wouldn't be to measure the temp of the tape on the heat shield, but rather get a piece of scrap aluminum and place it approximately where your SC would go, and place a piece of black tape on that to measure from. This way you can quantify how effective your setup is at reducing the heat going to the SC.I like how you are actually testing this. Could you run a control test with just the header to evaluate the effectiveness of that DEI wrap?
Reply
0
0
09-17-2015, 08:08 PM
#31
Elite Member
Thread Starter
iTrader: (16)
Join Date: Aug 2007
Location: Houston, TX
Posts: 9,297
Total Cats: 476
That's some hella shiny stainless! Source?
If you were local I would loan you my IR temp gun, it's good for over 2250F, has programmable emissivity, and has a very high distance to spot size (measures a very small area), that way you could get more accurate data.
When you are measuring temps with cheapo IR guns, towards the top of their range they get really inaccurate. The last time I compared my gun to a friends whose max temp is like 720F, we measured the temp of his catalytic converter to see if its working. His gun just so happened to say that his cat was 710F, which I thought was rather close to the max temp of the gun. Measuring the temp of his cat with my gun, in the same spot, said 950F...a huge difference.
A really effective test wouldn't be to measure the temp of the tape on the heat shield, but rather get a piece of scrap aluminum and place it approximately where your SC would go, and place a piece of black tape on that to measure from. This way you can quantify how effective your setup is at reducing the heat going to the SC.
I like how you are actually testing this. Could you run a control test with just the header to evaluate the effectiveness of that DEI wrap?
If you were local I would loan you my IR temp gun, it's good for over 2250F, has programmable emissivity, and has a very high distance to spot size (measures a very small area), that way you could get more accurate data.
When you are measuring temps with cheapo IR guns, towards the top of their range they get really inaccurate. The last time I compared my gun to a friends whose max temp is like 720F, we measured the temp of his catalytic converter to see if its working. His gun just so happened to say that his cat was 710F, which I thought was rather close to the max temp of the gun. Measuring the temp of his cat with my gun, in the same spot, said 950F...a huge difference.
A really effective test wouldn't be to measure the temp of the tape on the heat shield, but rather get a piece of scrap aluminum and place it approximately where your SC would go, and place a piece of black tape on that to measure from. This way you can quantify how effective your setup is at reducing the heat going to the SC.I like how you are actually testing this. Could you run a control test with just the header to evaluate the effectiveness of that DEI wrap?
What are you asking about doing a control test though? What would I do, what would I test? I test the SC bracket temp without the header wrapped, but that test was done by driving for a while. These test are all done at idle to keep that part constant/easy and allow me to quickly test different things.
I like you testing idea for SC temp though. I'll probably just bolt the SC Bracket in place though, that would be just as easy as rigging up a test setup.
I'm sure the heat gun temp accuracy is crap, but it's what i got. The hold-my-hand-until-it-burns test did show the Stainless beat the OEM shield by a lot though. This temp gun goes up to about 620*F, so maybe it's decently accurate in the 300ish degree range? That's the range the shields are at so far.
Any other ideas to test? I'm actually thinking about, instead of putting a sheet of DEI between the layers, to try to do an air gap instead. We'll see how hard that proves to be to fab. Gonna wear gloves this time, I feel like i just donated blood... .
Reply
0
0
09-17-2015, 08:27 PM
#32
By a control test, I meant just use your hold your hang until it burns test to see if the DEI wrap helped very much, but since the header is now wrapped, that's not very practical because you would have to unwrap it. Never mind that comment.
Testing with an air gap instead of the DEI wrap between the layers would be a far better use of your material in my opinion, but would probably be harder to pull off.
In my opinion, that stuff is effective enough to just replace the OEM heatshield with it, and fabricate a heatshield with a small air gap next to the supercharger, with the shiny sides facing each other. This would probably get you 90% of your way towards the best solution, with 20% of the work, and allow you to periodically clean the heatshield's shiny surfaces easily, as Jason mentioned.
Reply
0
0
 09-17-2015, 08:45 PM
#34
2 Props,3 Dildos,& 1 Cat


iTrader: (8)
Join Date: Jun 2005
Location: Fake Virginia
Posts: 19,338
Total Cats: 573
stick this to your dull side of your shiny stainless:
https://www.designengineering.com//c...hesive-backing
Granted it's not as shiny as you'd like, but I think surface finish of stainless is pretty trivial in the grand scheme of things. I bet both sides of what you have are immesurably close in emissivity.
https://www.designengineering.com//c...hesive-backing
Granted it's not as shiny as you'd like, but I think surface finish of stainless is pretty trivial in the grand scheme of things. I bet both sides of what you have are immesurably close in emissivity.
Reply
0
0
09-17-2015, 09:48 PM
#35
Elite Member
Thread Starter
iTrader: (16)
Join Date: Aug 2007
Location: Houston, TX
Posts: 9,297
Total Cats: 476
stick this to your dull side of your shiny stainless:
https://www.designengineering.com//c...hesive-backing
Granted it's not as shiny as you'd like, but I think surface finish of stainless is pretty trivial in the grand scheme of things. I bet both sides of what you have are immesurably close in emissivity.
https://www.designengineering.com//c...hesive-backing
Granted it's not as shiny as you'd like, but I think surface finish of stainless is pretty trivial in the grand scheme of things. I bet both sides of what you have are immesurably close in emissivity.
Decided I'm going to go ahead and fab an entire shield for the header from stainless. Then put stainless sheets on the SC base as well, so the two shiny surfaces face each other as mentioned here. Then fire the car up and let it idle forever and see how hot the SC base gets.
Also I hate sheet metal, I have much respect for people that can use this stuff well. Gotta go buy some rivets, bolts, and dinner. Probably post something at 2am knowing me.
Reply
0
0


 09-18-2015, 03:52 AM
#38
Elite Member
Thread Starter
iTrader: (16)
Join Date: Aug 2007
Location: Houston, TX
Posts: 9,297
Total Cats: 476

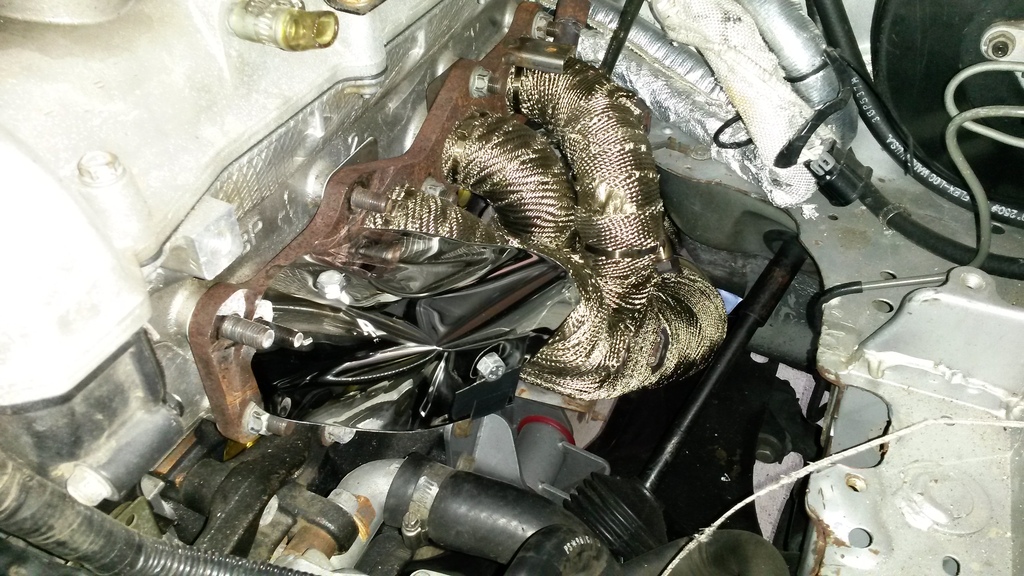
This is how reflective the non-polished side is:


Did another idle test, this thing works way better than the OEM heat shield. There's a couple spots where the sheet metal meets up I need to adjust to close the gap, as I noticed 2 spots where hot air was leaking out. Otherwise, this thing block a lot of heat. And I believe it fits tighter than the OEM shield everywhere, or at least 95% of everywhere. It also goes all the way down past the collector as the OEM shield does. I can hold my hand 1" away from it until I get tired of doing so. The top is hotter than the sides, no surprise, and you can feel the difference.
Tomorrow the plan is to put same material on SC base, bolt the base in and see how hot it gets. Based on how effective the header shield is, I would imagine the amount of heat than can go into another layer of this metal, and then past it, is a small amount.
Thanks again for all the help and suggestions!
Reply
0
0


