How to install Galaxy Tab 2 7.0 in NB
 08-25-2013, 06:49 PM
#1
Junior Member
Thread Starter

Join Date: Jul 2013
Location: TX
Posts: 319
Total Cats: -11
Hey guys, I'm going to do a small write up on how to install a Galaxy Tab 2 7.0 into my 03 NB Miata.
There's a few things you'll need:
1) NB2 Miata
2) Galaxy Tab 2 7.0
I bought this unit because I found it on CL for dirt cheap ($130 BNIB)
3) OEM Charge/Sync Cable
I purchased this one because it comes with the cigarette lighter adapter, along with the charge/sync cable
4) One Automotive Relay (Fog light five pin relay)
5) Cigarette Lighter Socket (unless you want to use your stock one somehow)
6) Small Amp (I chose a small motorcycle amp)
I chose this unit because it was cheap, and had a decent amount of power, and of course it's small size.
7) OBD II Bluetooth Adapter (Optional)
Cheap, easy, also already had it.
8) Bluetooth Speaker Phone (Optional)
I specifically chose this unit because it had a motion detector for on and off, it works, but its not as sensitive as I wished.
9) Mazda Radio wiring harness adapter
My car already had this, so I'm not sure if this is the correct one, you'll want to confirm it.
10) 3.5mm to RCA with a 90 degree end. I cannot stress on how much you'll need the 90 degree bend. 6-Ft. 1/8 Stereo to Dual Phono (RCA) Plug Y-Cable : Y-Cables | RadioShack.com This was in stock at my local Radio Shack.
11) You may need a ground loop isolator
Ground Loop Isolator : Isolators | RadioShack.com
Just a little info on my car, mine is an 03 with a NON-Bose package. It had a factory double din, but does not have the rear speakers/wind blocker.
You will need to know how to wire things up, if you've installed a radio before, you can definitely do it. You'll also need a dremel, wire cutters, some zip ties, phillips screw driver, and common sense. Of course, I'm not responsible for you breaking something, or catching it on fire etc etc.
Wiring Portion
This is probably the hardest part of it all. If you can accomplish this, then you'll be able to do the rest with ease!
Now that you have everything situated, you'll want to grab the relay, radio wiring harness, cigarette light port (not the charger)and the amp harness.
Yellow - 12V Constant
Red - 12V Accessory
Black - Ground
Orange - Dash Light Dimmer/Illumination
Green - Left Rear Speaker (+)
Green with Black Stripe Left Rear Speaker (-)
White - Left Front Speaker (+)
White with Black Stripe - Left Front Speaker (-)
Purple - Right Rear Speaker (+)
Purple with Black Stripe - Right Rear Speaker (-)
Gray - Right Front Speaker (+)
Gray with Black Stripe - Right Front Speaker (-)
Verify this, but it should be correct. I took the speakers and tied them together (So Front and Rear and Left Speaker (-), then the (+)). So put all the left speakers together, and the right speakers together. Once everything is hooked up, you should have four wires (Left +, Left -, Right +, and Right -) for the speakers.
Now to wire up the relay, amp, and cigarette lighter socket. Take the 85 pin of the relay and tie it into the Black on the radio harness, the black of the cigarette lighter socket and amp will go into here as well.
Then 86 pin will go to the Red wire, however the cigarette lighter socket WILL NOT go to this pin. To test the relay, plug the harness up, and turn the key on, you should feel it click. If it clicks we're good to go. If not, you may want to check your connections. This will also go to the REMOTE (REM) wire on the AMP.
Now take the 87 pin (not the 87a) and wire this up to positive wire on the cigarette lighter socket, and the positive pin on the amp.
Finally you take the 30 pin of the relay and tie it into the Yellow wire on the radio harness.
Hook it up and test the system. With the key on, the relay should click, the cigarette lighter socket, and amp should have power.
Wire up the speaker wires up to the amp, and make sure you put on the RCA's as well.
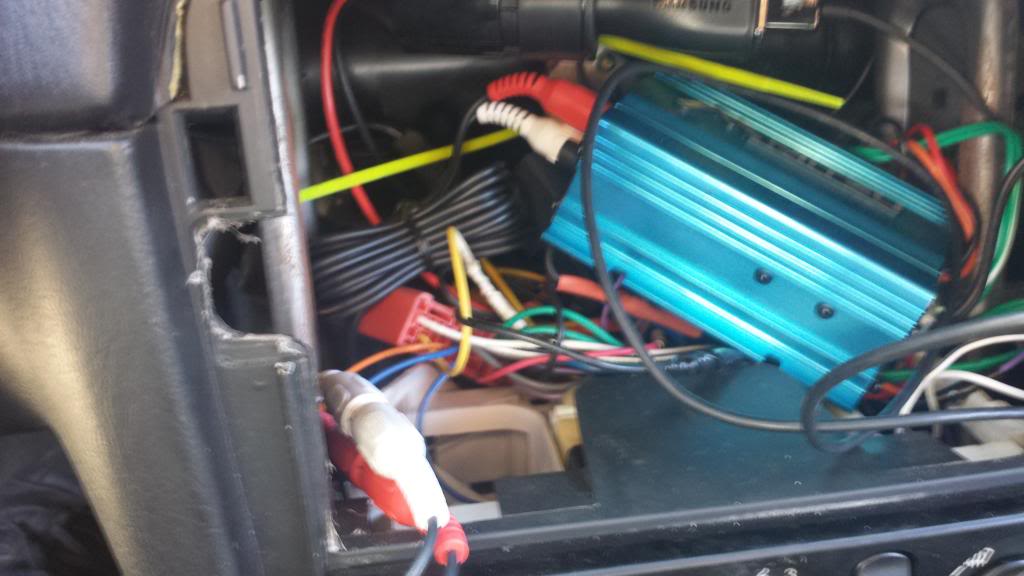
Once you get this all setup, you'll have to figure out how to mount all of this, you'll see mine is kinda a bit of everywhere, but it's ziptied to the "radio frame" if you will. You'll want the cigarette lighter away from the AMP, and the RCA wires. You'll want to have the amp on the LEFT hand side (driver's side), because the 3.5mm wire will be on this side.
Take your tablet, and you'll probably want to set all of stuff up, but it's up to you.
The apps I have are:
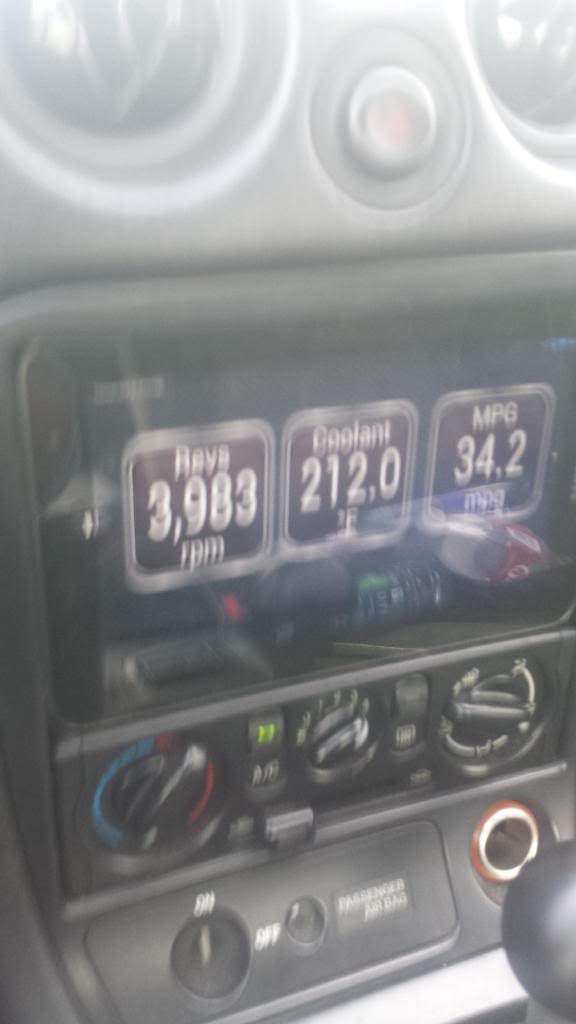
Torque (Free)
Navfree
Tablet Talk (you'll have to pay for this twice, once for your phone, and once for the tablet)
Llama/Tasker
You'll want to use the factory music player widget. I've used brightness widget, and volume widget.
Tasker is a few bucks, and much easier to work with, however with most of us, we're broke so you'll want to use Llama. Pretty much you'll need to set it up, pretty much you'll have to google it, it's kinda confusing, but you'll get it.
You'll want to have it when it gets "charging power from USB" it'll turn on the monitor, and have media player to play/pause, and launch whatever app you want (I have tablet talk, but had Navfree for awhile).
Then next you'll want "Loss of power (disconnected or something like that)" to turn off the display, and play/pause media player.
On Llama you can test out each function, make sure you try it over and over until you get the effects you want. Also on Llama, you can have location functions as well. I have it setup on my phone, so when I get to work, it realizes the location, and turns off bluetooth on my phone. On Tablet Talk, you can have it automatically open/close the program based on the bluetooth switch (so if bluetooth gets turned on, it automatically turns on tablet talk, and vice versa). A little more on this later as well.
On Navfree make sure you update whatever maps for your state.
The purpose of tablet talk is so dope. It's by far, the coolest part of my install. Tablet talk allows you to link your phone to your tablet via bluetooth. So I see text messages, reply on the screen, and answer and make calls on the tablet. So if you pull up tablet talk on your tab, you'll be able to call somewhere from there, and it'll dial it on your phone.
You'll want to play with the options here as well.
Nothing much about Torque, download, and install. Make sure you pair it to your OBD II bluetooth unit.
First step for the insides of the car is you'll have to remove the center console, radio trim piece and the radio itself. If you can't do this, then you should stop while you're ahead.
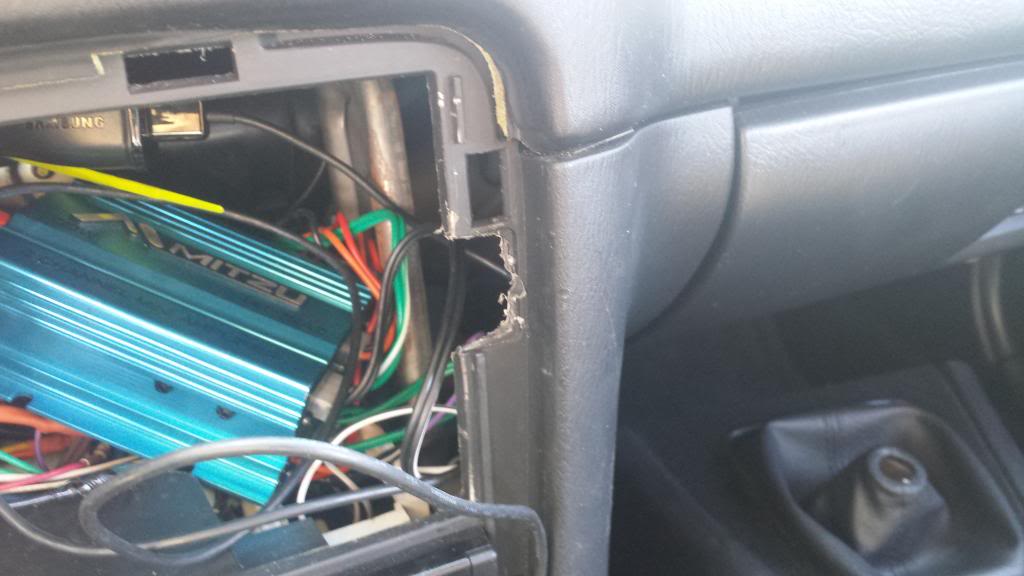
Once you're done, you'll have to trim a few things.
You'll notch out both the left and right sides of this, it's for 30 pin adapter, and the 3.5mm jack.
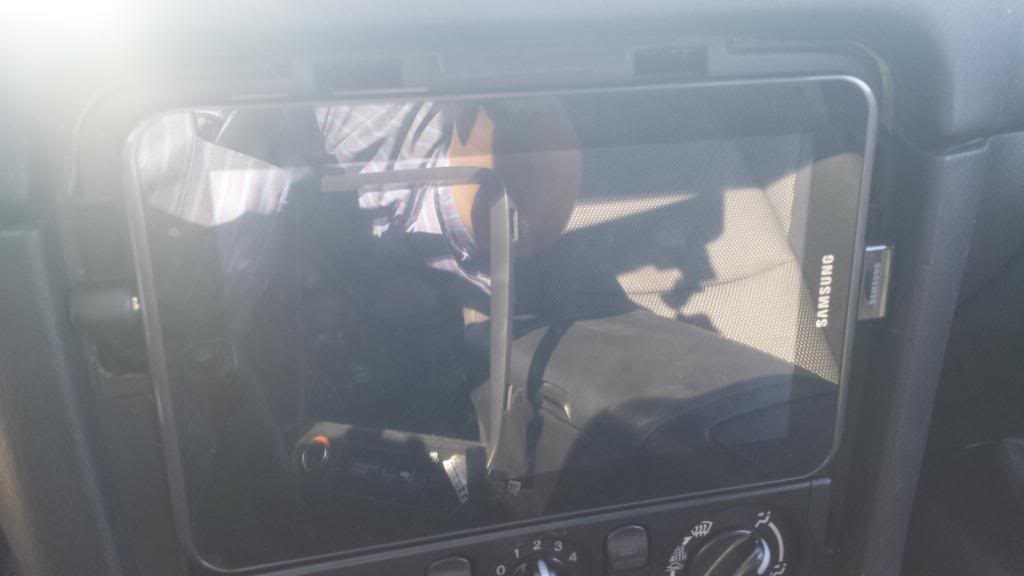
And here it is with the tablet in place
Now you'll want to trim the radio surround, unfortunately I didn't take a before picture, but look at yours and compare it to mine.
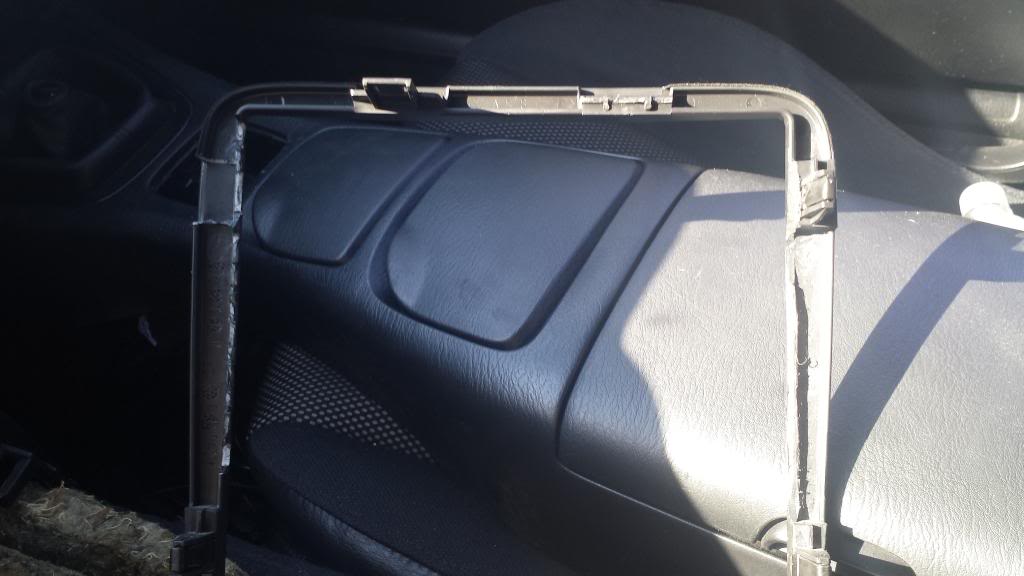
You'll see the sides trimmed away. The upper left hand side tab cut, the reason why is because it was interferring with the volume/power buttons. The complete right side tab was cut off completely for the 30 pin power adapter.
Once done it should look like so!
On bluetooth pairing, on the phone pair it with the Jabra Speakerphone, and the tablet (via tablet talk), but do not pair it with the OBDII adapter.
On the tablet portion of it, you'll want to pair it to the phone (via tablet talk, unless you've already done it on the phone) and ONLY the OBDII adapter.
Unfortunately, I could NOT replace the factory media player, and find a working widget, but after the update, I'm actually pretty happy with the player.
Also I DID have a ground loop, so I had to purchase the isolator, I didn't want to go back and figure it out (call me lazy), but it fixed it in a jiffy, and definitely worth it.
There's a few things you'll need:
1) NB2 Miata
2) Galaxy Tab 2 7.0
I bought this unit because I found it on CL for dirt cheap ($130 BNIB)
3) OEM Charge/Sync Cable
I purchased this one because it comes with the cigarette lighter adapter, along with the charge/sync cable
4) One Automotive Relay (Fog light five pin relay)
5) Cigarette Lighter Socket (unless you want to use your stock one somehow)
6) Small Amp (I chose a small motorcycle amp)
I chose this unit because it was cheap, and had a decent amount of power, and of course it's small size.
7) OBD II Bluetooth Adapter (Optional)
Cheap, easy, also already had it.
8) Bluetooth Speaker Phone (Optional)
I specifically chose this unit because it had a motion detector for on and off, it works, but its not as sensitive as I wished.
9) Mazda Radio wiring harness adapter
My car already had this, so I'm not sure if this is the correct one, you'll want to confirm it.
10) 3.5mm to RCA with a 90 degree end. I cannot stress on how much you'll need the 90 degree bend. 6-Ft. 1/8 Stereo to Dual Phono (RCA) Plug Y-Cable : Y-Cables | RadioShack.com This was in stock at my local Radio Shack.
11) You may need a ground loop isolator
Ground Loop Isolator : Isolators | RadioShack.com
Just a little info on my car, mine is an 03 with a NON-Bose package. It had a factory double din, but does not have the rear speakers/wind blocker.
You will need to know how to wire things up, if you've installed a radio before, you can definitely do it. You'll also need a dremel, wire cutters, some zip ties, phillips screw driver, and common sense. Of course, I'm not responsible for you breaking something, or catching it on fire etc etc.
Wiring Portion
This is probably the hardest part of it all. If you can accomplish this, then you'll be able to do the rest with ease!
Now that you have everything situated, you'll want to grab the relay, radio wiring harness, cigarette light port (not the charger)and the amp harness.
Yellow - 12V Constant
Red - 12V Accessory
Black - Ground
Orange - Dash Light Dimmer/Illumination
Green - Left Rear Speaker (+)
Green with Black Stripe Left Rear Speaker (-)
White - Left Front Speaker (+)
White with Black Stripe - Left Front Speaker (-)
Purple - Right Rear Speaker (+)
Purple with Black Stripe - Right Rear Speaker (-)
Gray - Right Front Speaker (+)
Gray with Black Stripe - Right Front Speaker (-)
Verify this, but it should be correct. I took the speakers and tied them together (So Front and Rear and Left Speaker (-), then the (+)). So put all the left speakers together, and the right speakers together. Once everything is hooked up, you should have four wires (Left +, Left -, Right +, and Right -) for the speakers.
Now to wire up the relay, amp, and cigarette lighter socket. Take the 85 pin of the relay and tie it into the Black on the radio harness, the black of the cigarette lighter socket and amp will go into here as well.
Then 86 pin will go to the Red wire, however the cigarette lighter socket WILL NOT go to this pin. To test the relay, plug the harness up, and turn the key on, you should feel it click. If it clicks we're good to go. If not, you may want to check your connections. This will also go to the REMOTE (REM) wire on the AMP.
Now take the 87 pin (not the 87a) and wire this up to positive wire on the cigarette lighter socket, and the positive pin on the amp.
Finally you take the 30 pin of the relay and tie it into the Yellow wire on the radio harness.
Hook it up and test the system. With the key on, the relay should click, the cigarette lighter socket, and amp should have power.
Wire up the speaker wires up to the amp, and make sure you put on the RCA's as well.
Once you get this all setup, you'll have to figure out how to mount all of this, you'll see mine is kinda a bit of everywhere, but it's ziptied to the "radio frame" if you will. You'll want the cigarette lighter away from the AMP, and the RCA wires. You'll want to have the amp on the LEFT hand side (driver's side), because the 3.5mm wire will be on this side.
Take your tablet, and you'll probably want to set all of stuff up, but it's up to you.
The apps I have are:
Torque (Free)
Navfree
Tablet Talk (you'll have to pay for this twice, once for your phone, and once for the tablet)
Llama/Tasker
You'll want to use the factory music player widget. I've used brightness widget, and volume widget.
Tasker is a few bucks, and much easier to work with, however with most of us, we're broke so you'll want to use Llama. Pretty much you'll need to set it up, pretty much you'll have to google it, it's kinda confusing, but you'll get it.
You'll want to have it when it gets "charging power from USB" it'll turn on the monitor, and have media player to play/pause, and launch whatever app you want (I have tablet talk, but had Navfree for awhile).
Then next you'll want "Loss of power (disconnected or something like that)" to turn off the display, and play/pause media player.
On Llama you can test out each function, make sure you try it over and over until you get the effects you want. Also on Llama, you can have location functions as well. I have it setup on my phone, so when I get to work, it realizes the location, and turns off bluetooth on my phone. On Tablet Talk, you can have it automatically open/close the program based on the bluetooth switch (so if bluetooth gets turned on, it automatically turns on tablet talk, and vice versa). A little more on this later as well.
On Navfree make sure you update whatever maps for your state.
The purpose of tablet talk is so dope. It's by far, the coolest part of my install. Tablet talk allows you to link your phone to your tablet via bluetooth. So I see text messages, reply on the screen, and answer and make calls on the tablet. So if you pull up tablet talk on your tab, you'll be able to call somewhere from there, and it'll dial it on your phone.
You'll want to play with the options here as well.
Nothing much about Torque, download, and install. Make sure you pair it to your OBD II bluetooth unit.
First step for the insides of the car is you'll have to remove the center console, radio trim piece and the radio itself. If you can't do this, then you should stop while you're ahead.
Once you're done, you'll have to trim a few things.
You'll notch out both the left and right sides of this, it's for 30 pin adapter, and the 3.5mm jack.


And here it is with the tablet in place

Now you'll want to trim the radio surround, unfortunately I didn't take a before picture, but look at yours and compare it to mine.

You'll see the sides trimmed away. The upper left hand side tab cut, the reason why is because it was interferring with the volume/power buttons. The complete right side tab was cut off completely for the 30 pin power adapter.
Once done it should look like so!

On bluetooth pairing, on the phone pair it with the Jabra Speakerphone, and the tablet (via tablet talk), but do not pair it with the OBDII adapter.
On the tablet portion of it, you'll want to pair it to the phone (via tablet talk, unless you've already done it on the phone) and ONLY the OBDII adapter.
Unfortunately, I could NOT replace the factory media player, and find a working widget, but after the update, I'm actually pretty happy with the player.
Also I DID have a ground loop, so I had to purchase the isolator, I didn't want to go back and figure it out (call me lazy), but it fixed it in a jiffy, and definitely worth it.

Reply
 0
0

0
08-25-2013, 06:50 PM
#2
Junior Member
Thread Starter
Join Date: Jul 2013
Location: TX
Posts: 319
Total Cats: -11
If I could go back, here's what I'd change.
I would have used a Nexus instead of a Tablet, why? OTG plus charging at the same time (well with a none-stock rom).
So this means that I can charge, while being a USB host. I would add a powered USB hub as well. Then I could hook up a USB EQ, FM antennae, and a SSD Hard drive.
Here's why, my current setup doesn't have FM, nor EQ. Though it's not a big deal if you're not really an audiophile or content with IheardRadio/Pandora (used with either a 4g unit, or wifi tethering). As far as the SSD hard drive, I listen to a bit of music, not a lot, but it's a hassle to add movies and music because I have to remove the tablet (takes me a minute or so, but what a hassle).
I hate with tablet talk, I have to CONFIRM the pair, and sometimes it glitches up every now and again (sometimes it won't connect, but a reboot on either phone or tab fixes it). I wish it didn't have to do that every time, but otherwise an amazing app.
One other thing I kinda wanted to try but am a bit scared of. I want to drill a very small hole in the A/C vents because (especially TX) it gets hot, and tablet won't charge and causes this super annoying beeping periodically until the unit is cool enough to charge.
Reply
0
0

Thread
Thread Starter
Forum
Replies
Last Post
bigmackloud
Miata parts for sale/trade
19
01-08-2021 11:24 AM
StratoBlue1109
Miata parts for sale/trade
21
09-30-2018 01:09 PM
stoves
Suspension, Brakes, Drivetrain
5
04-21-2016 03:00 PM


