Media Got any pics or vids to share?

Progress pic of my CF NACA duct

Thread Tools
 
Search this Thread
 
Old 02-25-2010, 09:07 PM
  #1  
Senior Member
Thread Starter
iTrader: (3)
 
miataspeed2005's Avatar
 
Join Date: Jul 2005
Location: Connect-I-Cut
Posts: 1,404
Total Cats: 0
Default Progress pic of my CF NACA duct

After I cut the hole, I still have to attach it and bondonto gaps, sand and paint
Name:  089e6afb.jpg
Views: 88
Size:  50.9 KB
miataspeed2005 is offline  
Old 02-25-2010, 09:31 PM
  #2  
Elite Member
iTrader: (11)
 
Cspence's Avatar
 
Join Date: Jun 2007
Location: Meriden, CT
Posts: 2,065
Total Cats: 1
Default

This reminds me....I gotta finish mine too. Too bad mines not carbon.
Cspence is offline  
Old 02-26-2010, 05:06 AM
  #3  
Senior Member
 
lightyear's Avatar
 
Join Date: Aug 2009
Location: melbourne aus
Posts: 515
Total Cats: 92
Default

Looks good. You should have made it bigger.
lightyear is offline  
Old 02-26-2010, 07:43 AM
  #4  
Senior Member
Thread Starter
iTrader: (3)
 
miataspeed2005's Avatar
 
Join Date: Jul 2005
Location: Connect-I-Cut
Posts: 1,404
Total Cats: 0
Default

Yeah I wish I go the 4" one instead of the 3" but it doesn't look as bad in person, it will still flow enough air for the intake I think.
Cspence go work on it so we could all do that meet by apr/may.
miataspeed2005 is offline  
Old 02-26-2010, 10:04 AM
  #5  
Boost Czar
iTrader: (62)
 
Braineack's Avatar
 
Join Date: May 2005
Location: Chantilly, VA
Posts: 79,493
Total Cats: 4,080
Default

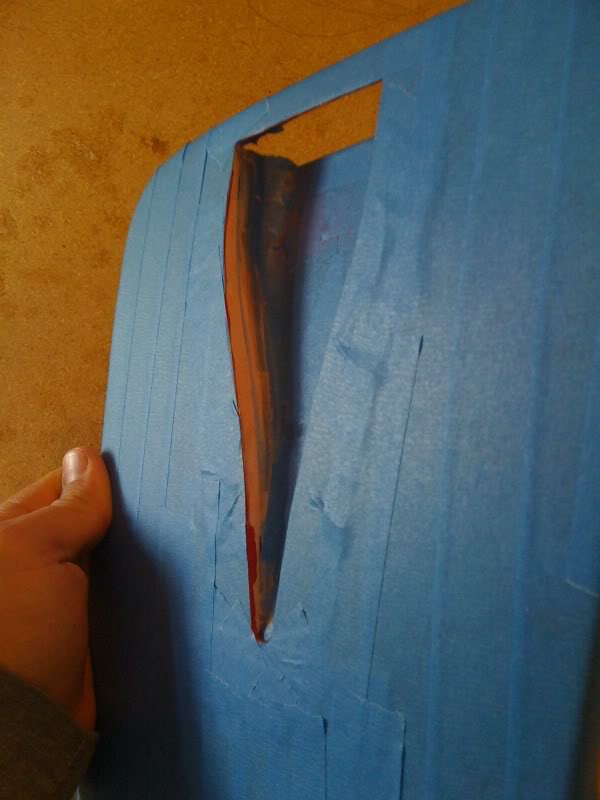
hey you didnt let the cutting tool go wild on your paint, nice job. I've done two and both times I've slipped once and it made me a sad panda.

I had to cut the 4" down and make it .5" shorter, it's still larger than your 3" but it was too long and hit the headlight when mounted.
Braineack is offline  
Old 02-26-2010, 12:28 PM
  #6  
Senior Member
Thread Starter
iTrader: (3)
 
miataspeed2005's Avatar
 
Join Date: Jul 2005
Location: Connect-I-Cut
Posts: 1,404
Total Cats: 0
Default

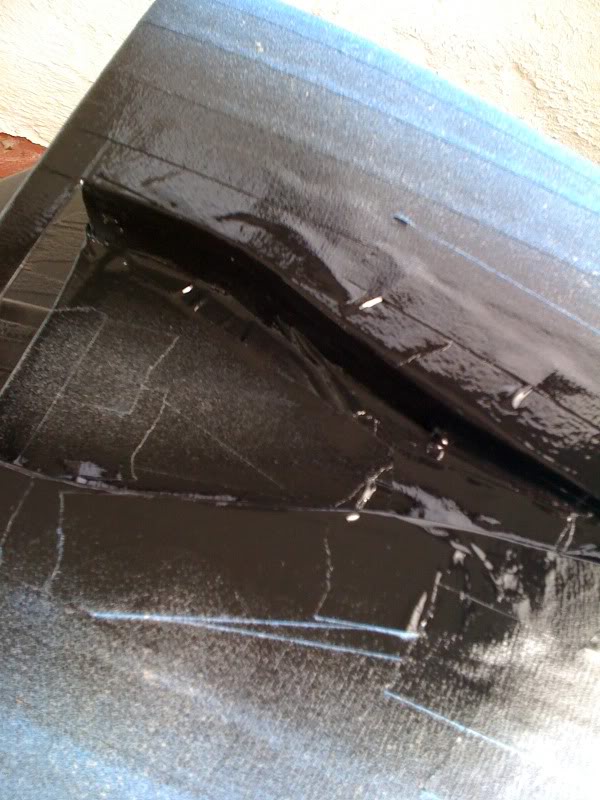
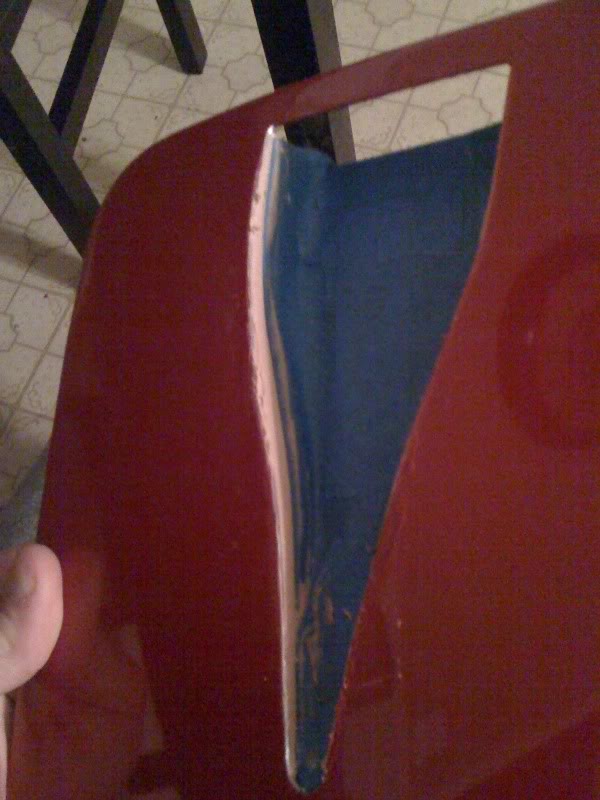
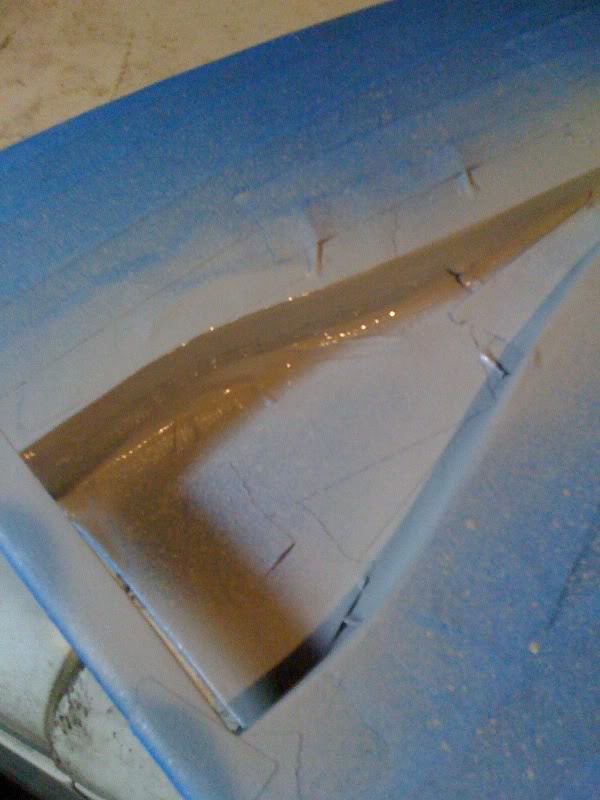
The paint is a little messed up and there's a little section that I cut a little too much, but a little touch up paint, some wet sanding and a new clear coat will make it look nice I hope.
miataspeed2005 is offline  
Old 02-26-2010, 01:26 PM
  #7  
Elite Member
iTrader: (18)
 
astroboy's Avatar
 
Join Date: Dec 2007
Location: oahu
Posts: 1,787
Total Cats: 6
Default

Looks good, where did you pick it up?
astroboy is offline  
Old 02-26-2010, 02:07 PM
  #8  
Senior Member
iTrader: (4)
 
ScottFW's Avatar
 
Join Date: Jan 2008
Location: Falls Church, VA
Posts: 1,361
Total Cats: 17
Default

Originally Posted by miataspeed2005
...some wet sanding and a new clear coat will make it look nice I hope.
I'm pretty sure the NAs had single stage paint (no clear coat) except for the metallic colors. If the rest of your car is single stage then I wouldn't bother clear coating the lid.
ScottFW is offline  
Old 02-26-2010, 04:24 PM
  #9  
Senior Member
Thread Starter
iTrader: (3)
 
miataspeed2005's Avatar
 
Join Date: Jul 2005
Location: Connect-I-Cut
Posts: 1,404
Total Cats: 0
Default

I bought it of some dude on CR...
My car was re-painted by the previous owner so I'm not sure if it was CC or not

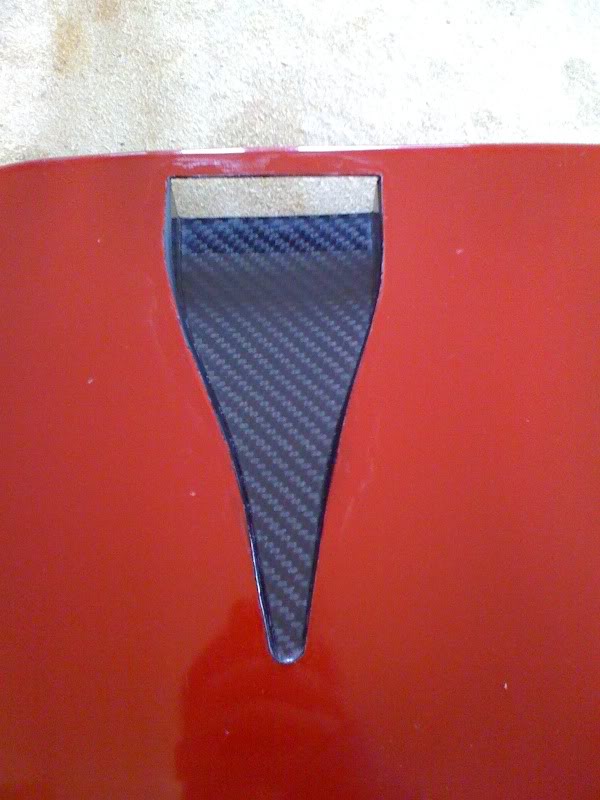
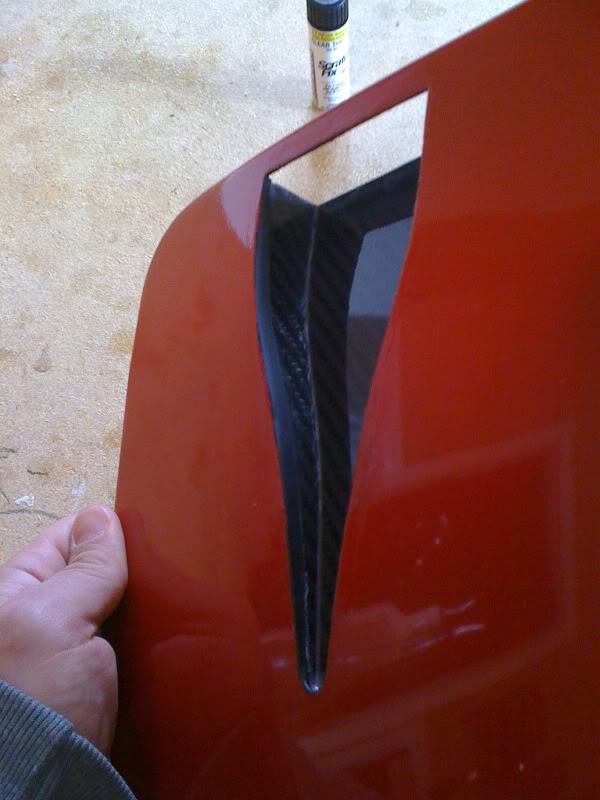
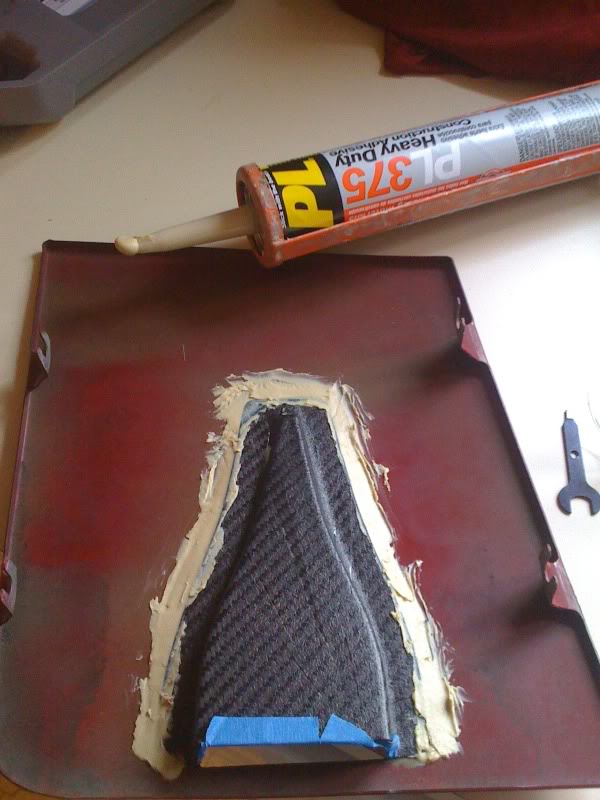
here's a pic from today, glued it on with PL
Name:  3a910266.jpg
Views: 69
Size:  72.1 KB
miataspeed2005 is offline  
Old 02-26-2010, 05:01 PM
  #10  
Elite Member
iTrader: (11)
 
Cspence's Avatar
 
Join Date: Jun 2007
Location: Meriden, CT
Posts: 2,065
Total Cats: 1
Default

Originally Posted by miataspeed2005
Yeah I wish I go the 4" one instead of the 3" but it doesn't look as bad in person, it will still flow enough air for the intake I think.
Cspence go work on it so we could all do that meet by apr/may.
I've rocked the car without the headlight lid long enough. It definitly would'nt stop me from going on a cruise
Cspence is offline  
Old 02-26-2010, 05:23 PM
  #11  
Senior Member
iTrader: (1)
 
revlimiter's Avatar
 
Join Date: Jan 2009
Location: ABQ, NM
Posts: 518
Total Cats: 95
Default

Looks great! You did a smooth cutting job on that lid.
revlimiter is offline  
Old 02-26-2010, 05:47 PM
  #12  
Junior Member
iTrader: (2)
 
hensonator's Avatar
 
Join Date: Oct 2008
Location: SoCal
Posts: 68
Total Cats: 0
Default

He got it off me.
Looks great btw!

You can get em at mckinney corp website for like $40-50 per duct
hensonator is offline  
Old 02-26-2010, 06:02 PM
  #13  
Boost Czar
iTrader: (62)
 
Braineack's Avatar
 
Join Date: May 2005
Location: Chantilly, VA
Posts: 79,493
Total Cats: 4,080
Default

Braineack is offline  
Old 02-26-2010, 08:42 PM
  #14  
Elite Member
iTrader: (11)
 
Cspence's Avatar
 
Join Date: Jun 2007
Location: Meriden, CT
Posts: 2,065
Total Cats: 1
Default

Well you motivated me. Ran out to lowes and picked up some adhesive and glued mine on....bout time I finished that project anyways, thanks!
Cspence is offline  
Old 02-26-2010, 09:52 PM
  #15  
Senior Member
Thread Starter
iTrader: (3)
 
miataspeed2005's Avatar
 
Join Date: Jul 2005
Location: Connect-I-Cut
Posts: 1,404
Total Cats: 0
Default

Originally Posted by hensonator
He got it off me.
Looks great btw!

You can get em at mckinney corp website for like $40-50 per duct
Yeah thanks man
miataspeed2005 is offline  
Old 02-26-2010, 10:22 PM
  #16  
Junior Member
iTrader: (1)
 
stranges12712's Avatar
 
Join Date: May 2009
Location: Niagara Falls, ON
Posts: 431
Total Cats: 2
Default

Whats the website to buy these ducts?
stranges12712 is offline  
Old 02-26-2010, 10:50 PM
  #17  
Elite Member
iTrader: (1)
 
NA6C-Guy's Avatar
 
Join Date: Feb 2008
Location: Birmingham Alabama
Posts: 7,930
Total Cats: 45
Default

I think I would have put the lip of the duct on the outside to cover the curvy/not smooth cut. Otherwise it looks pretty good. Larger would be more win.
NA6C-Guy is offline  
Old 02-27-2010, 10:52 AM
  #18  
Senior Member
Thread Starter
iTrader: (3)
 
miataspeed2005's Avatar
 
Join Date: Jul 2005
Location: Connect-I-Cut
Posts: 1,404
Total Cats: 0
Default

Filled it with bondo
Name:  193b9ae7.jpg
Views: 120
Size:  60.7 KB
Sanded
Name:  193b9ae7.jpg
Views: 120
Size:  60.7 KB
Taped and ready for paint
Name:  b8086acf.jpg
Views: 71
Size:  45.2 KB
A coat of primer
Name:  c0f65812.jpg
Views: 72
Size:  63.9 KB
Attached Images
File Type: jpg
193b9ae7.jpg (60.7 KB, 61 views)
miataspeed2005 is offline  
Old 02-27-2010, 11:27 AM
  #19  
Elite Member
iTrader: (11)
 
Cspence's Avatar
 
Join Date: Jun 2007
Location: Meriden, CT
Posts: 2,065
Total Cats: 1
Default

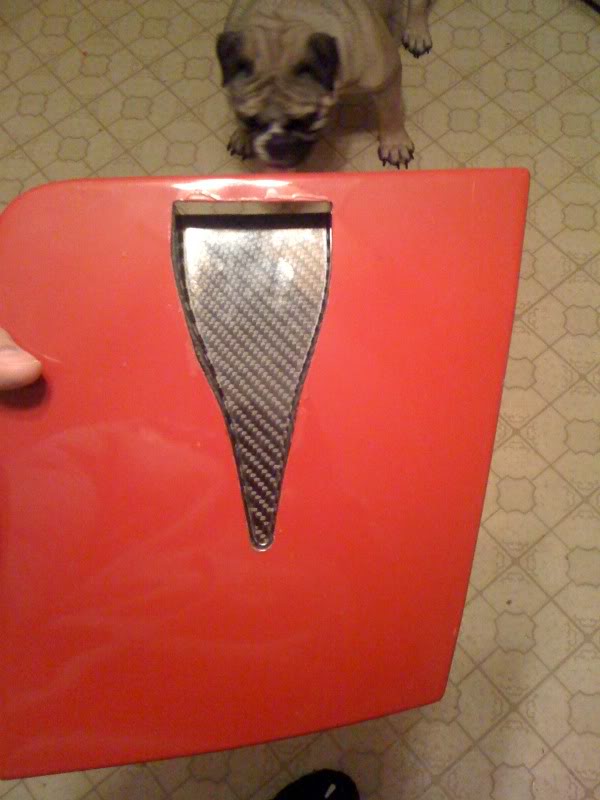
How did that PL adhesive do for you....I used it on mine last night and today when I was checking on it I noticed that it was basically lifting off my naca duct. After 18 hours of curing I was able peal it all off in one huge sheet. I'm not sure what the problem was...I mean I roughed everything up and cleaned it with acetone prior to application. Maybe its the type of plastic my duct is made out of. O well, I am redoin it right now with epoxy. Yours is comin along good though!
Cspence is offline  
Old 02-27-2010, 02:14 PM
  #20  
Senior Member
Thread Starter
iTrader: (3)
 
miataspeed2005's Avatar
 
Join Date: Jul 2005
Location: Connect-I-Cut
Posts: 1,404
Total Cats: 0
Default

Really? I used that stuff on everything, I basacly did the same as you scuffed it up, acetone and applied.

Got the black on
Name:  dacf3d0a.jpg
Views: 79
Size:  82.9 KB

Name:  5bbb7541.jpg
Views: 76
Size:  60.7 KB

Name:  02f4f15e.jpg
Views: 93
Size:  59.3 KB
miataspeed2005 is offline  


Quick Reply: Progress pic of my CF NACA duct


All times are GMT -4. The time now is 06:00 PM.