Ziggo's 1993 Miata (its a rescue)
 07-13-2014, 08:32 AM
#1
Junior Member
Thread Starter

Join Date: Mar 2010
Location: Melissa, TX
Posts: 172
Total Cats: 20
About me: Live in DFW, work as mechanical engineer. My DD is a 2008 Speed3 making ~380hp at the wheels on a journal bearing 2871 and a E85 Mixture. I am 29 with two kids and a stay at home wife which means the budget is pretty tight. I have not been out on the track since my first was born and I wanted to get something RWD, light, and a little cheaper to track than my speed3. After lurking miata sites for awhile I think I will fit in best here, despite my naturally aspirated status. I like to call it like it is which is a banable offense in some places.
About the car:
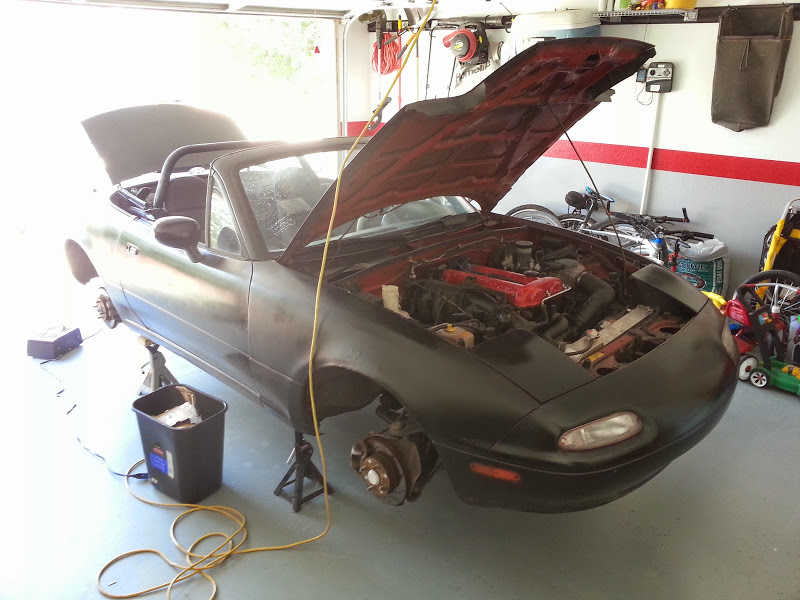
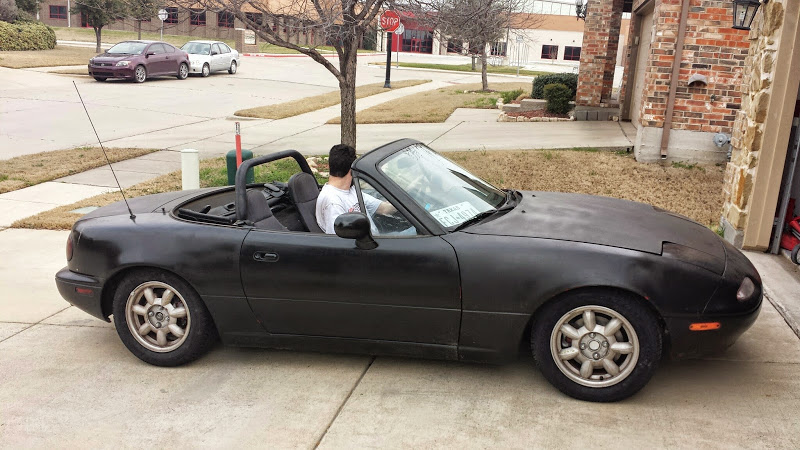
Its a 1993 Base Model with 180,000 miles. Has been plastidipped black but is red underneath Has a loud engine clack, and came with no wheels. Seems crazy to buy a car with no wheels, but the way I figure it, I was going to be buying something wider anyway. Paid $1000 for it as is. Seller thought it was rod knock but I am reasonably sure the noise is just a failed HLA. There isn't any rust to speak of on the car, one of the frame rails is pretty beat up which is kind of weird. Clean title with no accident history. Compression is 202-203-206-208
The Plan:
Video Of Noise
So I made the previous video really creepy by slowing it down to 1/8th speed, but you can clearly hear and count the ticks and based on some maths I made up (in the youtube description) its looking very very likely that its a stuck HLA.
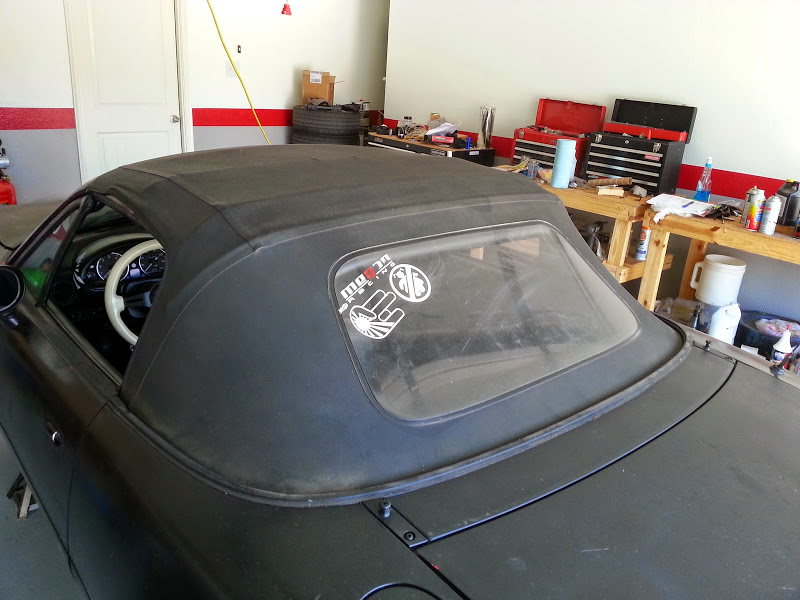
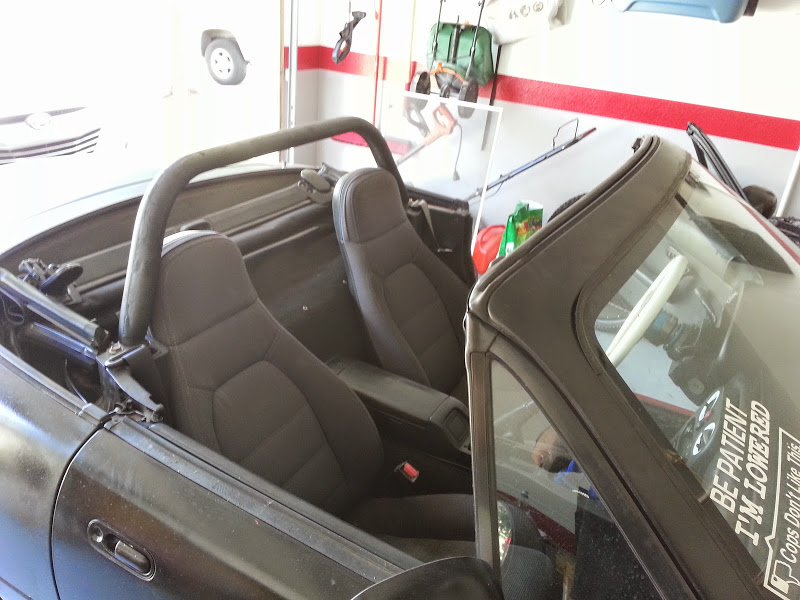
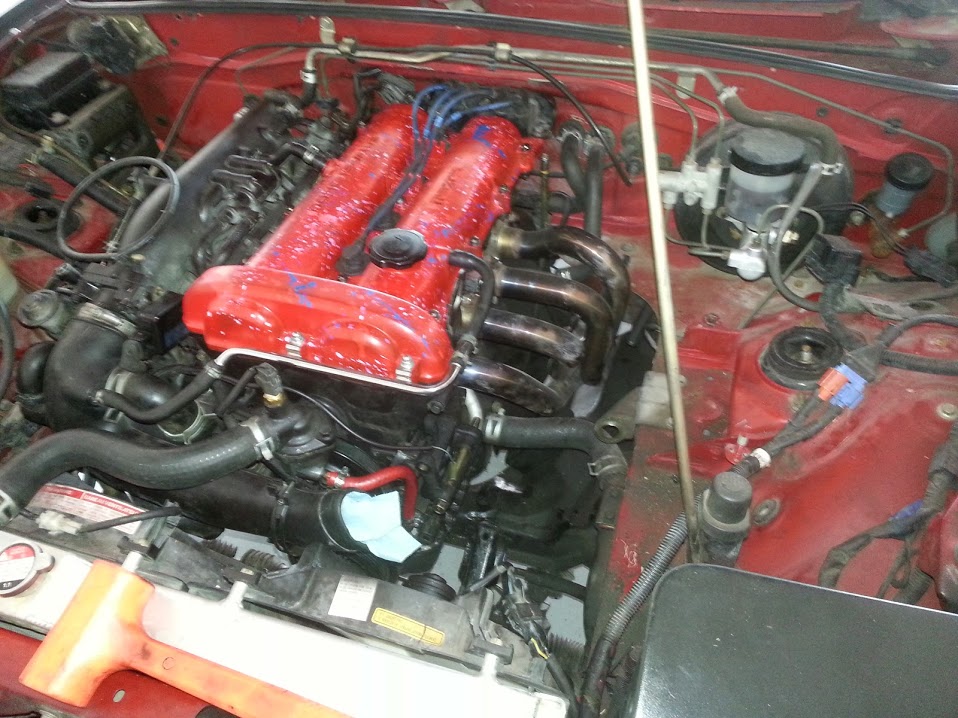
Top Seems to be in decent condition, ignoring the stickers
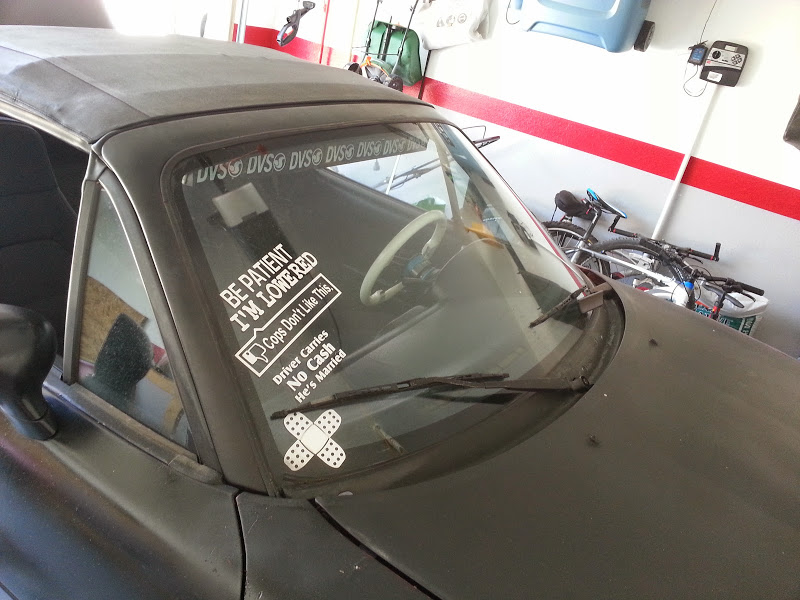
MOAR stickers, (5hp each)
Some brand of bolt in rollbar: (will need to be replaced with a proper unit)
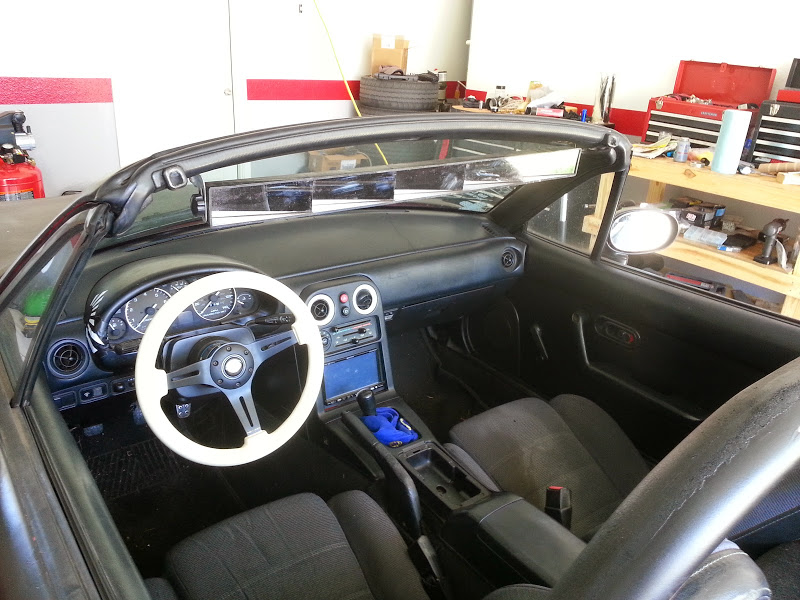
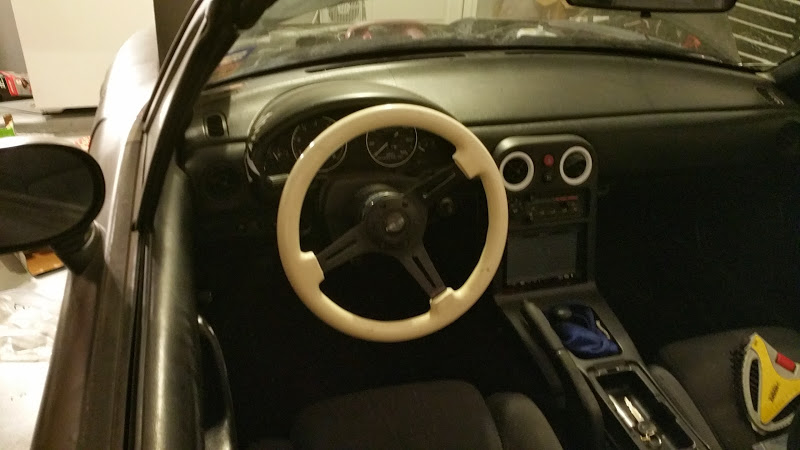
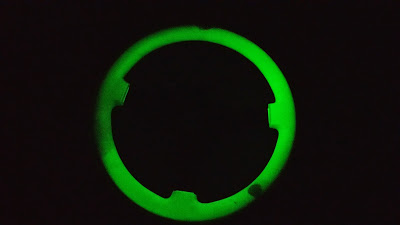
Also came with a sweet crown royal bag shift boot, a headunit that plays DVDs and my favorite bit, a NRG quick release hub its blue anodized, and while I would prefer just black I can live with it. The steering wheel glows in the dark and will be replaced with a deep dish wheel with an extender at some point
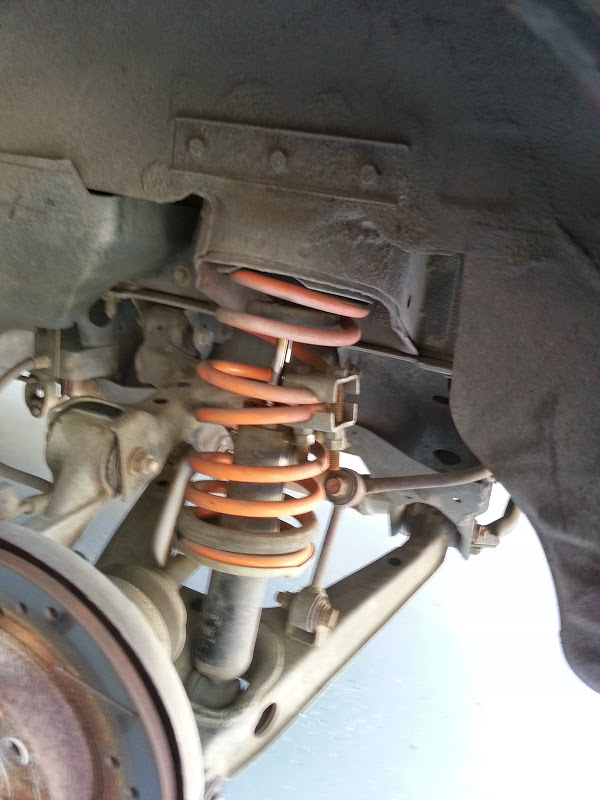
Looks like megan racing lowering springs, which apparently were not low enough...
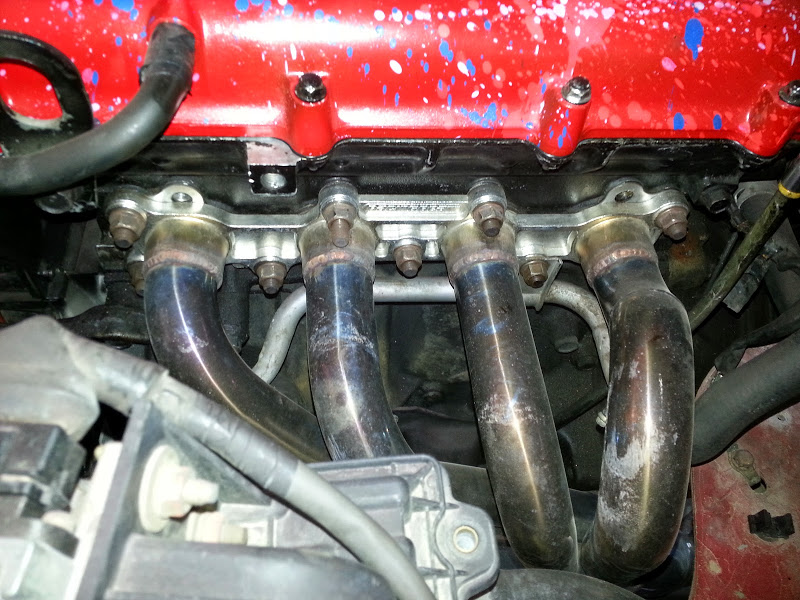
Has a racing beat 4-1 Header, not a bad get if I end up keeping the 1.6 NA for awhile
Some sort of aftermarket all aluminum radiator, one of the mount brackets is broken tho, can anyone help identify the radiator and/or where to buy the brackets?
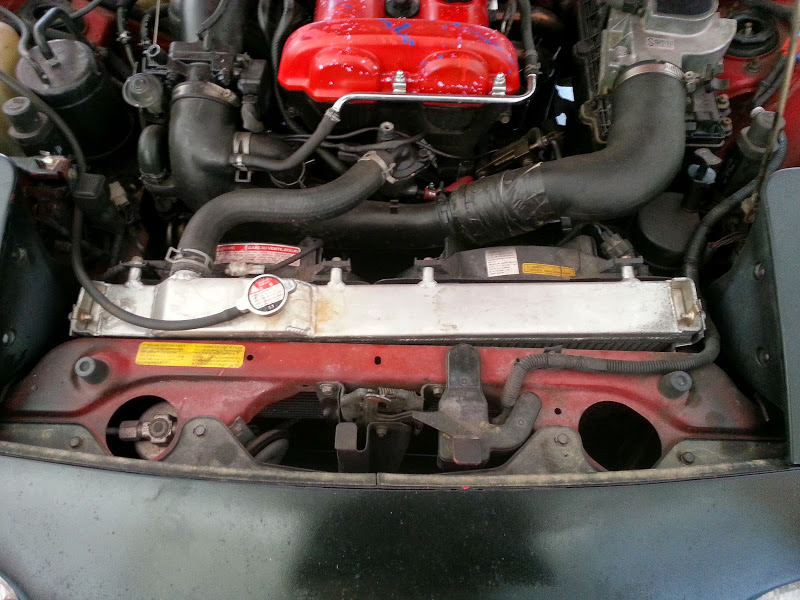
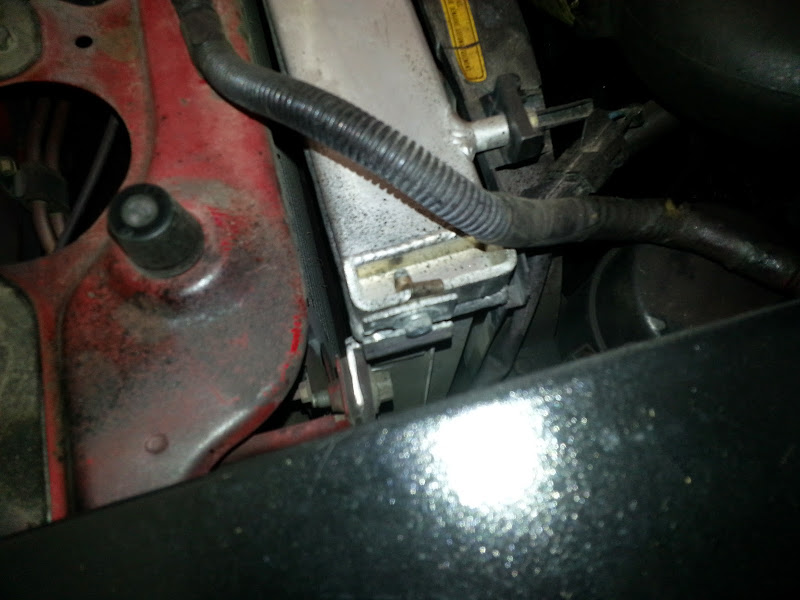
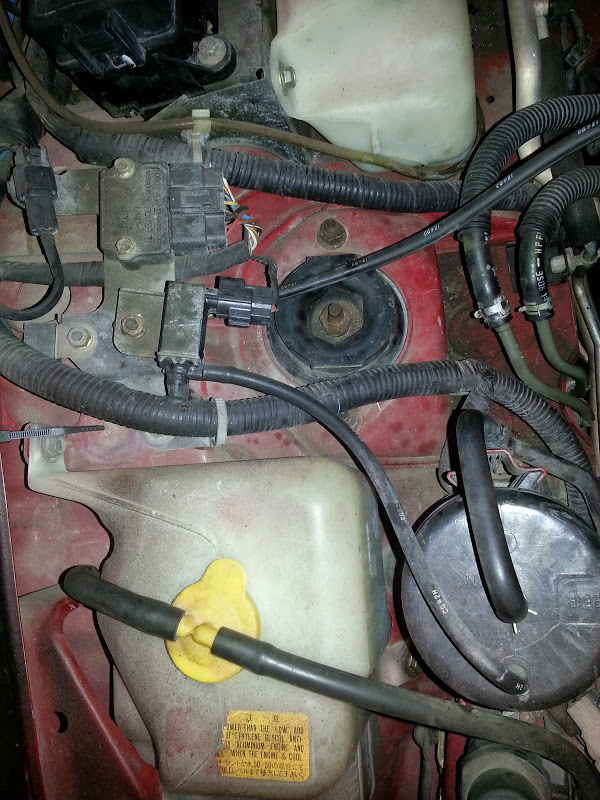
Its also dripping coolant from this hose and there was a fair amount of oil on the passenger side of the block, but he did say he just changed the oil, and with that filter location I can't see how you can remove it without getting oil everywhere. Probably easiest to fix with a coolant reroute

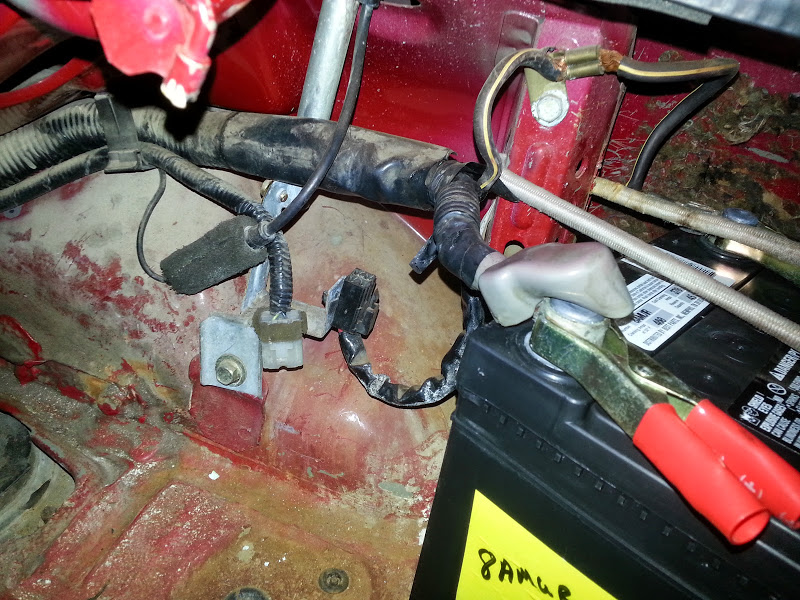
This connector back by the battery is unplugged, anyone know what it does?
This connector is just dangling near the front of the motor. I think this is supposed to plug into the thermoswitch for the radiator fans The connector seems to be a single lead. Appears to be the right length to plug into something located on top of the coolant housing..
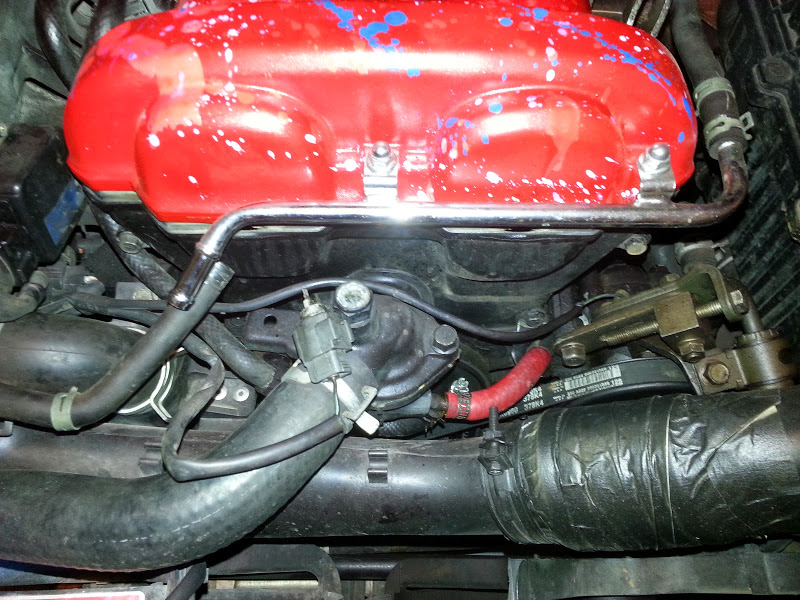
A loose vacuum line was confusing me till I realized it used to connect to the obviously broken nipple on the solenoid, leading to the charcoal canister. I guess I can just delete this whole apparatus.
About the car:
Its a 1993 Base Model with 180,000 miles. Has been plastidipped black but is red underneath Has a loud engine clack, and came with no wheels. Seems crazy to buy a car with no wheels, but the way I figure it, I was going to be buying something wider anyway. Paid $1000 for it as is. Seller thought it was rod knock but I am reasonably sure the noise is just a failed HLA. There isn't any rust to speak of on the car, one of the frame rails is pretty beat up which is kind of weird. Clean title with no accident history. Compression is 202-203-206-208
The Plan:
- Sort out the engine noise, hopefully just an HLA, but I am willing to 1.8 swap if its something more critical.
- Get some nice 15x8s with some sticky rubber and a rear view mirror.
- Sort out the seating position. I am 6'5" and need to pass track inspection. there is a shop SW of Fort Worth (MER) that says they can help make it happen
- Suspension, Chassis Bracing & LSD
- Track Time (HPDE & TT)
- When I get bored of being a speed bump for Z06s, boost the motor/transmission off into the sunset and save for a v8 swap.
Video Of Noise
So I made the previous video really creepy by slowing it down to 1/8th speed, but you can clearly hear and count the ticks and based on some maths I made up (in the youtube description) its looking very very likely that its a stuck HLA.
Top Seems to be in decent condition, ignoring the stickers
MOAR stickers, (5hp each)
Some brand of bolt in rollbar: (will need to be replaced with a proper unit)
Also came with a sweet crown royal bag shift boot, a headunit that plays DVDs and my favorite bit, a NRG quick release hub its blue anodized, and while I would prefer just black I can live with it. The steering wheel glows in the dark and will be replaced with a deep dish wheel with an extender at some point
Looks like megan racing lowering springs, which apparently were not low enough...
Has a racing beat 4-1 Header, not a bad get if I end up keeping the 1.6 NA for awhile
Some sort of aftermarket all aluminum radiator, one of the mount brackets is broken tho, can anyone help identify the radiator and/or where to buy the brackets?
Its also dripping coolant from this hose and there was a fair amount of oil on the passenger side of the block, but he did say he just changed the oil, and with that filter location I can't see how you can remove it without getting oil everywhere. Probably easiest to fix with a coolant reroute
This connector back by the battery is unplugged, anyone know what it does?
This connector is just dangling near the front of the motor. I think this is supposed to plug into the thermoswitch for the radiator fans The connector seems to be a single lead. Appears to be the right length to plug into something located on top of the coolant housing..
A loose vacuum line was confusing me till I realized it used to connect to the obviously broken nipple on the solenoid, leading to the charcoal canister. I guess I can just delete this whole apparatus.
Last edited by Ziggo; 07-13-2014 at 12:24 PM. Reason: Fixed pictures

Reply
 0
0

0
07-13-2014, 09:18 AM
#2
Elite Member
iTrader: (13)

Join Date: Dec 2006
Location: Taos, New mexico
Posts: 6,600
Total Cats: 561
LOL, that slow motion video of the ticking is great. It sounds like the soundtrack from a horror film.
Sounds like a stuck lifter or something to me, not rod knock. You should inspect the cam gears and make sure nothing has come loose there, as a loose cam sounds like death (and similar to rod knock).
Sounds like a stuck lifter or something to me, not rod knock. You should inspect the cam gears and make sure nothing has come loose there, as a loose cam sounds like death (and similar to rod knock).
Reply
0
0


 !
07-20-2014, 10:44 PM
!
07-20-2014, 10:44 PM
#9
Junior Member
Thread Starter
Join Date: Mar 2010
Location: Melissa, TX
Posts: 172
Total Cats: 20
Lots of progress and pain.
The HLA\Clack issue is resolved, so I am keeping the 1.6 for now. (yay?......)
Ordered OEM brackets to attach to the ebay radiator($20), received and installed them with no issues. I am not a huge fan of where the radiator is sitting right now, its about 1/4" off the frame rail, I would rather it be snugged right up against it, but it should have no issues keeping a 1.6l cool I figure. Slimmer fans would be nice to have more work area.
Cleaned out coolant overflow tank and lines, which were filled with what looked like mud. In cleaning the tank I must have finished it off, developed a slow leak. Ordered replacement $55 (ouch)
Coolant leak on the red hose is resolved. Removed it, cleaned the bungs on both ends with some sandpaper. Then put some high temp RTV on the bung, reinstalled the hose and clamped down. It will hold for now, but I am eventually going to have to get a bunch of rubber hose of various sizes and replace all the lines on the car. They are all at the end of their lifetime and hard as rocks. Upper and lower radiator hoses are in good shape though, must have been replaced more recently.
Ordered replacement thermostatic switch to replace the broken one. ($15). New one seems to be working fine though the fan kicks on at a higher temperature than I would like, 210F on the tstat housing.
Ordered new radiator cap ($5).
That about kills it for the cooling system, I will still need to flush, pure distilled water in there right now. Not going to reroute.
Washer fluid tank had a leak at the pump. Removed the pump found grommet was completely hardened and torn. Ordered replacement pump ($11)
Charcoal canister removed. Looped the vapor line back to the tank. After thinking about it, with the car off and the solenoid closed, not any real pressure difference.
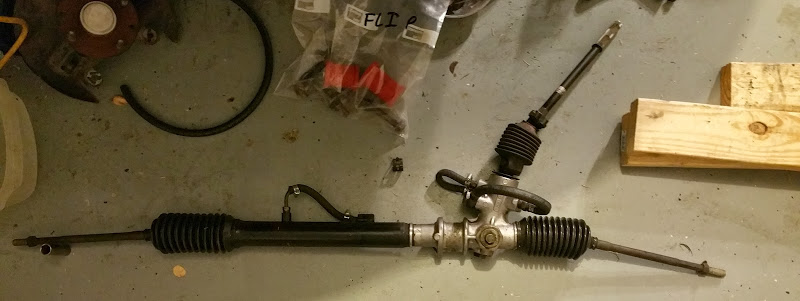
Went hunting for the source of grime on the exhaust side of the motor and it seems to be the power steering rack. Overflow tank completely dry, pulled the line from the rack and nothing came out. I was thinking about de-powering anyway, so this just makes up my mind for me.
Decided to risk the wrath of the EPA\Obama and I tapped on the schrader valve for the A\C system, no pressure. With a leak likely somewhere in the system and no idea if the compressor is still good I decided just to remove the entire system. If I just cant stand it I will convert to R134a and reinstall.
So much more room on the exhaust side now. Took me awhile to figure out how to get the PS pump bracket off. One of the bolts was blocked by the bracket. Then I figured out it was just a bushing and bashed it out of the way. Note: Orange convincer shown is not the favored tool mentioned below.
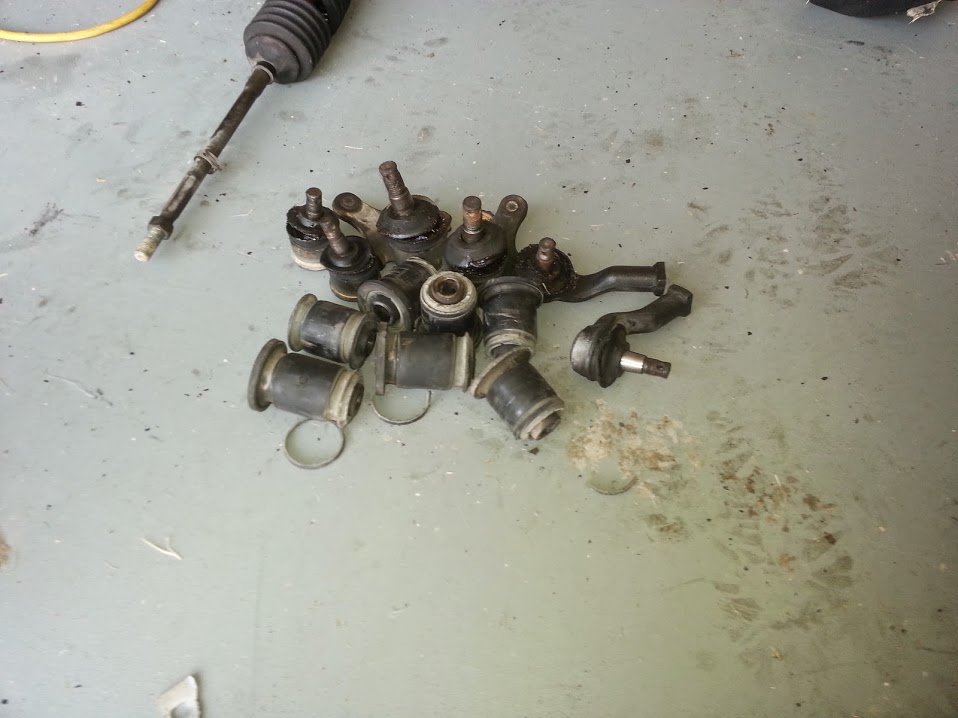
Read some about depowering the steering rack, decided to go with a looped line setup, but need to pull the pinion to have the needle valve welded to reduce on center slop. Started removing the rack when the real fun started. Tie rods wouldn't budge, then I took a closer look and saw that the tie rod end, upper and lower ball joints all had busted boots. Nuts. Hadn't planned on this job, but not trusting my life on the track to some dodgy ball joints. Managed to get all the castle nuts off, but the ball joints wouldn't pop out, so this became my big task. After seeing the condition of the rubber on the ball joints, my mind was made up about the suspension bushings... they all need to be replaced. ****.
So now we are talking real budget. Ordered all new ball joints and tie rod ends ($160) and a complete prothane suspension bushing kit ($170) Also made a run to Harbor Freight to get this wonderful thing: 3/4" Forged Ball Joint Separator
Tightened it down on every ball joint, nada, still not budging. Tried heat with a heat gun. Still nothing. Sprayed a little more PB blaster on, waited awhile and tried again. Still nothing. Decide to do what I do best when the going gets tough, break out the hammer. Tighten the tool up again, smack the tool with a hammer right where it clamps the ball joint, BAM, **** goes flying everywhere as the ball joint comes loose and is shot across the garage. Try same method on the other 5 which pop off in rapid succession. Tool is worth every penny, though make sure you have a hammer to go with it.
Couldn't get the vertical bolt that holds on the lower ball joint to budge on either side. Eventually just put the giant cheater bar on it and twisted the heads off. Rust makes an effective weld after 21 years I suppose. Will need to order new bolts.
With the tie rod and lower ball joints off I then pulled the LCA and UCA off of both sides. No real issues, though the drivers side UCA bolt did not want to slide out. Took some convincing with my trusty hammer and various 3/8" ratchet extensions to push it all the way out. Passenger side slid right out. Will be greasing the **** out of these. Pulled out my favorite tool and bashed the upper ball joints out of the upper control arms. Then I used a 3 jaw puller (another Harbor Freight special) to push all the bushings out.
Hard days work right here..
With all that fun over with it was finally time to remove the rack, which certainly seems to be the root of my grime issue. The entire hosing was covered in 1/8" of caked on black gunk. Spent some time cleaning it up before I start disassembly. Both boots are split which probably wasn't doing the rack any favors. Ordered replacement boots ($28)
Things still to do to get this thing off of jackstands:
Source replacement Lower ball joint bolts
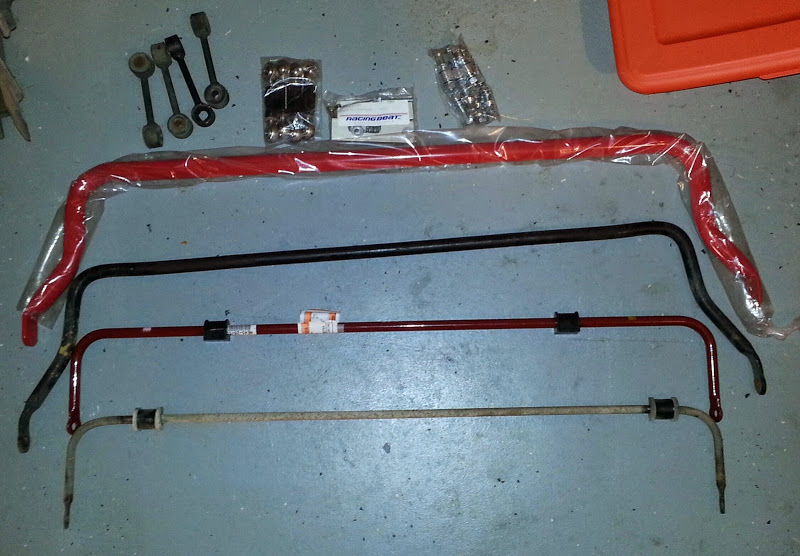
Rear suspension removal and de-bushifying (Control arms, end links, sway bar)
Remove pinion assembly from steering rack for welding.
Zerk fittings for control arms a la 949 instructions? Still undecided about this, though its now or never I suppose.
New bushings and ball joints all around
Foamectomy on bottom and back cushions of seat
Deep dish steering wheel and extension
Need to make a decision re: wheels. I really want some 15x9 wheels, but keep getting mixed answers on if they will fit with the OEM perch type springs, 949 says no, but there are reports in the ether of it working with 5m spacers and careful alignment. Wouldn't be an issue to get a cheap coilover kit so they fit, but I really want some xida club sports, but I don't have the cash for them right now. The wheels, tires and coilovers would be a $3.5k expense. Which is kinda hilarious on a car purchased for 1k. Hell for the same price I could do a JDM 1.8, 6 speed manual and LSD. JDM 01-05 Mazda BP Engine Motor Manual 6 Spd Tran 1.8L DOHC MX5 Miata
The HLA\Clack issue is resolved, so I am keeping the 1.6 for now. (yay?......)
Ordered OEM brackets to attach to the ebay radiator($20), received and installed them with no issues. I am not a huge fan of where the radiator is sitting right now, its about 1/4" off the frame rail, I would rather it be snugged right up against it, but it should have no issues keeping a 1.6l cool I figure. Slimmer fans would be nice to have more work area.
Cleaned out coolant overflow tank and lines, which were filled with what looked like mud. In cleaning the tank I must have finished it off, developed a slow leak. Ordered replacement $55 (ouch)
Coolant leak on the red hose is resolved. Removed it, cleaned the bungs on both ends with some sandpaper. Then put some high temp RTV on the bung, reinstalled the hose and clamped down. It will hold for now, but I am eventually going to have to get a bunch of rubber hose of various sizes and replace all the lines on the car. They are all at the end of their lifetime and hard as rocks. Upper and lower radiator hoses are in good shape though, must have been replaced more recently.
Ordered replacement thermostatic switch to replace the broken one. ($15). New one seems to be working fine though the fan kicks on at a higher temperature than I would like, 210F on the tstat housing.
Ordered new radiator cap ($5).
That about kills it for the cooling system, I will still need to flush, pure distilled water in there right now. Not going to reroute.
Washer fluid tank had a leak at the pump. Removed the pump found grommet was completely hardened and torn. Ordered replacement pump ($11)
Charcoal canister removed. Looped the vapor line back to the tank. After thinking about it, with the car off and the solenoid closed, not any real pressure difference.
Went hunting for the source of grime on the exhaust side of the motor and it seems to be the power steering rack. Overflow tank completely dry, pulled the line from the rack and nothing came out. I was thinking about de-powering anyway, so this just makes up my mind for me.
Decided to risk the wrath of the EPA\Obama and I tapped on the schrader valve for the A\C system, no pressure. With a leak likely somewhere in the system and no idea if the compressor is still good I decided just to remove the entire system. If I just cant stand it I will convert to R134a and reinstall.
So much more room on the exhaust side now. Took me awhile to figure out how to get the PS pump bracket off. One of the bolts was blocked by the bracket. Then I figured out it was just a bushing and bashed it out of the way. Note: Orange convincer shown is not the favored tool mentioned below.
Read some about depowering the steering rack, decided to go with a looped line setup, but need to pull the pinion to have the needle valve welded to reduce on center slop. Started removing the rack when the real fun started. Tie rods wouldn't budge, then I took a closer look and saw that the tie rod end, upper and lower ball joints all had busted boots. Nuts. Hadn't planned on this job, but not trusting my life on the track to some dodgy ball joints. Managed to get all the castle nuts off, but the ball joints wouldn't pop out, so this became my big task. After seeing the condition of the rubber on the ball joints, my mind was made up about the suspension bushings... they all need to be replaced. ****.
So now we are talking real budget. Ordered all new ball joints and tie rod ends ($160) and a complete prothane suspension bushing kit ($170) Also made a run to Harbor Freight to get this wonderful thing: 3/4" Forged Ball Joint Separator
Tightened it down on every ball joint, nada, still not budging. Tried heat with a heat gun. Still nothing. Sprayed a little more PB blaster on, waited awhile and tried again. Still nothing. Decide to do what I do best when the going gets tough, break out the hammer. Tighten the tool up again, smack the tool with a hammer right where it clamps the ball joint, BAM, **** goes flying everywhere as the ball joint comes loose and is shot across the garage. Try same method on the other 5 which pop off in rapid succession. Tool is worth every penny, though make sure you have a hammer to go with it.
Couldn't get the vertical bolt that holds on the lower ball joint to budge on either side. Eventually just put the giant cheater bar on it and twisted the heads off. Rust makes an effective weld after 21 years I suppose. Will need to order new bolts.
With the tie rod and lower ball joints off I then pulled the LCA and UCA off of both sides. No real issues, though the drivers side UCA bolt did not want to slide out. Took some convincing with my trusty hammer and various 3/8" ratchet extensions to push it all the way out. Passenger side slid right out. Will be greasing the **** out of these. Pulled out my favorite tool and bashed the upper ball joints out of the upper control arms. Then I used a 3 jaw puller (another Harbor Freight special) to push all the bushings out.
Hard days work right here..
With all that fun over with it was finally time to remove the rack, which certainly seems to be the root of my grime issue. The entire hosing was covered in 1/8" of caked on black gunk. Spent some time cleaning it up before I start disassembly. Both boots are split which probably wasn't doing the rack any favors. Ordered replacement boots ($28)
Things still to do to get this thing off of jackstands:
Source replacement Lower ball joint bolts
Rear suspension removal and de-bushifying (Control arms, end links, sway bar)
Remove pinion assembly from steering rack for welding.
Zerk fittings for control arms a la 949 instructions? Still undecided about this, though its now or never I suppose.
New bushings and ball joints all around
Foamectomy on bottom and back cushions of seat
Deep dish steering wheel and extension
Need to make a decision re: wheels. I really want some 15x9 wheels, but keep getting mixed answers on if they will fit with the OEM perch type springs, 949 says no, but there are reports in the ether of it working with 5m spacers and careful alignment. Wouldn't be an issue to get a cheap coilover kit so they fit, but I really want some xida club sports, but I don't have the cash for them right now. The wheels, tires and coilovers would be a $3.5k expense. Which is kinda hilarious on a car purchased for 1k. Hell for the same price I could do a JDM 1.8, 6 speed manual and LSD. JDM 01-05 Mazda BP Engine Motor Manual 6 Spd Tran 1.8L DOHC MX5 Miata
Reply
0
0
 04-18-2015, 06:45 PM
#11
Junior Member
Thread Starter
Join Date: Mar 2010
Location: Melissa, TX
Posts: 172
Total Cats: 20
Time to catch this bastard up. Been keeping a build thread on another site that isn't very heavily trafficed with miata owners...
So what have I gotten done?
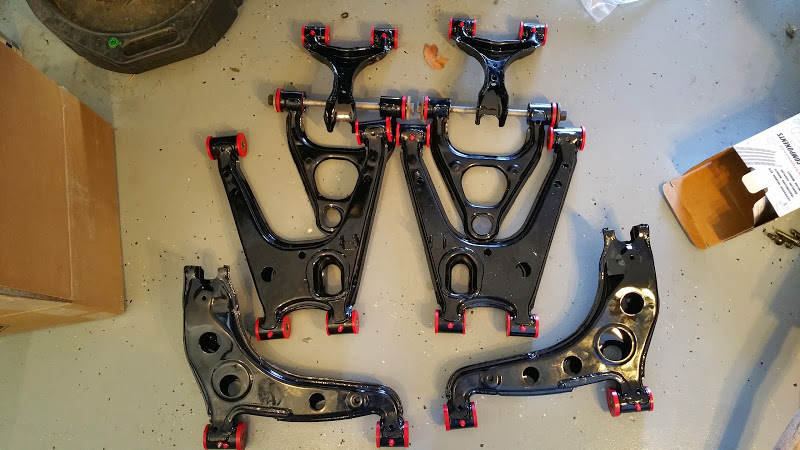
Well I placed an order for xidas back in October of last year. While I was waiting I decided to do bushings and got the control arms tapped for zerks and powder coated. Sexy.
I also deleted the A\C and powersteering, just looped the lines on the rack.
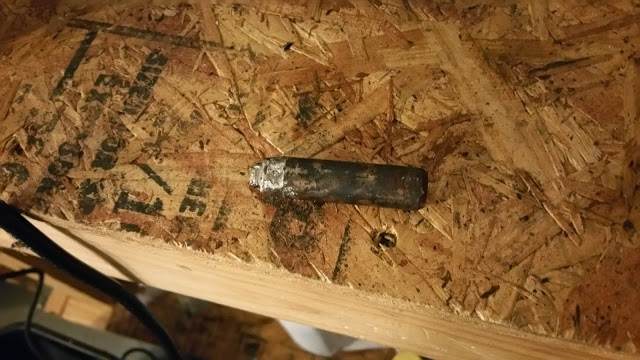
I was glad I worked on this, because when disassembling the rear suspension I noticed that the rear caliper slide pin was sheared. Not sure why someone would think its ok just to leave it like this....

That slide pin was completely siezed in the caliper. I had to grind a hex into the end of it and hit it with the big impact gun to break it loose, along with alot of pb blaster and heat gunning.
Since that caliper bracket was screwed up, I decided to just buy a full set of 1.8 brackets, rotors and pads, along with stainless steel lines. Might as well do it right.
Then the long wait for the xidas began. Screw the long beach dockworkers......
So what have I gotten done?
Well I placed an order for xidas back in October of last year. While I was waiting I decided to do bushings and got the control arms tapped for zerks and powder coated. Sexy.
I also deleted the A\C and powersteering, just looped the lines on the rack.
I was glad I worked on this, because when disassembling the rear suspension I noticed that the rear caliper slide pin was sheared. Not sure why someone would think its ok just to leave it like this....
That slide pin was completely siezed in the caliper. I had to grind a hex into the end of it and hit it with the big impact gun to break it loose, along with alot of pb blaster and heat gunning.
Since that caliper bracket was screwed up, I decided to just buy a full set of 1.8 brackets, rotors and pads, along with stainless steel lines. Might as well do it right.
Then the long wait for the xidas began. Screw the long beach dockworkers......
Reply
0
0
04-18-2015, 06:54 PM
#12
Junior Member
Thread Starter
Join Date: Mar 2010
Location: Melissa, TX
Posts: 172
Total Cats: 20
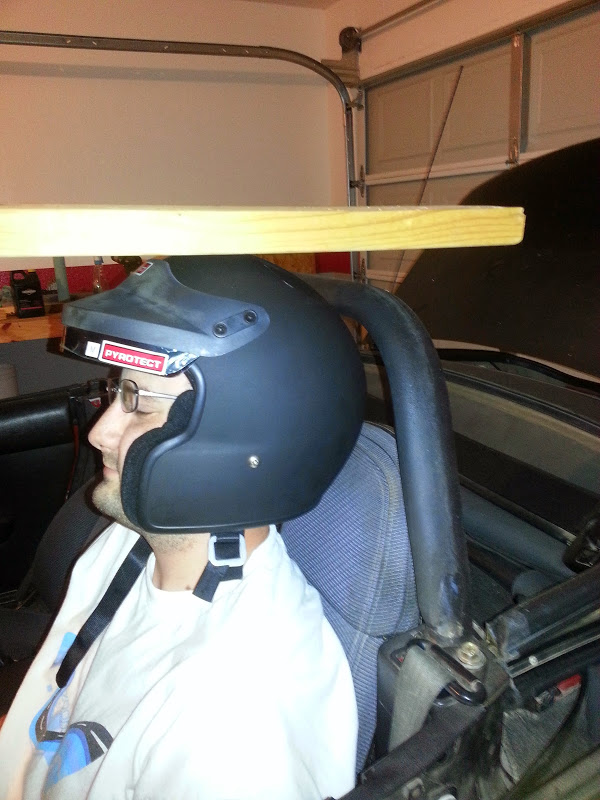
In the meantime I did a foamectomy - still not enough to pass tech.... I know this roll bar sucks, I am planning on replacing it, but the new one wont be much higher.
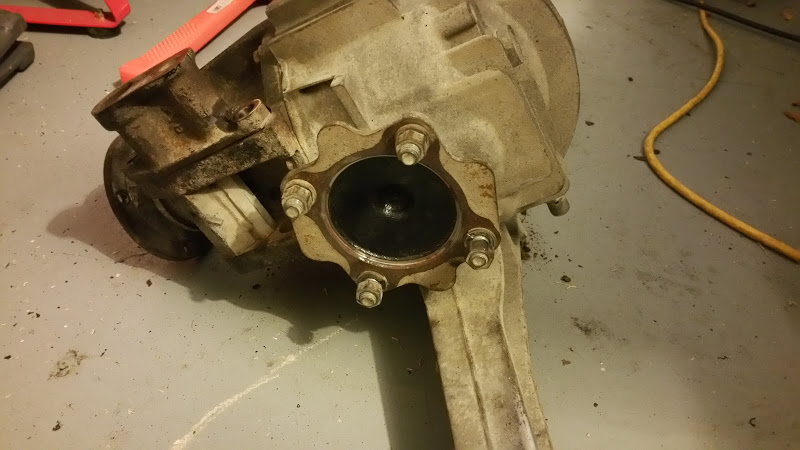
I also did the differential bushings, I never want to mess with that ever again. hopefully this differential housing can handle whatever I need to put inside of it.
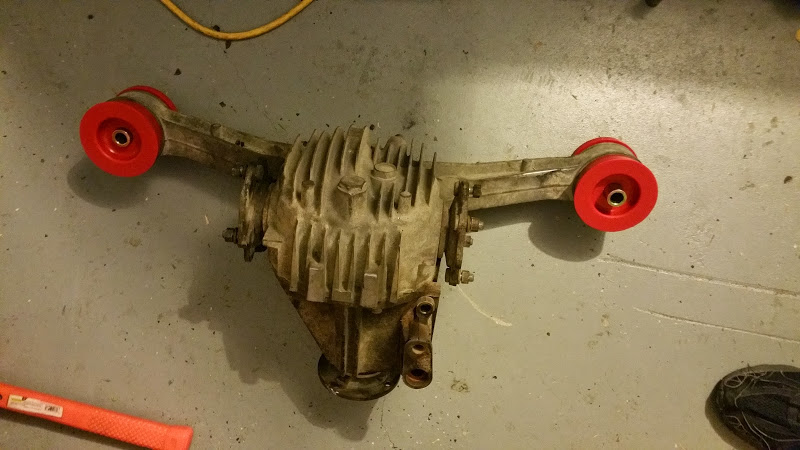
Not that it is really worth anything, but based on the spotters guide for differentials, this is VLSD based upon the shape of the lobes on the mount for the axles.
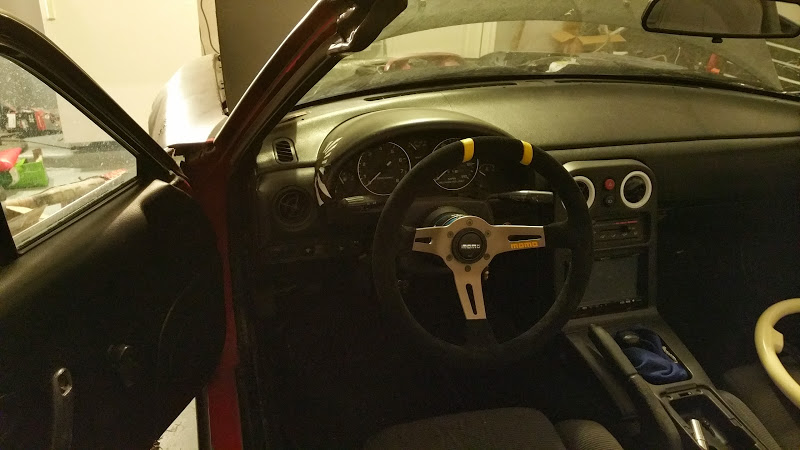
I also got rid of this retarded thing, and put a deep dish momo wheel in to help clear my knees. Works great, I can get my knees behind it and straighten my leg enough to heel\toe
I also did the differential bushings, I never want to mess with that ever again. hopefully this differential housing can handle whatever I need to put inside of it.
Not that it is really worth anything, but based on the spotters guide for differentials, this is VLSD based upon the shape of the lobes on the mount for the axles.
I also got rid of this retarded thing, and put a deep dish momo wheel in to help clear my knees. Works great, I can get my knees behind it and straighten my leg enough to heel\toe
Reply
0
0
04-18-2015, 07:02 PM
#13
Junior Member
Thread Starter
Join Date: Mar 2010
Location: Melissa, TX
Posts: 172
Total Cats: 20
Early Februrary, XIDAS ARRIVED!!!

They went in the following weekend
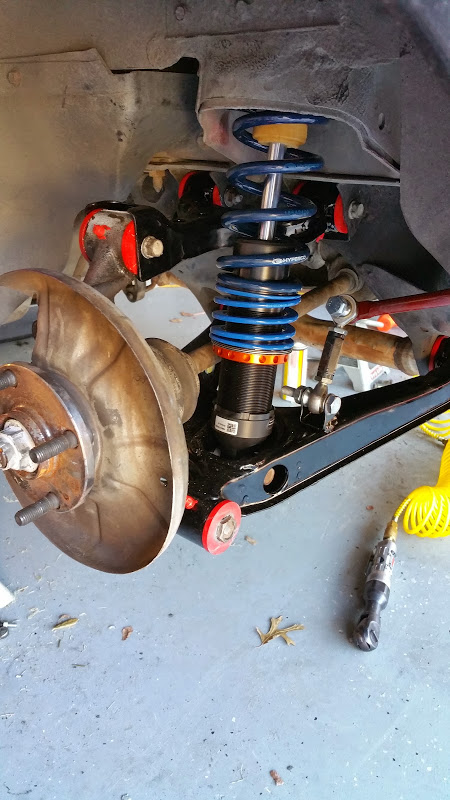
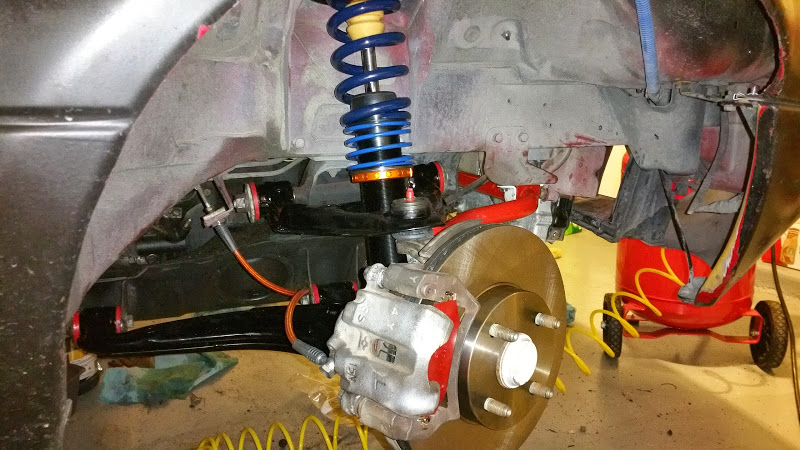
Along with all of this, which requires a fair amount of trimming on the radiator fan shrouds
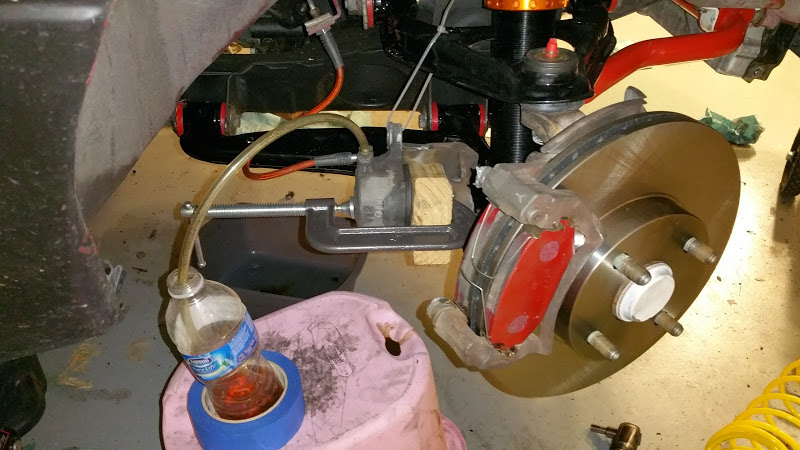
Also discovered that when you do the 1.8 conversion, you swap the front brakes, which I knew, but I didnt realize it puts the bleed port on the brake on the bottom... so now I have this fun way of bleeding the front brakes.
They went in the following weekend
Along with all of this, which requires a fair amount of trimming on the radiator fan shrouds
Also discovered that when you do the 1.8 conversion, you swap the front brakes, which I knew, but I didnt realize it puts the bleed port on the brake on the bottom... so now I have this fun way of bleeding the front brakes.
Reply
0
0
04-18-2015, 07:22 PM
#14
Junior Member
Thread Starter
Join Date: Mar 2010
Location: Melissa, TX
Posts: 172
Total Cats: 20
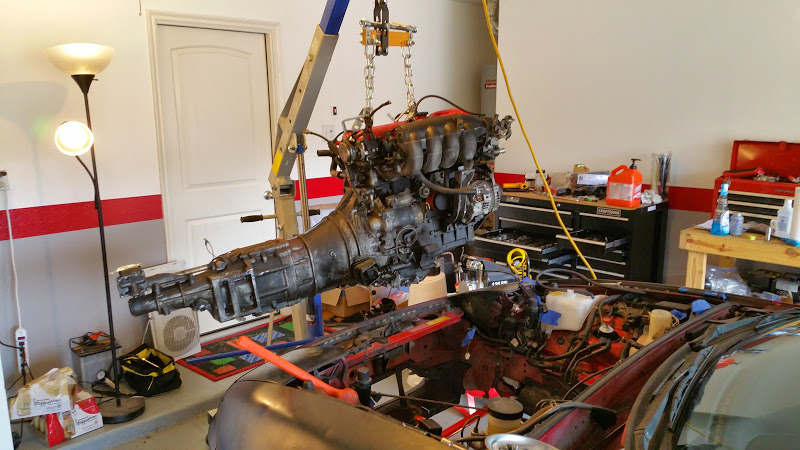
So after all this work, its finally ready to drive right? Off the jackstands, took it out to get some fresh gas and let the alignment settle a bit, and after getting gas and warming it up I decide to wring it out a little bit so I run it in 3rd gear to redline and BAM something let loose in the motor, noticeable vibration on the shifter and it sounds like a can of marbles in the motor. Limp it the half mile to home, and put it back in the garage.
A checked the play in the pistons using the screwdriver thru the spark plug hole trick. (rotate piston to TDC, then rotate till it just slightly starts to go down) and pushing on the screwdriver on the #4 piston revealed a noticible displacement. ****. Bad rod bearing most likely.
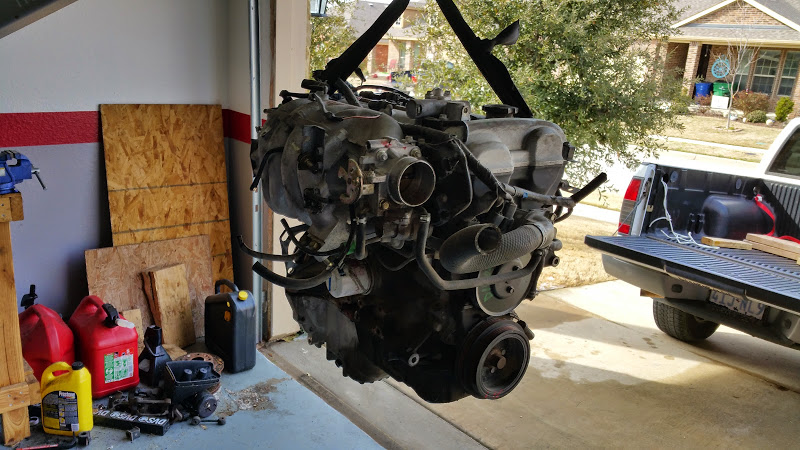
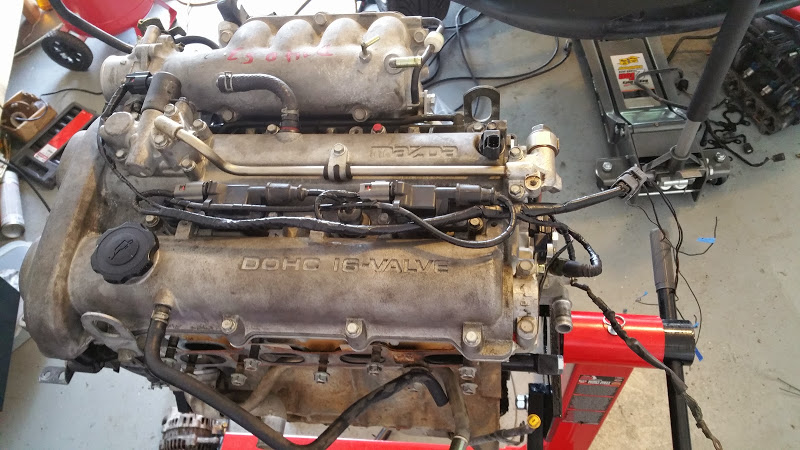
Because this was a worthless 1.6l motor I decided to follow what many others have done and do a VVT swap. Also because the 1994-1997 motors all have so many miles, and the 1999-2000 motors were all so expensive. I picked up this 2004 that had 62k on it for $600 including core charge.
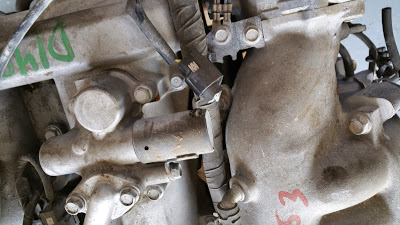
It wasnt perfect, the VVT solenoid connector was busted, as well as the VTCS solenoid, though I didn't know that is what it was at the time.
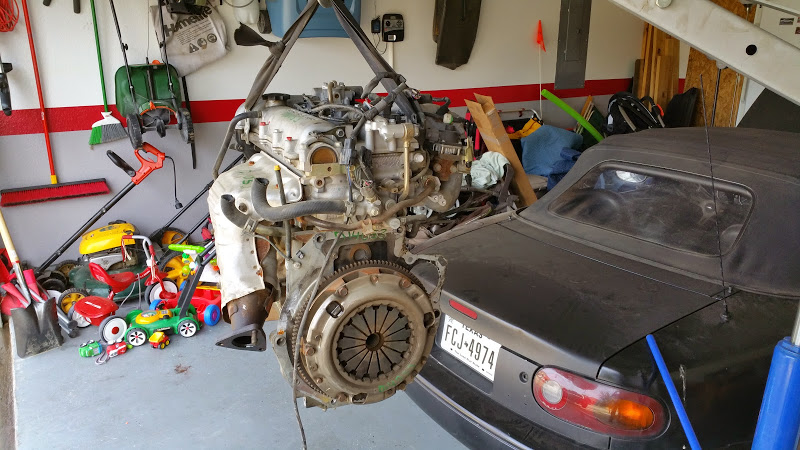
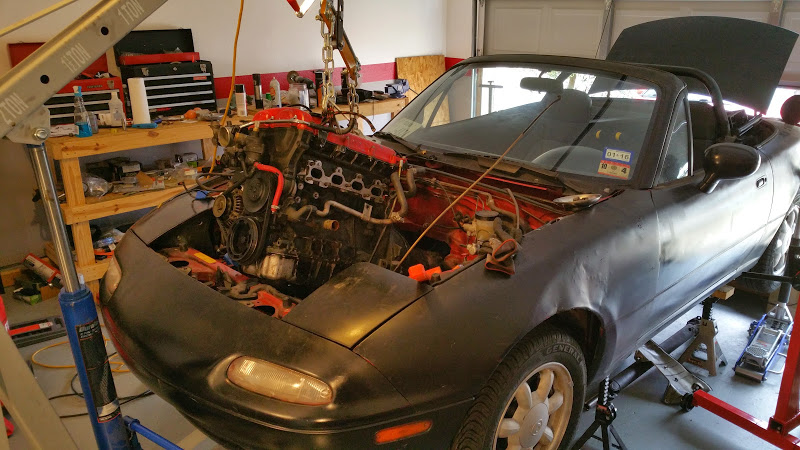
With the new motor purchased, time for the 1.6 to go.
A checked the play in the pistons using the screwdriver thru the spark plug hole trick. (rotate piston to TDC, then rotate till it just slightly starts to go down) and pushing on the screwdriver on the #4 piston revealed a noticible displacement. ****. Bad rod bearing most likely.
Because this was a worthless 1.6l motor I decided to follow what many others have done and do a VVT swap. Also because the 1994-1997 motors all have so many miles, and the 1999-2000 motors were all so expensive. I picked up this 2004 that had 62k on it for $600 including core charge.
It wasnt perfect, the VVT solenoid connector was busted, as well as the VTCS solenoid, though I didn't know that is what it was at the time.
With the new motor purchased, time for the 1.6 to go.
Reply
1
1
04-18-2015, 07:43 PM
#15
Junior Member
Thread Starter
Join Date: Mar 2010
Location: Melissa, TX
Posts: 172
Total Cats: 20
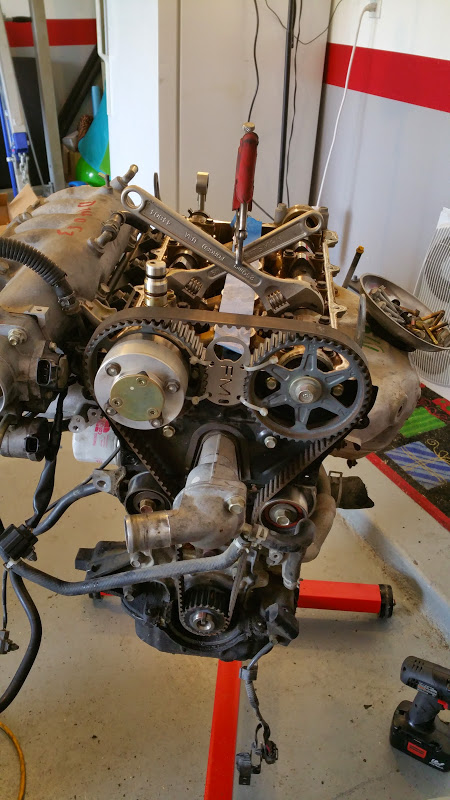
So I bought a ton of crap for the new motor. a new valve cover (including solenoid) for $100, also got a timing belt and associated pullies, a new water pump, thermostat, cam and crank seals, an alternator\water pump belt, rear main seal, The FM hose kit and stg 1 happy meal clutch kit, new input and output seals for the transmission as well as the clutch lever boot. Also purchased a 1999 fuel rail.
It was the easiest timing belt I have ever done thanks to the crescent wrench trick and the FM ninja tool.
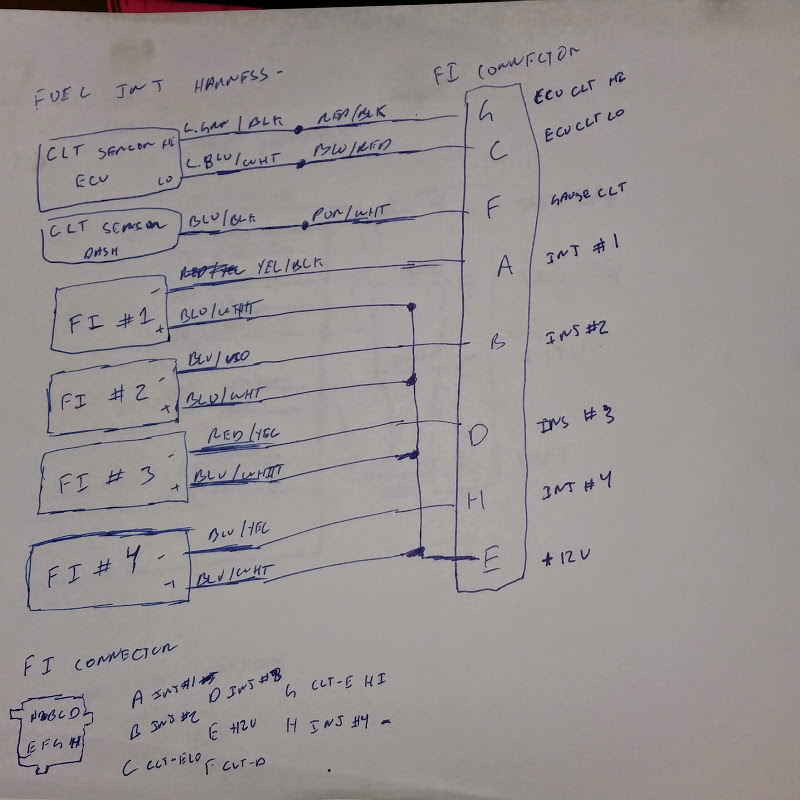
I rewired the 2004 fuel injector harness to eliminate the 3 wire sensor, and add the two sensors from the old motor, as well and allow for sequential fuel injection. Installed before pictures, you will have to make do with my scribbles. I will cut the pigtail on the chassis side of the harness and wire in the other side of this connector to match. Behind it I will connect injectors 2/3 and 1/4 together for now with jumpers, running all 4 discrete wires back to the ECU. If I want to convert to sequential I will just cut the jumpers and modify the ECU harness. I also eliminated the ground and condensor from this bundle, salvaging the 4 pin connector for use on the reworked spark plug connector.
Speaking of which, I purchased an MS3 Basic from MSlabs which will be how this thing is controlled.
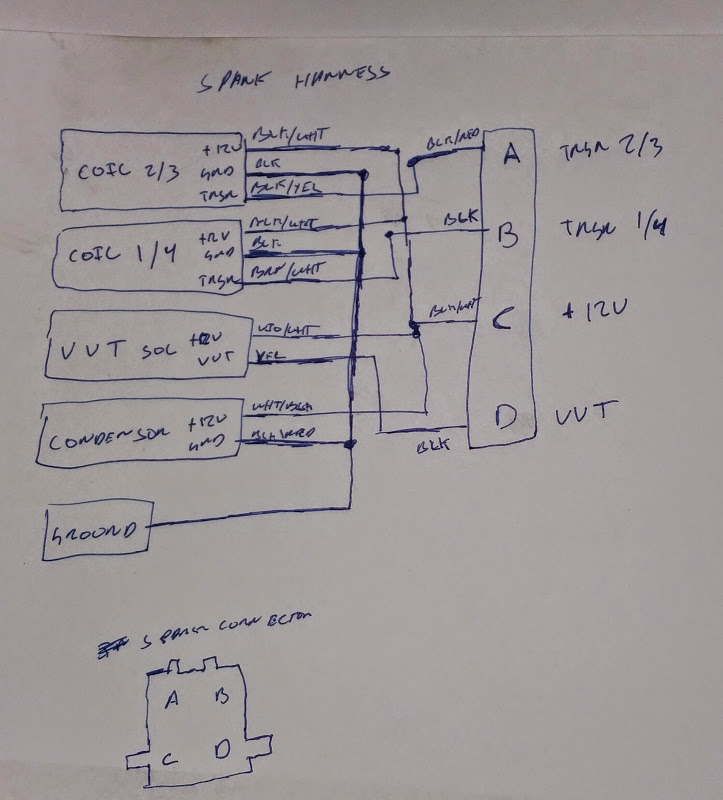
I did the same to the spark plug harness to add the VVT solenoid and wire the condensor directly into this harness.
It was the easiest timing belt I have ever done thanks to the crescent wrench trick and the FM ninja tool.
I rewired the 2004 fuel injector harness to eliminate the 3 wire sensor, and add the two sensors from the old motor, as well and allow for sequential fuel injection. Installed before pictures, you will have to make do with my scribbles. I will cut the pigtail on the chassis side of the harness and wire in the other side of this connector to match. Behind it I will connect injectors 2/3 and 1/4 together for now with jumpers, running all 4 discrete wires back to the ECU. If I want to convert to sequential I will just cut the jumpers and modify the ECU harness. I also eliminated the ground and condensor from this bundle, salvaging the 4 pin connector for use on the reworked spark plug connector.
Speaking of which, I purchased an MS3 Basic from MSlabs which will be how this thing is controlled.
I did the same to the spark plug harness to add the VVT solenoid and wire the condensor directly into this harness.
Reply
2
2
04-18-2015, 07:55 PM
#16
Junior Member
Thread Starter
Join Date: Mar 2010
Location: Melissa, TX
Posts: 172
Total Cats: 20
So with the Fuel and spark harnesses handled, everything else will need to be sized up once the motor is installed. I will be cutting the CAS connector off and wiring the Cam and Crank angle sensors directly into it. To remove the motor these will need to be disconnected at the sensor connector.
I moved on to getting into the firewall on the passenger side so I could start prepping for the new signal wires as well as the vaccum line for the onboard map sensor. The intention is to run 10 new wires thru the firewall for use now and potential future expansion:
Injector 3 - inactive
Injector 4 - inactive
VVT - Active
VICS - inactive
Knock - Active
Spark C - inactive
Spark D - inactive
Boost Control Solenoid - inactive
Flex Fuel Sensor - inactive
Ground - inactive
I discovered quite a mess.
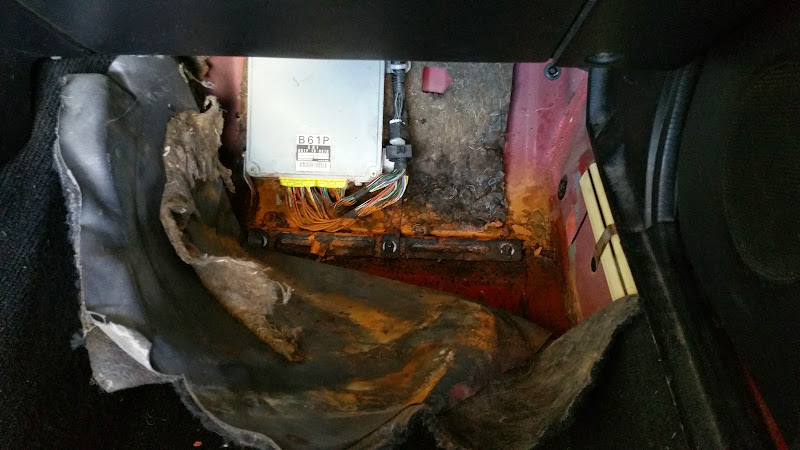
When removing the ECU I must have given this wire its last bend.... Its the +12v for the ECU so there is no way the car would have been running if it was disconnected before.
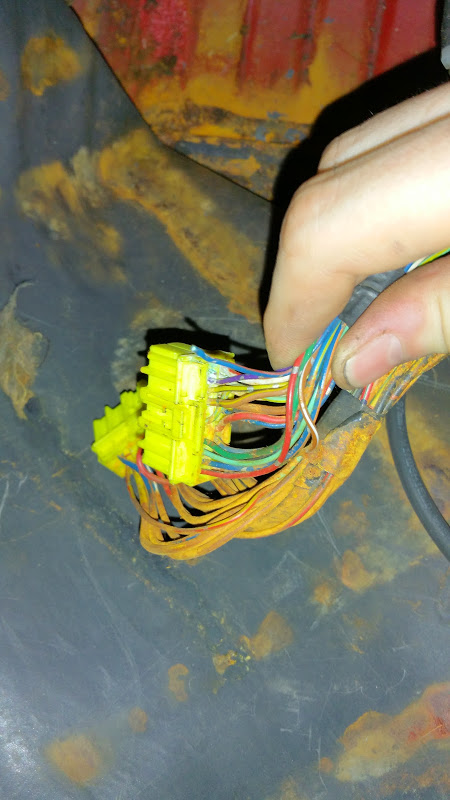
I swear this car has AIDS.
So I am looking for a tool to service that connector, as well as replacement contacts. I could put the motor in and continue with the wire harnesses, but I would rather the alternator went on first. Since I am going to have the ability to mess with the ECU connector, I will probably go ahead and hook up the sequential injection as well.
Other things I still need:
1.8L Alternator Bracket (I could make the 1.6L work, but it also crowds the fuel line)
Radiator Fan
LC-1 Wideband
1.8L Exhaust header & cat
Intake & GM IAT Sensor
I moved on to getting into the firewall on the passenger side so I could start prepping for the new signal wires as well as the vaccum line for the onboard map sensor. The intention is to run 10 new wires thru the firewall for use now and potential future expansion:
Injector 3 - inactive
Injector 4 - inactive
VVT - Active
VICS - inactive
Knock - Active
Spark C - inactive
Spark D - inactive
Boost Control Solenoid - inactive
Flex Fuel Sensor - inactive
Ground - inactive
I discovered quite a mess.
When removing the ECU I must have given this wire its last bend.... Its the +12v for the ECU so there is no way the car would have been running if it was disconnected before.
I swear this car has AIDS.
So I am looking for a tool to service that connector, as well as replacement contacts. I could put the motor in and continue with the wire harnesses, but I would rather the alternator went on first. Since I am going to have the ability to mess with the ECU connector, I will probably go ahead and hook up the sequential injection as well.
Other things I still need:
1.8L Alternator Bracket (I could make the 1.6L work, but it also crowds the fuel line)
Radiator Fan
LC-1 Wideband
1.8L Exhaust header & cat
Intake & GM IAT Sensor
Reply
0
0
04-19-2015, 10:20 PM
#17
Junior Member
Thread Starter
Join Date: Mar 2010
Location: Melissa, TX
Posts: 172
Total Cats: 20
Hit it hard today, didn't stop to take pictures. Since I am dead in the water with the ECU stuff, and the only thing engine wise I was waiting on is the alternator bracket, I decided to go ahead and put the engine in. Also replaced the rear main seal and installed the FM Stage 1 clutch & flywheel, a new clutch slave cylinder, and a braided clutch line. I also went ahead and ran the new wires thru one of the A\C line holes in the firewall, bought plastic caps for both at lowes, and I am making a gasket of sorts around the wirebundle with RTV, using the plastic cap and the existing grommet as a mold. The contacts and tools to service the ECU connector are on order.
Had lots of fun remating the transmission to the motor all by my lonesome, but that was just a undercard to the main event, which was getting the motor into the car and the motor mounts lined up. Taking the motor out by yourself is not too bad, but putting it back in alone is a huge PITA. I eventually got it done, using a jack from underneath, the invaluable load leveler, and some strategically placed 2x4s. I am probably going to be sore all over tomorrow from all the wrestling of heavy parts I did today.
With the motor in I can now start working on the TPS, IAC, Cam and Crank signal lines, and adapt the Spark Plug and Fuel injector plugs for my new wiring.
Reply
1
1
04-20-2015, 11:36 PM
#18
Junior Member
Thread Starter
Join Date: Mar 2010
Location: Melissa, TX
Posts: 172
Total Cats: 20
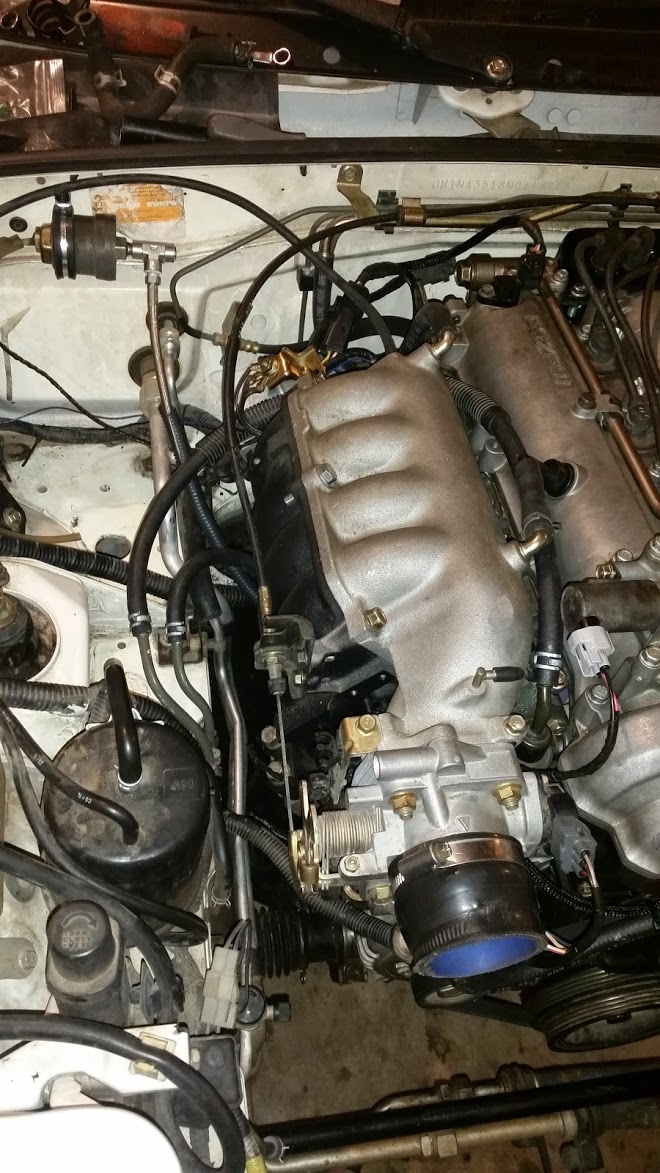
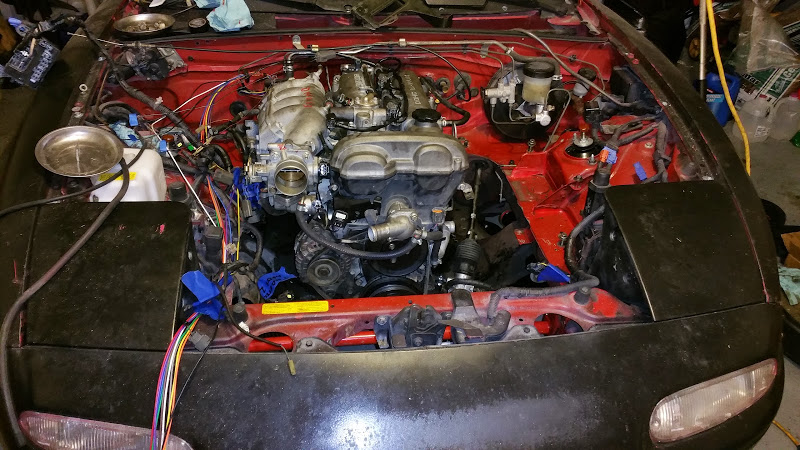
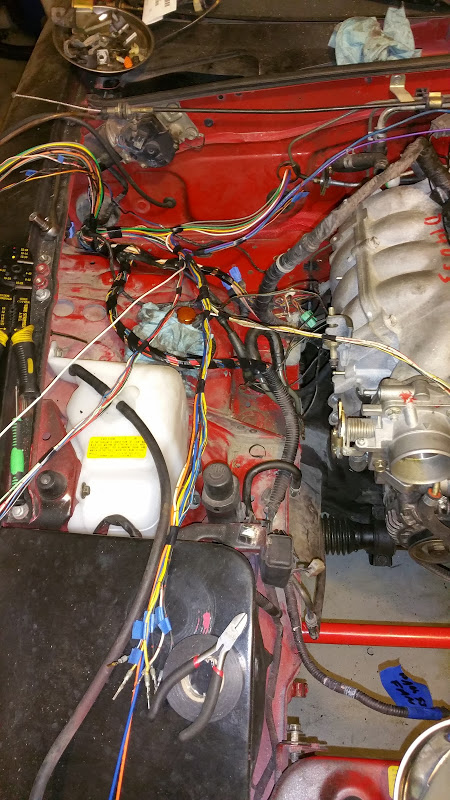
CHAOS!
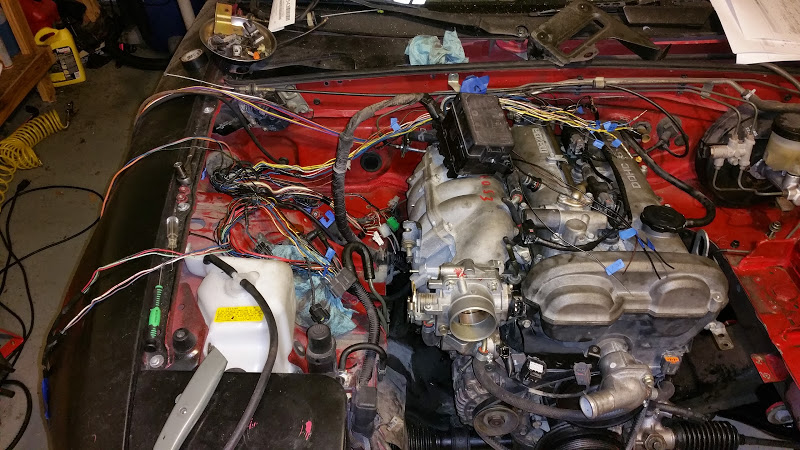
No really. I am moving all the engine harnesses to the back near the firewall, so the Fuel Injector,TPS, IAC, Crank Sensor, and Knock will all go over the top of the intake manifold.
Its slowly shaping up.
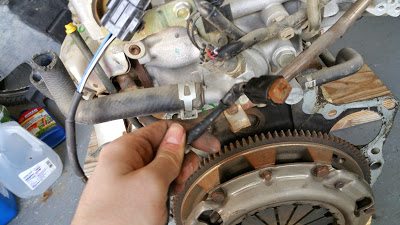
About the fuel lines, its been so long I forget which one is the feed and which one is the return. Is there a way to tell which is which? Other than hitting the fuel pump with 12v and seeing where the fountain of flammable fluid flies from?
No really. I am moving all the engine harnesses to the back near the firewall, so the Fuel Injector,TPS, IAC, Crank Sensor, and Knock will all go over the top of the intake manifold.
Its slowly shaping up.
About the fuel lines, its been so long I forget which one is the feed and which one is the return. Is there a way to tell which is which? Other than hitting the fuel pump with 12v and seeing where the fountain of flammable fluid flies from?
Reply
0
0