When you click on links to various merchants on this site and make a purchase, this can result in this site earning a commission. Affiliate programs and affiliations include, but are not limited to, the eBay Partner Network.
Finally starting my build thread, really got into it in the motor work during spring of 2020 and took photos along the way.
Started with a JR M45 supercharged 95 on slammed Tokico shocks. My 1st Miata, all I really knew about them was to avoid rust, which this one being garaged and never wintered in New England has little to no rust at all.
I pulled the JR supercharger with the intent of doing some STS autocross on NA, but knew I'd want the power back, +more, in the future. @Colipto 's EFR 6758 came along for sale and that kick started the re-boosting process last fall, which meant buying a bunch of stuff for a 'Rods Only' rebuild.
Engine into the garage this spring:
Head off, still factory hatching:
Post dingleberry hone:
Plastigauge checking ARP studs and ACL bearing clearances. I was happy with them all torqued to 50ftlbs (no line bore here)
eBay rods, sealed power rings and ACL bearings being prepped.
Pulled cams to do valve stem seals and install Volvo springs. Also cleaned out the lifters while they were out, basically flushed them with mystery oil.
Fluidampr arrived around this time, at least the box for one did
Cams back in, cam seals in and CAS installed.
Back to bottom end, Boundary oil pump installed.
Sealed and fit pan. A Fluidampr did finally arrive, got this one from a vendor who put the retail package in an actual box. Thanks Summit for doing it smart.
Waterpump on and ARP head studs in, ready for gasket and head to go back on.
Head back on. June 7th. Looking back, I pulled the head on May 23rd.
I�m planning pretty much exactly the same build for my 2002 VVT engine in my Exocet.
What �clearance� did you go with for the ACL bearing? I�m assuming you used the �Race� version?
I�m planning pretty much exactly the same build for my 2002 VVT engine in my Exocet.
What �clearance� did you go with for the ACL bearing? I�m assuming you used the �Race� version?
Also, where did you find the Volvo springs?
Finally what HP numbers are shooting for?
Good luck with your build
I did standard clearance ACL Race bearings all around. Main / Rod / Thrust, need to order all 3 sets.
I'll dig around for the link to springs.
HP is ?. I don't have any e85 plans, just see what I can get out of it. I have a NB1 head that I picked up for a decent price, but that was about a week or two after the motor went in. Someday I'll get around to swapping that in.
Shorten the AN-4 oil line, you don't want to be routing that excess all over the place, trying to avoid kinks when the engine's installed.
Thanks for the advice, I may look for a shorter line at some point, but here is how the line is run now.
Old radiator hose looks like a good fit...
Some spiral scissor cutting later...
Under the manifold view
It then follows up the oil drain line when the trubo is installed. Image soon...
But first I needed to bend the heater core return pipe back towards the firewall a bit.
Turbo test fit. I found that the downpipe for sure hit the shelf, so needed to do some finesse work with a hammer.
I gave it the pein, using a Cross Pein hammer. (I've had this thing for 20+ years, didn't know it was called that till I looked up "hammer with wedge"):
Method: Hammer upwards from subframe. Was surprisingly easy. The wedge end starts it real fast and then flip to blunt to smooth it around.
Downpipe go in now.
Test fit turbo in with downpipe. I'm using 3 Stage8 bolts and 1 stud+nut. Getting a wrench on the stud nut is really tough and I already rounded one out once, only open end will fit. I found a new method of getting the stud nut tight without risking rounding it. Hang the turbo on the stud and put the nut on pretty much tight with the turbo clocked a bit counter-clockwise, maybe what would be 1/8th turn of the nut. Then with a wrench on the nut I rotate the turbo and nut clockwise together to line up the other holes. This seems to have got it really tight. 'Installation Is Reverse Of Removal' technique at work here since this is how I got it off when the nut rounded off in the first place.
At this point I got to see that hood no close... Wastegate actuator is too tall. Up next, how to shut the hood.
It's not hard to DIY-shorten the hose.
I don't remember if I shortened my TSE AN-4 hose and re-used the existing 4-AN connector (probably not if it needed a brass acorn) or used another 4-AN connector I had lying around.
The connectors aren't expensive so buy one and shorten the hose yourself.
Just remember, measure twice, cut once!
Make sure your hose routing is correct before any cutting commences (using a sacrificial hose of similar pliability to get the length perfect is never a bad idea).
Back to the thread... Have done about 8 AutoX events, no major issues. Had some old OEM fan failures, replace with SPAL fans. Will post some photos, but keeping the build in order for now.
Left off with not being able to shut the hood with TSE manifold and EFR regular wastegate canister bracket. Saw some info here on MT about the low bracket should work and won't require hood cutting. Unfortunately low bracket requires short actuator, I already have an actuator and don't want to buy a new one, so got to work on seeing if I could get the long one to work before ordering stuff.
Only got this one picture, but a good die and double nut the threads to hold everything I was able to run the die down enough to effectively make the shorter actuator. Time to order the shorter bracket.
Short bracket is some sort of casting vs the thick bent metal of the standard.
It is never that simple though, shorter actuator requires re-clock of the center section to the exhaust side to get the linkages to all line up correctly. So apart it comes. After breaking out the hammers again, which required some rather careful and worrisome beating of the exhaust housing at several clock positions it did come apart without incident.
Low life, hood closes. Needed to clock the cold side as well, but that was much easier. Did do some hammering on the shelf again for the cold side turbine outlet to fit with new clock position.
Bonus: Low front view.
Well the motor works, the hood closes, next was taking the piles of IC pipes and couplers and clamps and making something fit so I could drive it. I'll do it right later (yeah right), I just wanted to drive.
Some charge pipes ended up a bit low, but will get the job done for now.
Took it for a quick drive on wastegate pressure, right foot regulated to 6psi.
Top gauge is Fuel Pressure, Middle is VAC/Boost PSI, bottom is AFR.
Still much to do, this was still on stock injectors, coils, fuel pump, and FPR.
Haven't really been updating thread. Have taken photos of a few things.
Poly bushings all around. Not posting pictures, don't want to remember it. Used a tiny puller, ok one picture. Add a little heat from a propane torch when the puller is putting on some pressure. They slide right out once you figure this out.
Not long after the turbo bits were installed I put the factory undertray back in. Had some help from a heat gun, but all the charge pipes fin inside.
Did a linear temp gauge mod. Wasn't really fun, don't think I'd want to repeat this task. I don't even think the documentation I found was totally accurate.
Did an electric power steering column. Just looped the line on the rack. Kept fluid in it.
When the column was out I gutted the parking pin. Drilled out those two areas and pushed out the pins to remove cover. Next time I did one I just used a step drill dead center of plate till guts came out. If you don't want your car to get stuck in run position and be unable to remove key then hotglue that mechanism in place when you figure out the right spot for it. Replaced the spline head things that were factory with some M8 button heads.
Found a decent price on a Torsen and put that in a housing from classifieds here that had a KMiata brace and poly bushings already done.
Rolled some fenders to fit 245 Falken RT 660s on 15x9 wheels. Old wheel combo for scale. 15x7.5 205 RE71R
Roll fully flat and pull and roll and pull. I one hand dual wielded heat-guns to get some nice even heat. shocks springs removed to check full travel shocks springs removed to check full travel
Was originally just going to try some o-rings and heatshrink to keep in the holes, but after handling these things for a while and looking at the grommet I got the cut and secure method idea.
-018 I ended up using, -019 could work as well but I don't have any to try.
Installed a 36-2 FM trigger wheel on my NA.
Since it was really vague on whether or not CAS could be used to pick up CAM signal and get full sync for sequential I'm putting the results here. You don't need to open the CAS and figure out if you have optical or mechanical and then start cutting teeth or taping windows or making new holes.
It works just fine if you pick 36-2 in Tunerstudio and are running MS3. I'm running MSPNPPRO for 94/95.
I made a PNP harness that is wired like the attached image. Plugs into stock CAS harness > splits the CKP signal to the NB sensor > CAS to get CMP signal only.
Spark mode: Miata 36-2
Full sequential for fueling
Coil on Plug for number of coils (your ignition harness must be wired for sequential, need to run 2 additional wires if using stock harness, pick wasted spark if you haven't run them)
PS: Get your connectors from Ballenger: https://www.bmotorsports.com/shop/static.php/post/miata They are just a really great resource for figuring out Miata connectors, also can search their store on Amazon for good prices and shipping.
BATCH ONLY
If you want to run/test batch only, something left out of the end all (but not really) 36-2 trigger thread is this: Toothed wheel
Number of teeth: 36
Missing teeth: 2
Tooth #1 angle: 149 <<< this was missing in many suggested posts to get a car to run in batch fire. IDK why... Probably is 150 in reality, but 149 got my light where I wanted it with 10deg fixed timing light check.
Wasted Spark or Wasted COP depending on your coil harness wiring
Semi Sequential for fueling
Thought this was neat, I figured out a way to control my 2nd fan, wired to the AC fan relay, with my PNP in a way that is very similar to the primary Fan Control function.
note: I don't have AC, so the I and J outputs and respective relays are free to use in the stock locations to power other things.
Previously I was using the generic I/O settings to control the fan like MS2 does, but you don't get the idle up and conditional settings you do with Fan Control.
I had always thought about a way to make this work, but it was more involved than software. Yesterday I was picking through the triggers for AC Idle Up (turning on AC) and I noticed LOOP1-8 were available. I checked the Megasquirt manual b/c this sounded like some sort of virtual output, and it is. Unfortunately I couldn't find anything about it in either manual, it says to look in Setting Up manual, but I failed to find anything there. I did however find a pretty good example on this site: https://bartuneengineering.wordpress.com/guides/megasquirt-loops/
Now I use Loop1 to turn on at a set coolant temp.
Then I can go into AC settings, tell it to use that input as a trigger and tell it to use output I for fan. (instead of default J for AC)
I get some idle up and rpm increase on my fans now. I can also enable / disable under the same conditions as primary fan.
I have the 2nd fan trigger on with a 1deg difference to stagger the startup.
Old fan control, like MS2:
*do not use both methods at the same time, either use this simple 2nd fan control or what I did above. Hey it even says so...
This just occurred to me, if you do have AC you could do a simple auto climate control with loop and an in-cabin temperature sensor... Set a trigger temp for AC to come on with, can also have a 2nd condition to detect the AC button.
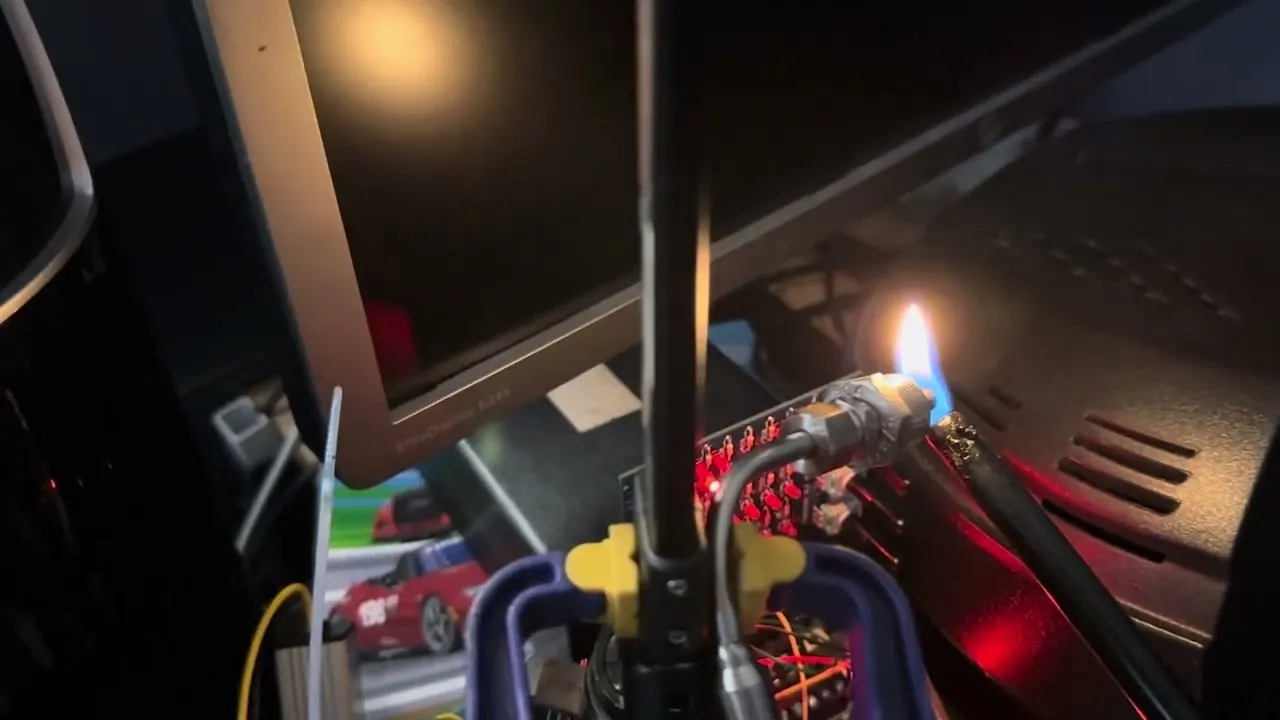
Adding some additional I/O to my ECU. This is a small CANBUS board, TinyIOx. I�ve started with an EGT circuit.
I don�t really know what I�m doing layout wise.
Got it to work after a bunch of not working.the layout took so long, figuring out how the schematic works vs the real components. It would look psycotic if you put the components in the board the way the schematic shows. I ended up recreating the schmegmatic on an online PCB board fab site and it dawned on my how a board lays out vs the schematic.
that schematic was able to generate something like this where I could rotate components
and it kind of clicked how the multiple grounds etc could wire up
then I found something in an old online Megasquirt manual
which helped diagnose some stuff as well and is pretty much what I ended up creating.
initially all the little blue traces were all over the place on the PCB layout, crossing etc, I just moved and rotated till things that could solder together were next to eachother or in a line I could just connect
no idea if that is proper, going to guess not great, but it fit in a small area on the limited board space
the rest of the board space should just be R/C filters for analog inputs now. Those will just be resistor and capacitor I think. Maybe just pullup resistor only.
 09-16-2020, 01:14 PM


 0
0


 Got it to work after a bunch of not working.the layout took so long, figuring out how the schematic works vs the real components. It would look psycotic if you put the components in the board the way the schematic shows. I ended up recreating the schmegmatic on an online PCB board fab site and it dawned on my how a board lays out vs the schematic.


