When you click on links to various merchants on this site and make a purchase, this can result in this site earning a commission. Affiliate programs and affiliations include, but are not limited to, the eBay Partner Network.
Got a call this morning asking if we're going to make the filler panels available, and it wasn't the first call I got about them.
If there's enough interest, I can make it happen.
That would be a cool product. Cut fenders and bolt on filler panel, done. Factory fenders are getting harder to find for cheap so the old way I did it is becoming less of an option, and it's a very small % of guys who are up for making their own body panels.
If you're looking for a full replacement fender you'll be best building your own.
I'm thinking in the direction of supplying the filler panels with a cut template, just trace it on the factory fender, cut the section away and rivet / bolt the new filler plate on.
It's smaller and therefore cheaper to make and ship, and the cars already have fenders on them... much like Ryan offering his hood vents as opposed to a vented hood
I have followed most of the Morpheus build but your fabrication skills are an order of magnitude above mine. I loved the finish panels but am unsure the process in which you used to get the shape. One of the better cuts I have seen using just a single fender is a recent one in the aero sticky. I would probably us a cutting tool with a bit less width but the execution looks good.
This is timely for me as I'm just modifying my guards to fit some 10" rims. What do you guys think of this design?
I photo modelled the front guard, re-skinned it in 3D then shaped some louvers over the wheel arch. The gap between each 'gill' is around 10mm so it's an equivalent cross section of around 70sq cm or a 3.7" round hole.
Mould:
I can CNC machine a female mould from chemiwood easy enough. It's a simple 3-axis cut and I already have the material. I don't have any experience in making fiberglass or carbon fibre parts though so I need some advice as to what way to form it from here. Like can I just sand, and paint the female mould and form up directly onto that? Alternatively I could gut the male part as a solid plug and then lay up a mould over that.
Welllll yeah, you used one set of fenders, but then you had to make a new rear section from scratch... it's a great execution and lighter weight but it's also the more complicated option of the two, not the simpler one. The point was you can't just cut up one set of fenders and be done - you've got to either scavenge a back section from a second pair of fenders OR you'd have to make new rear sections from scratch.
That said, plenty of guys HAVE done similar stuff with just one set of fenders that takes only simple cutting and no significant fabriction... they just don't have a rear section
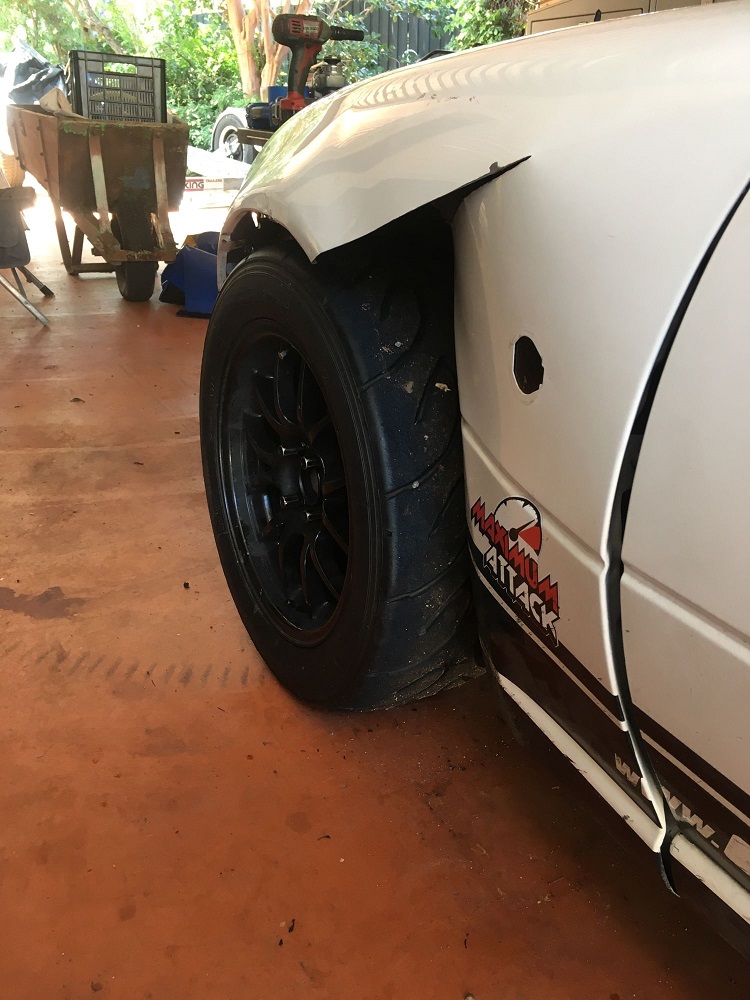
Is that just the fender cut away and the body underneath painted the same color as the car?
I can CNC machine a female mould from chemiwood easy enough. It's a simple 3-axis cut and I already have the material. I don't have any experience in making fiberglass or carbon fibre parts though so I need some advice as to what way to form it from here. Like can I just sand, and paint the female mould and form up directly onto that? Alternatively I could gut the male part as a solid plug and then lay up a mould over that.
I think this great. Could you not just make the mold solid, lay some fiberglass over the top, cure, then use a rotary tool to cut/grind the rest out? I have limited use with fiberglass, but that is probably how I would attempt it.
This is timely for me as I'm just modifying my guards to fit some 10" rims. What do you guys think of this design?
I photo modelled the front guard, re-skinned it in 3D then shaped some louvers over the wheel arch. The gap between each 'gill' is around 10mm so it's an equivalent cross section of around 70sq cm or a 3.7" round hole.
Mould:
I can CNC machine a female mould from chemiwood easy enough. It's a simple 3-axis cut and I already have the material. I don't have any experience in making fiberglass or carbon fibre parts though so I need some advice as to what way to form it from here. Like can I just sand, and paint the female mould and form up directly onto that? Alternatively I could gut the male part as a solid plug and then lay up a mould over that.
Nice work there - did you use 123D Catch for the photogrammetry? What software did you use to create the surface? I made some hood vents in a similar fashion, on a 2-1/2 axis CNC router. I laminated MDF to make a 3" thick block, then machined the plug (male) surface down .030" offset (deeper) than the final surface. then I applied epoxy tooling coat from Smooth-On and built the surface back up, then machined it again. Then sanded it smooth and polished it up. Then used tooling coat again and reinforcement to create the female moulds. If I were to to do it again I would likely just machine the mold in the first place and skip the plug, since I only made a few parts anyway. Although once you have the smooth plug, making a mold is relatively quick and easy. It also comes down to which shape is easier to sand and finish...usually a convex surface is easier to finish than concave. If you do it correctly the mold you pull from the plug really wont need any sanding, maybe just a polish.
For a race car part, why bother with a polish at all?
The 'fender vents' look lovely madjak. I'm sure you could ship the mould over to us in Melbourne and get them made by the lightyear for basically nothing.
For a race car part, why bother with a polish at all?
The 'fender vents' look lovely madjak. I'm sure you could ship the mould over to us in Melbourne and get them made by the lightyear for basically nothing.
Sonds like a plan. They will come up much nicer than what i'd manage. How similar are the na to nb fenders in that location?
Any suggestions to changes in the design? I'm trying to keep them fairly flat like shark gills so that they don't break the laminar flow. Most of the GT and lemans prototypes look similar.
How similar are the na to nb fenders in that location?
Similar enough that I think they could be made to fit. I've got a spare NB guard in the shed, i'll try lay it against my NA for some kind of confirmation.
The other consideration is, are they... erm "mirror-able", or would left and right sided moulds be necessary?
Originally Posted by Madjak
Any suggestions to changes in the design? I'm trying to keep them fairly flat like shark gills so that they don't break the laminar flow. Most of the GT and lemans prototypes look similar.
The theory is simply to alleviate high pressure air, so i agree the design should be perfect provided there is enough space for the required airflow. I'm not clever enough to be able to 'calculate' the size necessary..... so just go on gut feel
I just take inspiration from the fastest of cars (as you mentioned, GT and lemans prototypes):
The alternative is, a completely exposed fender such as my go-to car for inspiration:
I think the time attack car style vents are more for an aggressive look rather than ideal flow. You wouldn't expect those sort of vents on an F1 car which says something about the aero effect.
The vents are mirrorable... but I can machine both moulds easy enough.
I think I'm going to lift the base a bit so they can clear fender flares and maybe add an additional 'gill' on the back. This will make them a bit less chunky.
If you wrap some tape in stripes over the NB guard, draw some squiggles on the tape and take a series of photos in an arc at different elevations I can photomodel them and see how different they are. Nest to do it in ambient lighting so you don't get lots of specular highlights and reflections.
For a race car part, why bother with a polish at all?
The 'fender vents' look lovely madjak. I'm sure you could ship the mould over to us in Melbourne and get them made by the lightyear for basically nothing.
If you dont polish the mold, the parts you mold arent going to come out.


 12-08-2016, 02:12 PM


 0
0