
Post your DIY aero pics
 07-11-2013, 02:57 AM
#461

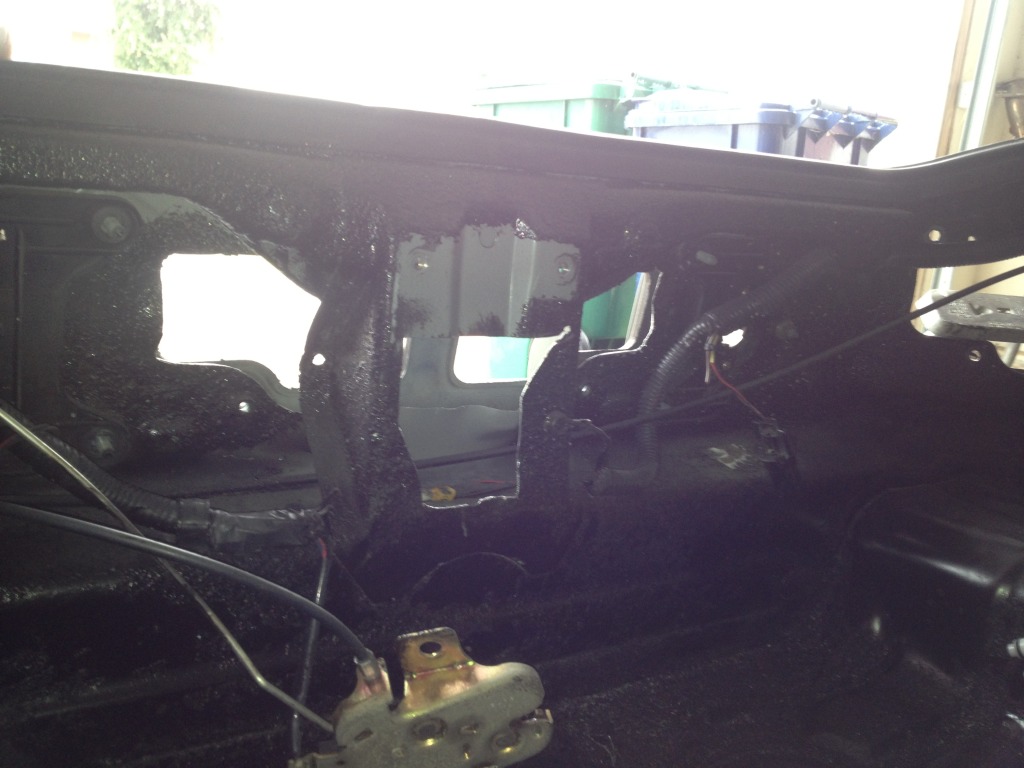
Sonny's wing in the pic is still not 100% complete. I still need to weld together the part the wing bolts to and the struts together. The flat plates with only a single bolt through them will disappear. Also the side to side play right now is a little much and should probably be braced.
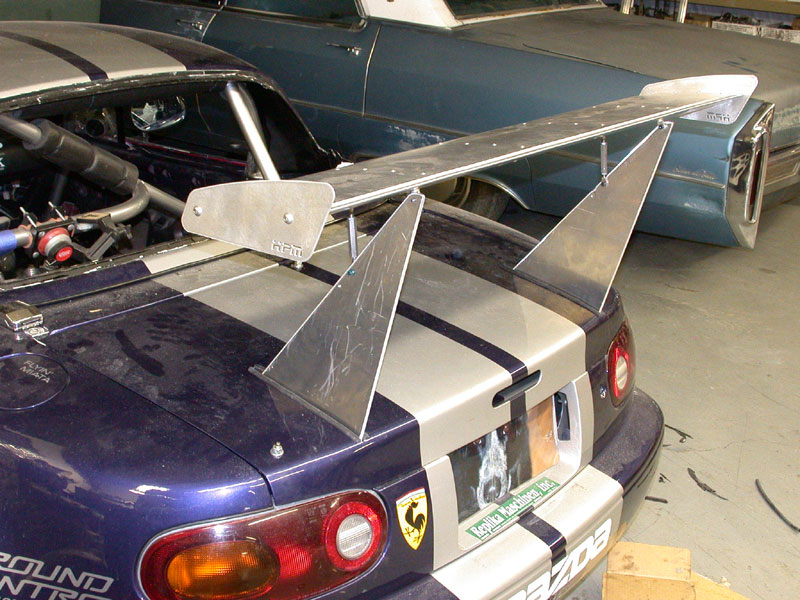
The ones I made for my car are a little more sturdy. The NA trunk was a little different which allowed me to move the mount back and run shorter arms to the wing.
The ones I made for my car are a little more sturdy. The NA trunk was a little different which allowed me to move the mount back and run shorter arms to the wing.

Reply
 0
0

0
 07-11-2013, 03:39 AM
#463
On both Sonny's and mine the plan is to do long cuts in the trunk. We talked about doing stubs coming out of the trunk that that struts bolt to and doing cuts barely big enough for the struts. Personally I don't like that since if the car becomes endurod and something happens with the battery or anything else that ends up in the trunk it would take extra time to fix. For the case of my car I dont have space/money for a truck and trailer so I have to drive to the track. I need to be able to access the trunk without unbolting things. I may build something the trunk closes onto to hide the cuts or just dgaf.
Depending on how the trunk is on crusher I have a few ideas to make it cleaner. Apparently the later years like Sonny's got some funky gussets above the tow hooks which is why I had to give his mounts so much of a rake. If those are not there, I may be able to have the mounts pass through barely above the tail light and maybe angle up after that. Should look much cleaner. Since the taillights on my NA were closer this was not doable.
Depending on how the trunk is on crusher I have a few ideas to make it cleaner. Apparently the later years like Sonny's got some funky gussets above the tow hooks which is why I had to give his mounts so much of a rake. If those are not there, I may be able to have the mounts pass through barely above the tail light and maybe angle up after that. Should look much cleaner. Since the taillights on my NA were closer this was not doable.
Reply
0
0

 07-11-2013, 02:01 PM
#465

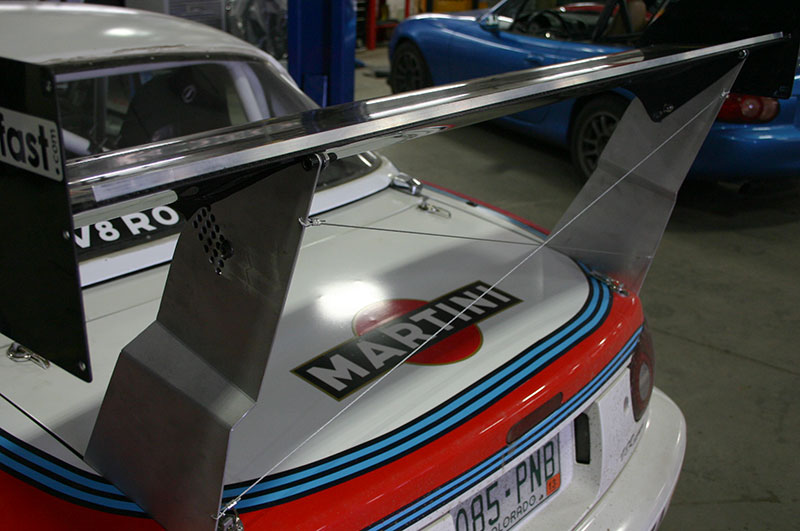
Everything old is new again - looks a lot like the setup on our Track Dog from forever ago. I've gotta say, the slotted trunklid is a bit of a pain in the *** to live with. A QR would be pretty much required.
A guy wire X made a big difference in rigidity on my tall wing mount. Although it would make the slotted trunklid pretty much a no-go.
A guy wire X made a big difference in rigidity on my tall wing mount. Although it would make the slotted trunklid pretty much a no-go.
Reply
0
0
07-11-2013, 02:17 PM
#466
Everything old is new again - looks a lot like the setup on our Track Dog from forever ago. I've gotta say, the slotted trunklid is a bit of a pain in the *** to live with. A QR would be pretty much required.
A guy wire X made a big difference in rigidity on my tall wing mount. Although it would make the slotted trunklid pretty much a no-go.
A guy wire X made a big difference in rigidity on my tall wing mount. Although it would make the slotted trunklid pretty much a no-go.
__________________
Reply
0
0
 07-11-2013, 02:27 PM
#468
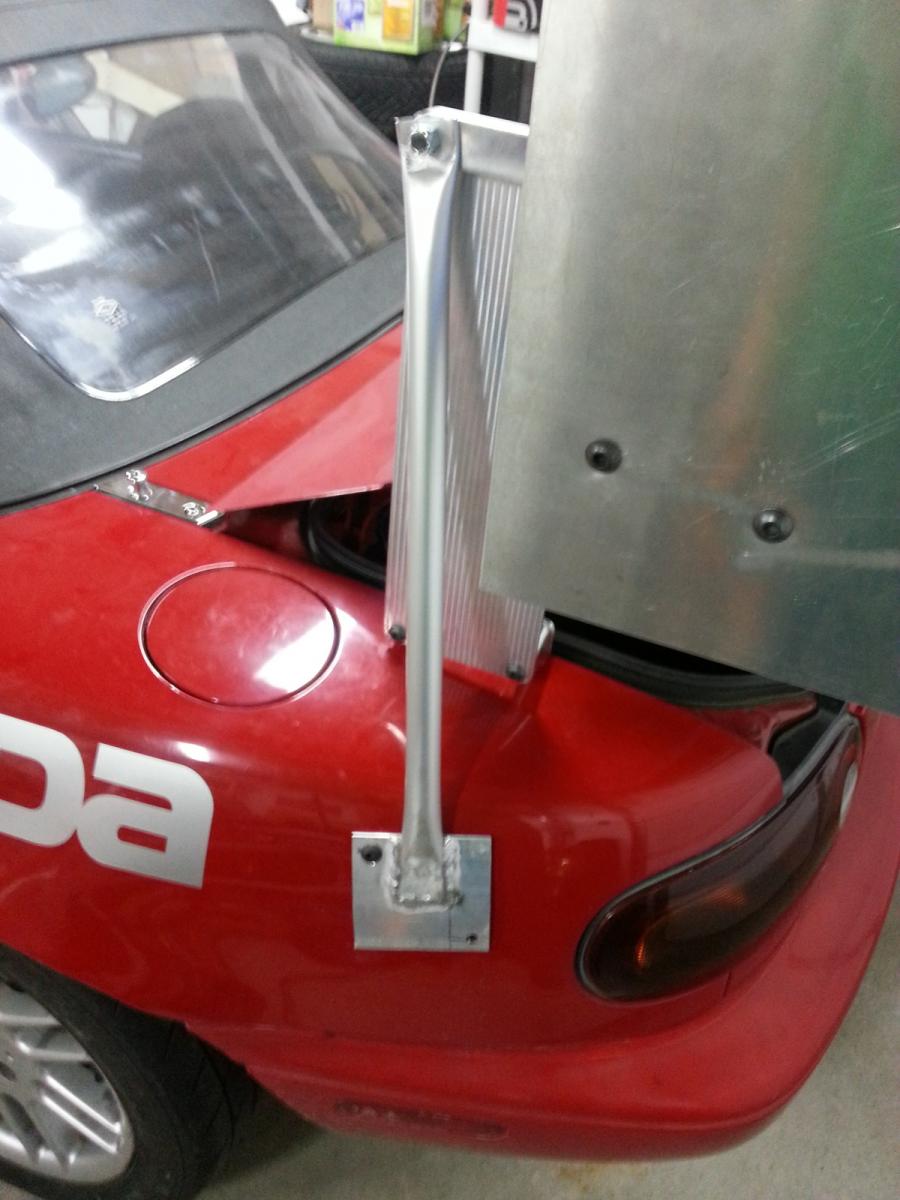
I'm comfortable with the position. They're behind the wing, so airflow disruption isn't an issue. I also kept them a bit lower to keep them away from the wing. Drag - well, I know wires are draggy, but it was the cleanest solution in my mind. Since my mounts are attached to the car at trunk height, a strut down low wouldn't help. I could have increased the thickness of the uprights, but that's not the clever solution and had some other effects I wasn't happy with. The wires not only stopped the side-side movement, but they also made the mounts stronger in the longitudinal direction as I attached them where the mounts want to bow under high load.
Reply
0
0
 07-11-2013, 02:40 PM
#470
Elite Member
iTrader: (1)

Join Date: May 2009
Location: Jacksonville, FL
Posts: 5,155
Total Cats: 406
^that looks more draggy than the wires, more frontal area anyway.
But anyway, couldnt you have the upright coming up right on the edge of the trunklid, then if the trunklid was held in place by dzuz fasteners you could lift up one side and pull it backwards through the space between the uprights and spoiler?
But anyway, couldnt you have the upright coming up right on the edge of the trunklid, then if the trunklid was held in place by dzuz fasteners you could lift up one side and pull it backwards through the space between the uprights and spoiler?
Reply
0
0
 07-11-2013, 10:19 PM
#472
Hm, I never had any splitter tip damage with my plywood ones, the last car had 1 auto-x and 15k street miles on it. Including winter in new england. Word from the wise, as cool as you think you are intentionally plowing snow with your splitter, DONT. You'll spend hours trying to get the snow out that has packed itself into spots you didnt know it could.
Reply
0
0
07-14-2013, 07:56 PM
#473
Newb

Join Date: Dec 2011
Posts: 19
Total Cats: 2
Dollars spent: $45
Hours spent: 5hrs
How effective: Currently untested
First:
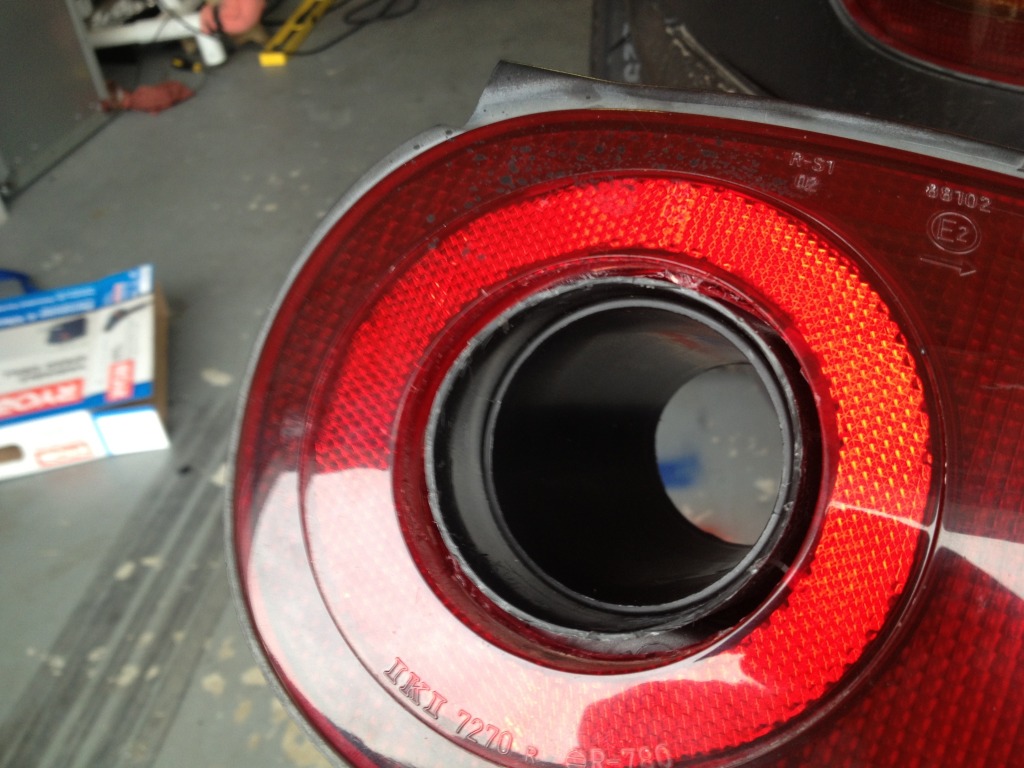
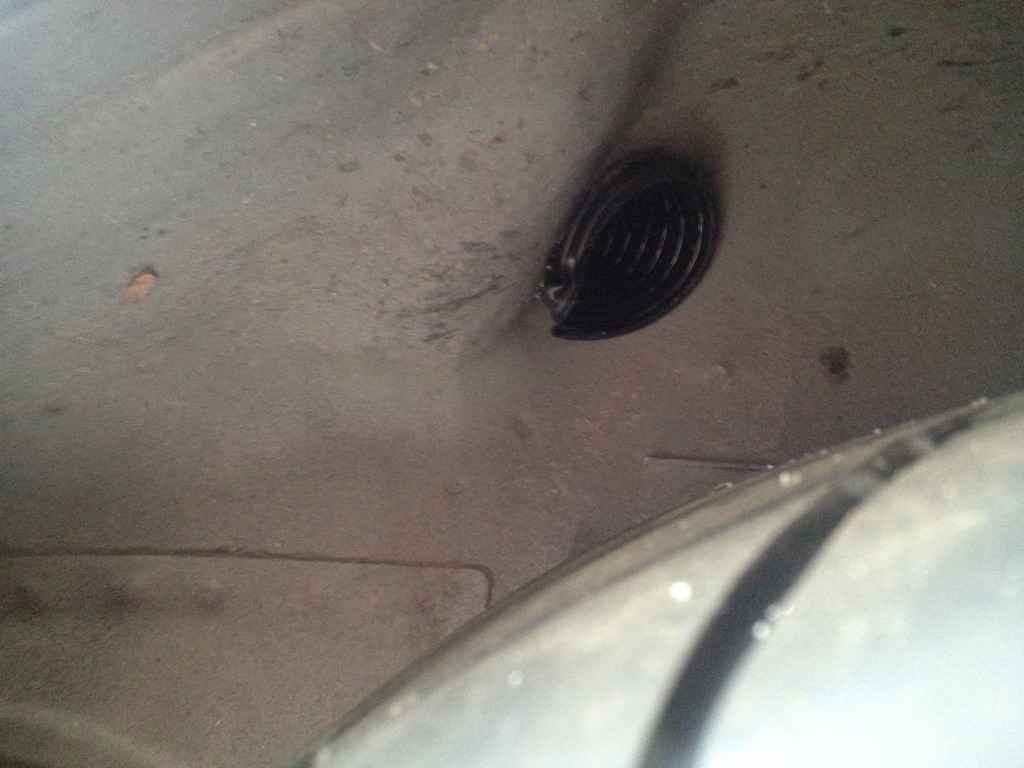
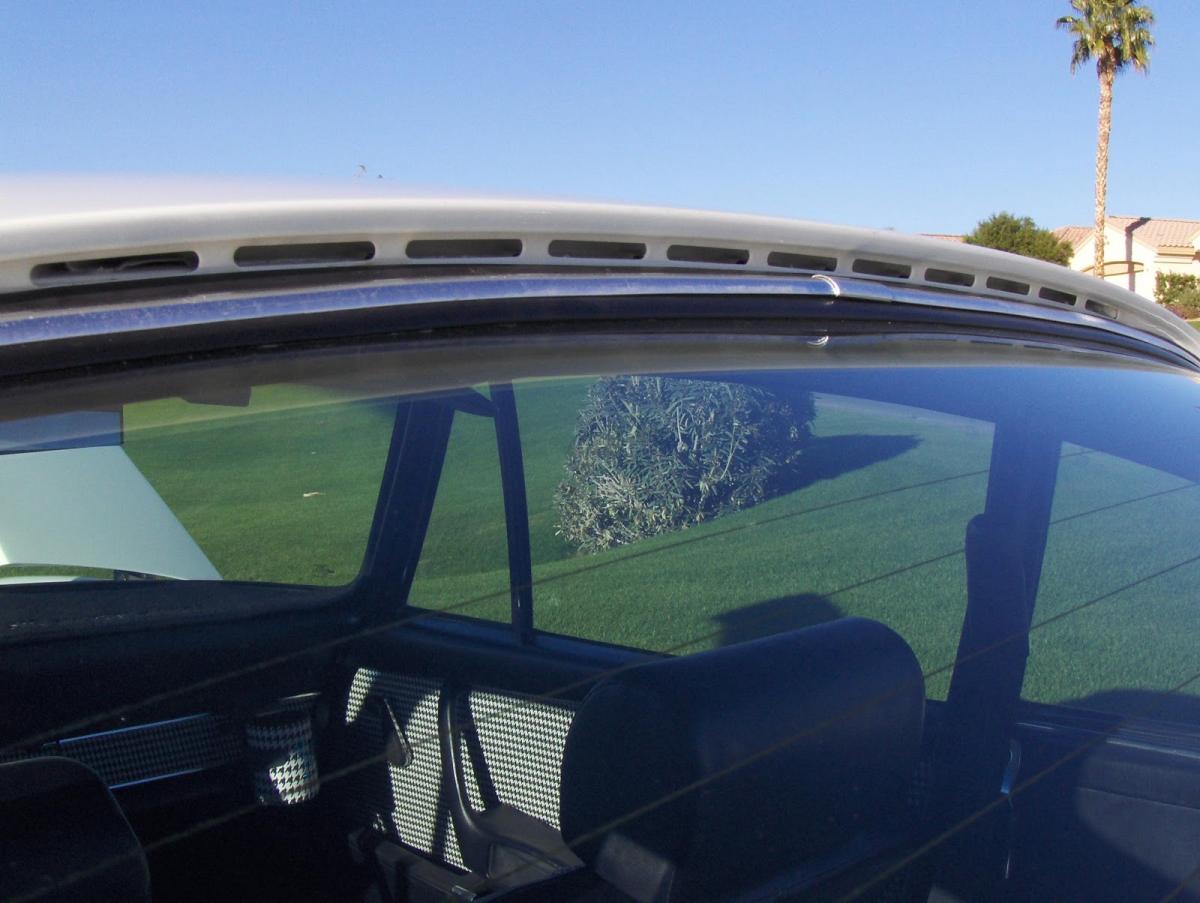
I didnt want to loose the rear window, but since its made of Lexan, it is very easy to make some vent holes. For the same reason I dont want to loose the rear window, I didnt want water to get into the holes in case of rain. So for $20 I ordered 4 - 3 1/2" Snapvents to fill the holes (same ones that are used in the lexan quarter glass windows)
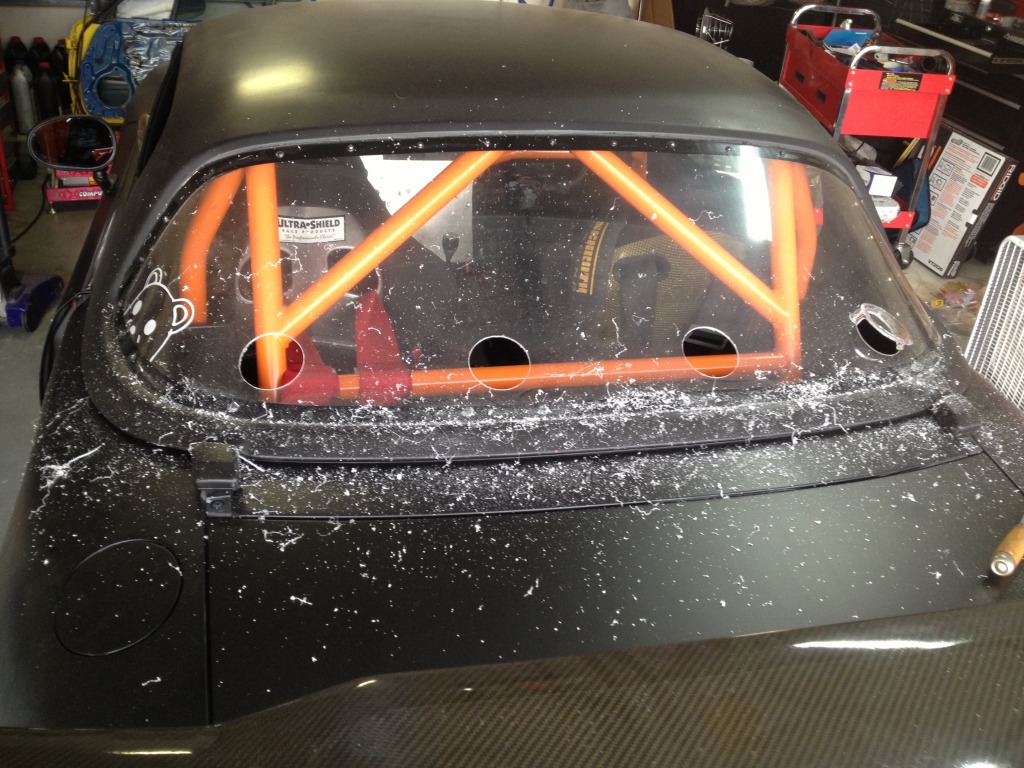
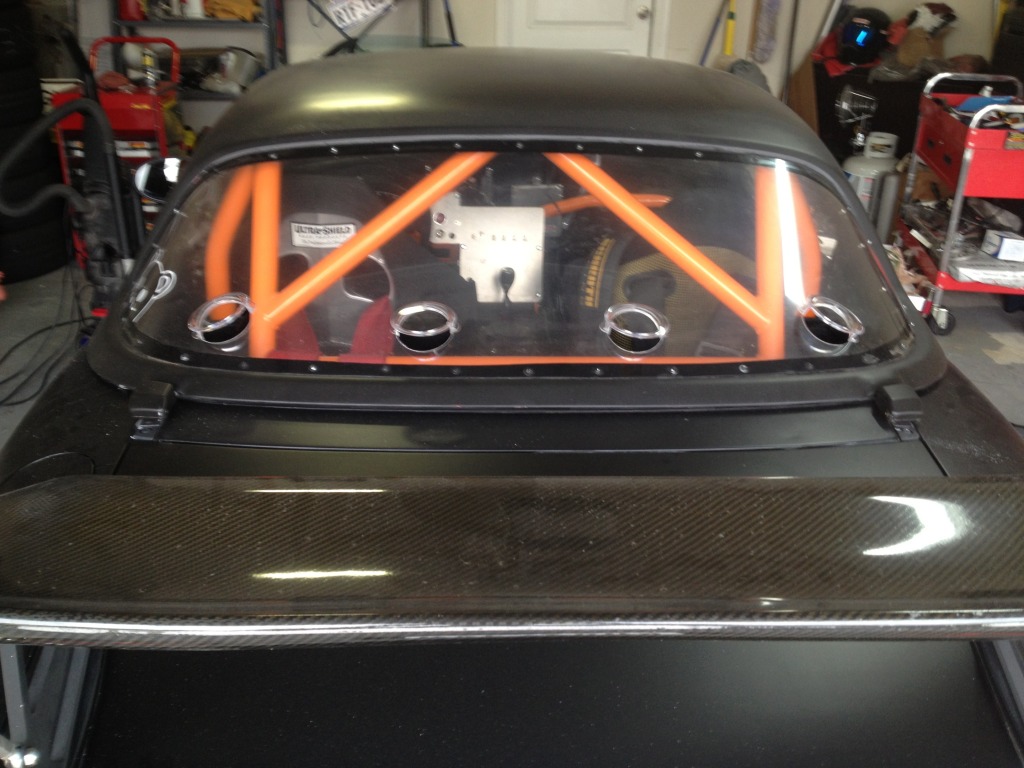
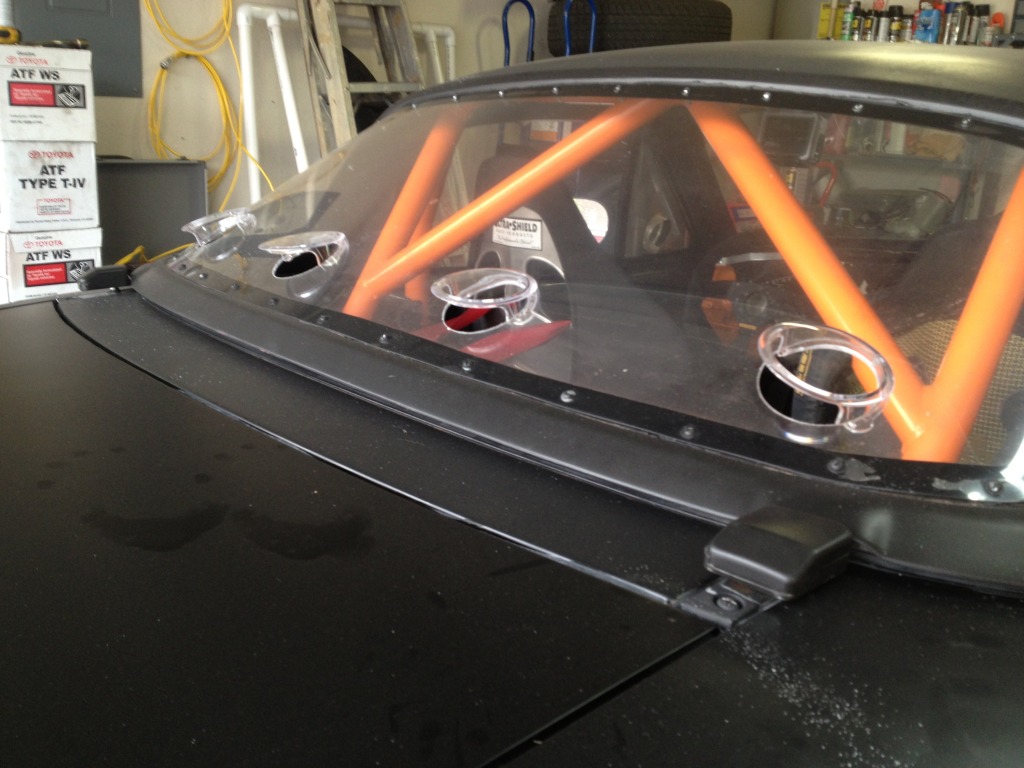
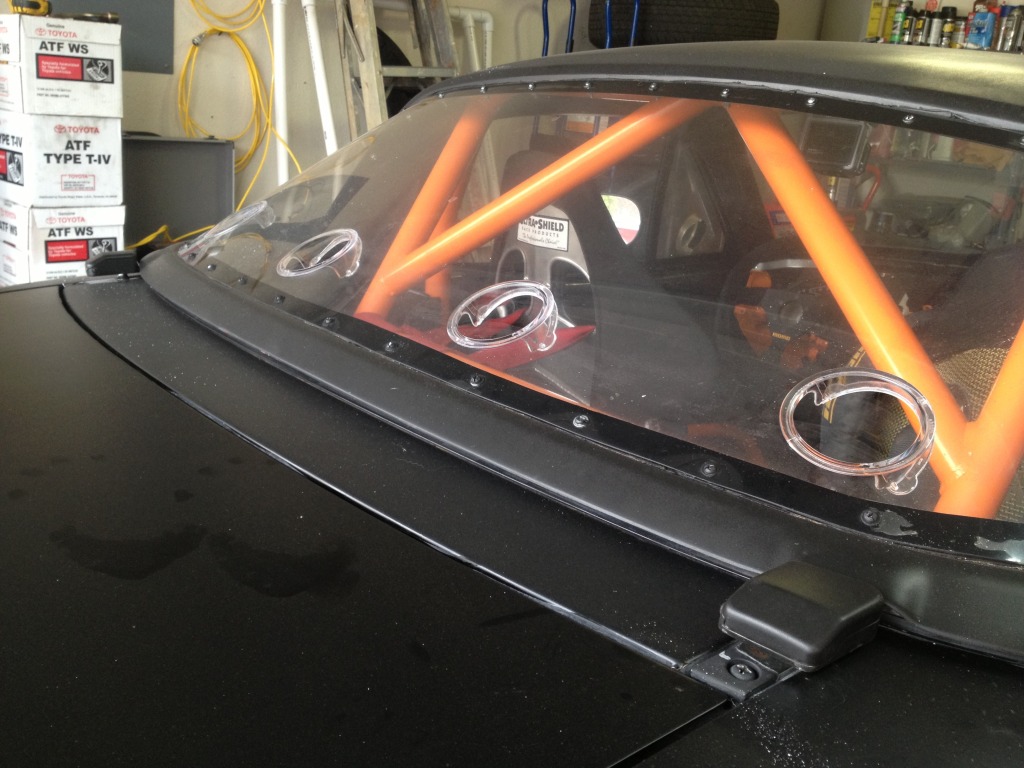
Also, everyone knows that there is a vacuum created behind the car as your are driving. So this is to reduce the vacuum and pull air out of the cabin.
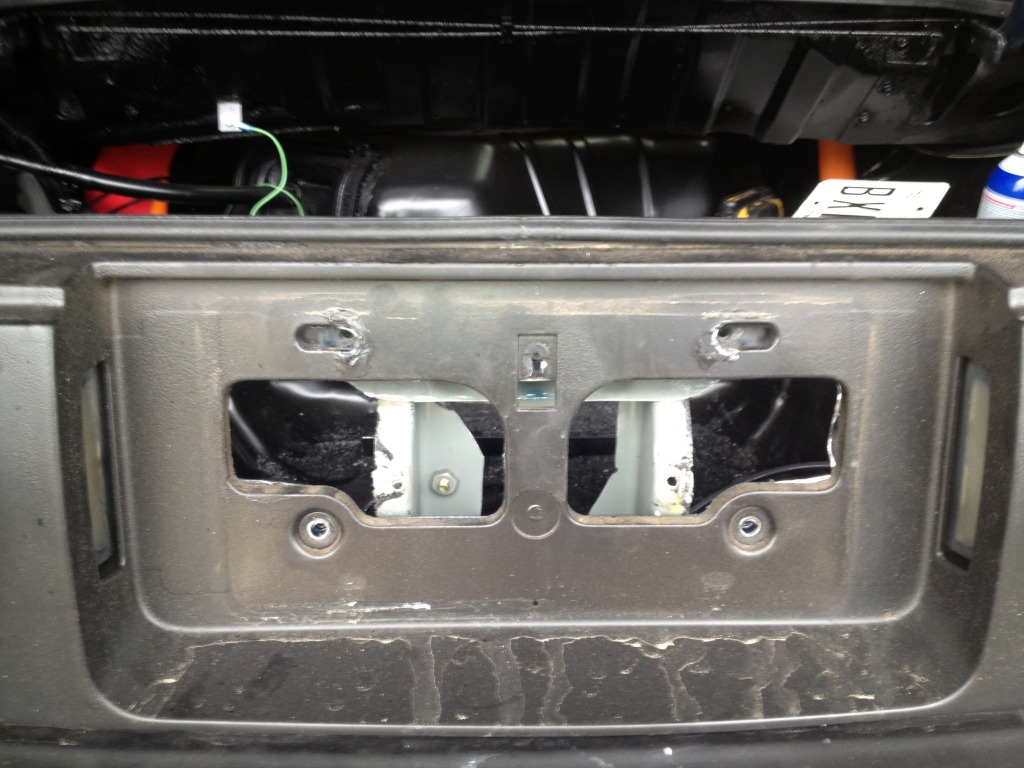
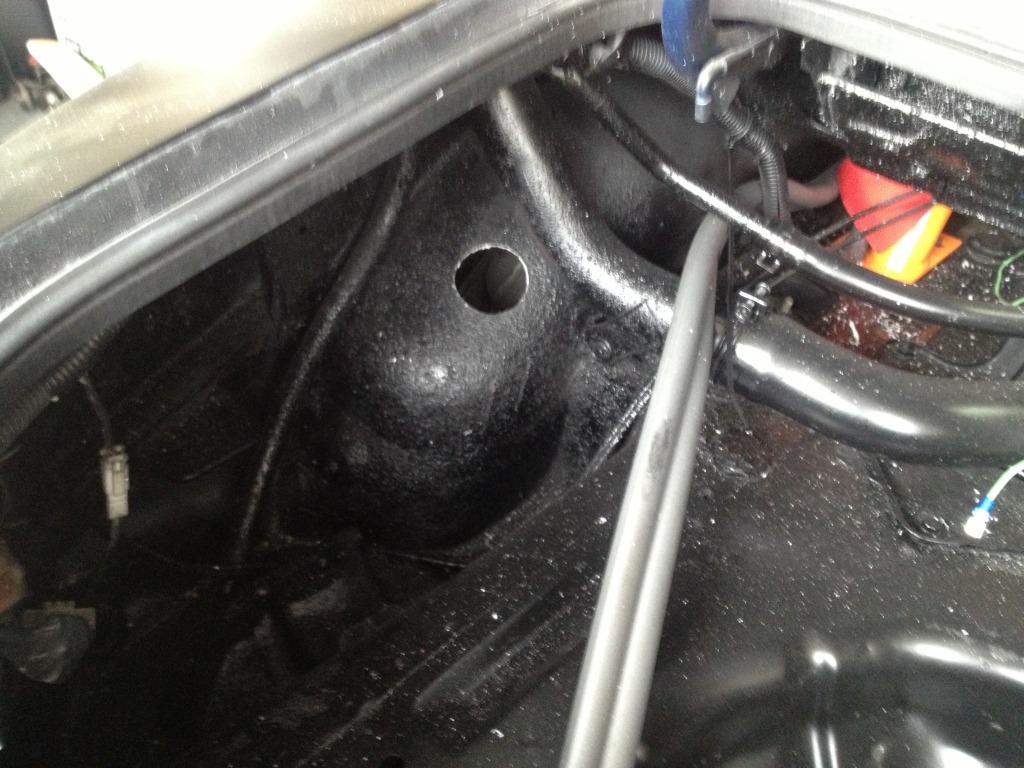
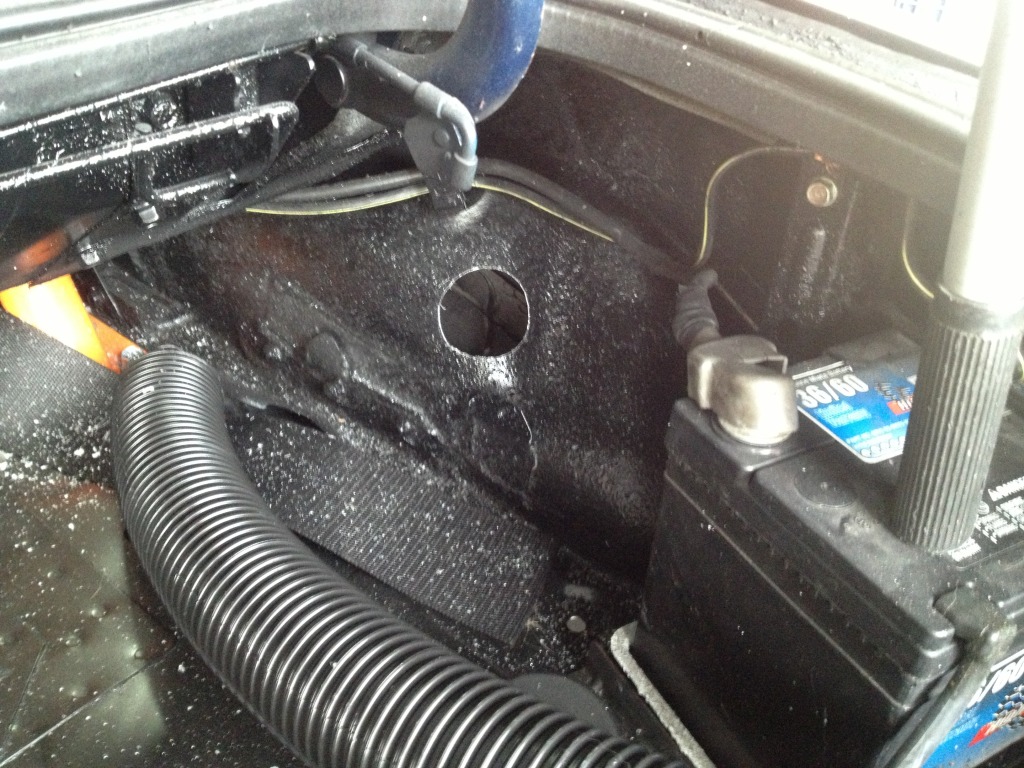
And last, is to remove the air that creates the lift in the rear fender wells, and use the vacuum behind the car to pull it out. This will both reduce drag AND lift. Cost was only $20 for the 2 1/2" industral vacuum hose from Home Depot
Break out the reverse lens and break away all the plastic on the inside.
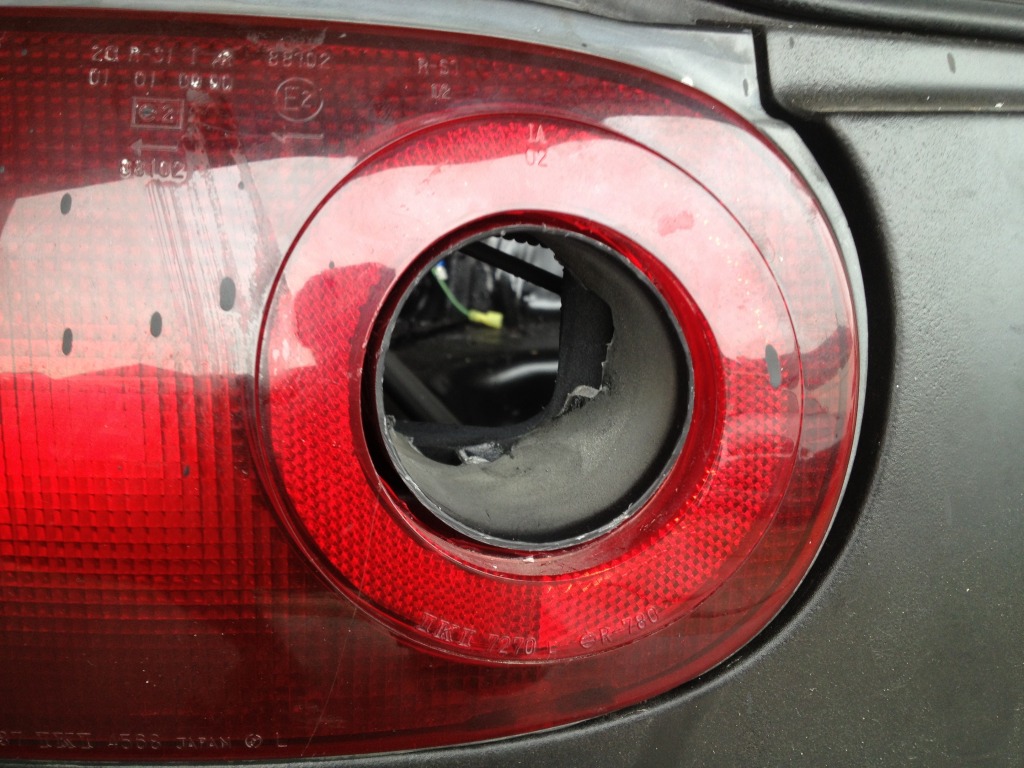
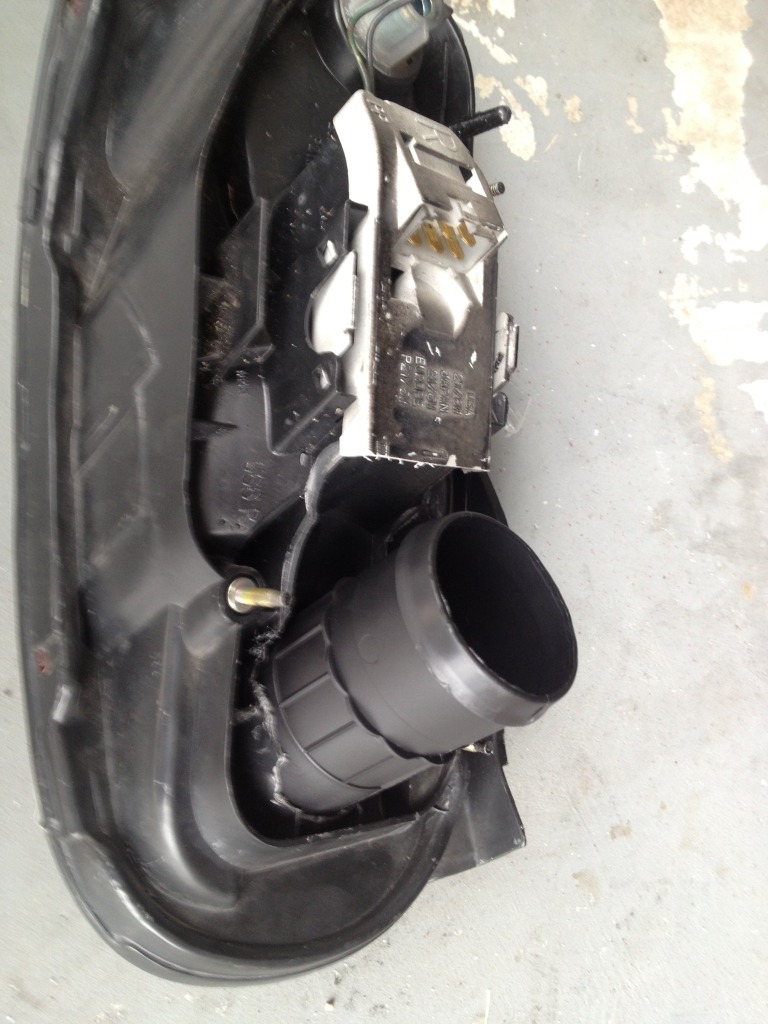
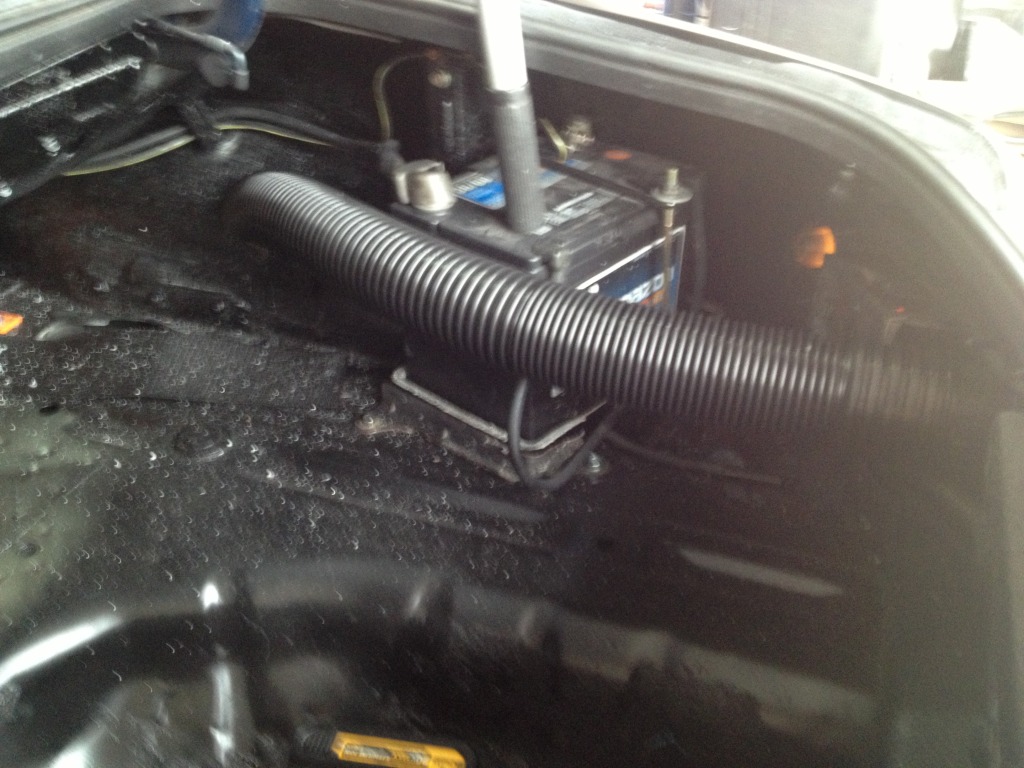
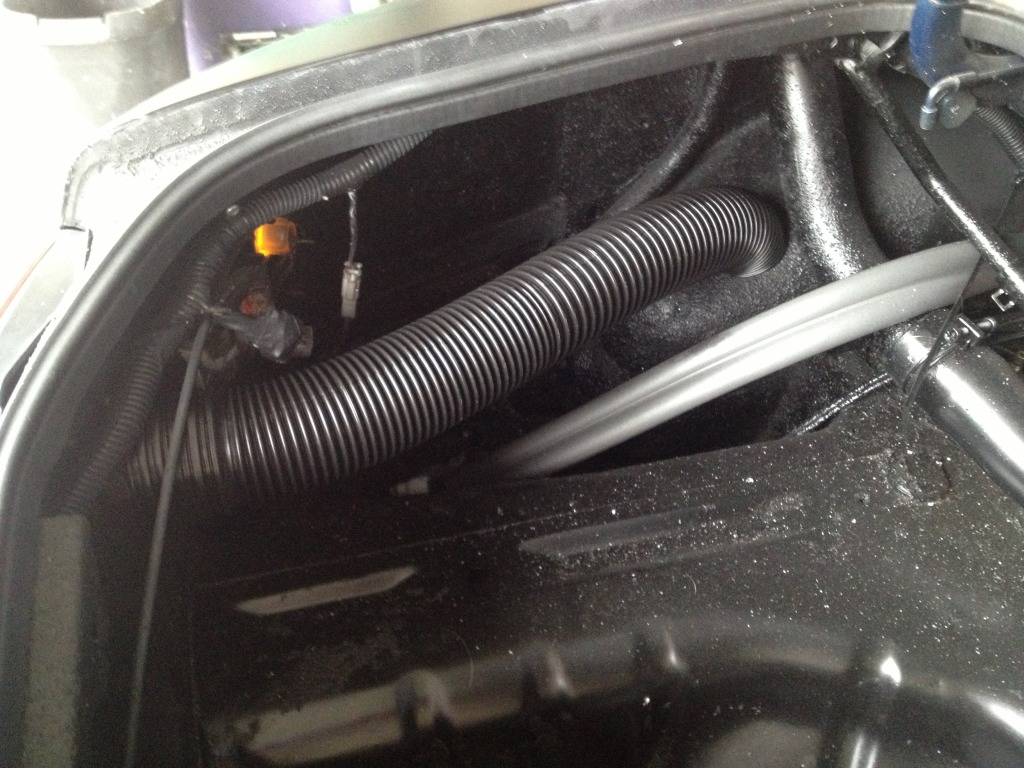
Inside the fender

Hours spent: 5hrs
How effective: Currently untested
First:
I didnt want to loose the rear window, but since its made of Lexan, it is very easy to make some vent holes. For the same reason I dont want to loose the rear window, I didnt want water to get into the holes in case of rain. So for $20 I ordered 4 - 3 1/2" Snapvents to fill the holes (same ones that are used in the lexan quarter glass windows)


Also, everyone knows that there is a vacuum created behind the car as your are driving. So this is to reduce the vacuum and pull air out of the cabin.


And last, is to remove the air that creates the lift in the rear fender wells, and use the vacuum behind the car to pull it out. This will both reduce drag AND lift. Cost was only $20 for the 2 1/2" industral vacuum hose from Home Depot

Break out the reverse lens and break away all the plastic on the inside.


Inside the fender


Reply
0
0
 07-14-2013, 08:31 PM
#475
Moderator


iTrader: (12)
Join Date: Nov 2008
Location: Tampa, Florida
Posts: 20,645
Total Cats: 3,009
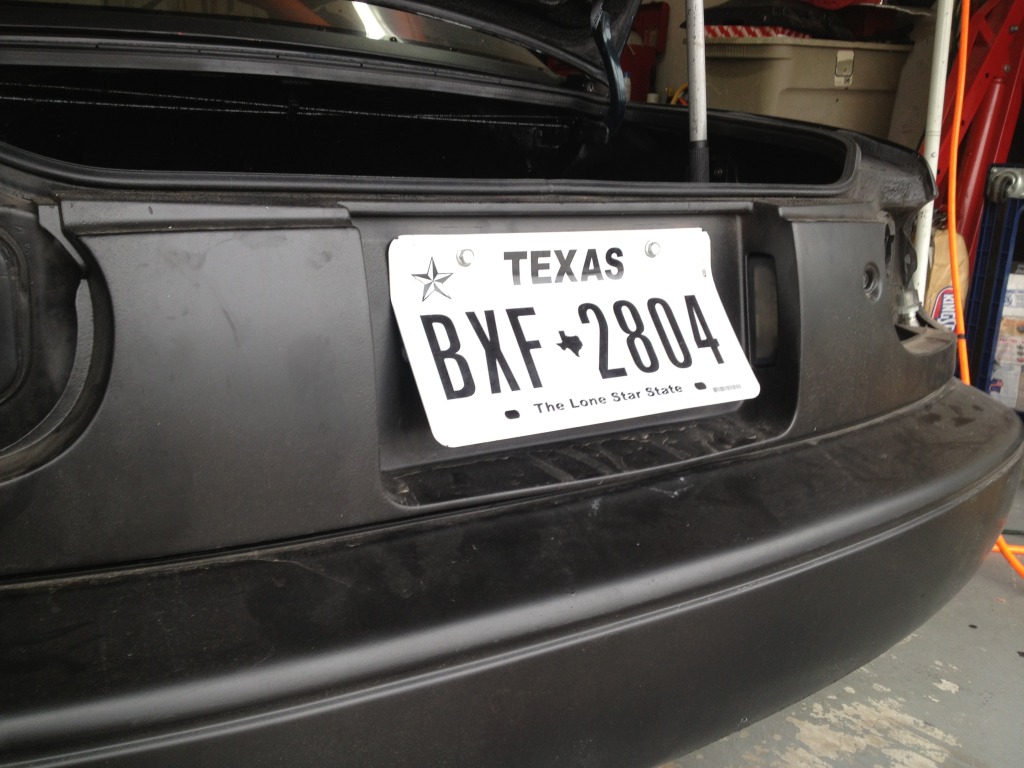
The license plate cutout will give you a surprise headache from the exhaust fumes being pulled into the cabin. The holes in the bottom of your rear window will allow airflow back into the cabin. Holes at the top of the rear window would draw air out of the cabin.
Opel:
Porsche:
Miata
Opel:
Porsche:
Miata
Reply
0
0
07-14-2013, 11:18 PM
#476
Newb
Join Date: Dec 2011
Posts: 19
Total Cats: 2
All of the wind tunnel info ive seen shows that the area at the bottem of the rear window is a high pressure area on the miata. That is caused by hardtop droping down to quickly and the airflow not able to stay attached. Thats why the best option would be to have the hardtop that extends to the rear of the trunk.
I think that the flow from the side windows to the rear vents wil remove the high pressure by speeding up the air. Project G said that the with the 2 large vents the had a large increase in air flow throught the cabin.
I plan on doing testing with vent open and closed.


Reply
1
1
07-15-2013, 01:24 AM
#477
Let us know how it works. Tuft tests at the license plate and better yet, manometer results in the wheel well and license plate (before/after) would be great.
Effective or not, props for working outside the box!

Reply
0
0
07-15-2013, 06:45 AM
#478
Moderator
iTrader: (12)
Join Date: Nov 2008
Location: Tampa, Florida
Posts: 20,645
Total Cats: 3,009
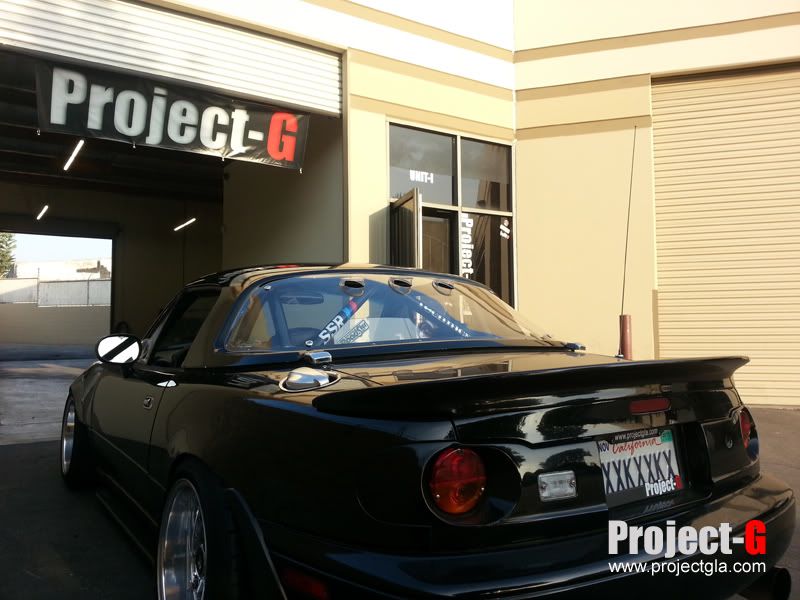
In the case of the "project g" car, he is reducing the effectiveness of the rear spoiler in the picture you posted and pulling huge amounts of air into the cabin from the base of the rear window. That car owner is obviously very confused about anything to do with actual performance, just looking at it.
Reply
0
0
07-15-2013, 11:06 AM
#479

you can't look at Project-G cars as your reference points for aerodynamic benefits (no offense to them). Sixshooter is right, the base of the rear window is very high pressure, as seen on Plucas' diagrams. Even with the windows down, you will pull in air from there. Put them at the top where the air hasn't separated as much yet, and you will have air pulled out.
Reply
0
0


