When you click on links to various merchants on this site and make a purchase, this can result in this site earning a commission. Affiliate programs and affiliations include, but are not limited to, the eBay Partner Network.
While were are building Vegas, our ground up S1 car, we bought a friends S2 "Bullet" build to race. Vegas has been taking much longer to get built than originally planned so we decided to convert Bullet into and S1. I thought it would be a useful build thread since it's taking a
dialed, race winning S2 into S1. We're trying to keep costs down on Bullet since it will be sold as soon as Vegas is ready. Vegas has its own build thread here and is more complex project with lots of proprietary bits and fabrication.
It has a forged NB1 NASA "points" engine which will get a BP5A intake cam, SPM damper and 36T trigger wheel
It will get a 100 series, 50 row Setrab with -10 lines and Mocal tstat. The 100 series is narrow with short rows, I/O right next to each other. This style has less pressure drop than a cooler with fewer, wider rows. Packaging also easier with I/O right next to each other.
1/2" birch ply splitter
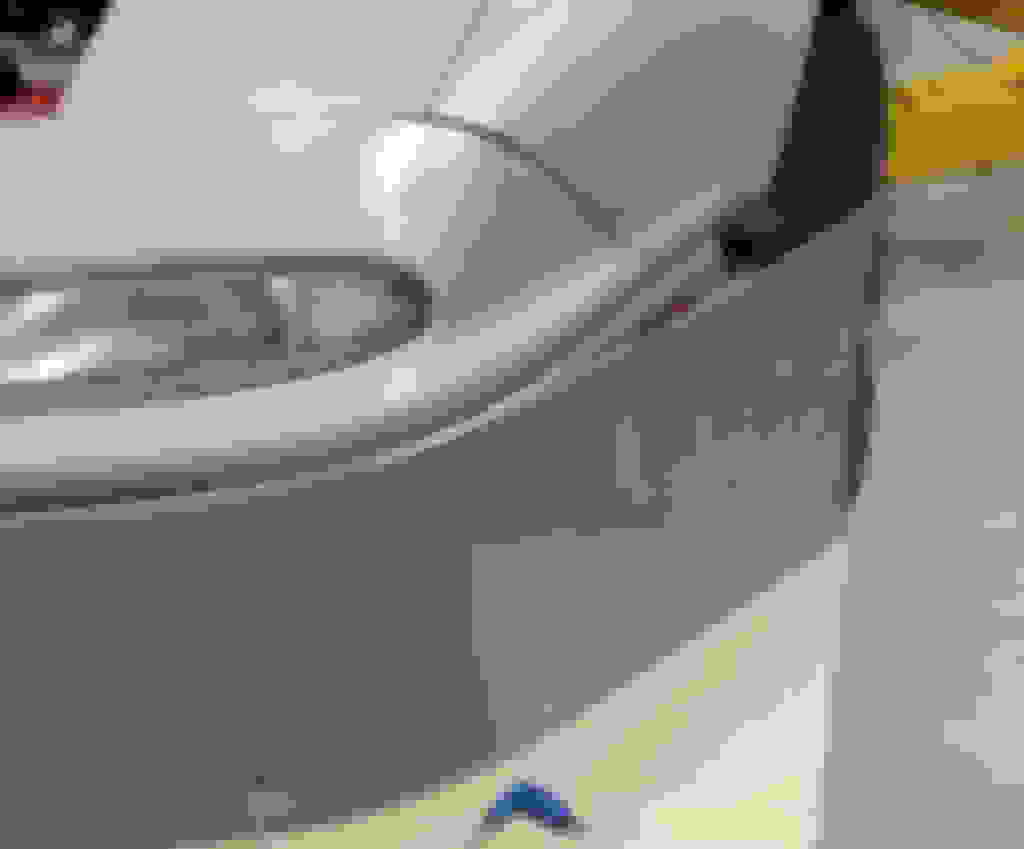
We'll cut the lower half of the bumper off to make rad ducting simpler, all covered by the air dam
20# Bosch battery in trunk gets repkaced by a 3 lb Shorai in the pax floor
OEM Sport front and NA8 rear brakes will initially be replaced by Stoptech 11" front. We're working on a Superlite Radial with 12x1" rotor front kit that it might get before the car is sold.
Supermiata 1.6 Sport Clutch/flywheel replaced with RaceTwin organic clutch
Racing Beat exhaust replaced with mandrel bent 3" system, Flowmaster 50 series muffler and resonator
Trunk hing & latch being yanked and replaced with pins
OEM trunk bracing being gutted to save some weight.
Singular 5 vent OEM hood
Gutting the trunk. I forgot the before after weights but it's something like 14lbs / 6 lbs. Once its done the skin is a bit floppy. Suitable for pinning, not hinges. Hinges are also really heavy, 3lbs or so IIRC.
Latch goes bye bye too. Skin will have slots for wing struts.
Gutting the trunk. I forgot the before after weights but it's something like 14lbs / 6 lbs. Once its done the skin is a bit floppy. Suitable for pinning, not hinges. Hinges are also really heavy, 3lbs or so IIRC.
Latch goes bye bye too. Skin will have slots for wing struts.
Little close for comfort with that bare leg and the cutoff wheel!
Mounts were Crushers old rear bumper mounts. Flipped 90�, a few extra holes drilled, little lateral braces added and voila. As an extra bracing measure, we slotted the trunk lid opening a half inch or so and ran the upright through there.
Some pics of Bullets S1 air dam and splitter work in progress. To accommodate the extra tire width, we allow the air dam to separate from the body as shown. The resultant gap should be covered but it can not be angled downward like a canard. Just a flat cap or block off plate level with the ground.
We contemplated allowing canards or diveplanes here but thought it would be too difficult to equalize with a simple set of rules. A curve plane generating downforce begins to stretch the abilities of the DIY mechanic. Drivers can build a second airdam & splitter for time attack, ST4 or other classes where you can go further. This car will have just the one front end. Vegas, our new S1 has a whole separate front end with giant splitter and low mount dive planes.
Interim aero, 15/32" 3 ply birch splitter. On the advice of TC Design, we're going to try 10mm alumalite with cables behind the air dam. He tells is it is so much stiffer than the birch ply that we can cantilever more it out front.
On the advice of TC Design, we're going to try 10mm alumalite with cables behind the air dam. He tells is it is so much stiffer than the birch ply that we can cantilever more it out front.
It is, and you can. MUCH lighter too. But it is much more of a consumable than birch. It'll take minor scrapes on curbs OK but any moderate contact with ground/curb/etc. will shred the very thin layer of aluminum on the underside.
We didn't like how much of the 245 was left exposed by the air dam set up so we tried something different. Detached the fender/bumper from the tabs on the tub, cut a few notches in the fender lip to facilitate yanking the front half of the fender out. We got about 1.5". The fender lip starts to buckle and distort so either cut the entire lip off or at least cut a few notches so it can bend in 3D. Shrouds all but about 10mm of the leading edge of the tire but leaves the top and trailing edge more exposed which is ok. We mocked it up with a piece of steel rod but it will get an adjustable turnbuckle riveted to the fender skin. We'll see how it turns out with the new 10mm Alumalite splitter.
Mid hack
Here you can see where we detached the bumper/fender from the mounting bracket on the tub


 2
2